Amount Off Coupon
2026-03-05 17:21
This guide helps employees and system administrators create and manage fixed amount discount coupons accurately, completely, and efficiently. It ensures all steps are followed correctly, promoting organized coupon management and seamless implementation across all stores.
1. Log in to the Back Office
Go to login.gpos.co.th , enter your email and password, and click Log In.
Click Marketing menu and select Coupon.

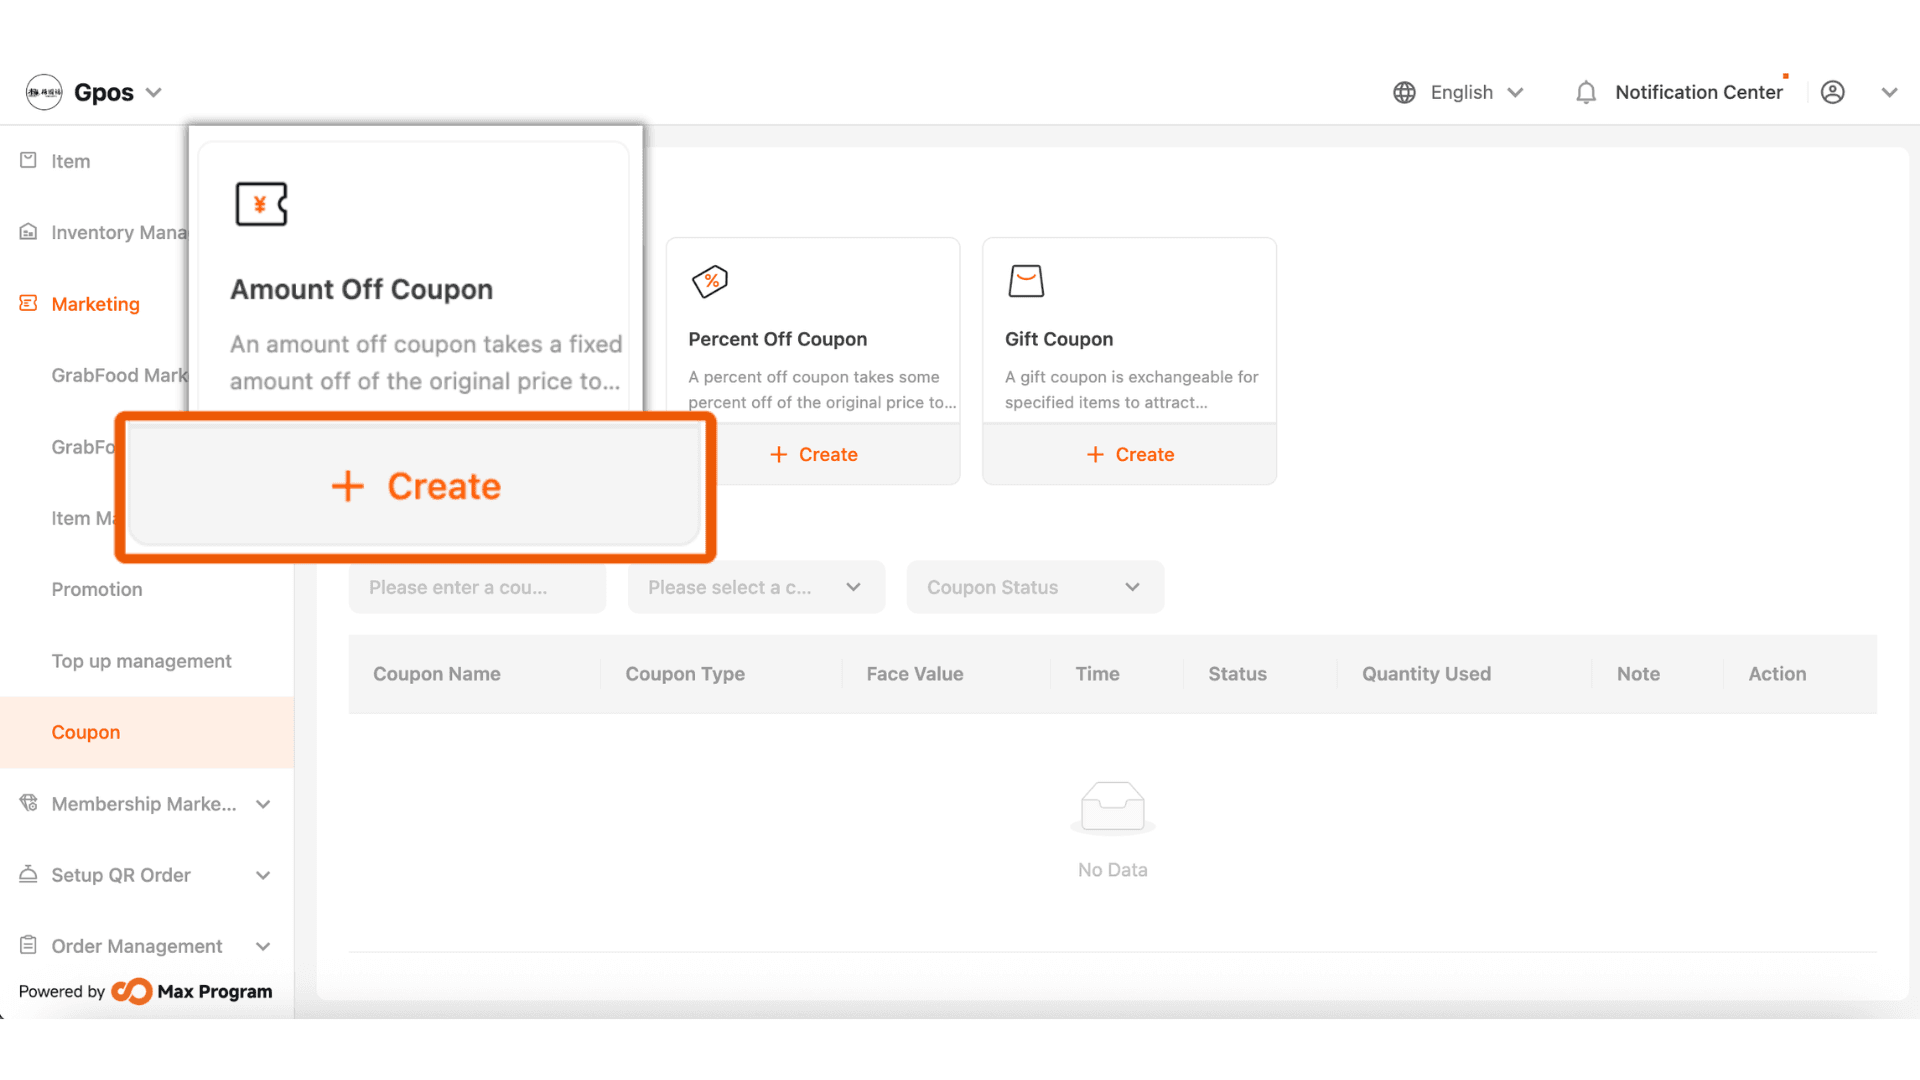
2. On the Coupons page, select Amount Off Coupon, click + Create button to start creating a new coupon.
3. The system will display a “Basic” section. Fill in the following details
- Amount Off Coupon Name – Give your coupon a clear and descriptive name, e.g. “Spend 500 Baht, Get 100 Baht Discount Coupon.”
- Face Value – Enter the amount of discount you want to offer, e.g. “100 Baht.”
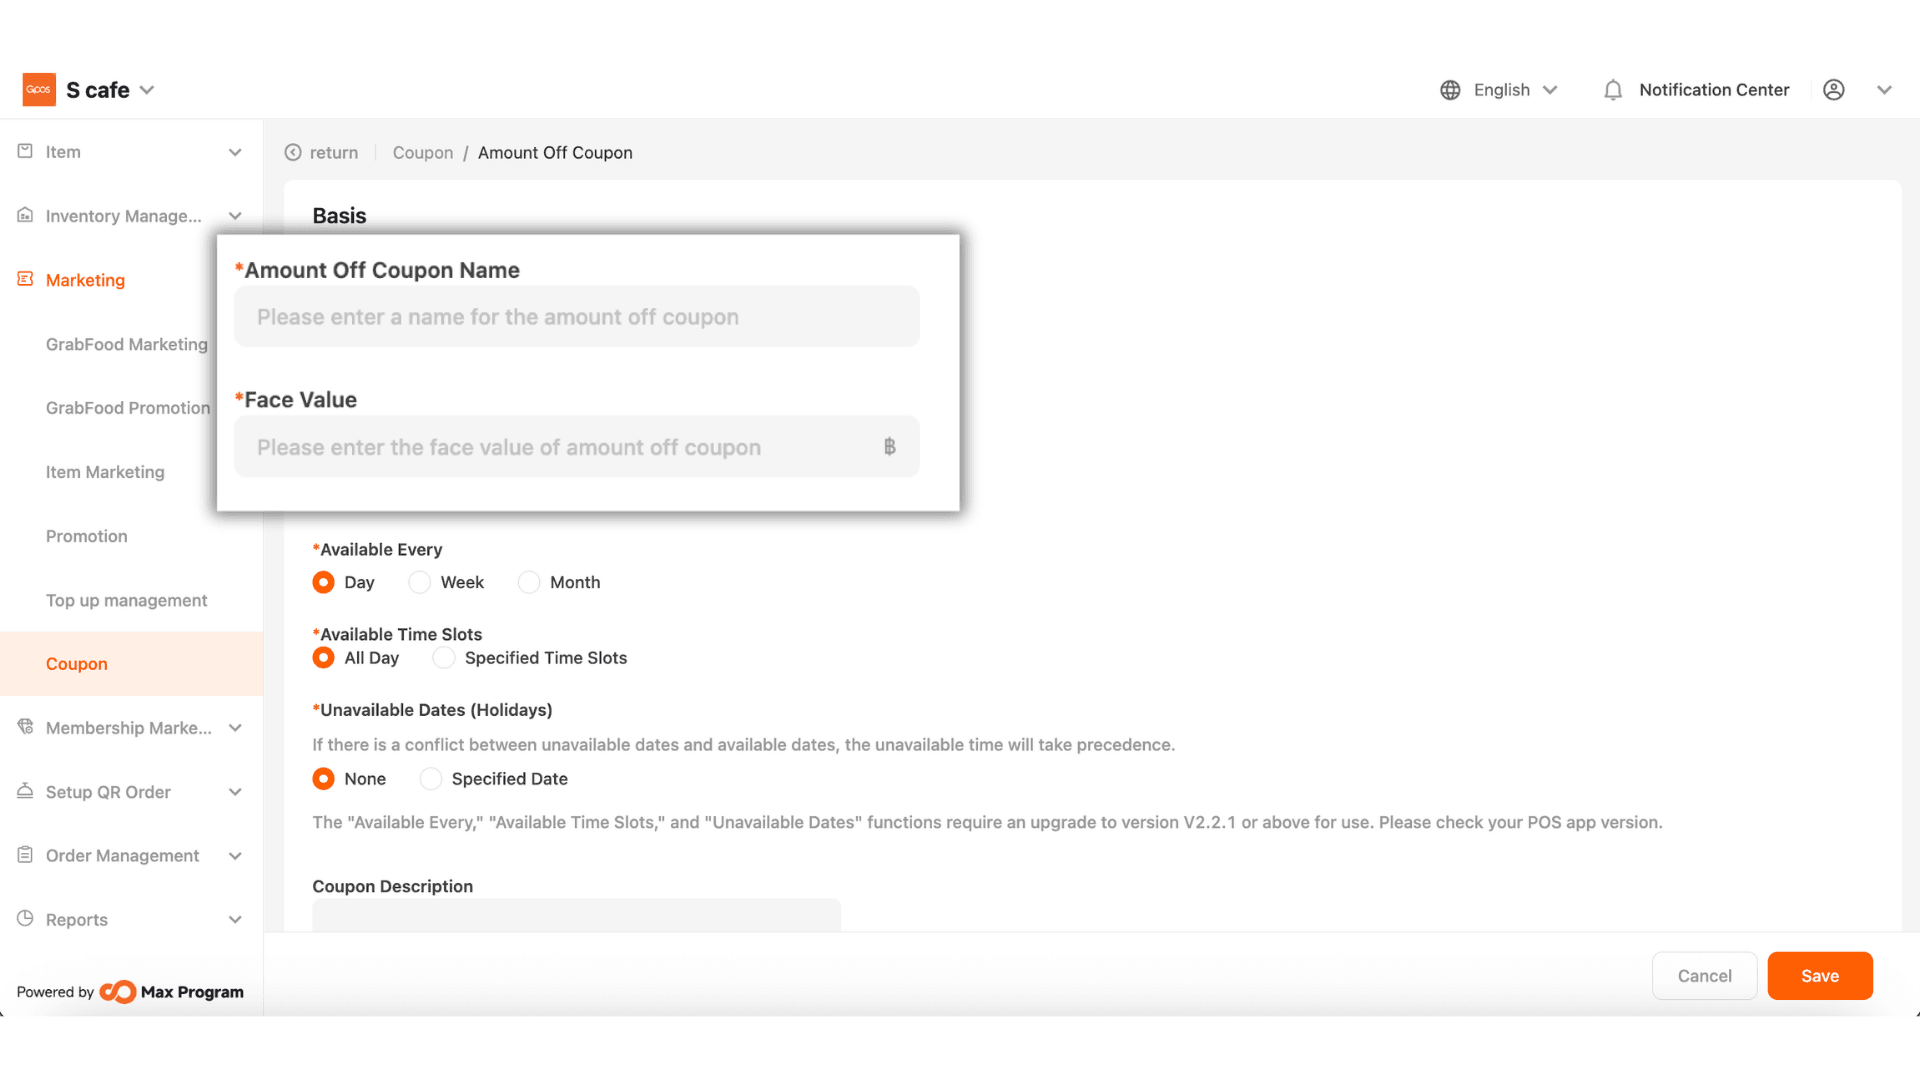
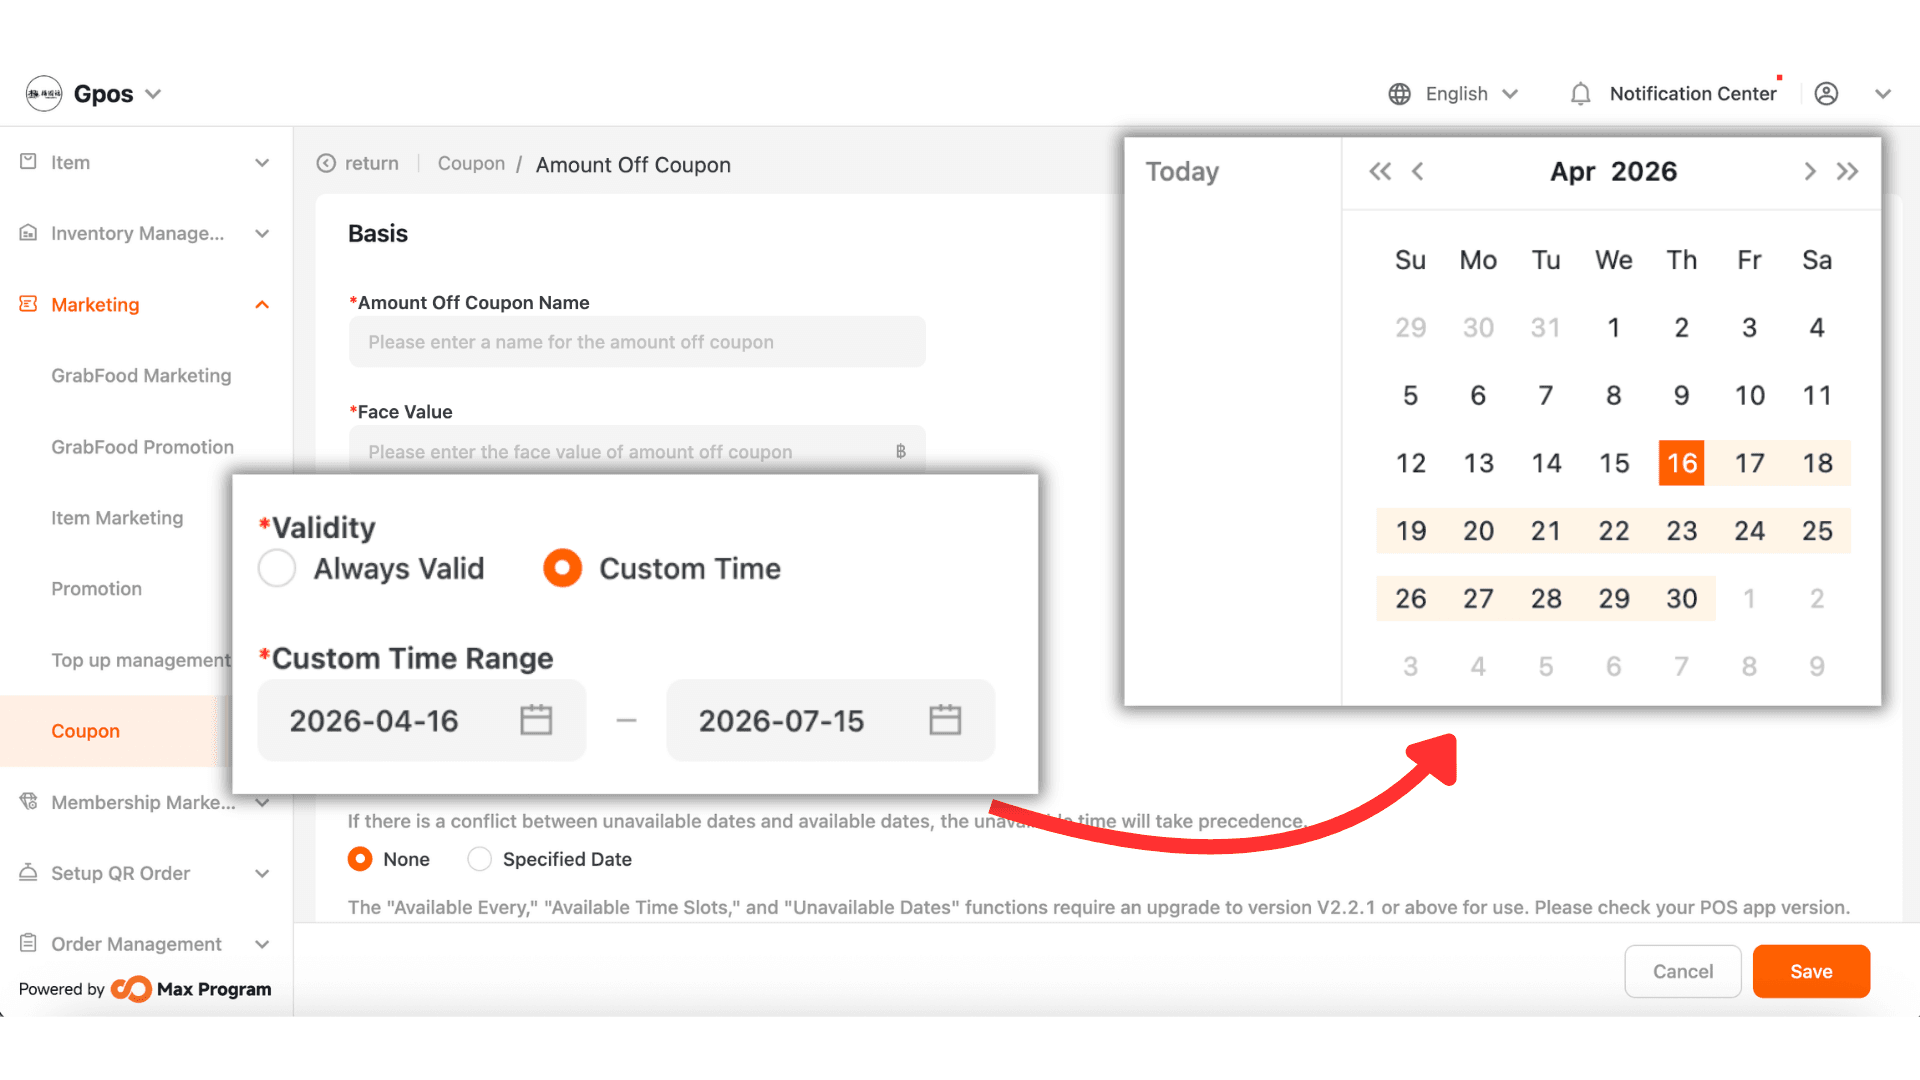
4. You can define the coupon’s usage period in two ways
- Always Valid – The coupon can be used at any time without start or end date limits.
- Custom Time – The system will open fields to specify the Start Date and End Date for the coupon’s validity.
Example: Valid from October 1, 2025 – October 31, 2025.
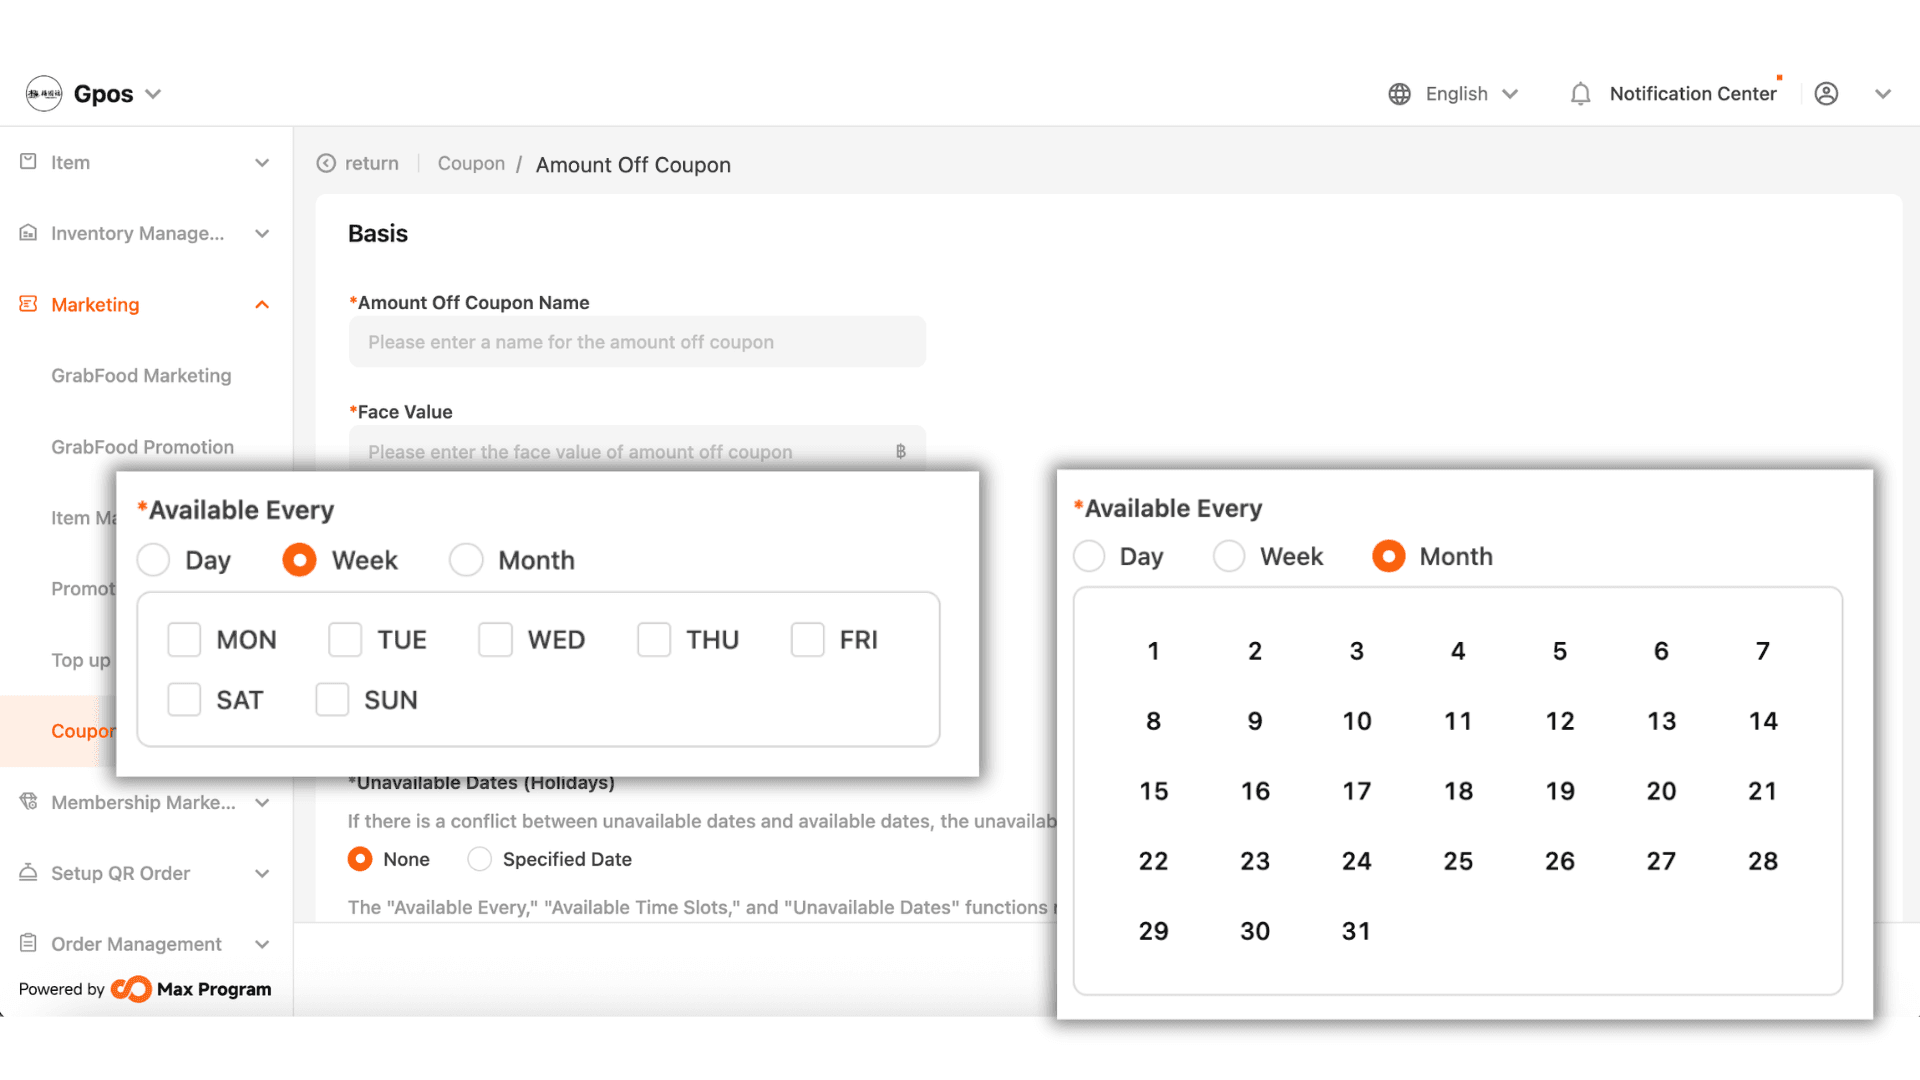
5. You can define the days the coupon can be used in three formats
- day – Usable every day.
- Week – The system will show days Monday–Sunday; tick the desired days.
Example: Tick Sunday to allow coupon usage only on Sundays each week.
- Month – The system will show dates 1–31; select the desired date(s).
Example: Selecting 1 means the coupon can be used on the 1st of every month.
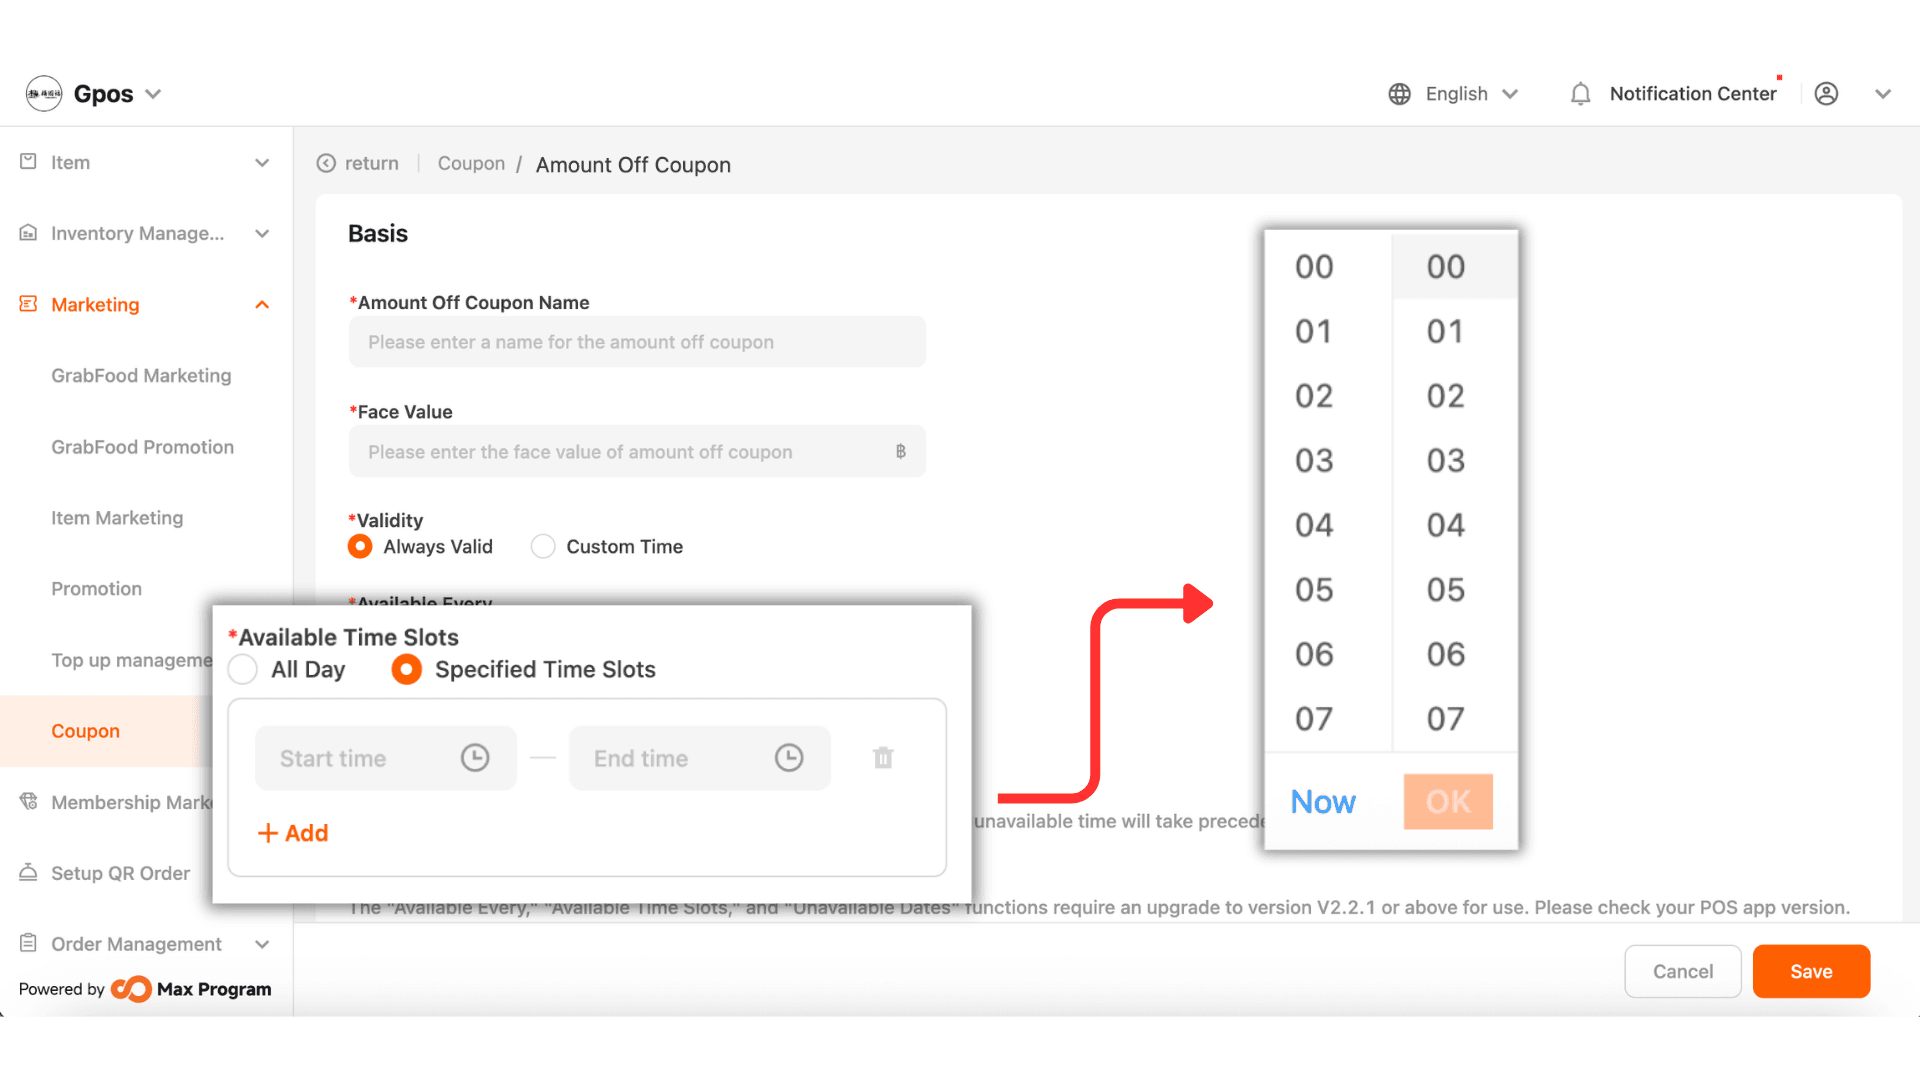
6. Choose how you want to define the coupon’s usable time:
- All day – The coupon can be used at any time of day.
- Specified Time Slots – Specify a Start Time and End Time. You can set up to 5 time periods.
Example: Valid from 6:00 PM – 7:00 PM.
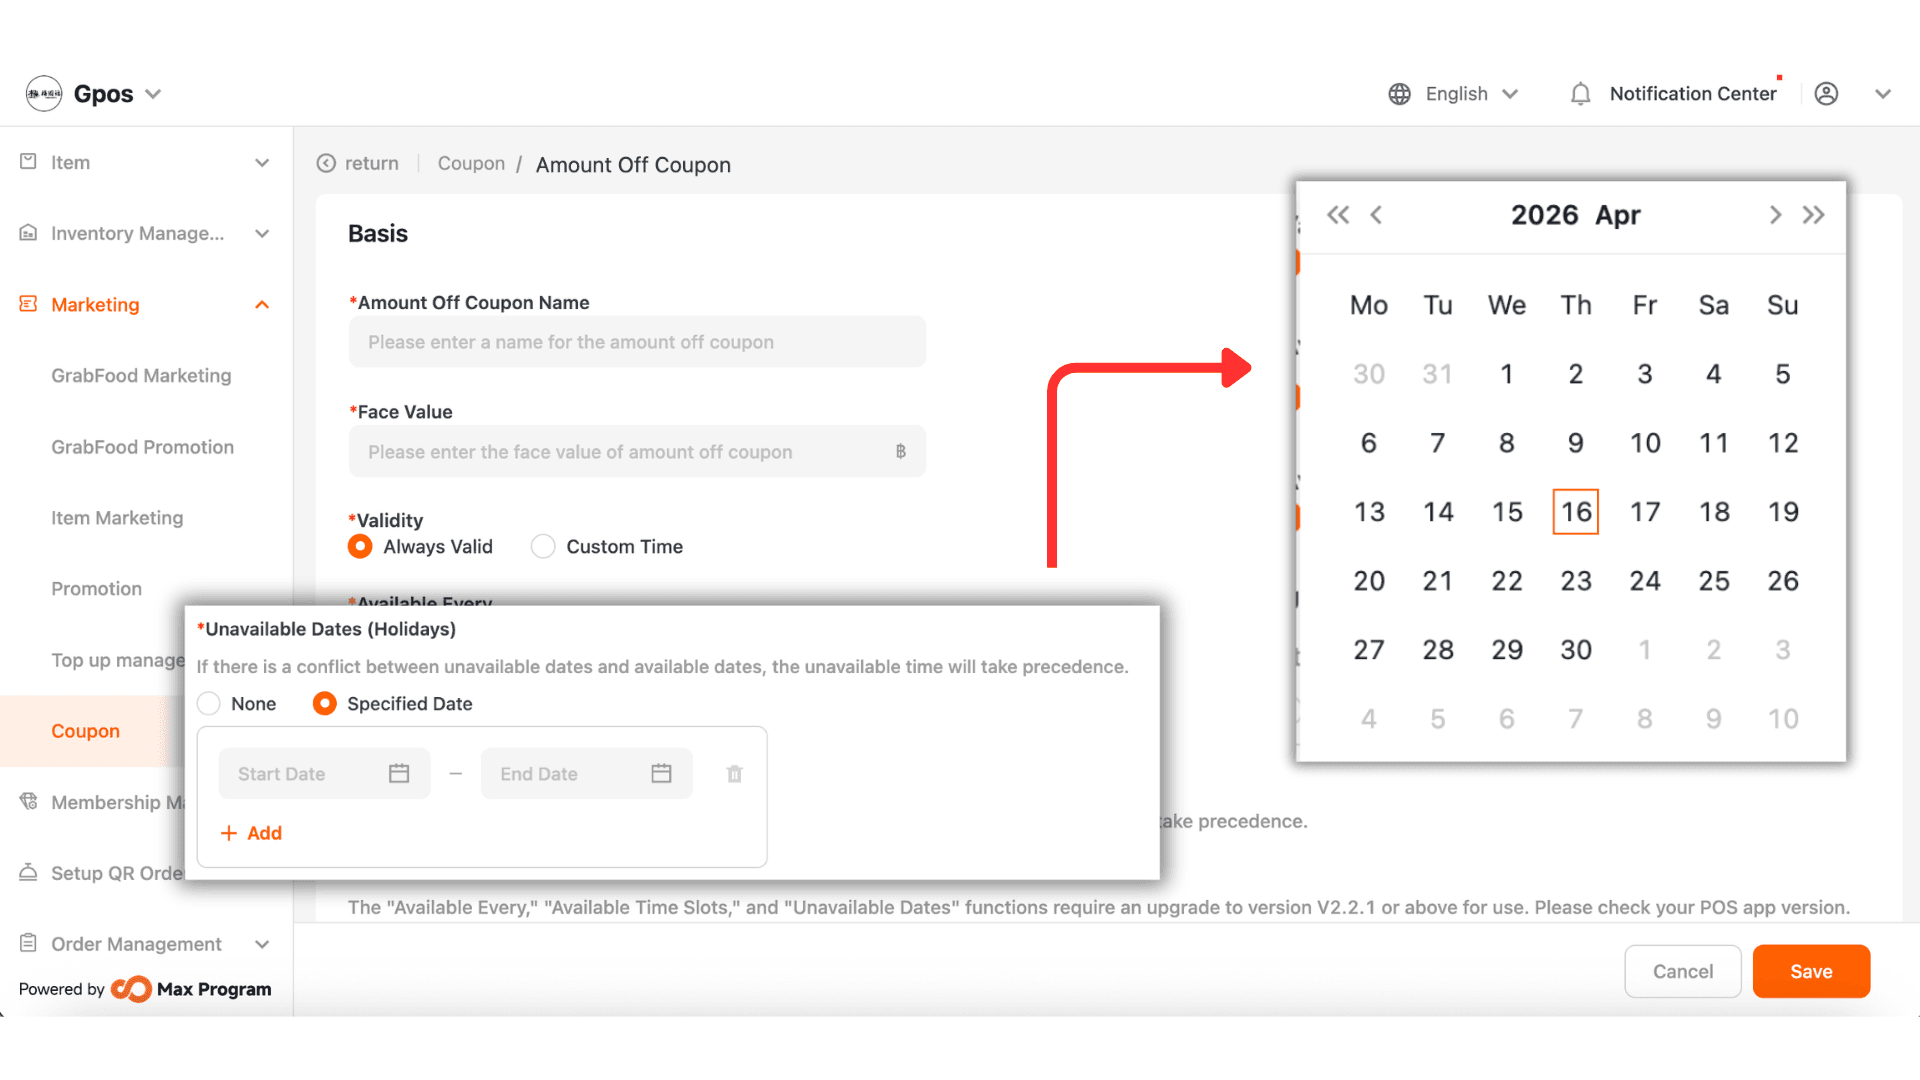
7. Specify dates when the coupon cannot be used
- None – The coupon can be used on all valid days.
- Specified Date – Specify a Start Date and End Date during which the coupon is not valid. You can set up to 5 date ranges.
Example: The October coupon excludes October 10.
Note : The functions “Available Every,” “Available Time Slots,” and “Unavailable Dates (Holidays)” are supported from version 2.2.1 and above.
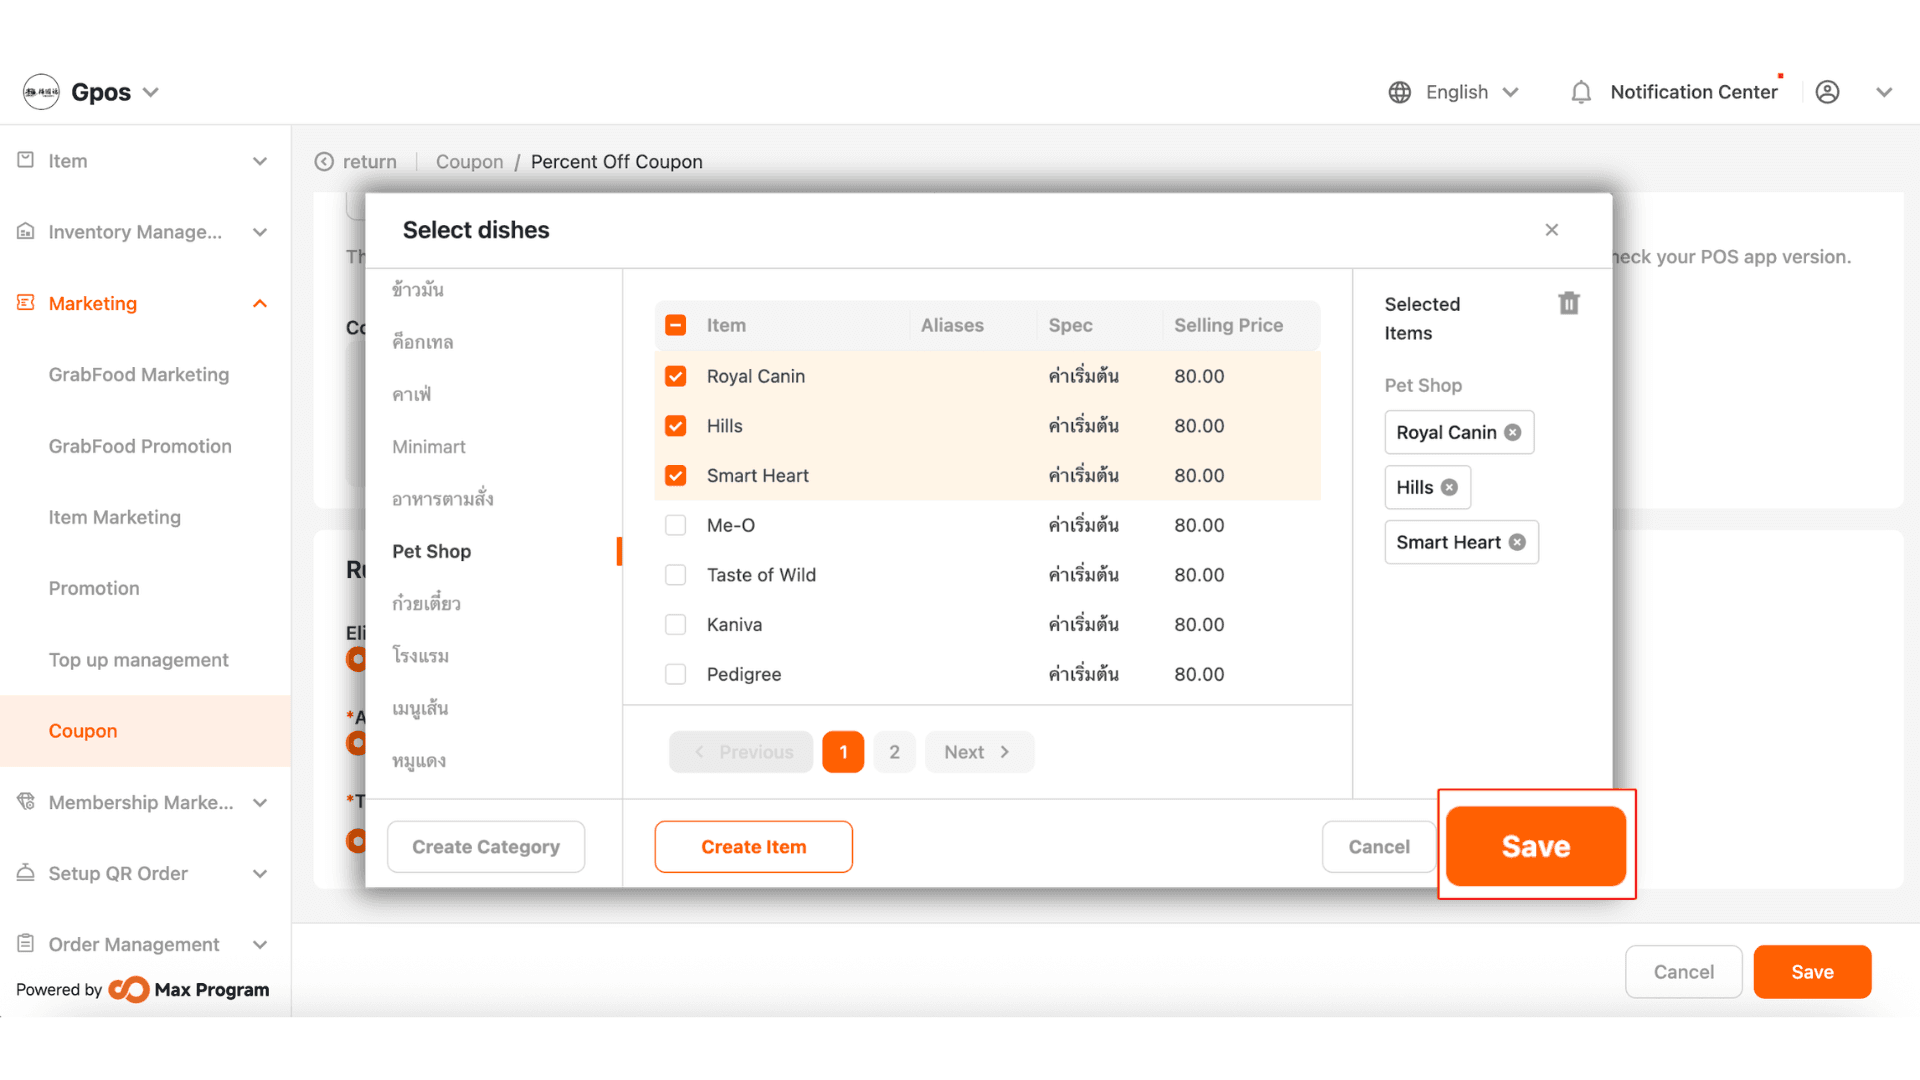
8.The system allows you to specify who can use the coupon. By default, all users are eligible. Then, choose which products the coupon applies to
- All items – The coupon can be used with all products.
- Partially Usable – Click + Add to choose specific products.
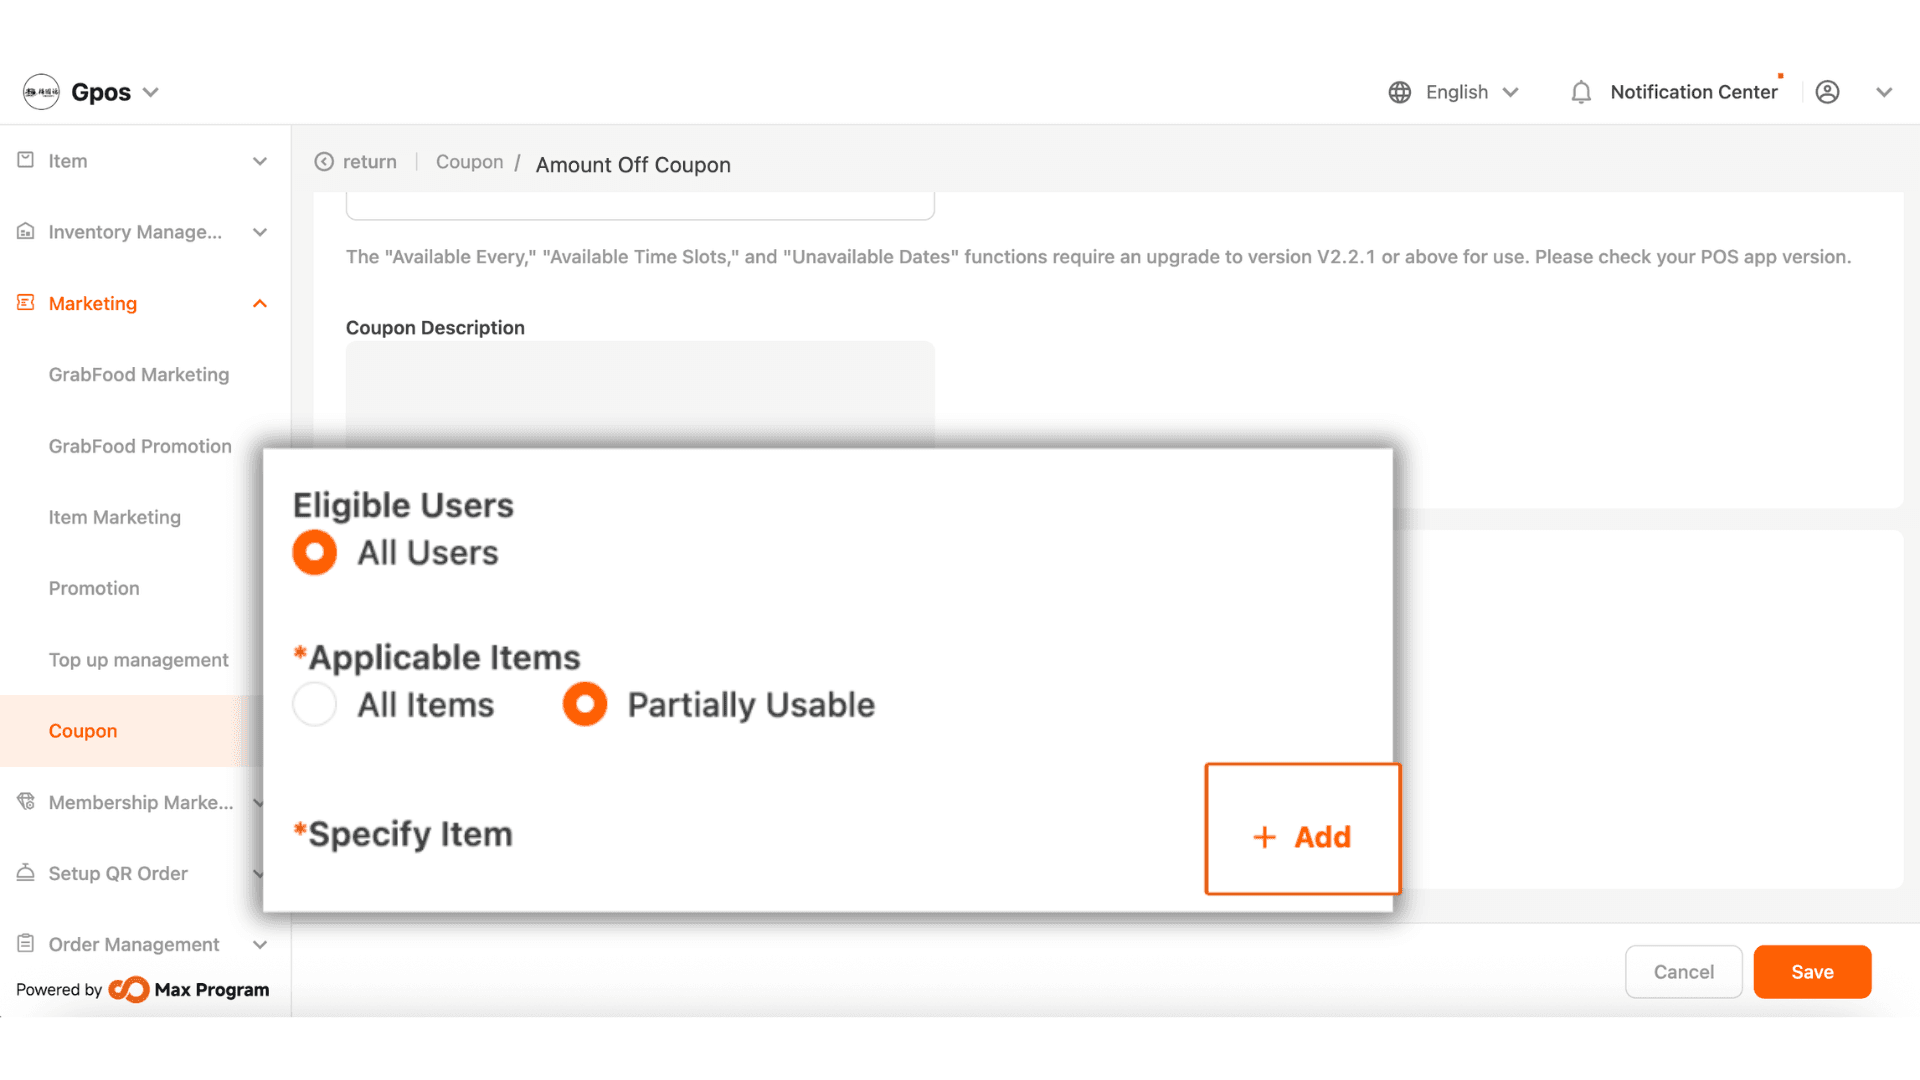
9 After clicking + Add, the system will display a list of products. Tick the items you want to include, then click Save.
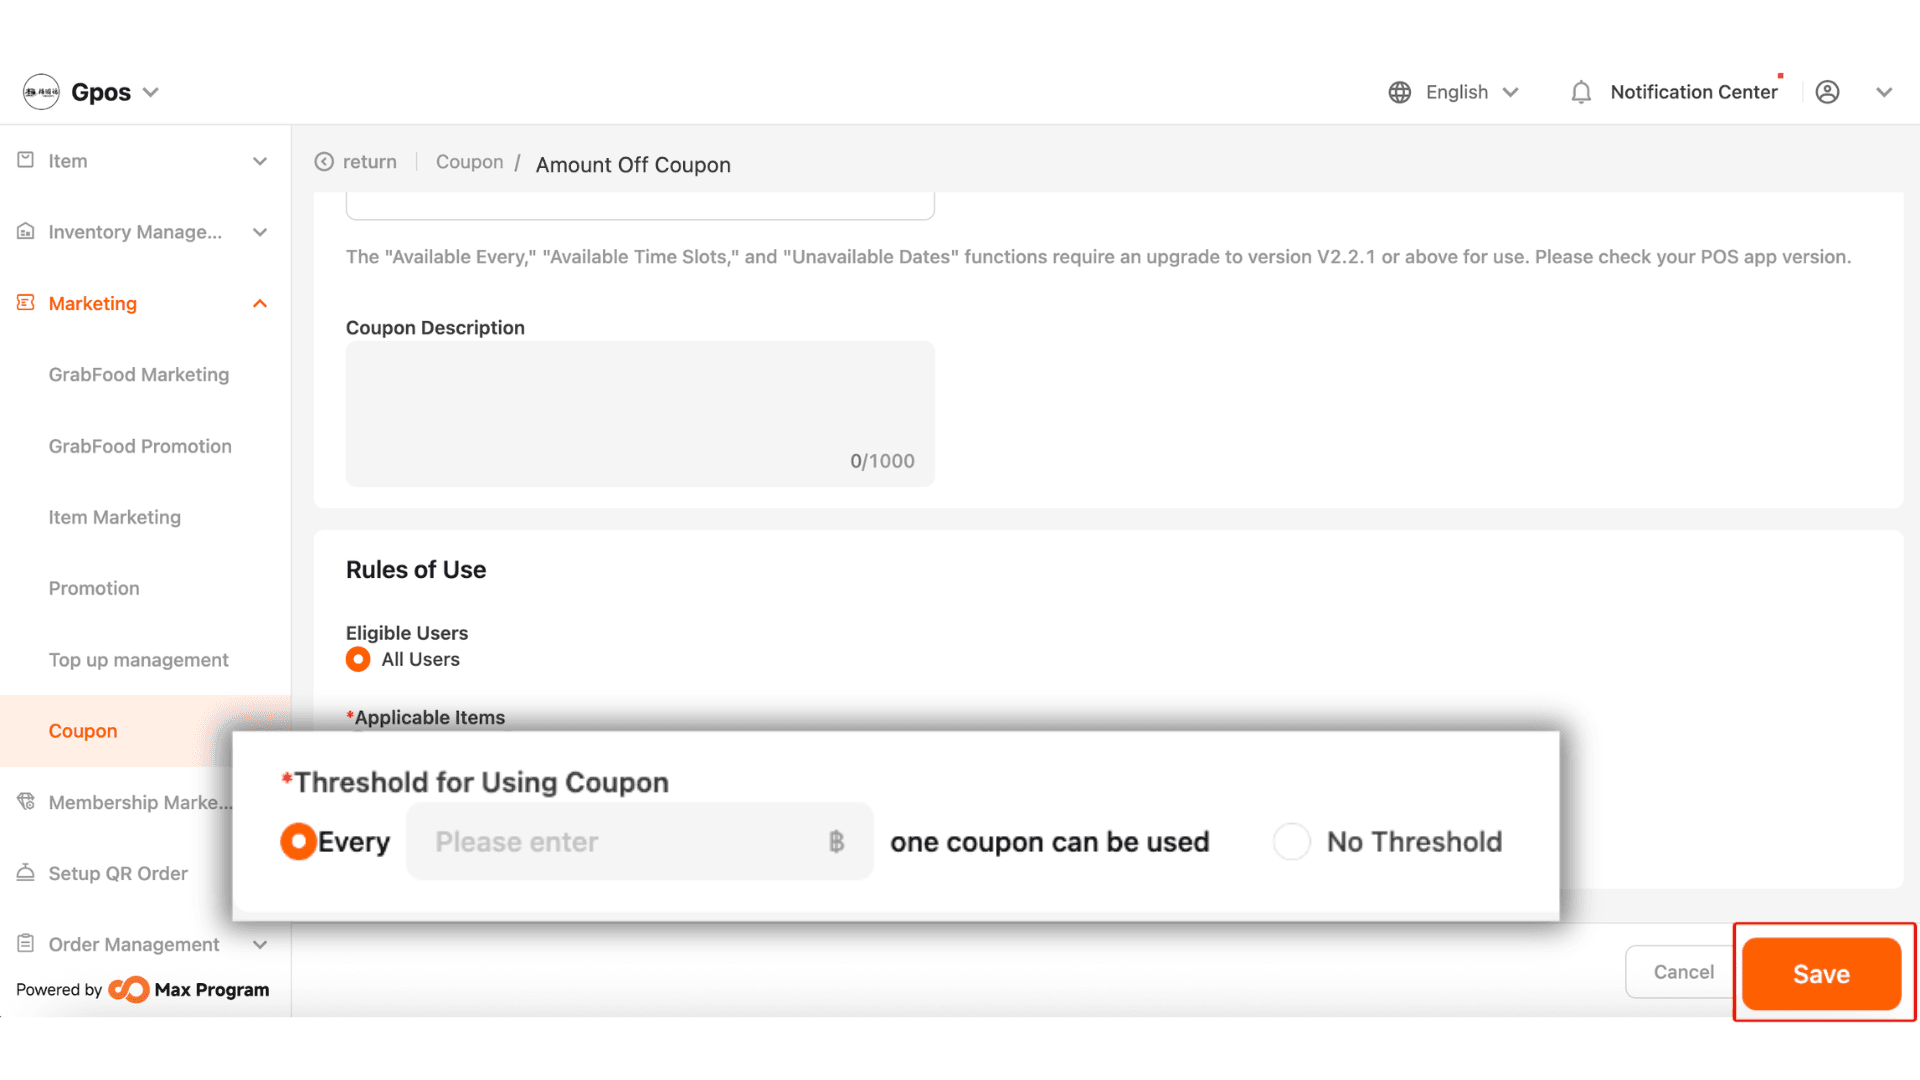
10. You can define one of two rule types
- Set condition – Specify the minimum purchase amount required before the coupon can be used.
Example: When the total purchase of selected items reaches 500 Baht, the coupon can be used once per transaction.
- No Threshold – The coupon can be used without any minimum purchase requirement.
After completing all settings, click Save to save the coupon to the system.