Category Percent Off (%)
2026-04-25 10:43
Creating category-based percentage discounts allows stores to manage promotions systematically, align them with marketing plans, and boost sales through discount tools that suit specific product groups.
1. Log in to the Back Office
Go to login.gpos.co.th , enter your email and password, and click Log In.
Click Marketing > Item Marketing.
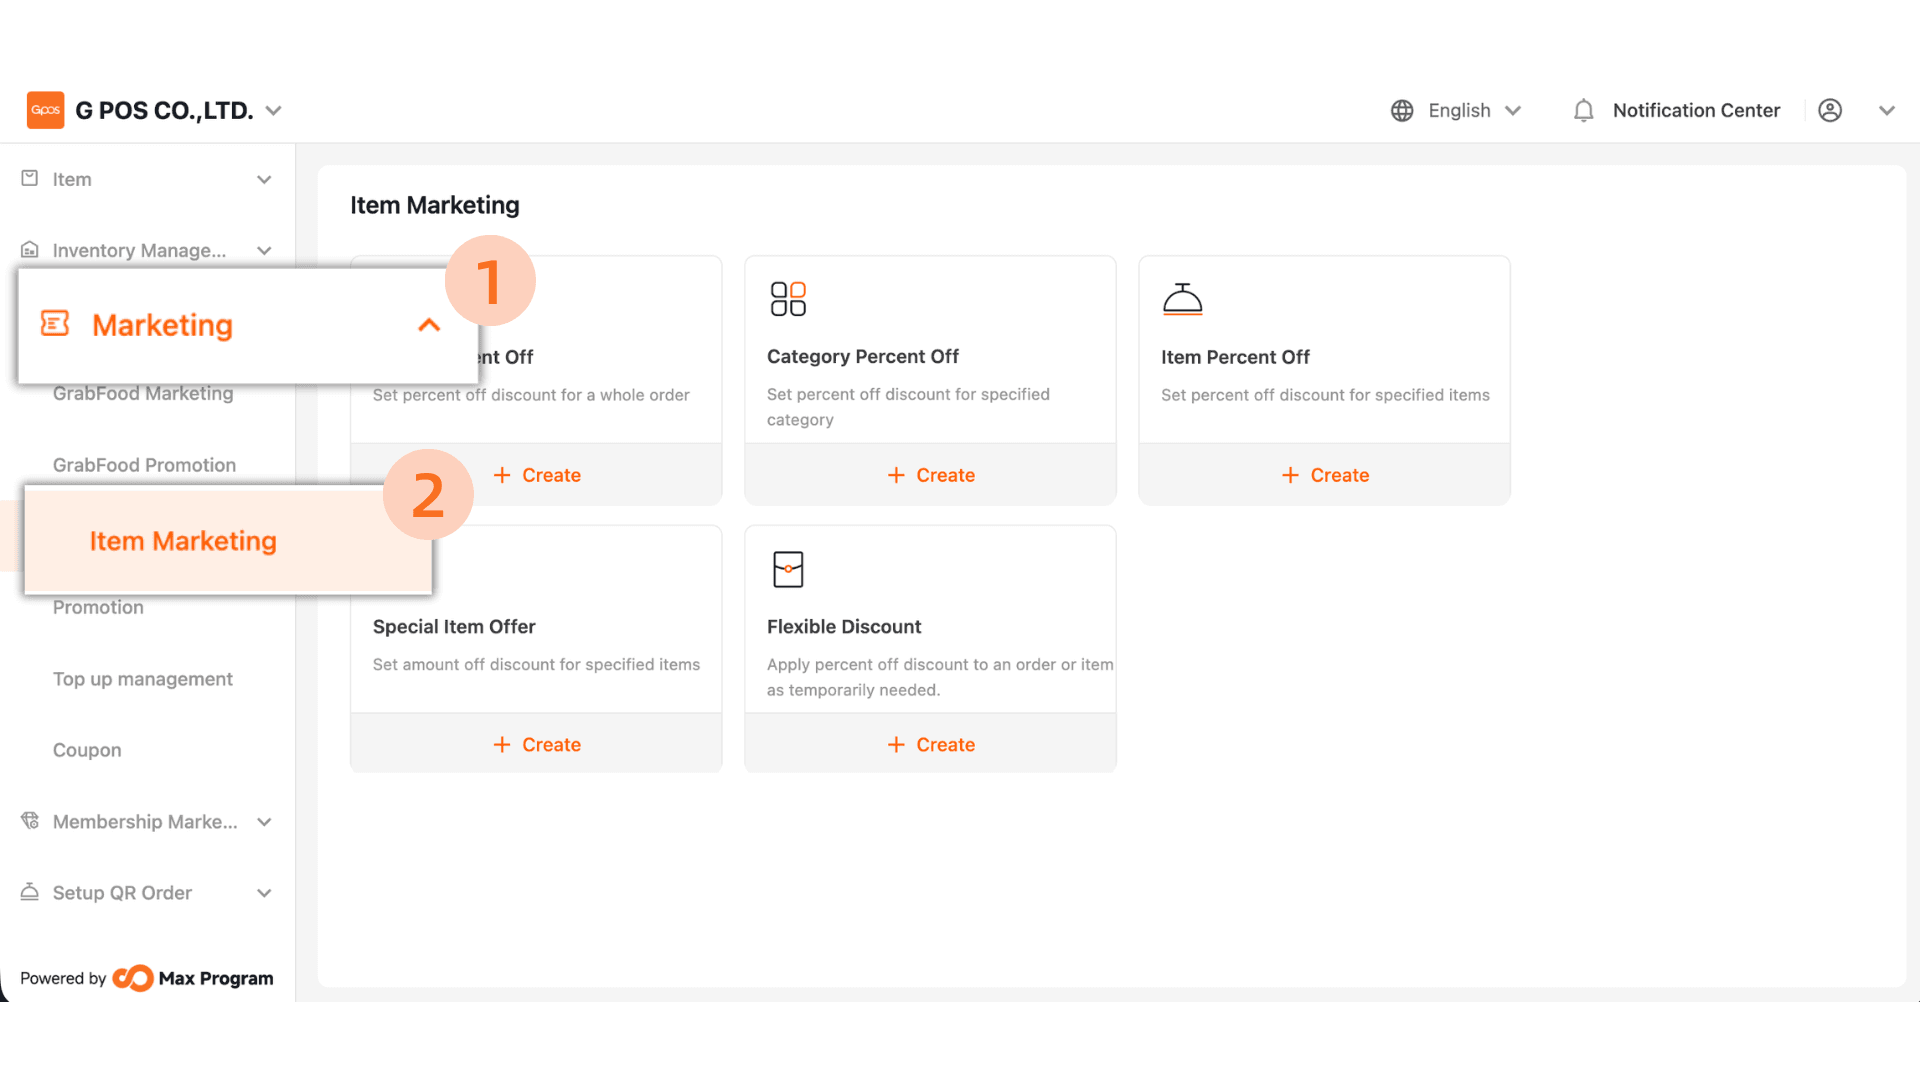
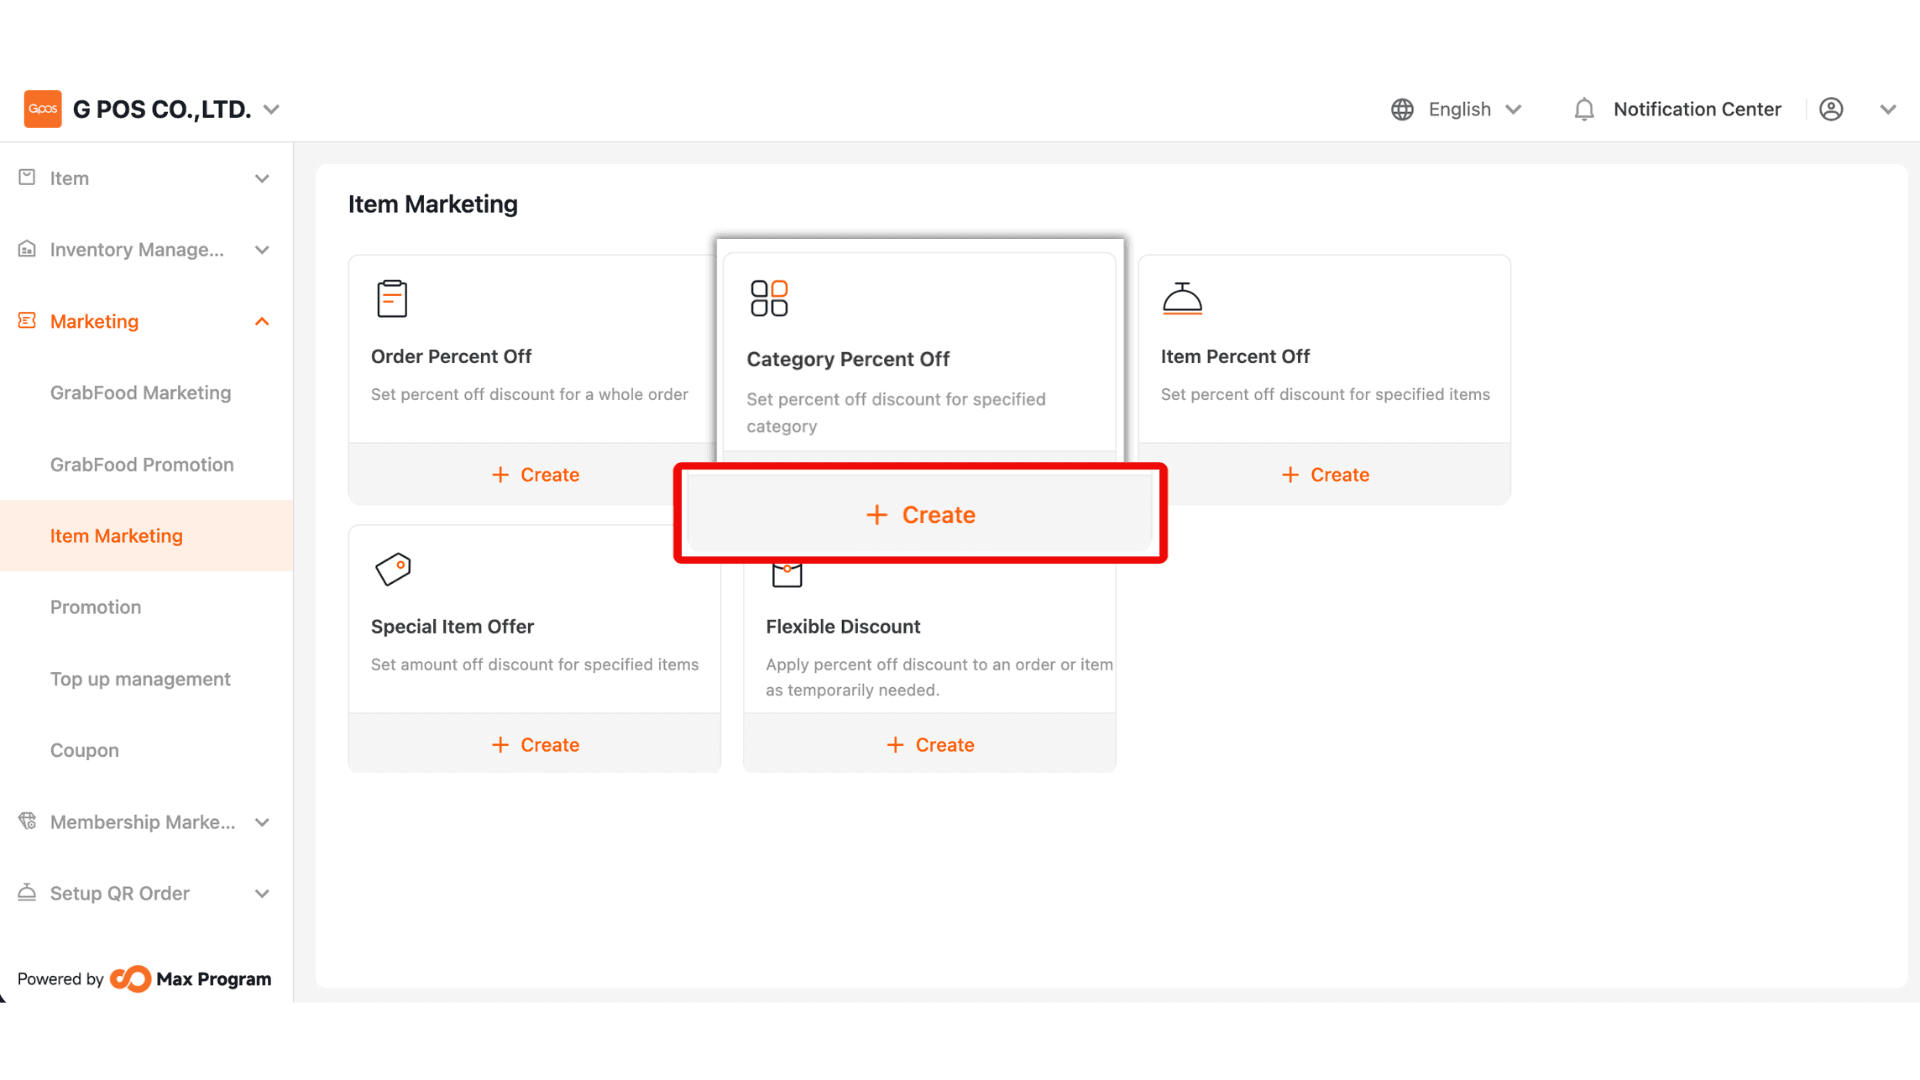
2. In the Discount List page, click “+ Create” and select “Category Percent Off.”
3. Enter the Promotion Name, such as “10% off food.” The name should clearly indicate the discount type and percentage for easier management later.
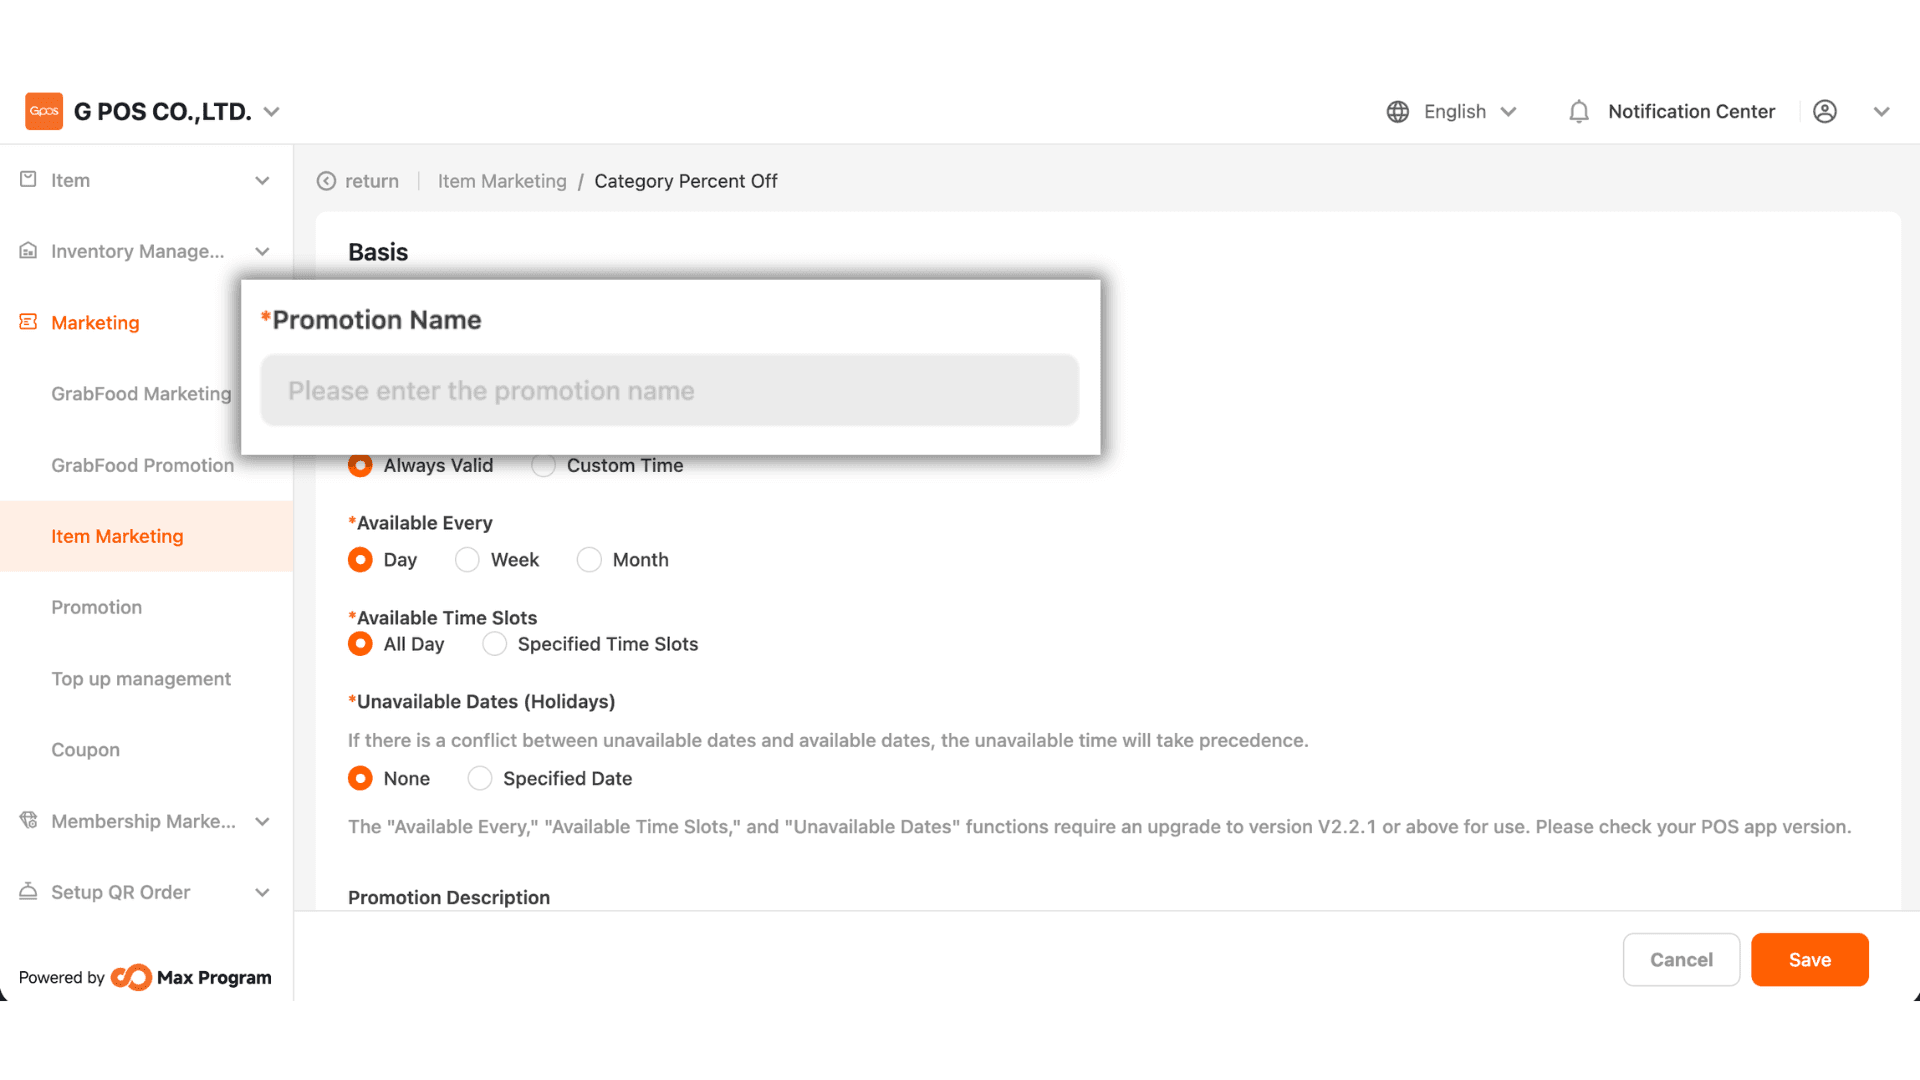
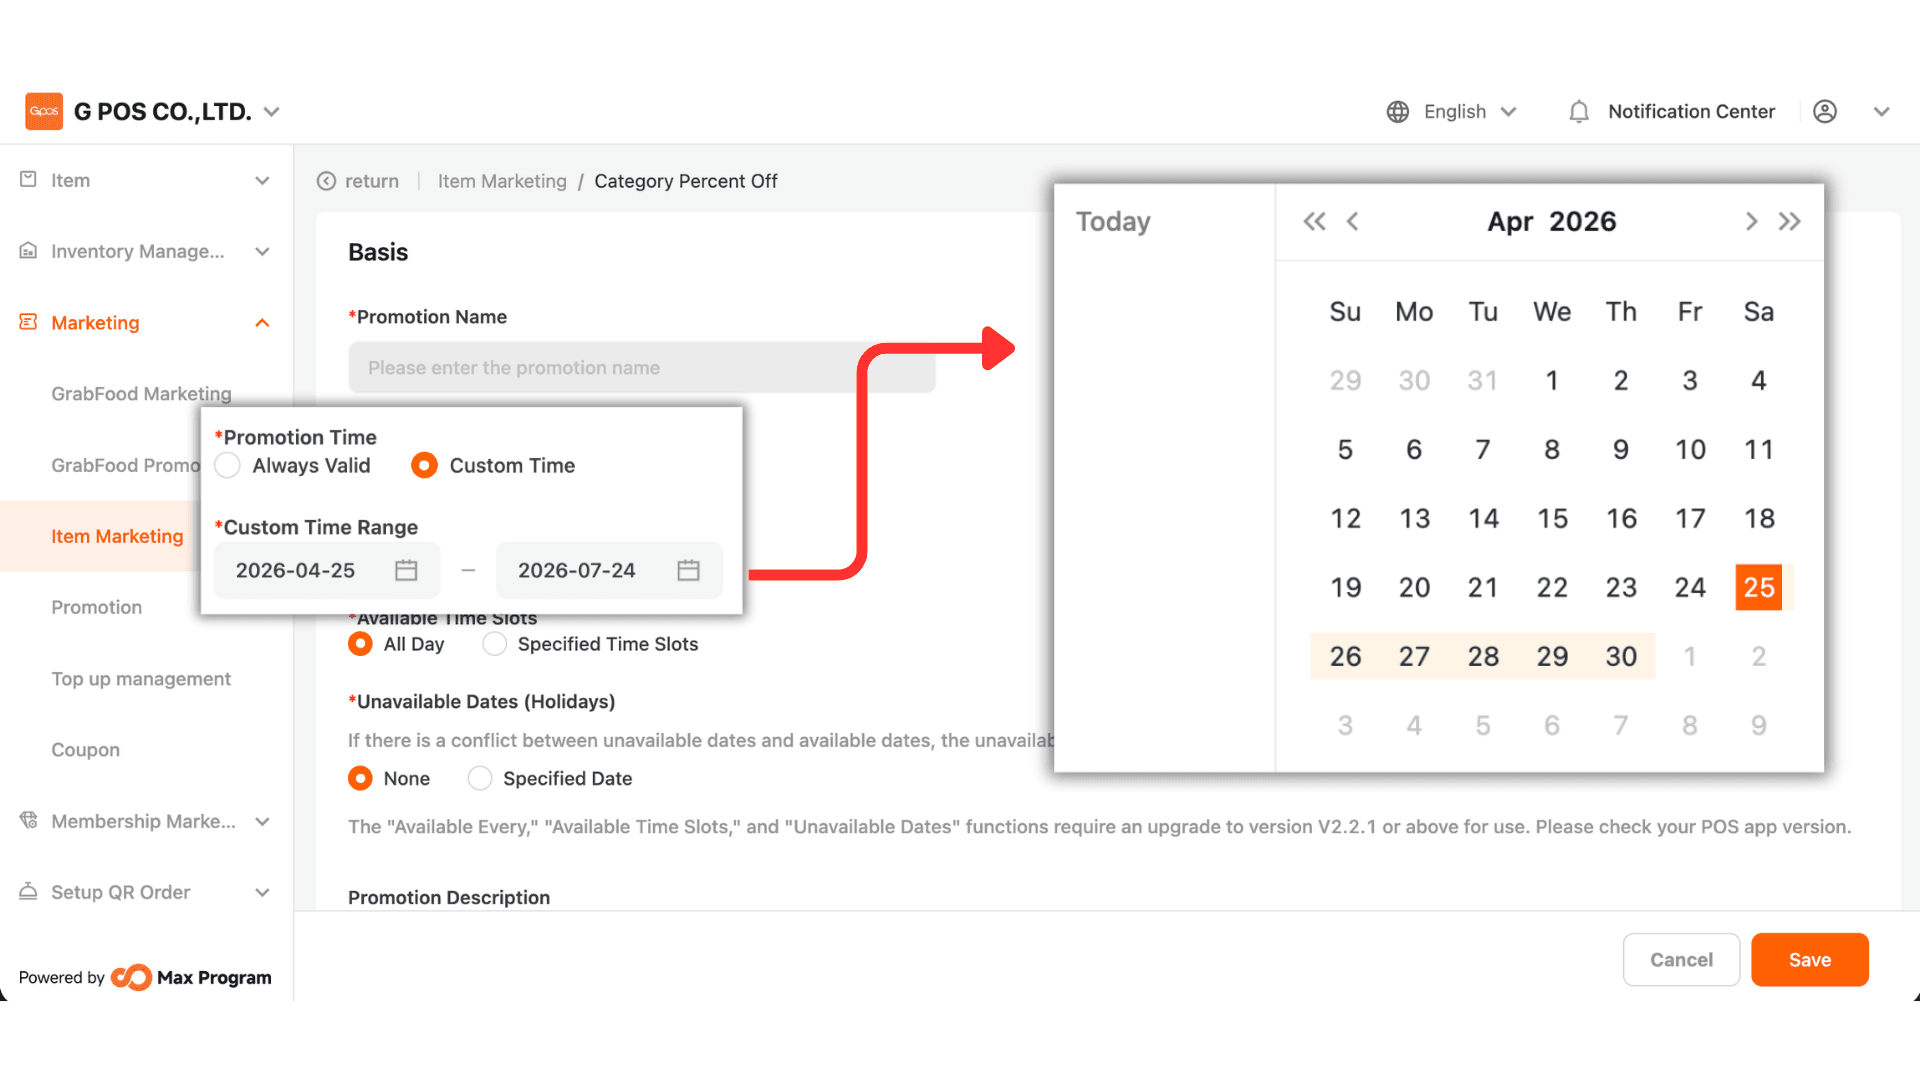
4. You can choose between two options
- Always Valid – The discount is always active with no start or end date.
- Custom Time – Specify the start date and end date for the discount period.
Example : The discount is valid from October 1, 2025 – October 31, 2025.
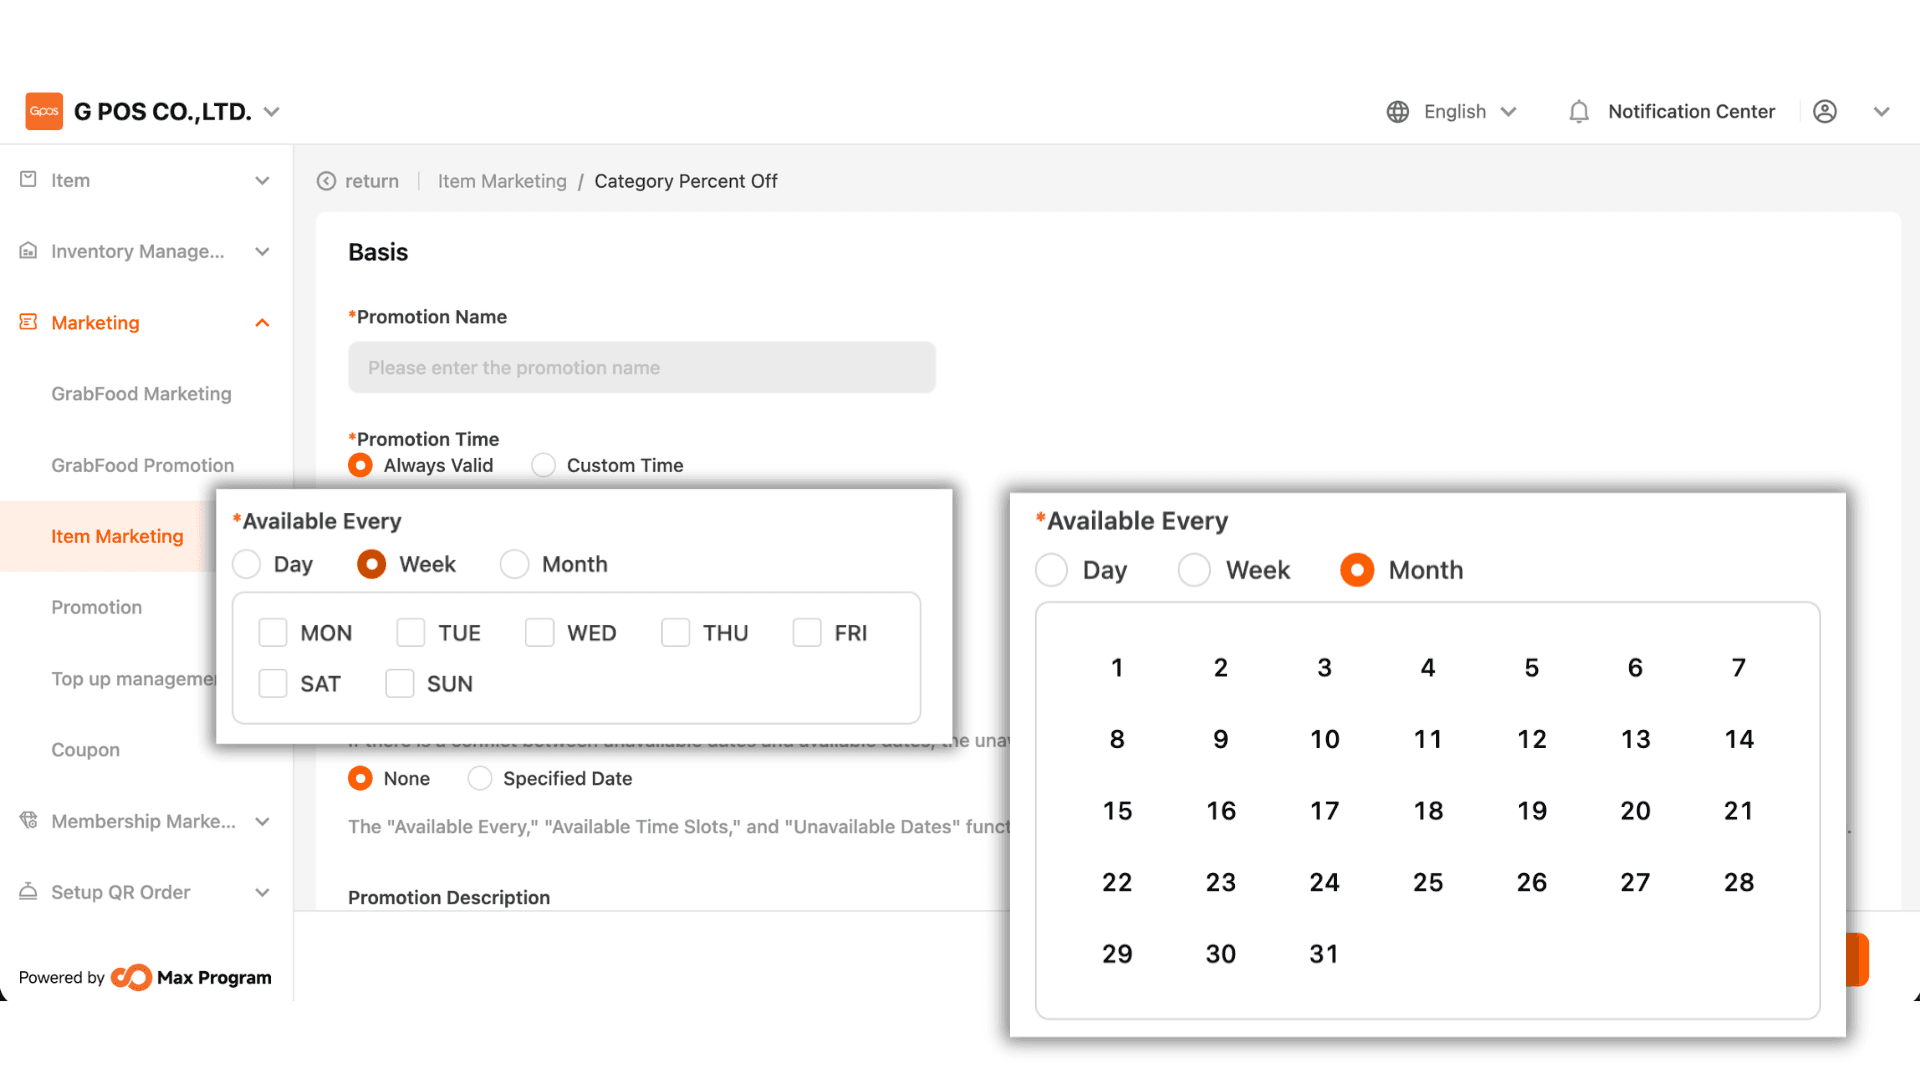
5. Choose how often the discount will be active
- Day – Available daily.
- Week – The system displays days Monday–Sunday. Tick the desired days.
Example : Selecting Sunday means the discount applies only on Sundays each week.
- Month – The system shows days 1–31 of the month. Select the applicable dates.
Example : Selecting 1 means the discount applies on the 1st of every month.
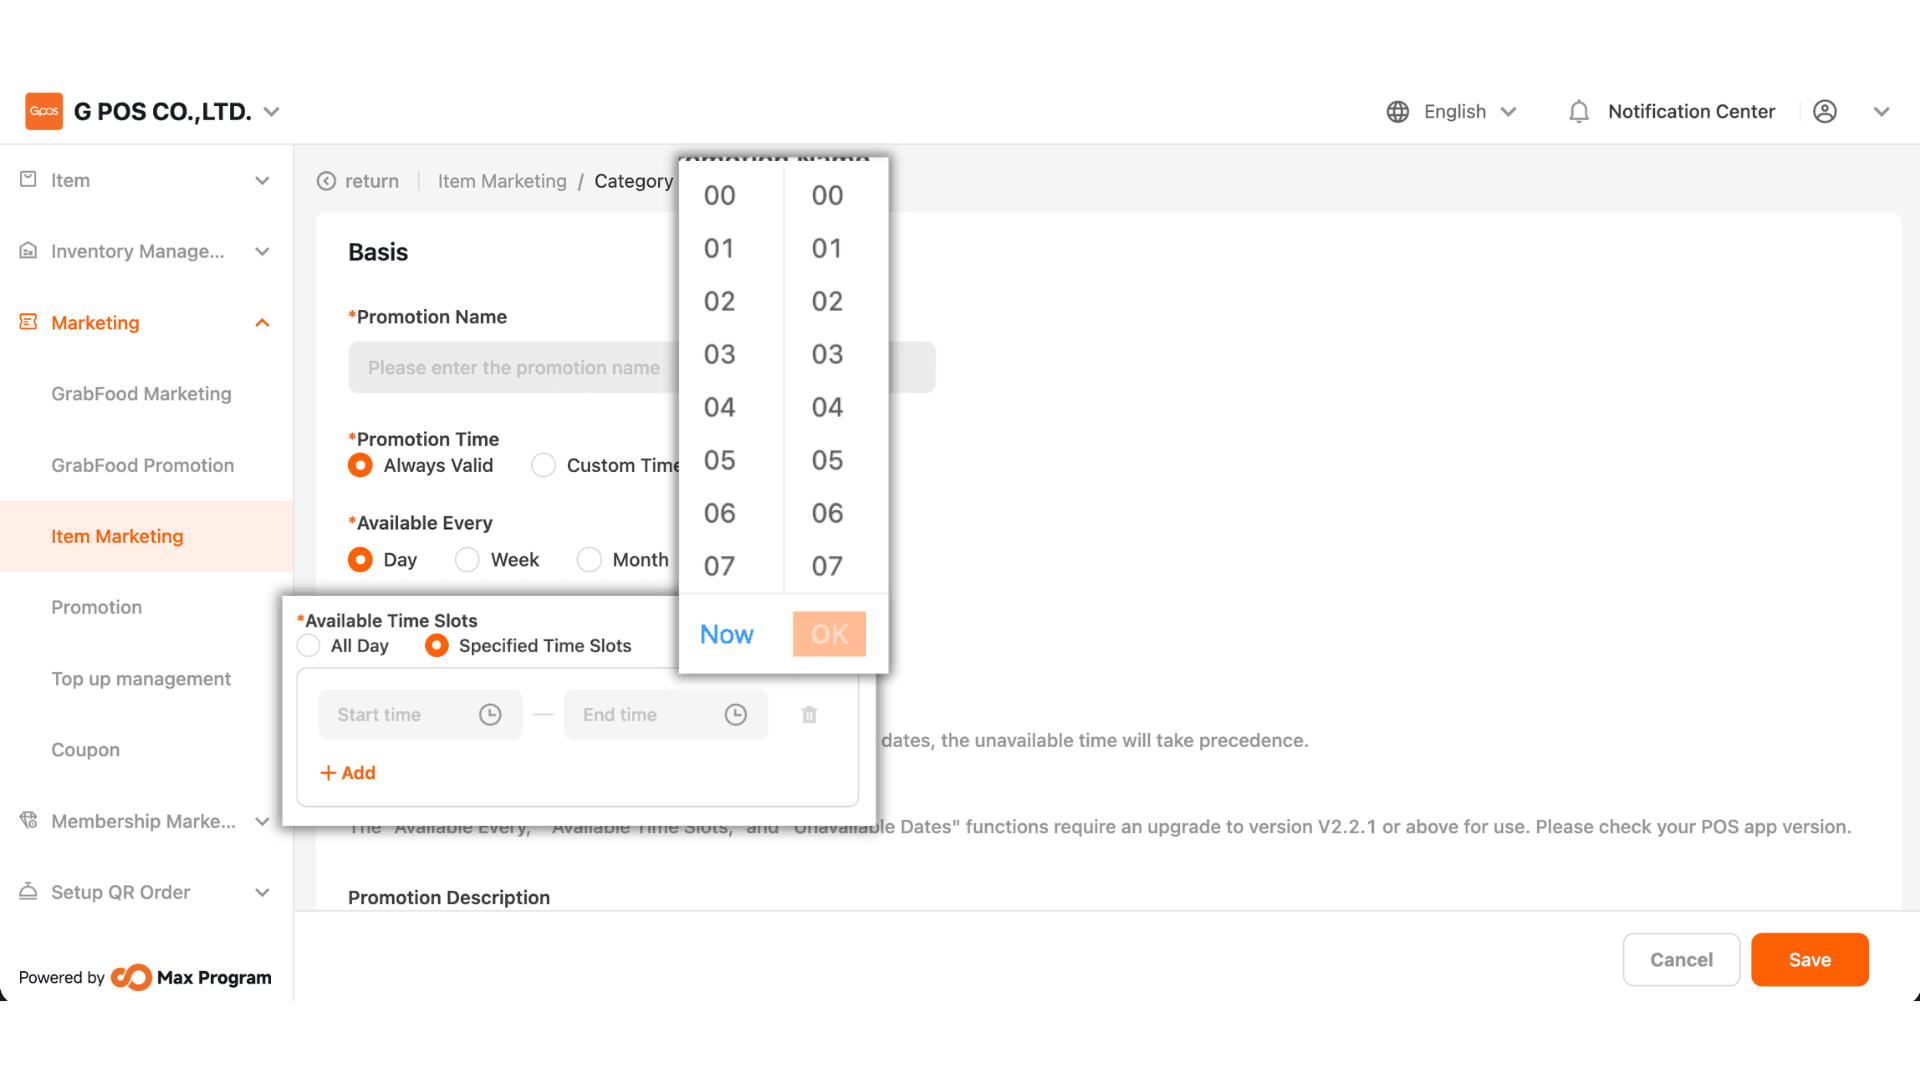
6. Choose how the discount will be applied by time
- All Day – The discount is available throughout the day.
- Specified Time Slots – Specify up to five time slots by setting a start time and end time.
Example : Valid between 6:00 PM – 7:00 PM.
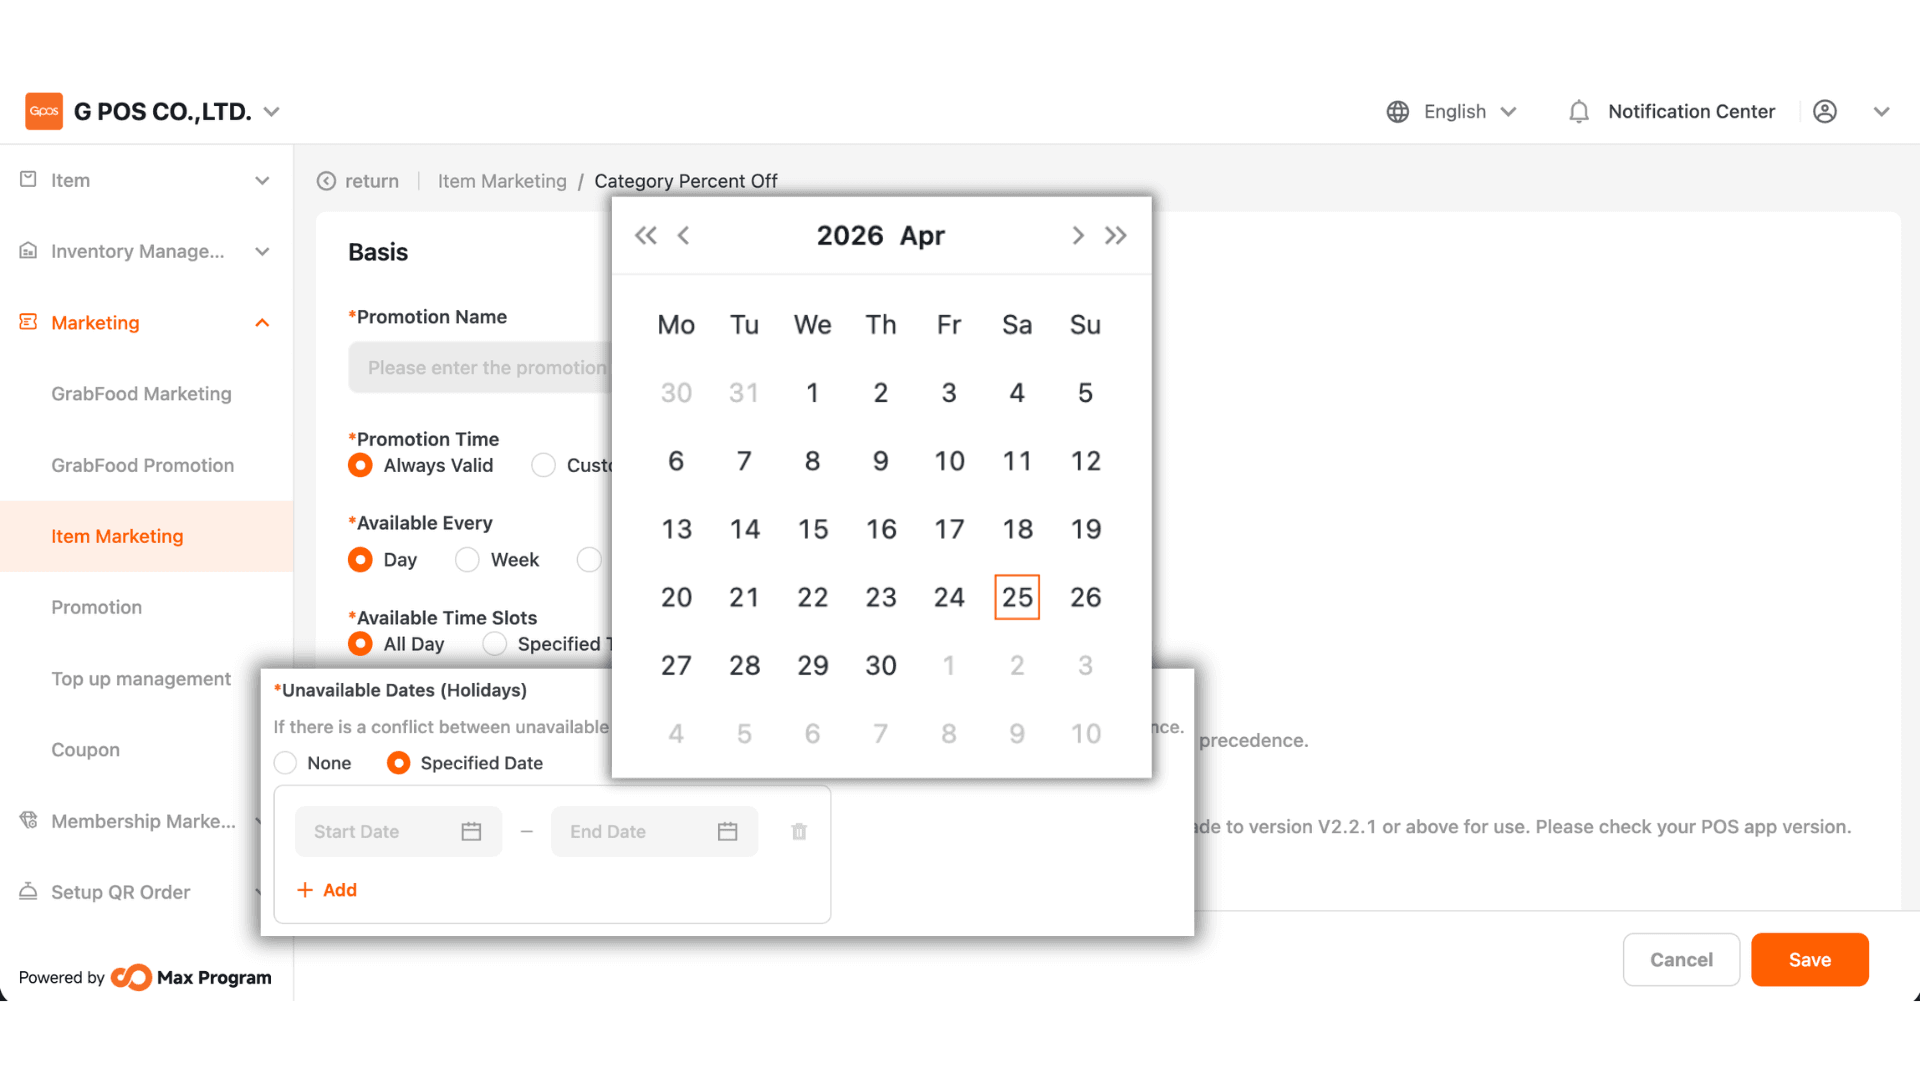
7. Choose dates when the discount cannot be applied
- None – The discount works normally on all specified days.
- Specified Date – Specify up to five date ranges where the discount should not be used.
Example : October promotion excluding October 10.
Note : The “Available Every,” “Available Time Slots,” and “Unavailable Dates (Holidays)” features are available from version 2.2.1 onward.
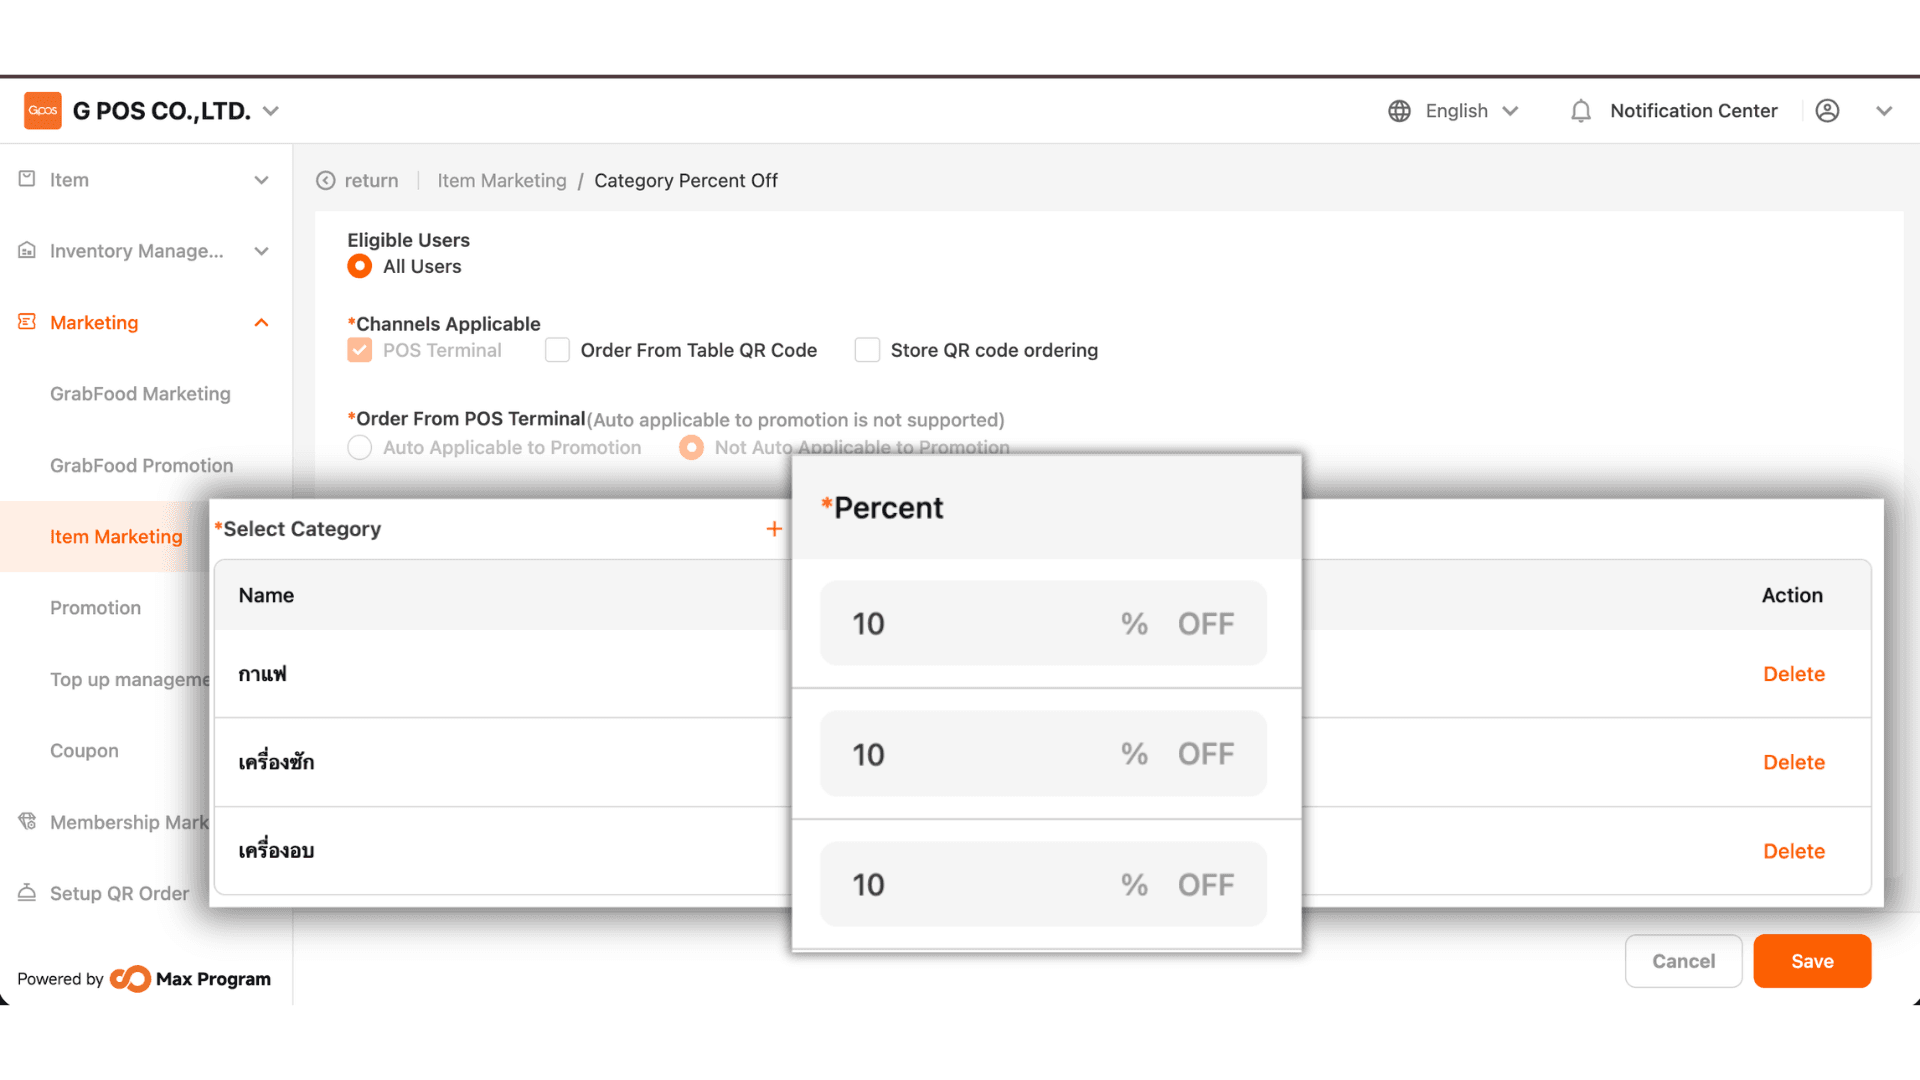
8.Click “+ Add” to choose product categories that will use this discount.
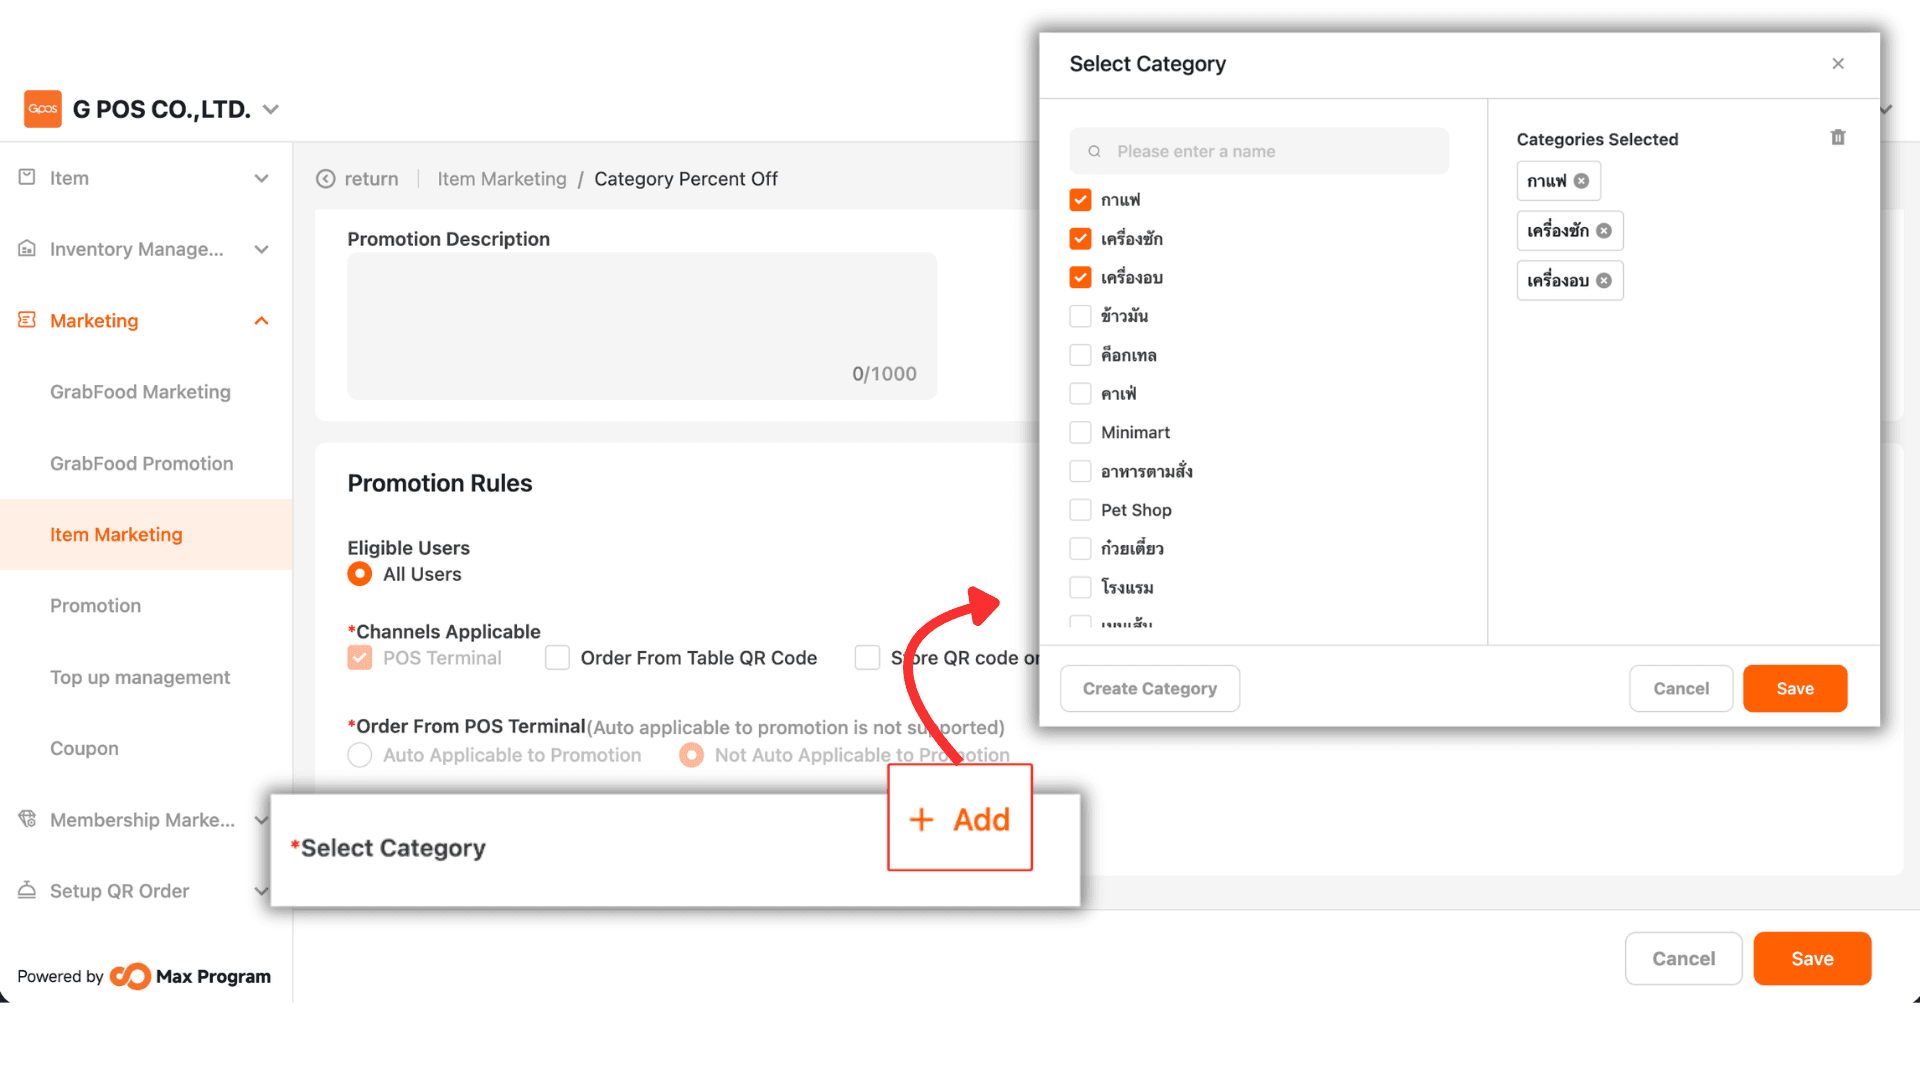
9. After saving, the system will display the selected categories. Enter the discount percentage for each category. To remove a category, click “Delete.” Once all details are filled in, click “Save” to confirm and create the discount.