Flexible Discount
2026-04-25 09:46
This manual helps users configure a variety of discount types to suit business needs and ensures standardized system usage across the organization.
1. Log in to the Back Office
Go to the website login.gpos.co.th, enter your email and password, then click Log In. After
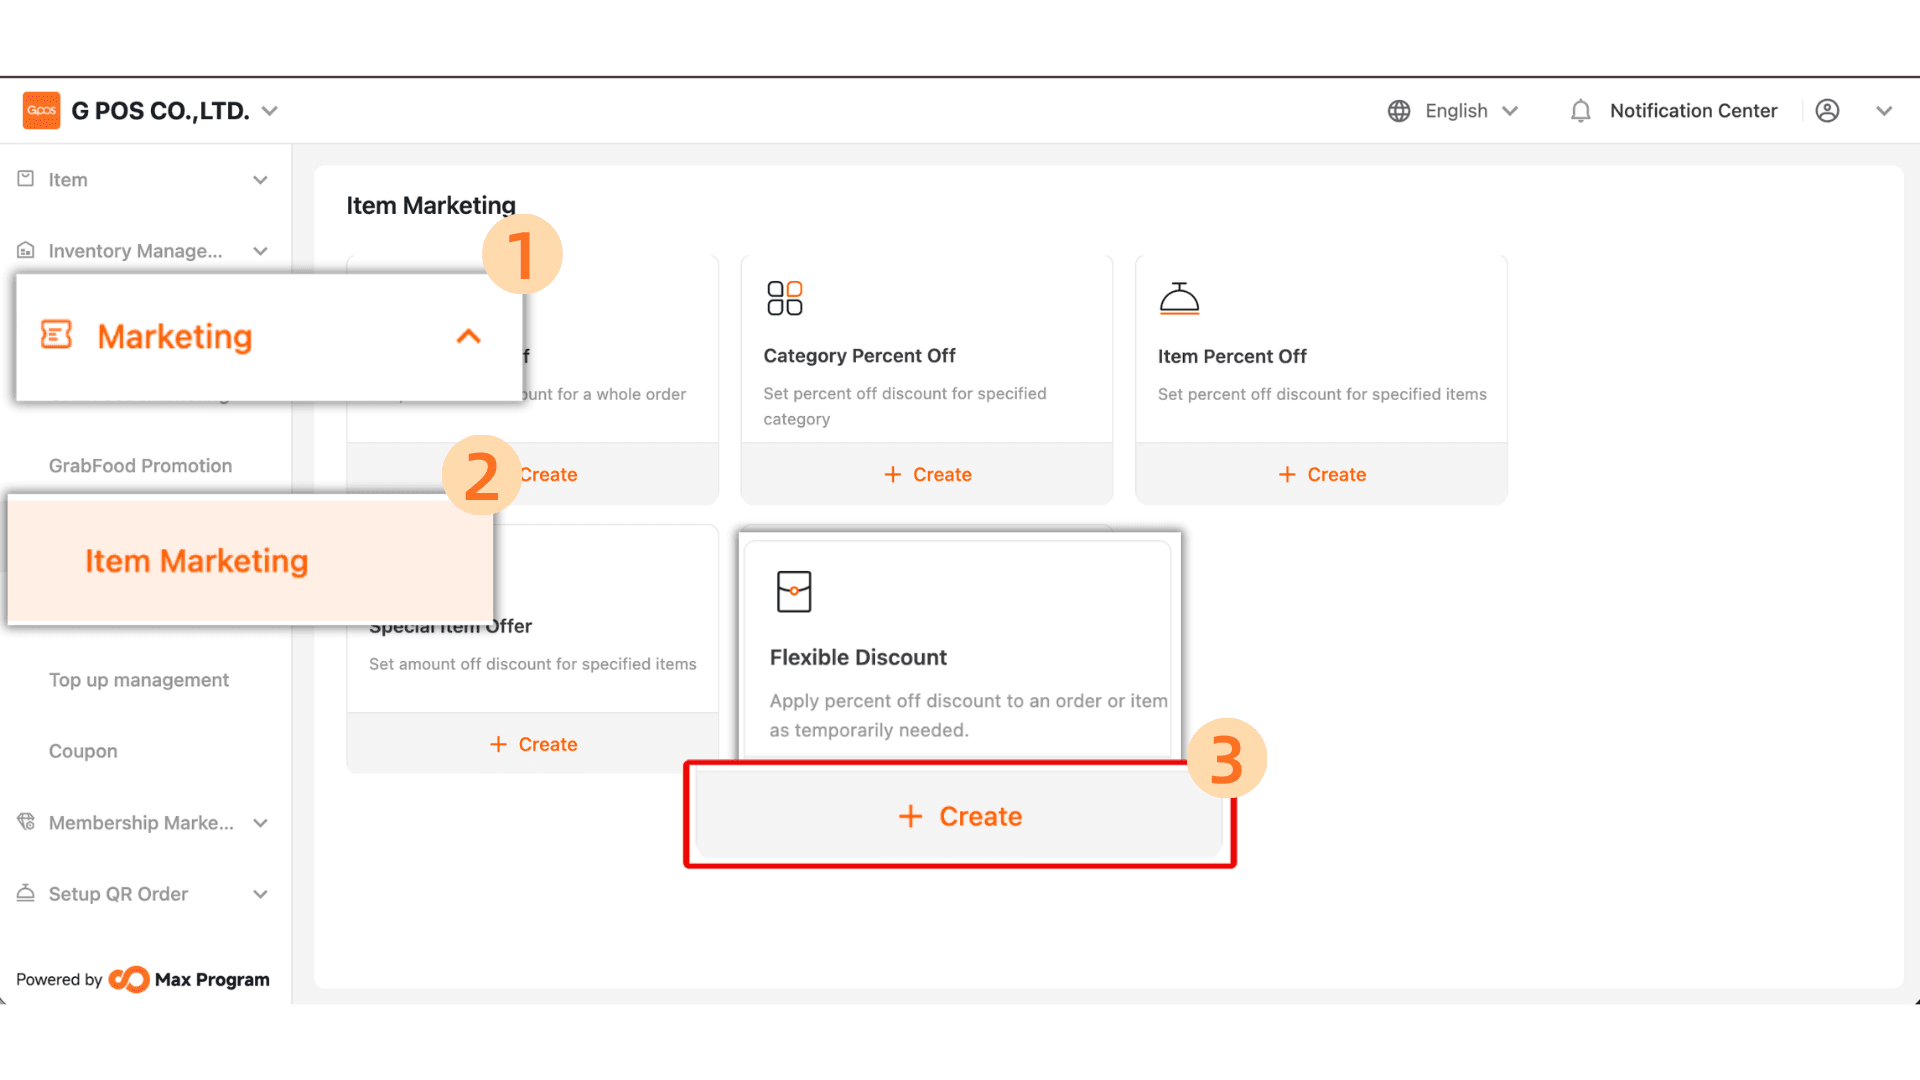
Click Marketing > Item Marketing > Flexible Discount
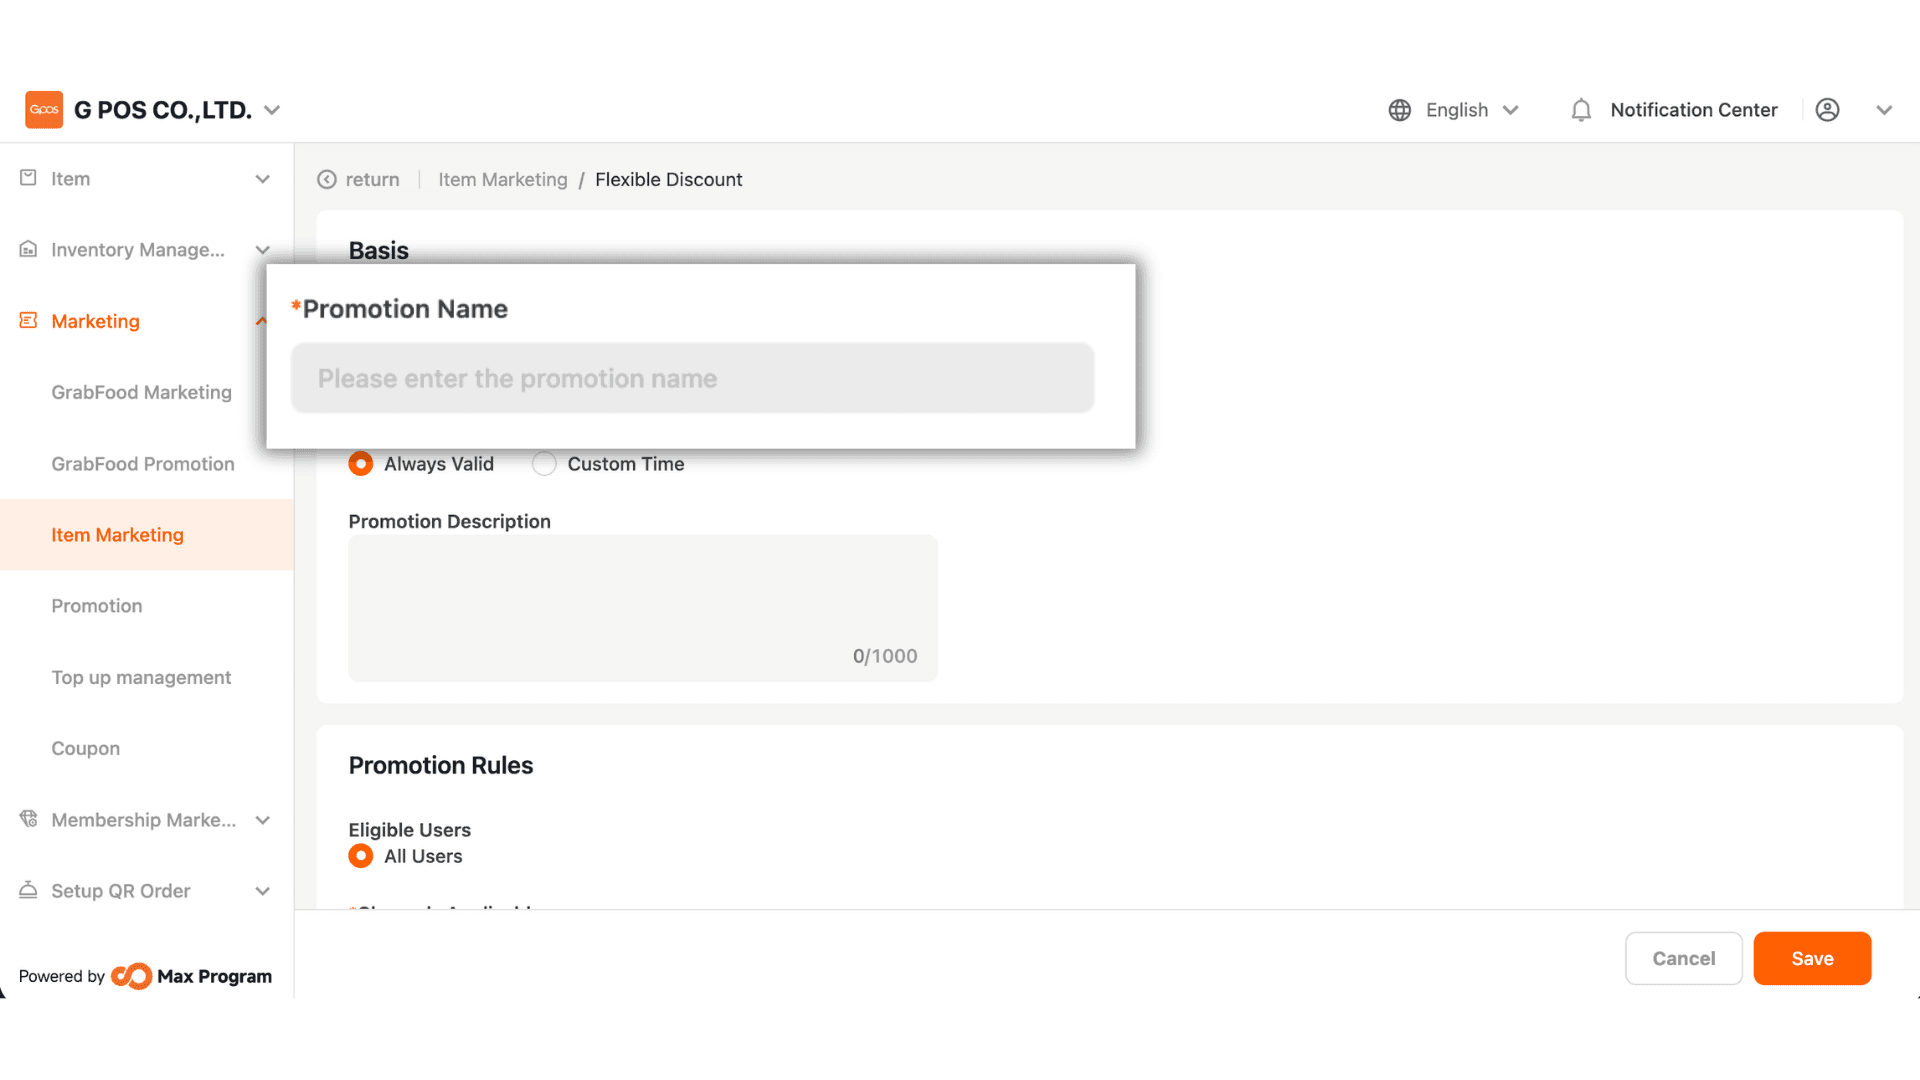
2. Specify the desired promotion name, such as “Monthly Special Discount” or “Discount”. The promotion name should be meaningful to make it easier to search for later.
4. The system provides 2 options
- Always Valid – The discount is always active with no start or end date.
- Custom Time – Specify the Start Date and End Date of the discount.
Example : Discount active between 1 Oct 2025 – 31 Oct 2025.

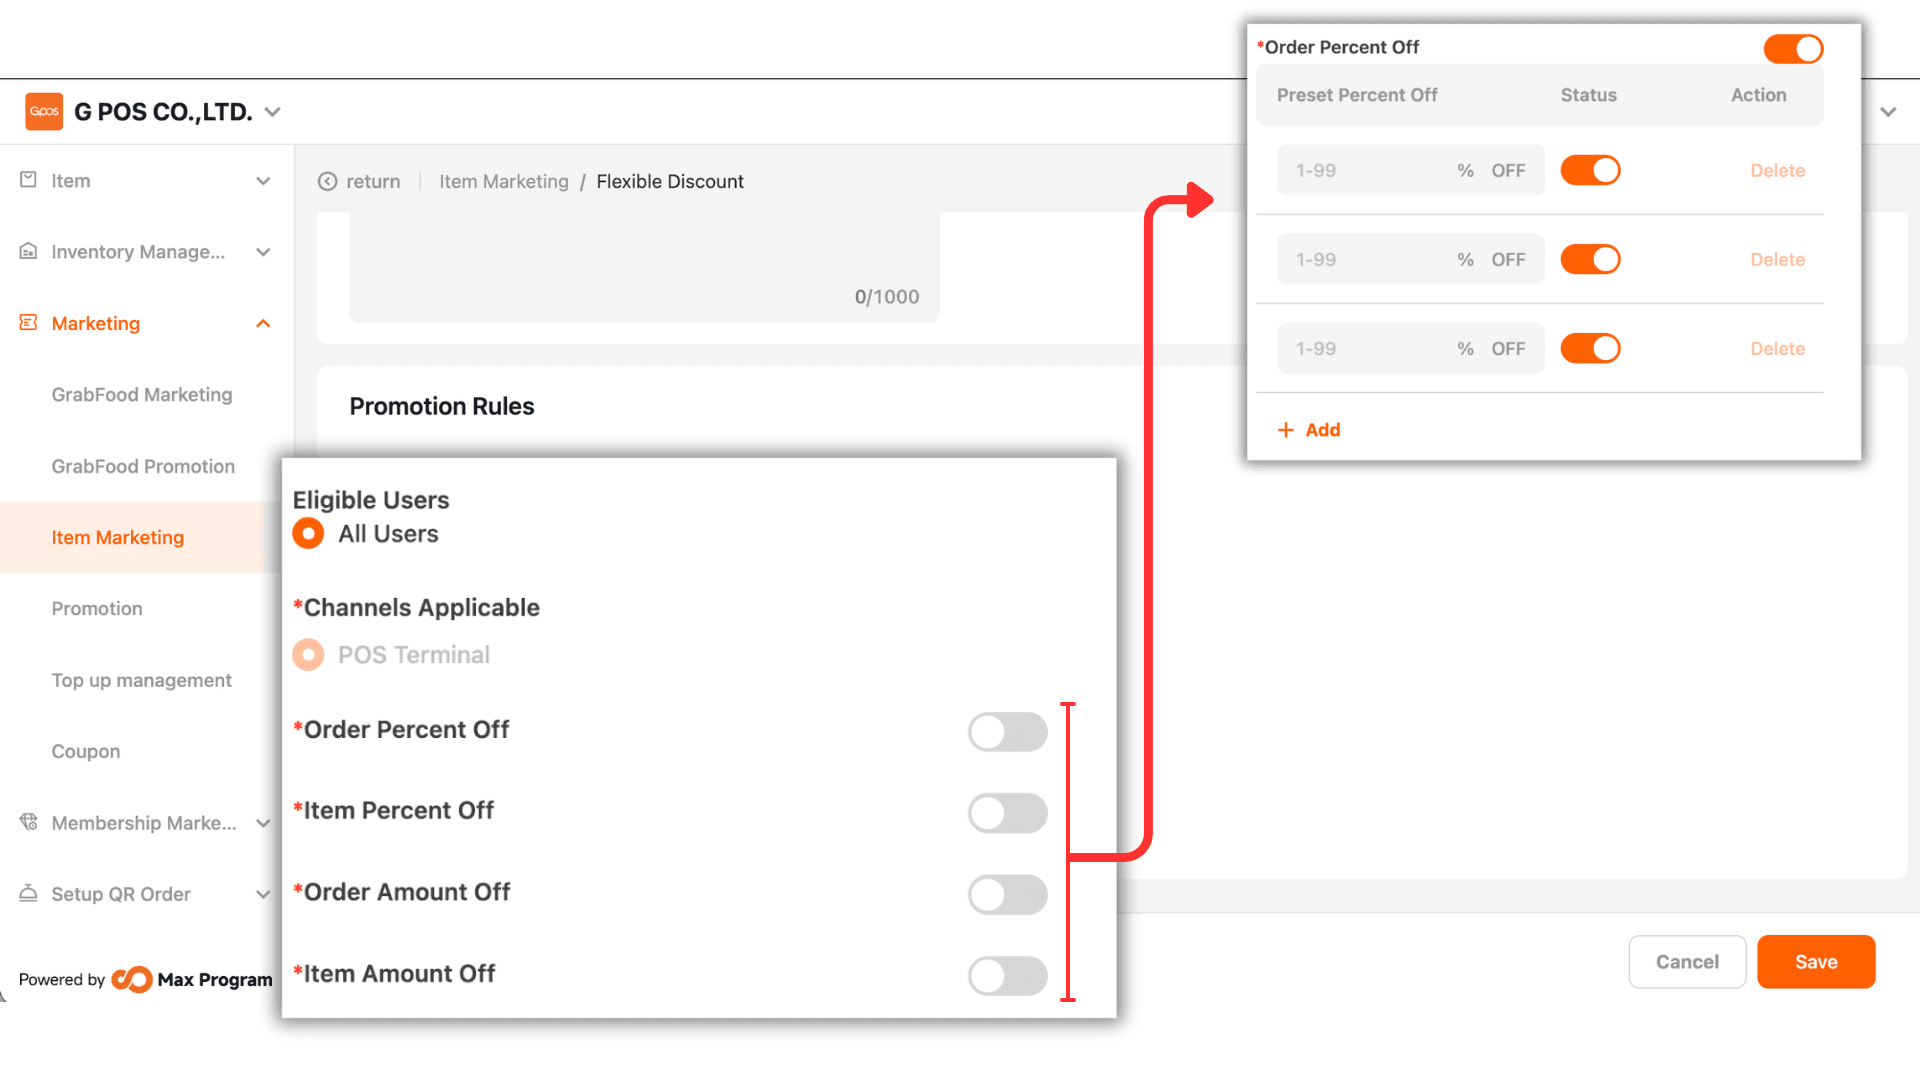
5.Enable the channels you want to use, then enter the discount amounts in all three fields as numbers, such as 10, 20, 30, etc.
|Note : It is recommended to enable all 4 types for greater flexibility. In the actual sales interface, users can choose from predefined discount options or manually enter a custom value.