Gift Coupon
2026-03-05 17:16
This guide is created to instruct users on how to create, manage, and set conditions for “Gift Coupon” correctly and completely.
1. Log in to the Back Office
Go to login.gpos.co.th , enter your email and password, and click Log In.
Click Marketing menu and select Coupon.

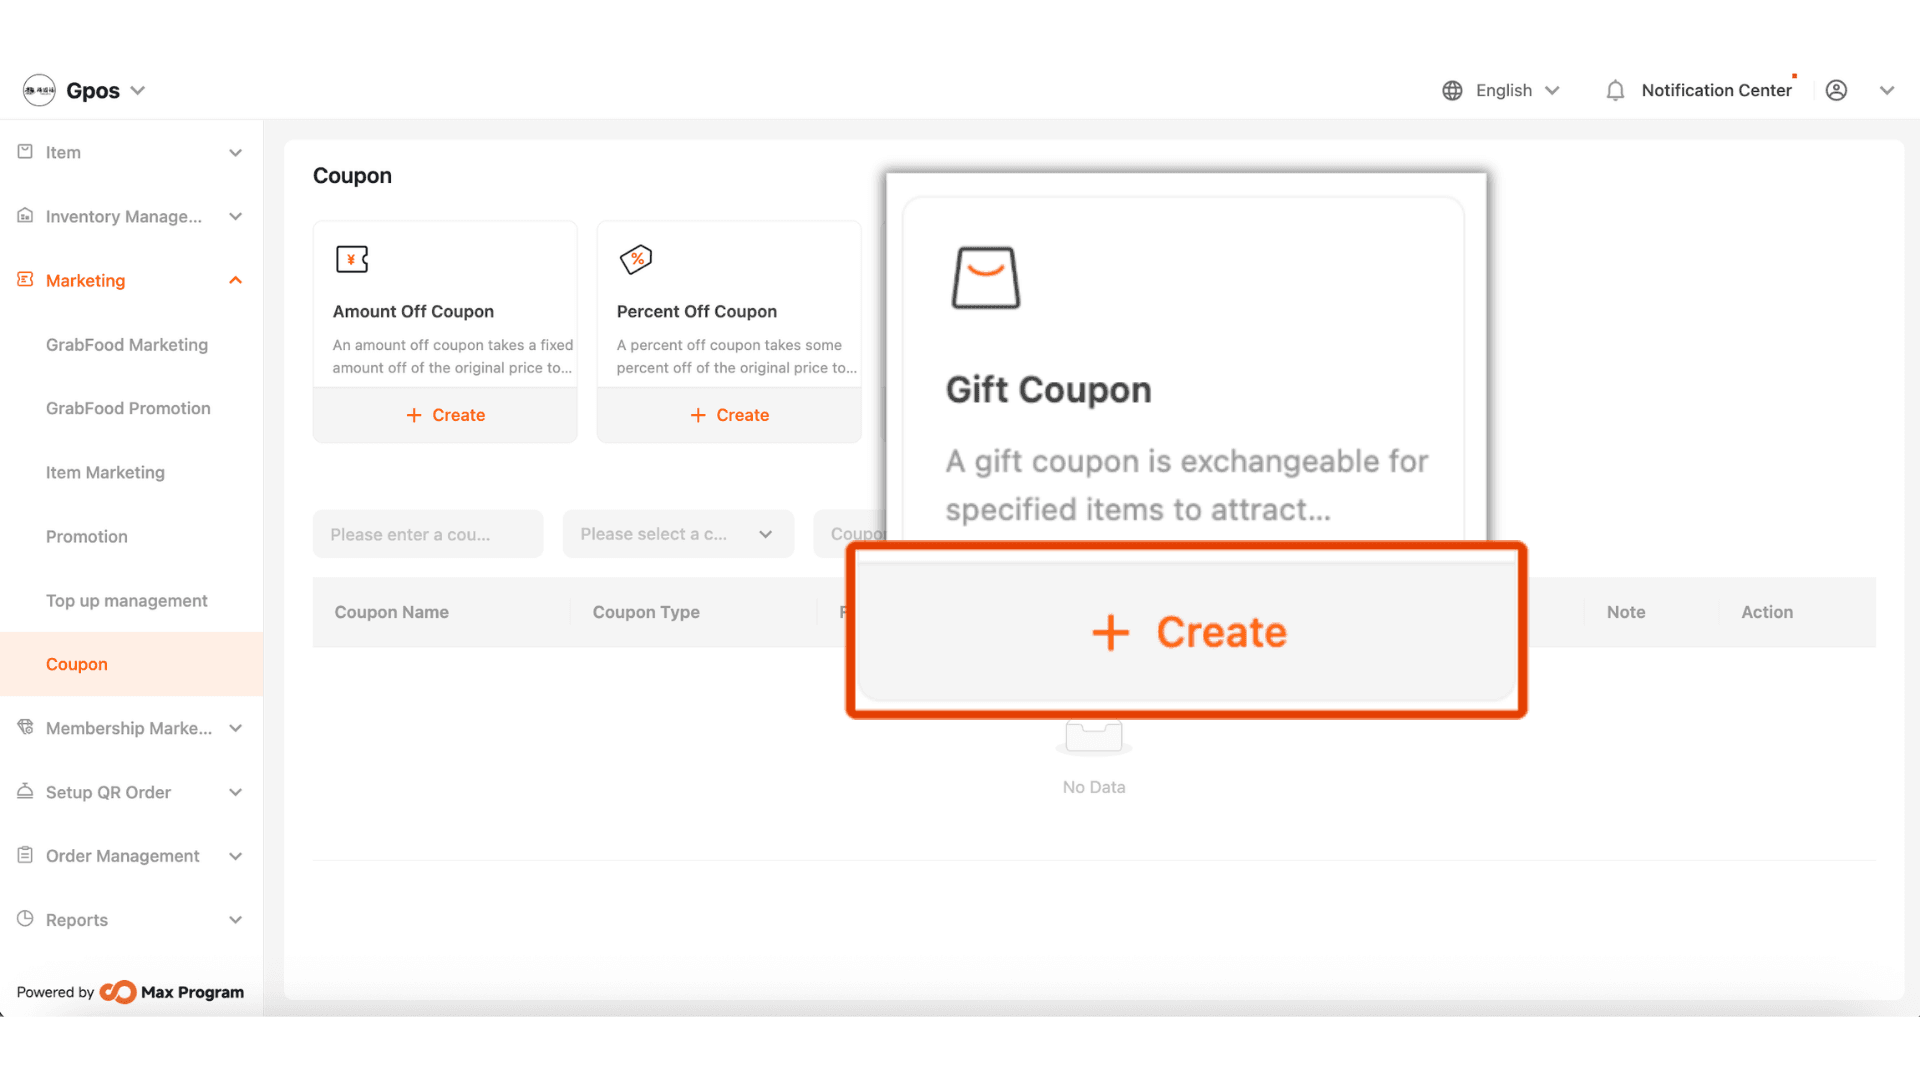
2.On the “Coupons” page, select the Gift Coupon tab and click the “+ Create” button to start creating a new coupon.
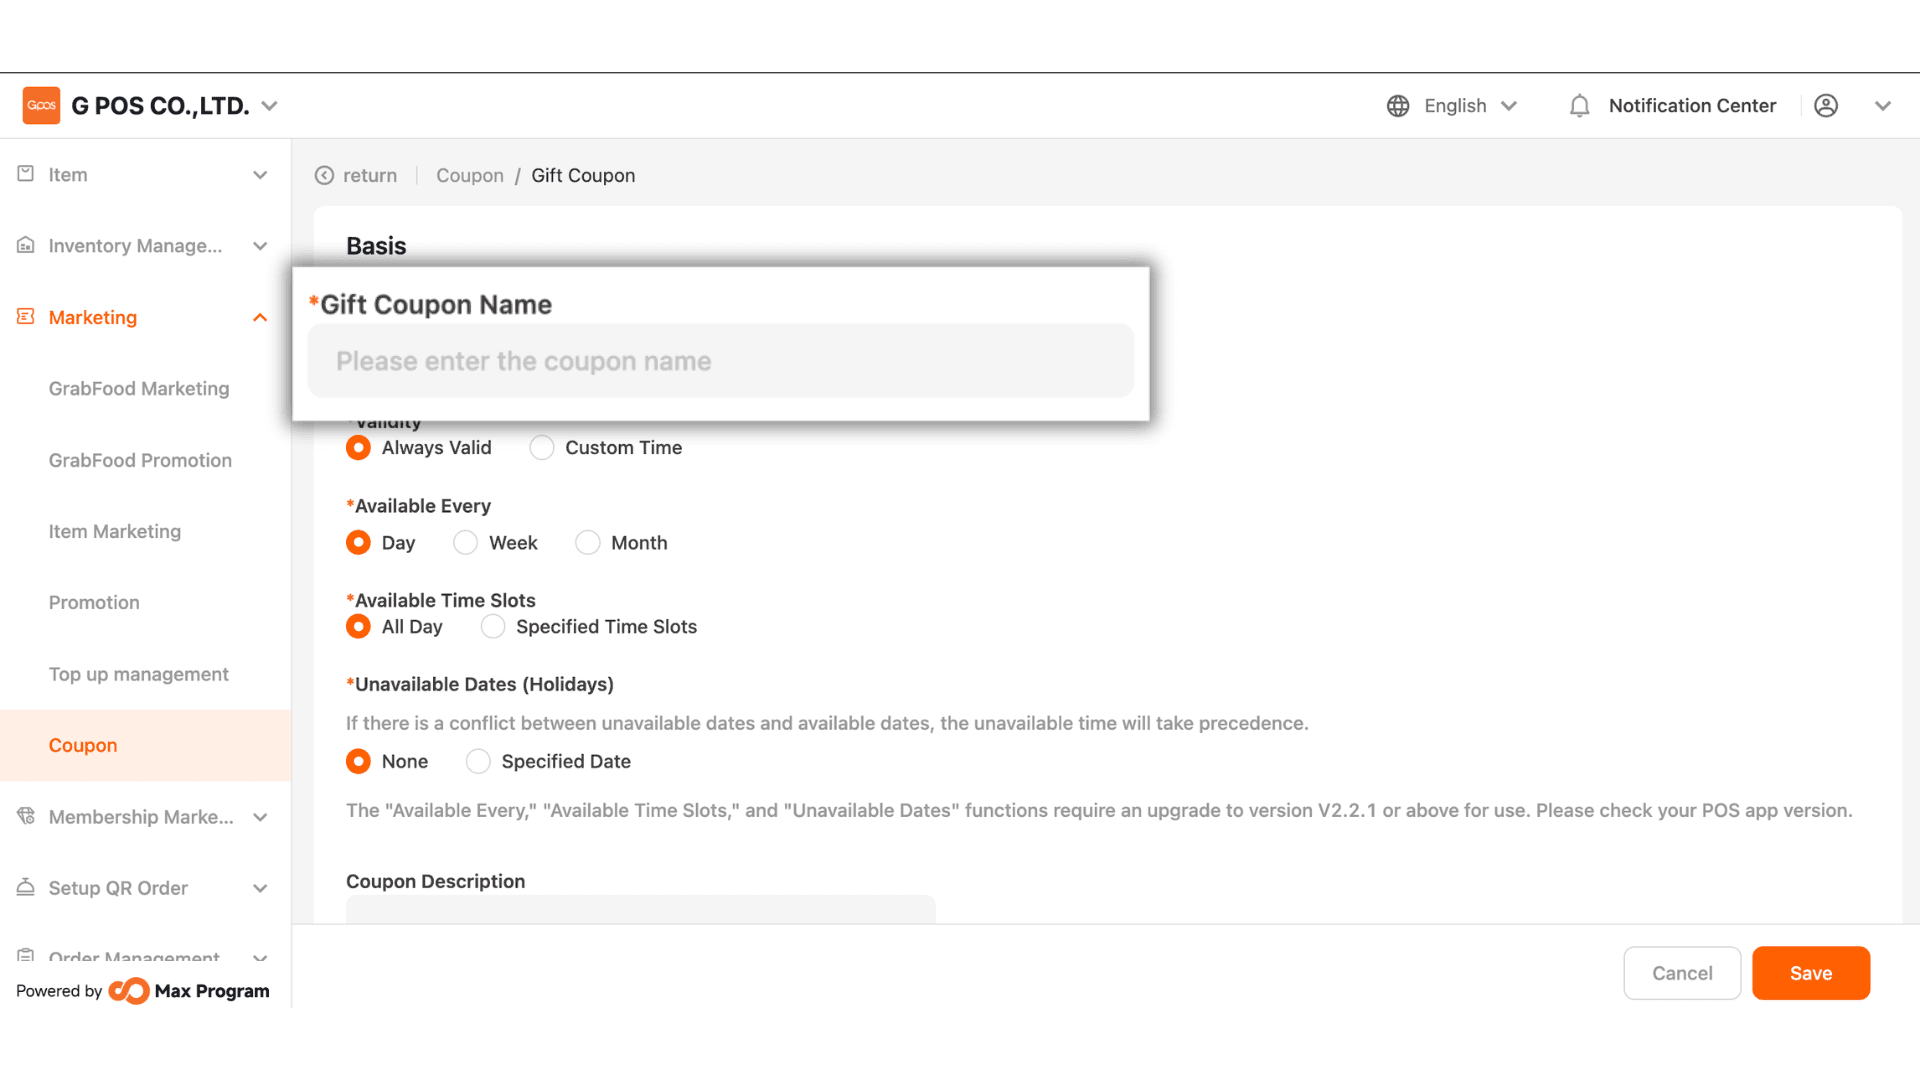
4. Fill in the Gift Coupon Name you want to appear in the system, such as
“Free!! Special Product” or “Get Free Item with Purchase Over 1,000 THB”.
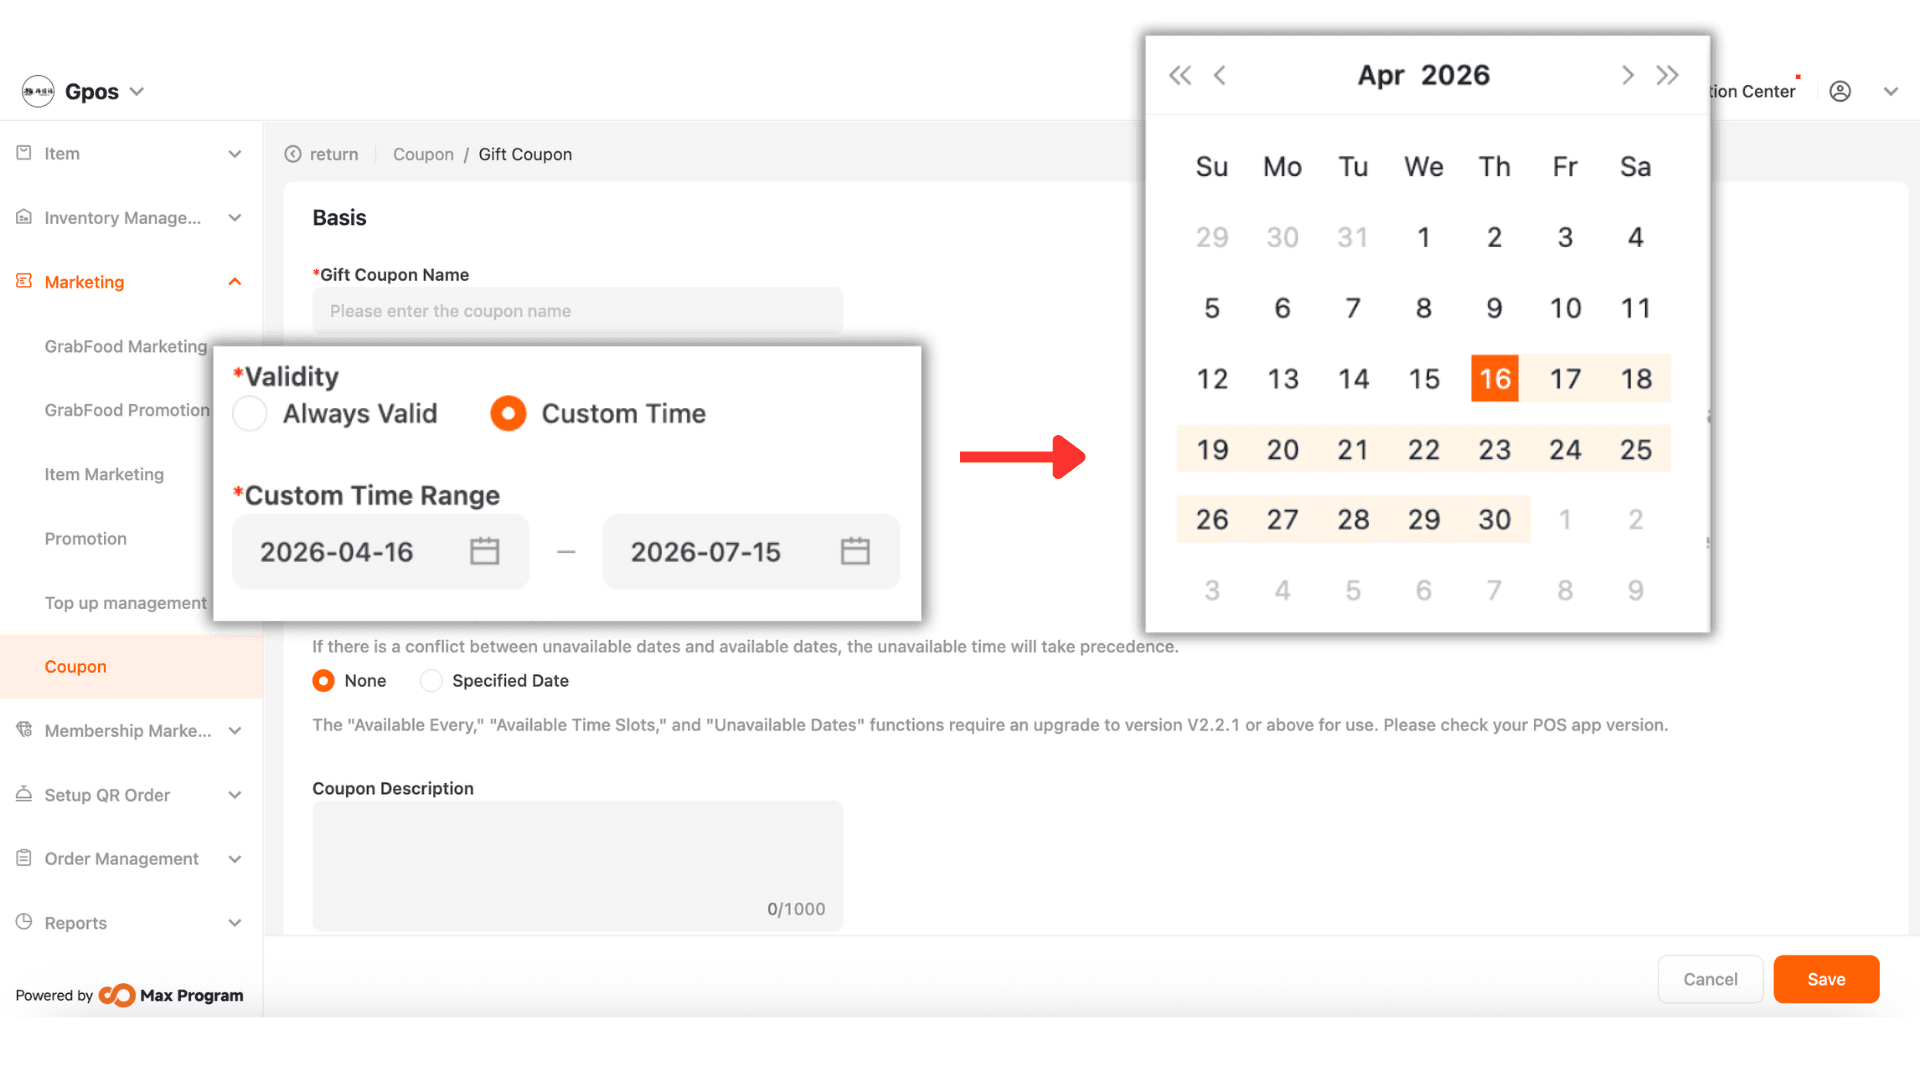
4. There are two options available
- Always Valid – The coupon is available all the time with no start or end date.
- Custom Time – Specify the start and end date for coupon usage.
Example : Coupon valid from October 1, 2025 – October 31, 2025.
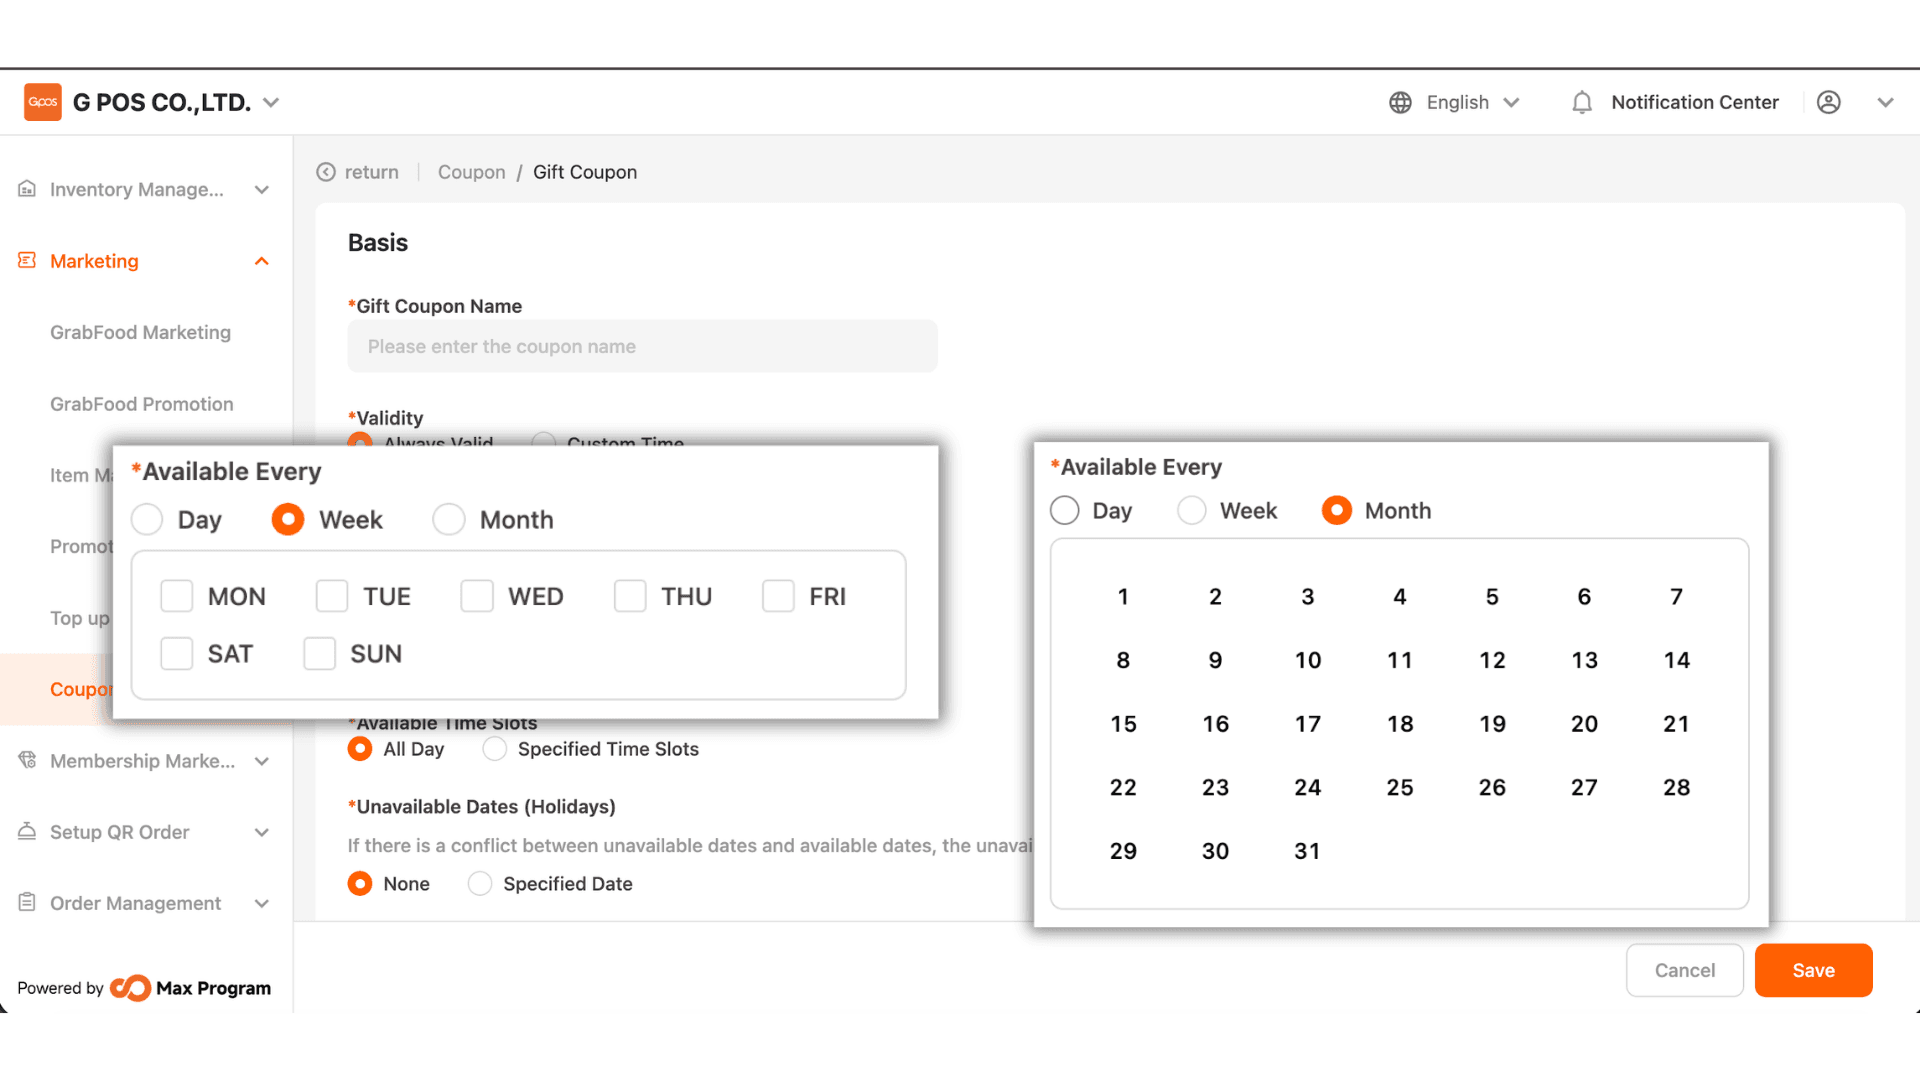
5. You can choose from 3 options
- day – The coupon can be used every day.
- Week – The system will display Monday–Sunday for you to select specific days.
Example : Selecting “Sunday” means the coupon can only be used on Sundays.
- Month – The system will display dates 1–31 for you to select.
Example : Selecting “1” means the coupon can be used on the 1st of every month.
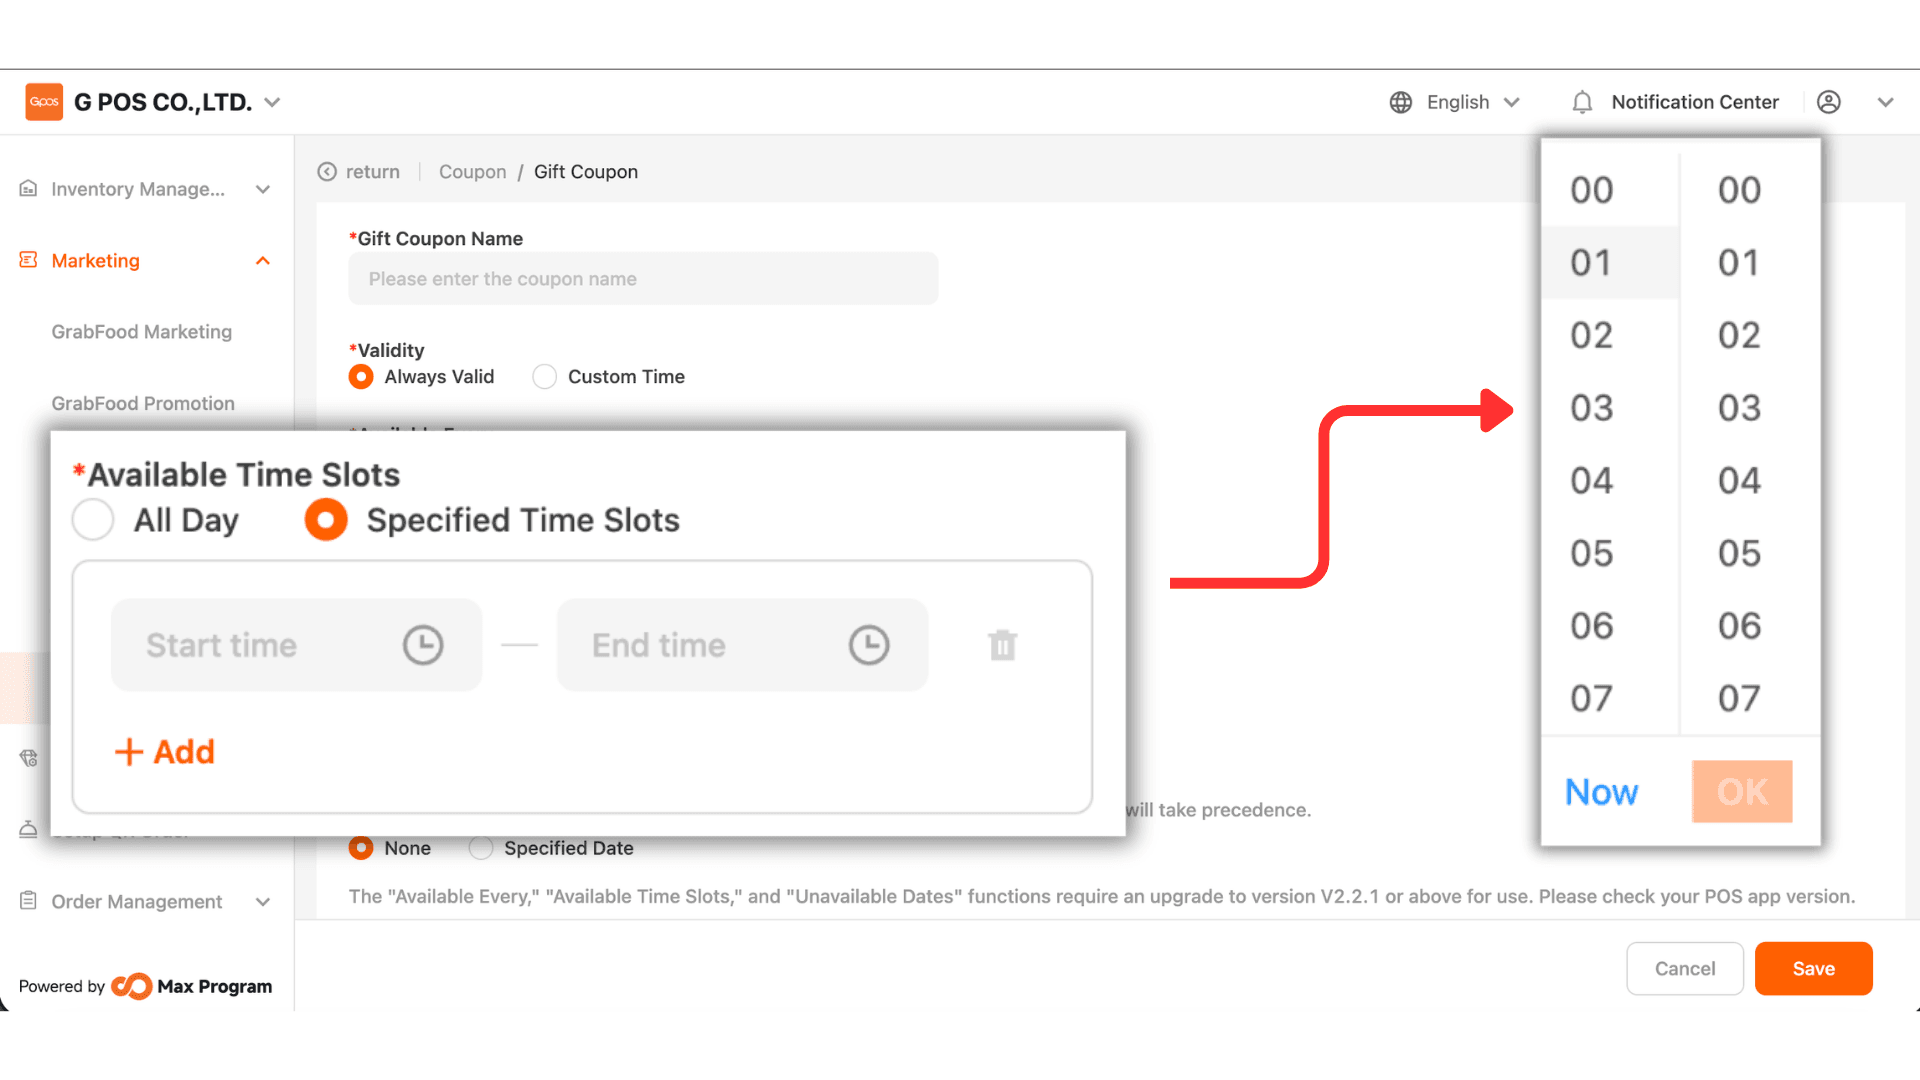
6. Two options are available
- All Day – The coupon can be used all day.
- Specified Time Slots – Specify start and end times (up to 5 time ranges).
Example : Valid from 6:00 PM – 7:00 PM.
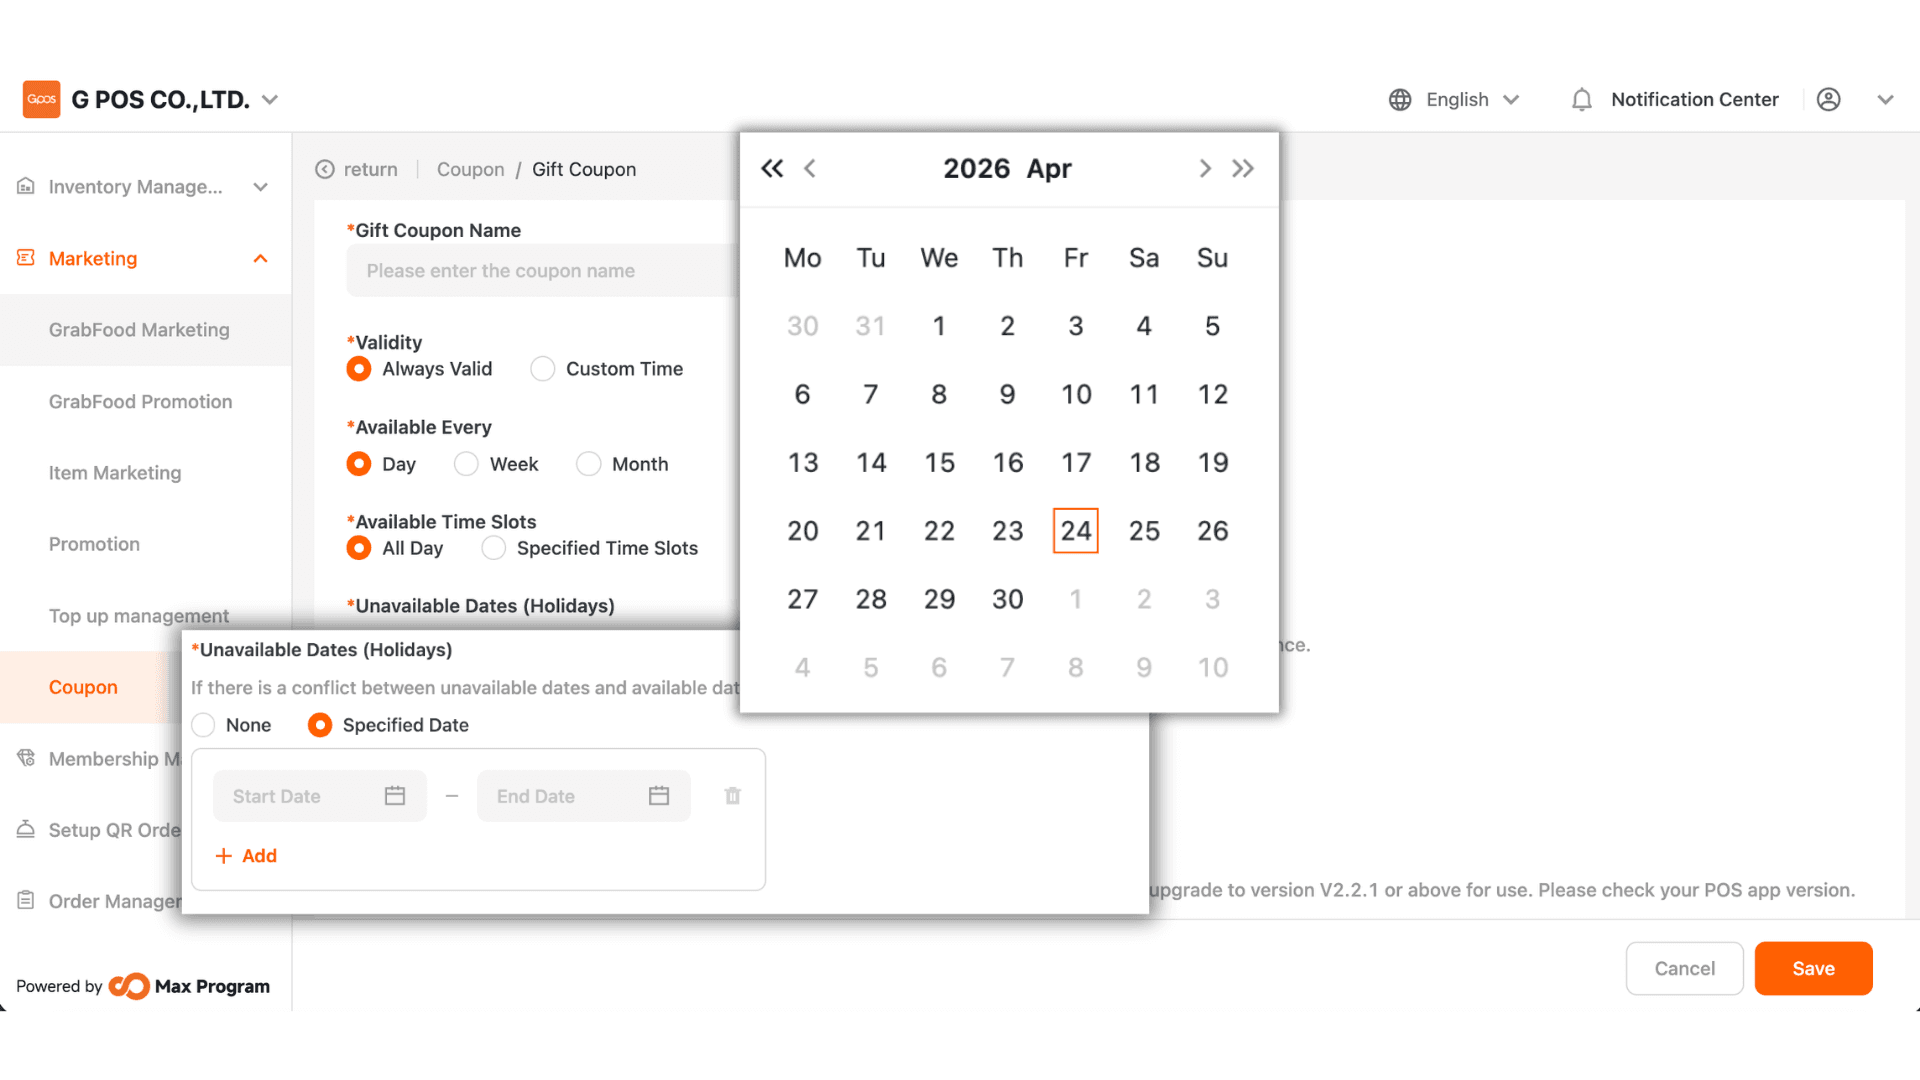
7. None – The coupon can be used as normal on all available days.
- Specified Date – Specify a date range when the coupon cannot be used (up to 5 periods).
Example : Coupon valid throughout October, except October 10.
Note : The functions “Available Every,” “Available Time Slots,” and “Unavailable Dates (Holidays)” are supported only on version 2.2.1 or higher.
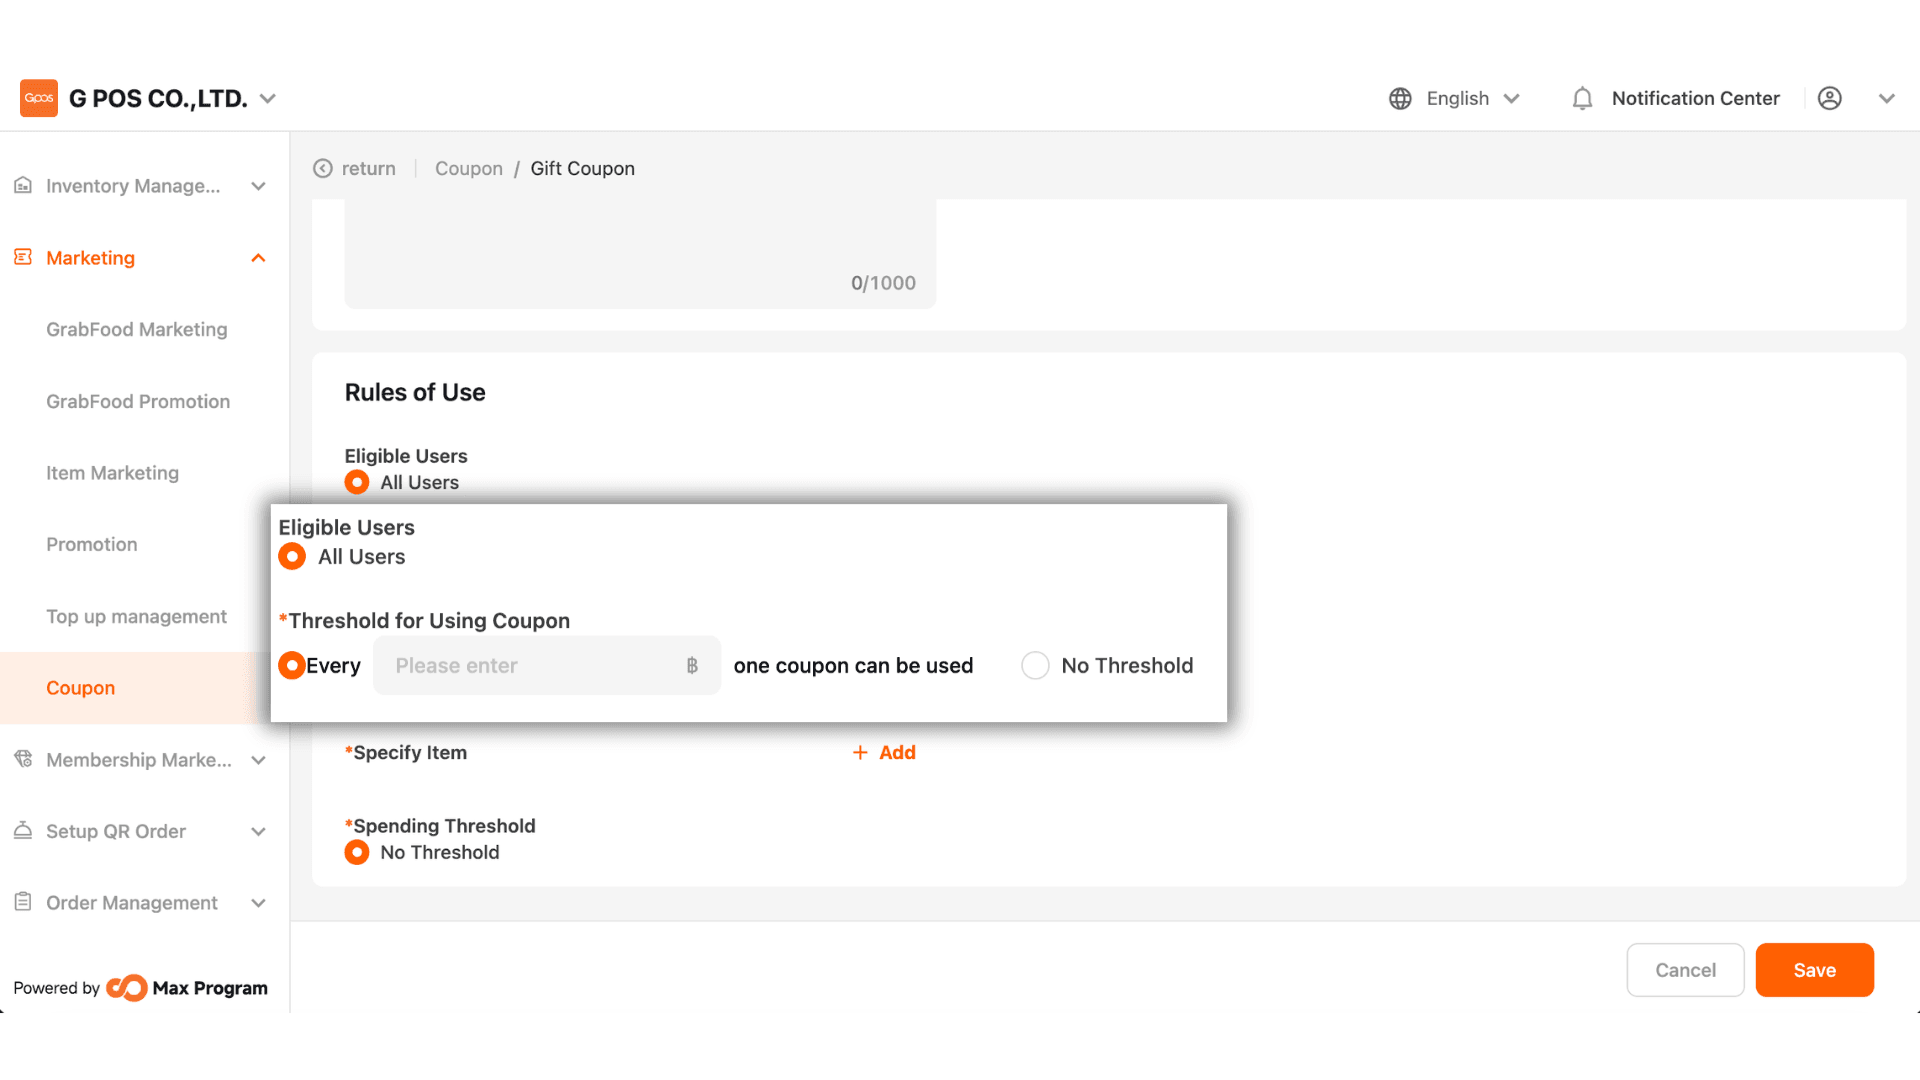
8. The system default setting is “All users can use this coupon.” You can set specific conditions by choosing one of the following
- Set Condition – Specify a minimum purchase amount before using the coupon.
Example : Spend 1,000 THB to use the coupon once.
- No Threshold – The coupon can be used without any spending limit.
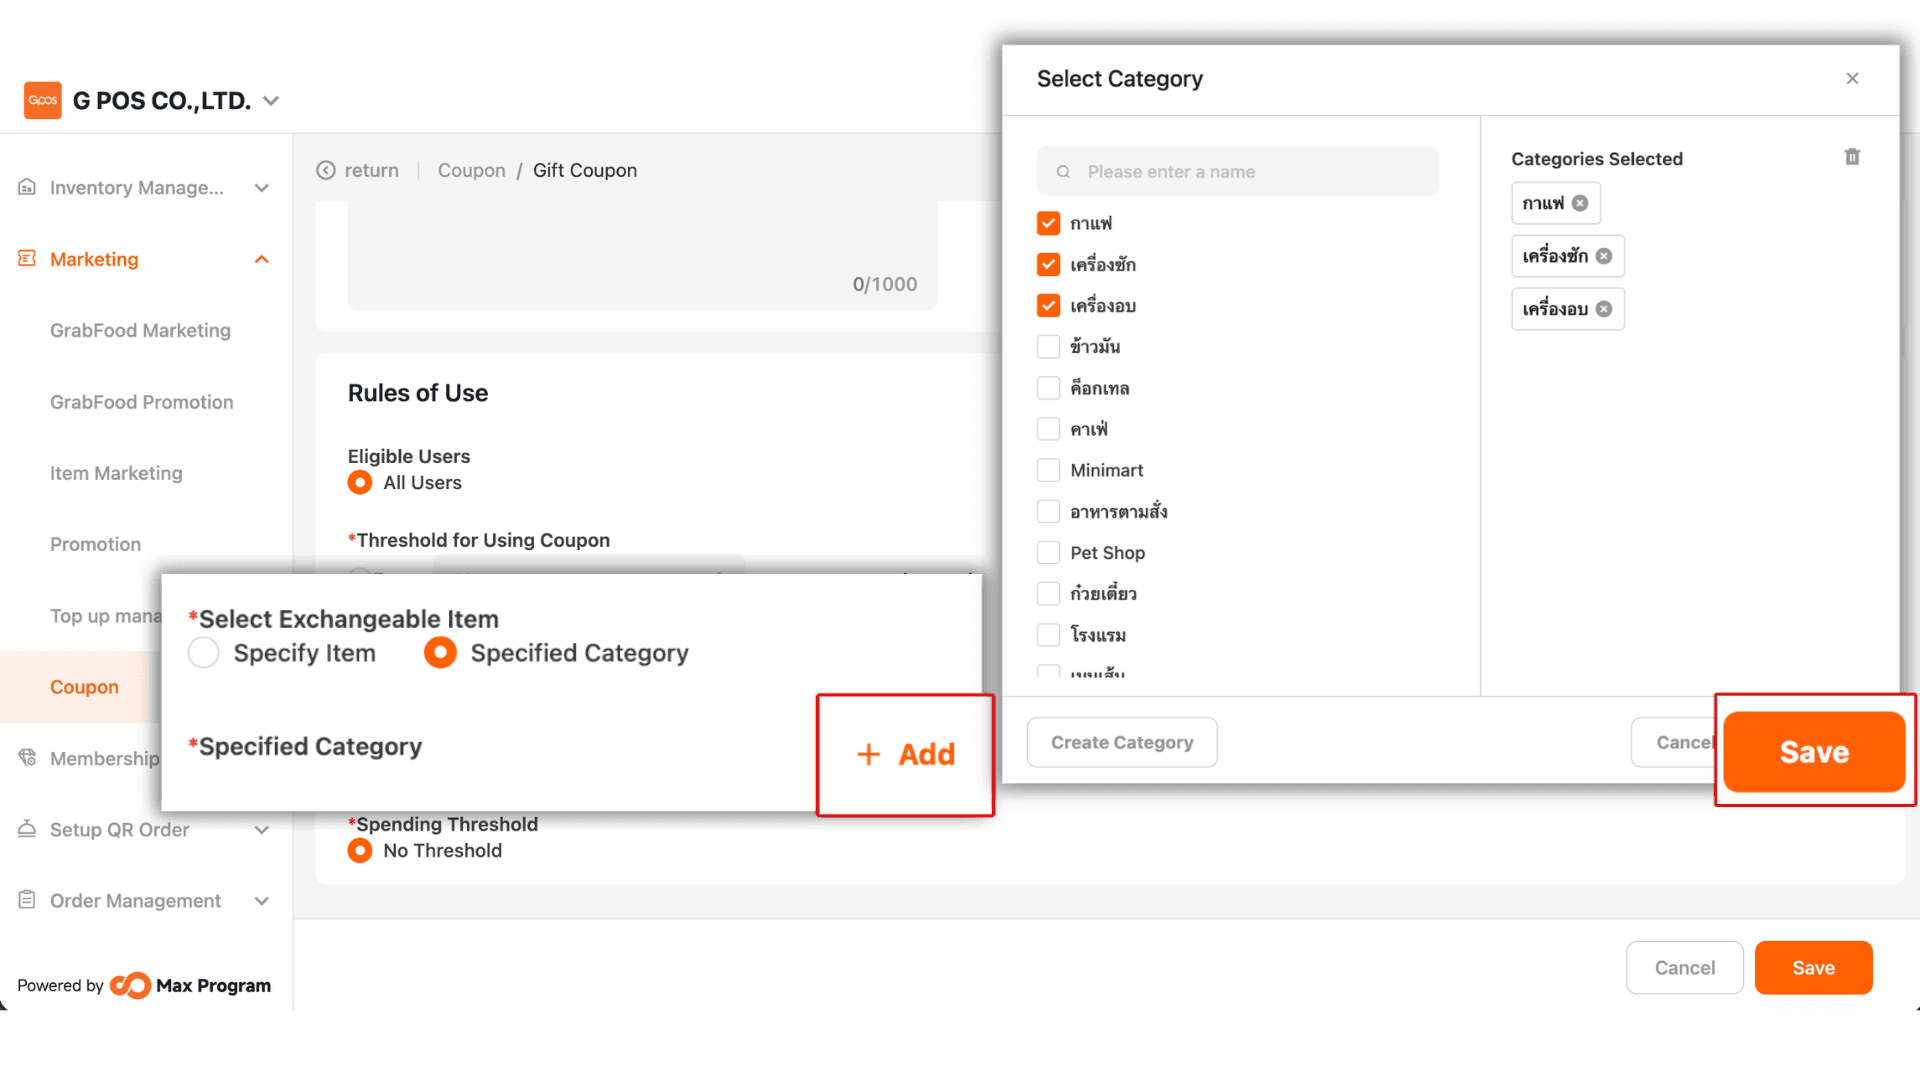
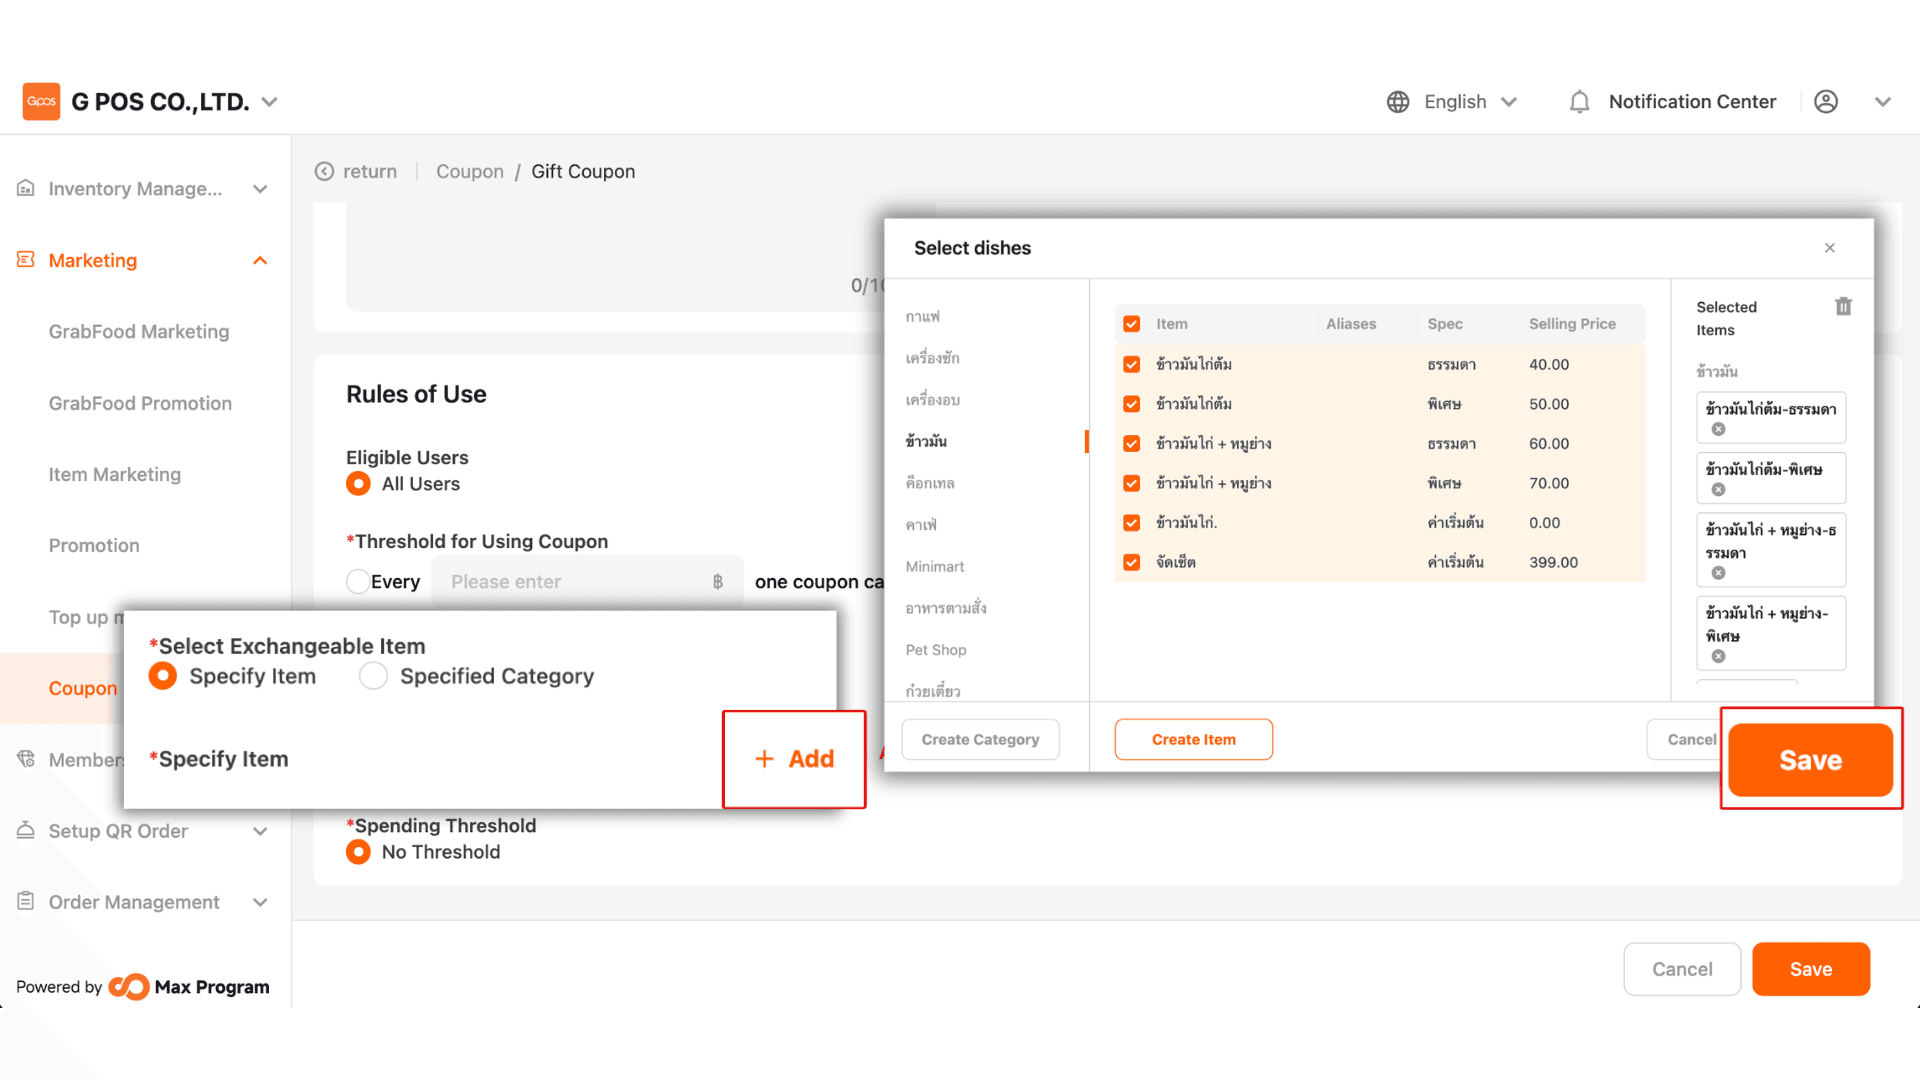
9. Click the “+ Add” button to choose products. The system will display a list of all products.
10 Select Product Categories
Click the “+ Add” button in the category section. The system will display a list of all categories.