Item Percent Off (%)
2026-04-25 10:31
This manual is designed to help users understand the correct steps for creating discounts, manage discounts effectively, prevent operational errors, and control the number of discounts per bill as well as the number of discounted items in accordance with store policies.
1. Log in to the Back Office
Go to login.gpos.co.th , enter your email and password, and click Log In.
Click Marketing > Item Marketing.
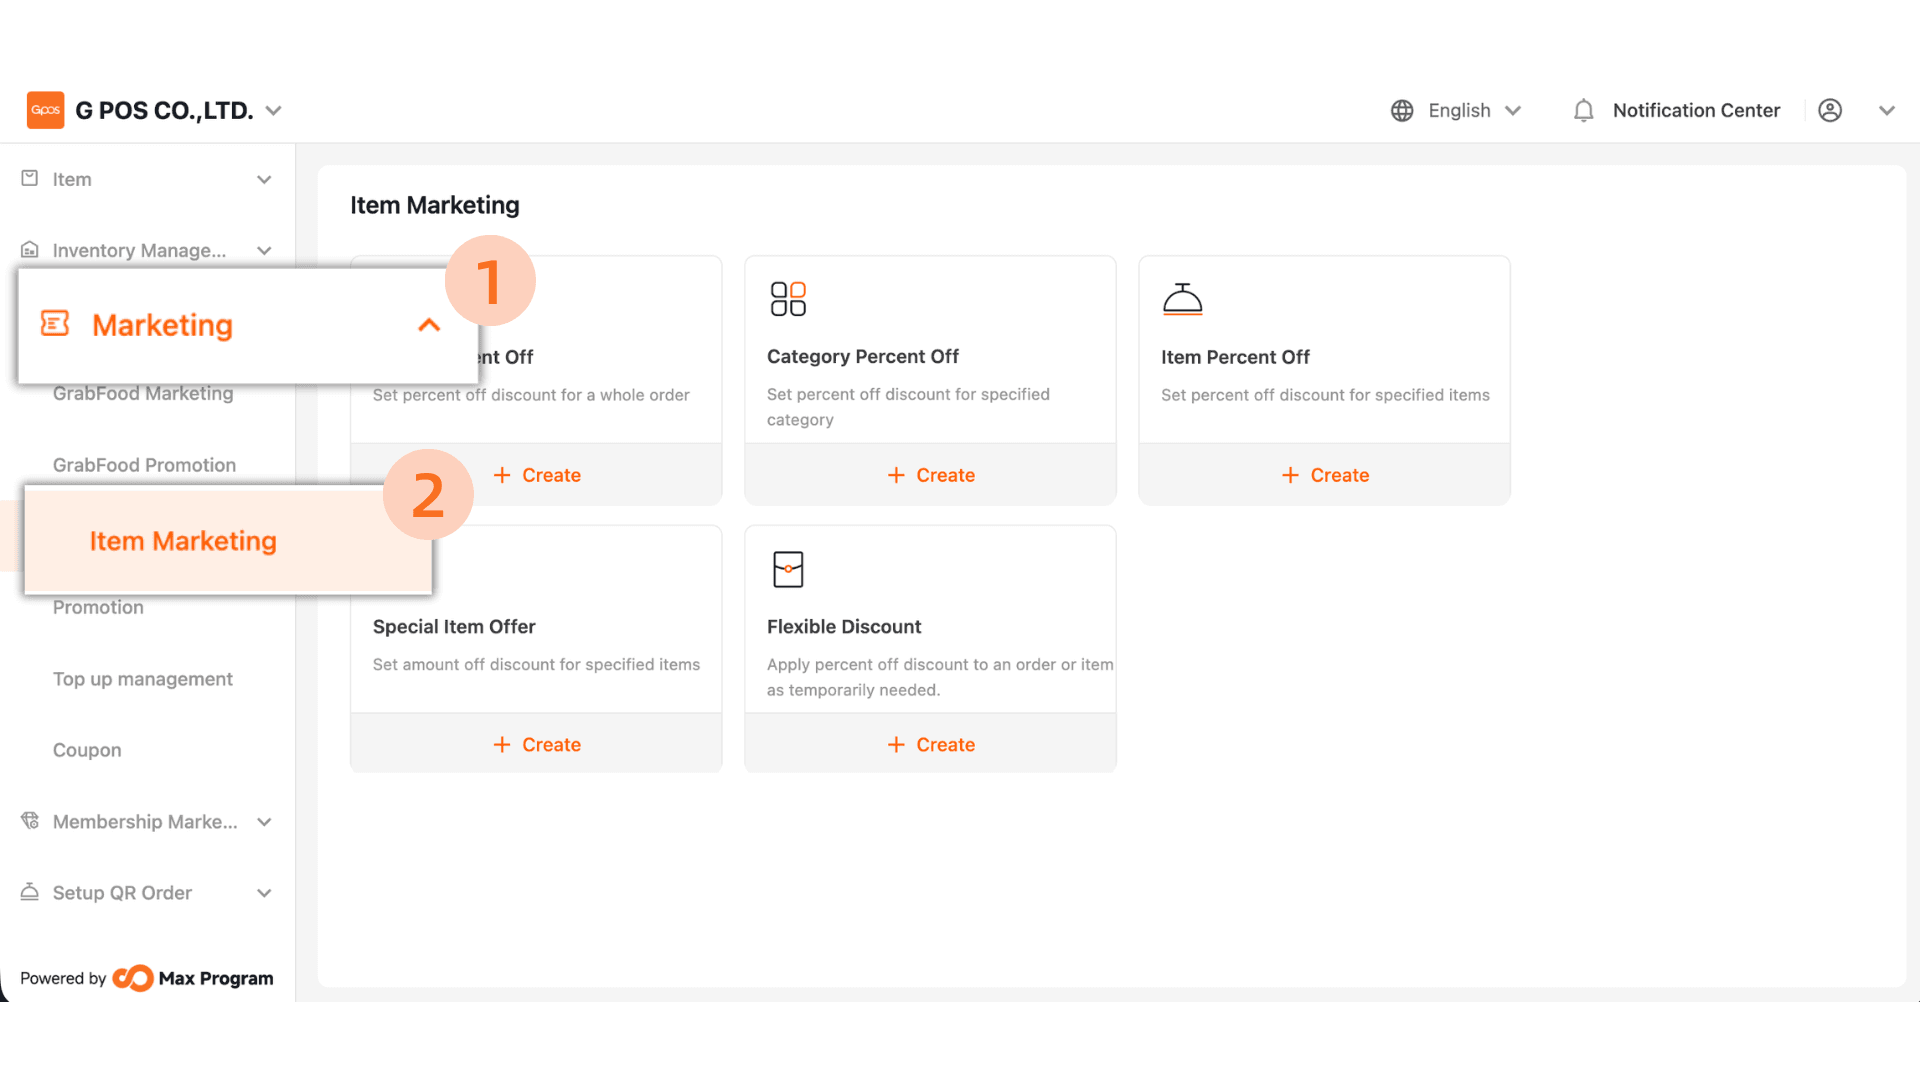
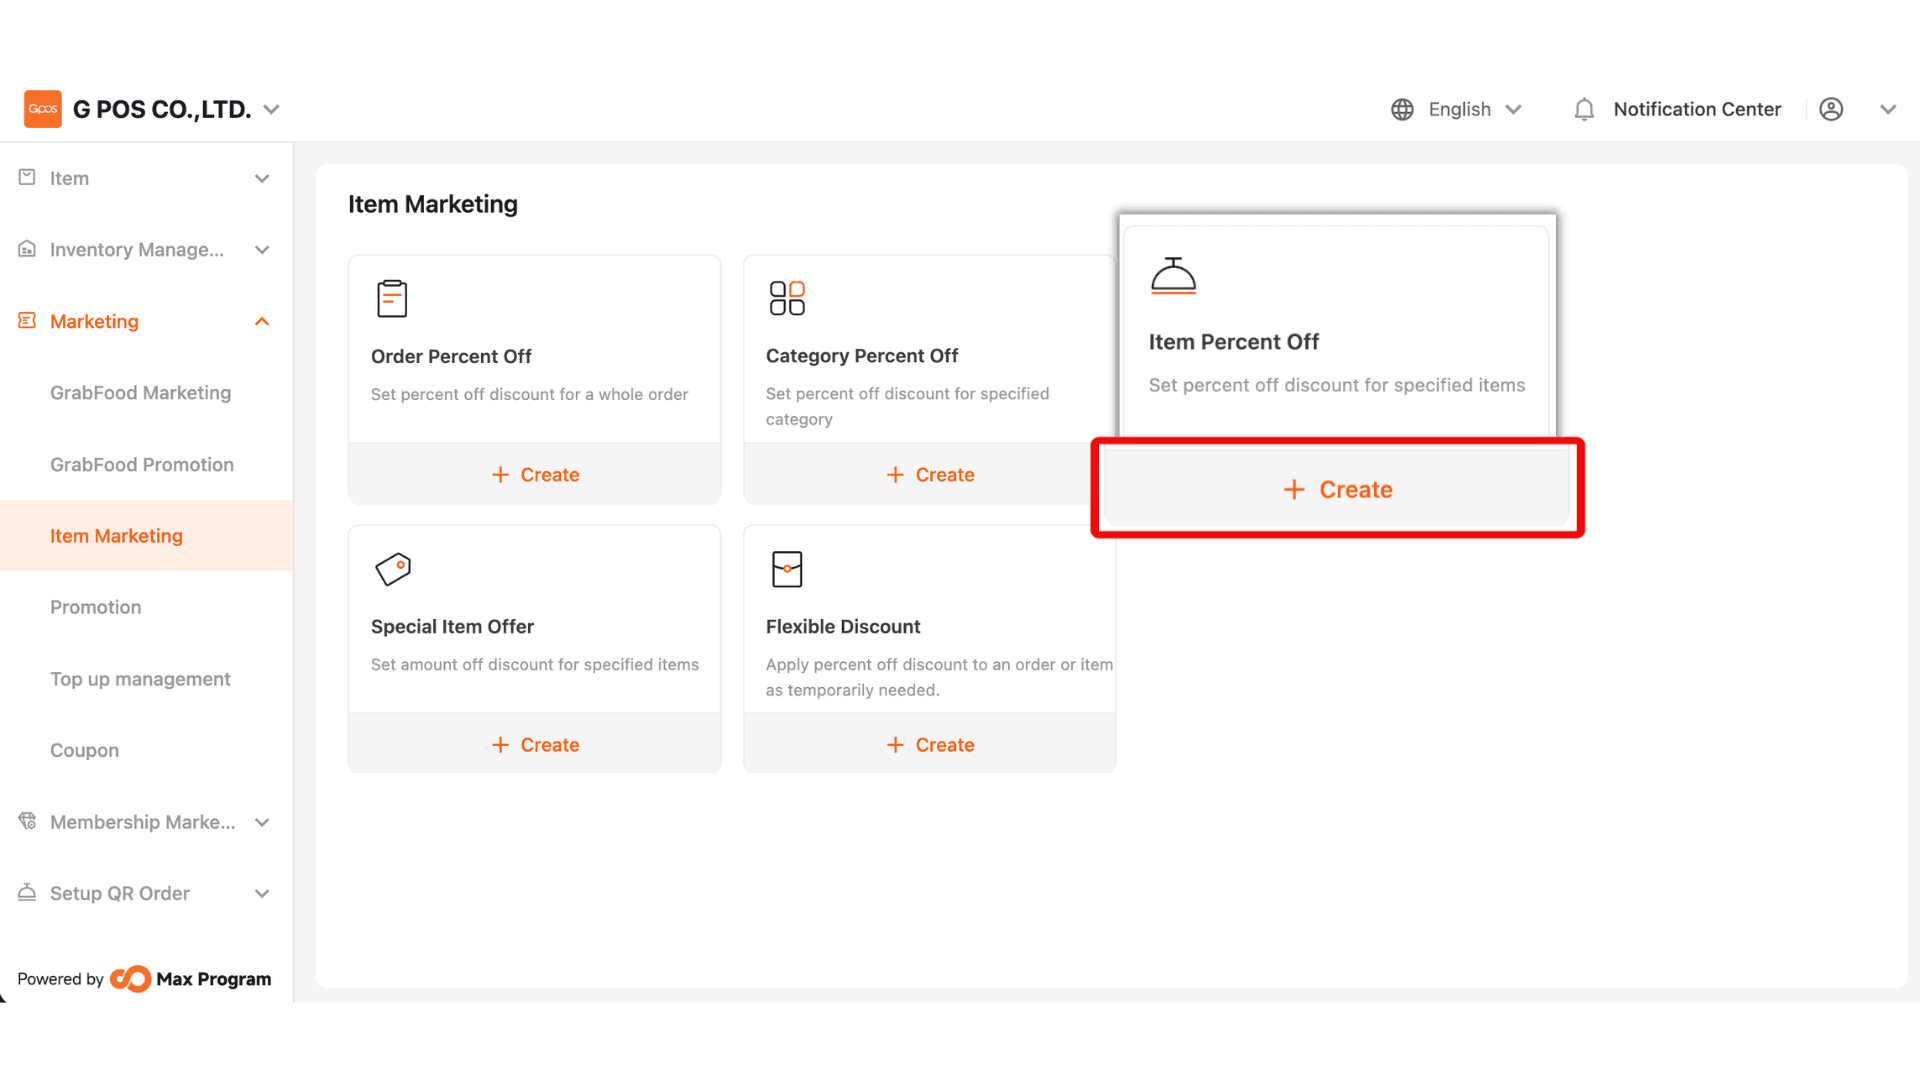
2. In the Item Marketing page Click “+ Create”. Select the discount type “Item Percent Off”.
3. Enter the Promotion Name, e.g., “10% Discount”. The name should clearly describe the purpose and percentage for easier future management.
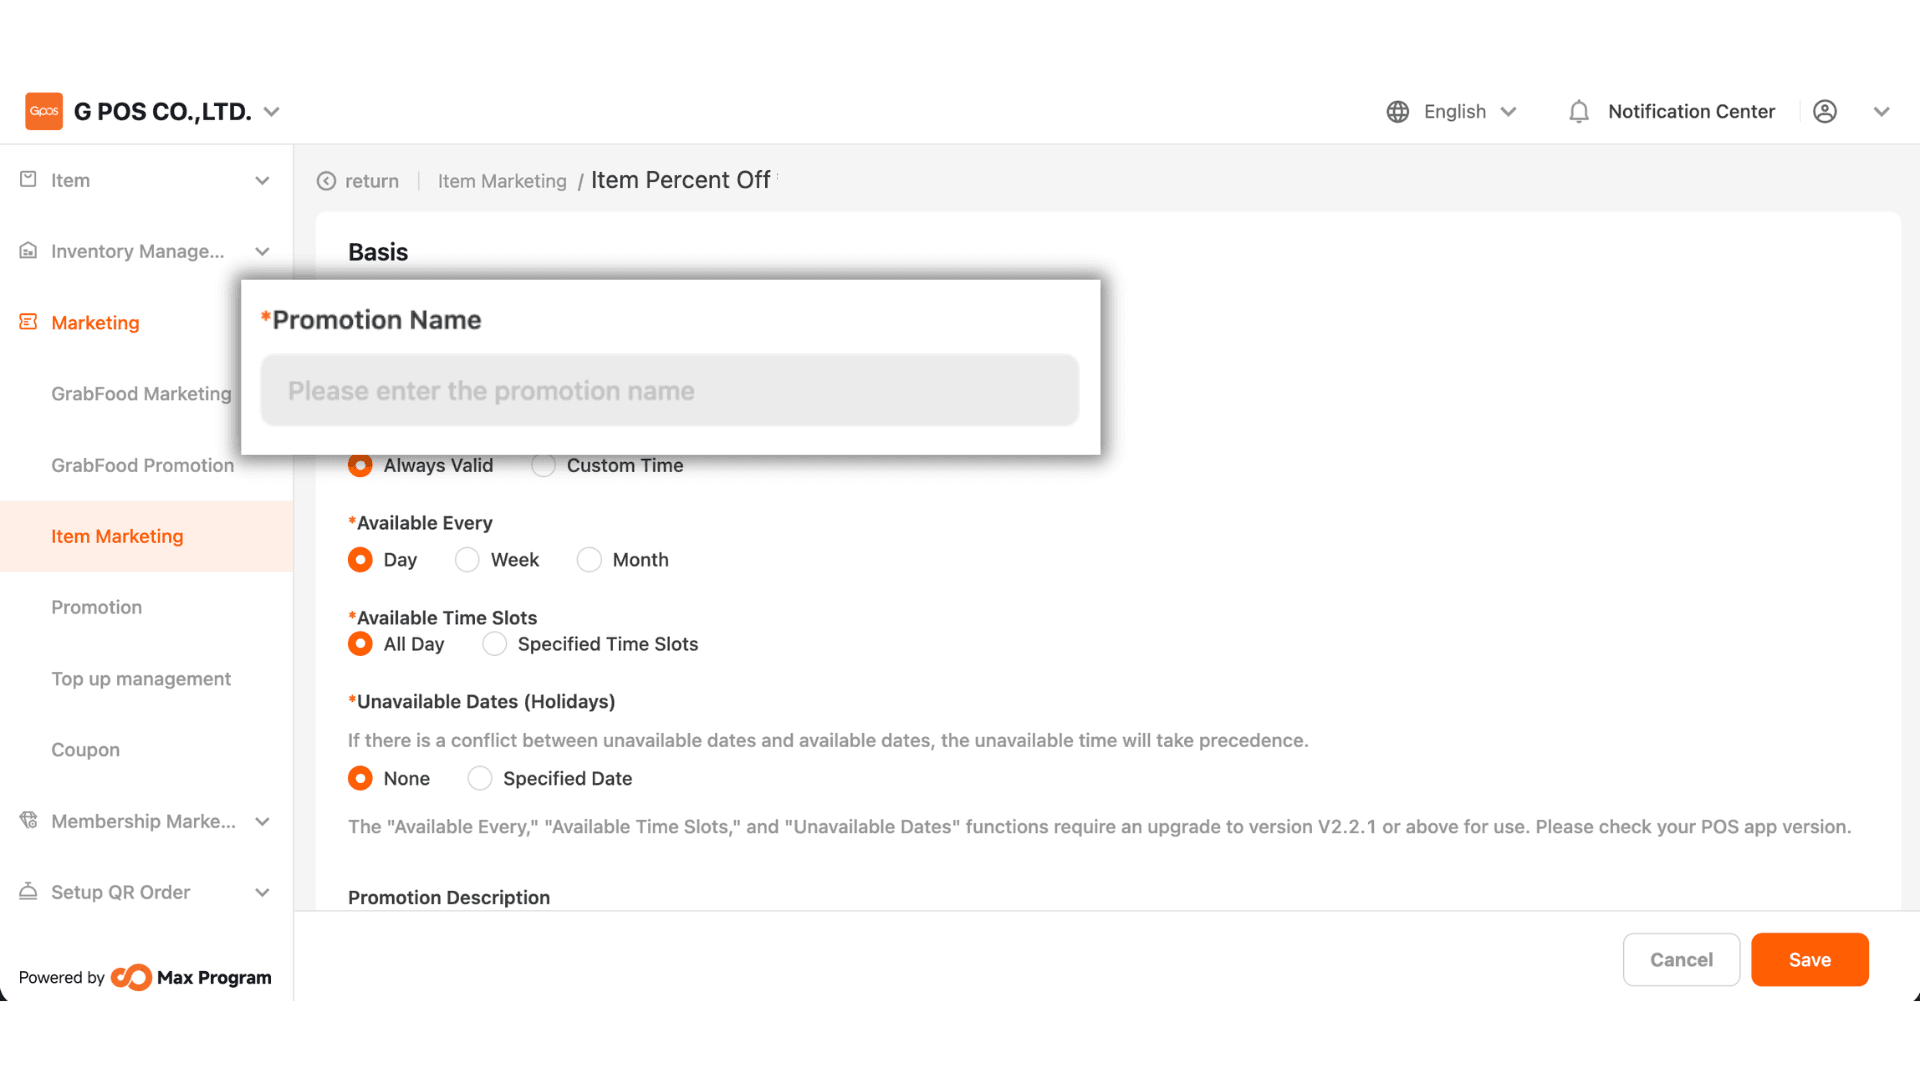
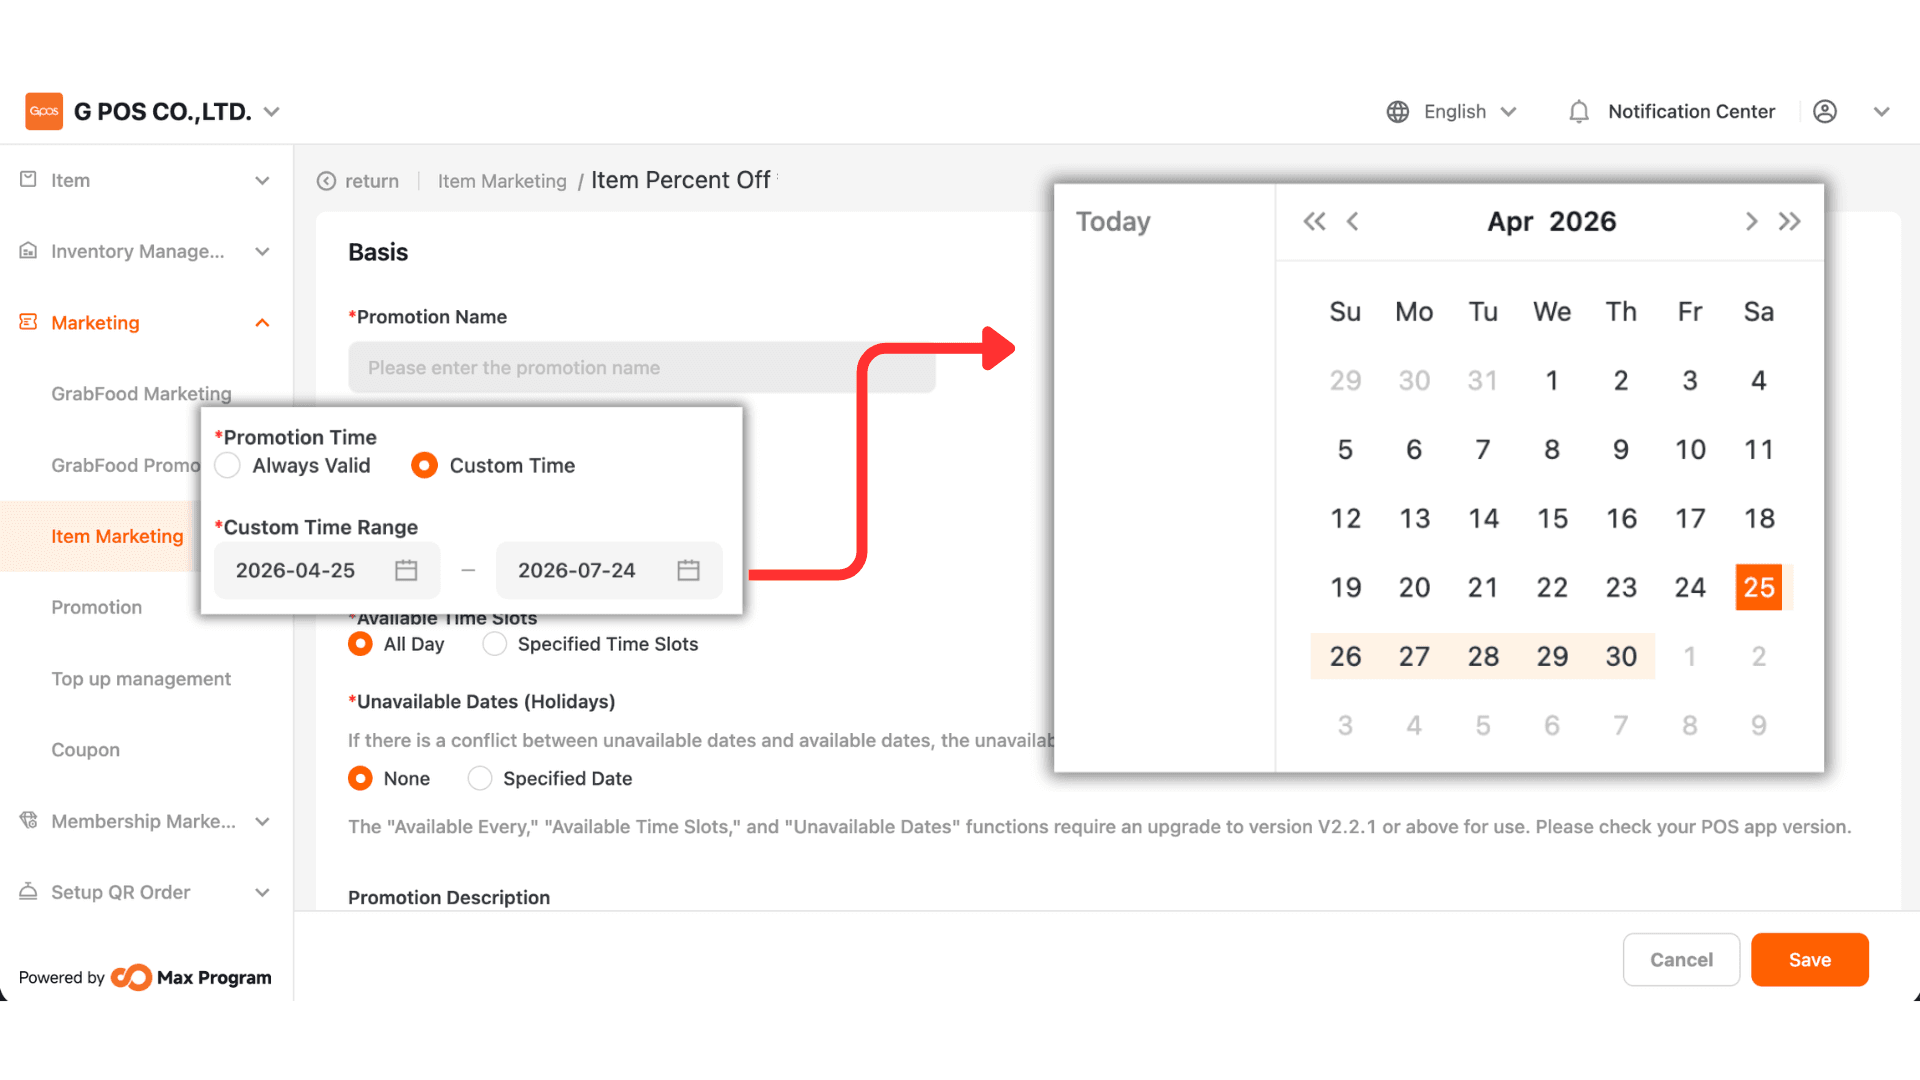
4.Choose from two options
- Always Valid – The discount can be used anytime with no start or end date.
- Custom Time – Specify a start date and an end date for the discount.
Example: Valid from 1 Oct 2025 – 31 Oct 2025
5. Choose one of the three usage patterns
- Day – Available daily.
- Week – The system displays Monday to Sunday; tick the days you want the discount to apply.
Example : Tick “Sunday” means the discount will apply every Sunday.
- Month – The system displays days 1–31; select specific dates.
Example : Select “1st” means the discount will apply on the 1st of every month.

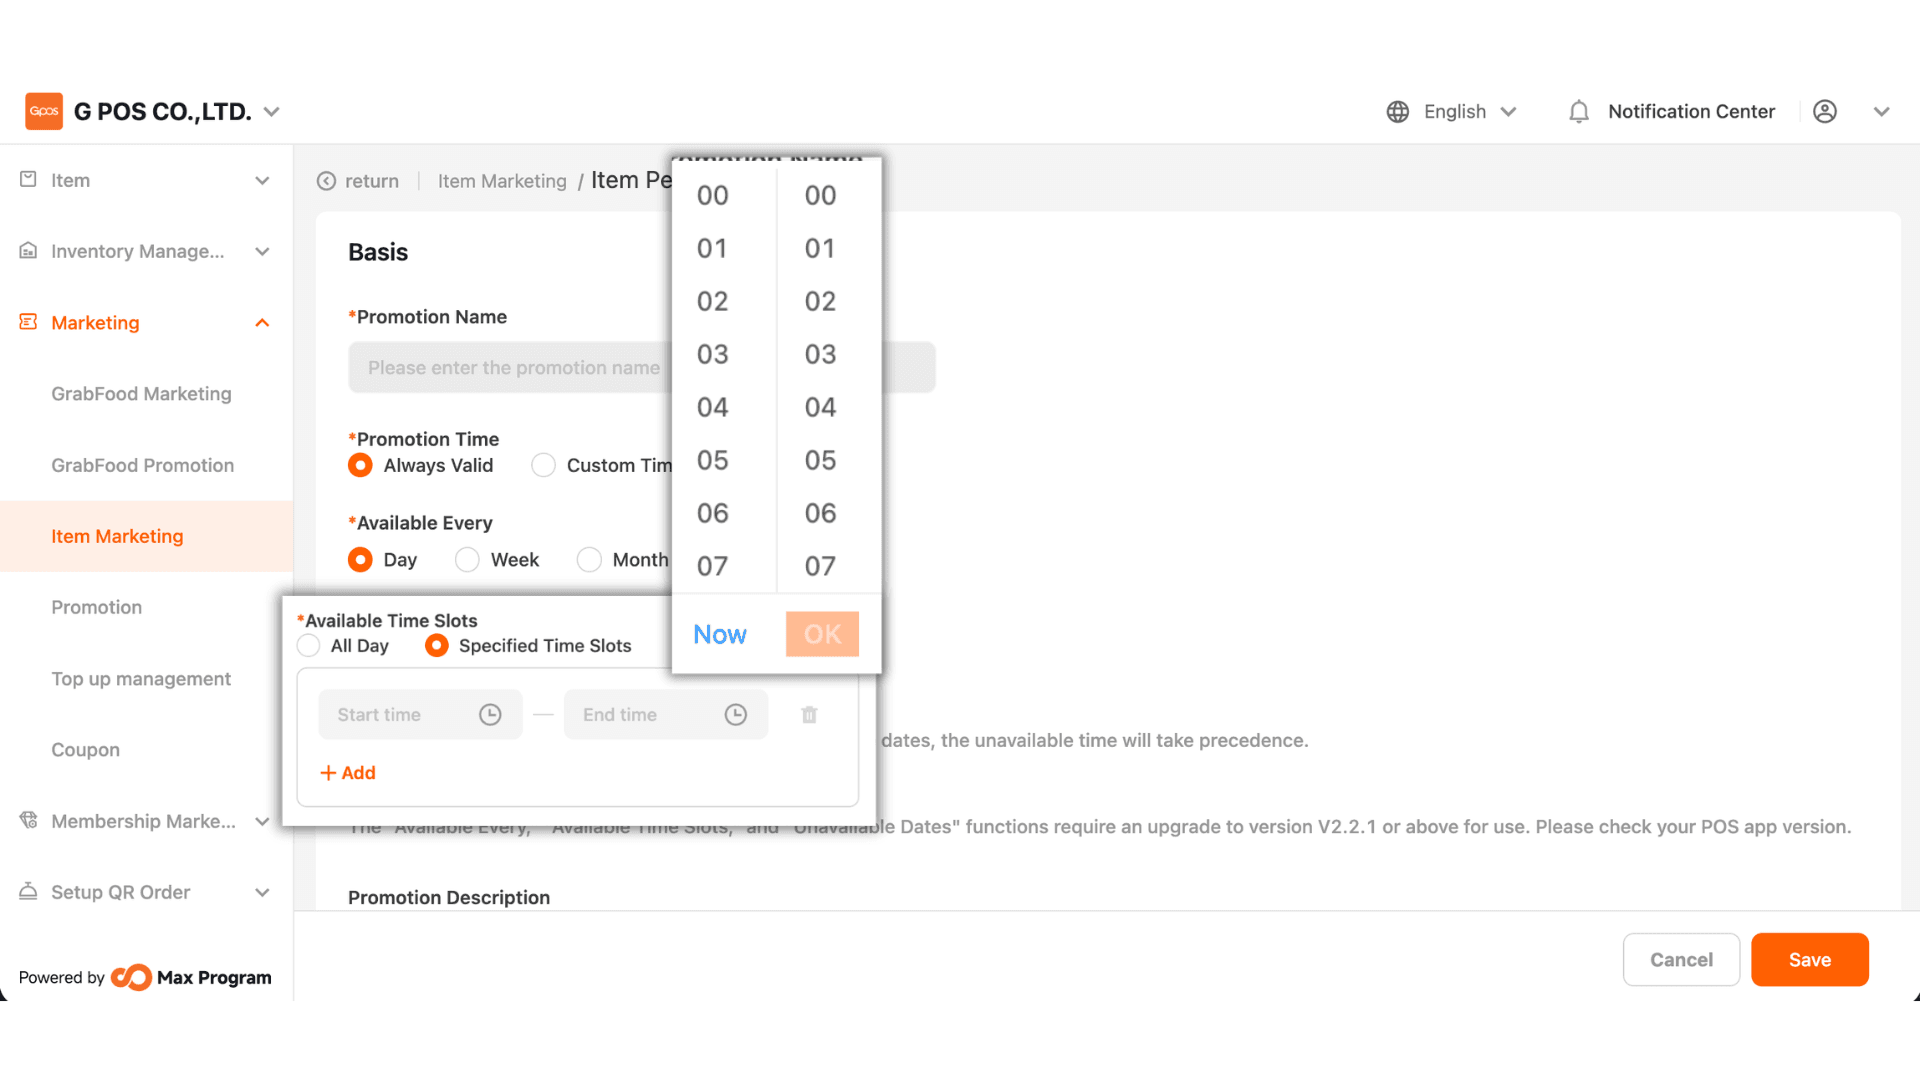
6. Choose how the discount will be available
- All Day – Available throughout the day.
- Specified Time Slots – Define a start and end time (up to 5 time ranges).
Example : Available between 6:00 PM – 7:00 PM
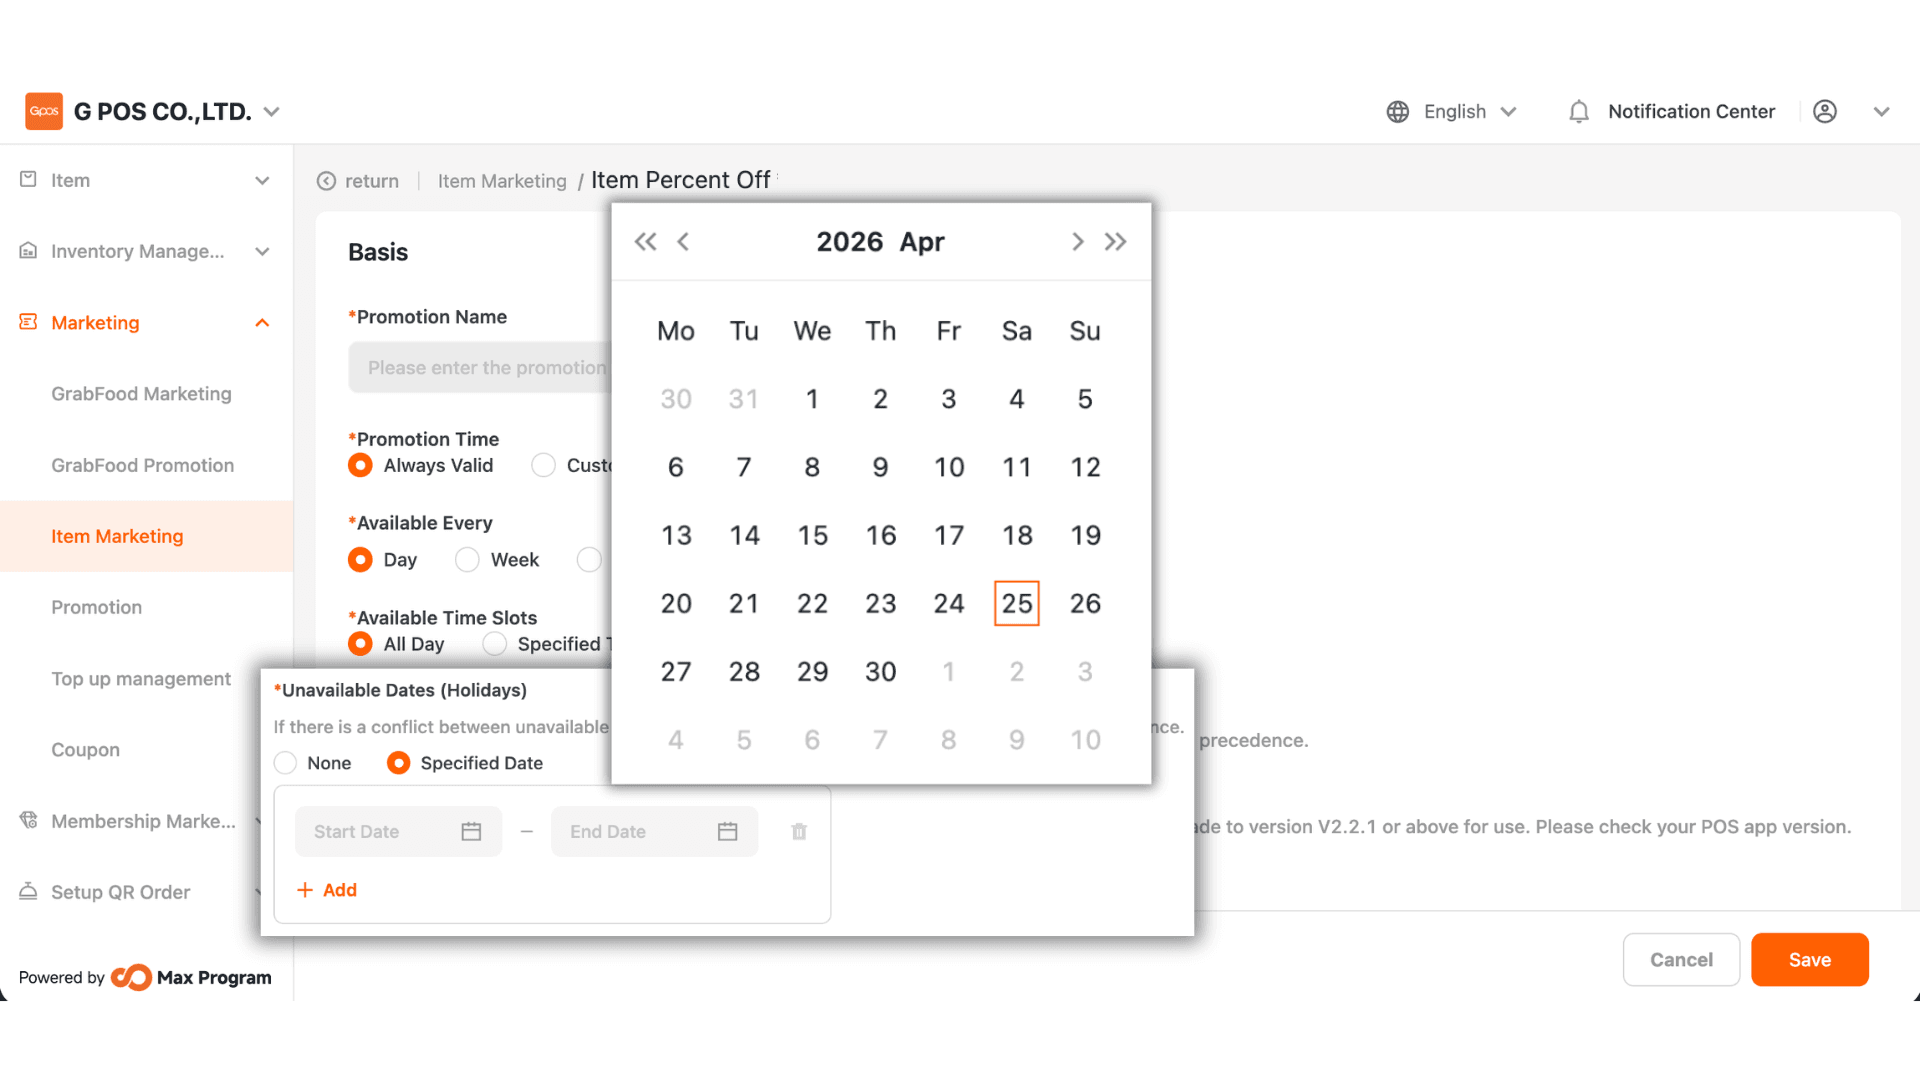
7. Choose from the following options
- None – The discount is valid as usual every day.
- Specified Date – Specify the start and end dates where the discount cannot be used (up to 5 ranges).
Example : October discount excluded on 10 Oct.
Note : The “Available Every,” “Available Time Slots,” and “Unavailable Dates (Holidays)” features are available from version 2.2.1 onward.
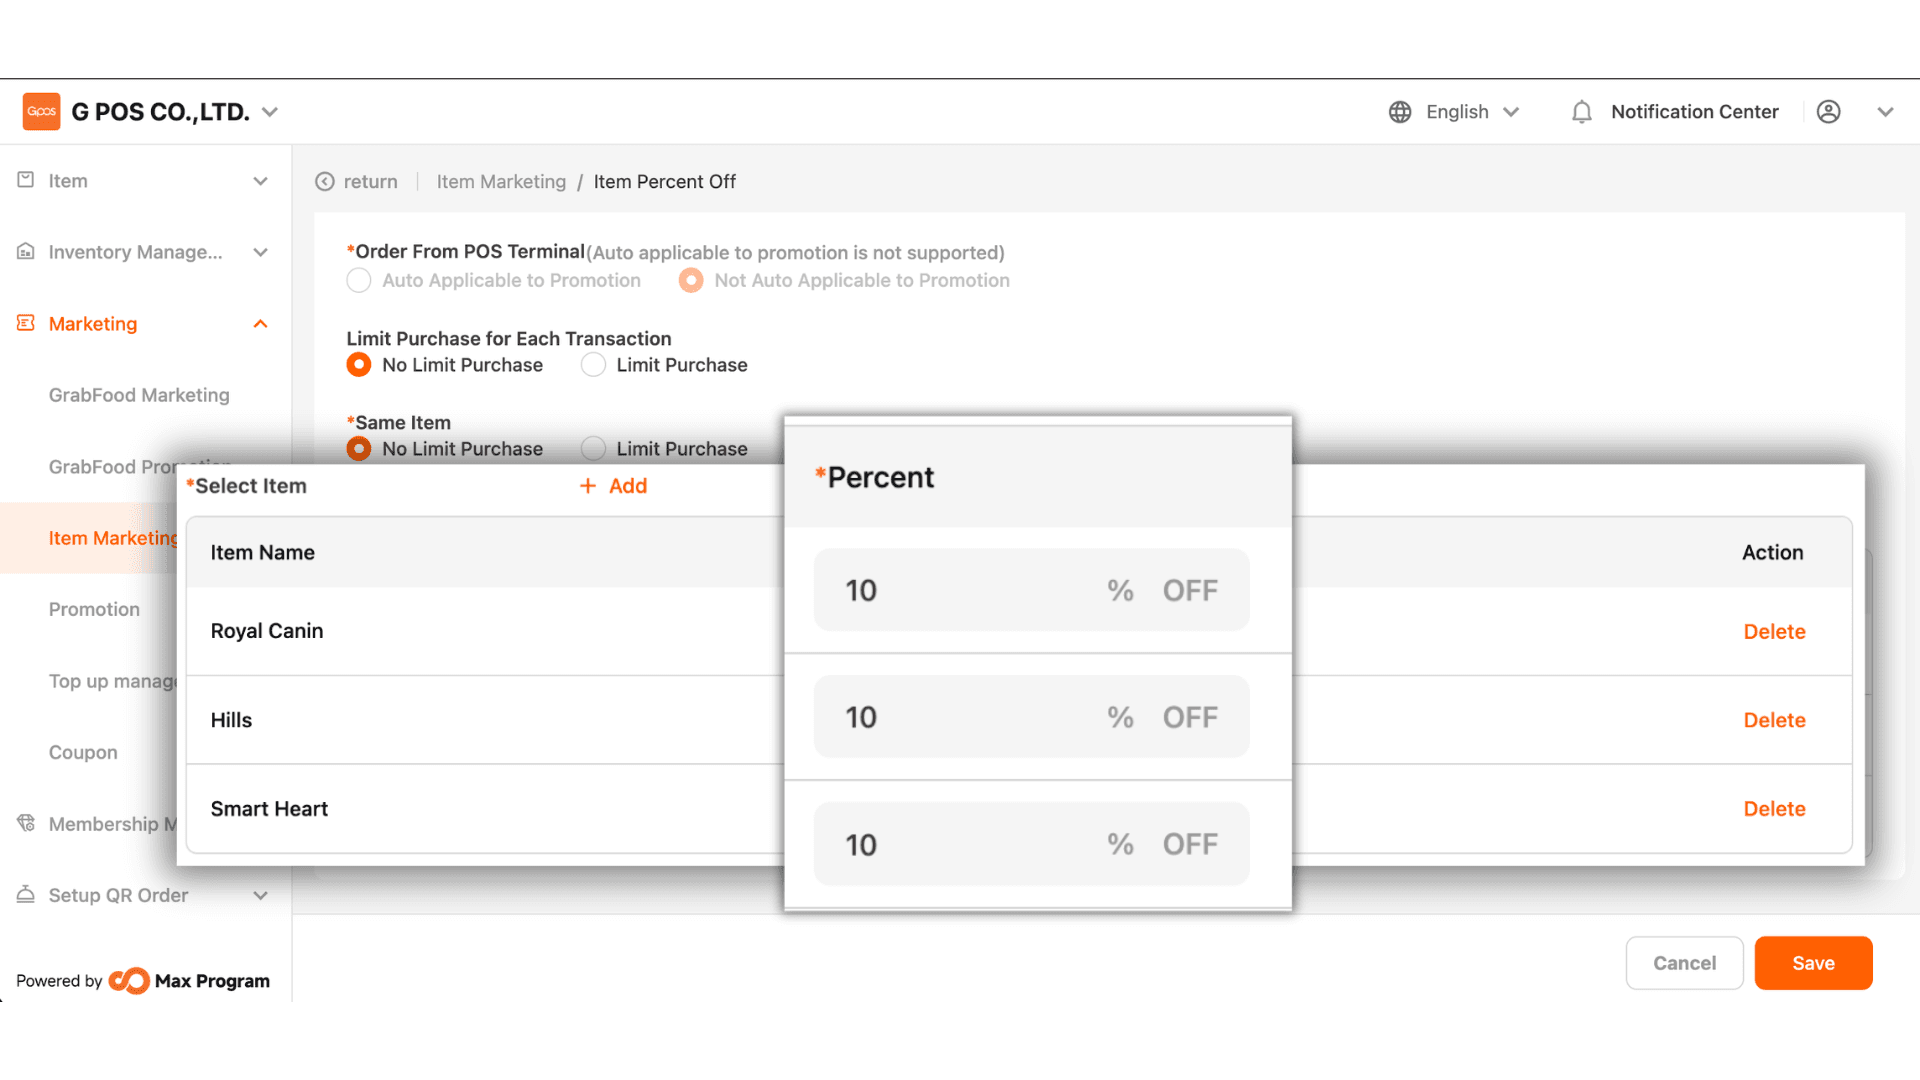
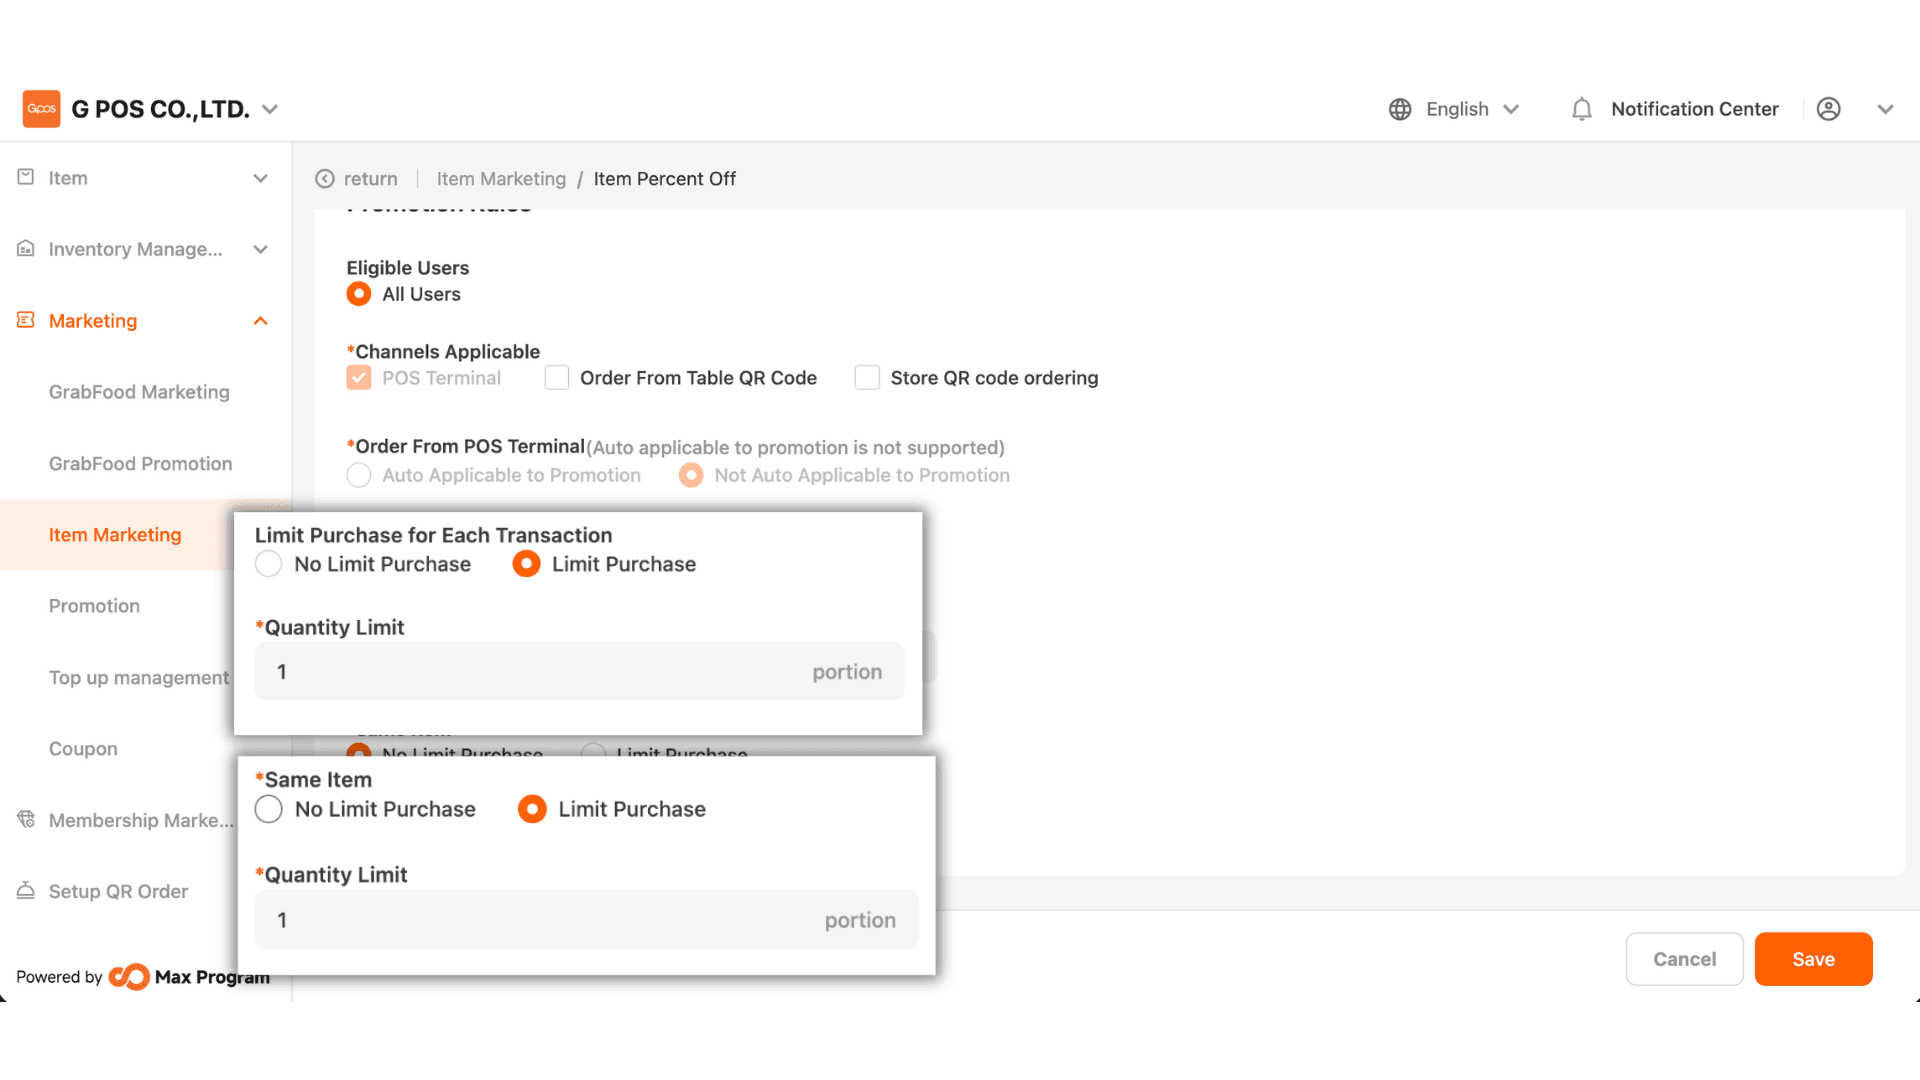
8. Limit Purchase for Each Transaction.
- No Limit Purchase – Discounts can be applied to an unlimited number of items per bill.
- Limit Purchase – Define the maximum number of items per bill that can use the discount.
Same Item
No Limit Purchase – The same item can use the discount without restriction. - Limit Purchase – Define how many units of the same item can receive the discount per bill.No Limit Purchase – The same item can use the discount without restriction.
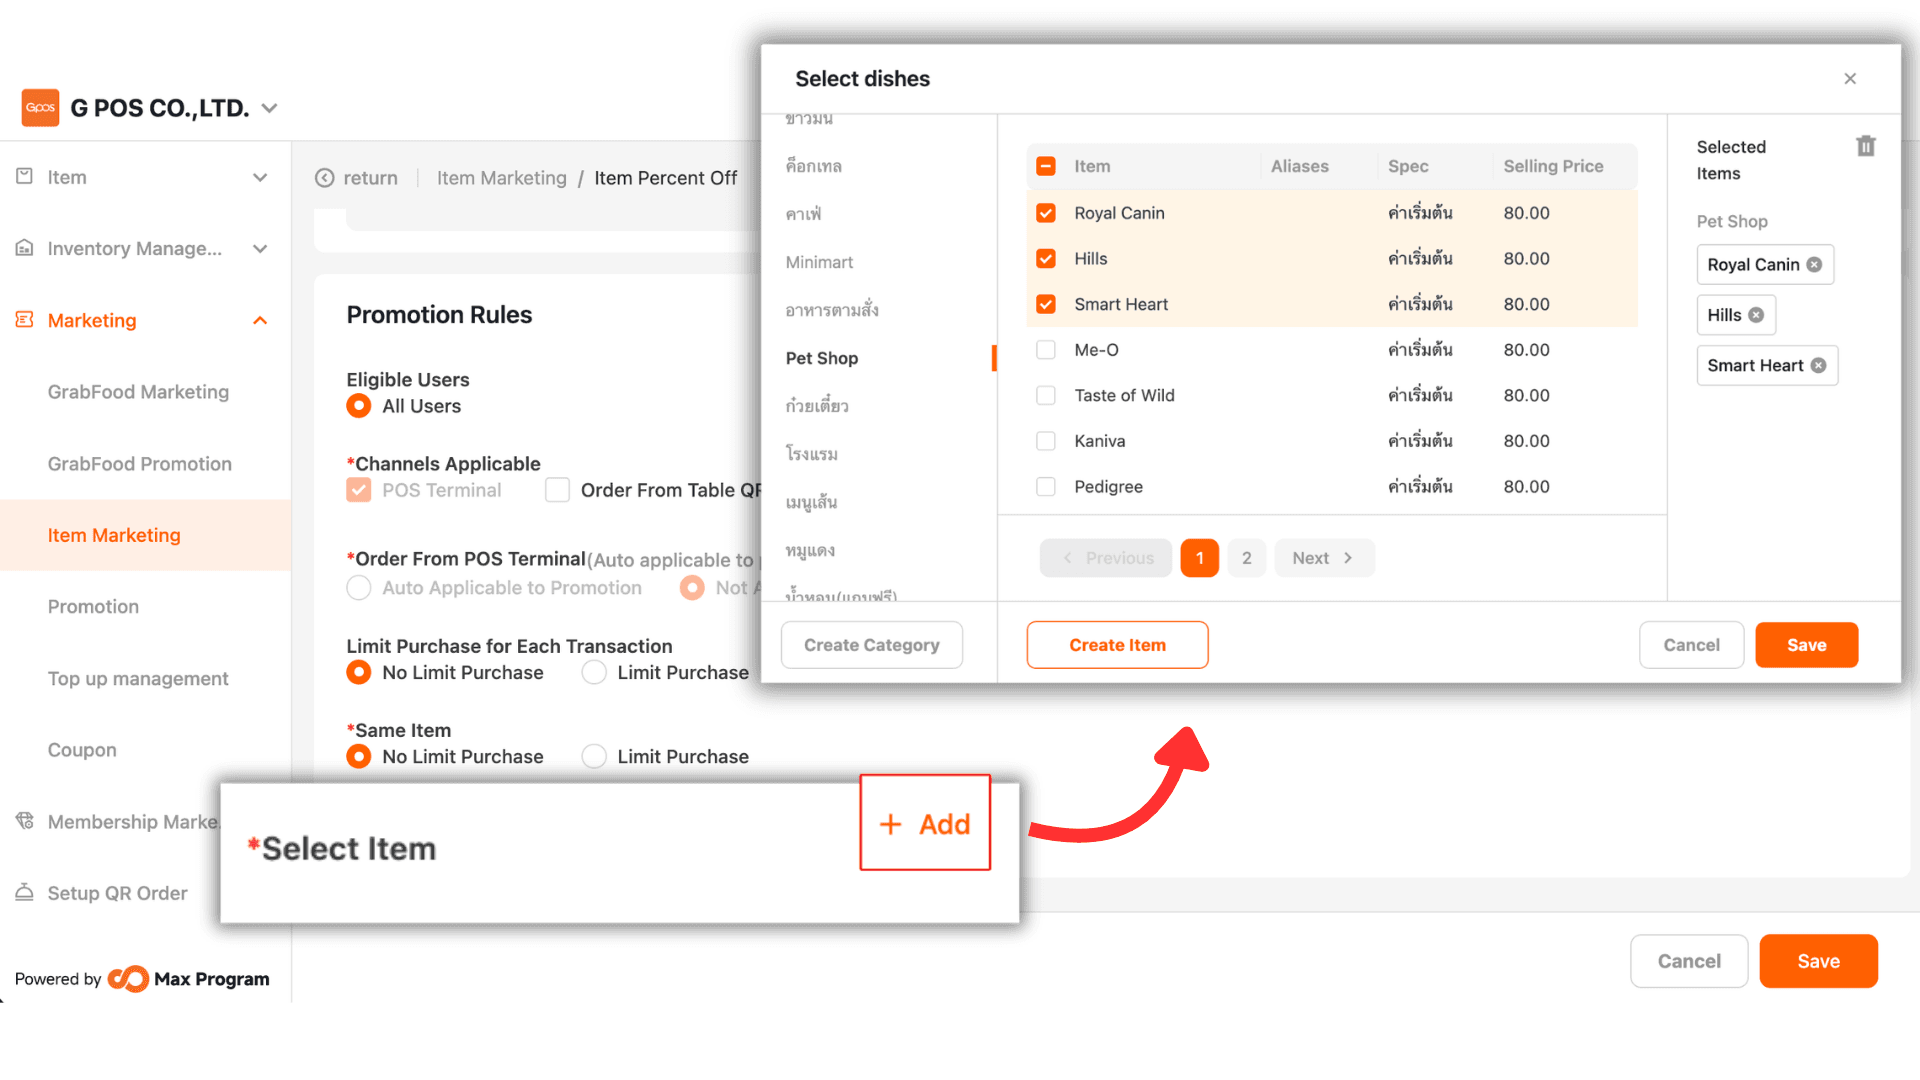
9. Click the “+ Add” button to select products for the discount.
10. Specify Discount Rate and Save
Define the discount percentage (%) for each selected item. To remove an item, click “Delete”. Once all values are set, click “Save” to confirm the discount creation.