Set Discount for Entire Bill (%)
2026-04-25 10:06
Creating a “Order Percent Off (%)” helps your store manage promotions effectively and achieve marketing goals.
1. Log in to the Back Office
Go to login.gpos.co.th , enter your email and password, and click Log In.
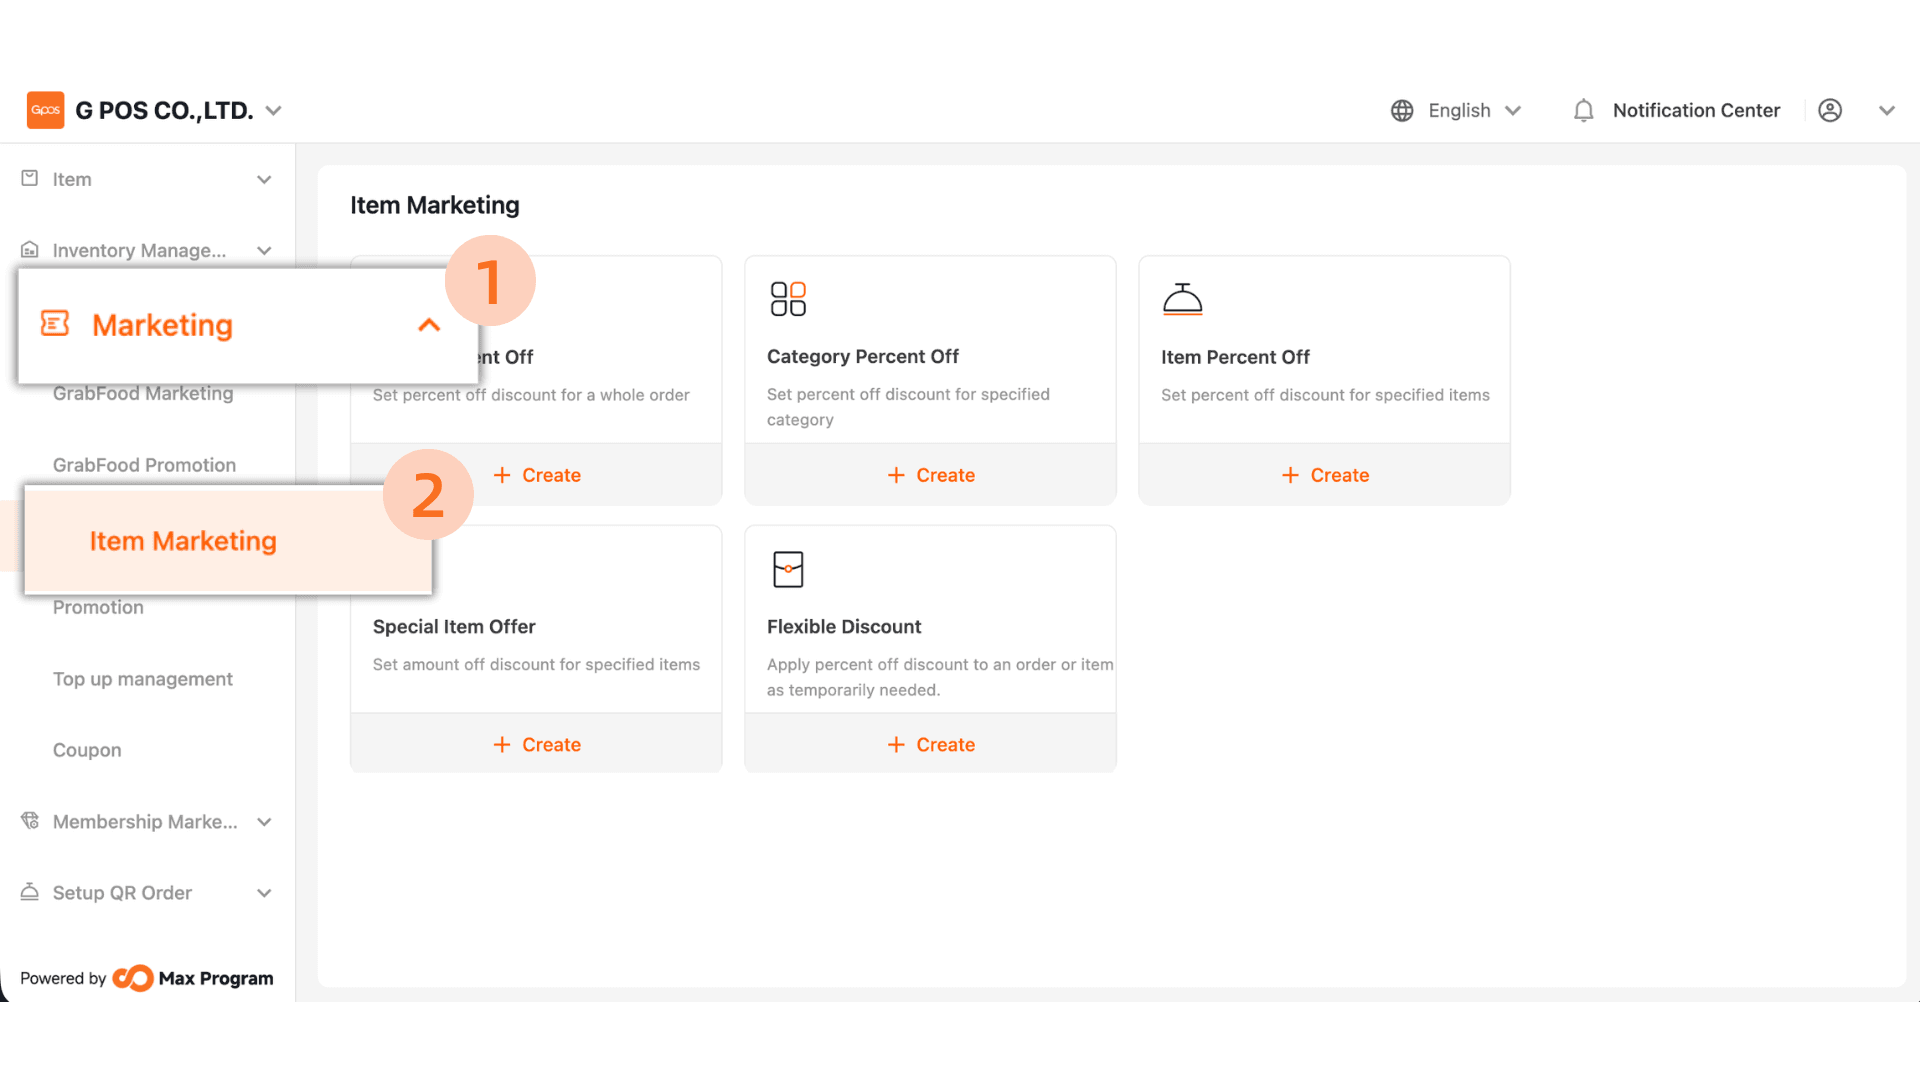
Click Marketing > Item Marketing.
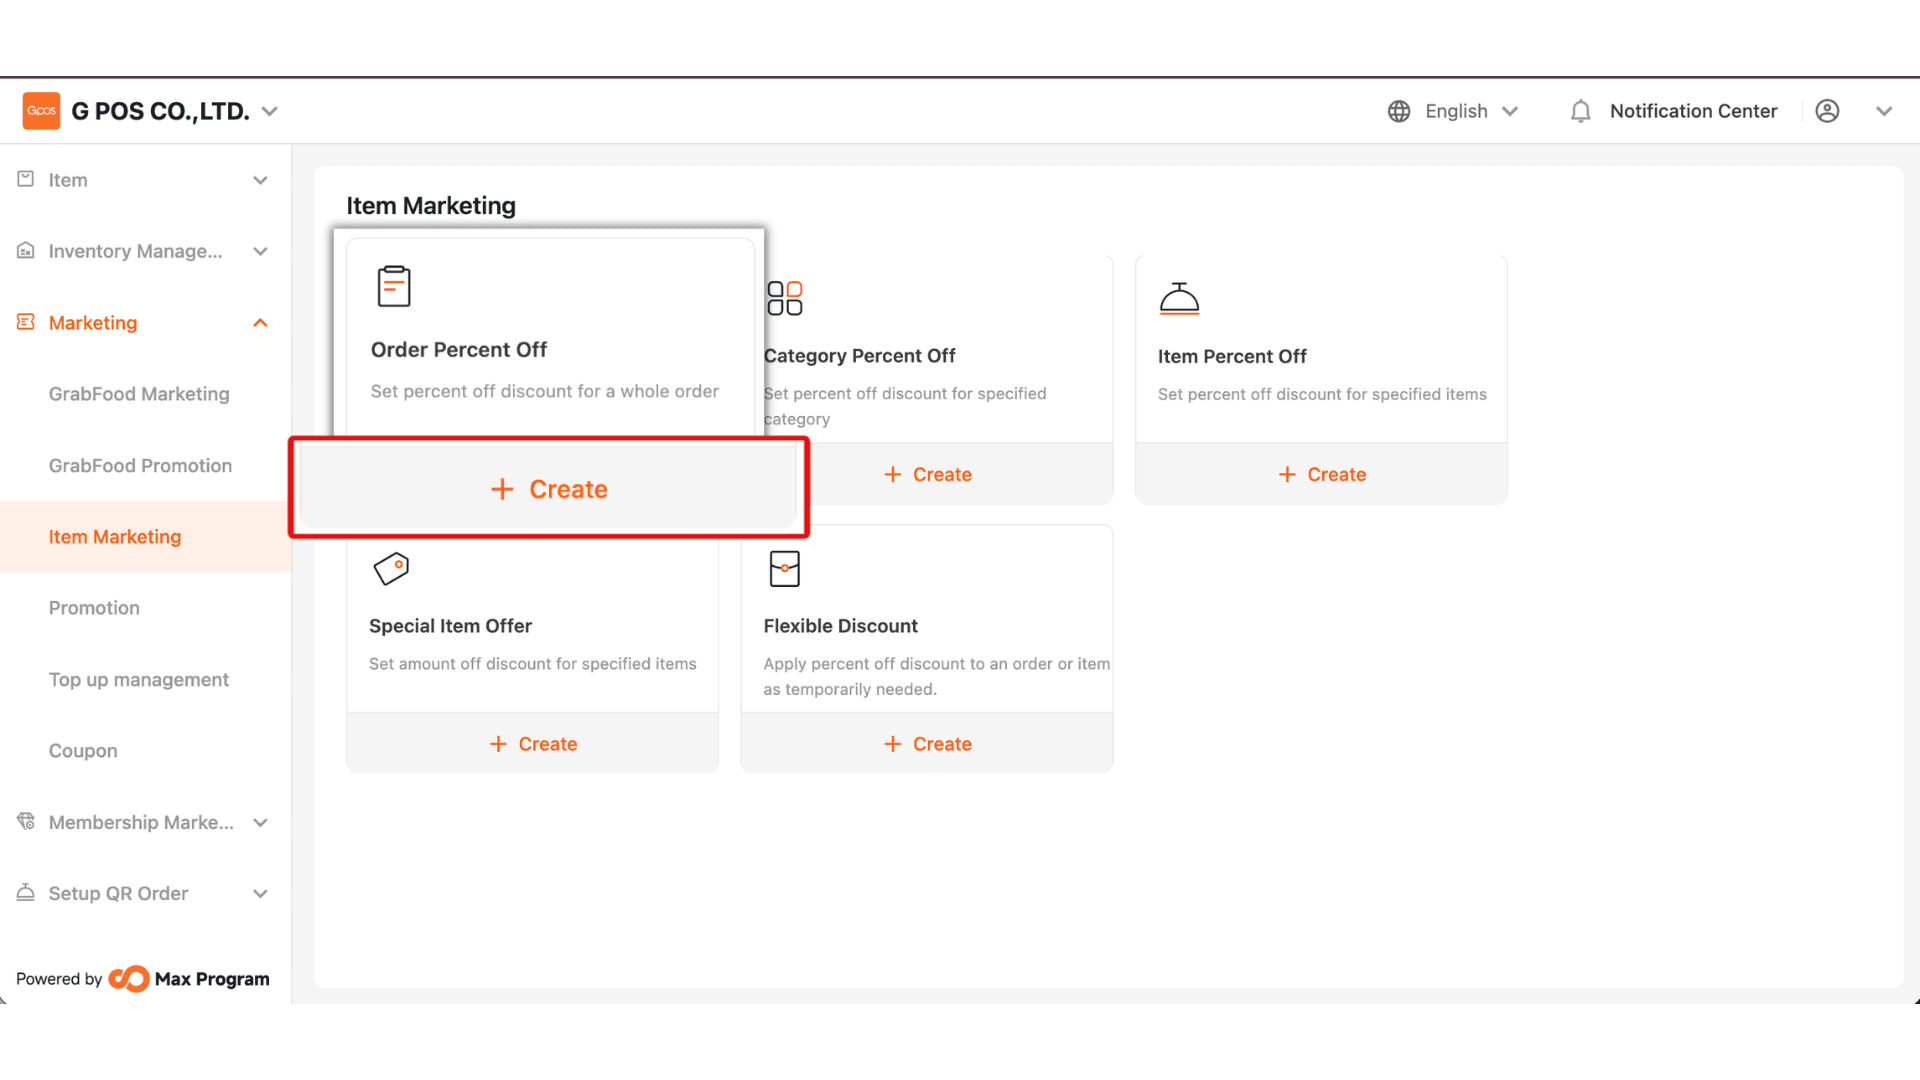
2. On the Discount List page, click the “+ Create” button. Select the discount type “Order Percent Off (%)”
3. Enter the desired discount name, e.g., “10% Discount”, to make it easier to search for and manage later.
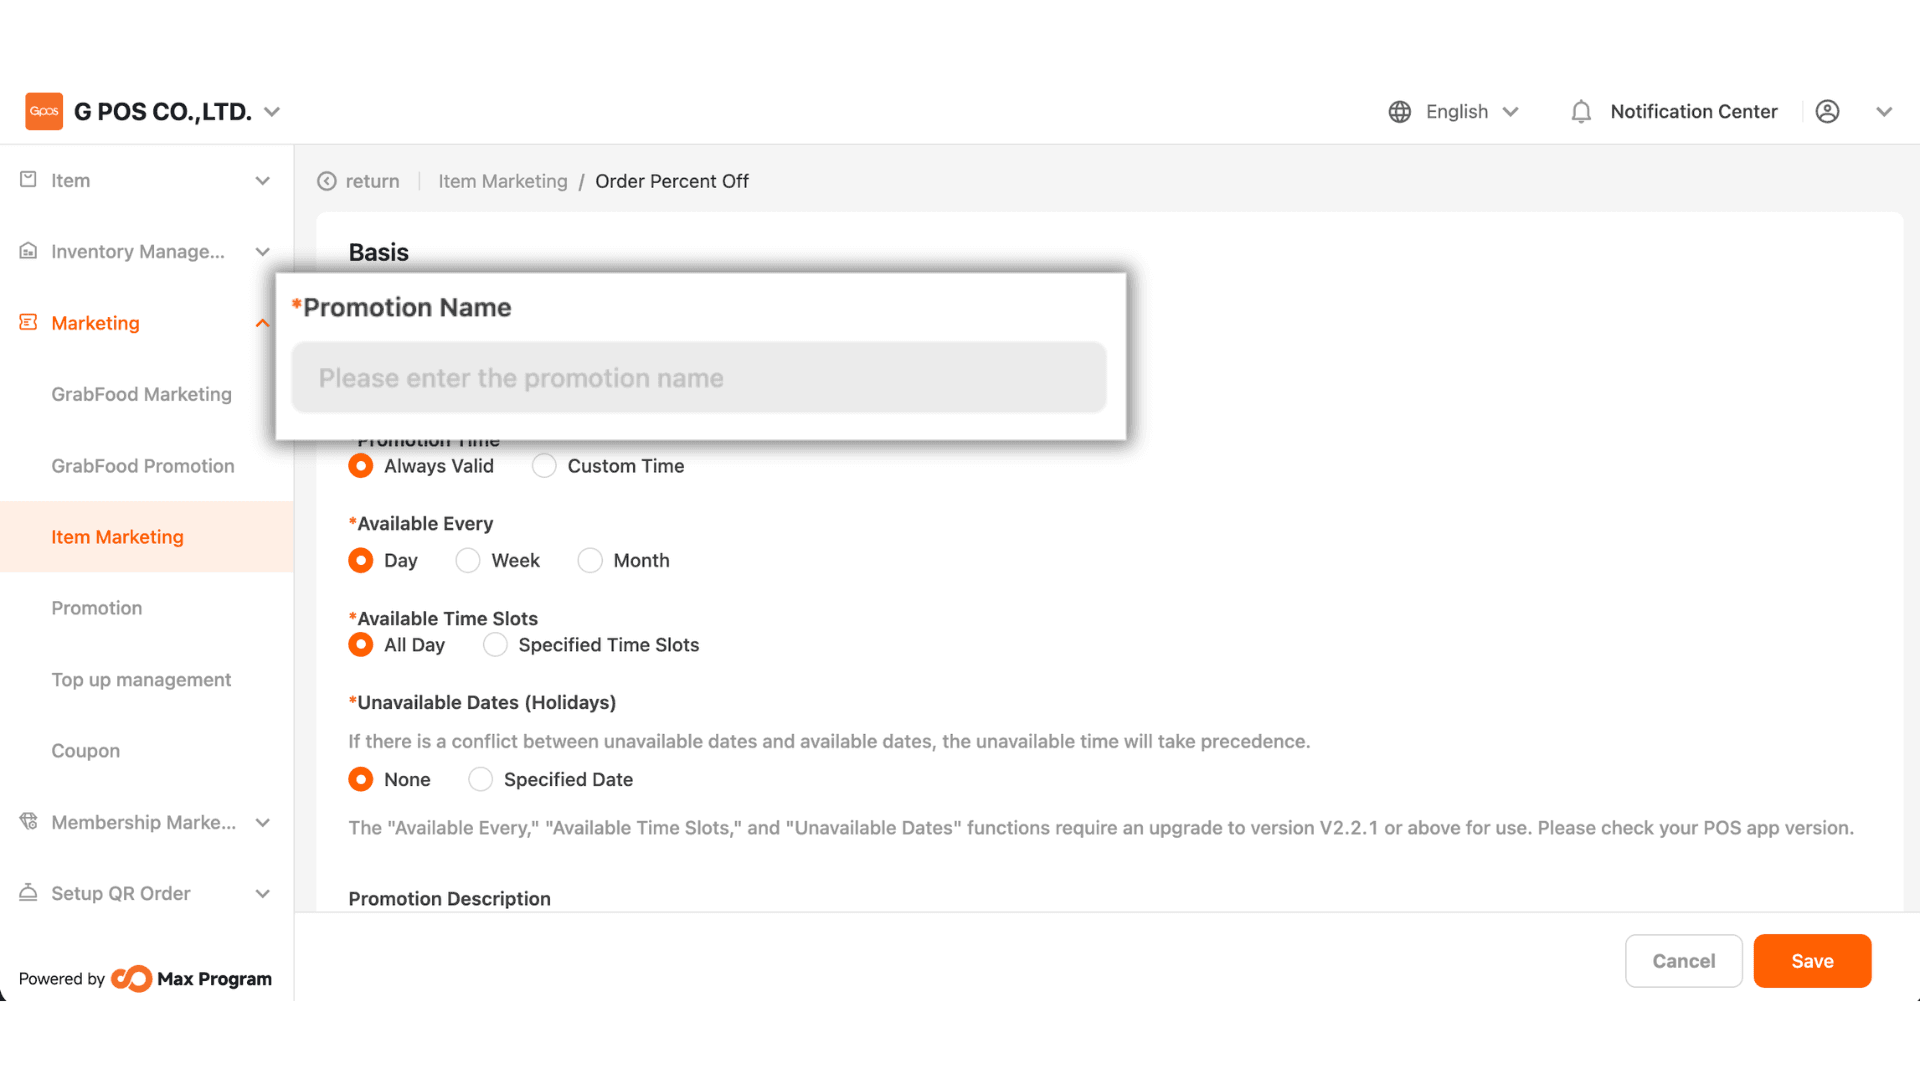
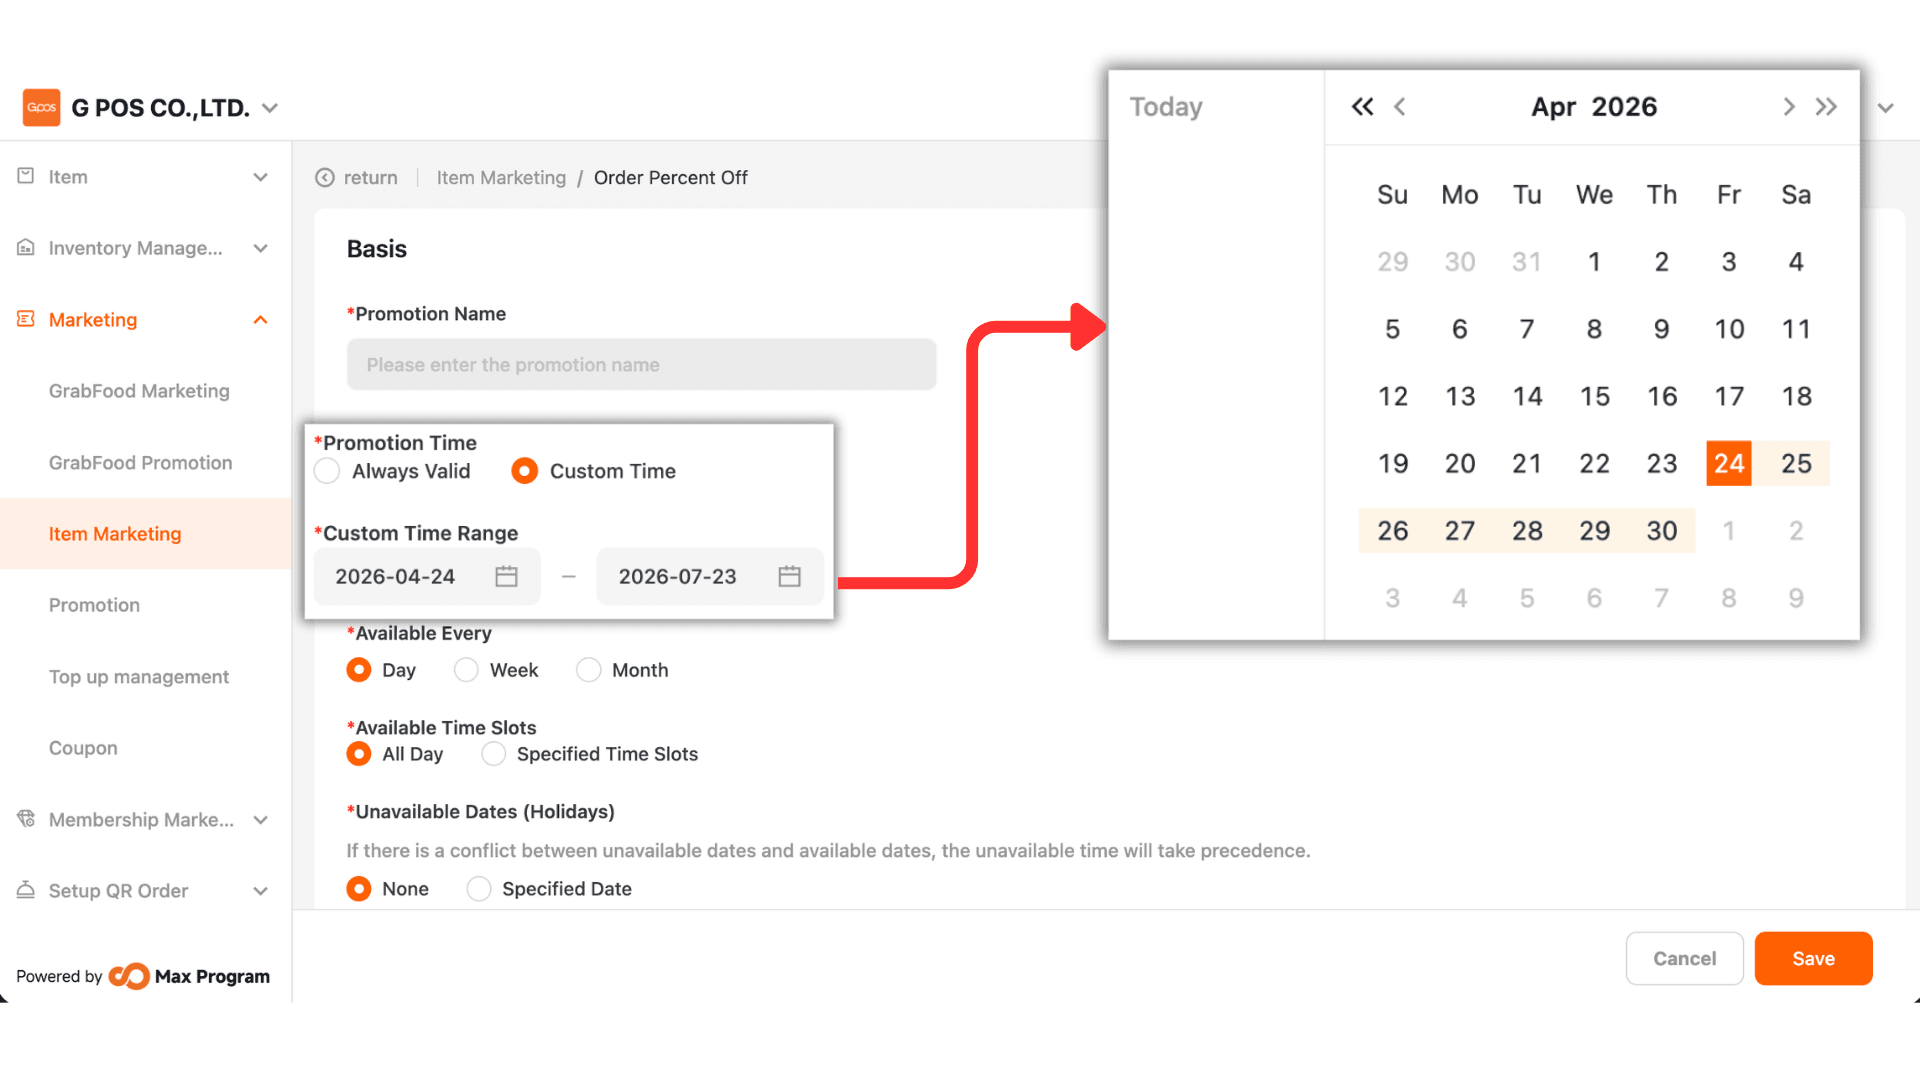
4. You can select one of two date options
- Always Valid – The discount is available all the time with no start or end date.
- Custom Time – The system will allow you to enter a start date and an end date.
Example : Discount valid from October 1, 2025 – October 31, 2025.
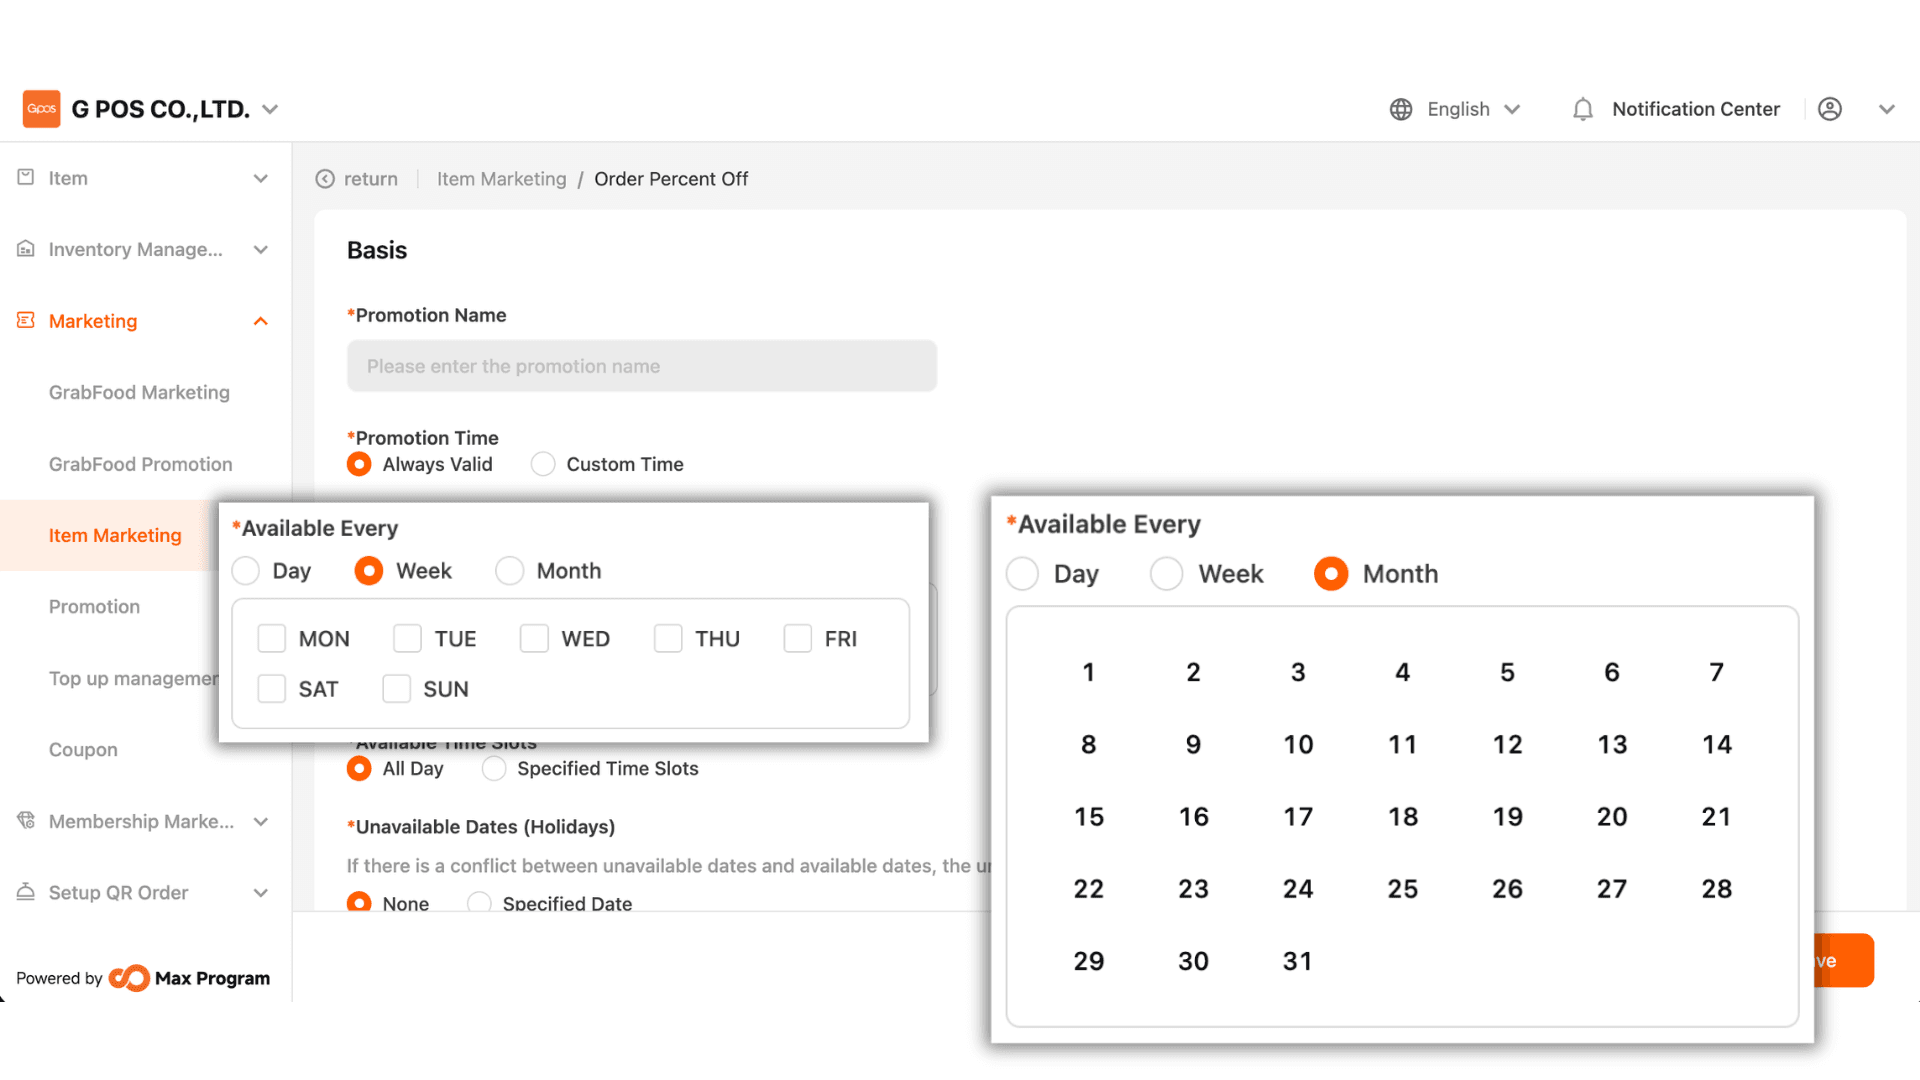
5. You can select from 3 types of available day ranges
- Day – Discount available daily.
- Week – The system will display Monday–Sunday. Check the days you want the discount to apply.
Example : Checking “Sunday” means the discount is only valid on Sundays each week.
- Month – The system will display dates 1–31. Select the desired date(s).
Example : Selecting “1” means the discount applies on the 1st of every month.
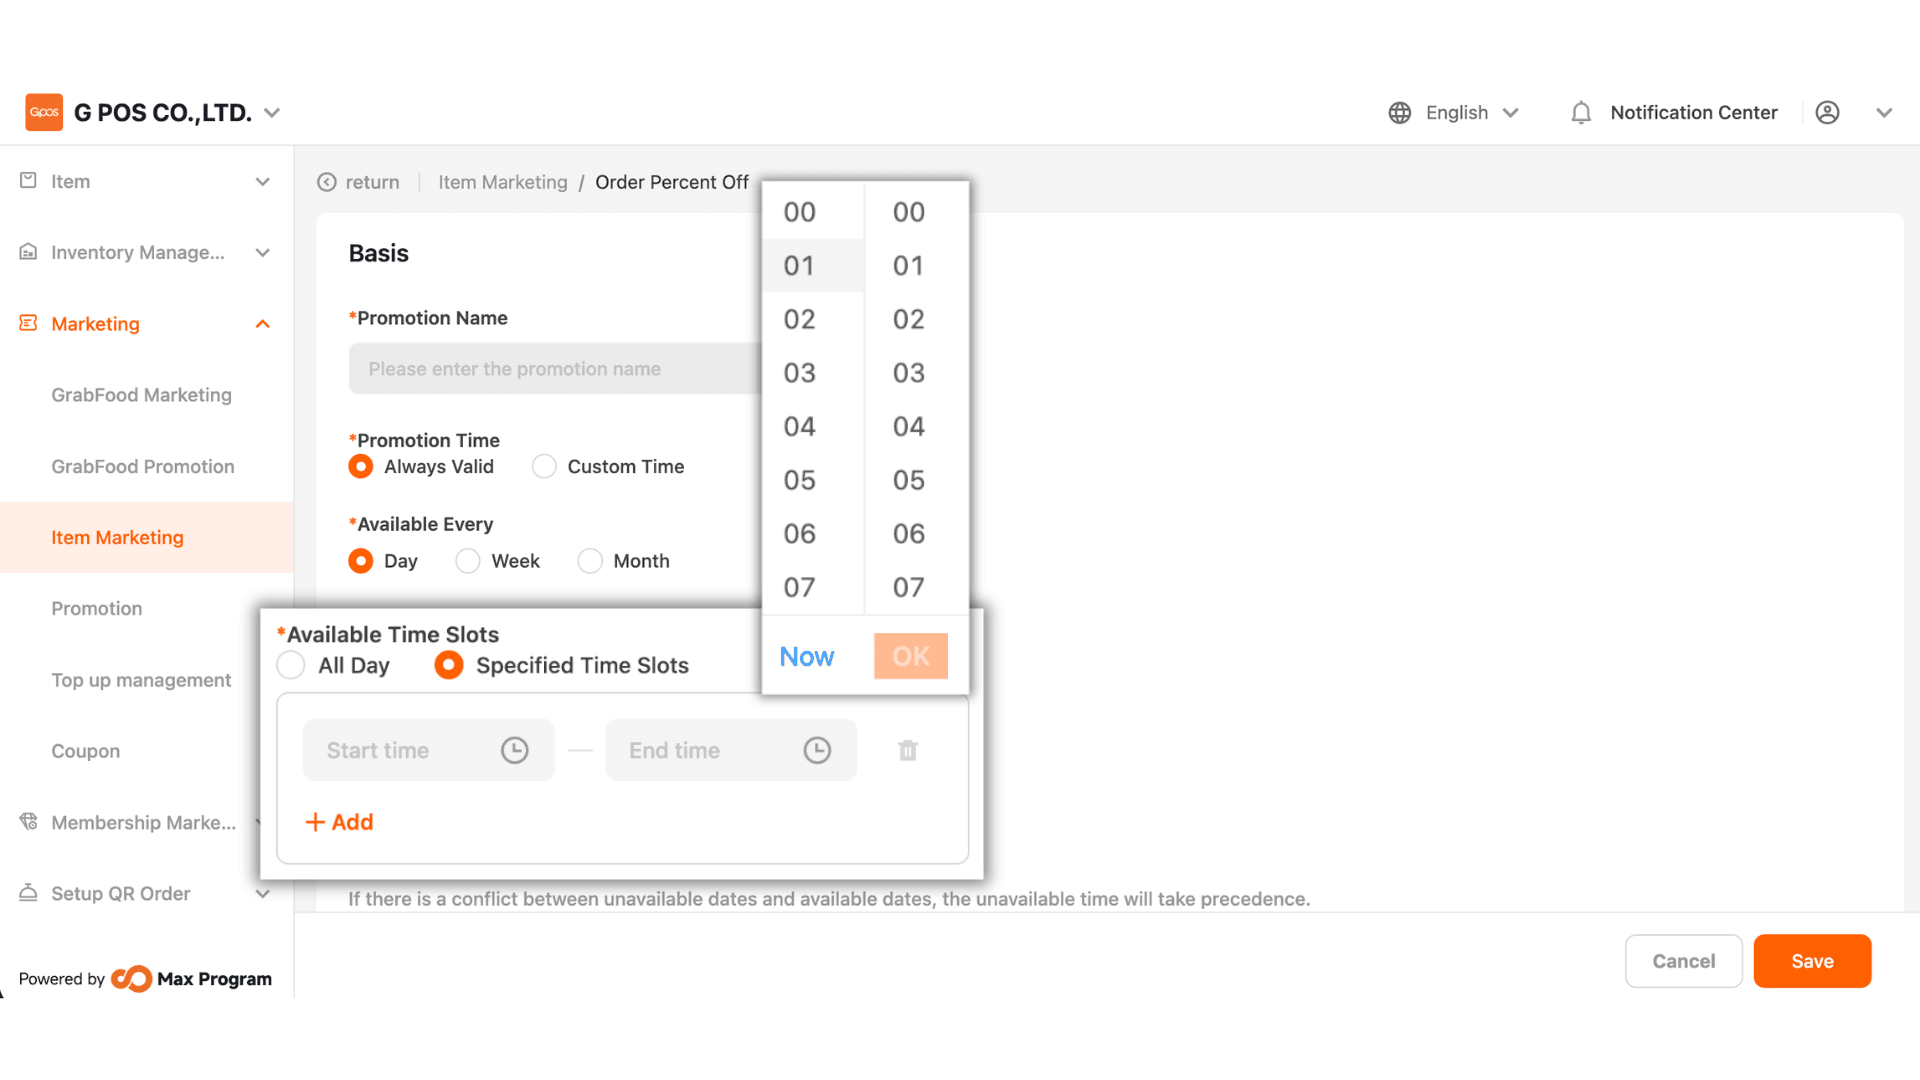
6. Select the time the discount can be used:
- All day – The discount can be used at any time of the day.
- Select time period – The system allows you to specify start time – end time, up to 5 time slots.
Example : Available between 6:00 PM – 7:00 PM.
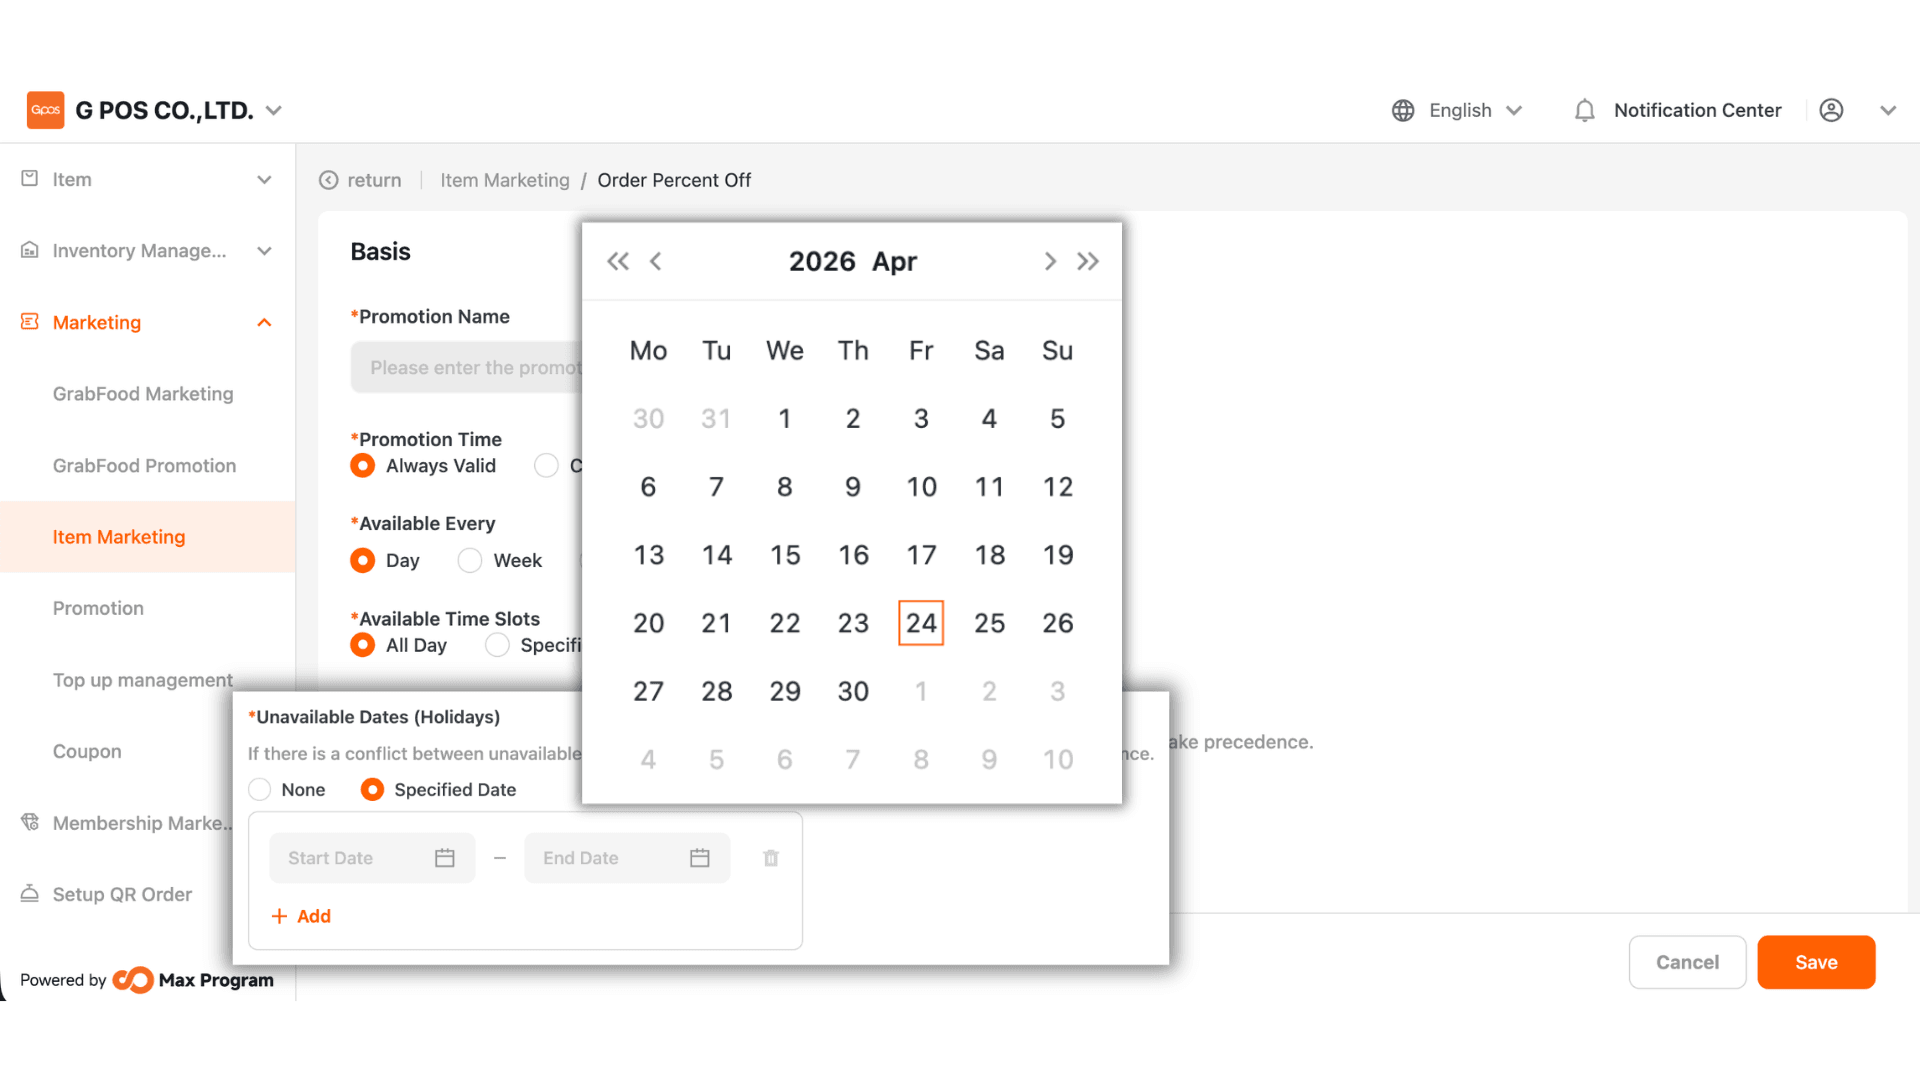
7. Choose the unavailable dates as follows
- None – The discount can be used as usual on all specified dates.
- Specified Date – Specify a date range “Start – End” during which the discount cannot be used. You can set up to 5 date ranges.
Example : October discount, except October 10.
Note : The “Available Every,” “Available Time Slots,” and “Unavailable Dates (Holidays)” features are available from version 2.2.1 onward.
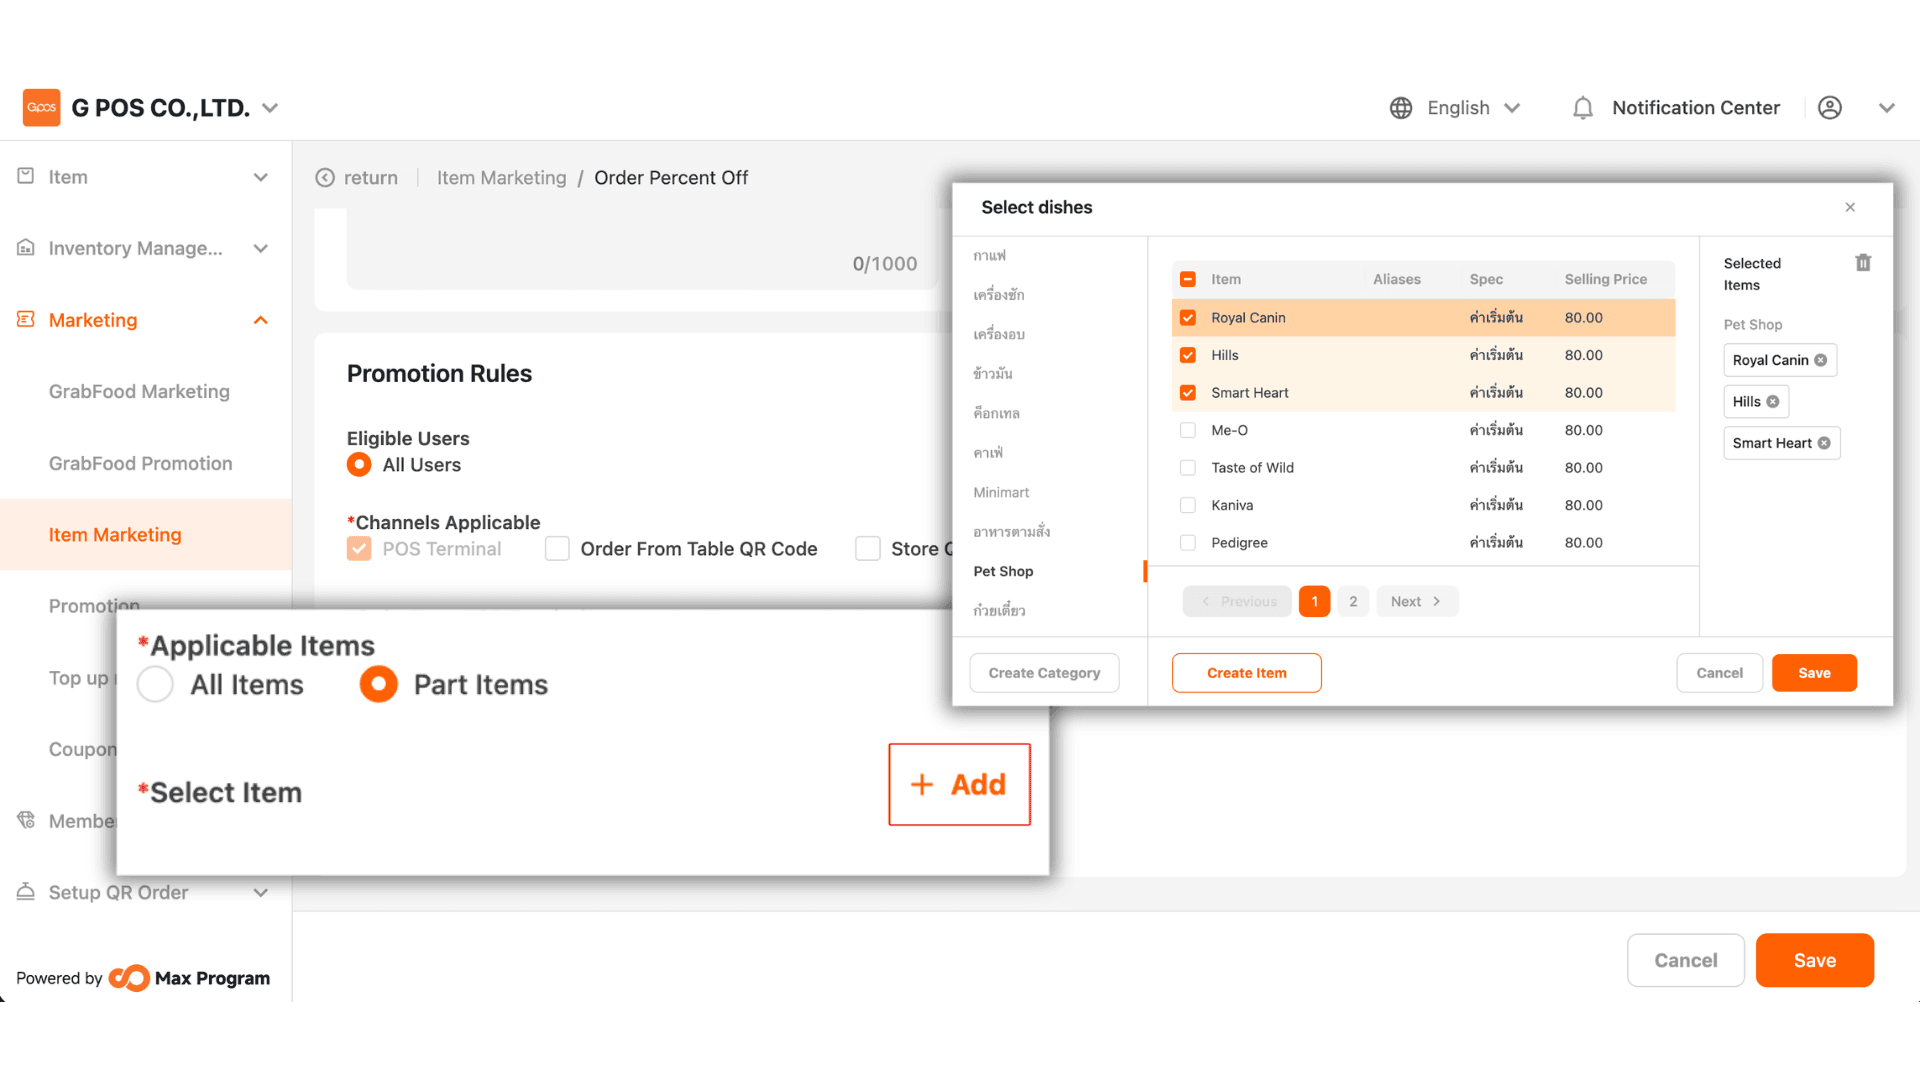
8. Set Applicable Items
You can choose from two options
- All Items – The discount applies to all menu items
- Part Items – Click the “+ Add” button to select specific items you want
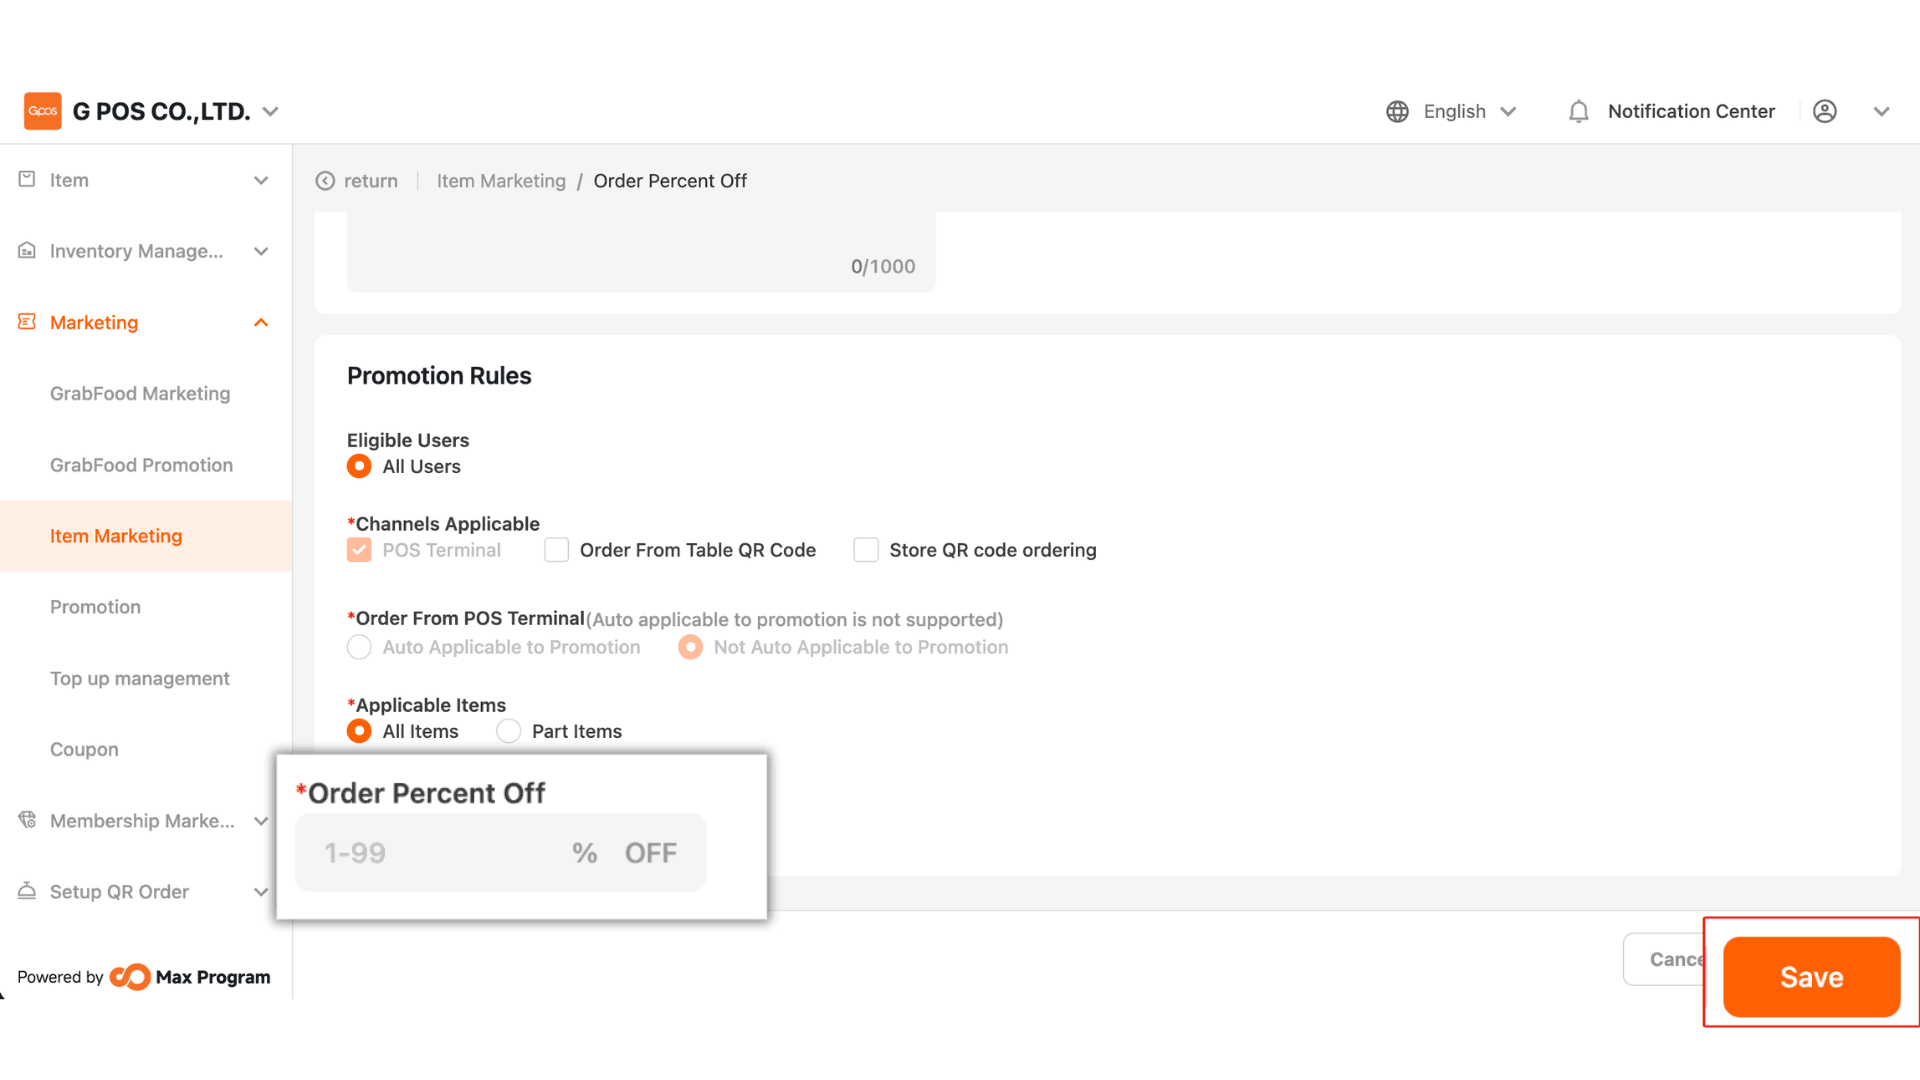
9. Enter the desired discount percentage, e.g., 10%, then click the “Save” button to create the discount.
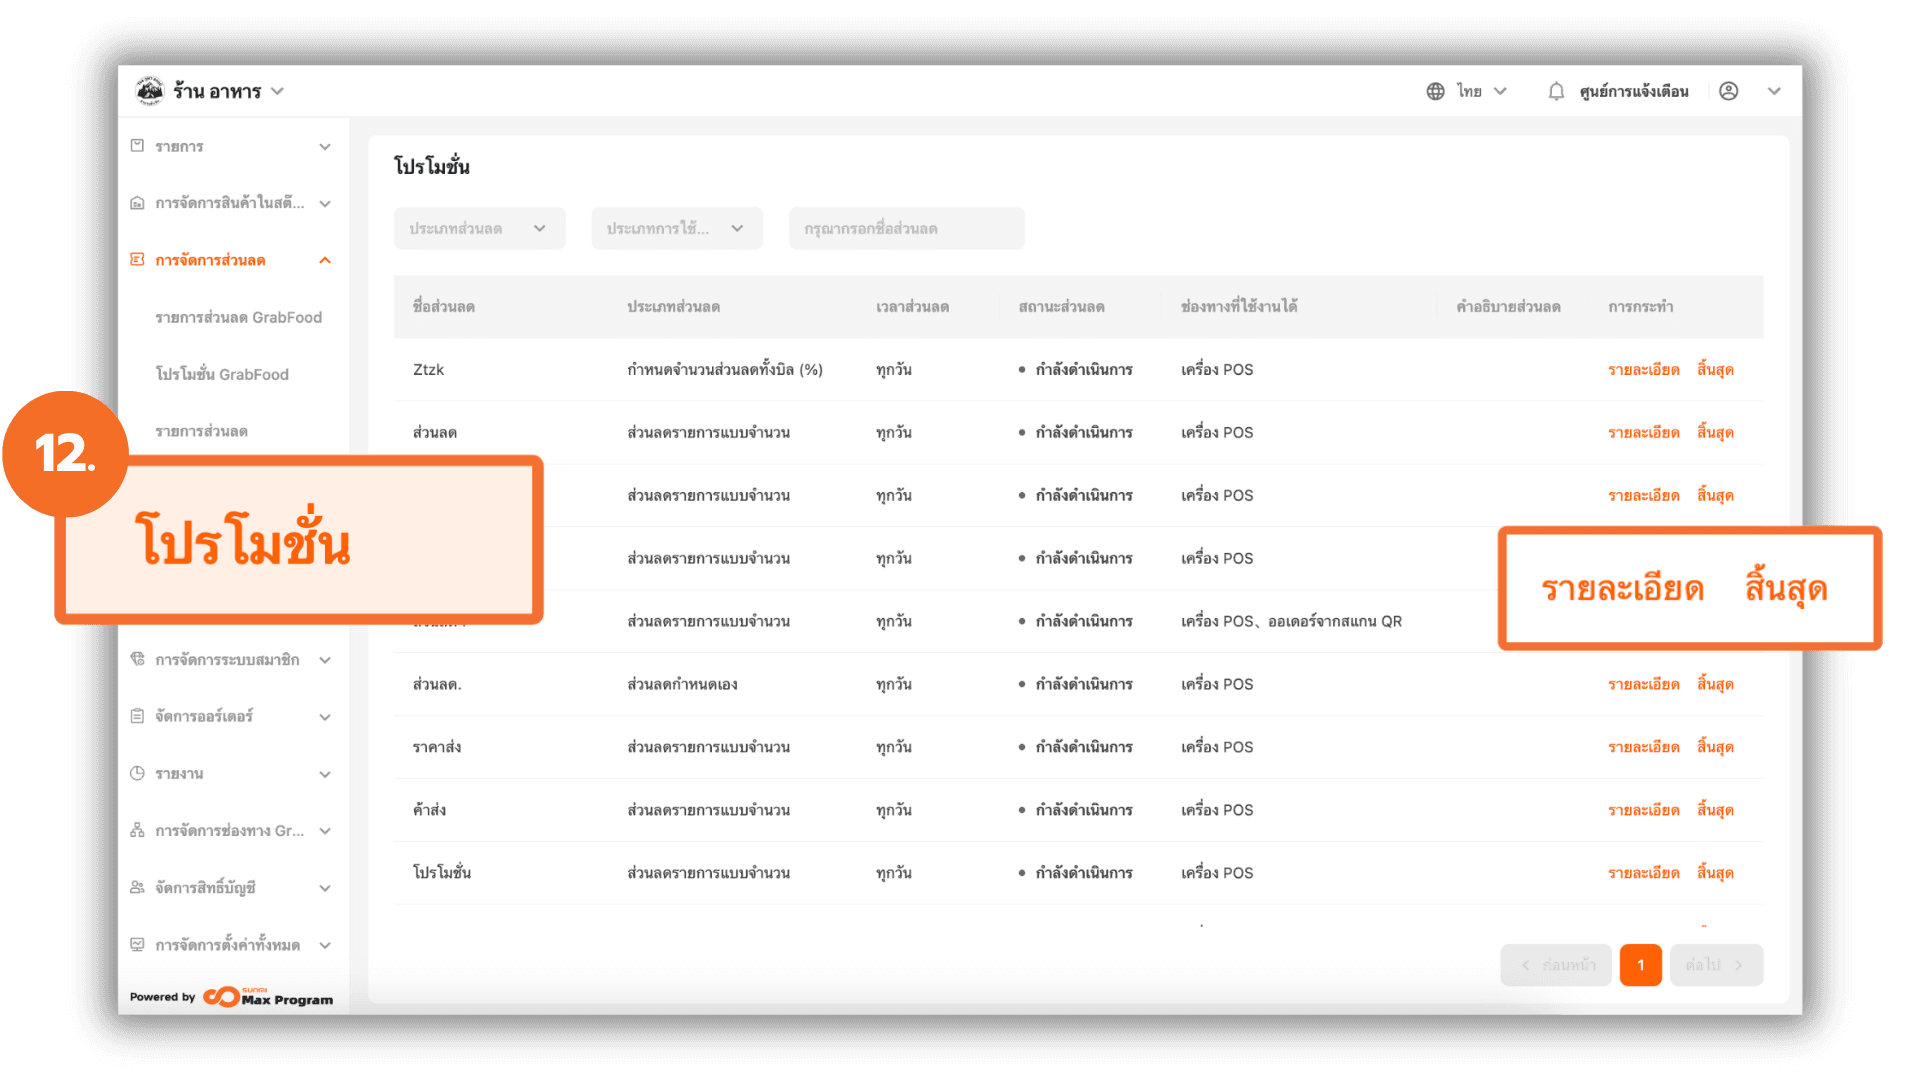
12. Managing Discounts After Creation
After creating a discount, you can manage it by going to the Promotions section and viewing the discounts you have created. You can manage existing discounts as follows
- View – To view the discount details
- End – The system will display a confirmation window. Click “OK” to proceed.
After ending a discount, the Delete button will become available.
Note : Deleting a discount will permanently remove it from the system (this action cannot be undone).