Special Item Offer
2026-04-25 10:22
This user guide is created to help users easily create and manage Item Discount by Amount promotions in the GPOS system. It supports efficient promotion management and enables businesses to develop flexible marketing strategies that meet their needs. With clear steps and straightforward instructions, users can confidently apply discount settings and tailor them to fit their store operations.
1. Log in to the Back Office
Go to login.gpos.co.th, enter your email and password, then click Login.
Click Marketing > Item Marketing.
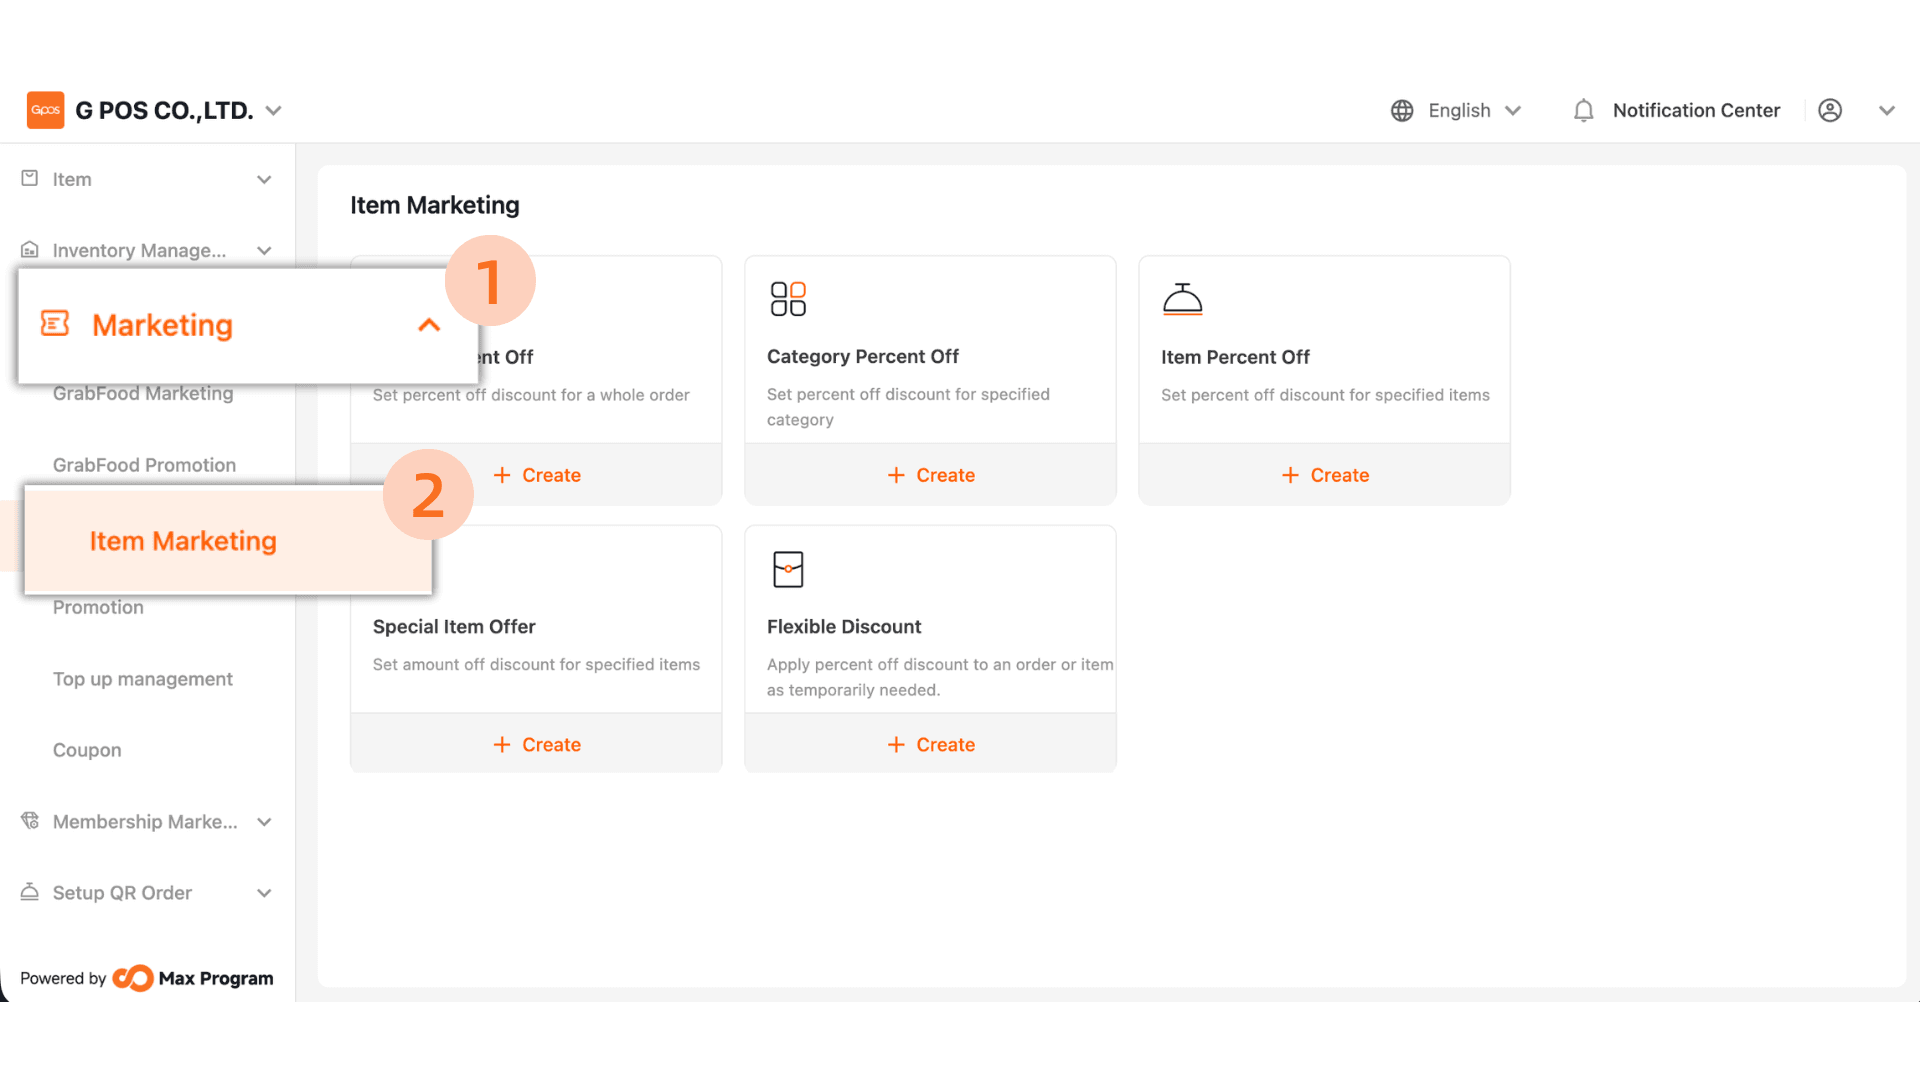
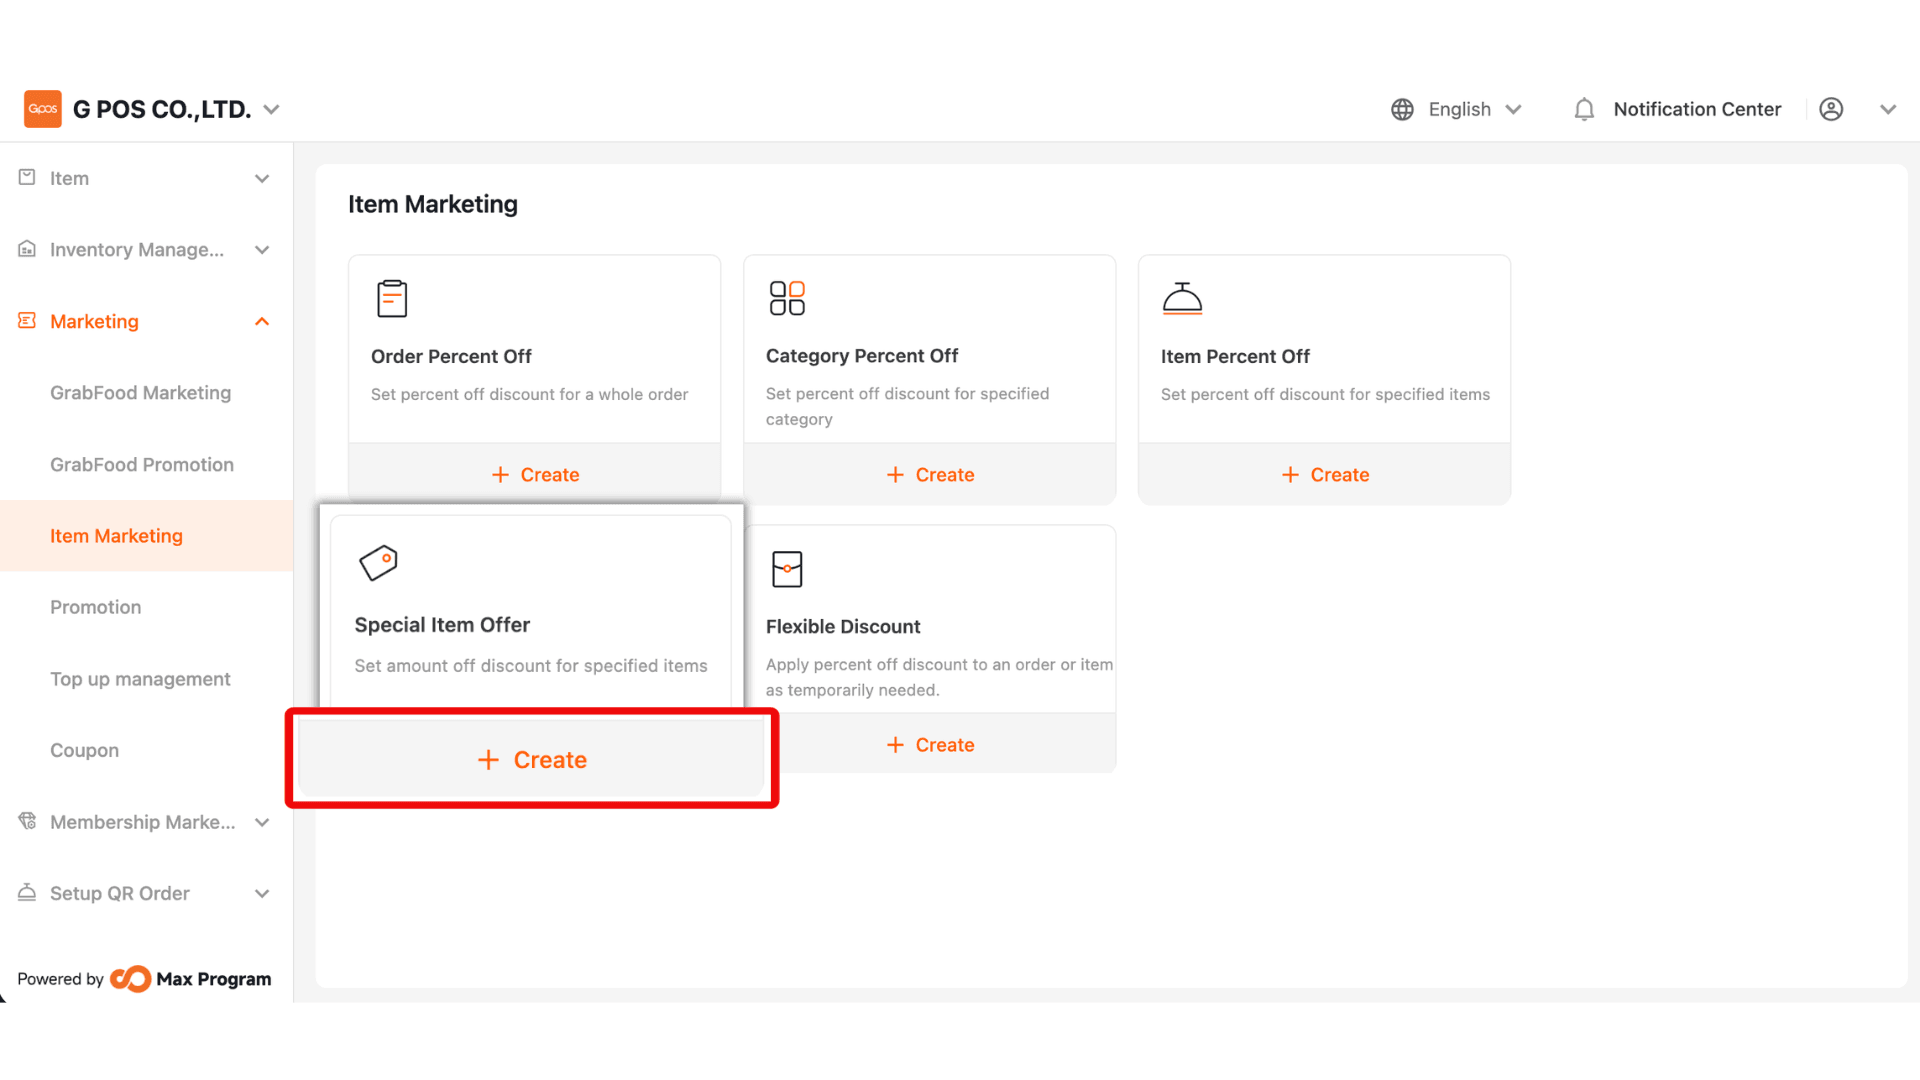
2. On the Discount List page, click “+ Create” and select the discount type
“Special Item Offer.”
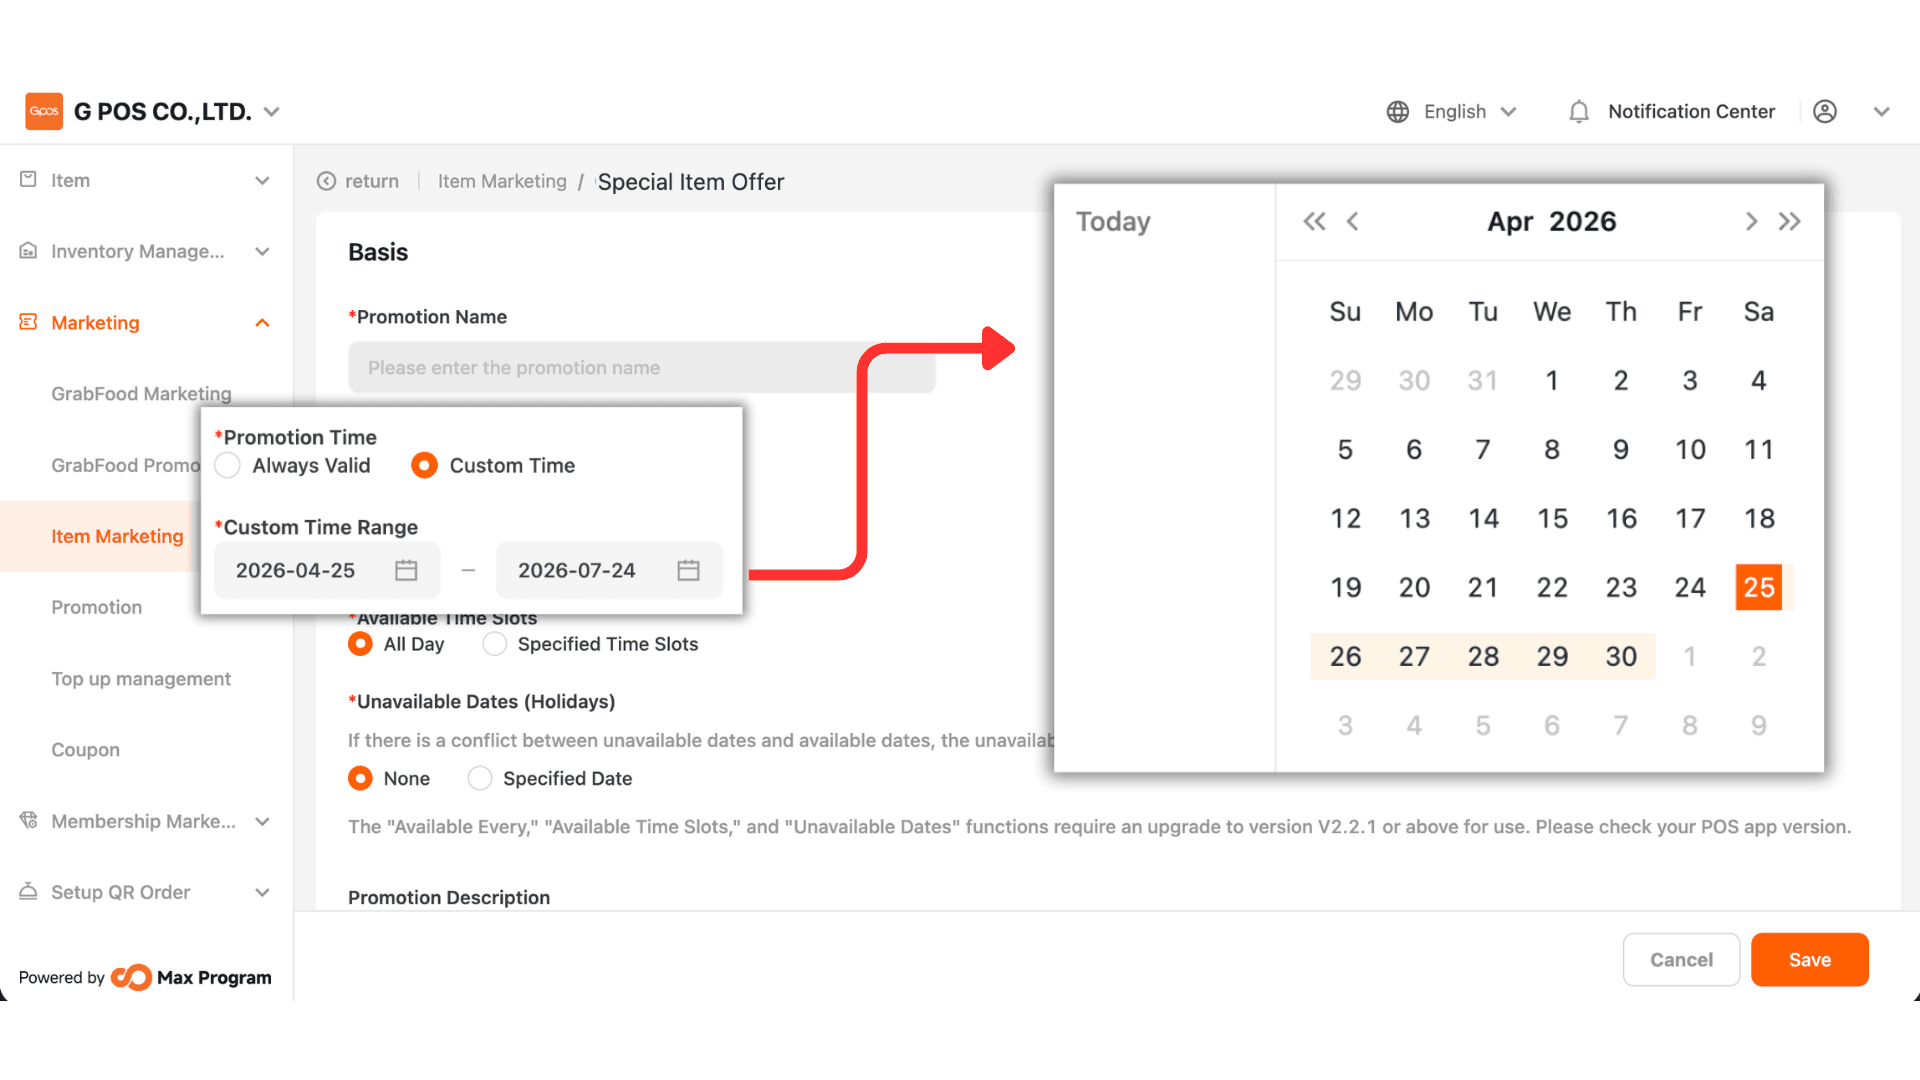
3. Enter the desired discount name, such as “30 Baht Discount.” It is recommended to name it clearly based on the discount amount or applicable period.

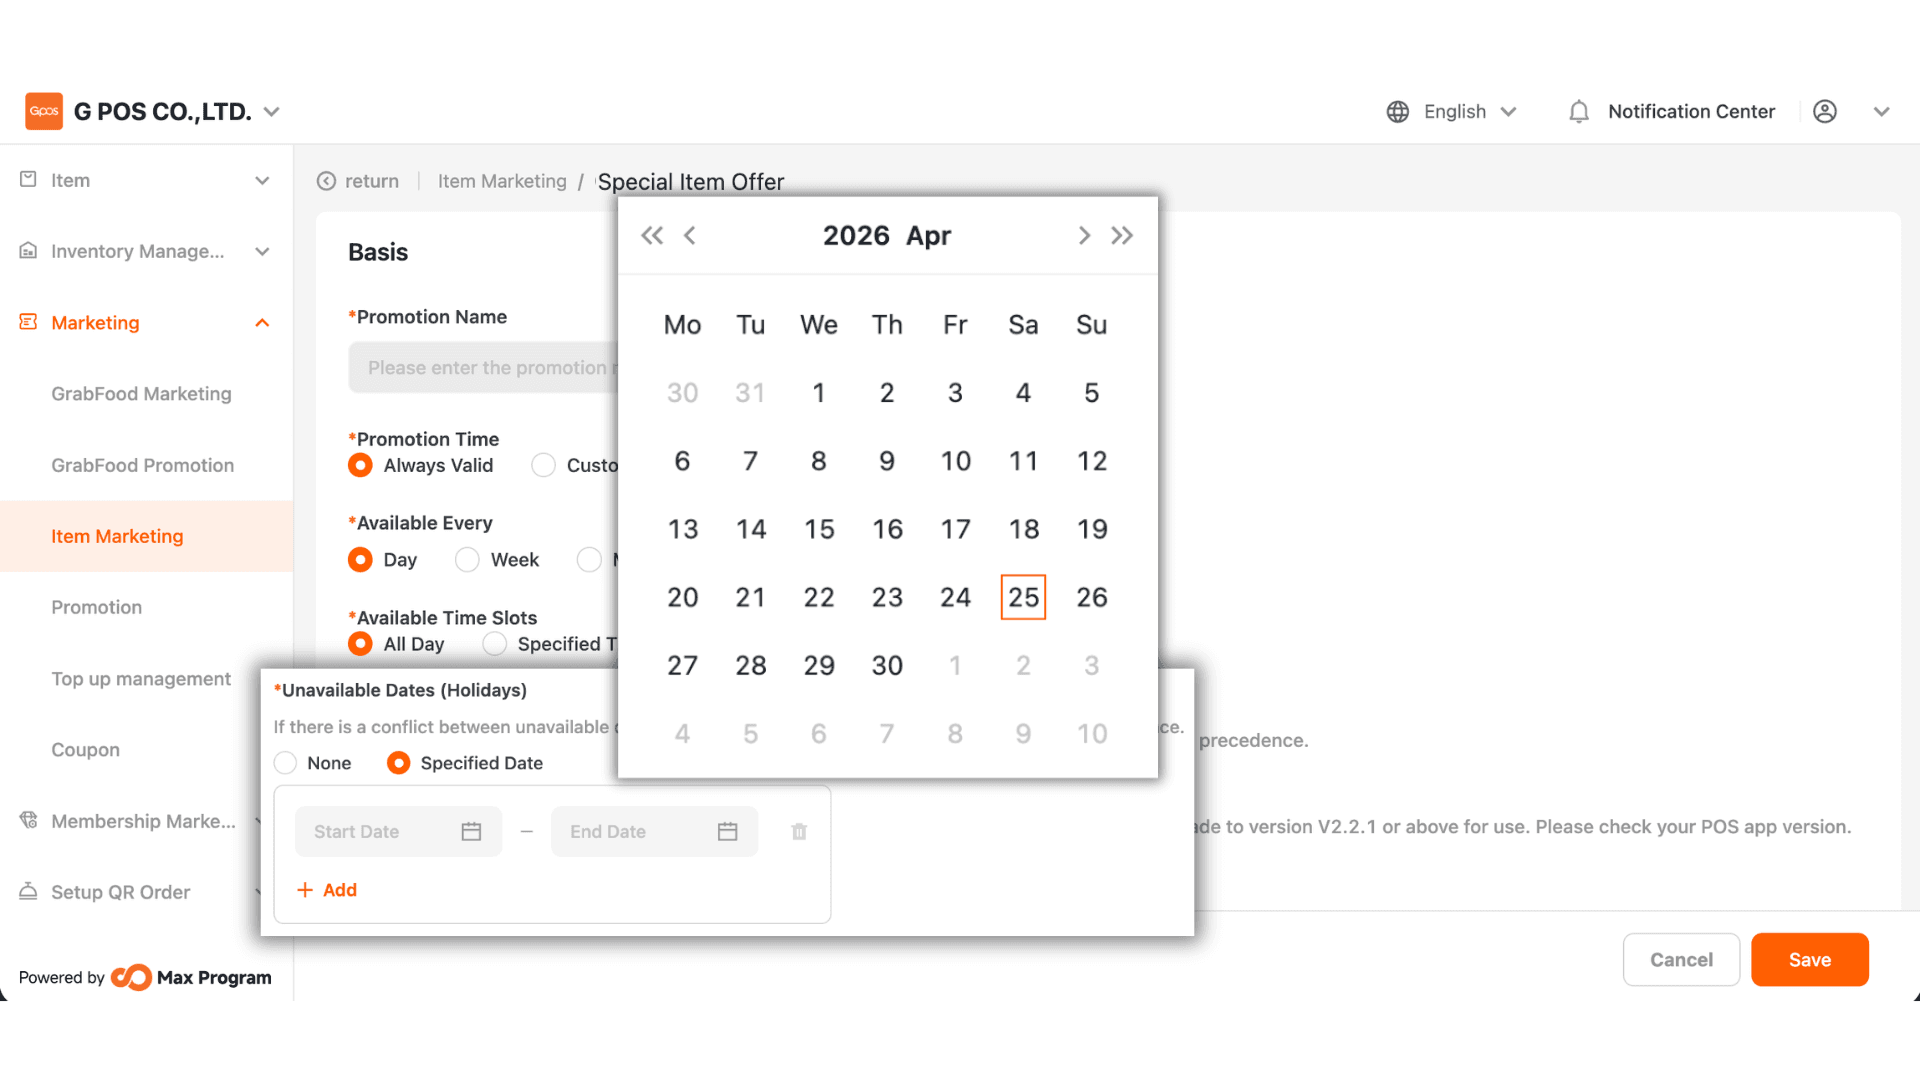
4.You can configure the date range using 2 options
- Always Valid - The discount can be used continuously with no start or end date.
- Custom Time - Set the start date and end date for the discount.
Example : Valid from 1 Oct 2025 – 31 Oct 2025
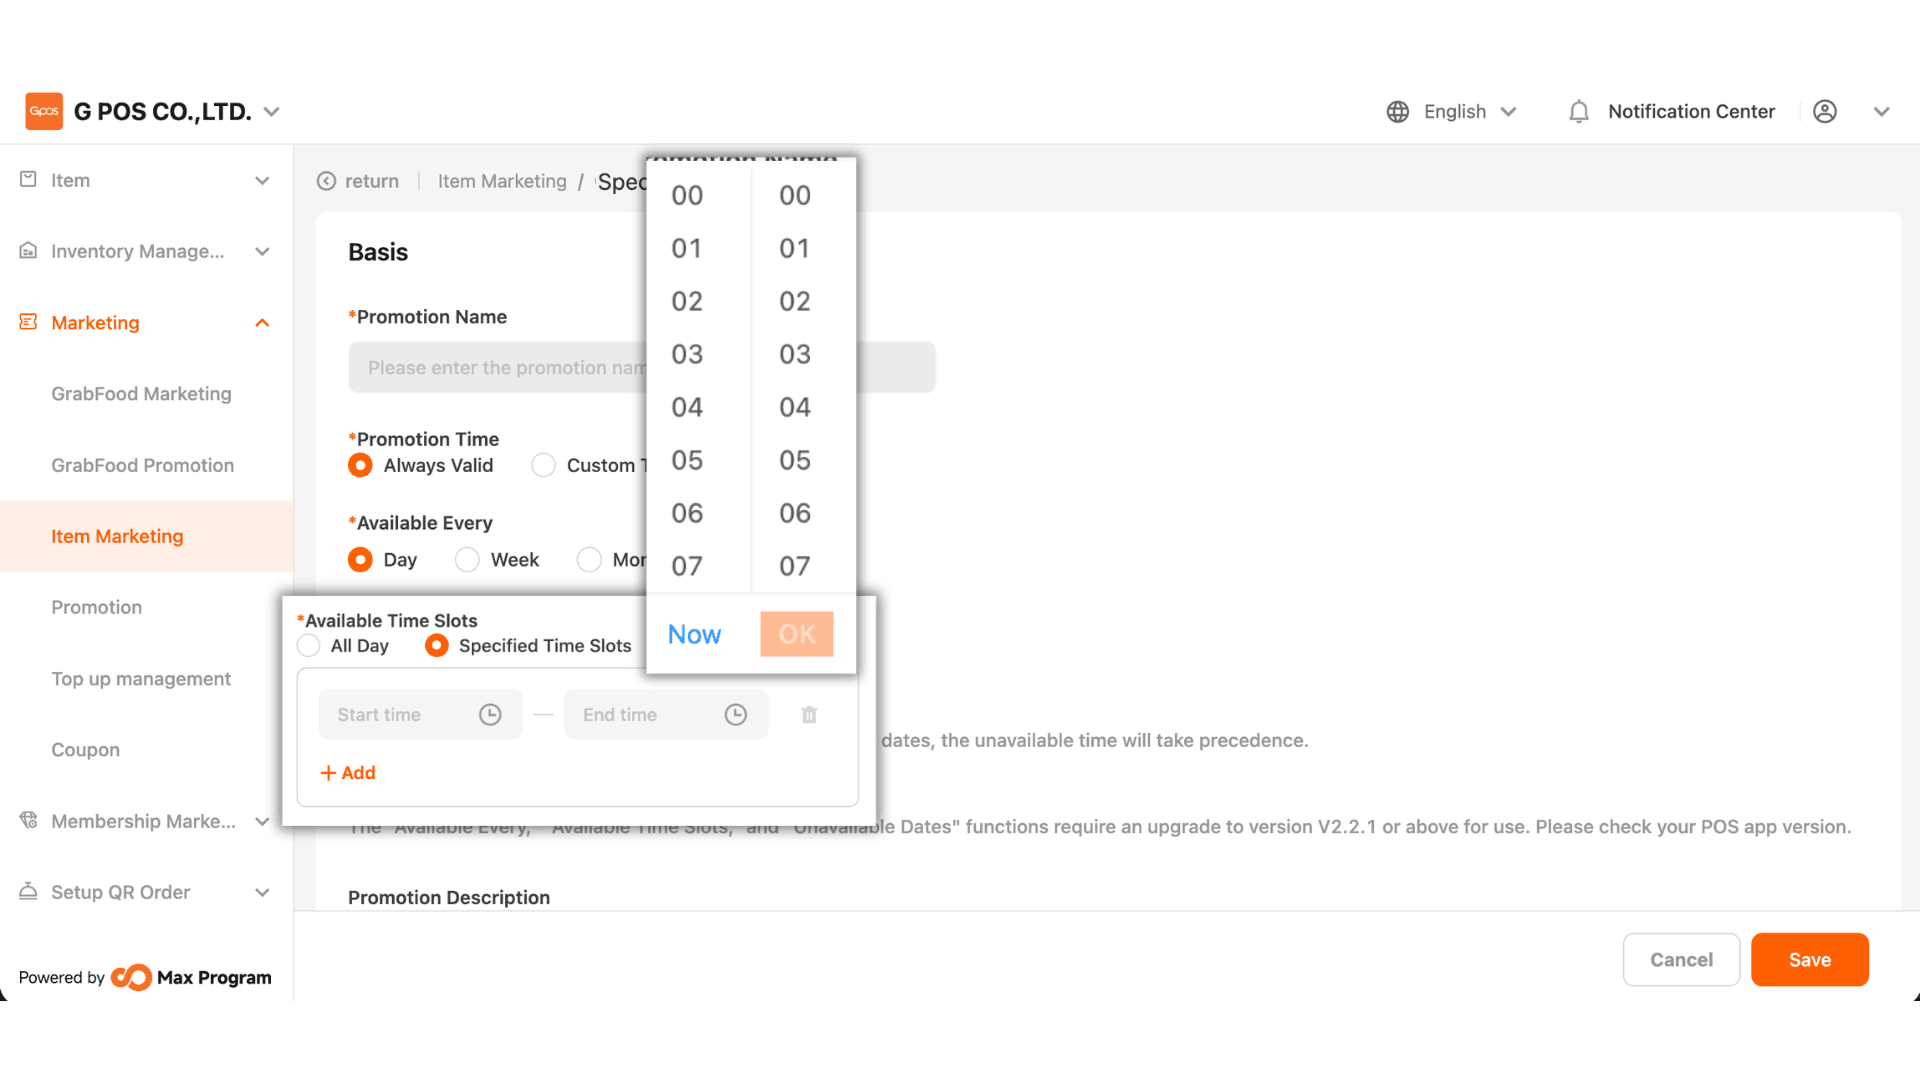
5. You can choose recurring usage in 3 formats
- Day - Usable every day.
- Week - Select one or more days from Monday to Sunday.
Example : Select “Sunday” The discount applies only on Sundays each week.
- Month - Select any date between the 1st–31st.
Example : Select “1st” The discount applies on the 1st of every month.

6. You can choose
- All Day - The discount can be used for the entire day.
- Specified Time Slots - Specify Start Time – End Time, up to 5 time periods.
Example : Valid between 18:00 – 19:00
7. You may choose
- None - The discount can be used every day as configured.
- Specified Date - Specify Start Date – End Date that should be excluded (up to 5 periods).
Example : October discount applies every day except 10 Oct.
Note : The “Available Every,” “Available Time Slots,” and “Unavailable Dates (Holidays)” features are available from version 2.2.1 onward.
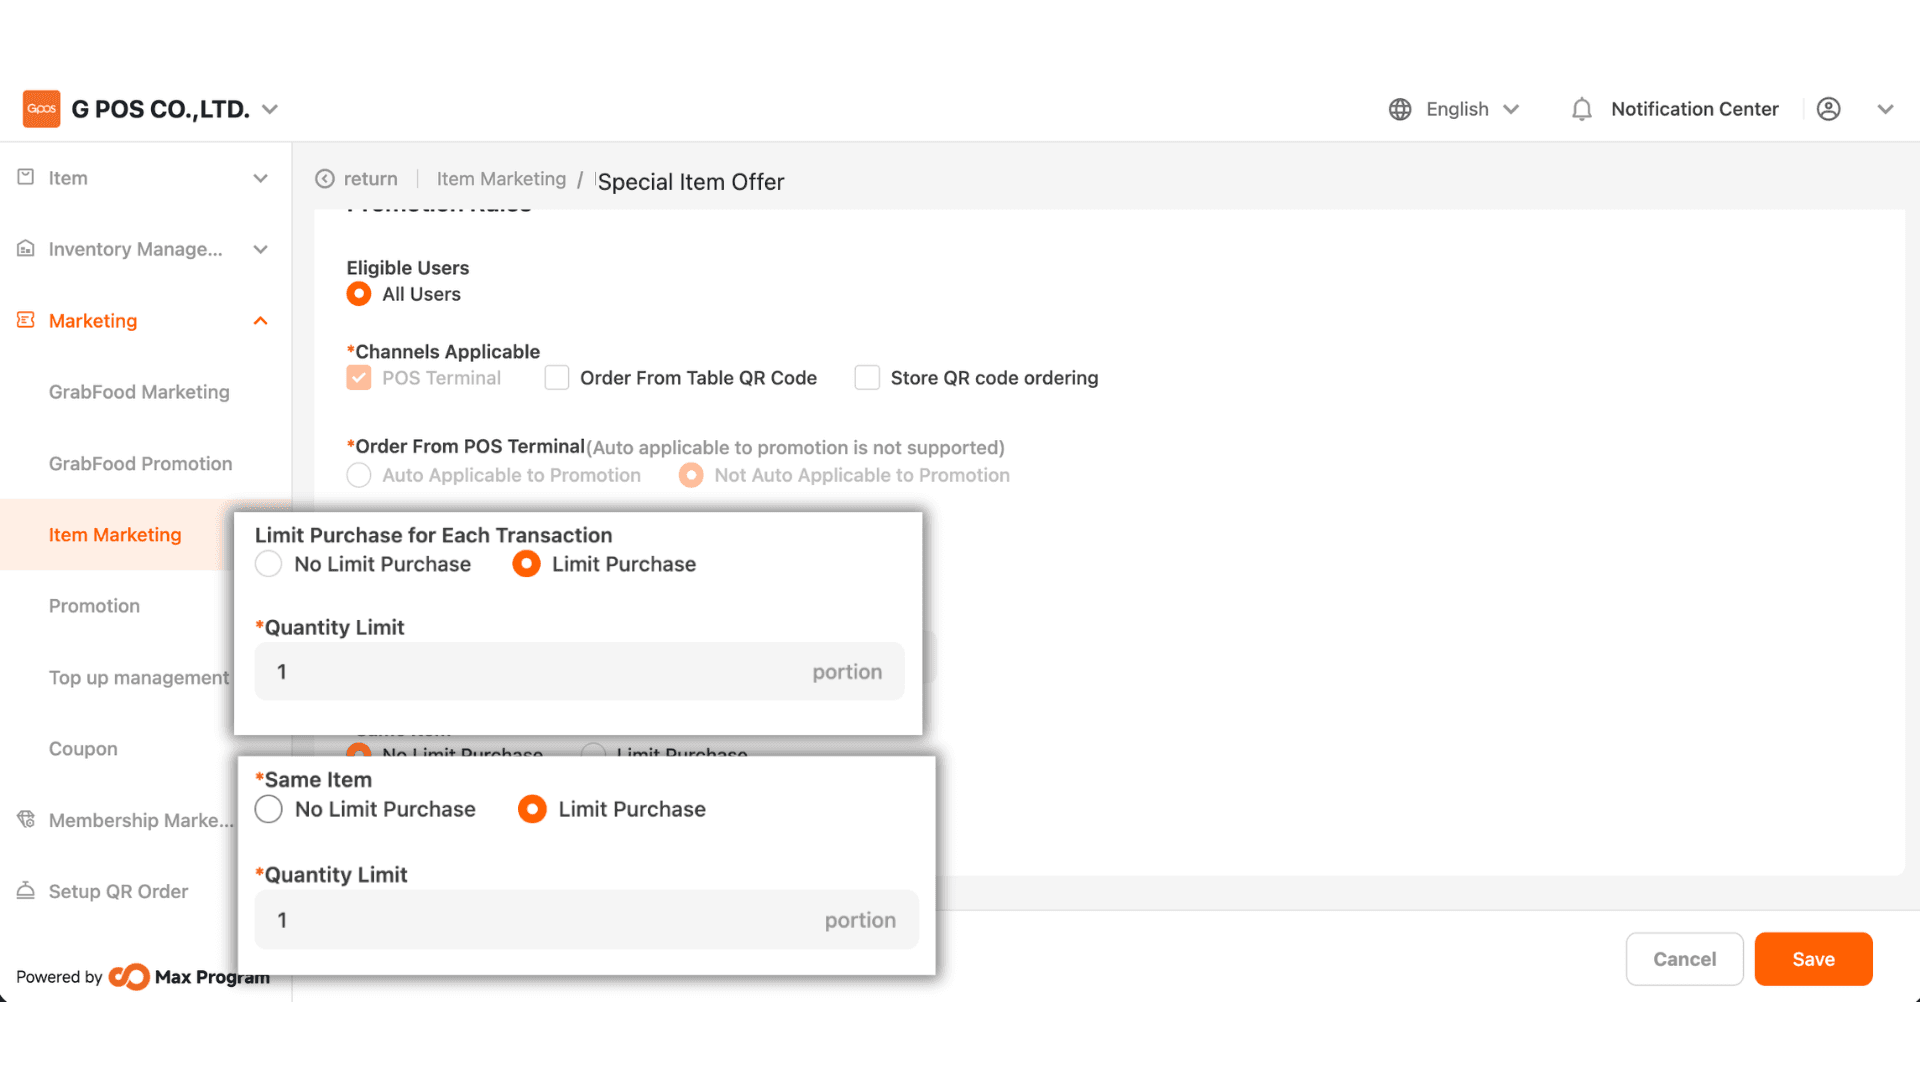
8. Limit Purchase for Each Transaction
- No Limit Purchase - No restriction on how many items per bill can use the discount.
- Limit Purchase - Specify the maximum number of items per bill eligible for the discount.
Same Item - No Limit Purchase - The discount can be applied to any quantity of the same item.
- Limit Purchase - Specify the maximum quantity of the same item allowed to use the discount per bill.
9. Click “+ Add” to start selecting items.
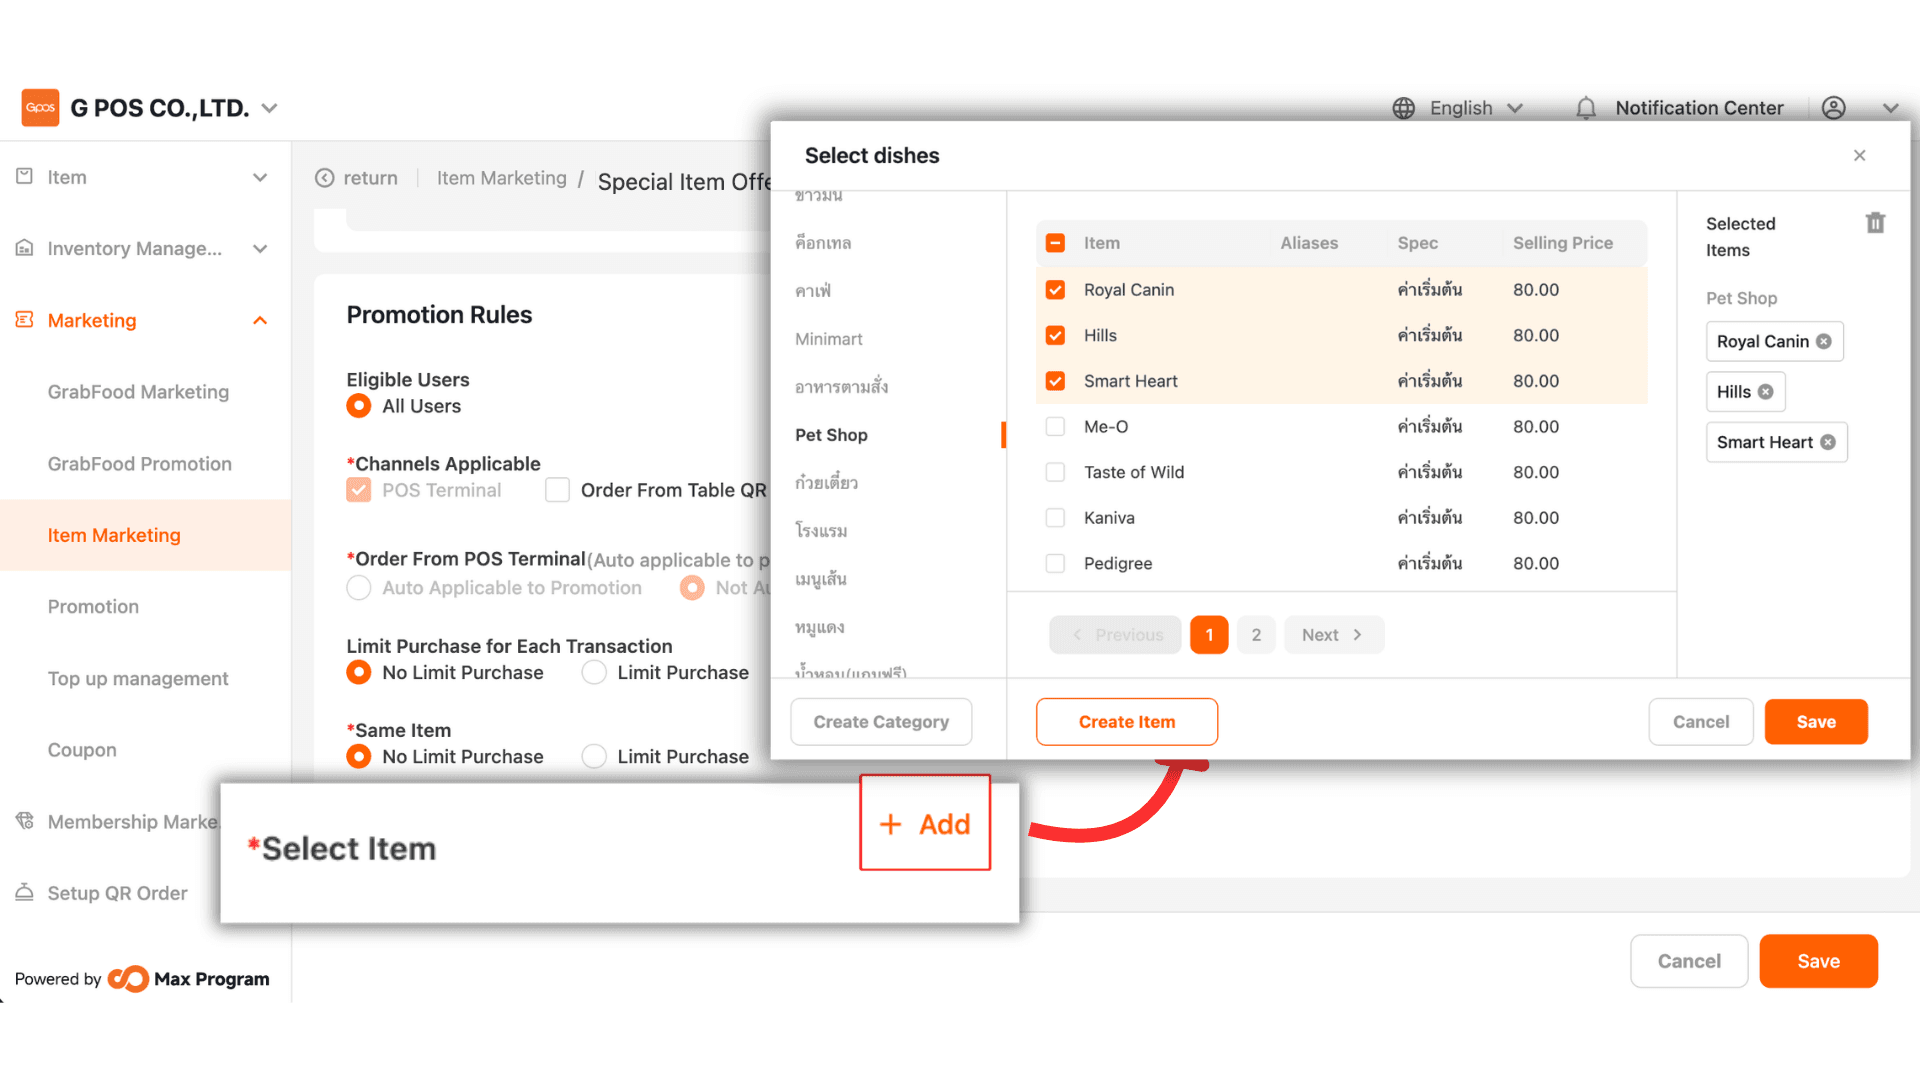
13. Enter the discounted item price for each item. To remove an item, click “Delete.”
Once all prices are set, click “Save” to create the discount.
