Add GrabFood Items via GPOS (Back Office)
2026-04-09 15:03
This manual provides detailed instructions on how to add products, set prices, manage option groups, and sync menus from the GPOS Back Office system to GrabFood accurately and completely.
1. Log in to the Back Office
Go to login.gpos.co.th , enter your email and password, and click Log In. Once logged in, go to the Item menu and select GrabFood Menu.
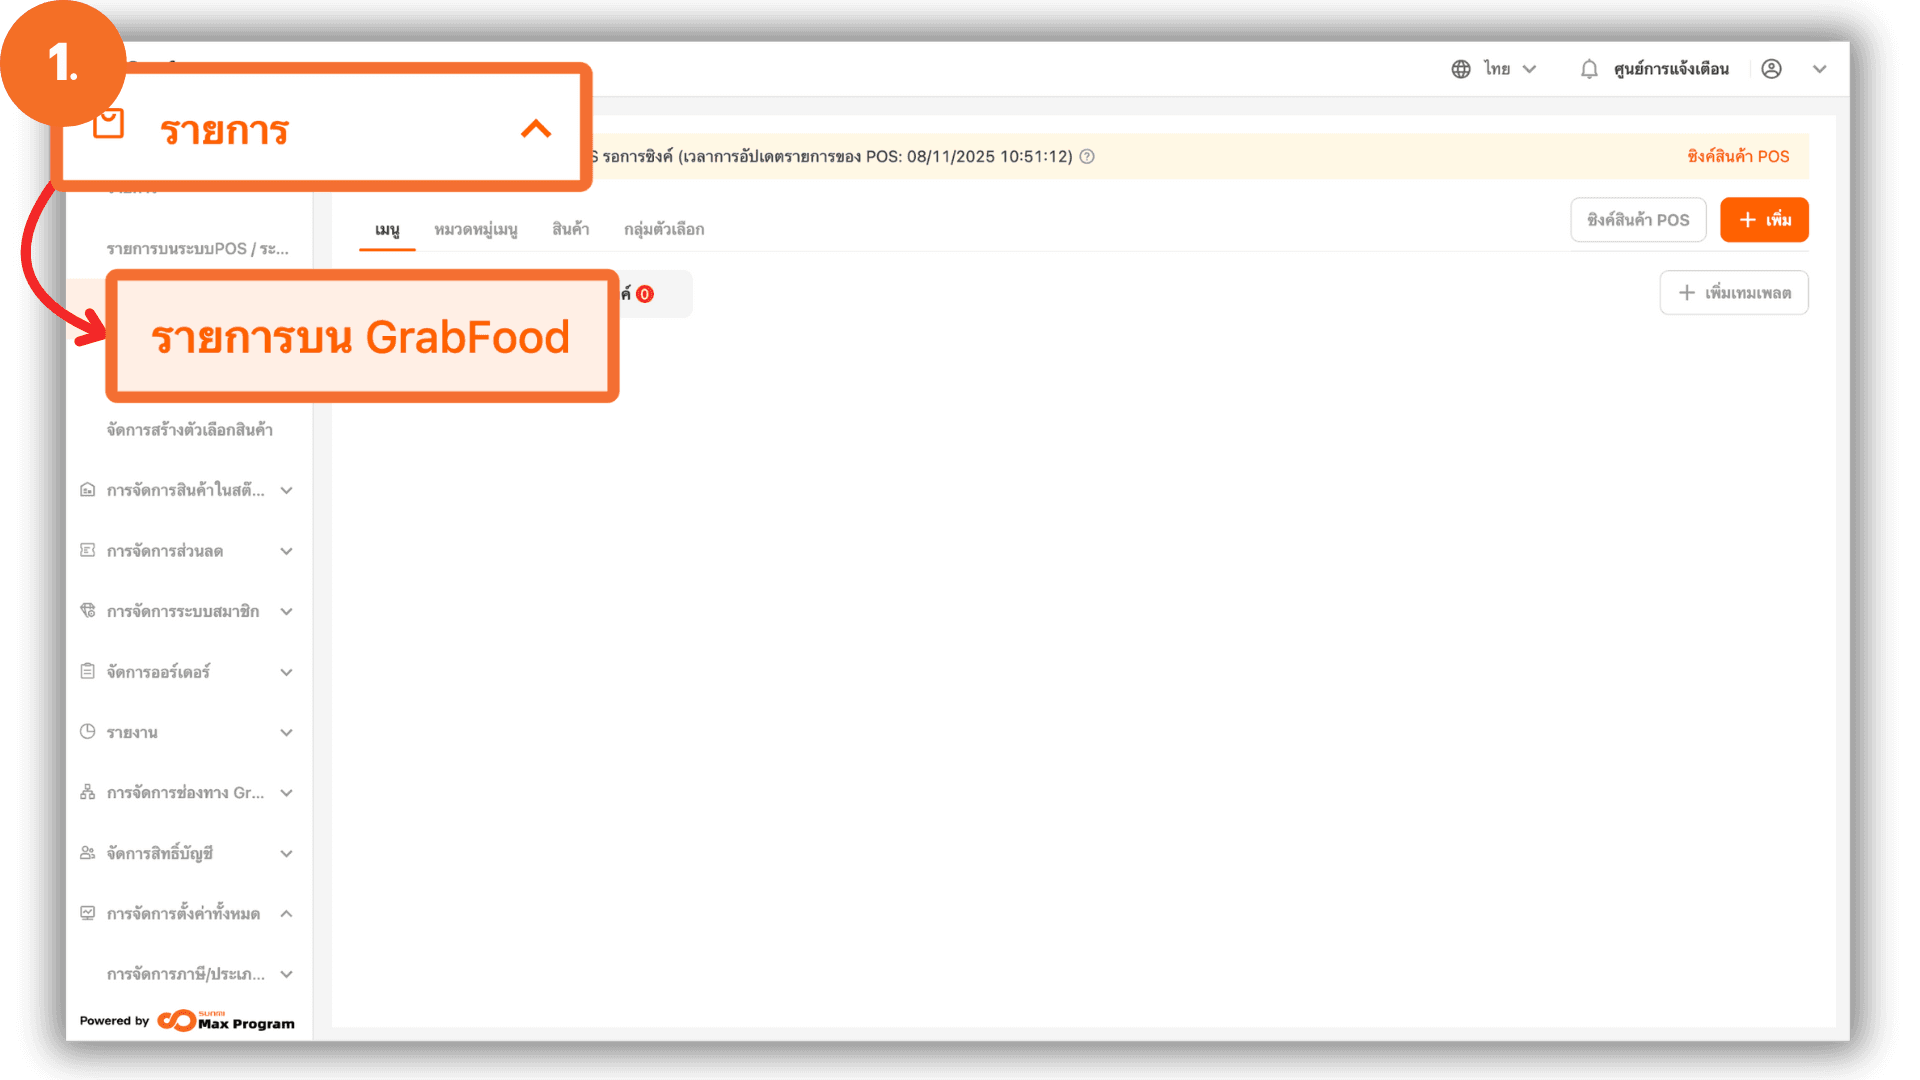
2. Accessing the GrabFood Item List
After selecting GrabFood Menu, click “+ Add” to choose products to sell on GrabFood.
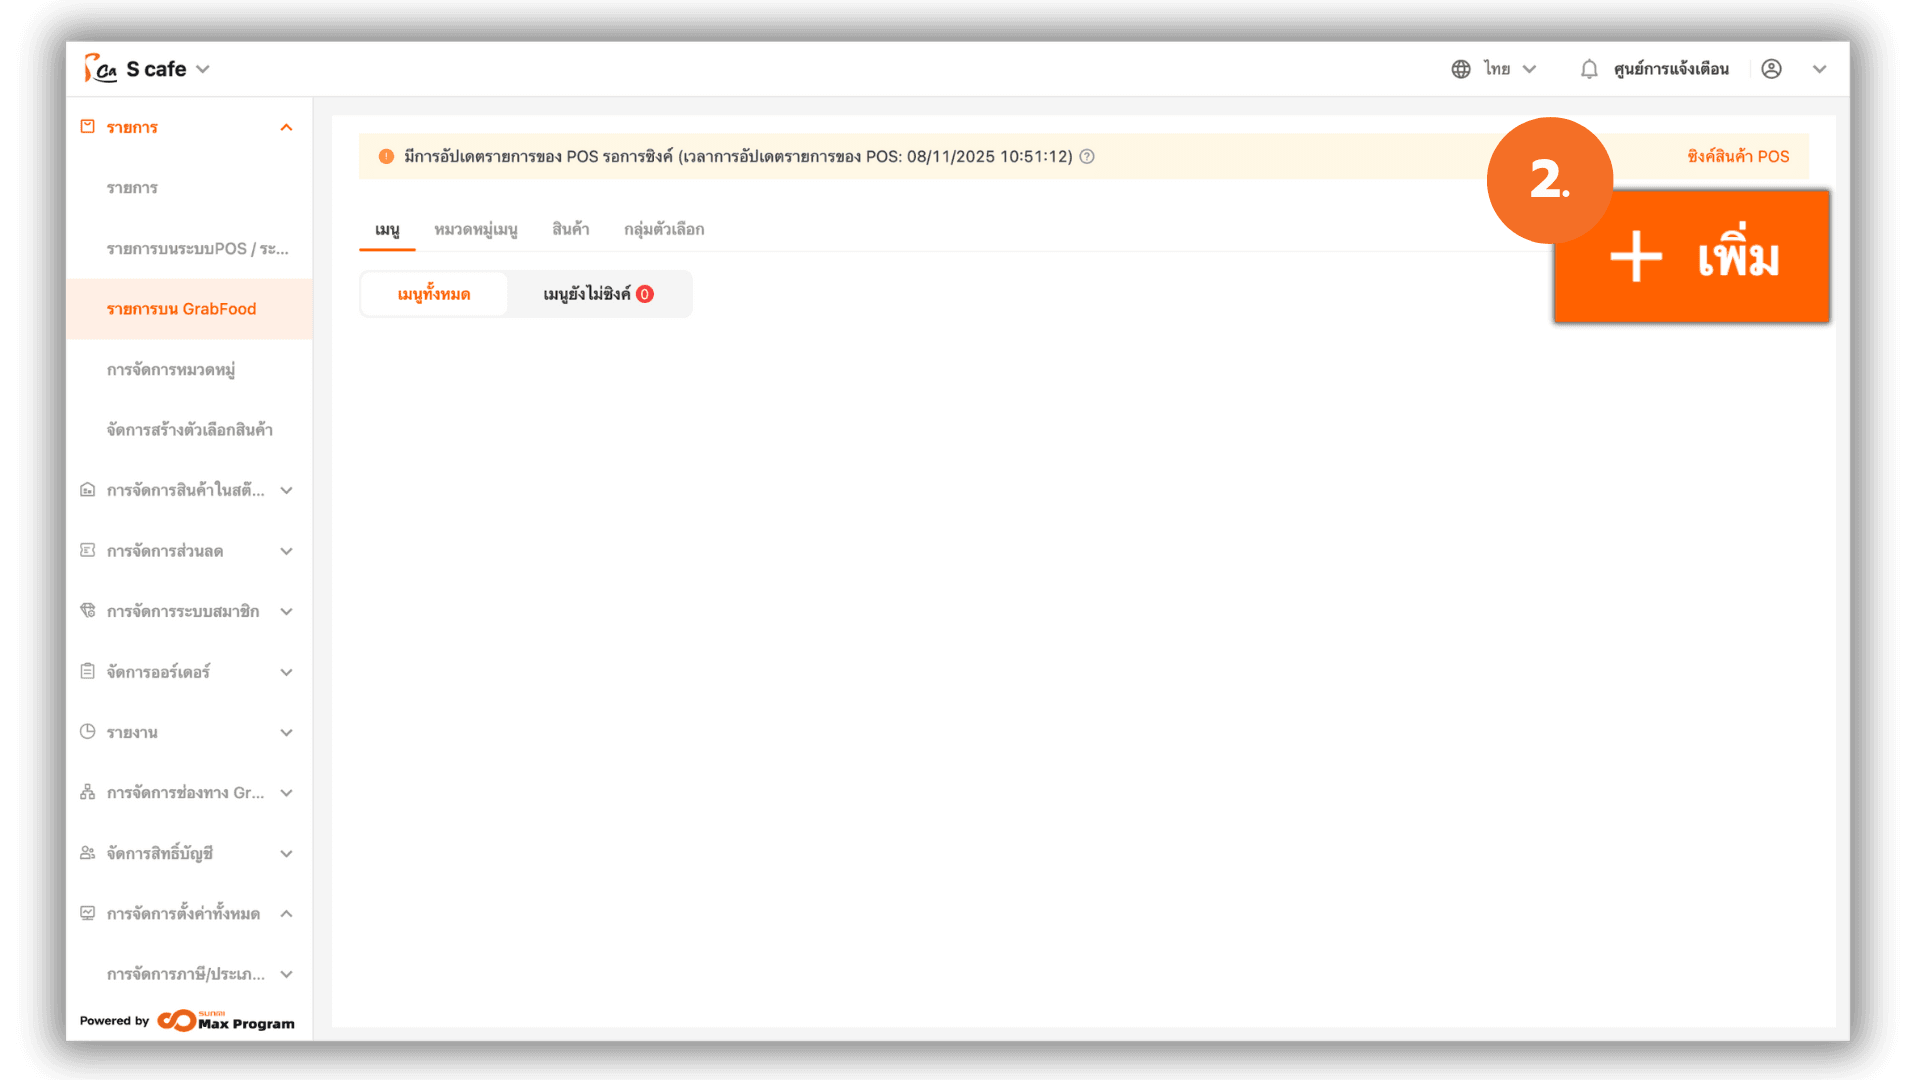
3. Adding Products to GrabFood
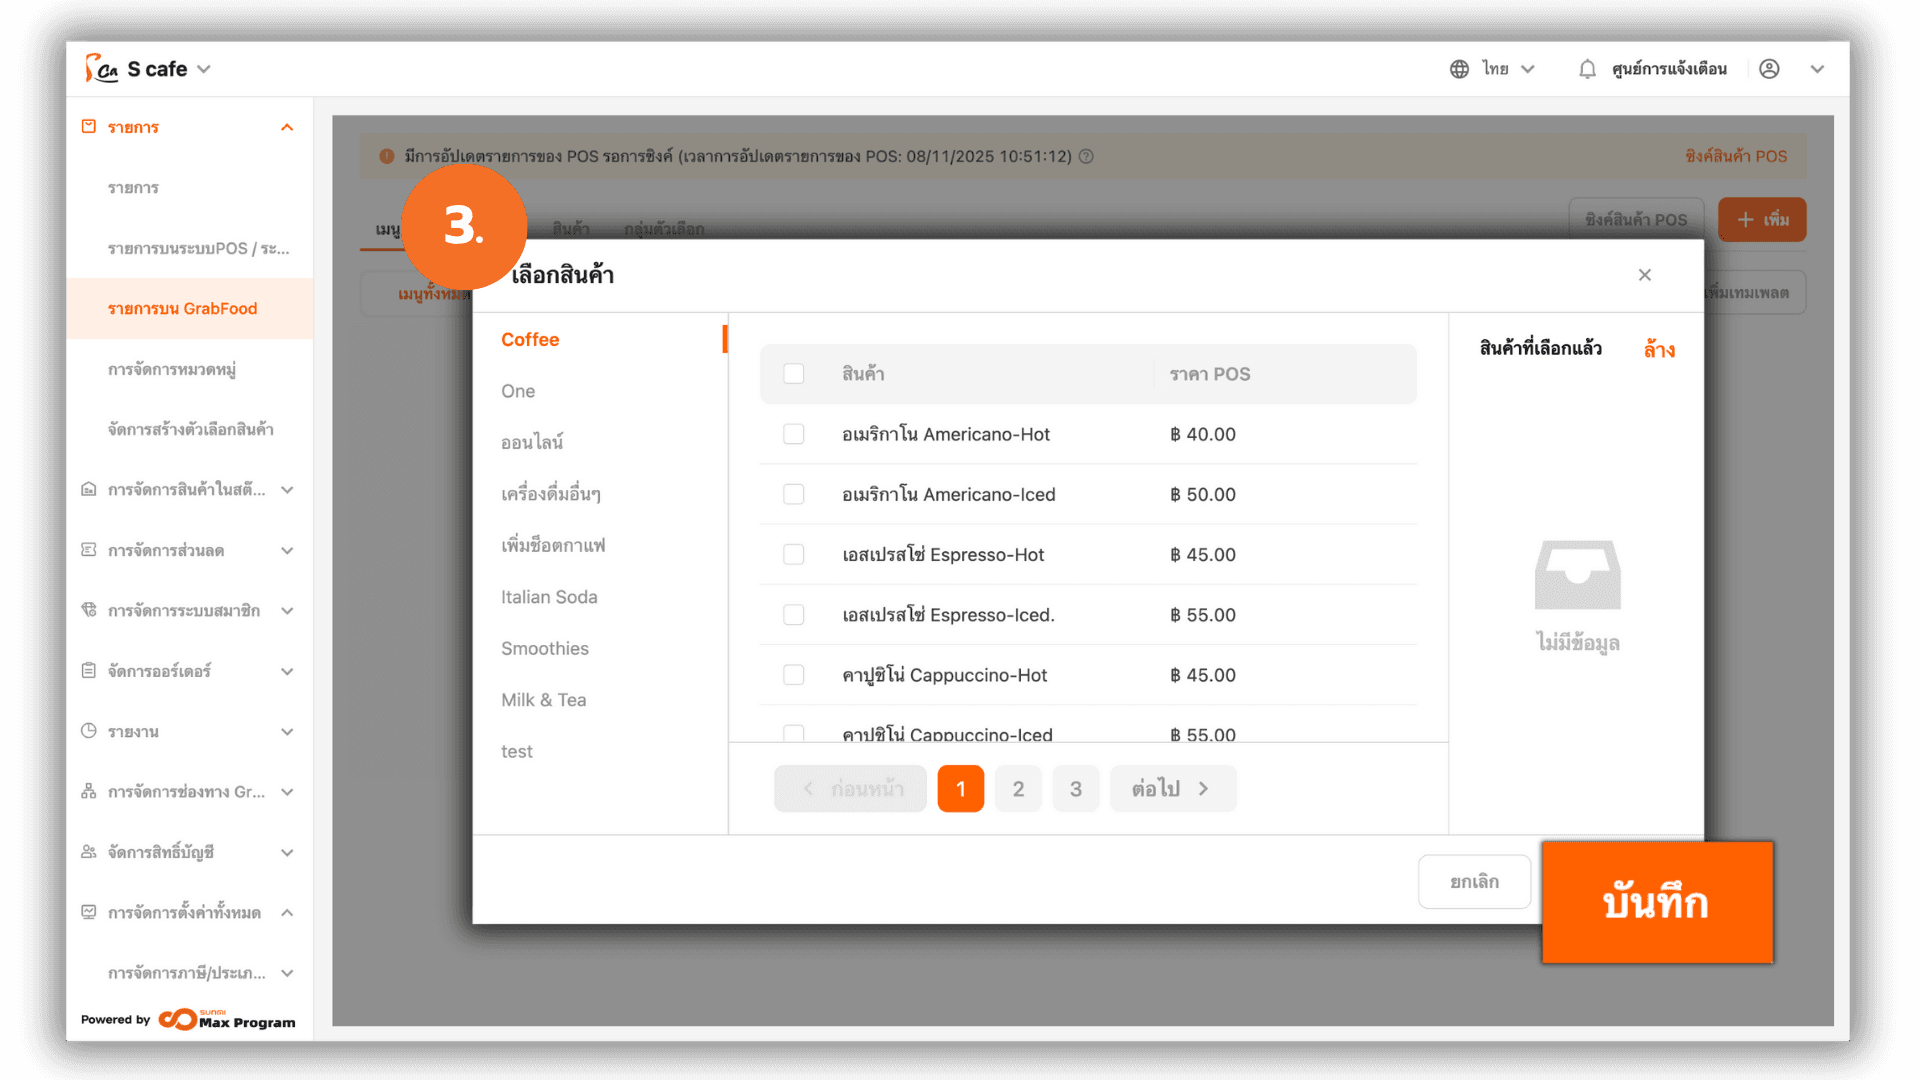
After clicking “+ Add,” the system will display all products available in your store. Check the box next to the items you want to sell on GrabFood. Click “Save” to confirm your selection.
Note : Please ensure that product items have stock quantities properly specified, product images are in a 1:1 aspect ratio, and the image file size does not exceed 1.5 MB.
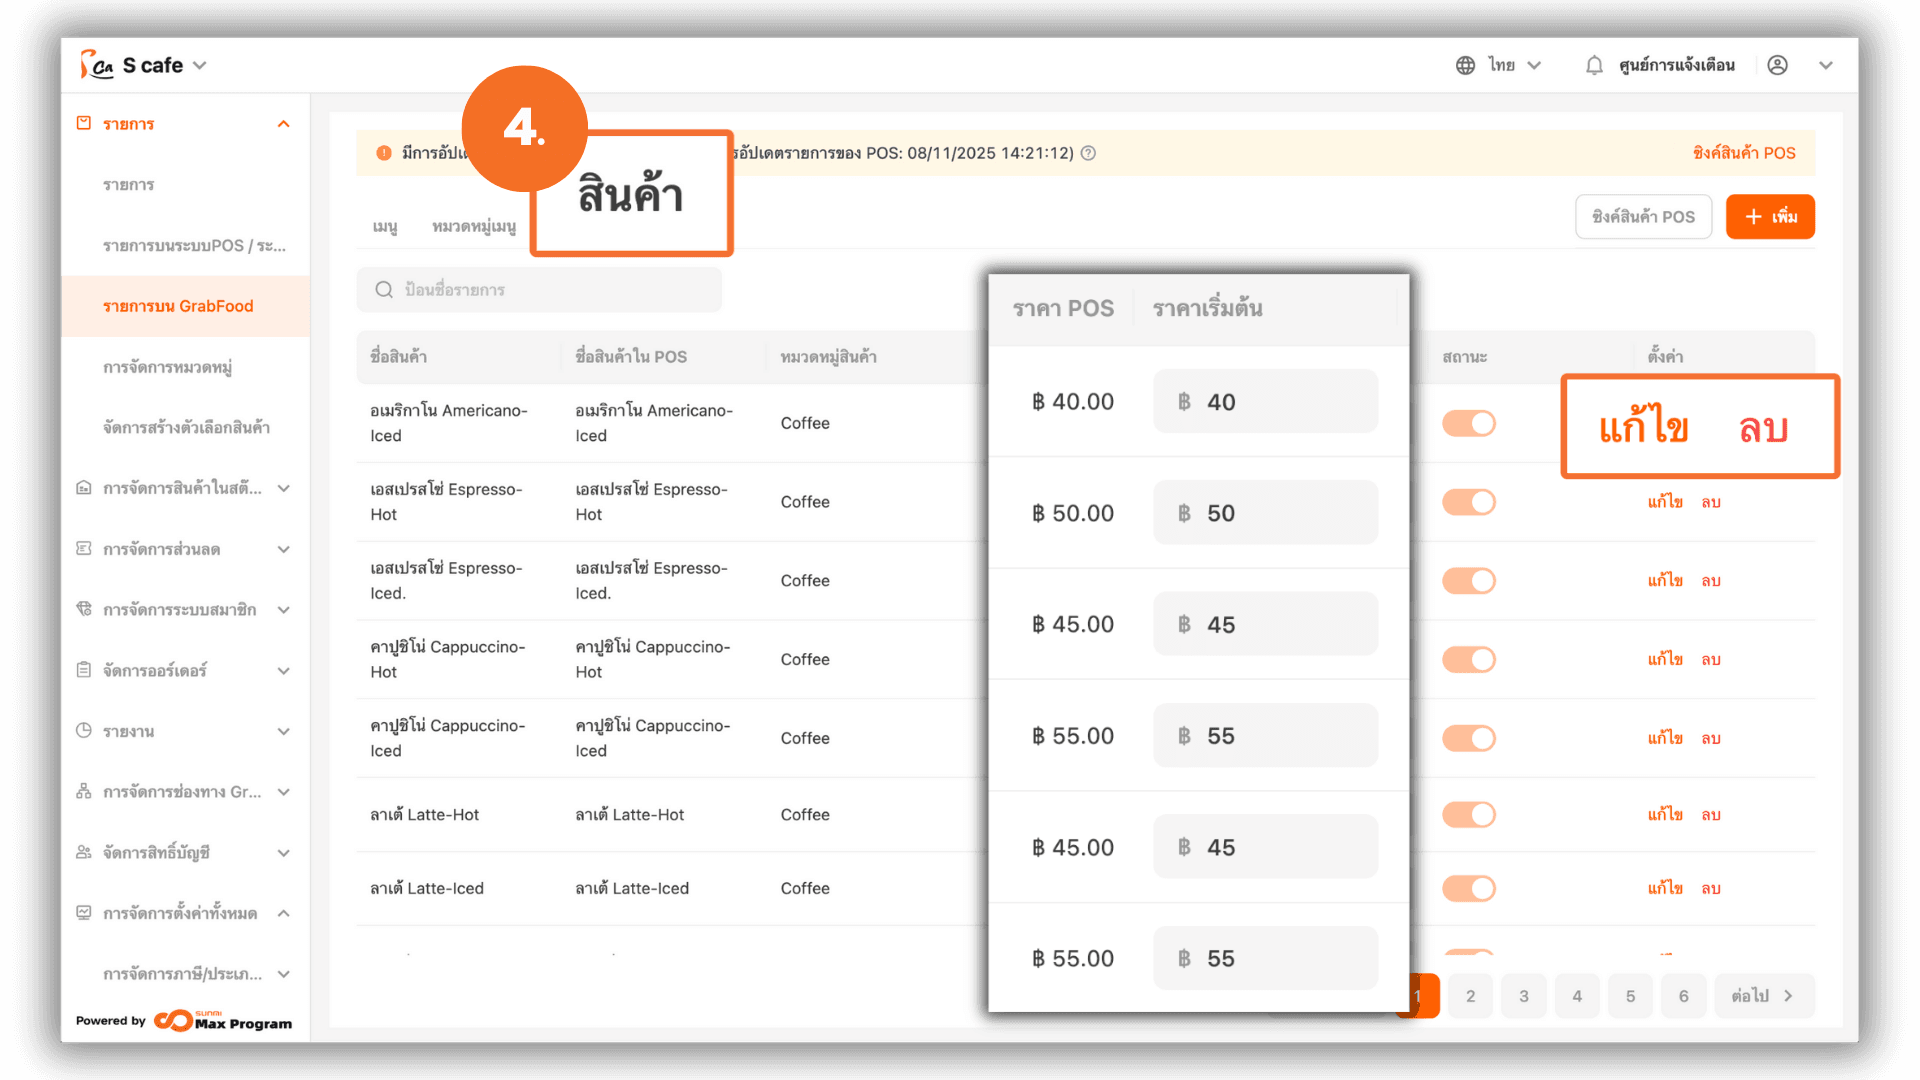
4. Setting Product Prices on GrabFood
Go to the “Item” menu at the top to view items you’ve added. You can manage each item by “Edit” or “Delete”.
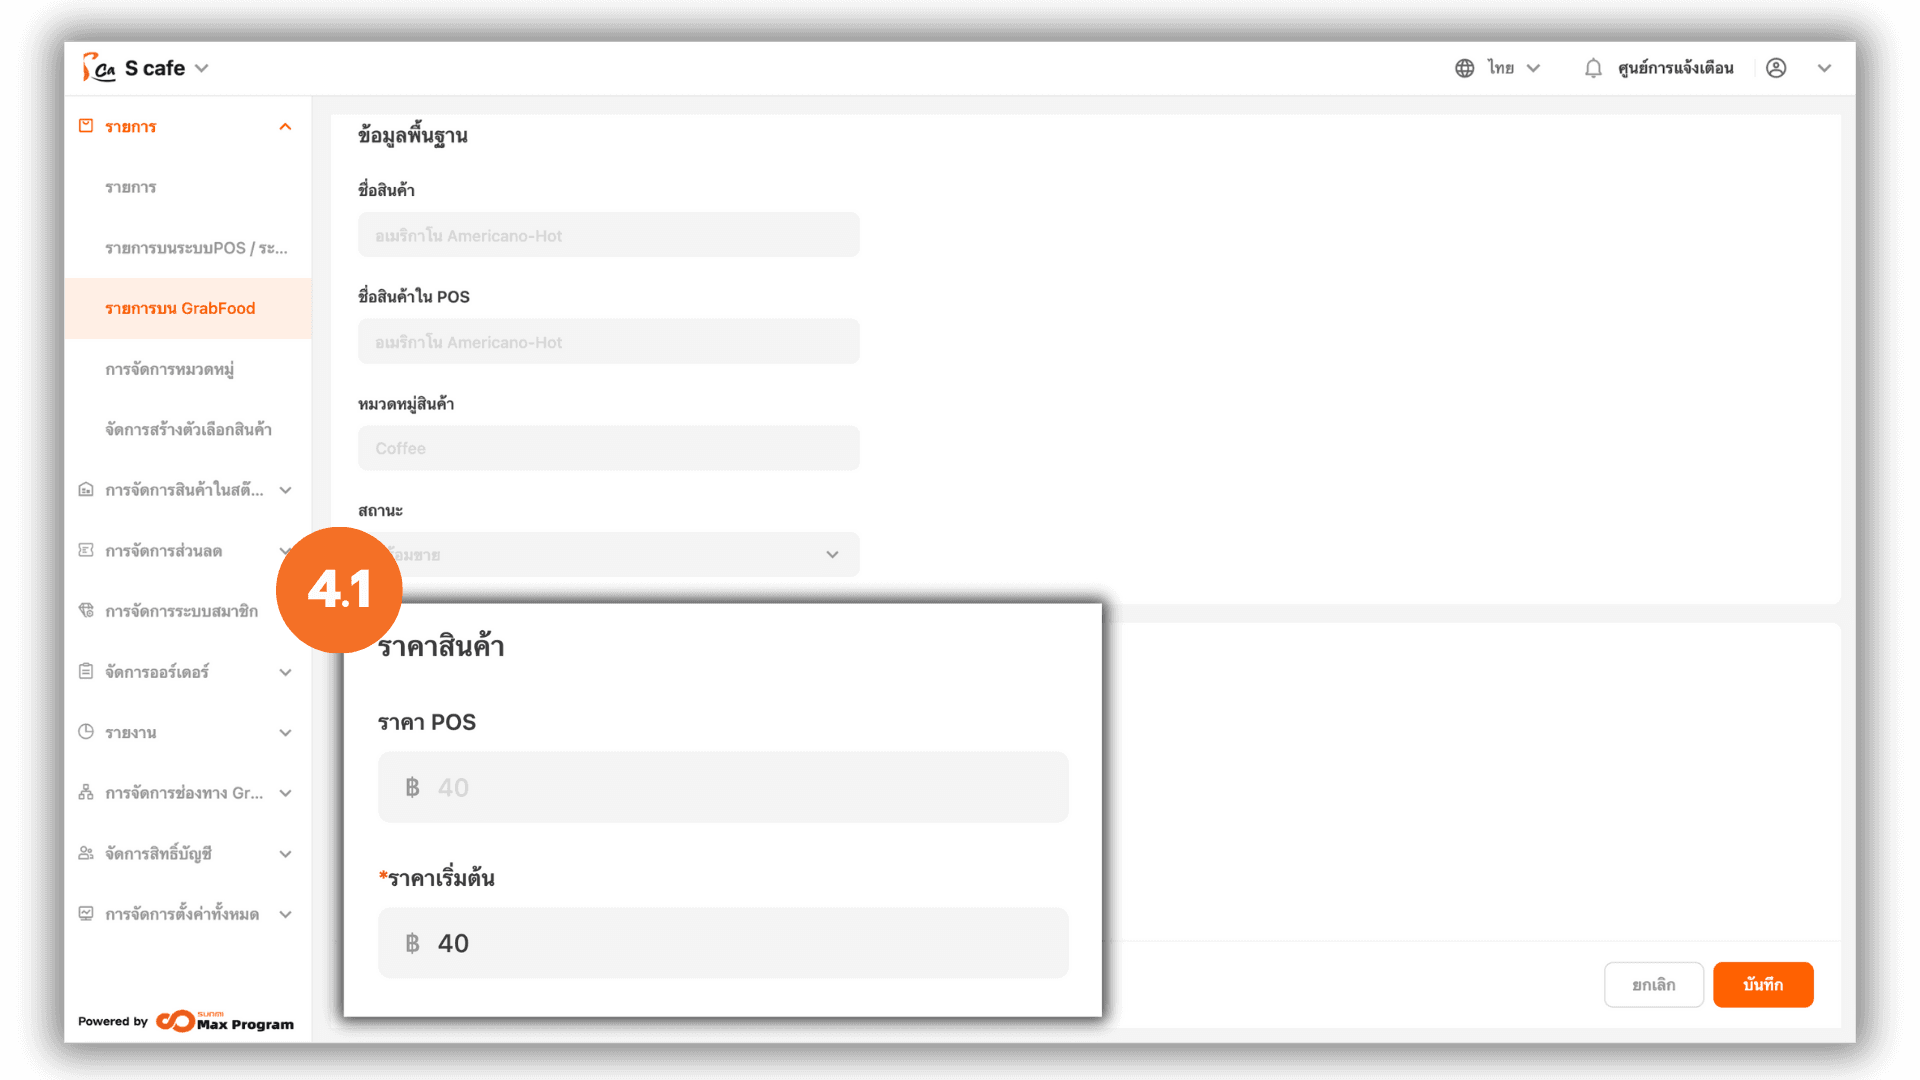
4.1 Editing Prices
The system will show product details. Enter the desired “Default Price (GrabFood)”.
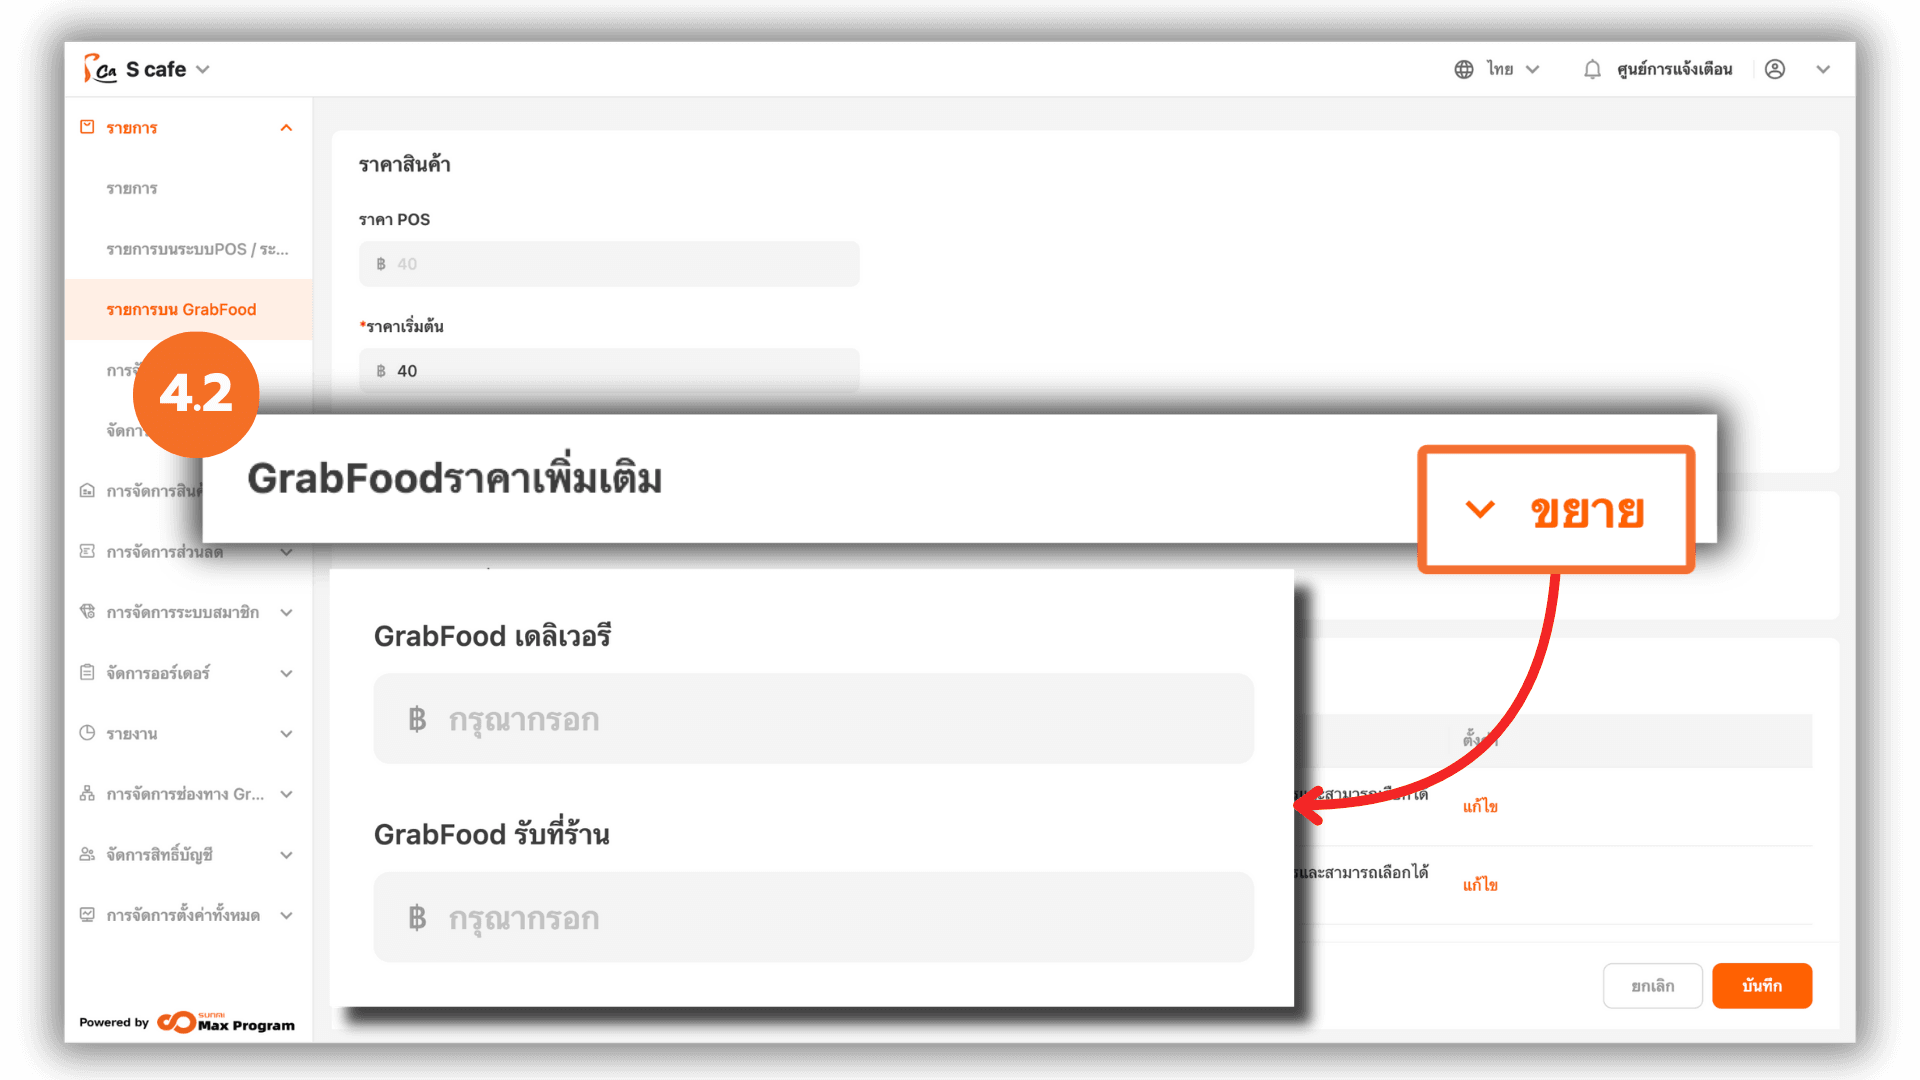
4.2 Setting Channel-Specific Prices
Click “Collapse” next to GrabFood Additional Price to set prices for each sales channel GrabFood Delivery and GrabFood Pickup
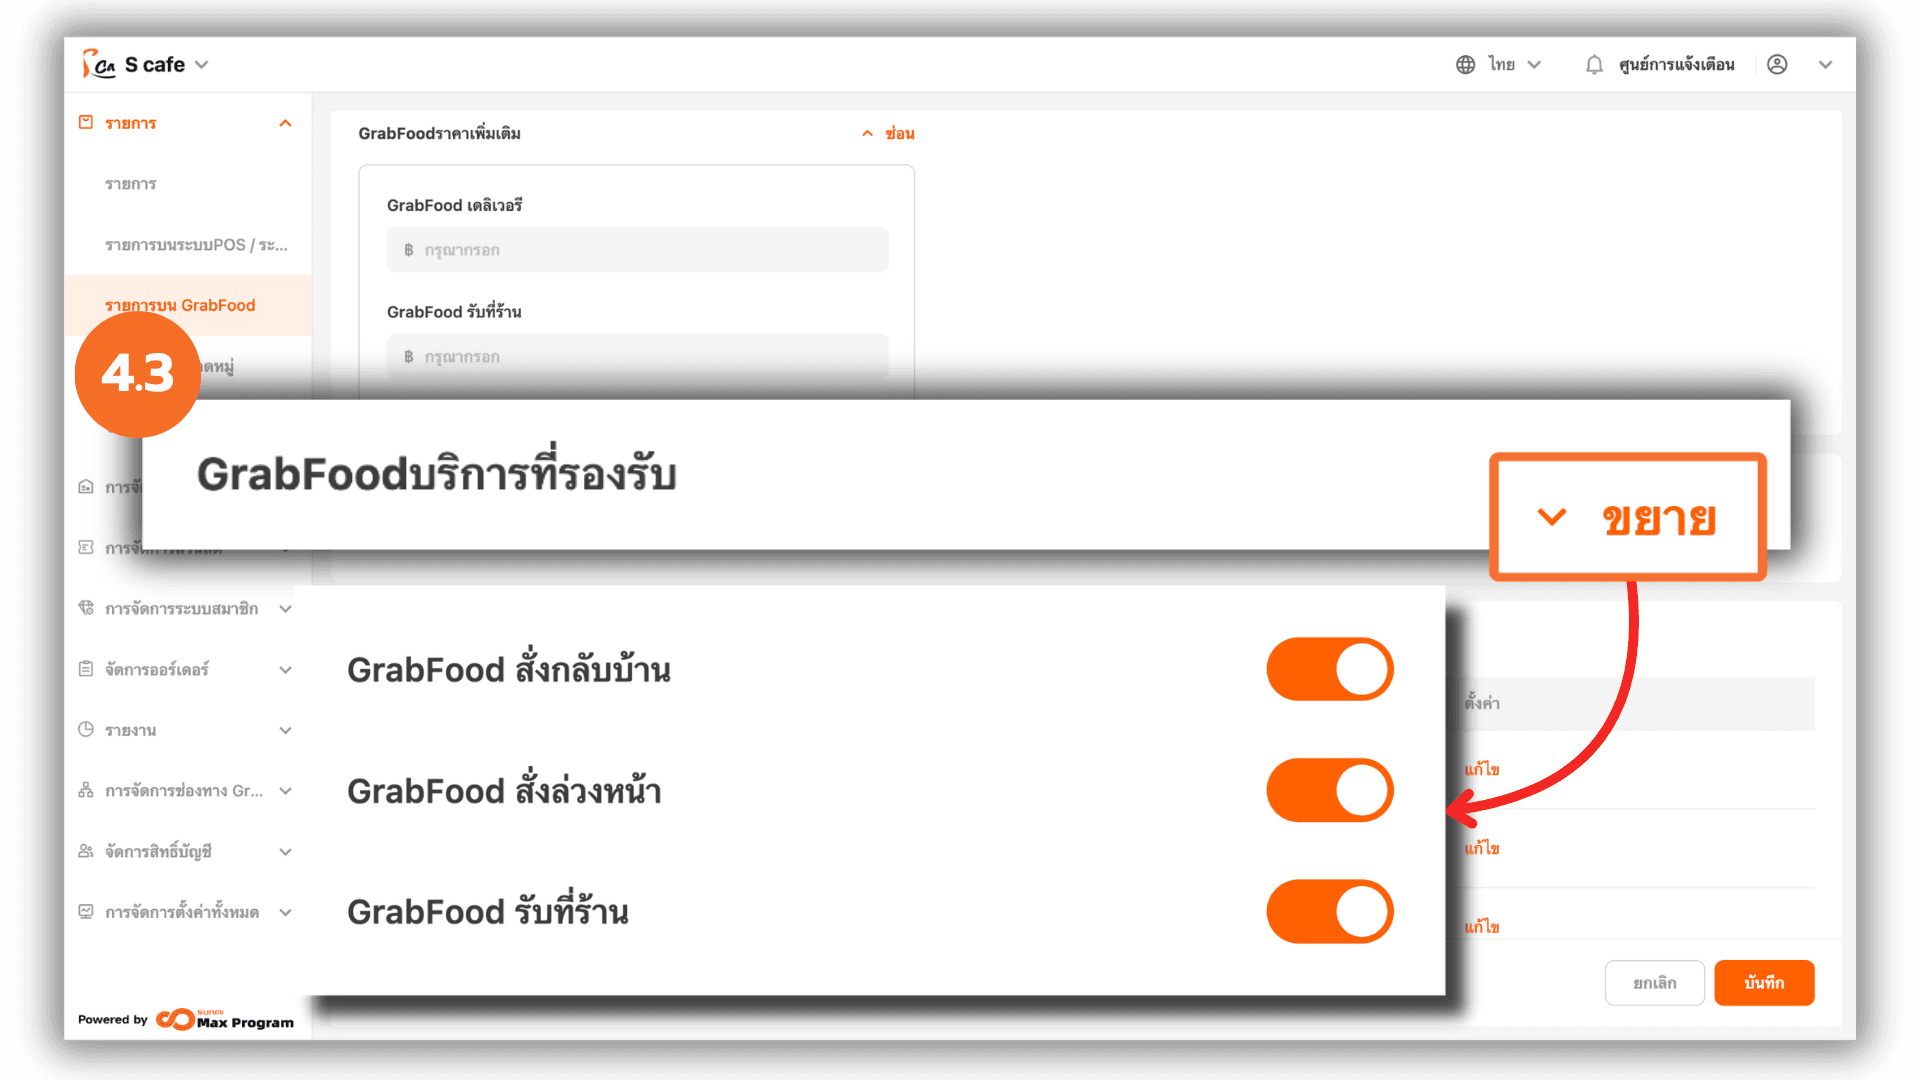
4.3 Enabling or Disabling Sales Channels
Click “Expand” next to GrabFood Supported Services to enable or disable the following channels GrabFoodDelivery Instant , GrabFoodDelivery Reservation and GrabFoodPickup
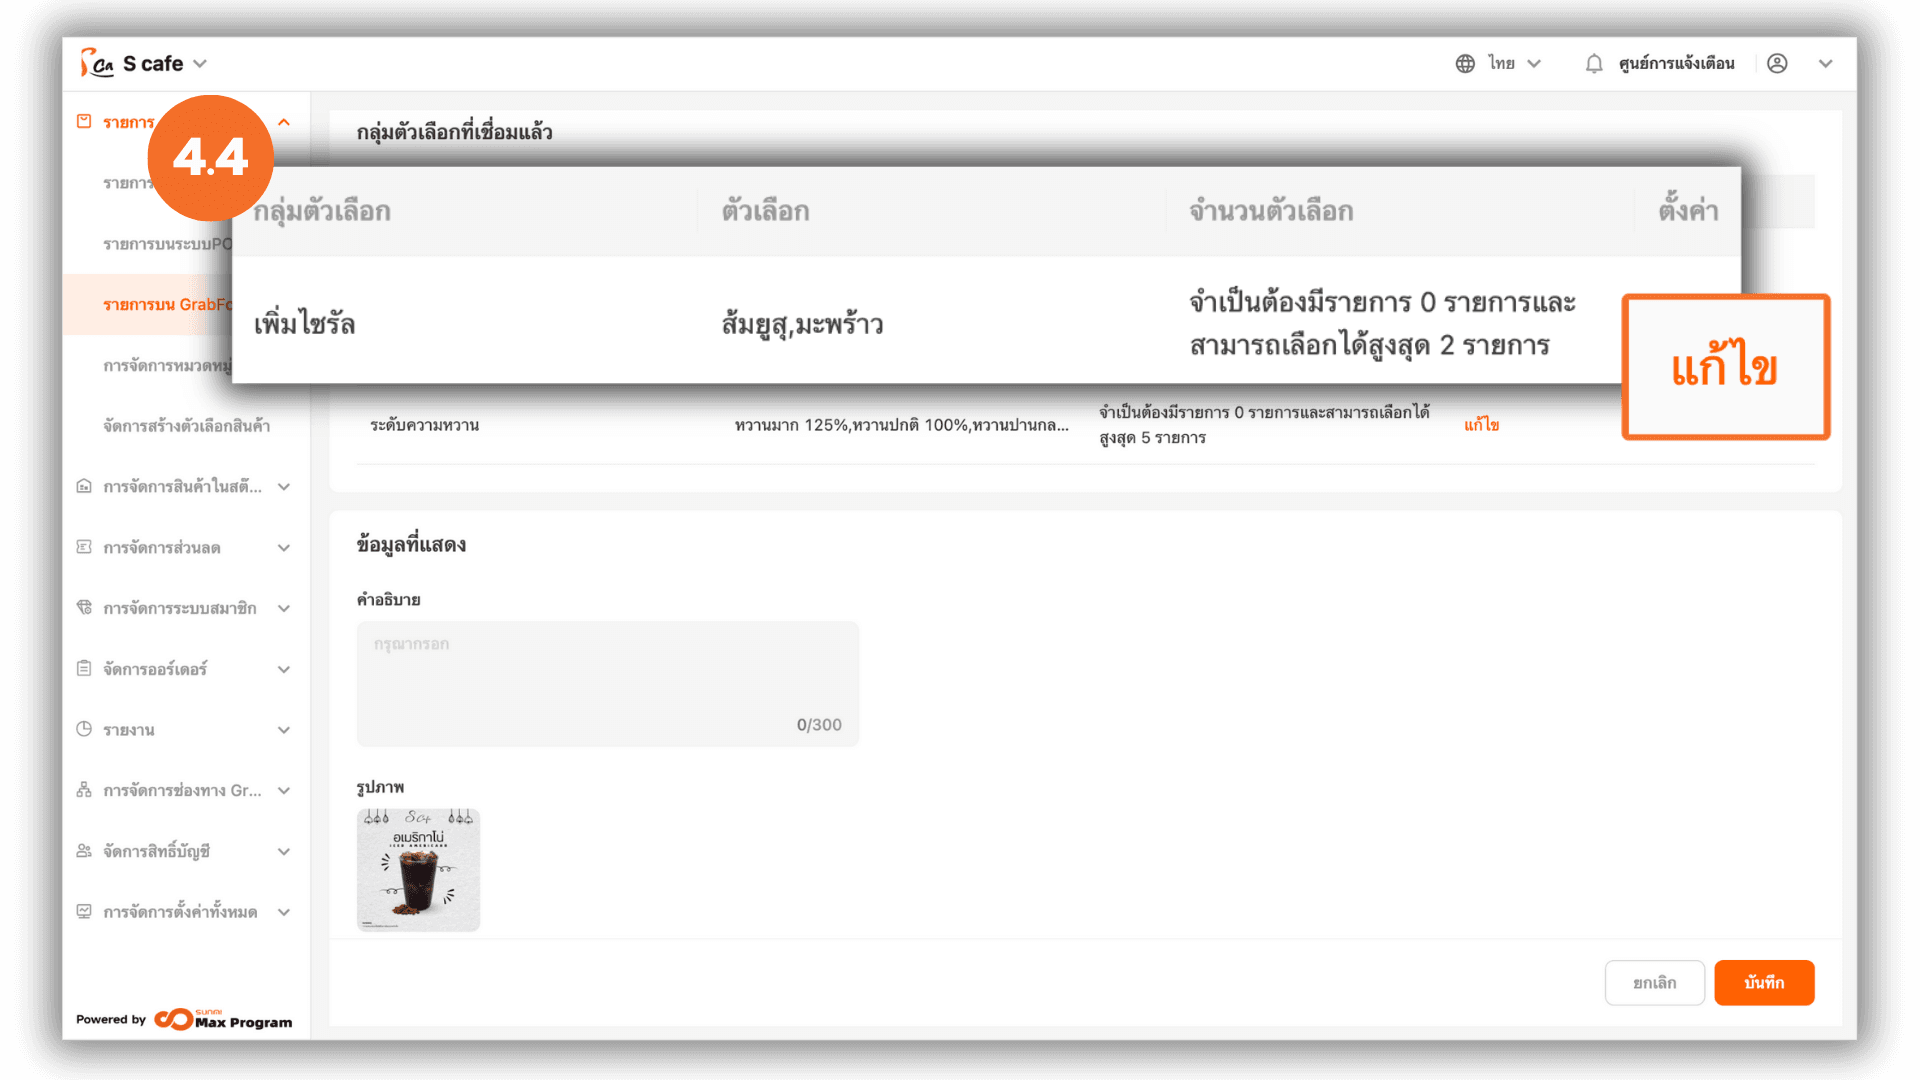
4.4 Managing Linked Option Groups
Scroll down to “Linked Option Groups” and click “Edit” to view option groups connected to the product.
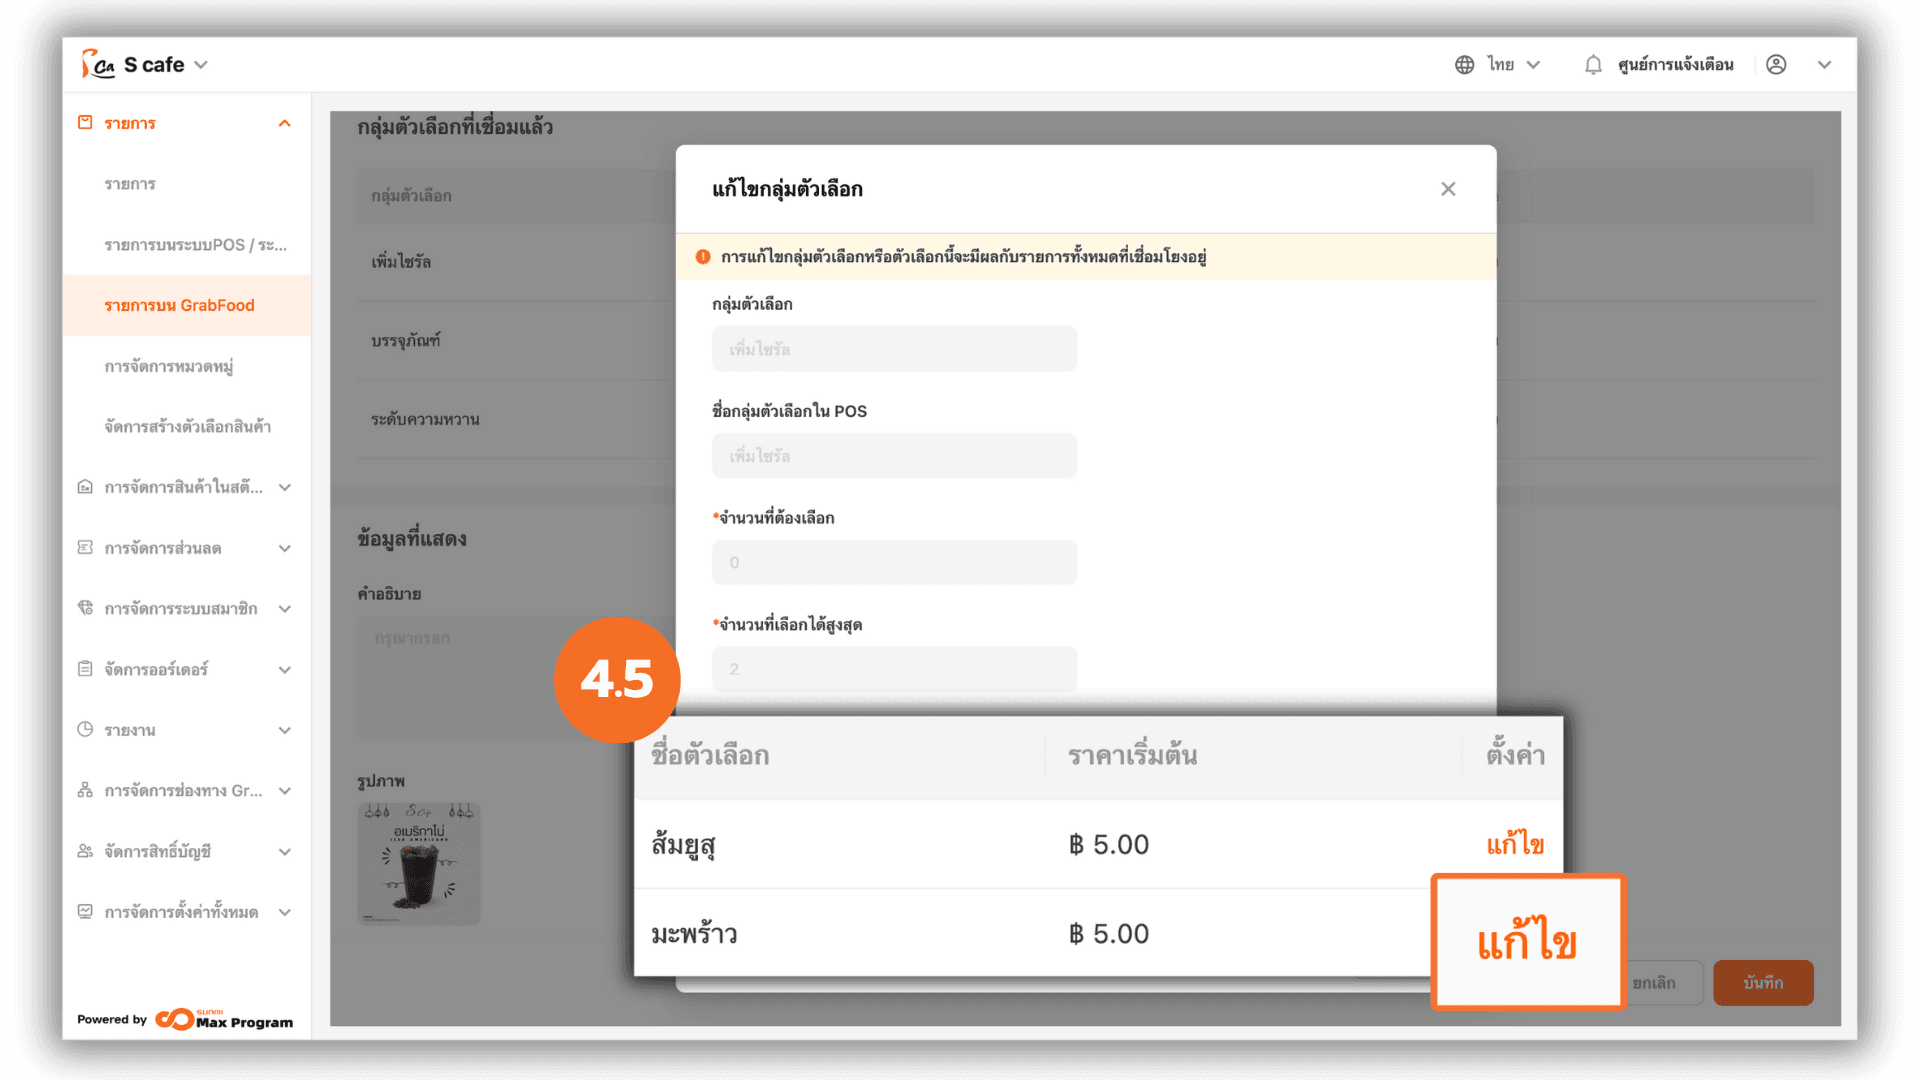
4.5 Editing Options within the Group
The system will display all available options (e.g., Yuzu, Coconut, etc.). Click “Edit” beside the option you wish to modify.
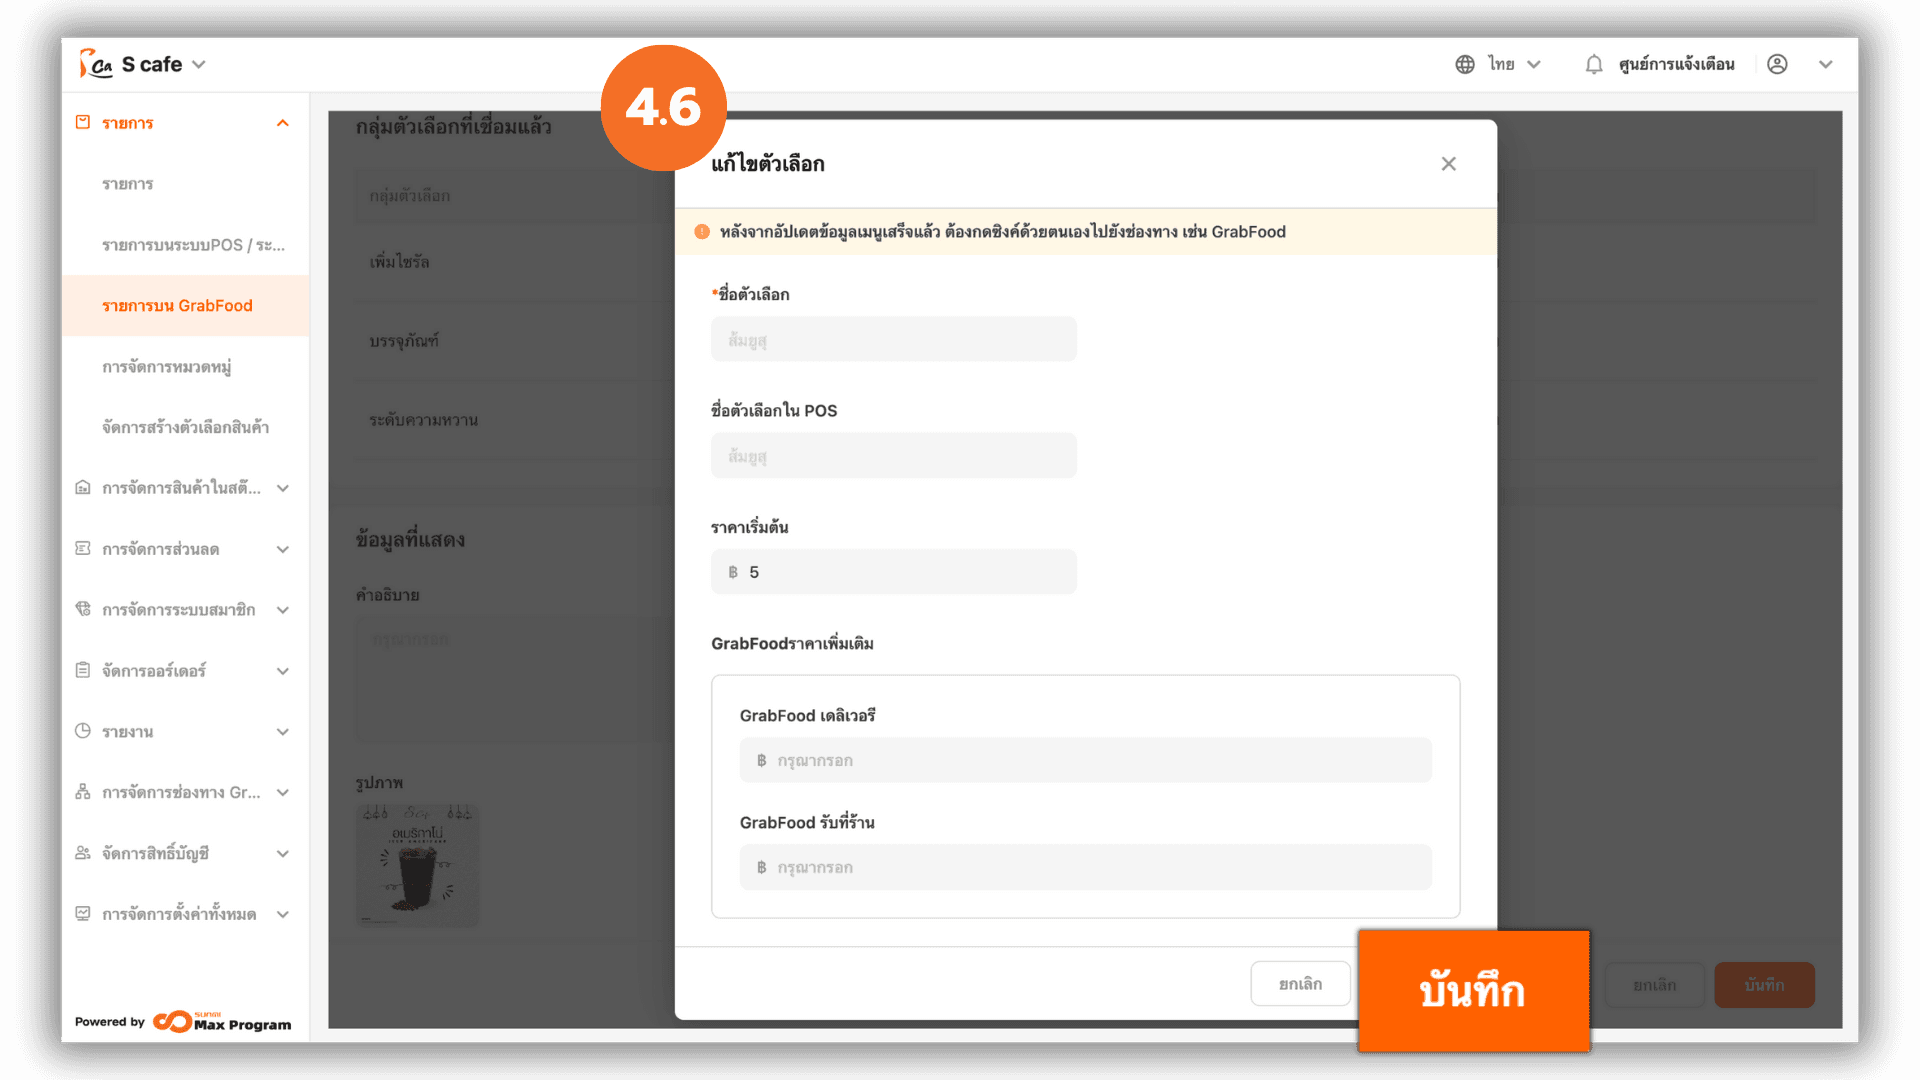
4.6 Setting Option Prices
Specify prices for each option Default Price (GrabFood) , GrabFood Delivery and GrabFood Pickup. Then click “Save” to confirm.
4.7 Saving Product Information
After saving, the system will return to the Edit Option Group page.
Click “Close” and “Save” again to confirm all changes.

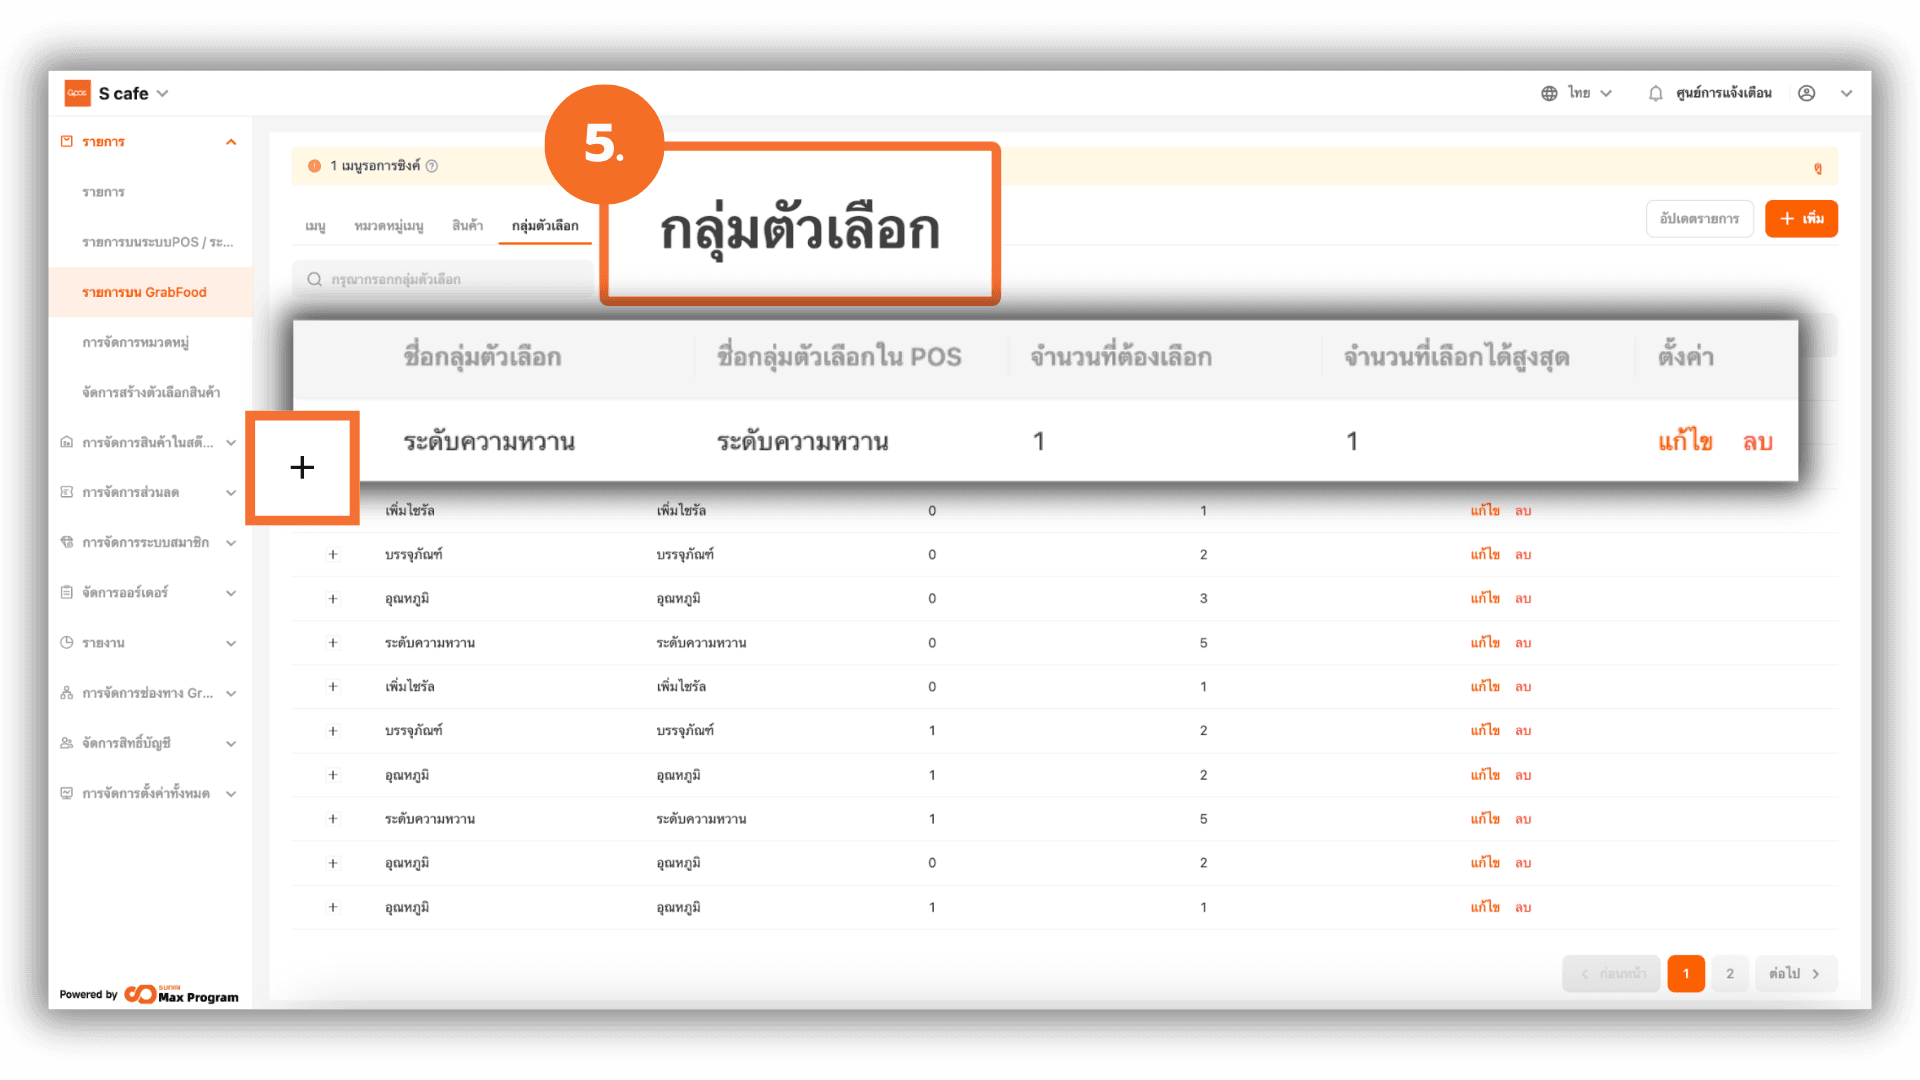
5. Additional Option Group Management
When accessing the Option Groups menu, the system will display all option groups linked to menu items. You can click the “+” icon in front of an option group name to expand and view the options within that group.
Note : The system will automatically merge option groups if all of the following information is identical
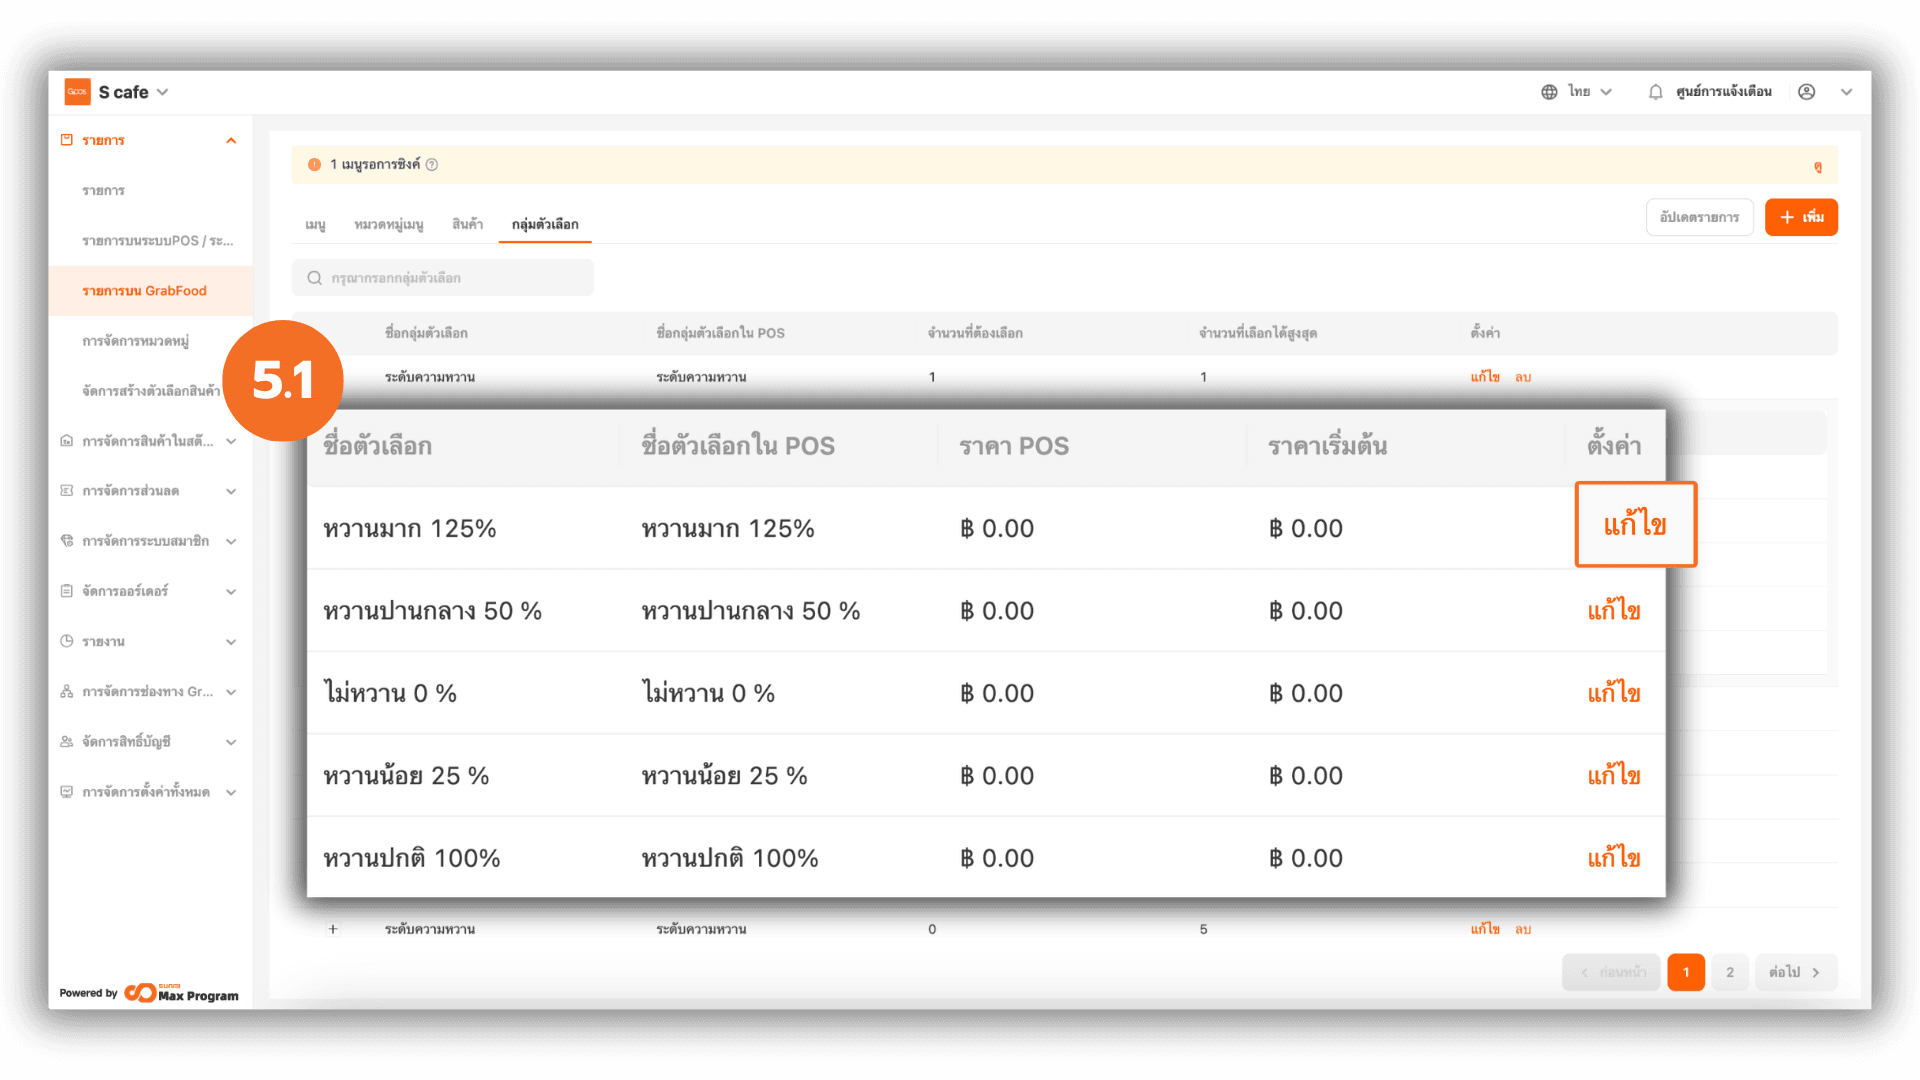
5.1 Viewing and Managing Options Within a Group
After clicking the “+” icon, the system will display all options within the selected option group. You can manage each option by clicking “Edit” next to the option name.
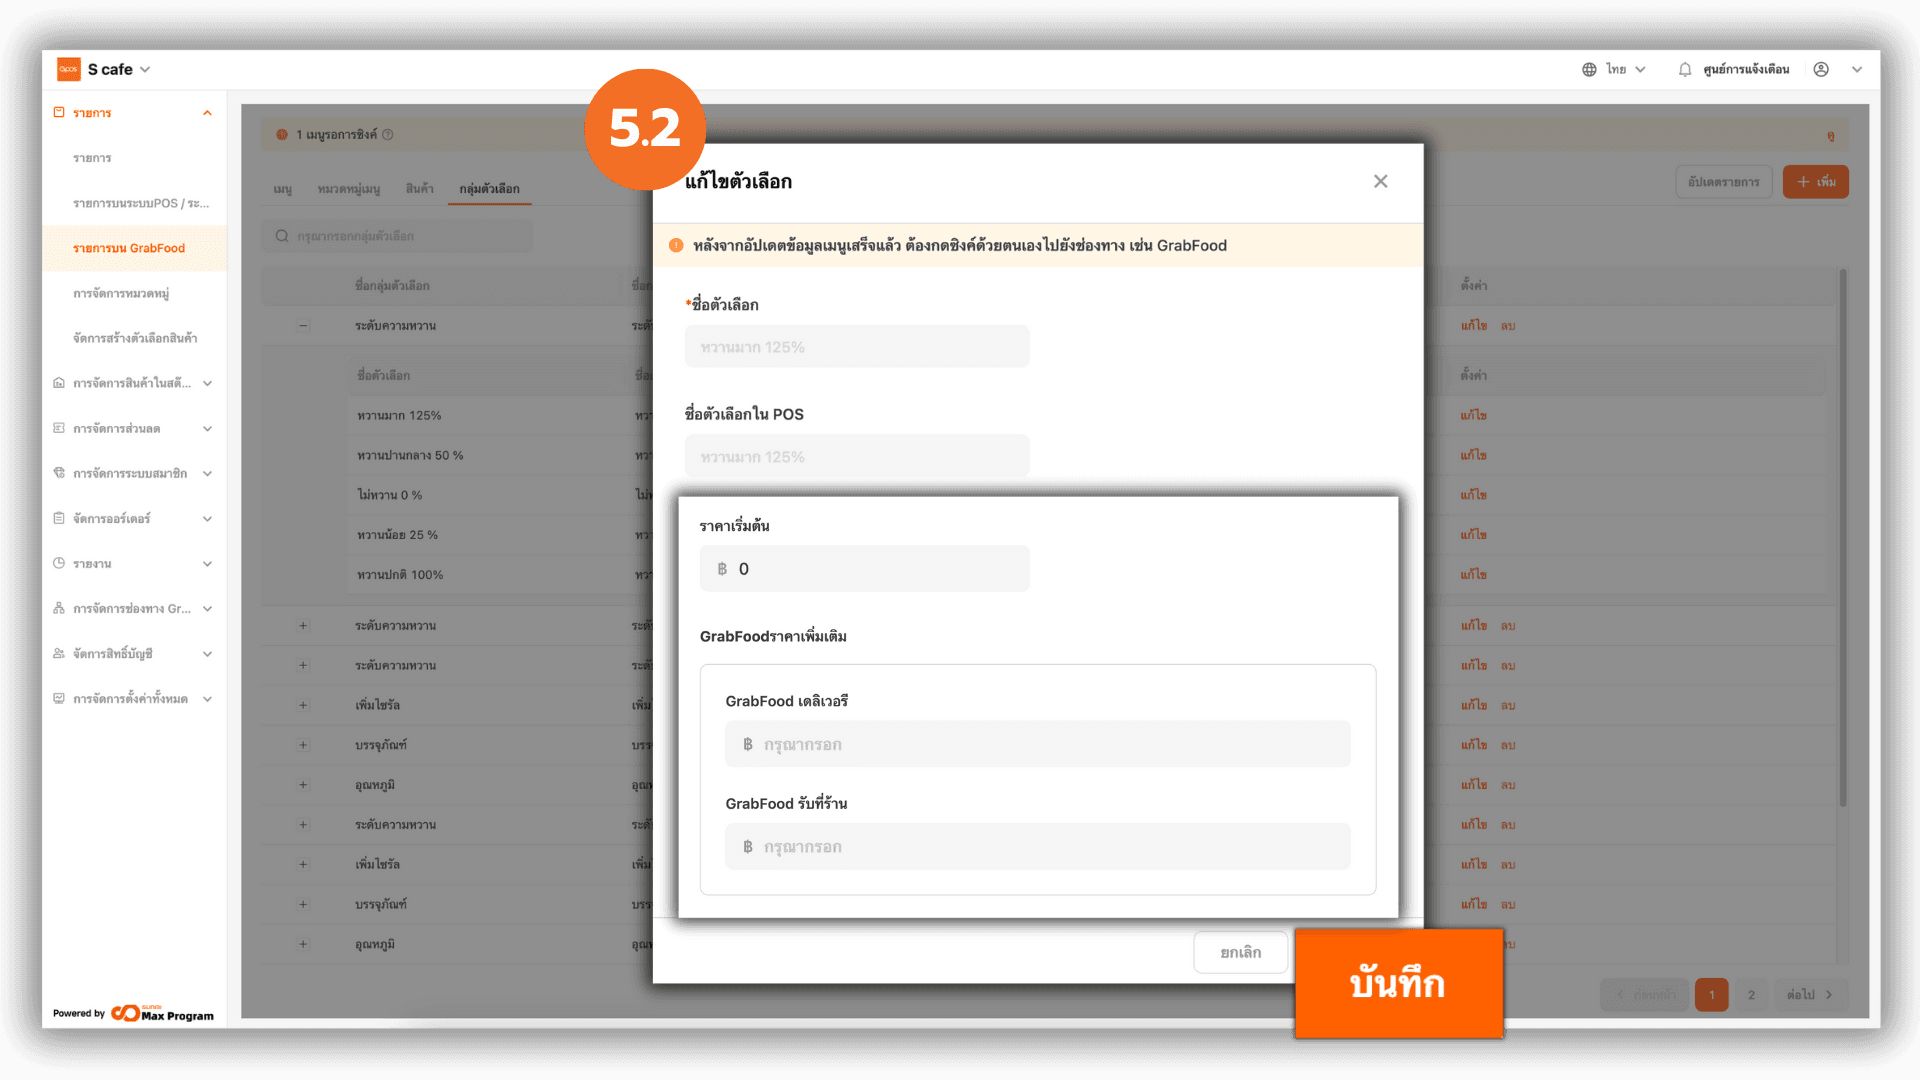
5.2 Setting Additional Prices for Options
When you click “Edit”, the system will display the page for setting additional option prices. You can specify prices for the following channels Default Price (GrabFood) , GrabFood Delivery and GrabFood Pick-up. Once the pricing is completed, click “Save” to confirm.
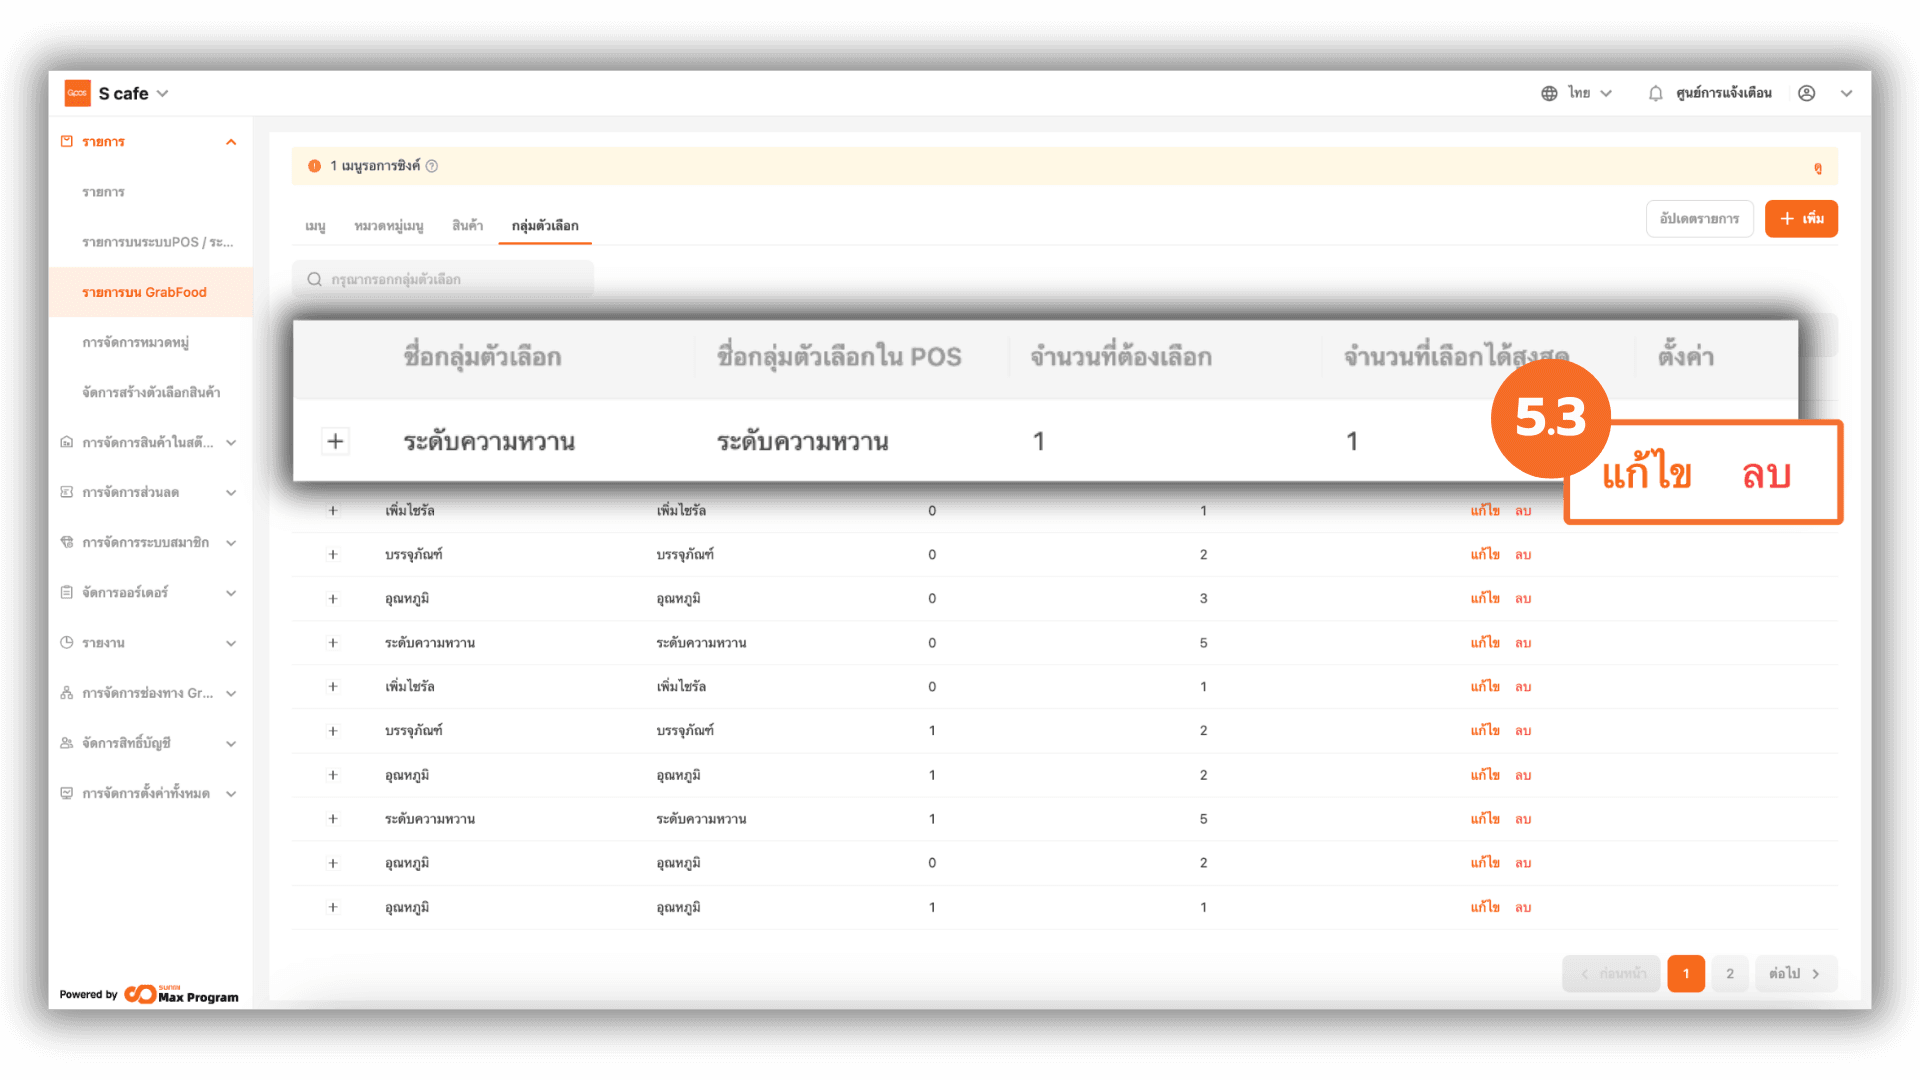
5.3 Editing or Deleting an Option Group
You can choose to Edit or Delete an option group by clicking the corresponding button next to the option group name.
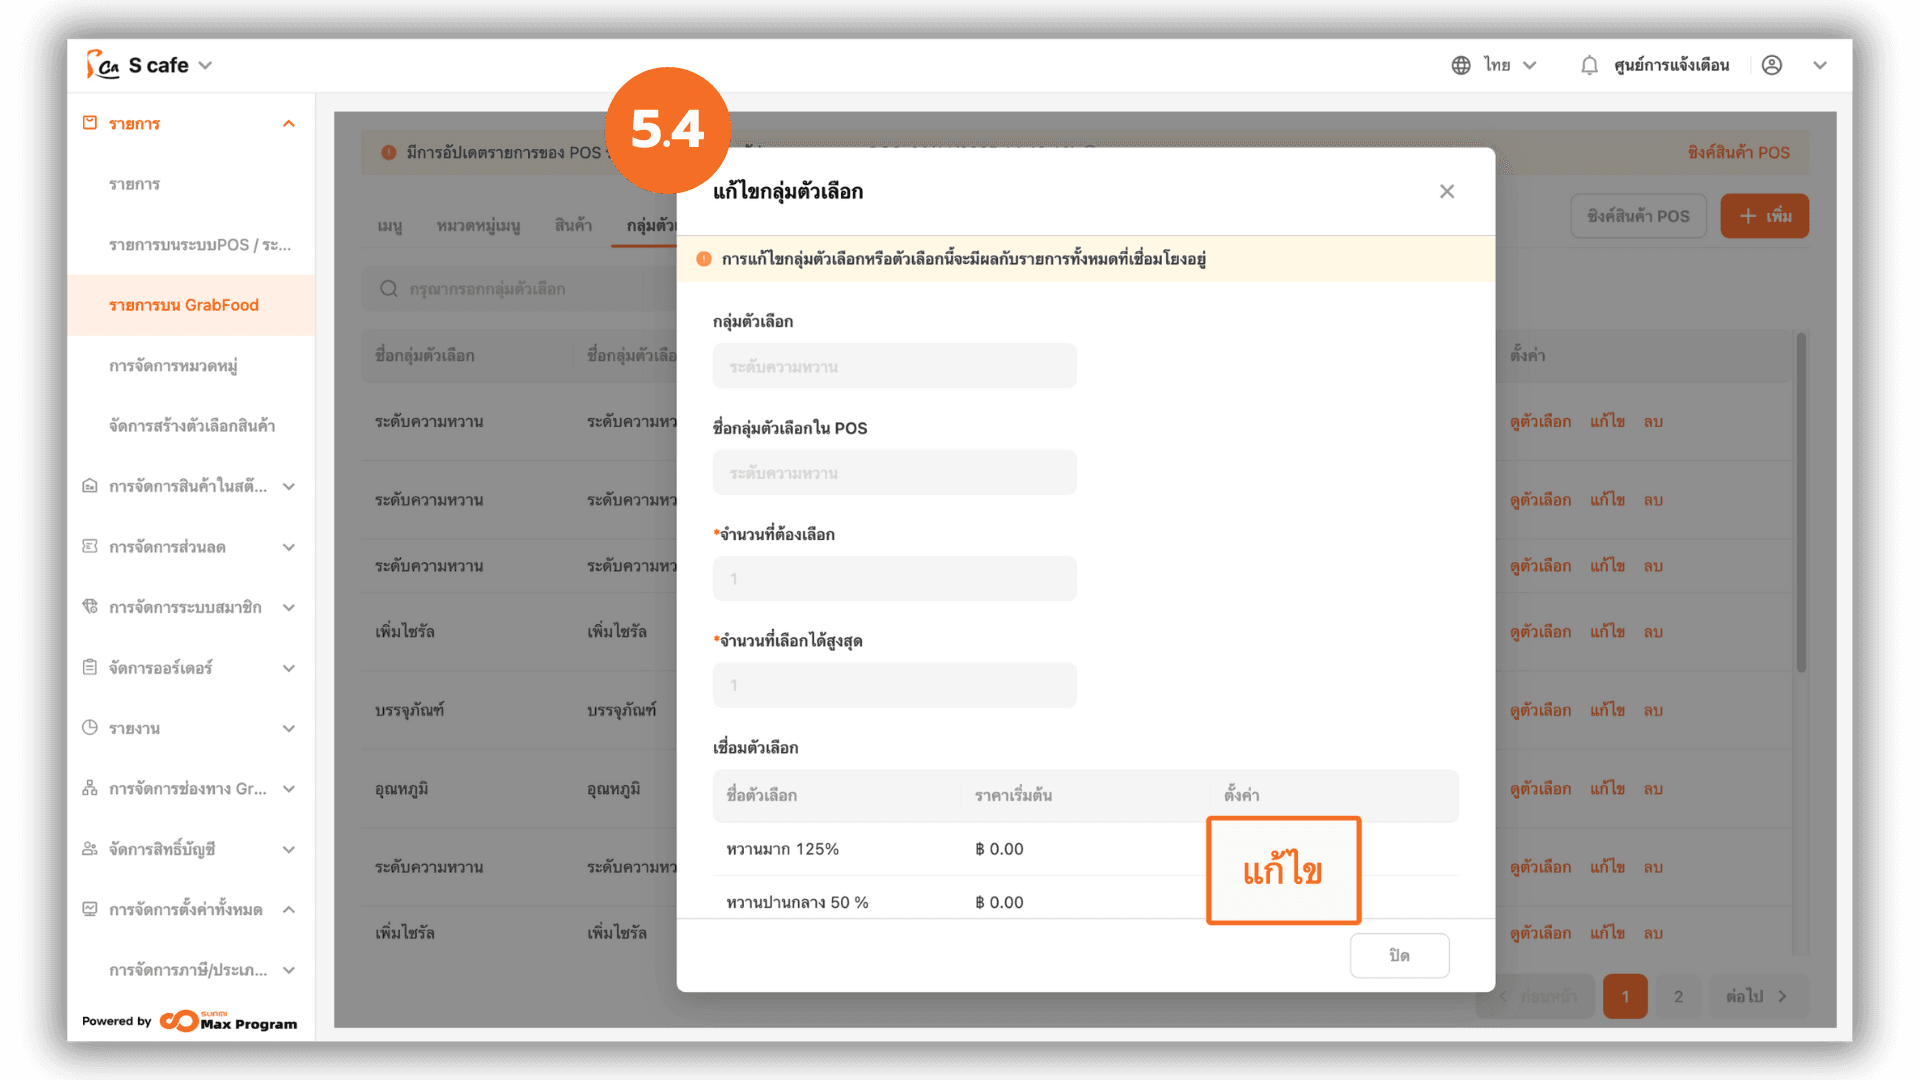
5.4 Editing Option Group Details
When selecting “Edit” for an option group, the system will display the option group details. Scroll down to view the list of menu items linked to this option group. Then click “Edit” next to the option you wish to modify.
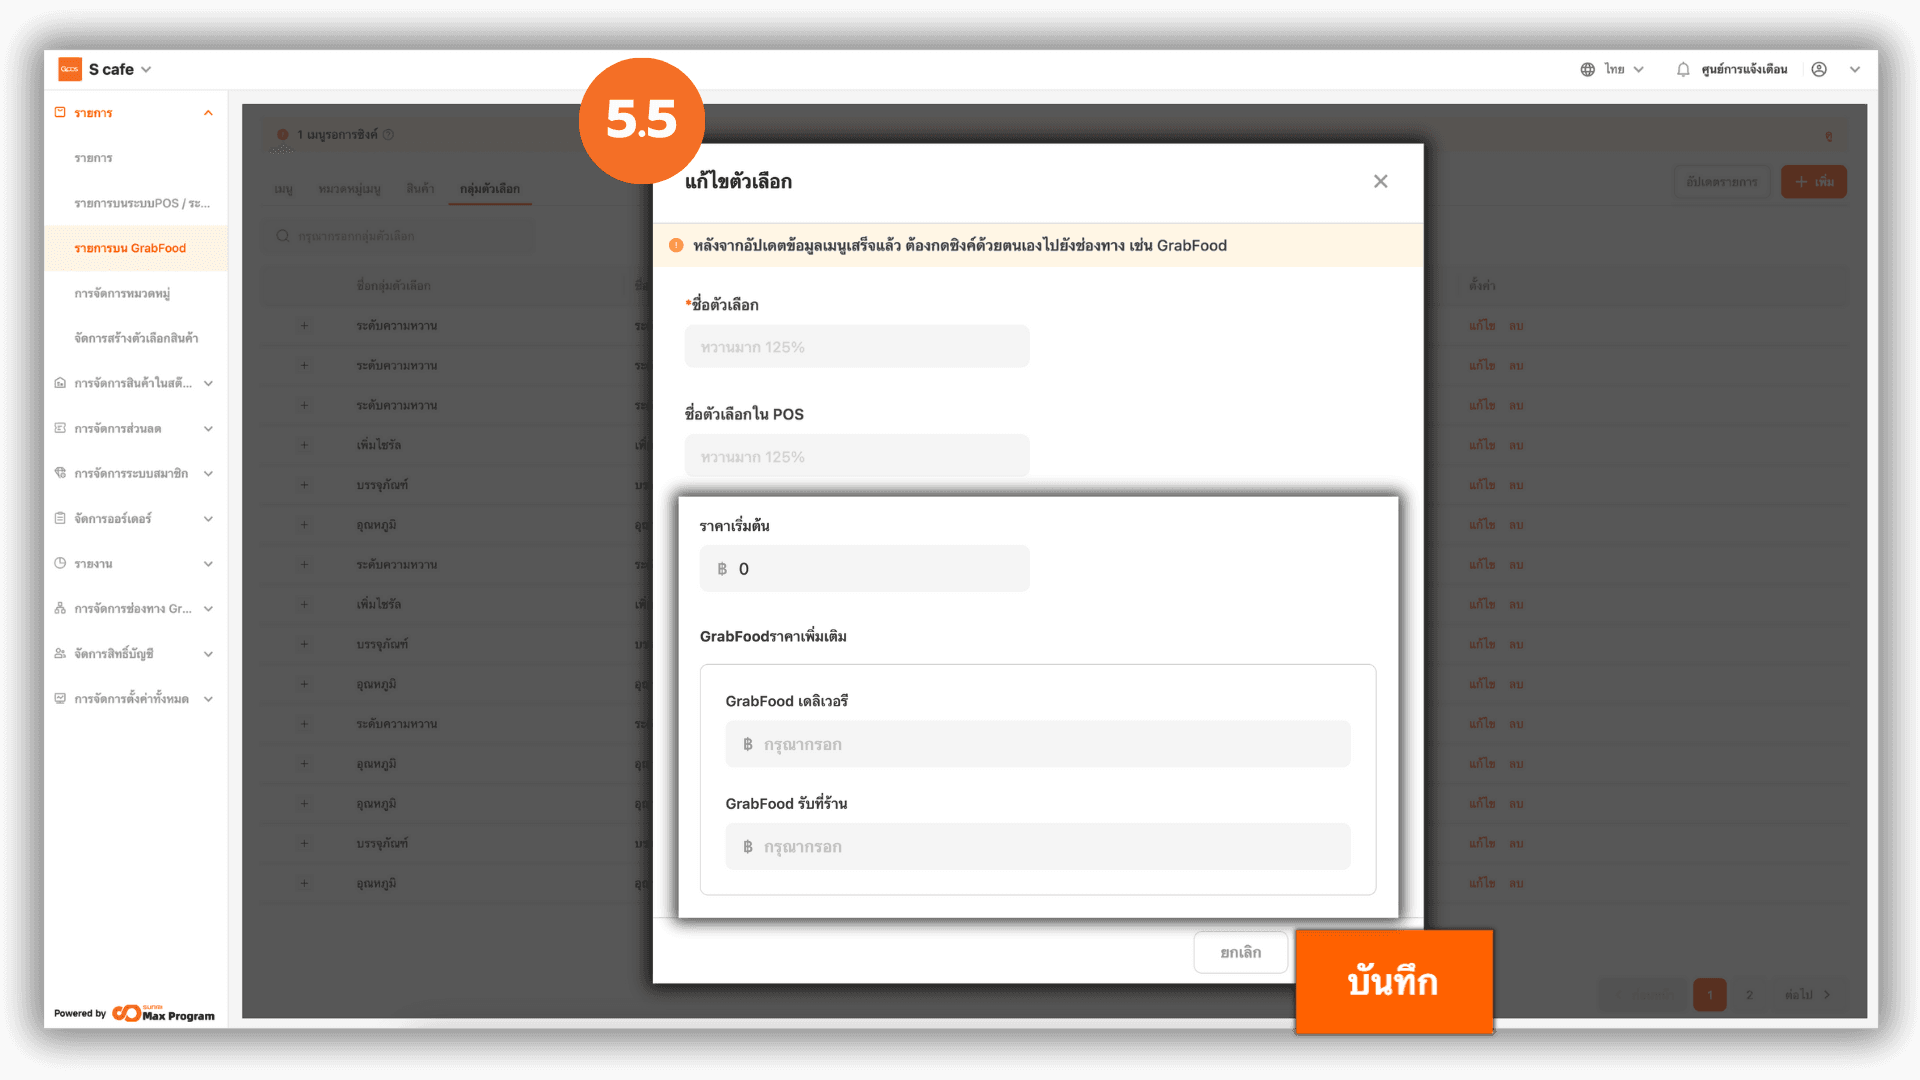
5.5 Editing Additional Prices Within an Option Group
The system will display the page for setting additional prices for the selected option. You can specify prices for the following channels Default Price (GrabFood) , GrabFood Delivery and GrabFood Pick-up. After completing the changes, click “Save” to confirm.
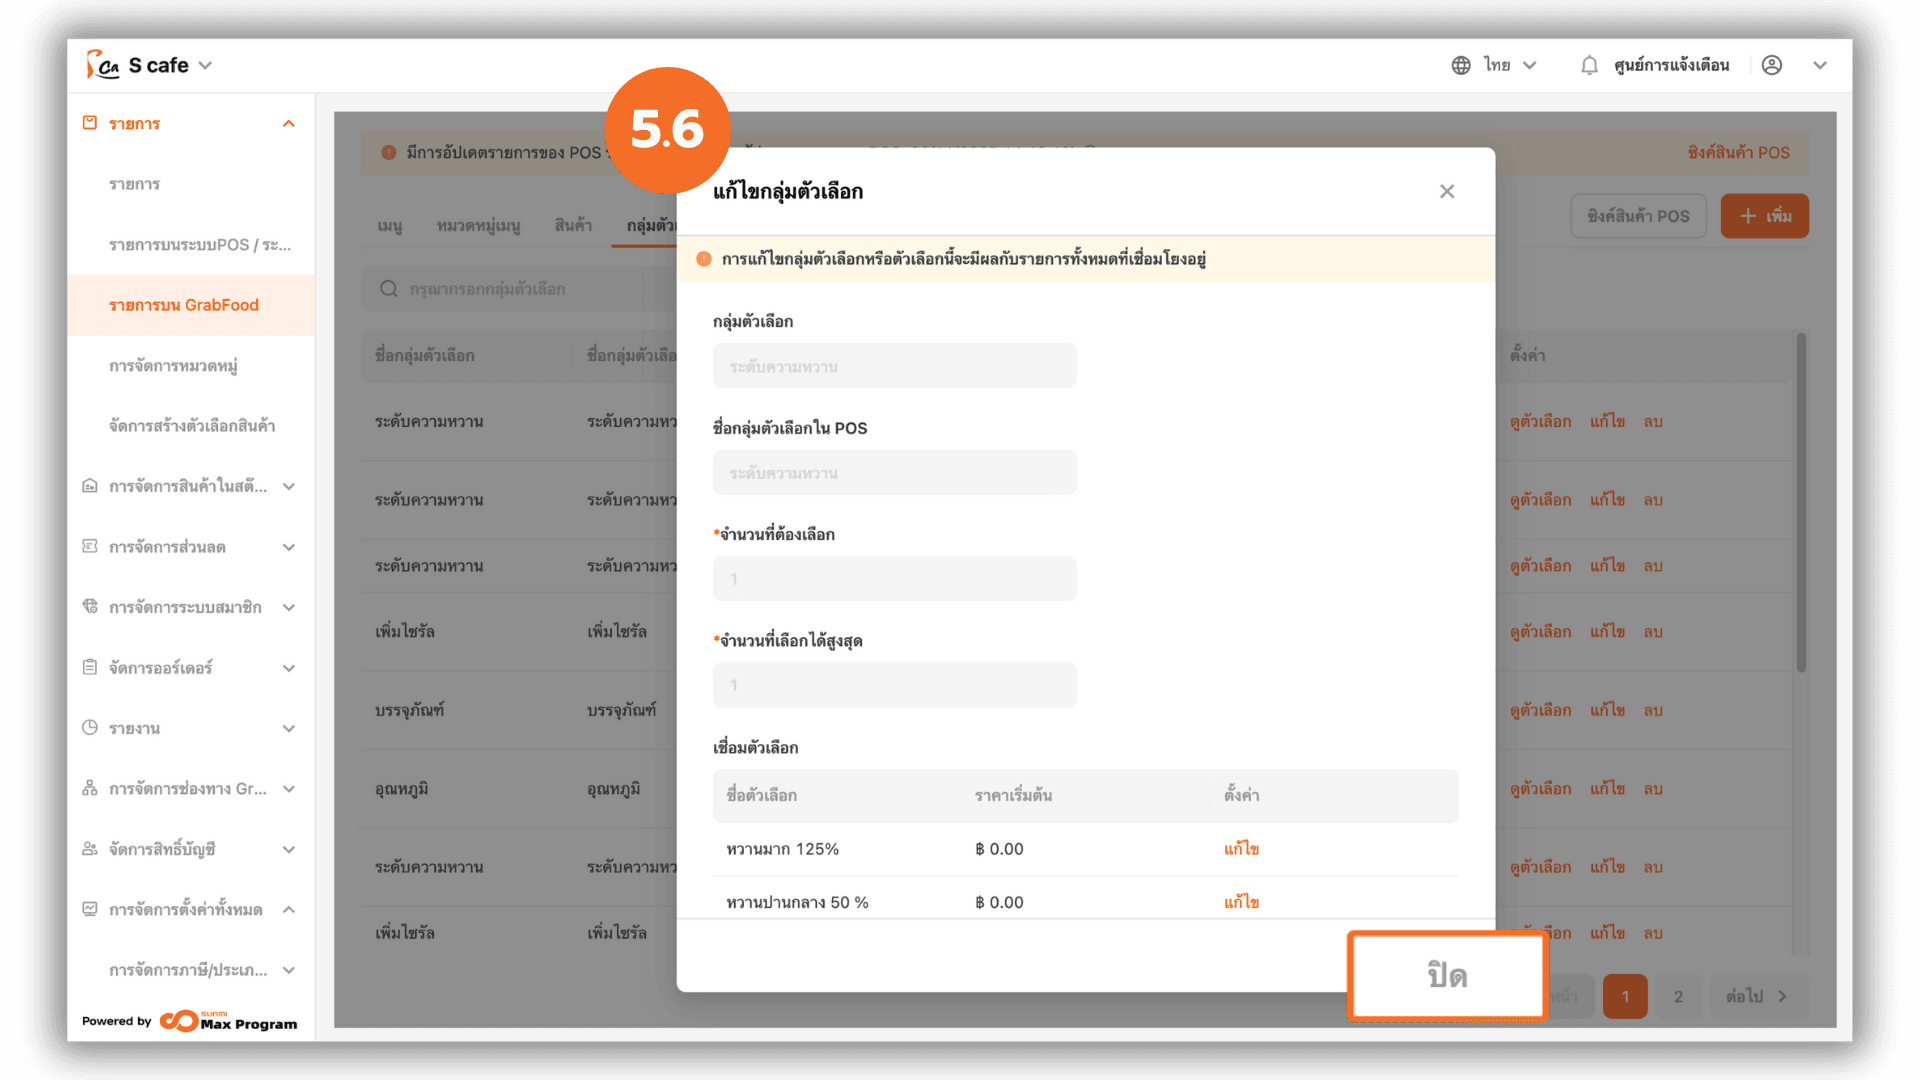
5.6 Confirming Option Group Changes
After clicking “Save”, the system will return to the Edit Option Group page.
Click “Close” again to confirm and exit the editing process.
5.7 Deleting an Option Group
When clicking “Delete”, the system will display a confirmation message for deleting the option group. Click “Delete” again to confirm the action.
Note : The option group must not be linked to any menu items in order to be deleted.

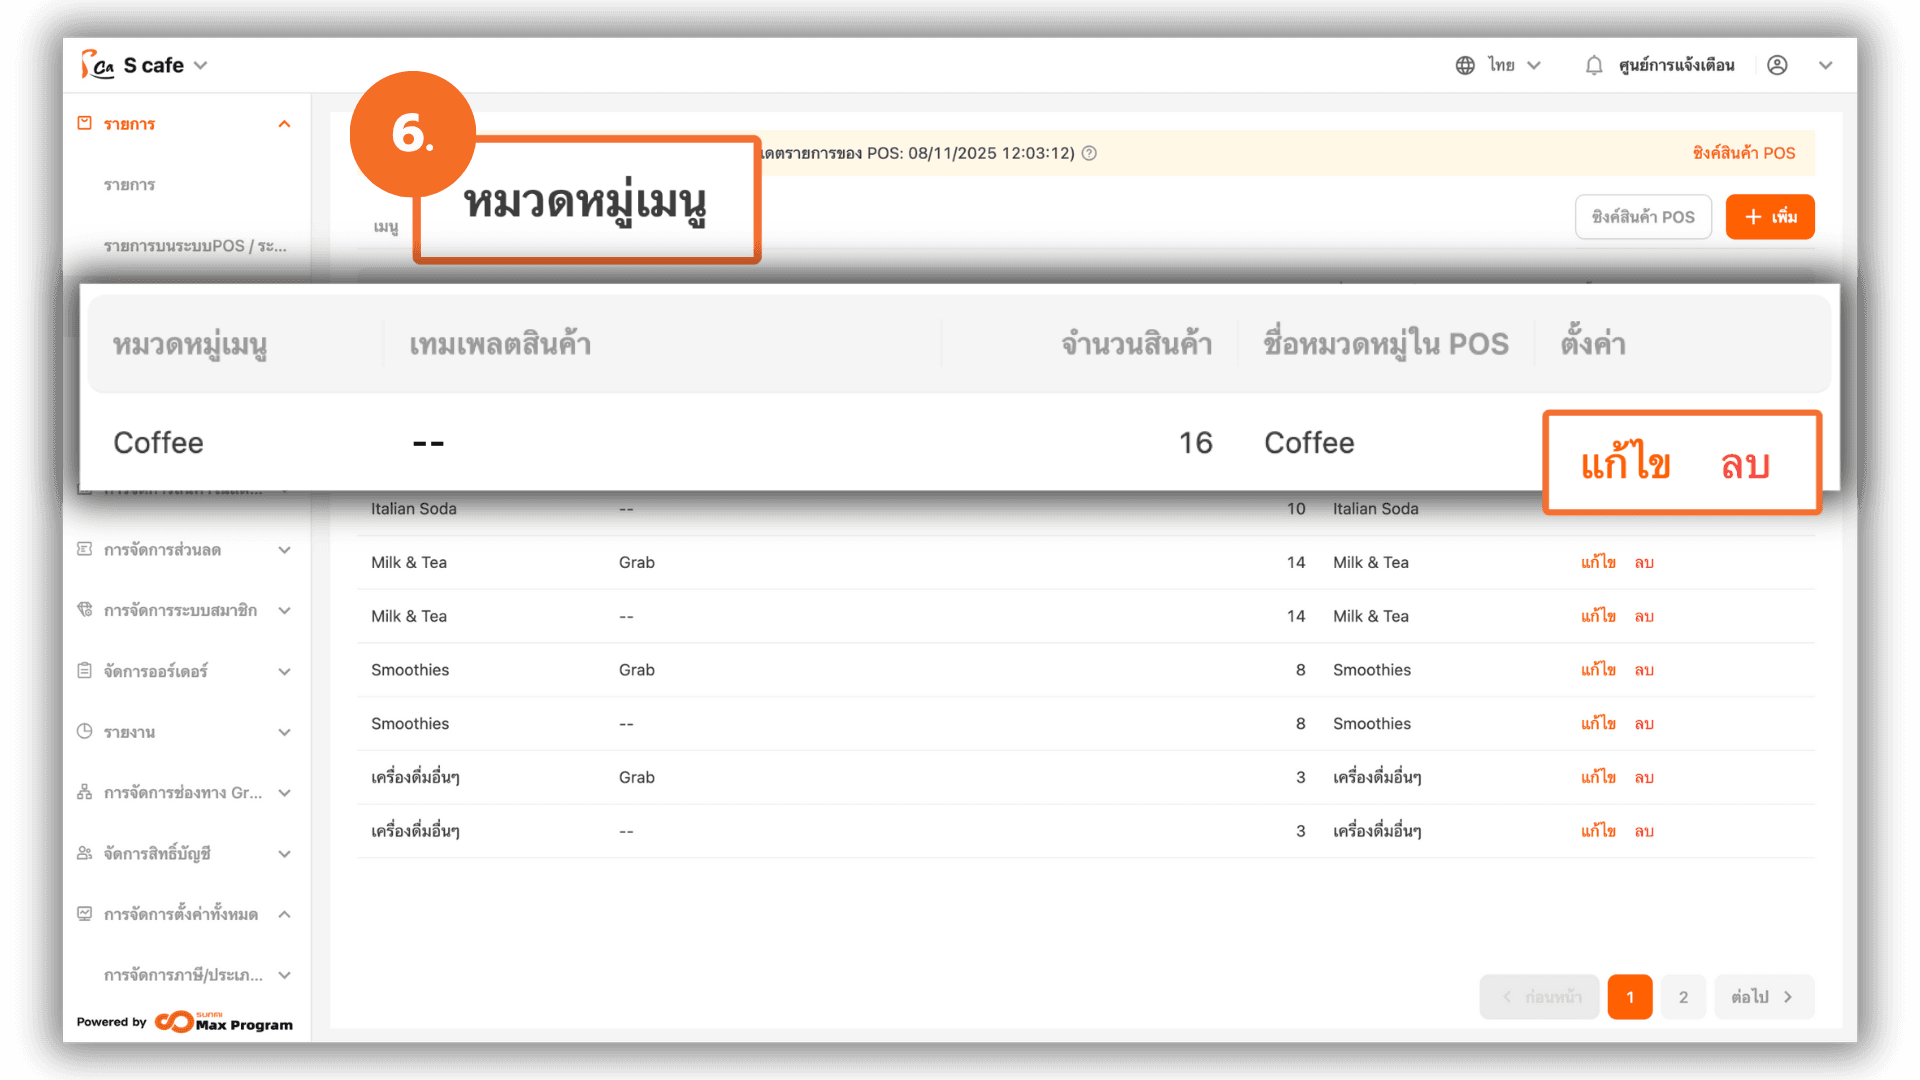
6. Menu Category Management
Go to the Menu Categories menu. The system will display all existing menu categories. You can manage each category by selecting Edit or Delete next to the category name.
Note : The system will automatically sync categories that have menu items linked to them.
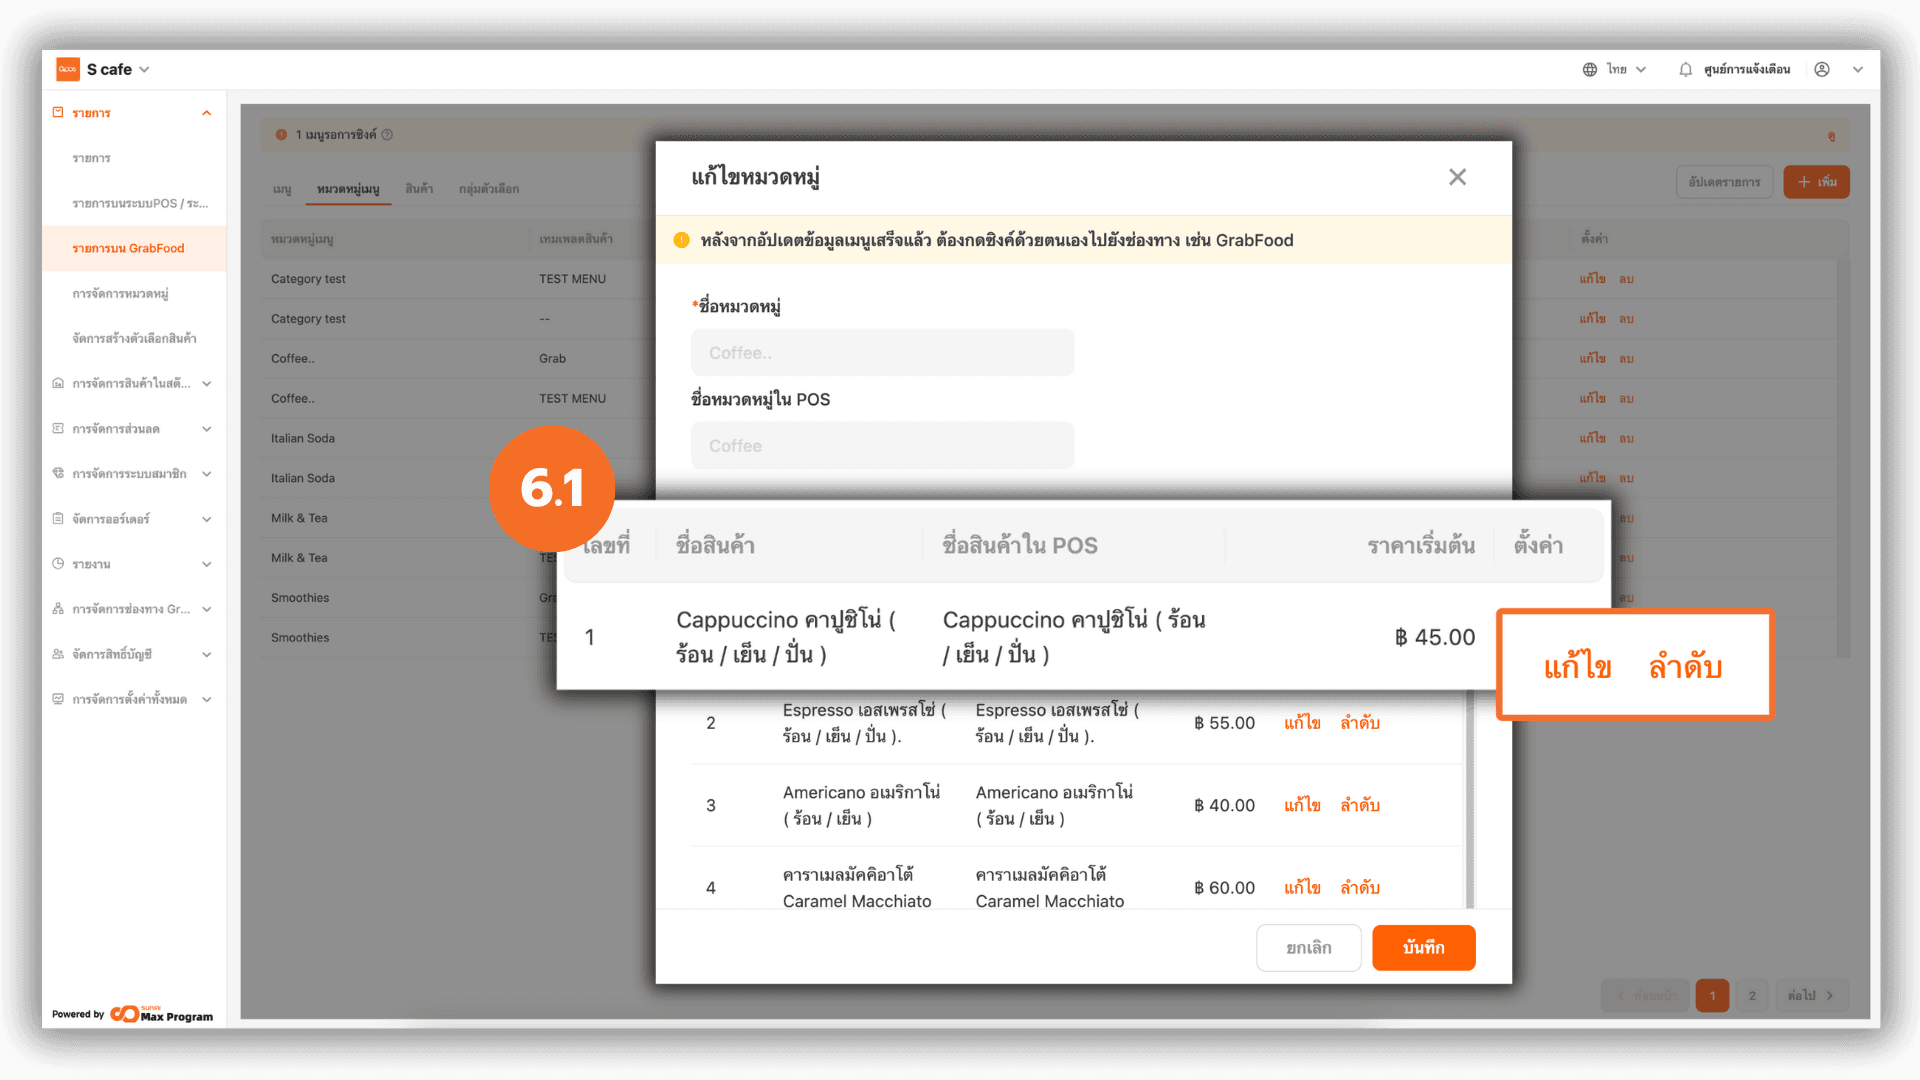
6.1 Editing Item Order Within a Category
When you click “Edit”, the system will display the list of items within the selected category. You can choose the following actions from the buttons next to each item
- Edit : Edit item details
- Sort : Adjust the item display order
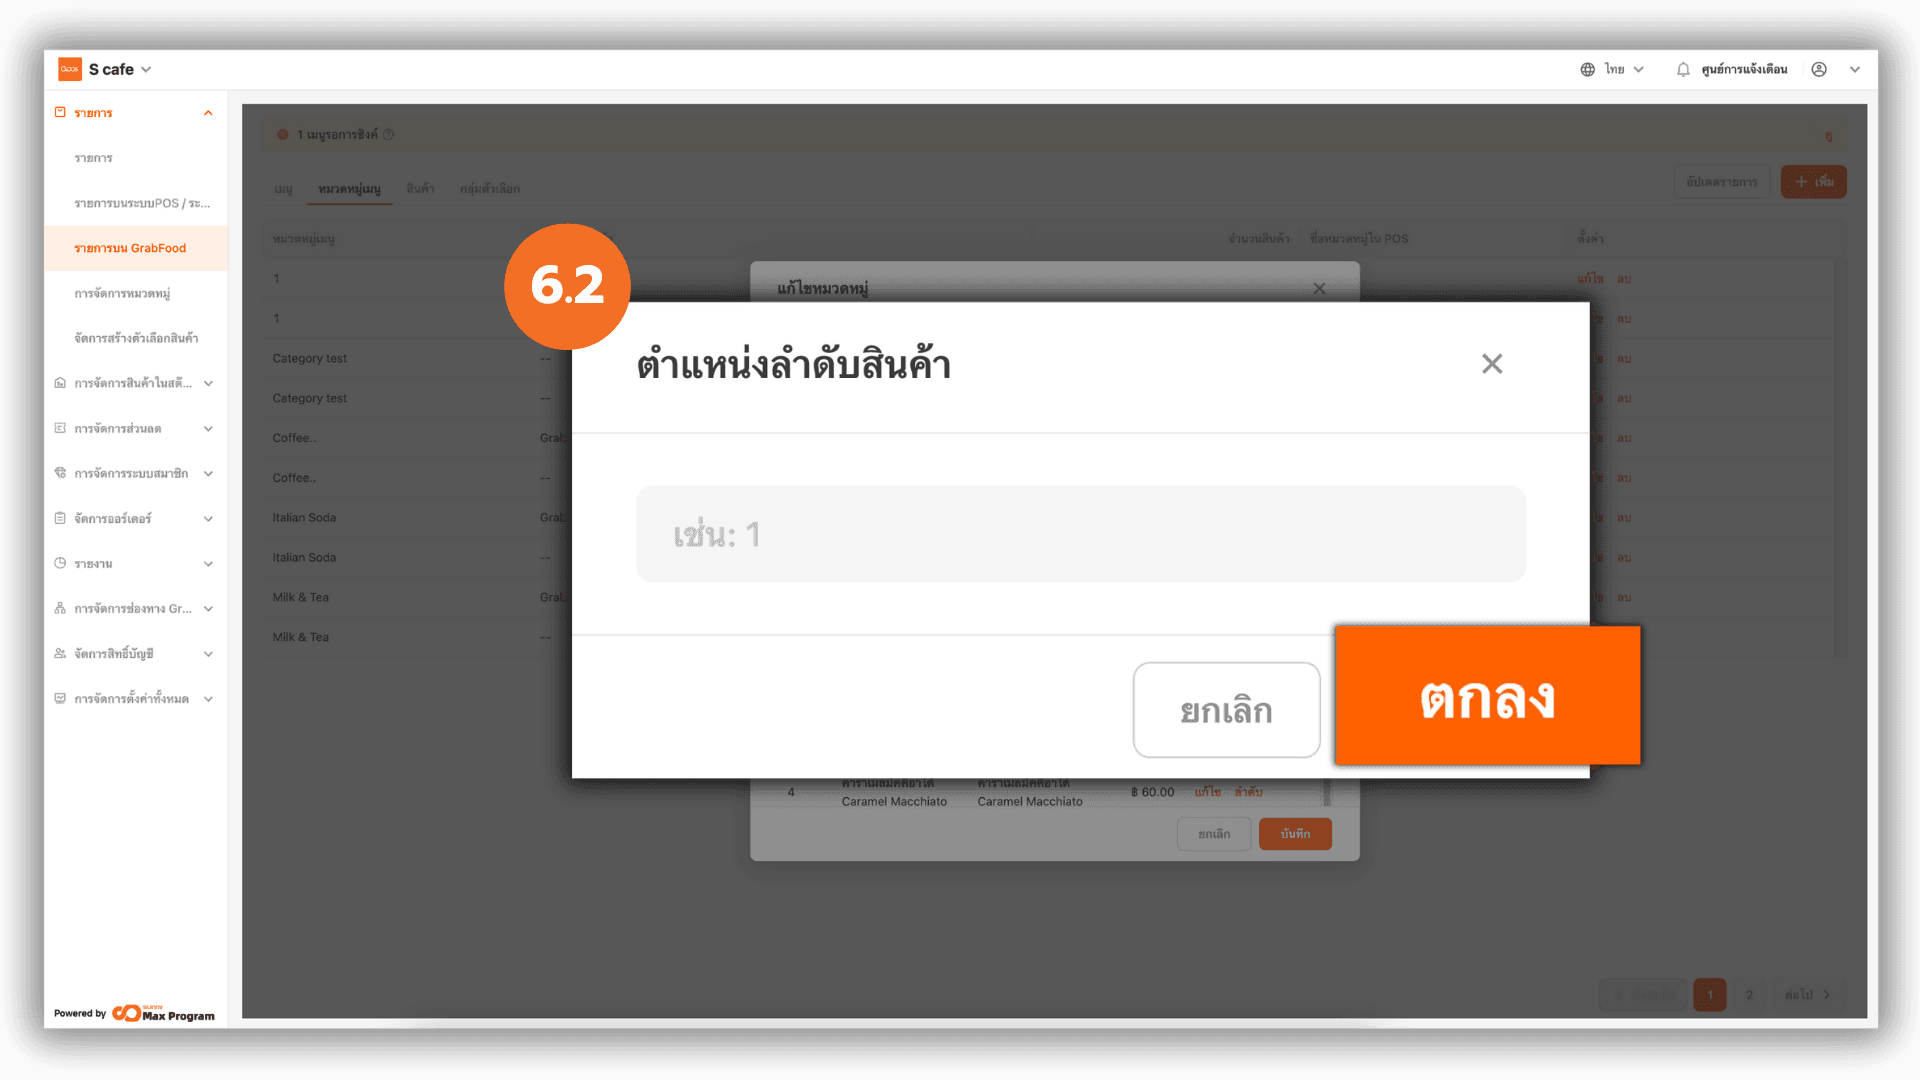
6.2 Reordering Items Within a Category
When clicking “Sort”, the system will prompt you to enter the desired order number. After entering the number, click “Save” to apply the changes.
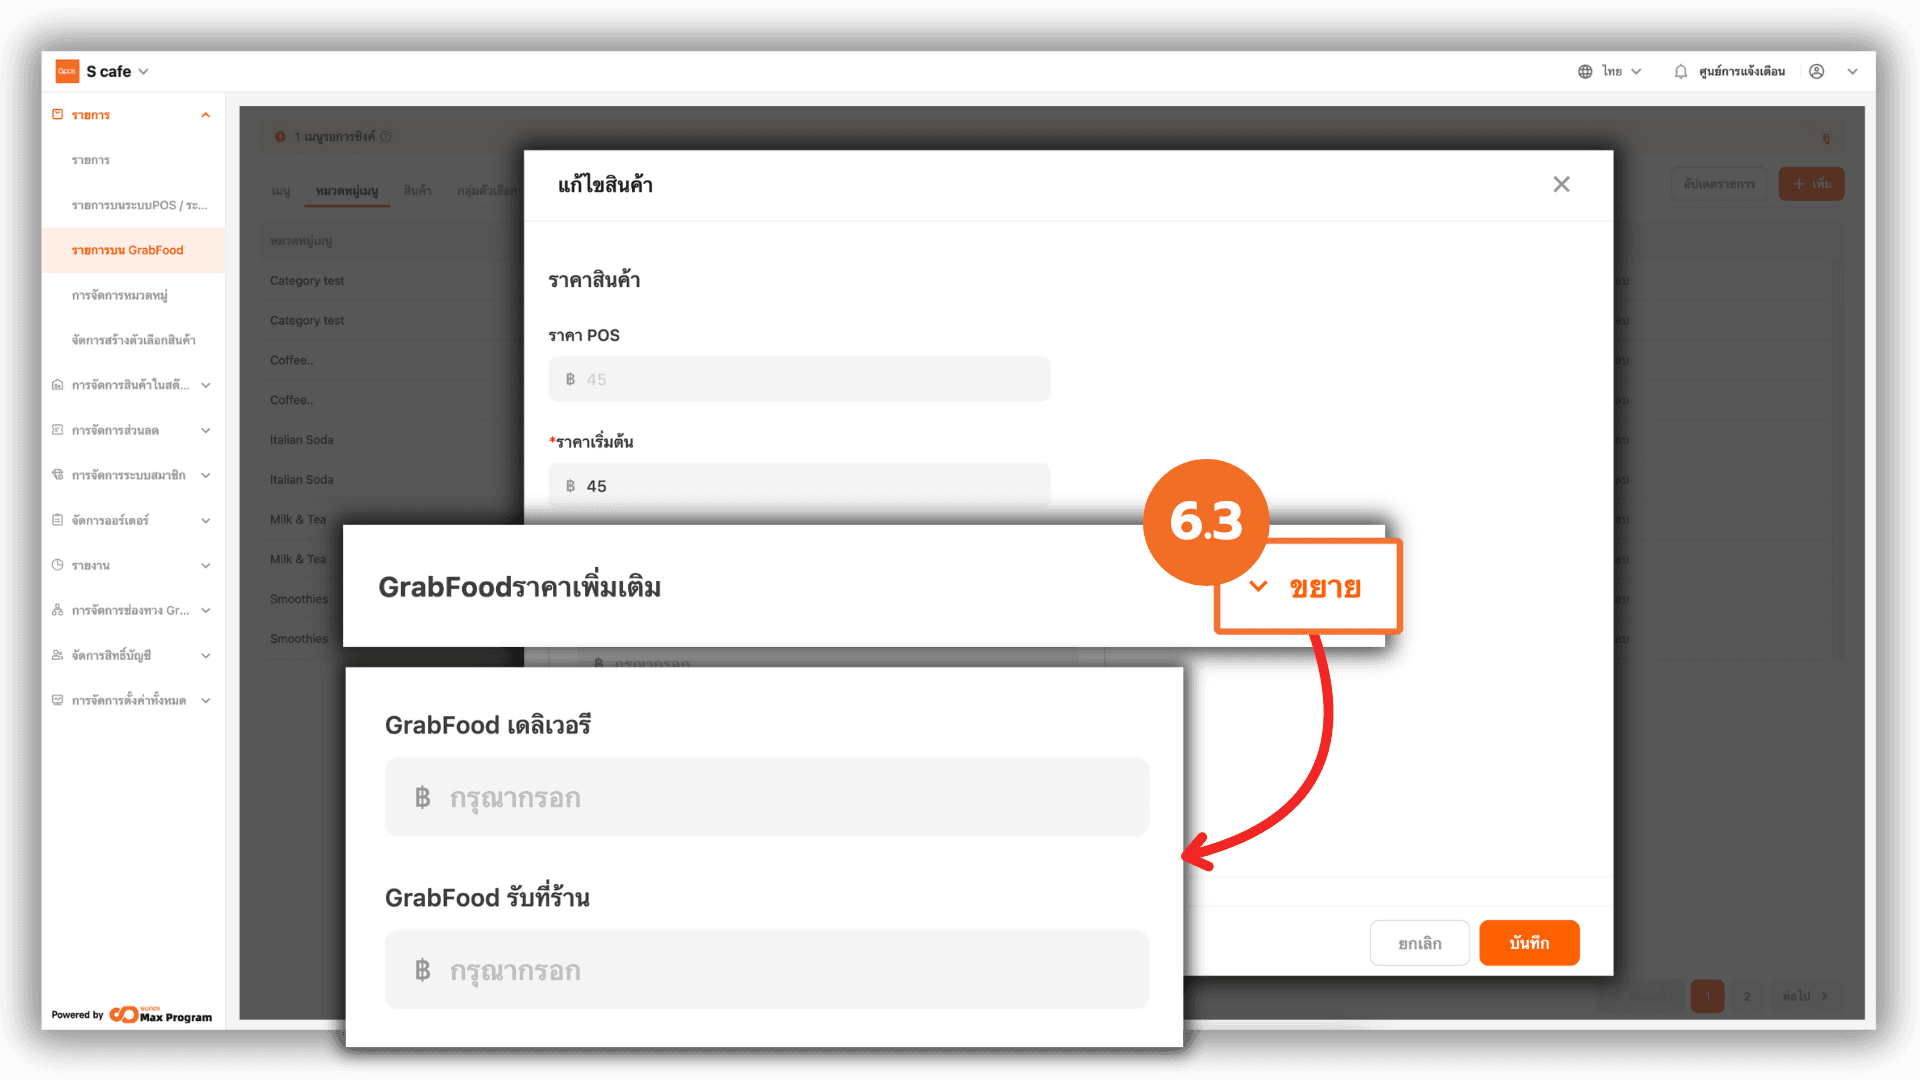
6.3 Editing Item Prices (GrabFood)
When clicking “Edit” on a menu item, the system will display additional item details. Click “Expand” next to GrabFood Additional Pricing. You can set different prices for the following channels GrabFood Delivery and GrabFood Pick-up.
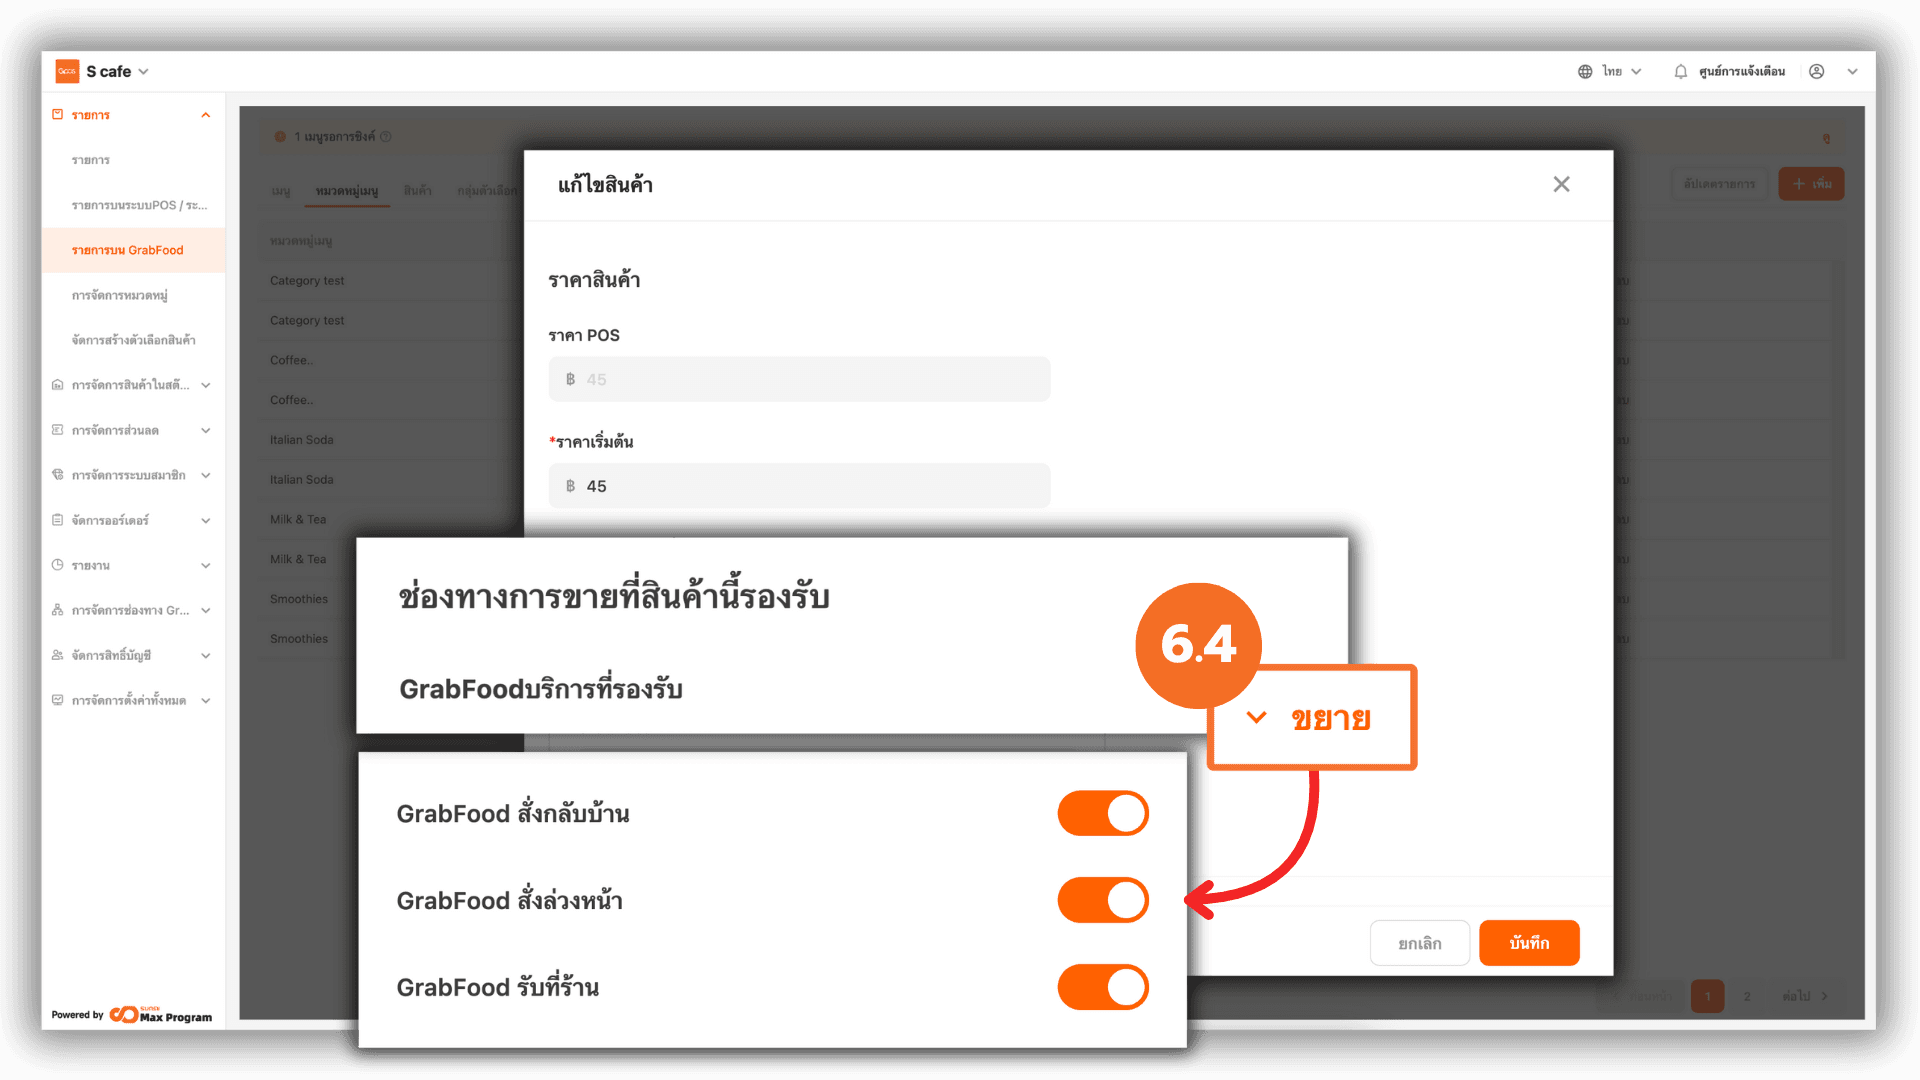
6.4 Configuring Sales Channels (GrabFood)
Scroll down and click “Expand” next to GrabFood Supported Services.
You can enable or disable the following sales channels GrabFoodDelivery Instant , GrabFoodDelivery Reservation and GrabFood Pick-up
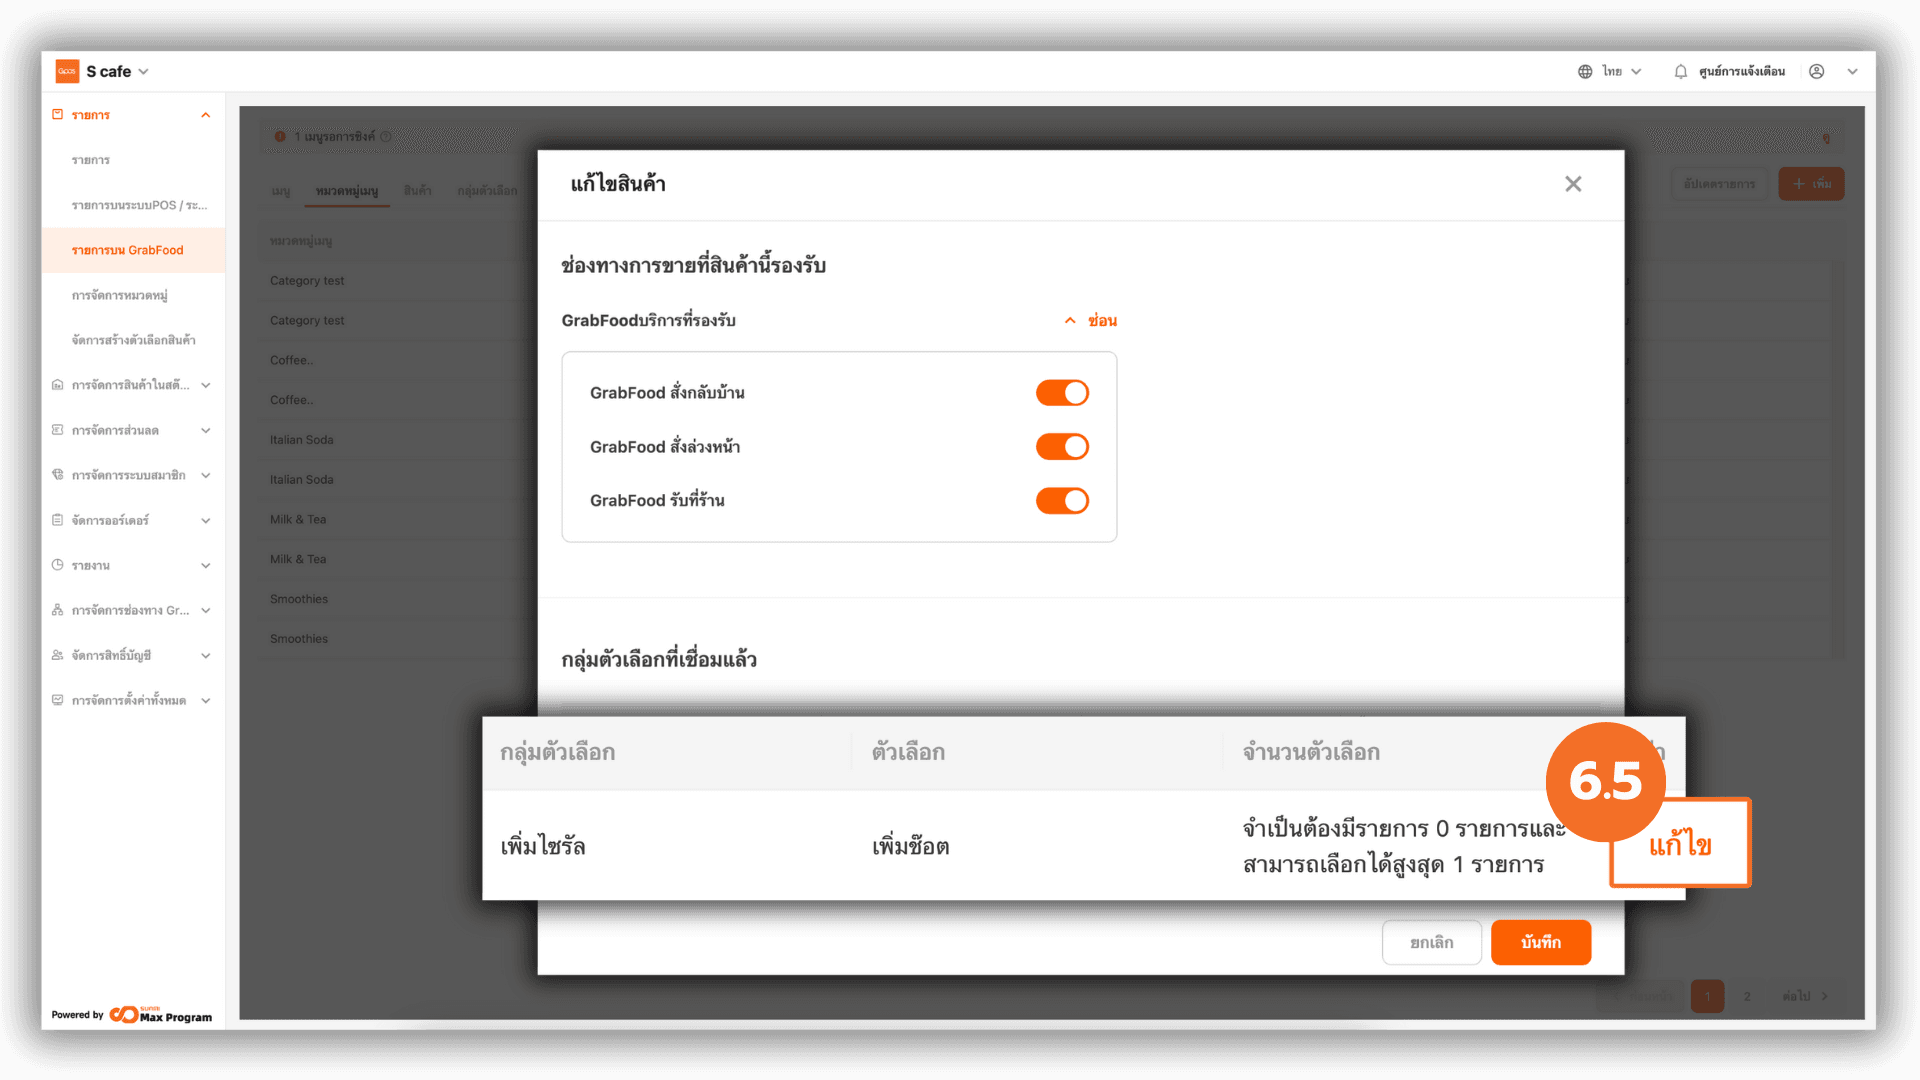
6.5 Managing Option Groups Linked to an Item
Scroll down to the “Linked Option” section. Click “Edit” to view the details of option groups linked to the selected item.
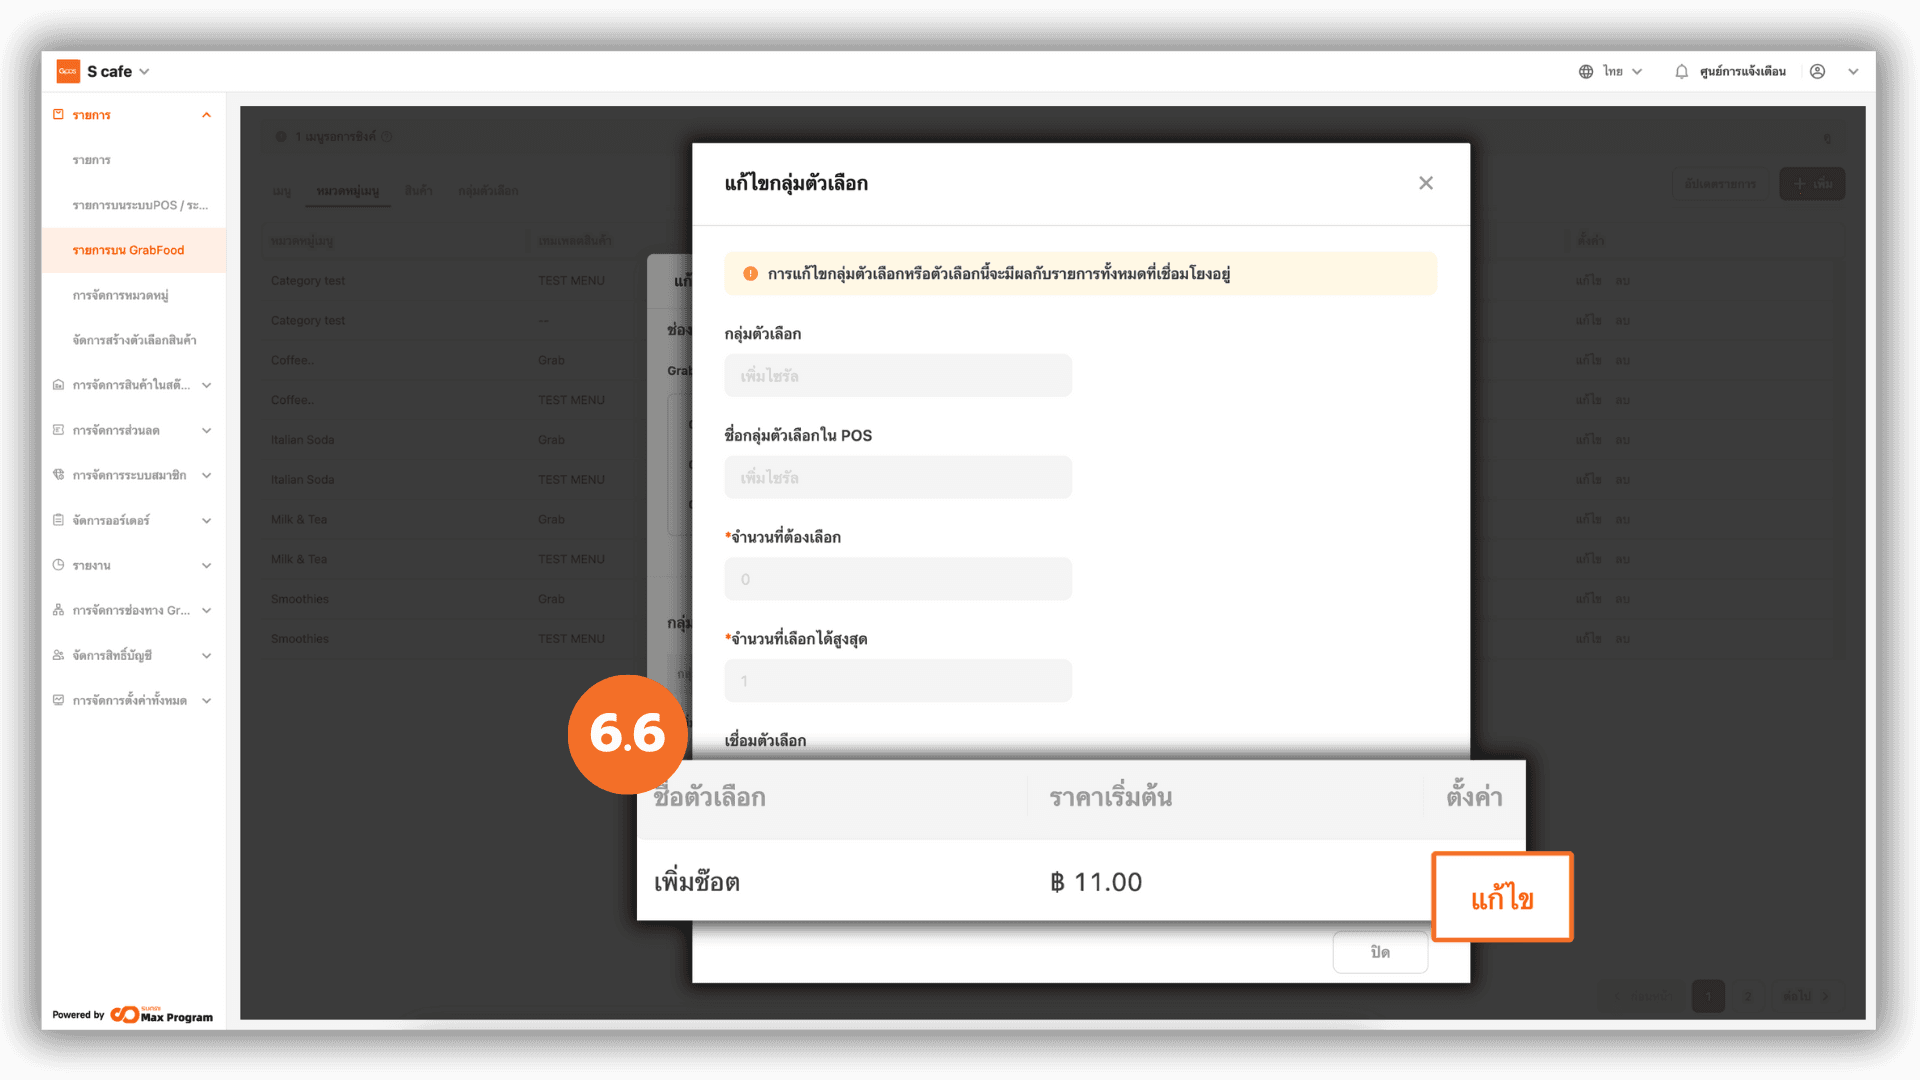
6.6 Editing Options Within an Option Group
The system will display the options within the group (e.g., Add Shot, etc.). Click “Edit” next to the option you wish to modify.
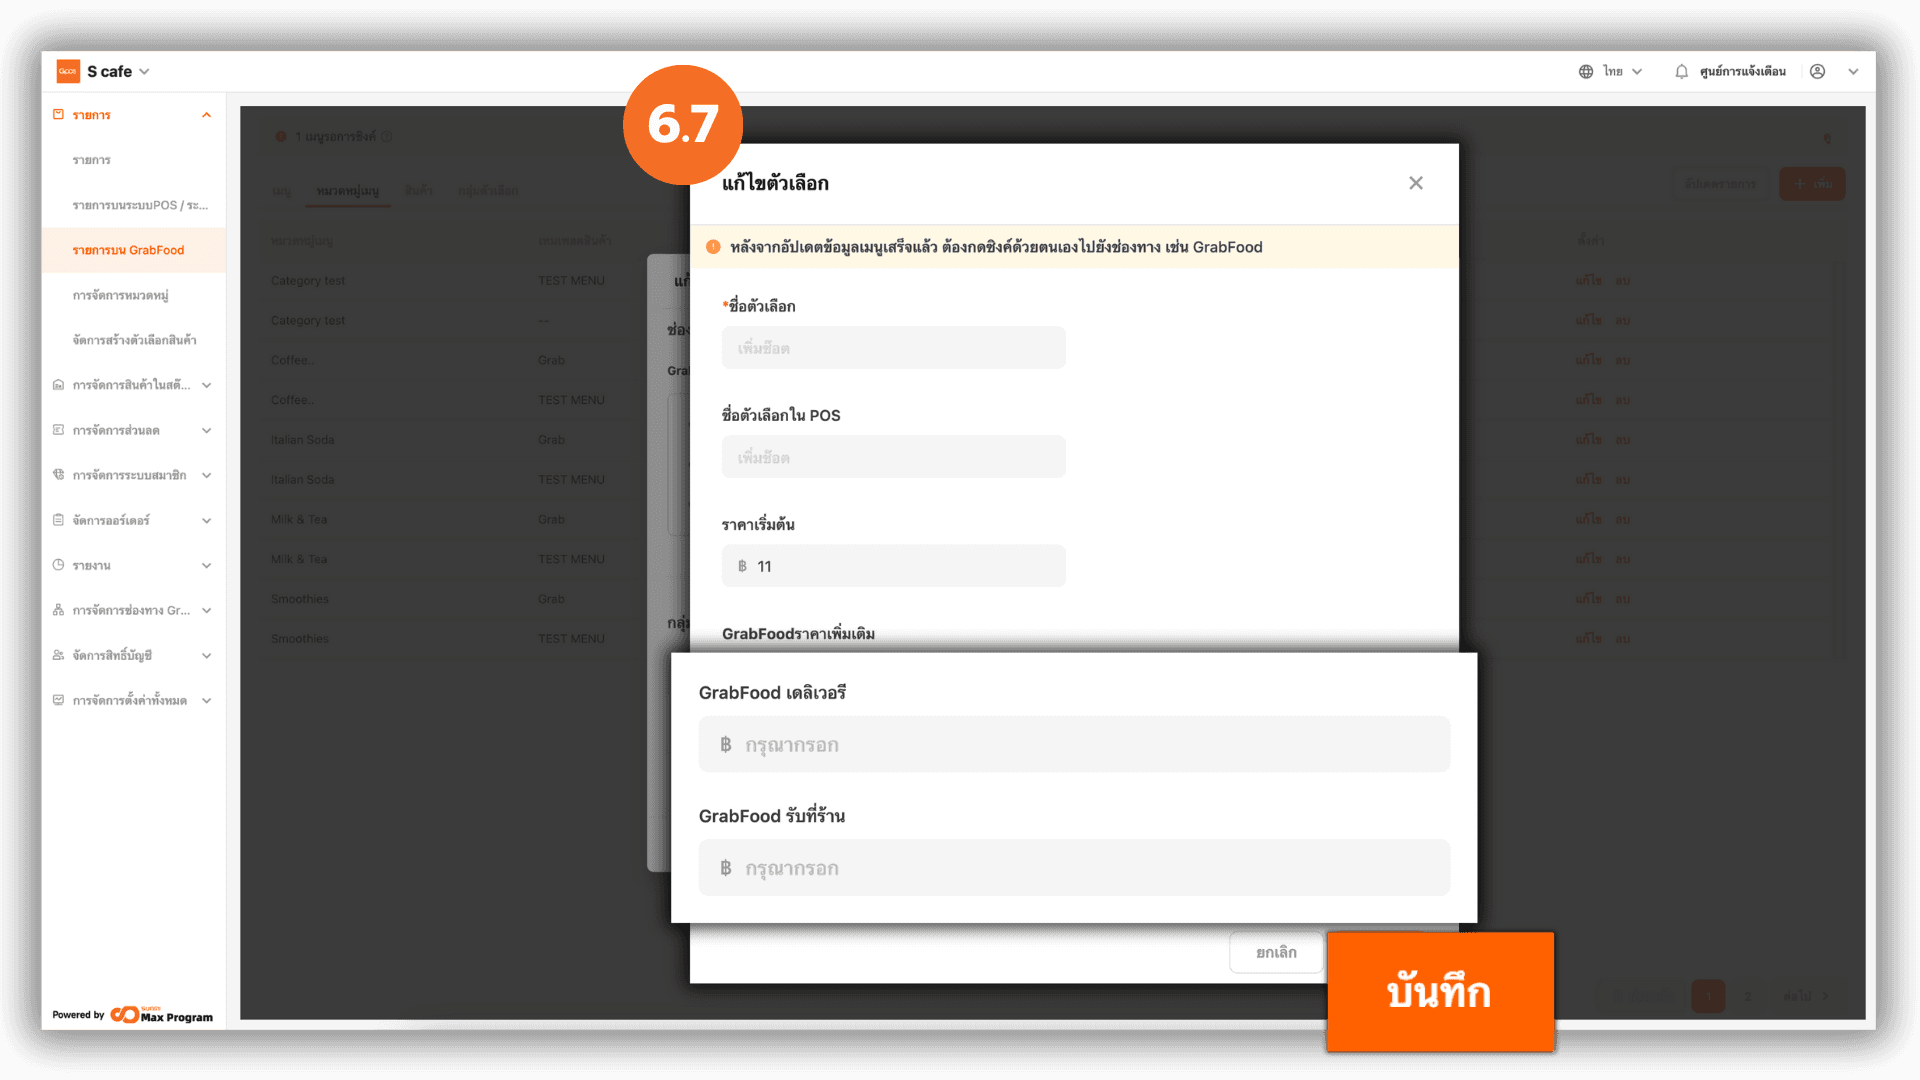
6.7 Setting Additional Prices for Options
You can set additional option prices for the following channels Default Price (GrabFood) , GrabFood Delivery and GrabFood Pick-up. After completing the pricing, click “Save” to confirm.
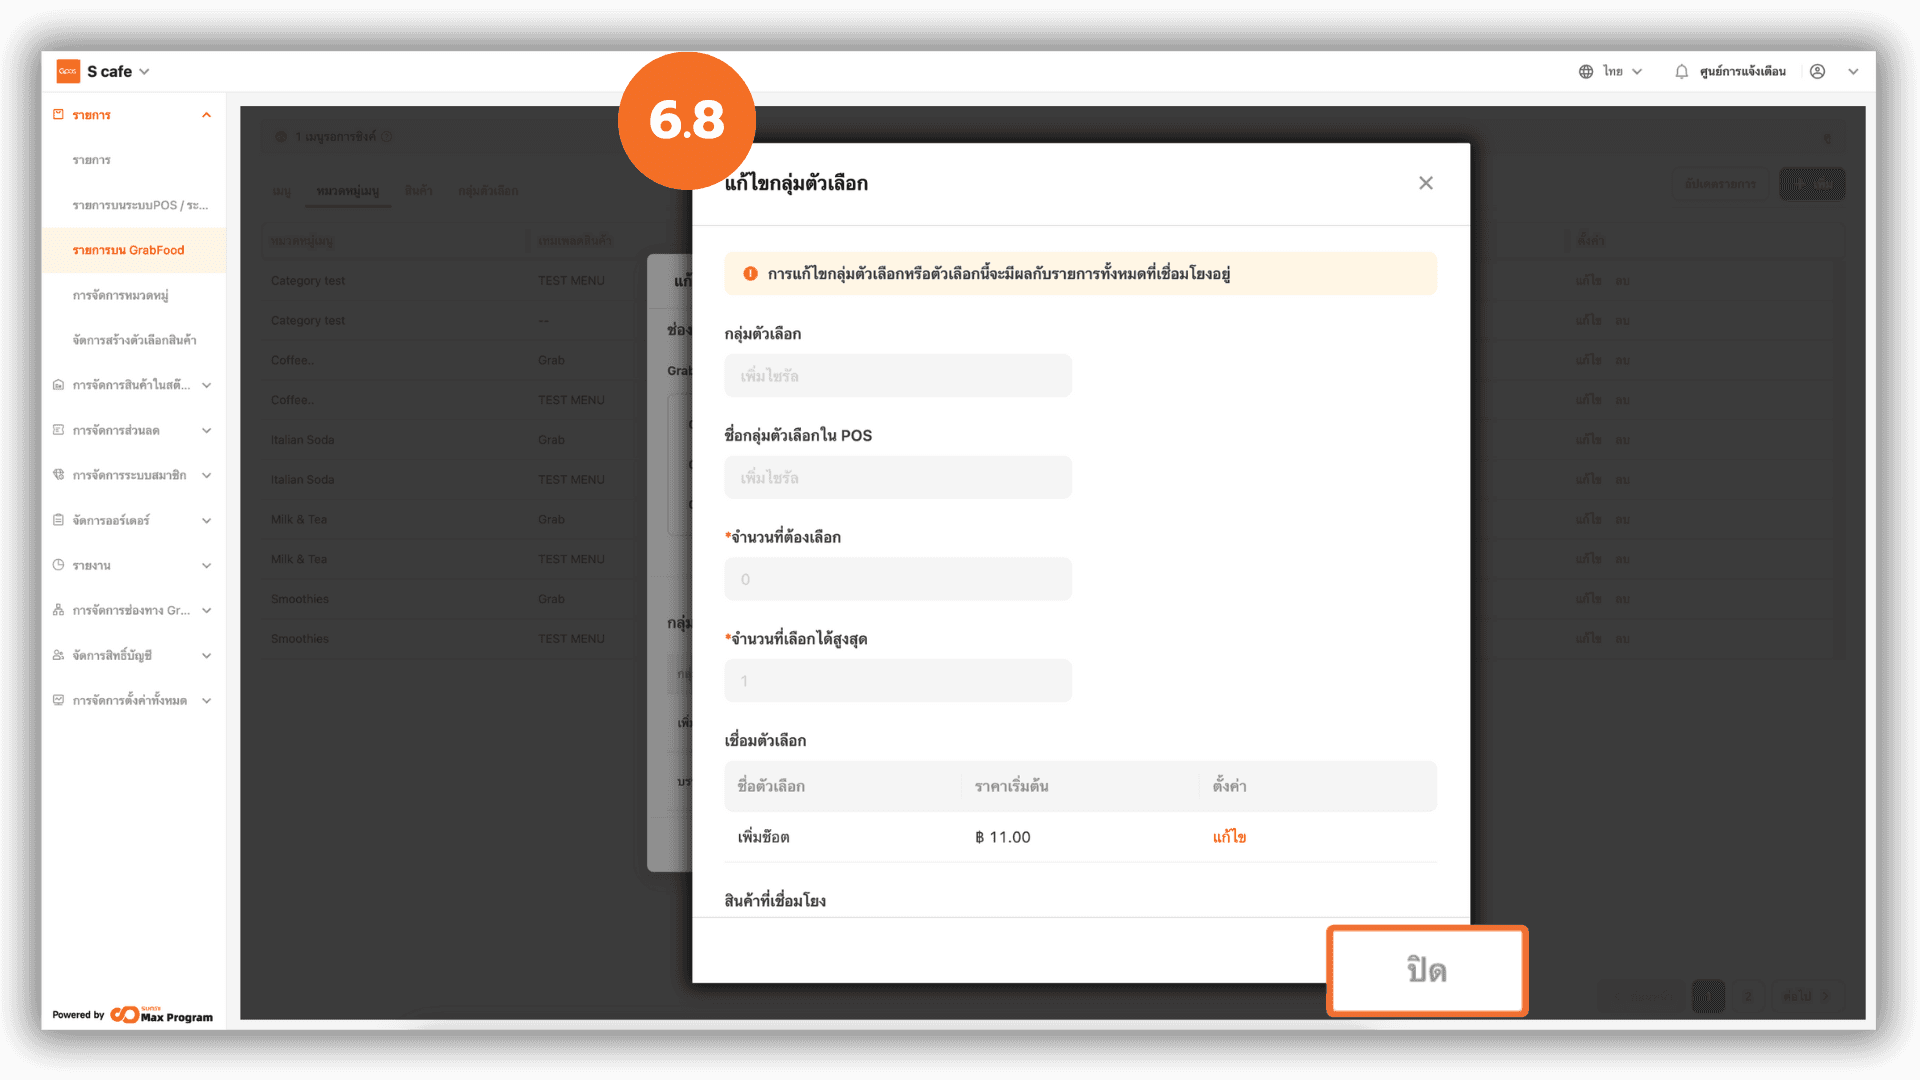
6.8 Exiting the Option Group Edit Page
After clicking “Save”, the system will return to the Edit Option Group page. Click “Close” again to exit the editing page.
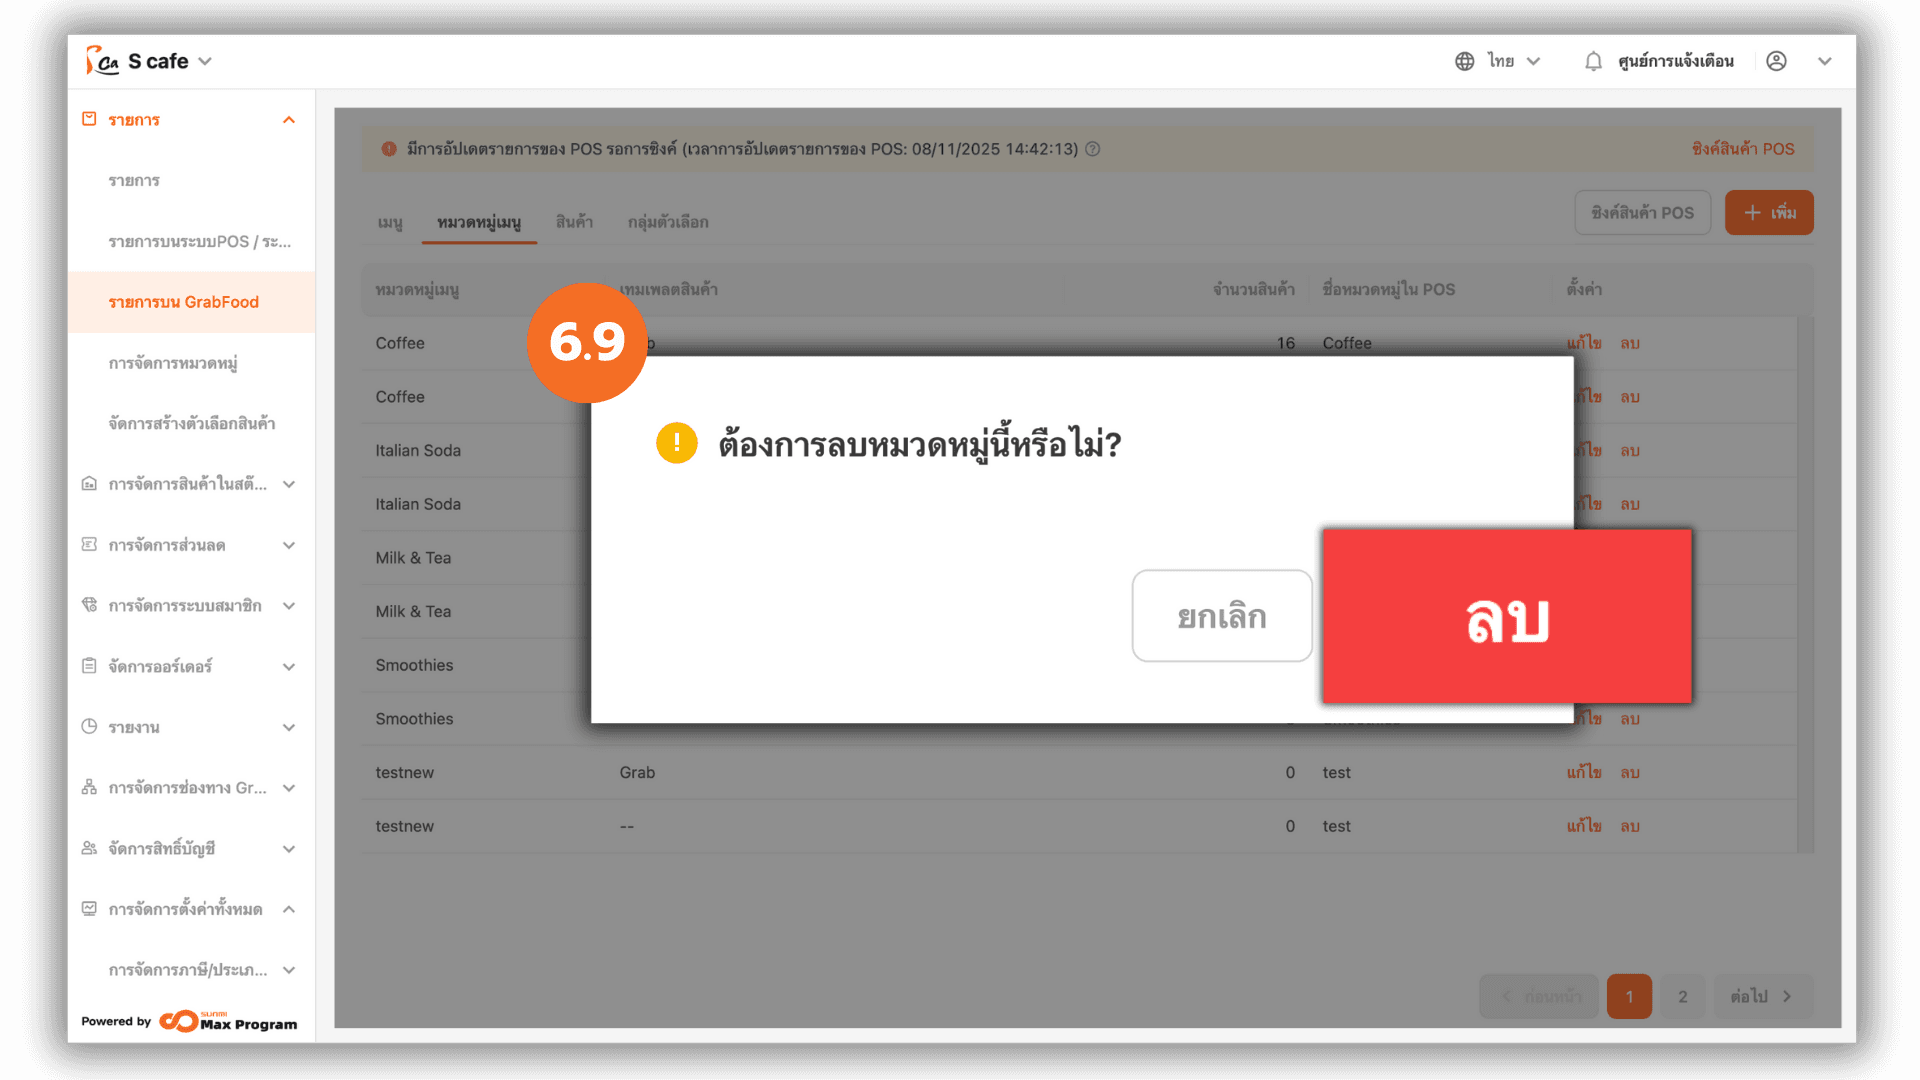
6.9 Deleting a Menu Category
When clicking “Delete” next to a category name, the system will display a deletion confirmation message. Click “Delete” again to confirm.
Note : The category must not be linked to any menu items in order to be deleted.
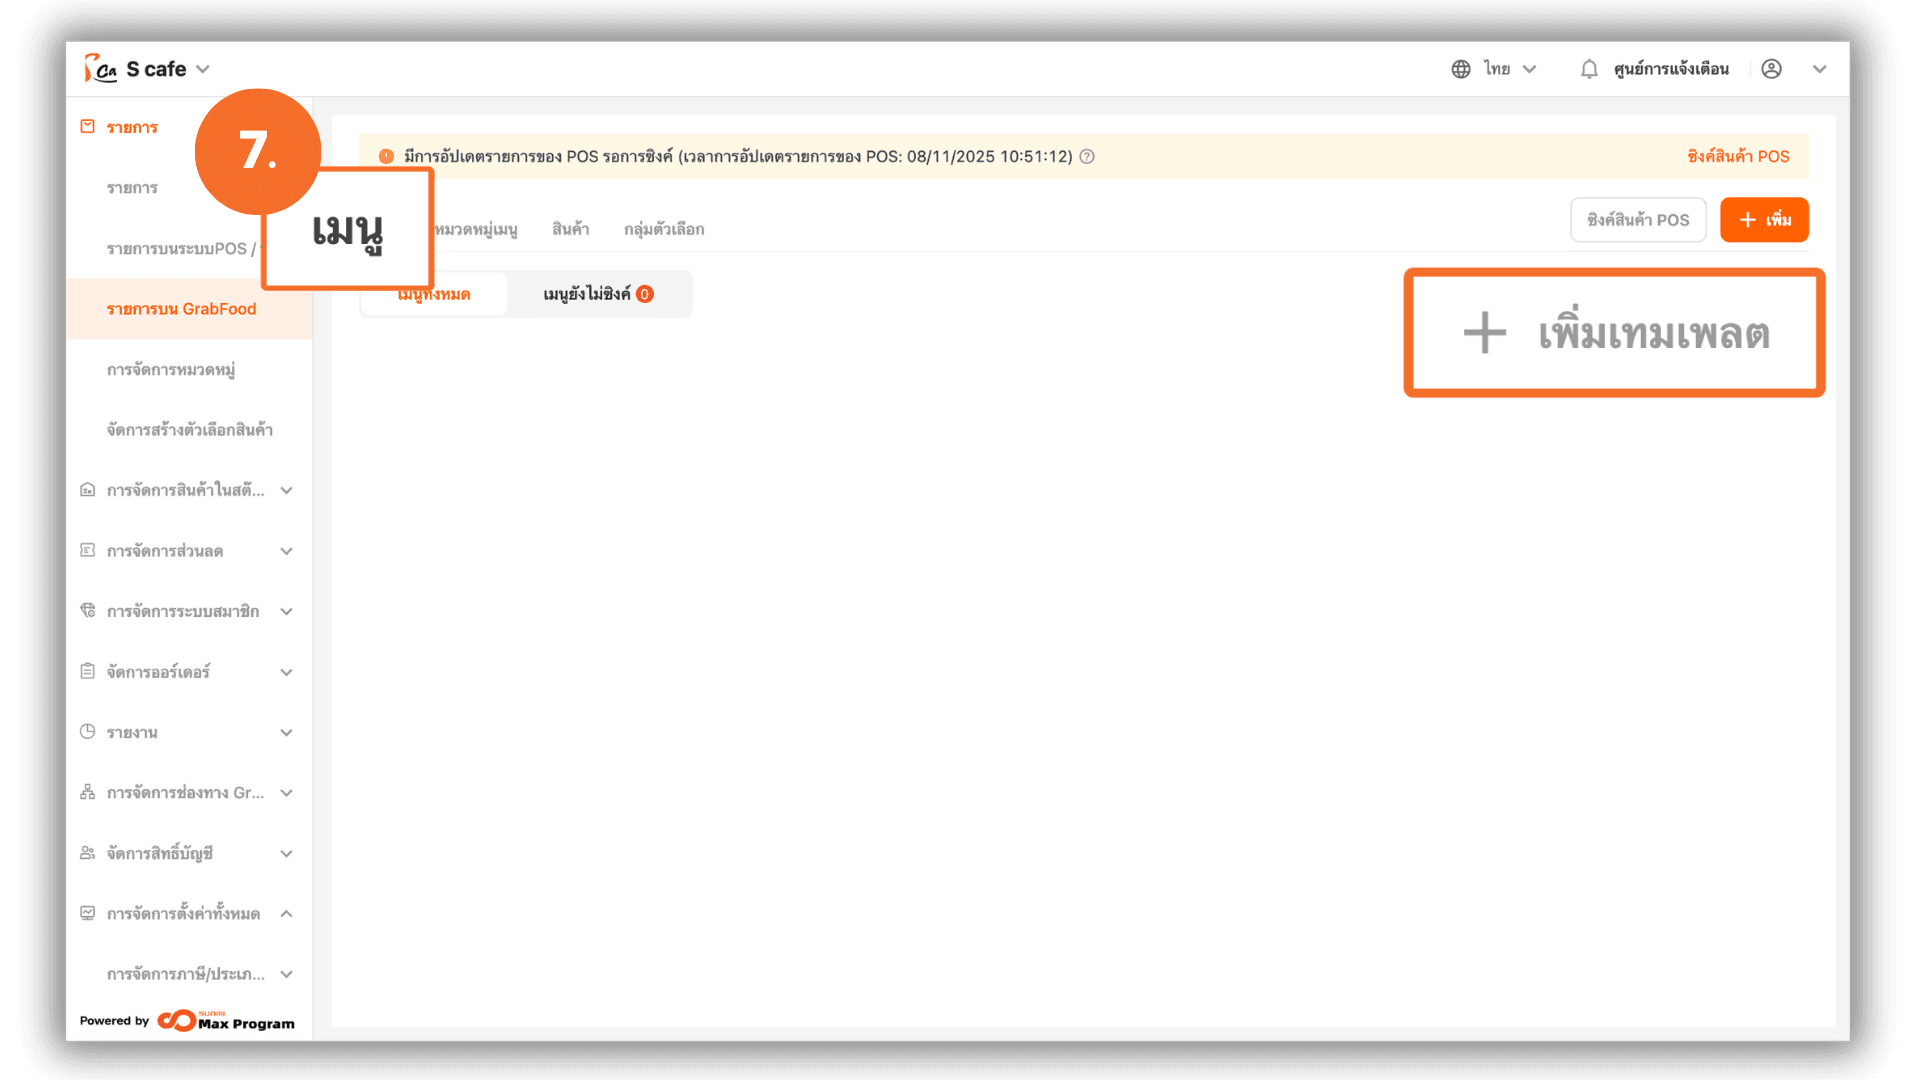
7. Creating a GrabFood Menu Template
Go to the Menu section and click “+ Add Menu” to create a new menu template.
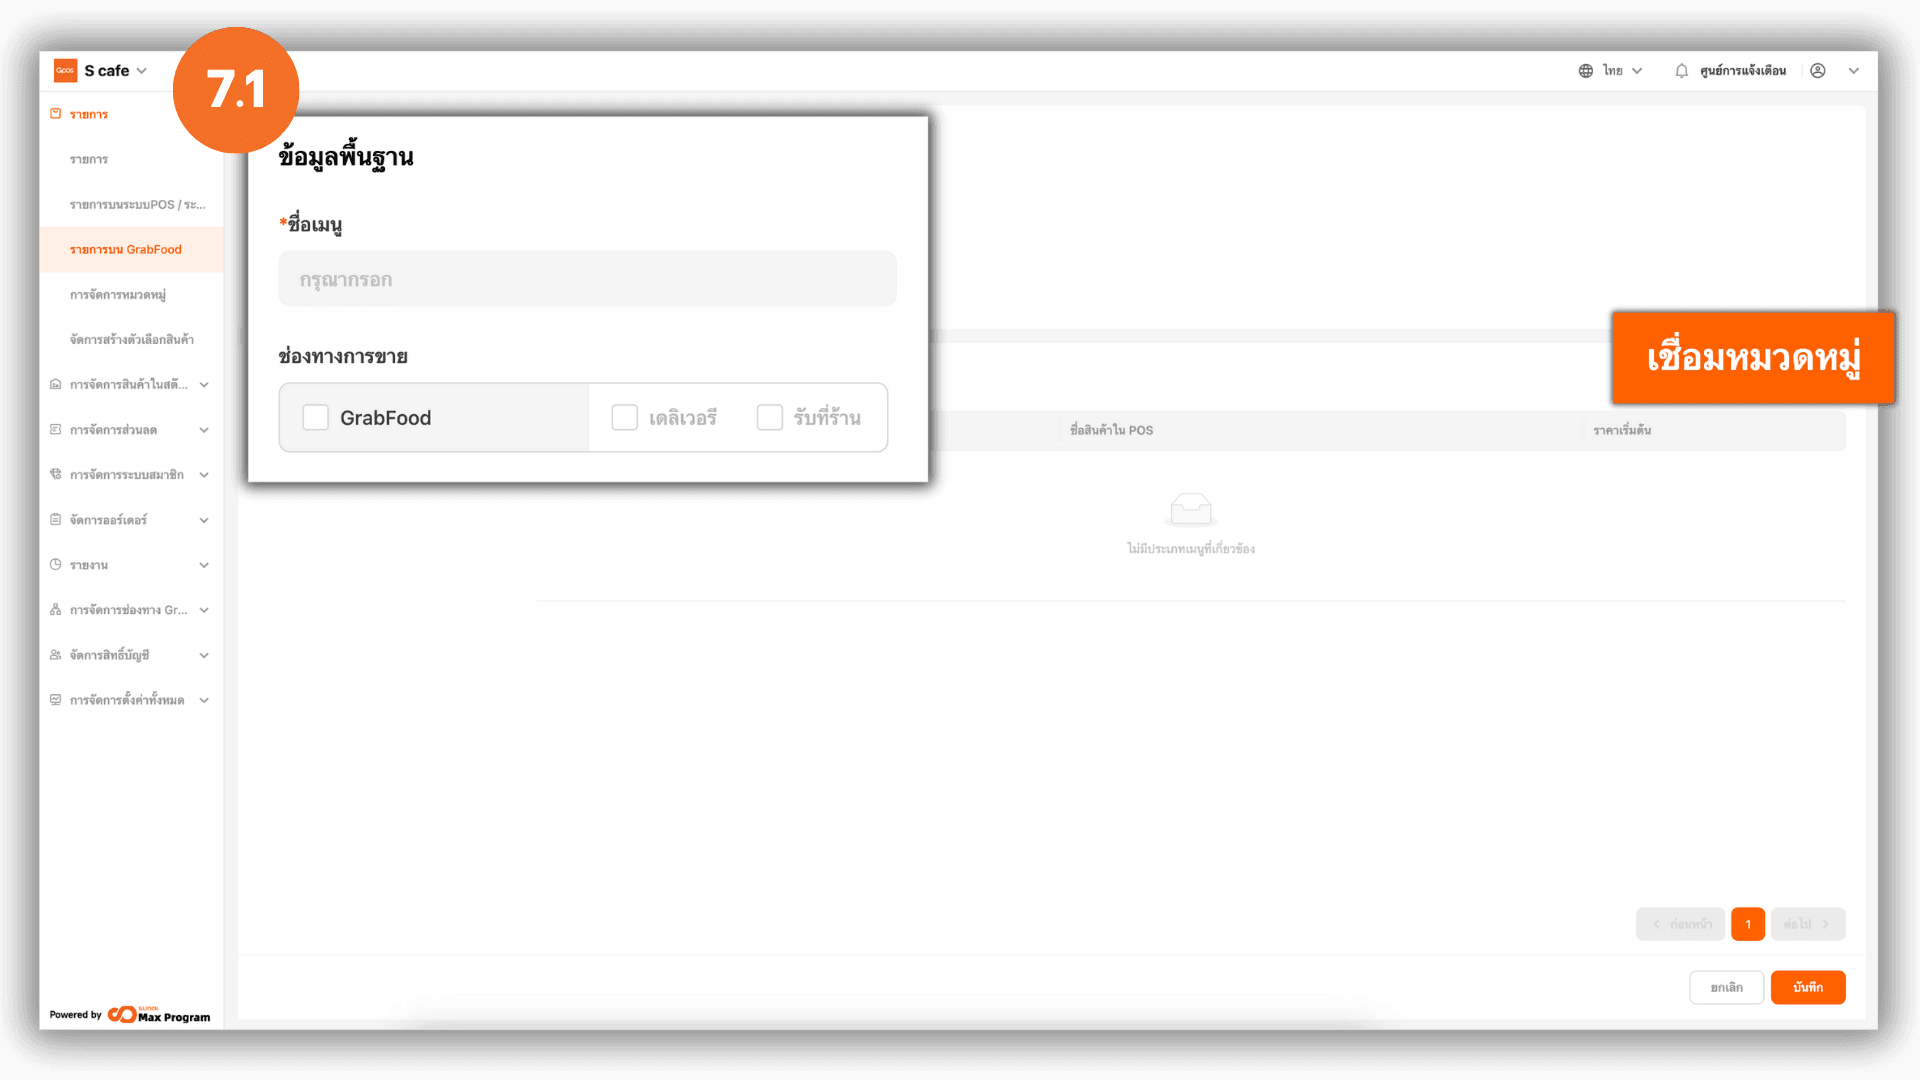
7.1 Creating a New Template
Enter the Menu name, select the GrabFood sales channel, and then click “Link Categories”.
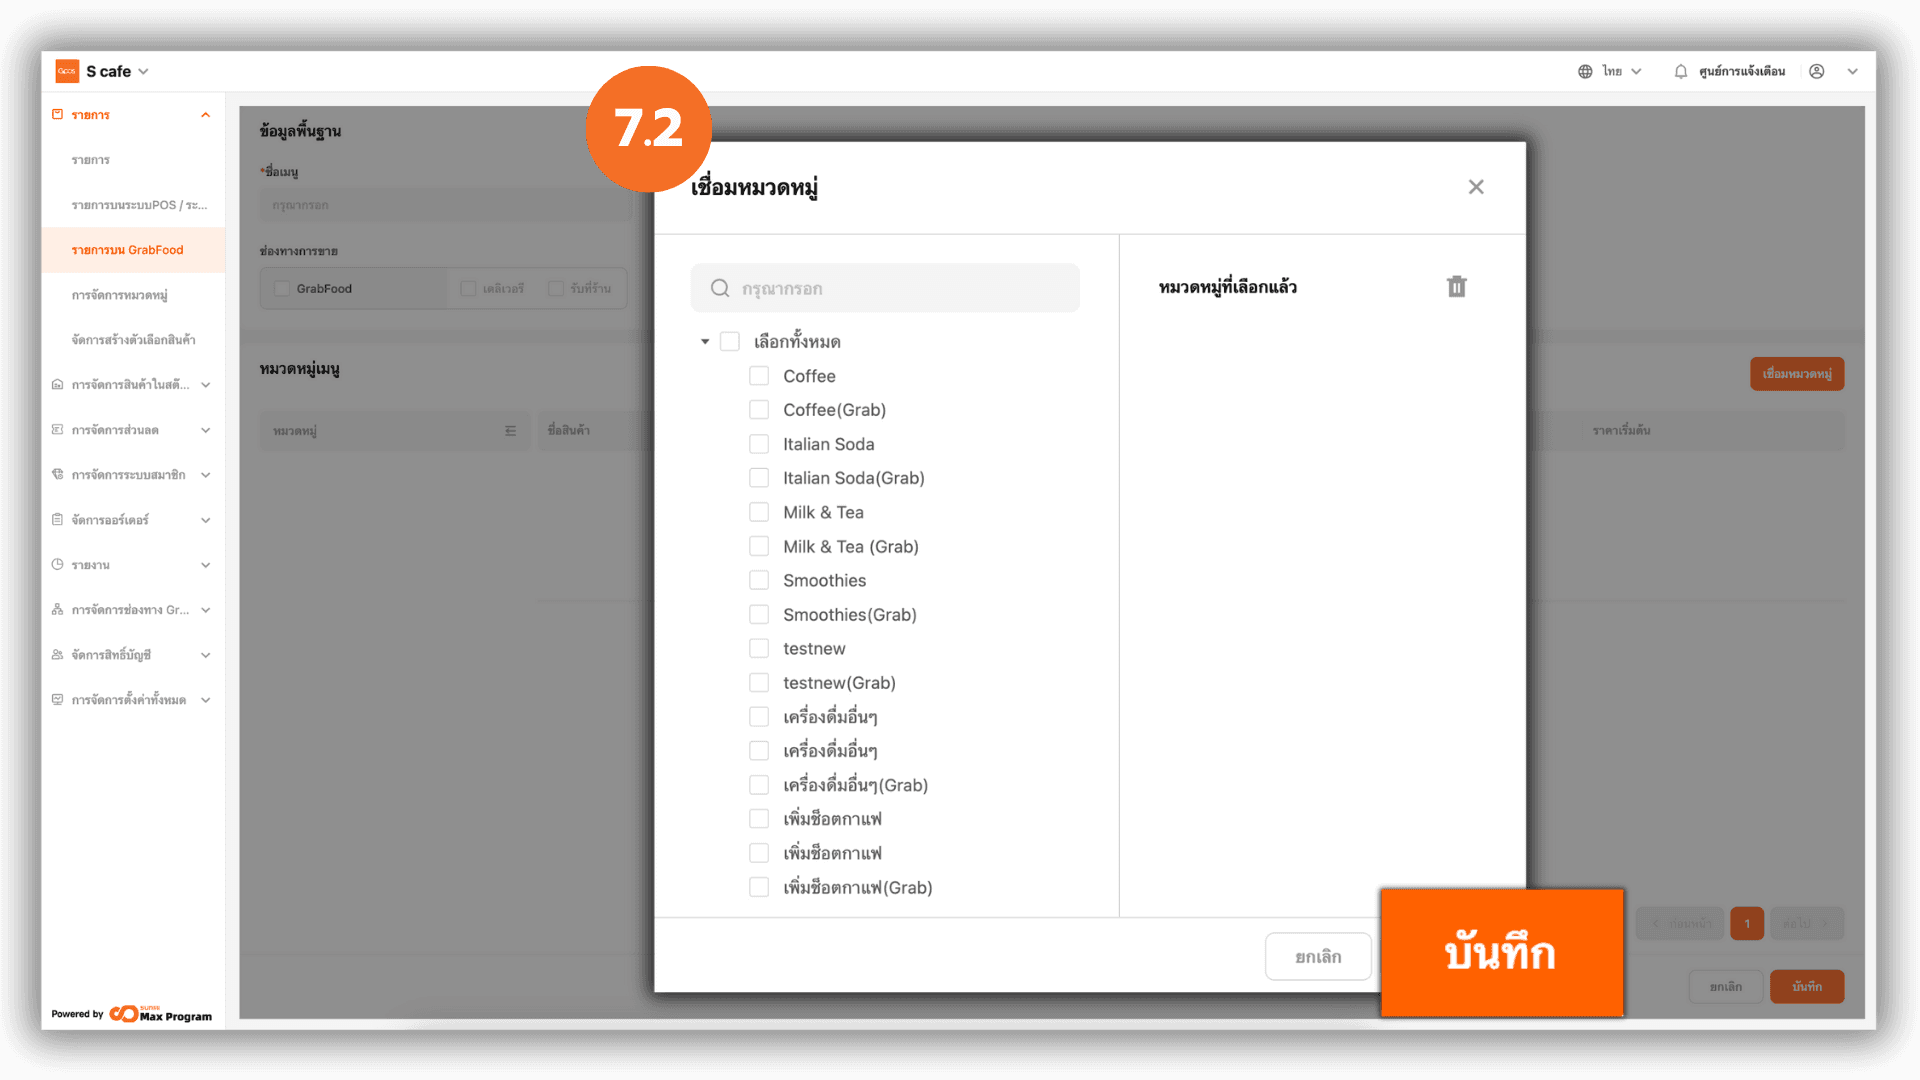
7.2 Linking Categories to the Template
After clicking Link Categories, the system will display all available menu categories. Select the categories you want to link to the template, then click “Save”.
7.3 Managing Categories Within the Template
The system will display the selected categories along with the menu items within each category. You can click the available icons to configure additional settings as needed.

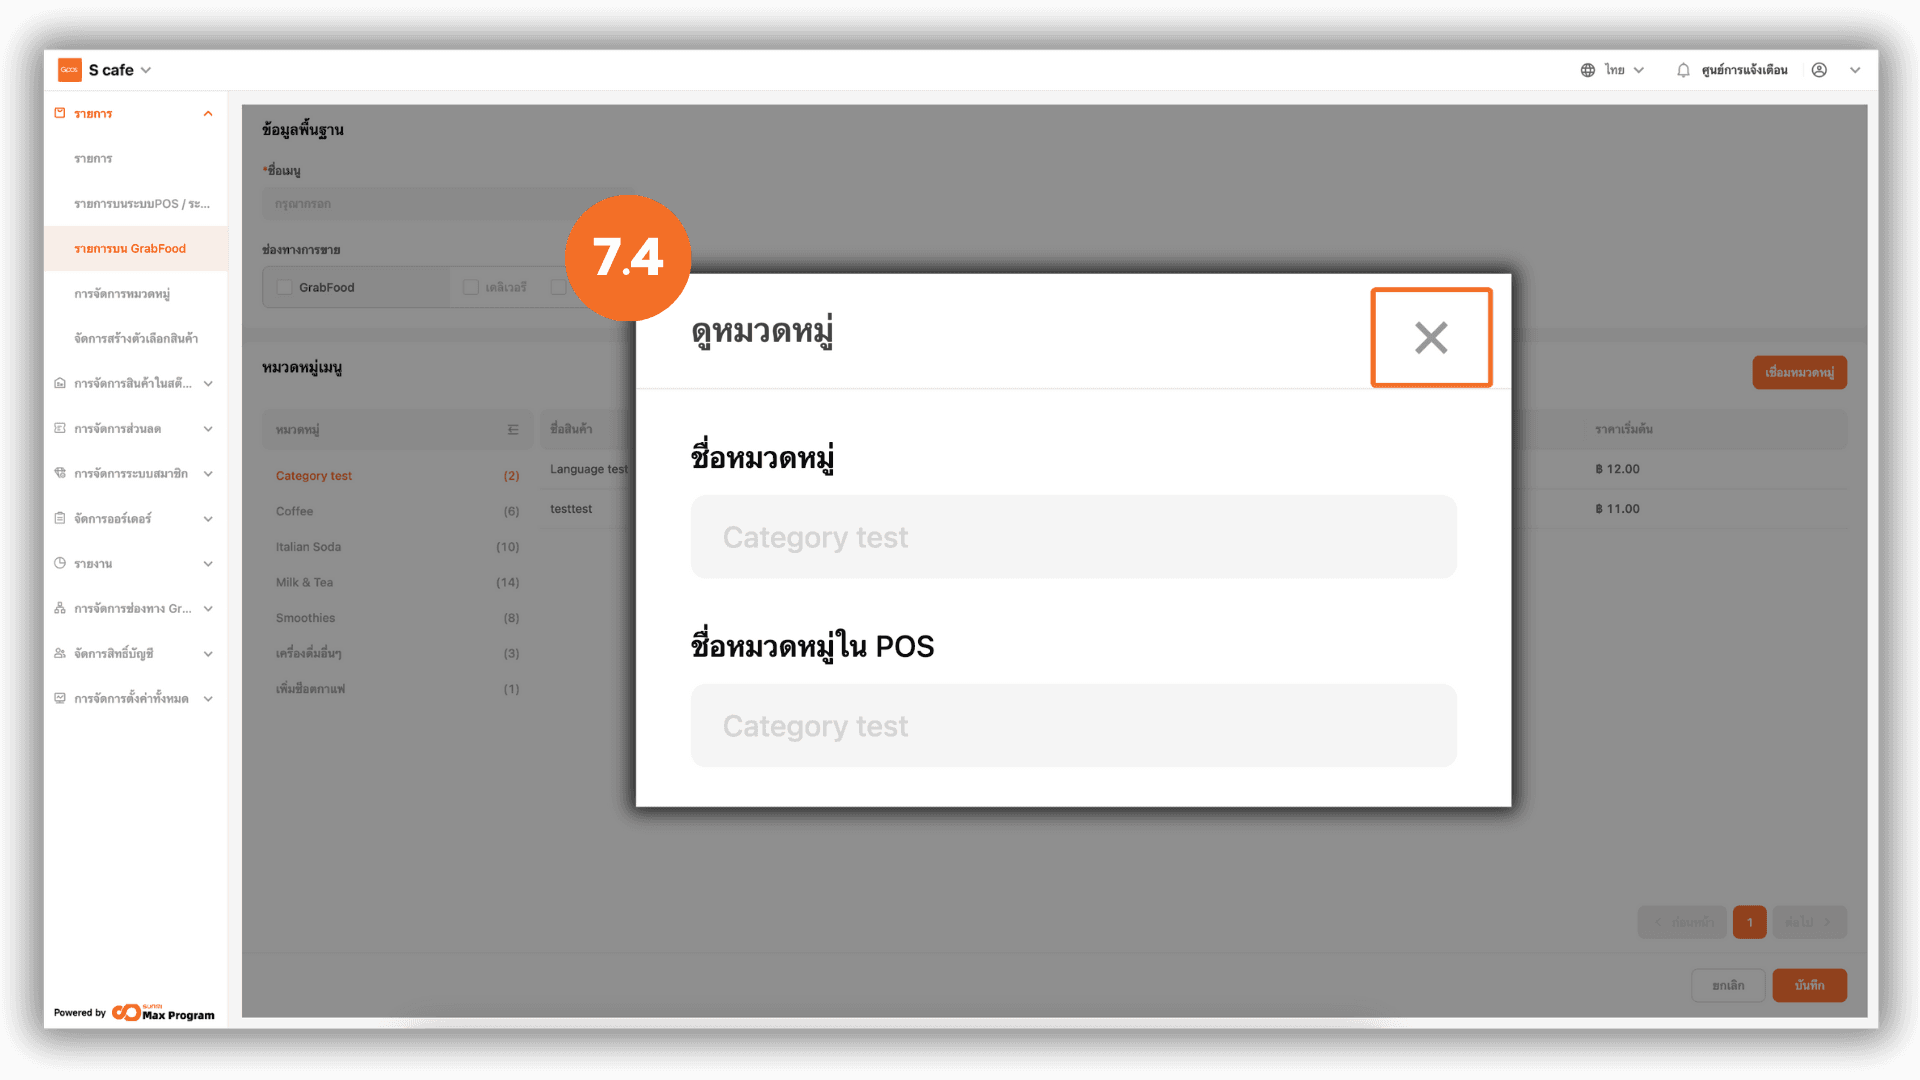
7.4 Category Name Display Icon
The eye icon allows you to view the category name set in the template. This is useful when the category name in the template differs from the name displayed on the storefront.
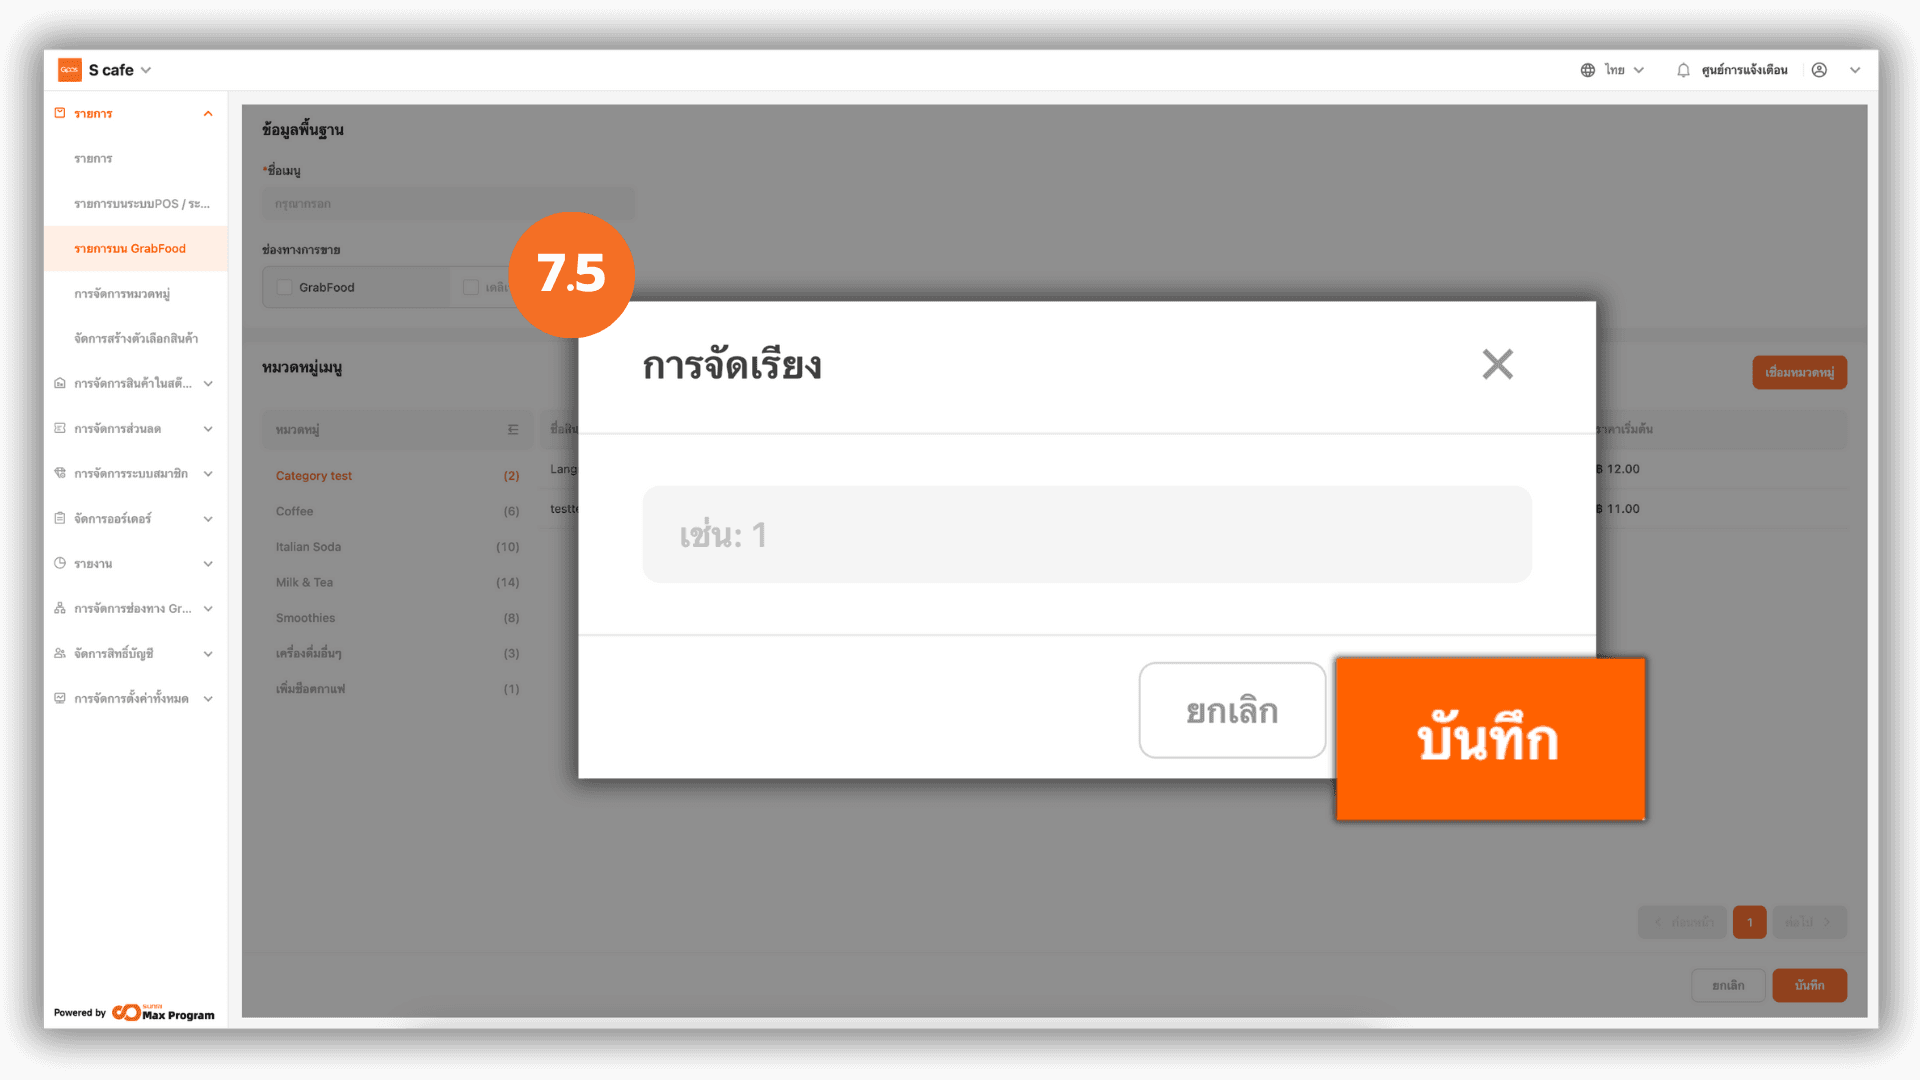
7.5 Reordering Categories
When clicking the reorder icon, the system will prompt you to enter the desired display order number. After entering the order number, click “Save” to confirm the change.
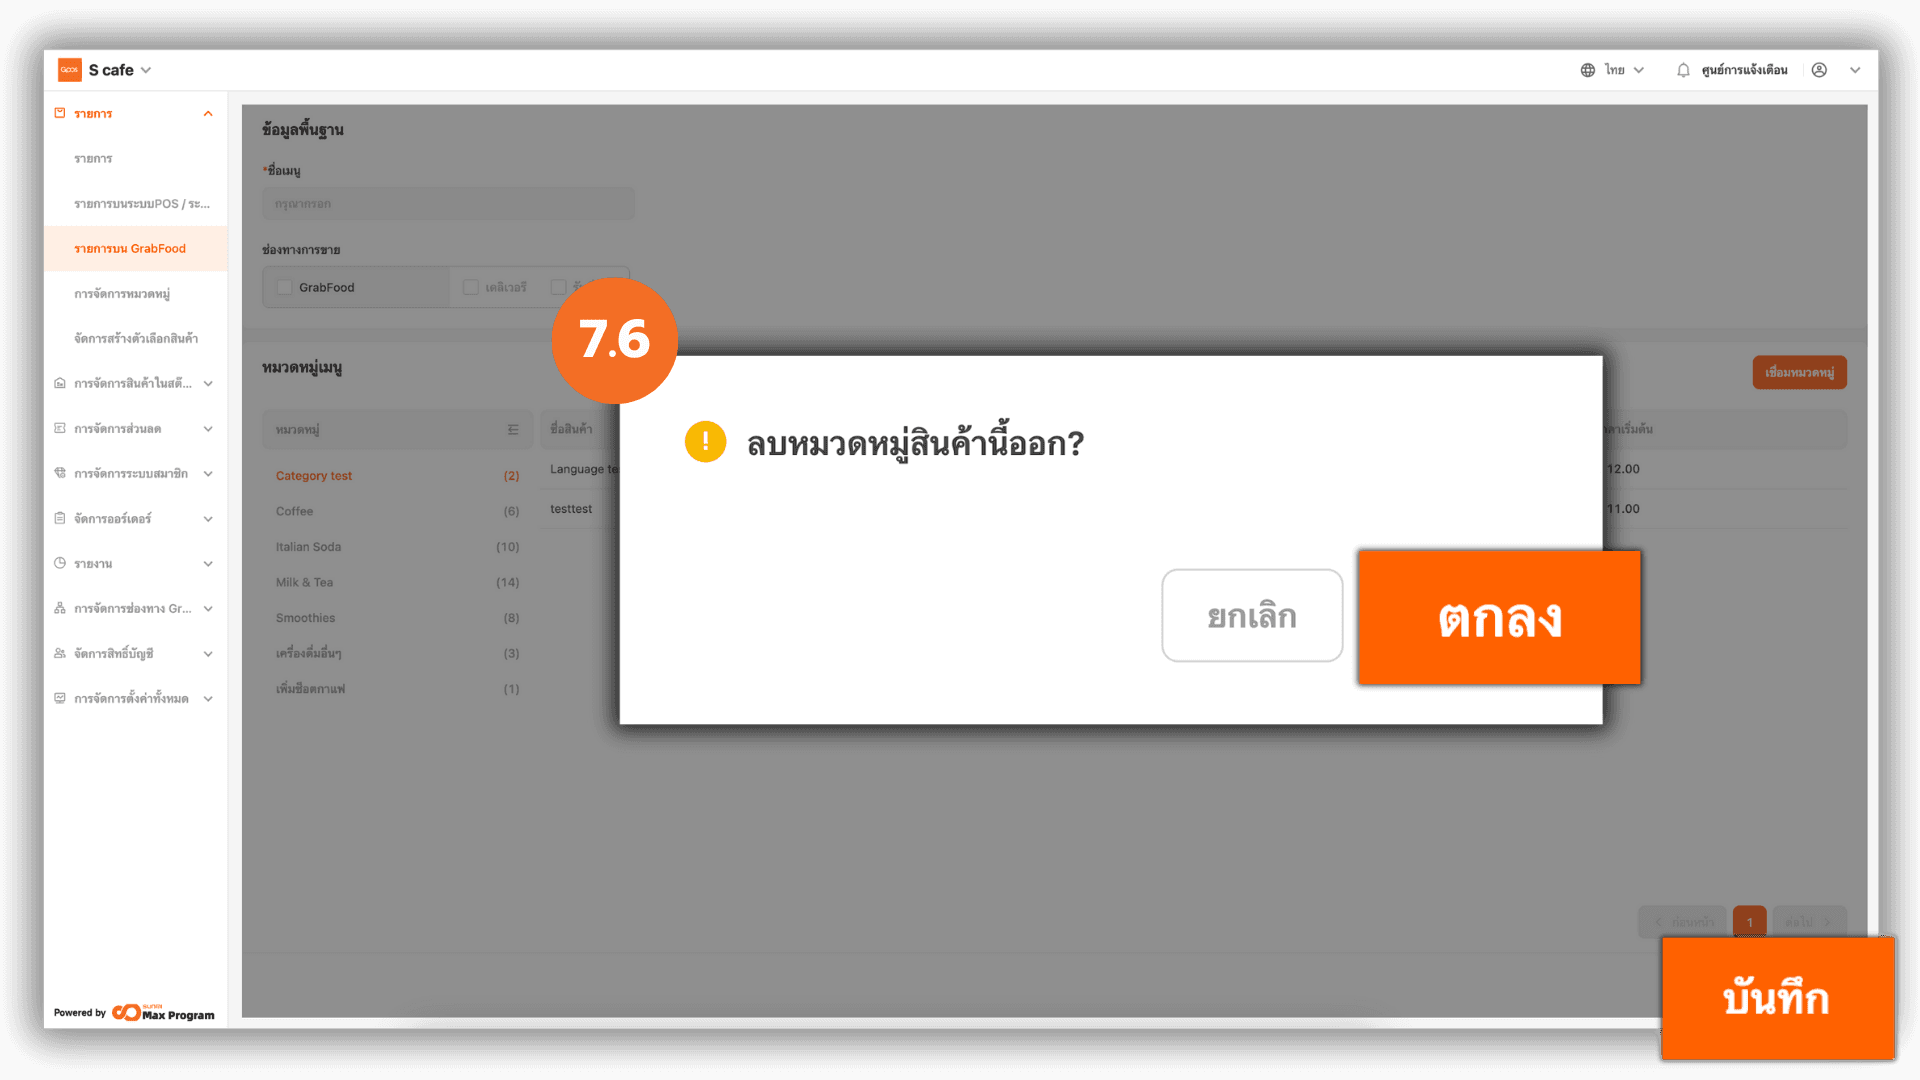
7.6 Removing a Category from the Template
When clicking the trash icon, the system will display a confirmation message for removing the category from the template. Click “Ok” to proceed. After completing all template settings, click “Save” to confirm and create the menu template.
8. Syncing Menu Data to GrabFood
Click “Sync” on the created template to update all data to GrabFood immediately. You can further manage templates using the following icons
- Trash Bin : Delete template
- Report : View sync history
- Sync : Re-sync after making updates
- Pencil : Modify linked categories

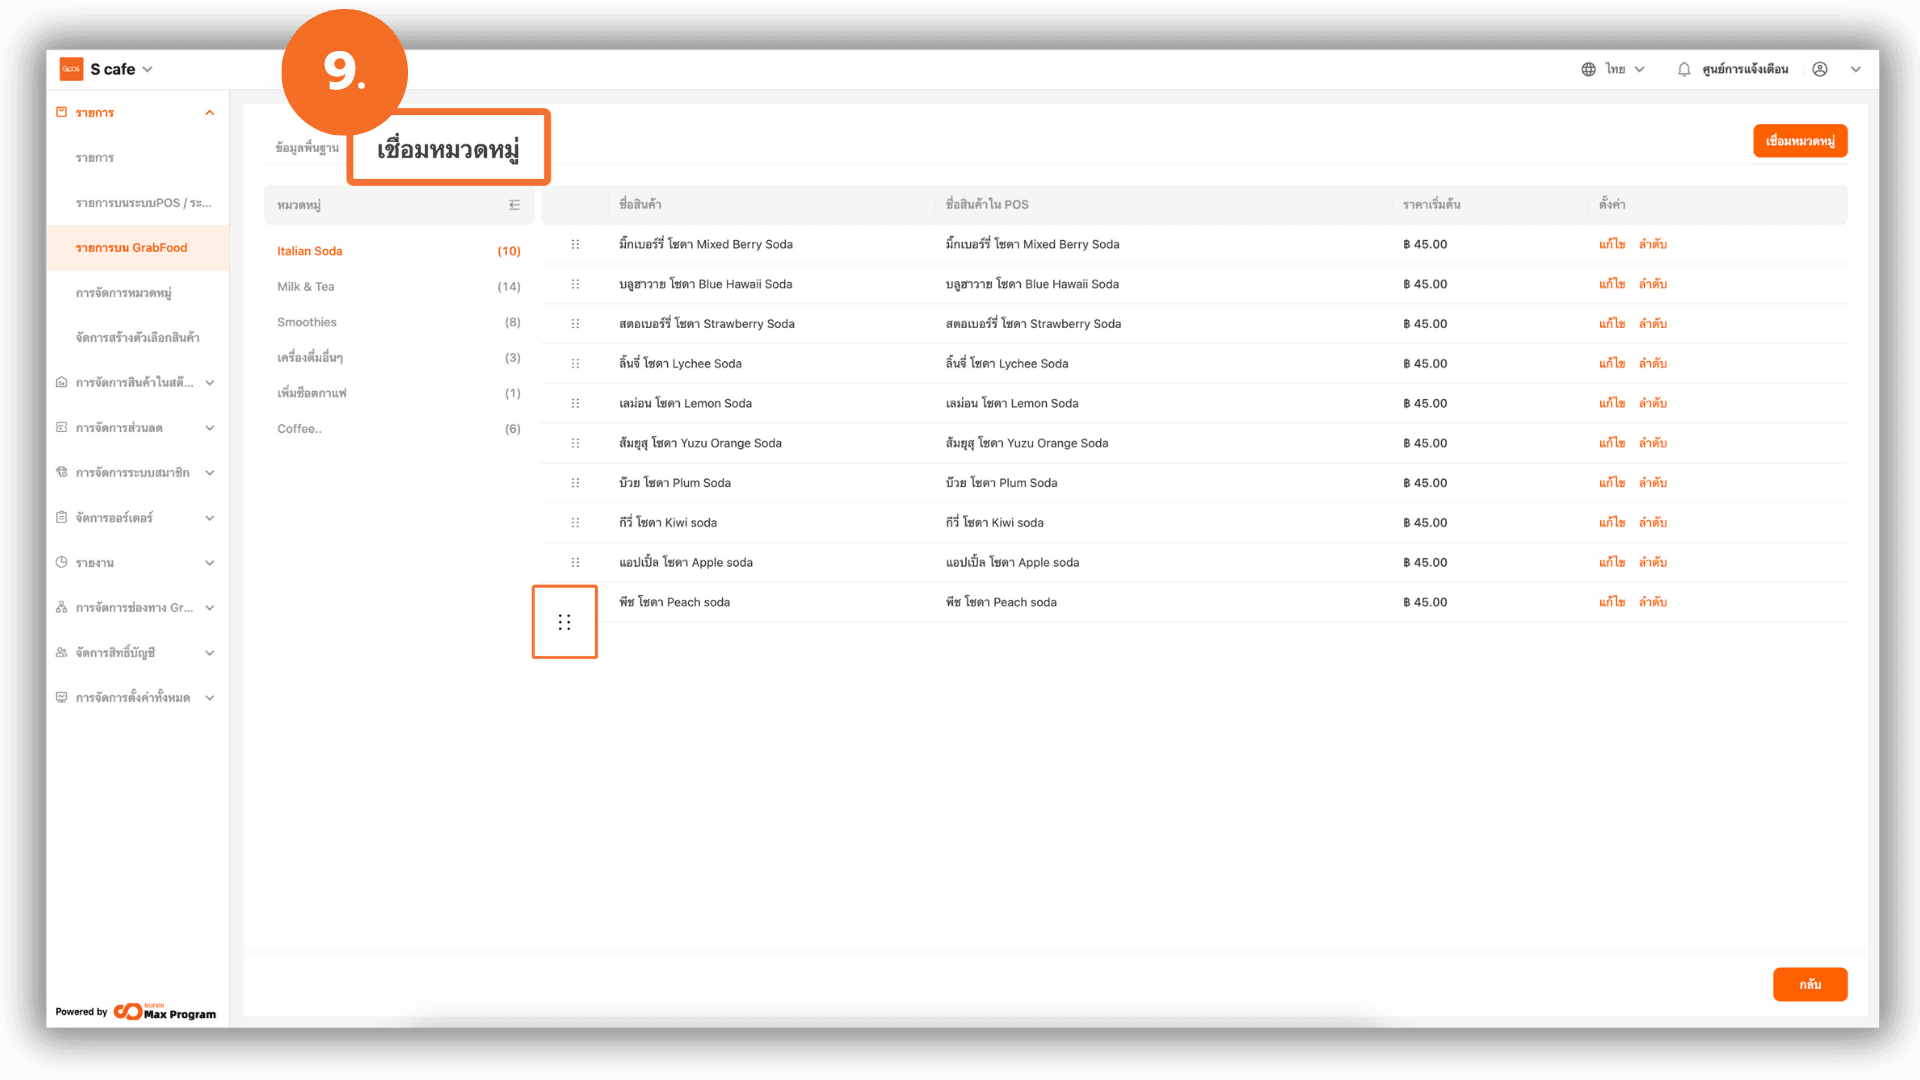
9. Reordering GrabFood Items After Creating a Template
To reorder GrabFood menu items after a template has been created, click the pencil icon (Edit) to edit the template. Select “Link Categories”, and the system will display the list of items within each category linked to the template. Next to each item name, you will see the six-dot icon. Press and hold the icon, then drag the item to the desired position to rearrange the order. Once the reordering is complete, click “Save”, then sync the menu again to apply the changes.
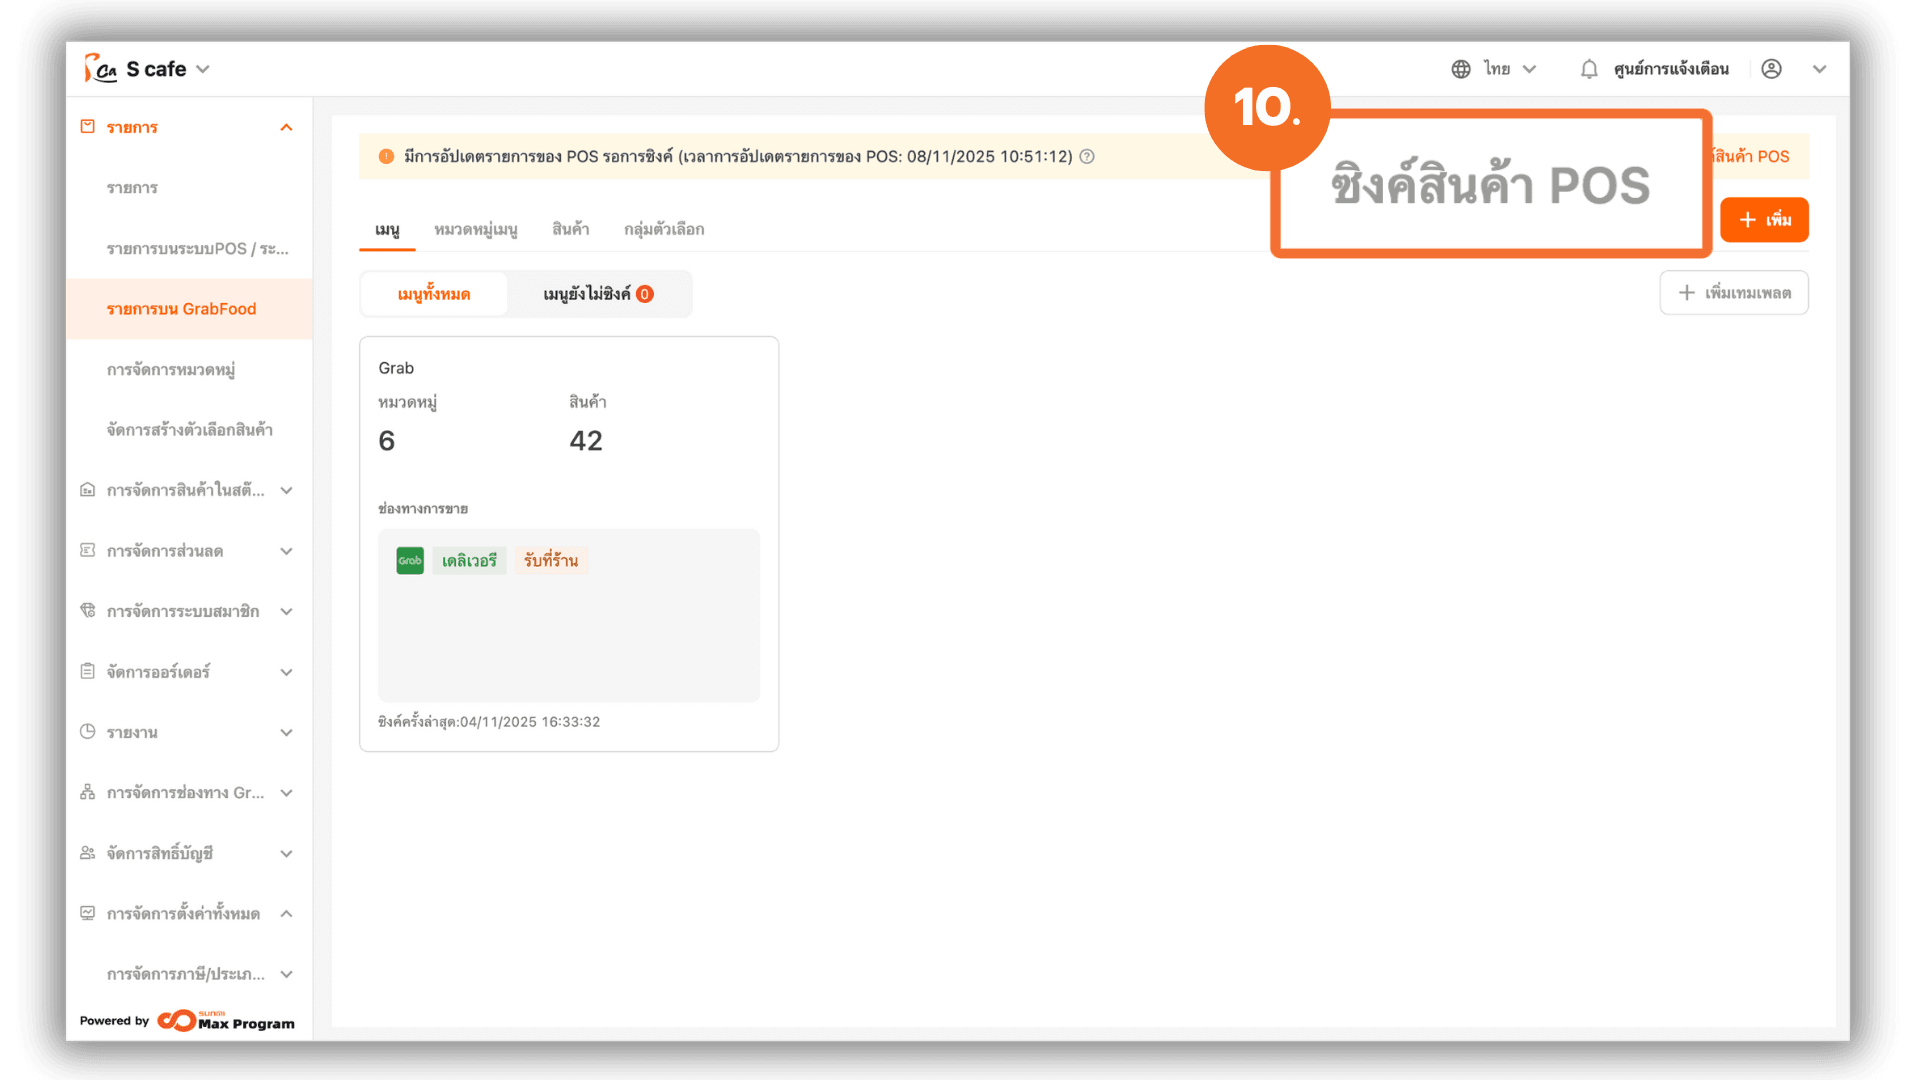
10. Syncing POS Data to GrabFood
If there are any changes to item names, images, or item descriptions in the POS (front-of-store) system, click “Update POS Item” to update and sync all information to GrabFood.