Connect GPOS with Grab (Sync from GPOS)
2026-01-09 11:01
This guide helps users correctly and systematically connect GrabFood with the GPOS system. It reduces configuration errors, ensures smooth synchronization of menus and store data, and enables efficient use of the back-office system.
Preparation Before Connecting GPOS with GrabFood
please go to login.gpos.co.th, enter your email and password, then click Log In.
1. Go to GrabFood Channel Management > GrabFood > Link Account.

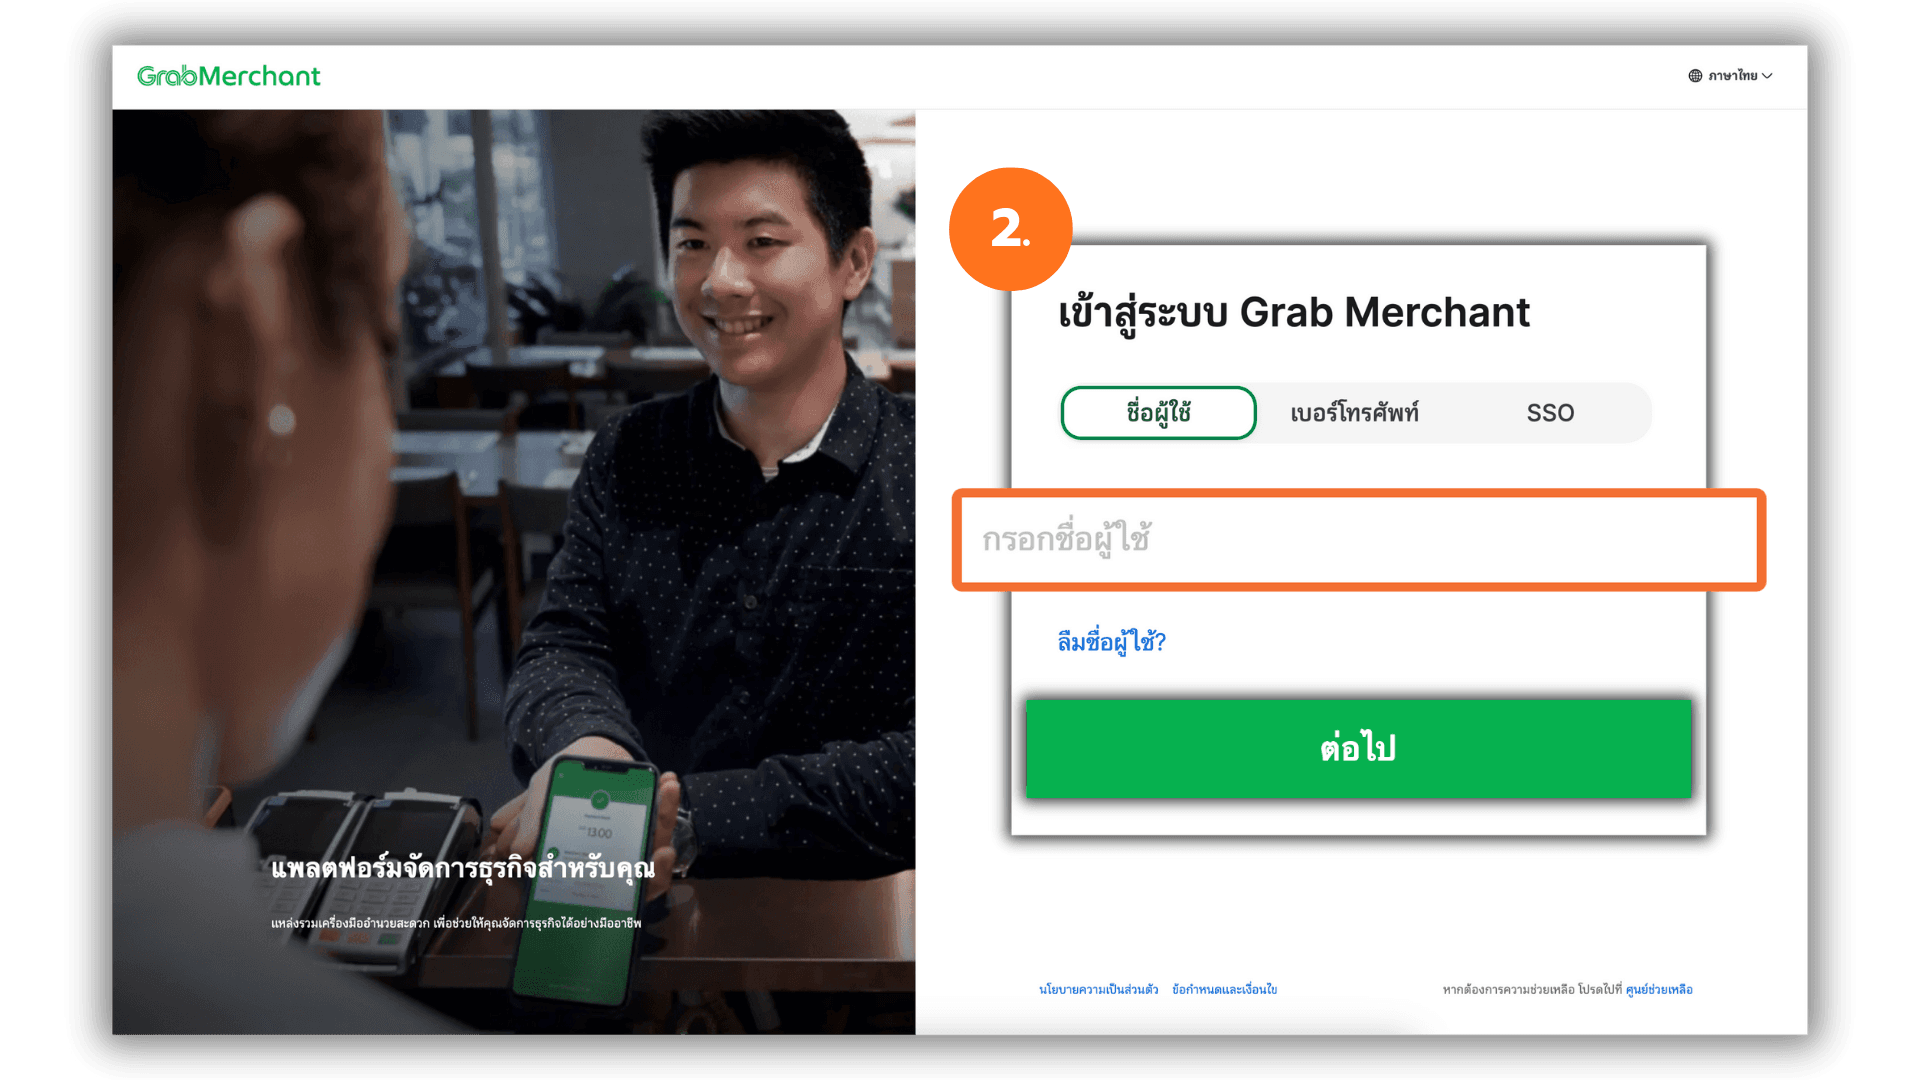
2. Enter the Grab Merchant Gmail address and click Next.
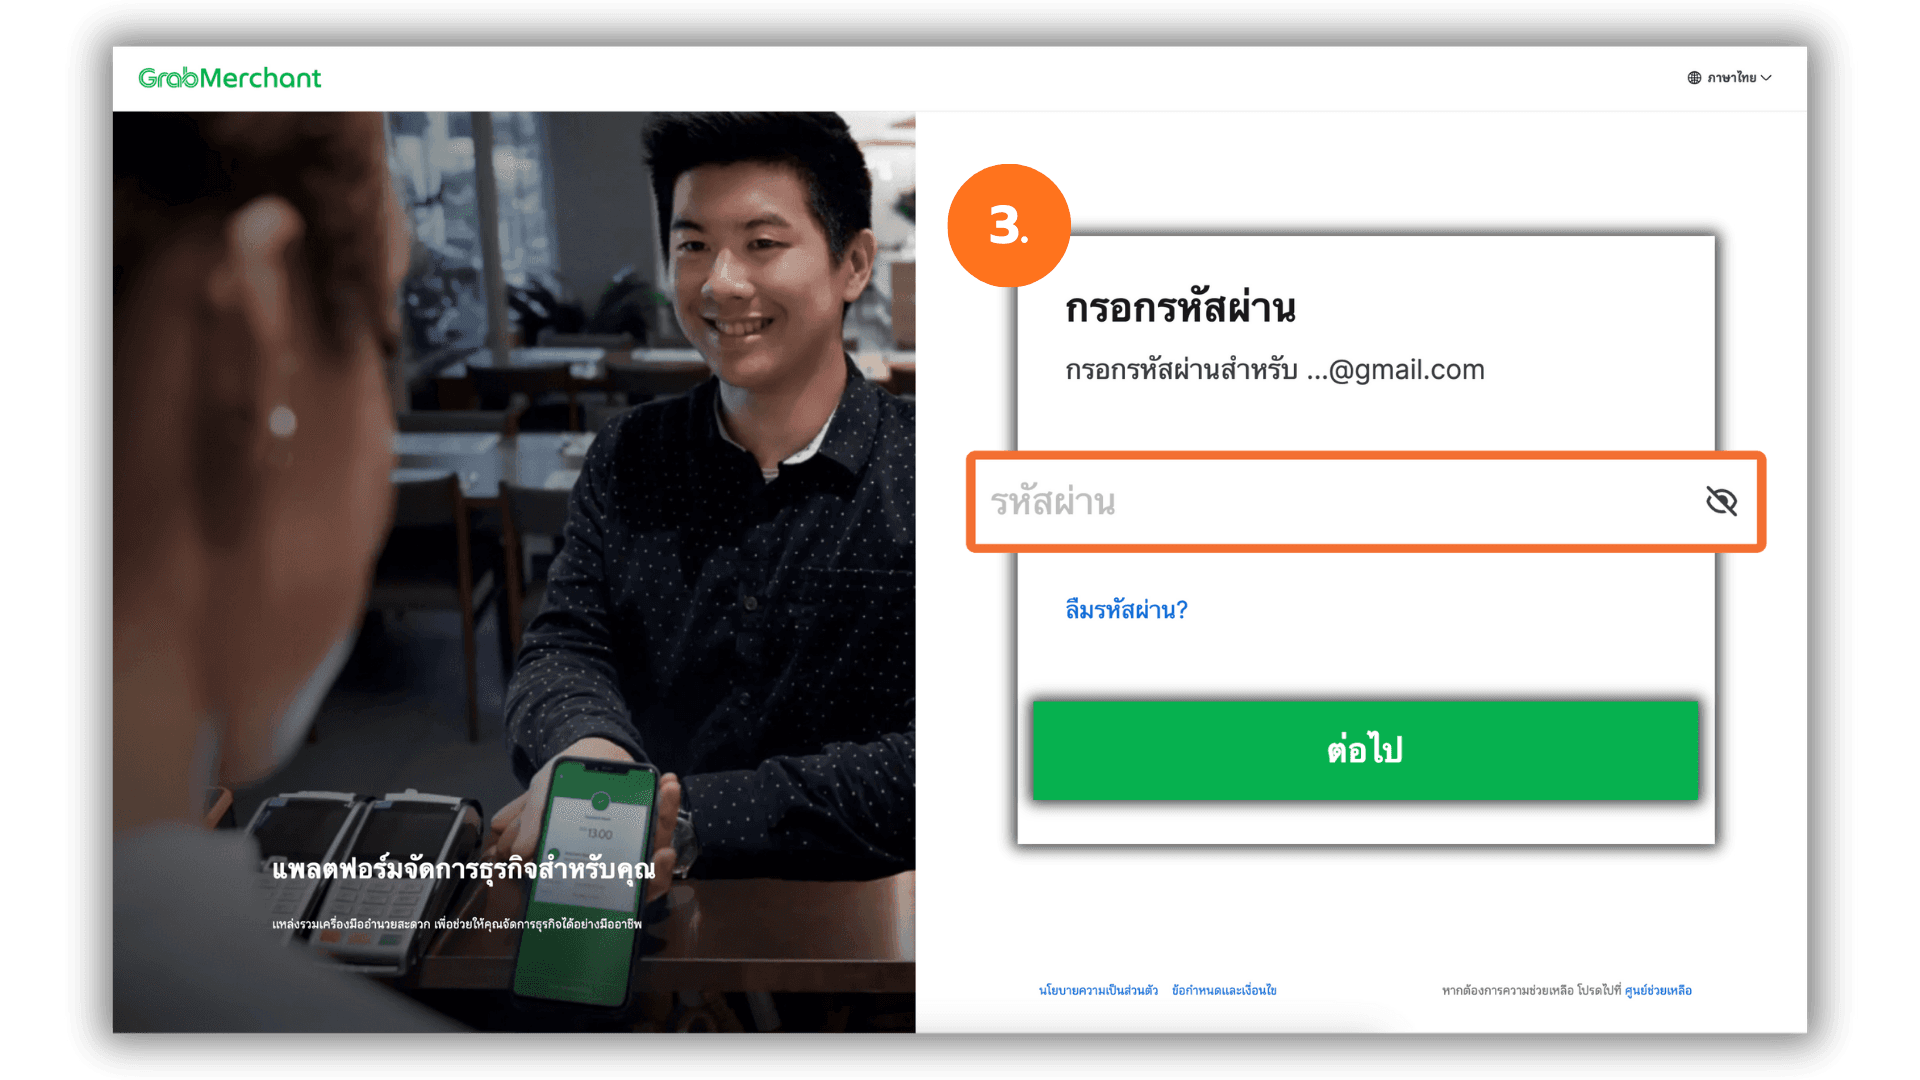
3. Enter the Grab Merchant password and click Next.
4. Select the store or branch that you want to connect to GPOS, then click Connect.

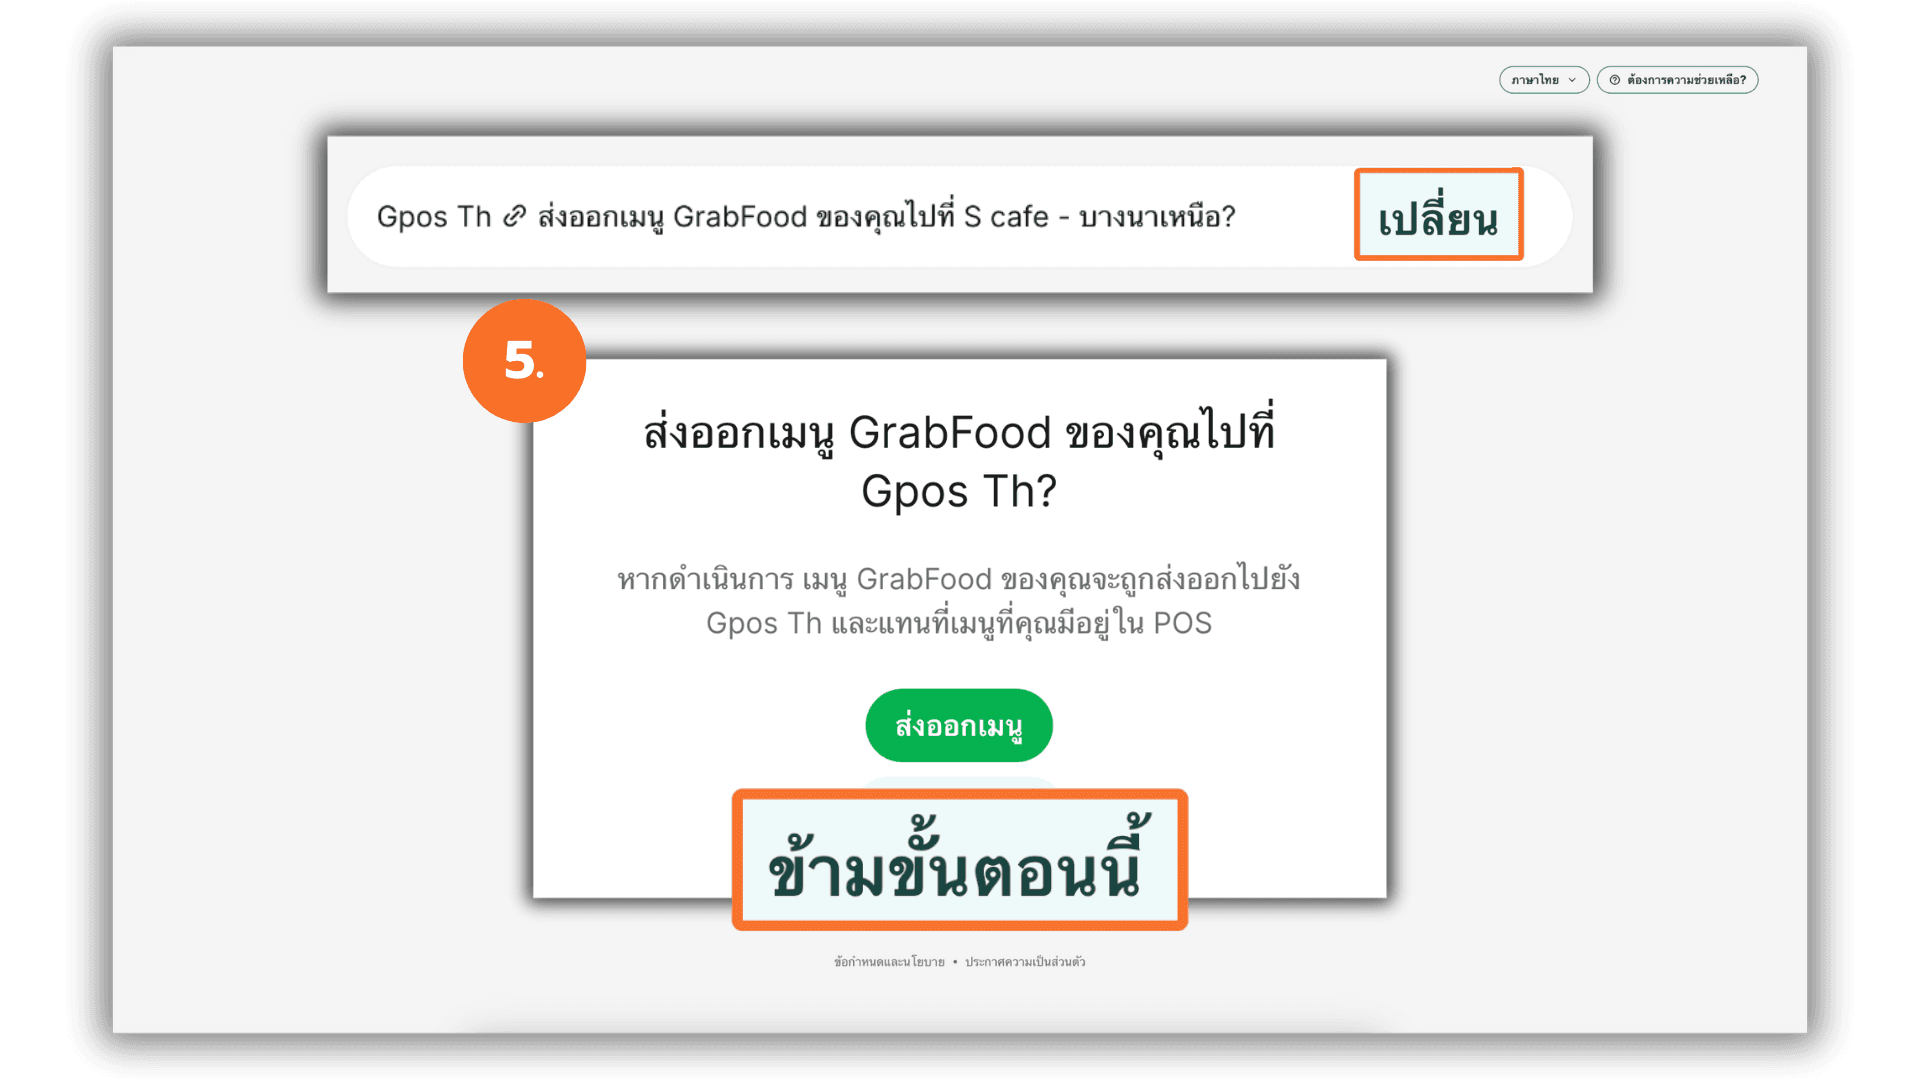
5. Click “Skip this step”. to import the product list from the Grab system into GPOS.
|If you want to change the GrabFood store, you can click “Change” at the top of the screen to select a new store.
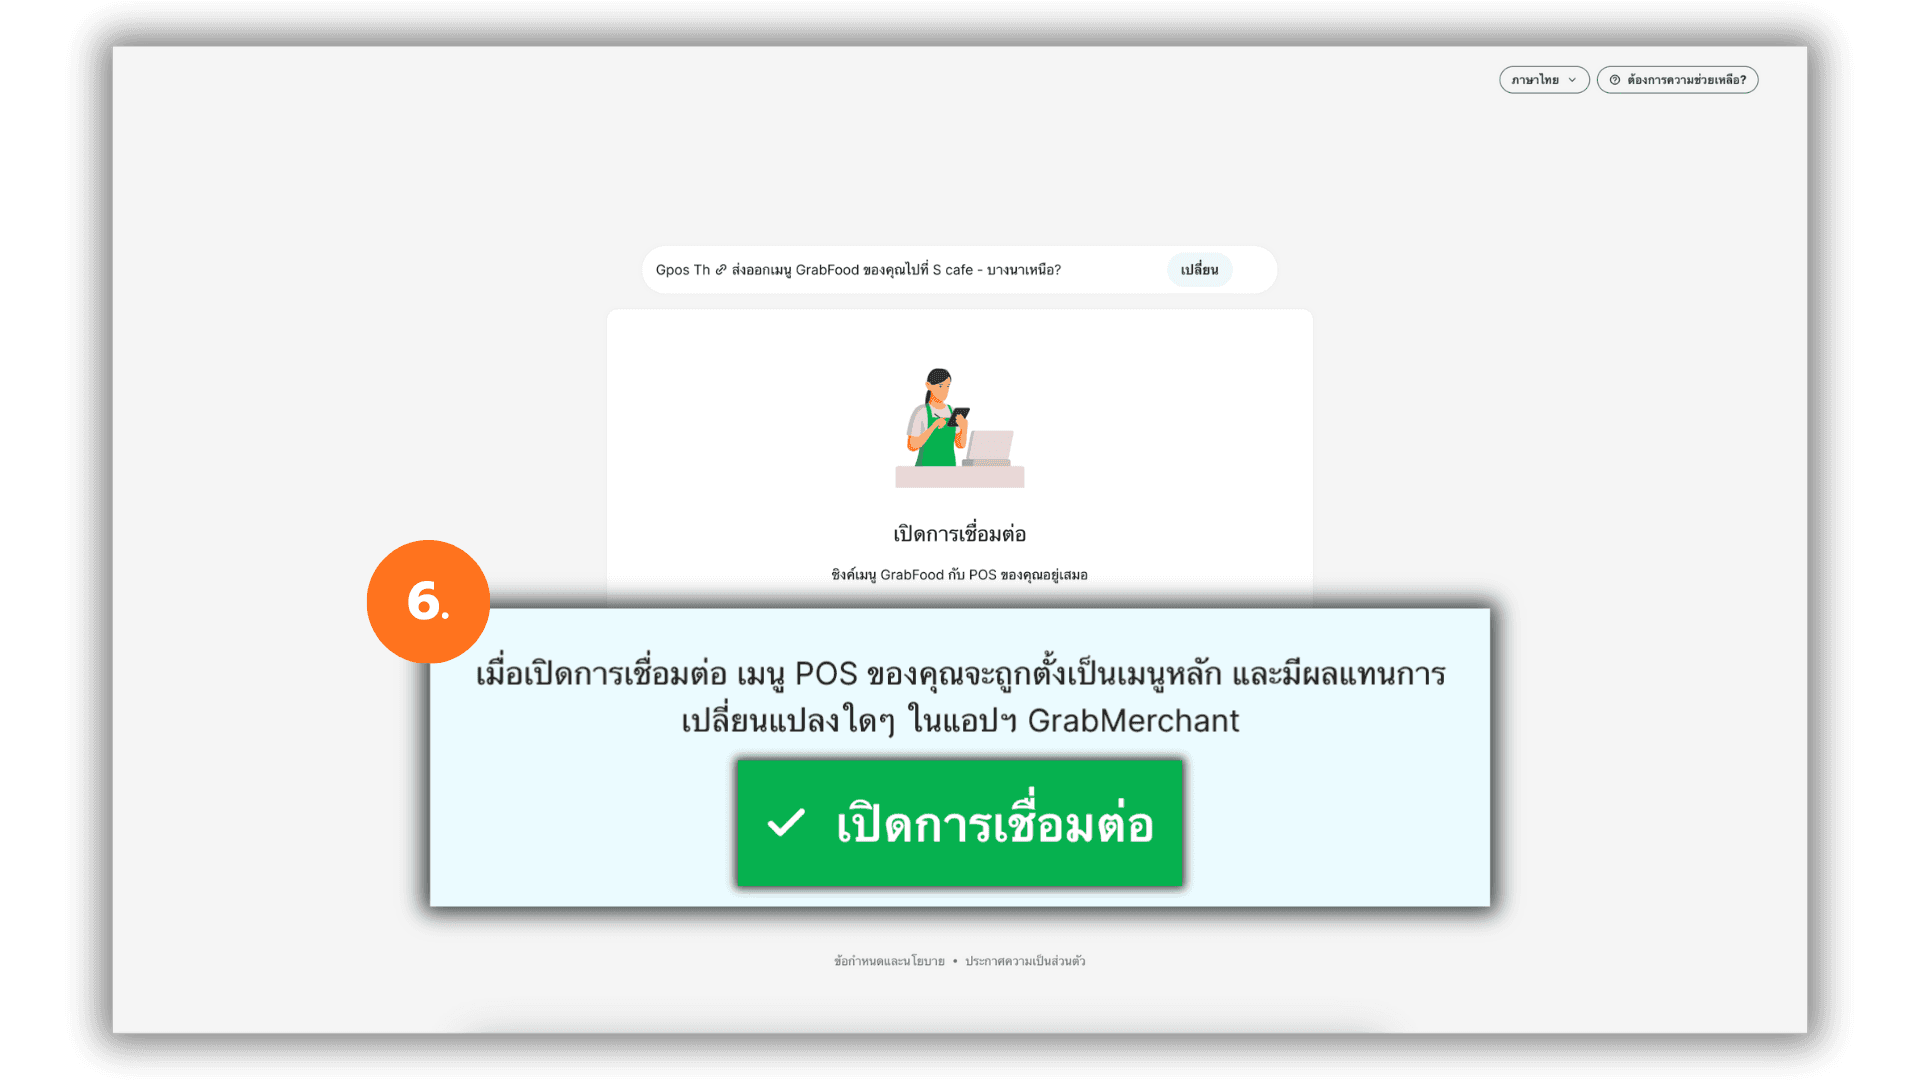
6. Click “Enable Connection” to start syncing the system. This process takes approximately 5 minutes.
|Note: Do not close the screen or switch to another page during the syncing process to prevent data loss.
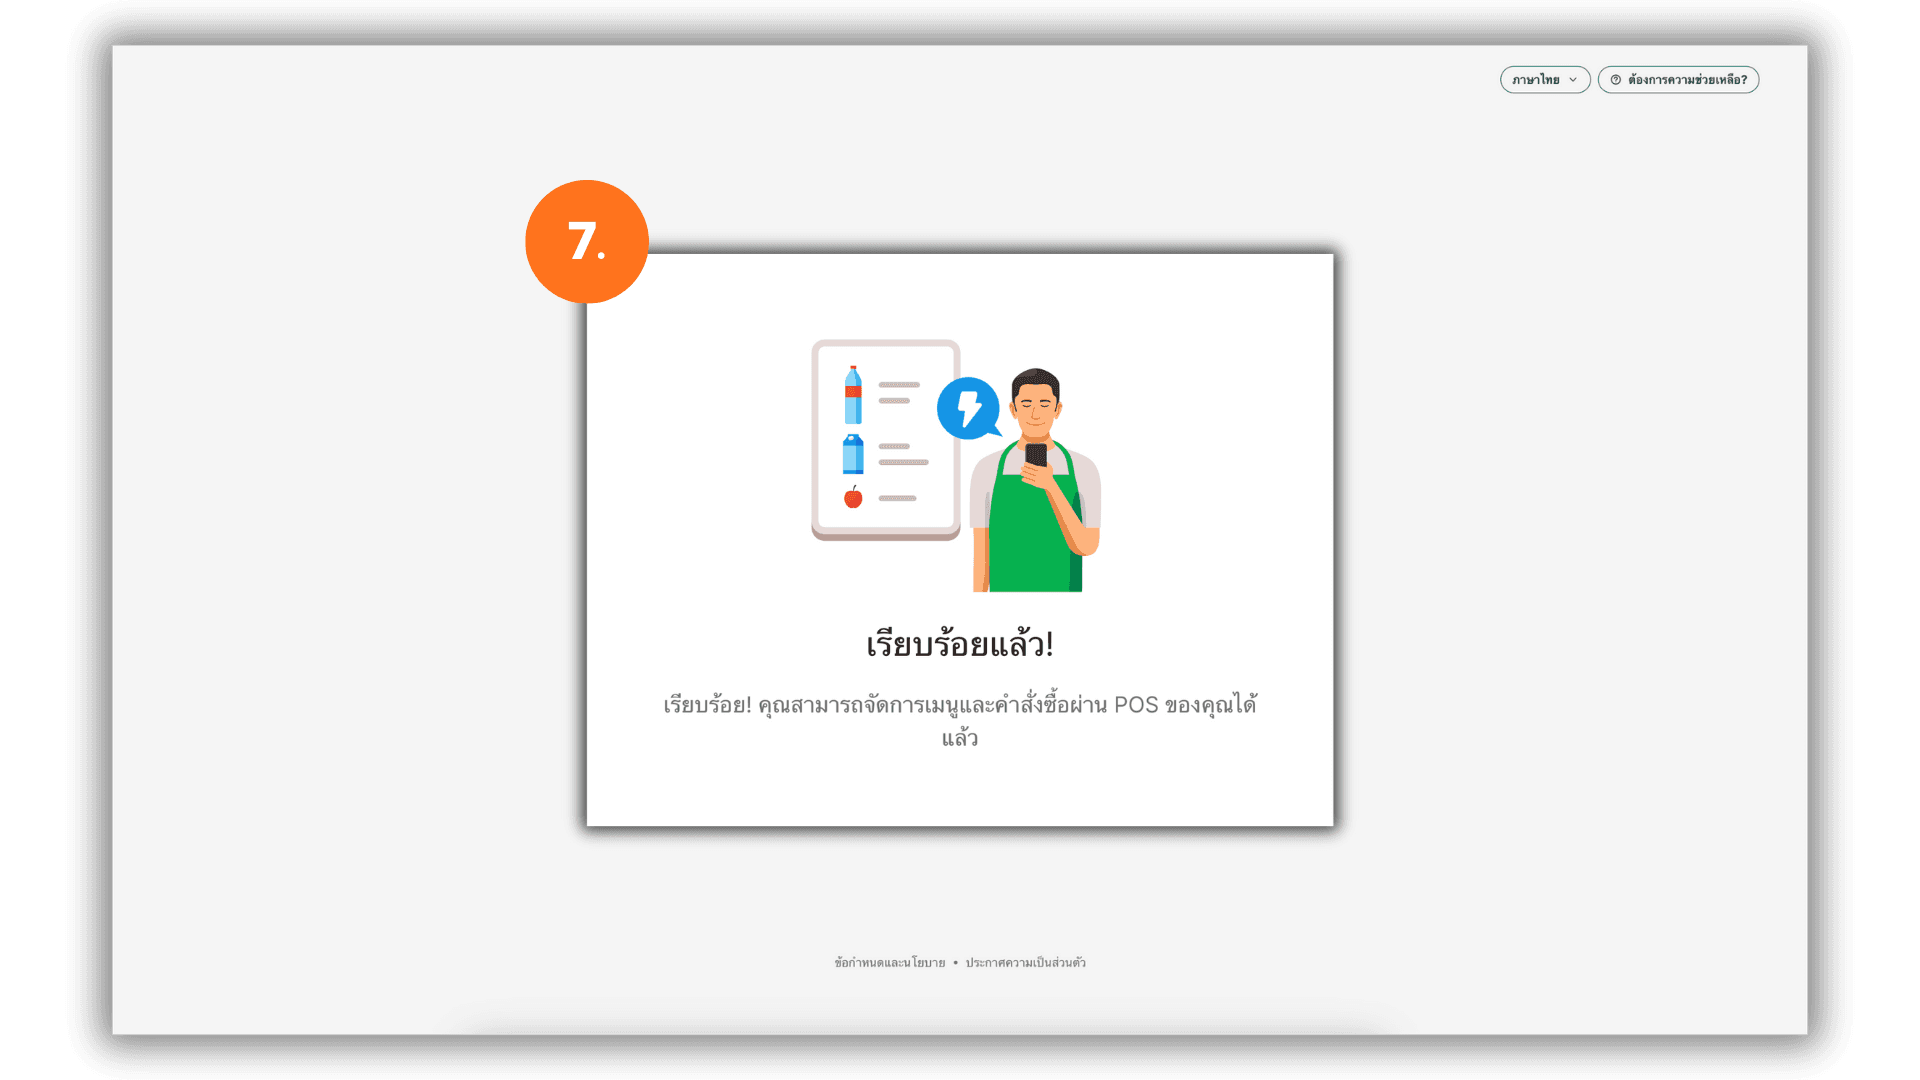
7. Once the connection is complete, please close the Grab Merchant window and start using the system directly through the GPOS back-office system immediately.