Configuration and Export to Store Branches
2026-03-06 10:49
1. Log in to the Back Office
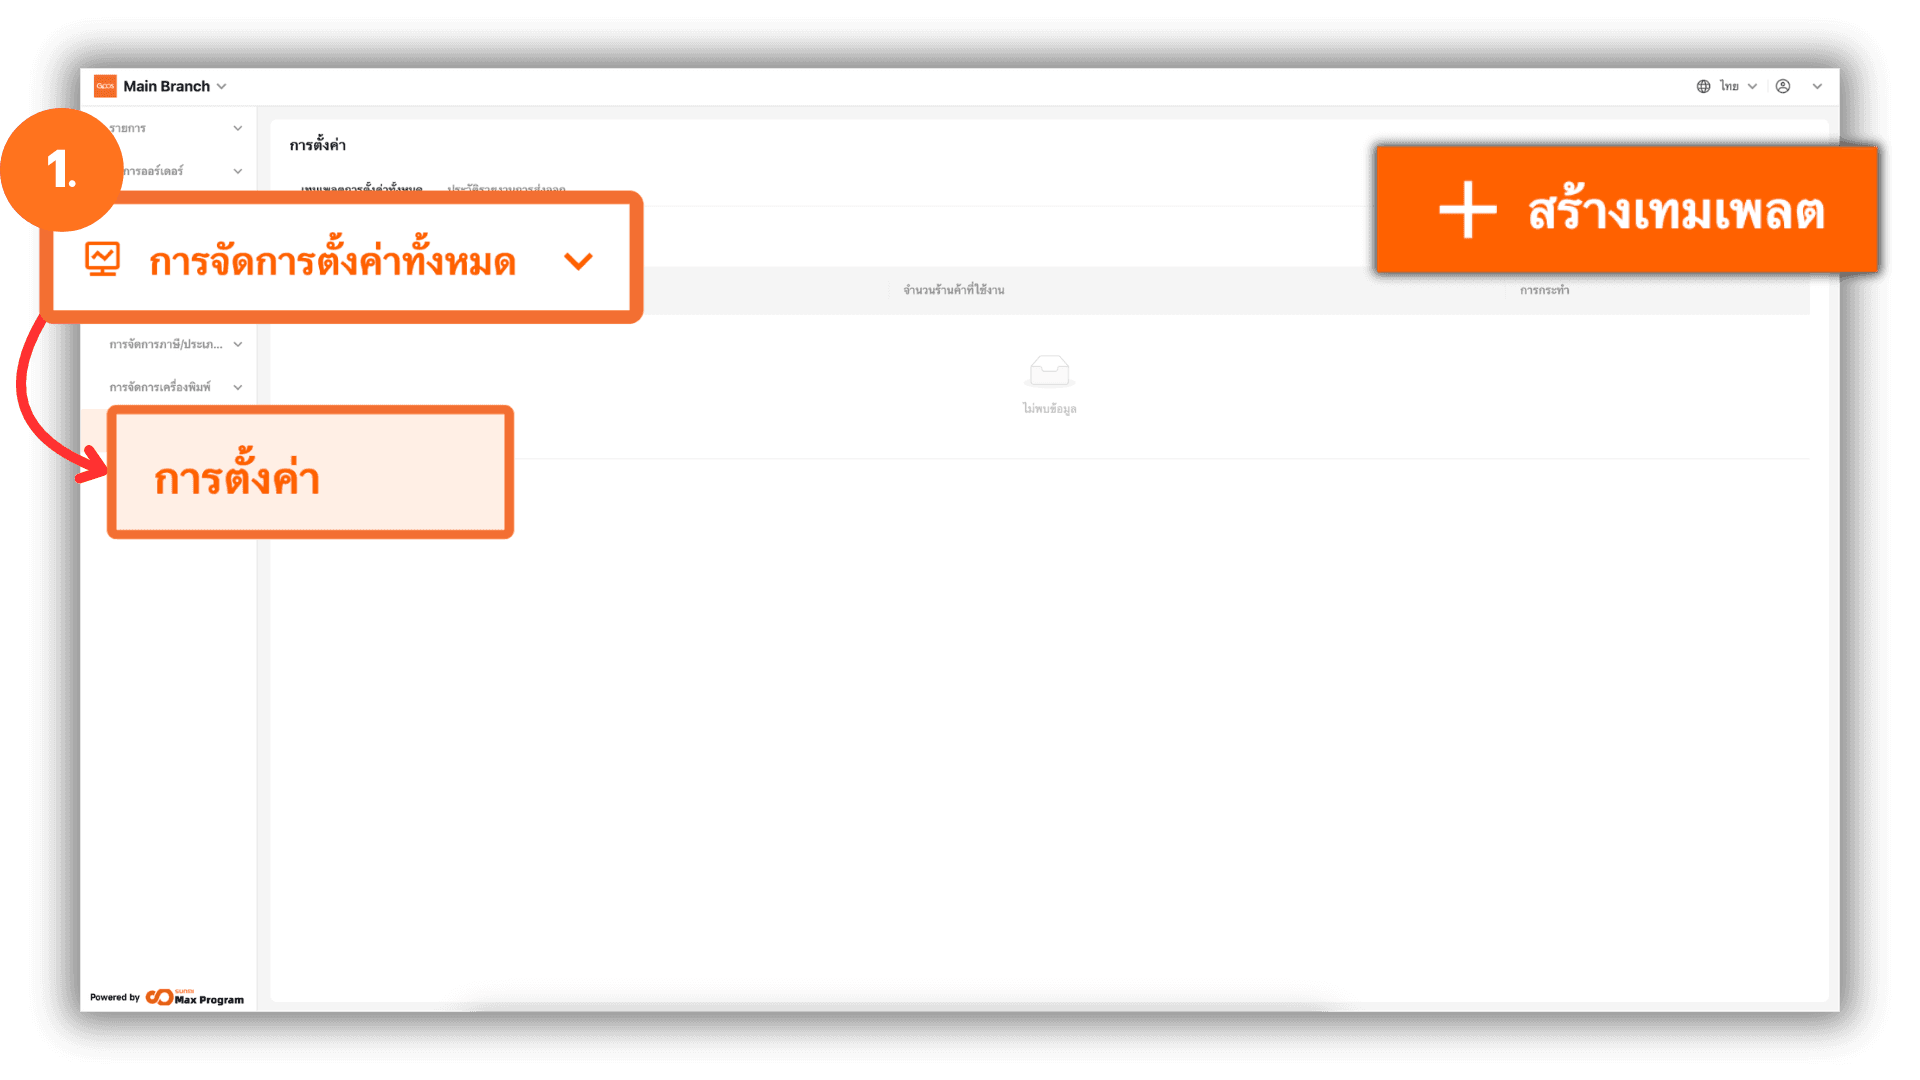
Go to the website login.gpos.co.th, then enter your Email and Password, and click Log in. After logging in successfully, go to Head Office, select the menu “Store Management”, and click “Store Settings.” The system will display the Settings Template page. Click the “+ Add Store settings template” button to start creating a new settings template.
2. Name the Template
After clicking + Add Store settings template, the system will open the Settings page. Enter the desired name in the “Template name” field.
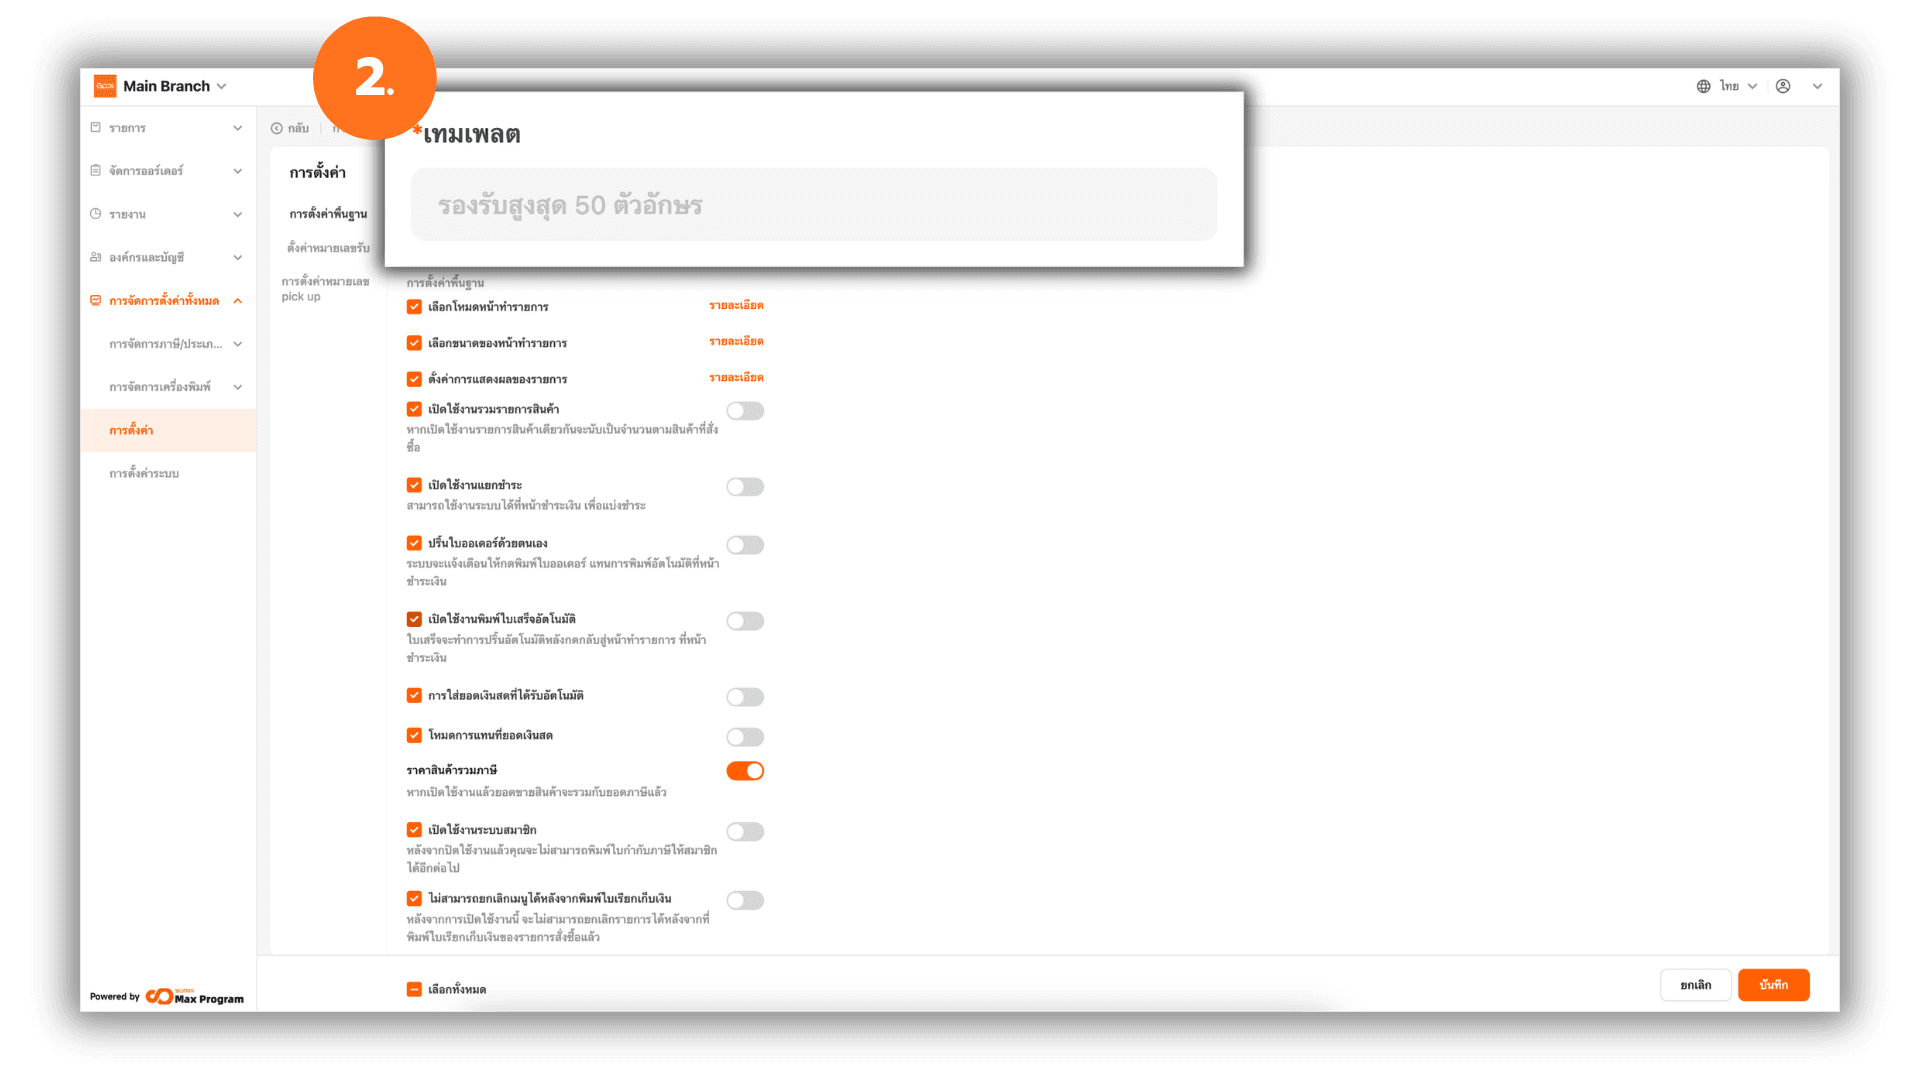
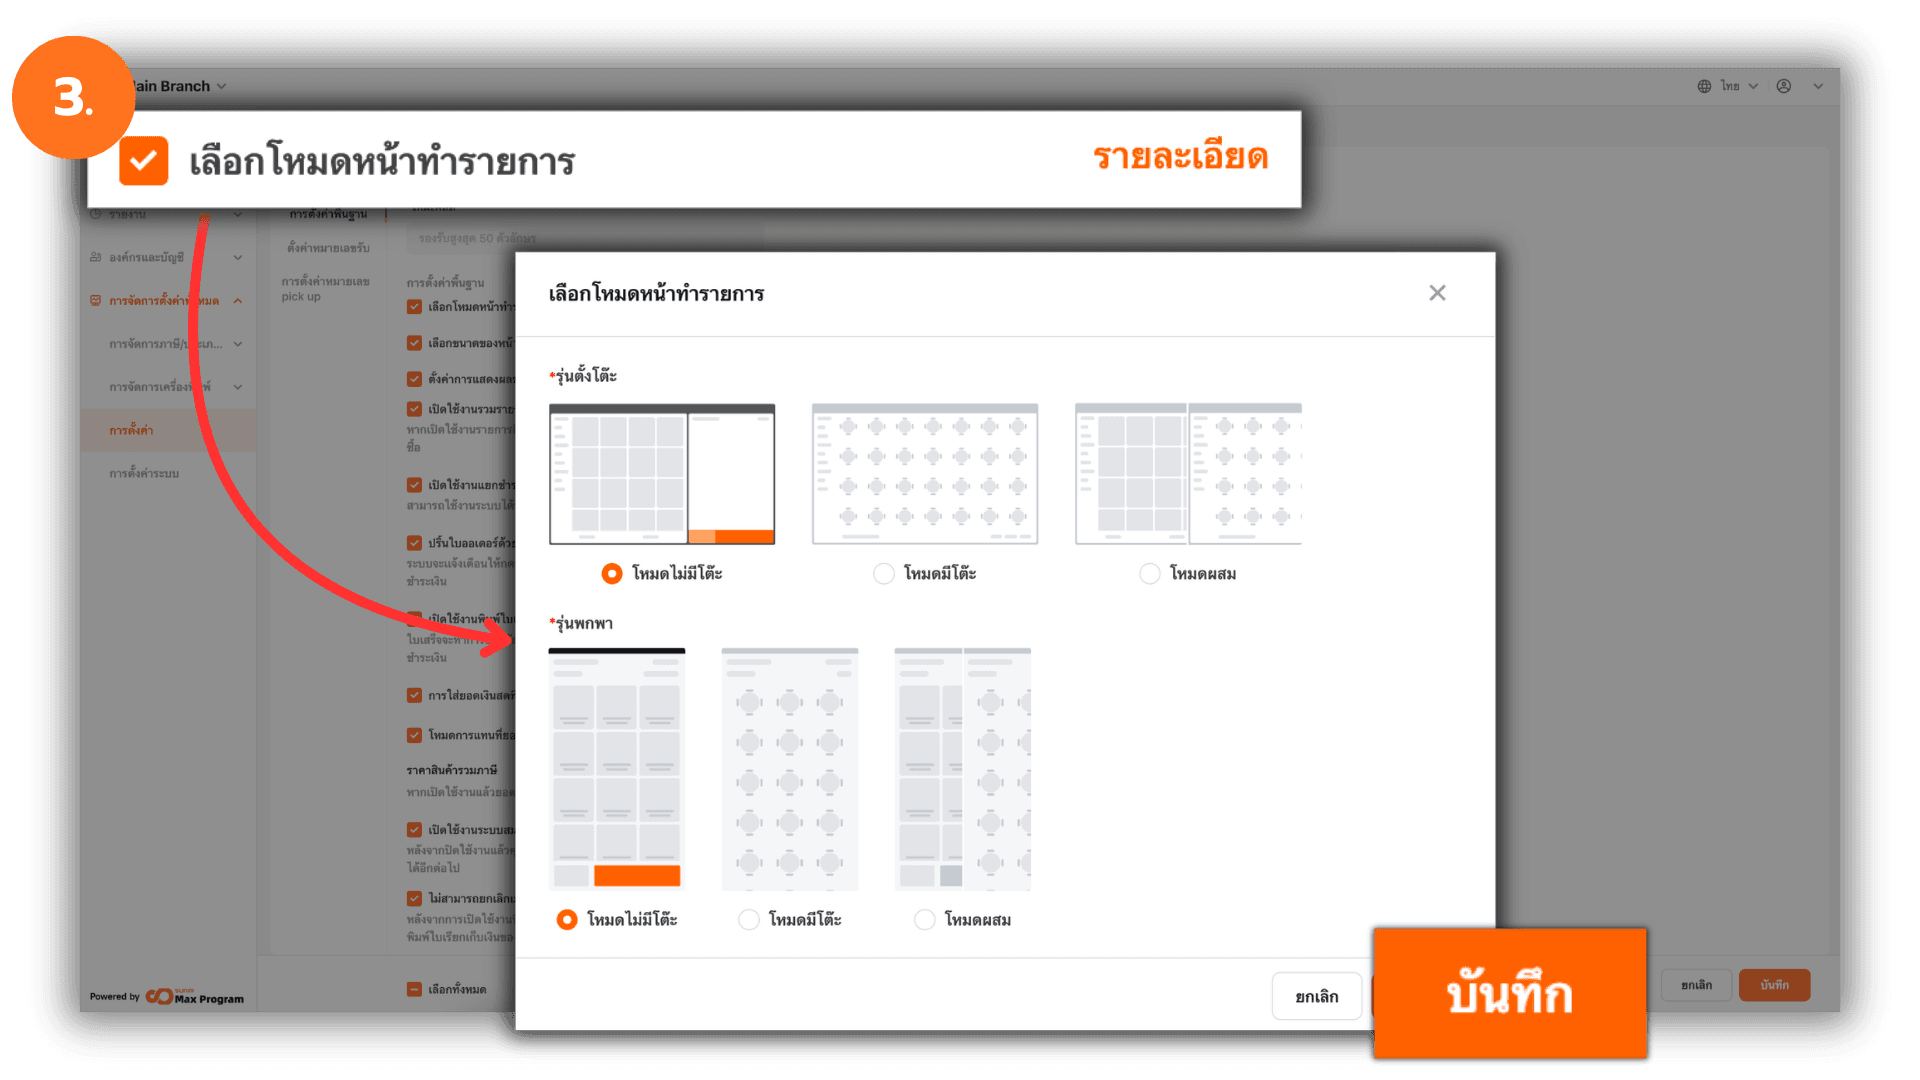
3. Select the Sales Screen Mode
In the Basic Store Settings section, go to Layout Setup Mode and click the “
Info” button. A window will appear for selecting the operation mode based on the device type: Desktop or Handheld.
You can choose one of the following modes :
- Quick Transaction Mode – You can go directly to the sales screen without selecting a table.
- Table Mode – The system requires selecting a table before starting a sales transaction.
- Mixed Mode – You can either select a table before making a sale or access the sales screen immediately.
After selecting the mode that matches your store’s operation, click “Save” to confirm the settings.
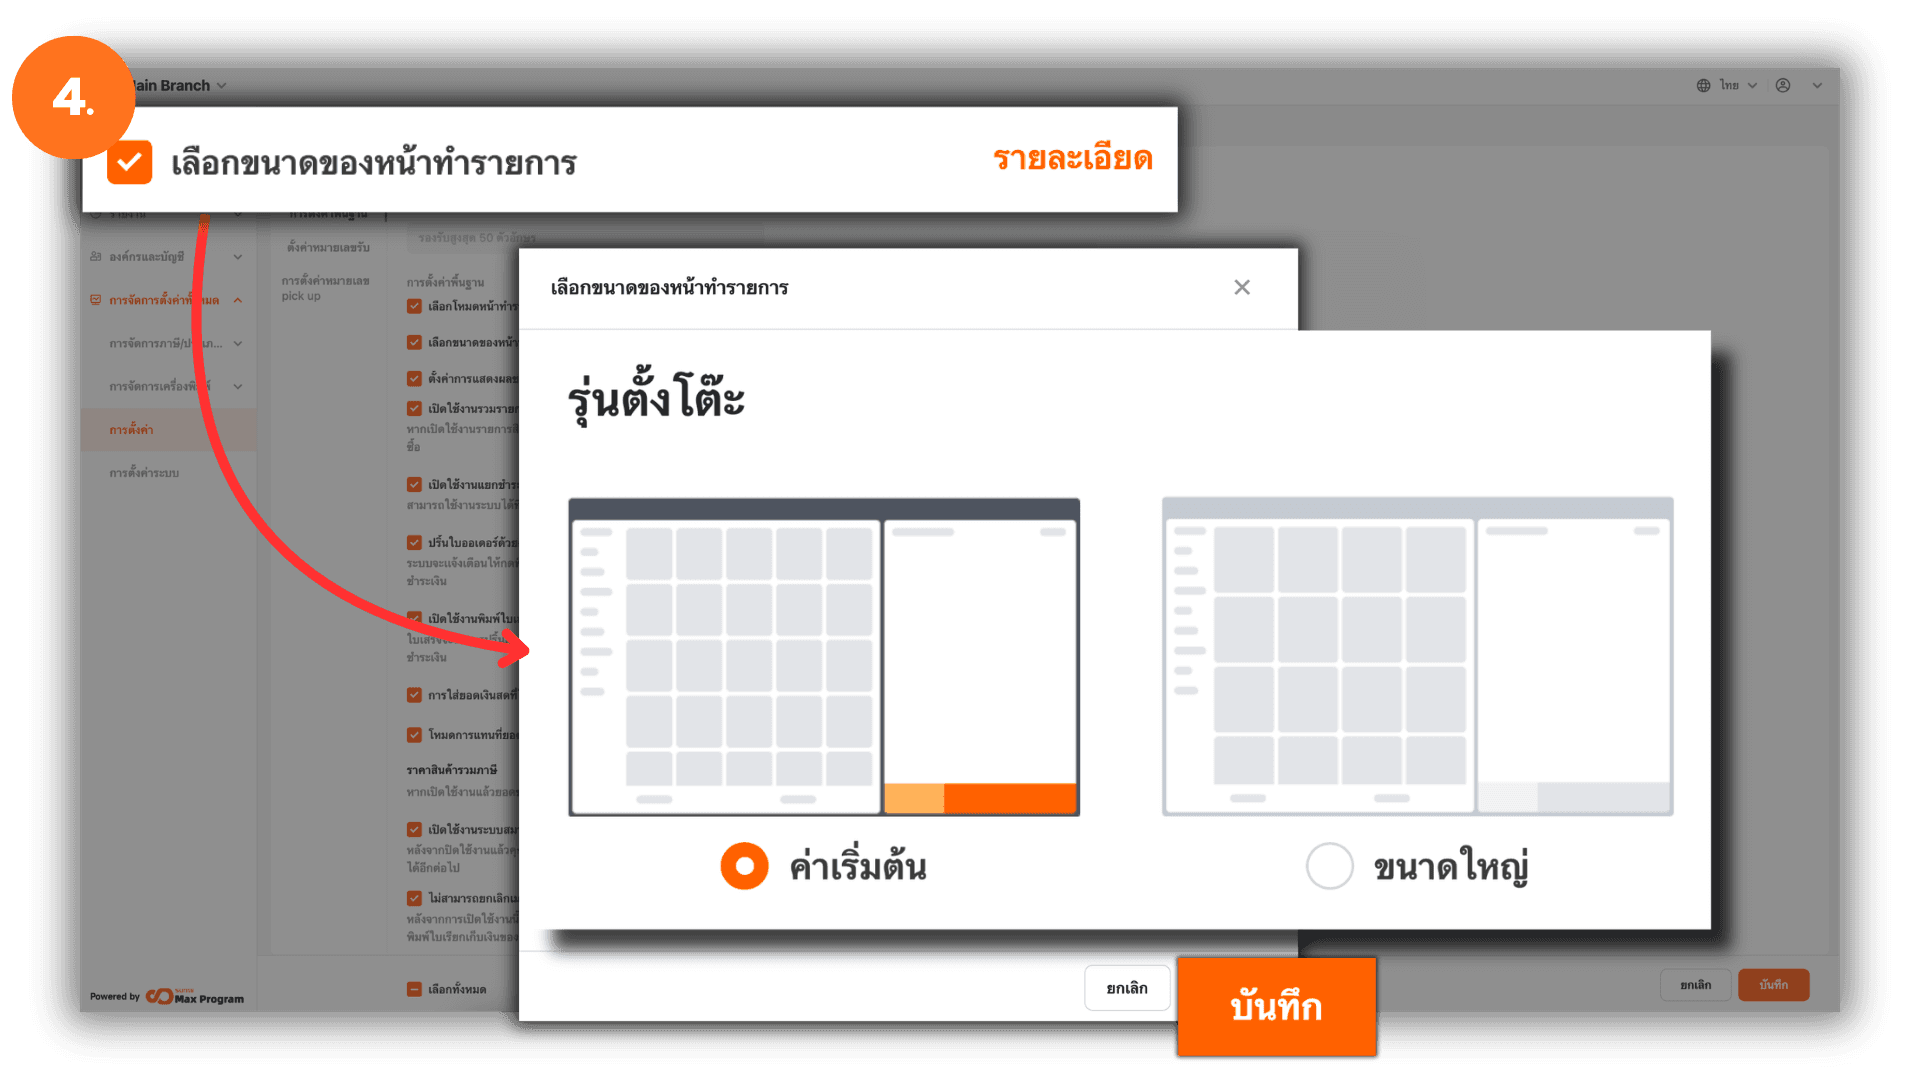
4. Set the Sales Screen Size (Desktop)
In the Basic Store Settings section, go to Cashier Layout and click “Info.” The system will display options for configuring the sales screen size based on the device type: Desktop or Handheld.
For Desktop, you can select the following display sizes :
- Standard – Displays products in a 5-grid layout (smaller product tiles).
- Large – Displays products in a 4-grid layout (larger product tiles for better visibility).
After selecting the desired screen size, click “Save” to confirm.
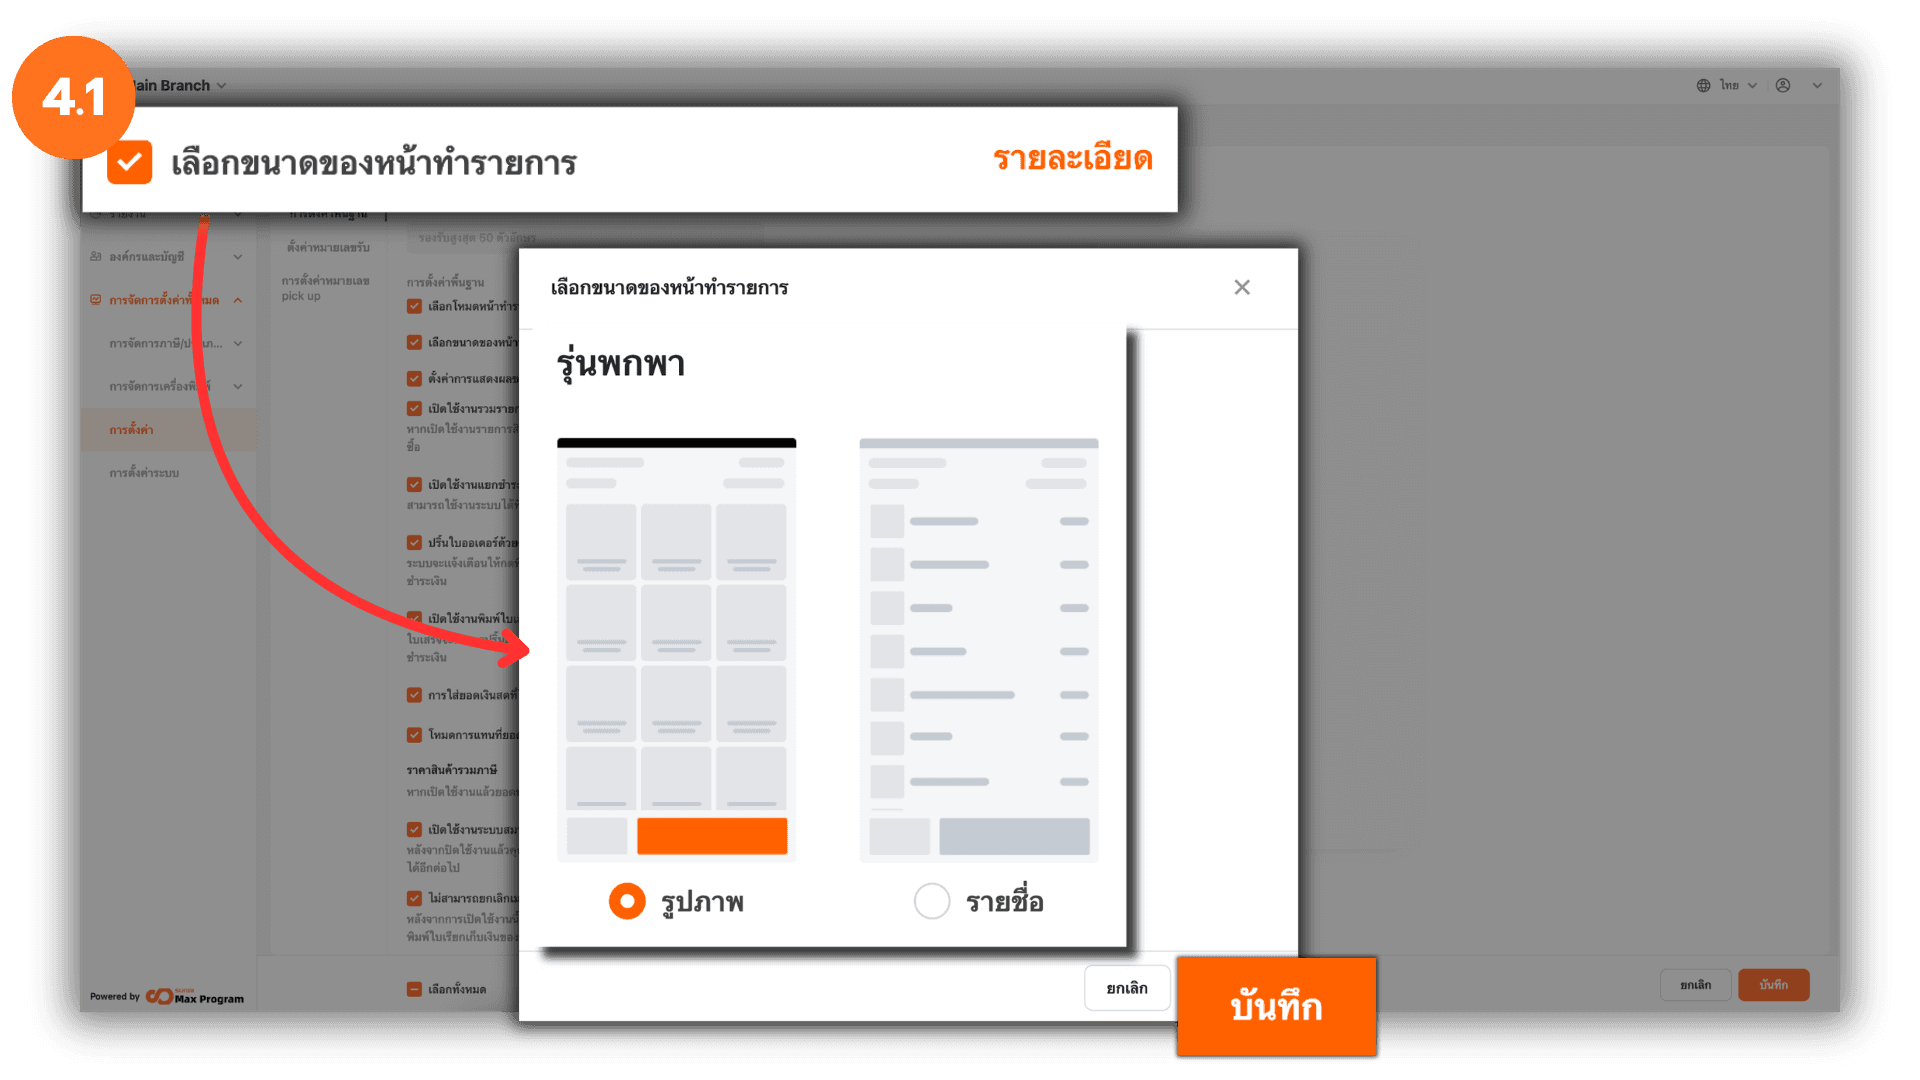
4.1 Set the Sales Screen Size (Handheld)
For Handheld, you can choose the following display styles :
- Grid – The product name appears over the product image.
- List – The product image appears on the left and the product name on the right in a list format.
Select the desired display style and click “Save.”
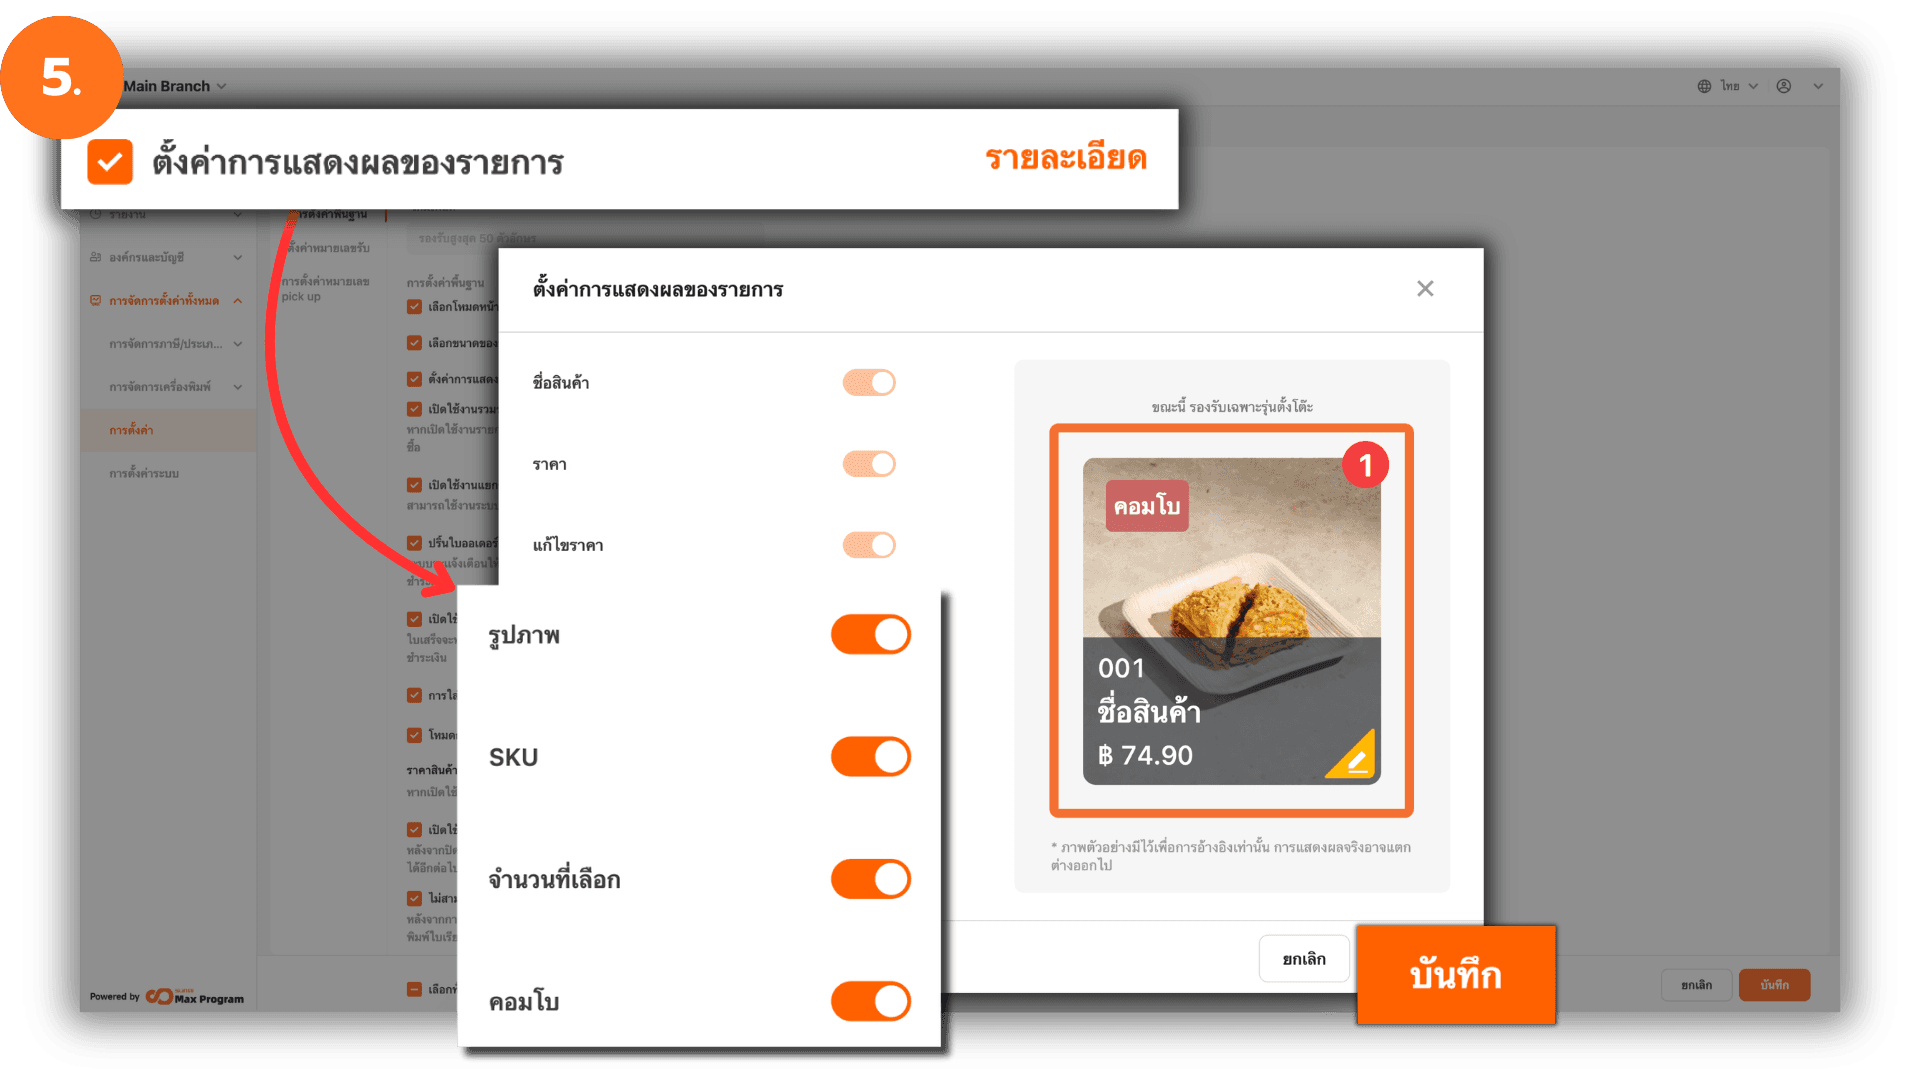
5. Configure Item Display
In the Basic Store Settings section, go to Item Card Setting and click “Info.” You can enable or disable the display of item information on the sales screen. When you toggle each option, the system will show a preview of the display on the right side. After finishing the configuration, click “Save.”
Note : This setting is supported only for Desktop devices.
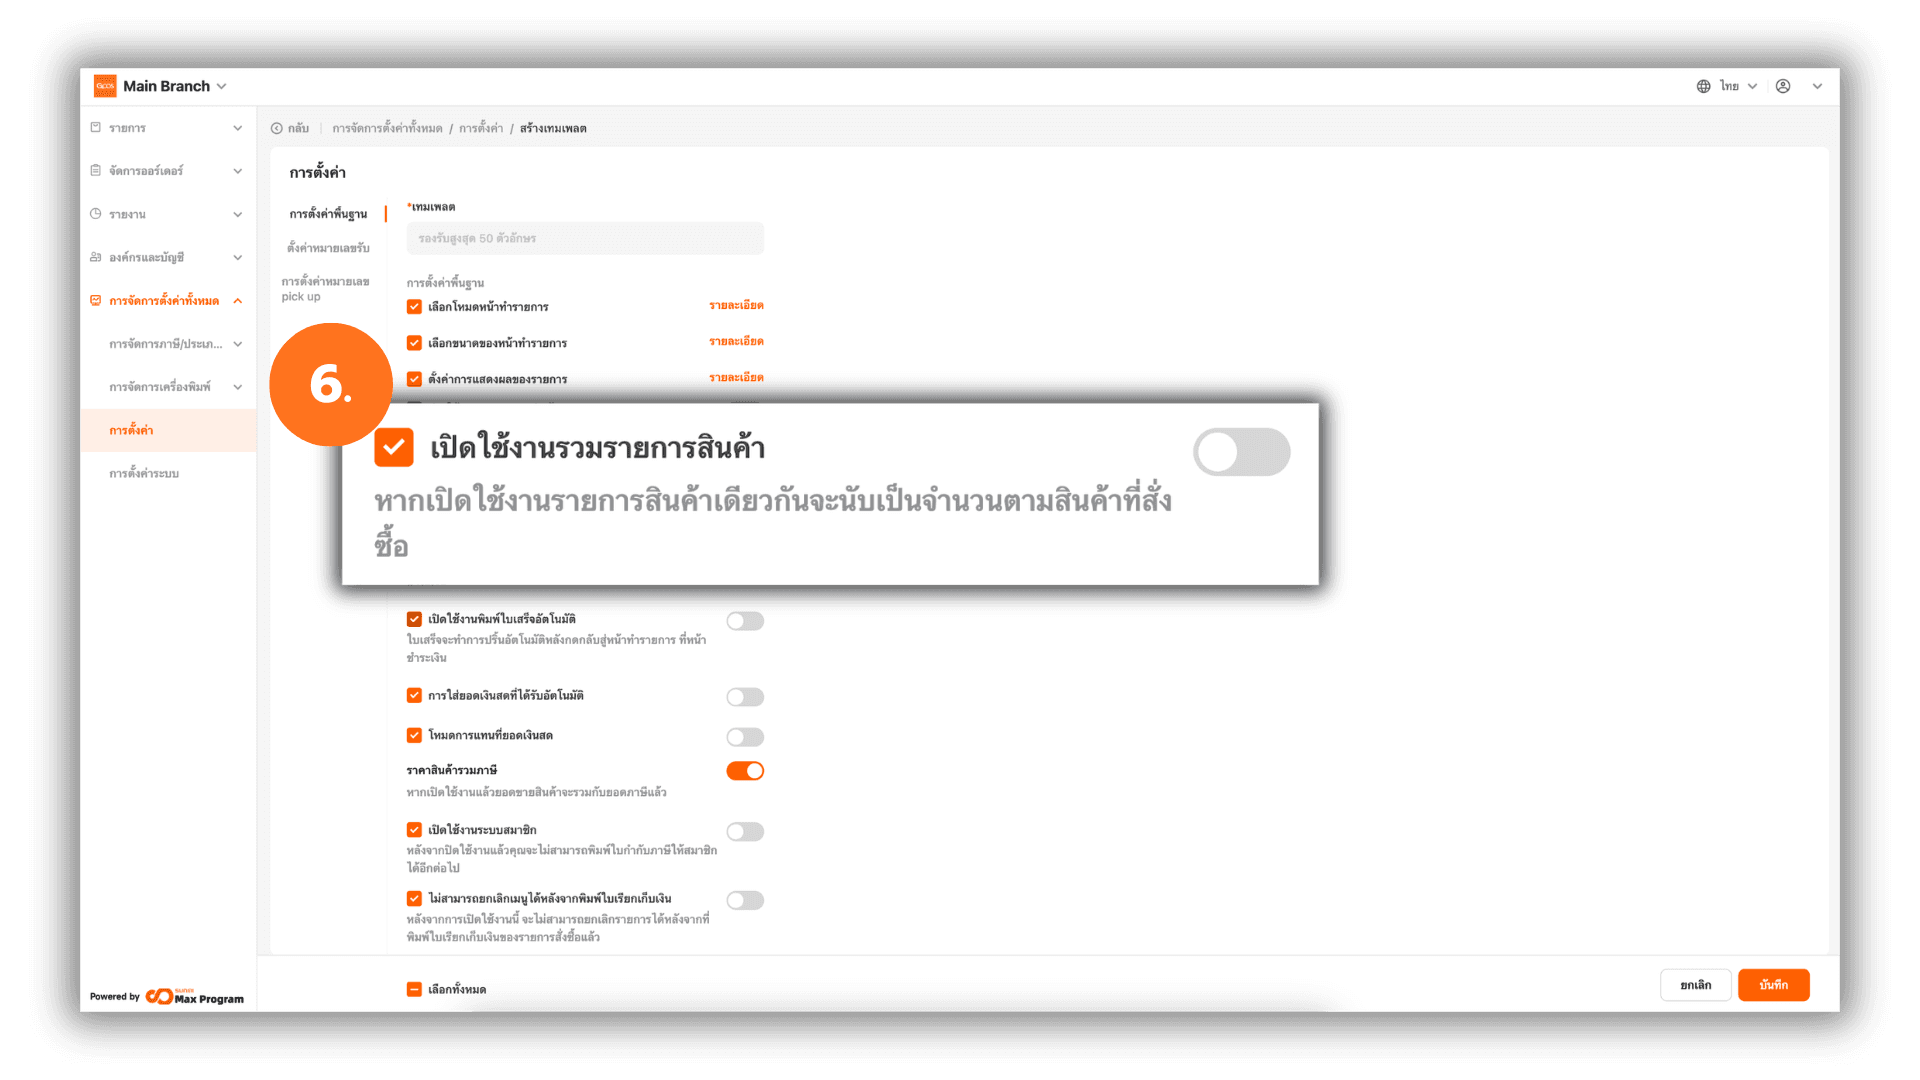
6. Enable Item Grouping
In Basic Store Settings, go to Enable Combine Items and toggle the On/Off button as needed.
- Enabled – If the same item is ordered multiple times, the system will combine them into one line item and only increase the quantity.
- Disabled – Each order of the same item will appear as a separate line on the sales screen.
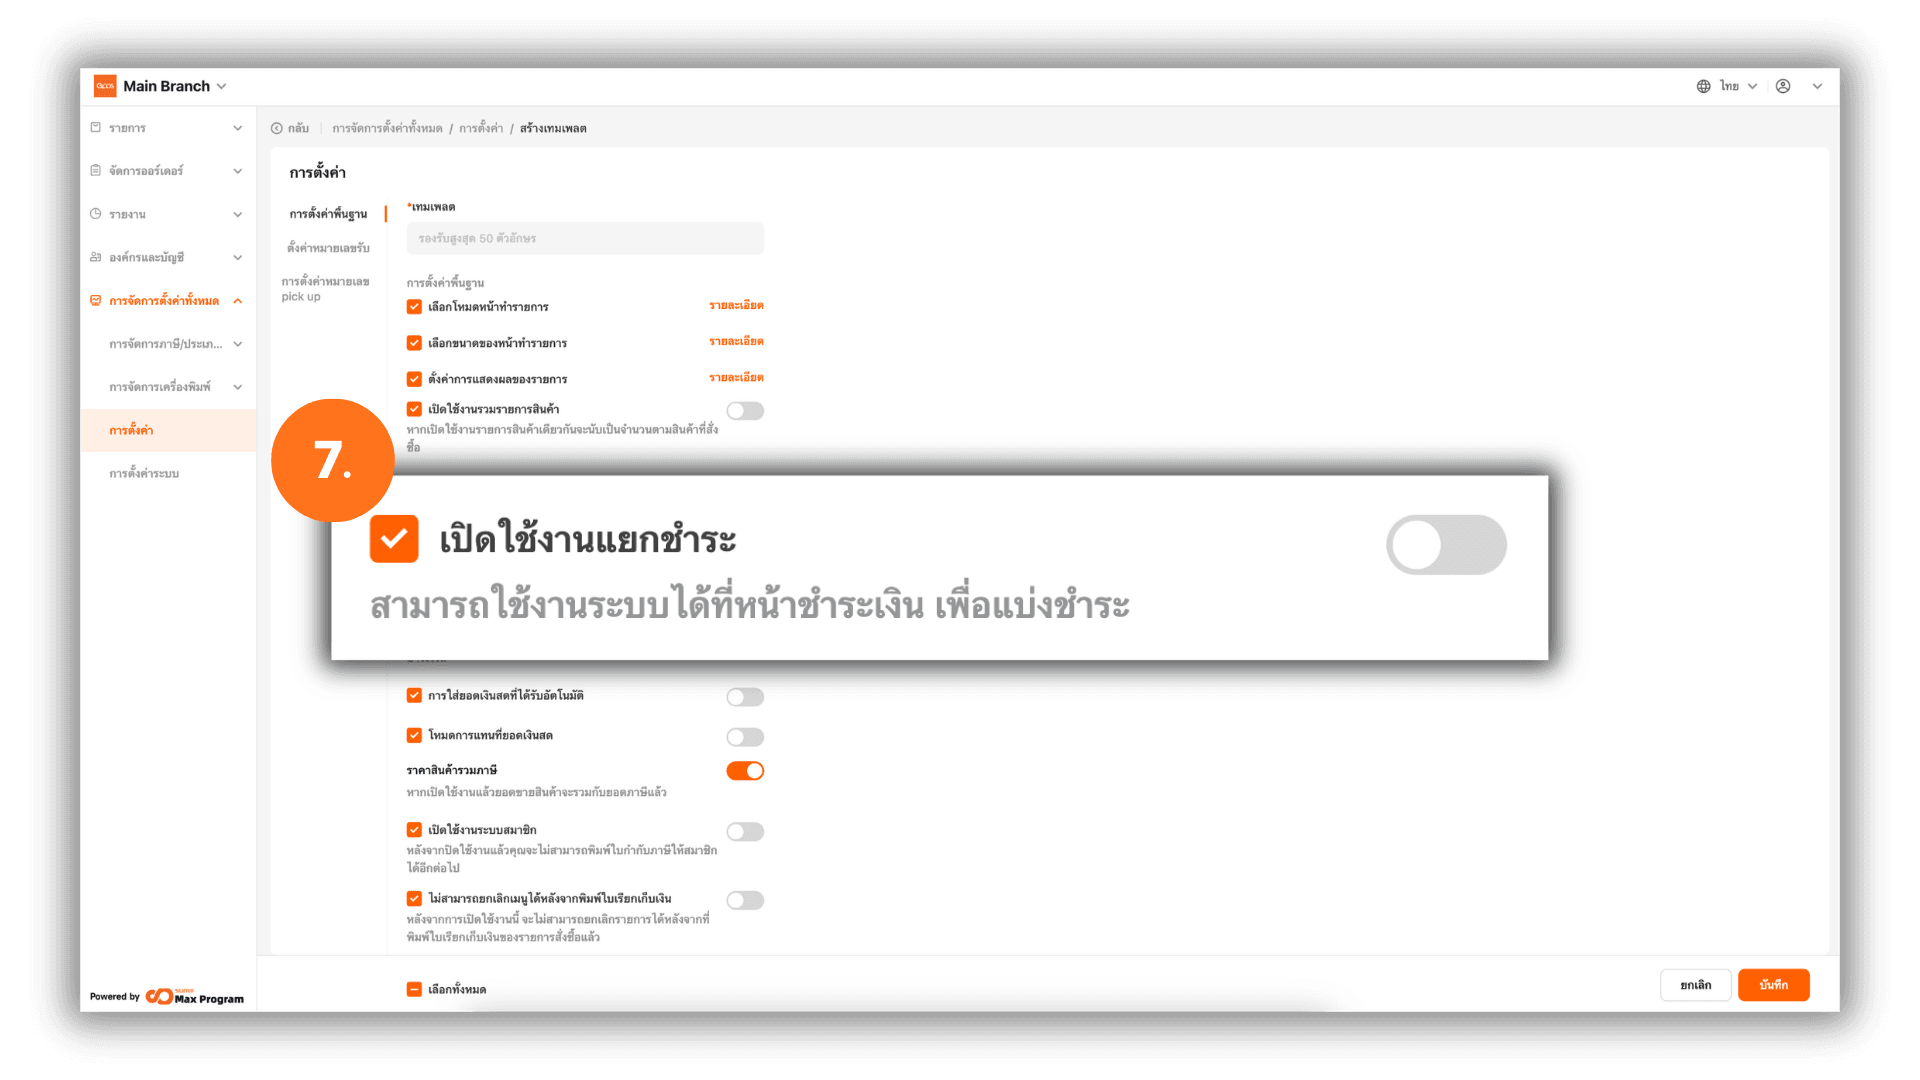
7. Enable Split Payment
In Basic Store Settings, go to Enable Split Payment and turn it on if you want multiple customers to pay separately within the same bill.
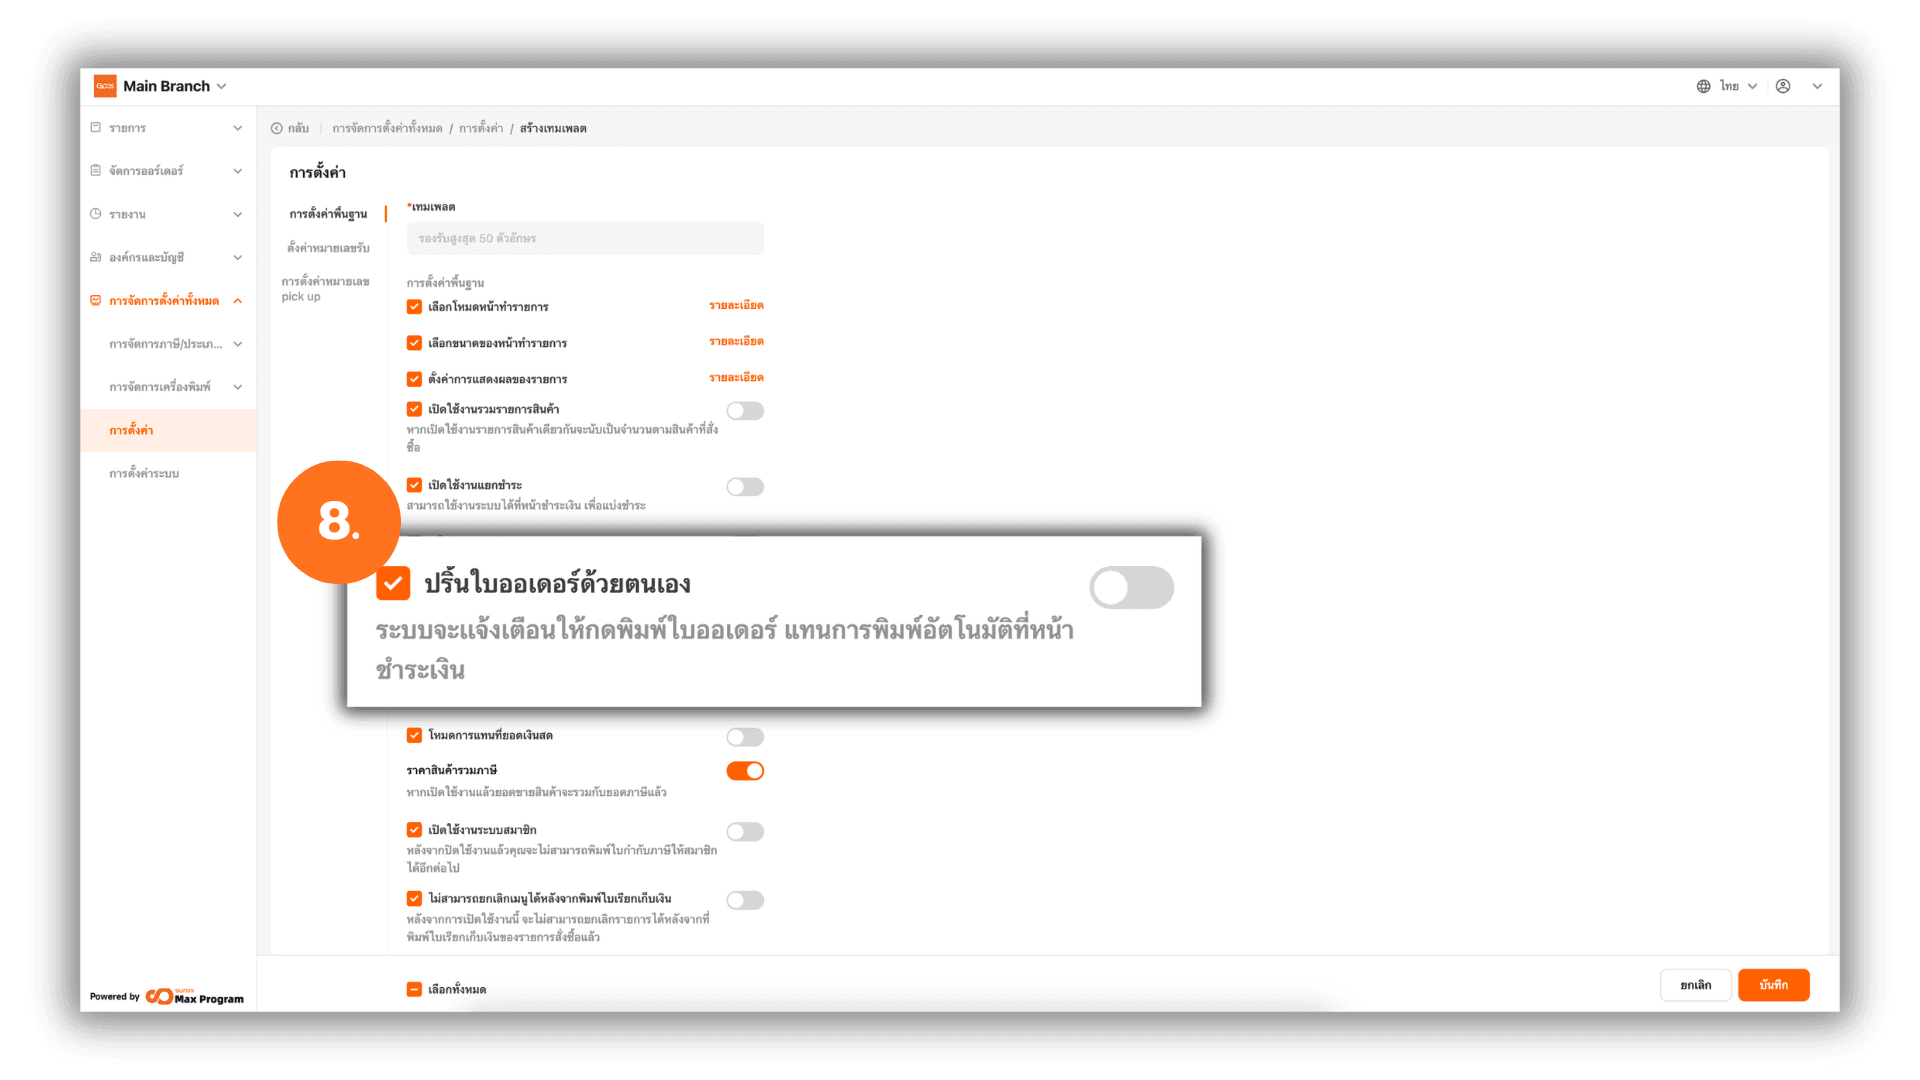
8. Manual Order Printing
In Basic Store Settings, go to Manual Kitchen Ticket Printing and enable it if required. When enabled, the system will not automatically print the order slip, but will display a notification prompting the user to manually press the print button after payment.
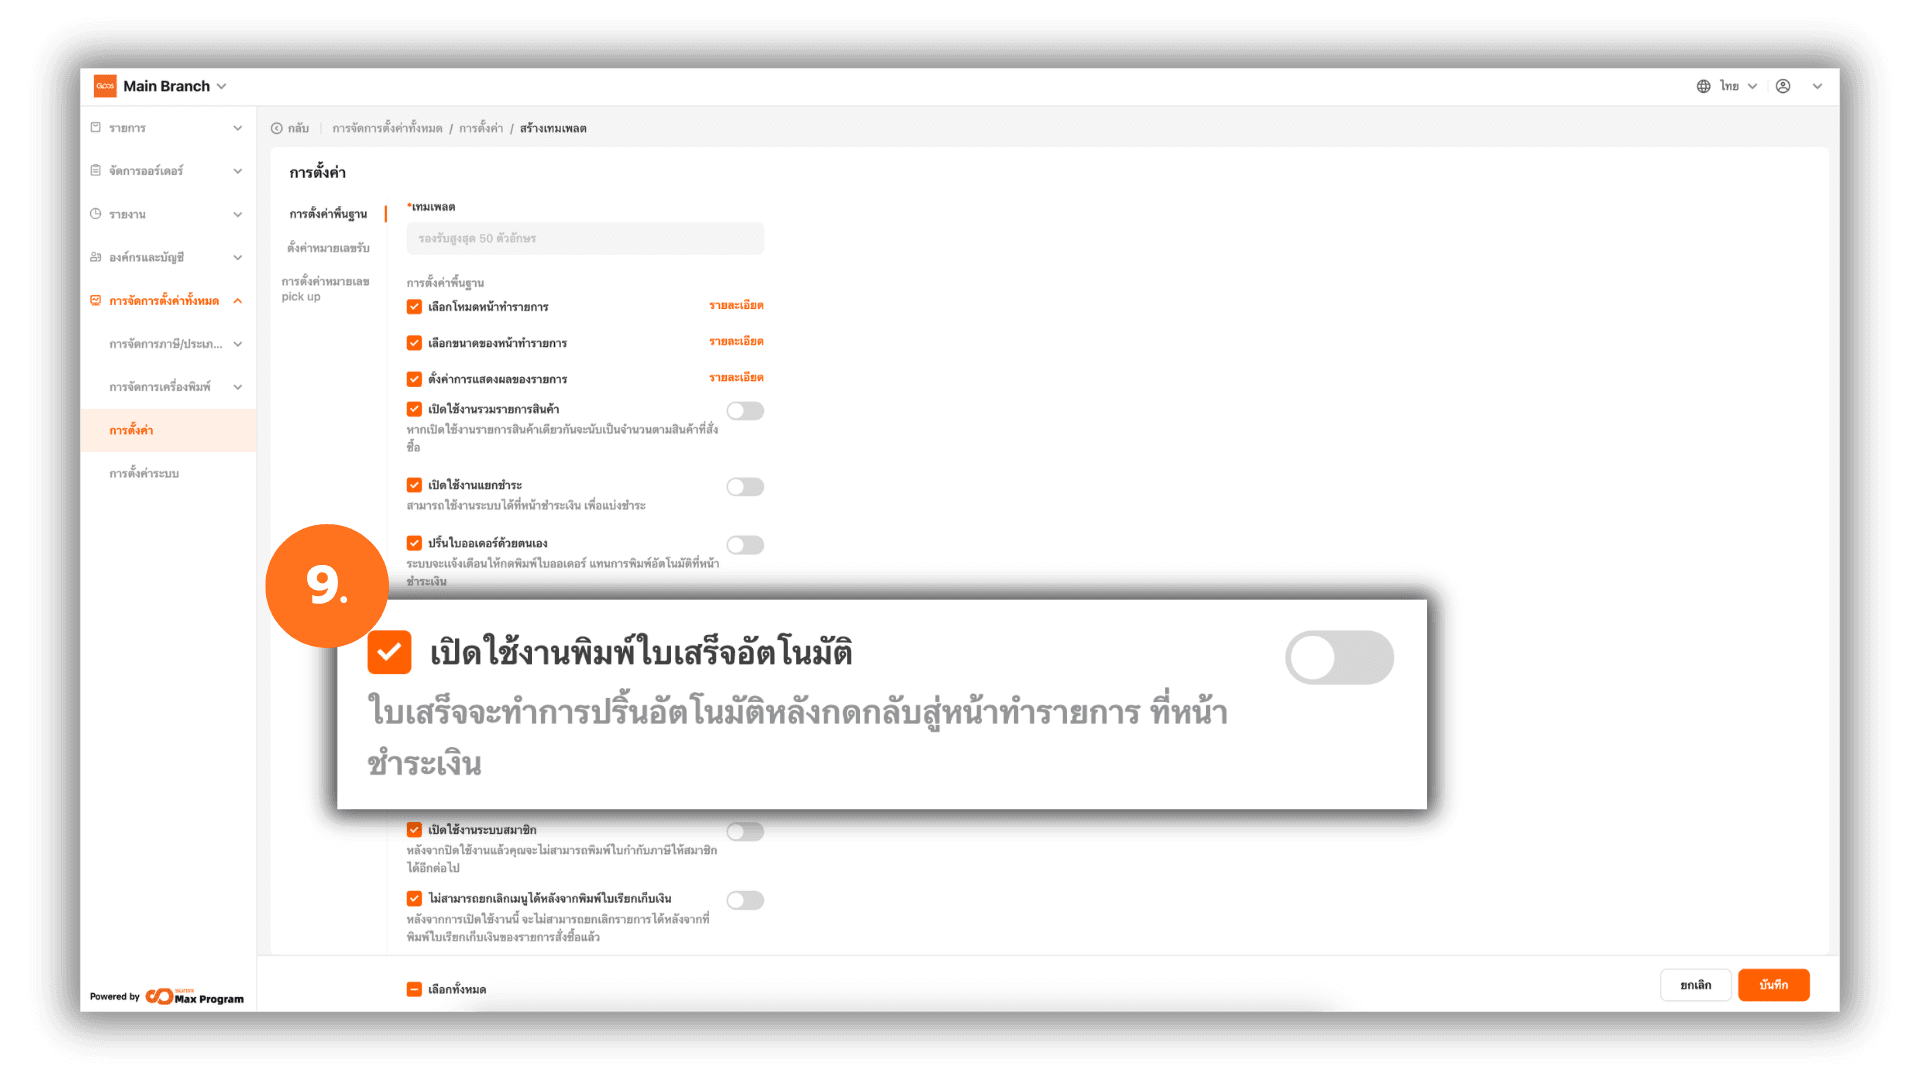
9. Enable Automatic Receipt Printing
In Basic Store Settings, go to Enable Print Receipt After Payment and turn it on if needed. When enabled, the system will automatically print the receipt after the Back to Sales Screen button is pressed following payment completion.
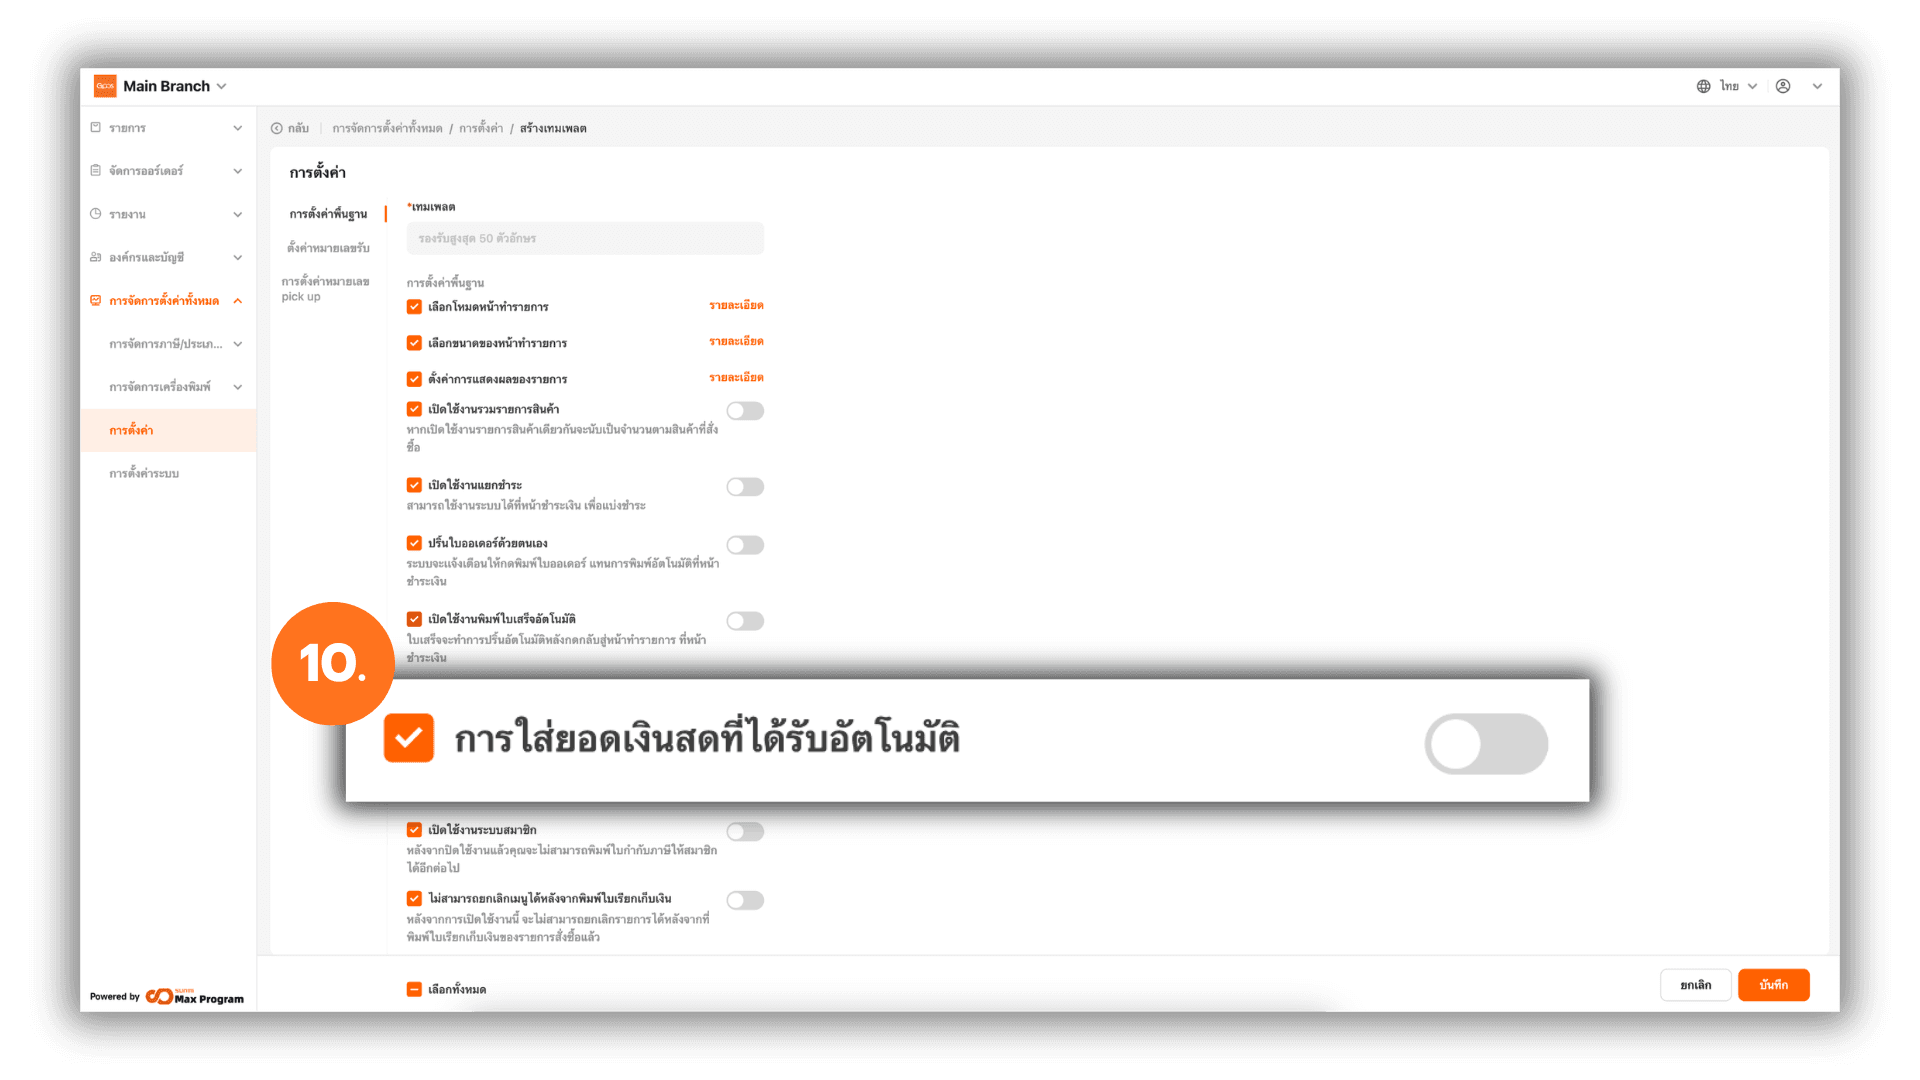
10. Automatic Cash Amount Entry
In Basic Store Settings, go to Autofill Amount Received and enable it as needed. When enabled, the system will automatically fill the payment amount into the Received Cash field when entering the payment screen.
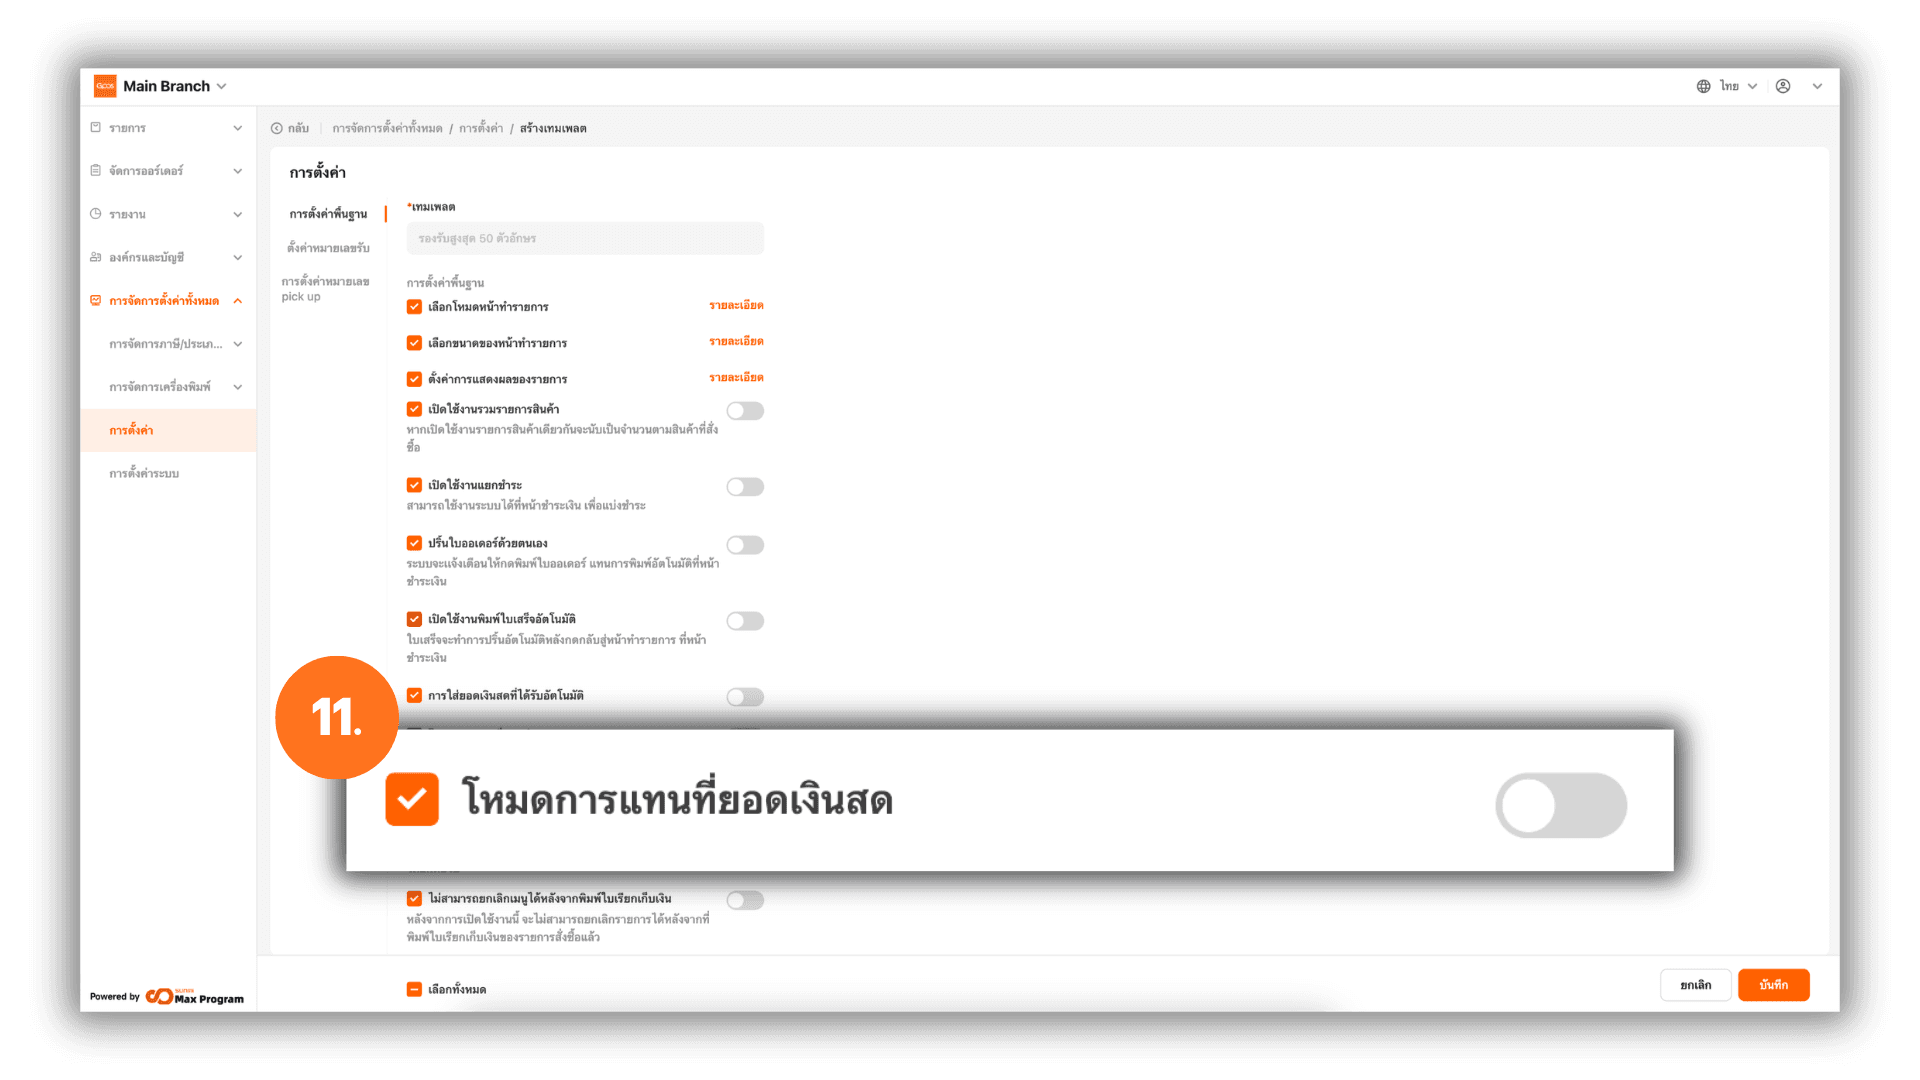
11. Cash Amount Replacement Mode
In Basic Store Settings, go to Override Preset Amount Mode and toggle it on or off depending on your workflow.
- Enabled – The first tap replaces the amount in the received cash field, and the second tap adds to the existing amount.
- Disabled – Every time a cash button is pressed, the amount will always be added to the existing amount.
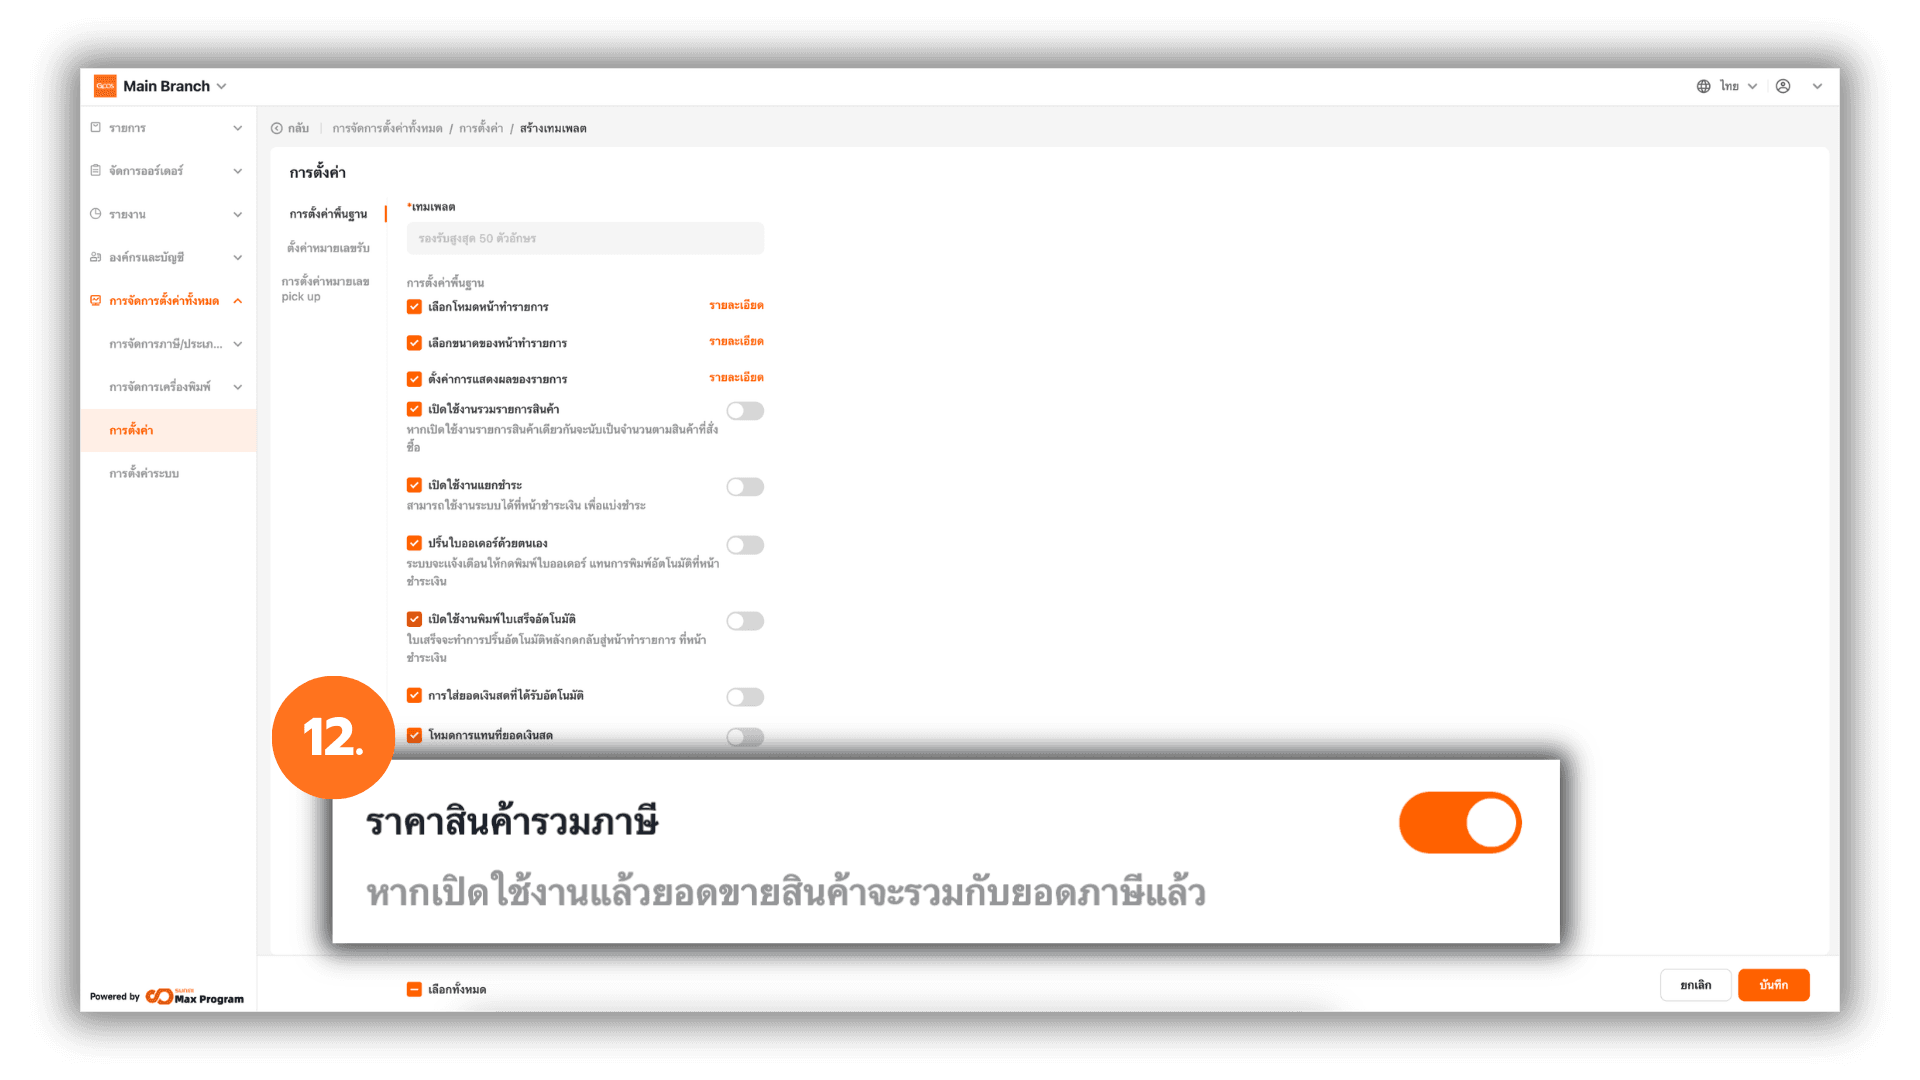
12. Product Price Includes Tax
In Basic Store Settings, go to Tax Inclusive Item Price and toggle On/Off based on your store’s pricing format.
- Enabled – The set selling price already includes VAT.
Example :Price set at 100 THB = 93.46 THB product price + 6.54 THB VAT = 100 THB. - Disabled – The set selling price does not include VAT.
Example :Price set at 100 THB, the system will add 7% VAT = 107 THB total.
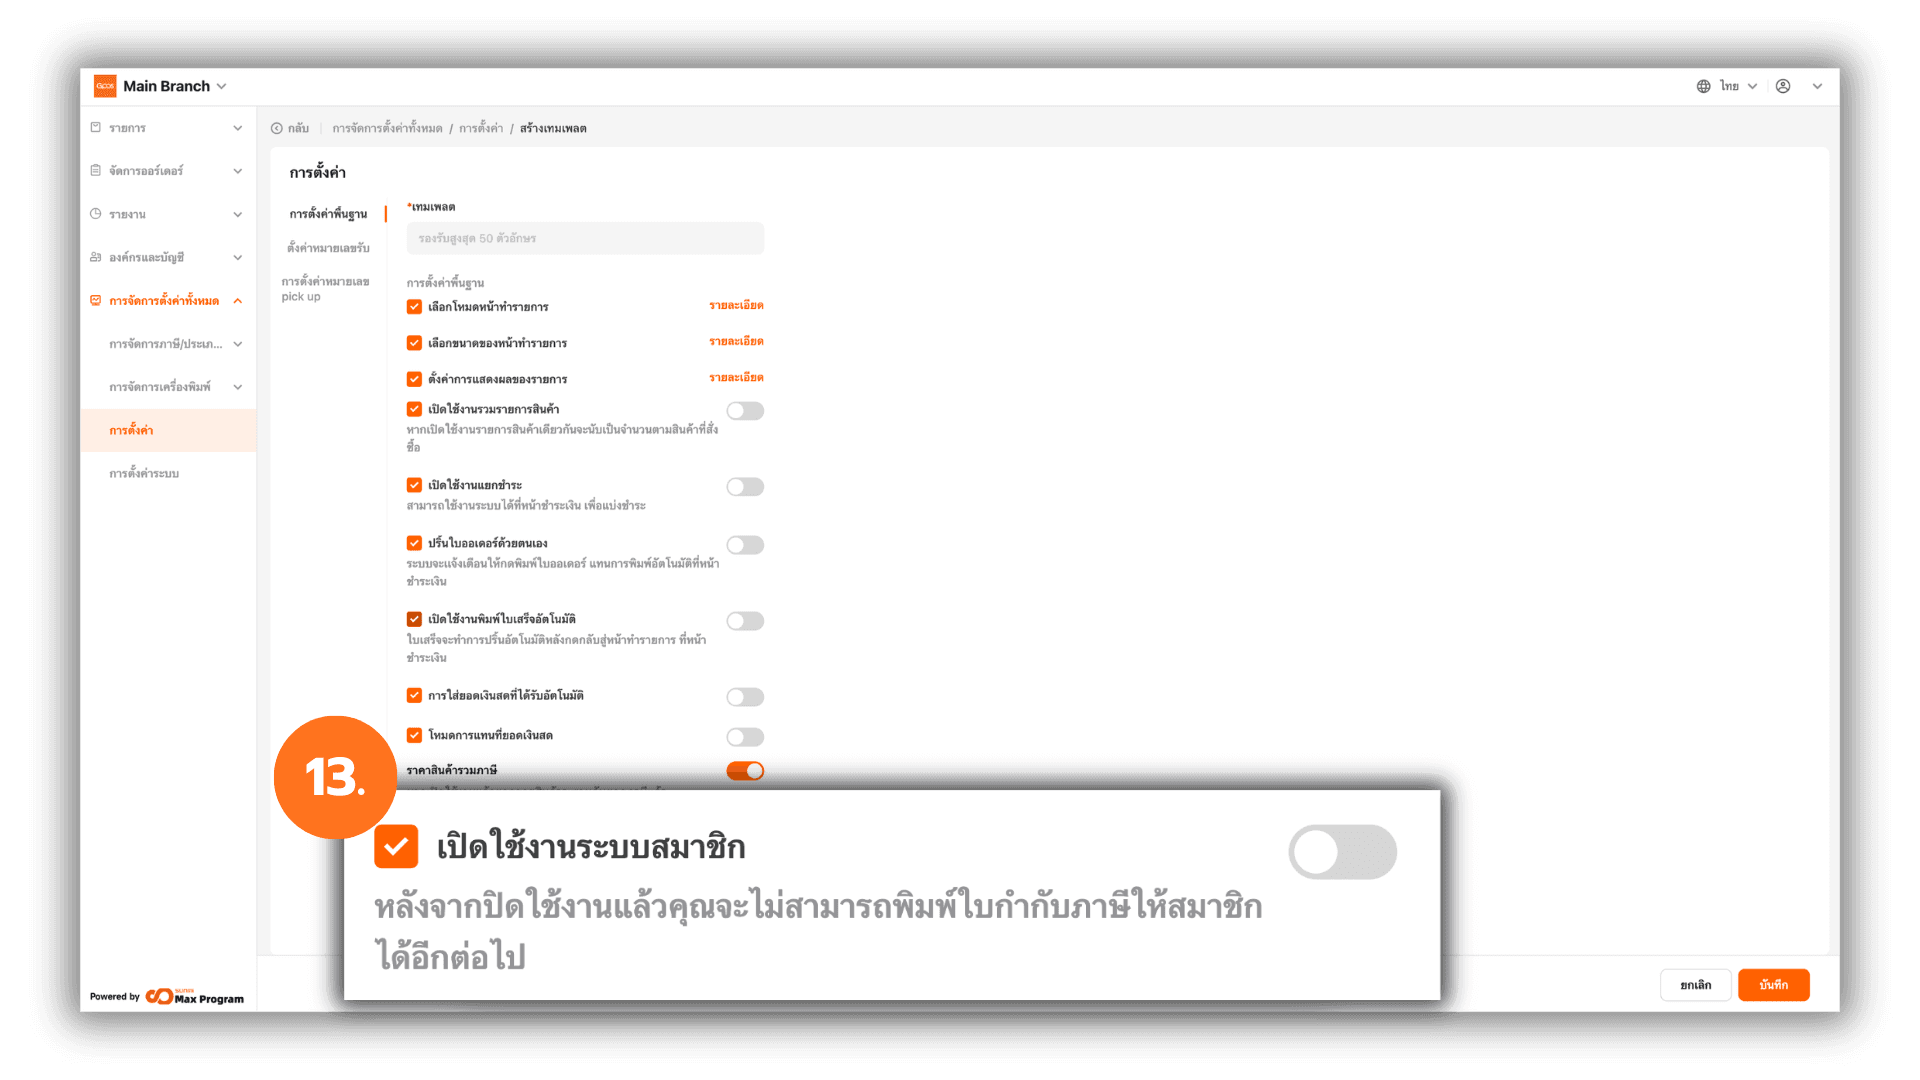
13. Enable Membership System
In Basic Store Settings, go to Enable Membership and turn it on if required.
When enabled, additional membership features will be available, such as point accumulation, member discounts, and tax invoice issuance under the member’s name.
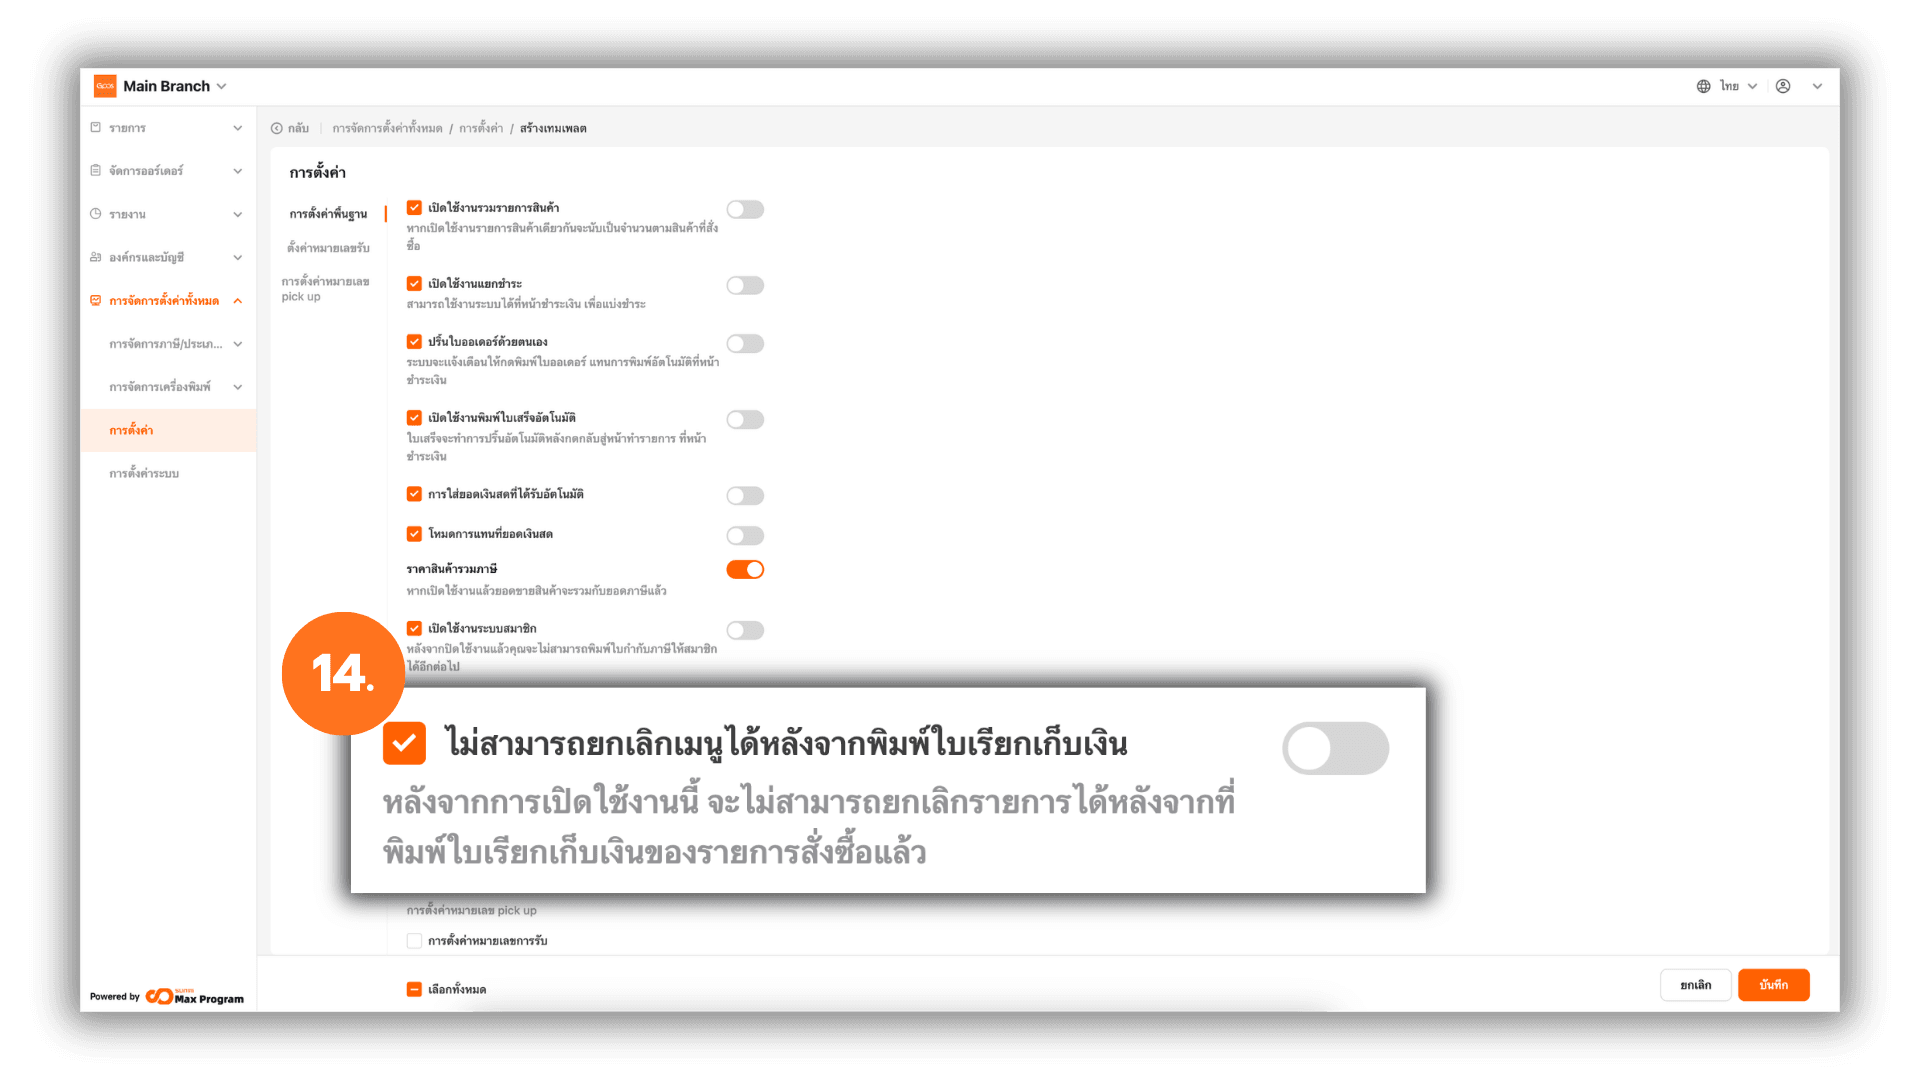
14. Prevent Item Cancellation After Printing the Bill
In Basic Store Settings, go to Cannot Void (Pre-bill Printed) and toggle it based on your store policy.
- Enabled – Items cannot be canceled after the bill has been printed.
- Disabled – Items can still be canceled even after the bill has been printed.
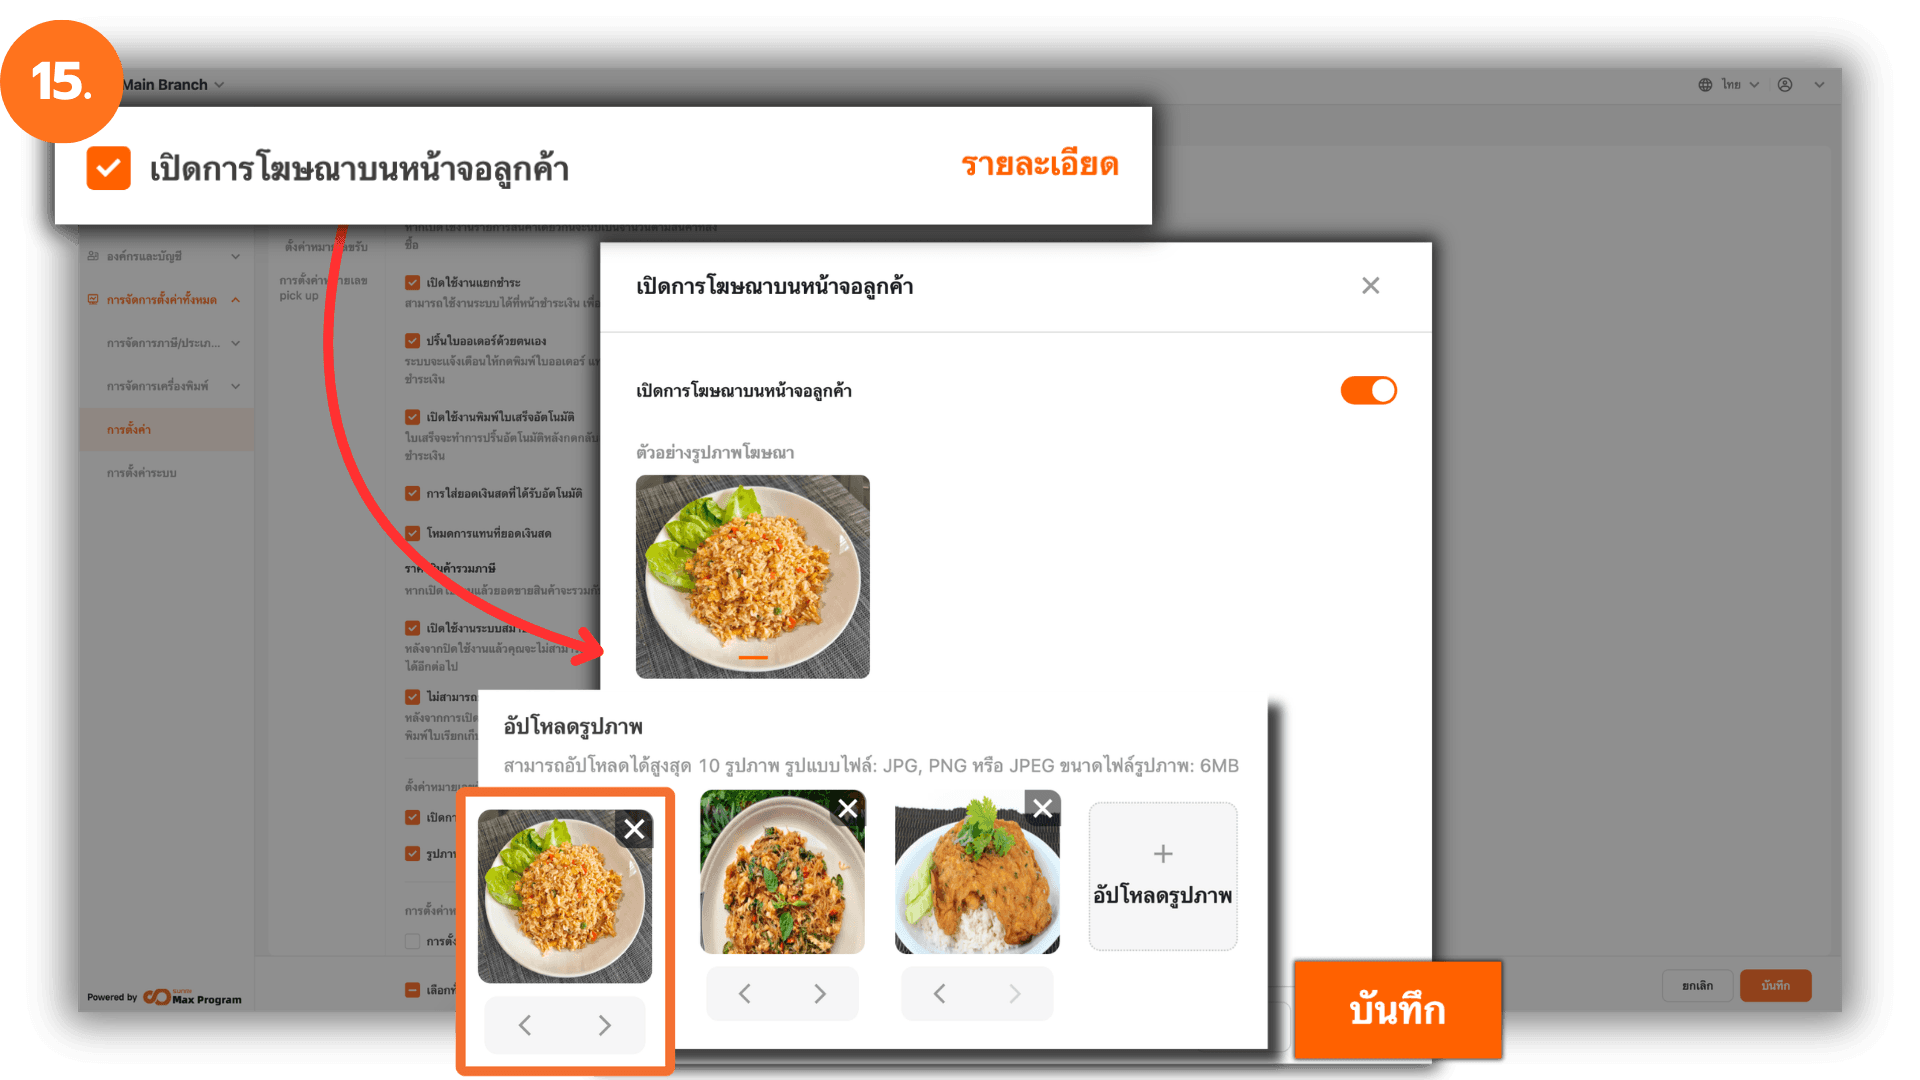
15. Enable Advertising on the Customer Display
In the Customer Display Setting section, go to Enable customer display AD and click “Info.” Enable the feature and upload advertisement images by clicking “➕ Upload.”
You can preview the images at the top and manage them as follows :
- < > arrows – Rearrange the display order of images (must be adjusted one image at a time).
- X – Remove an image from the list.
Click “Save” after finishing the setup.
Note : Supported formats JPG, JPEG, PNG , Maximum file size 6 MB per image , Maximum uploads 10 images and Supported Desktop devices only
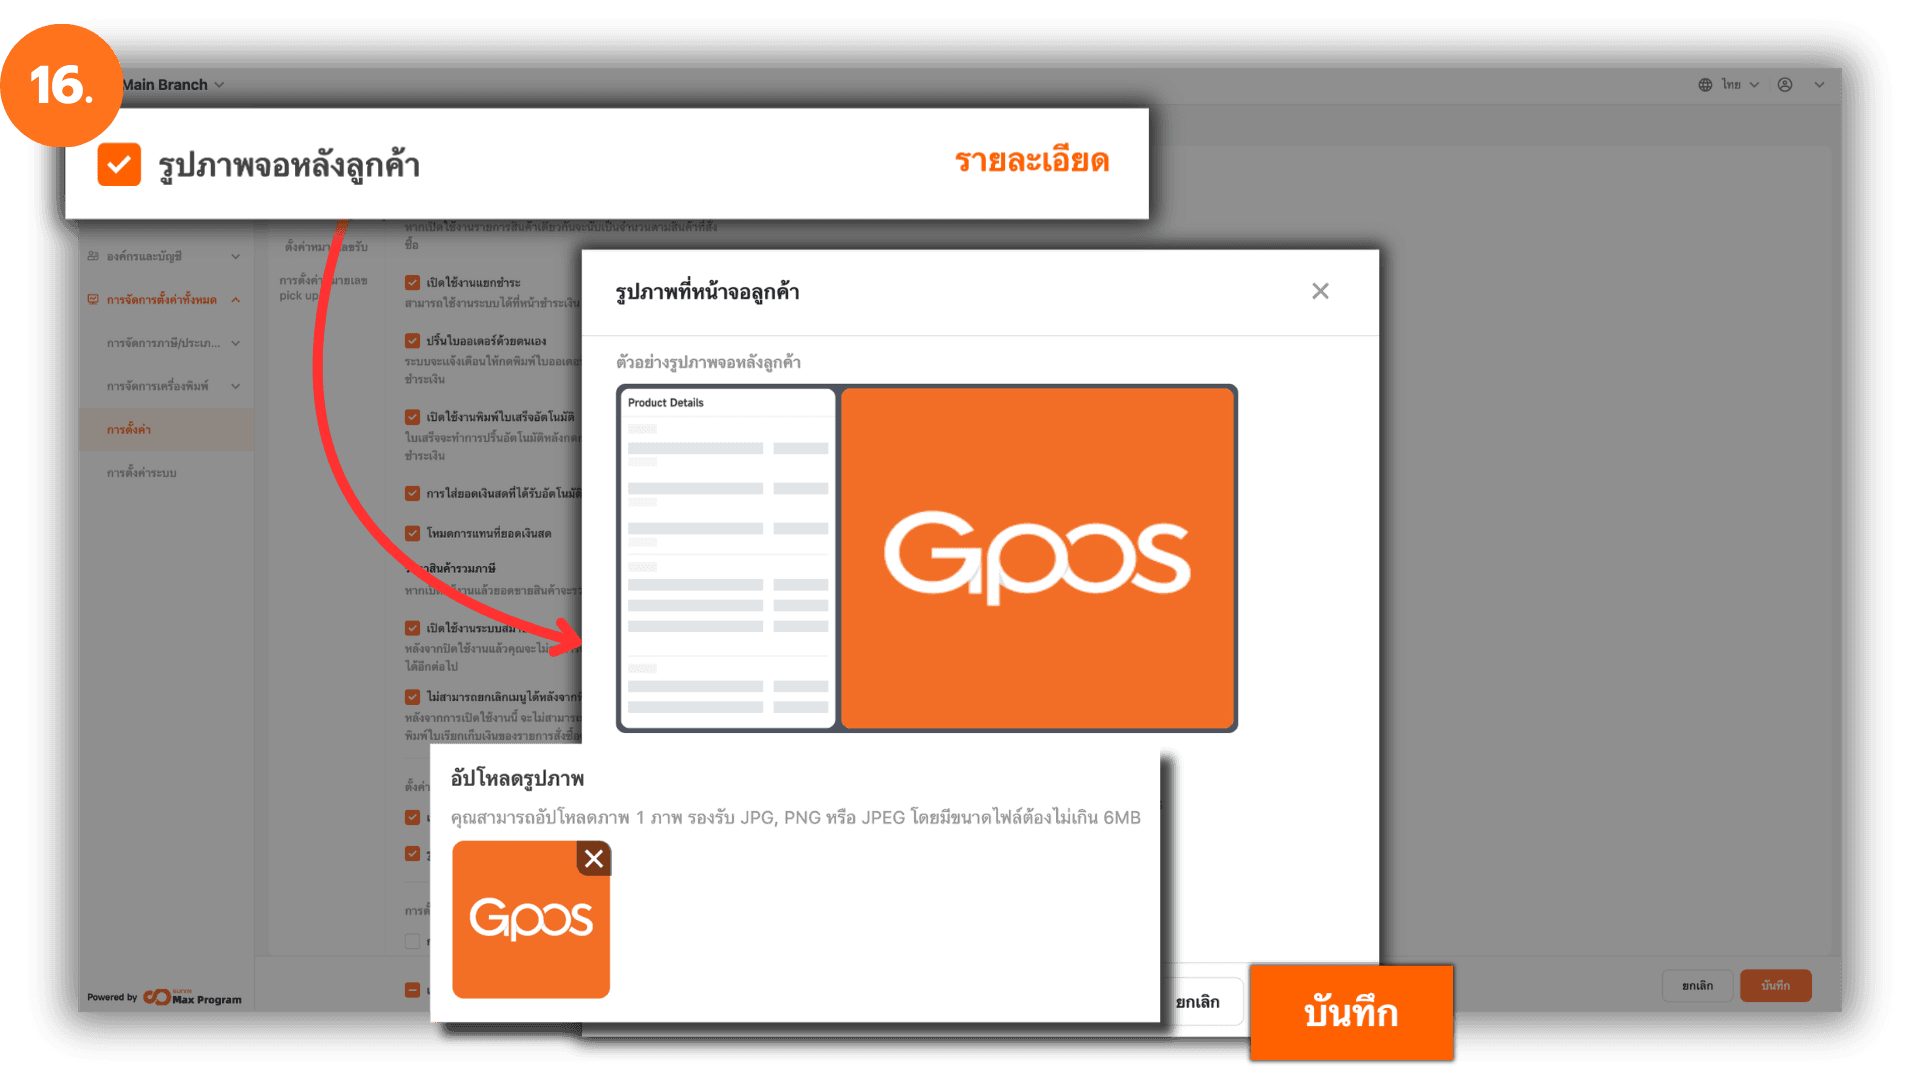
16. Customer Back Screen Image
In the Customer Display Setting section, go to Enable payment image and click “Info.” Click “➕ Upload” to select the image you want to display on the customer-facing screen. You can preview the image above before saving. Click “Save” to confirm.
Note : Supported formats JPG, JPEG, PNG , Maximum file size 6 MB , Only 1 image can be uploaded and Supported Desktop devices only
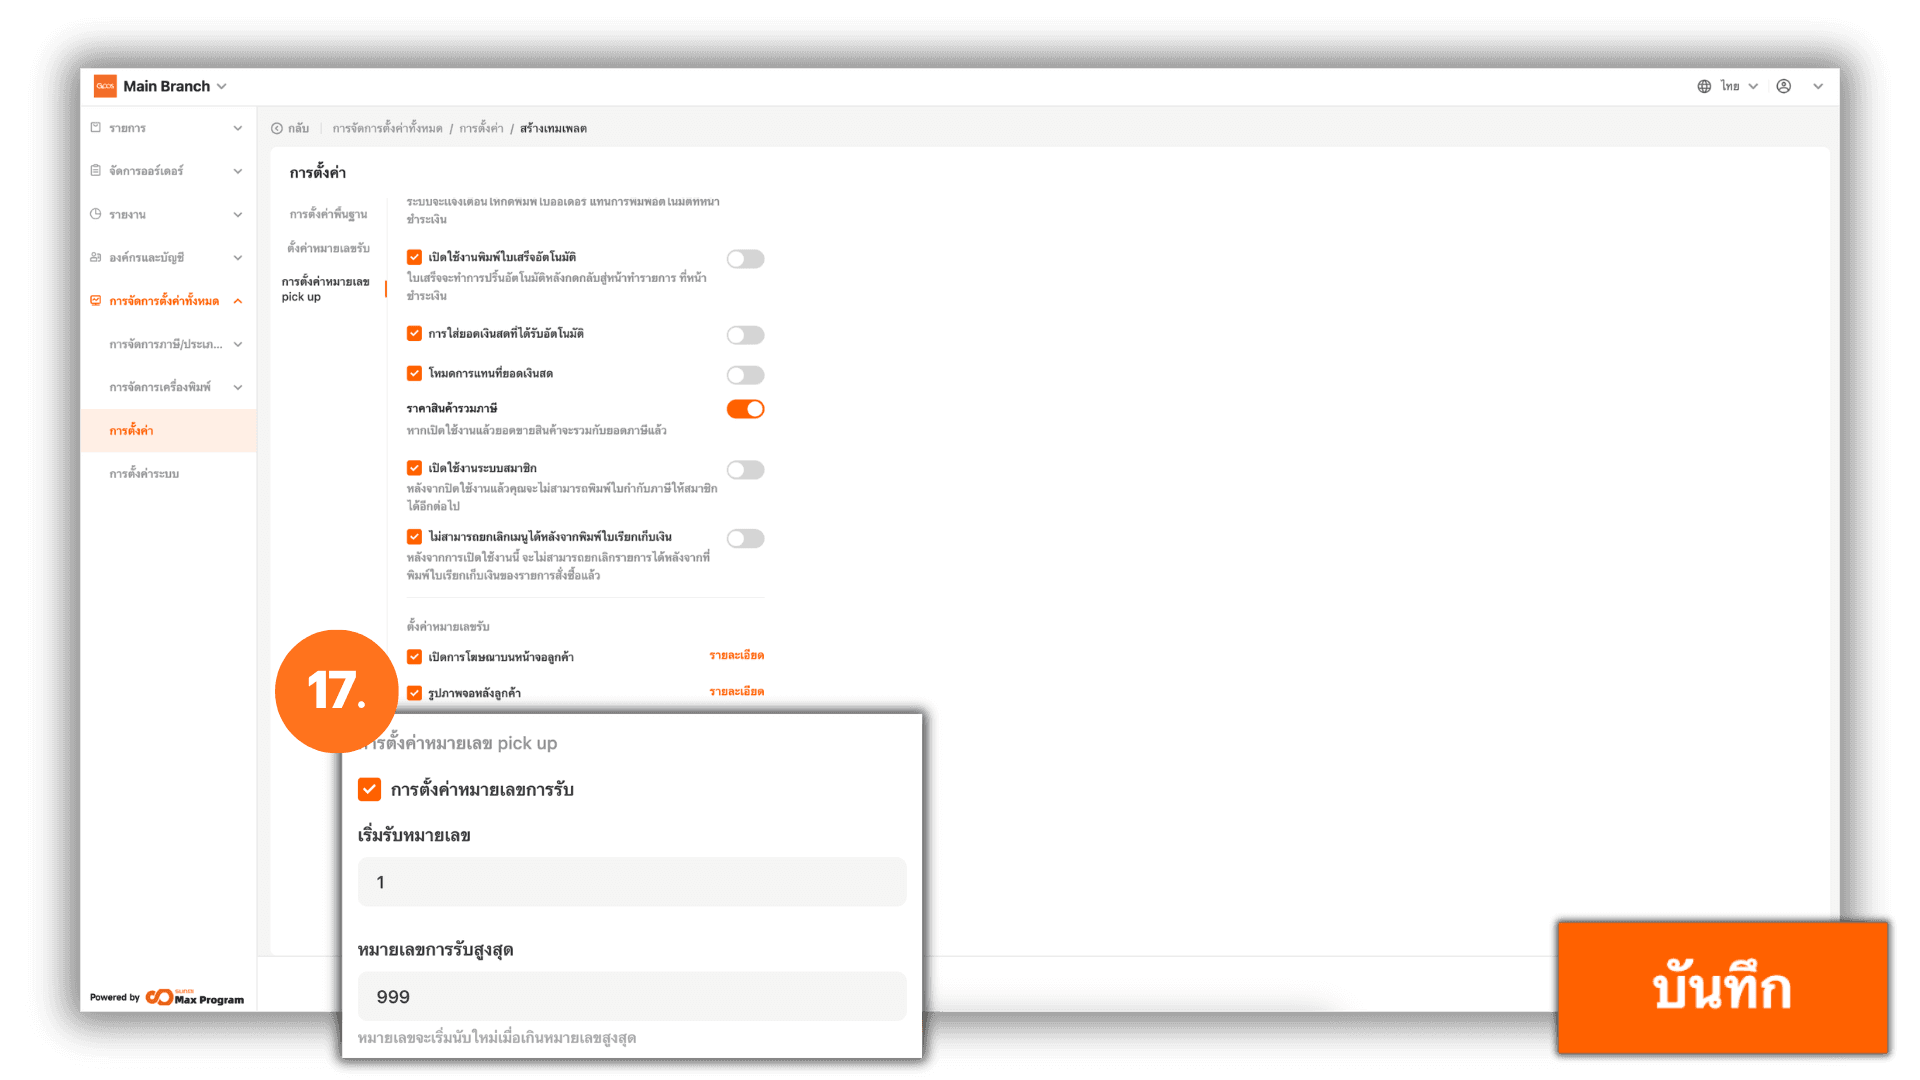
17. Pick Up Number Settings
In the Calling Setting section, go to Pickup Number Setting and enable it.
When enabled, you can enter the following information :
- Start Pickup Number – The number where the system begins counting (e.g., 1001)
- Max Pickup Number – The number where the cycle ends (e.g., 1999)
Click “Save” to confirm the template creation.
Note : When the Pick Up number reaches the maximum number, the system will automatically restart from the starting number.
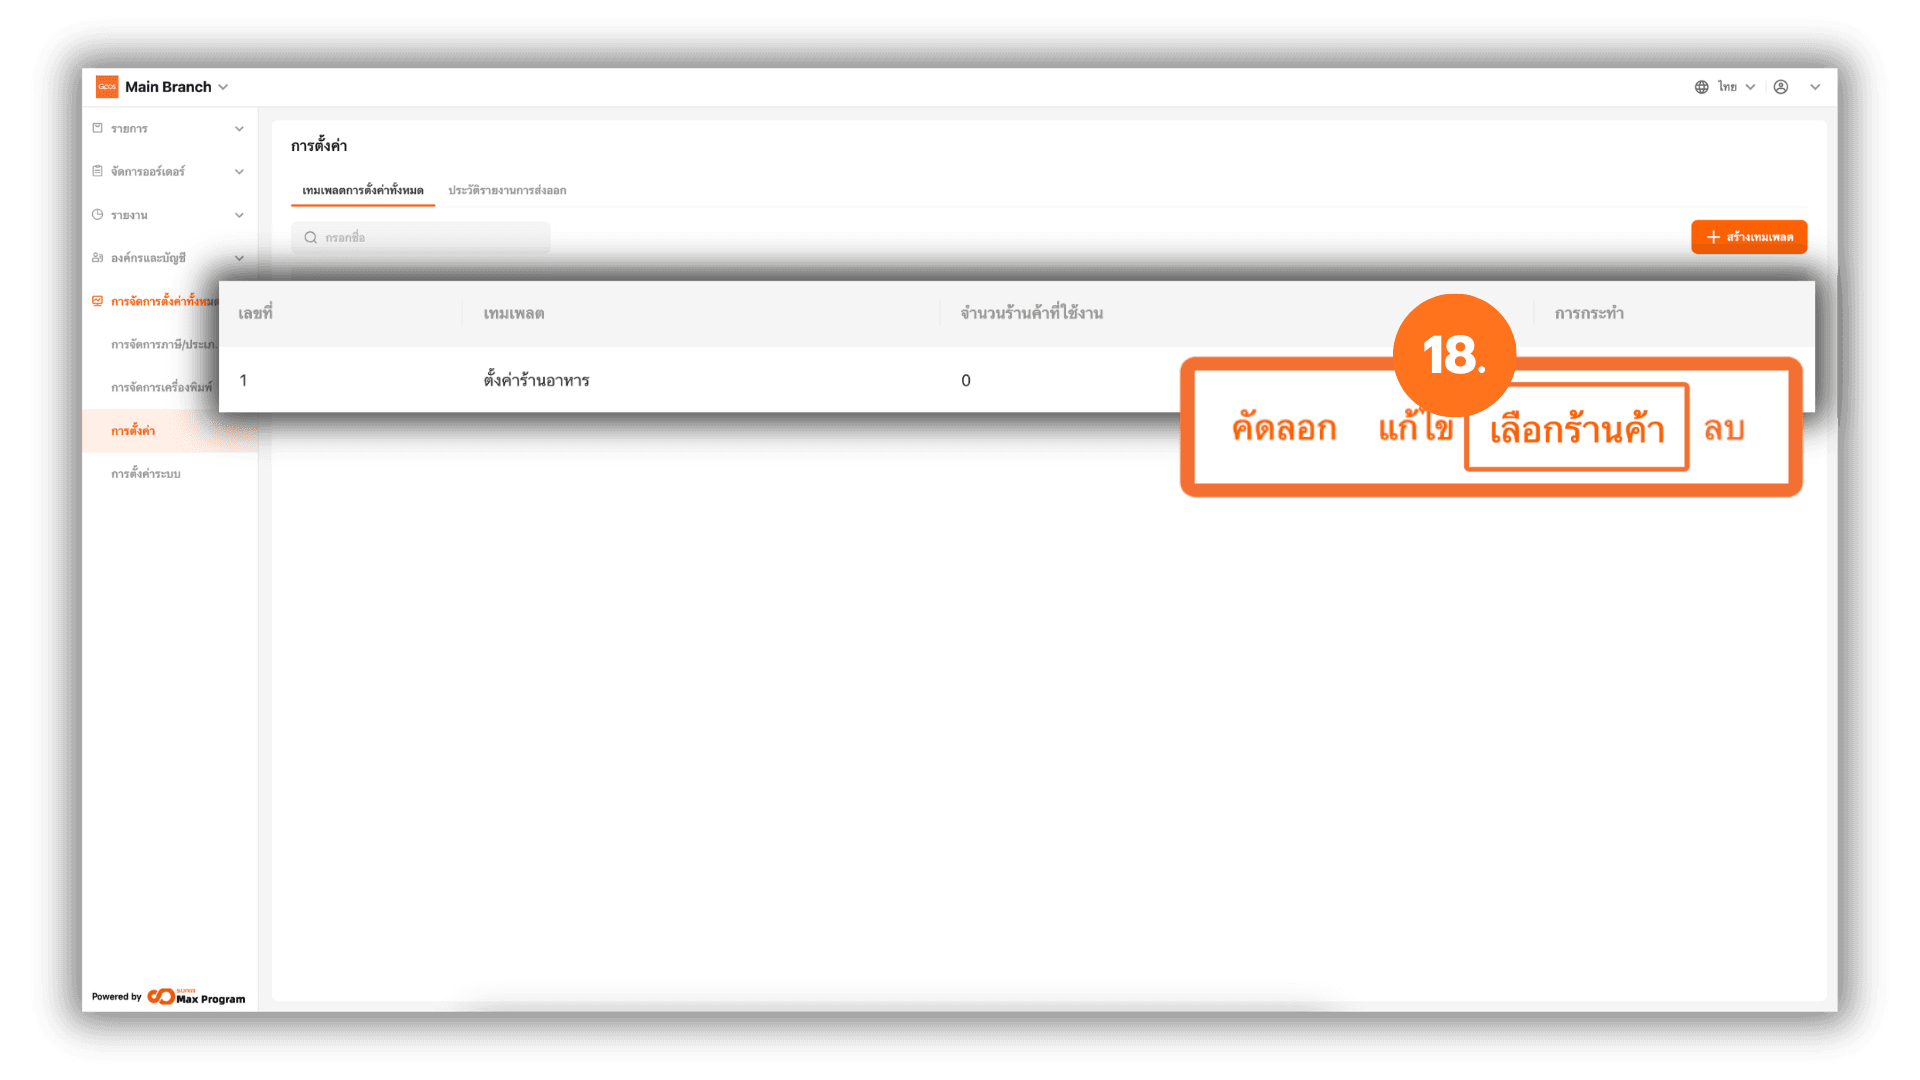
18. Manage Templates and Export to Store Branches
After saving, the system will return to the Store Settings page and display the created templates.
You can manage templates using the following options :
- Copy – Duplicate the selected template without creating a new one from scratch.
- Edit – Modify the template settings.
- Distribute – Confirm and export the template to Store Branches.
- Delete – Remove unwanted templates.
Note:
If a template is modified, you must export it again to update the settings for the branches.
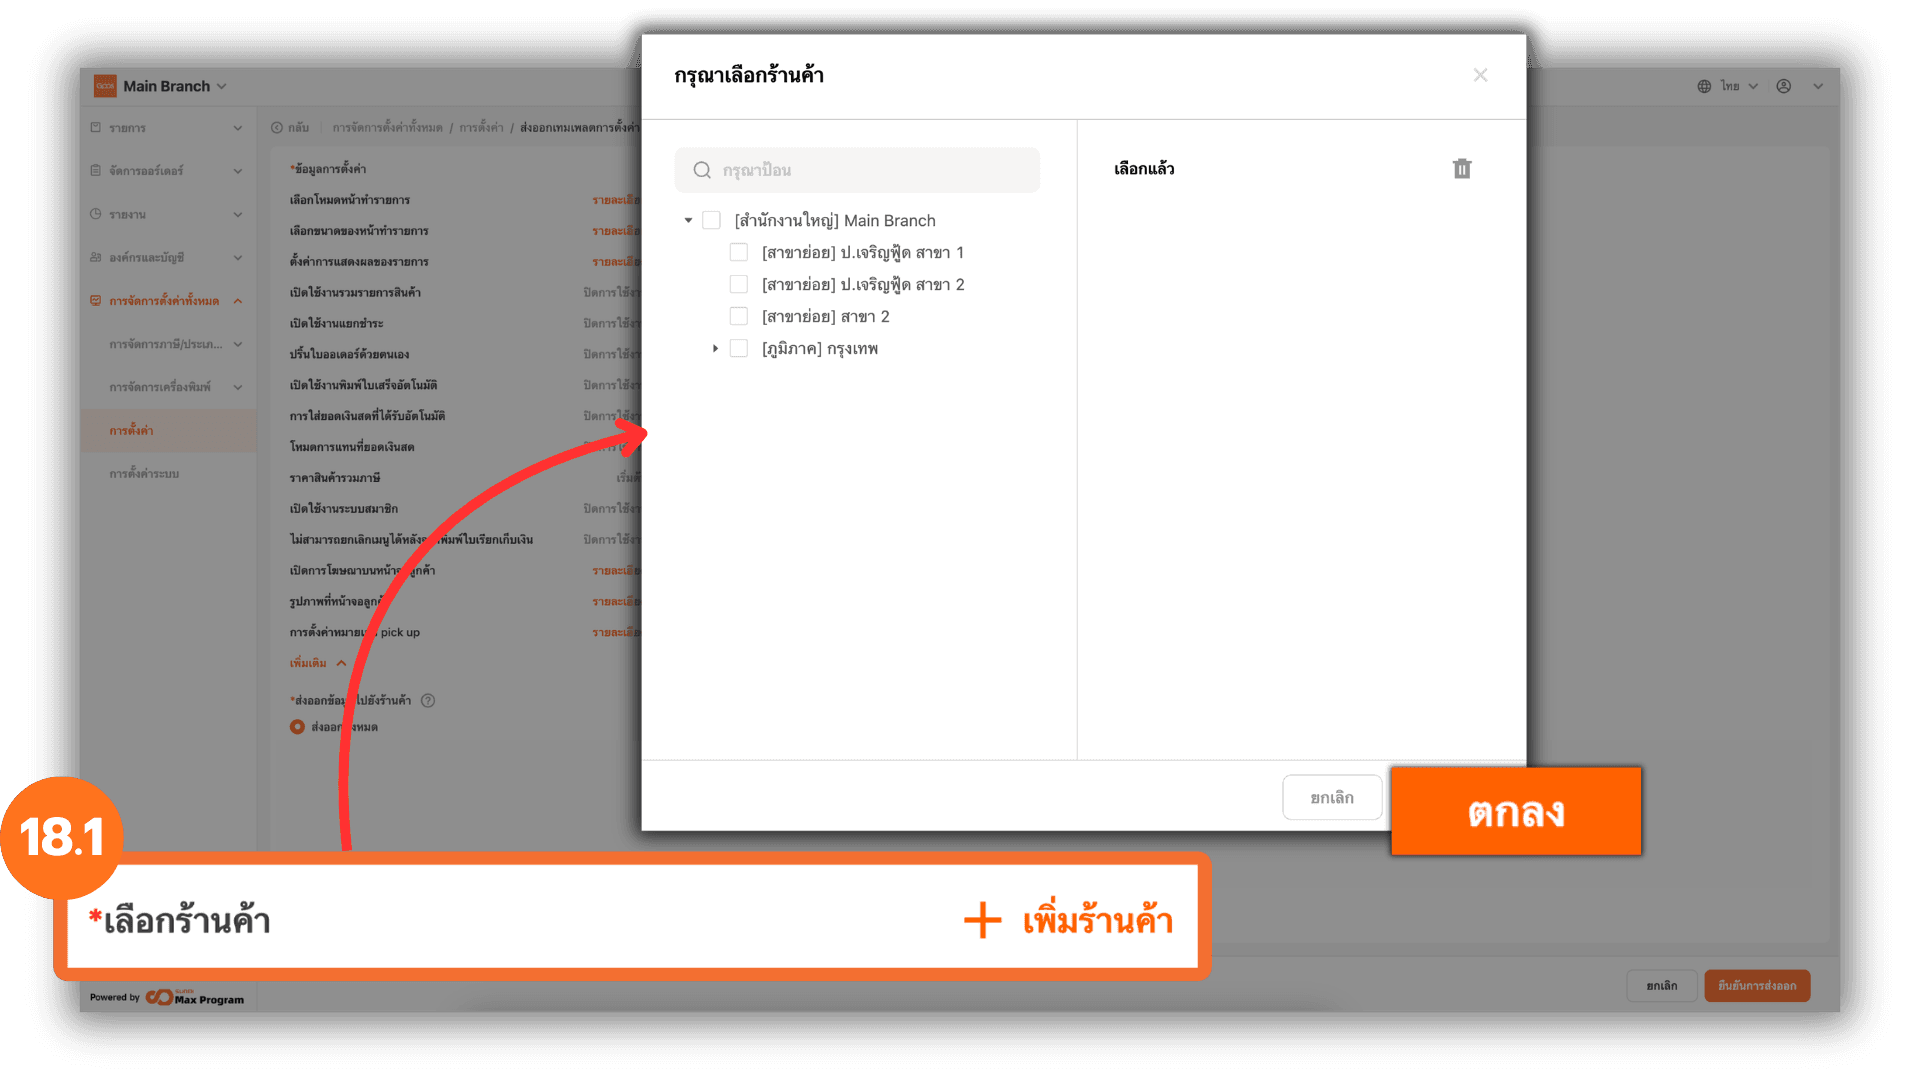
18.1 Add Store Branches for Template Export
After clicking “Distribute,” the system will display the template settings again.
Click “+ Add Store,” select the Store Branches to receive the template, review the selected stores, and click “Ok.”
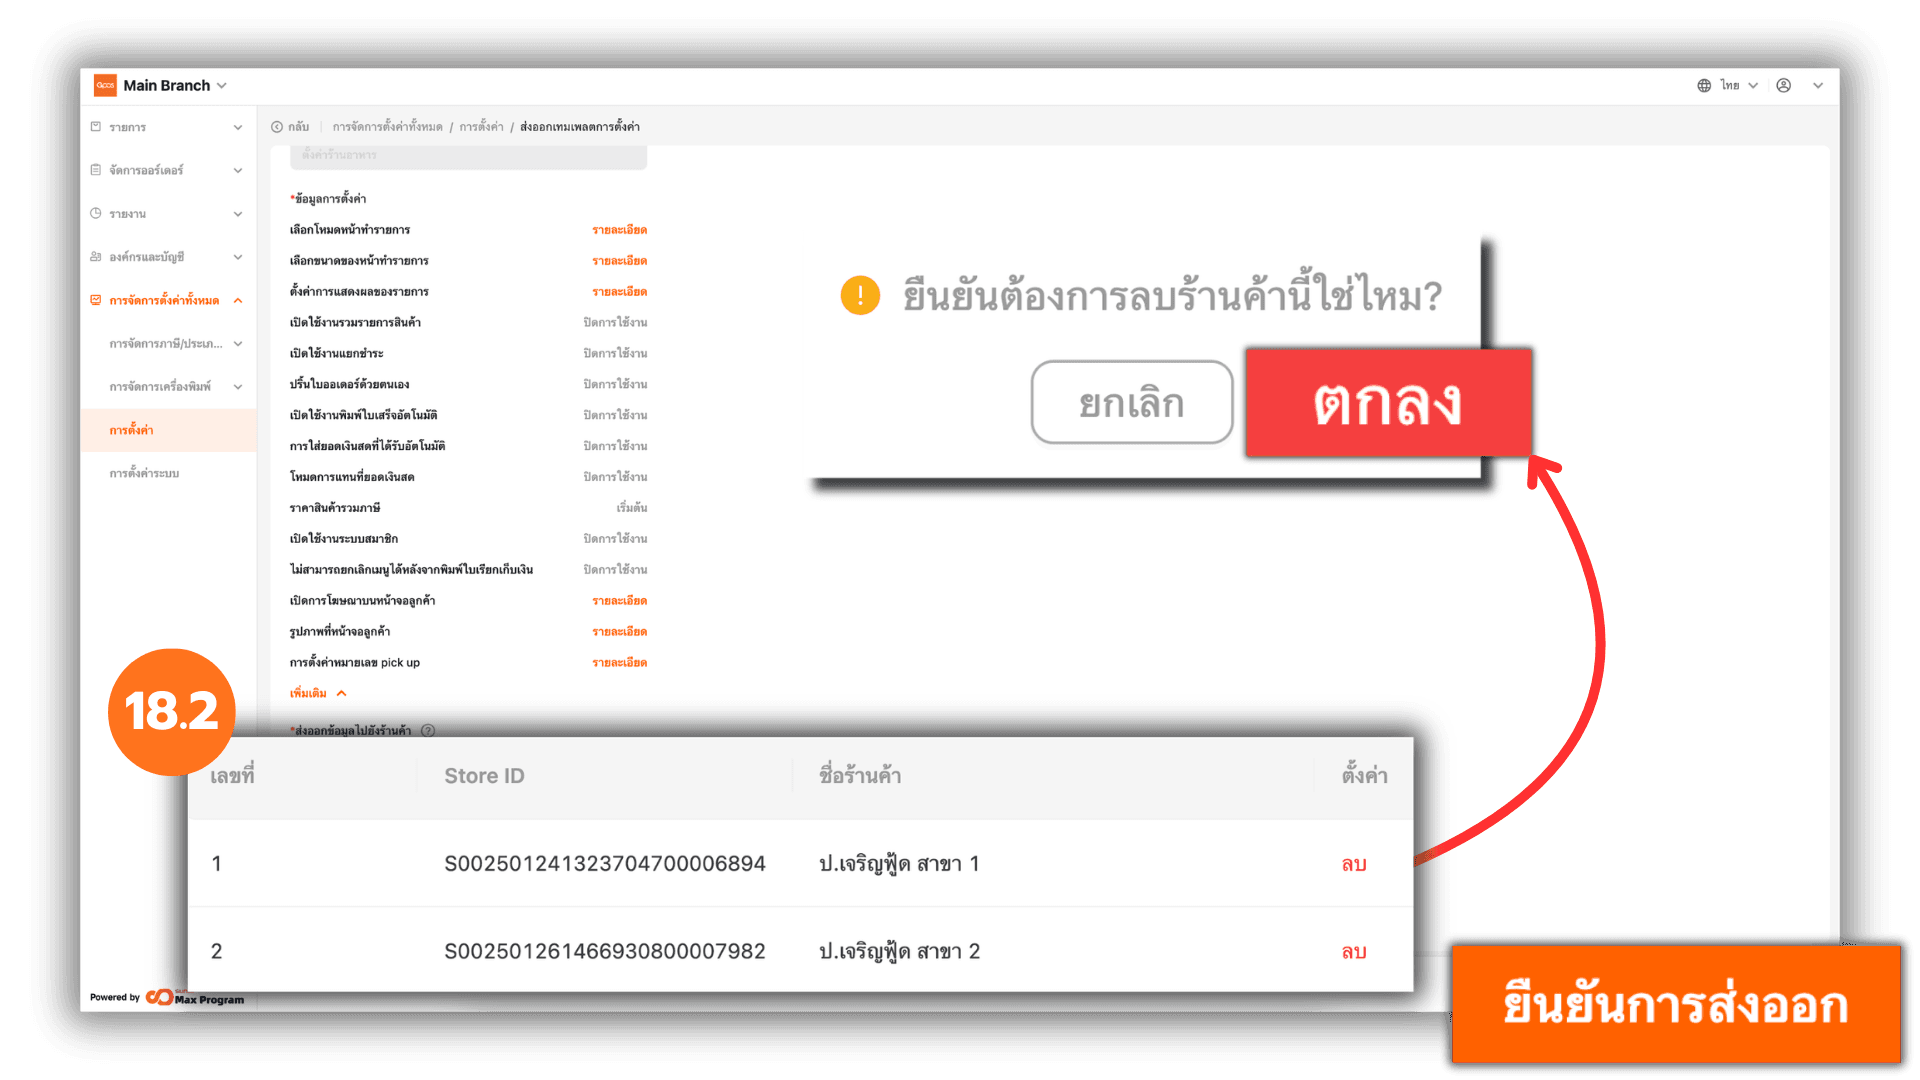
18.2 Edit Selected Stores and Confirm Export
If an incorrect store was selected, click “Remove” next to the store name to remove it. Review the list again and click “Confirm distribution” to send the template to the selected branches.
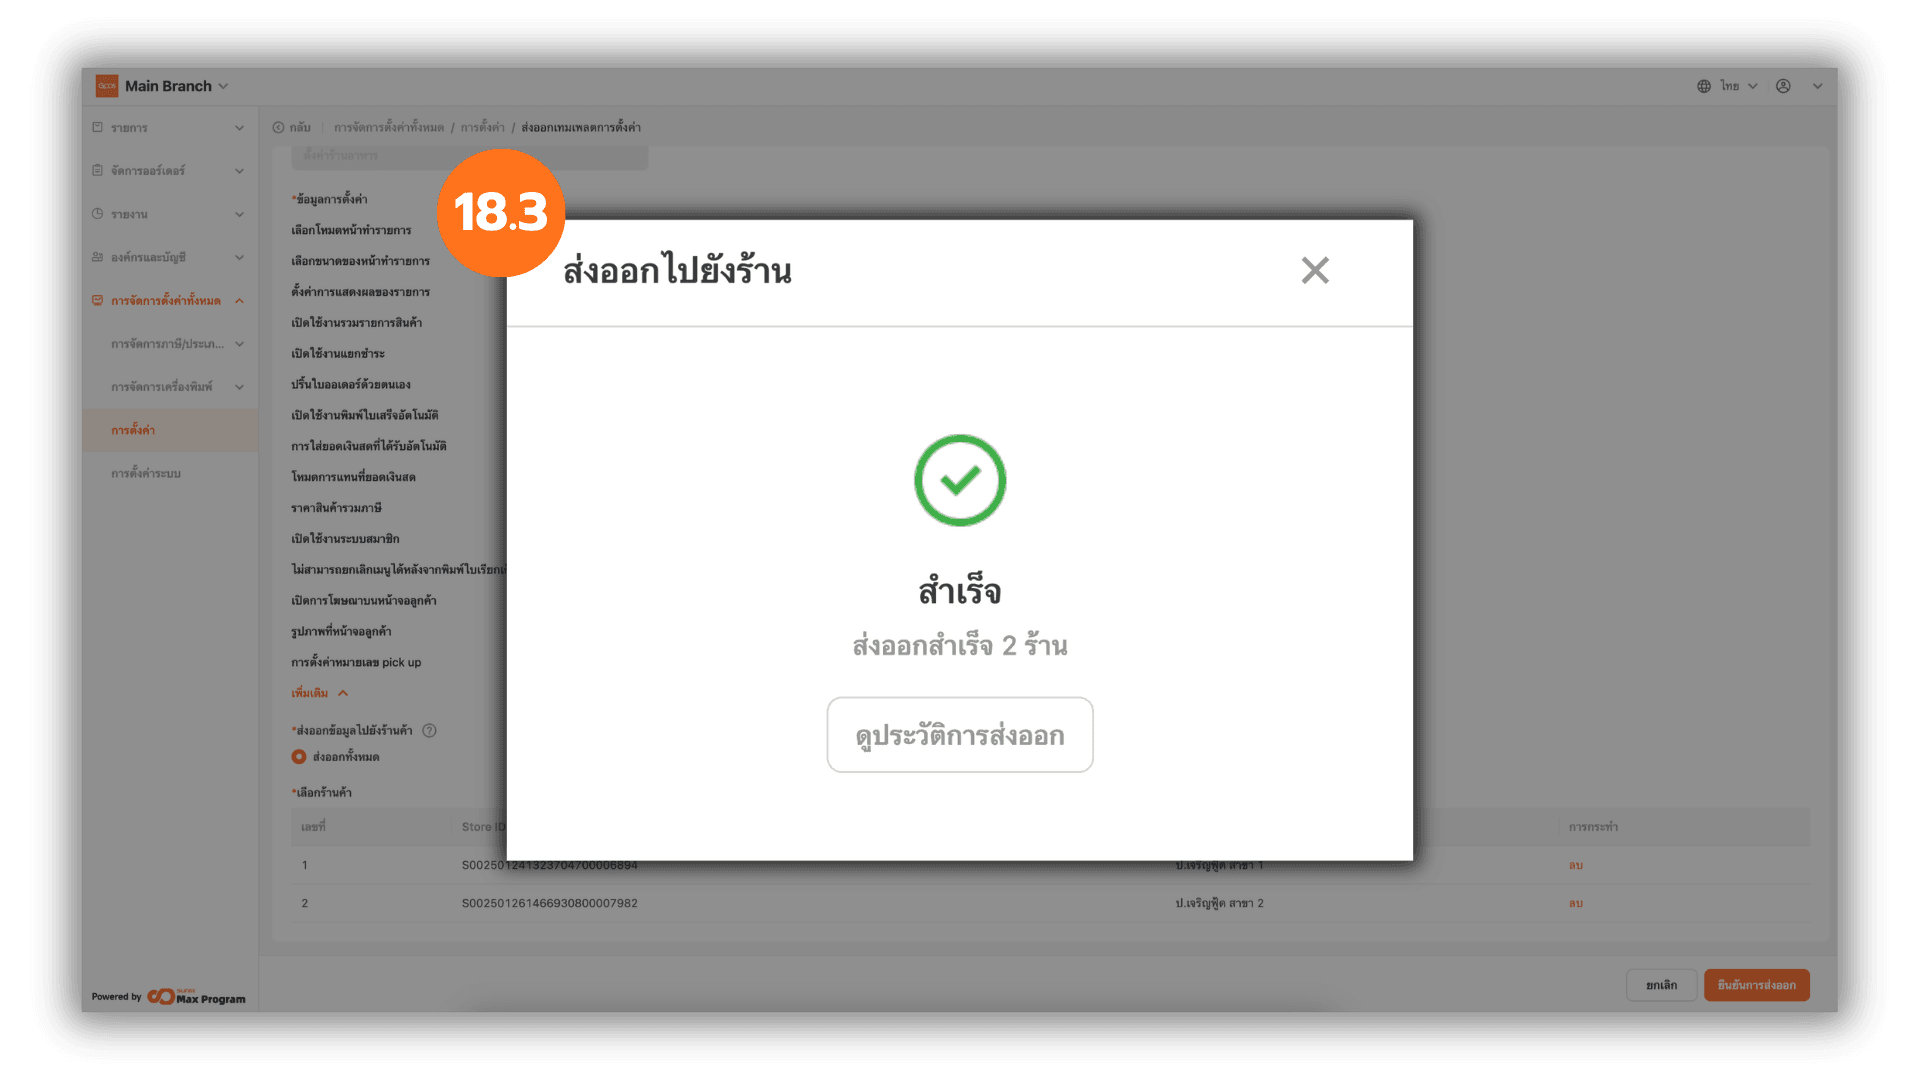
18.3 Check Export Status
After exporting, the system will display the status “Successful.” You can click “X” to close the window or click “View History” to check the details and past export records.