Creating a Menu Template
2026-02-16 11:22
Creating a menu template helps you manage product items and selling prices systematically. You can customize and arrange menu items as needed, reduce repetitive setup steps, increase convenience and speed, and effectively control menu standards across branches.
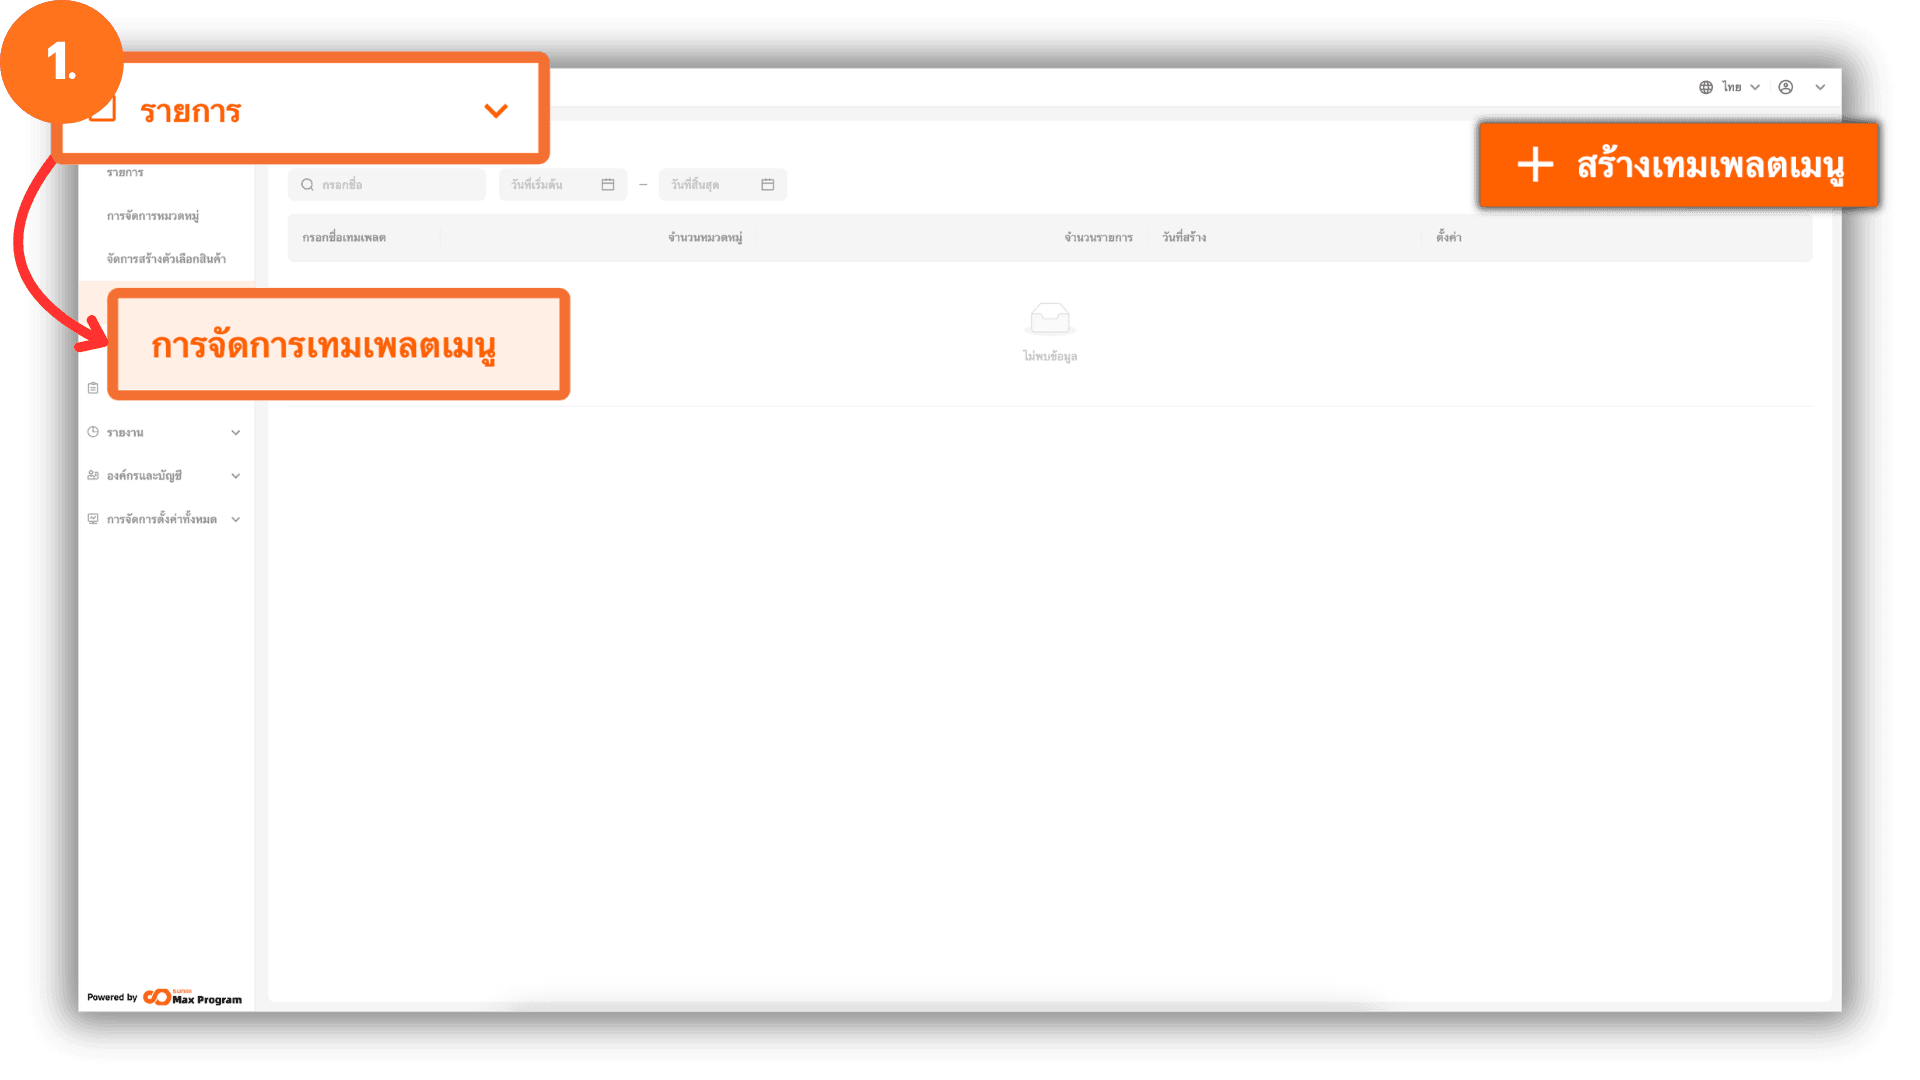
1. Log in to the Back Office
Go to the website login.gpos.co.th, enter your email and password, then click Log In. After logging in successfully, go to Head Office. Select the “Items” menu, Click “Menu Template Management”, Click the “+ Create Menu Template” button.
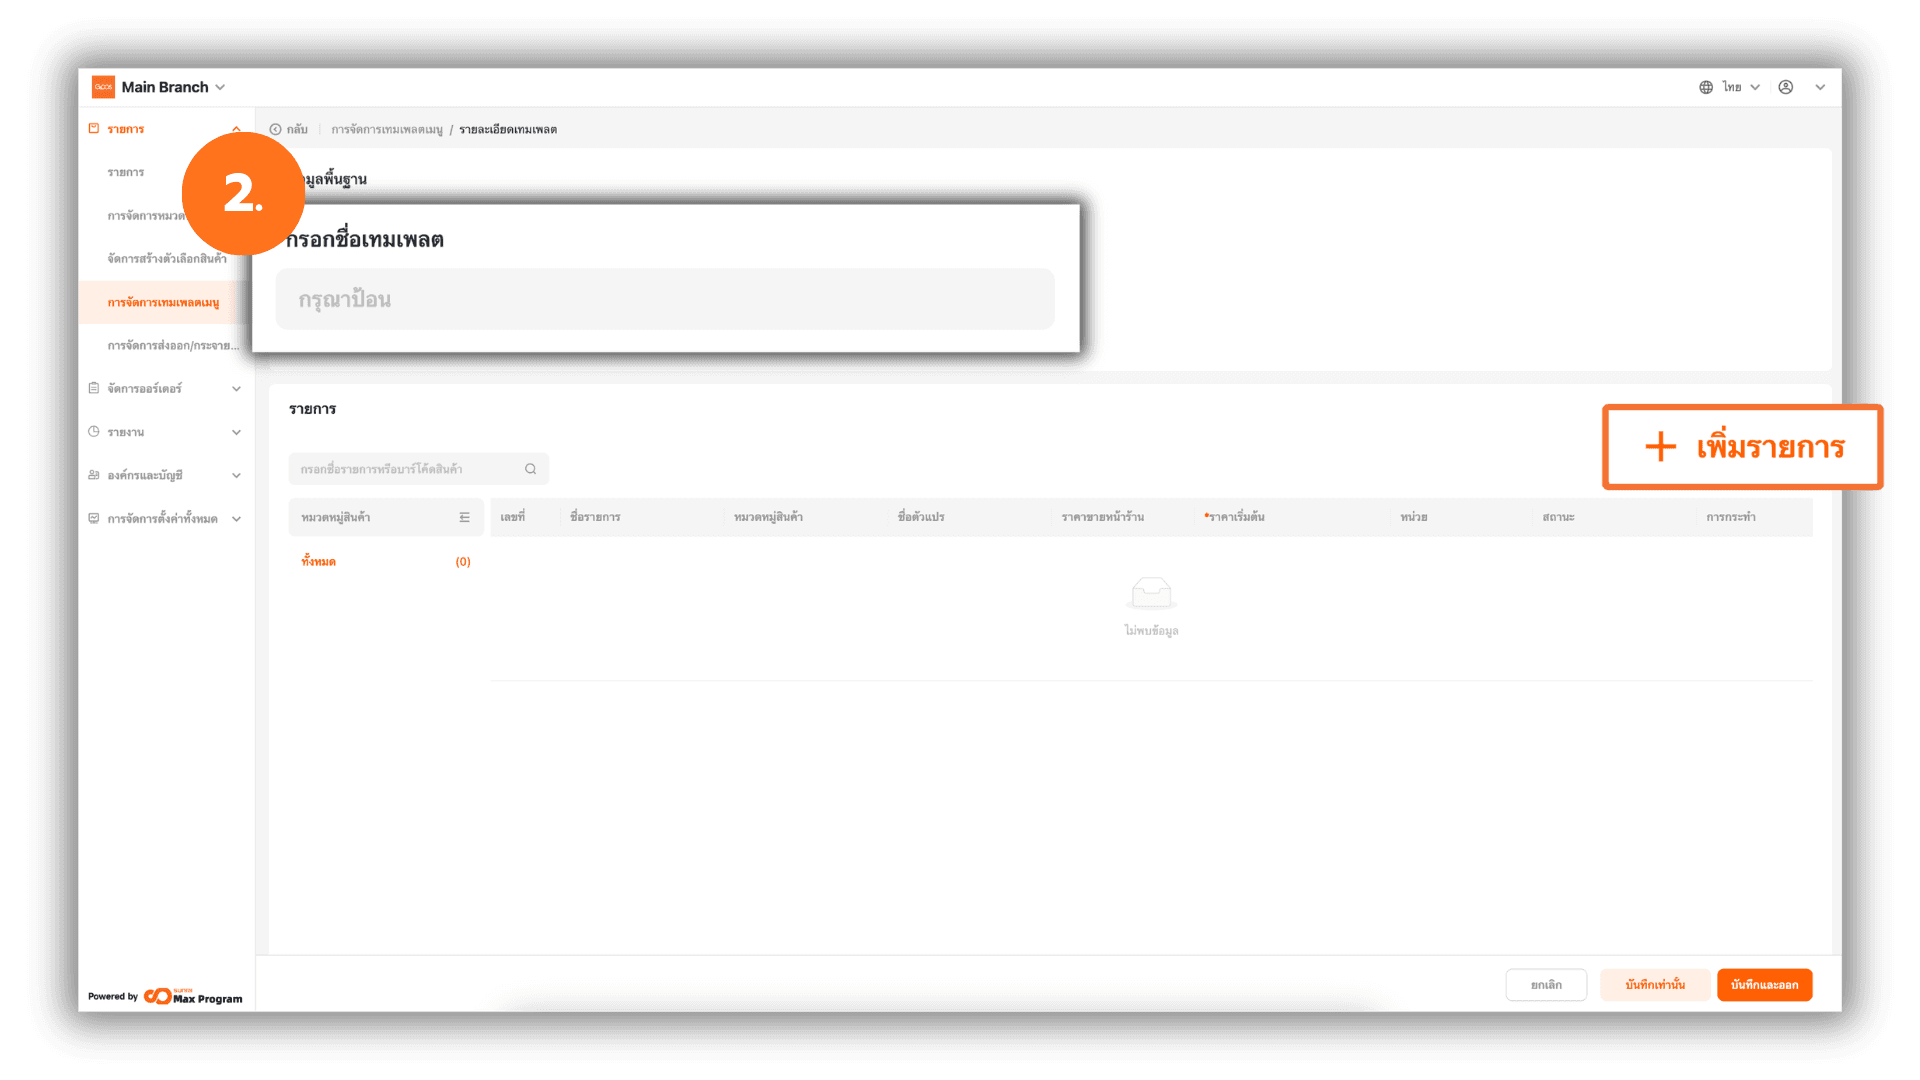
2. Enter Basic Template Information
The system will display a form for basic information. Enter the Menu Name as desired. Click “+ Add Item” to select products
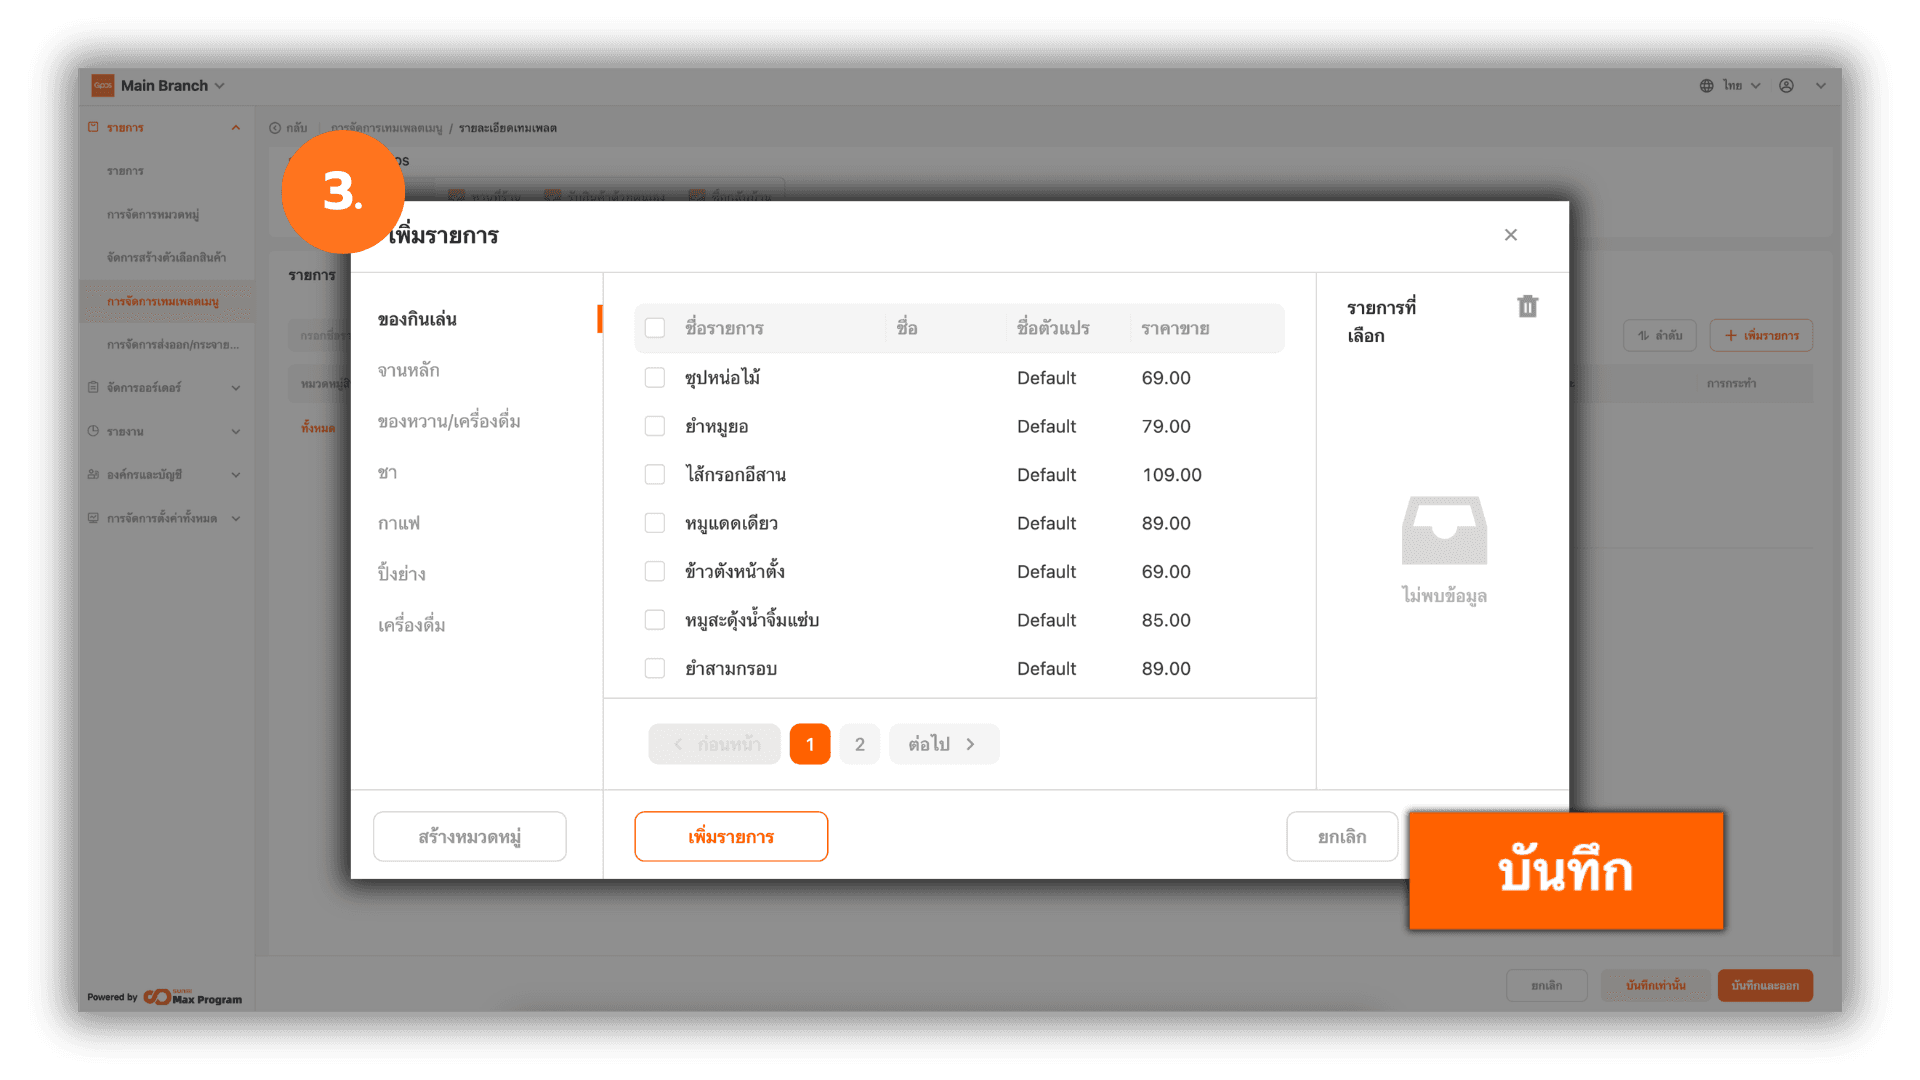
3. Select Products for the Template
The system will display the product list. Tick the products you want to add. Click “Save”
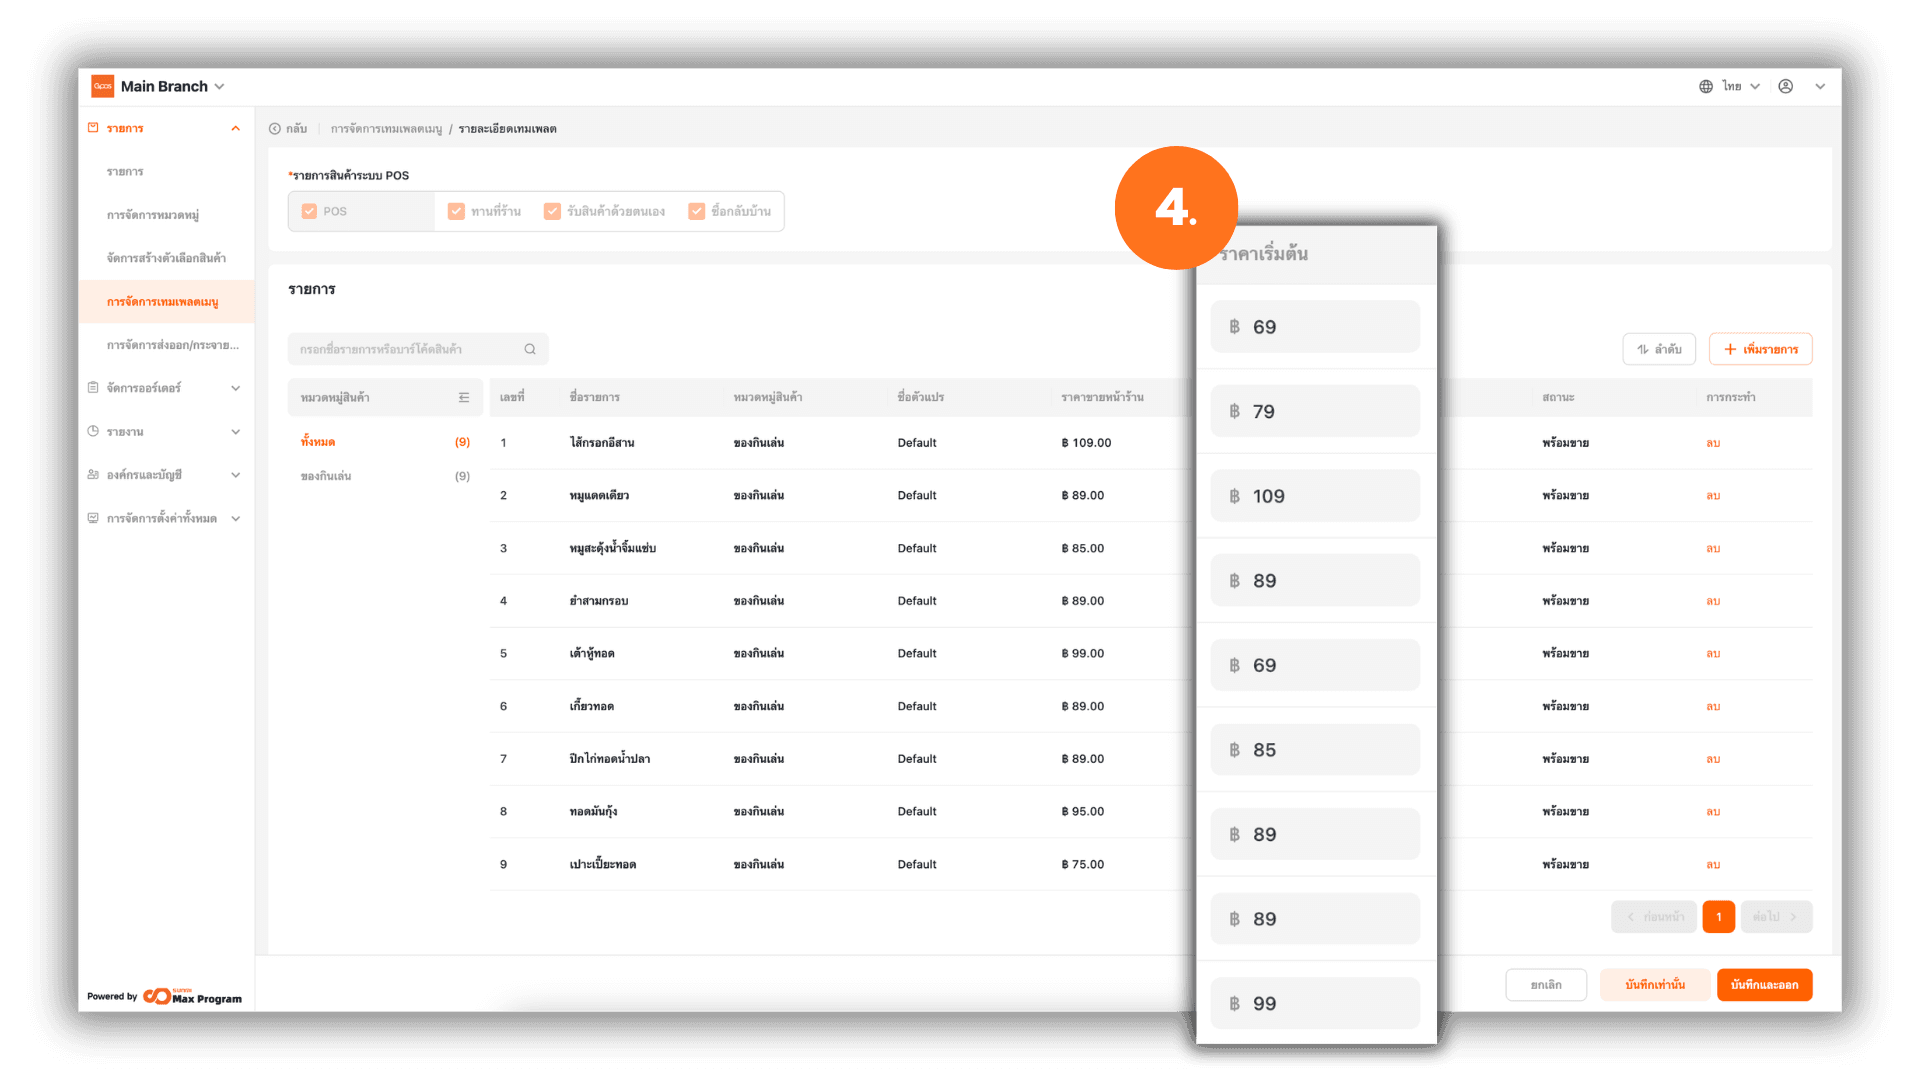
4. Edit Product Prices in the Template
The system will display the selected products. You can edit the Default price of each product specifically for this template as needed.
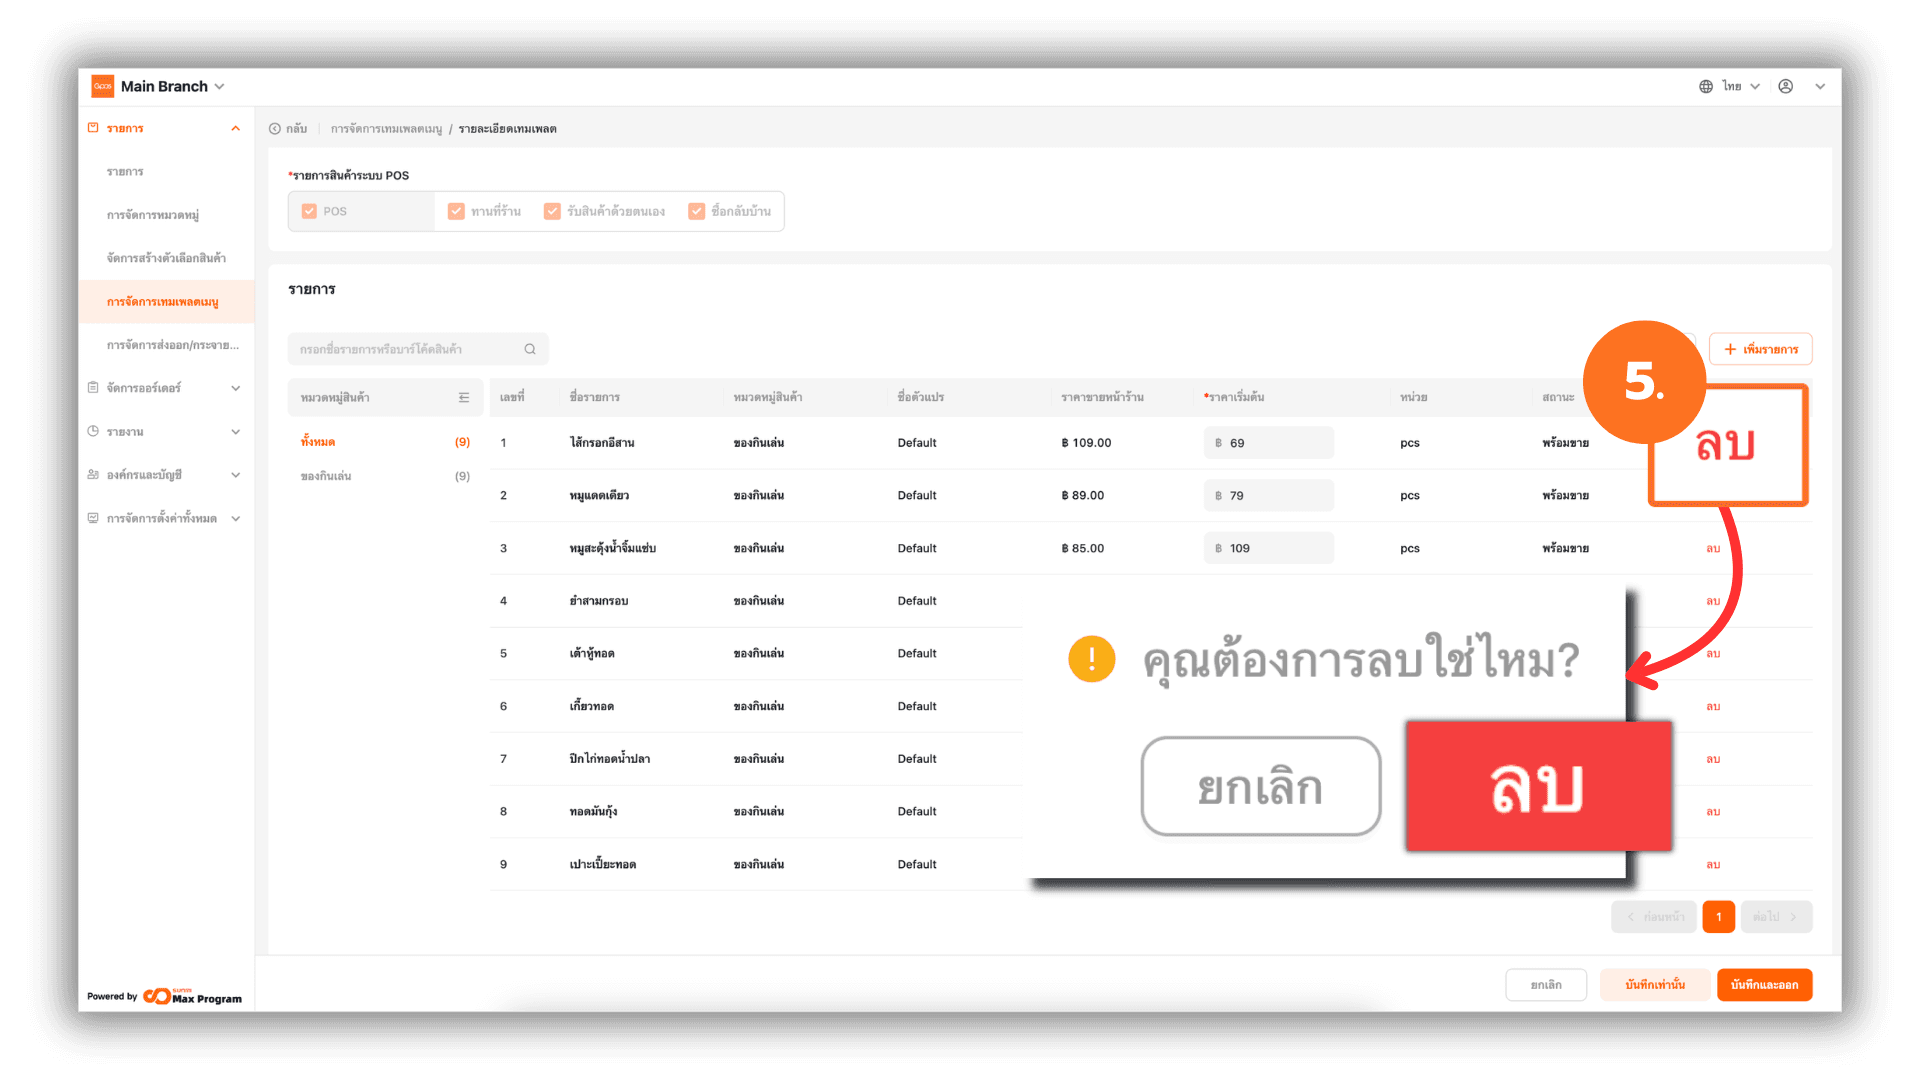
5. Remove Products from the Template
Click the “Remove” button next to the product name you want to remove. A confirmation message will appear Click “Delete” again to confirm removal
6. Arrange Items and Categories
Click the “Sort” menu. The system will display the categories of the selected items. Click “Sort” again to start arranging.
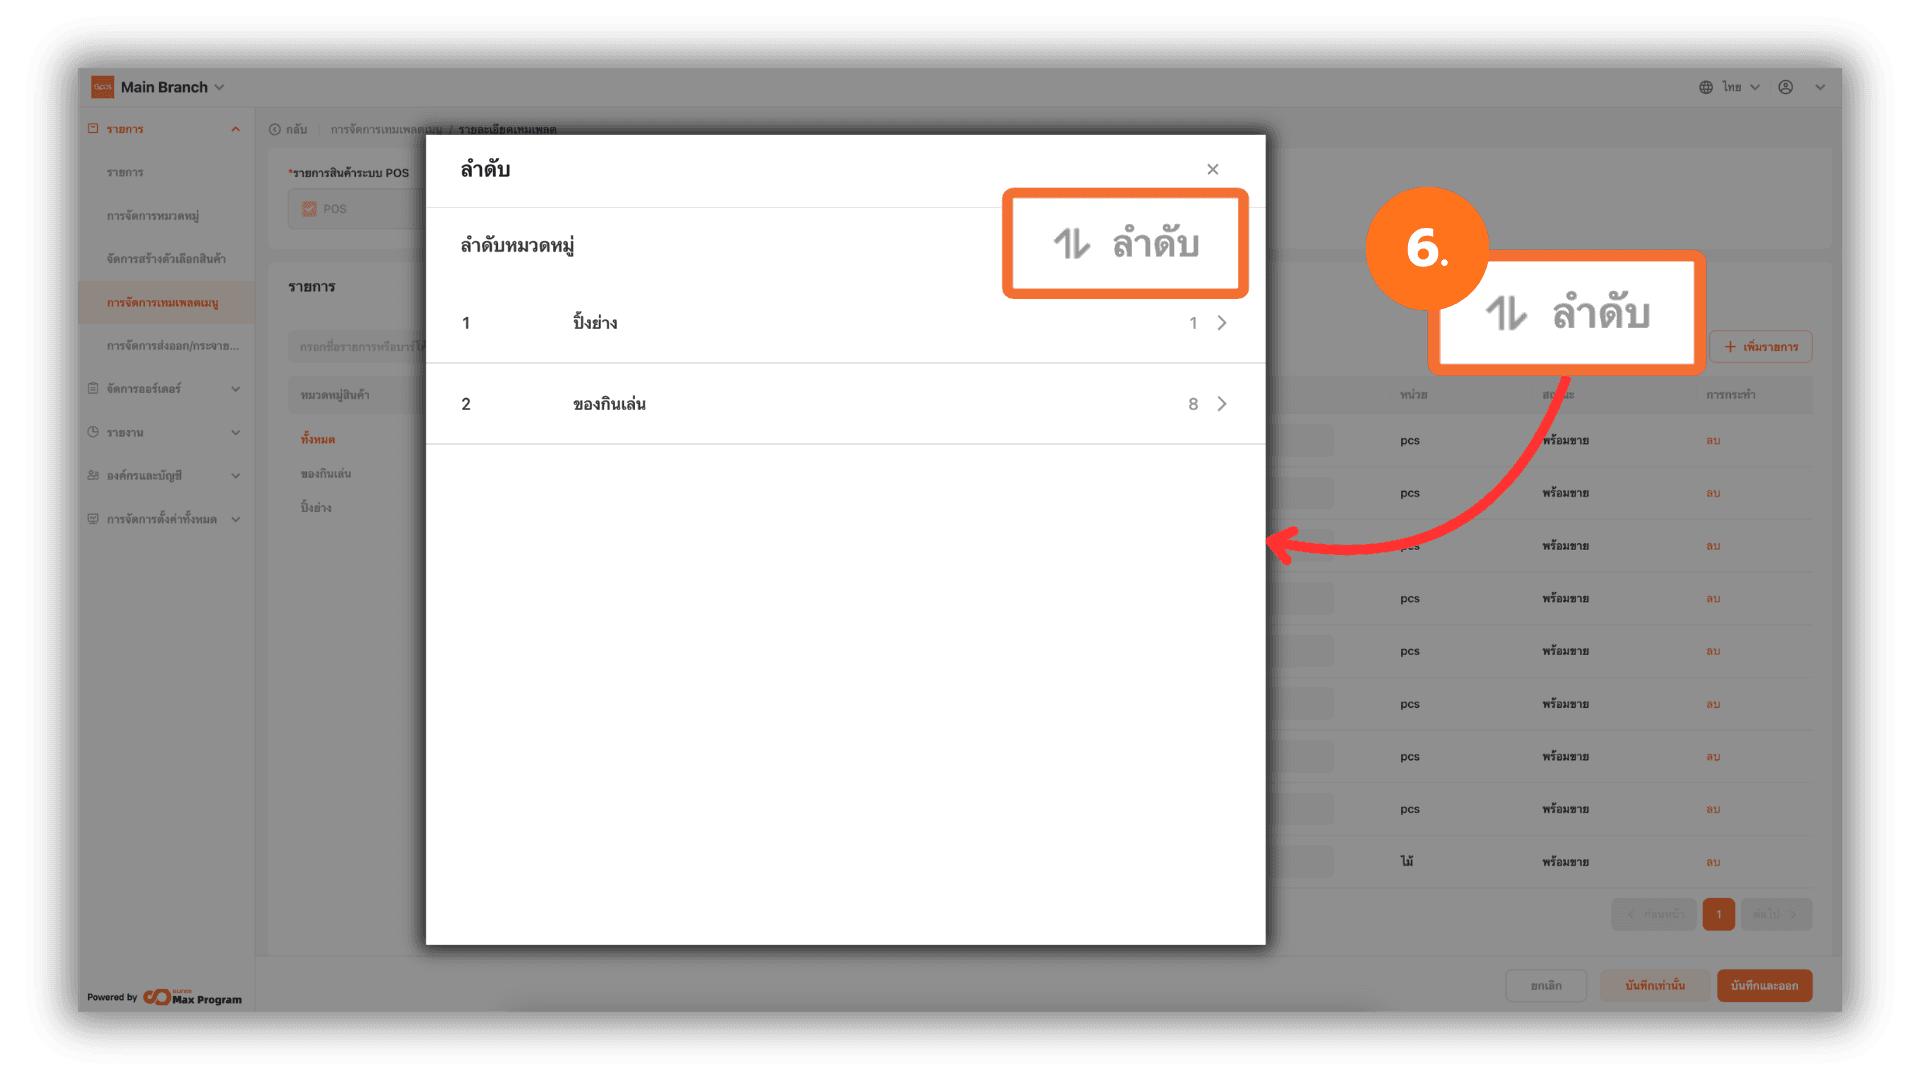
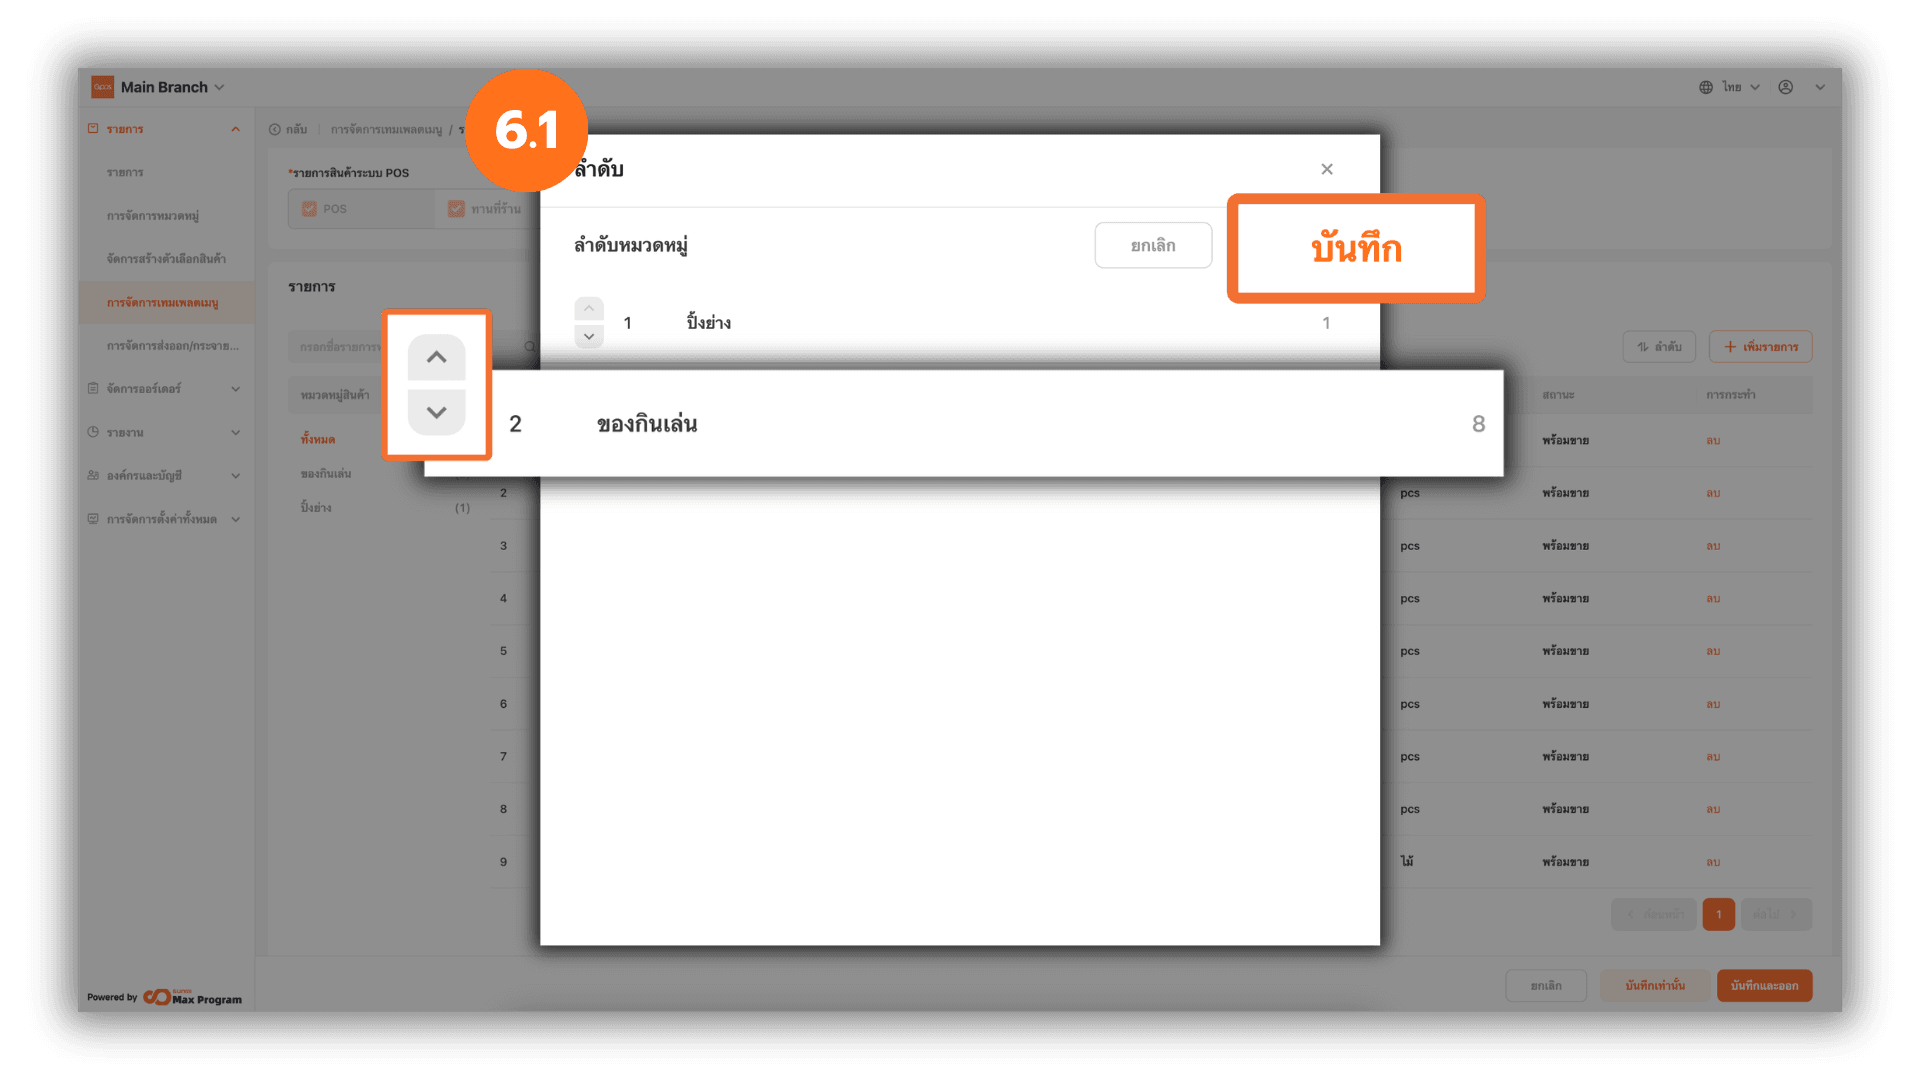
6.1 Reordering Categories
Up and Down arrows will appear in front of each category. Click to adjust the order as needed. Click “Save” to confirm changes
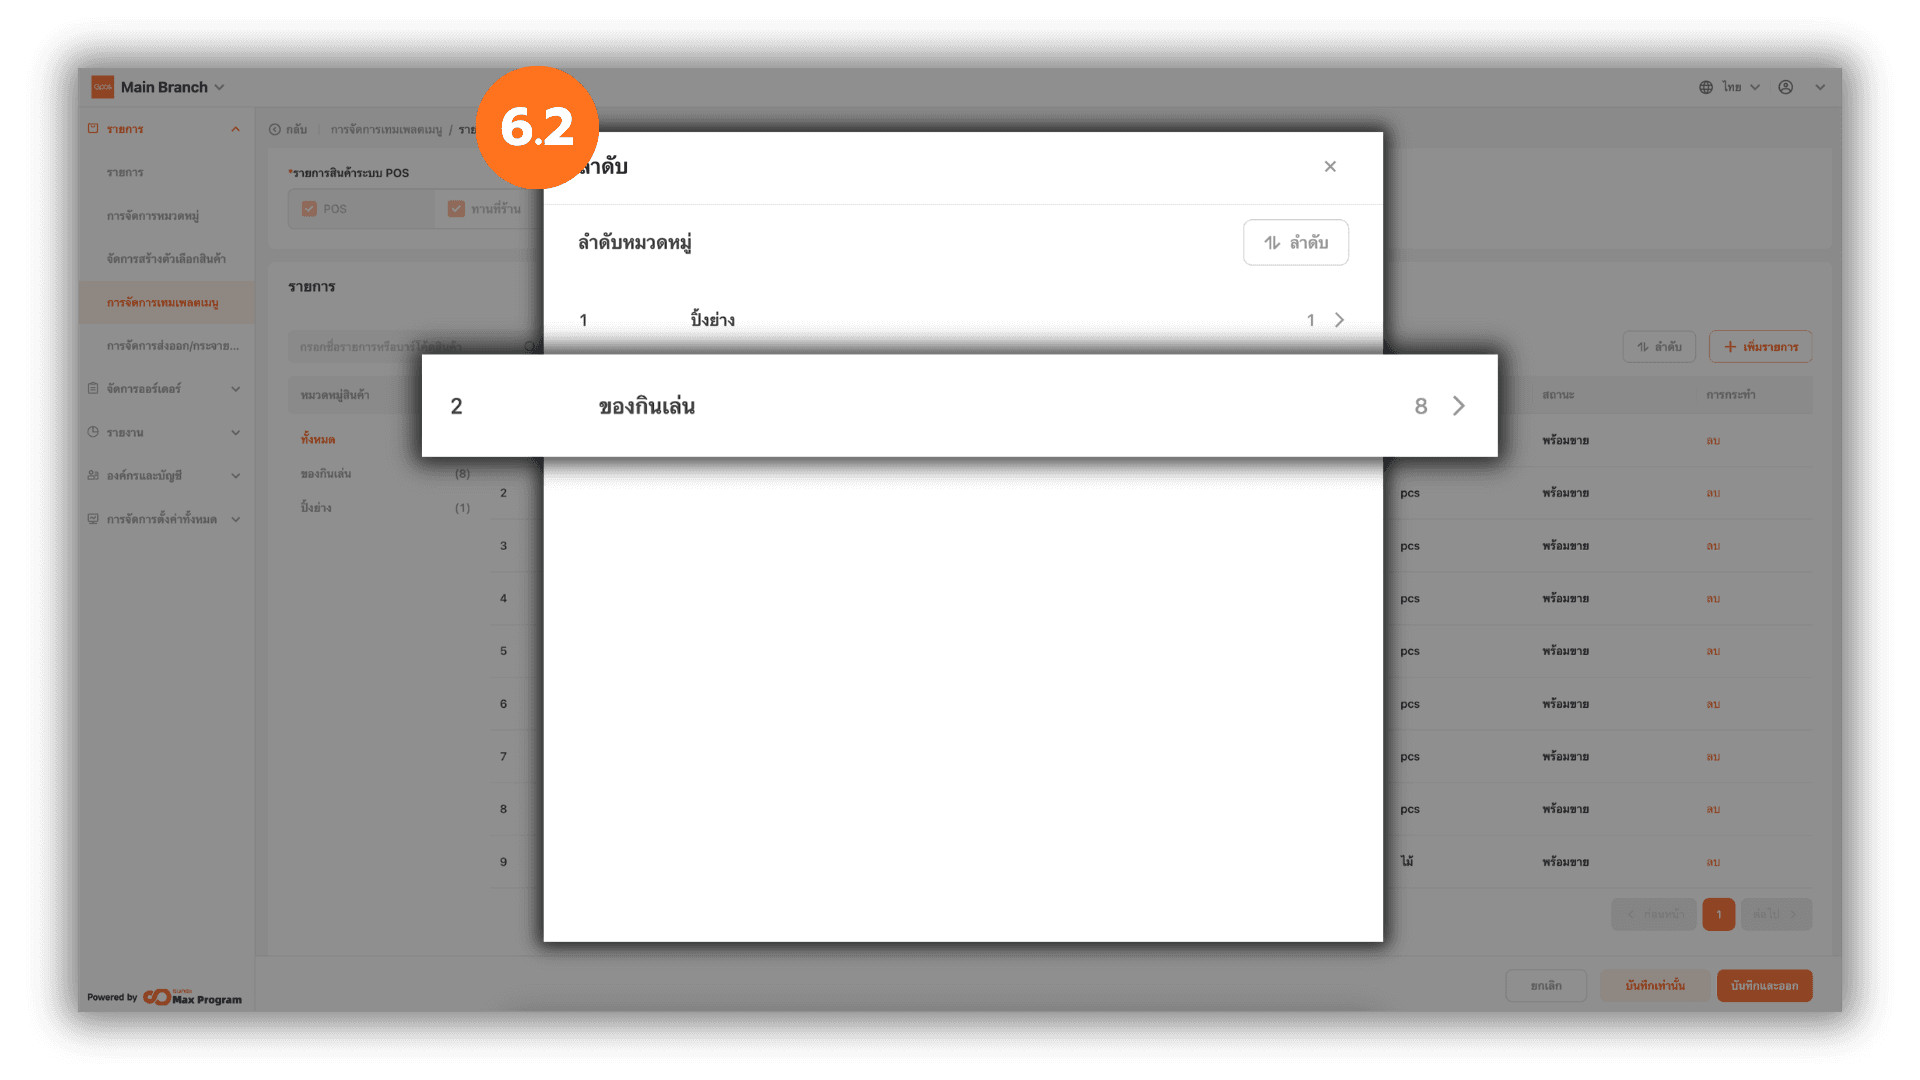
6.2 Select a Category to Arrange Products
Click the Category Name to enter the product arrangement page for that category
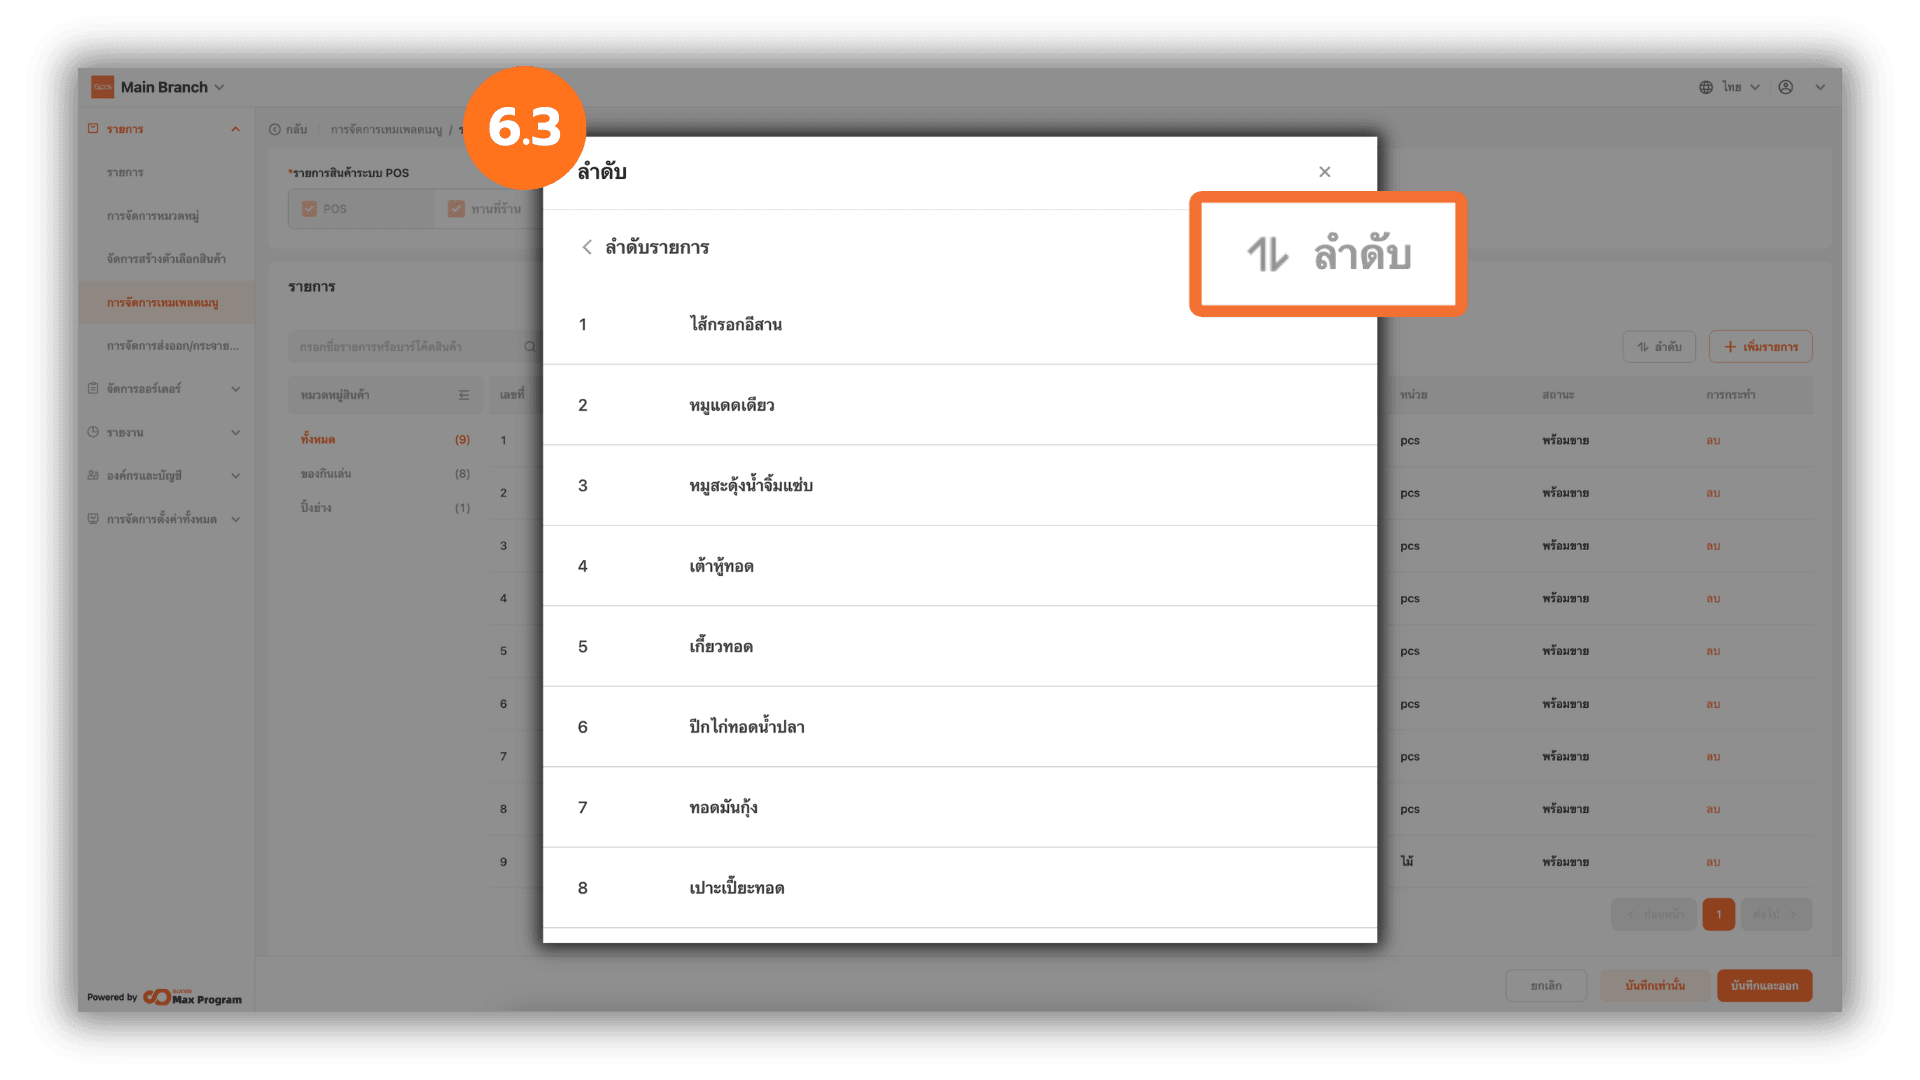
6.3 Enter Product Ordering Mode
After selecting a category, the system will display the products within it. Click “Sort”.
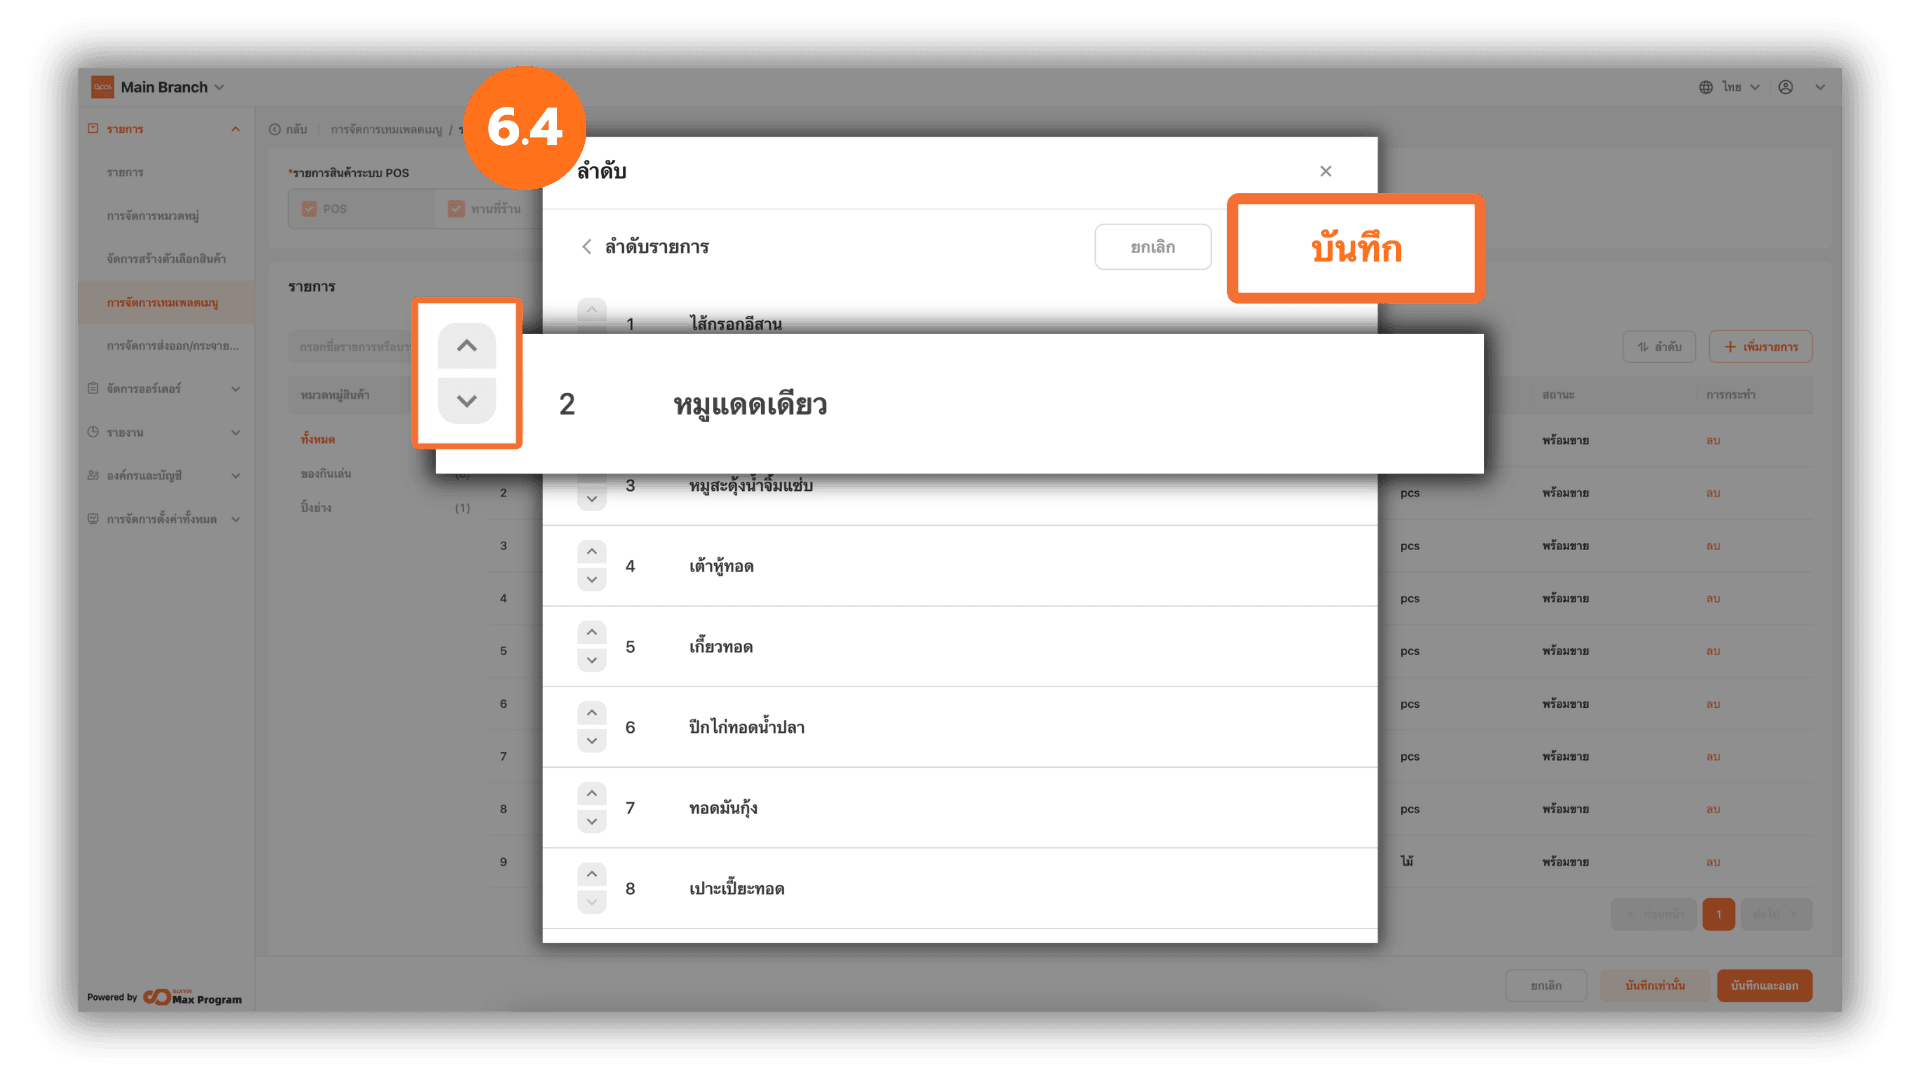
6.4 Reorder Products Within a Category
Up and Down arrows will appear in front of each product. Click to arrange as needed. Click “Save” to confirm
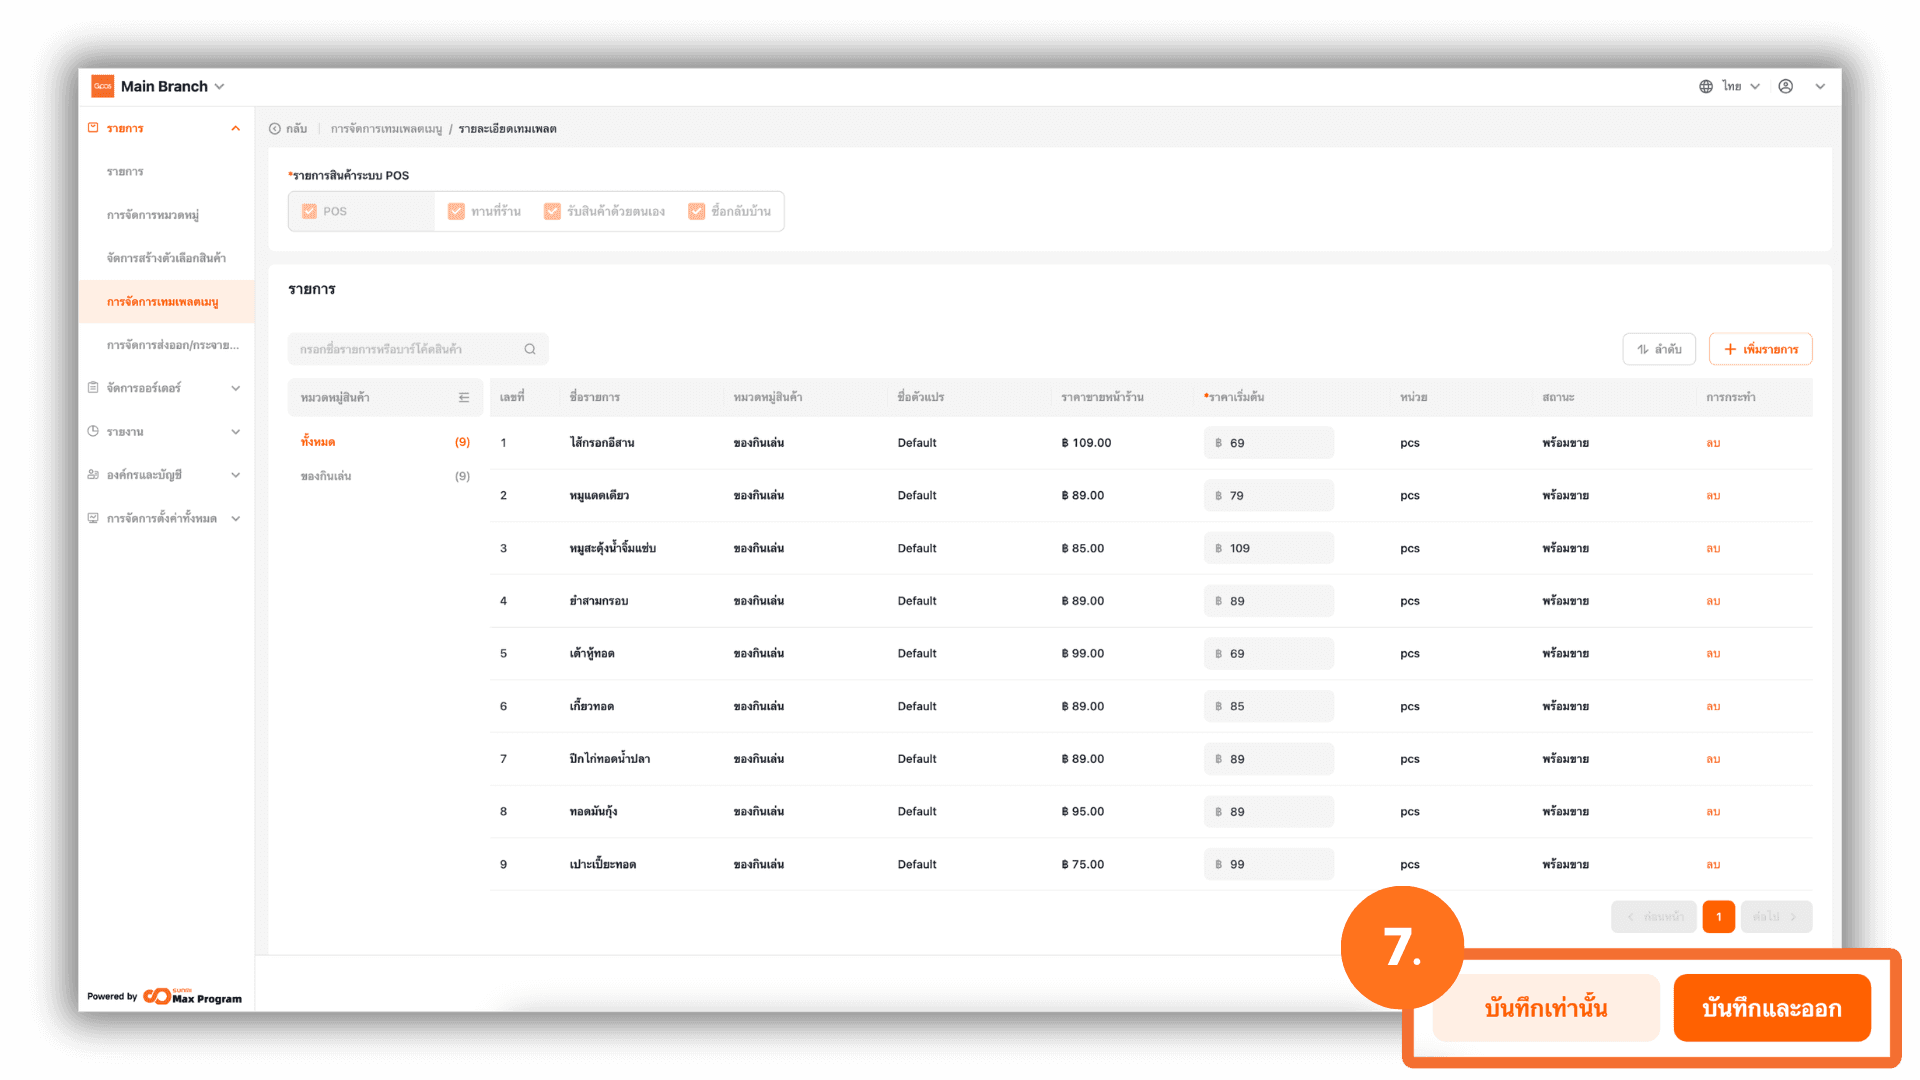
7. Save the Template
After setting up items and their order, you can choose “Save” to save and edit later or “Save and Exit” to save and proceed to the next step
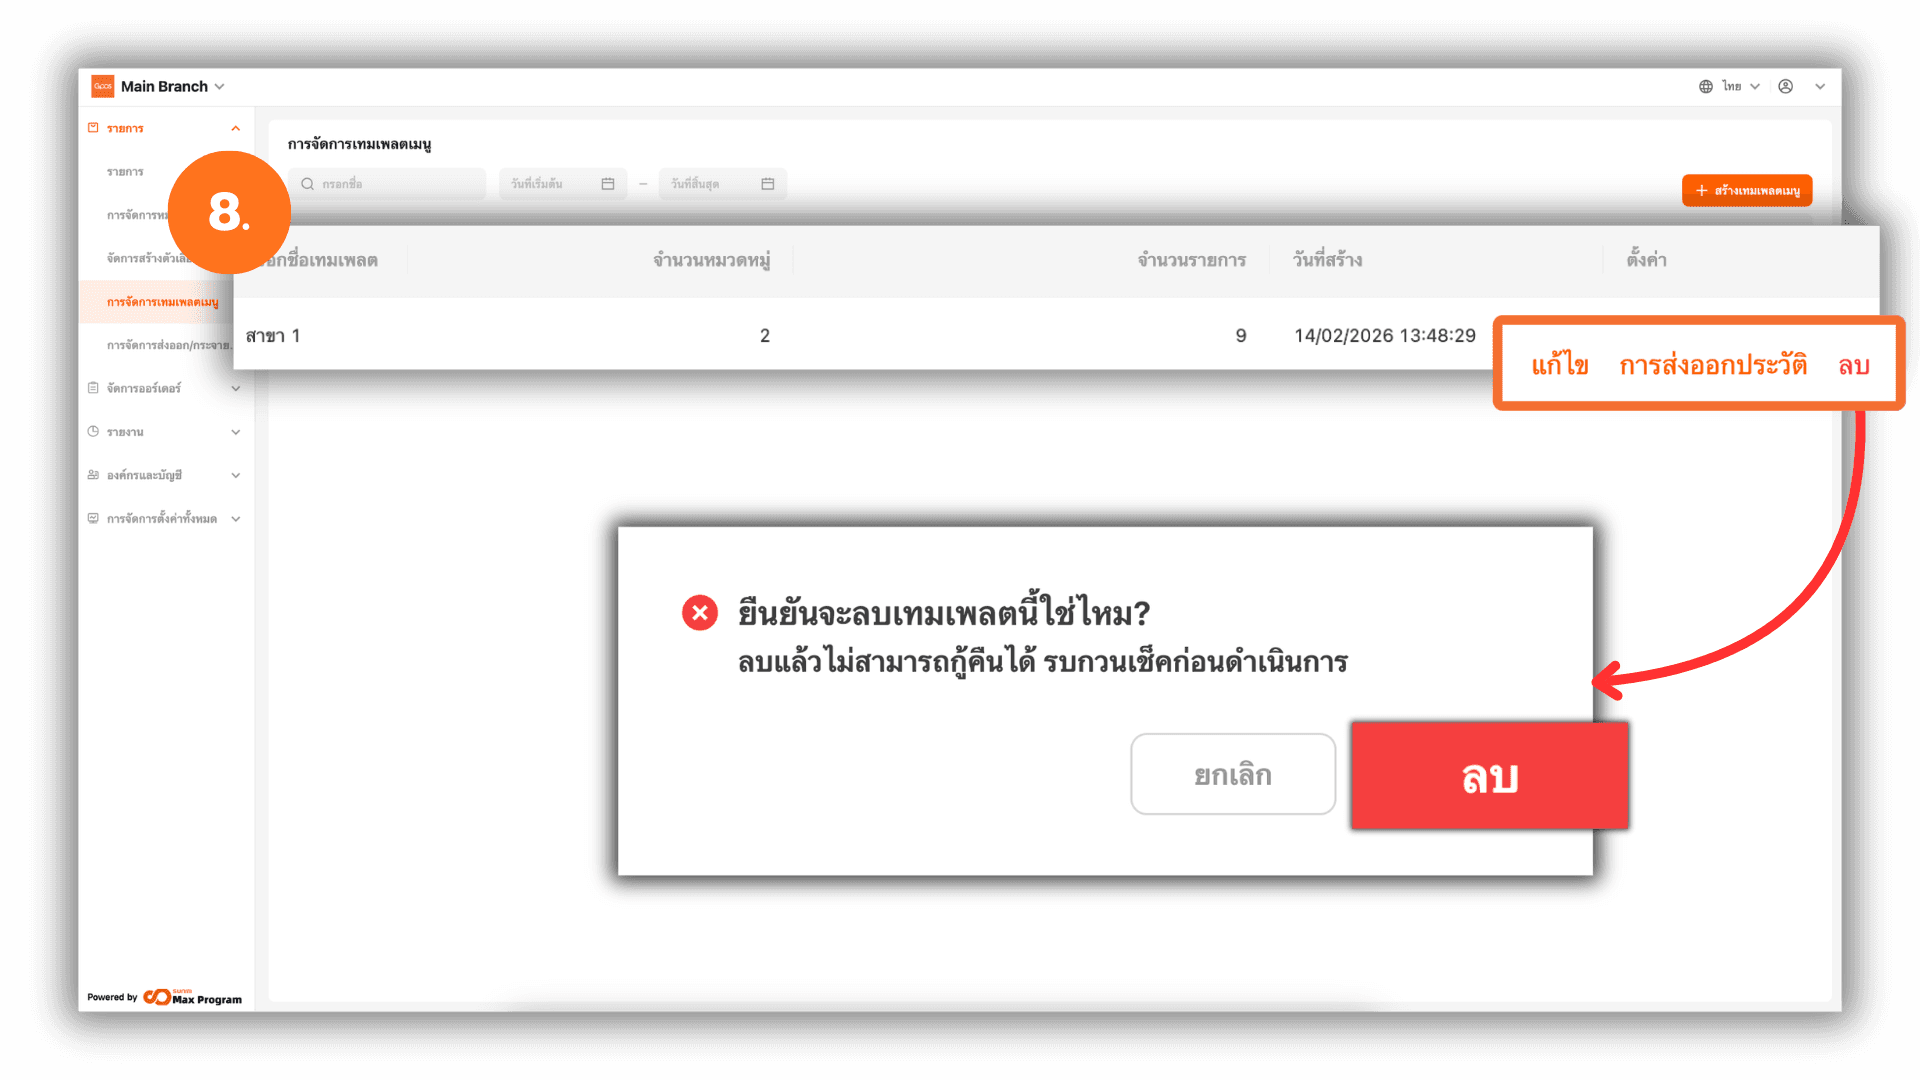
8. Manage the Template After Saving and Exiting
After clicking Save and Exit, the system will return to the template management page. You can then :
- Edit – Modify template details
- Distribution record – View the template export history
- Delete – Remove the created template (A confirmation message will appear. Click Delete again to confirm.)