Creating and Exporting Additional Service Charges to Store Branches
2026-02-19 17:19
This feature allows you to centrally define and control additional service charge rates and quickly export them to Store Branches. It ensures standardized service charge calculations, reduces errors, and makes management more efficient and convenient.
1. Log in to Back Office
Go to the website login.gpos.co.th, enter your email and password, then click Log In. After logging in successfully, go to Head Office. Go to “Store Management” menu, and choose “Charge Management.”
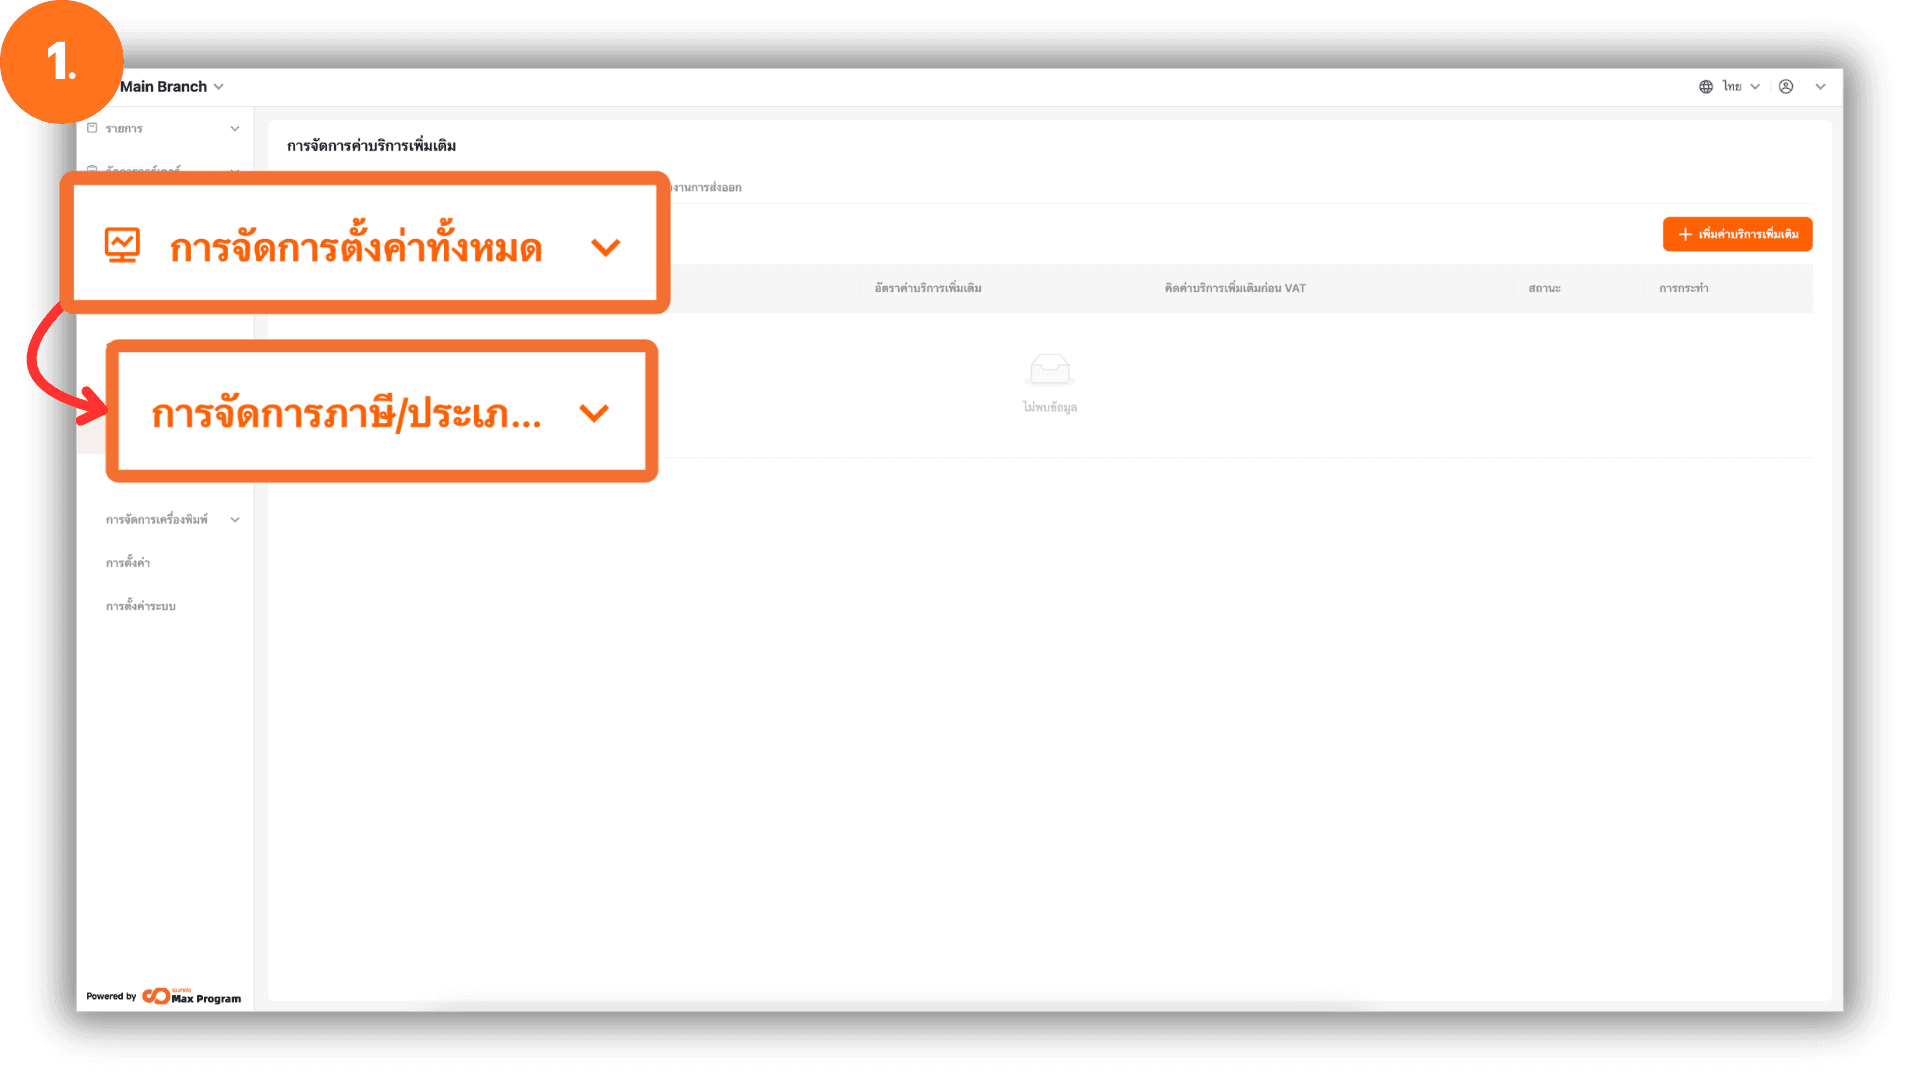
2. Create an Additional Service Charge
Select the “Additional Charge Management” menu, then click “+ Create Additional Charge” to create a new entry.

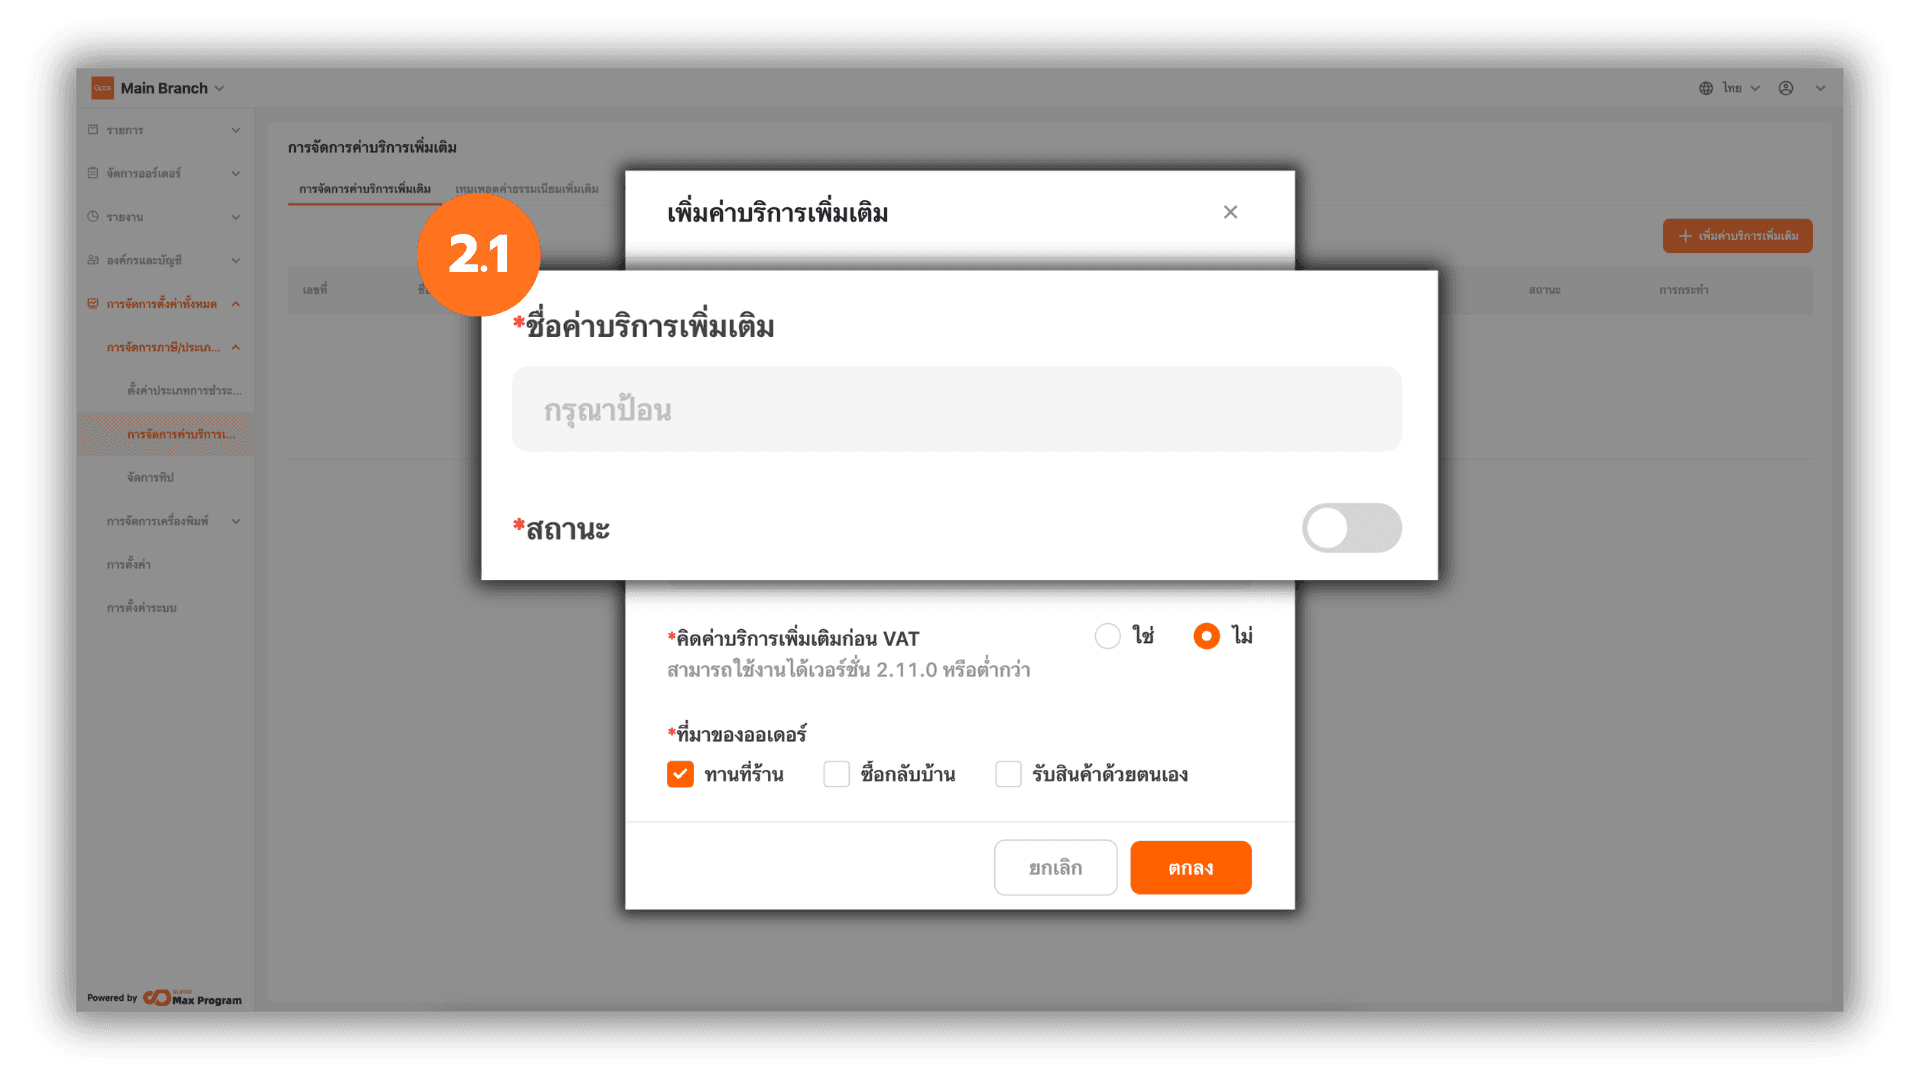
2.1 Define Service Charge Details
The system will display a form for entering information. Enter the desired Additional Charge Name and set the status to On or Off.
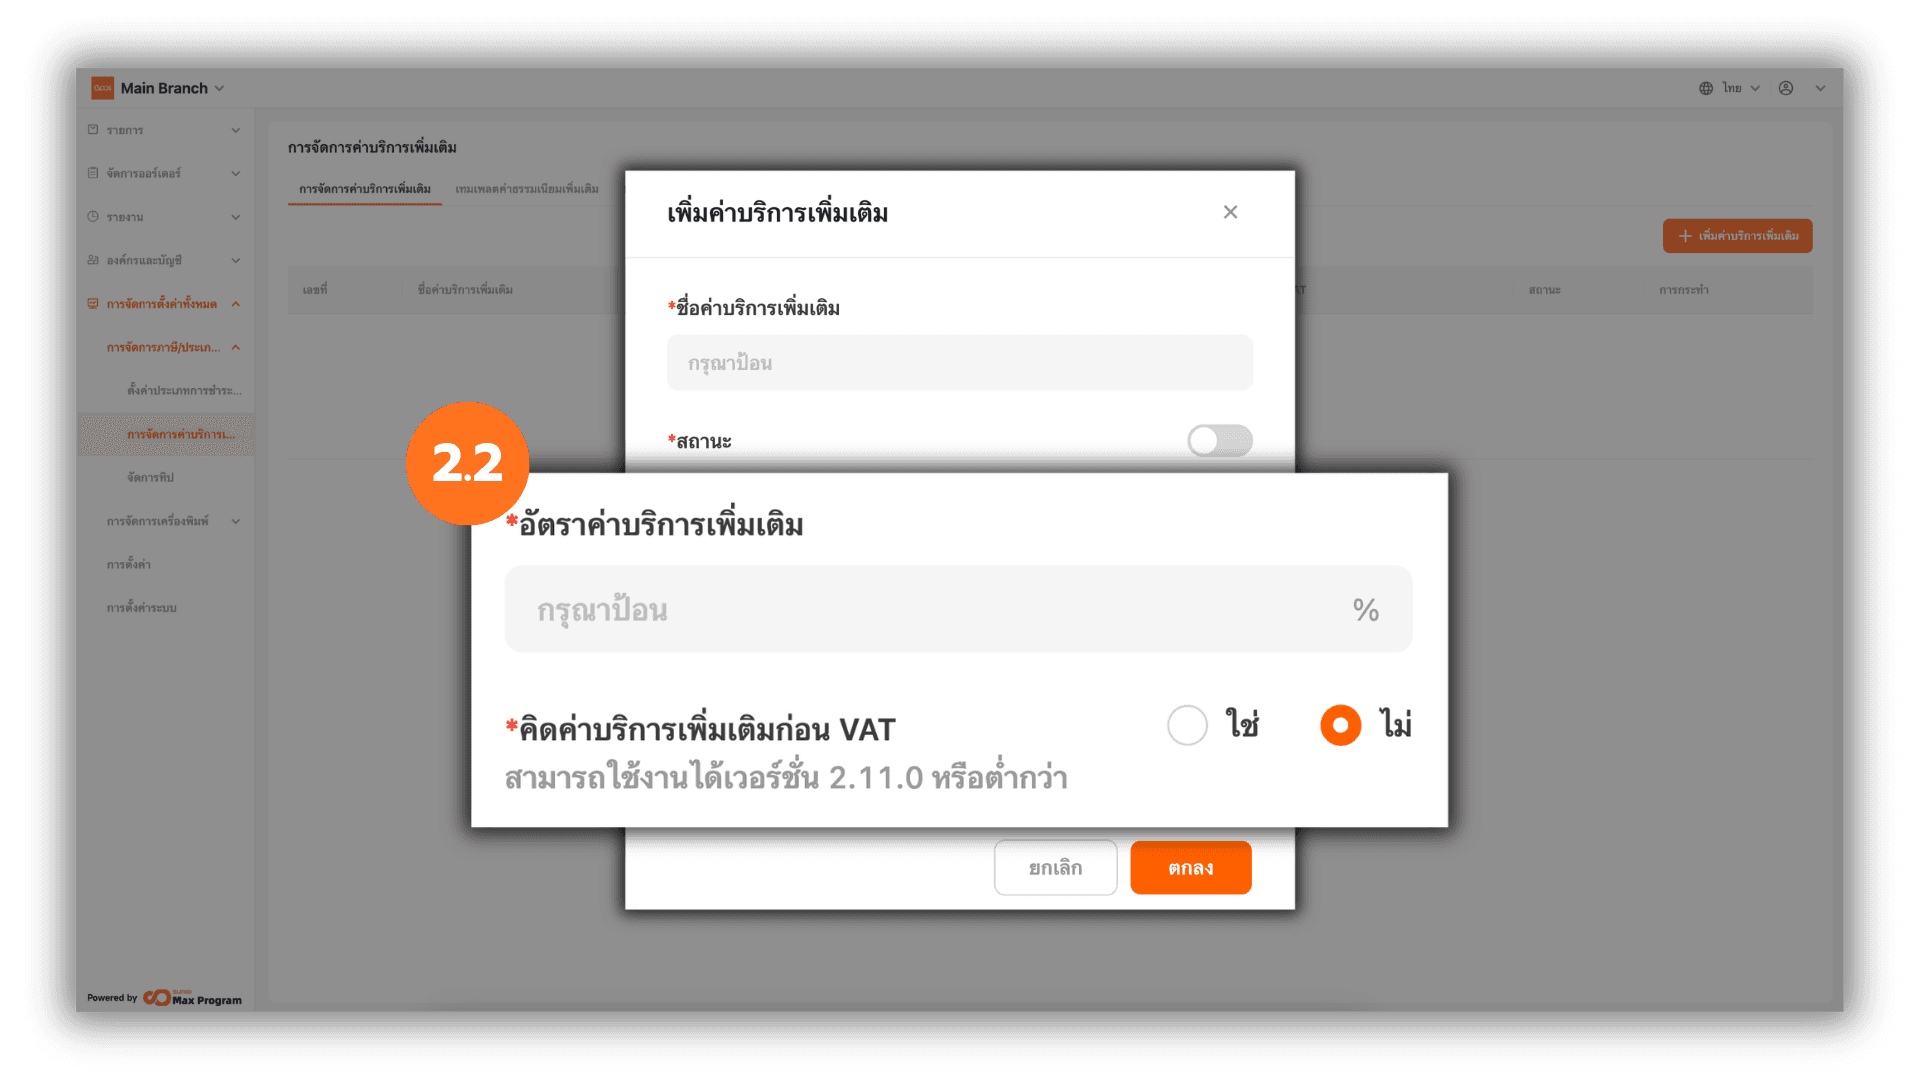
2.2 Set the Service Charge Rate
Enter the required Percent (%) and choose whether the service charge should be calculated Enabe vat-service (Yes / No).
- If you select “Yes” (calculate service charge before VAT), the system will calculate as follows
For example: if the product price is 100, add a 10% service charge first, then add 7% VAT. The total amount will be 117.70 THB. - If you select “No” (do not calculate service charge before VAT), the system will calculate as follows
For example: if the product price is 100, add a 10% service charge and separately calculate 7% VAT on the product price. The total amount will be 117.00 THB.
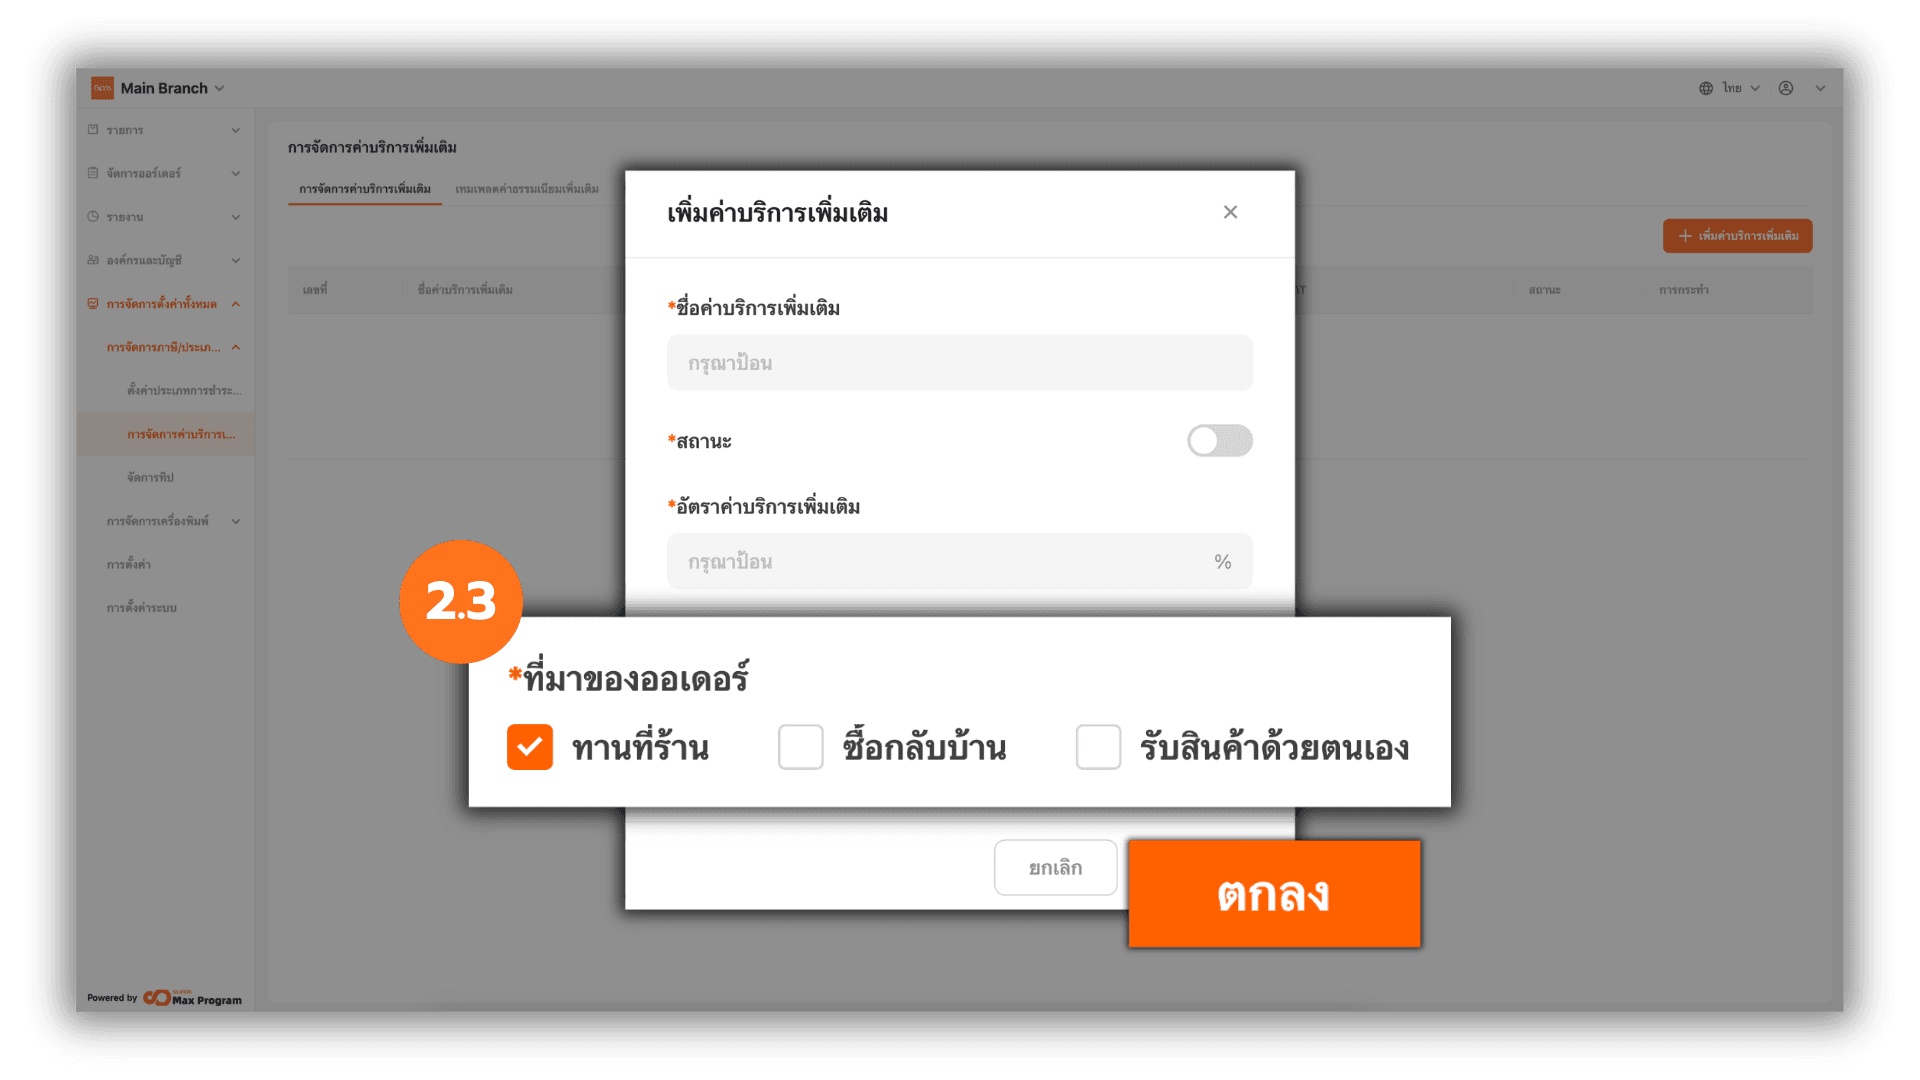
2.3 Select Order Type
Choose the order types for which the system will apply the additional service charge. There are three options: Dine-in, Takeaway, and Pickup. After making your selection, click “Ok” to create the additional service charge.
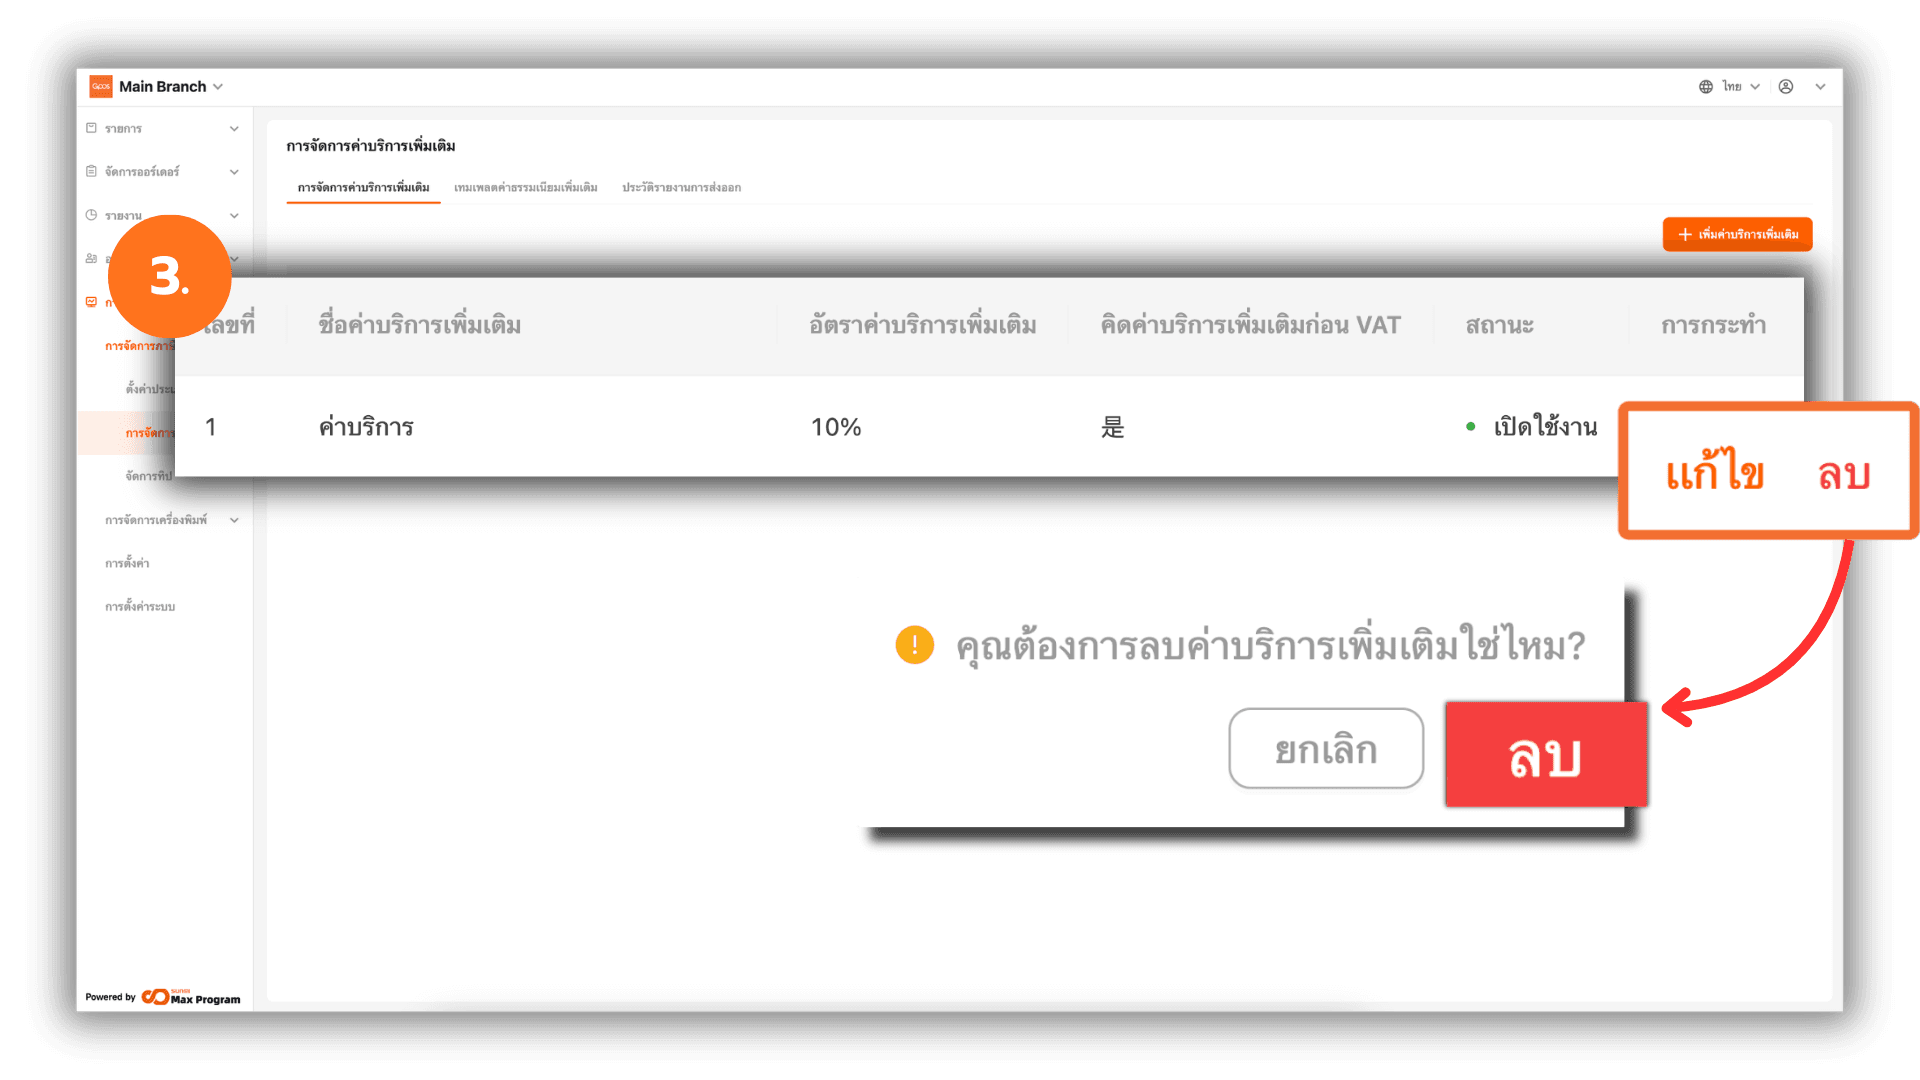
3. Manage Additional Service Charges
After creating the service charge, you can manage it as follows :
- Edit – Used to modify the existing service charge information.
- Delete – Used to remove the service charge from the system. The system will display a confirmation message. Click Delete again to confirm.
Note : If you edit the information or change the status (On/Off), you must export the additional service charge template again to update the information for all Store Branches.
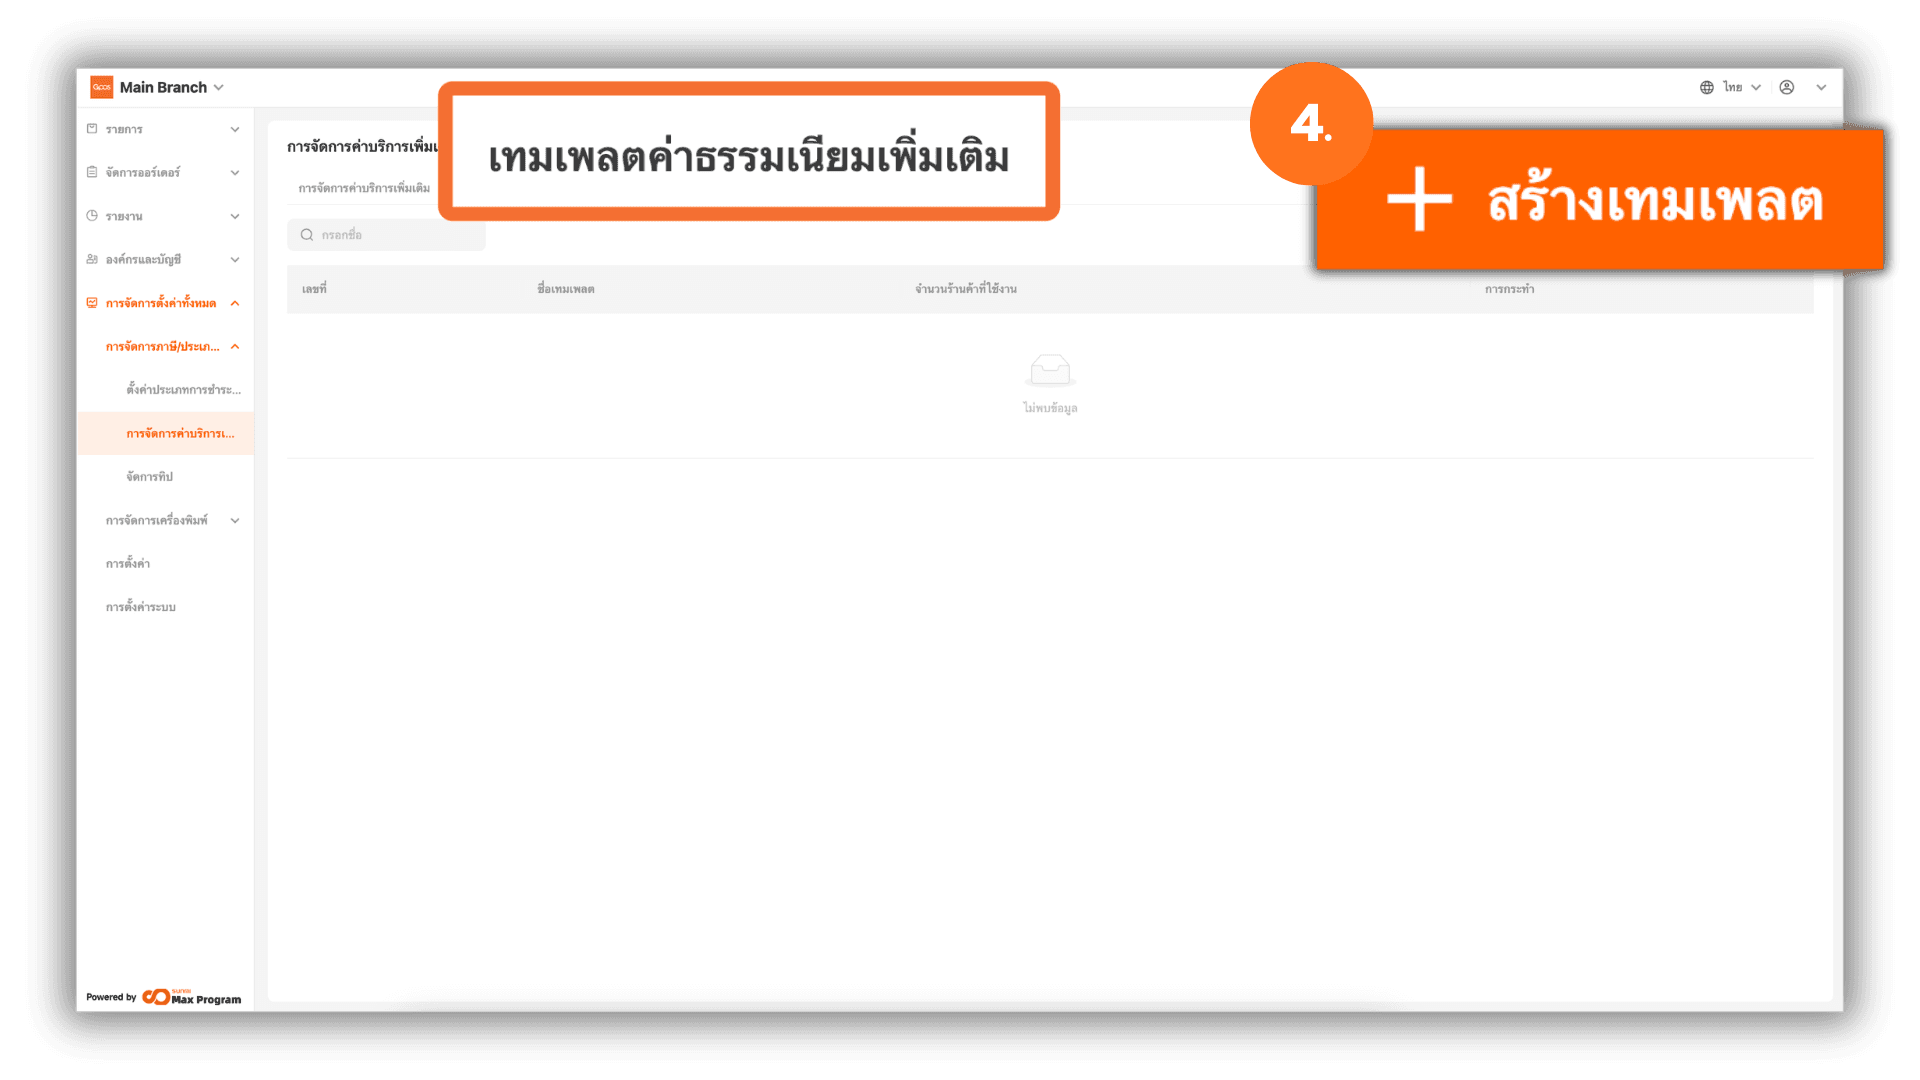
4. Create an Additional Fee Template
Go to the menu at the top and select “Additional Charge template,” then click “+ Create Additional Charge template.”
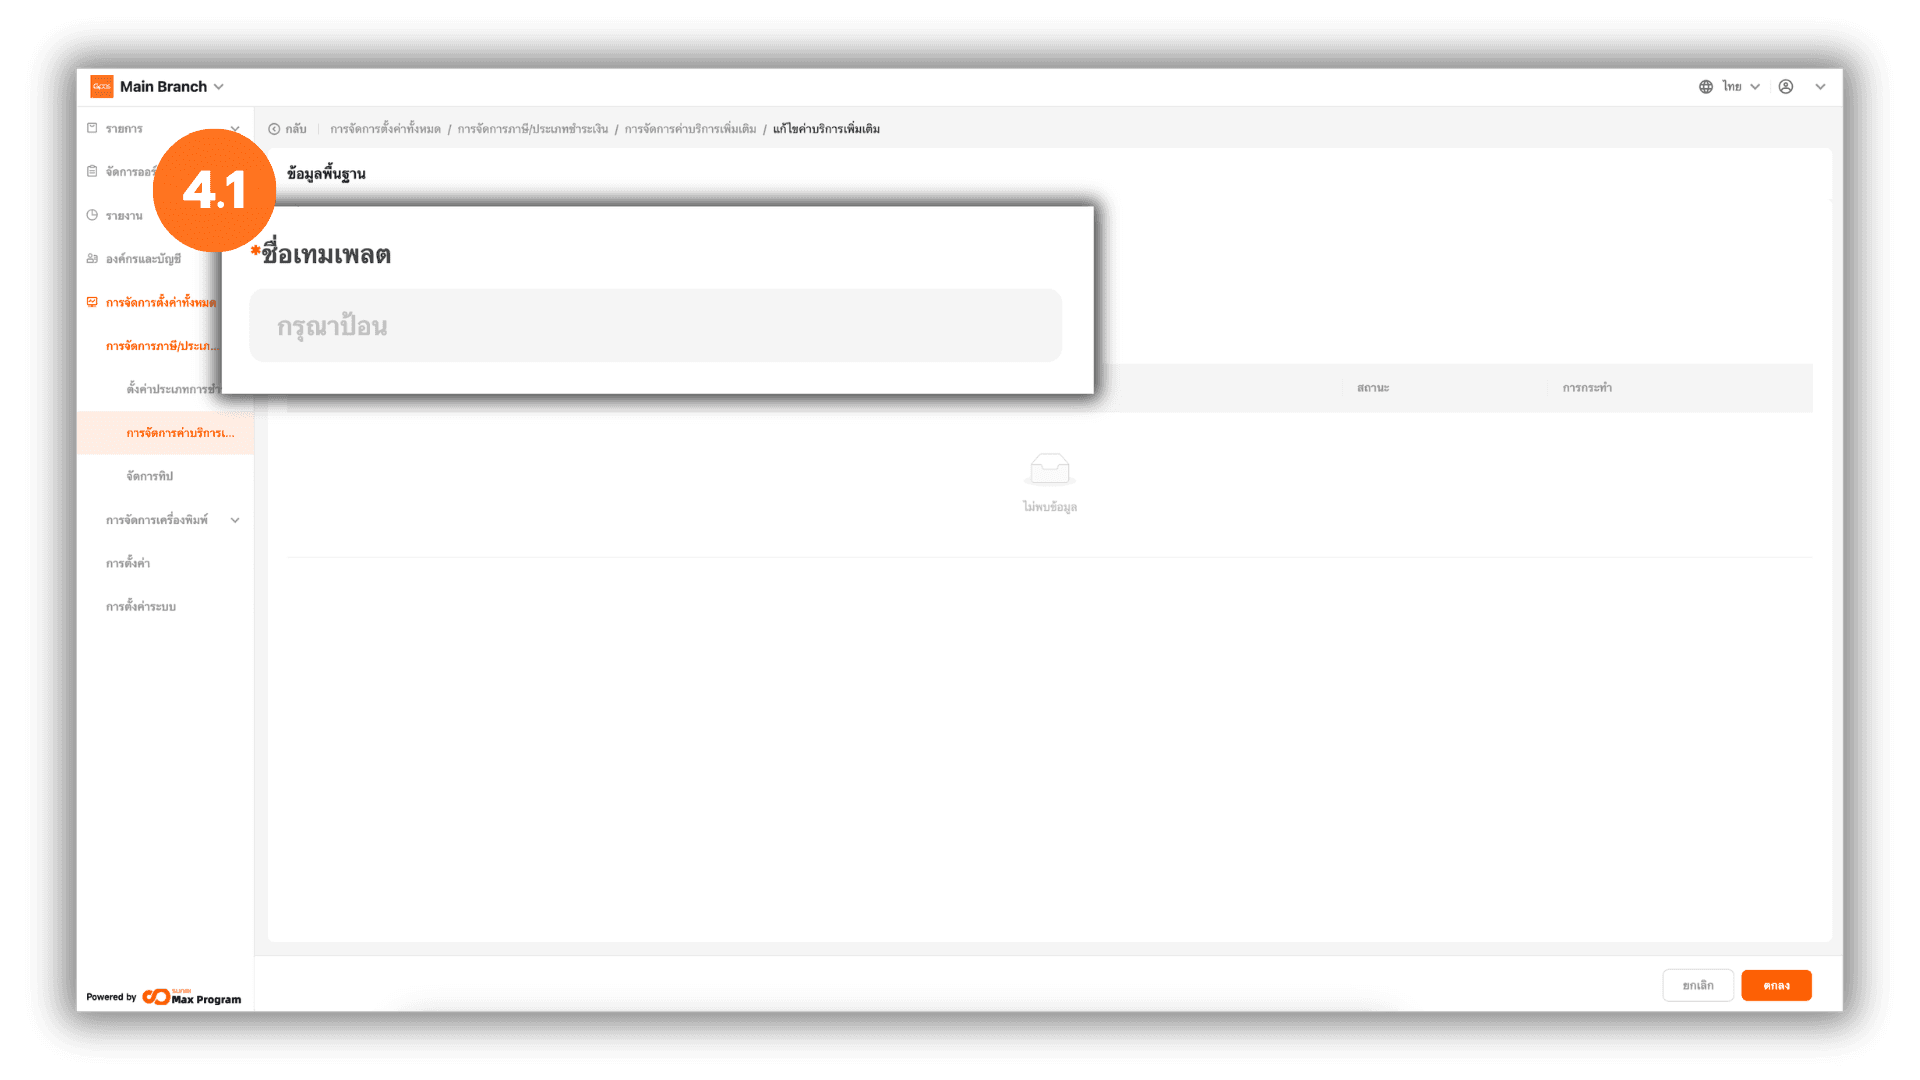
4.1 Enter Basic Template Information
The system will display a basic information page. Enter the desired Additional Charge name.
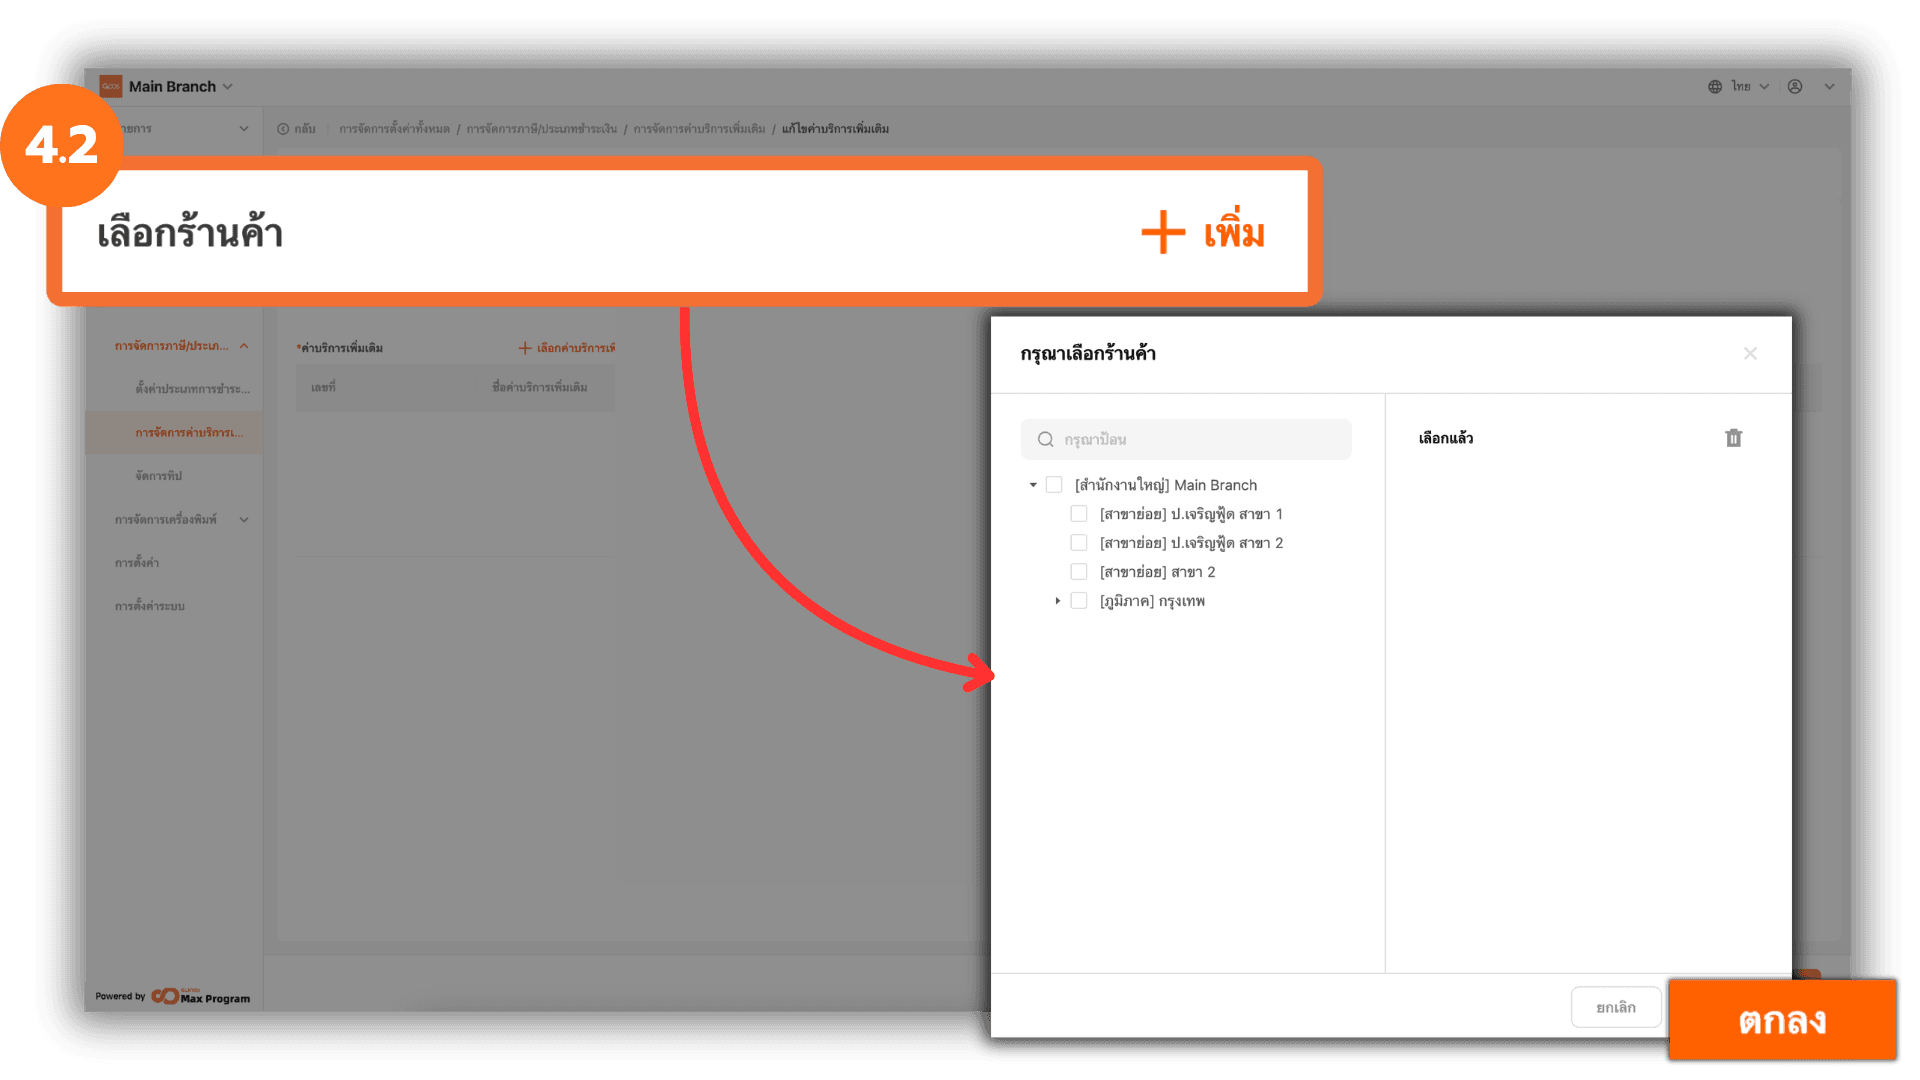
4.2 Select Store Branches
Click “+ Add” next to the store selection section. The system will display a list of all Store Branches. Select the desired Store Branches and click “Ok.”
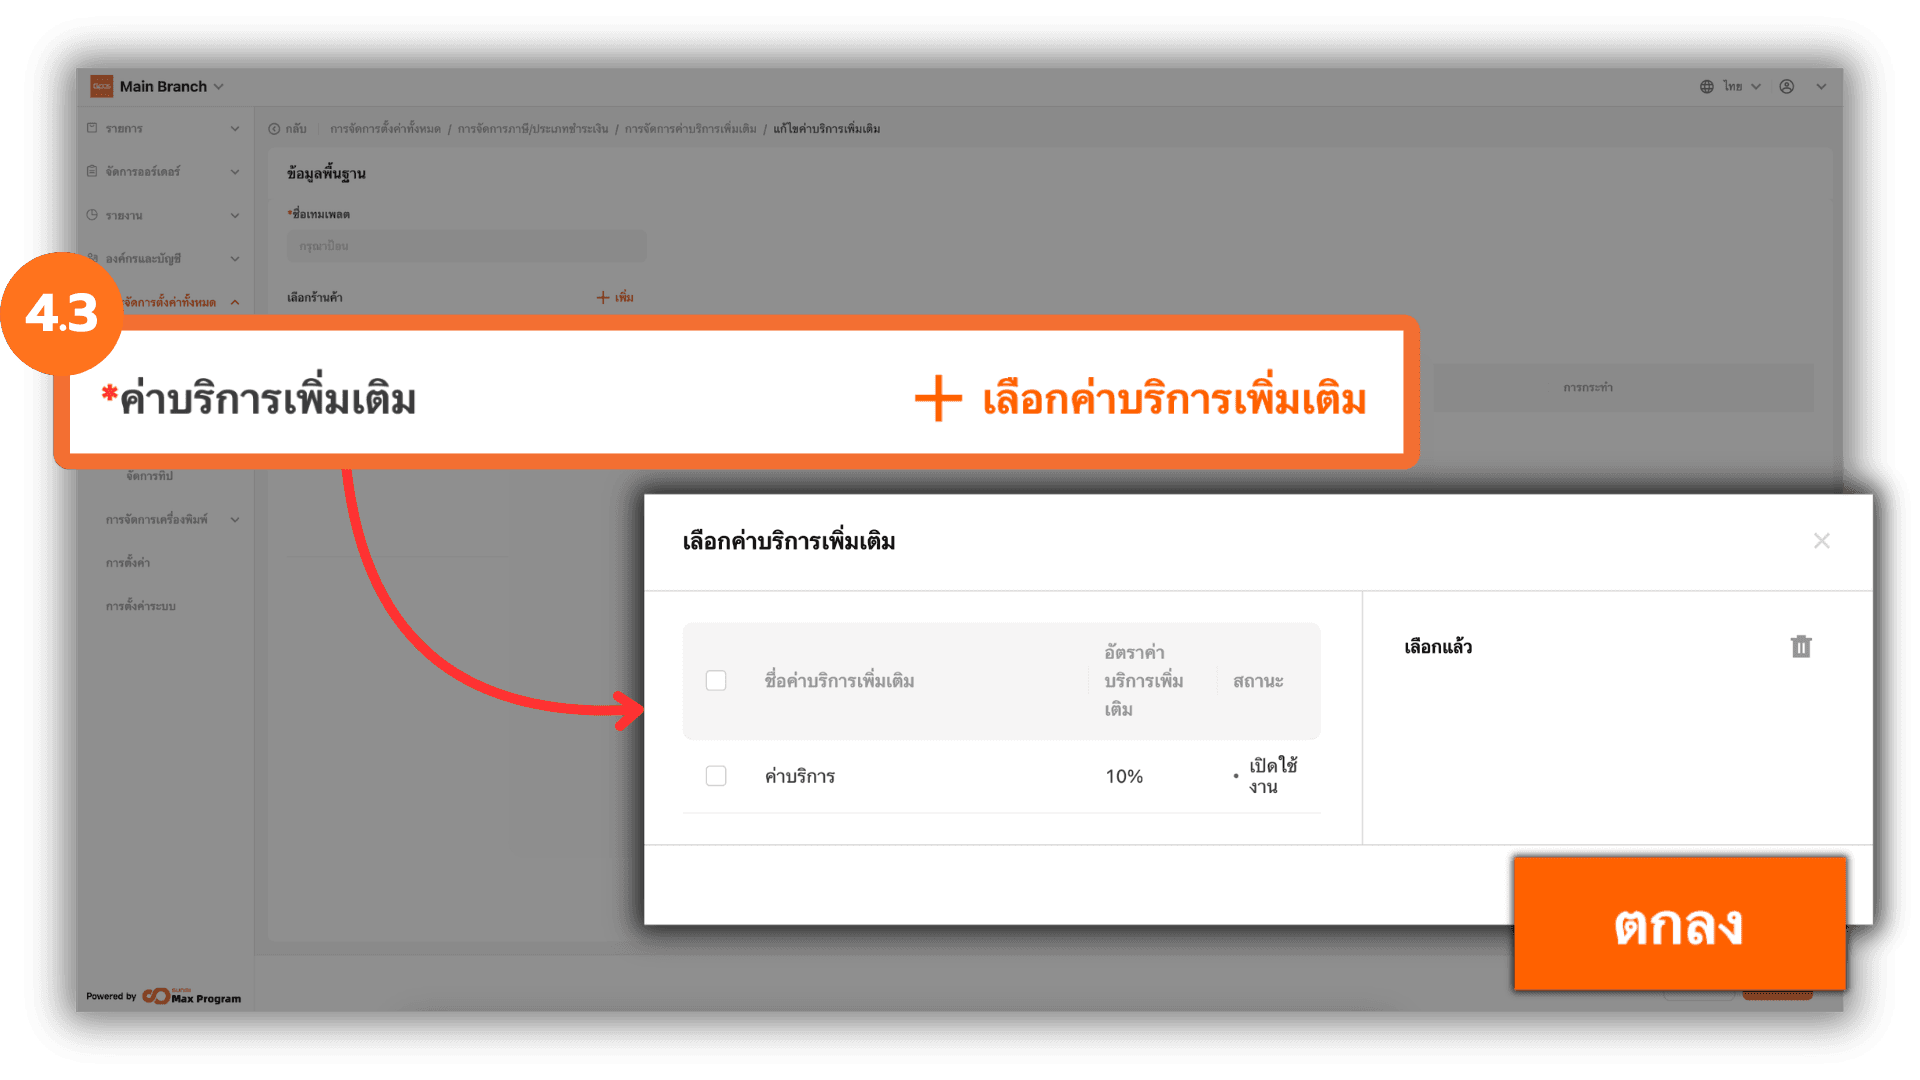
4.3 Select Additional Service Charges
Click “+ Add Additional charge.” The system will display all additional service charges created in the system. Select the required service charges and click “Ok.”
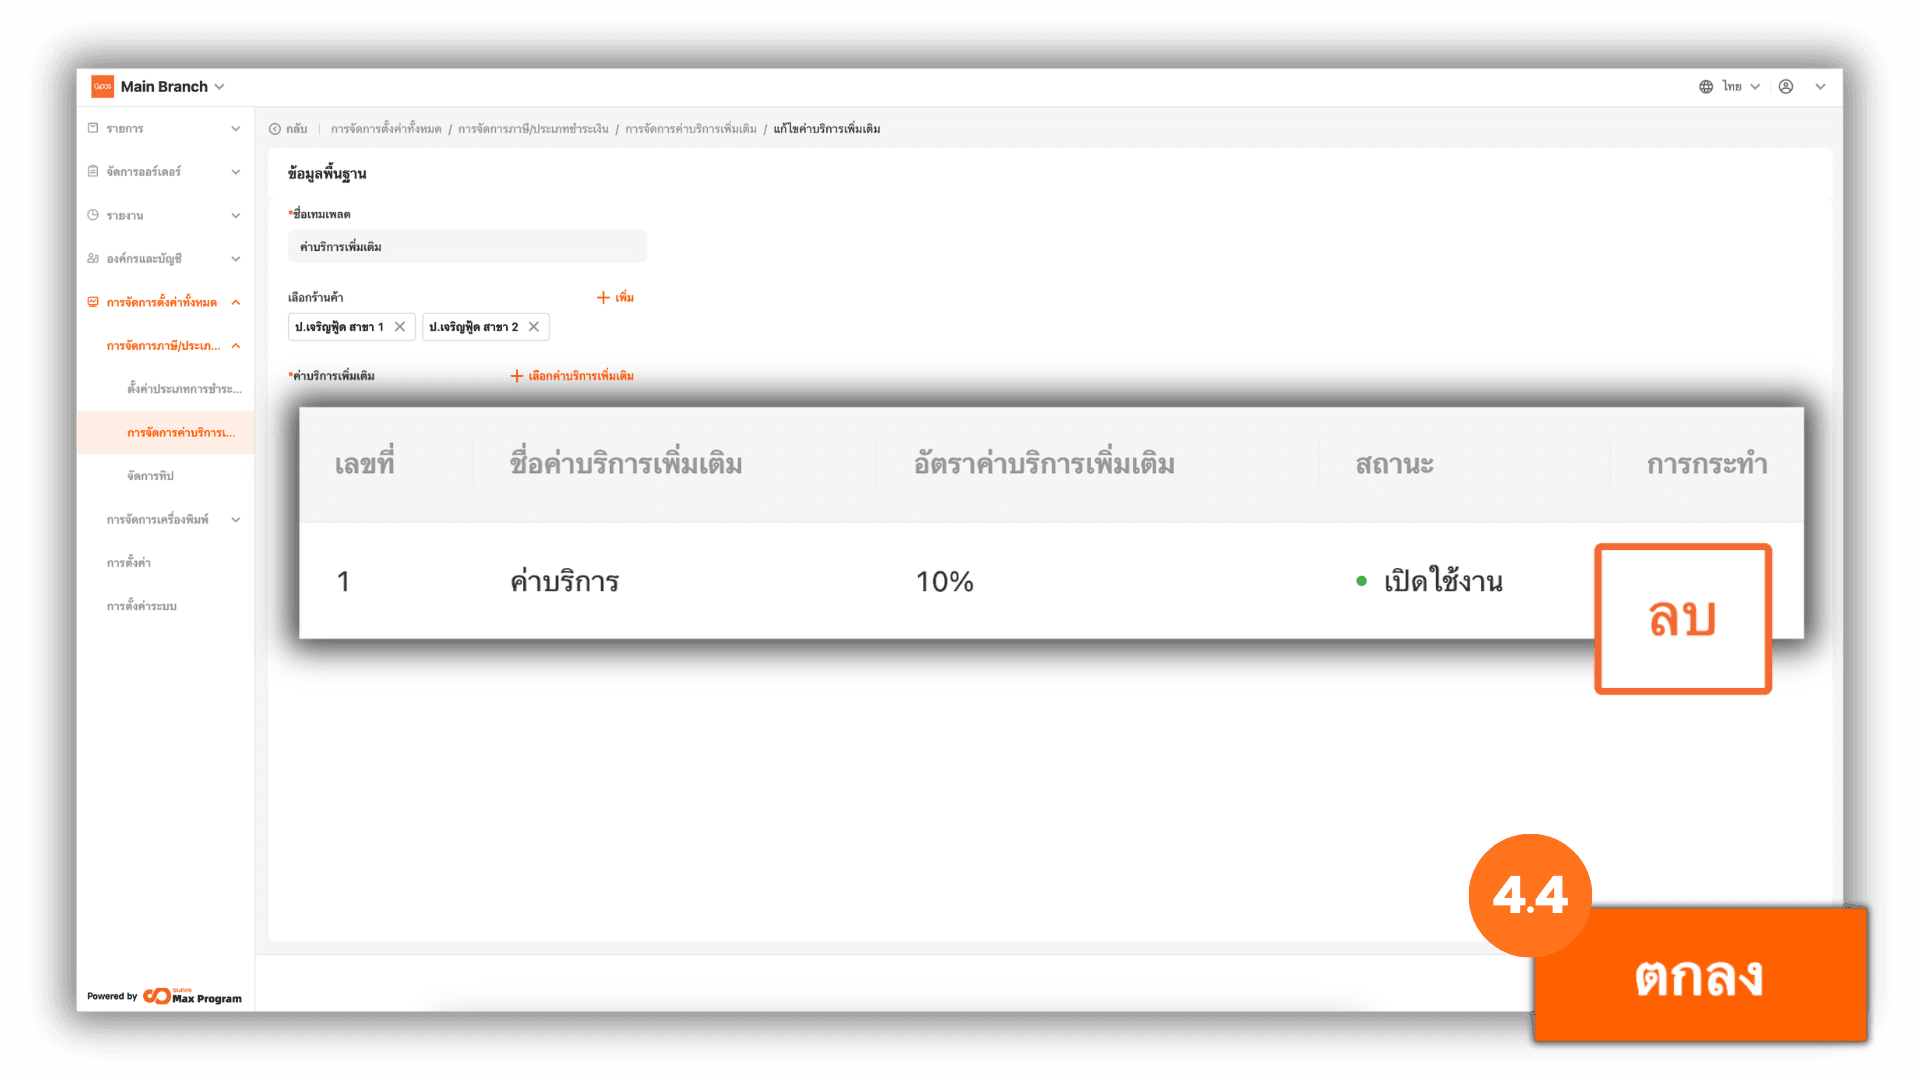
4.4 Review and Create the Template
Review the selected Store Branches and additional service charges. If you selected the wrong item, click “Remove” next to the service charge name to remove it. Once everything is correct, click “Ok” to create the template.
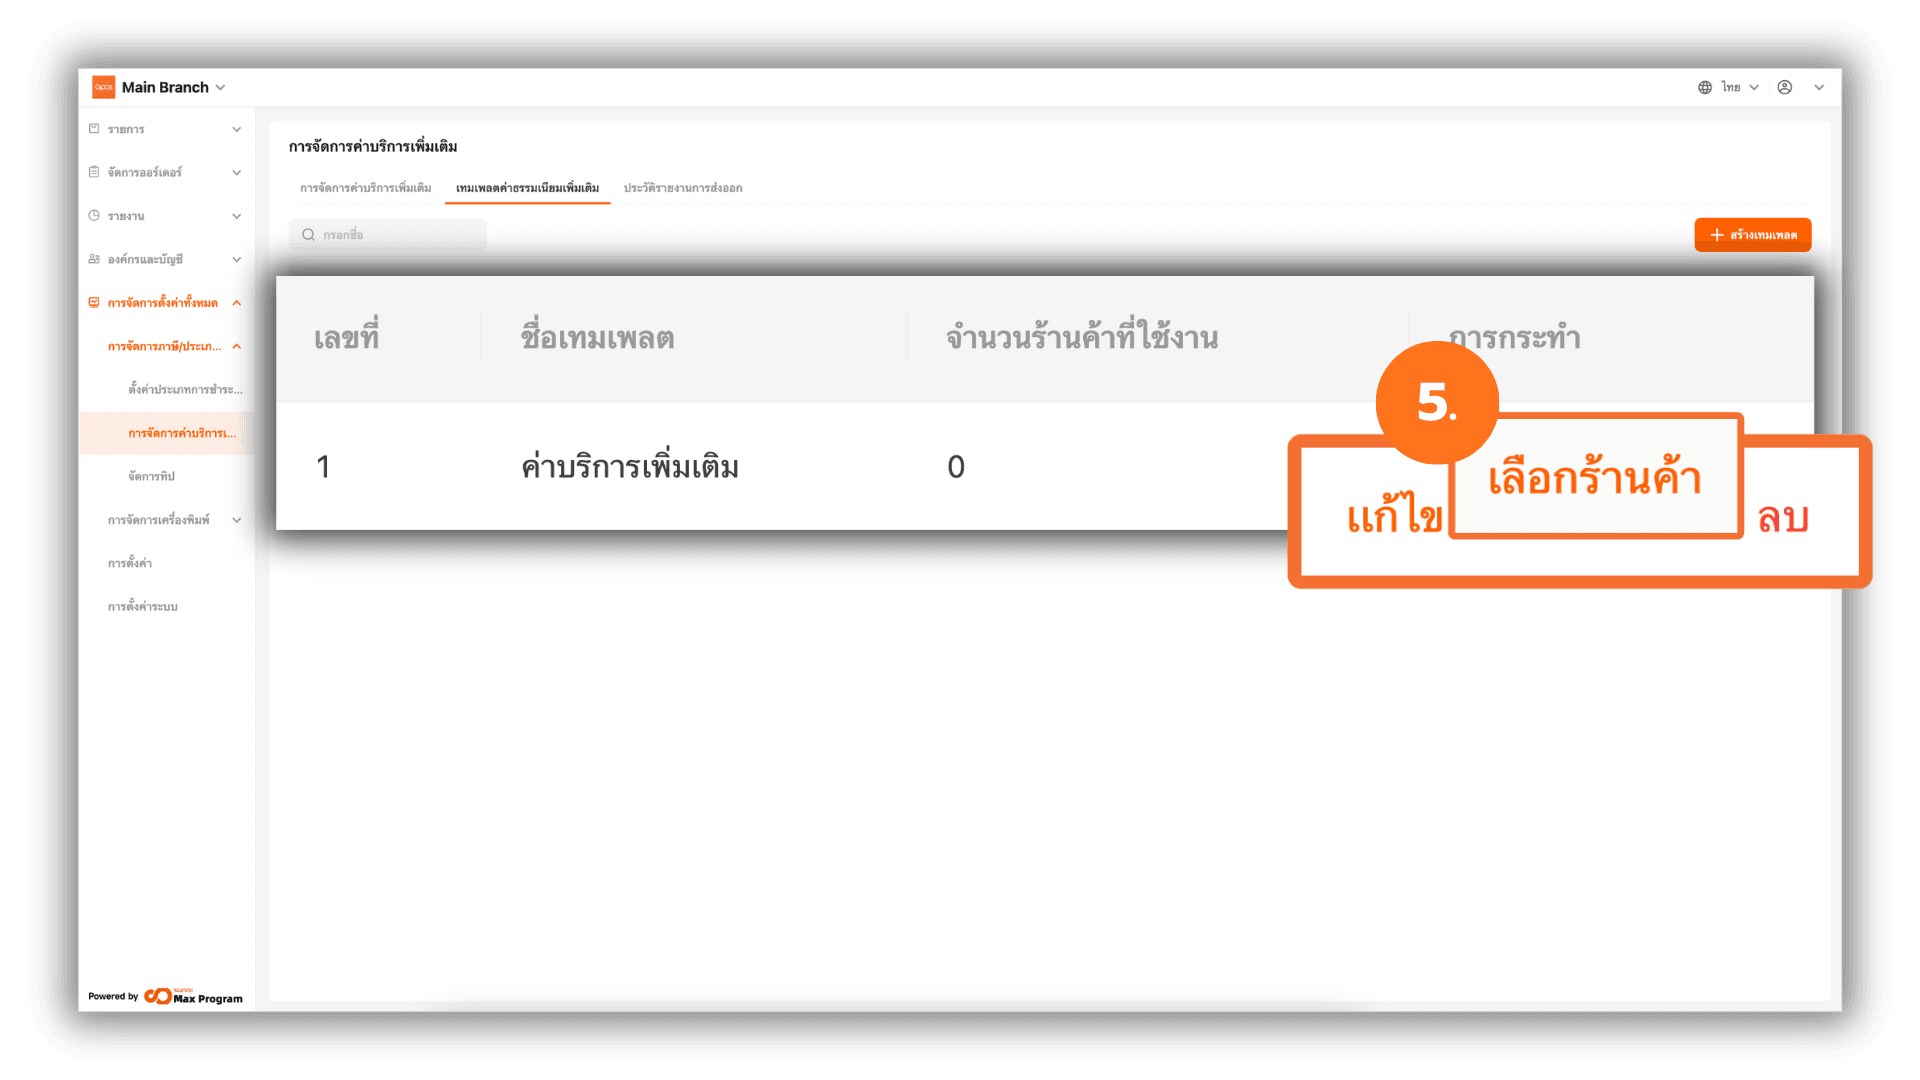
5. Manage Additional Fee Templates
After creating the template, the system will return to the Additional Charge template page and display the list of created templates. You can manage them as follows :
- Edit – To modify template information.
- Distribute – To confirm and export the template to Store Branches.
- Delete – To remove the created template.
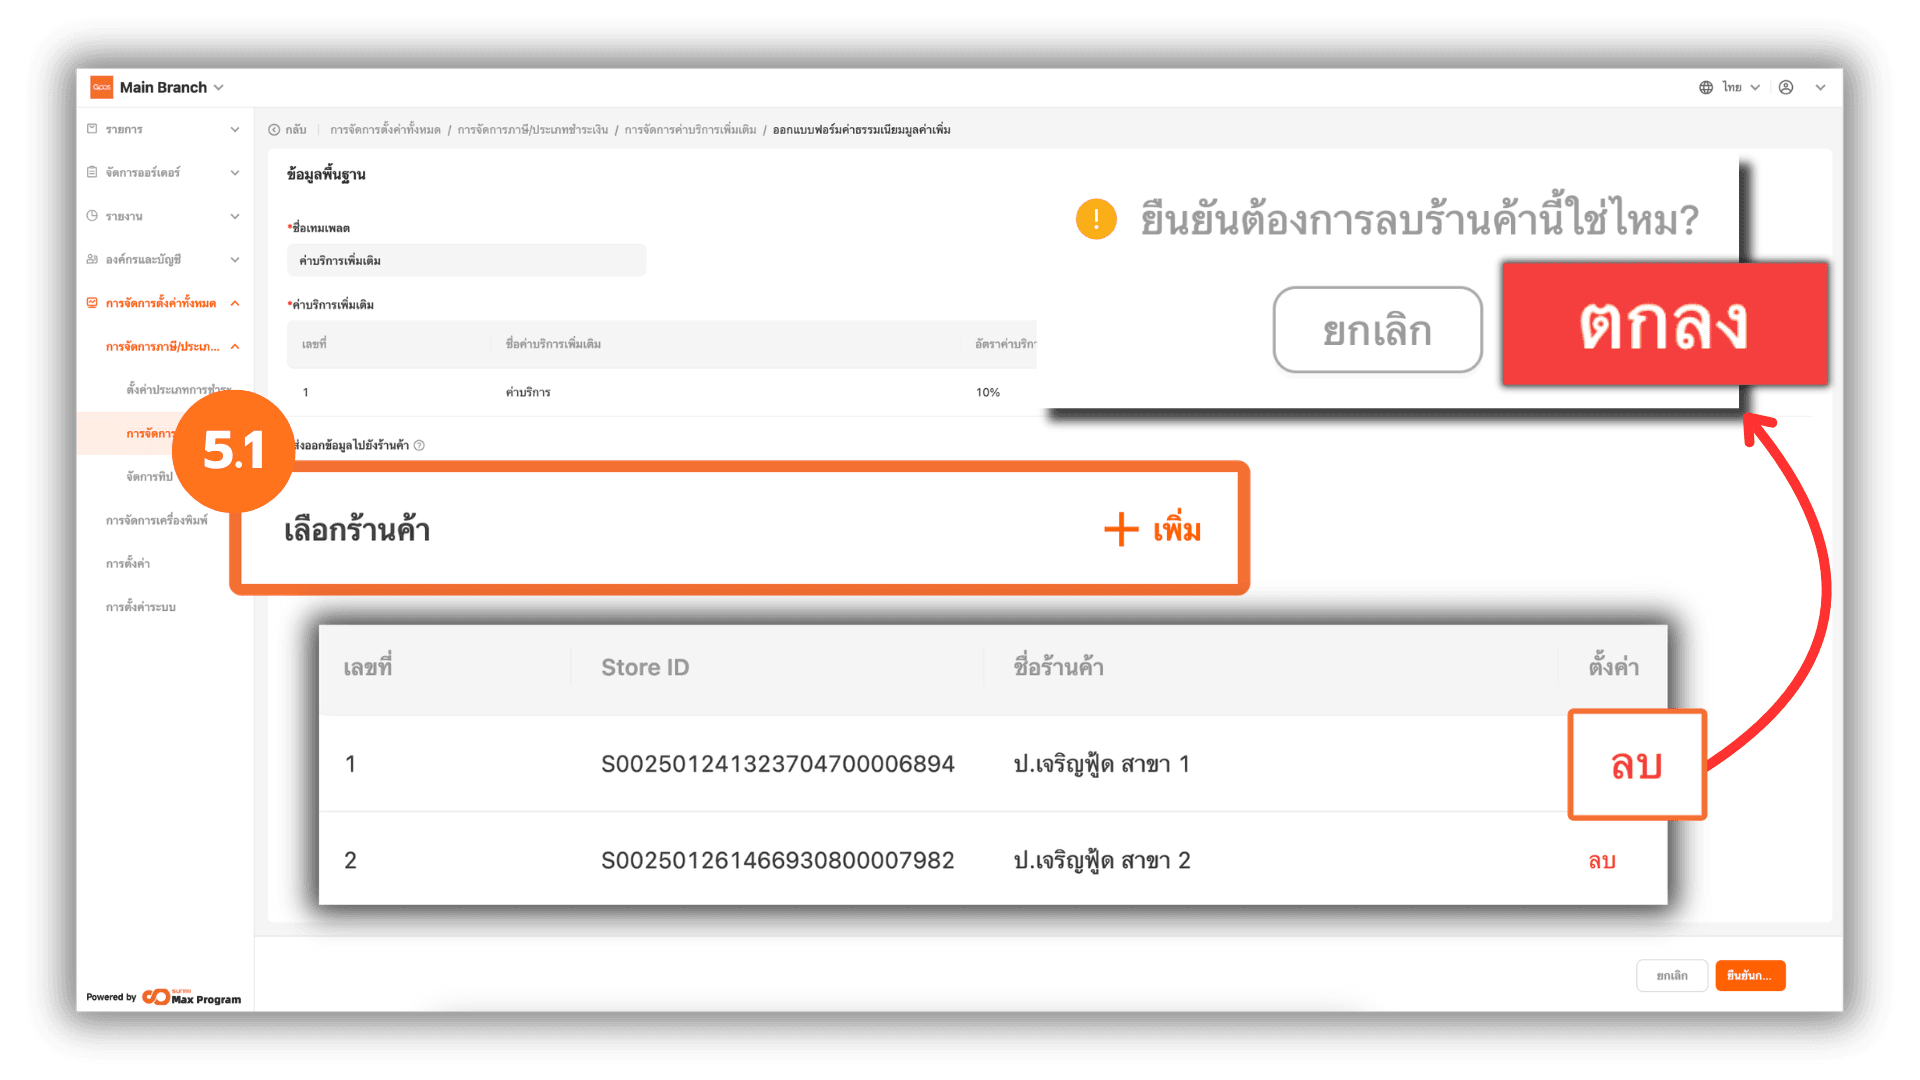
5.1 Manage Stores Before Export
After clicking “Distribute,” the system will display the template details again. You can click “+ Add” to add Store Branches or click “Remove” to remove selected Store Branches.
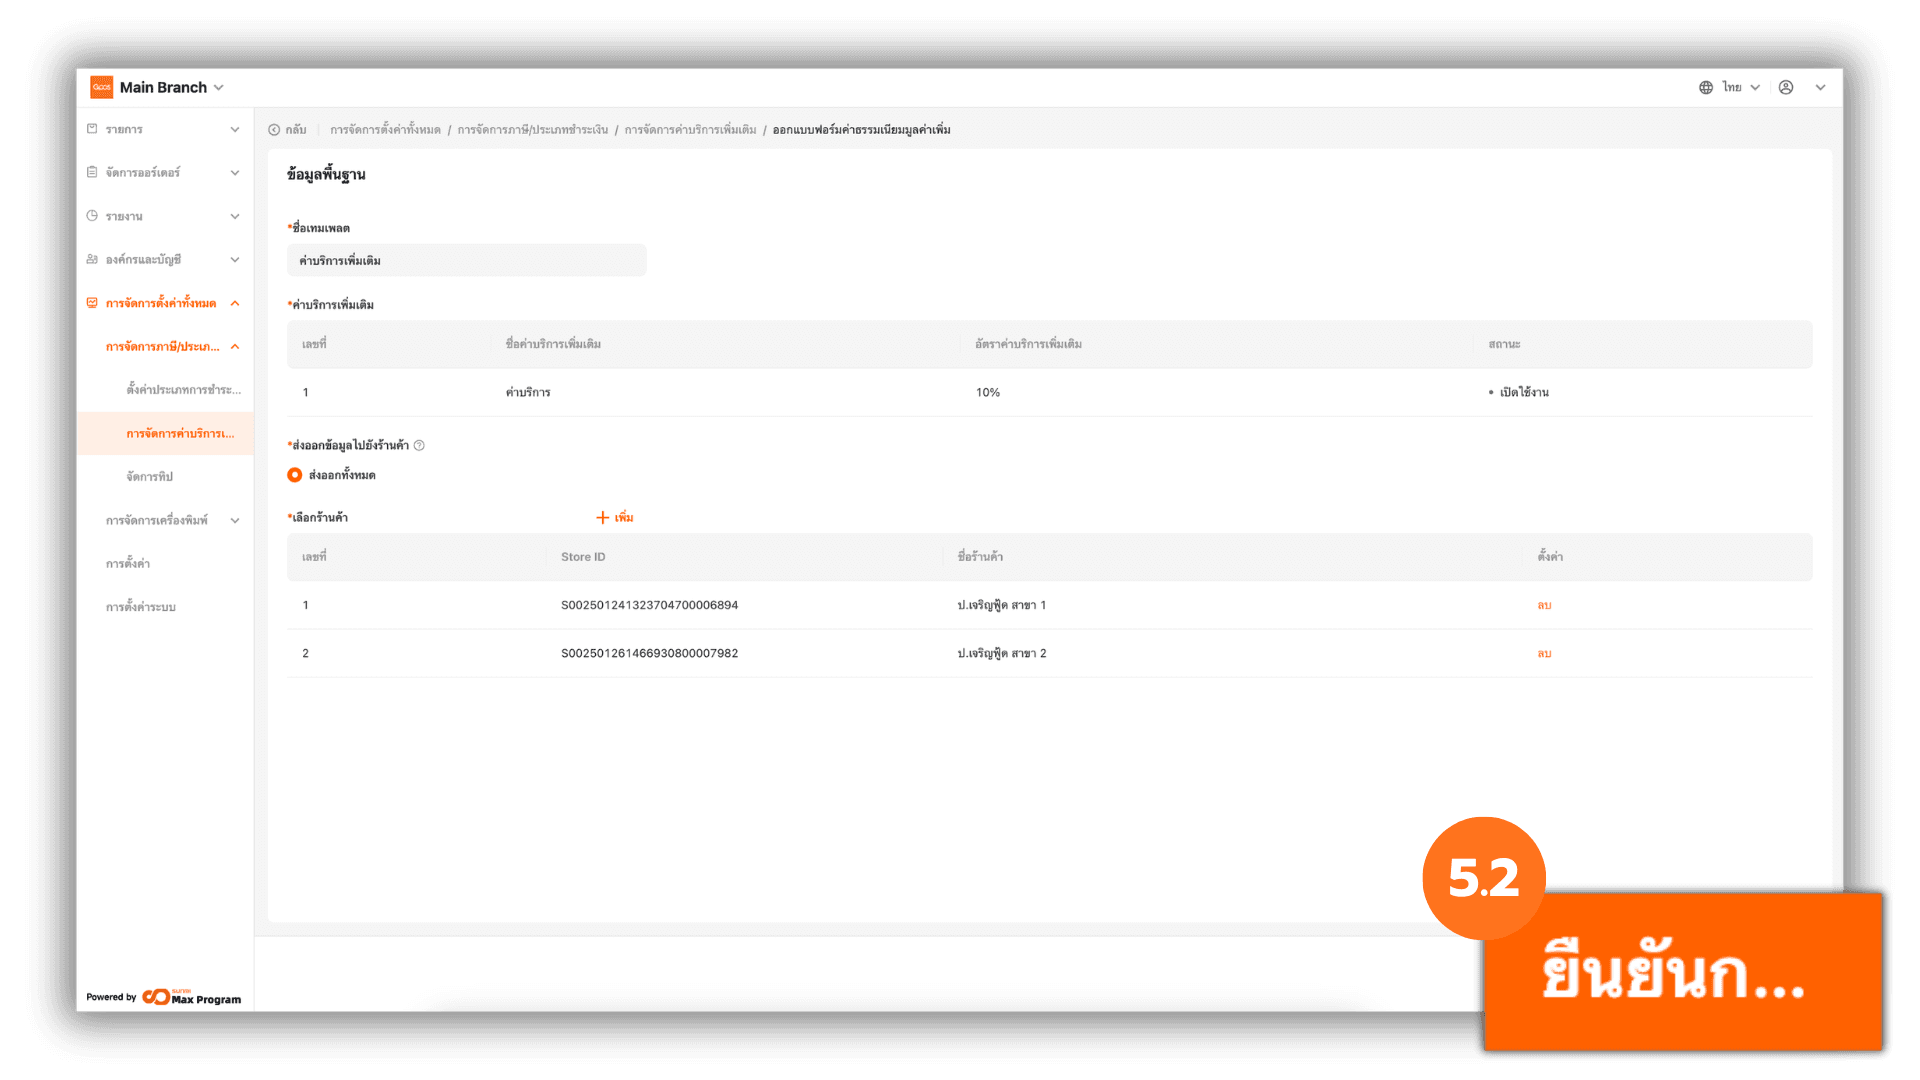
5.2 Confirm Export
Once everything is correct, click “Confirm distribution” to export the template to the selected Store Branches.
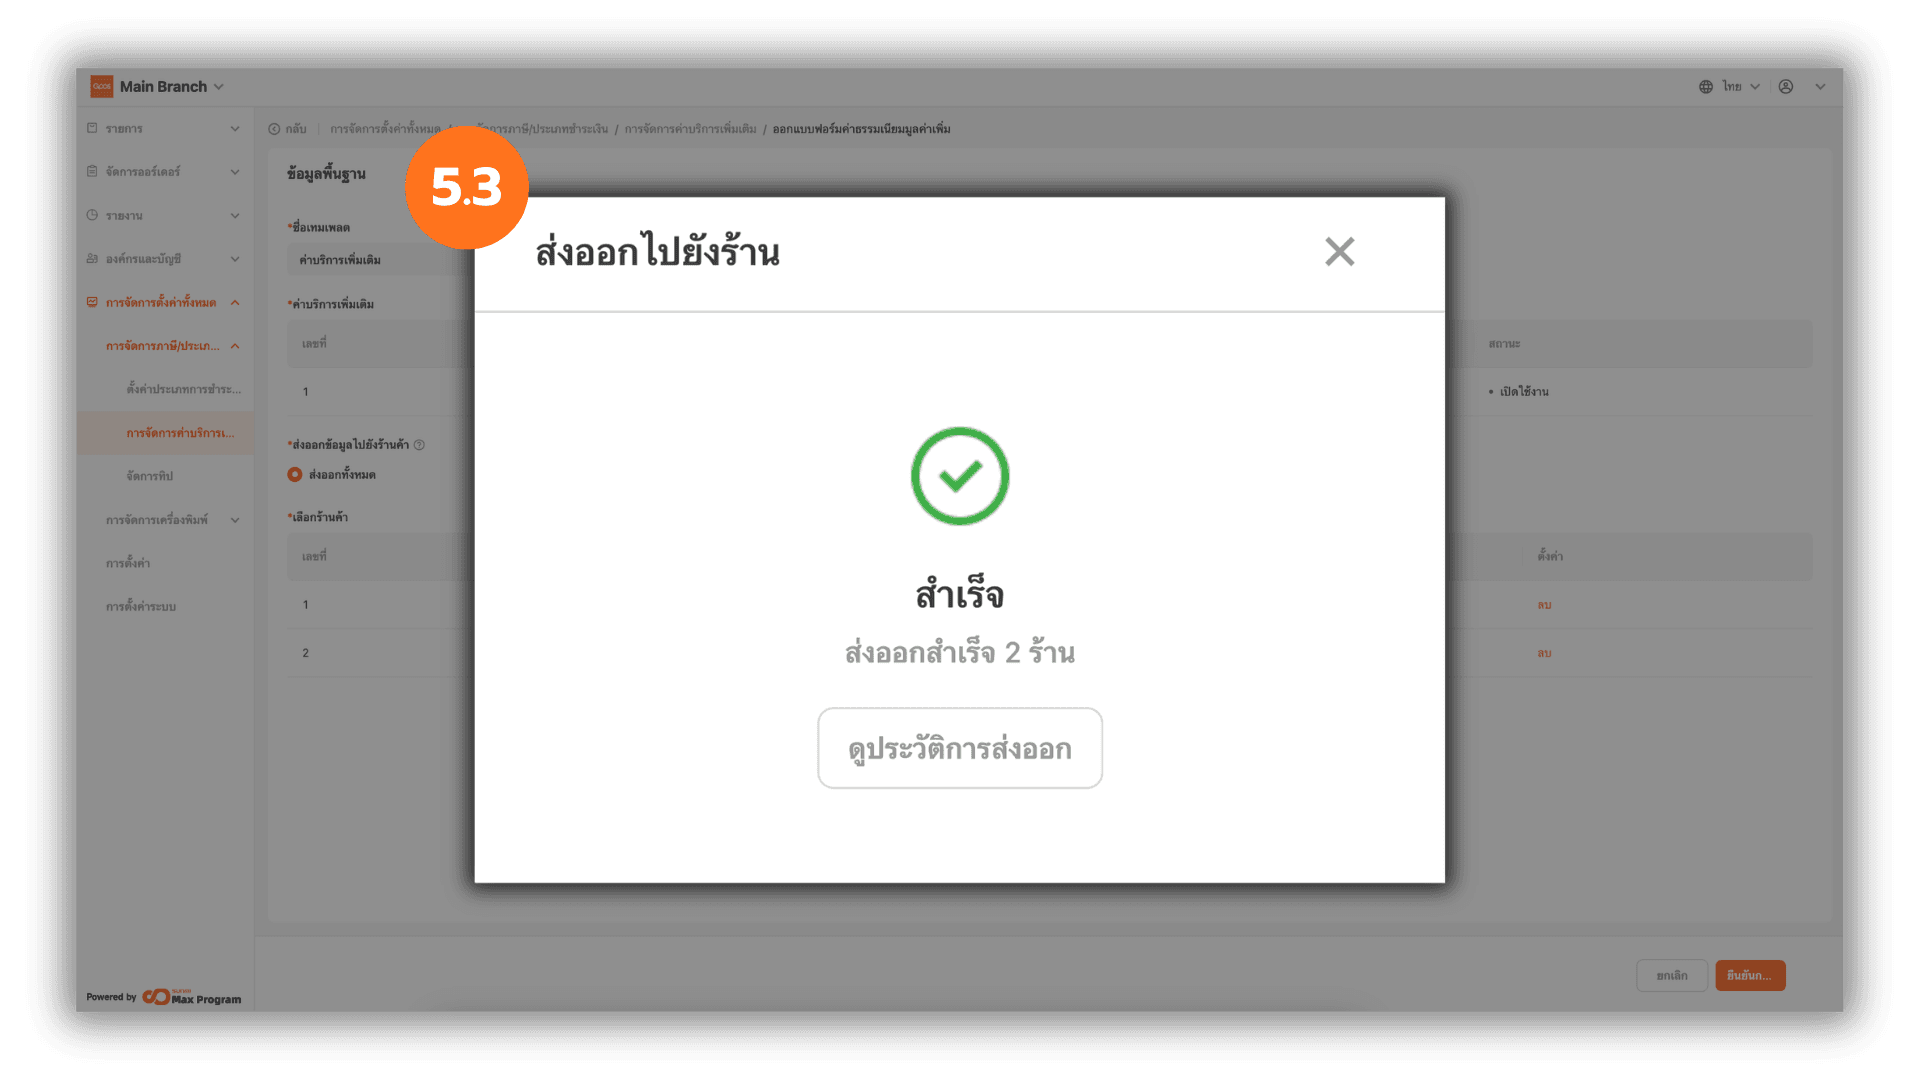
5.3 Check Export Status
The system will display the status “Successful” once the process is completed. You can click “X” to close the window or click “View History” to review the export details.