Creating and Exporting Payment Types to Store Branches
2026-02-17 16:25
This feature allows the Head Office to centrally define and control payment types in a standardized way, then quickly export the configuration to store branches. It helps reduce errors and ensures consistent data across the entire system.
1. Log in to Back Office
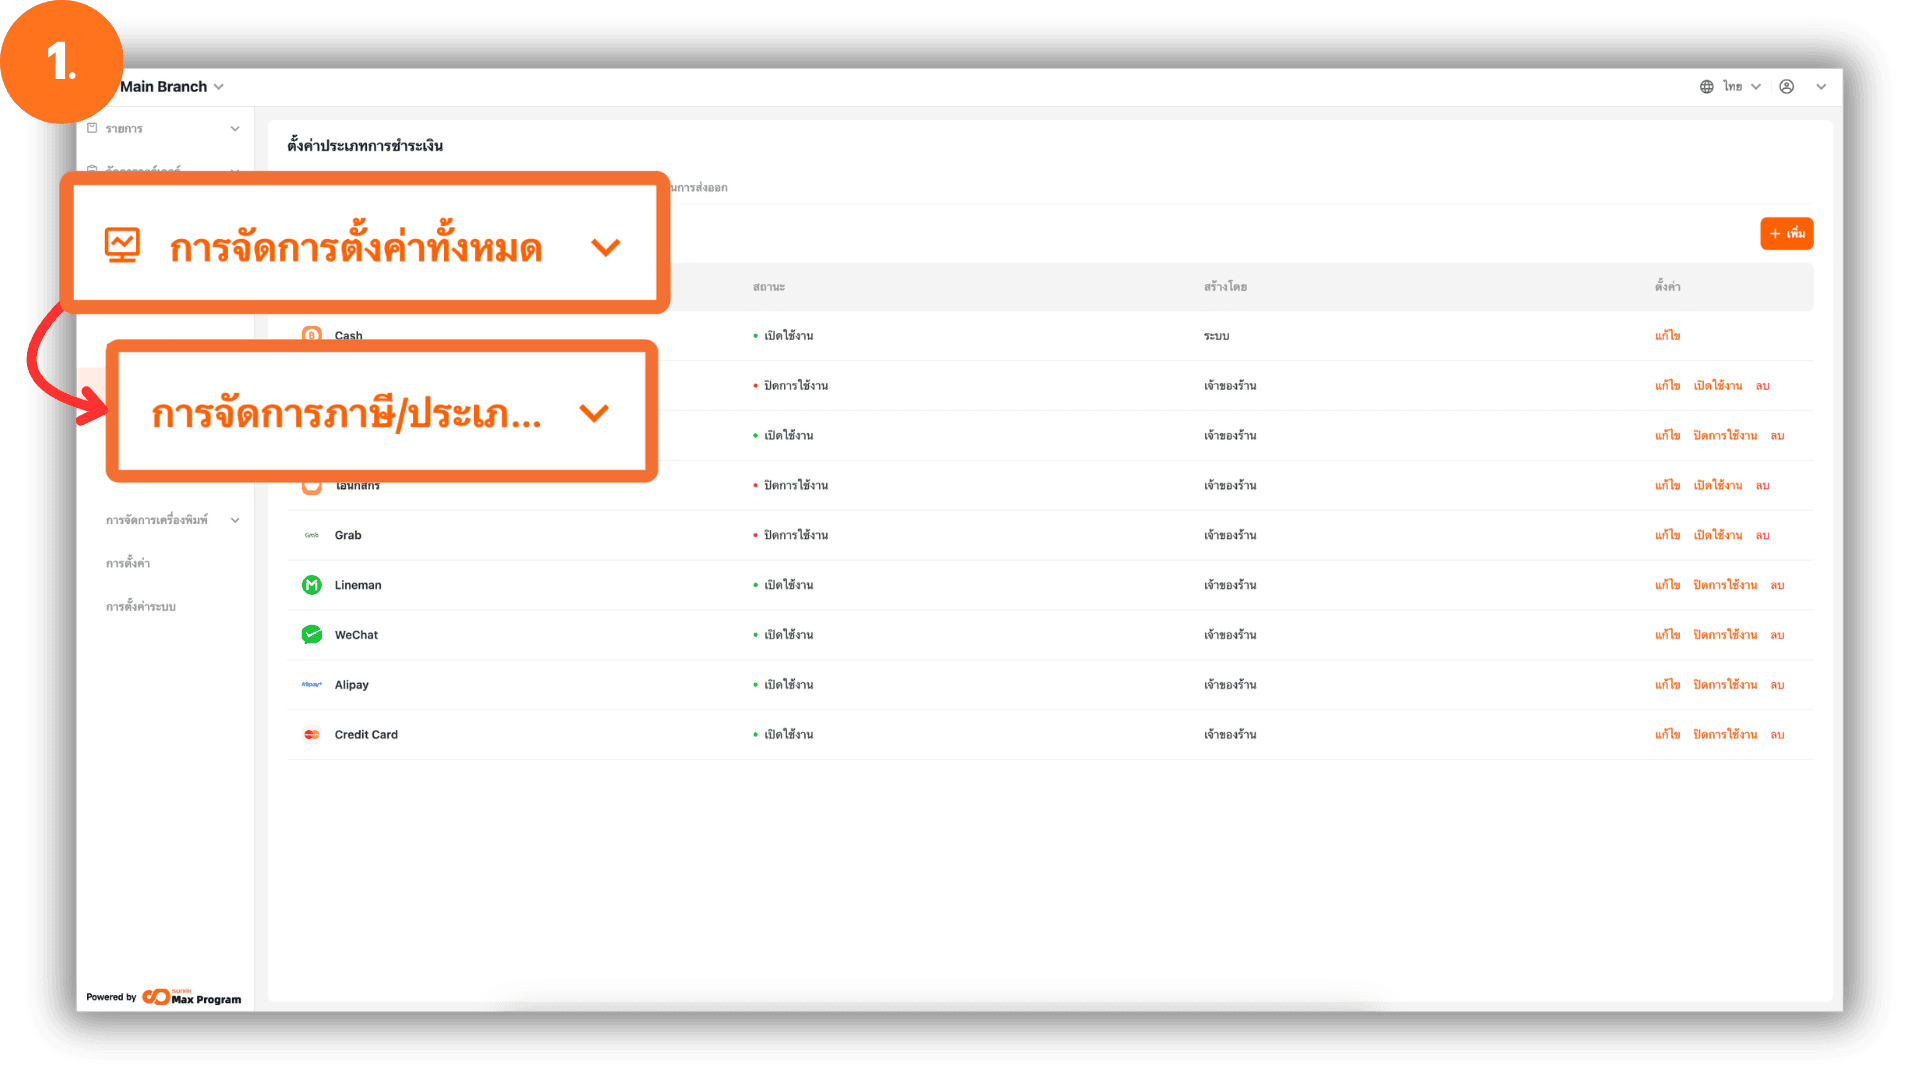
Go to the website login.gpos.co.th, enter your email and password, then click Log In. After logging in successfully, go to Head Office. navigate to the menu “Store Management”, and select “Charge Management.”
2. Add a Payment Type
Select the menu “Payment Type Settings” and click the “+ Add” button to create a new payment type.

3. Enter Payment Type Details
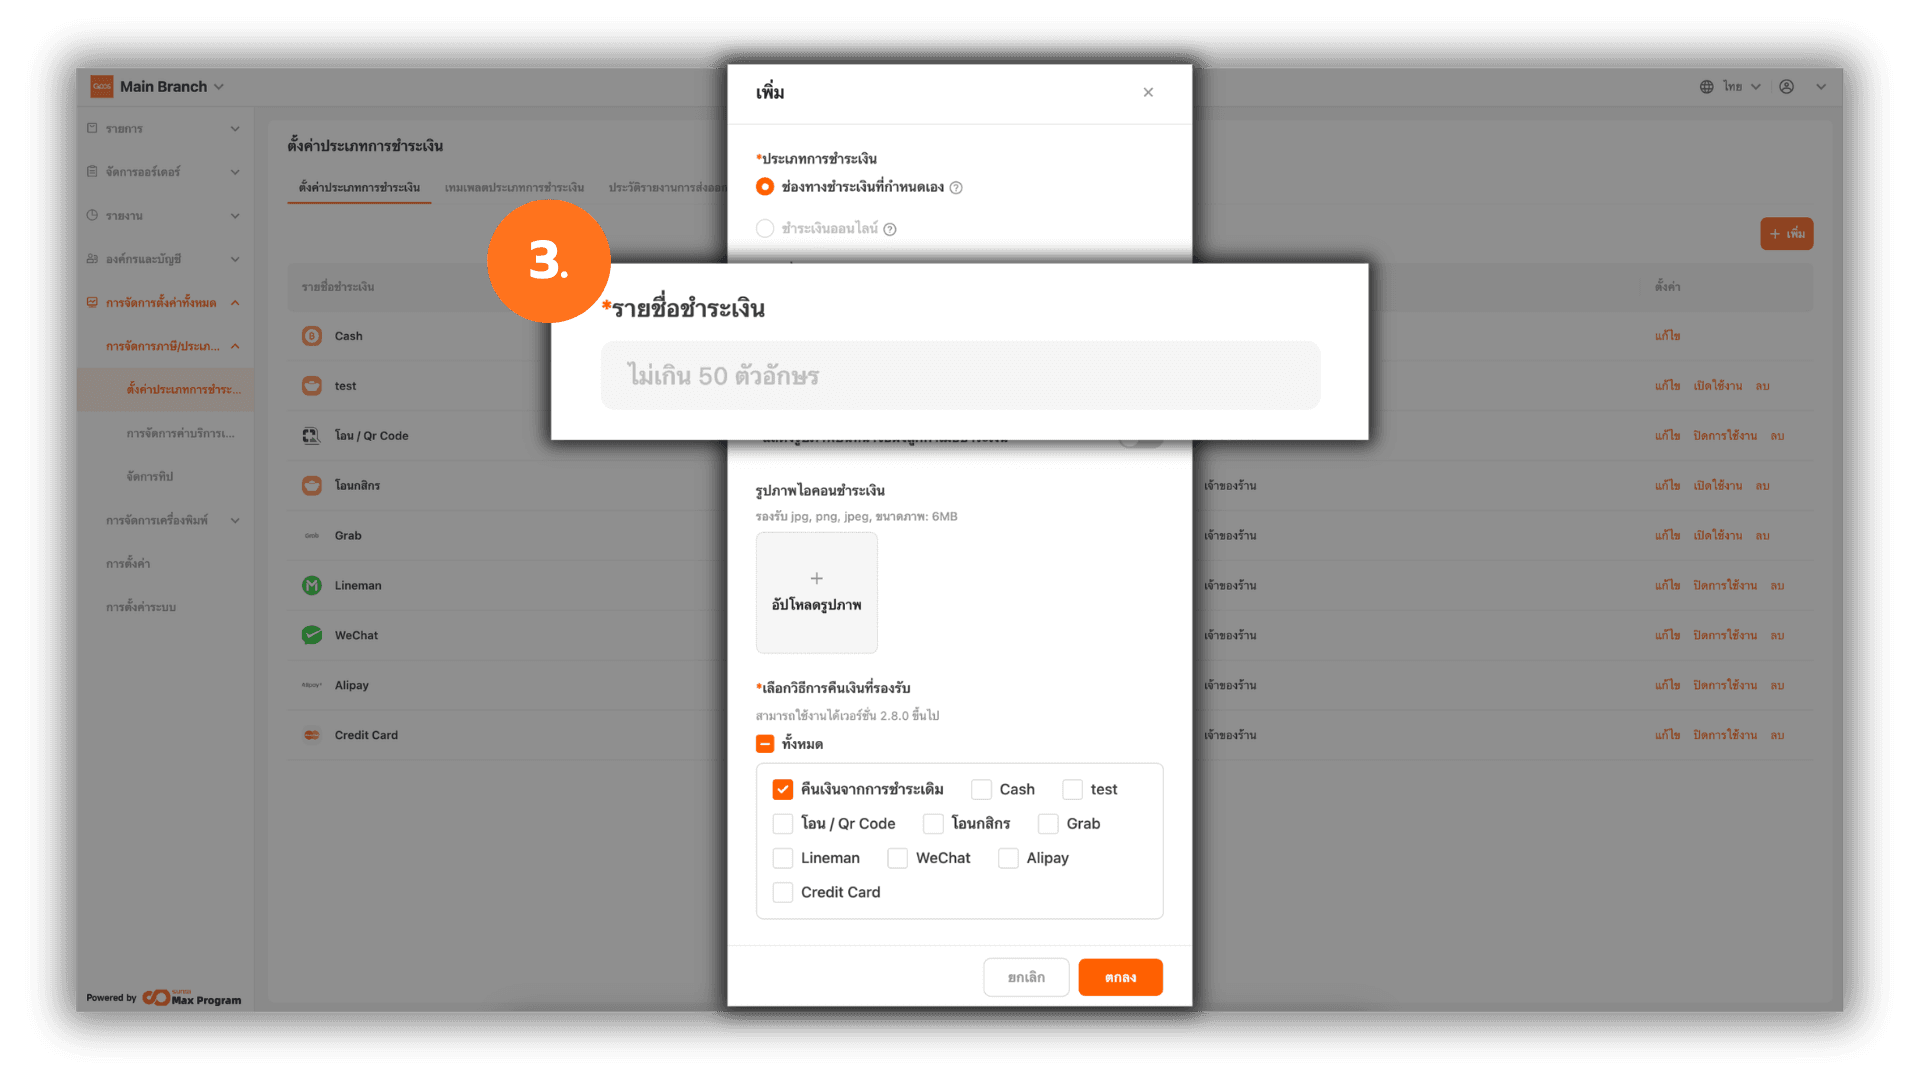
After clicking Add, the system will display a window for entering details. Fill in the Name as required.
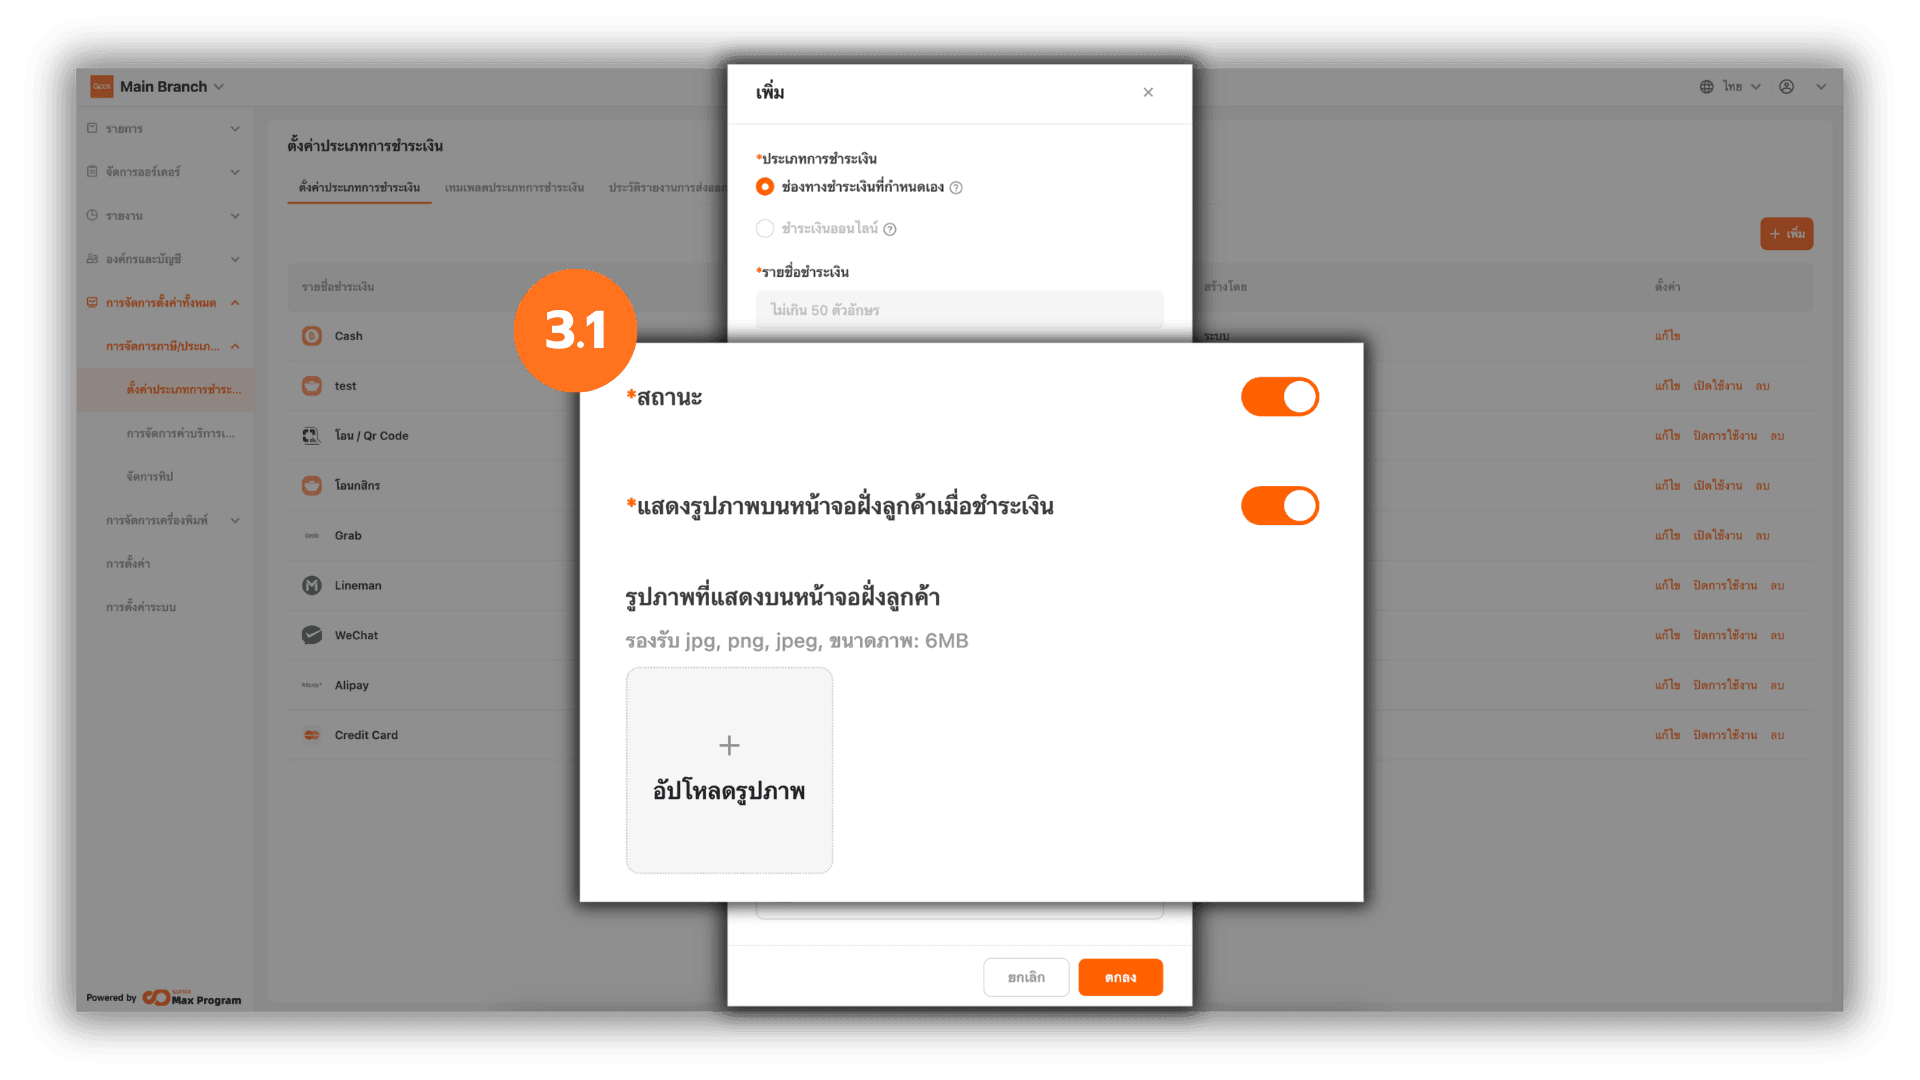
3.1 Set Active Status and Customer Screen Image
Turn On/Off the active status of this payment method and choose whether to enable or disable the display of the image on the customer screen. If enabled, the system will display an option to upload an image. Click “➕ Upload” to add an image that will be shown on the customer screen.
Note : The customer screen image display supports dual-screen POS devices. Supported file formats are .jpg, .jpeg, .png, with a maximum file size of 6MB.
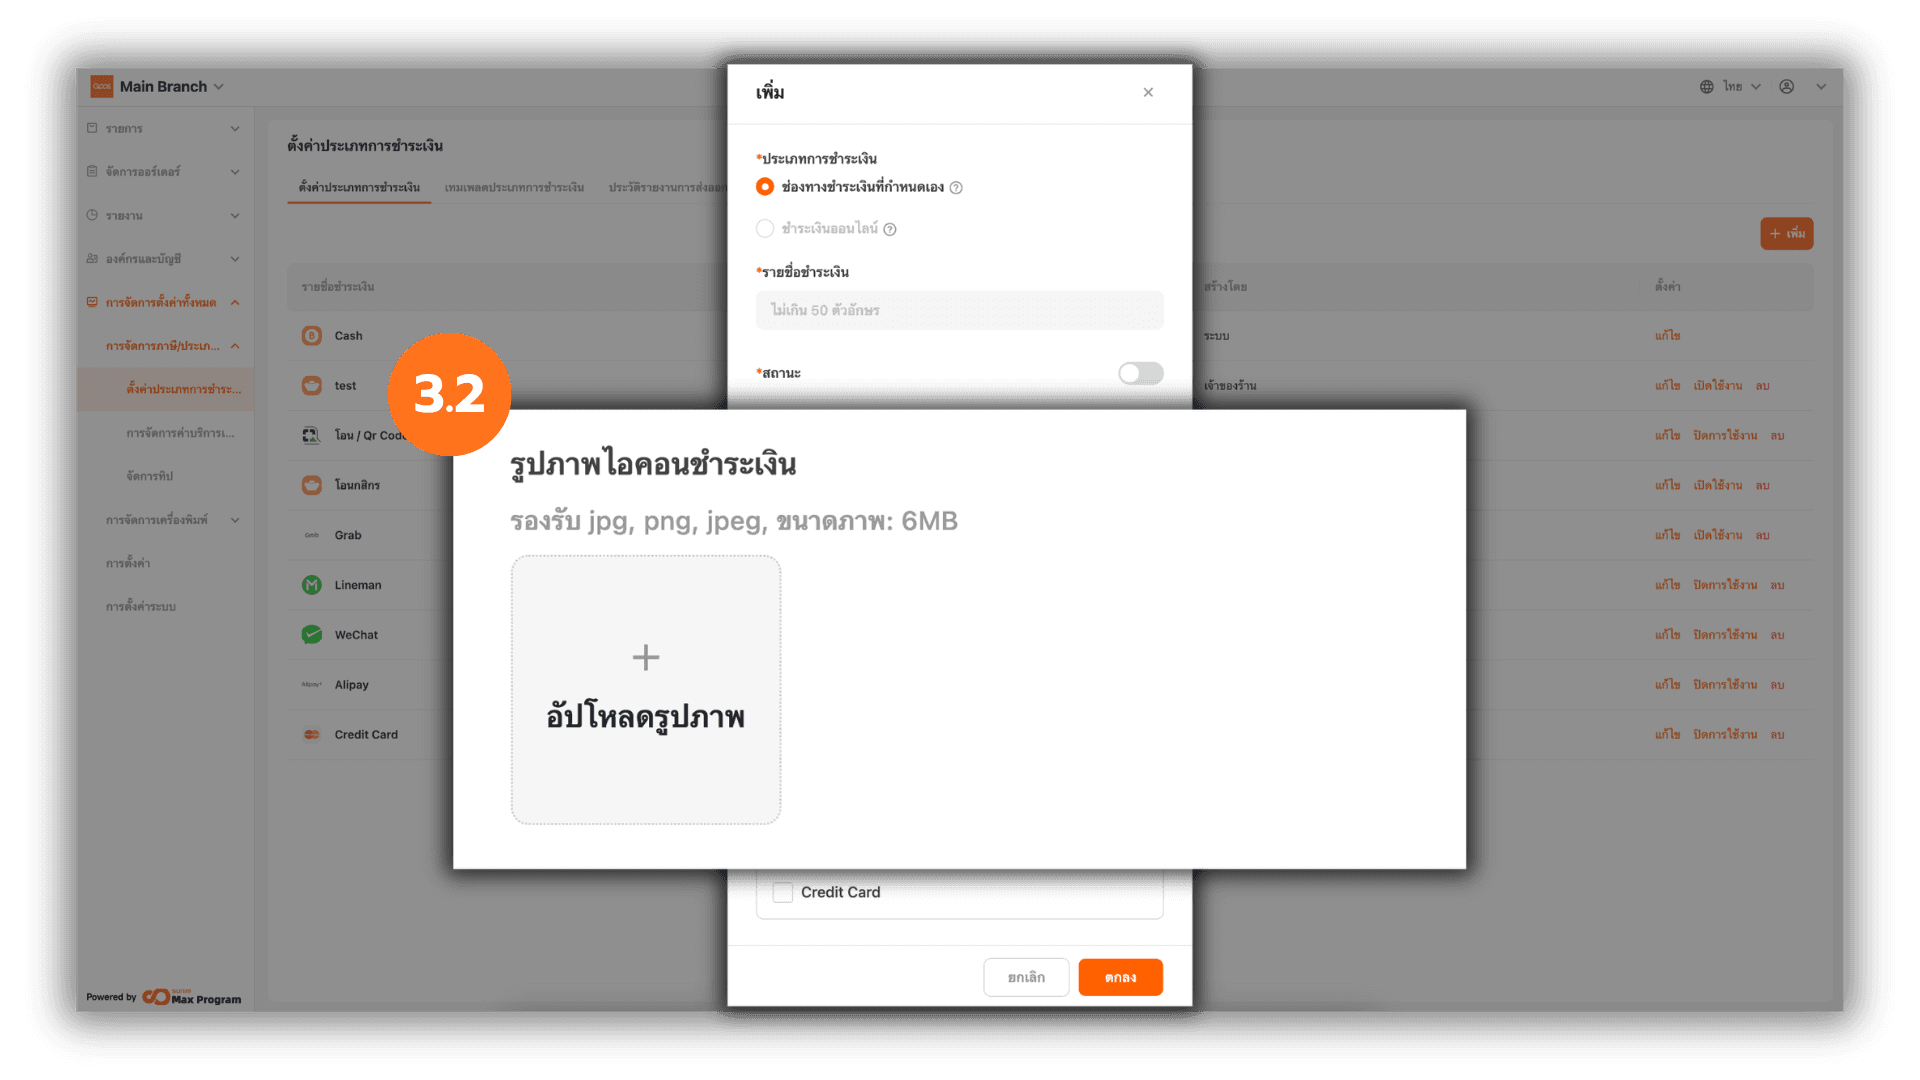
3.2 Upload Payment Method Icon
You can then click “+ Upload” to add an icon for the created payment method.
Note : Supported file formats are .jpg, .jpeg, .png, with a maximum file size of 6MB.
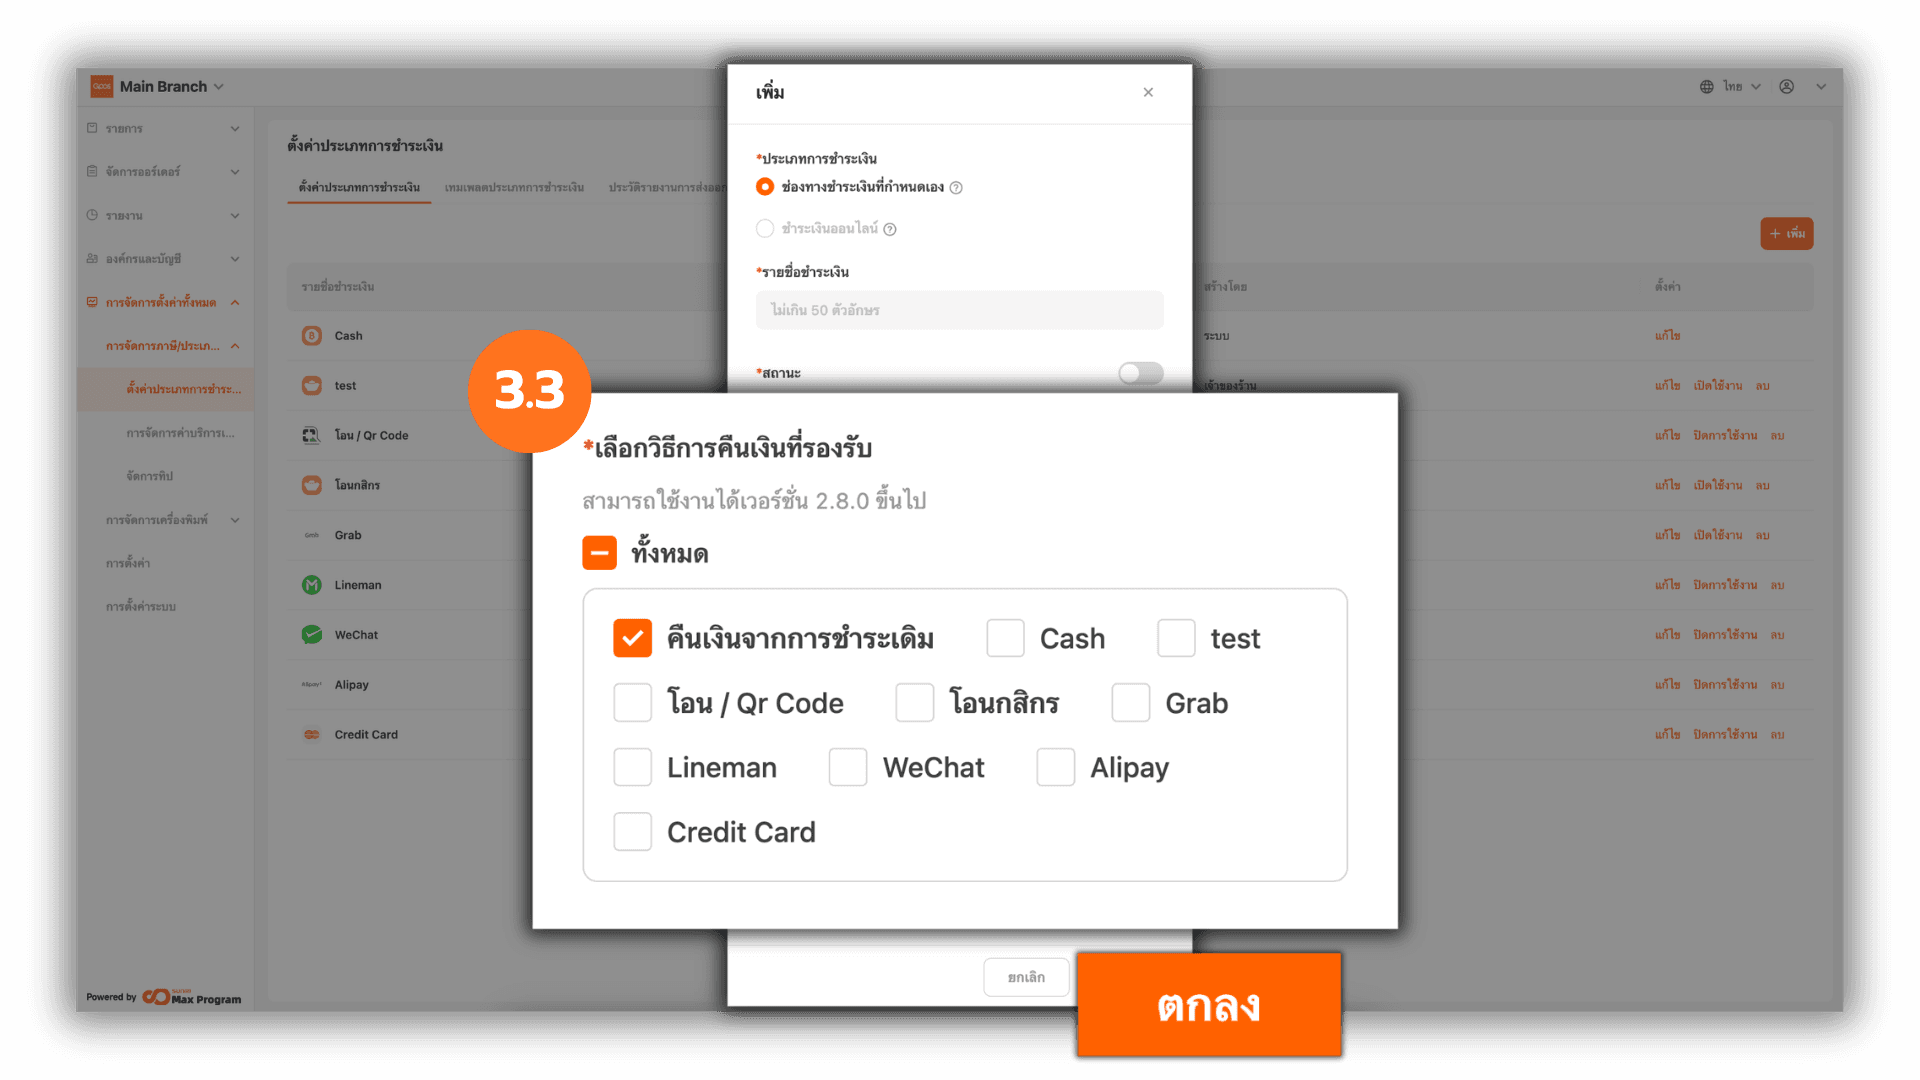
3.3 Select Supported Refund Methods
Select the desired refund method(s). The system will reference the existing payment methods in the system. Tick the refund method(s) you want and click “Ok” to complete the creation of the payment method.
Note : This refund method is used for recording purposes only. The system does not support automatic refund processing.
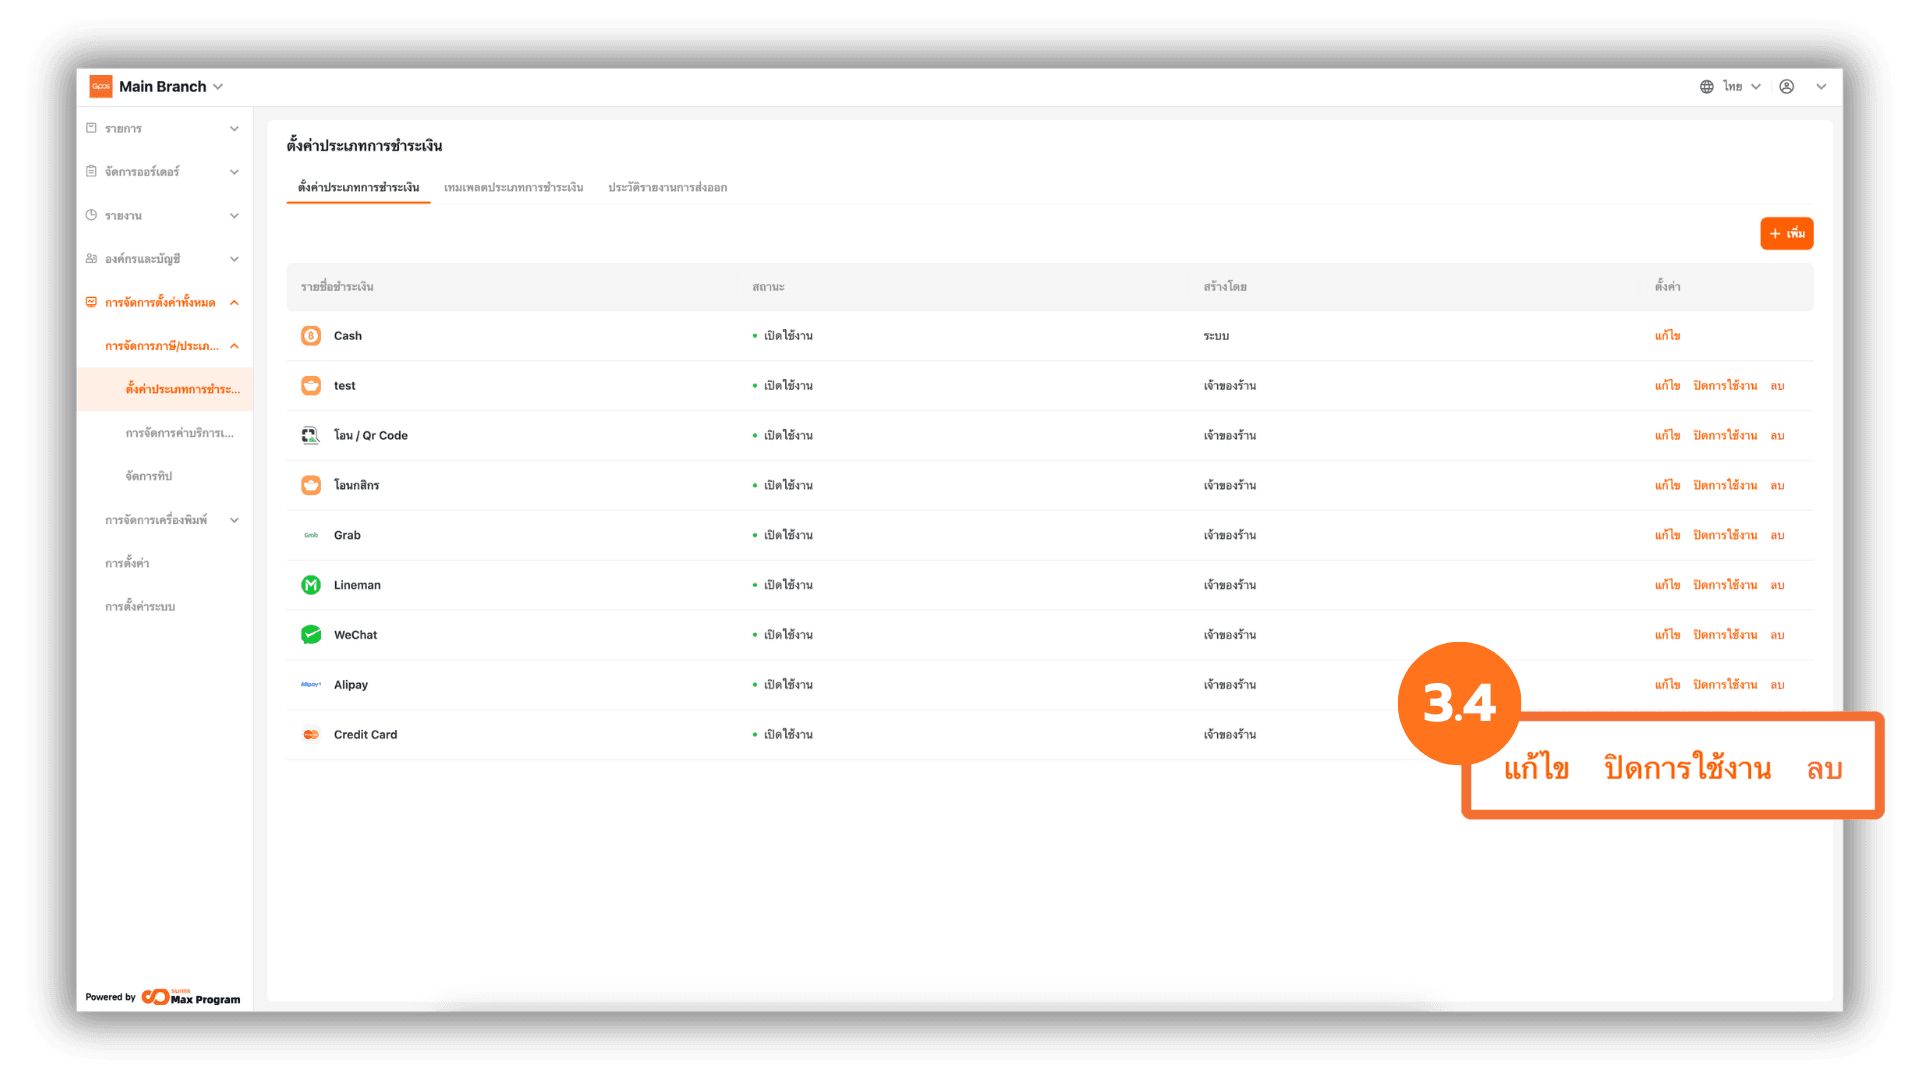
3.4 Managing Payment Methods After Creation
After successfully adding a payment method, you can manage it as follows :
- Edit – Modify name, image, status, or refund method.
- Enable/Disable – Hide the payment method from being displayed on the POS screen.
- Delete – Remove the payment method from the system if it has not yet been exported to Store Branches.
Note : If there are any edits or if the status is enable/disable, you must export the payment template again to update the information at Store Branches.
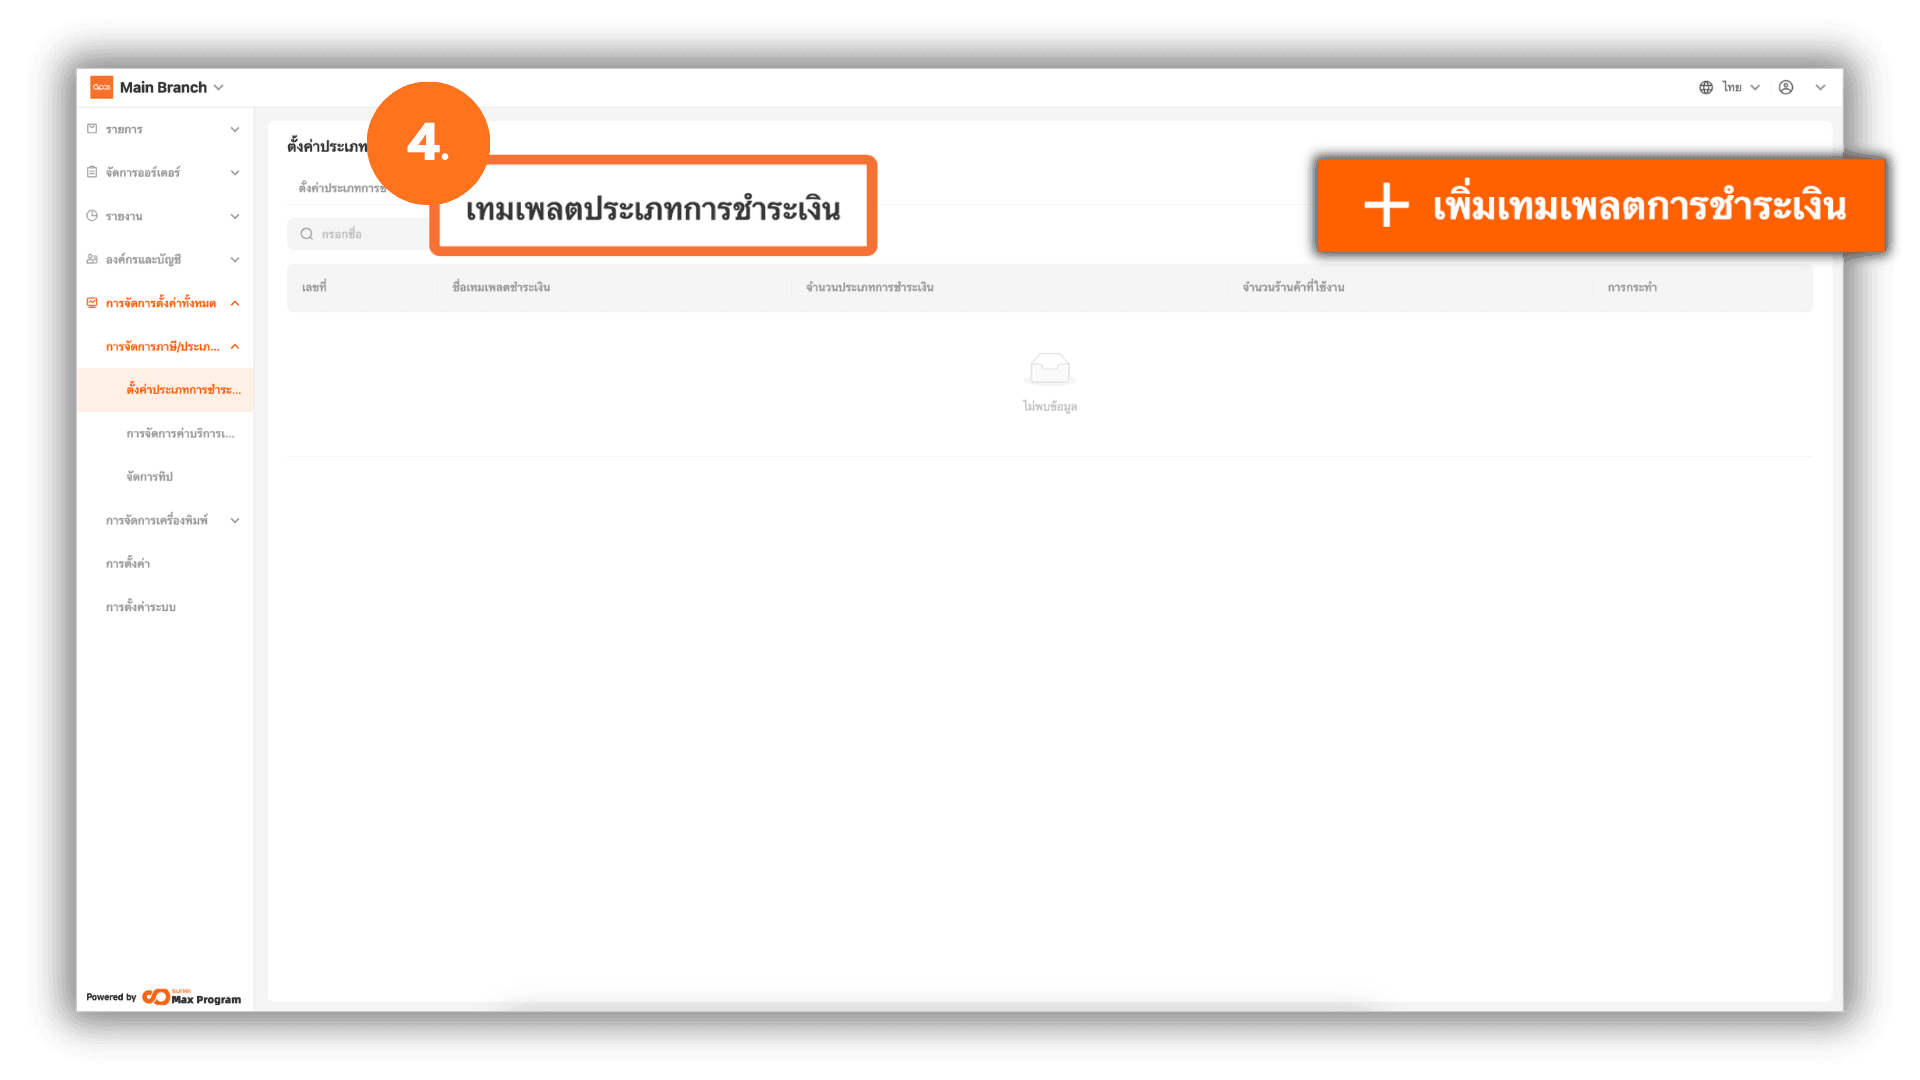
4. Create a Payment Template
Refer to the menu at the top, select “Payment Template”,and click the “+ Create Payment Method template.”
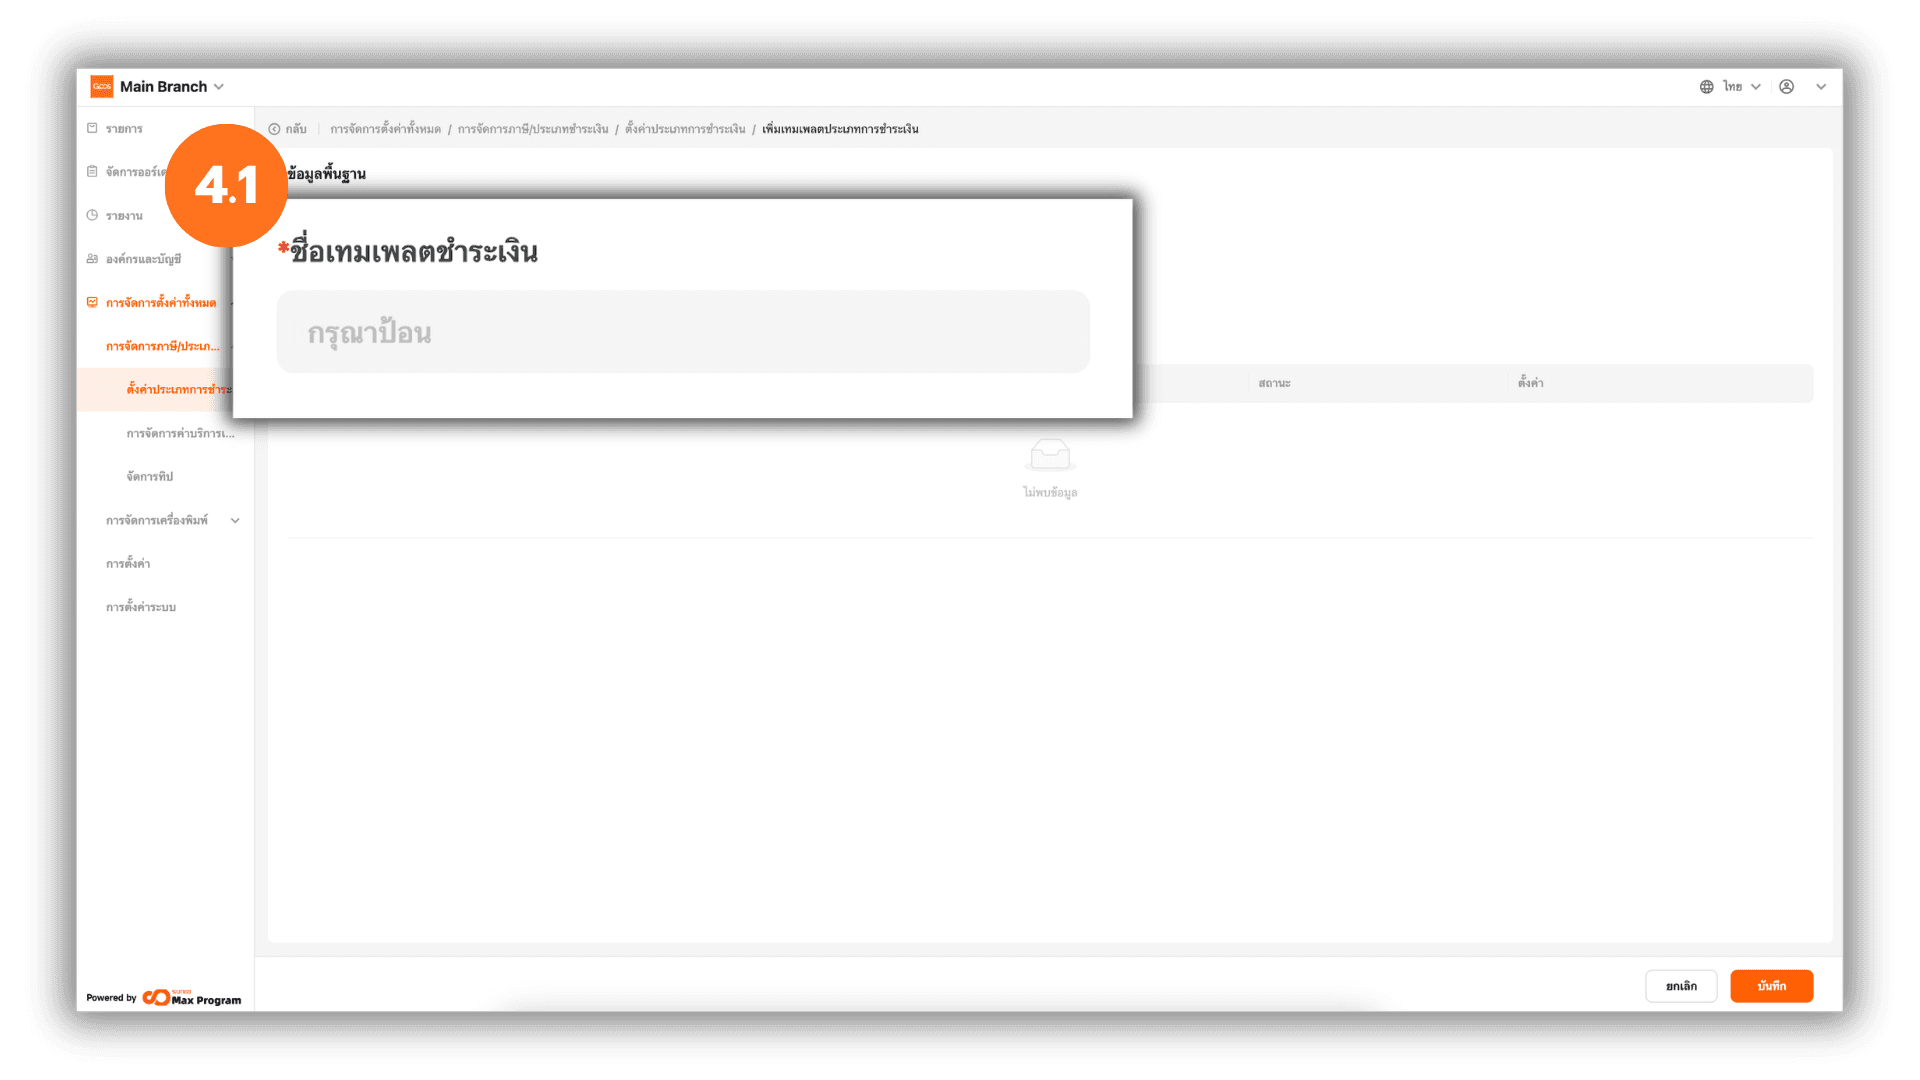
4.1 Enter Basic Template Information
The system will display the basic information page. Enter the Template Name as required.
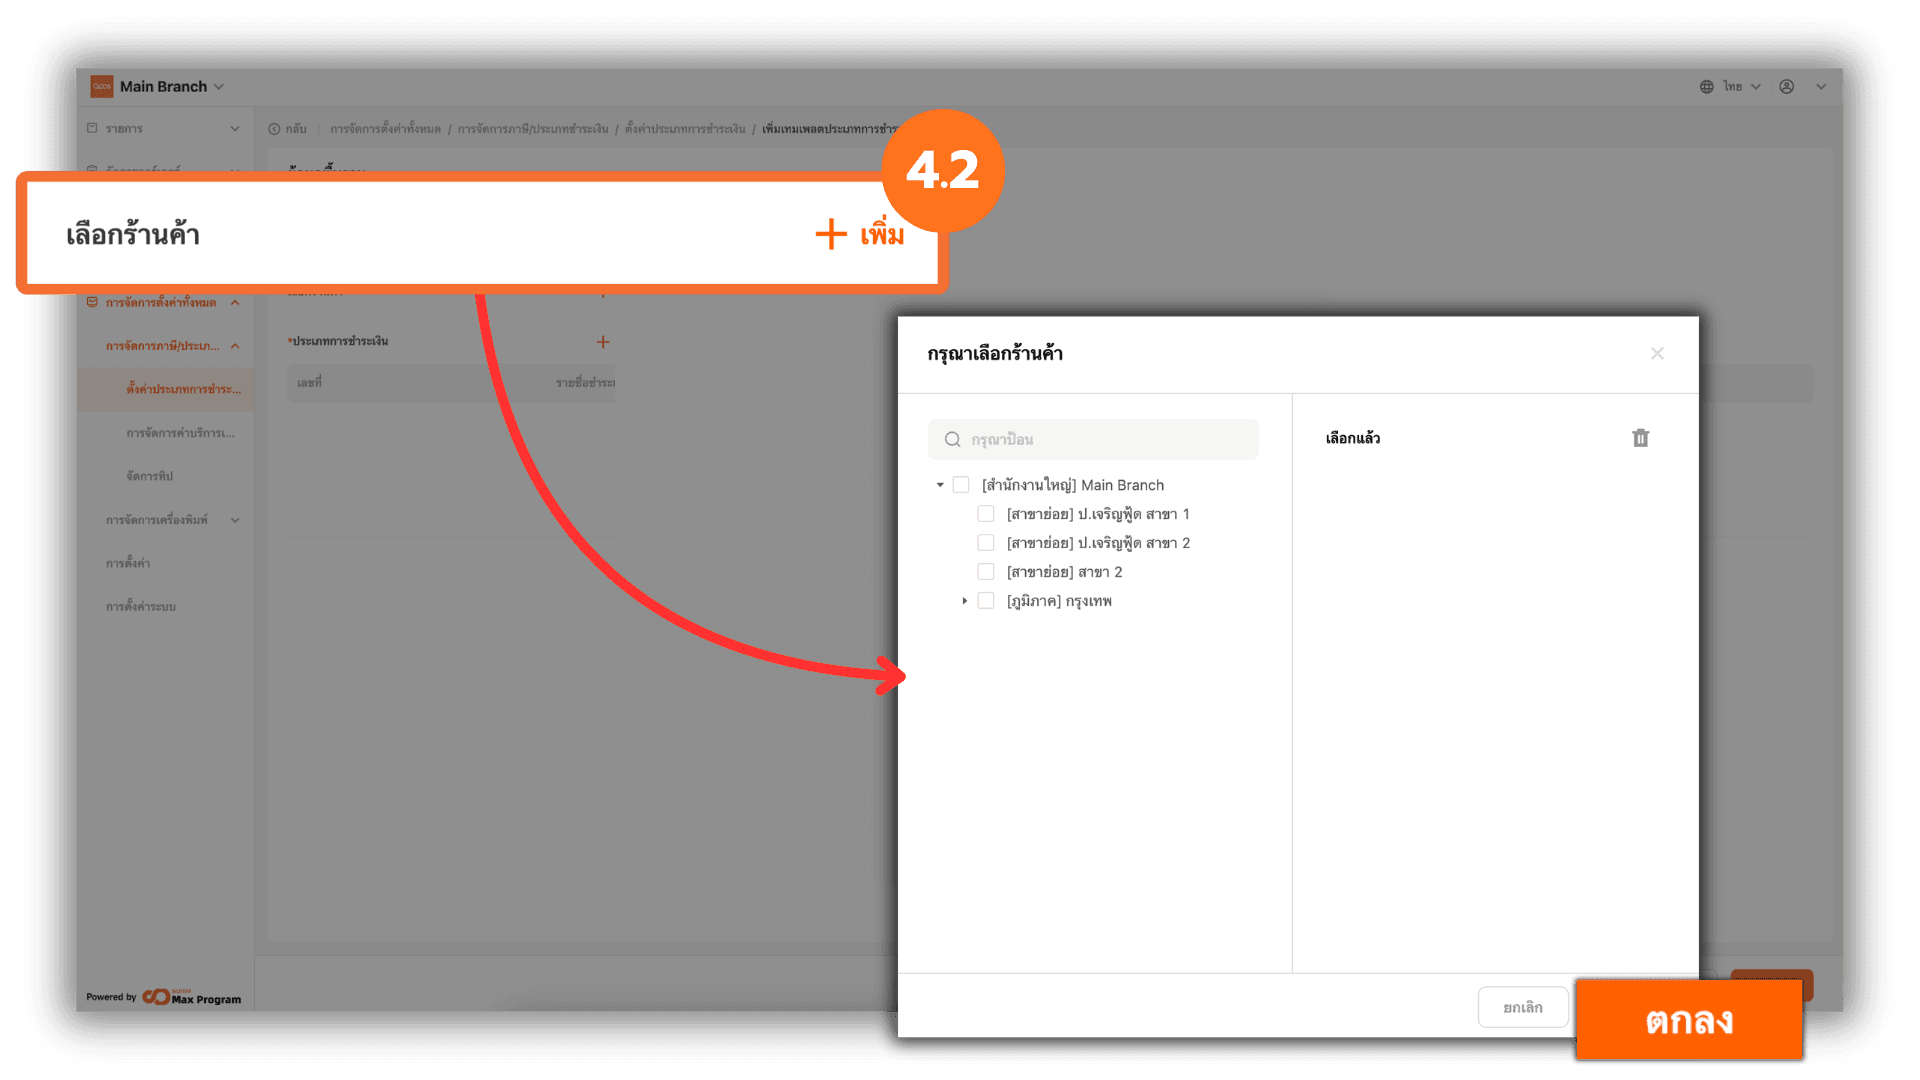
4.2 Select Store Branches
Click the “+ Add” button next to the Branch Store section. The system will display a list of Store Branches. Tick the branch store(s) you want and click “Ok” to proceed.
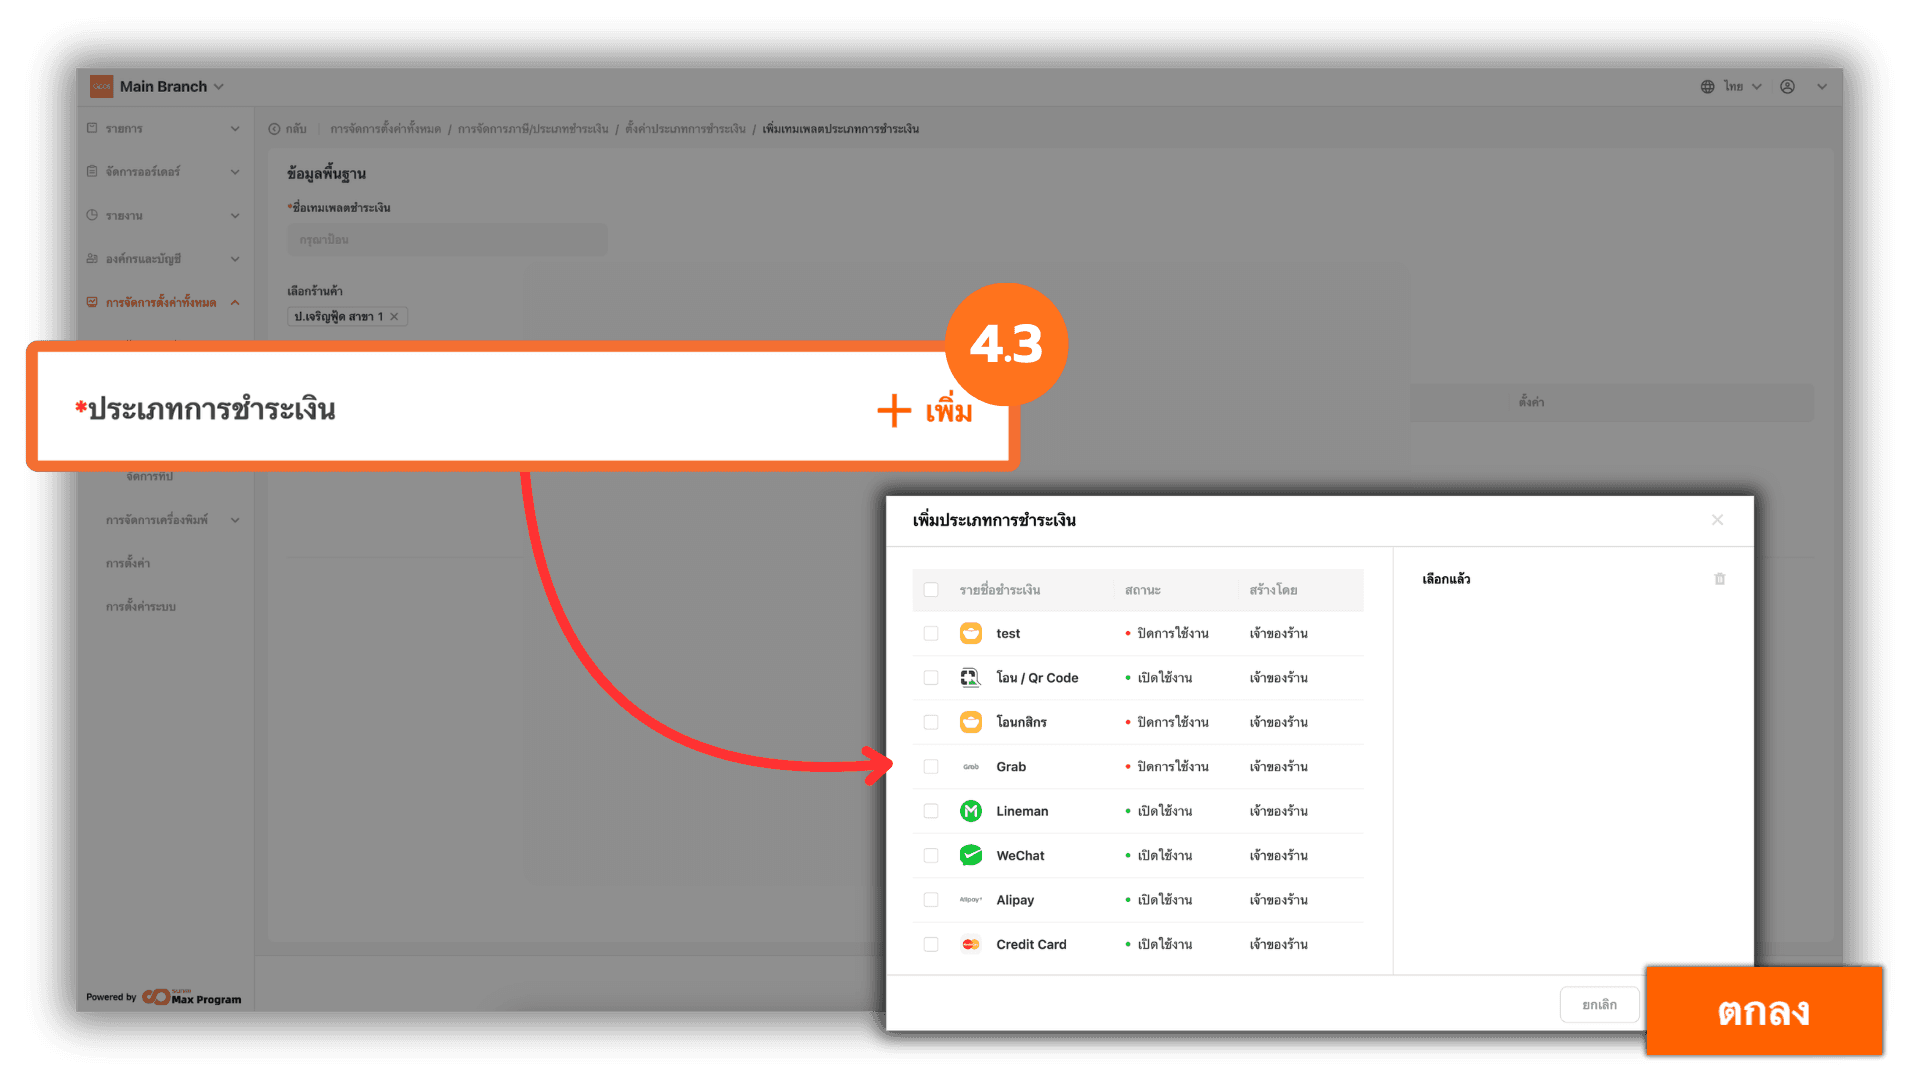
4.3 Select Payment Types
Click the “+ Add” button next to the Payment Type section. The system will display all payment types created in the system, excluding cash (cash payment method). Tick the payment type(s) you want and click “Ok”.
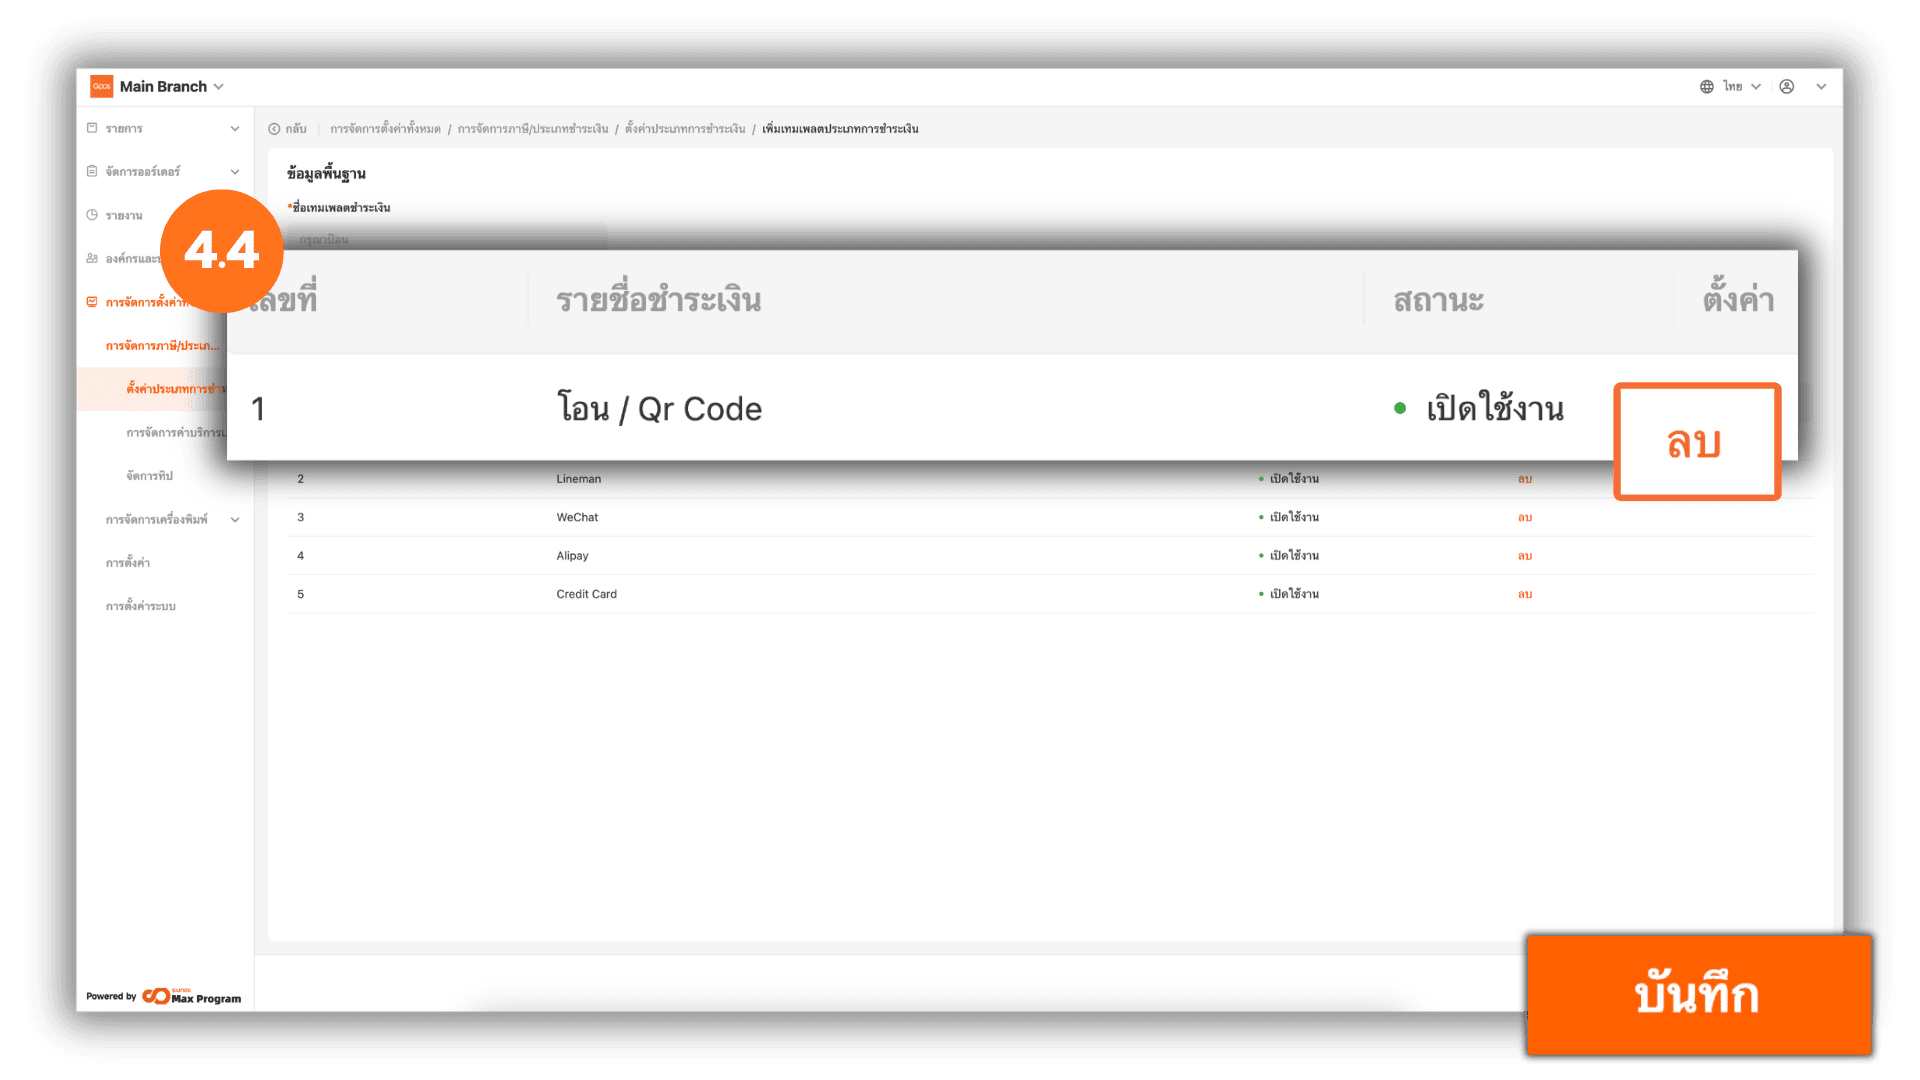
4.4 Review and Save the Template
Review the selected branch store(s) and payment type(s). If any selection is incorrect, click “Remove” next to the payment method name to remove it. Once completed, click “Save” to create the template.
5. Manage Payment Type Templates
After saving, the system will return to the Payment Template page and display the list of created templates. You can manage them as follows :
- Edit – Edit the details within the template.
- Distribute – Confirm the export of the template.
- Delete – Delete the created template.
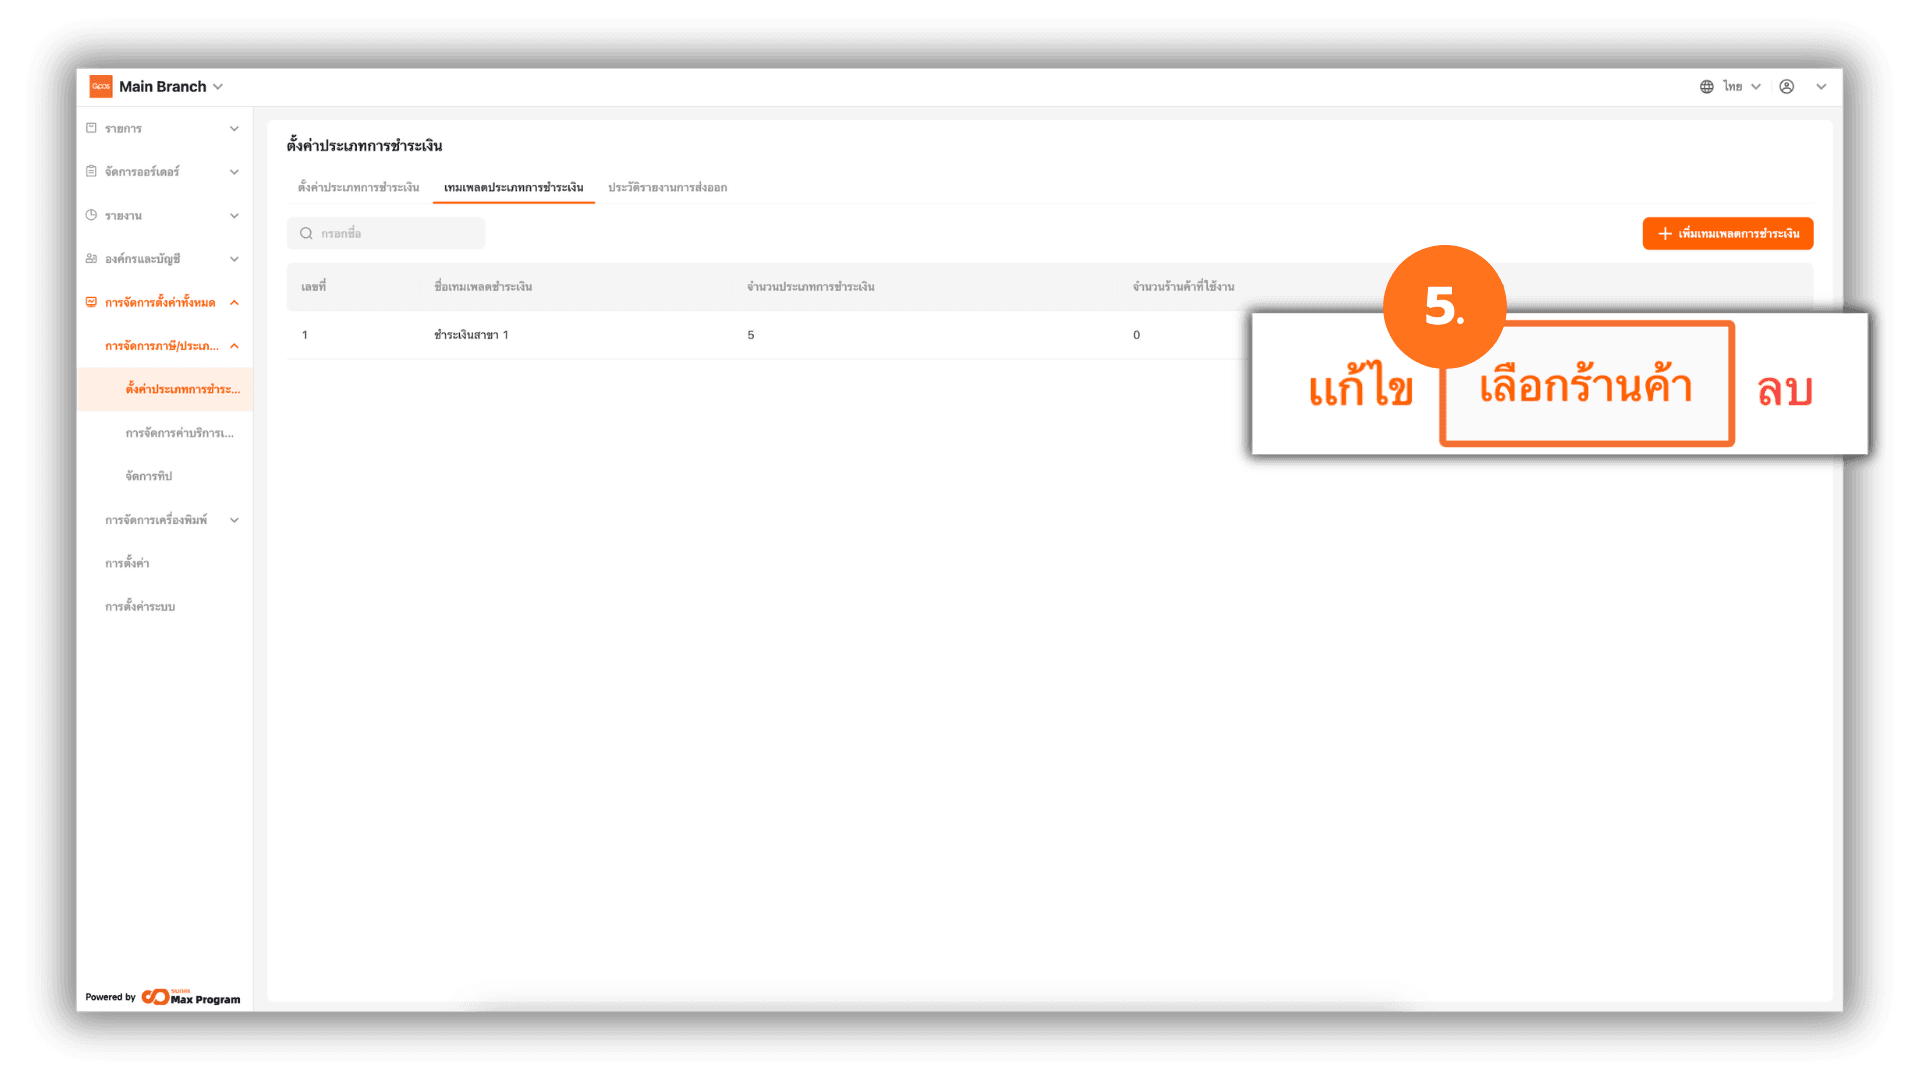
5.1 Manage Store Branches Before Export
After clicking “Distribute”, the system will display the template details again. You can click “+ Add” to add branch store(s) or click “Delete” to remove the selected branch store(s).
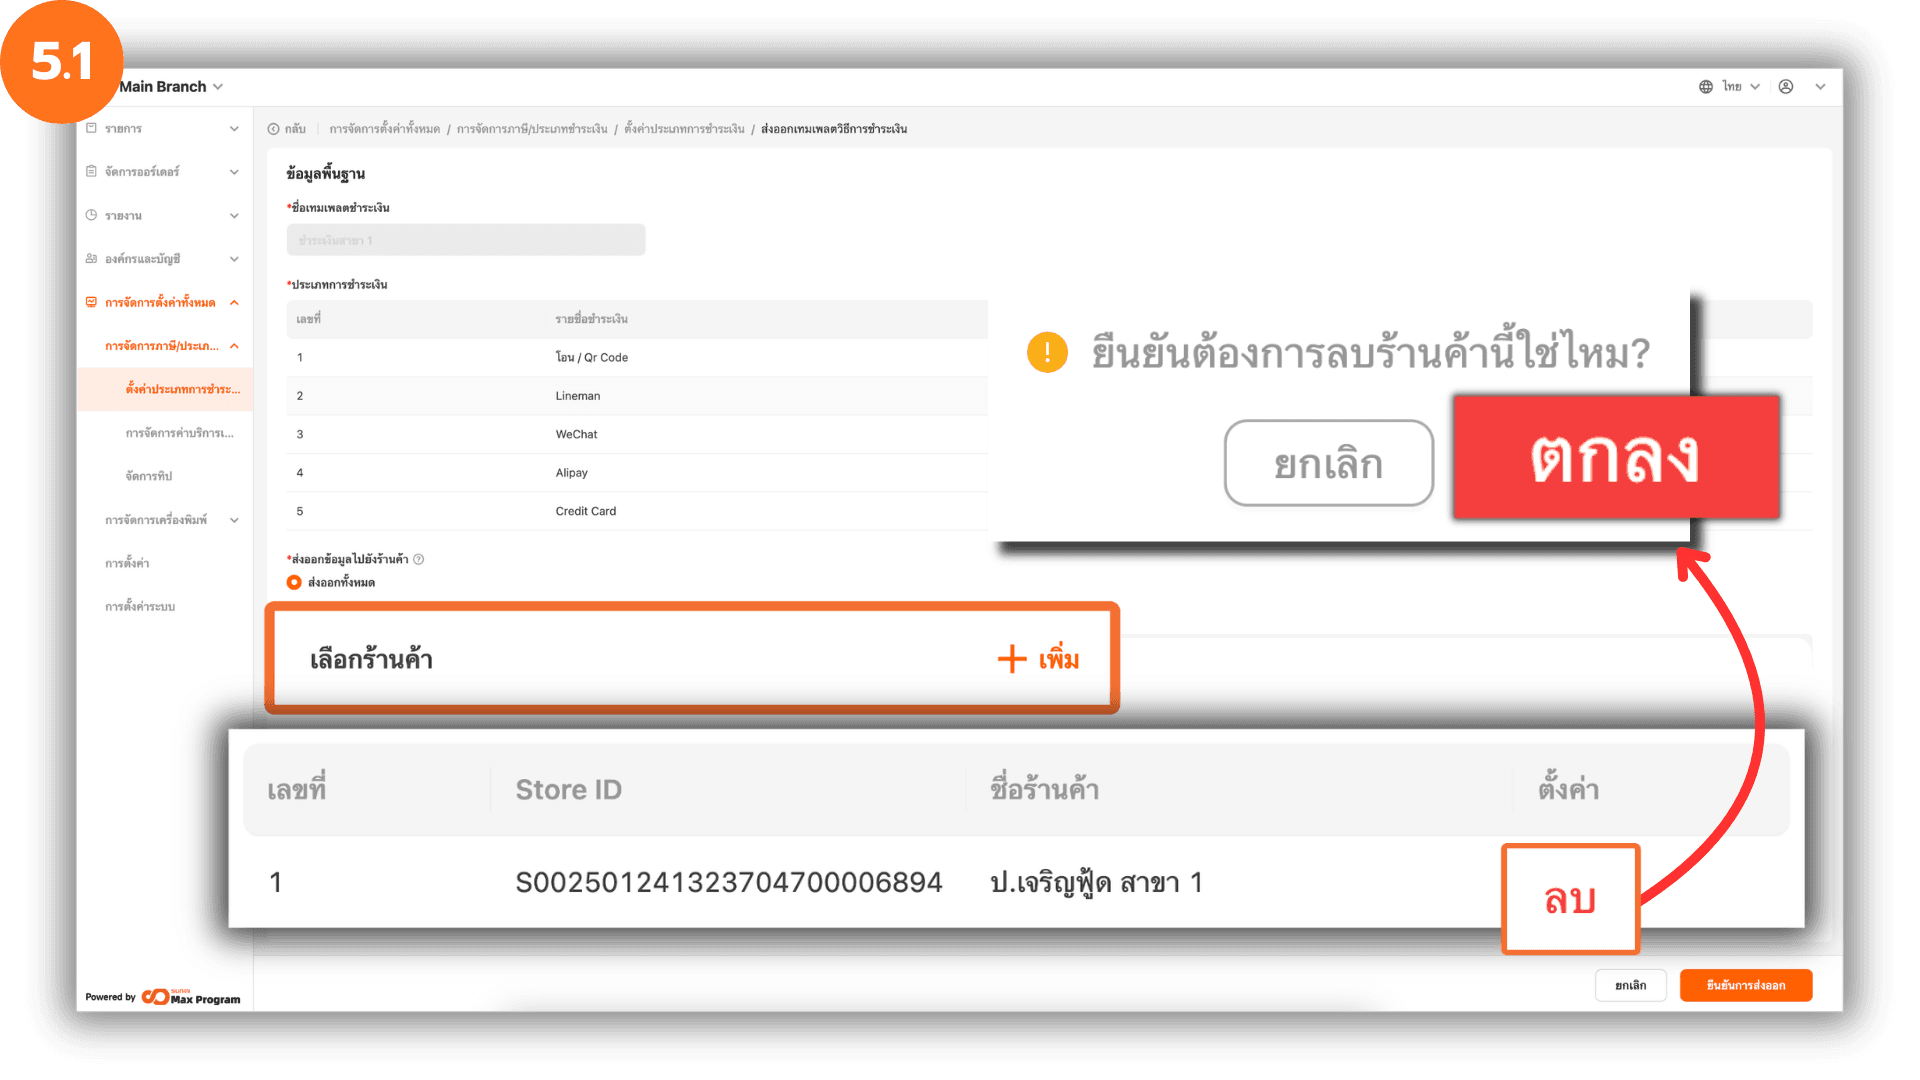
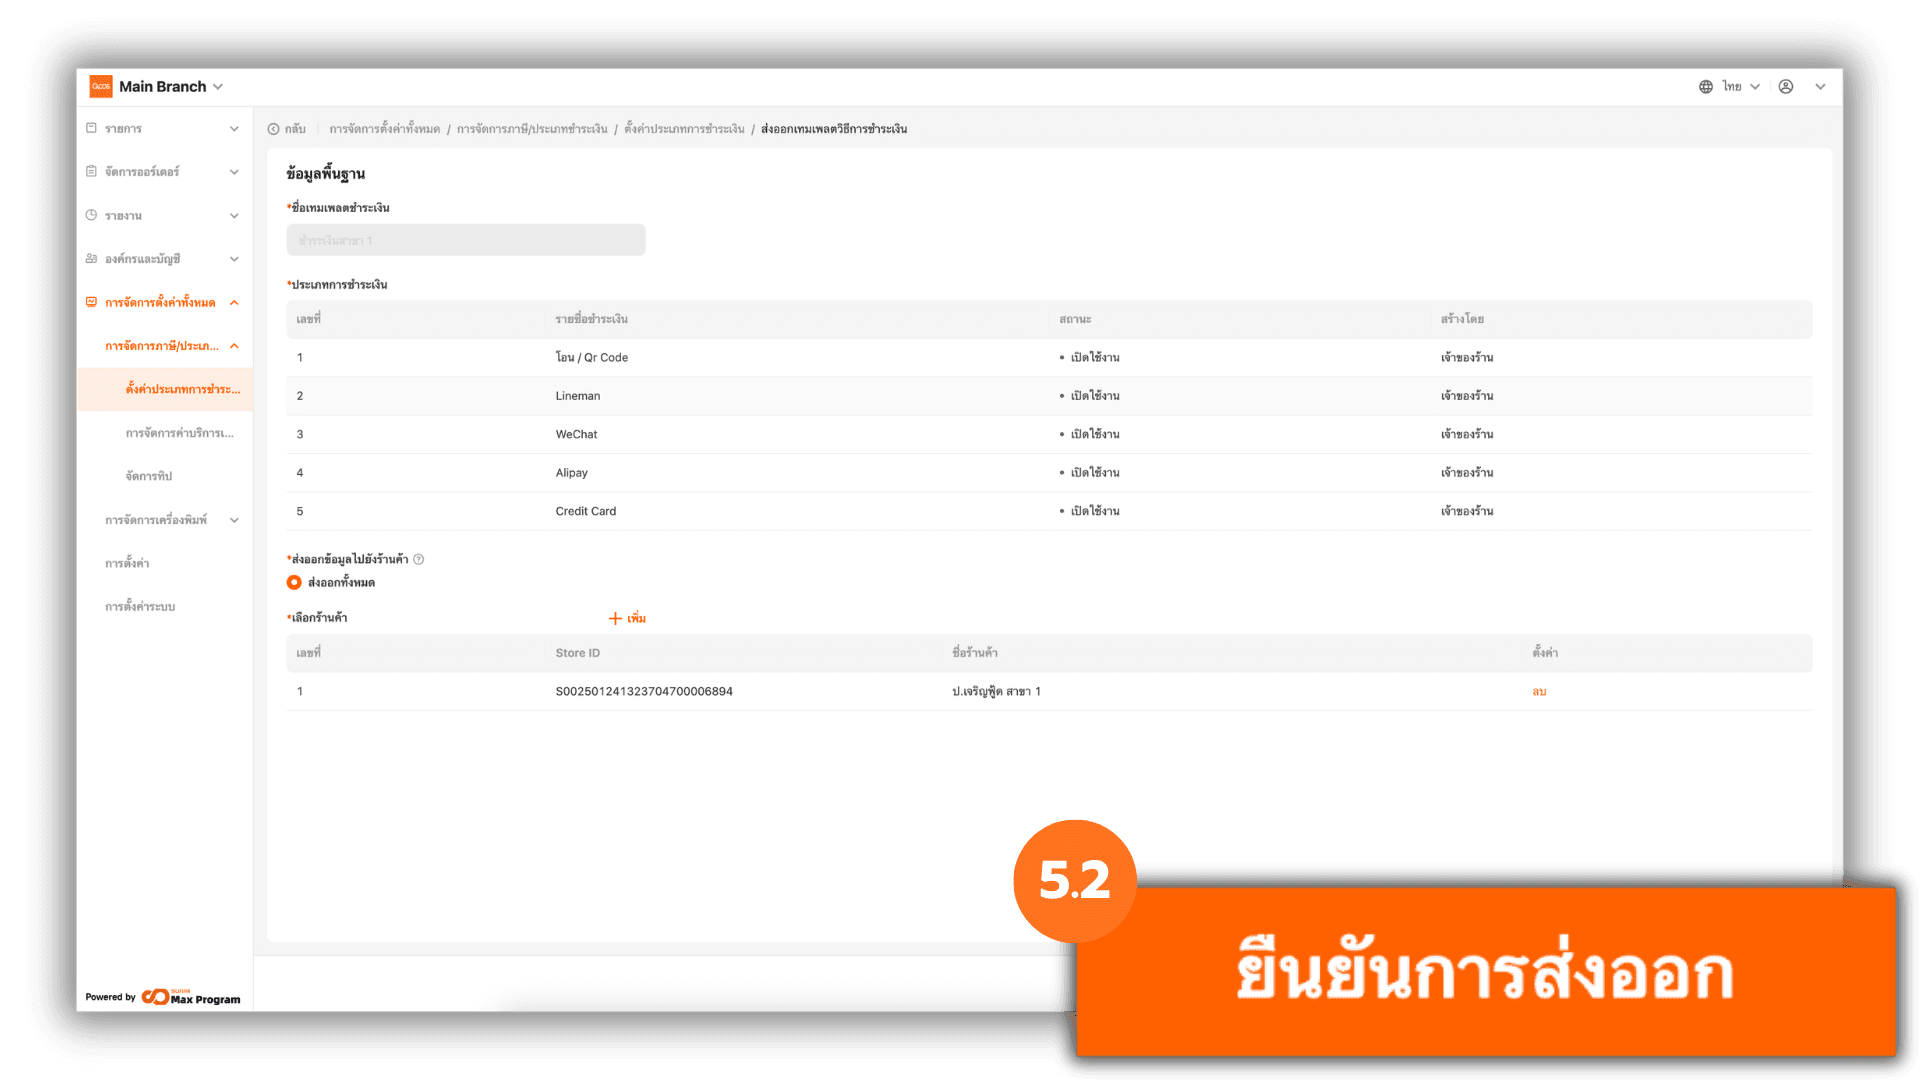
5.2 Confirm Template Export
Once everything is completed, click “Confirm distribution” to export the template to the selected branch store(s).
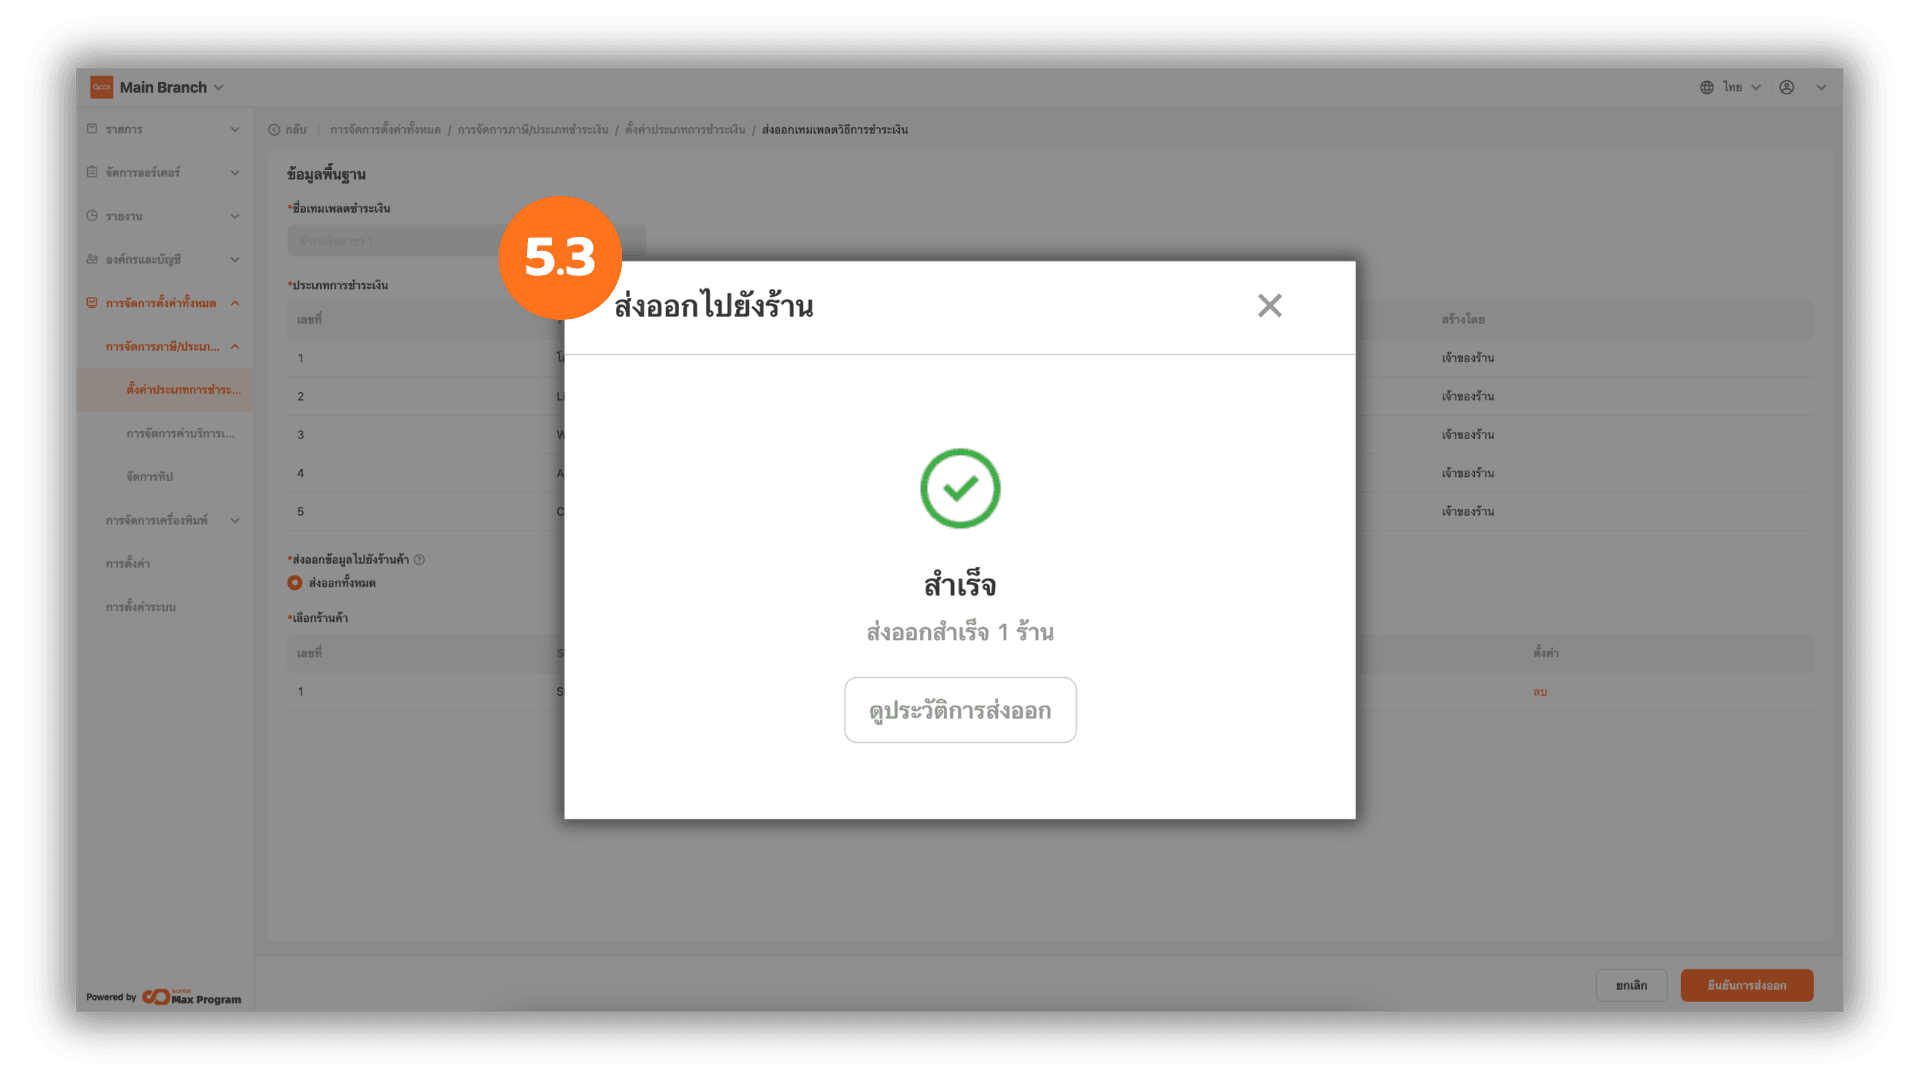
5.3 Check Export Status
The system will process the payment type export and display the status as “Successful.” You can click “X” to close the window or click “View History” to review past export details