Creating and Exporting Tip Templates to Store Branches
2026-02-20 10:19
Creating and exporting tip templates to store branches helps standardize tip formats across all branches, manage and update information centrally, reduce errors, and enhance customer service convenience.
1. Log in to Back Office
Go to the website login.gpos.co.th, enter your email and password, then click Log In. After successfully logging in, select Head Office, go to the menu “Store Management”, and choose “Charge Management.”
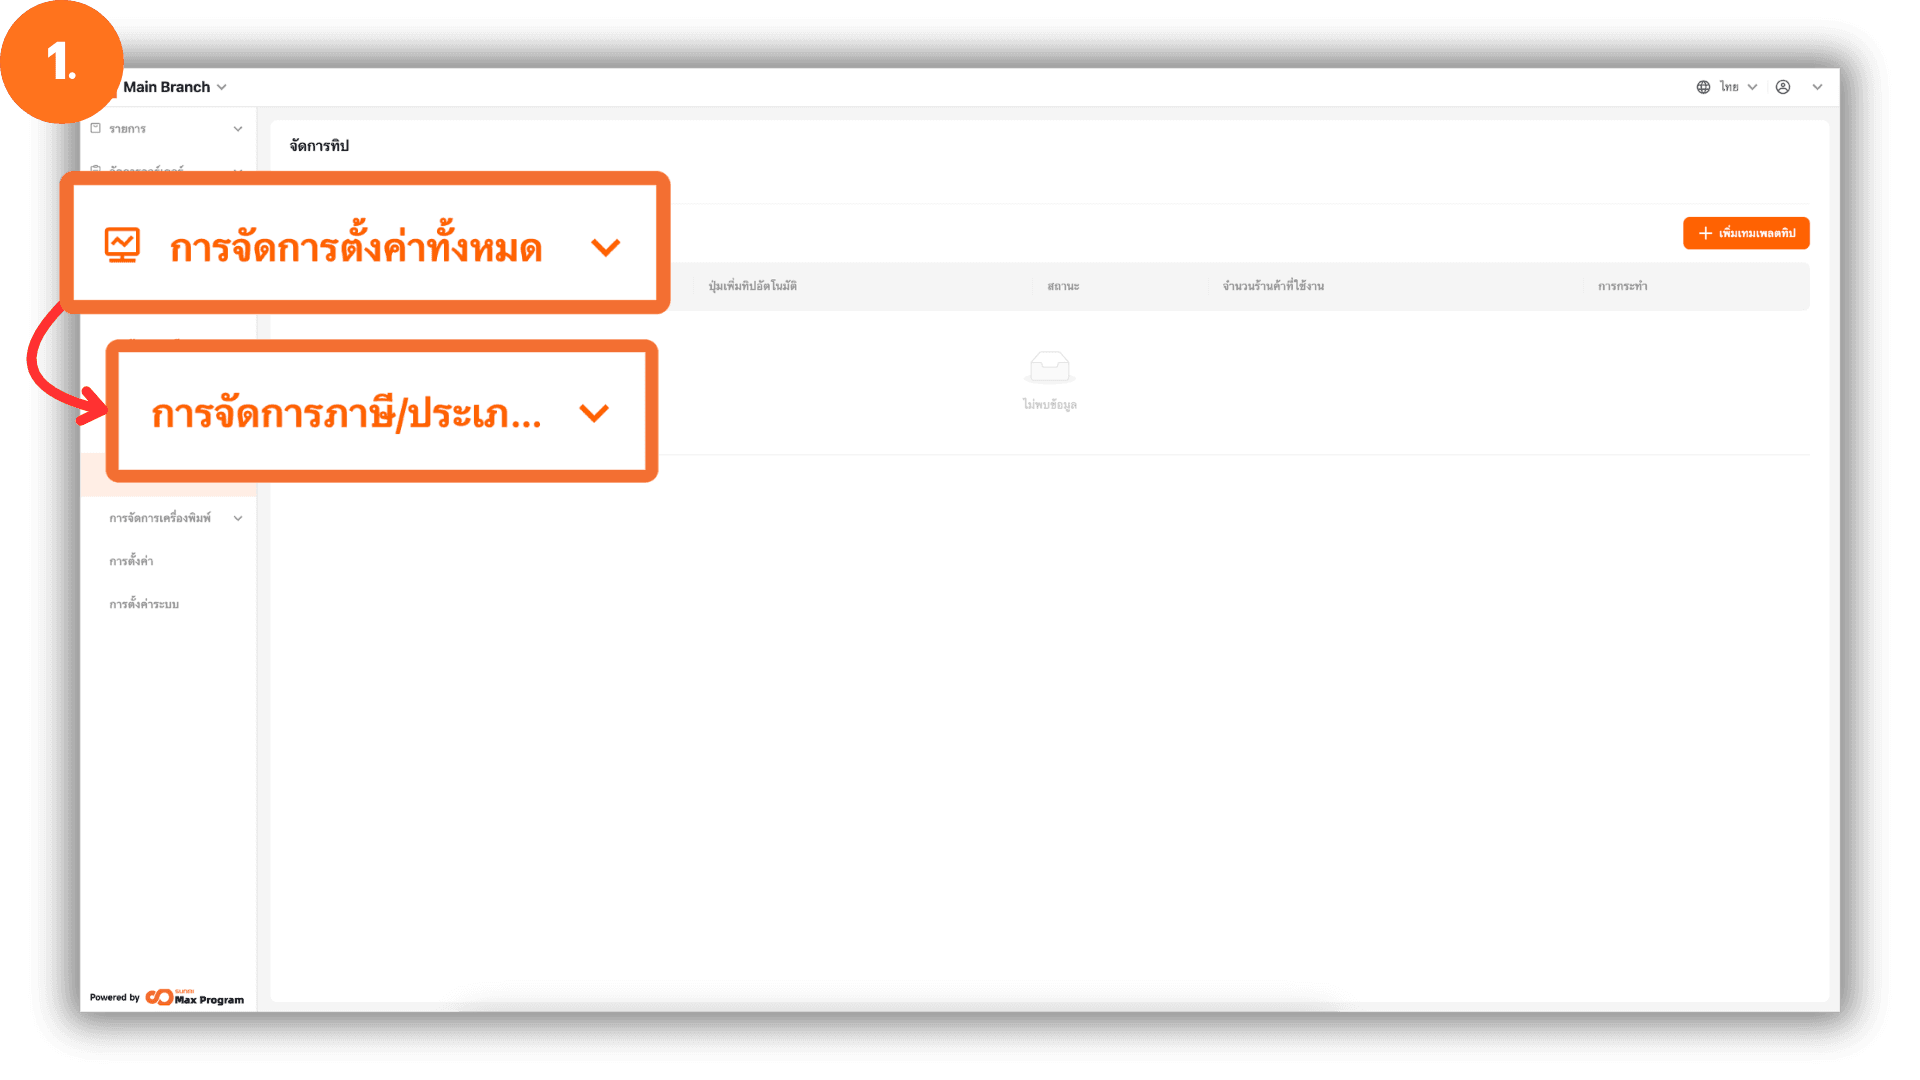
2. Create a New Tip Template
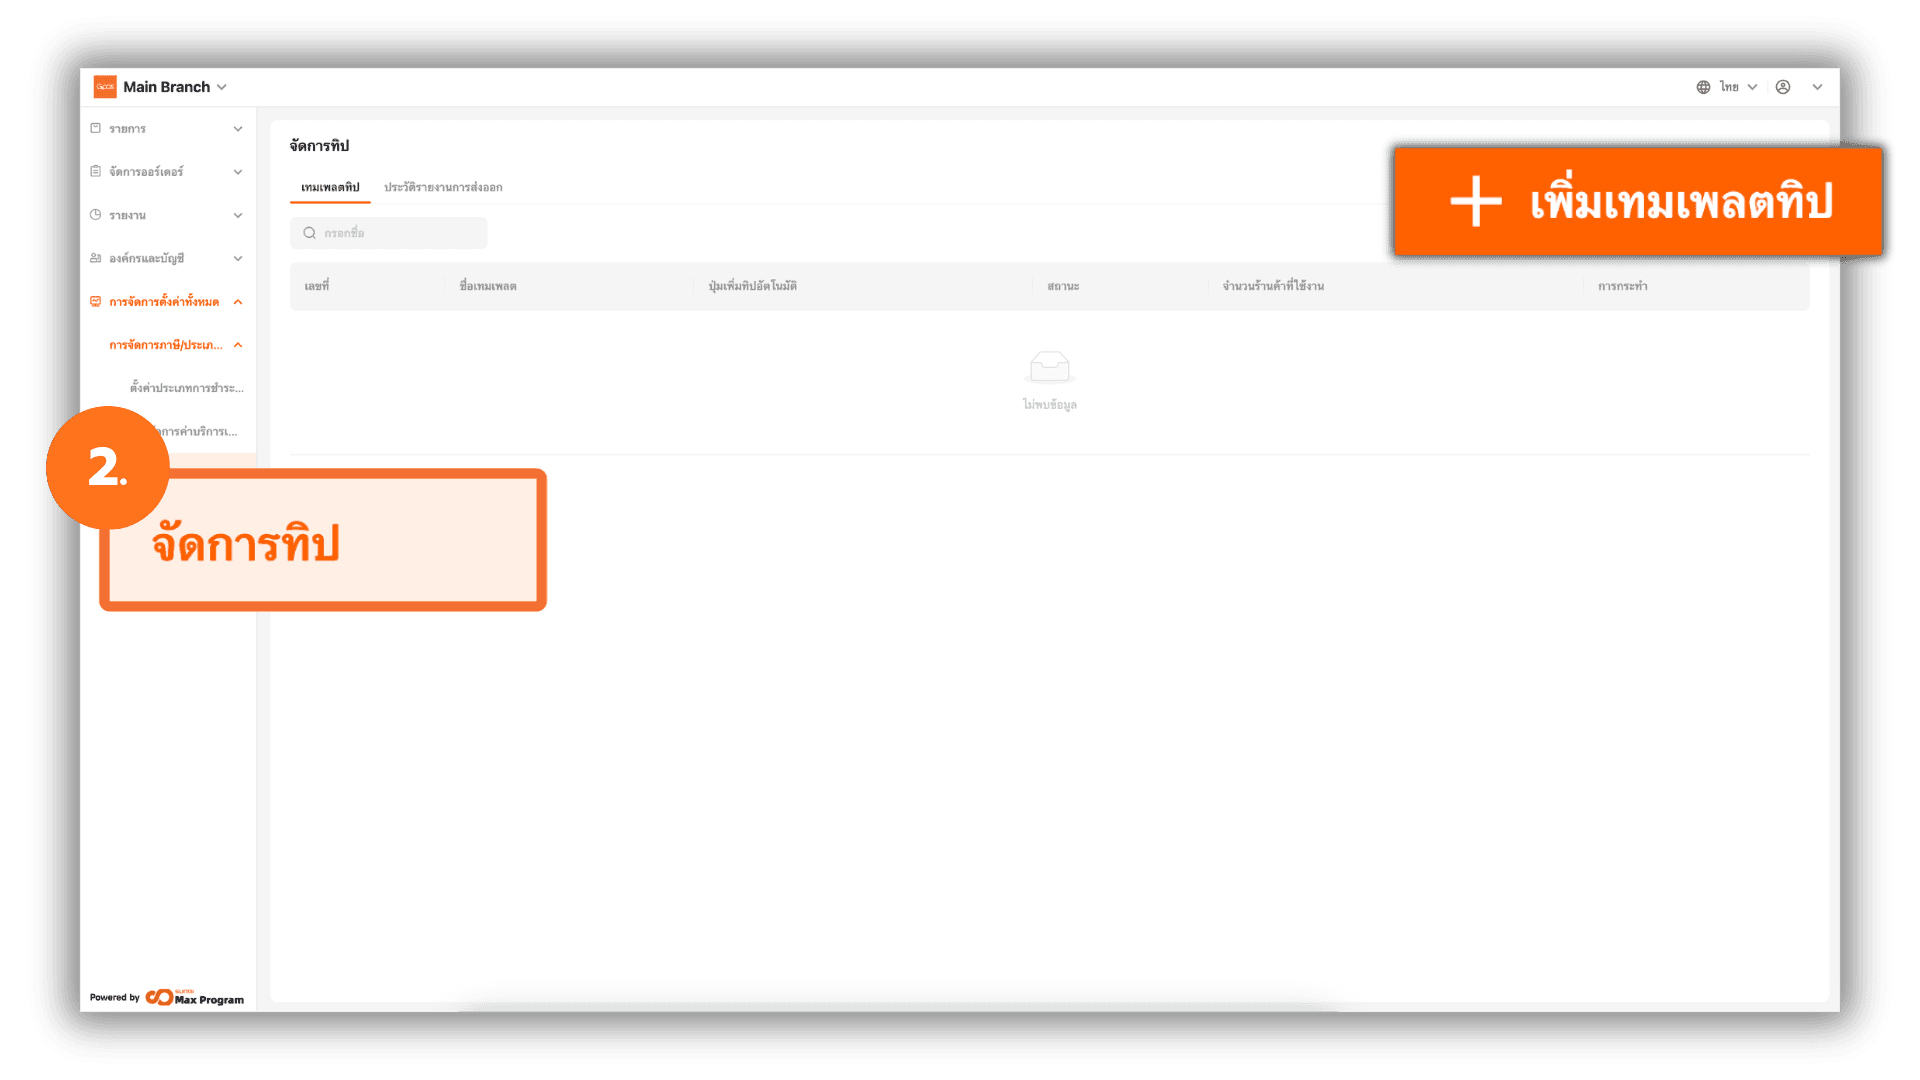
Select the “Tip Management” menu and click the “+ Create” button to start creating a new tip template.
3. Define Tip Template Details
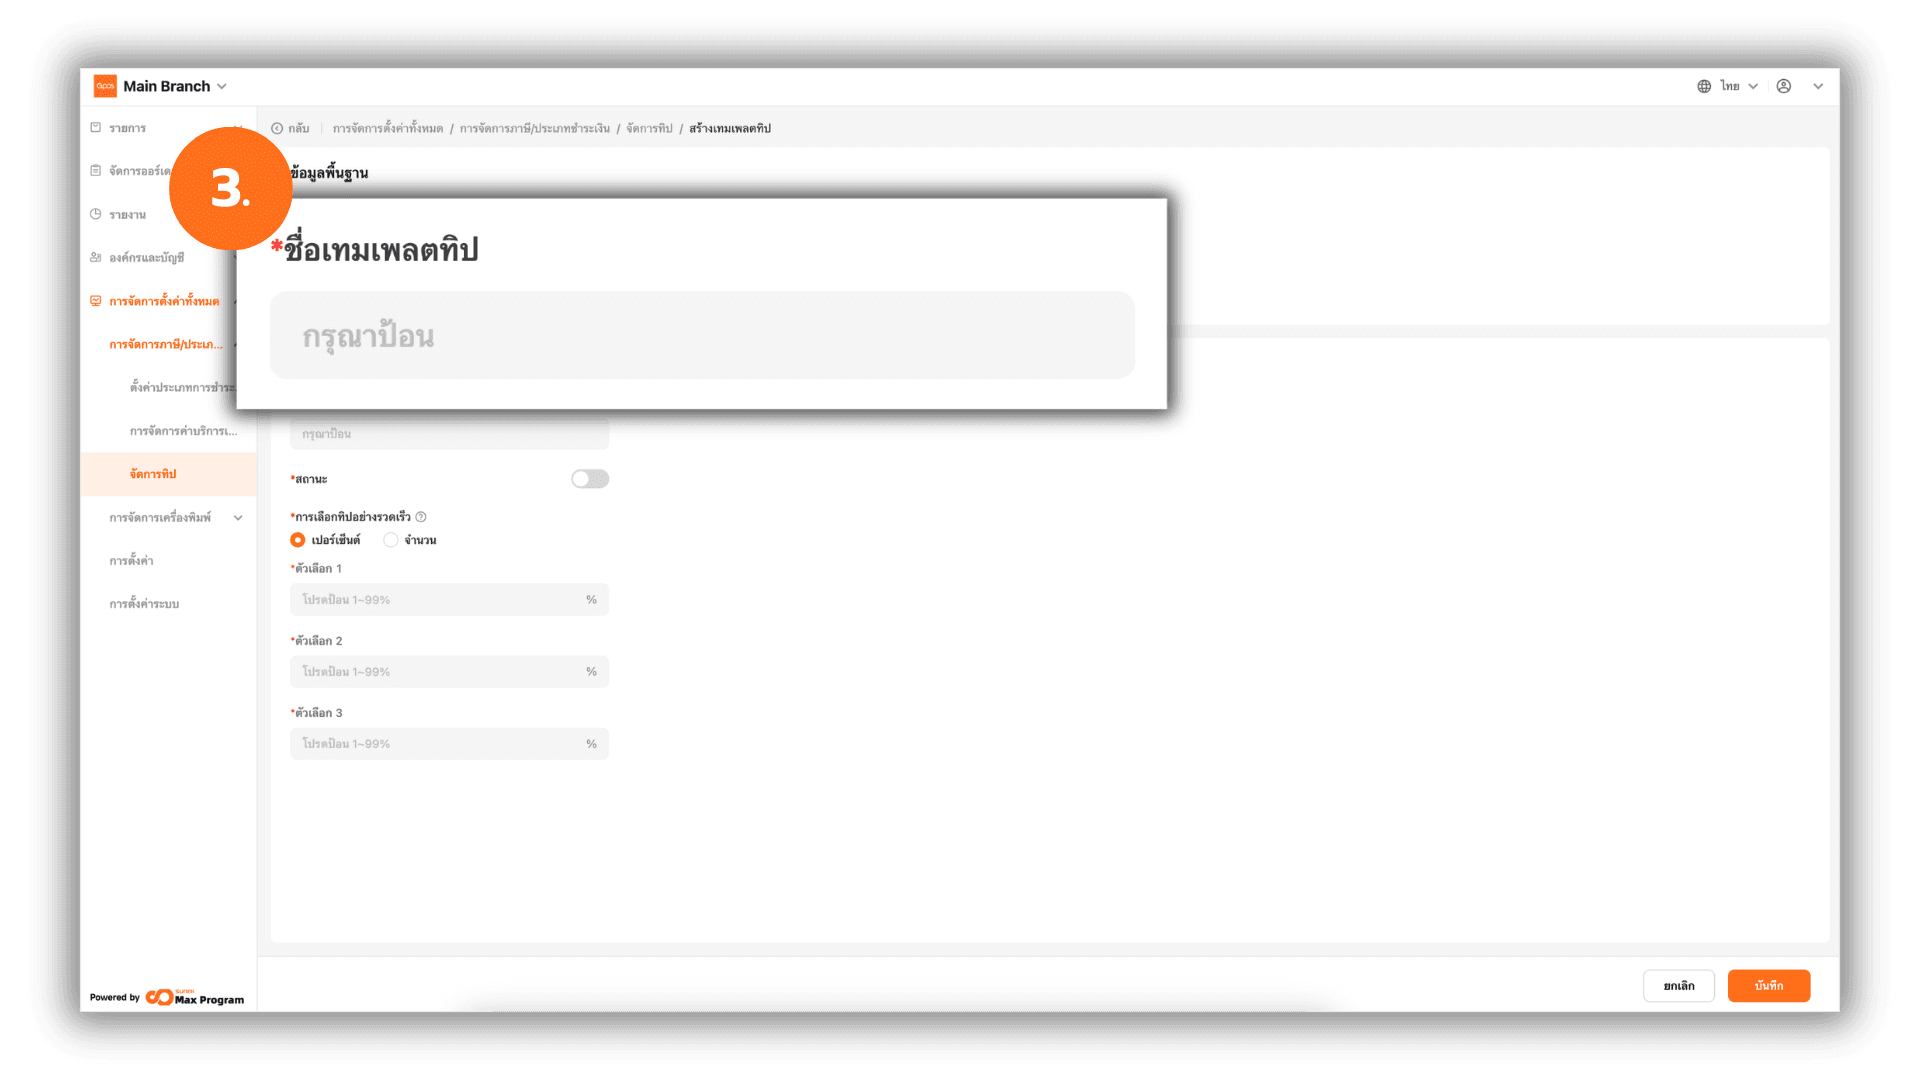
When entering the template creation page, the system will display a form for entering details. Enter the desired Tip Template Name.
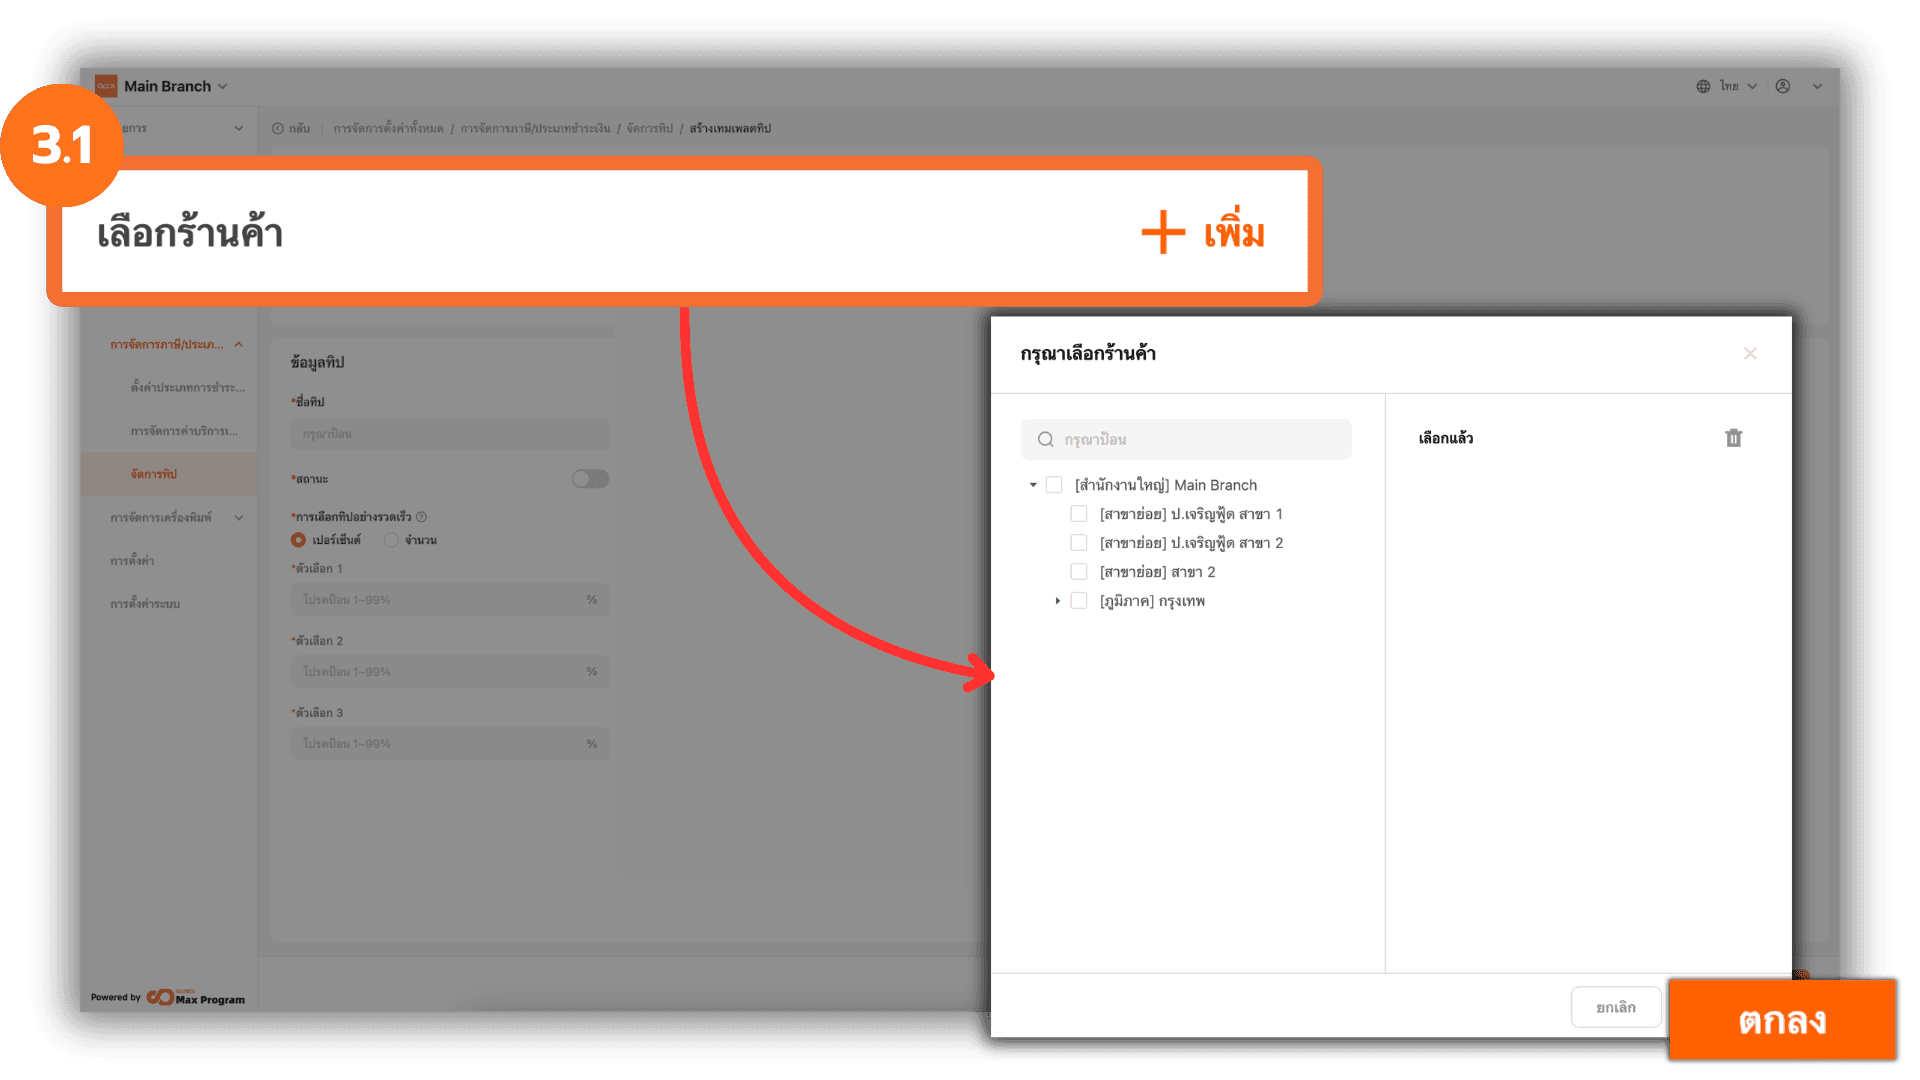
3.1 Select Store Branches
Click “+ Add” next to the store selection section. The system will display a list of store branches. Select the desired store branches and click “Ok” to proceed.
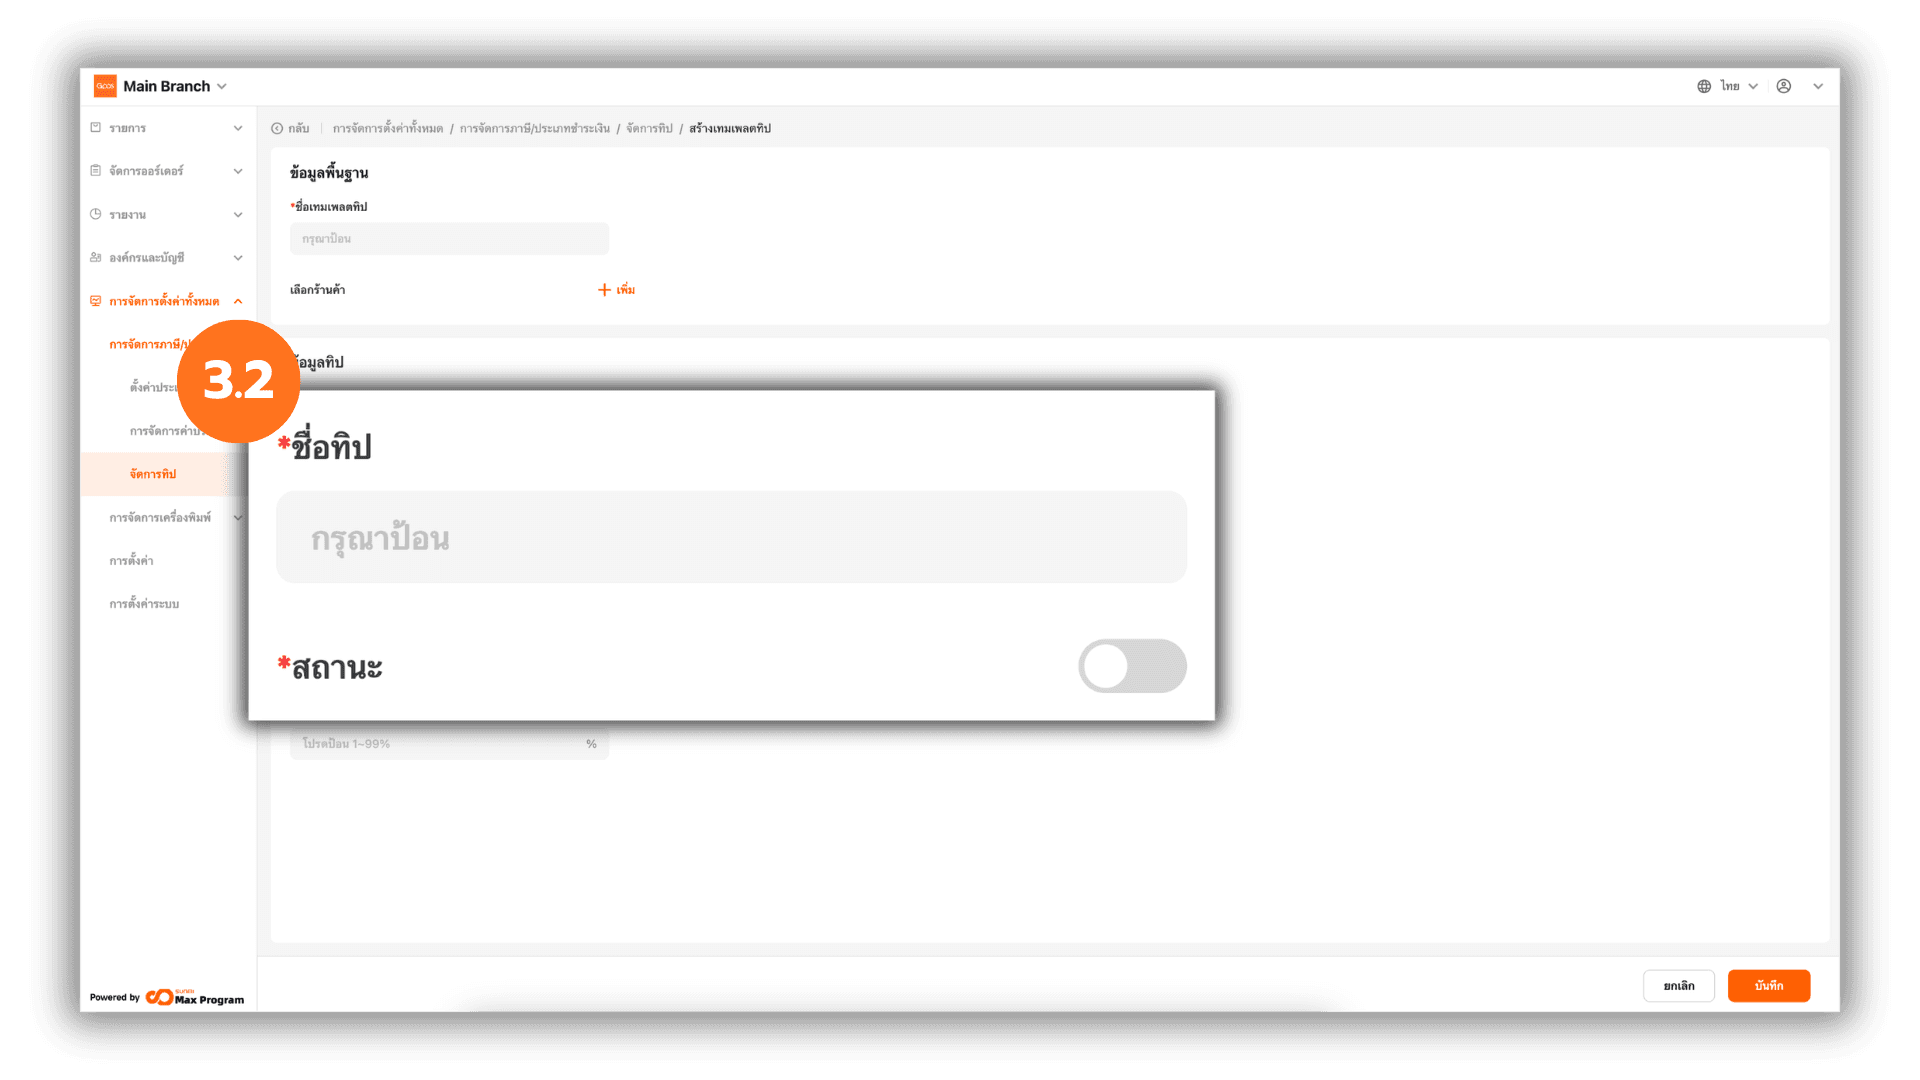
3.2 Configure Tip Information
Specify the Tip Name and set the usage status by selecting Enable or Disable for the tip being created.
Note : If any information is edited or the usage status is changed (enabled/disabled), you must export the tip template to update the information at the selected store branches each time.
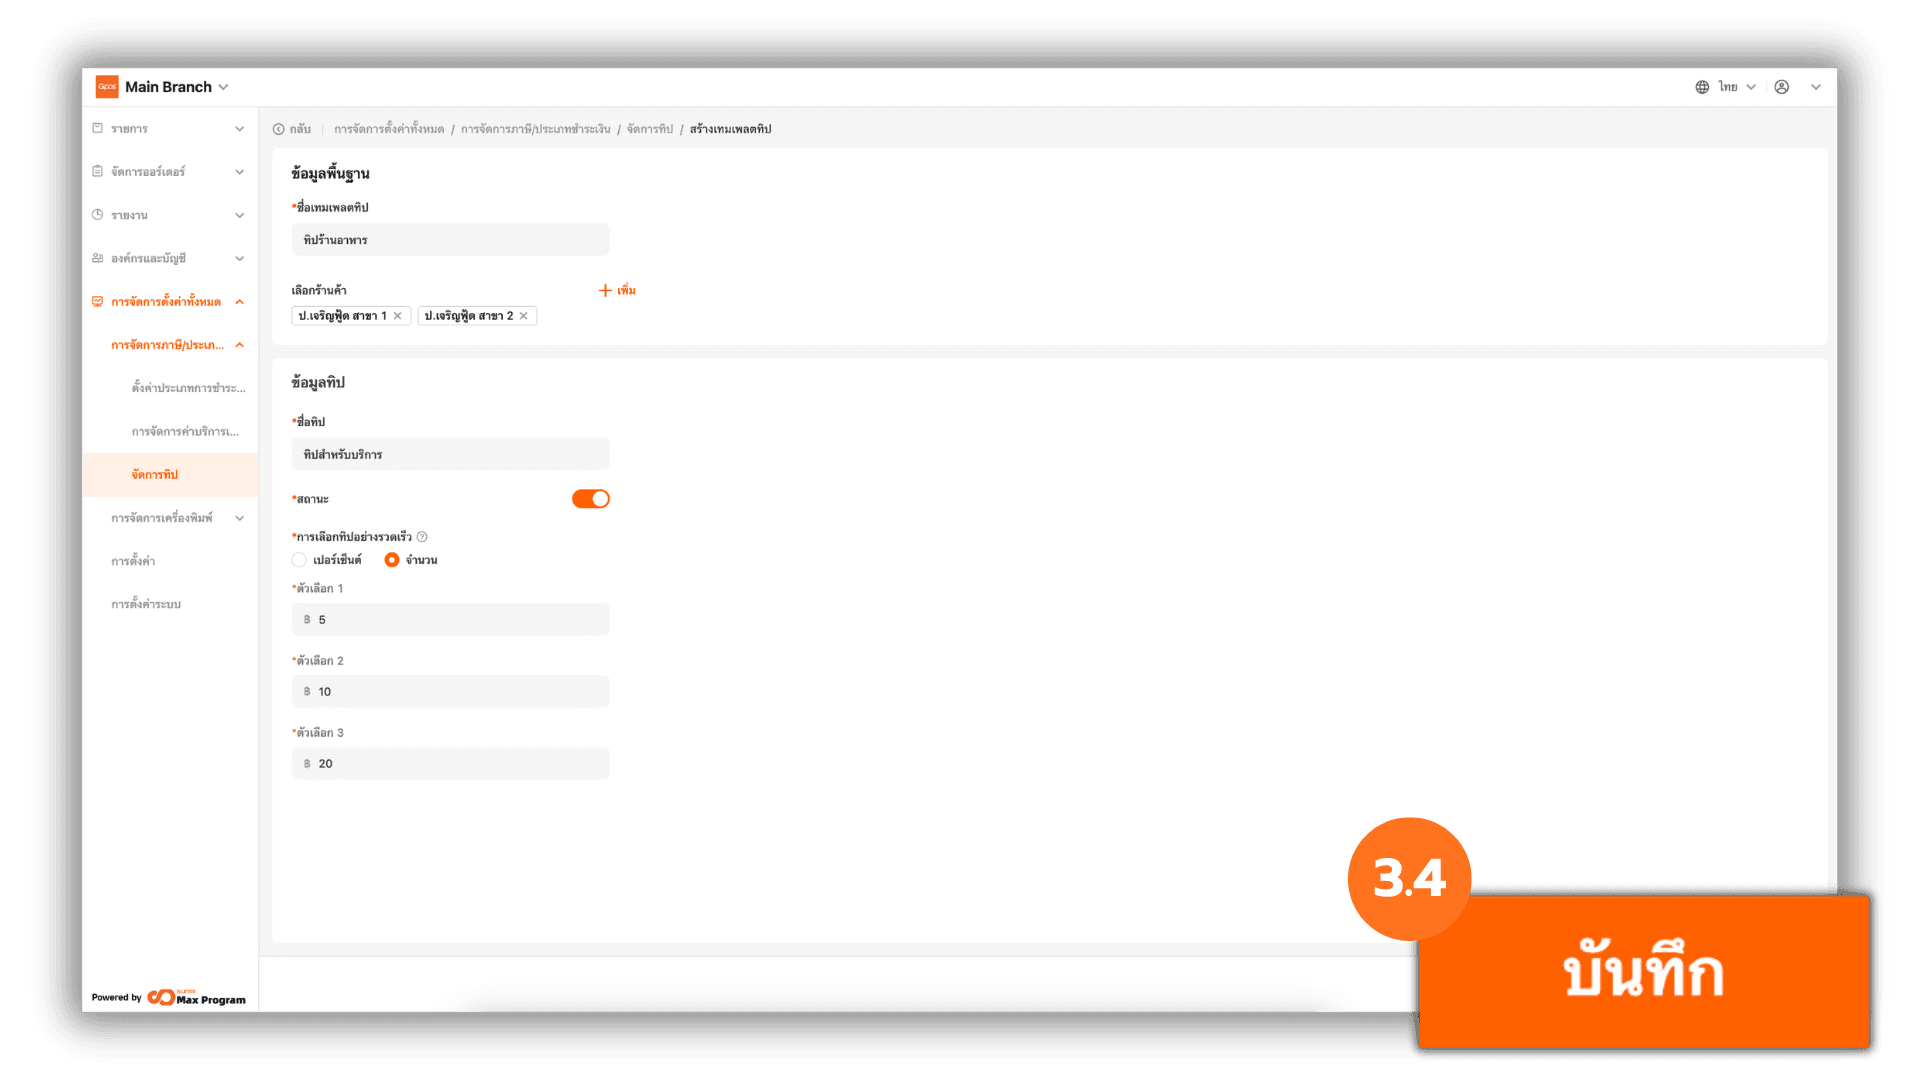
3.3 Set Quick Tip Options
The system supports two tip formats Percentage (%) or Amount (THB). You can define three tip rate levels according to the selected format.

3.4 Review and Save
Carefully review all information to ensure accuracy and completeness. Click “Save” to confirm and create the tip template.
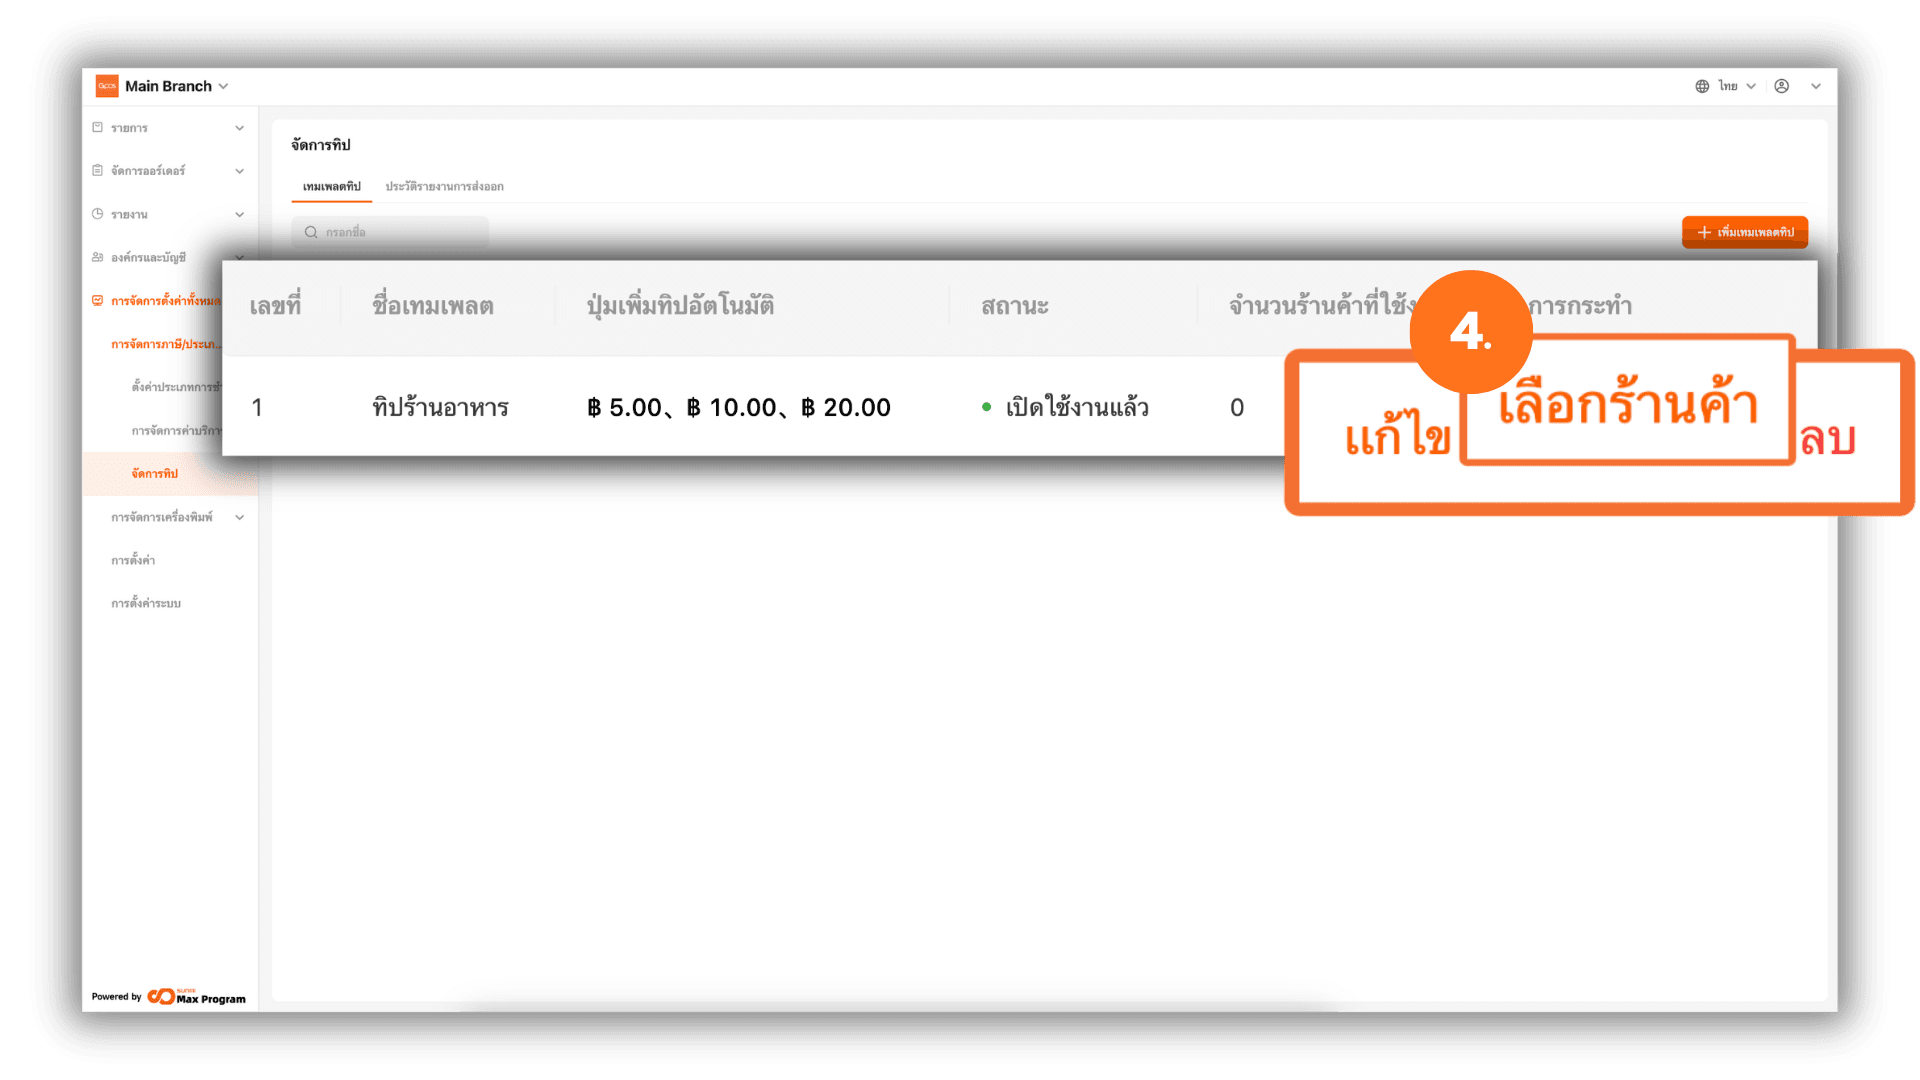
4. Manage and Export Tip Templates to Store Branches
After saving successfully, the system will return to the tip template page and display the created template. You can perform the following additional actions :
- Edit – Modify template details
- Distribute – Assign and confirm template export
- Delete – Remove the created template
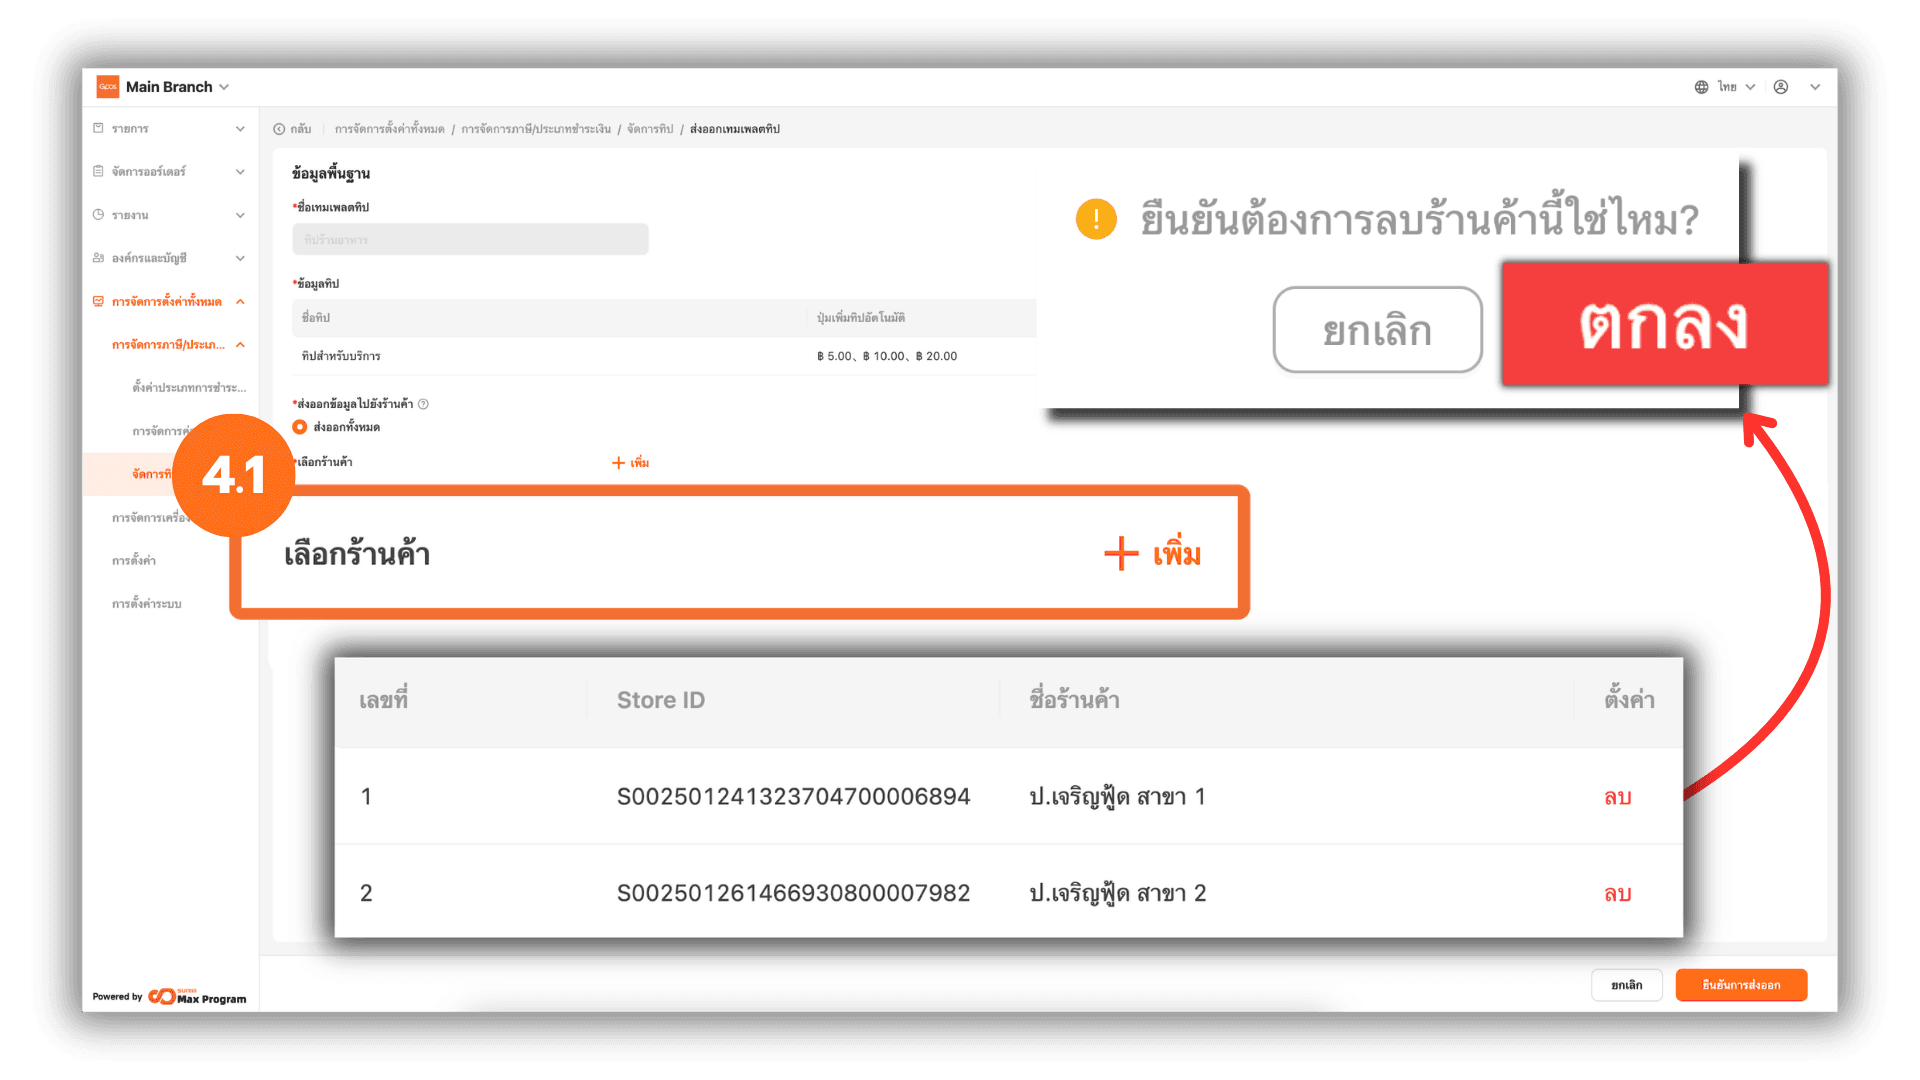
4.1 Manage Stores Before Exporting
Click “Distribute.” The system will display the template details again. You can click “+ Add” to add more store branches or click “Remove” to delete selected store branches.
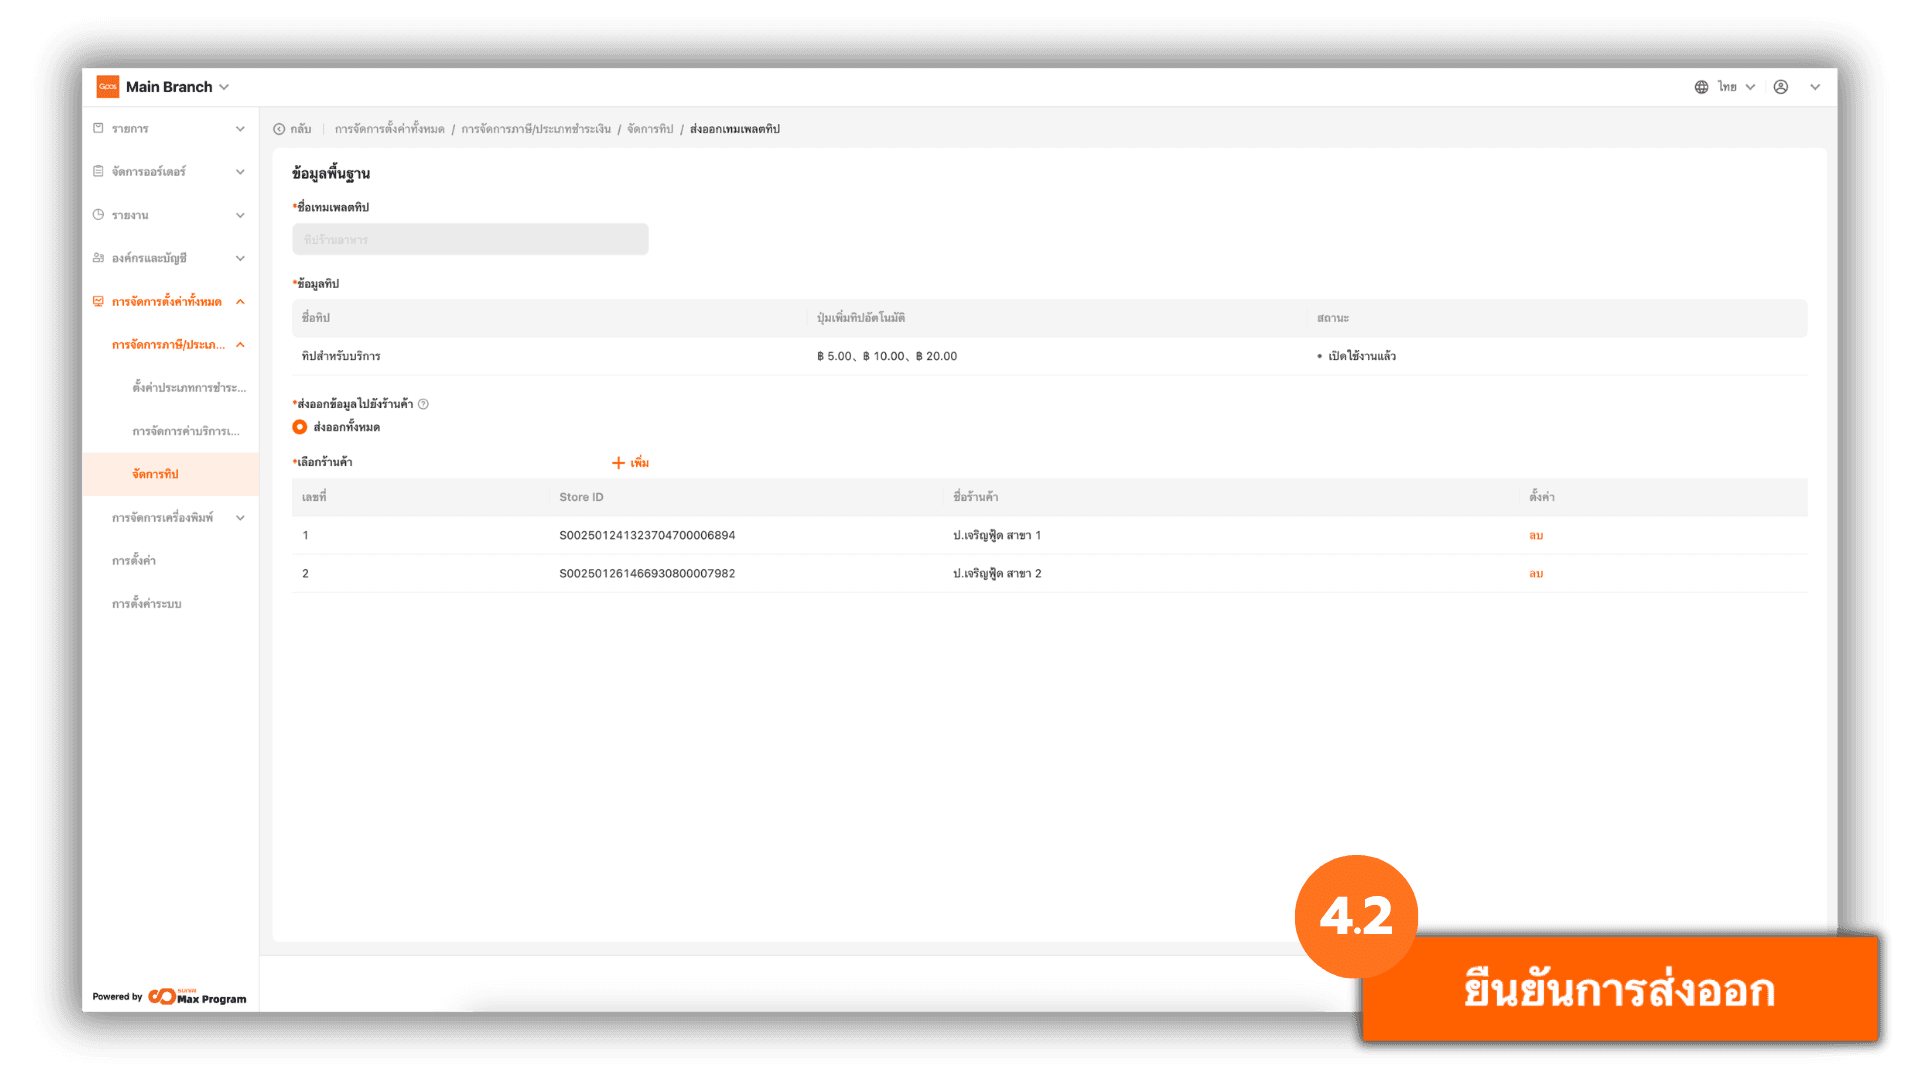
4.2 Confirm Export
Click “Confirm distribution” to export the template to the selected store branches.
4.3 Check Export Status
The system will display the status “Successful” once the process is completed.
You can click “X” to close the window or click “View History” to review past export details.
