Creating Kitchen Printers and Exporting to Store Branches
2026-02-23 11:31
Creating kitchen printers and exporting them to store branches helps organize order management more systematically, reduces communication errors between the front counter and the kitchen, and ensures a standardized print format across all branches. It also increases speed and efficiency in customer service.
1. Log in to the Back Office System
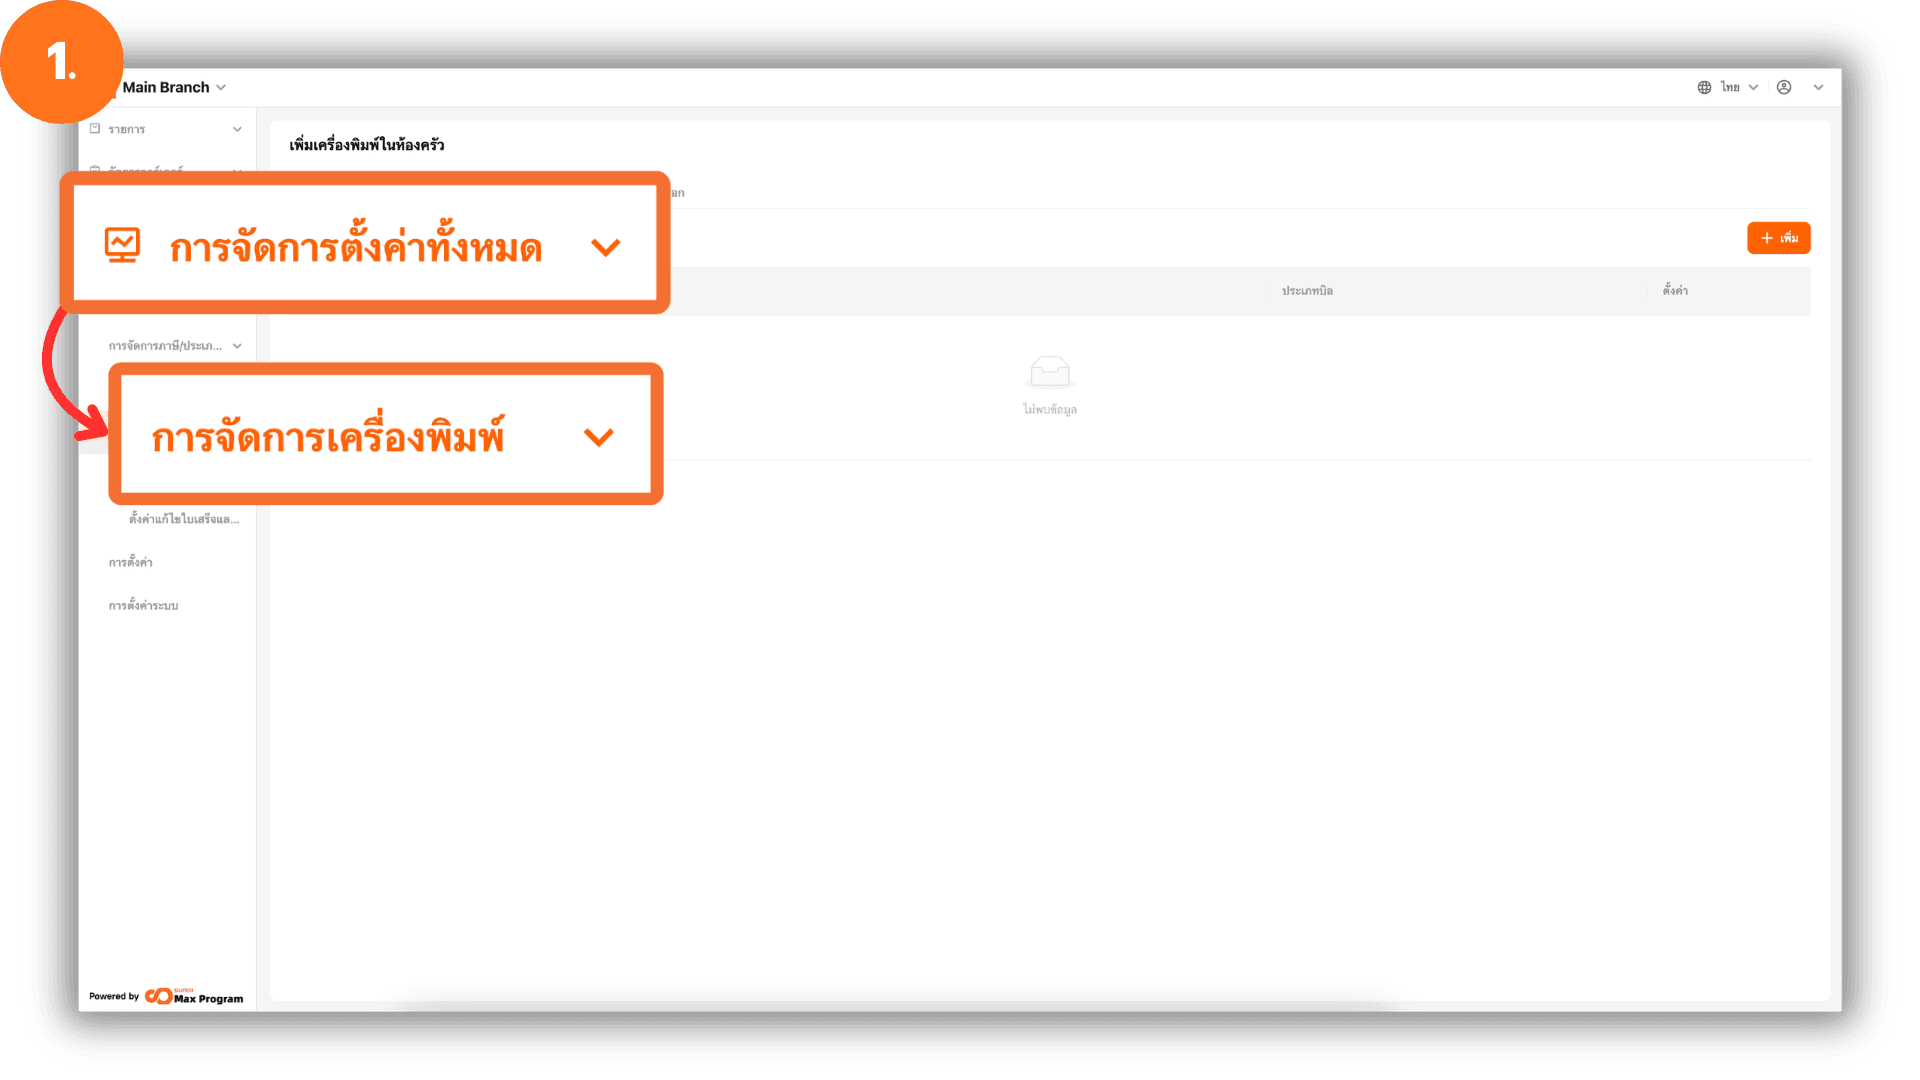
Go to the website login.gpos.co.th, enter your email and password, and click Log In. Once logged in successfully, select Head Office, then go to the menu “Store Management” and choose “Print Management.”
2. Add a Kitchen Printer
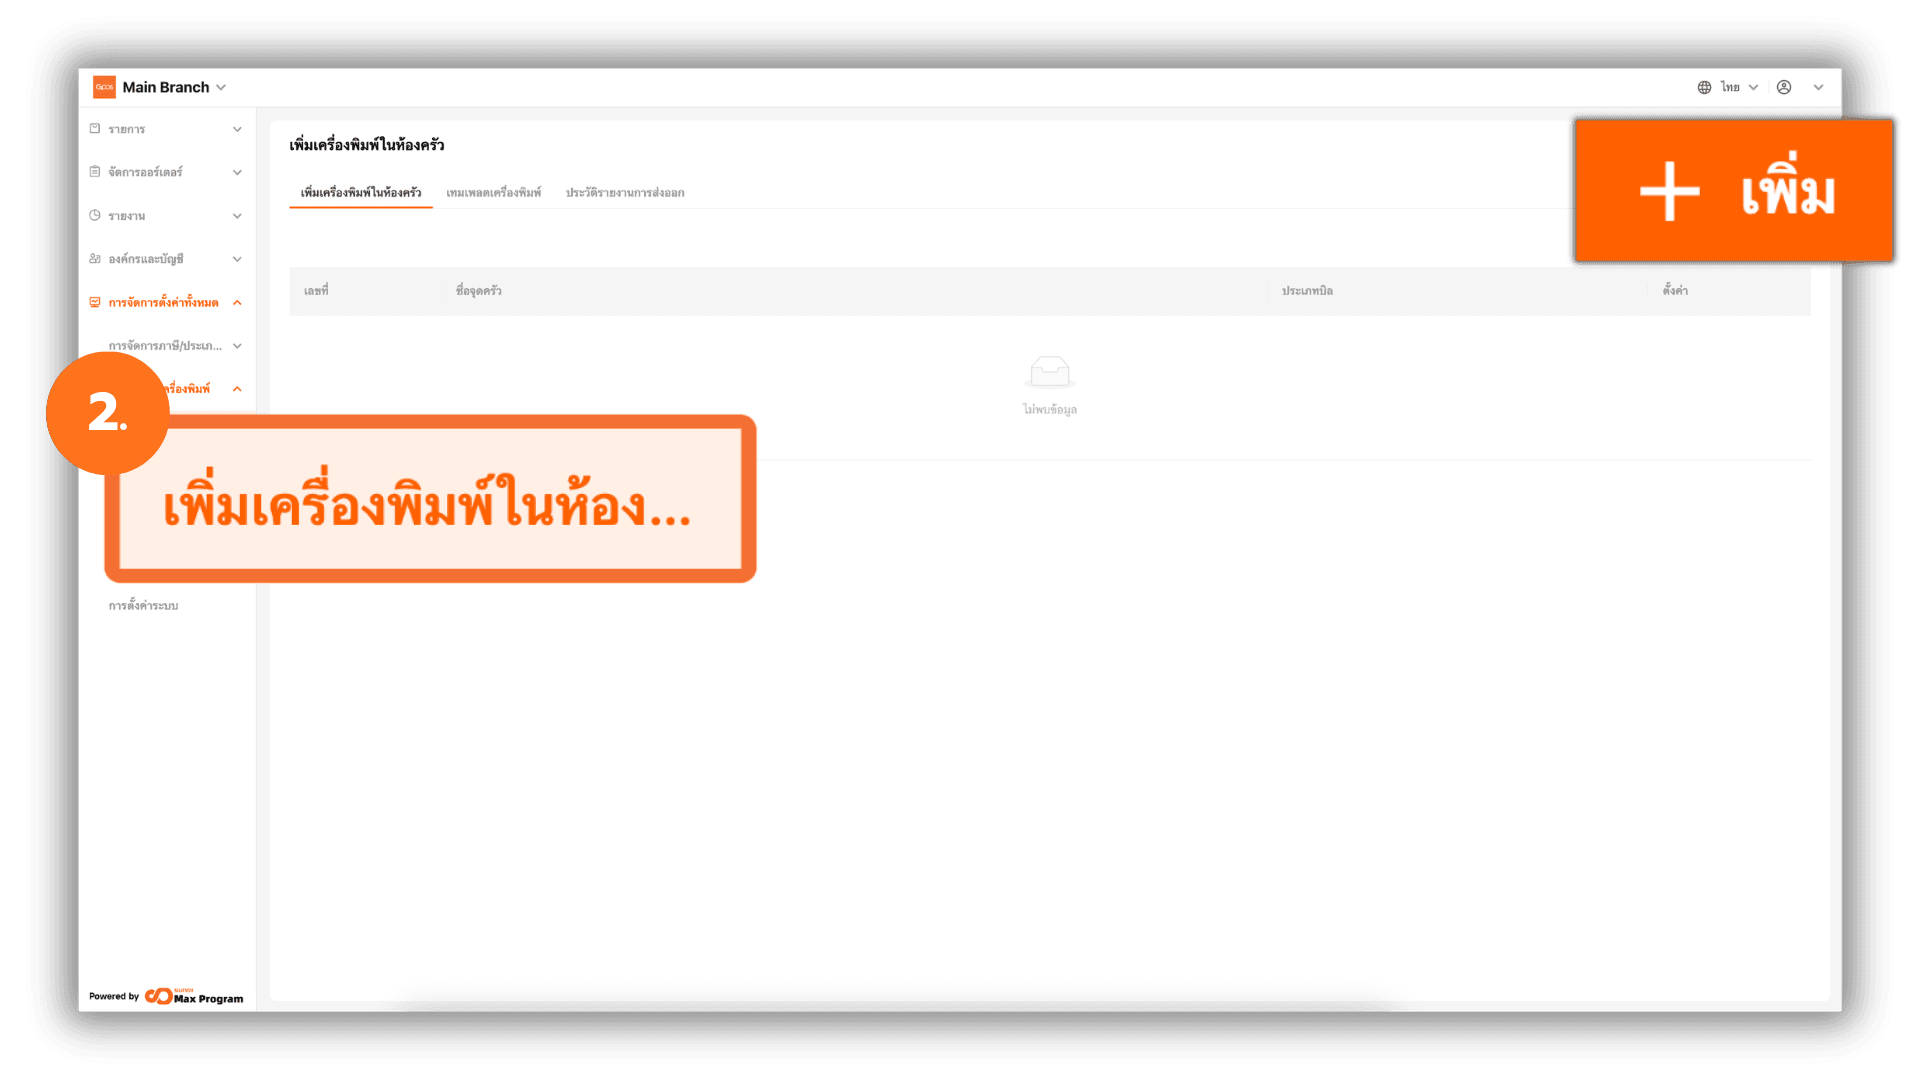
Select the menu “Kitchen Sections” and click the “+ Add” button to create a new printer.
3. Enter the Printer Category Name
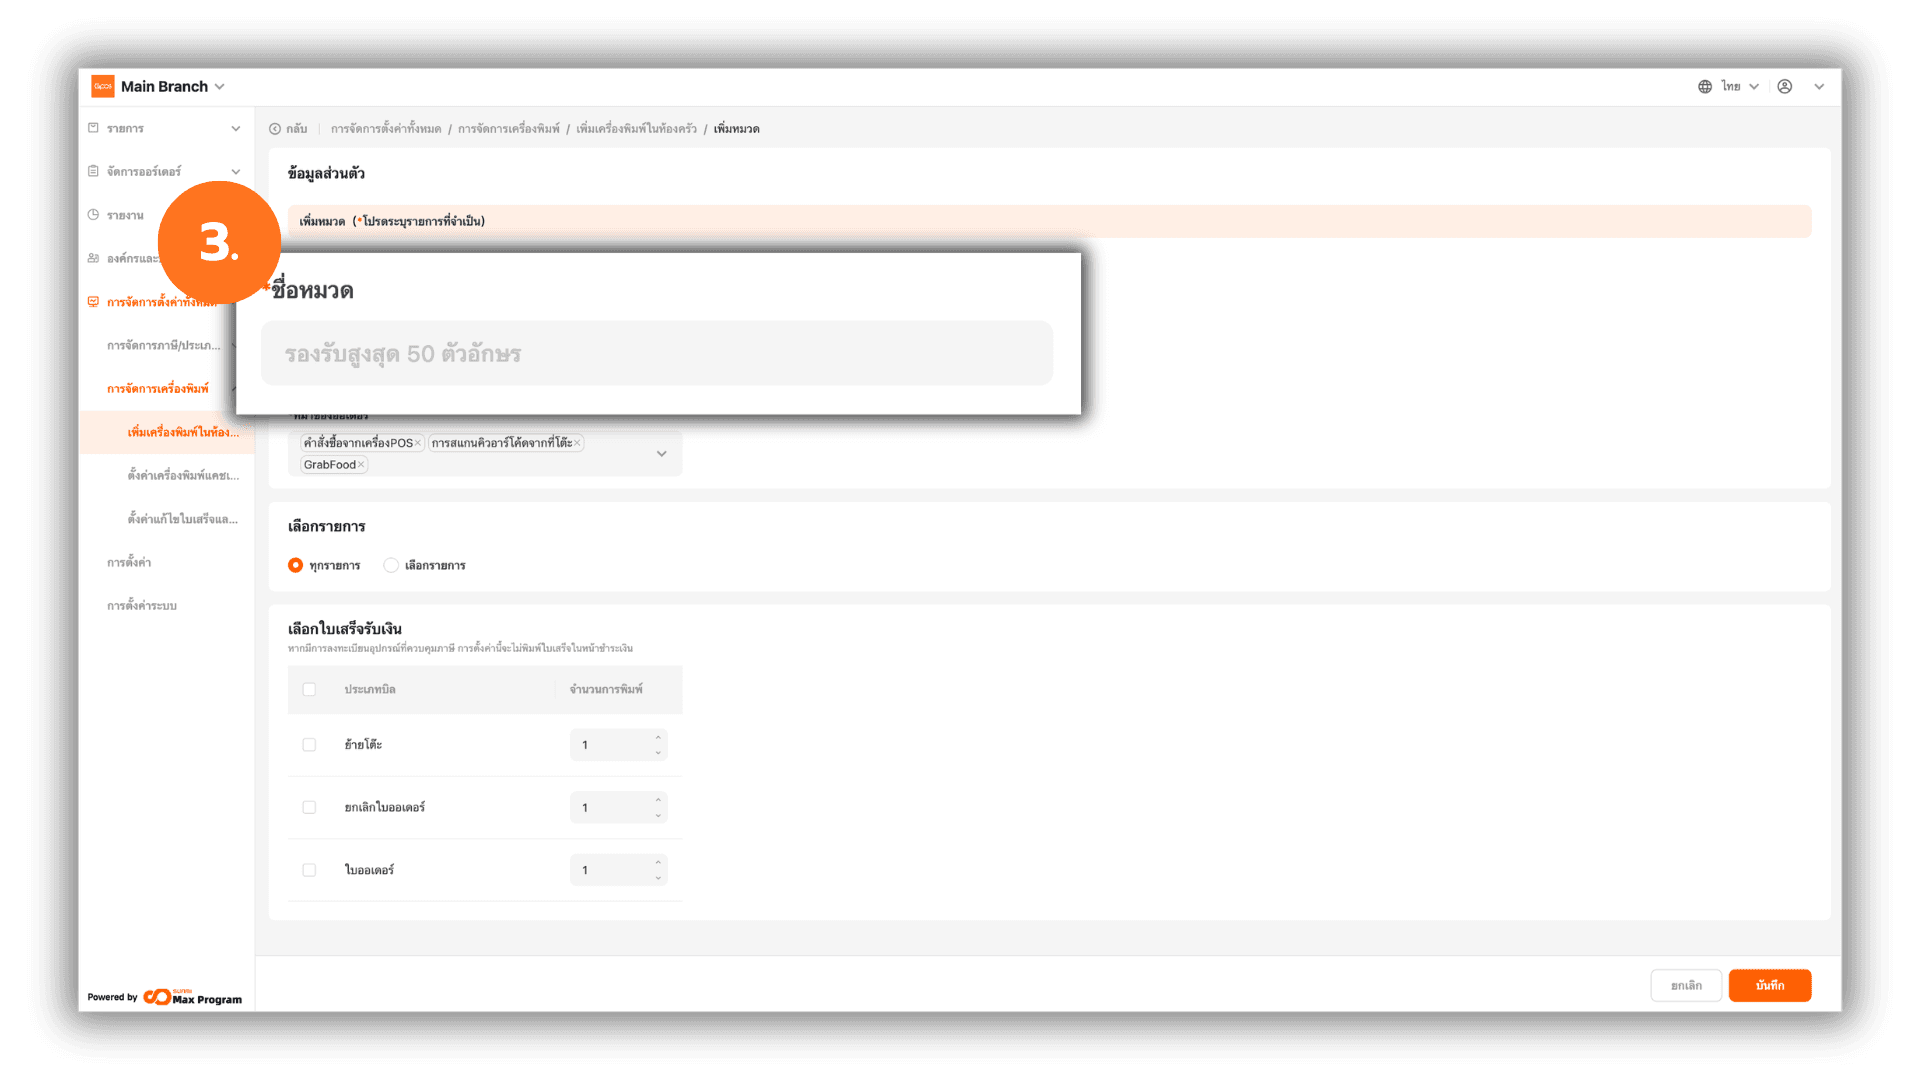
On the kitchen printer creation page, the system will display a basic information form. Enter the Kitchen Section Name of the printer you want to create.
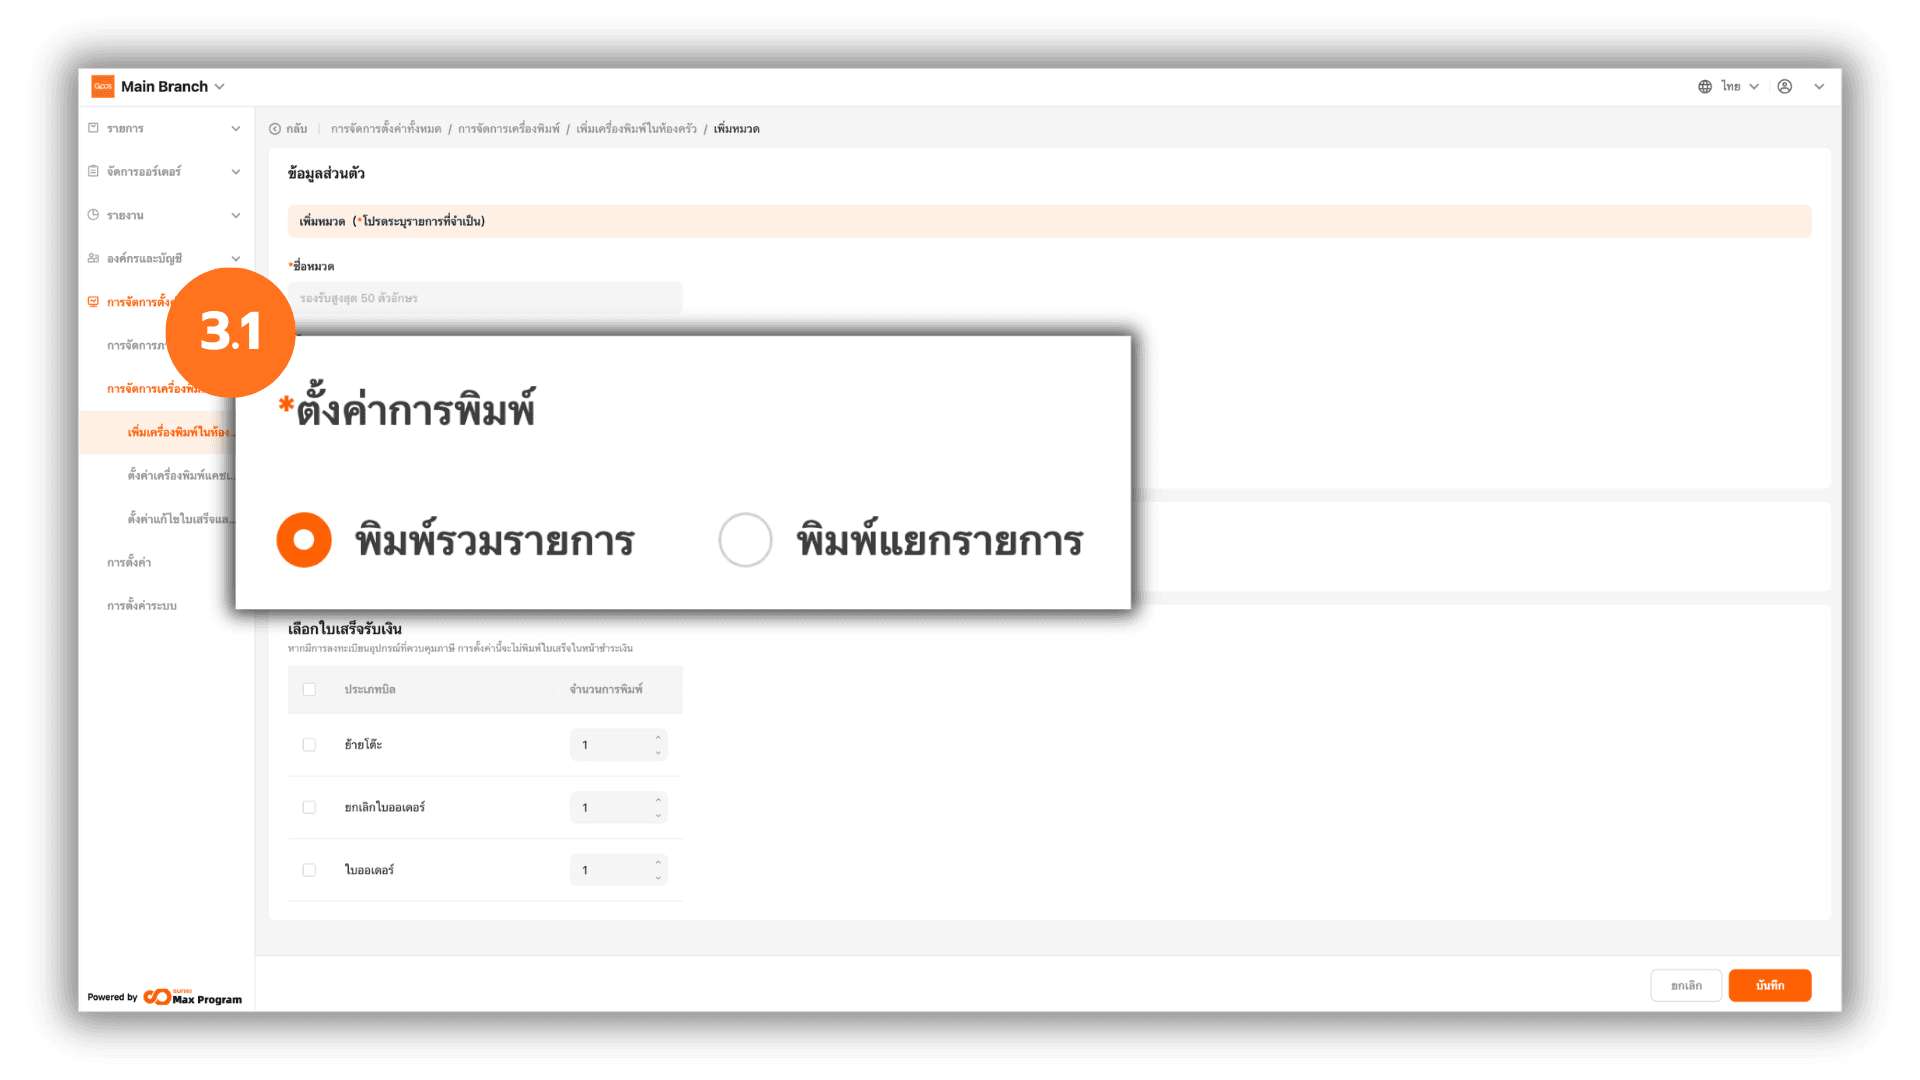
3.1 Printing Format Settings
There are two available printing format options as follows :
- Combine Items – When an order is placed, the system will combine all items into a single order slip.
- Split print – When an order is placed, the system will print each order separately, with one order per print slip.
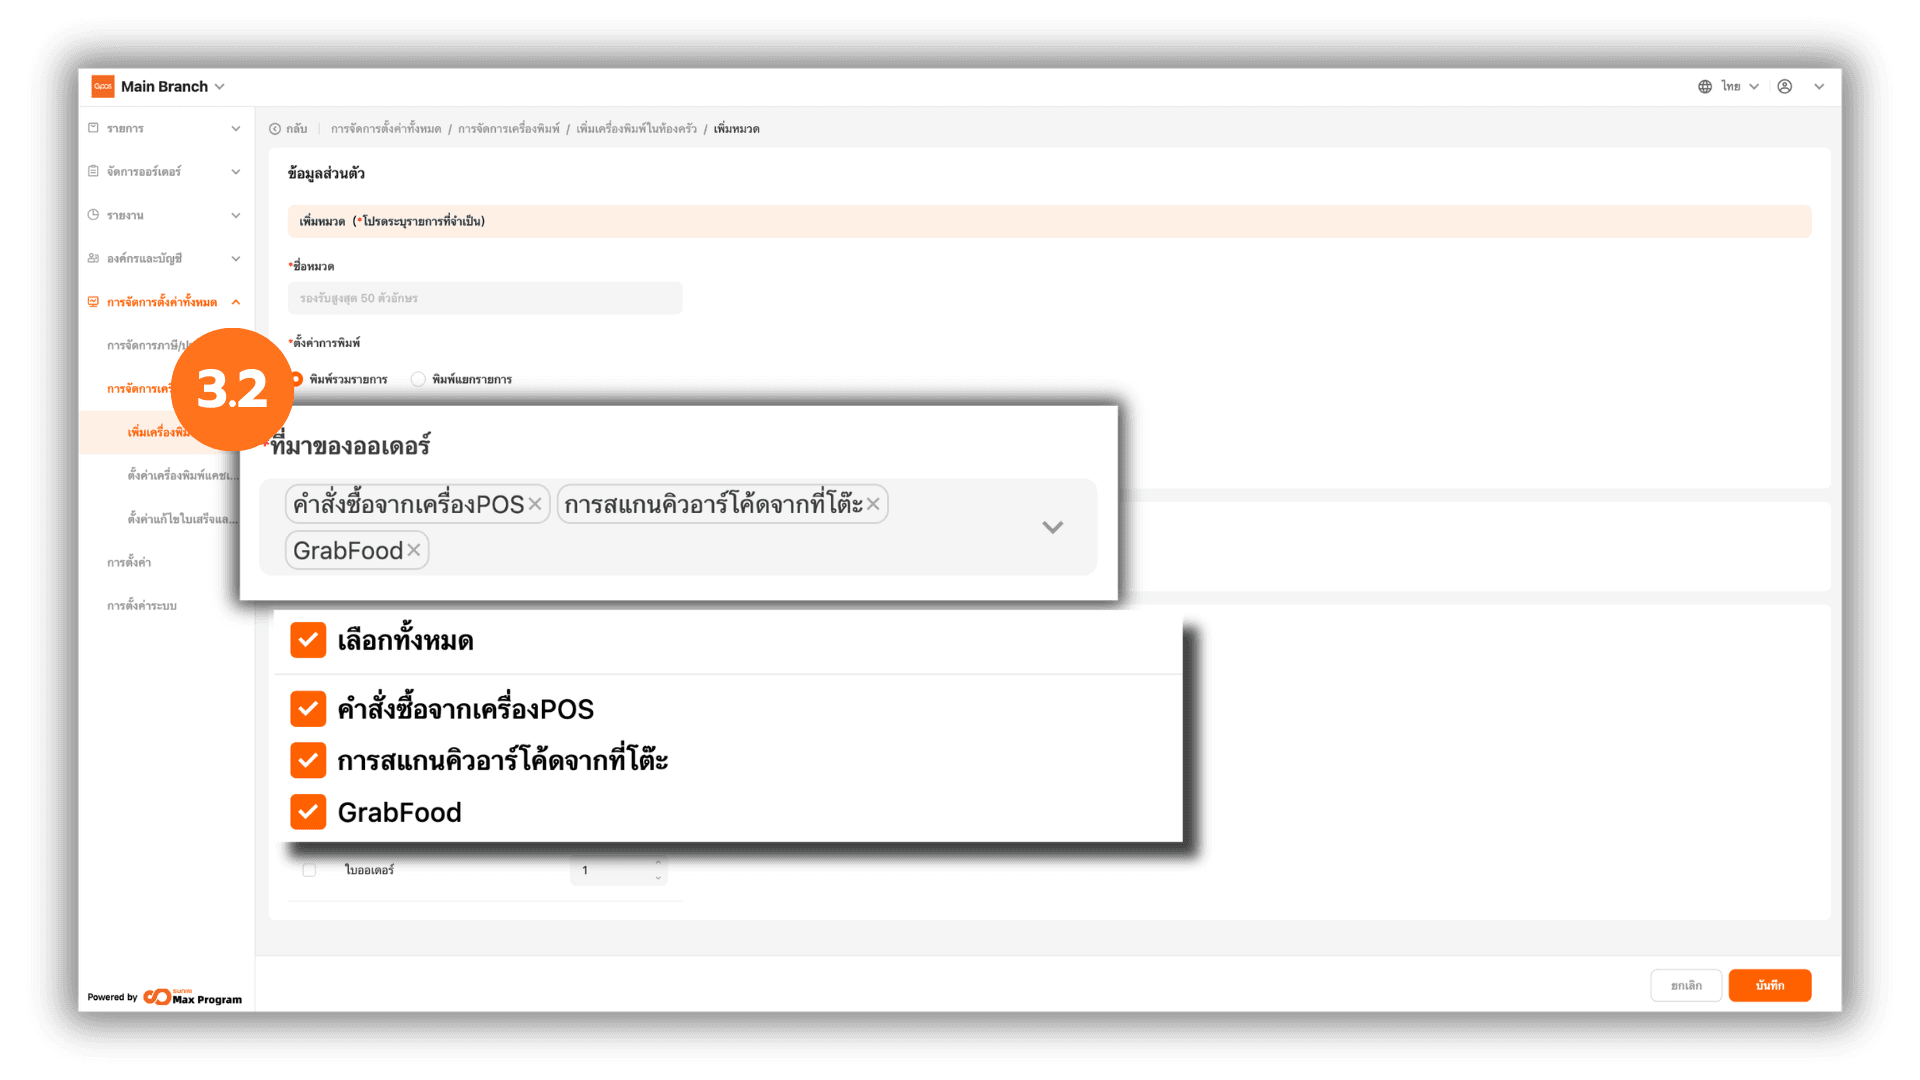
3.2 Set Order Source
The system automatically selects the order source. If you want to change it, click X to remove the current order source and select a new one.
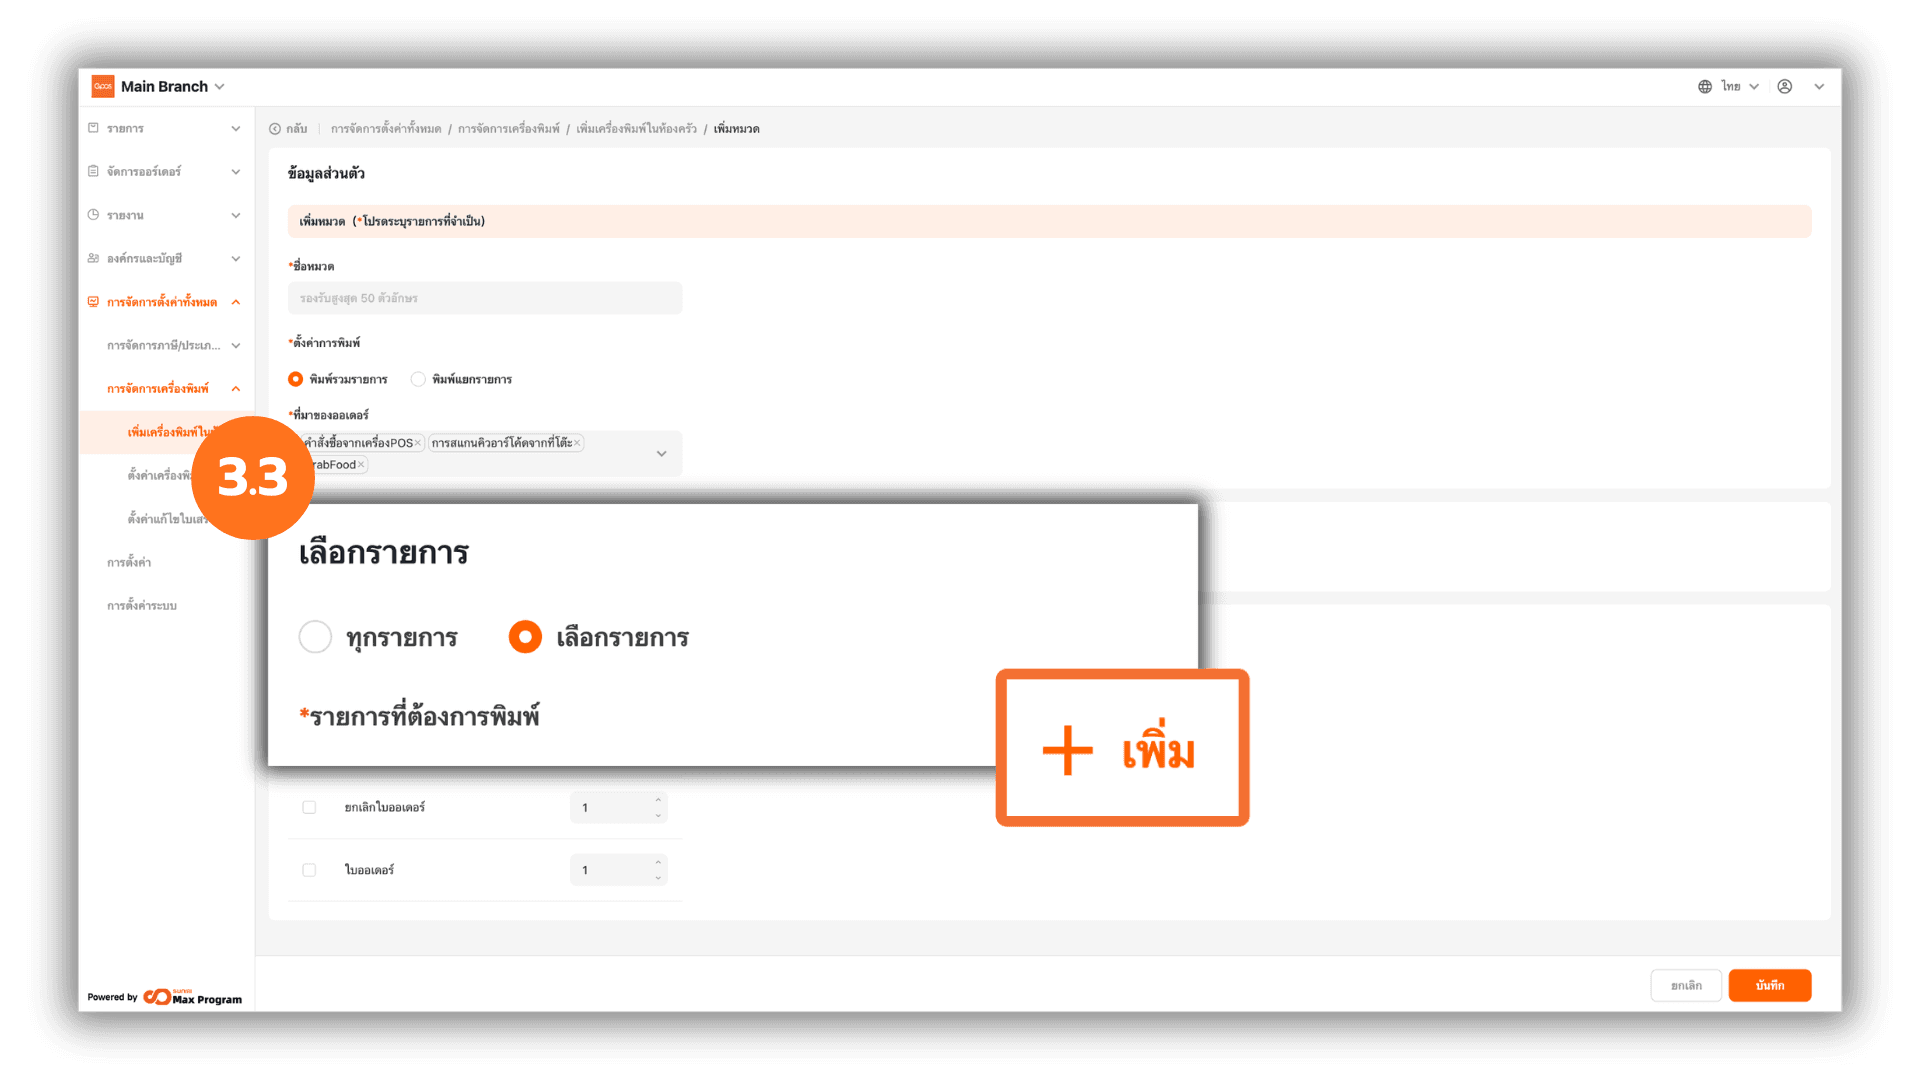
3.3 Select Items to Print
You can choose items to print in two ways :
- All Items – The system will print all menu items available in the store branch.
- Part Items – Choose specific items to print in the store branch. The system will display a “+ Add” button to select items.
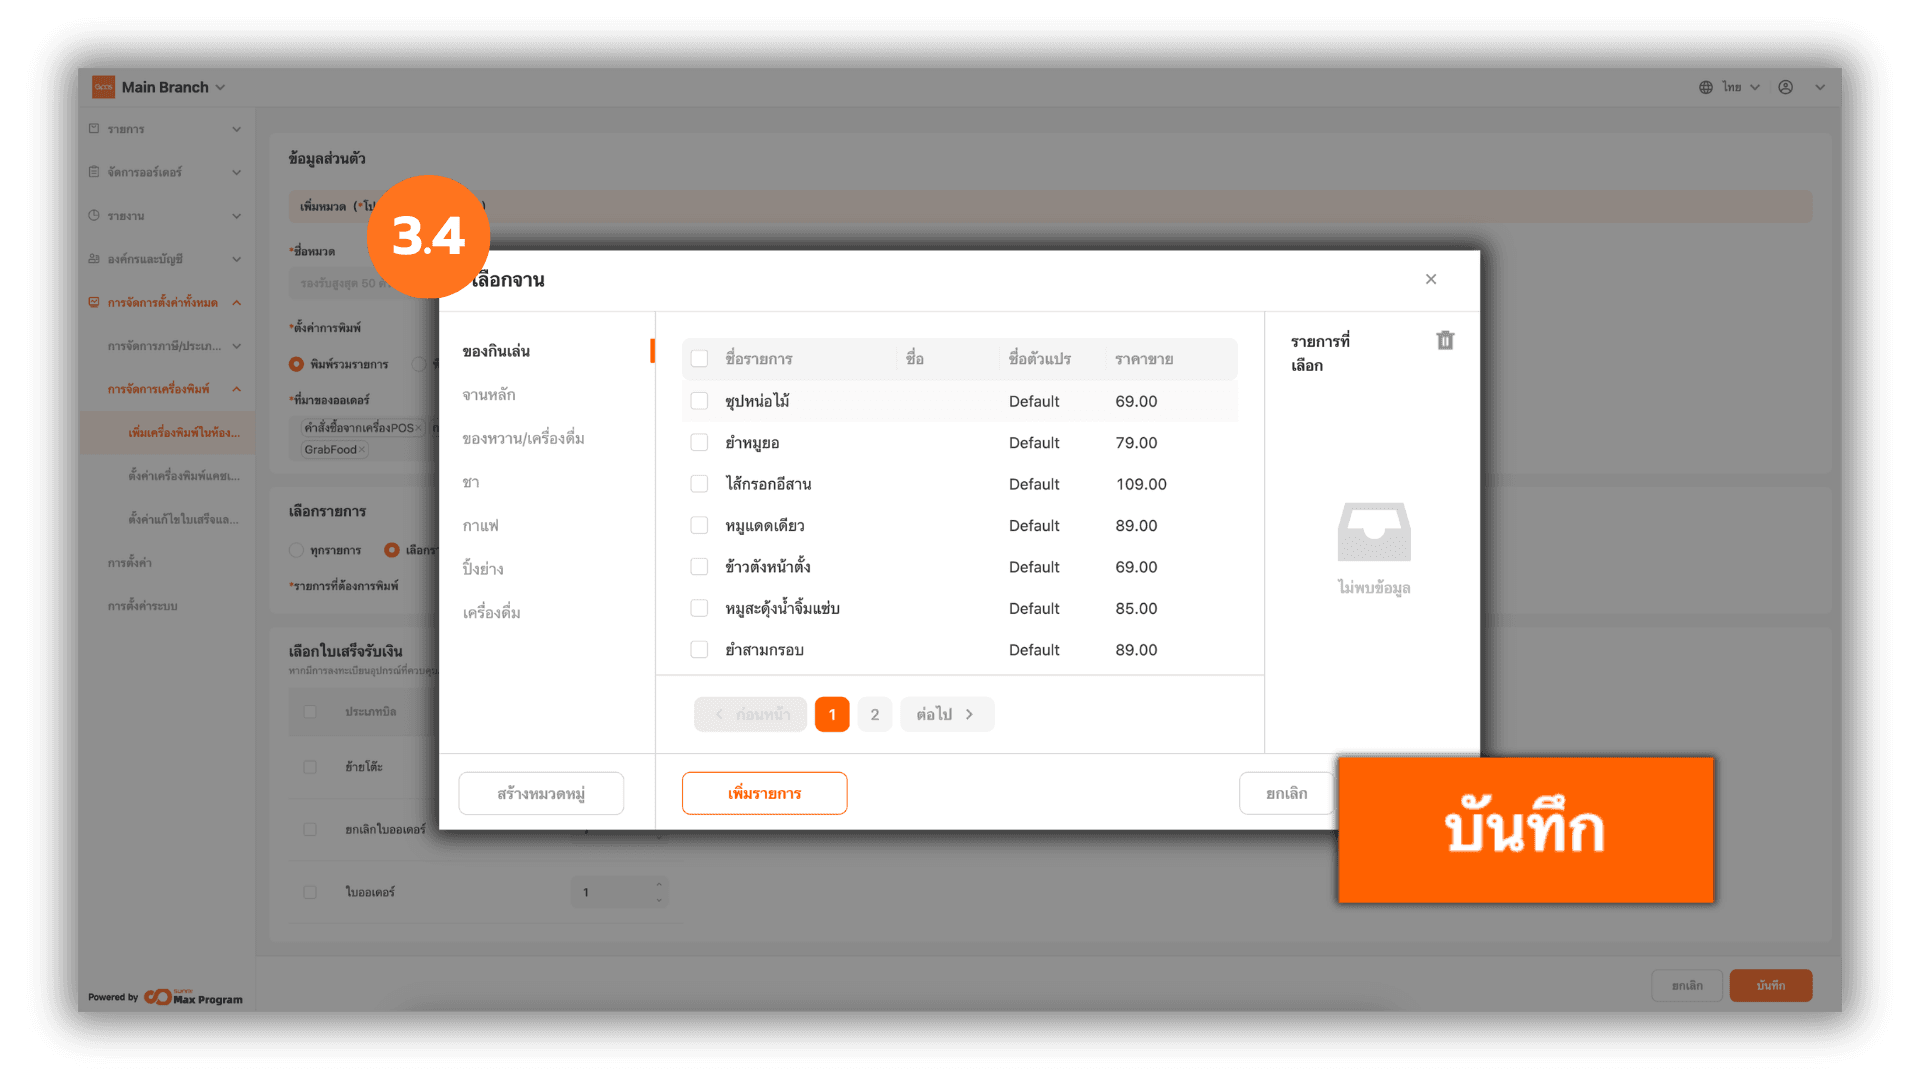
3.4 Steps to Select Items
Click “+ Add” to display the full list of products. Check the items you want and click “Save” to confirm.
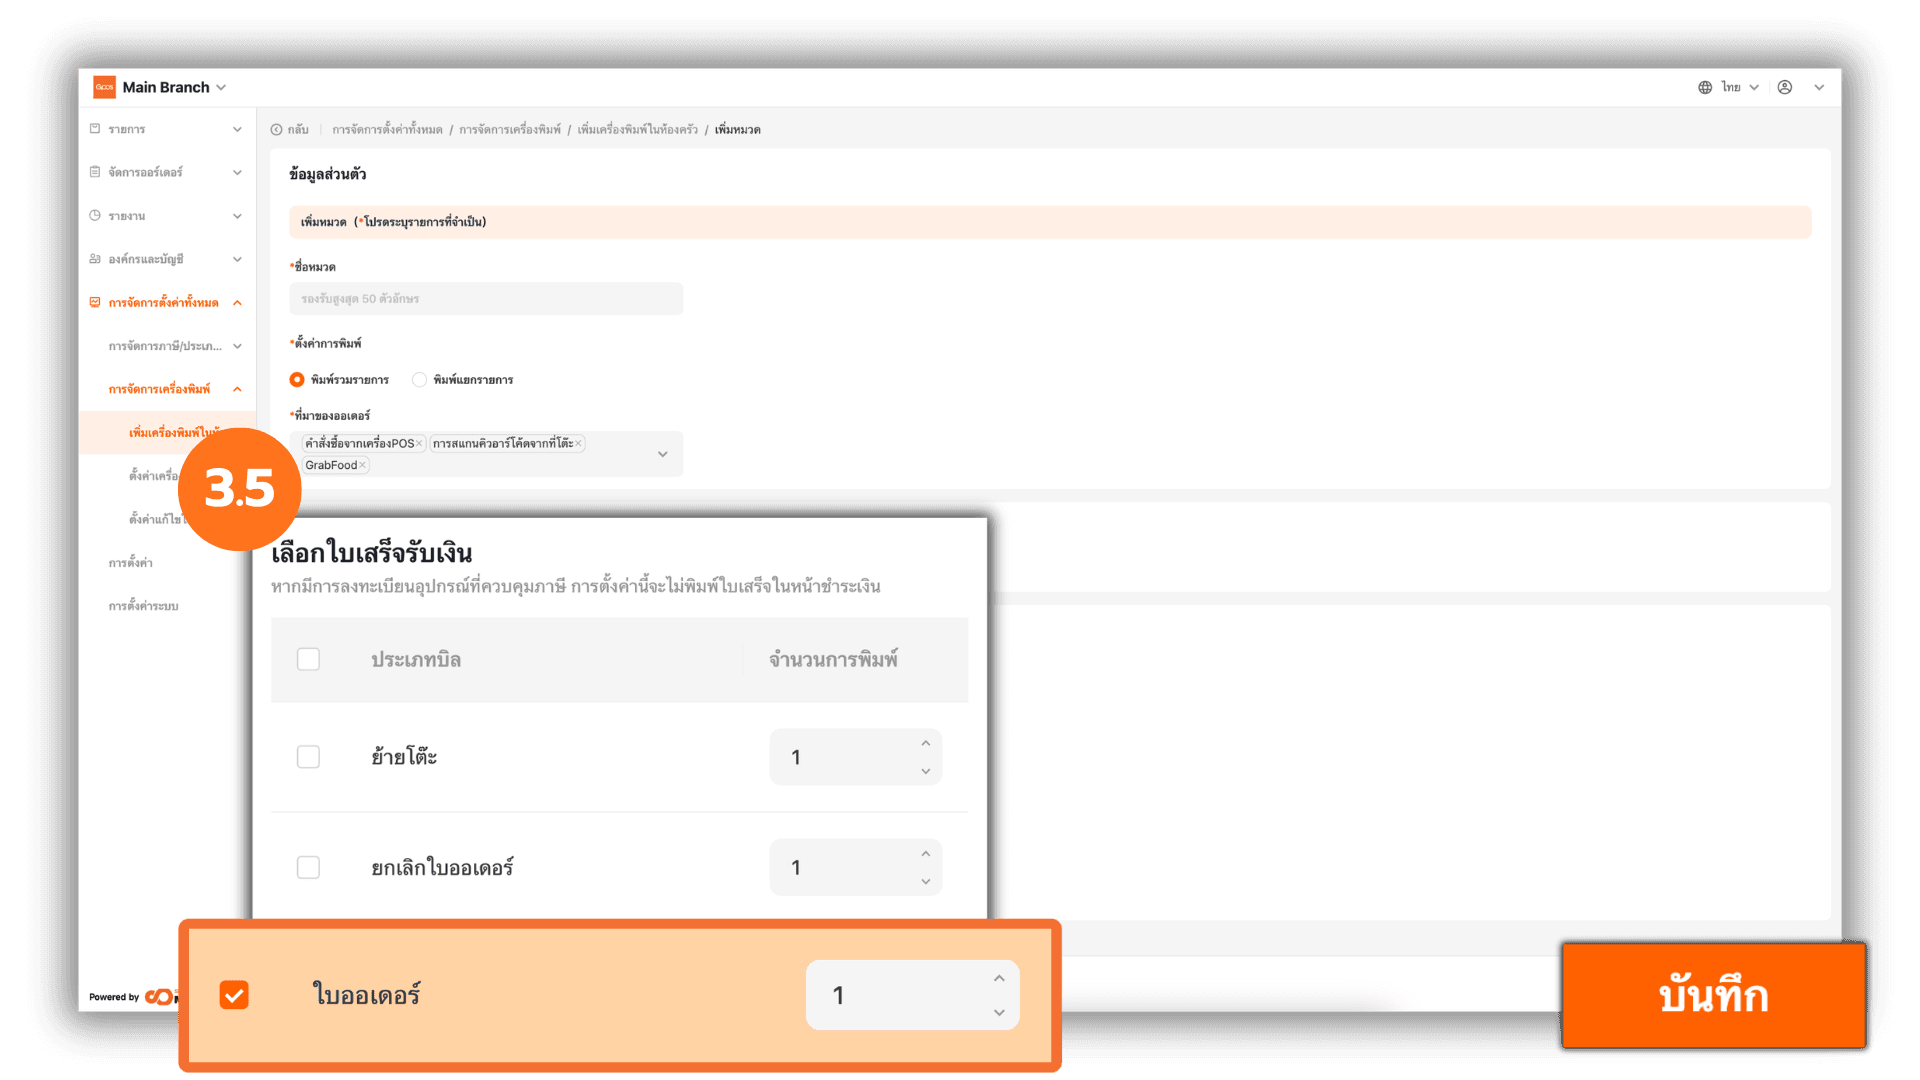
3.5 Select the Order Slip Type and Number of Copies
Choose the type of order slip you would like to print. There are three available options : Transfer table slip , Return ticket , and Kitchen ticket. Tick the desired receipt types, specify the number of copies to print, and click “Save” to confirm.
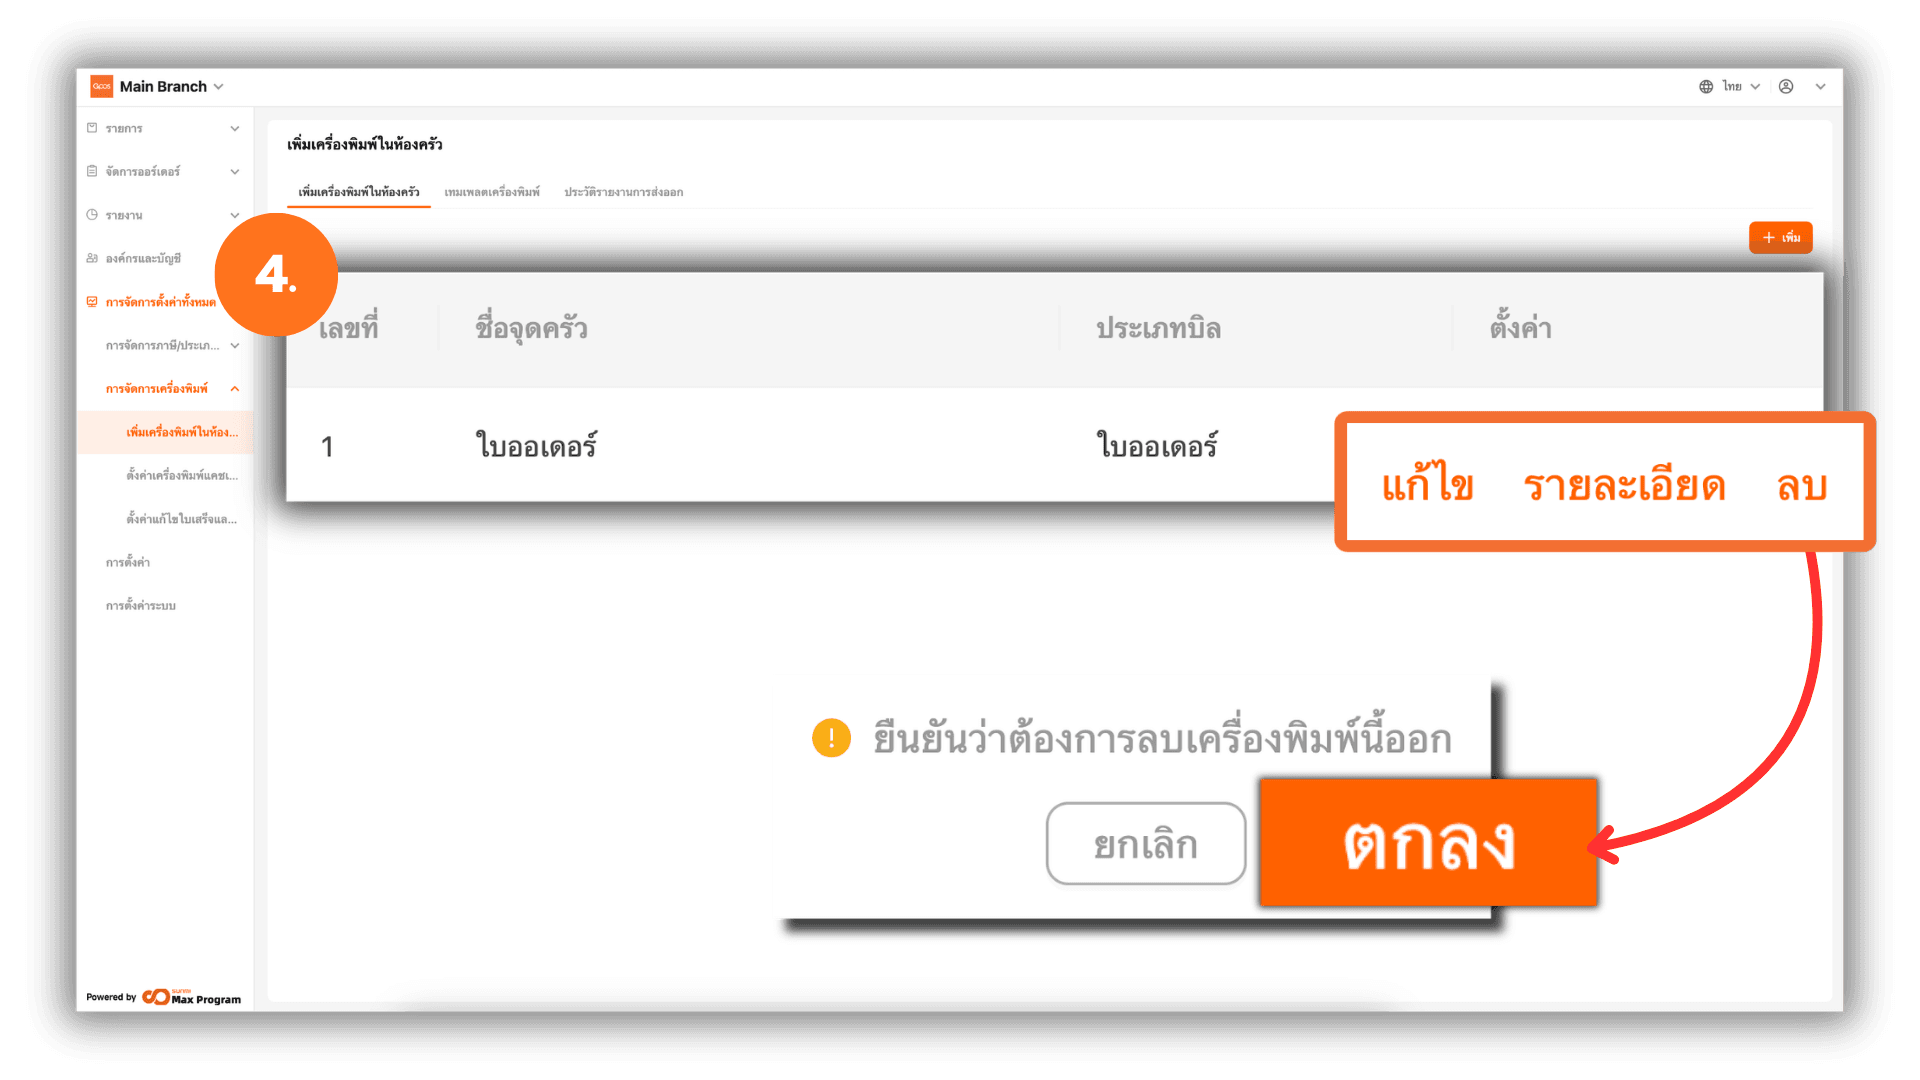
4. Managing Kitchen Printers After Creation
After successfully creating a printer, the system will return to the “Kitchen Sections” page. You can manage the created printers as follows :
- Edit – Modify or update printer information.
- View – View detailed information of the created printer.
- Delete – Remove the created kitchen printer. When clicked, the system will display a confirmation popup. Click “Ok” again to confirm.
Note : If you edit any information, you must re-export the kitchen printer template to update the data at the store branch.
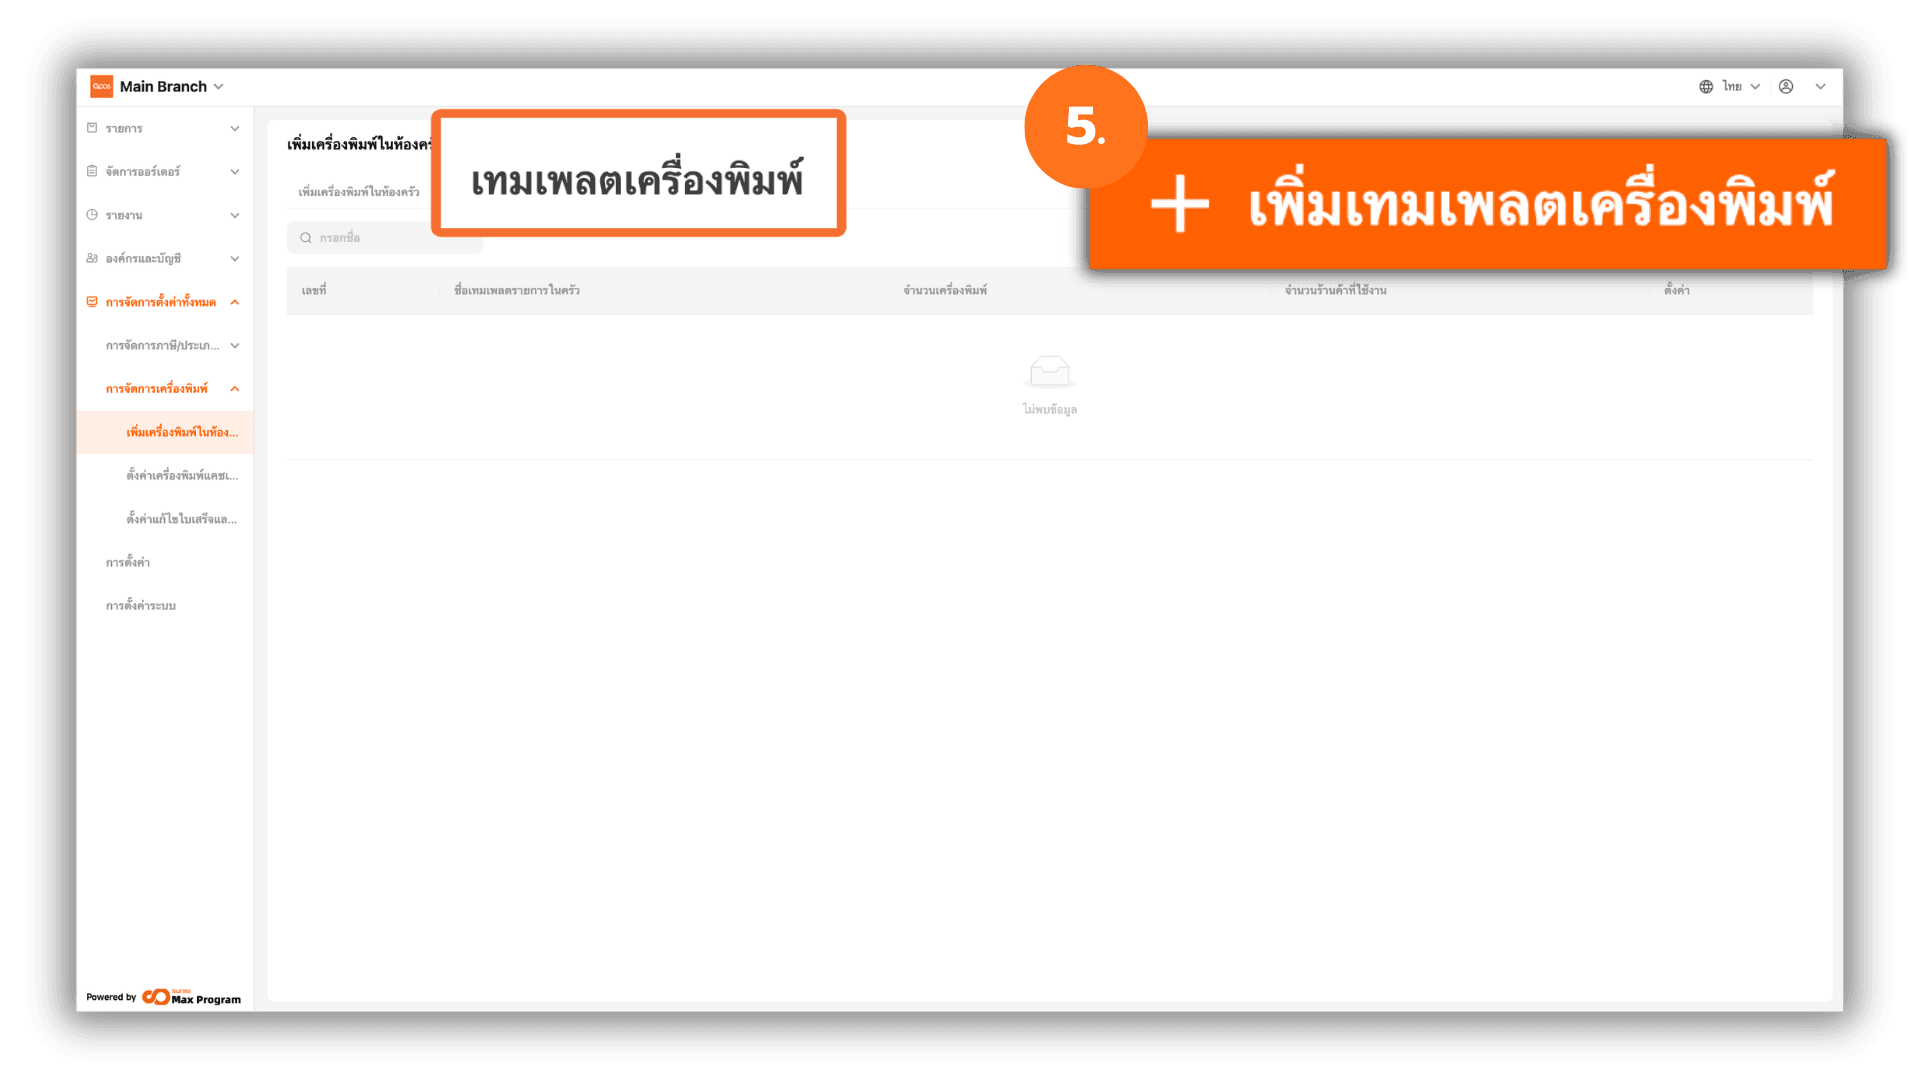
5. Creating a Printer Template
Select “Kitchen section template” at the top of the page and click “+ Add.”
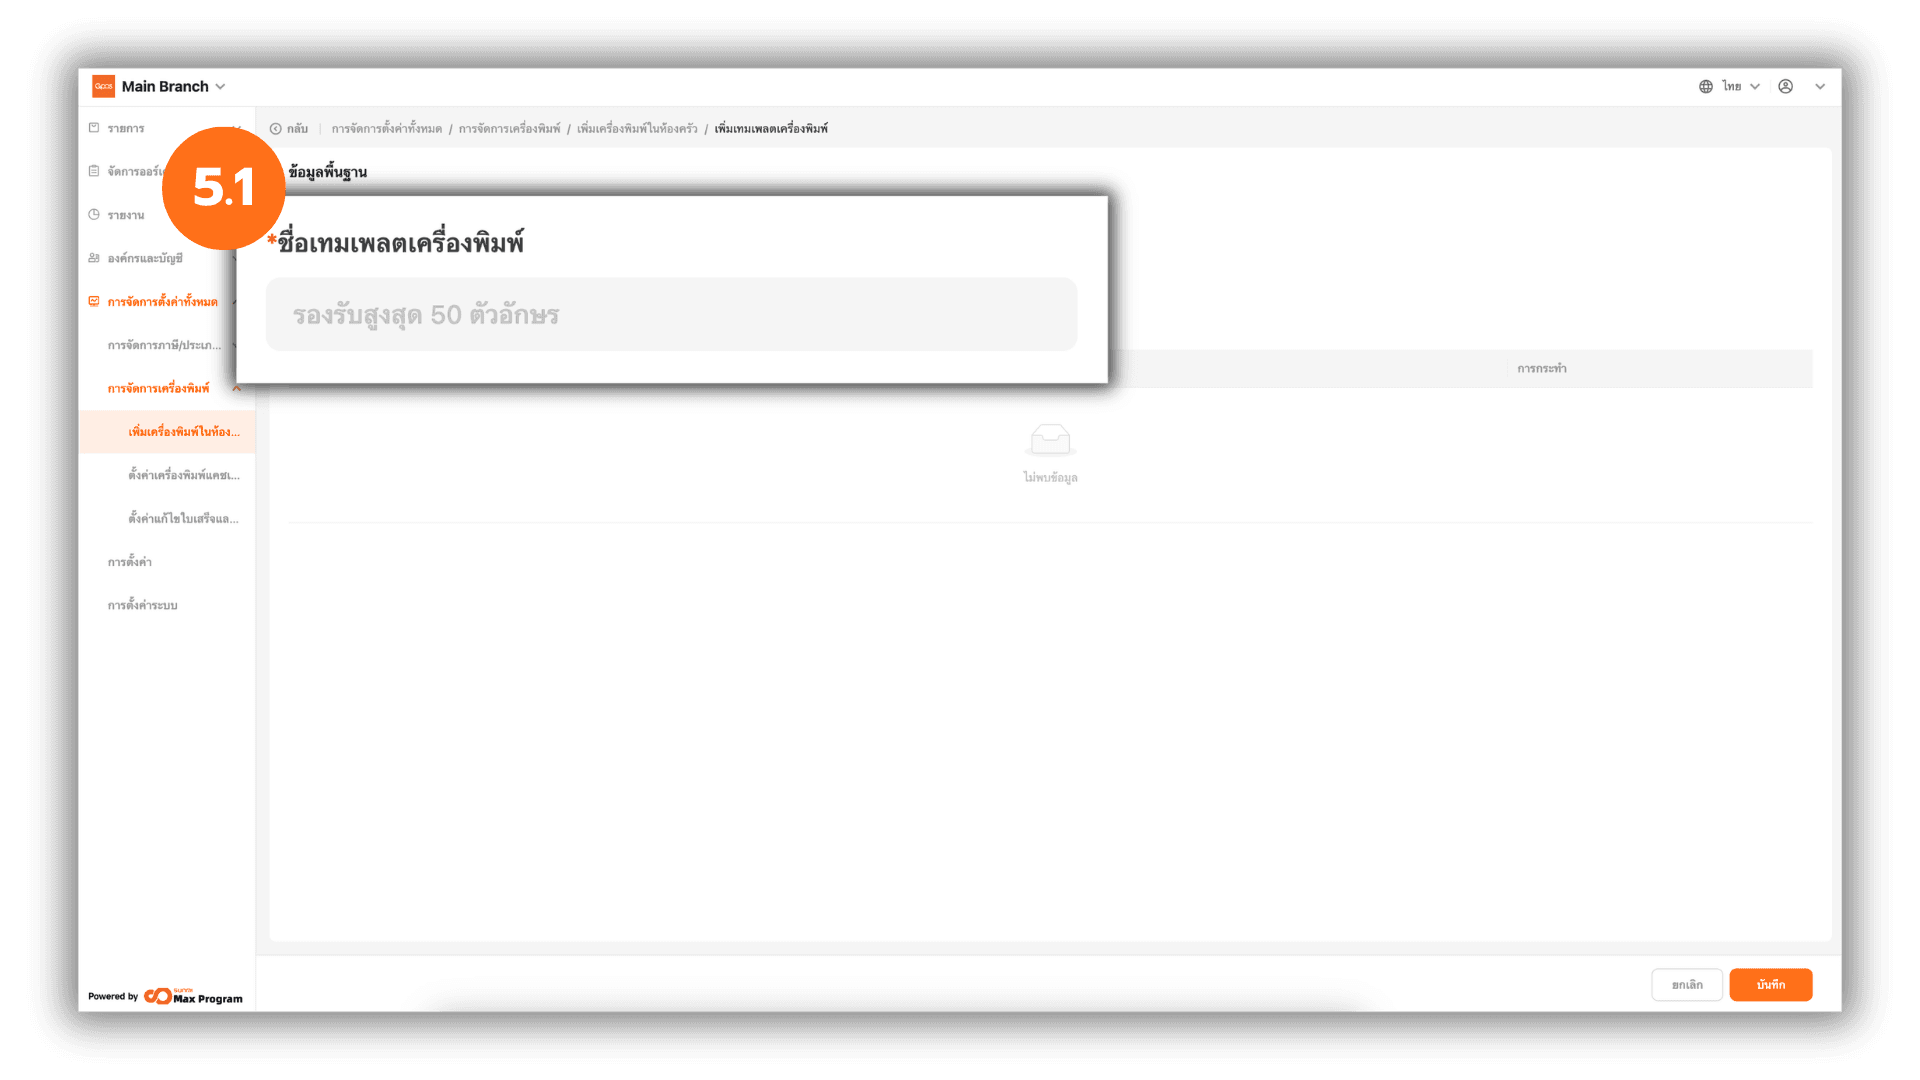
5.1 Enter Basic Template Information
The system will display a basic information page. Enter the Cashier section name you want to create.
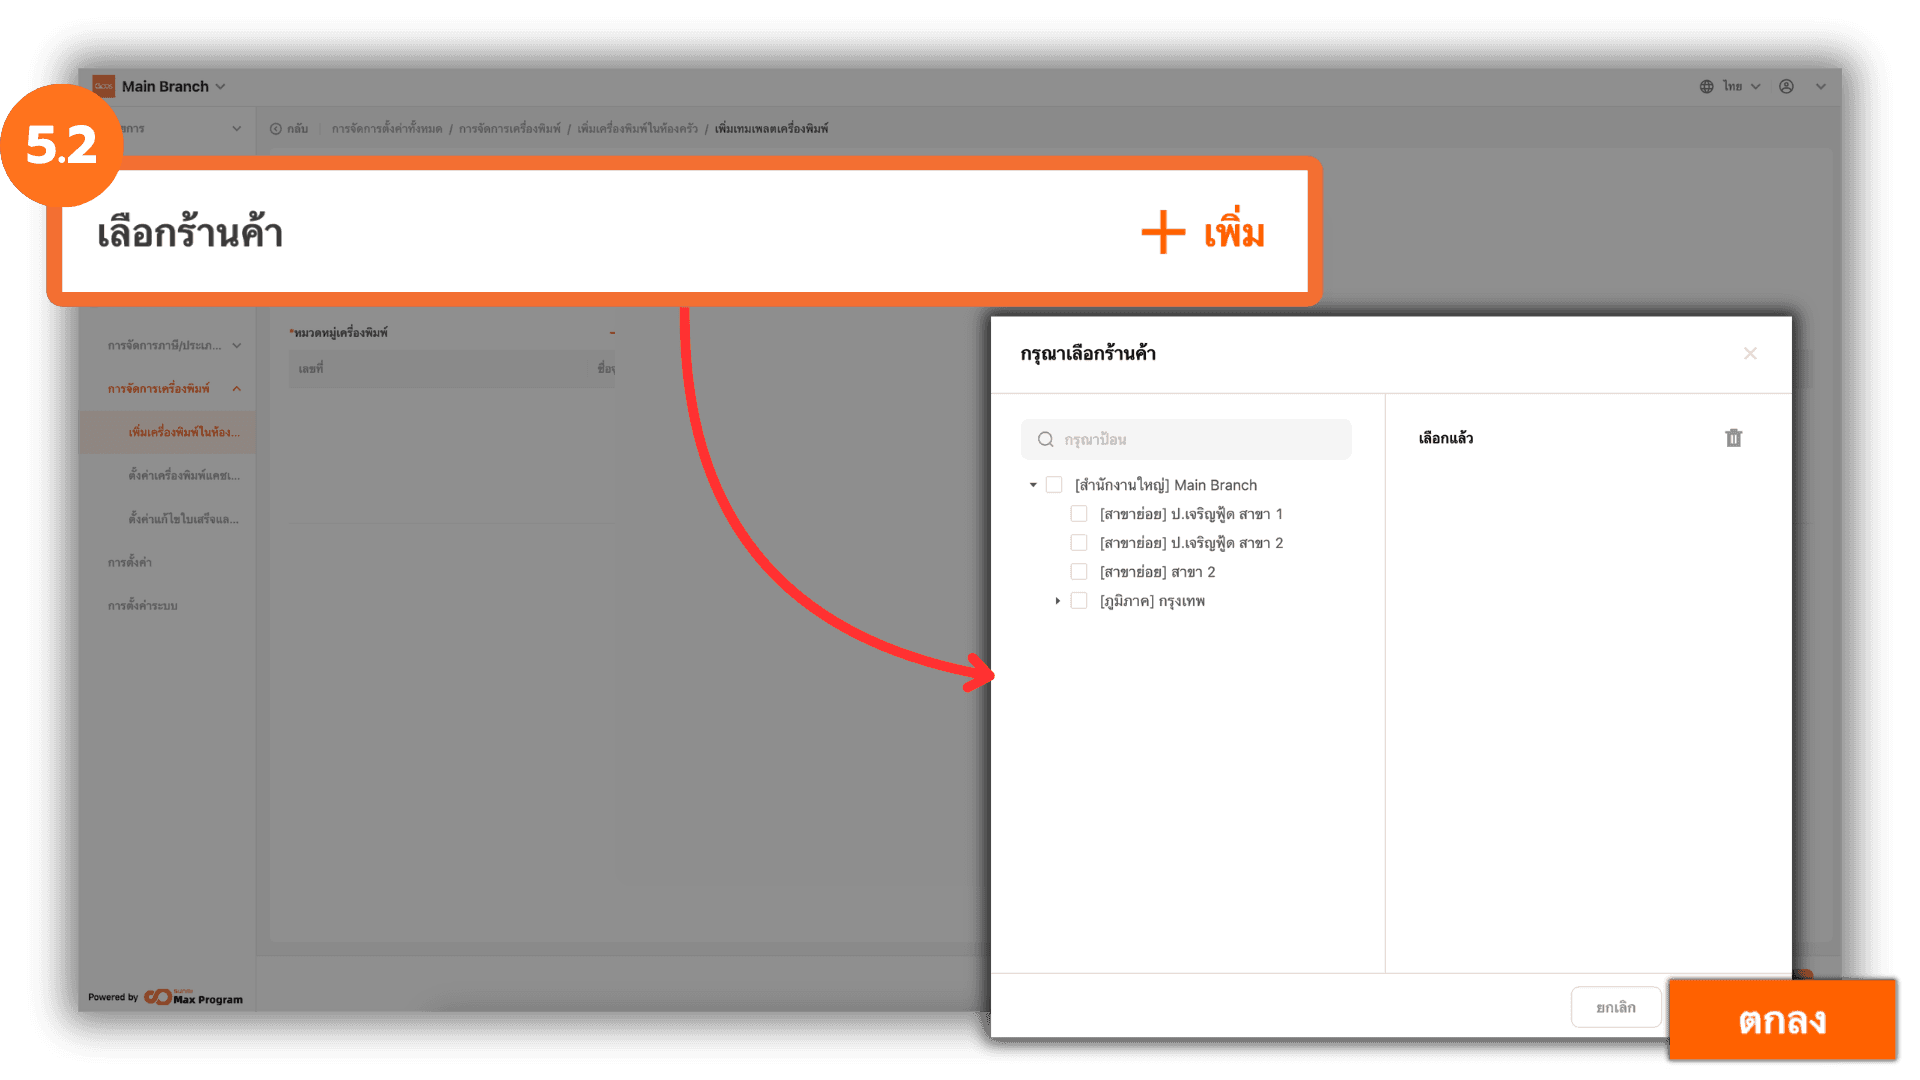
5.2 Select Store Branches
Click “+ Add” next to Select Store. The system will display a list of all store branches. Check the store branches you want and click “Ok.”
5.3 Select Printer Categories
Click “+ Add” next to Add Kitchen Section. The system will display all kitchen printers previously created. Check the desired kitchen printers and click “Save.”

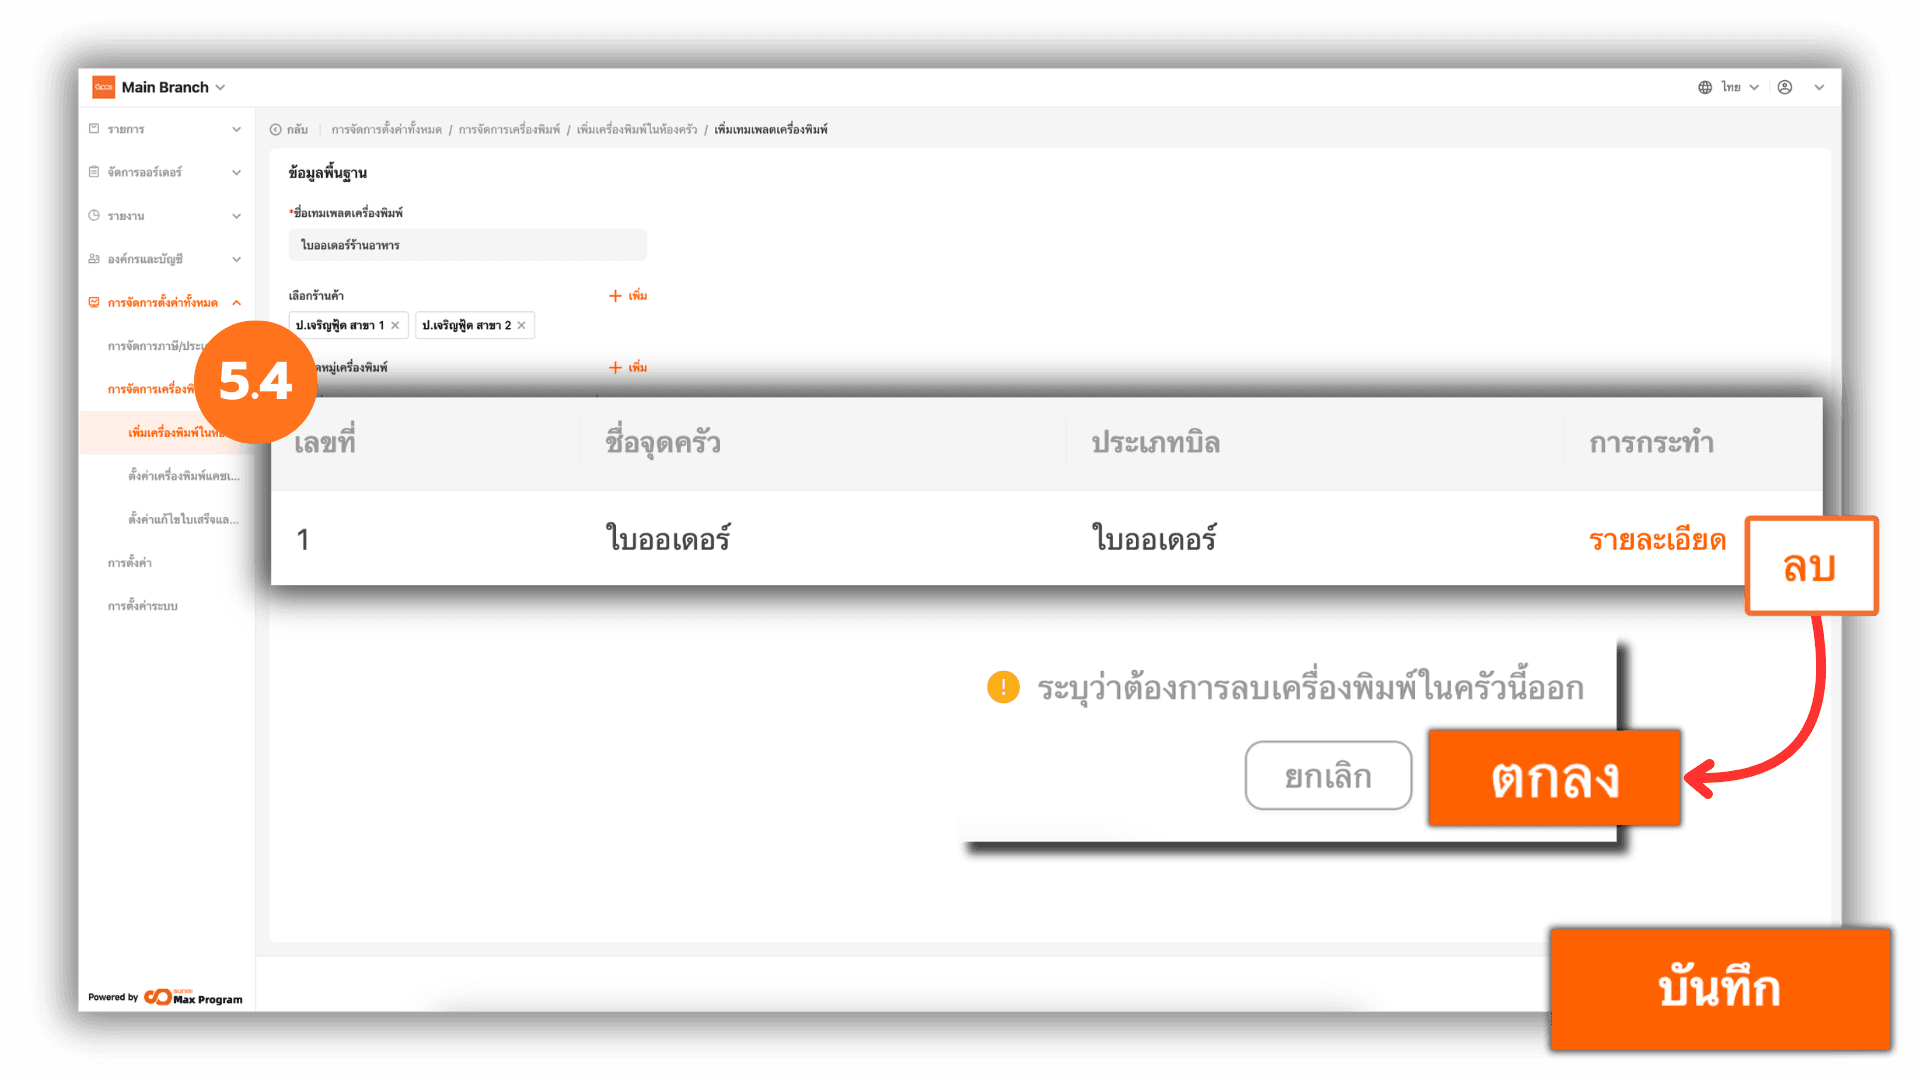
5.4 Review and Save the Template
Review the selected store branches and kitchen printers. If you selected the wrong printer, click Remove next to the printer name to remove it. Once everything is correct, click “Save” to confirm the printer template creation.
6. Managing and Exporting Printer Templates
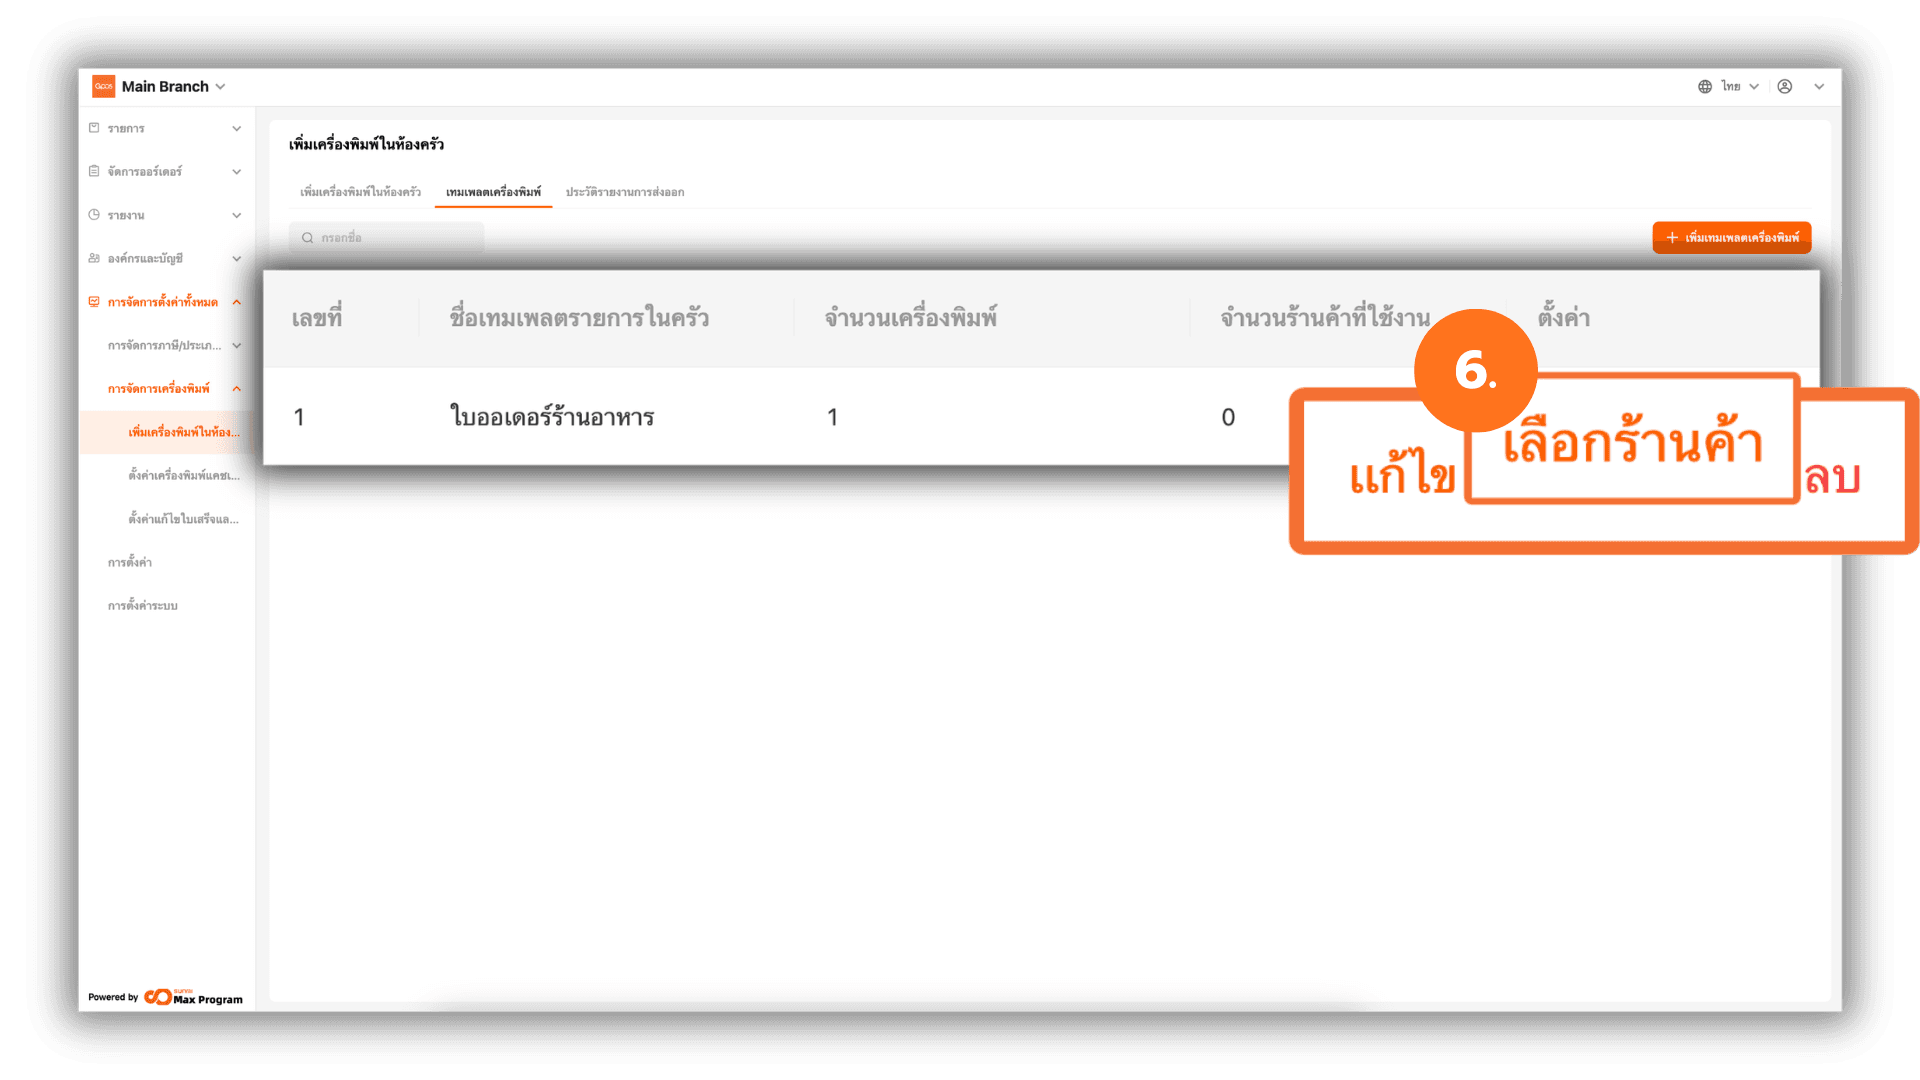
After creating the template, the system will return to the “Kitchen section template” page and display the created templates. You can manage them as follows :
- Edit – Modify template information.
- Distribute – Confirm and export the template to store branches.
- Delete – Remove the created template.
6.1 Manage Stores Within the Template
When clicking “Distribute,” the system will display the template details again. You can click “+ Add Store” to add more store branches or click “Remove” to remove selected store branches.
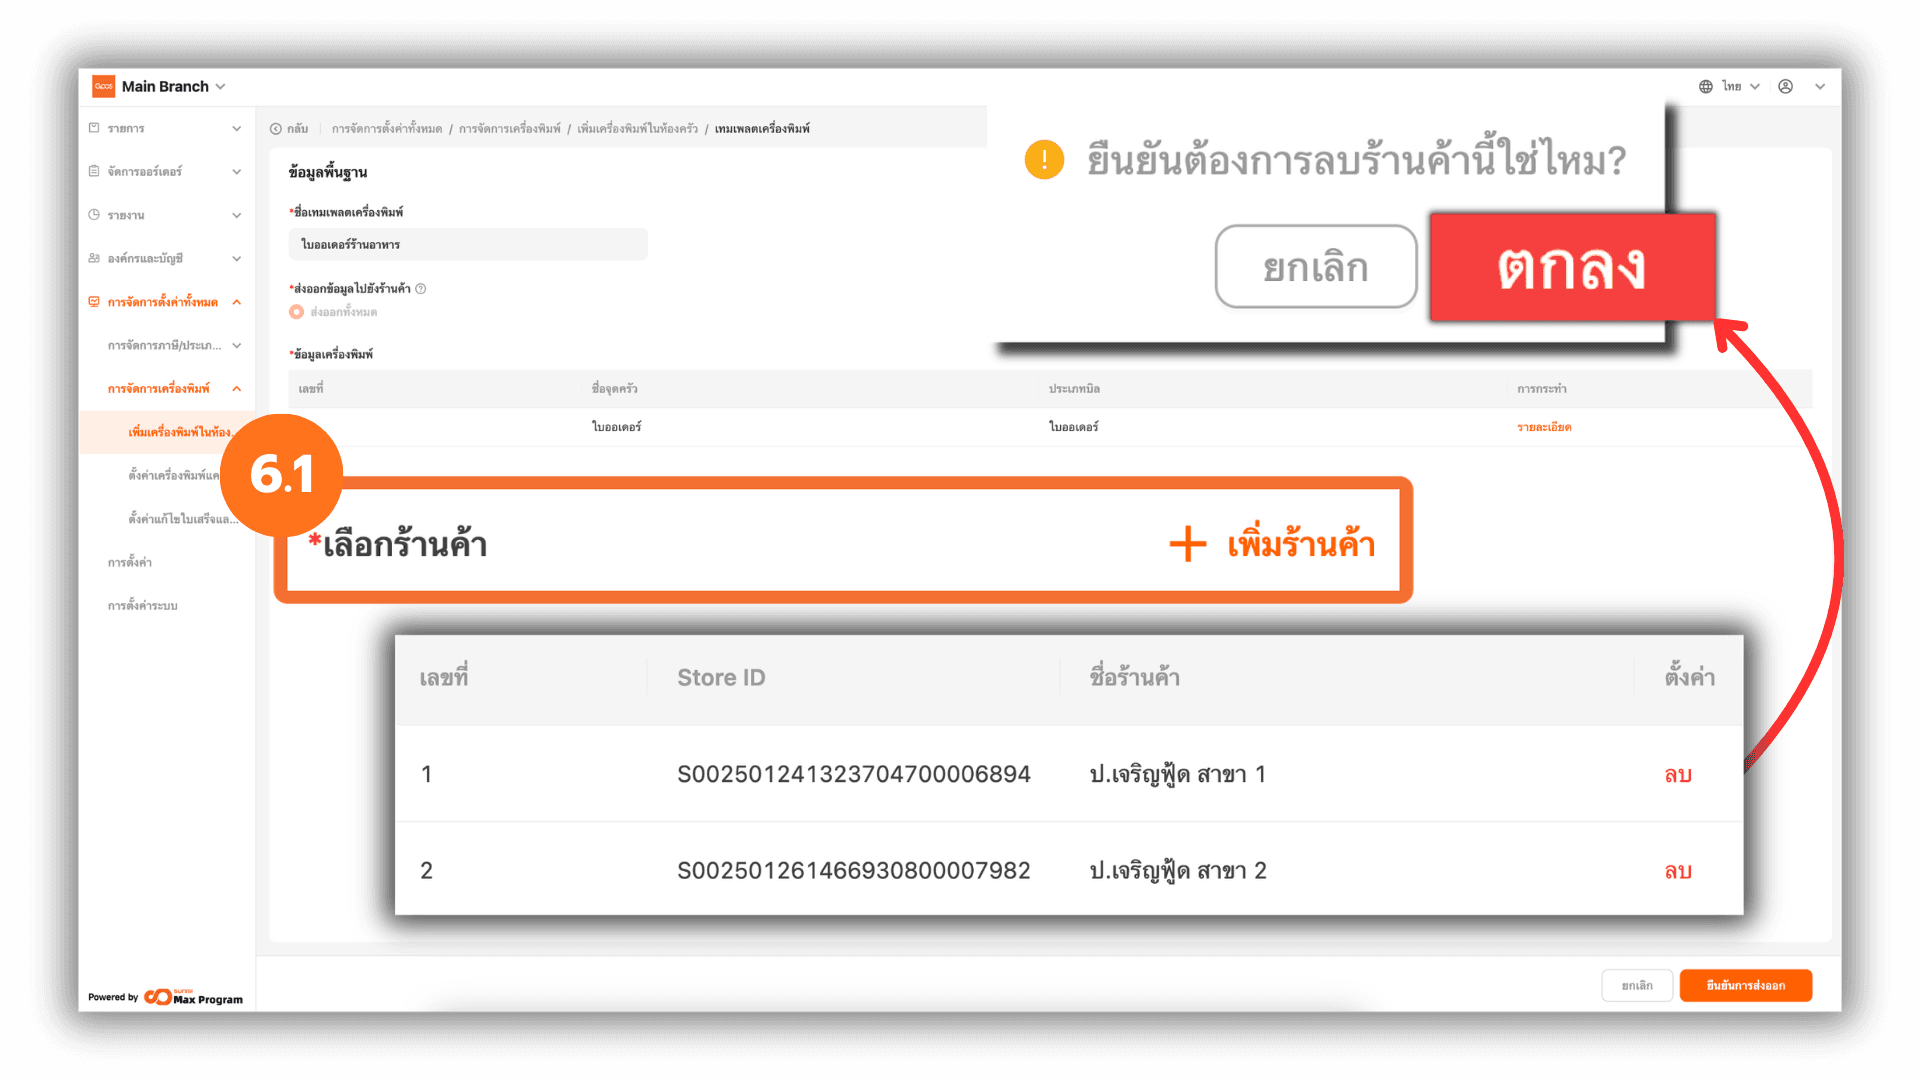
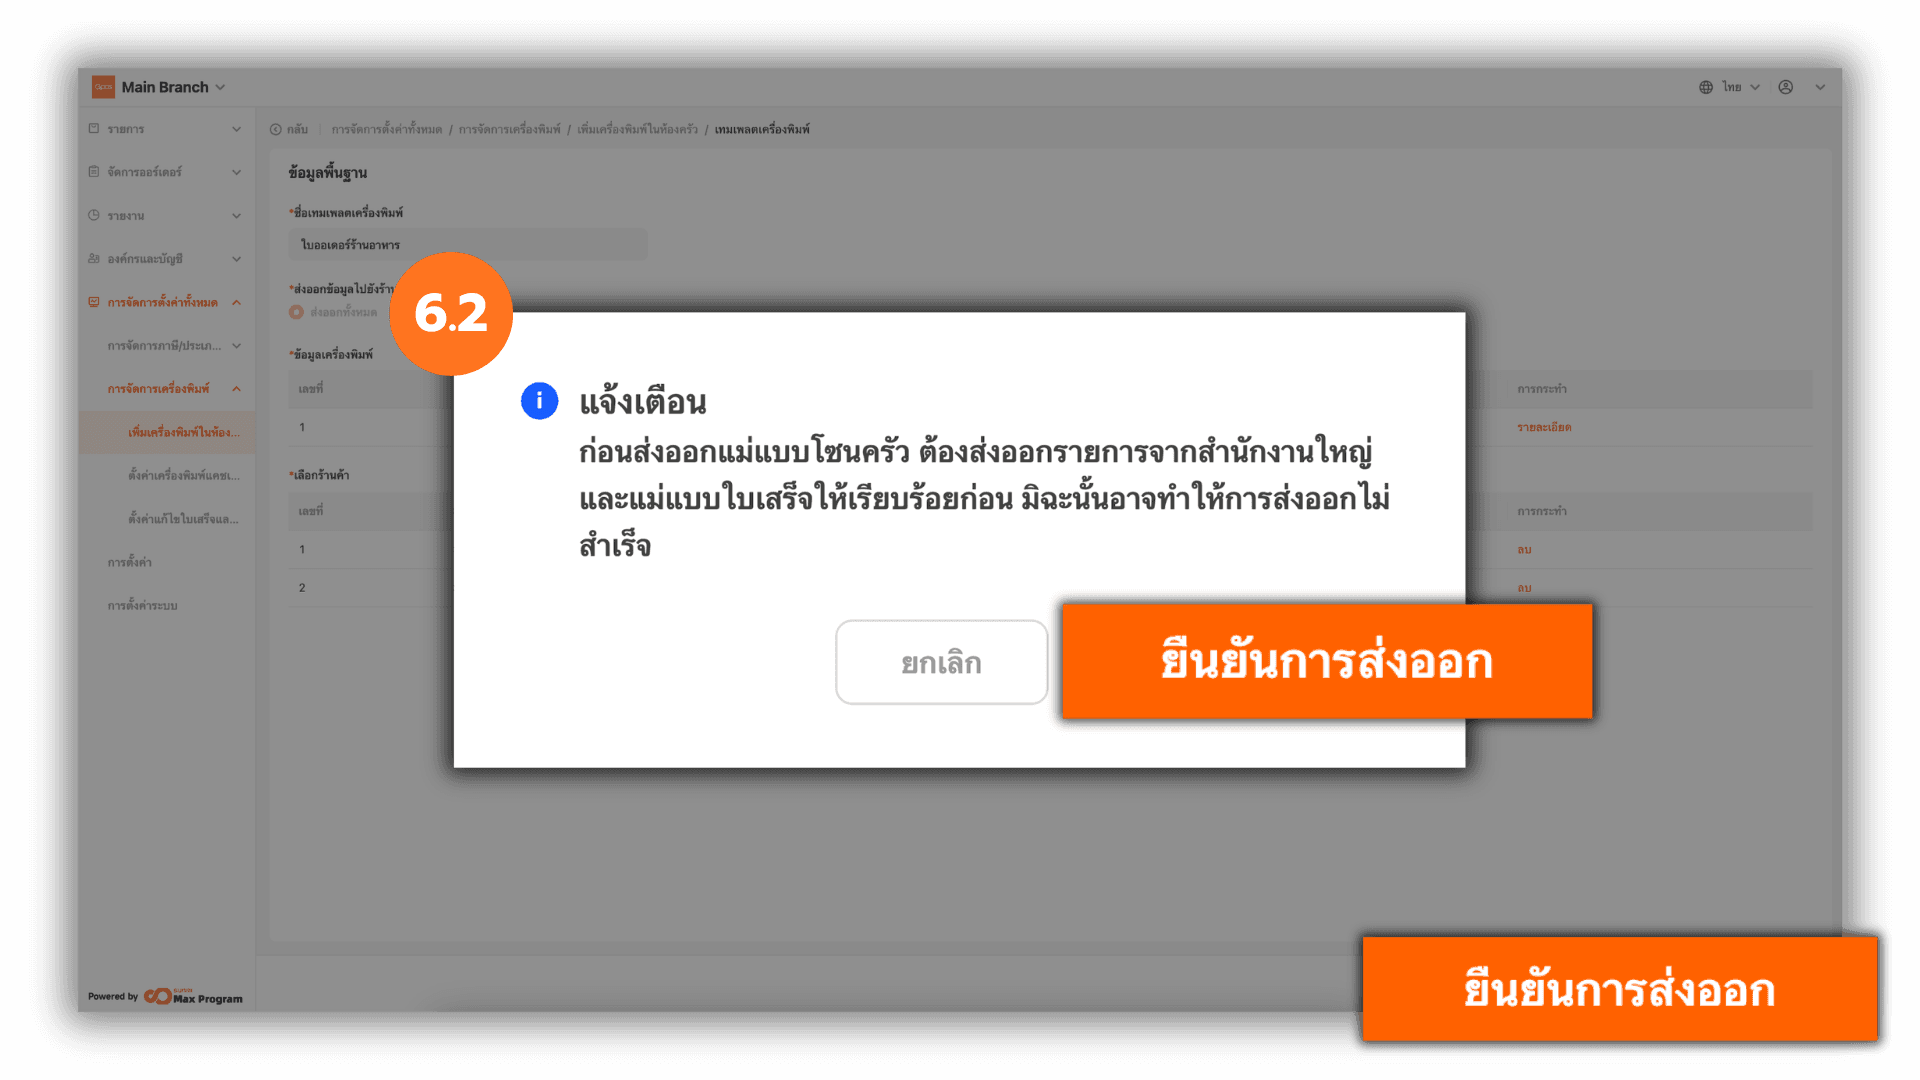
6.2 Confirm Template Export
Click “Confirm distribution.” A confirmation popup will appear. Click “Confirm distribution” again to export the printer template to the selected store branches.
Note : Product items and receipts must be exported from the Head Office to the store branches beforehand. Otherwise, the kitchen printer export may fail.
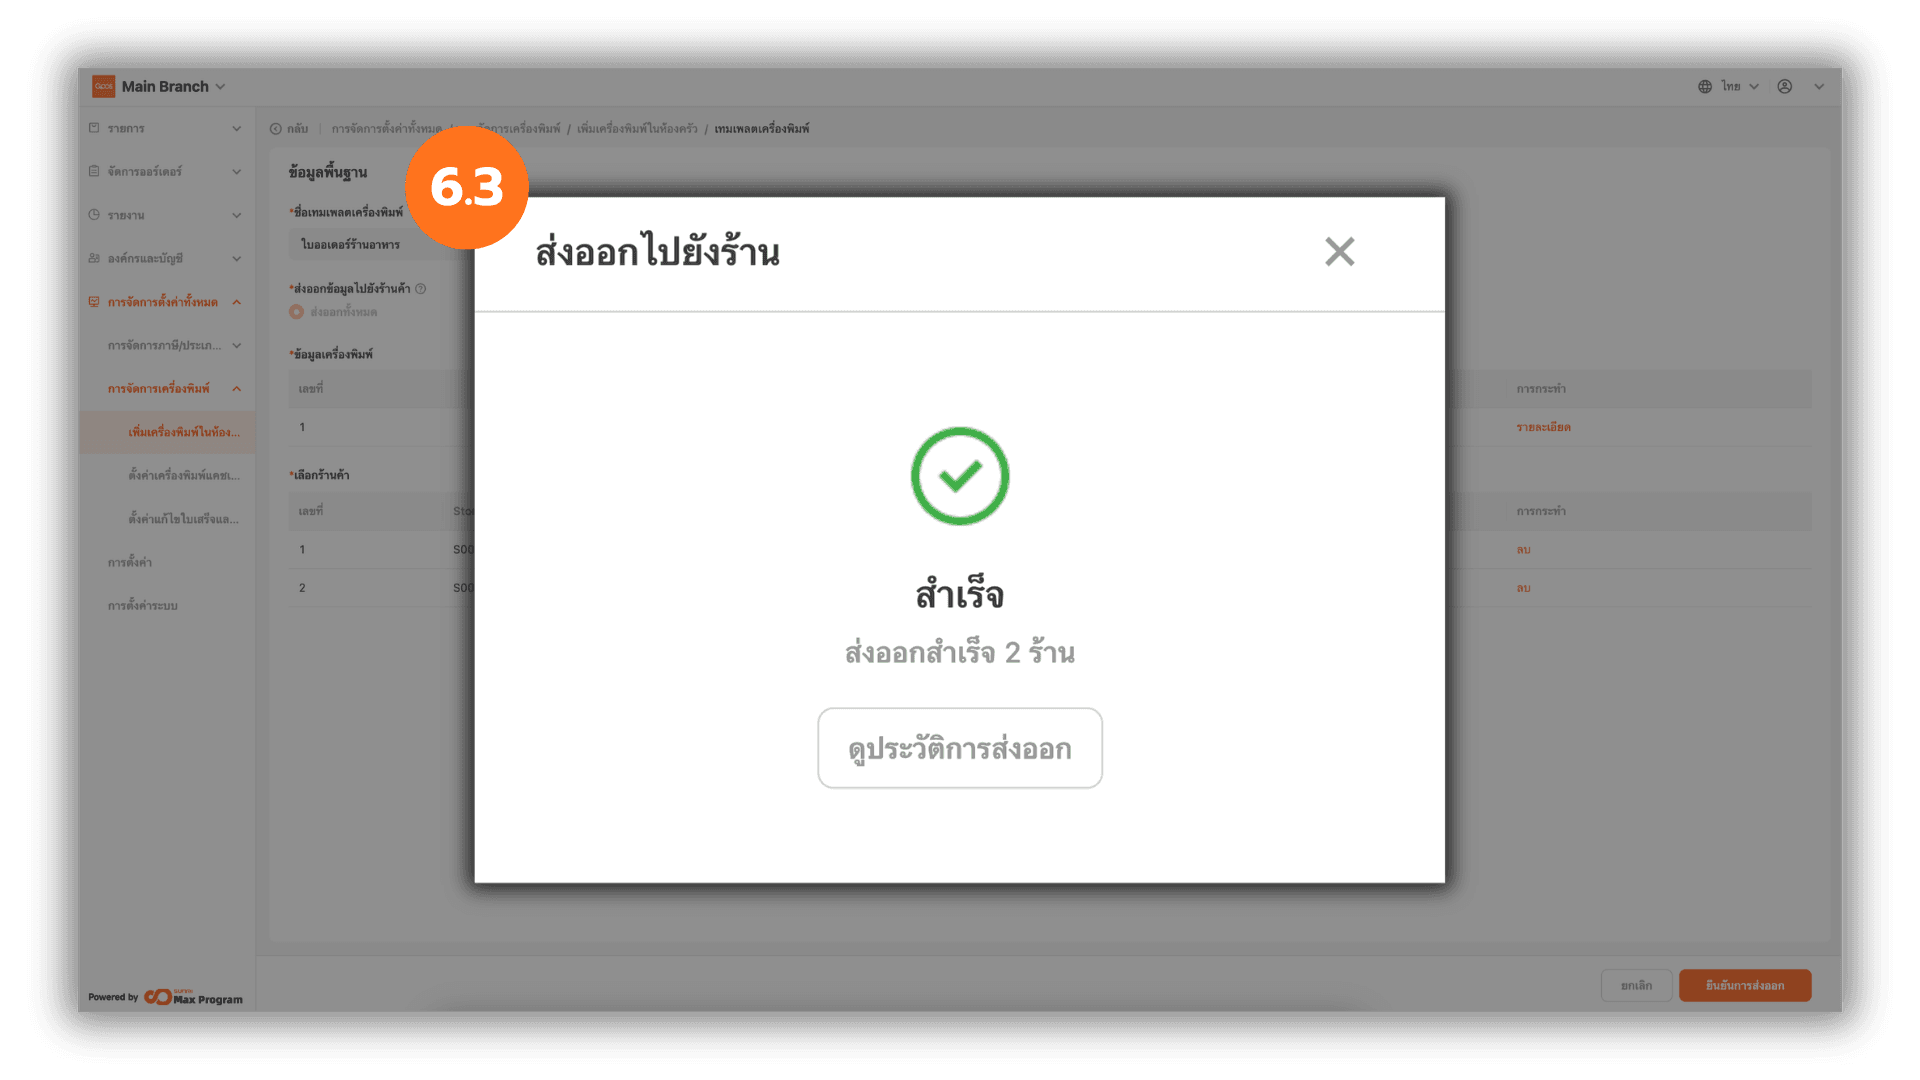
6.3 Check Export Status
Once completed successfully, the system will display the status “Successful.” You can click X to close the window or click “View History” to review past export details.