Creating Sales Channels via Head Office
2026-02-24 17:13
Creating sales channels through the Head Office allows you to centrally manage sales formats across all branches in a systematic way. You can set unified standards, control configurations from the center, clearly separate sales by channel, and conveniently analyze data for more effective business planning.
1. Log in to the Back Office System
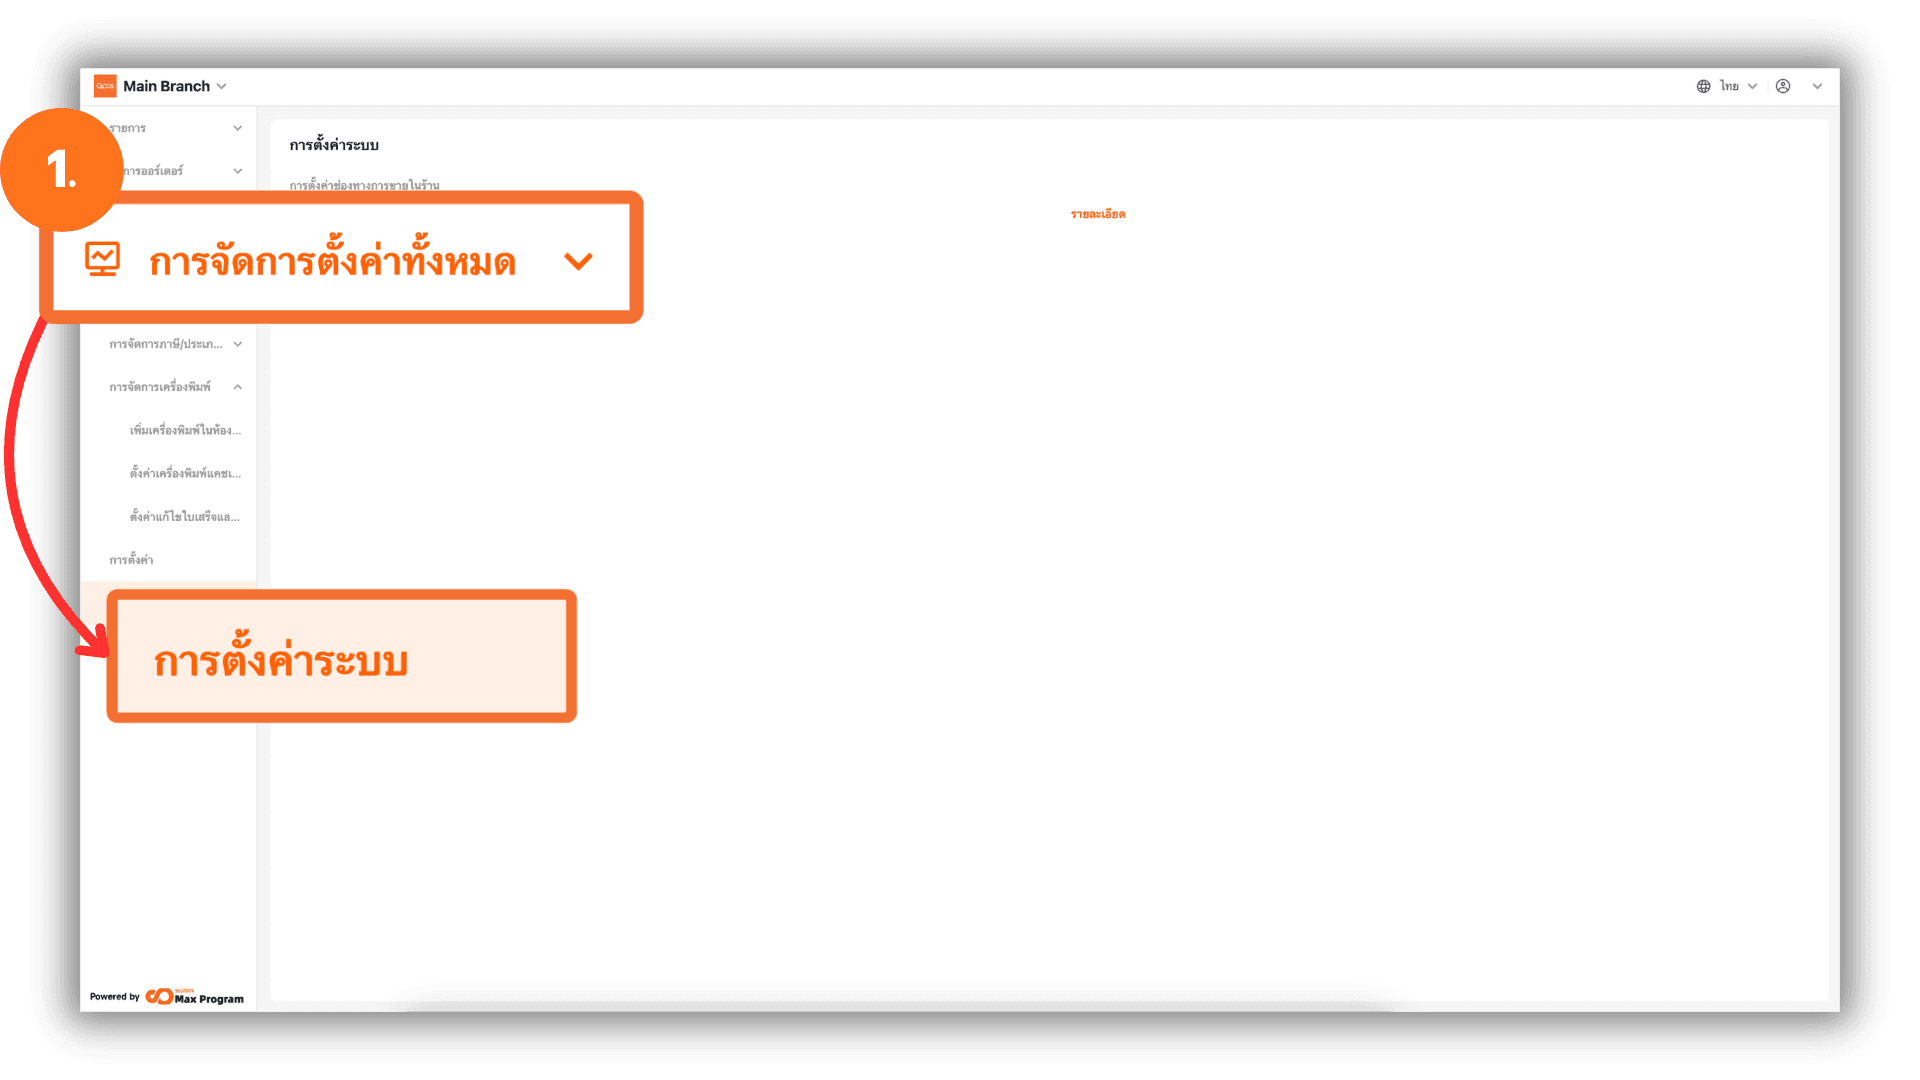
Go to the website login.gpos.co.th, enter your email and password, then click Log In. After successfully logging in, click on Head Office, then select the menu “Store Management” and click “System Settings” to access the system configuration page.
2. Set Up Sales Channels and Service Types Within the Store
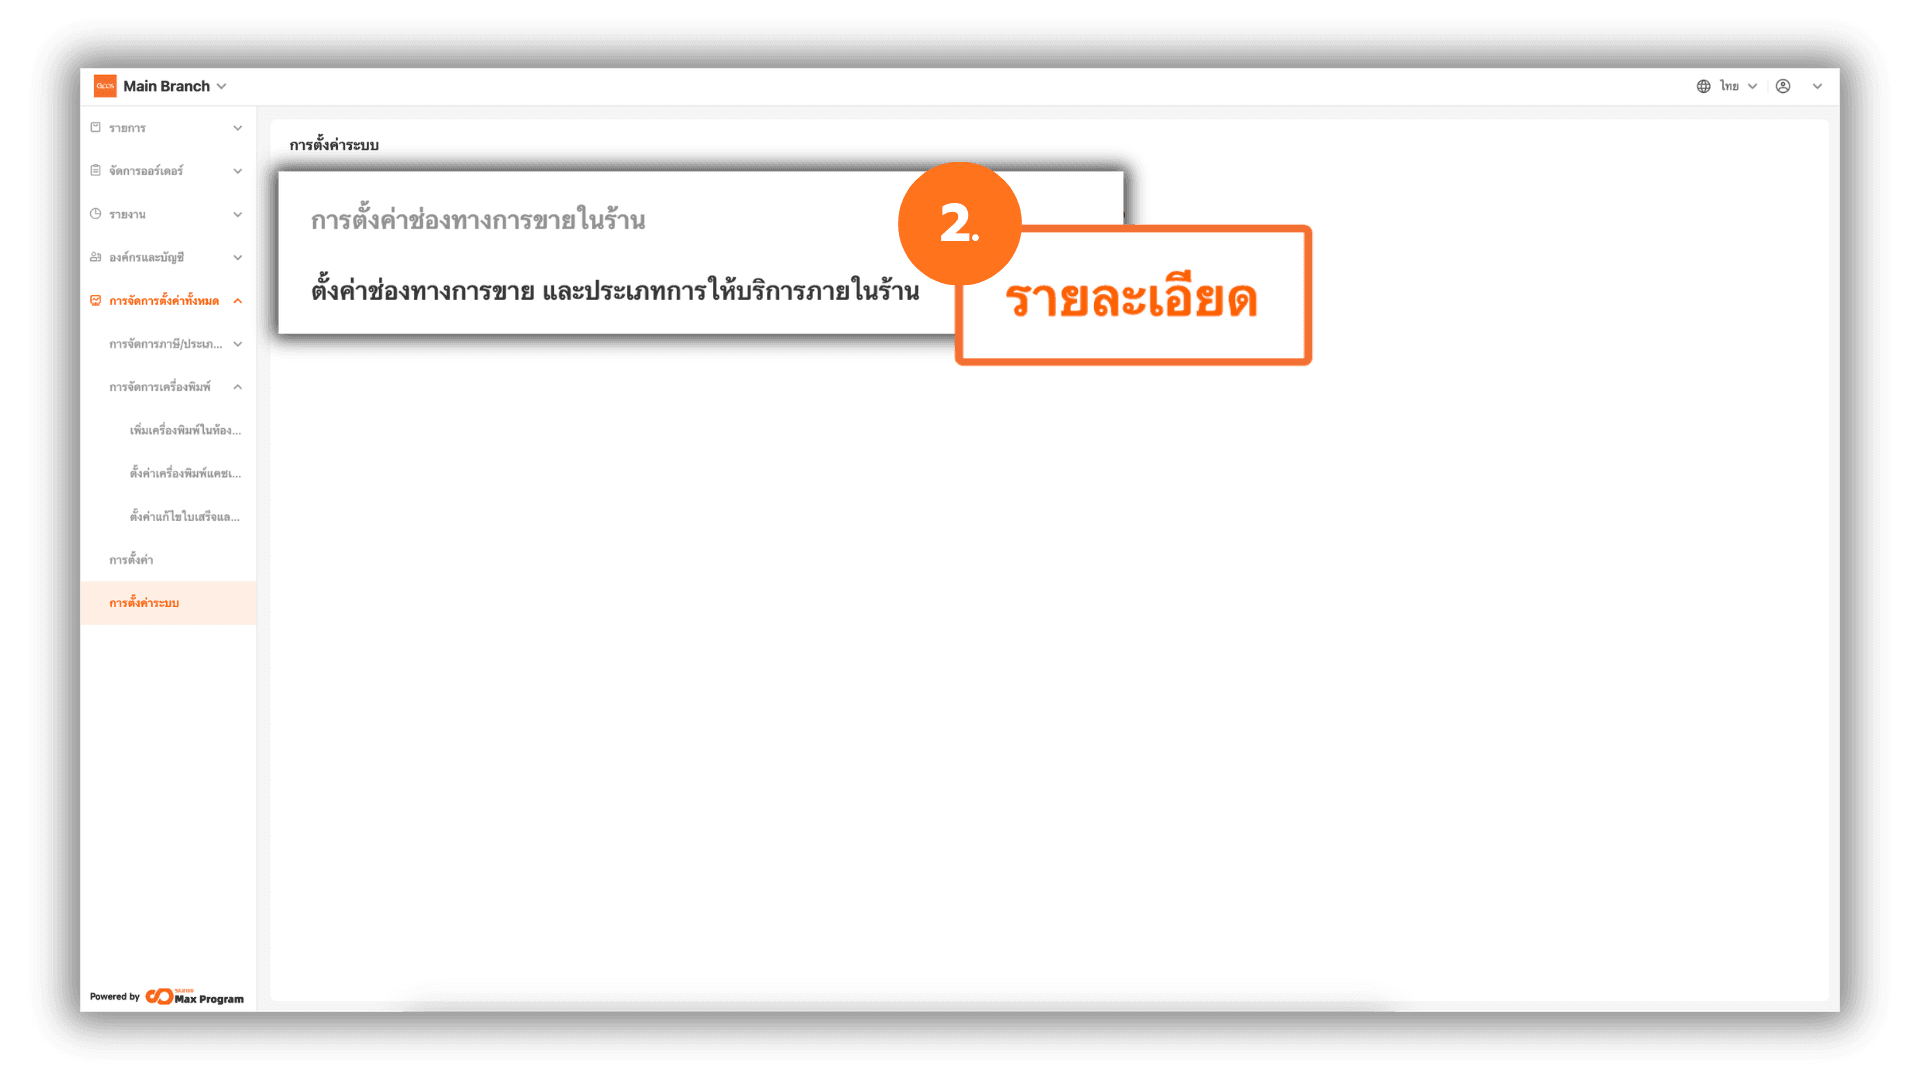
On the System Settings page, you will see the section Set up Sales channels and service types. Click the “Info” button next to this section to access the sales channel management page.
2.1 Add a New Sales Channel
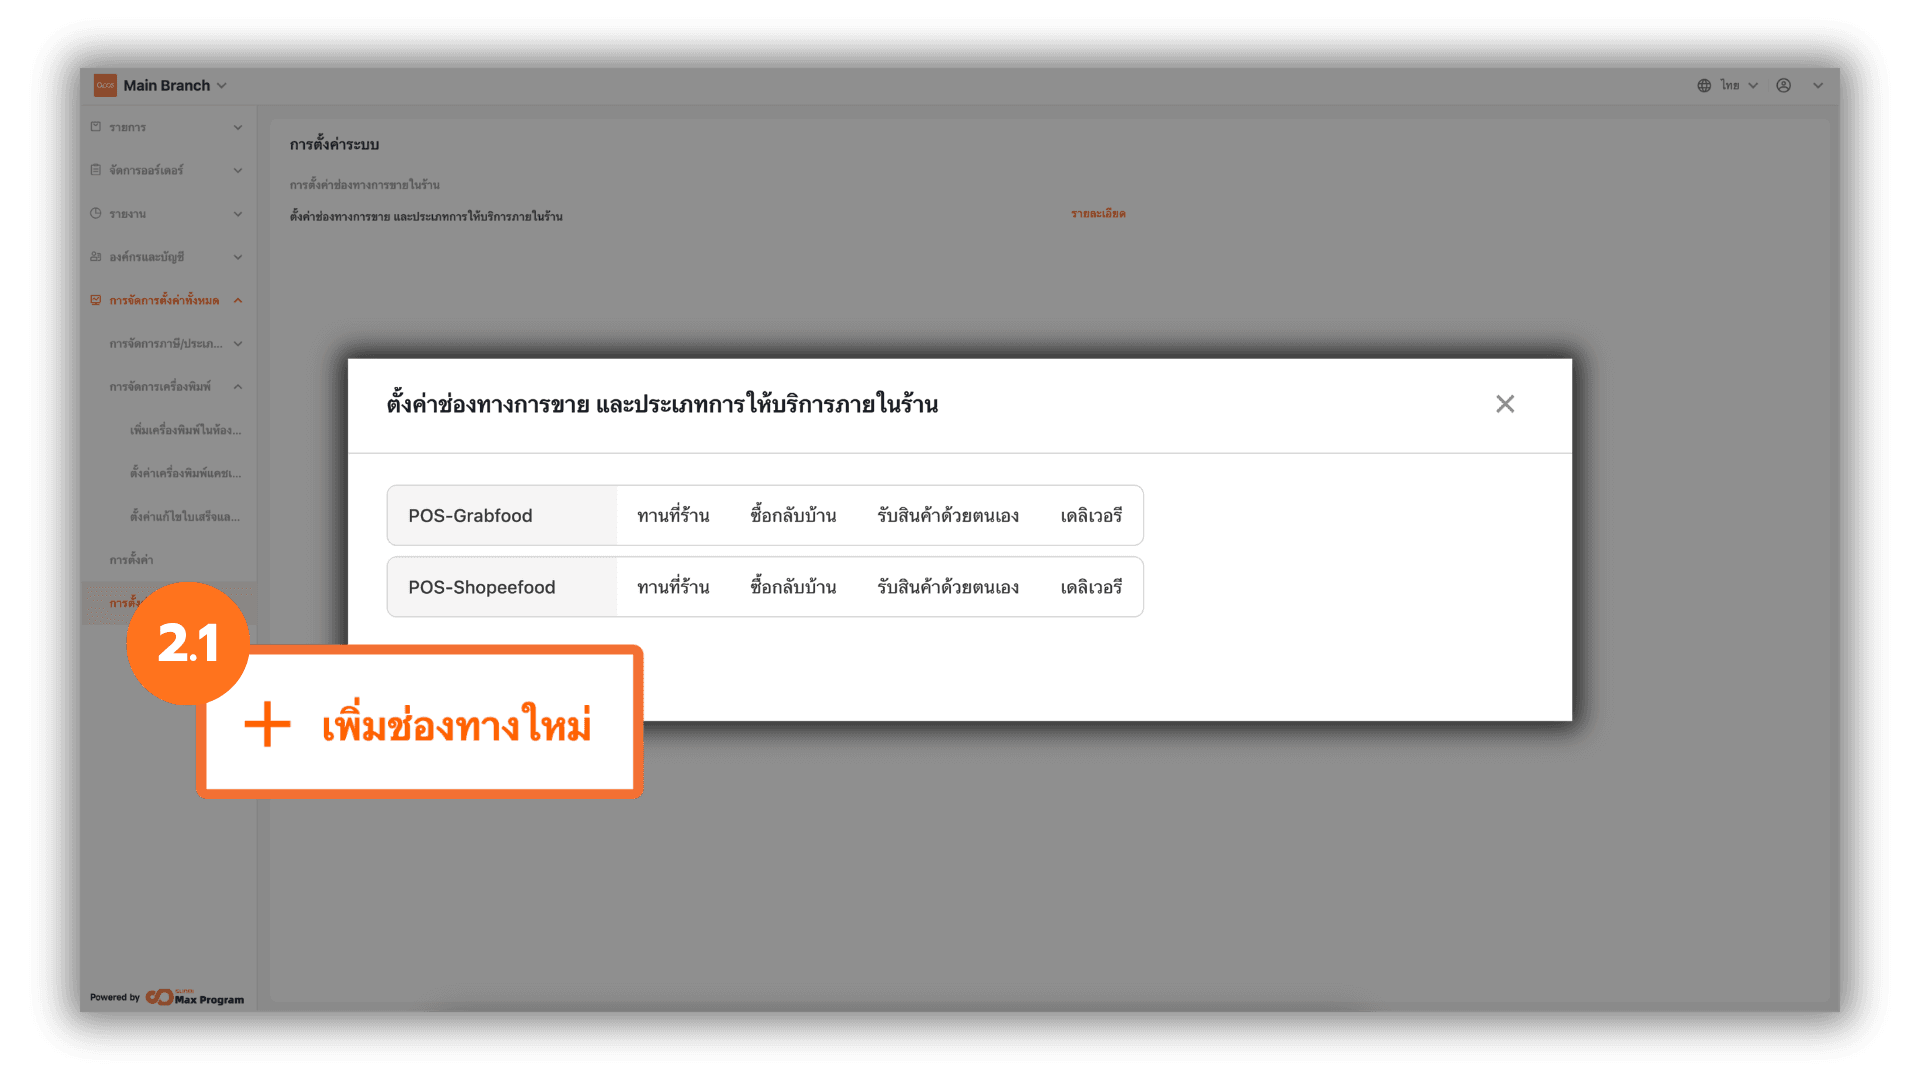
The system will display the current list of Set up Sales channels and service types. If you want to create an additional sales channel for use in Store Branches, click the “+ Add Sales Channel” button.
Note : This feature supports integration with POS System / Scan System Items.
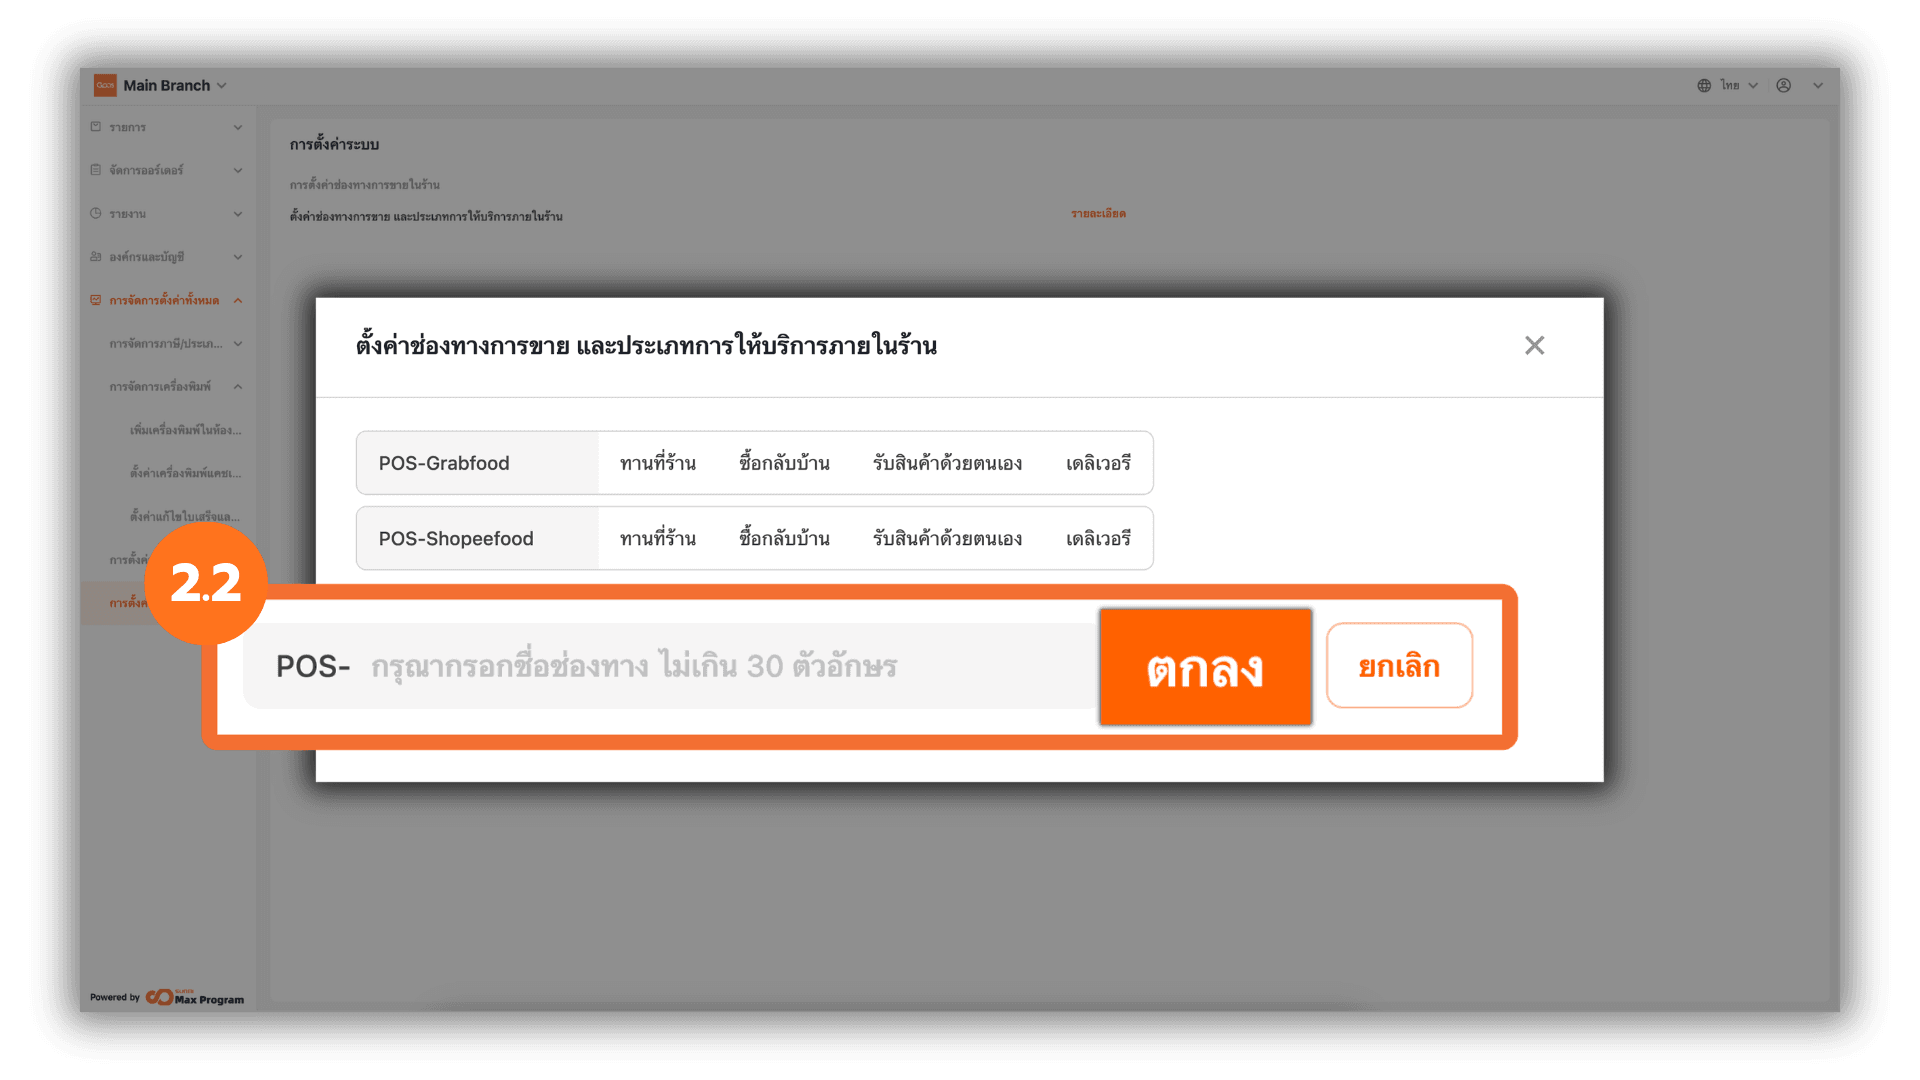
2.2 Set the Sales Channel Name
Enter the desired sales channel name, such as Main Storefront, Fair Booth, or Takeaway Only, then click “Ok” to create the channel.
Note : Once created, the sales channel and in-store service type name cannot be deleted or edited. Please verify the accuracy before confirming.
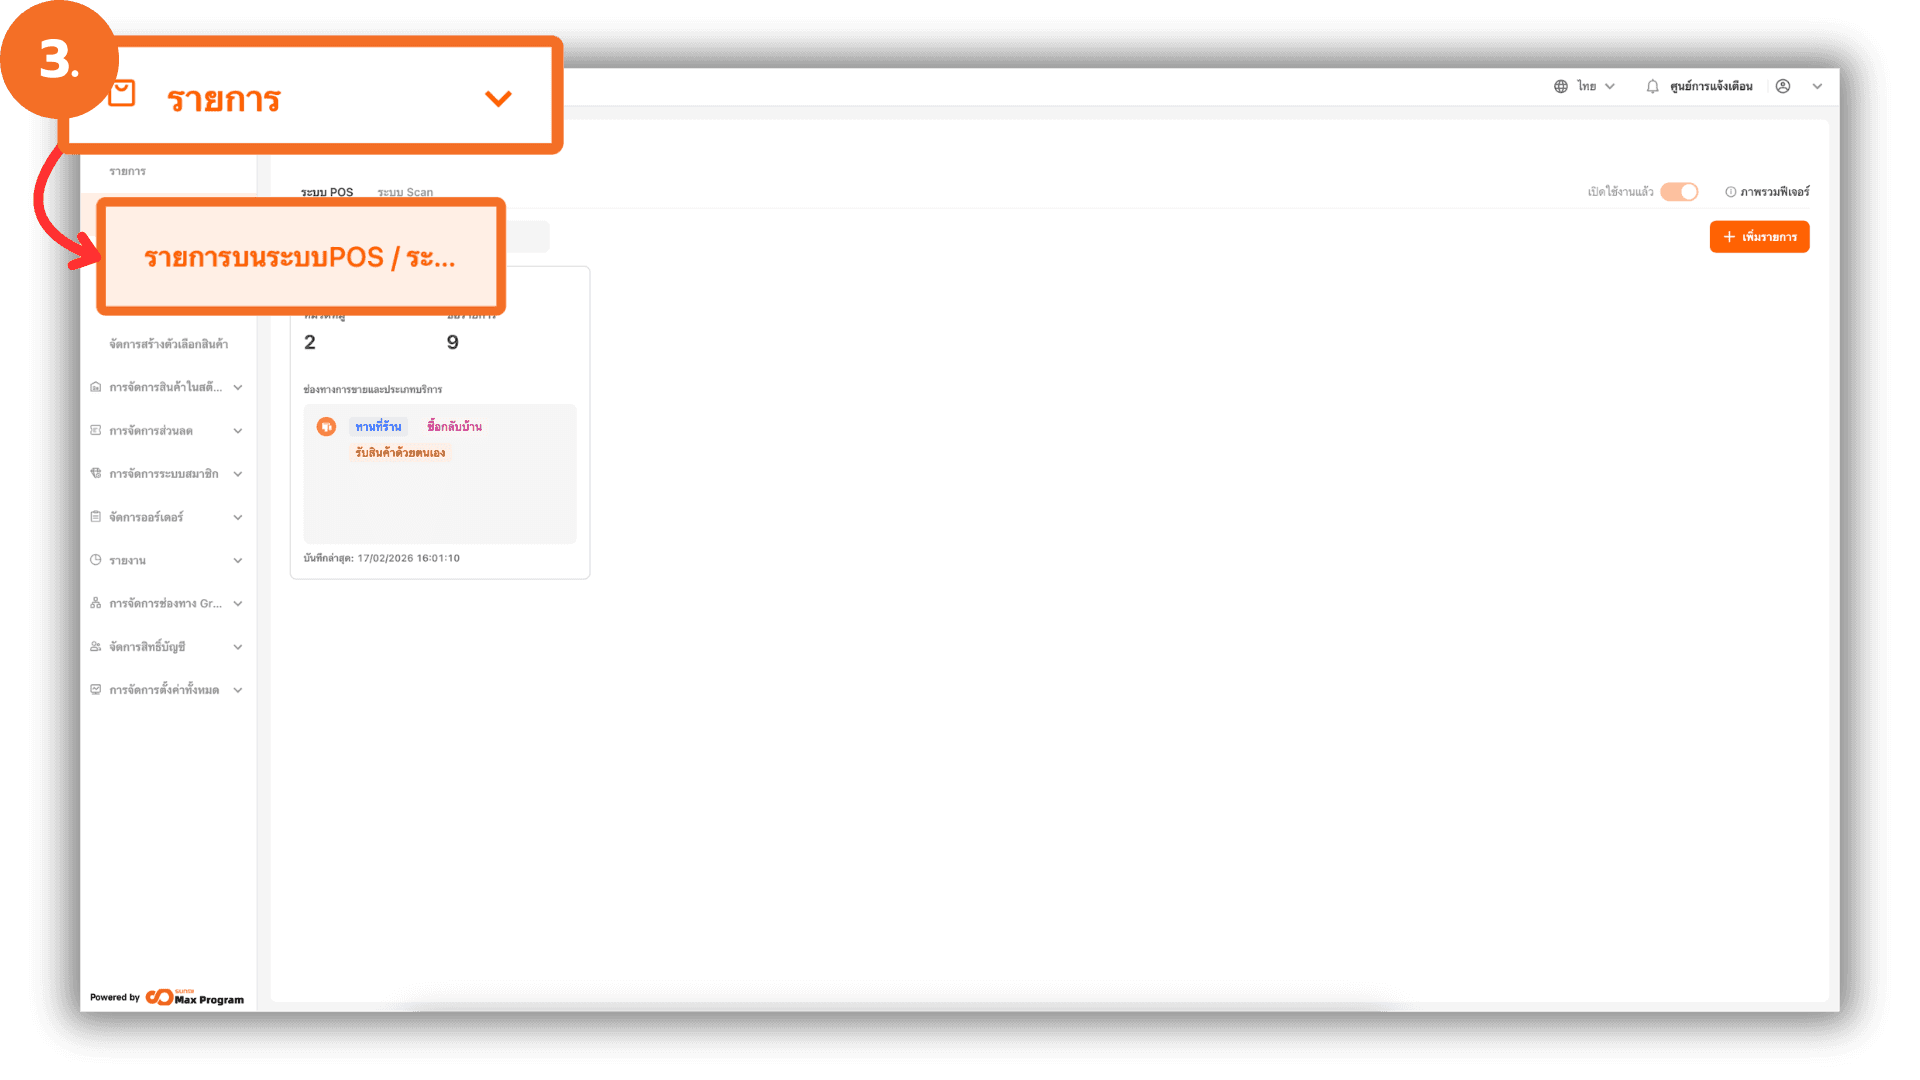
3. Assign Sales Channels to a Store Branches
After creating the sales channel and in-store service type, go to the desired Store Branches, then navigate to the “Items” menu and select “Menu management.”
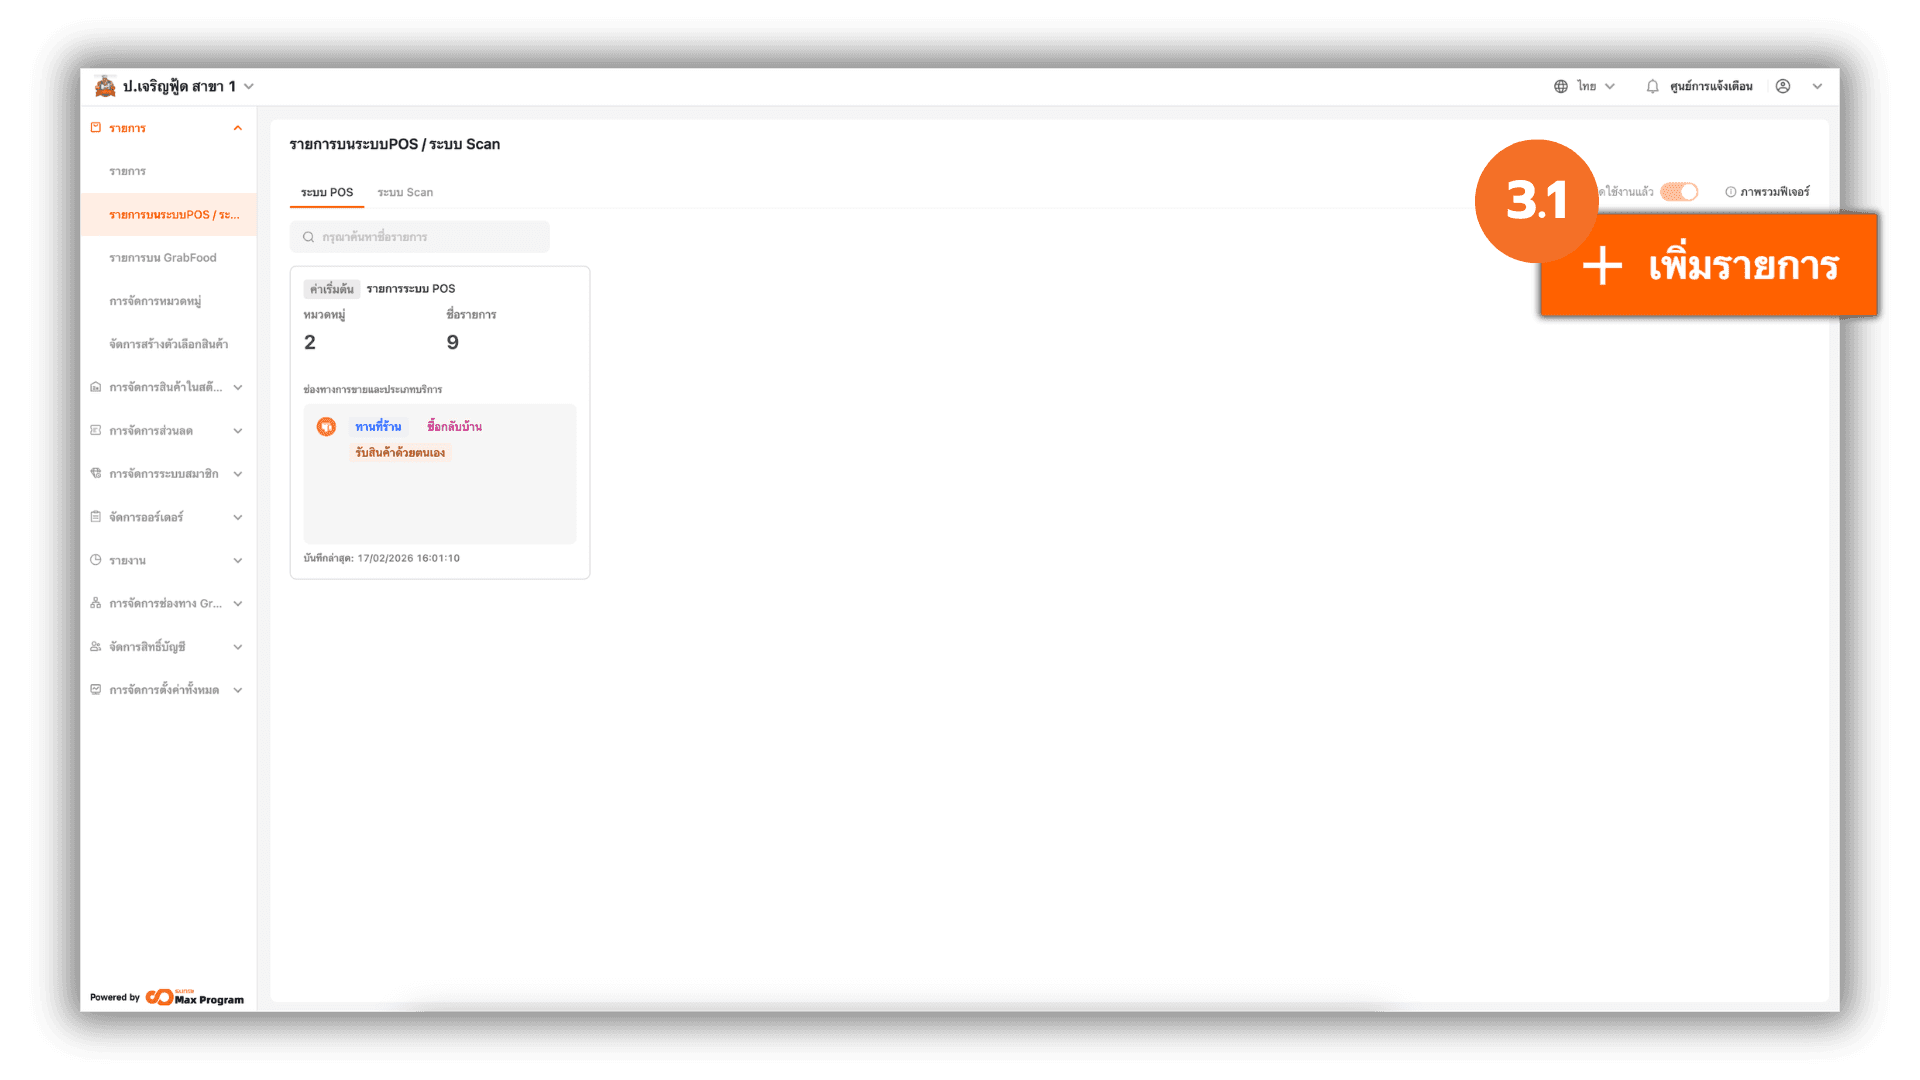
3.1 Create a POS Item Template
On the Menu management page, look under the POS Menu section and click “+ Add Template” to create a new template for that branch.
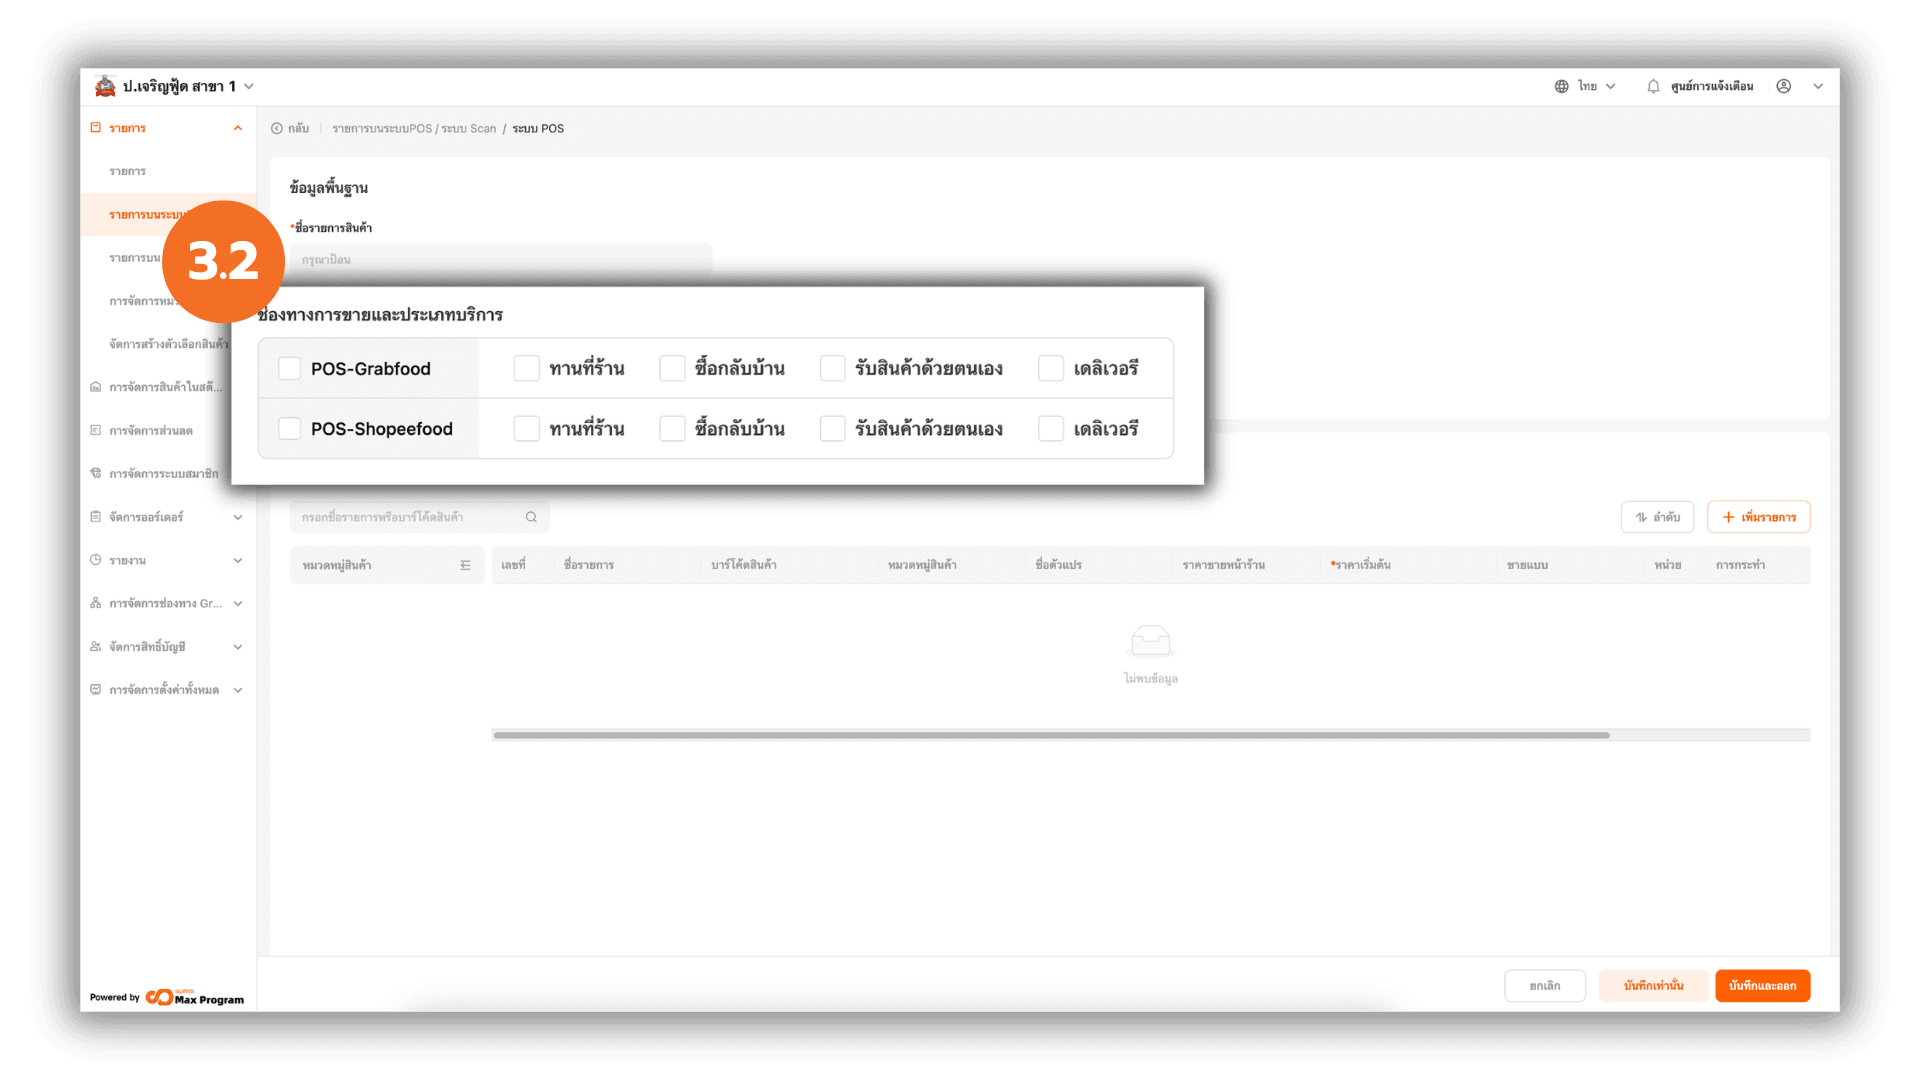
3.2 Select the Sales Channel and Service Type in the Template
In the template creation page, find the section “Sales Channel and Service Type.” Select the sales channel you previously created to match the store’s sales format.
How to Use the “Sales Channel” Feature on the POS Sales Screen
After enabling the POS System / Scan System Items feature, adding sales channels to the Store Branches, and creating products/menu items linked to the appropriate sales channel, you can use the feature as follows
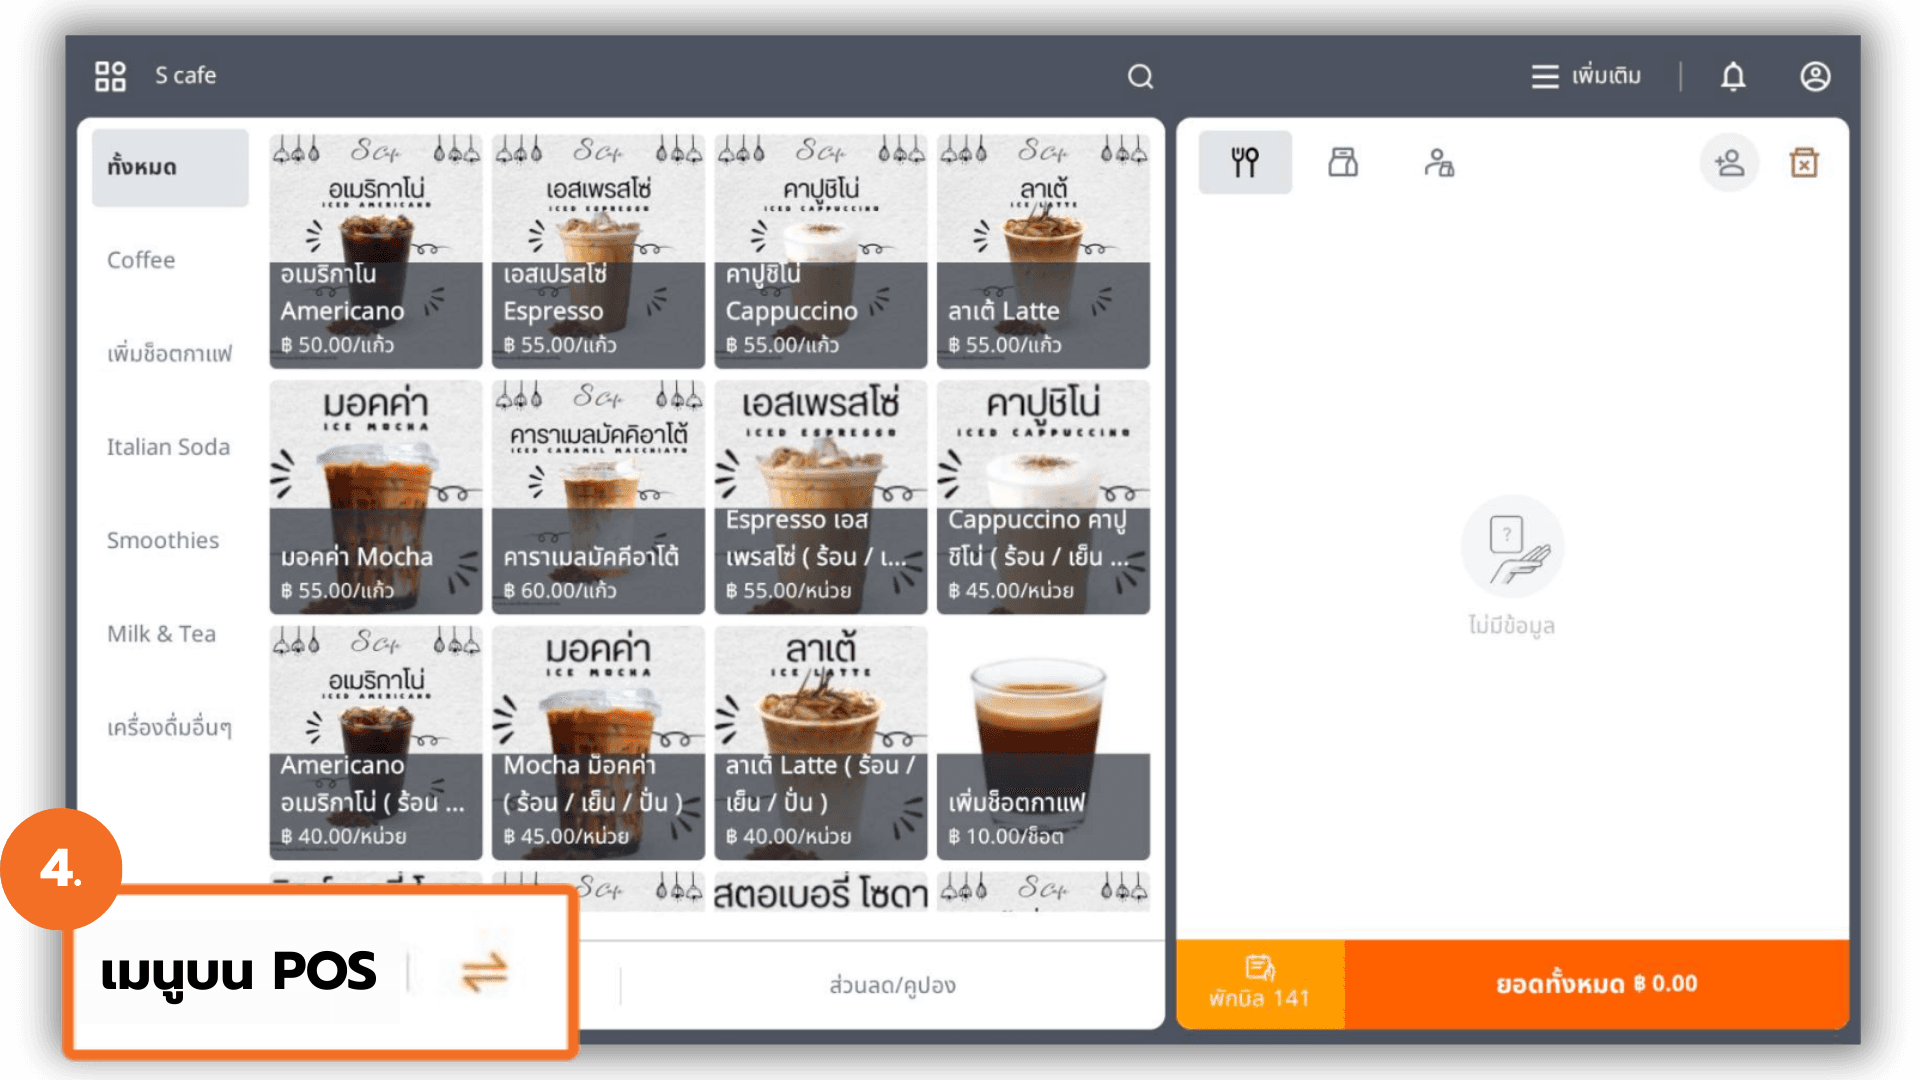
4. Using Sales Channels on the POS
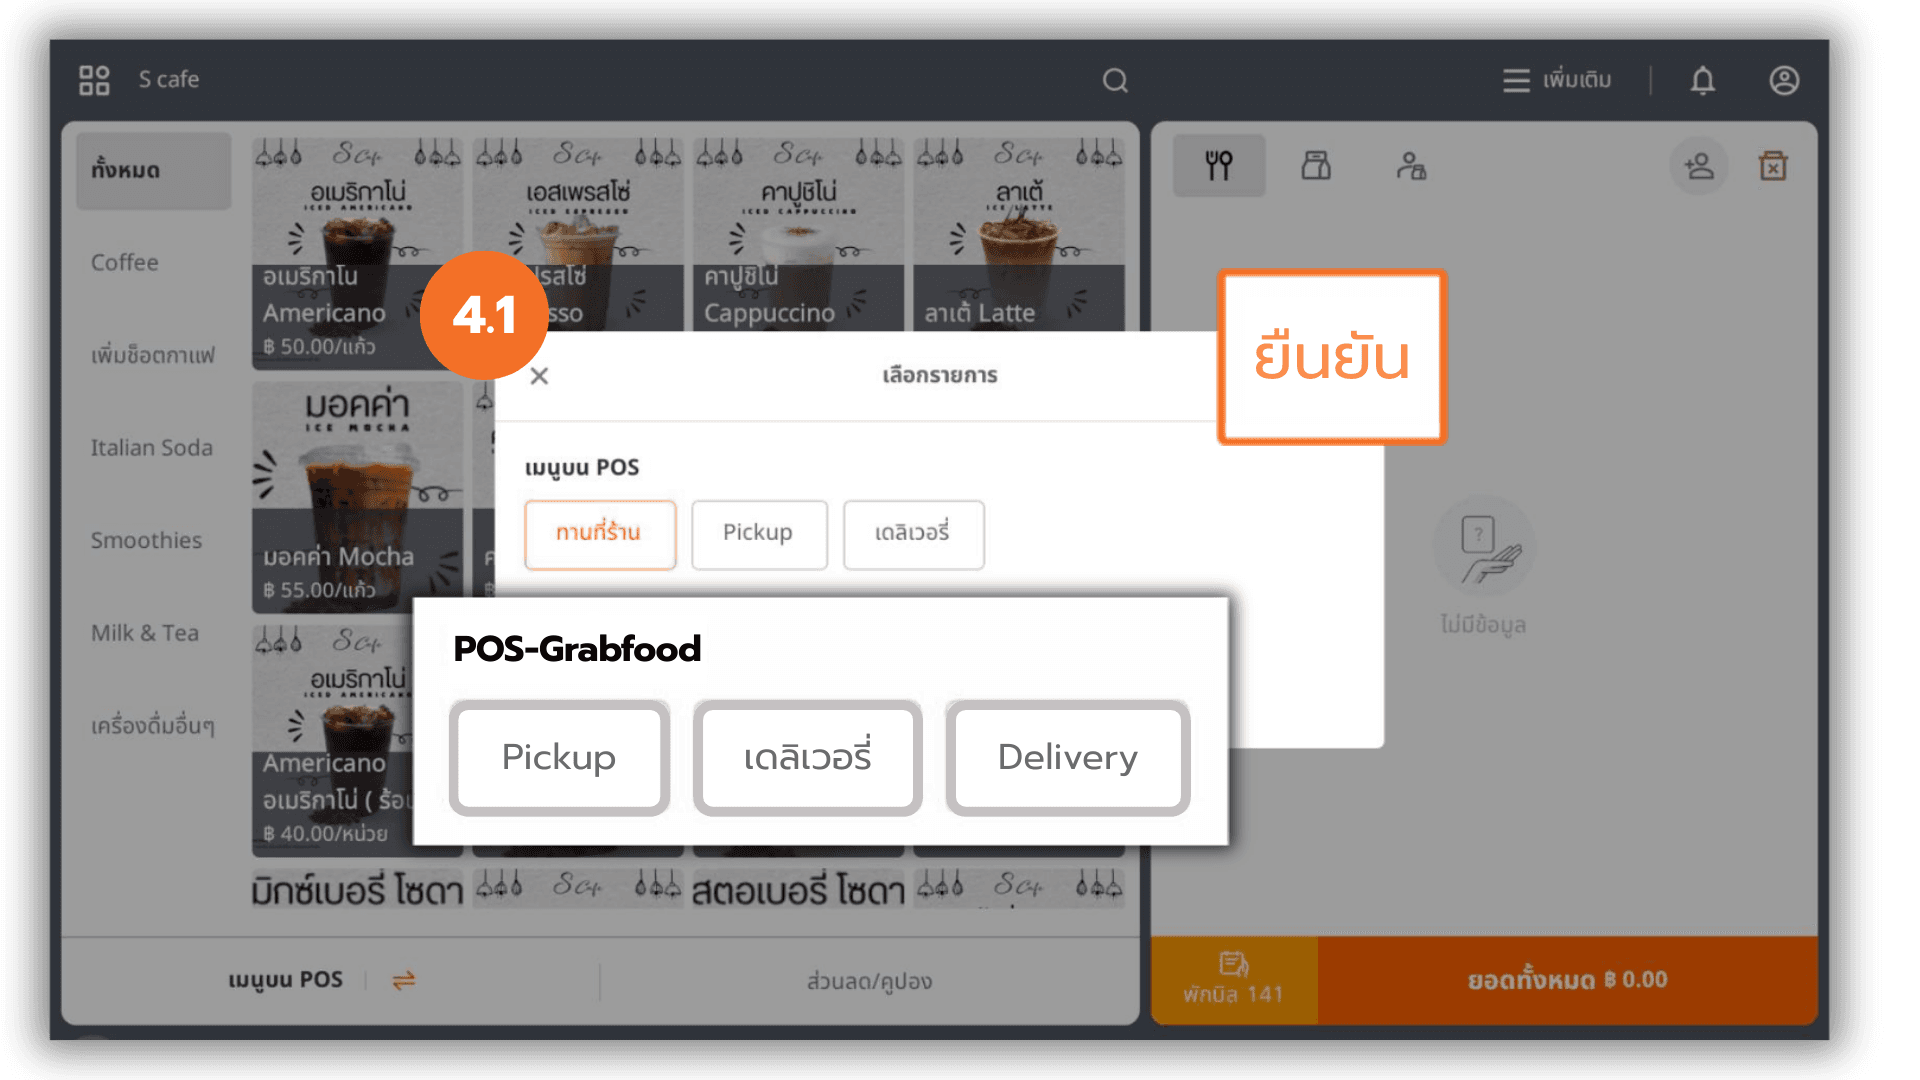
Open the POS program (Point of Sale), then go to the bottom-left corner of the screen and click the “POS Menu.” The system will display the “Select Menu” option for selection.
4.1 Switching Sales Channels During Operation
Select the sales channel you want to use, then click “Ok.” The system will switch the sales operation to the selected channel and immediately adjust its functionality according to that channel.