Managing GrabFood items via Manager App
2026-05-01 10:16
Managing GrabFood through this system allows merchants to control products and prices per sales channel, freely arrange menu categories and templates, and sync data with the POS quickly and accurately.
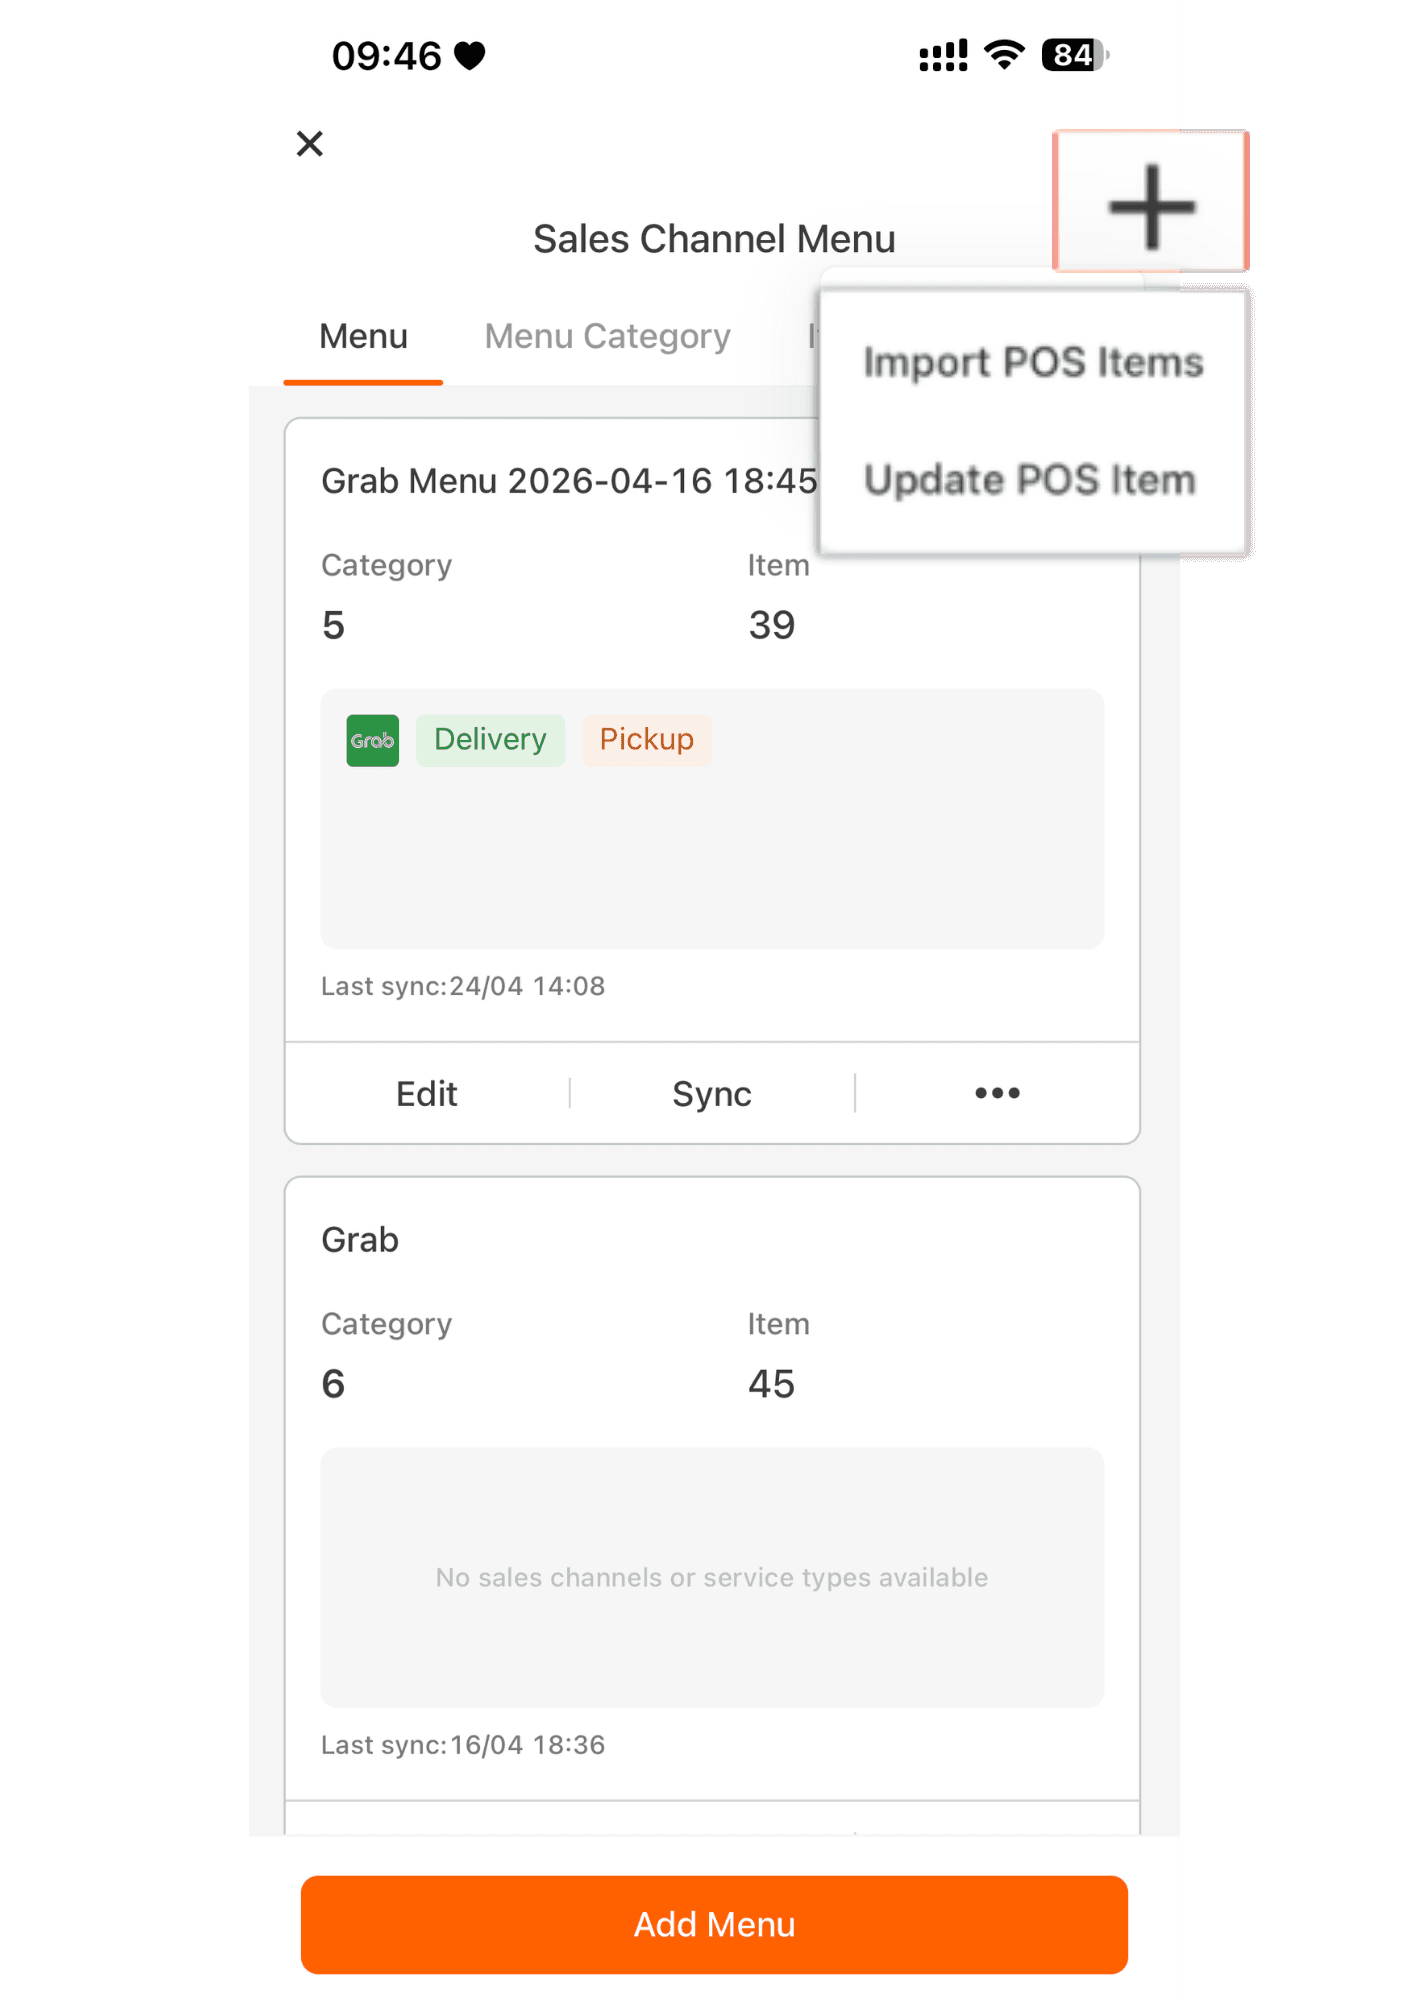
1.Click GrabFood

2.Click +Import POS Items
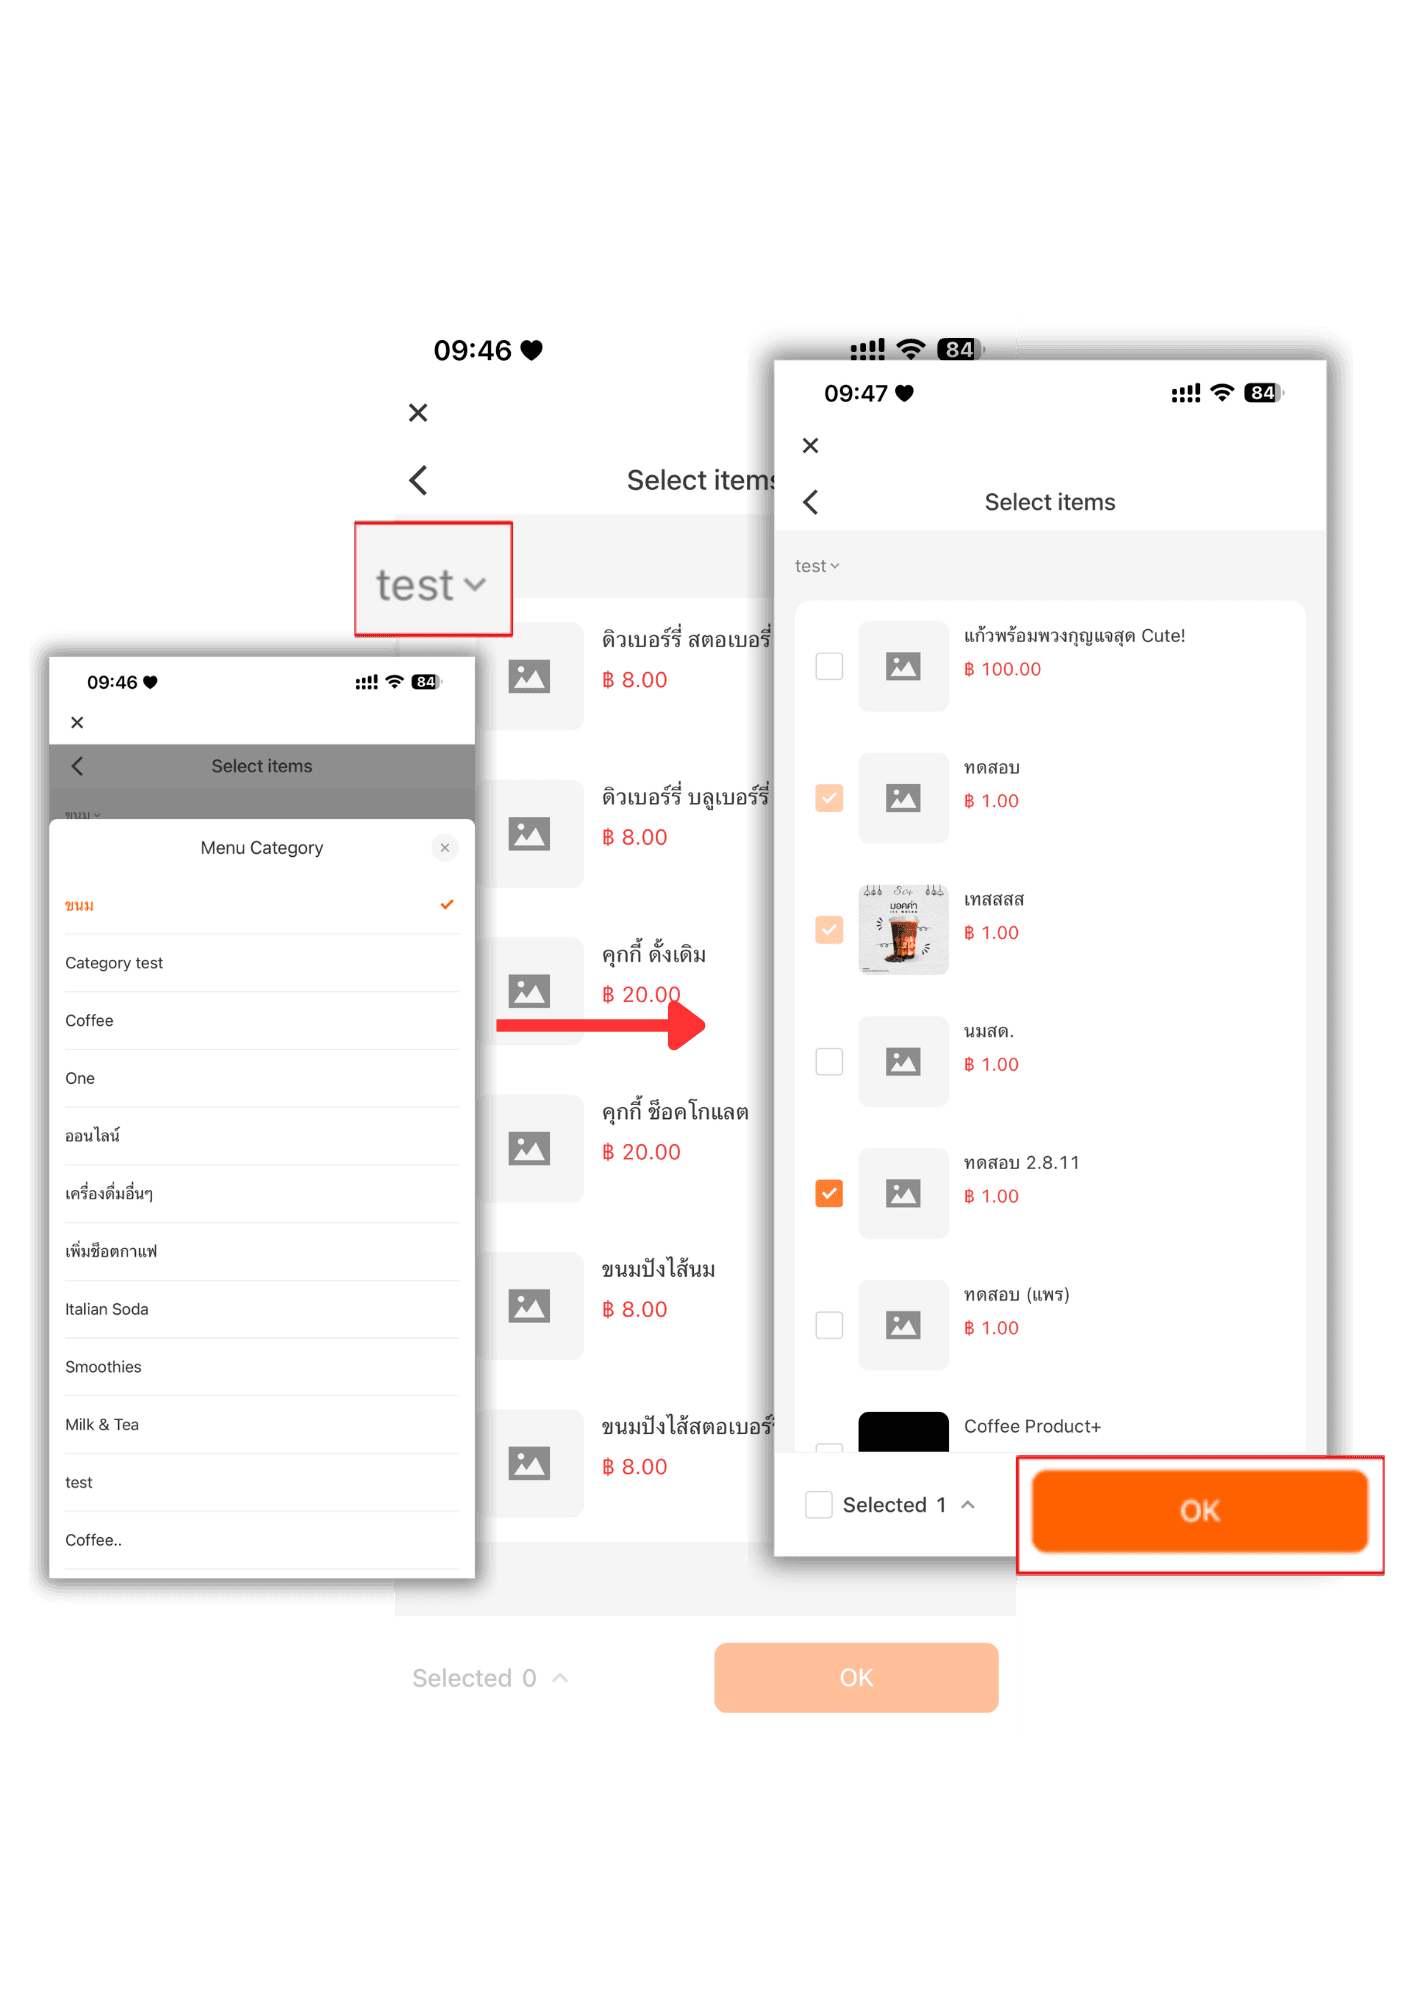
3.Select the category first, then choose the product items you want to display on Grab, and click “OK”
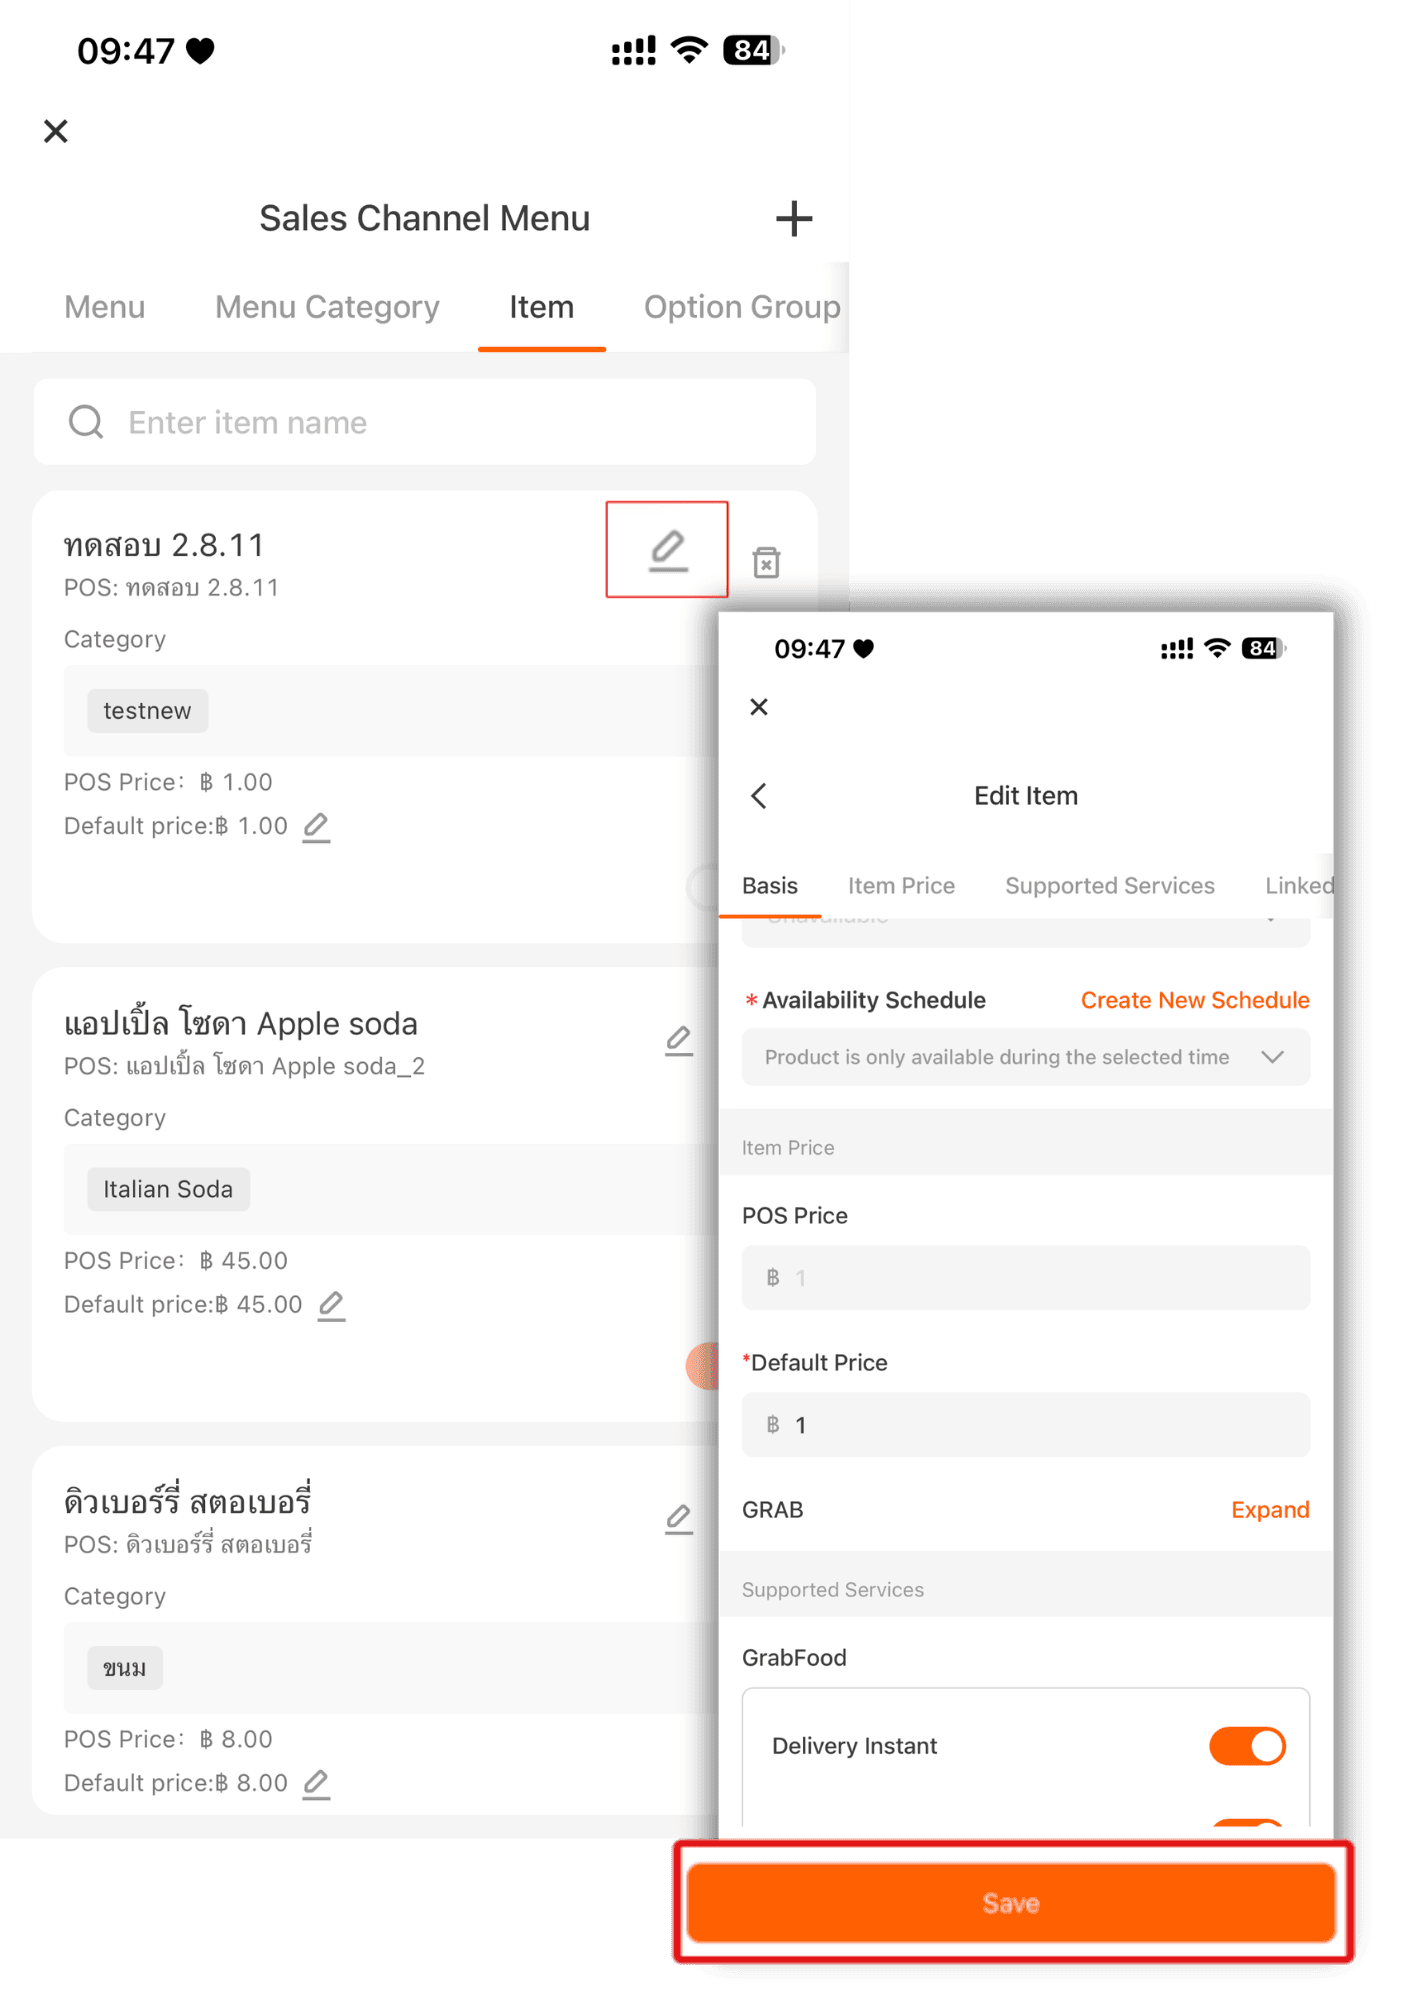
4.Then click the pencil icon to edit the product information, then press “Save.”
|You can edit the price, set selling hours, and manage other sales channels.
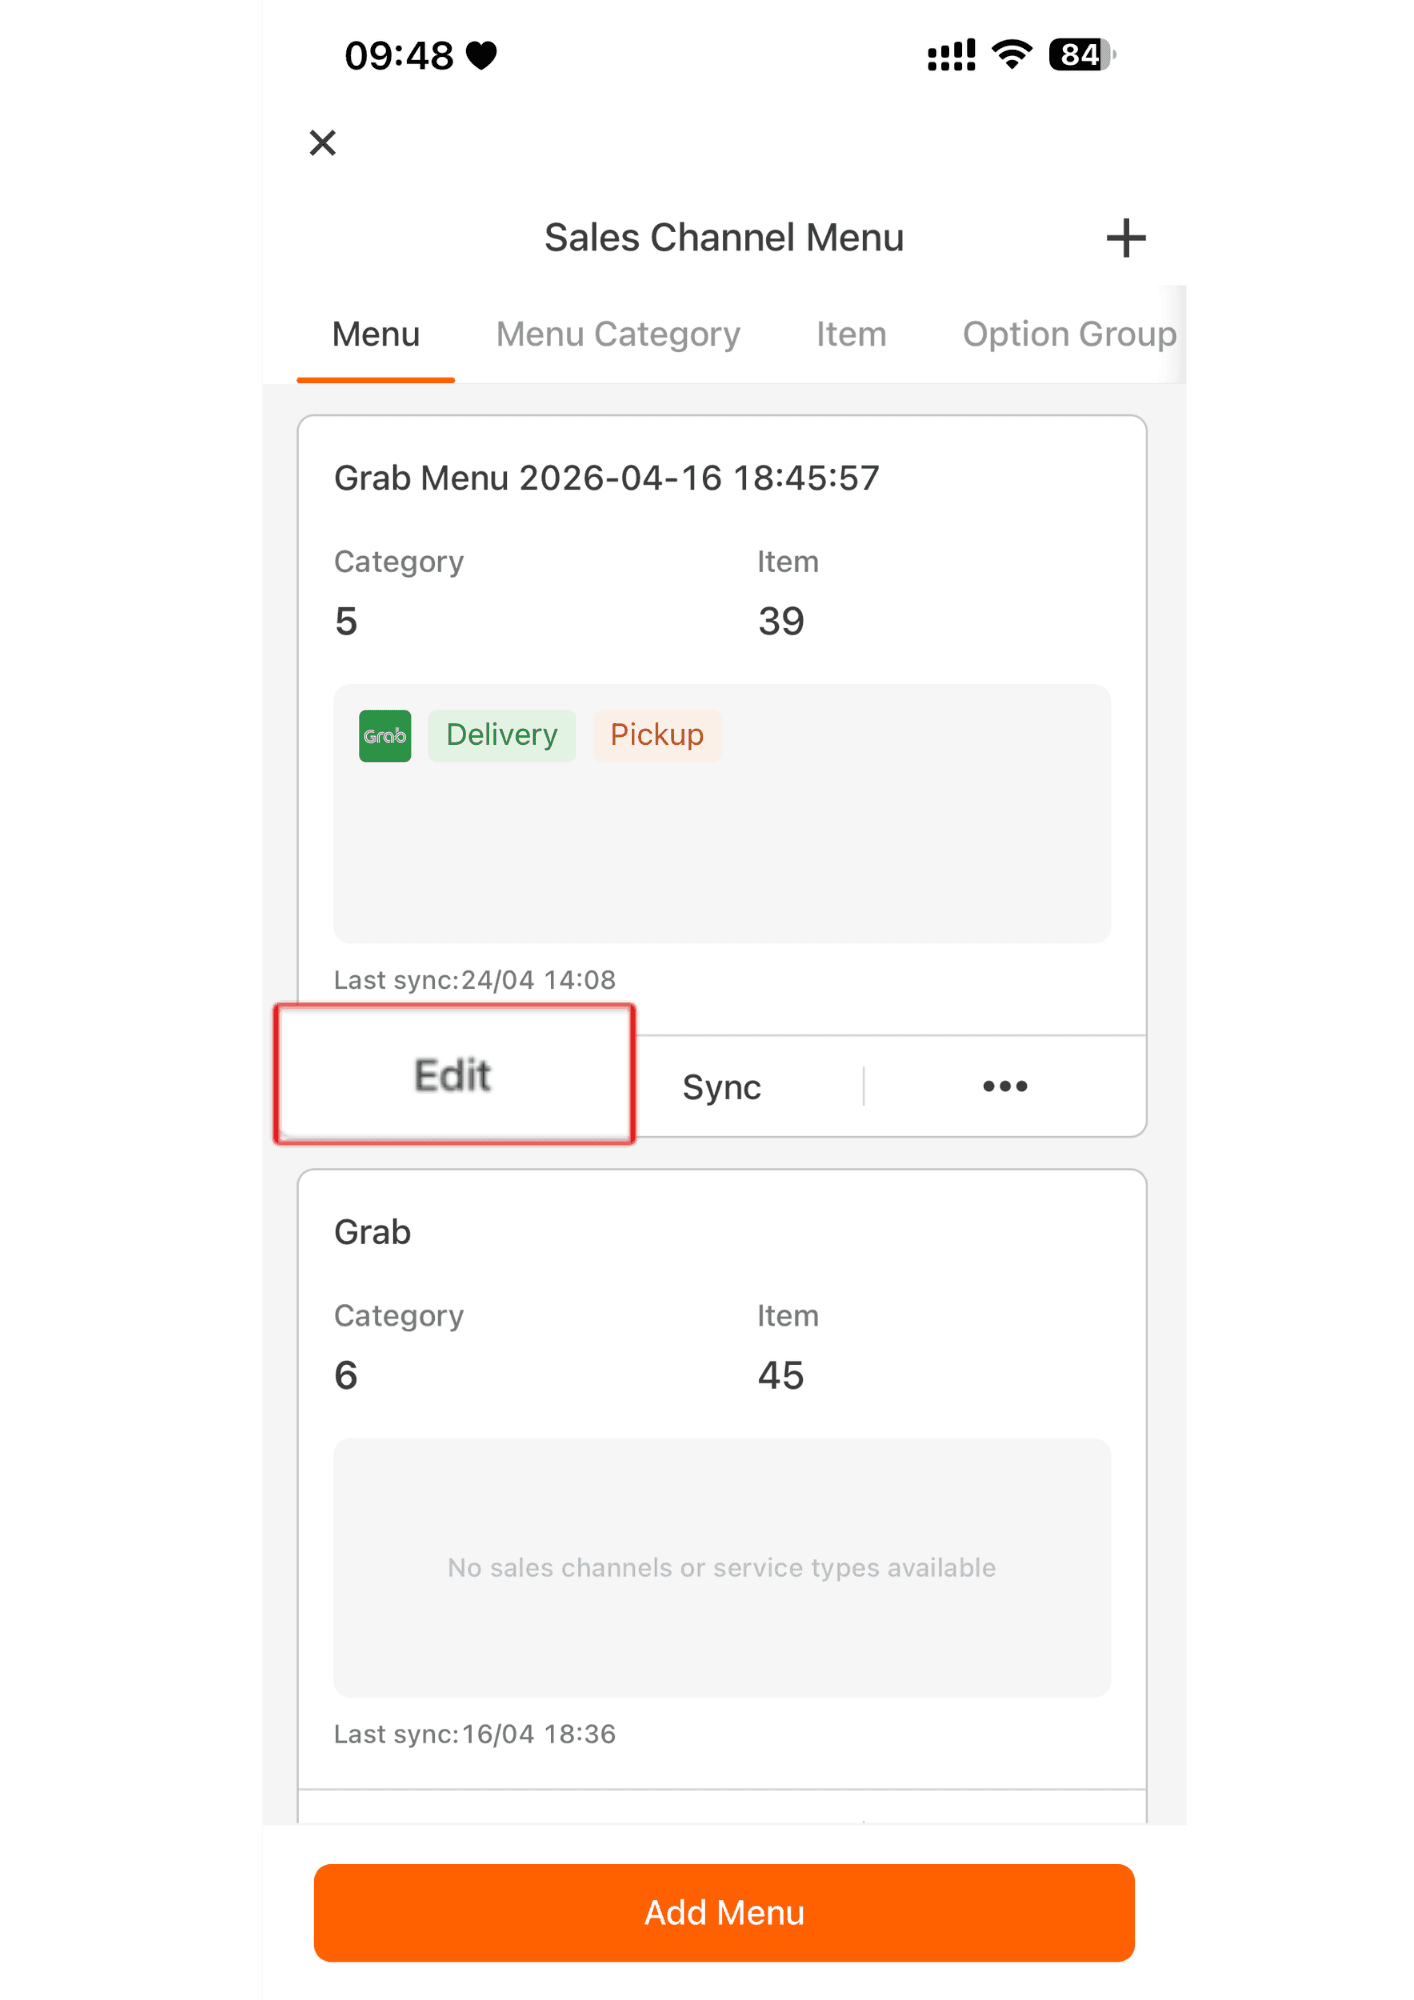
5.The system will return to the product template page, then click “Edit.”
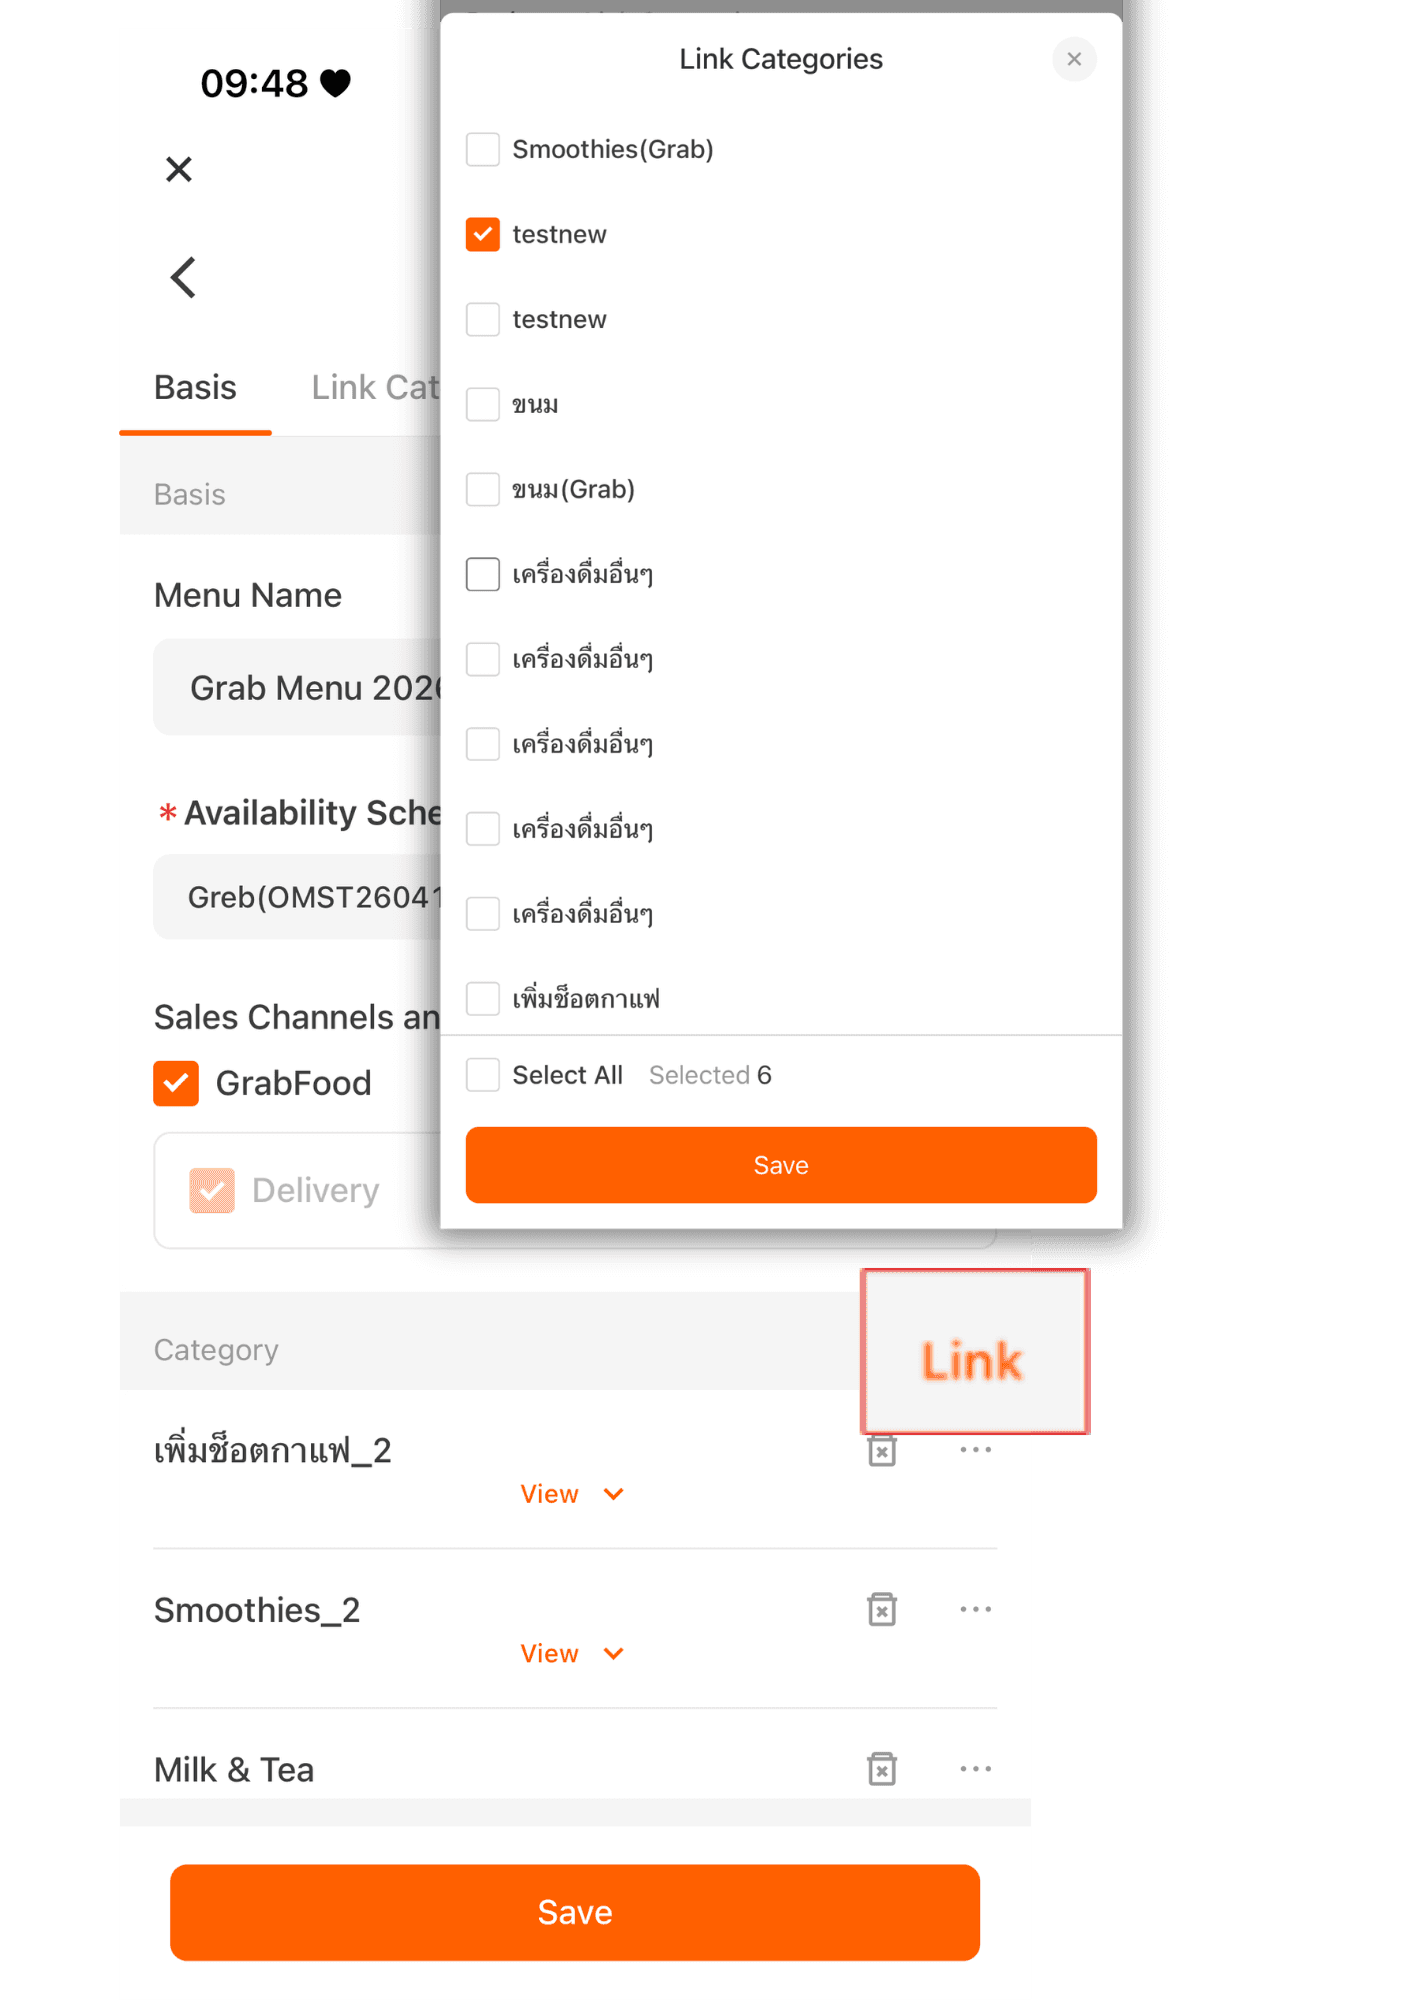
5. Click “Link” to select categories from the products that were added to the system before syncing the data to the GrabFood sales page.
Once all categories have been selected, click “Save”
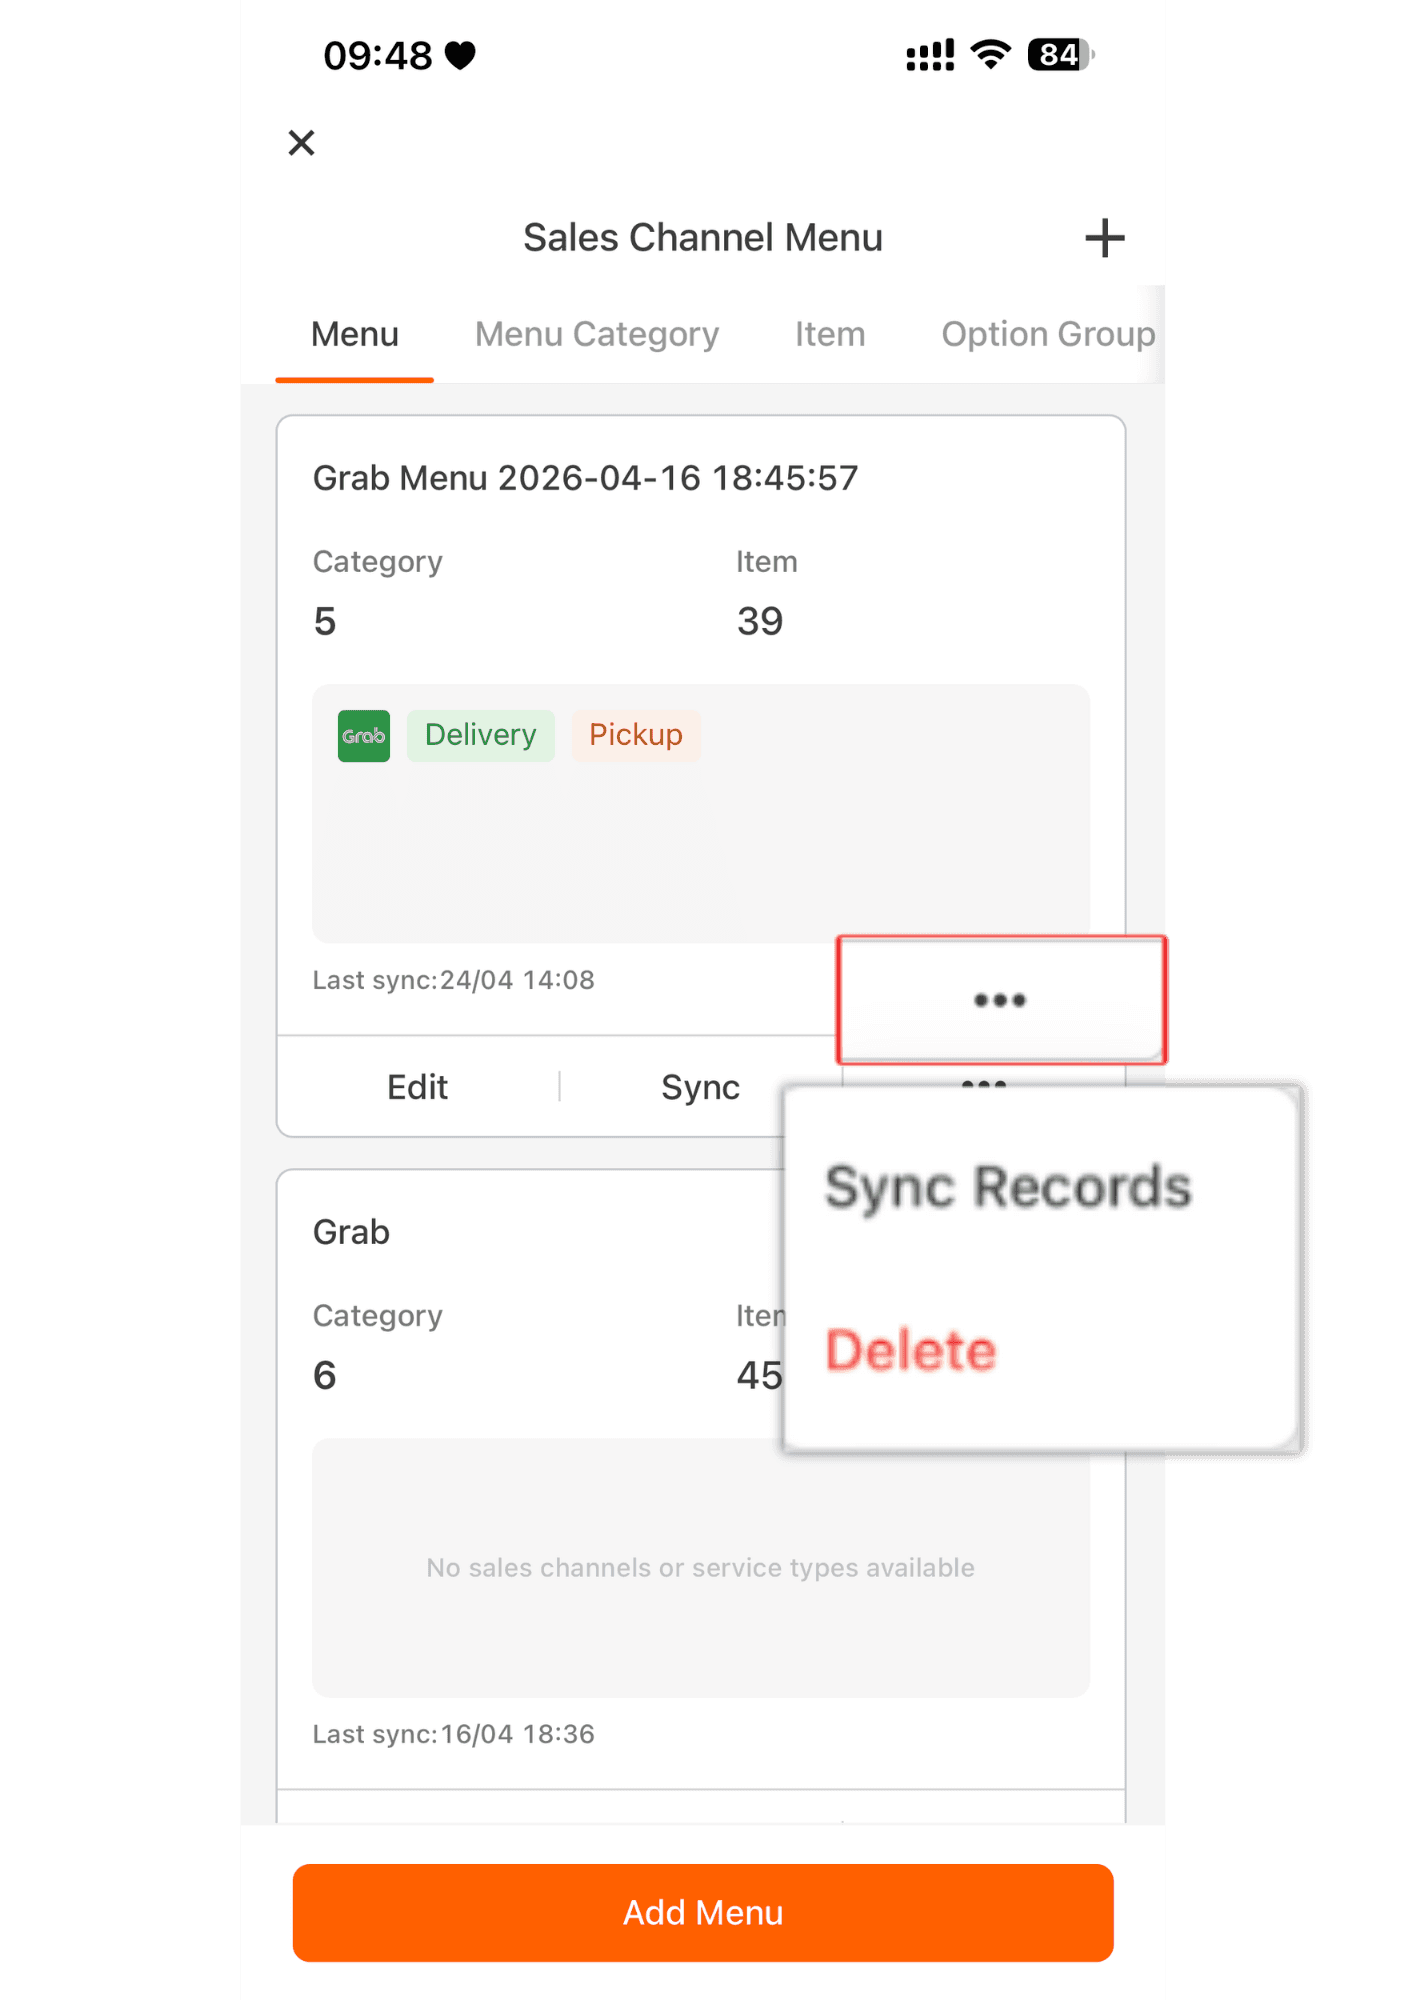
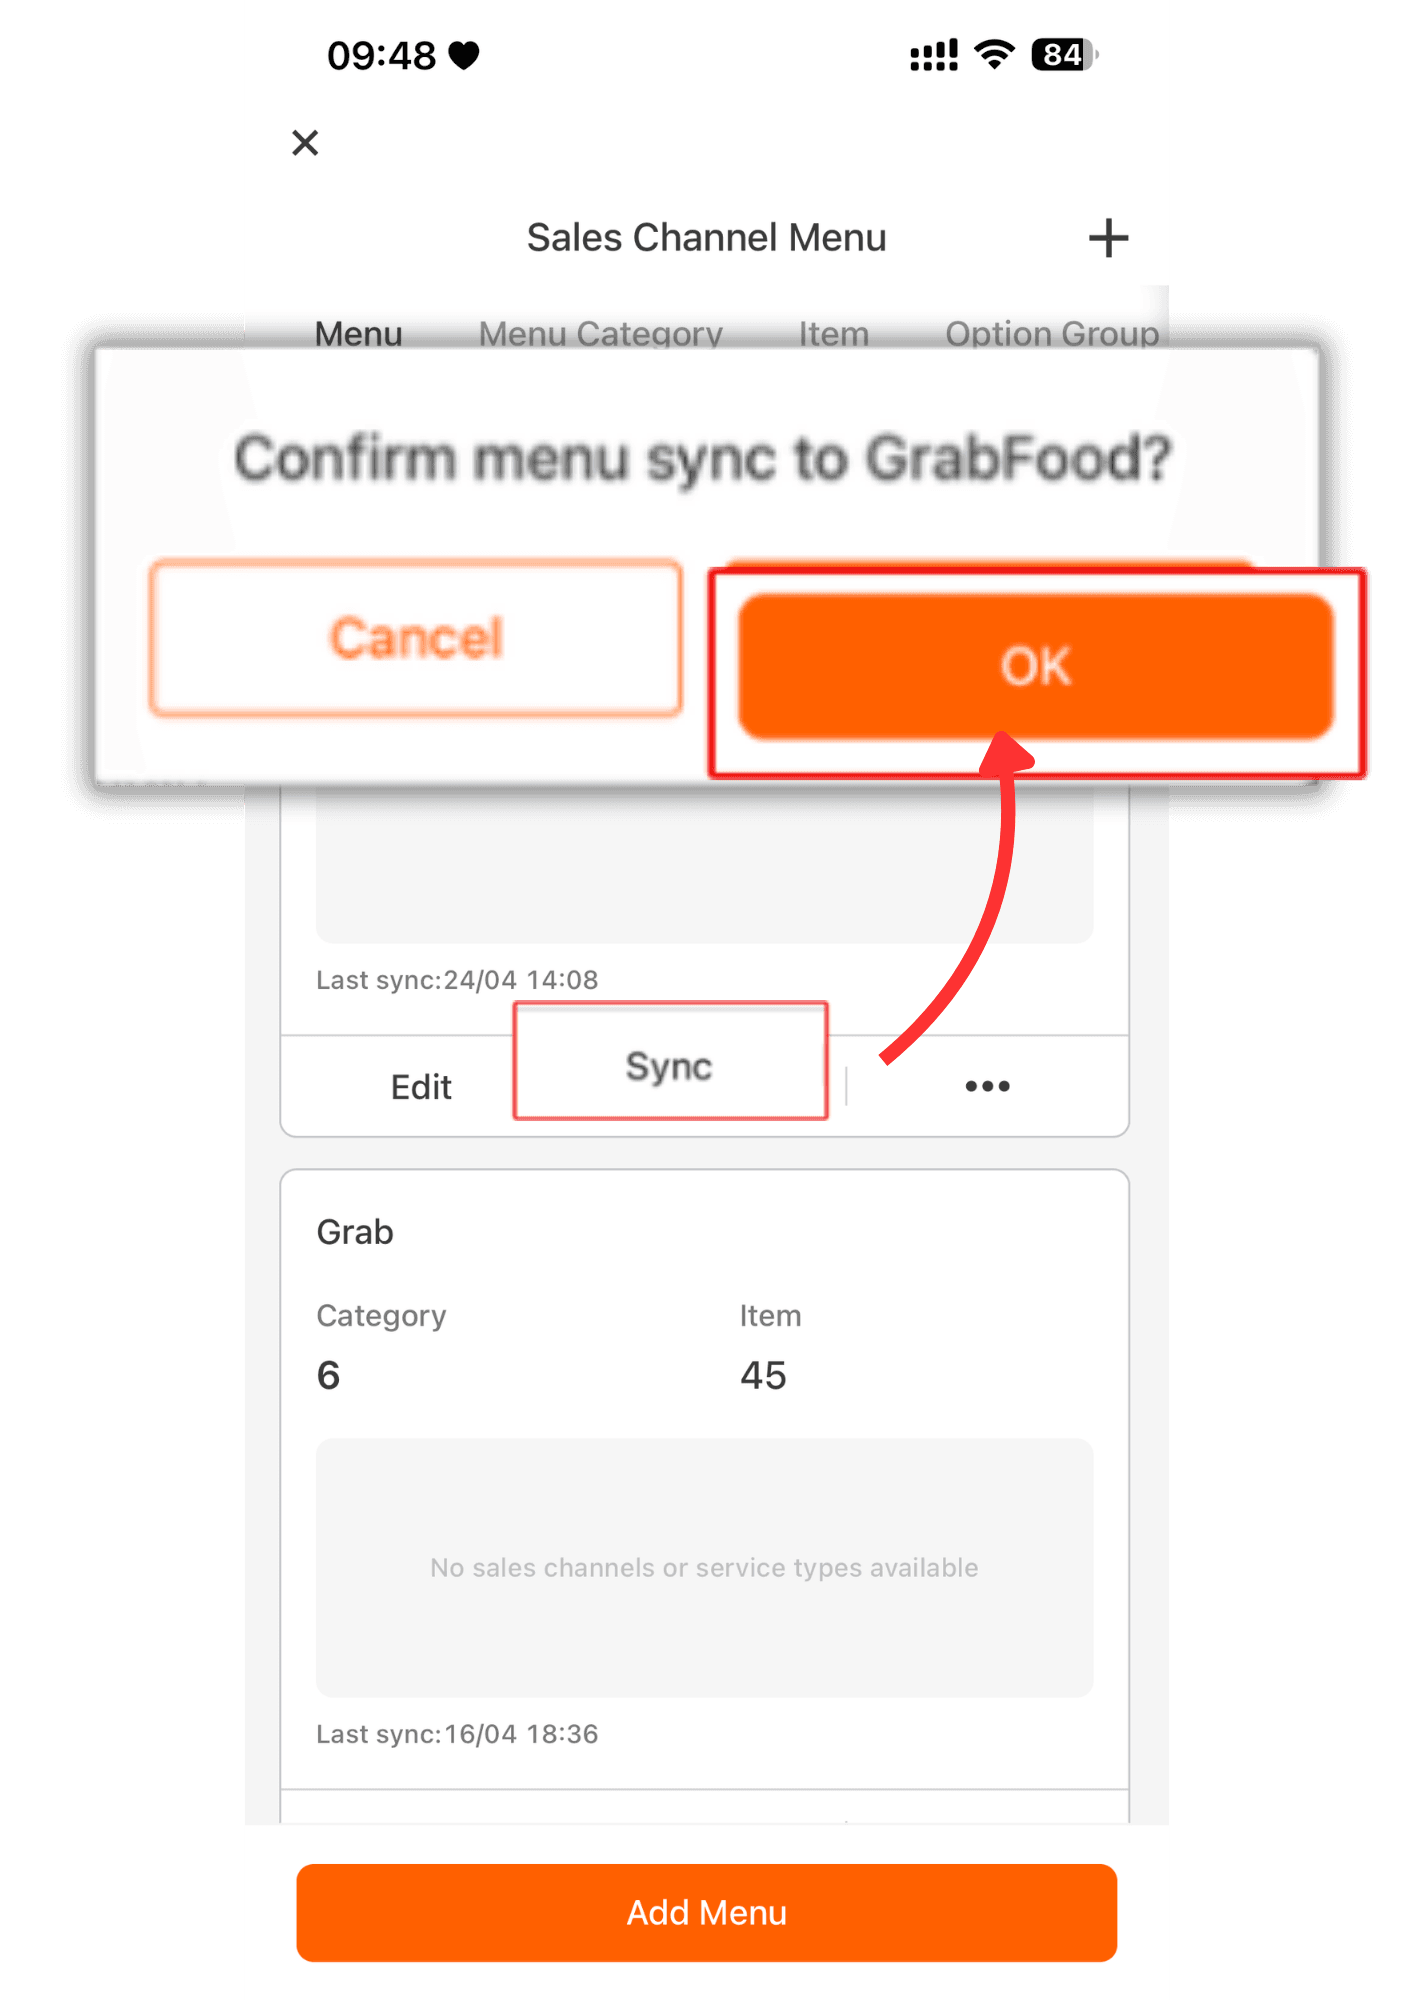
6. Once everything is completed, click “Sync” to synchronize the edited or newly added information to GrabFood.
7. Click ...to check the sync history or delete the template as well.