Percentage-Based Item Discount for Members
2026-02-13 09:57
This guide explains how to create and manage percentage-based item discount promotions exclusively for members through the Back Office system. It enables you to flexibly define discount conditions and effectively control usage for specific member groups as required.
1. Log in to the Back Office
Go to login.gpos.co.th, enter your email and password, then click Login.
Navigate to Membership Marketing and select Promotion.
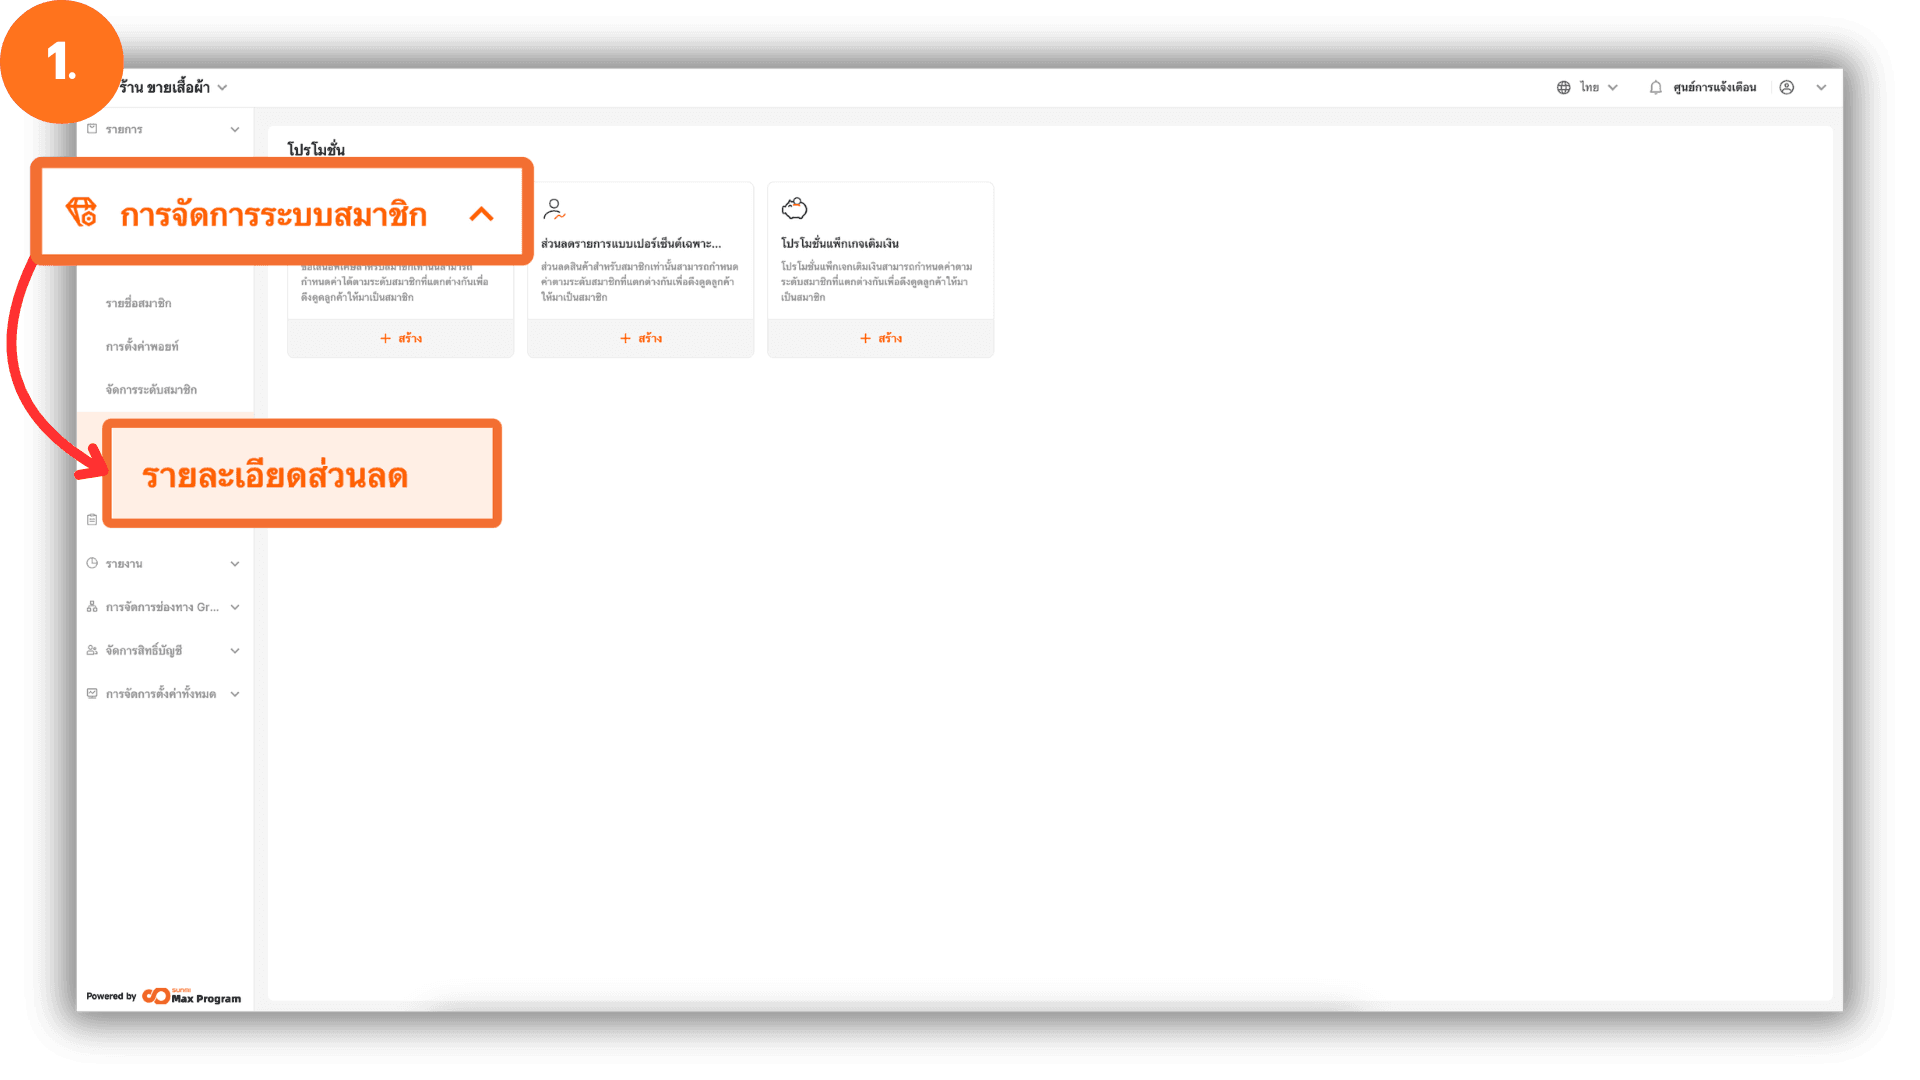
2. Create a Member Discount
The system will display available Member Promotions. Under the section Member-only item discount, click the “+ Create” button to start creating a new discount.
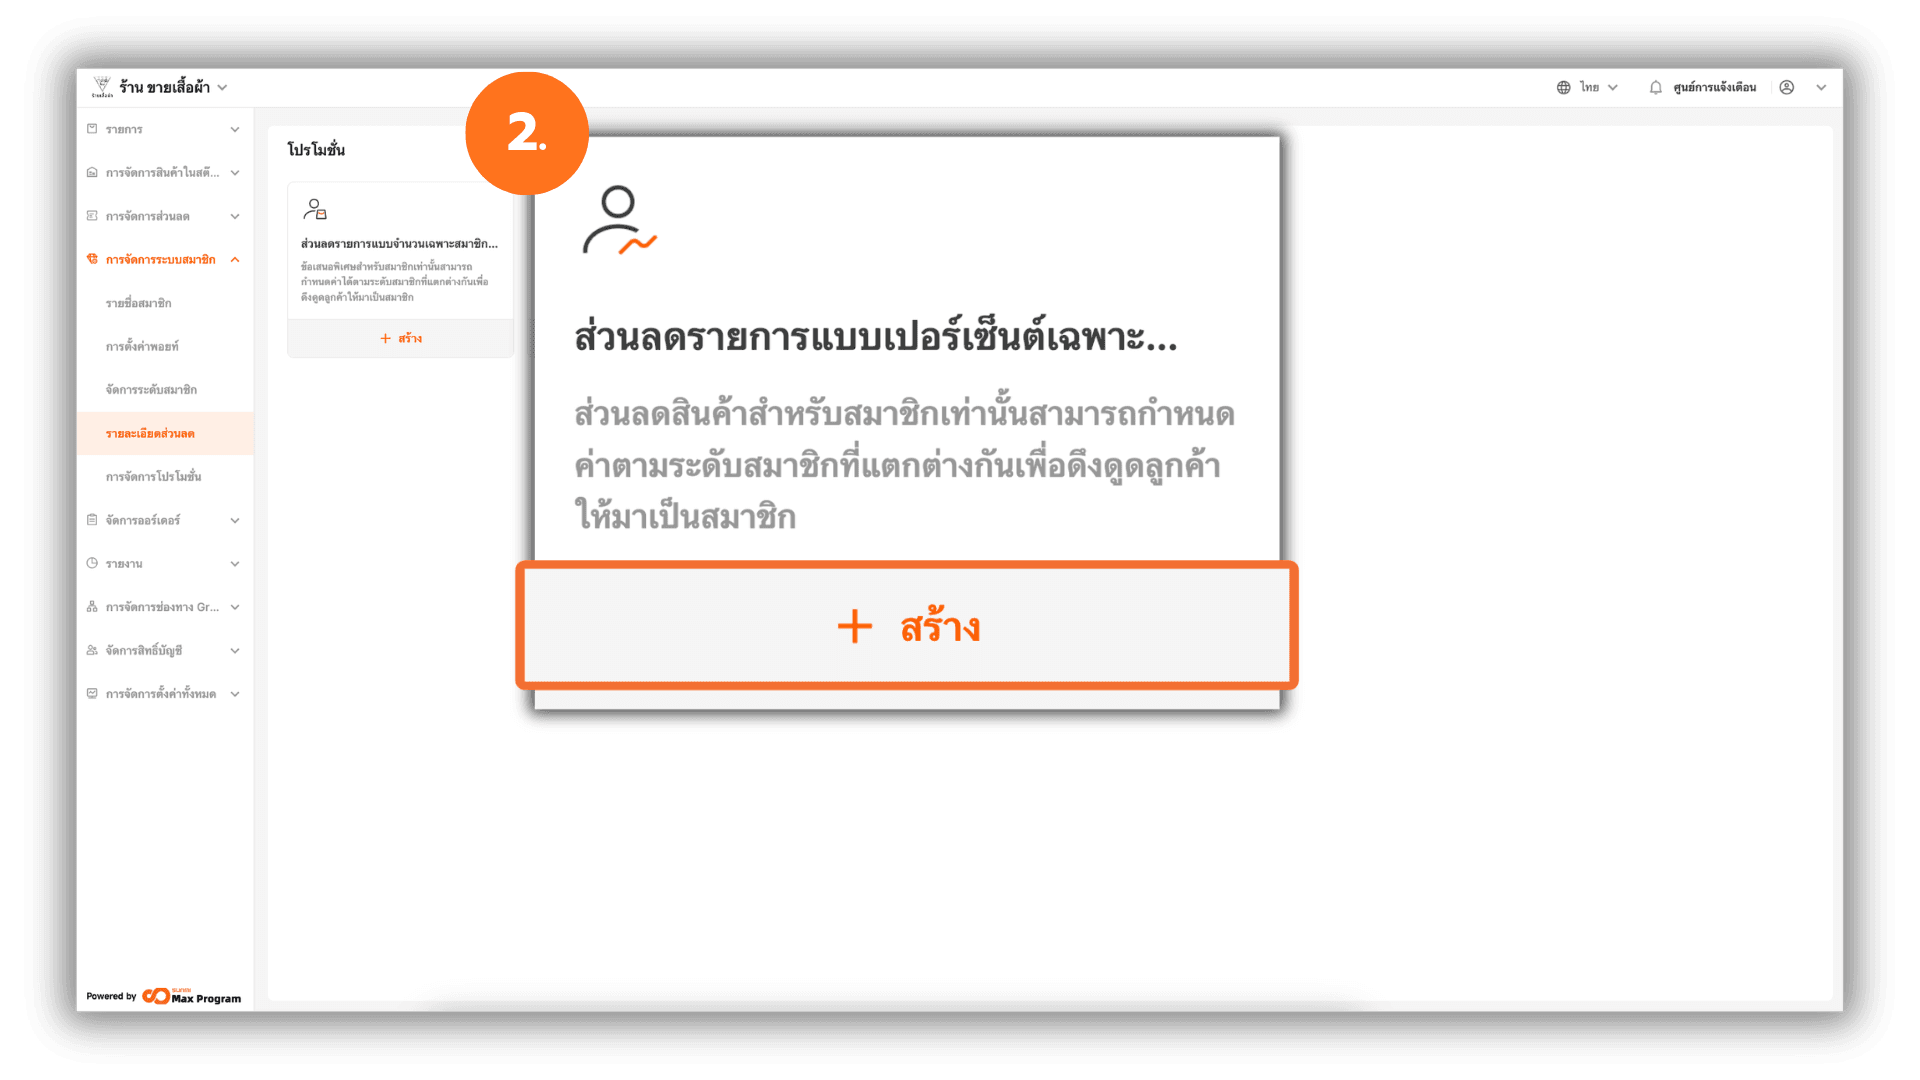
3. Enter the Discount Name
The system will display the discount setup page. Enter the Promotion Name to be displayed in the system (e.g., Member Exclusive Item Discount).
Note : Use a clear and descriptive name. You may include the discount amount or promotional period to make future management easier.
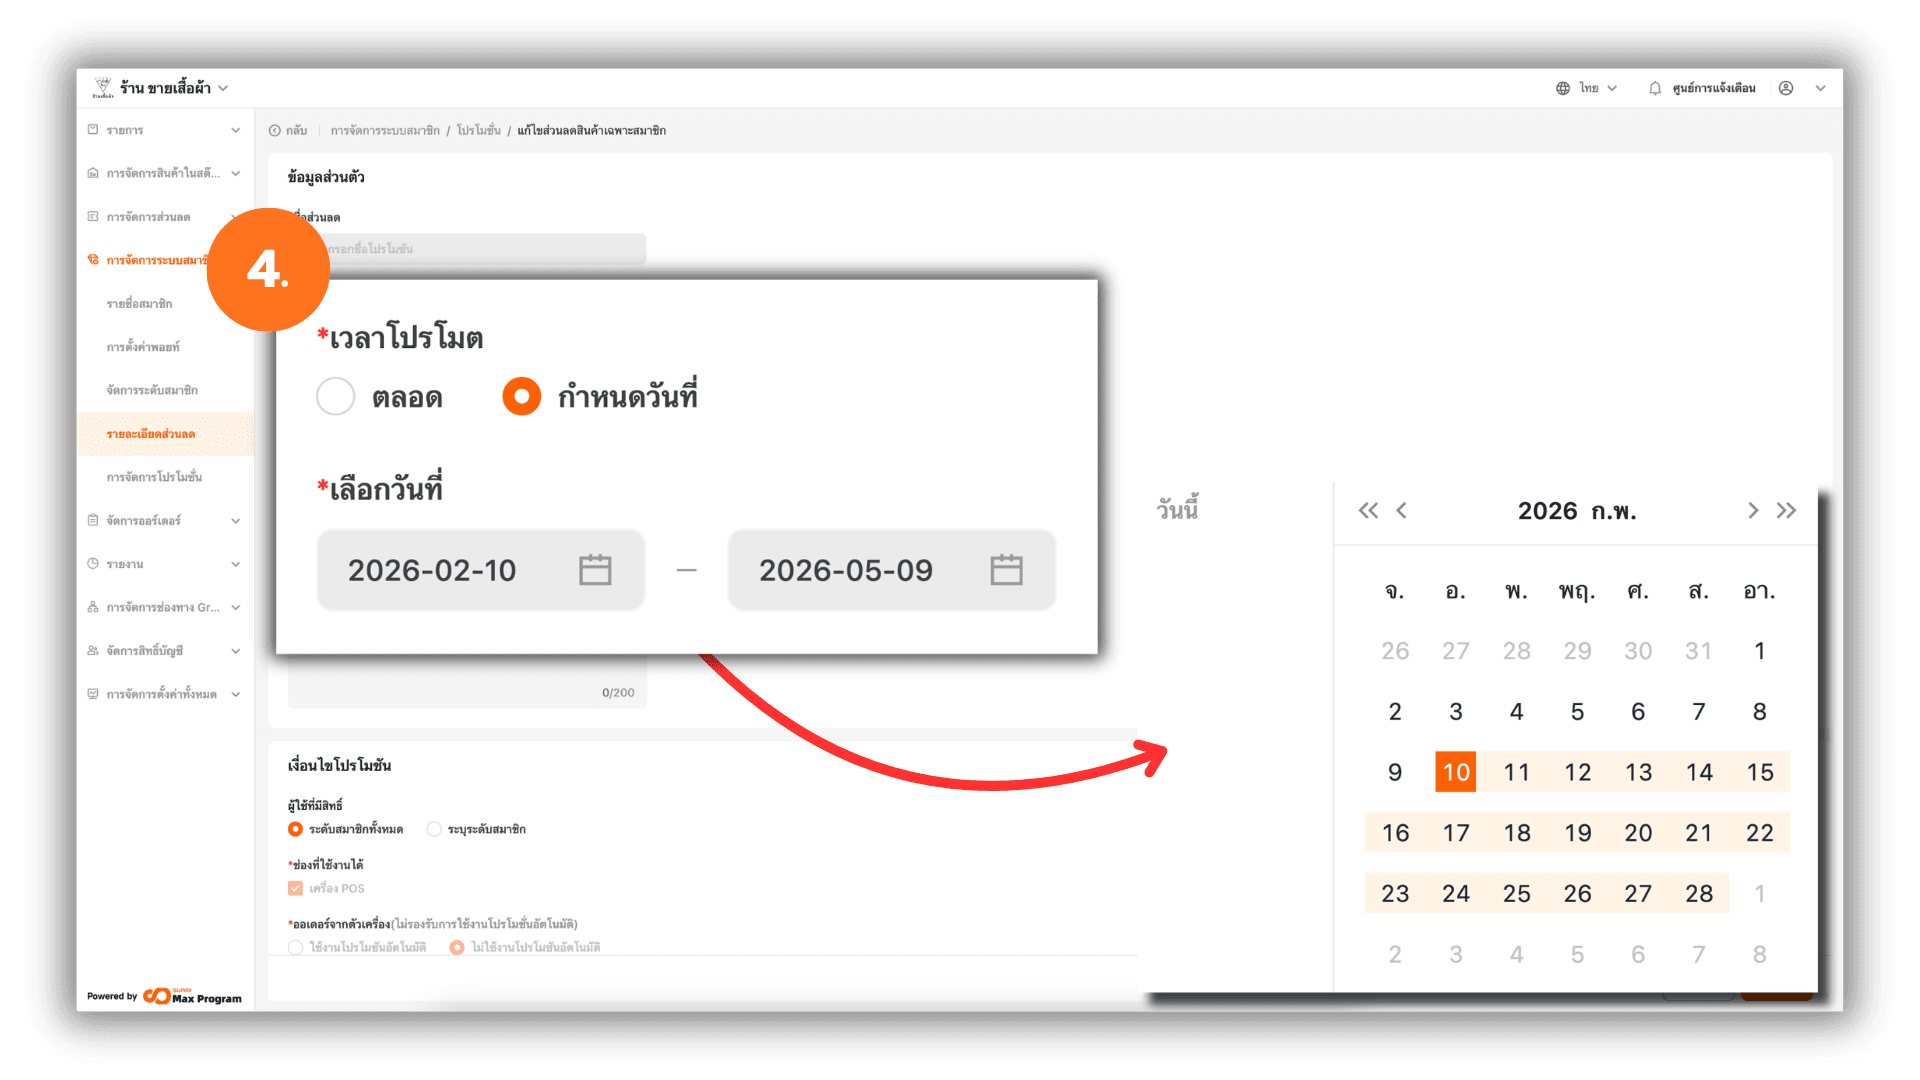
4. Set the Valid Date Range
Select one of the following date options :
- Always Valid – The discount will be available continuously with no end date.
- Custom Time – Set the Start Date – End Date of the promotion.
Example : Valid from 1 October 2026 – 31 October 2026.
5. Set Applicable Days
If the promotion runs for a long period and you want to limit usage to specific days, choose one of the following :
- Day – Available every day within the selected date range.
- Week – Select specific days (Monday–Sunday).
Example : If you select “Sunday,” the discount will only be available every Sunday.
- Month – Select specific calendar dates (1–31).
Example : If you select “1,” the discount will be available on the 1st of every month.

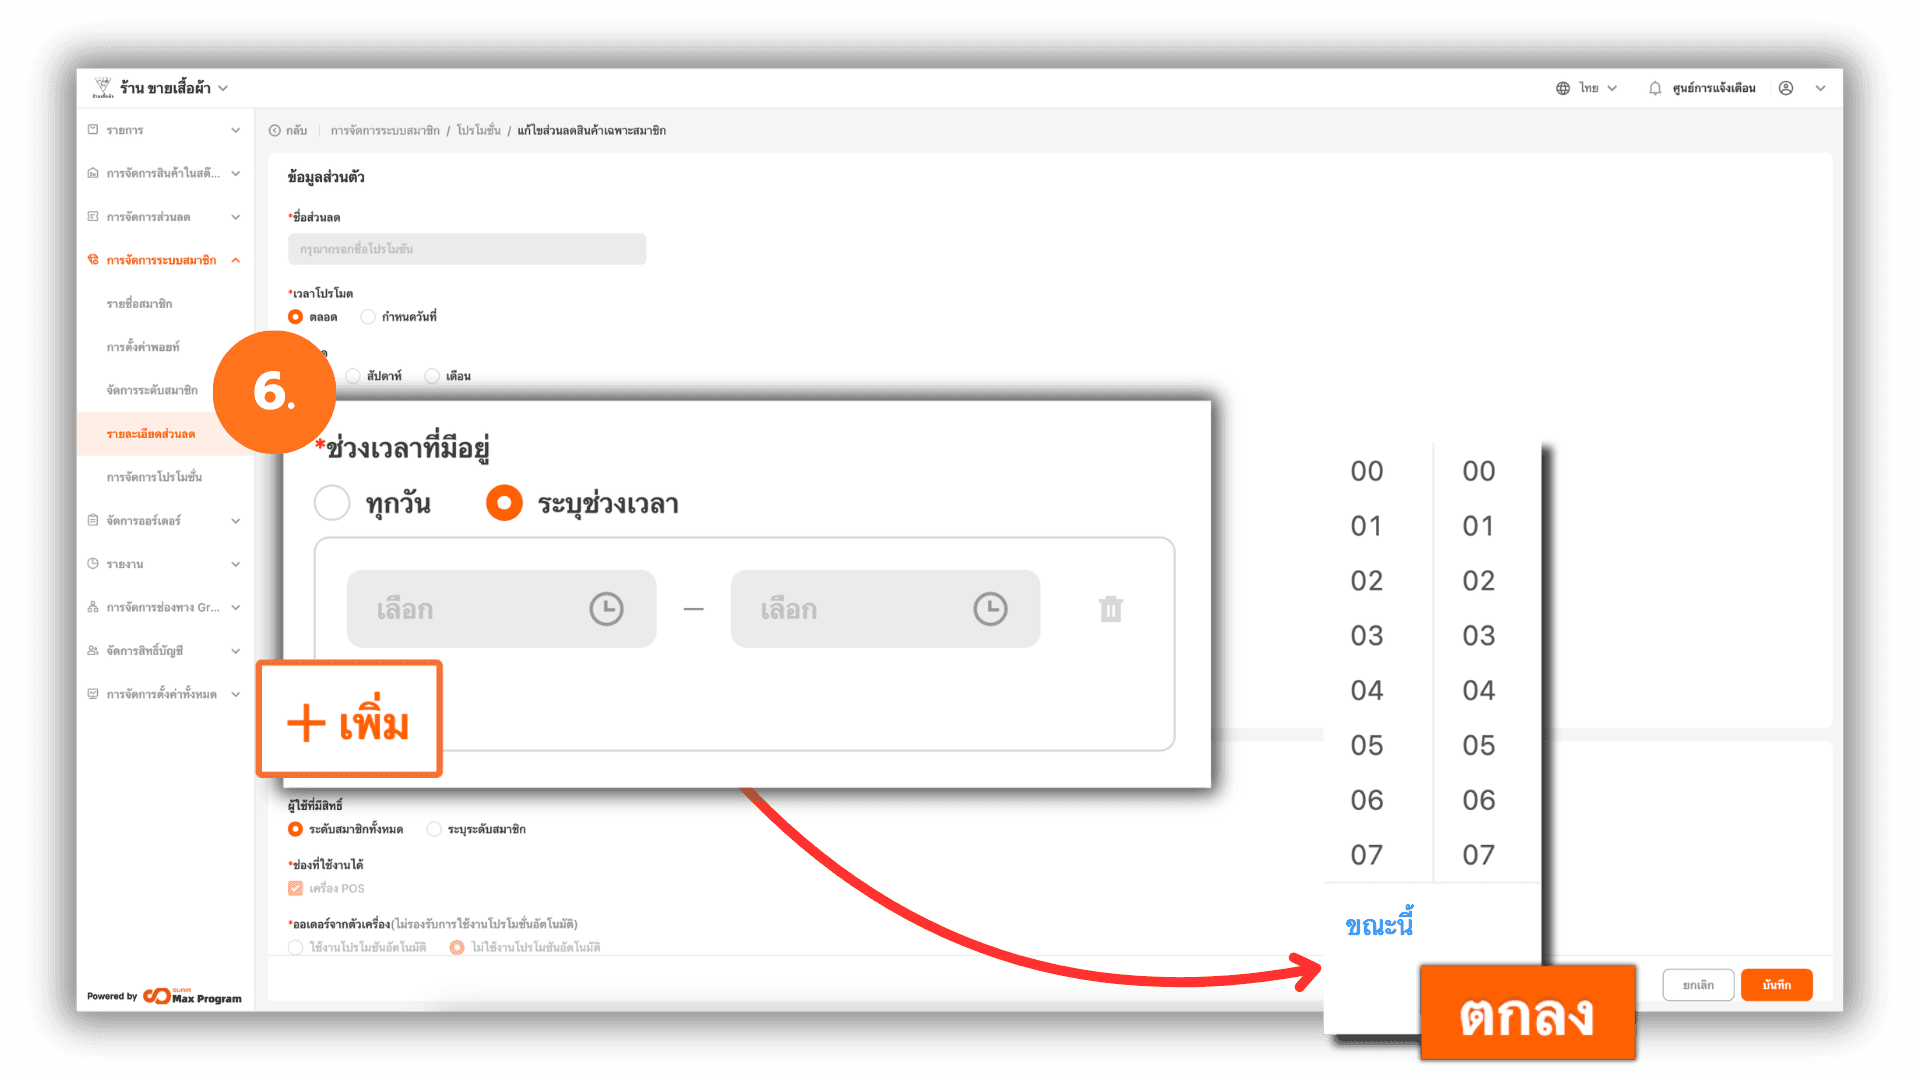
6. Set Applicable Time
Choose one of the following time options :
- All Day – Available from 00:00–23:59.
- Specified Time Slots – Set the Start Time – End Time. You can add up to 5 time periods.
Example : Available from 18:00–19:00.
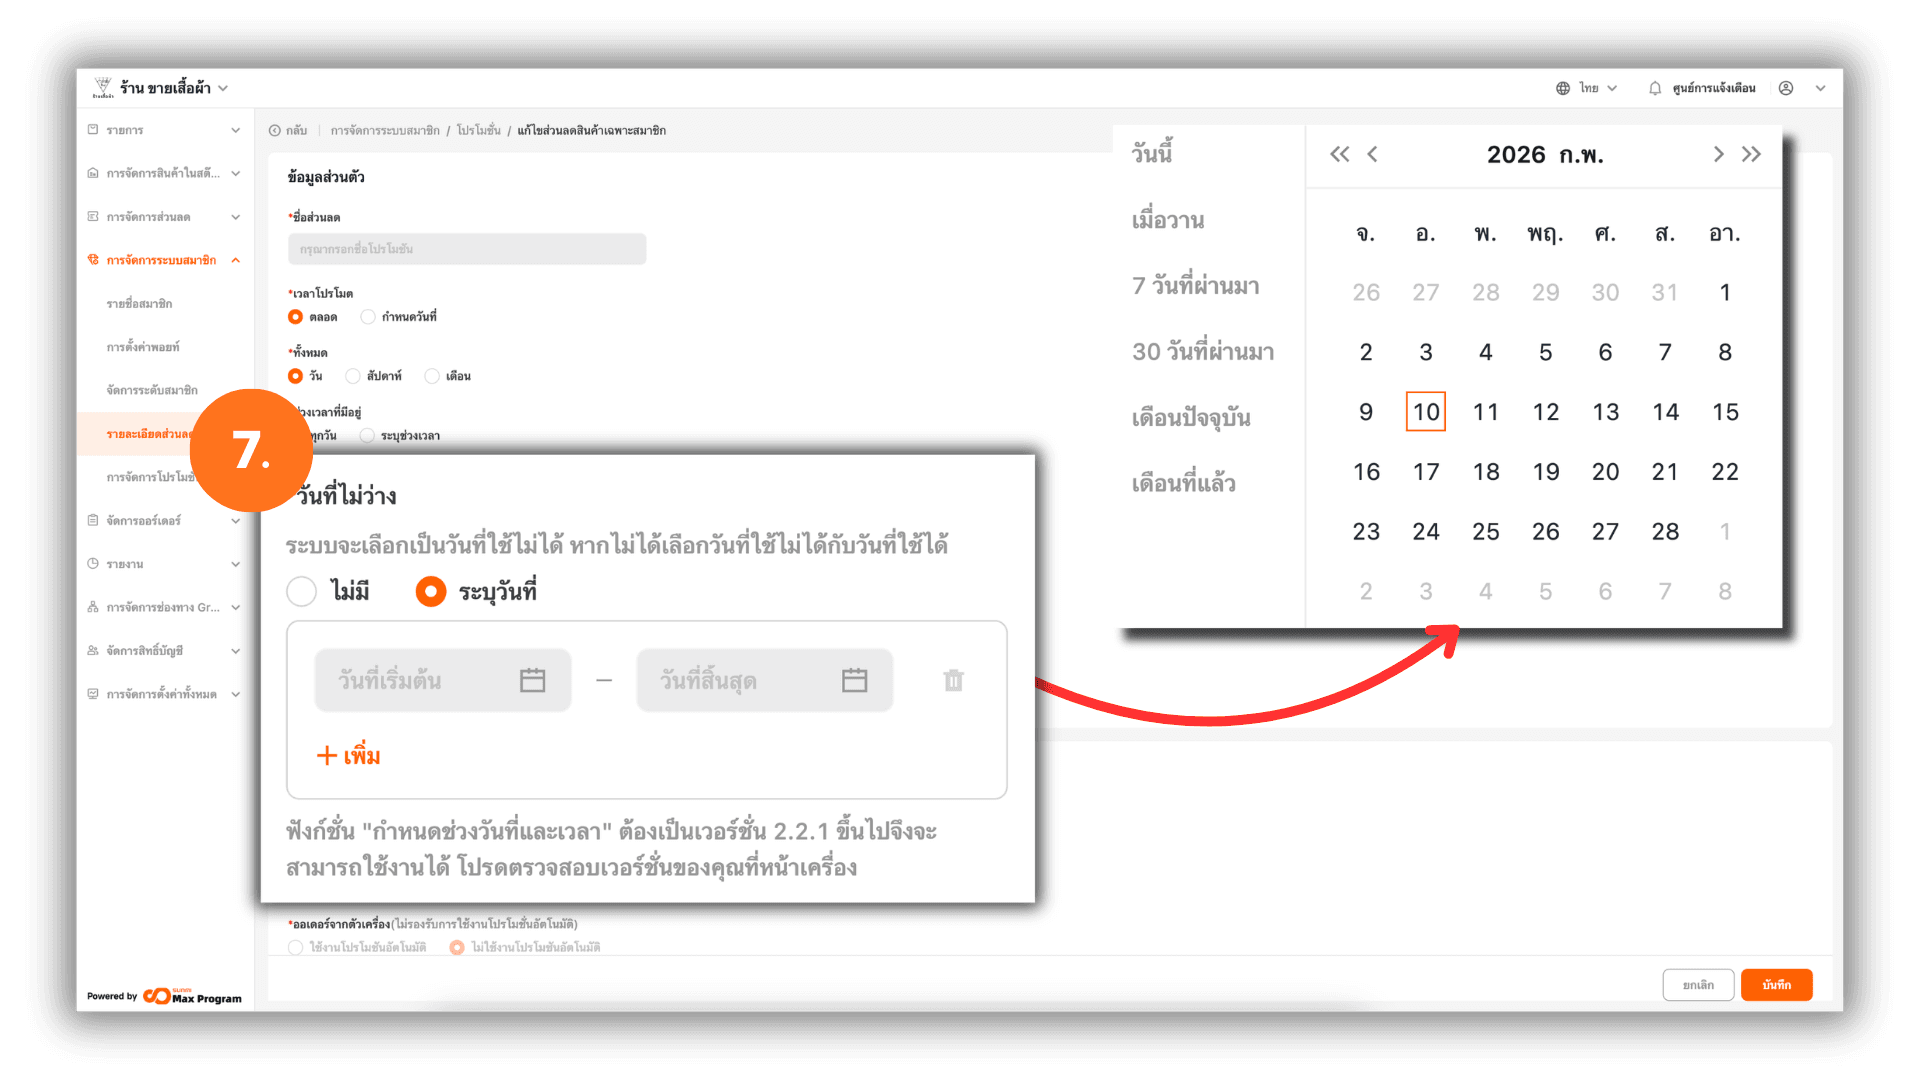
7. Set Excluded Dates
You can configure dates when the discount cannot be used.
Options:
- None – The discount follows the standard configuration.
- Specified Date – Set the Start Date – End Date to exclude (up to 5 date ranges).
Example : Valid throughout October except 10 October.
Note : The "Available Every," "Available Time Slots," and "Unavailable Dates" functions require an upgrade to version V2.2.1 or above for use. Please check your POS app version.
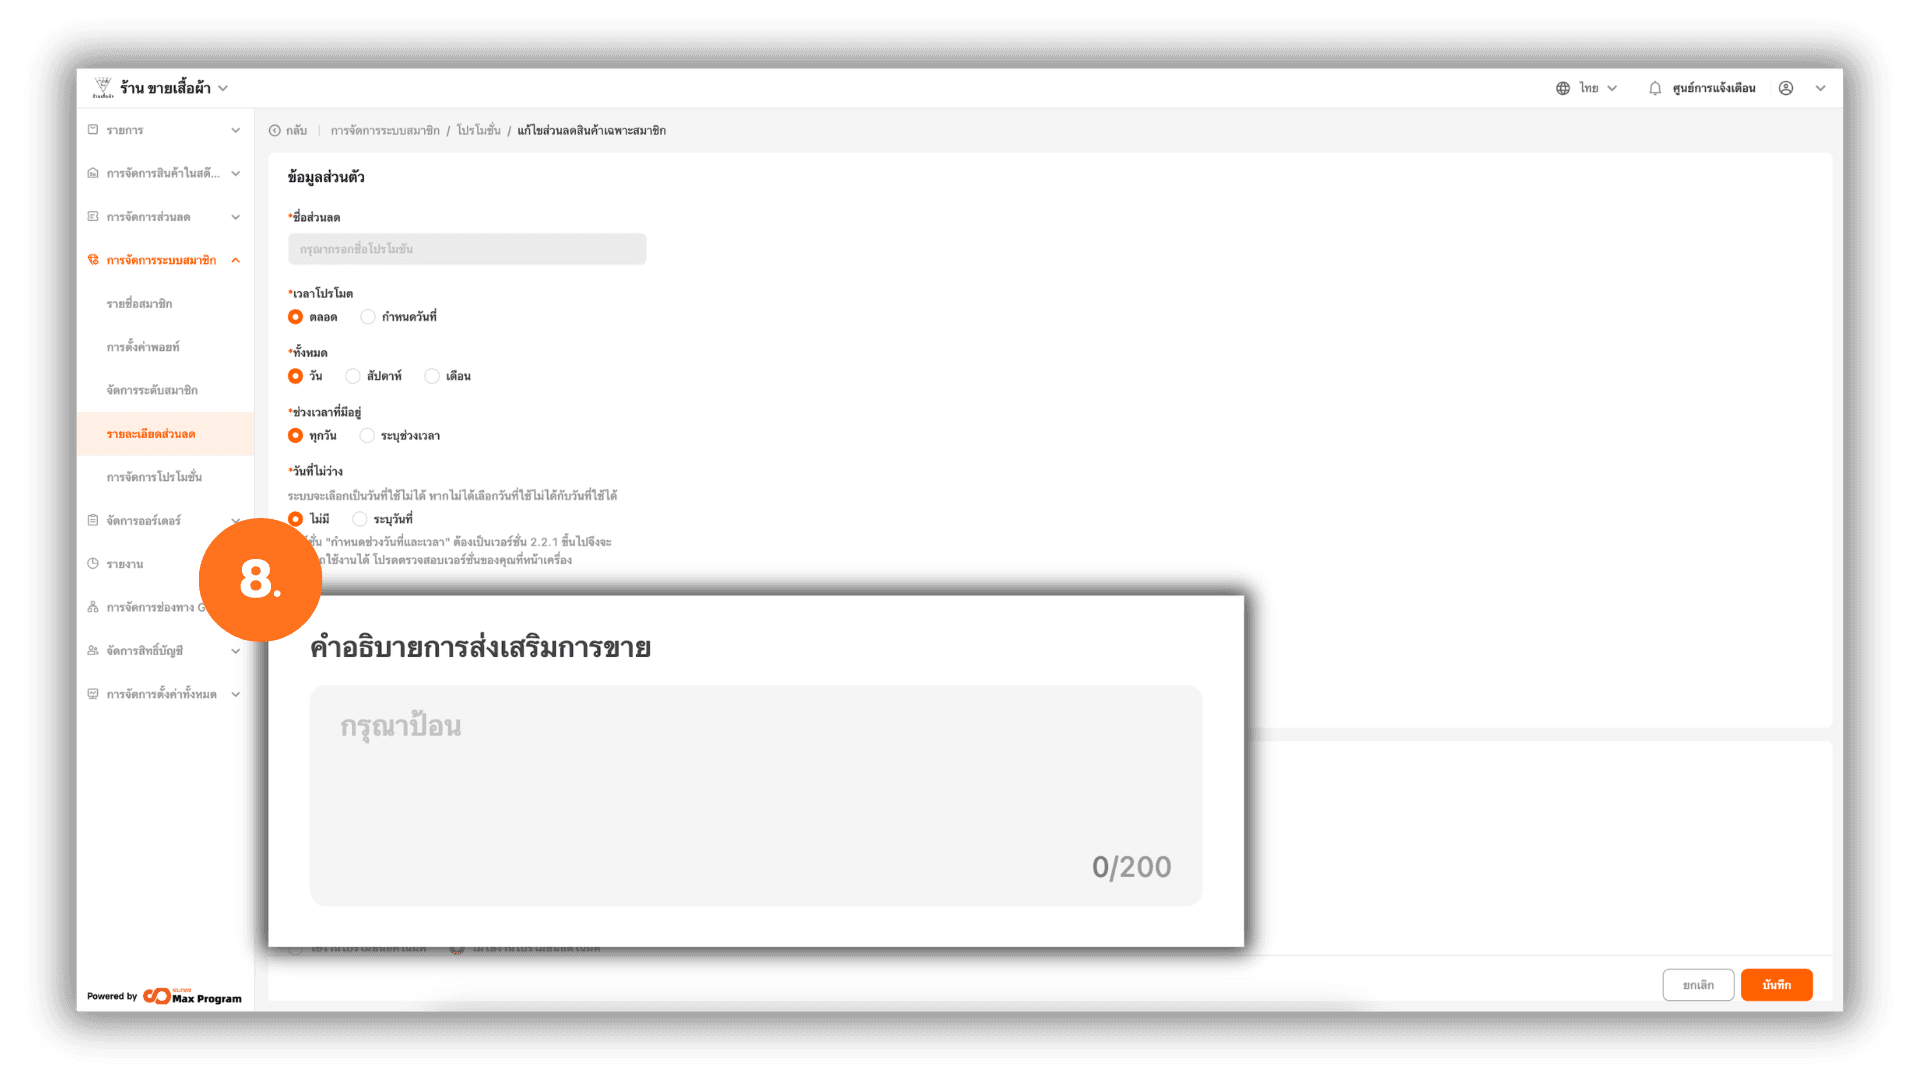
8. Enter Promotion Description
Fill in the Promotion Description field to provide additional details, such as Promotion objectives , Usage conditions or Limitations or restrictions
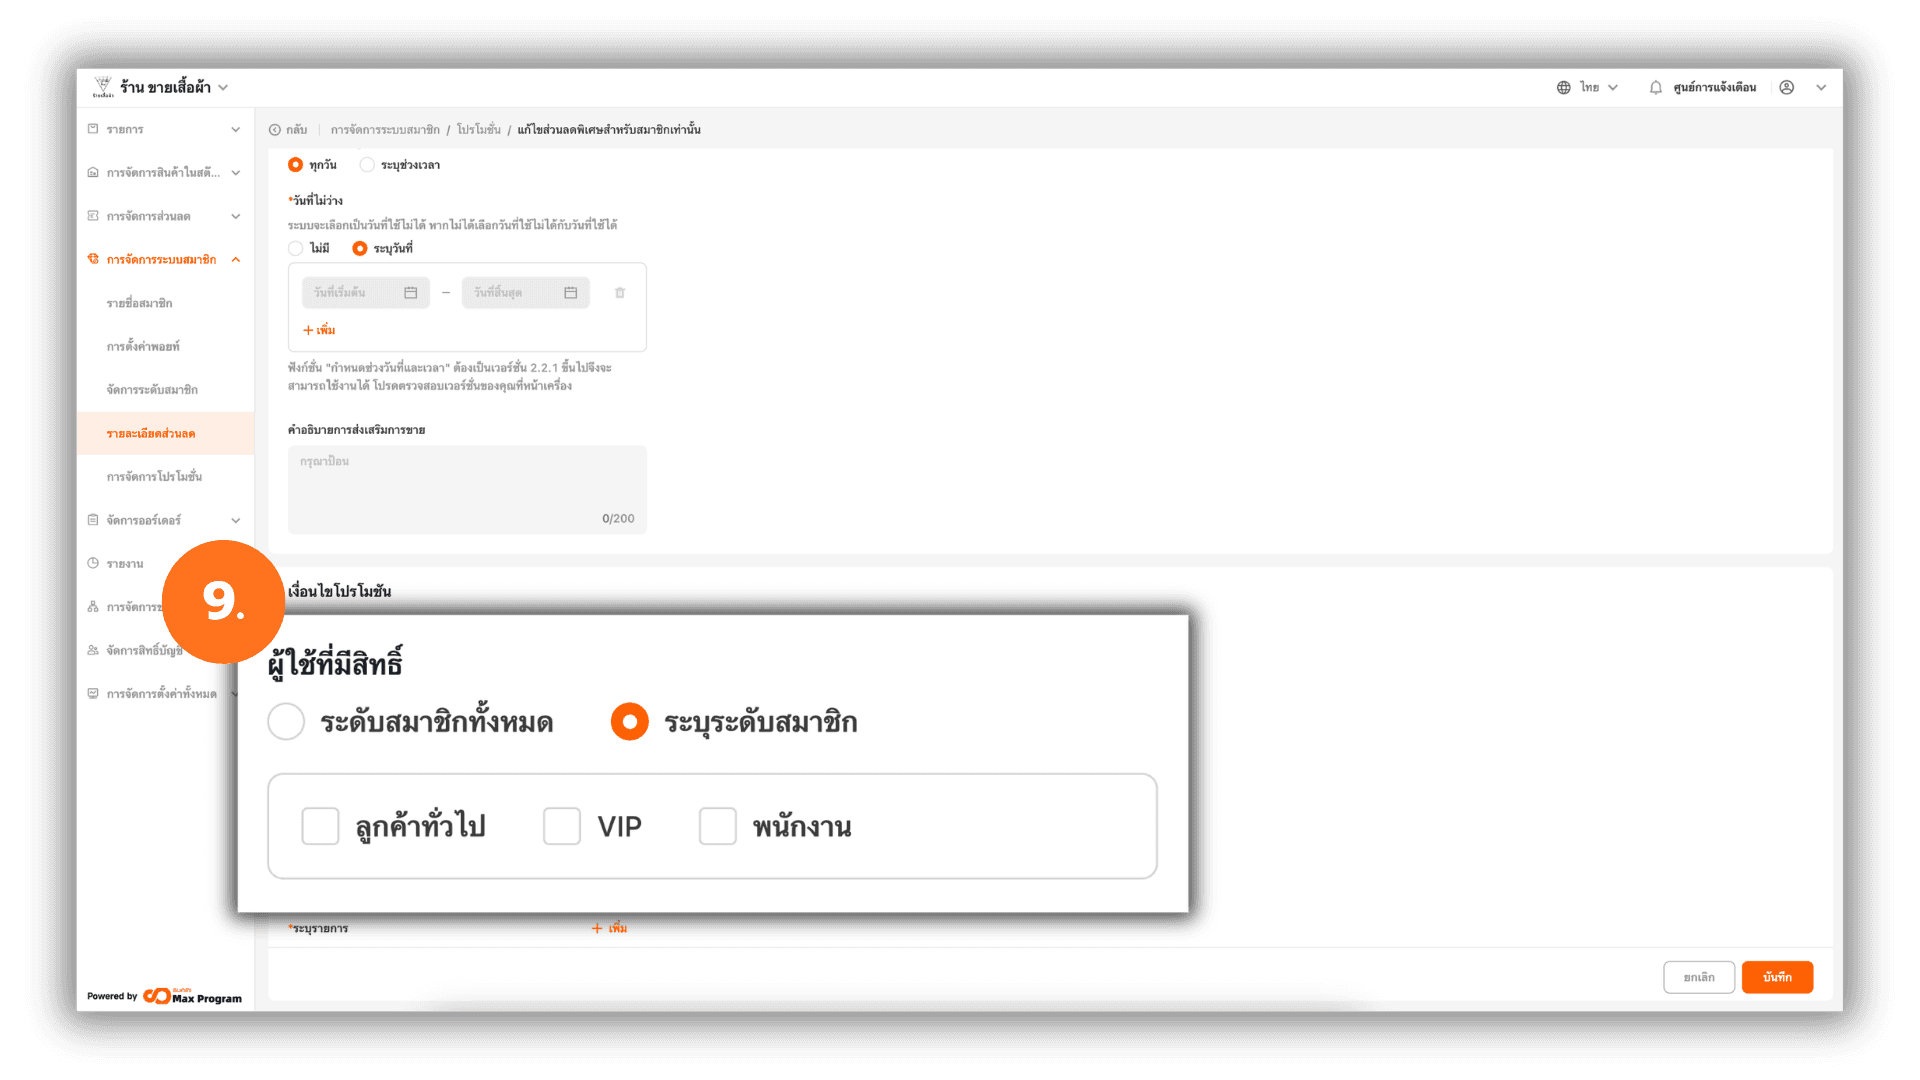
9. Set Promotion Conditions (Usage Eligibility)
Select eligible member groups :
- All membership levels – All members can use this discount.
- Specify membership levels – Select specific membership levels eligible for the discount.
Note : If a discount has already been configured for a specific member level, the system will automatically apply that discount. Only one member discount can be applied at a time.
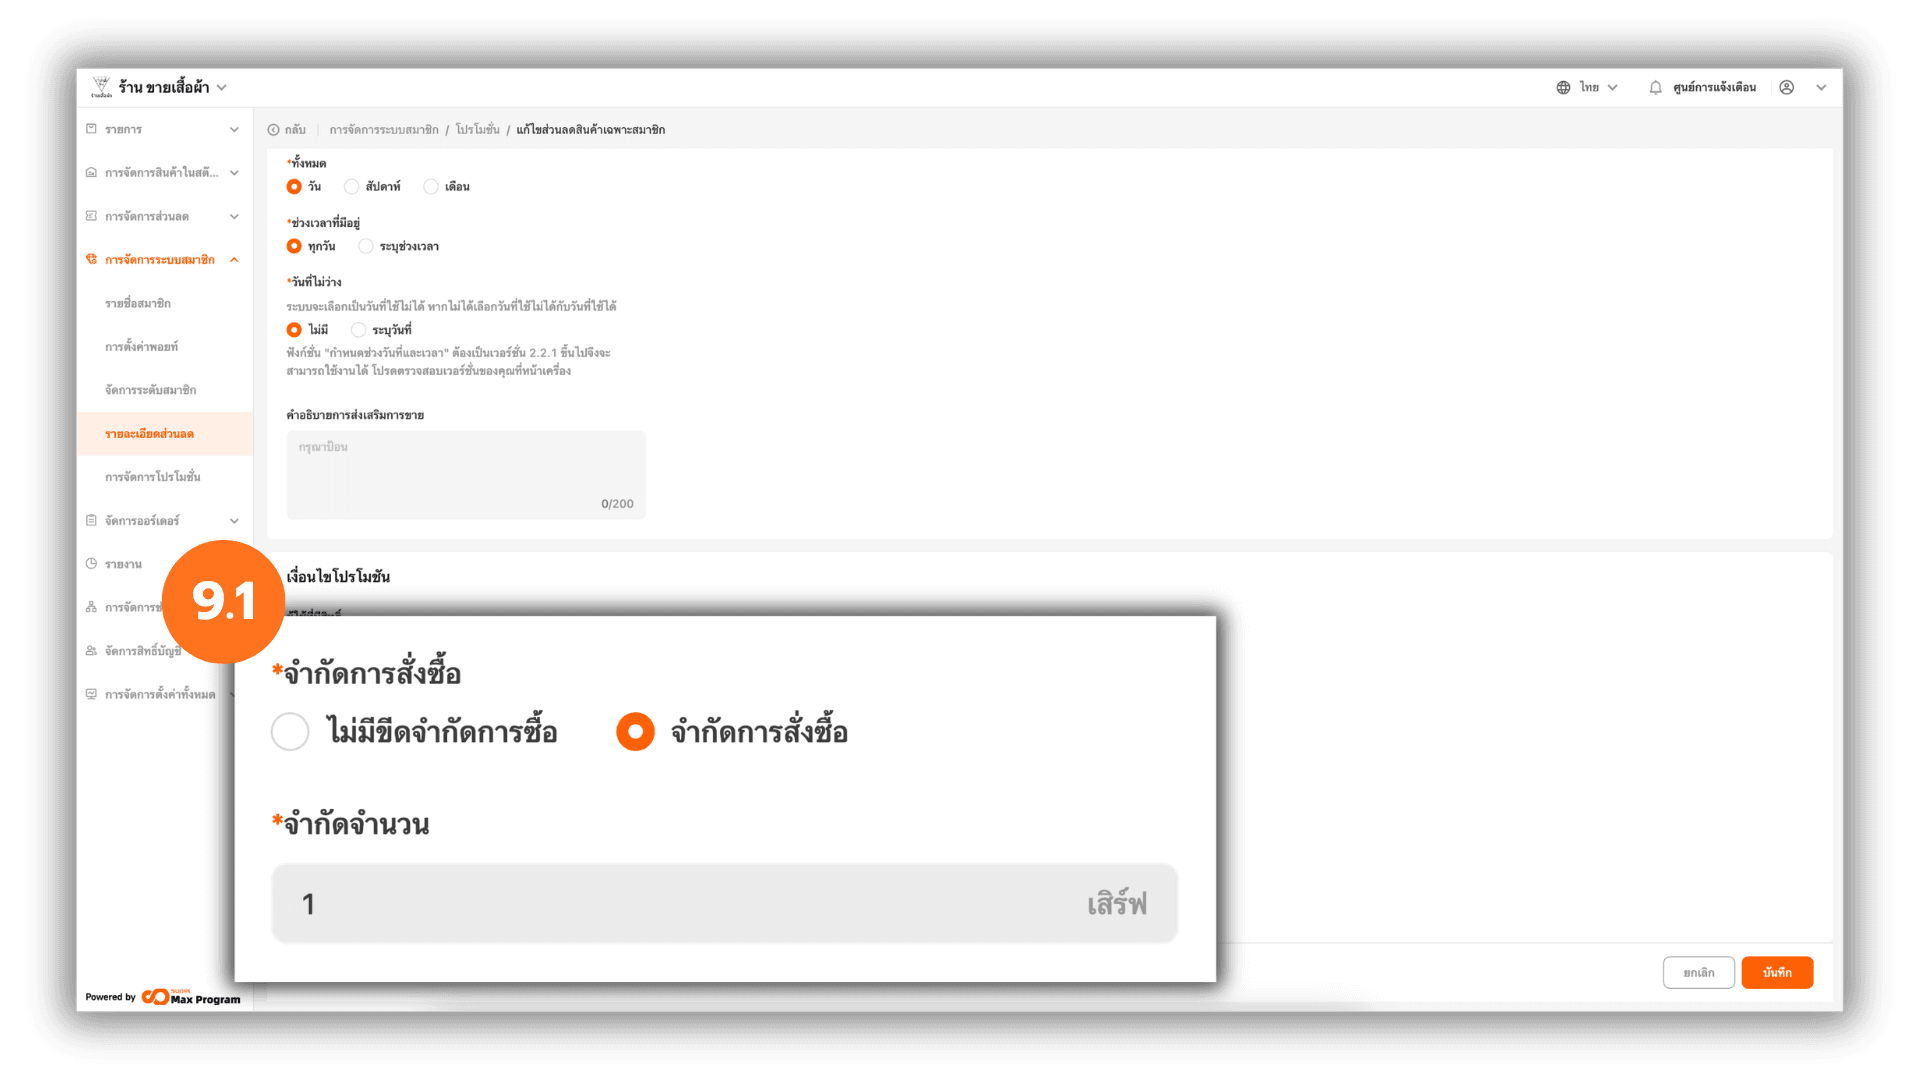
9.1 Purchase Limit Settings
Under Purchase Limit Settings, choose :
- No Limit Purchase – No limit on the number of items per bill.
- Limit Purchase – Specify the number of items per bill eligible for the discount.
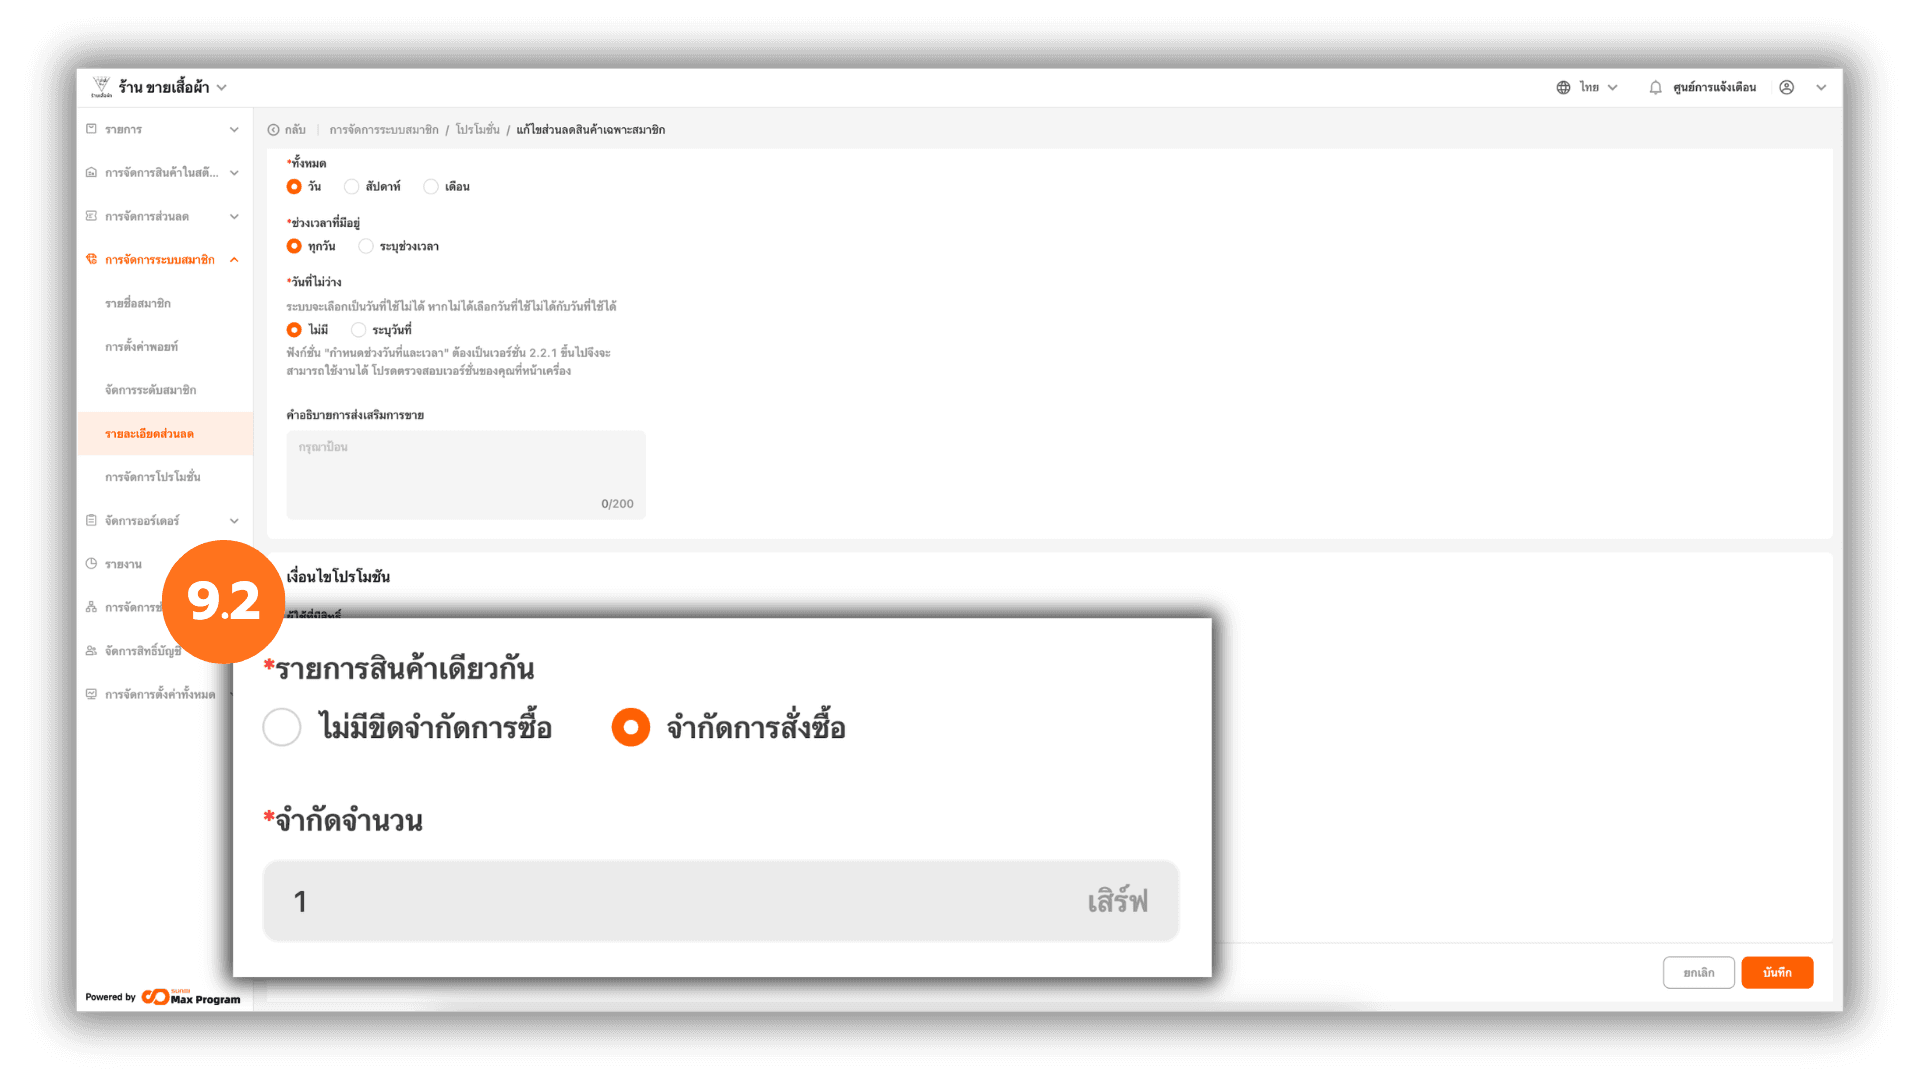
9.2 Same Item Limit Settings
Set conditions for applying discounts to identical items :
- No Limit Purchase – No limit on identical items per bill.
- Limit Purchase – Specify the number of identical items per bill eligible for the discount.
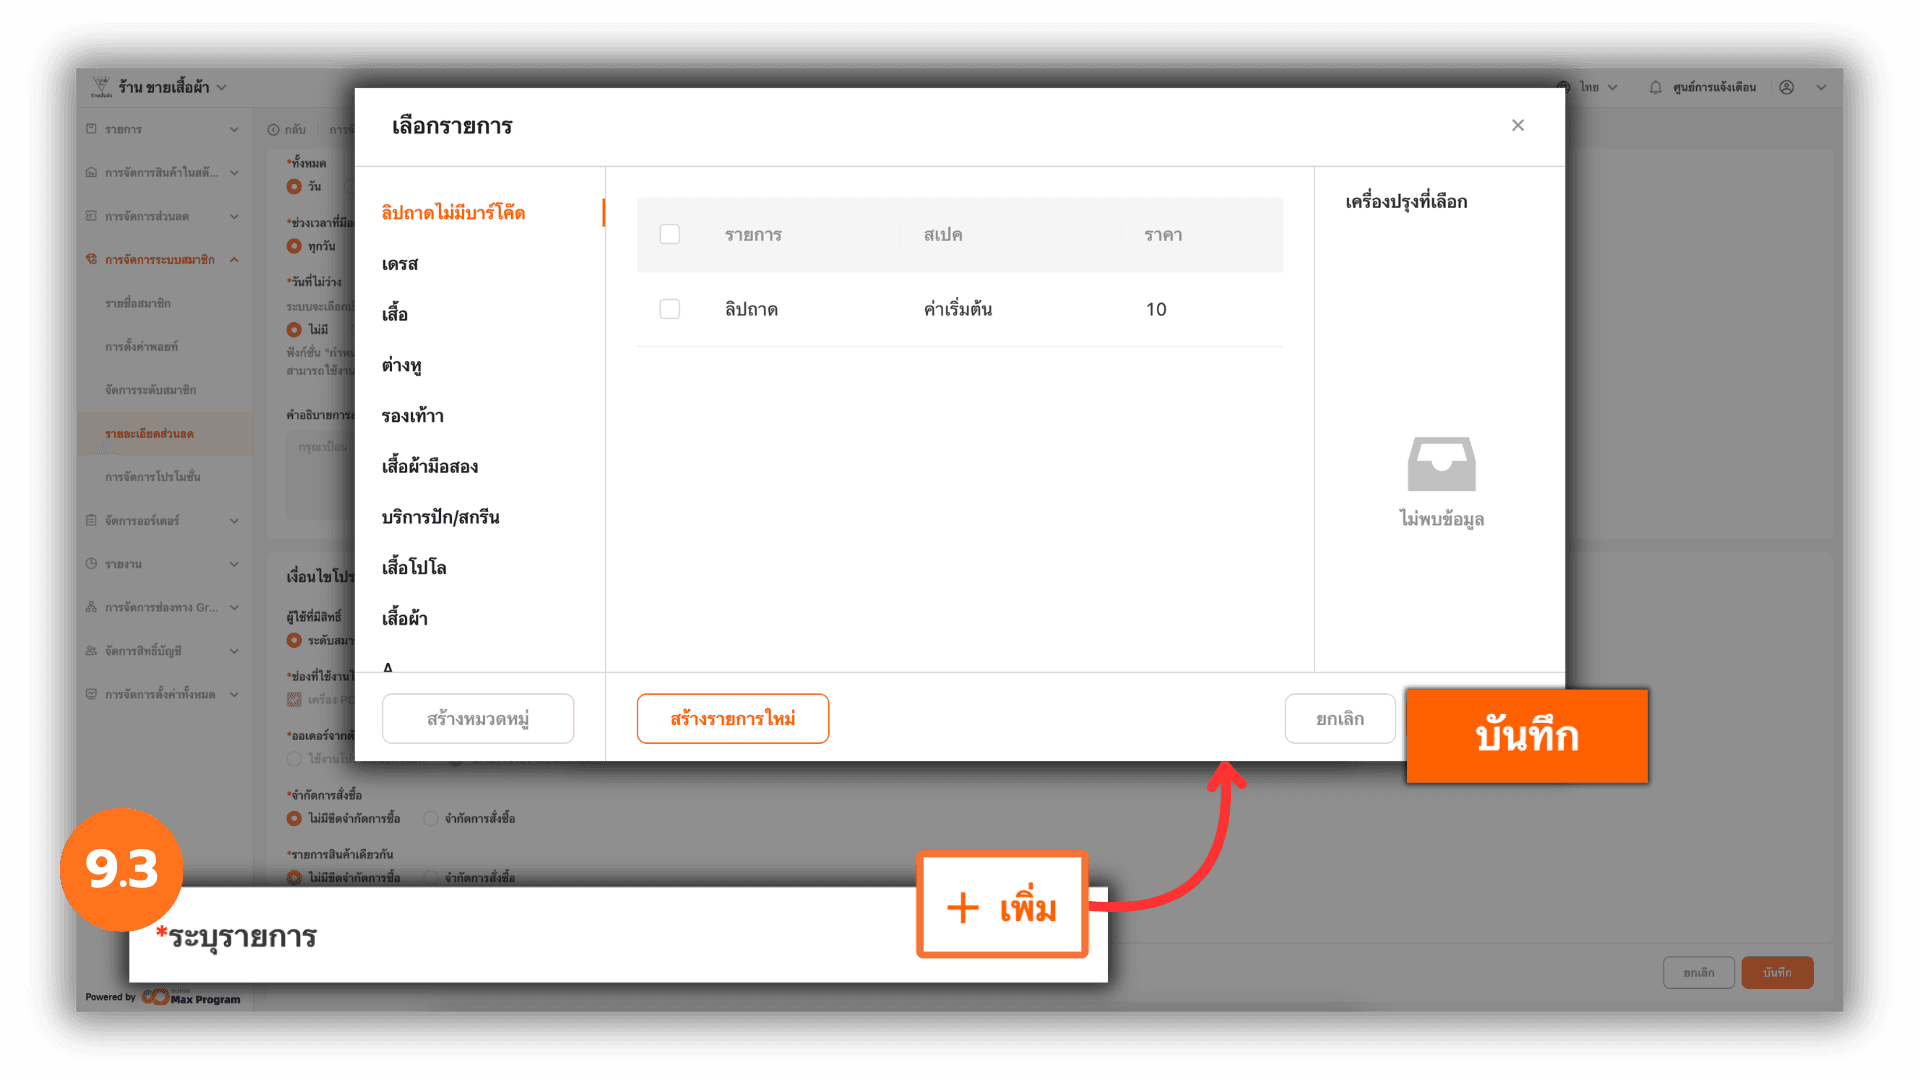
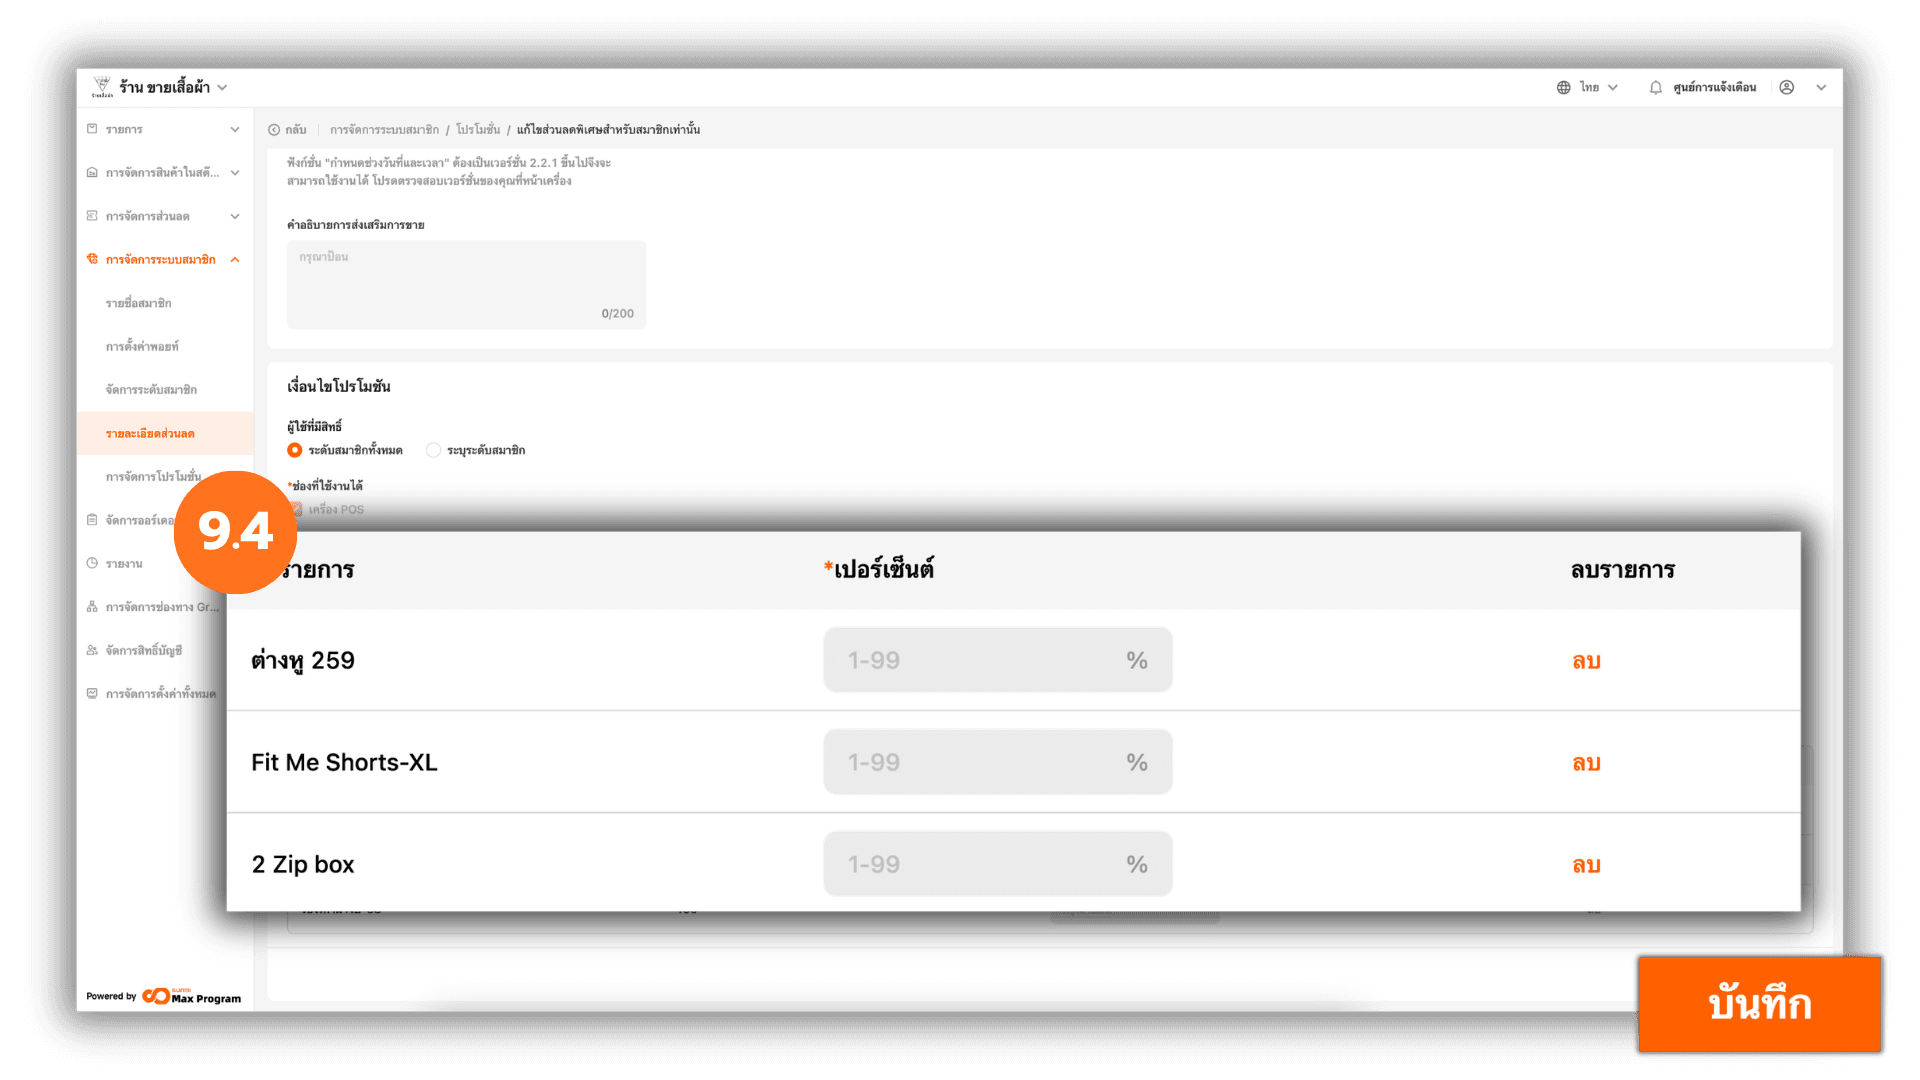
9.3 Select Eligible Products
Click “+ Add”. The system will display the product list. Select the products to include in the promotion and click “Save” to confirm.
9.4 Set Discount Percentage and Save
The system will display the list of selected products. Enter the discount percentage for each product as required. If you wish to remove a product from the list, click the “Delete” button located at the end of that item. After completing all required information, click the “Save” button to create a quantity-based discount for members.
10. Manage Created Discounts
To manage created discounts, go to Membership Marketing and select Promotion Management
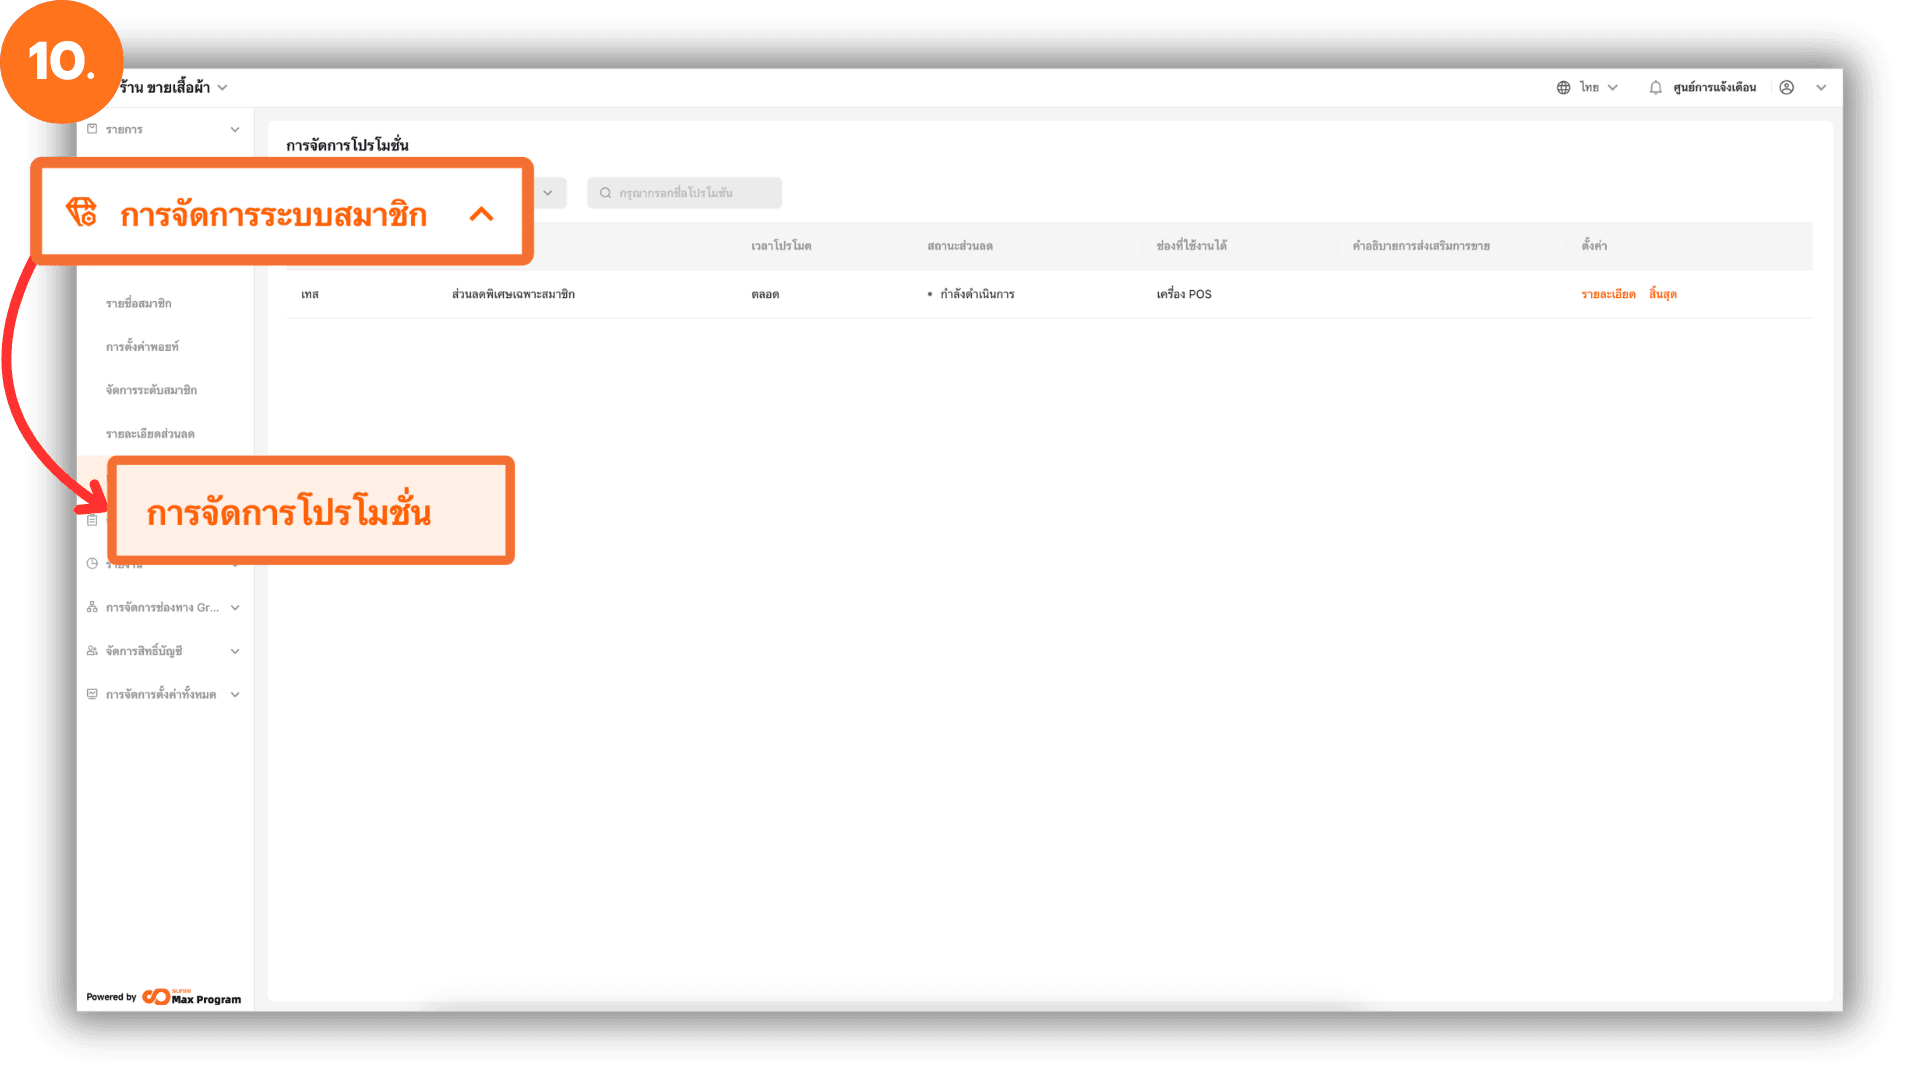
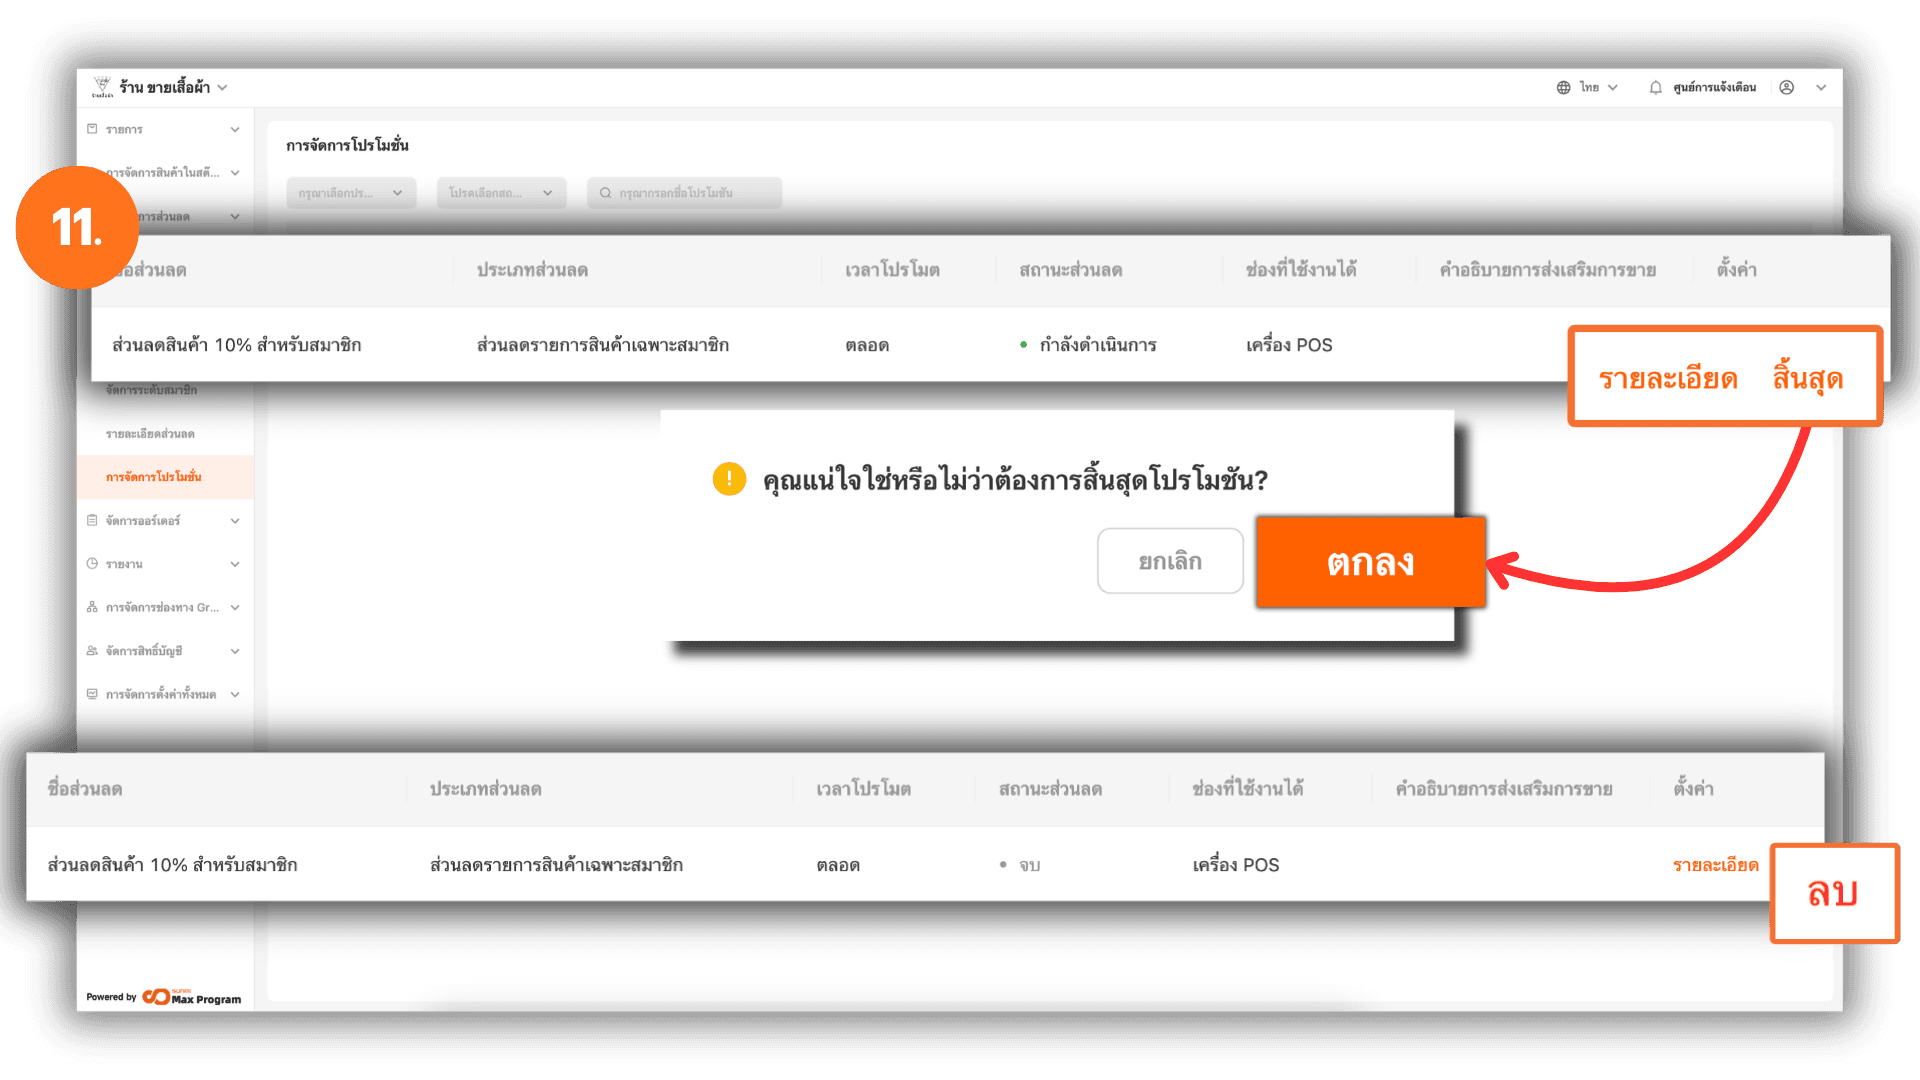
11. Manage Member Discount List
The system will display all created member discounts. Available actions :
- Details – View discount information.
- End – The system will display a confirmation window. Click “Ok” to end the promotion.
After ending the promotion, a “Delete” button will appear.
Note : Deleting a discount will permanently remove it from the system. The data cannot be recovered. Please verify before deletion.