Member Point Settings (Back Office)
2026-02-10 16:00
Encourage repeat purchases, increase customer loyalty, and boost sales through a structured point accumulation and redemption system.
1. Log in to the Back Office
Go to login.gpos.co.th, enter your email and password, then click Log in.
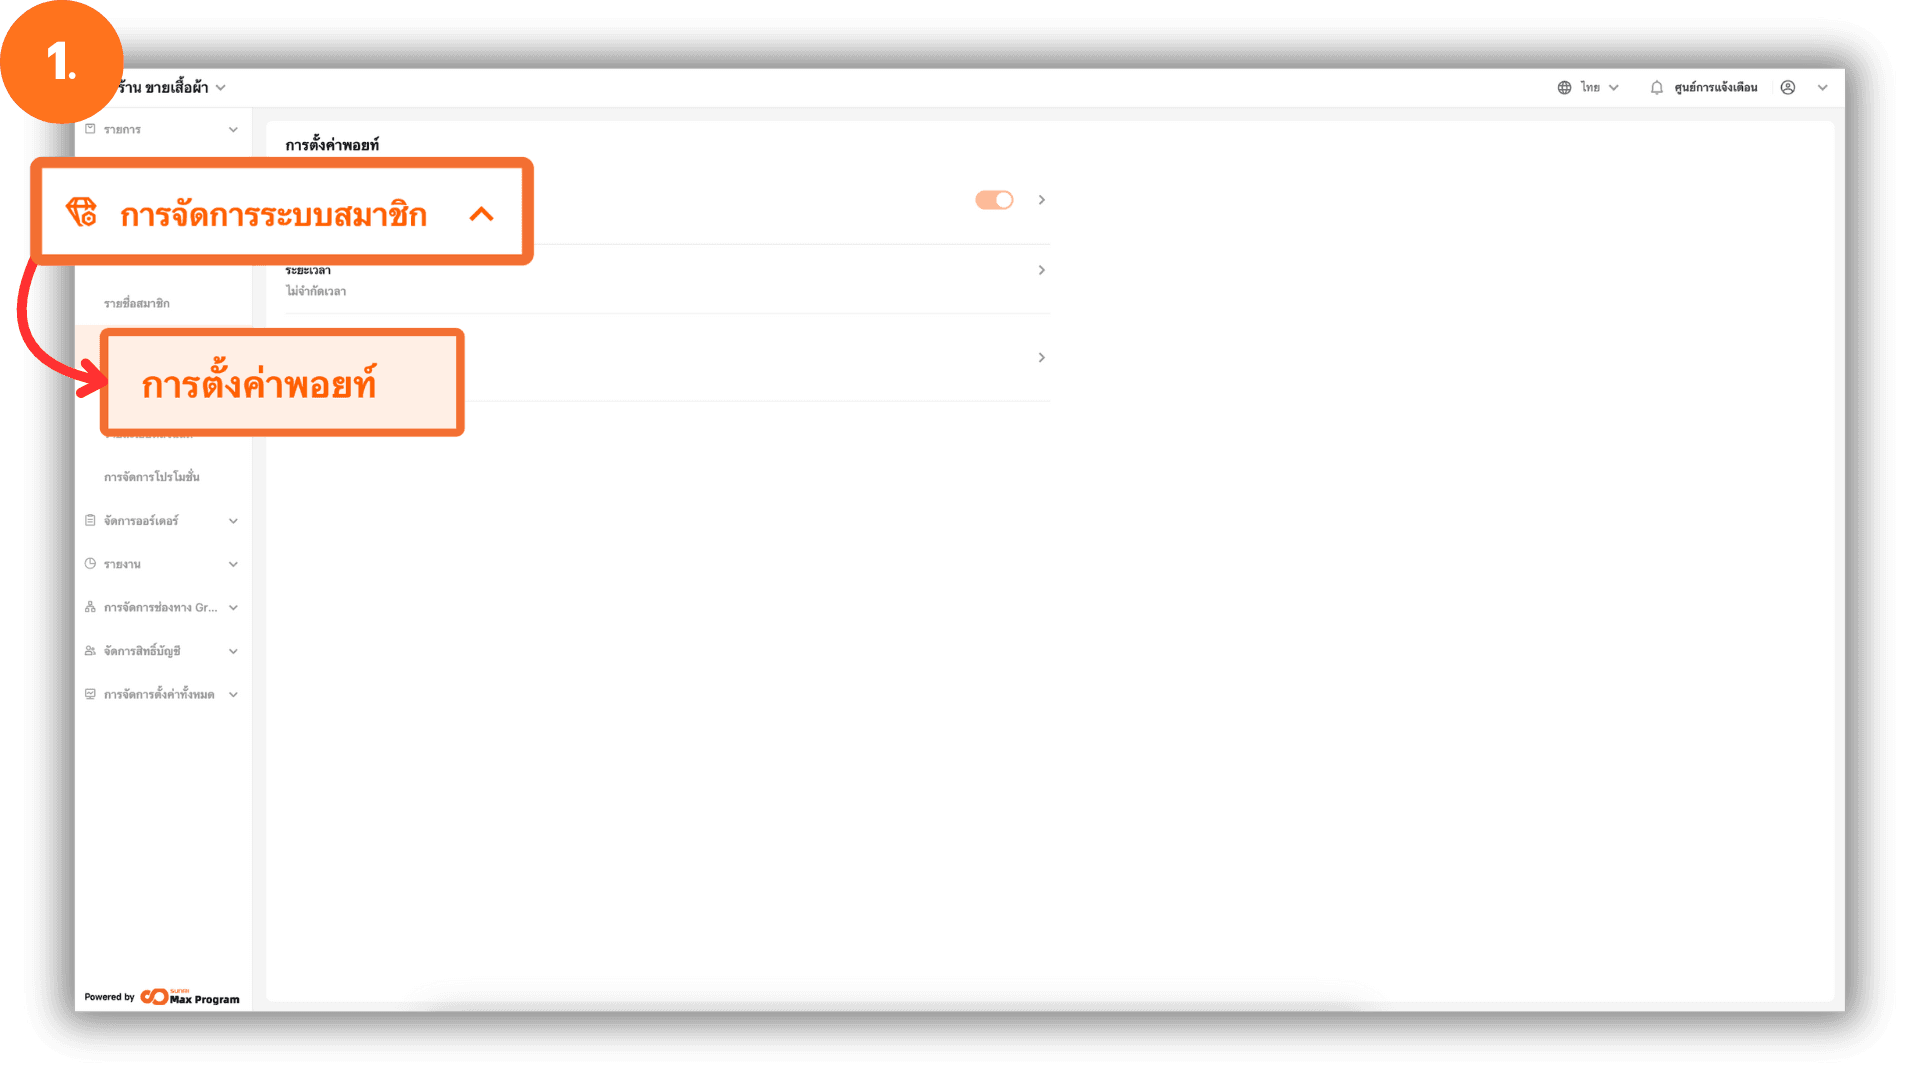
After logging in successfully, go to Membership Marketing, then select Point Settings.
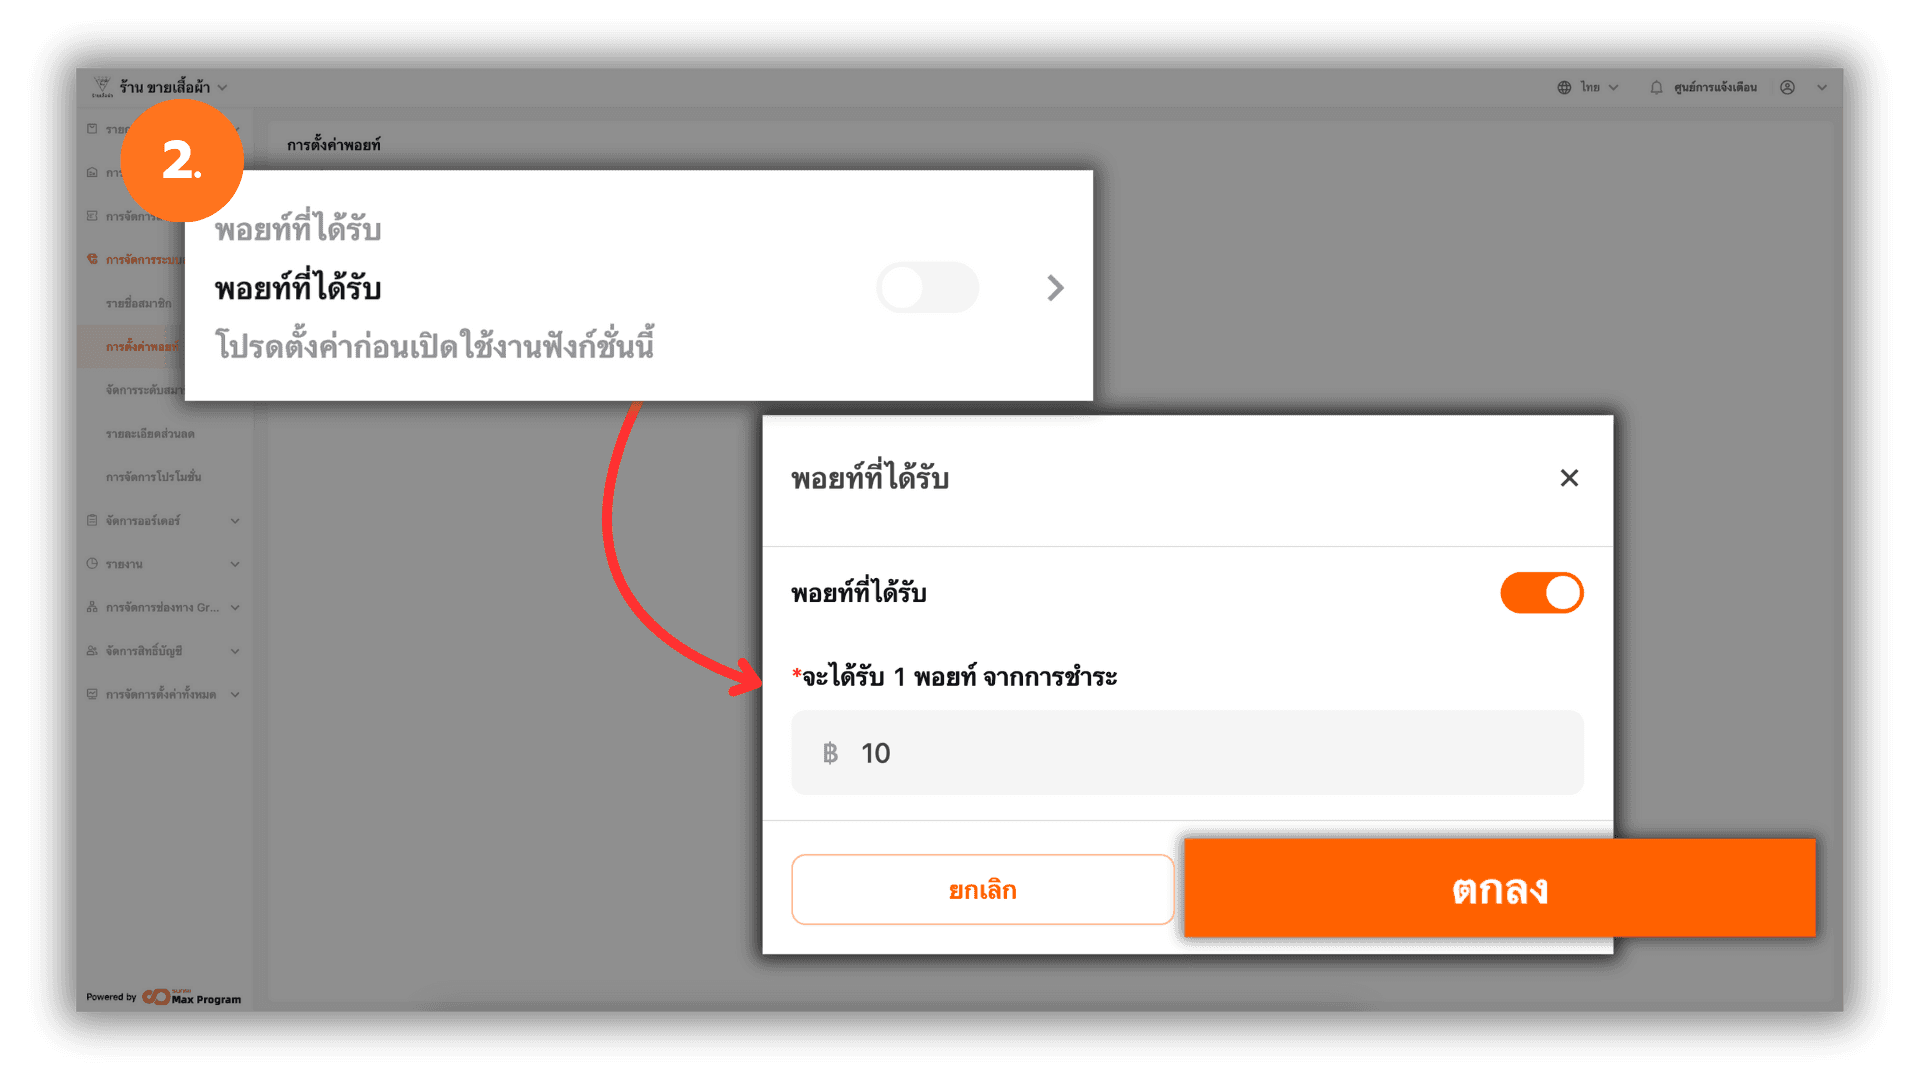
2. Set Earned Points
Click the Get points section and enable Get points. Specify the amount spent per 1 point based on the payment amount. Click Ok to save the settings.
- Example :
If set to 100 THB, customers will receive 1 point for every 100 THB spent.
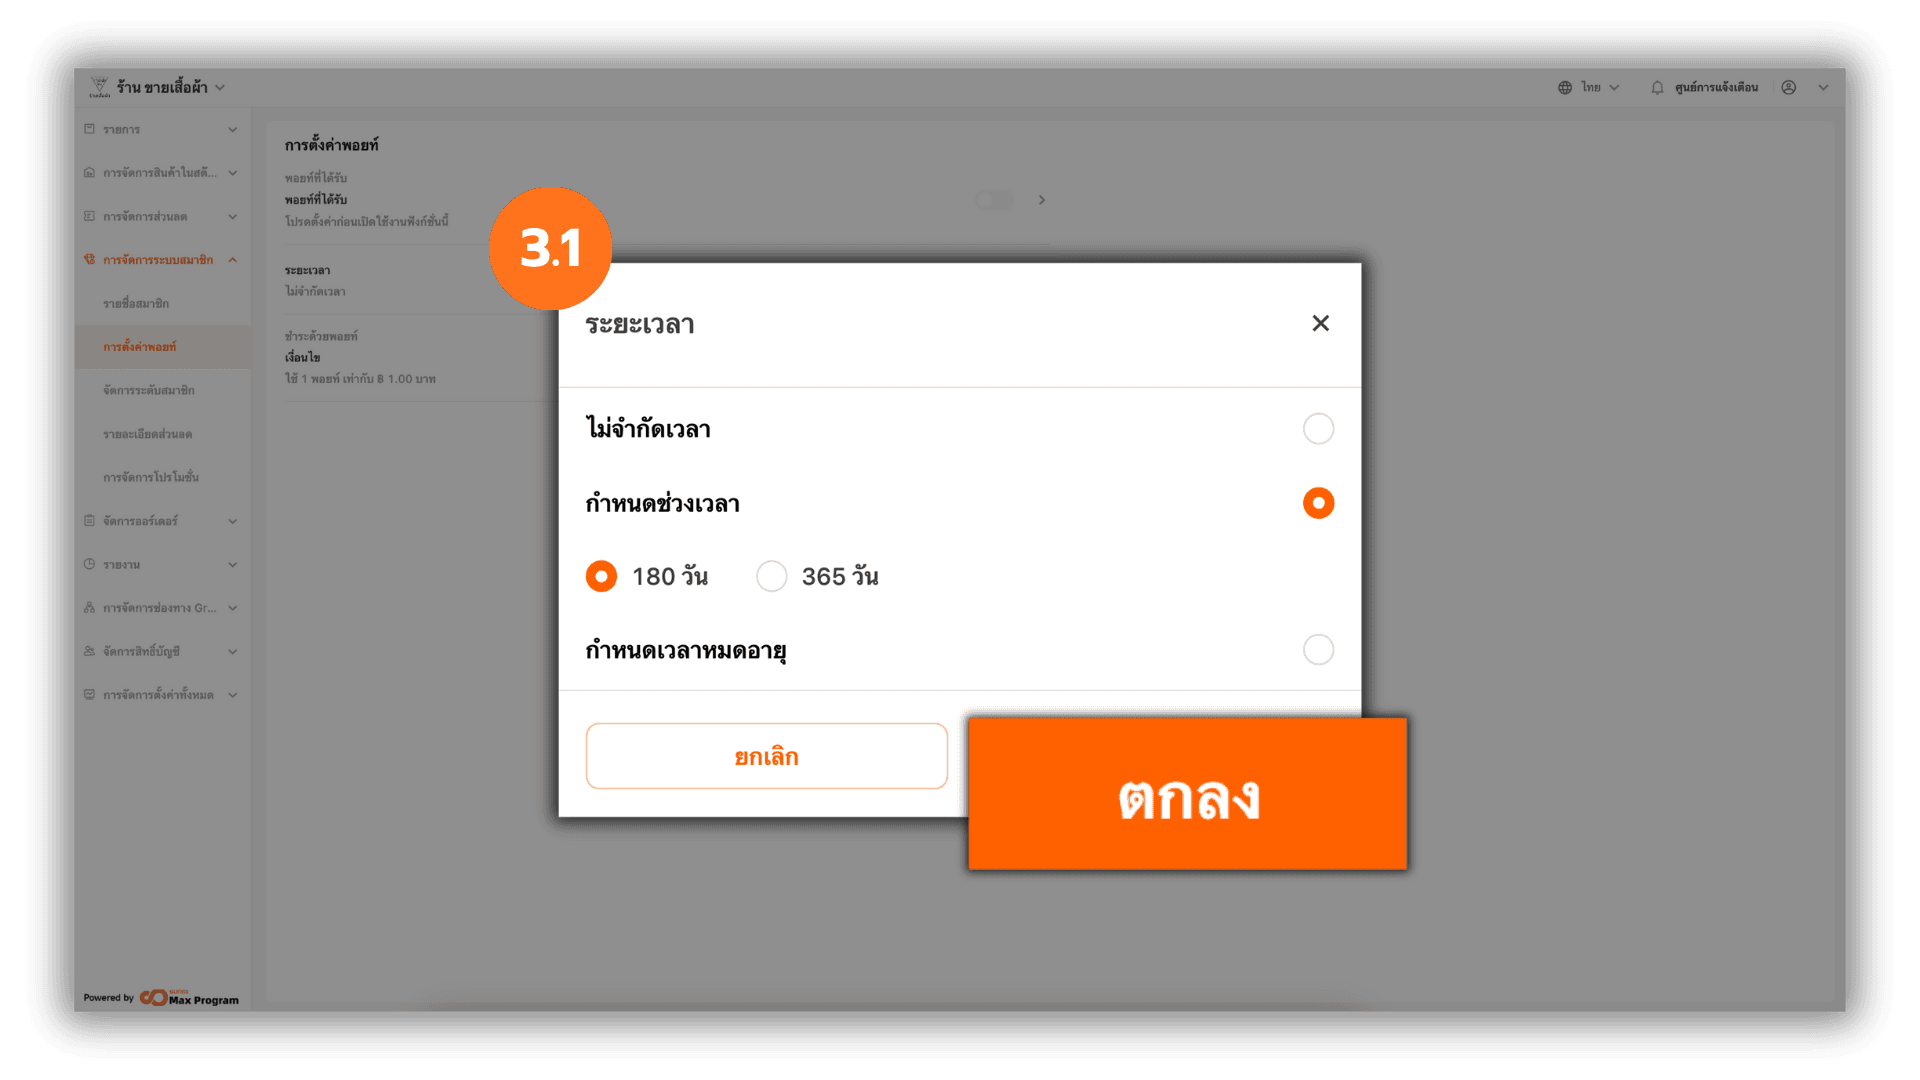
3. Set Point Expiration Period
Click the Time range section and select Always valid for points. Click Ok to save the settings.
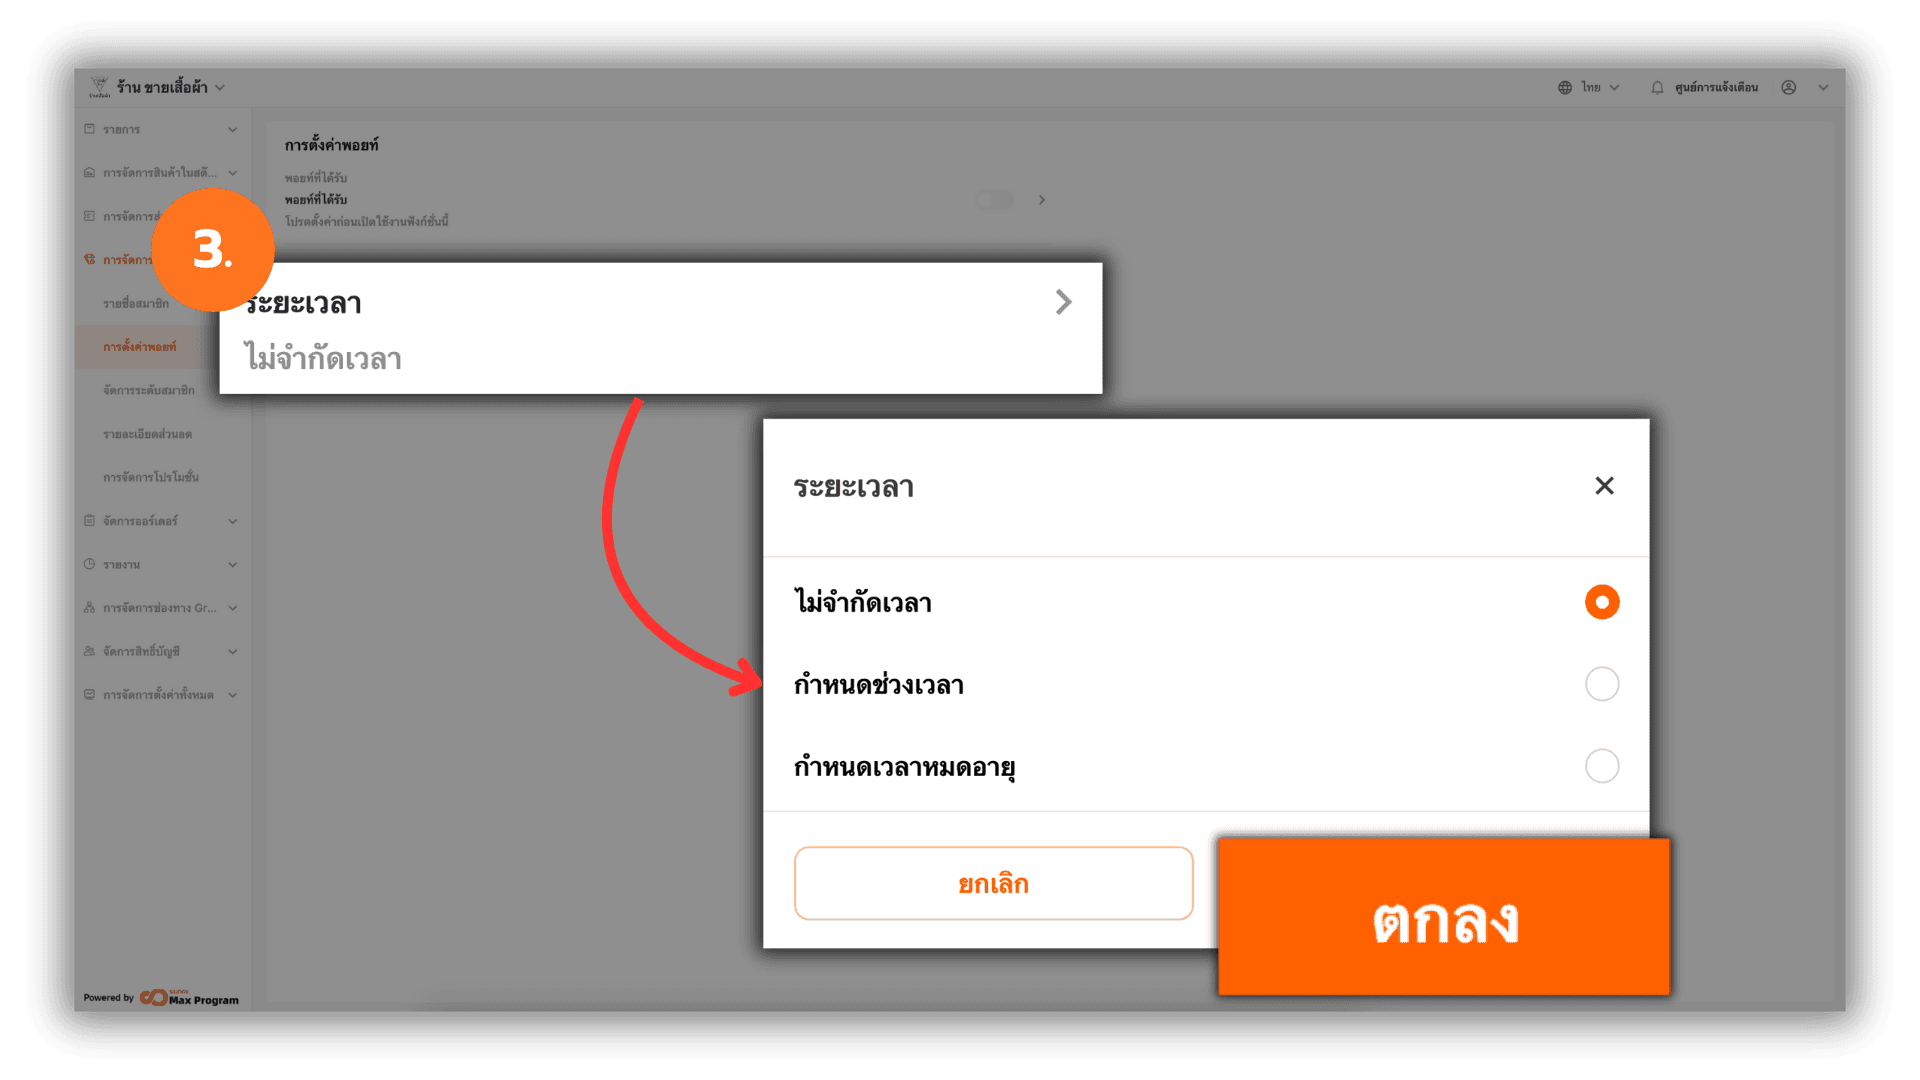
3.1 Set Expiration by Time Period
Alternatively, select Set valid term. The system will display options of 180 days and 365 days. Choose the desired period and click Ok.
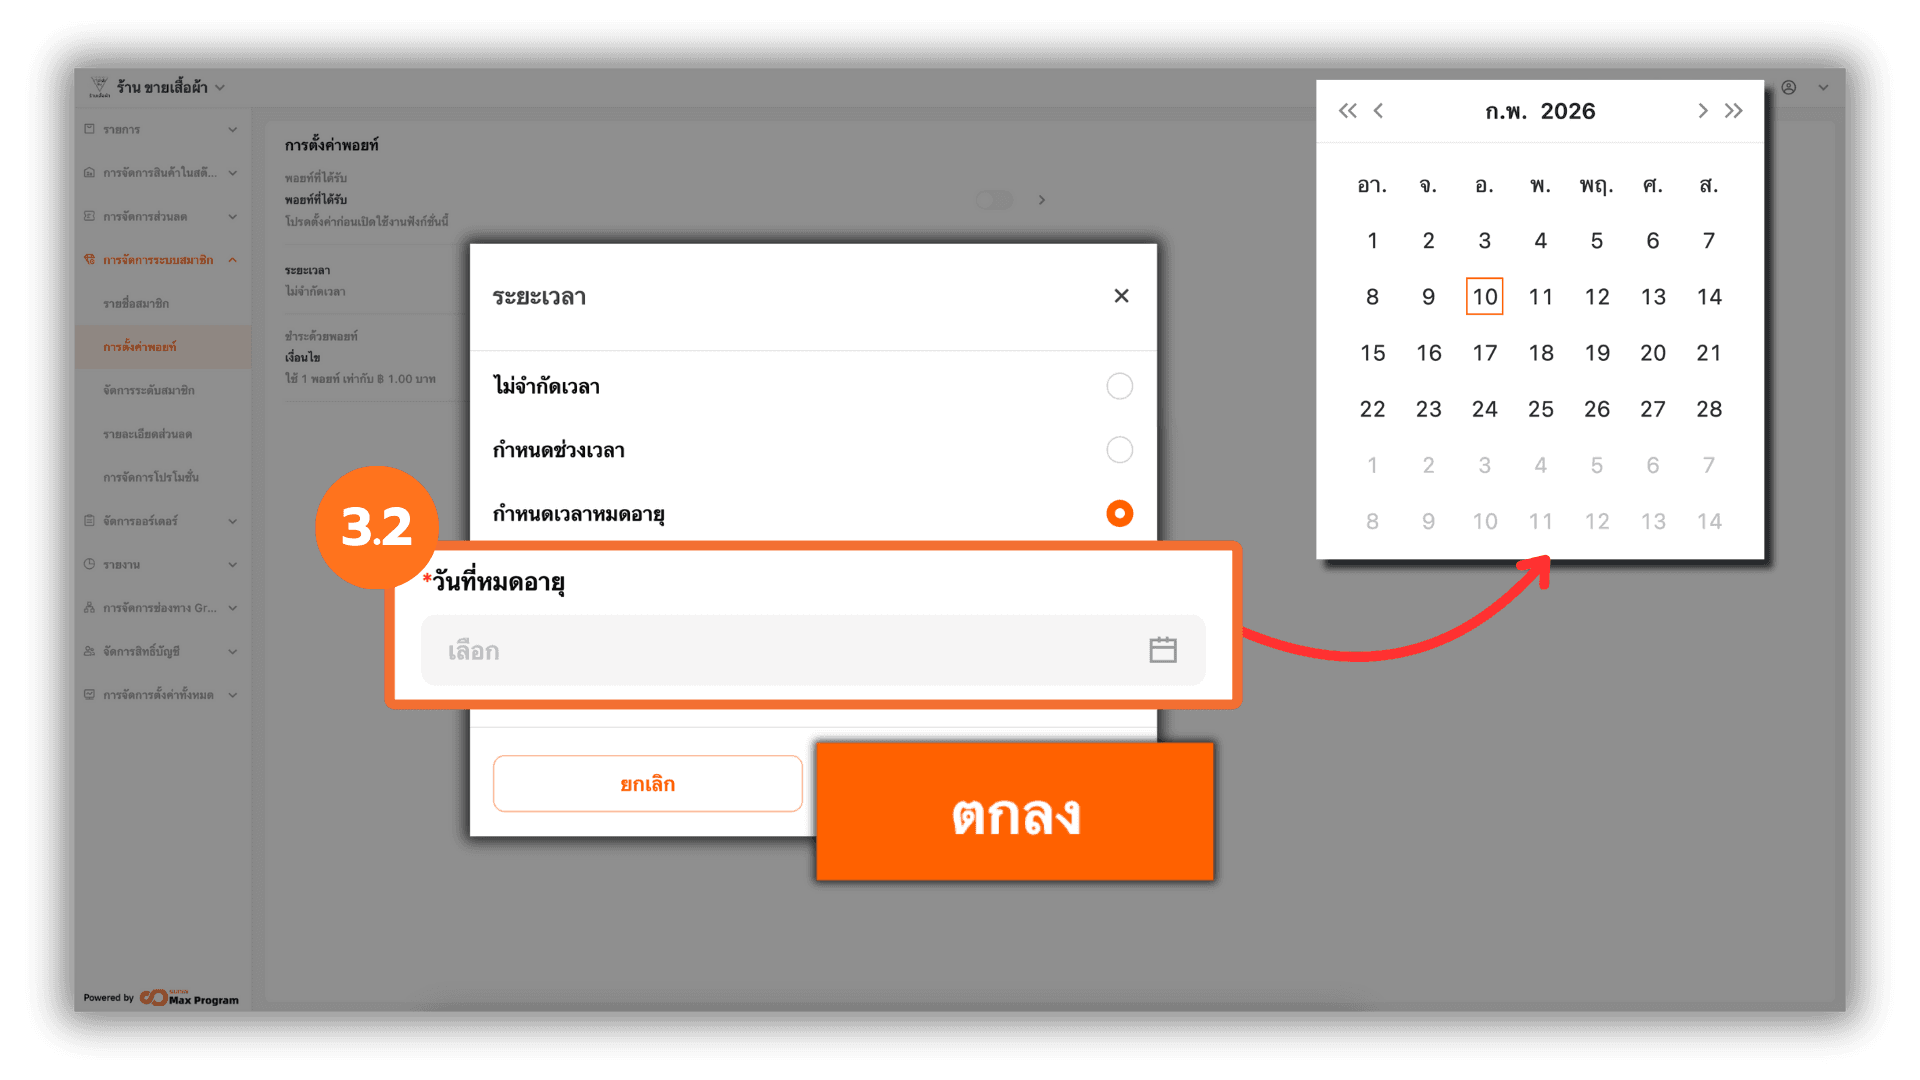
3.2 Set Expiration by Specific Date
Or select expiration date by specifying the day, month, and year. Choose the desired expiration date and click Ok.
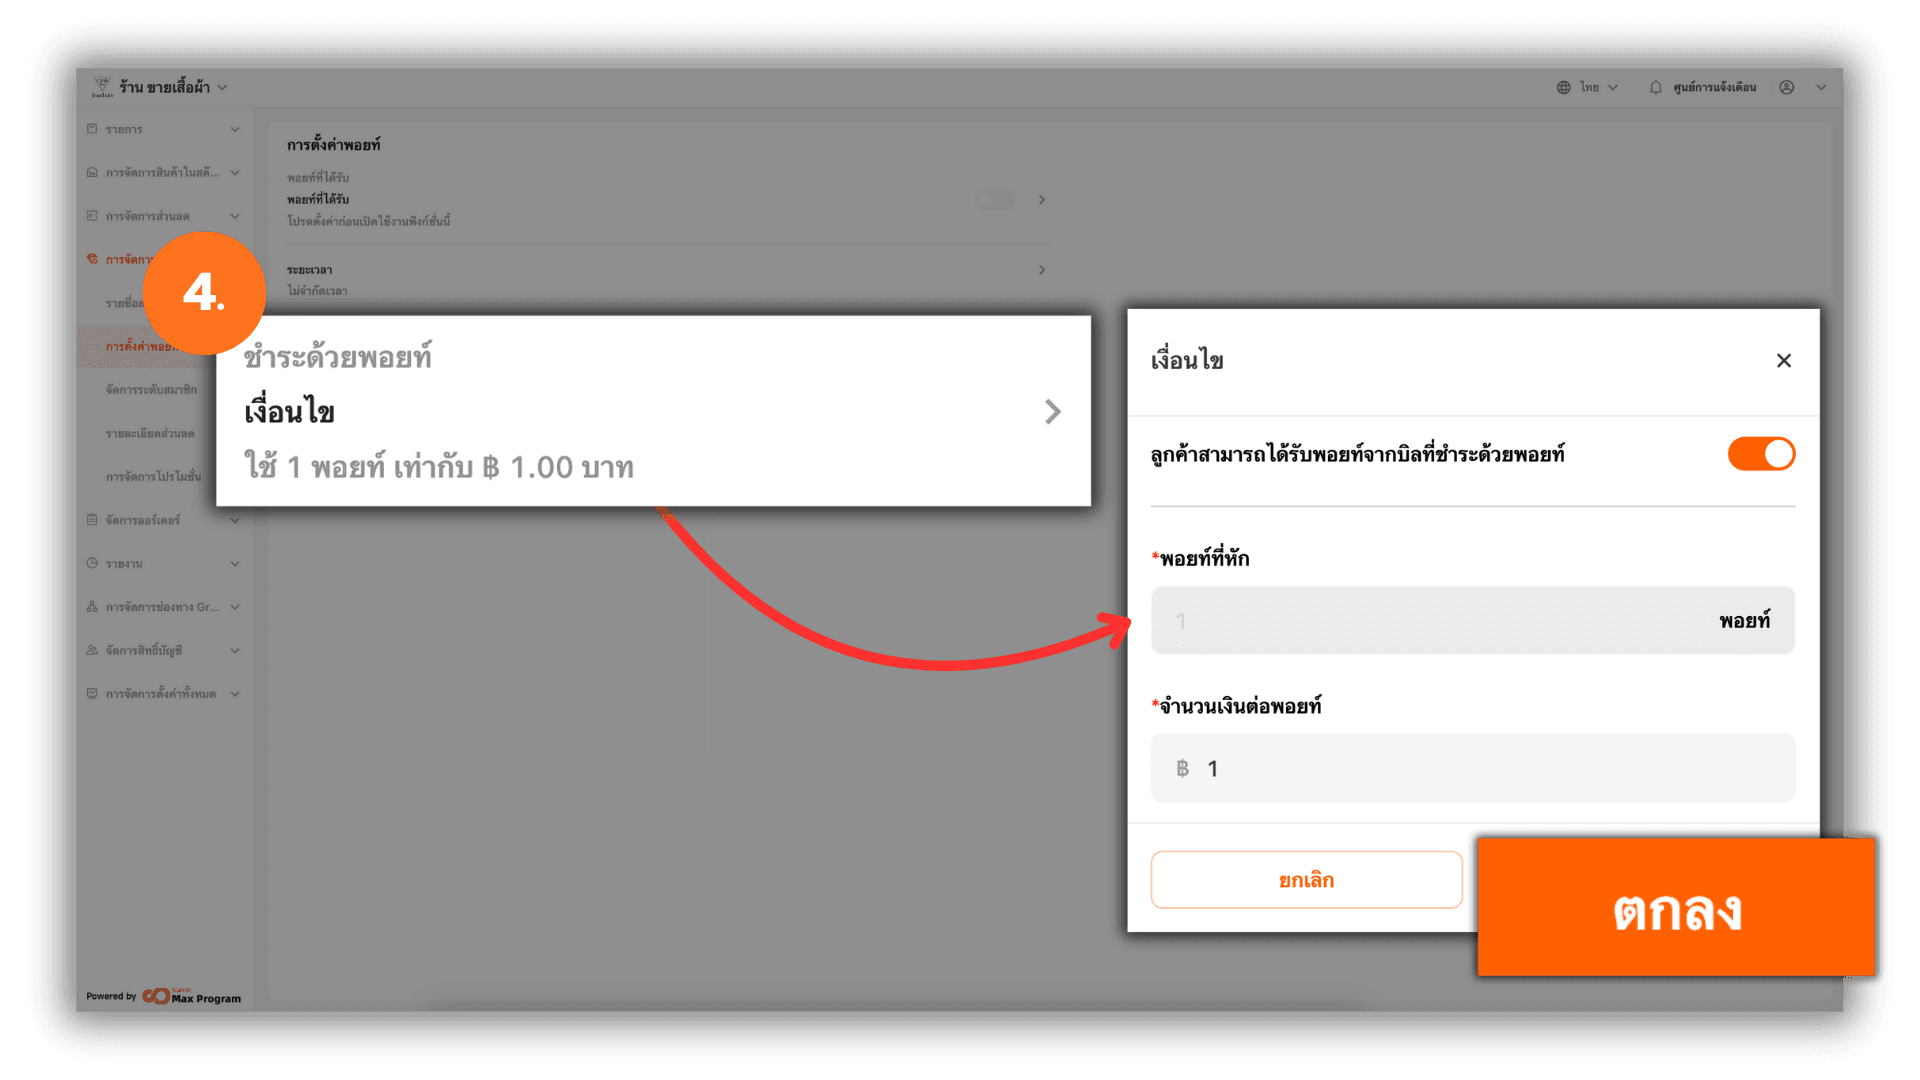
4. Set Point Usage Conditions
Click the Rules section and enable Earn Points from Bills Paid with Points. Specify the amount per 1 point for using points as payment.
- Example :
If set to 100 THB, 1 point can be used in place of 100 THB cash.
Note : If Enabled, bills that use points for payment will still earn points according to the settings. If Disabled, customers will not earn points from bills that use points and will only earn points from regular cash or payment transactions.