Membership Level Management (Back Office)
2026-02-04 15:48
Membership levels are used to define benefits and discounts for different customer groups. You can configure upgrade conditions and control discounts for each membership level in a structured manner.
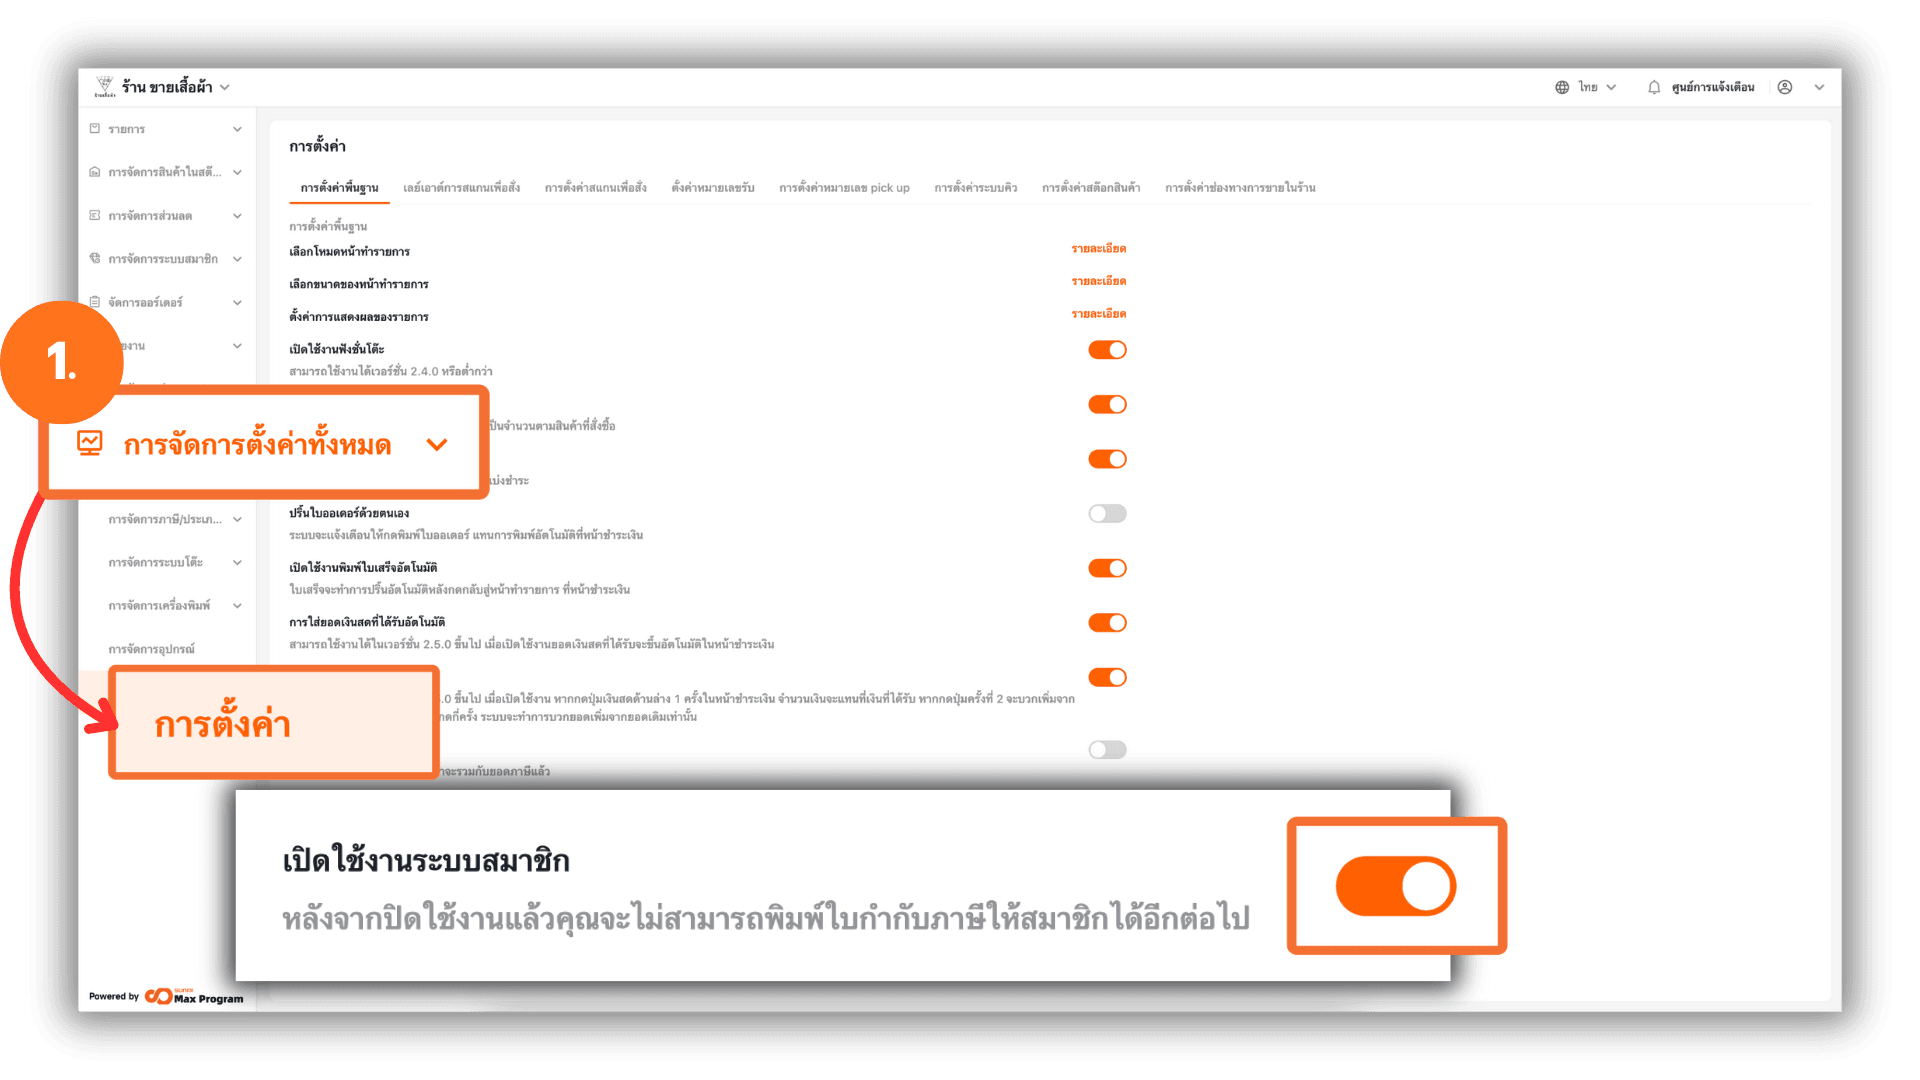
1. Log in to the Back Office
Go to login.gpos.co.th, enter your email and password, then click Log in. Once logged in, , go to Store Management, select Store Settings, and Enable Membership to activate additional membership features.
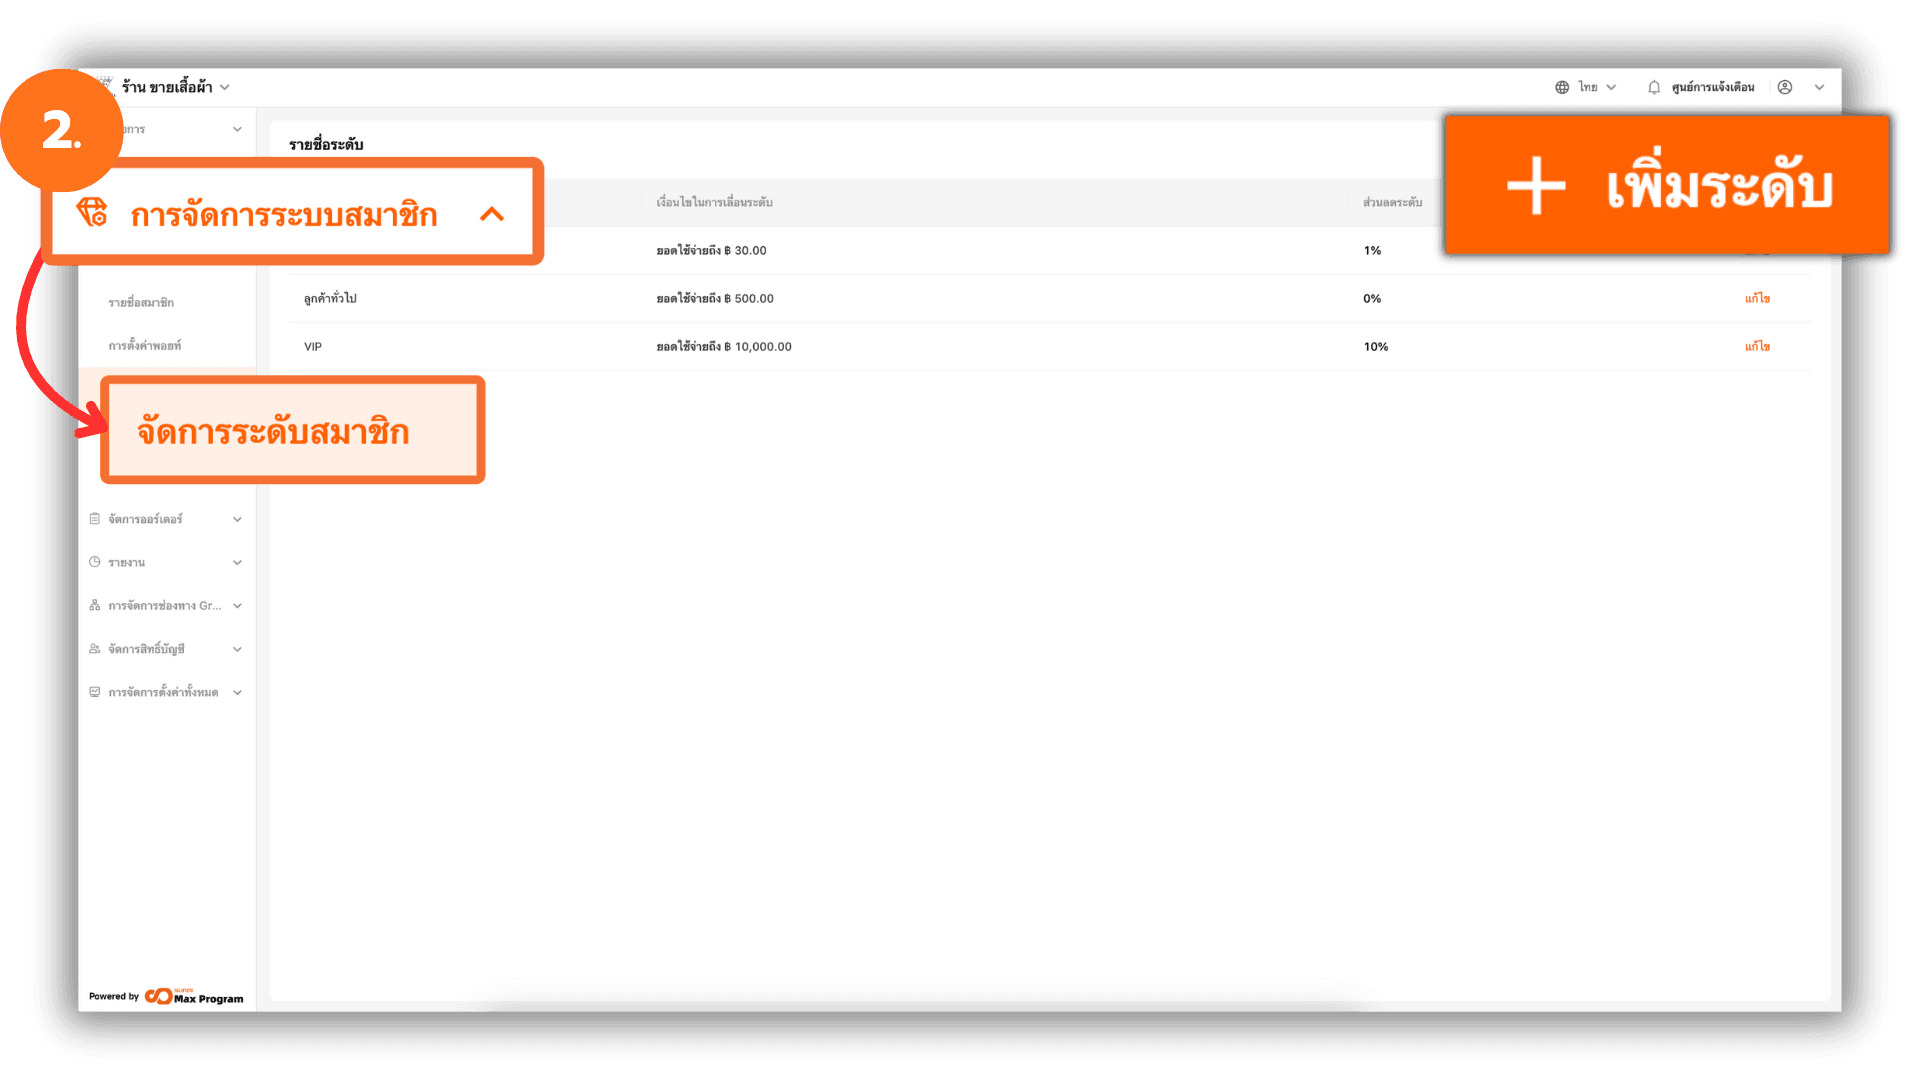
2. Accessing the Membership Level Management Menu
After enabling the membership system, additional features will appear. Go to Membership Management and select Level Setting, then click the + Add Level button.
Note : Once a membership level is created, it cannot be deleted.
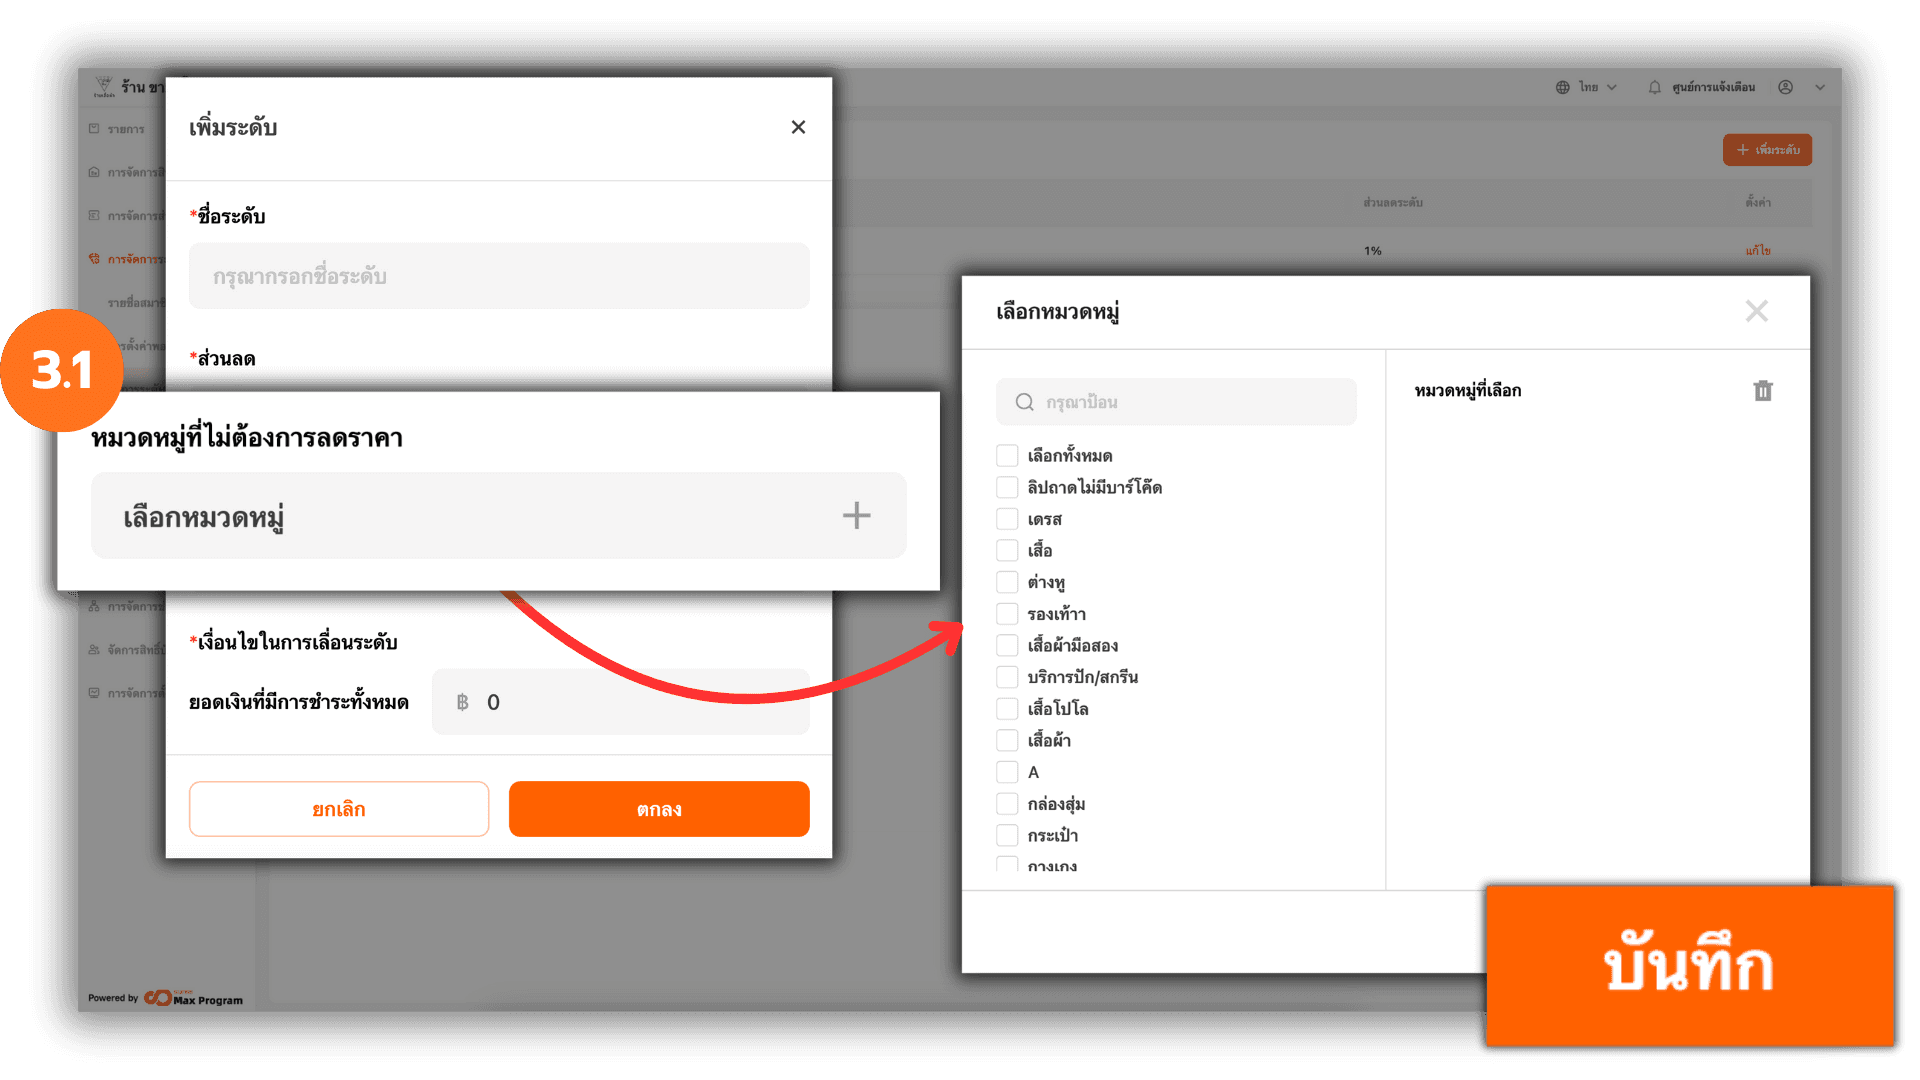
3. Adding a Membership Level
After clicking + Add Level, the system will display a form for entering membership level details, including Level Name and Discount.
Note : The membership level discount can be set from 0% to 100%.
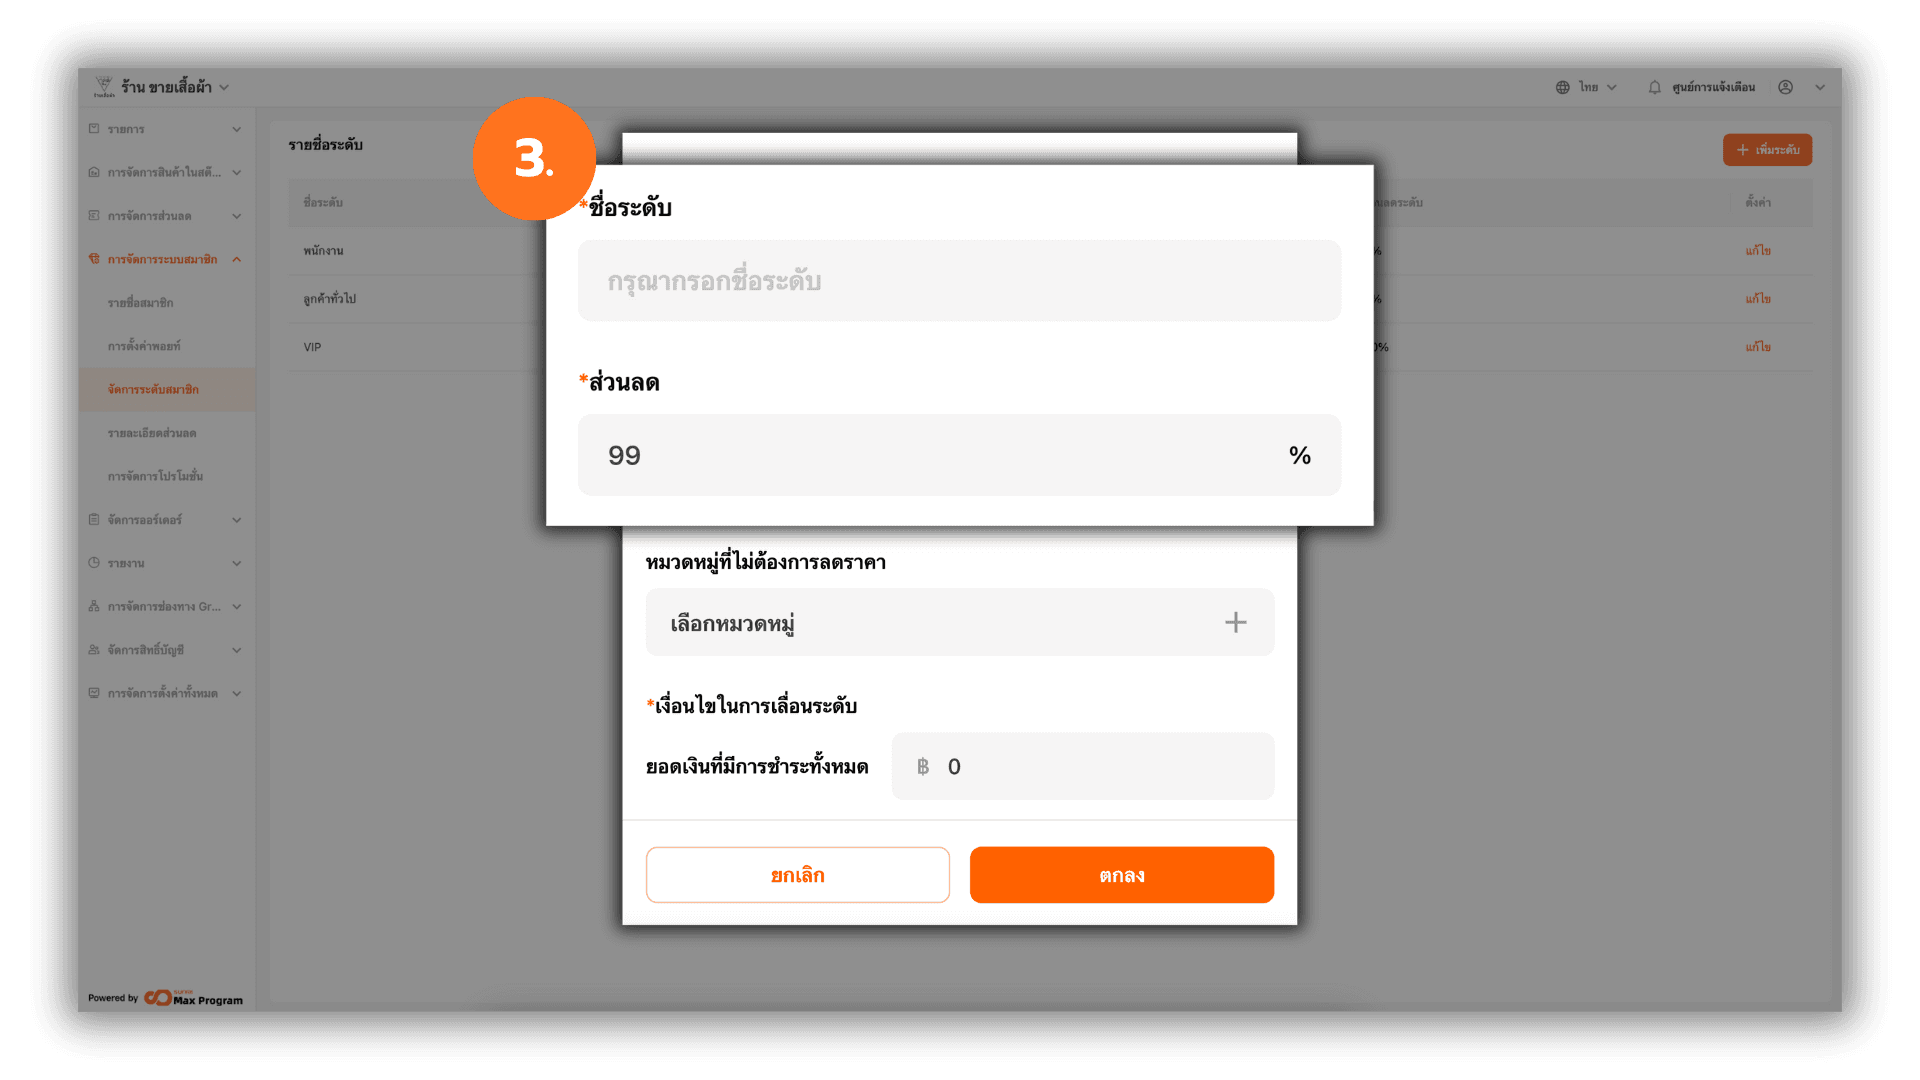
3.1 Setting Excluded Discount Categories
You can select product categories that will not be eligible for discounts for this membership level. Click Select Category +, the system will display a list of categories. Select the desired categories and click Save to confirm.
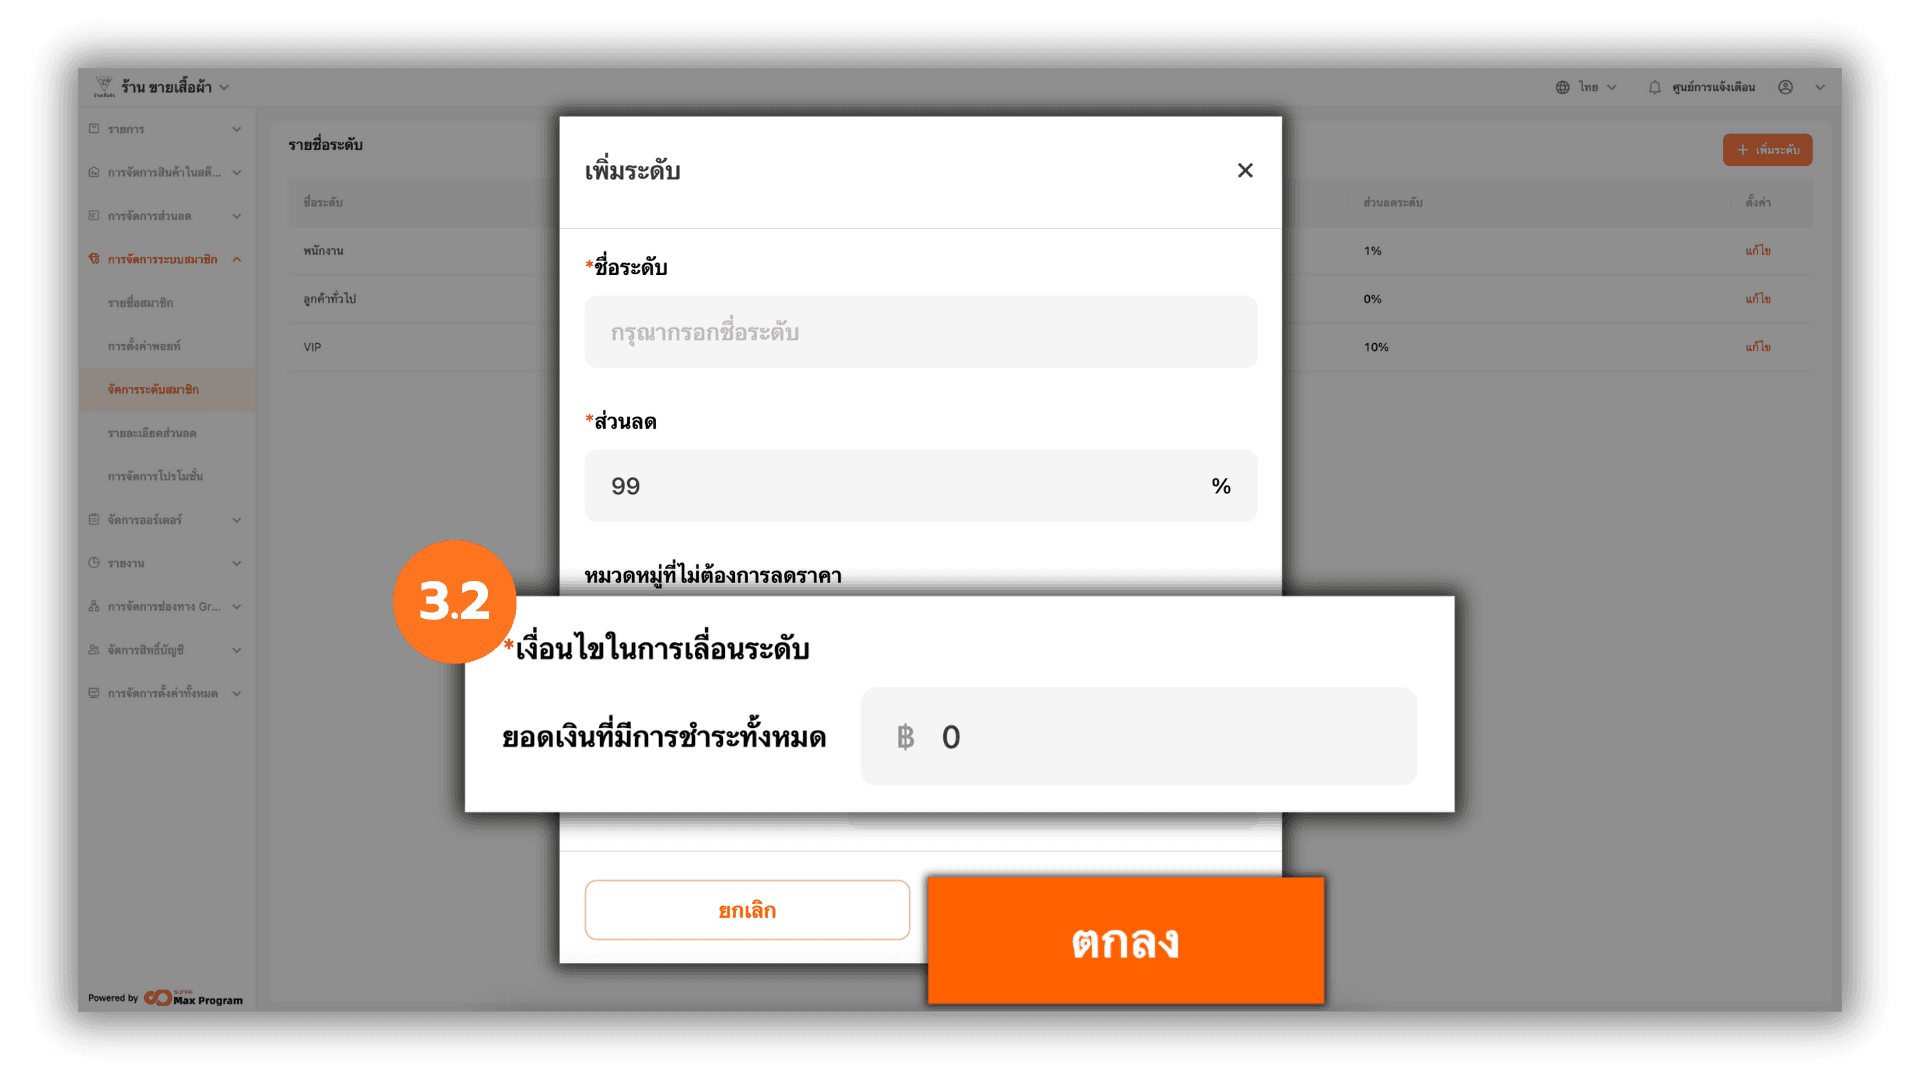
3.2 Setting Membership Level Upgrade Conditions
Enter the spending amount to be used as the membership level upgrade condition. The upgrade condition will take effect when the member’s spending reaches the specified amount within a single bill.
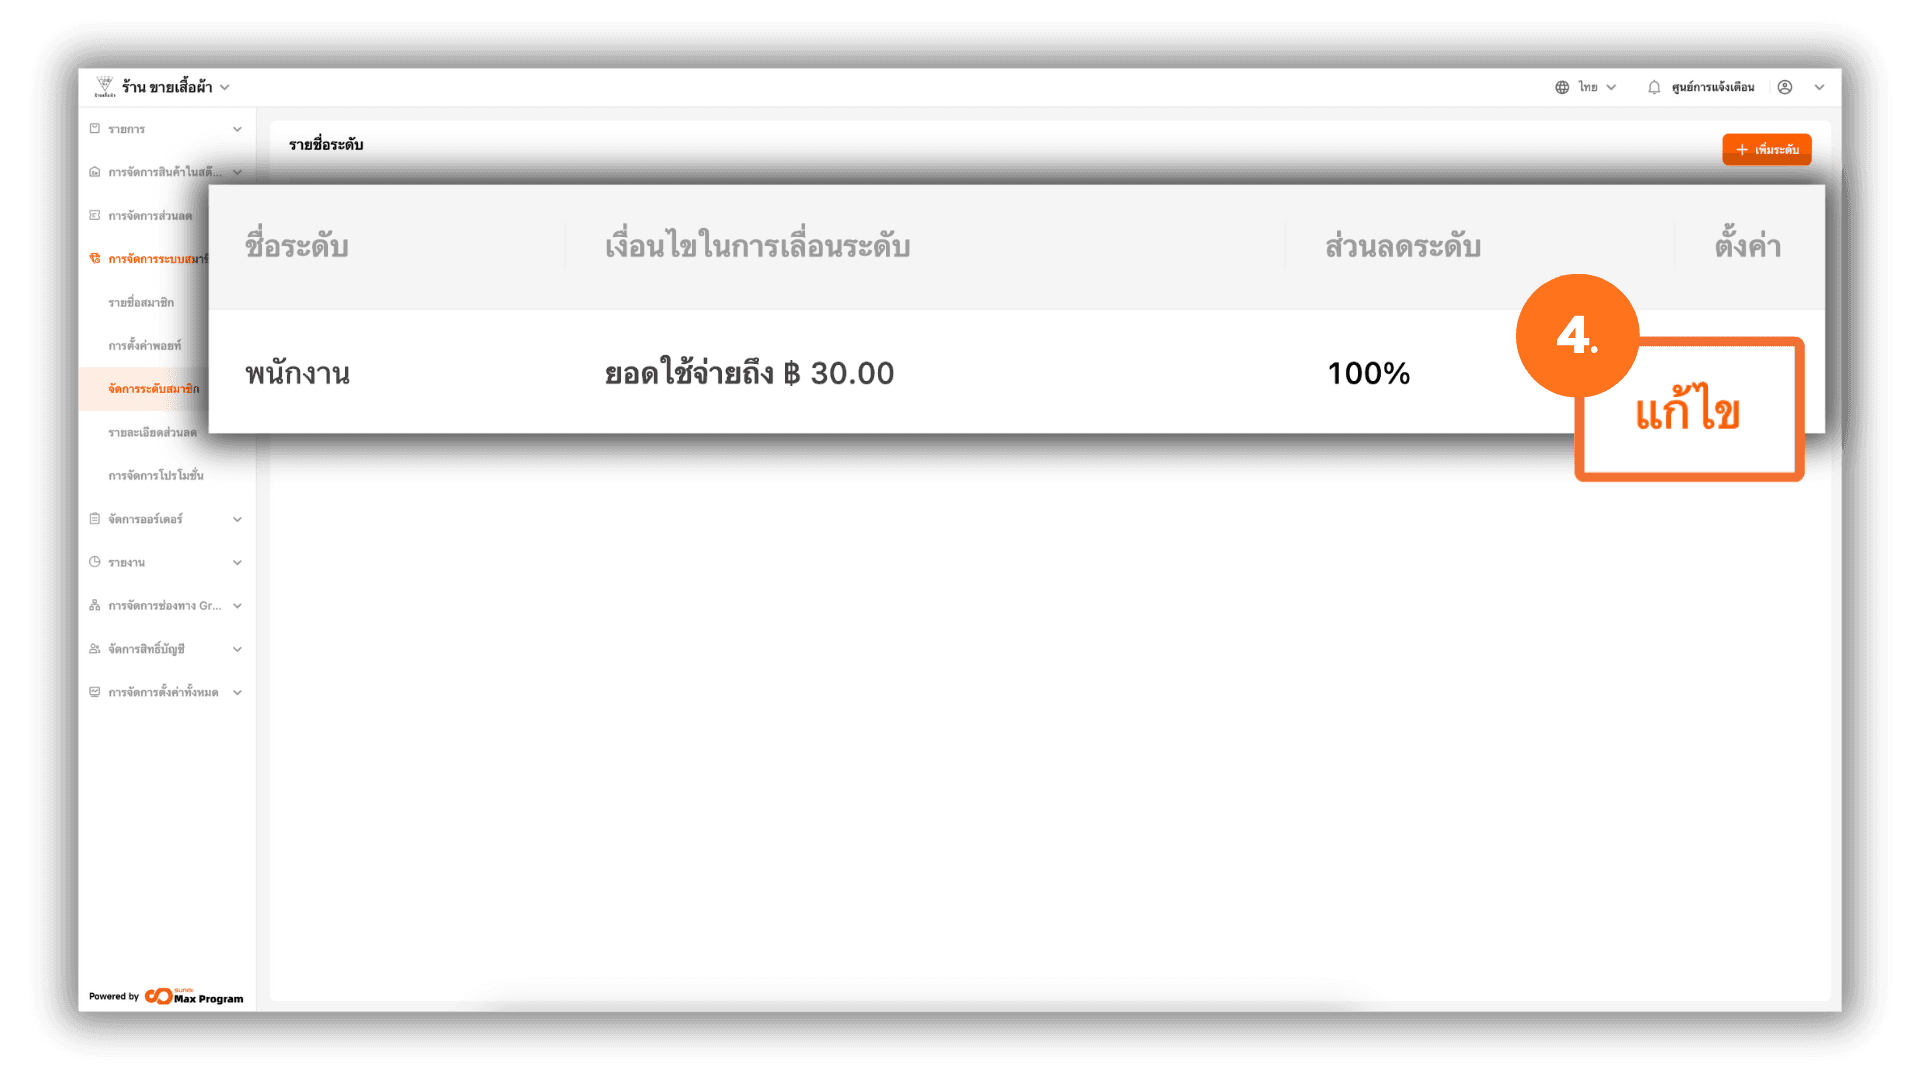
4. Editing a Membership Level
Previously created membership levels can be edited. Click the Edit button next to the membership level you want to modify.