Add Product (Back Office)
2026-03-23 15:23
This guide helps you create product items in the GPOS system correctly and step-by-step, reducing confusion, speeding up workflows, and ensuring that products are displayed accurately and consistently on both POS and GRAB.
1. Go to the website login.gpos.co.th, enter your email and password, then click Log In.
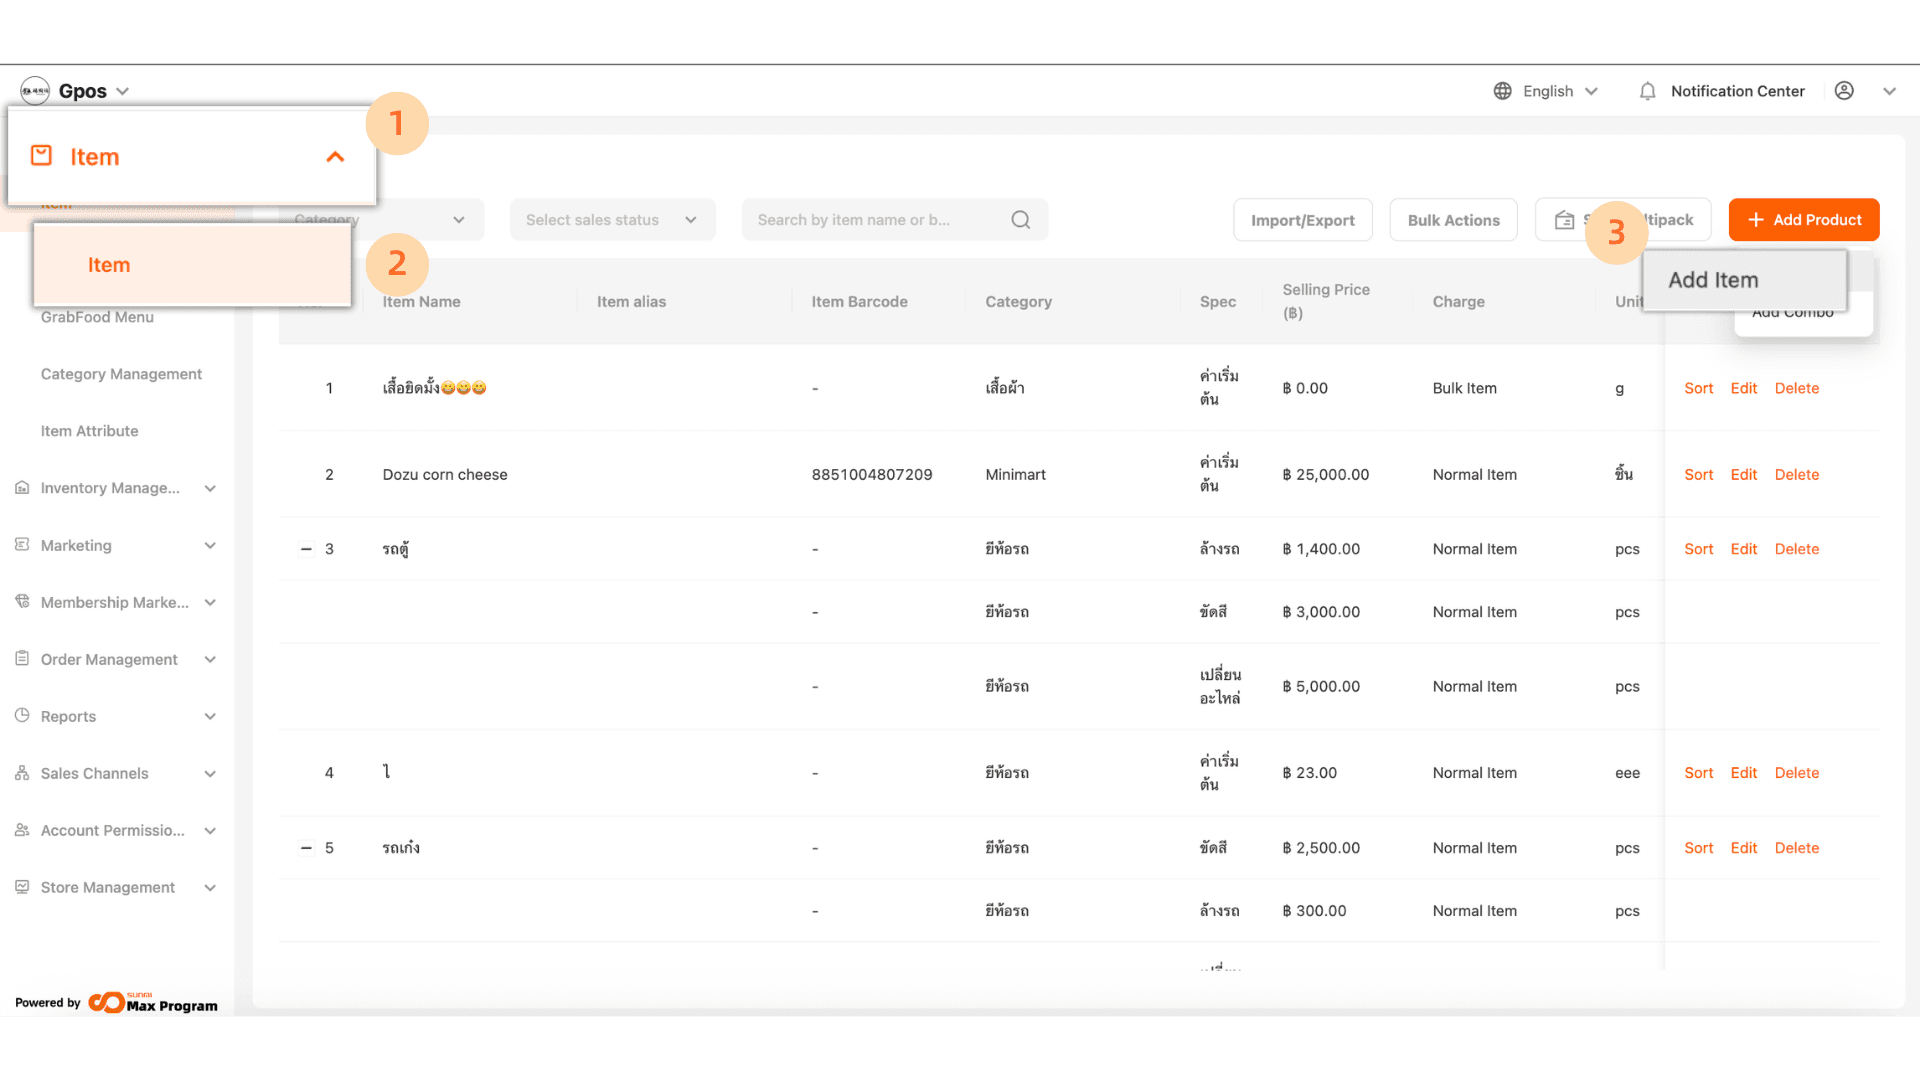
Click "Item > Item > +add product > add item
2. Enter the Item Name. The Item alias shown on the right side is the product name for GRABFOOD (for merchants who have linked their account).
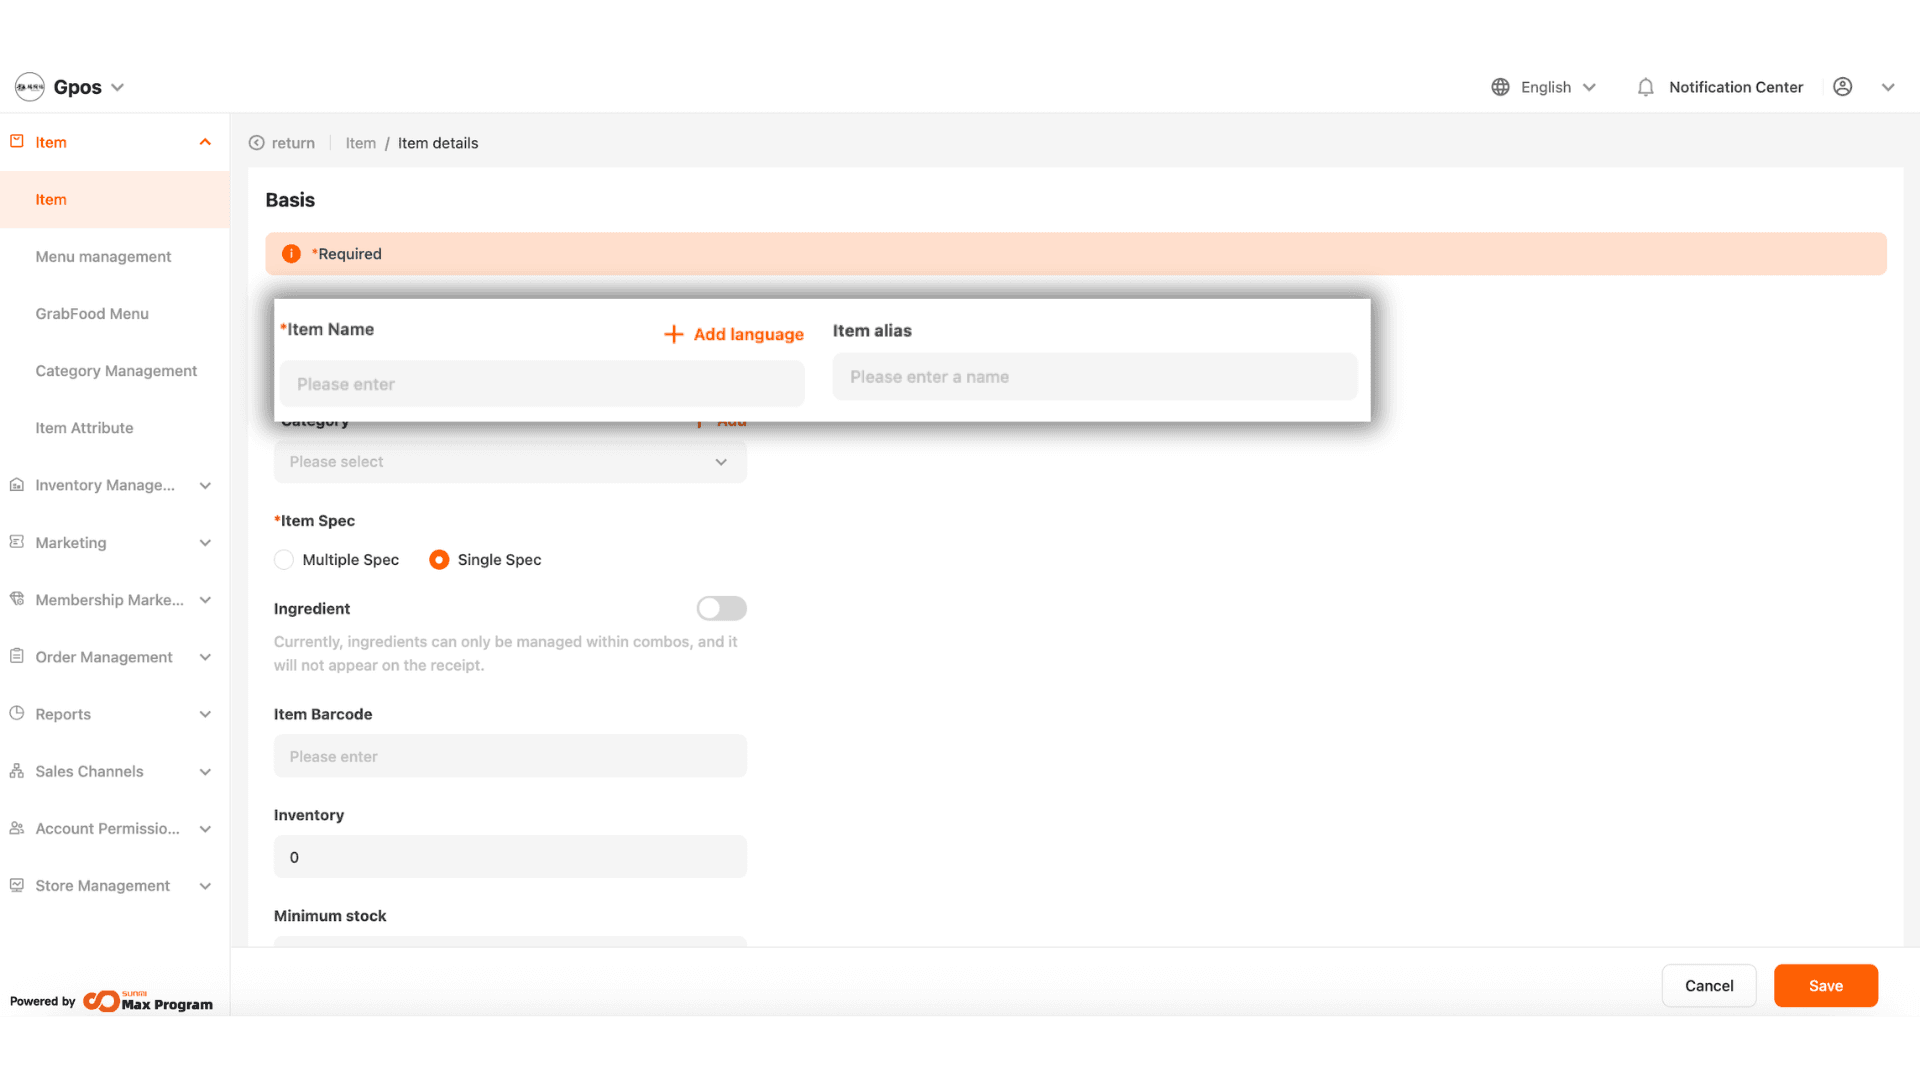
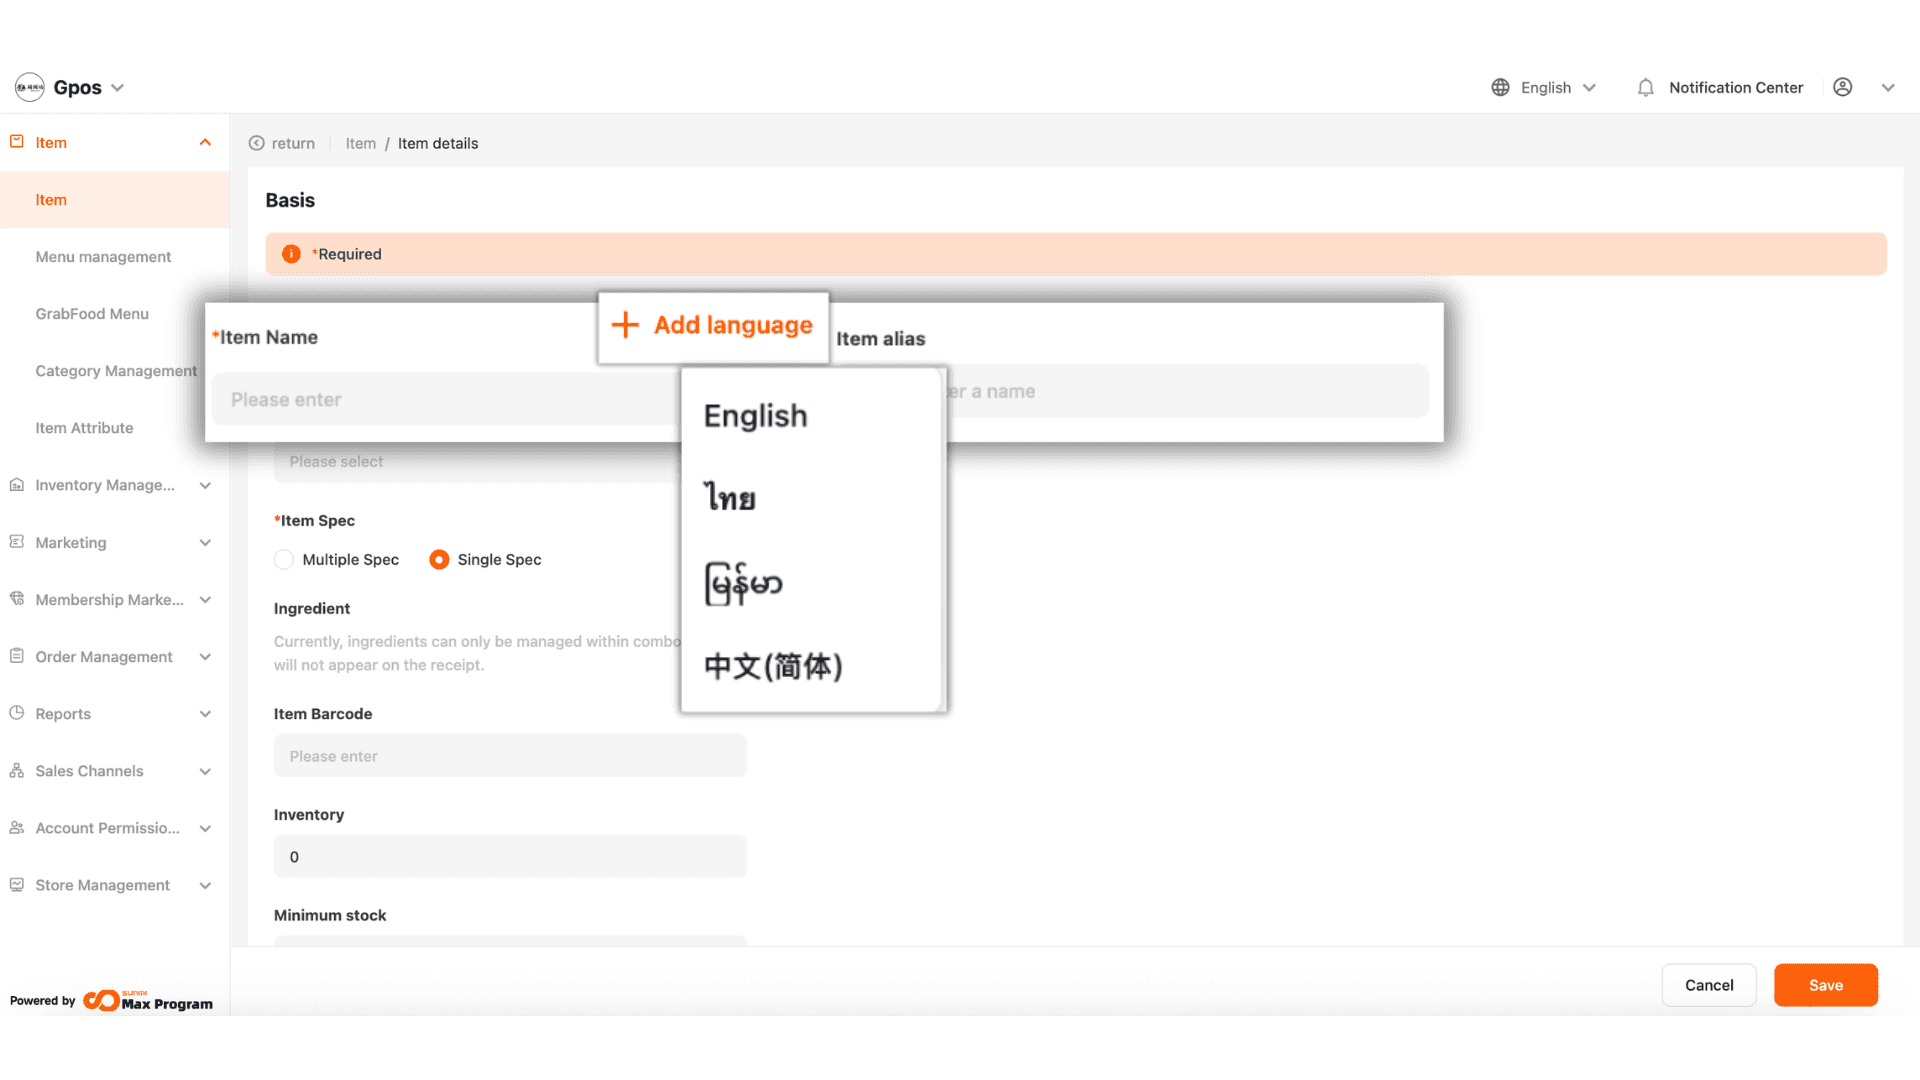
3. Click “+ Add Language” to add the product name in other languages. Supported languages: Thai, English, Burmese, and Chinese, useful for QR-code self-ordering systems that support multiple languages.
4. Choose the appropriate category by clicking the dropdown arrow to select an existing category.
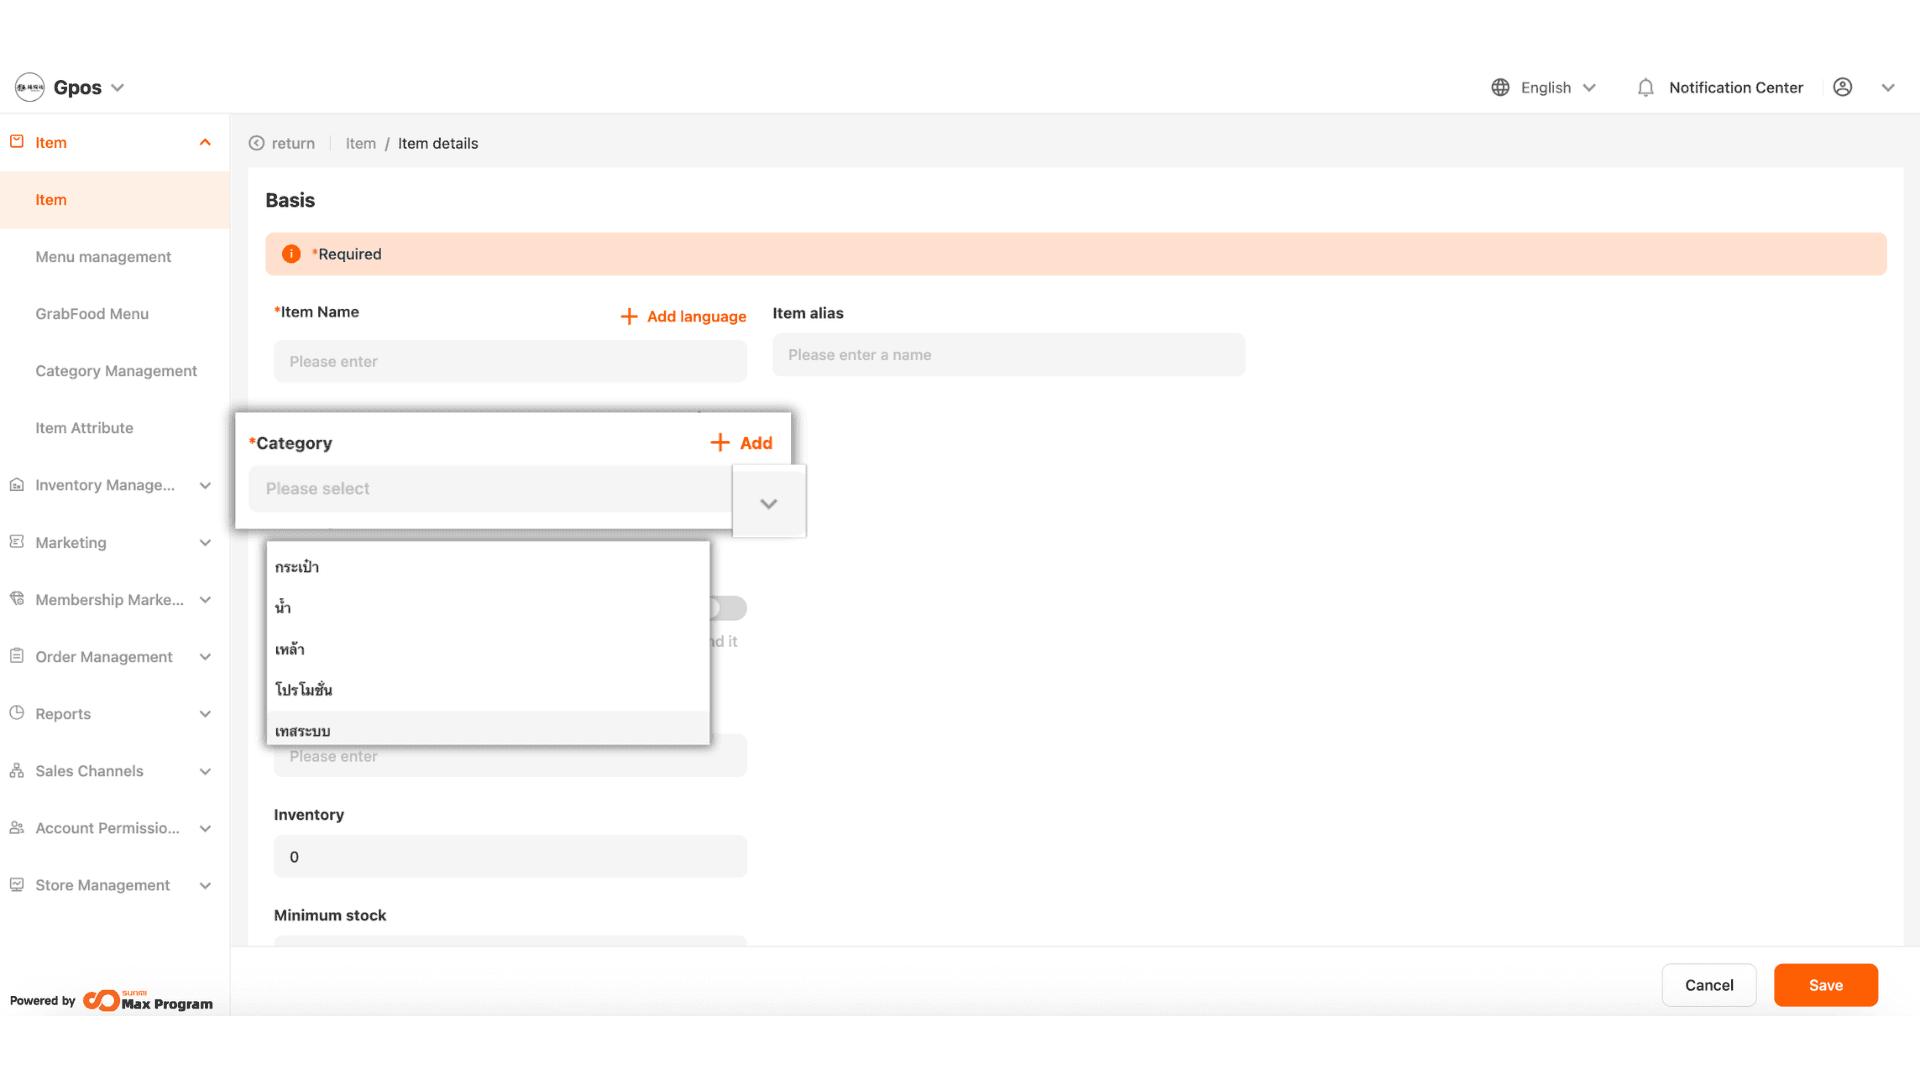
5. If you want to create a new category, click “+ Add”. The system will prompt you to enter the new category name. Click “Ok” to save.
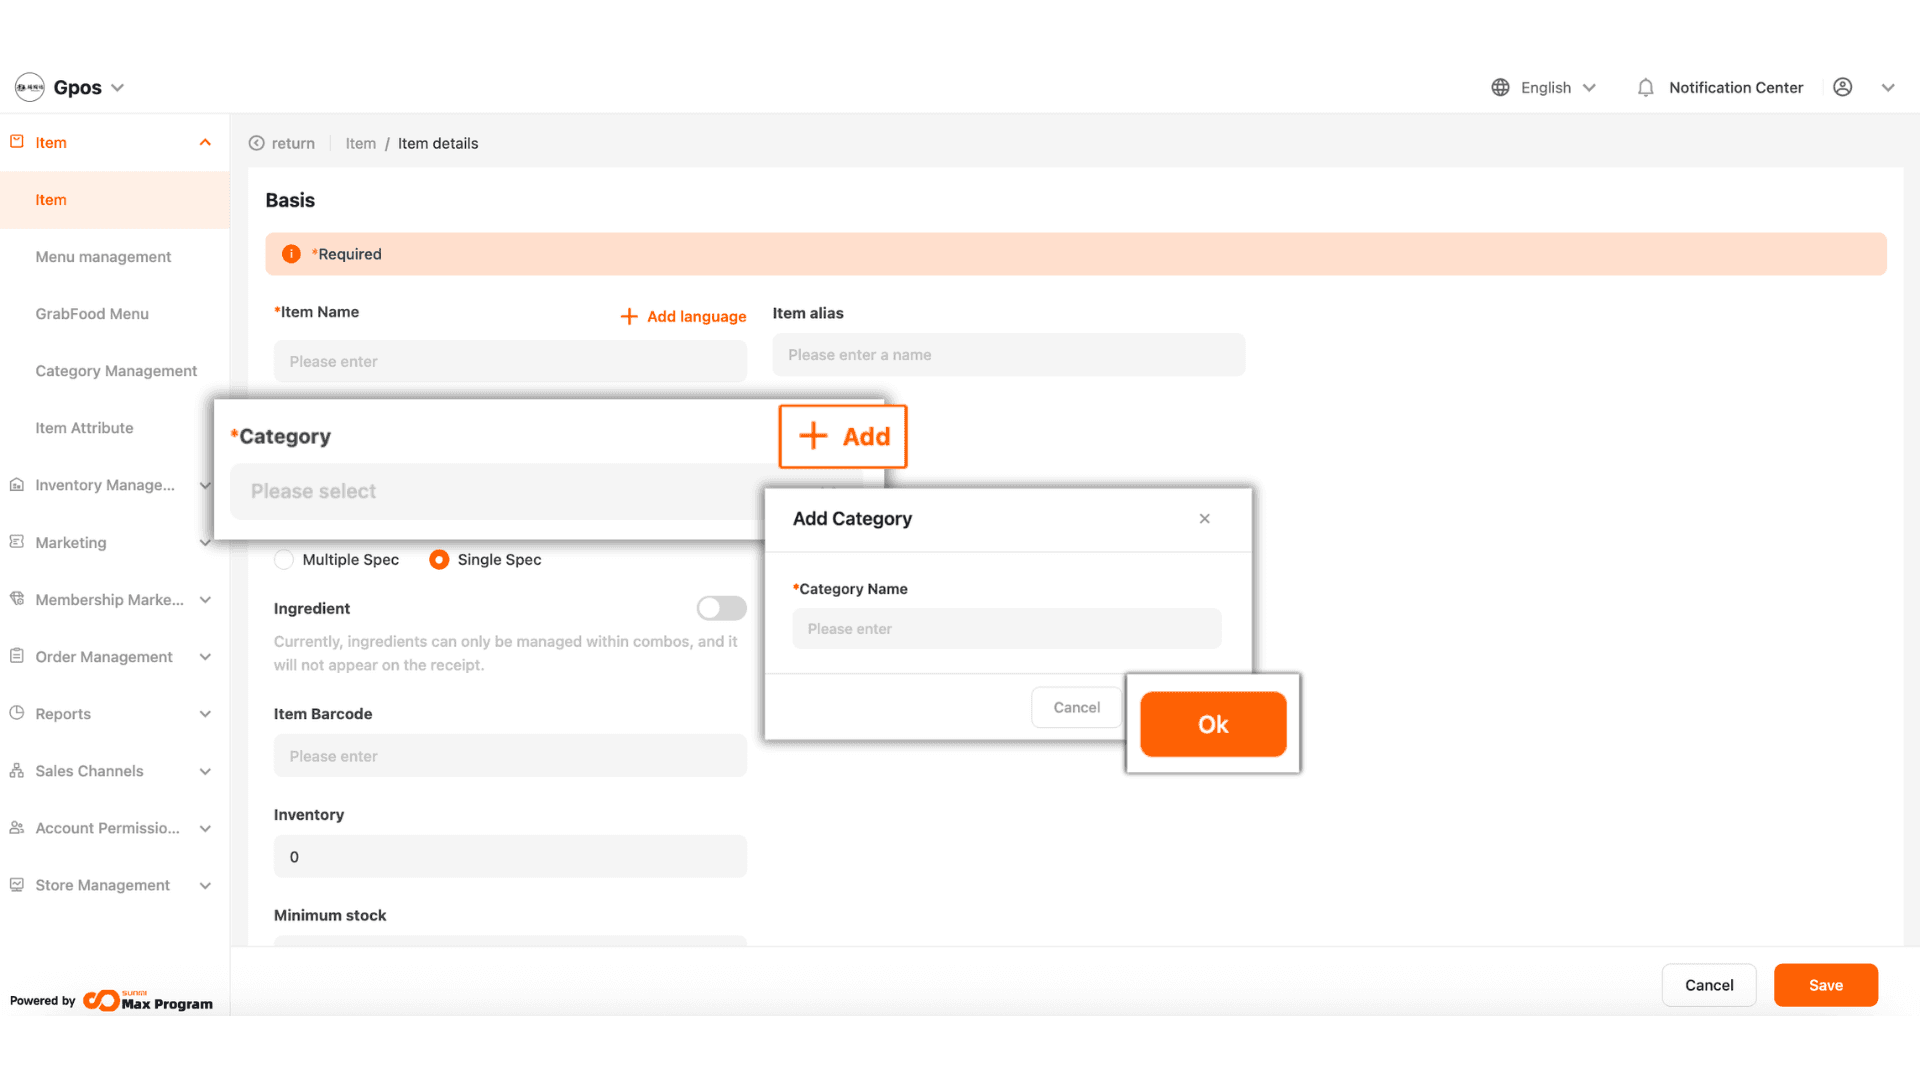
6.Item Spec refers to the product type. If ‘Single Spec’ is selected, it means the item has only one option/price (e.g., chicken fried rice 60 THB, basil rice 40 THB).
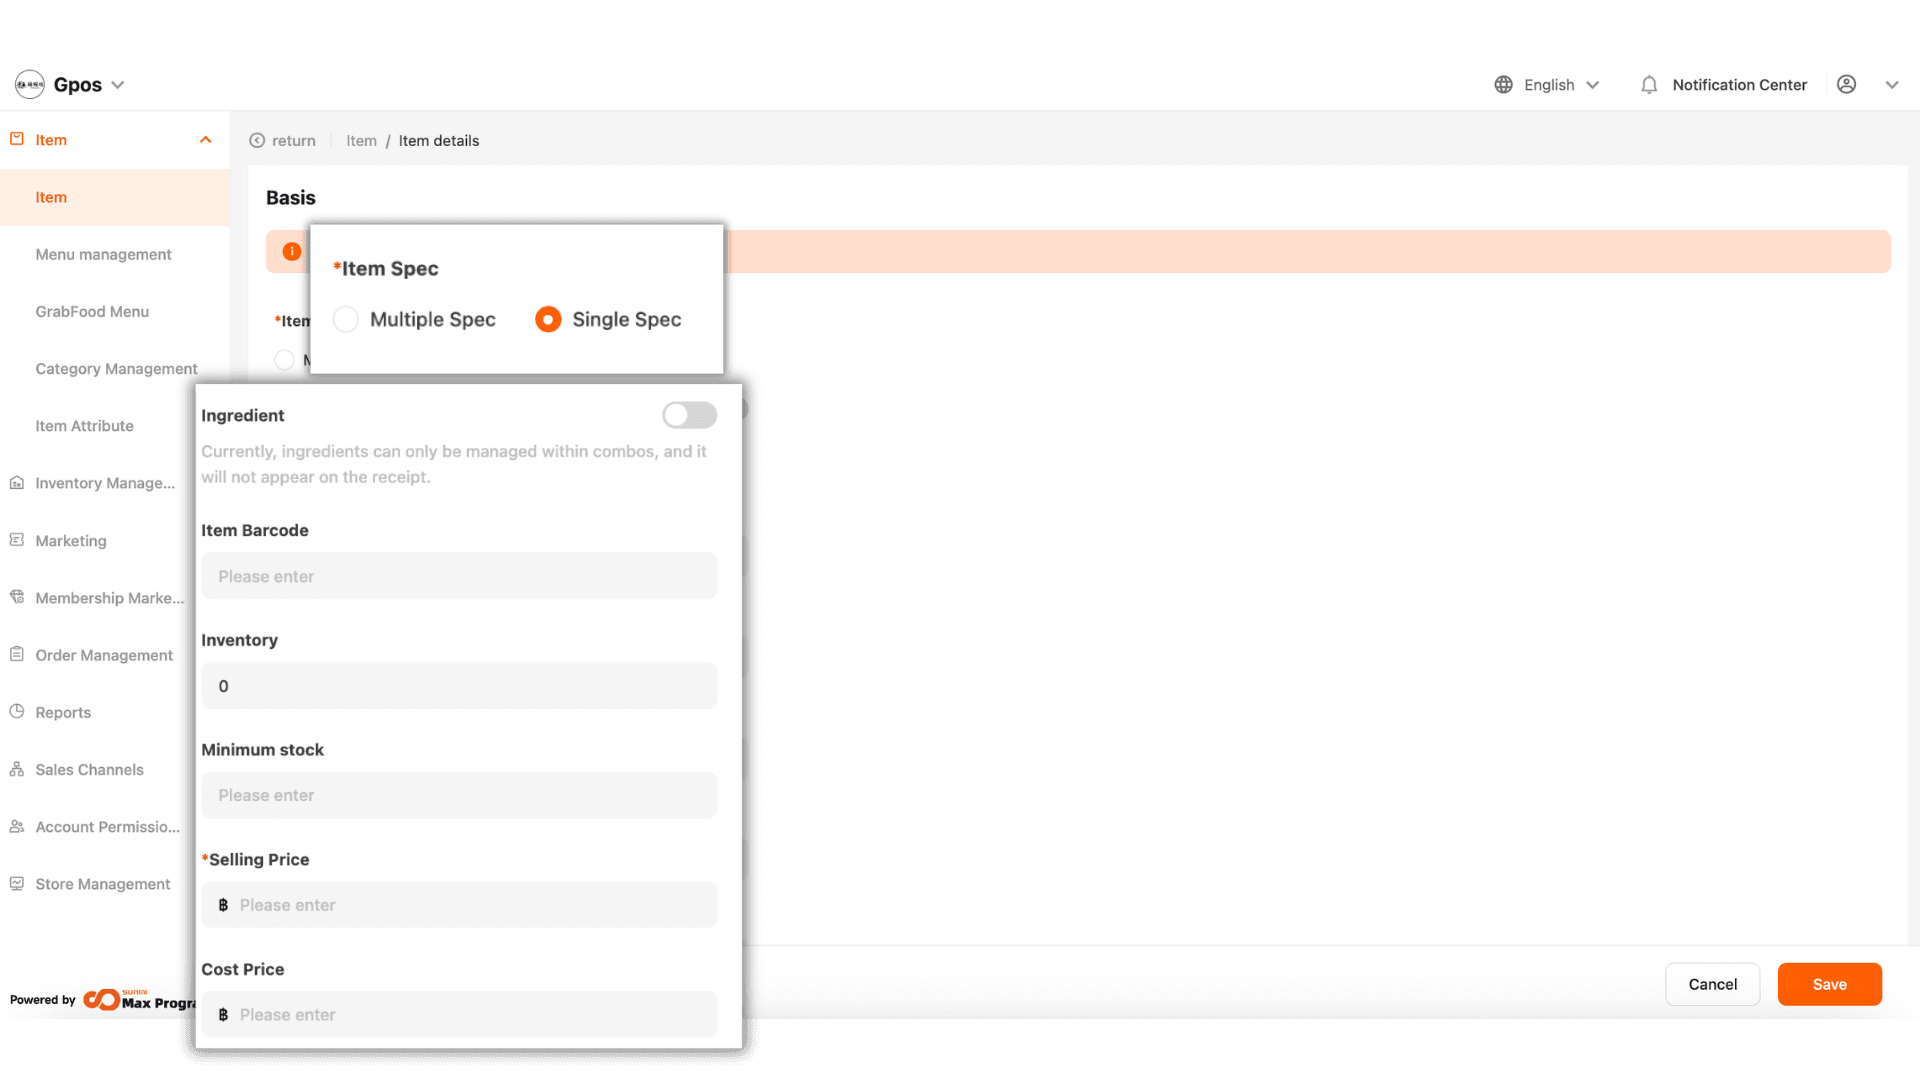
7. Multiple Spec is suitable for items with multiple prices or options (e.g., fried rice with pork, beef, or chicken in the same item). You can add unlimited specs.

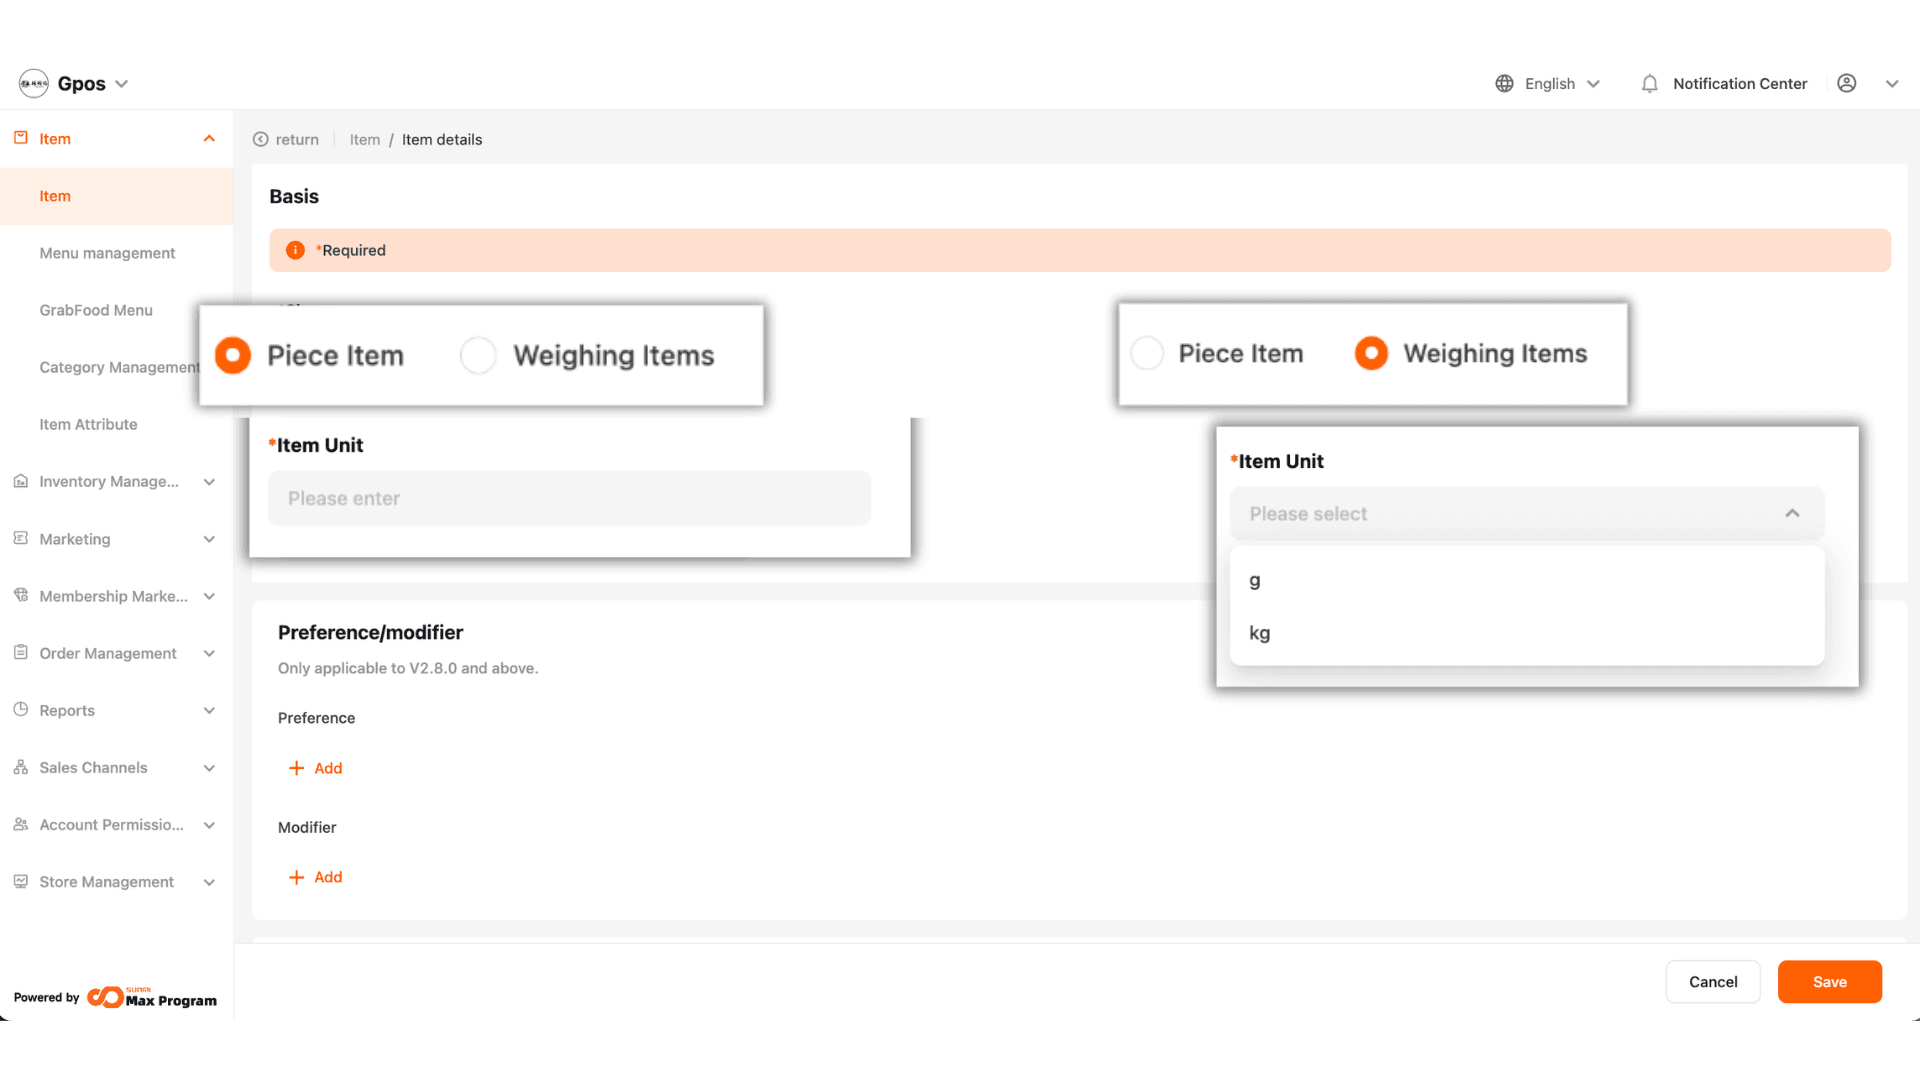
8.Piece Item refers to a standard unit item. You can enter the desired unit in the ‘Item Unit’ field (e.g., piece, item, bottle, plate, etc.).
Weighing Items refers to weight-based items. You can select the unit in the ‘Item Unit’ field as ‘g’ or ‘kg’ only.
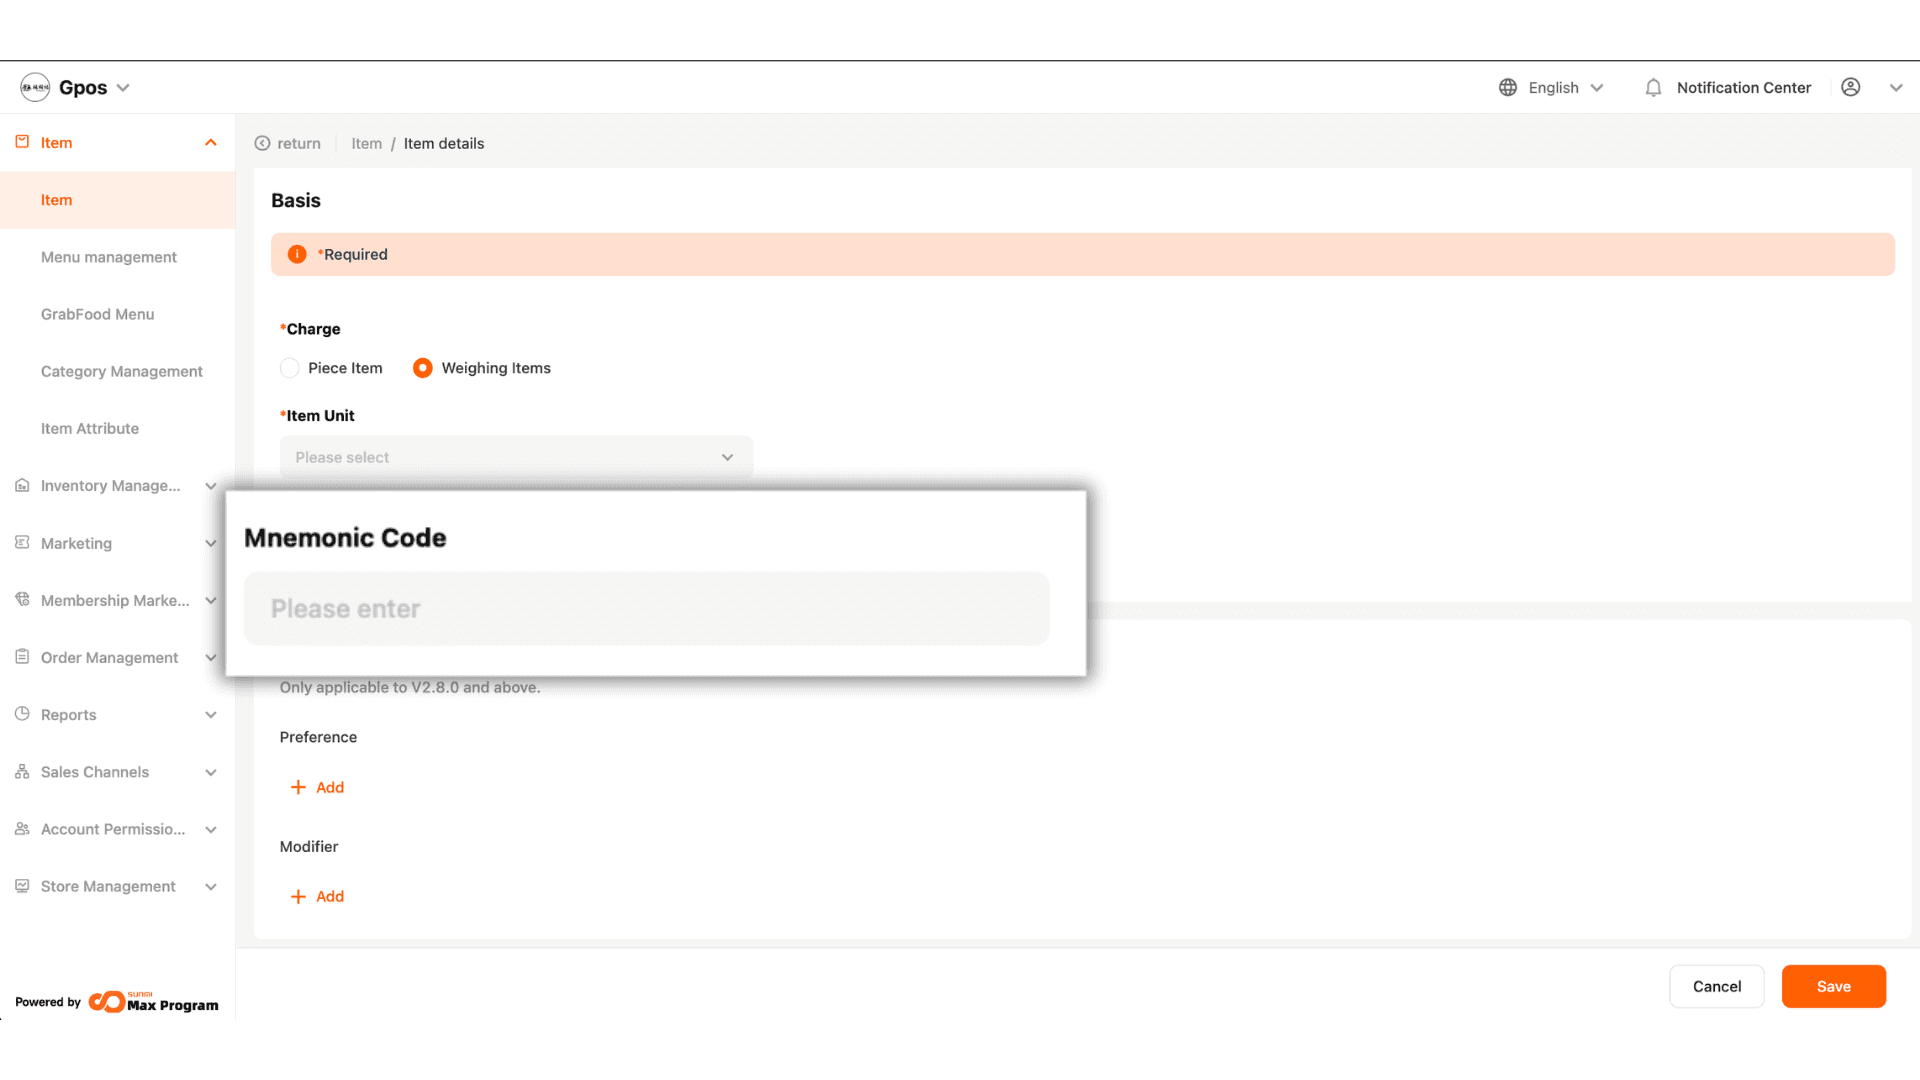
8. Mnemonic Code refers to the product SKU or item code, which can be used to search for the item instead of its name or barcode on the sales screen.
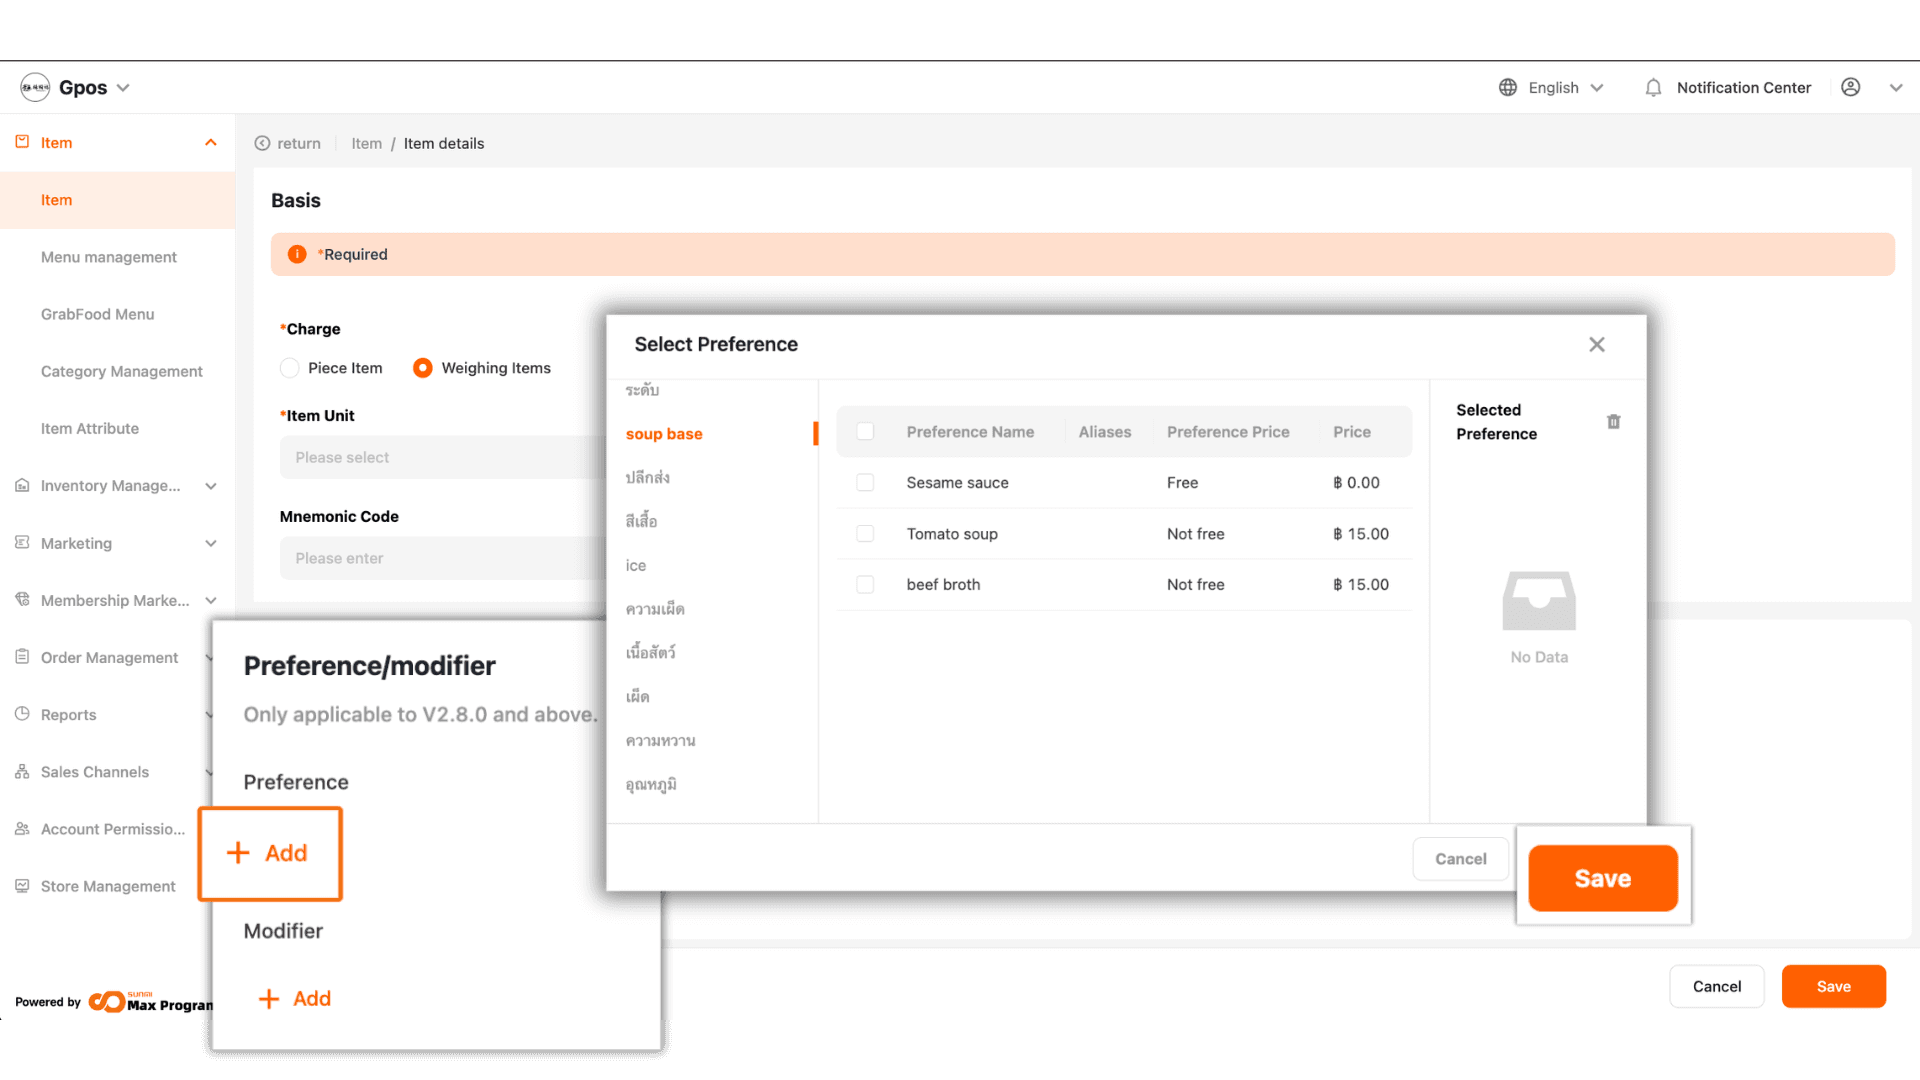
9. Click ‘+ Add’ in either the Preference or Modifier group, then select the desired toppings or options and click ‘Save’.
|Note: Before selecting these two option groups, you must first add options/add-ons in the Option Management page.
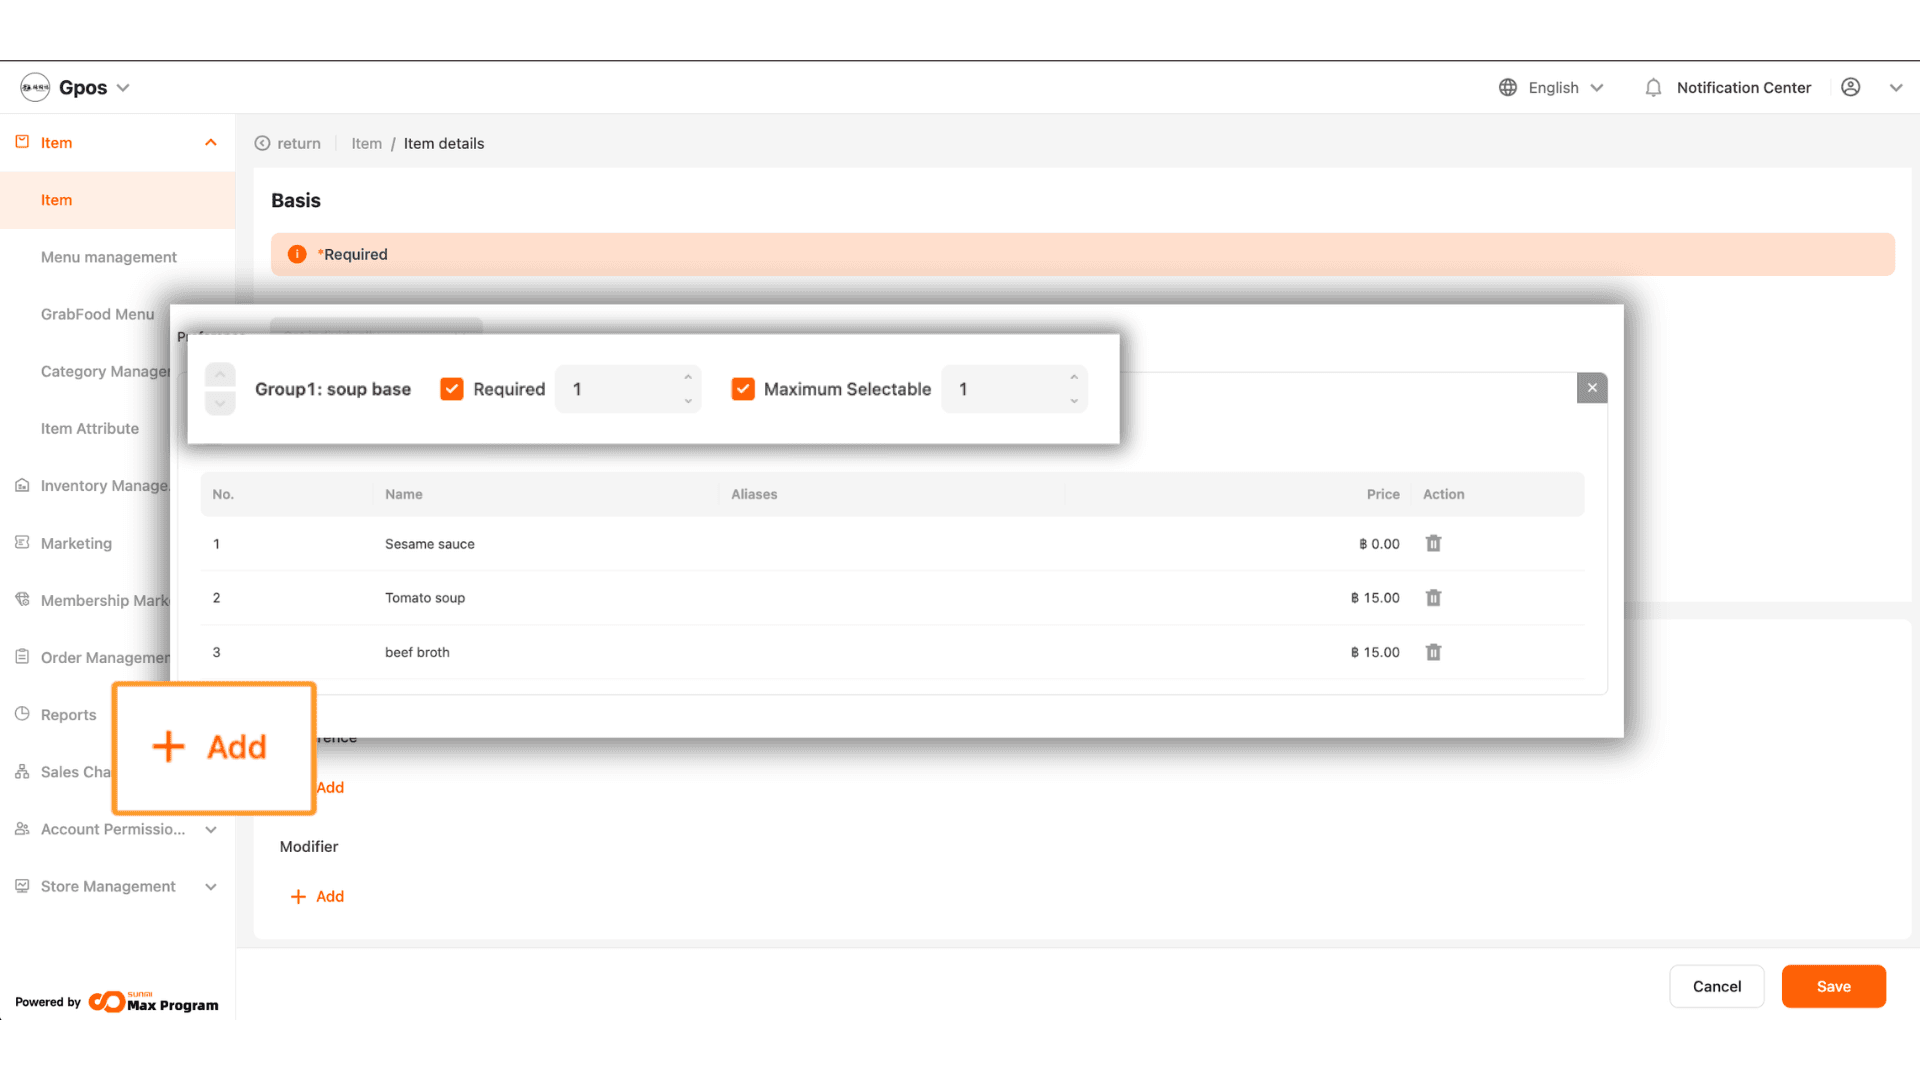
10. Required means the option must be selected, and you can set the required number of selections.
Maximum Selectable allows optional selection but limits the number of choices.
You can also click ‘+ Add’ to increase the number of selectable options.
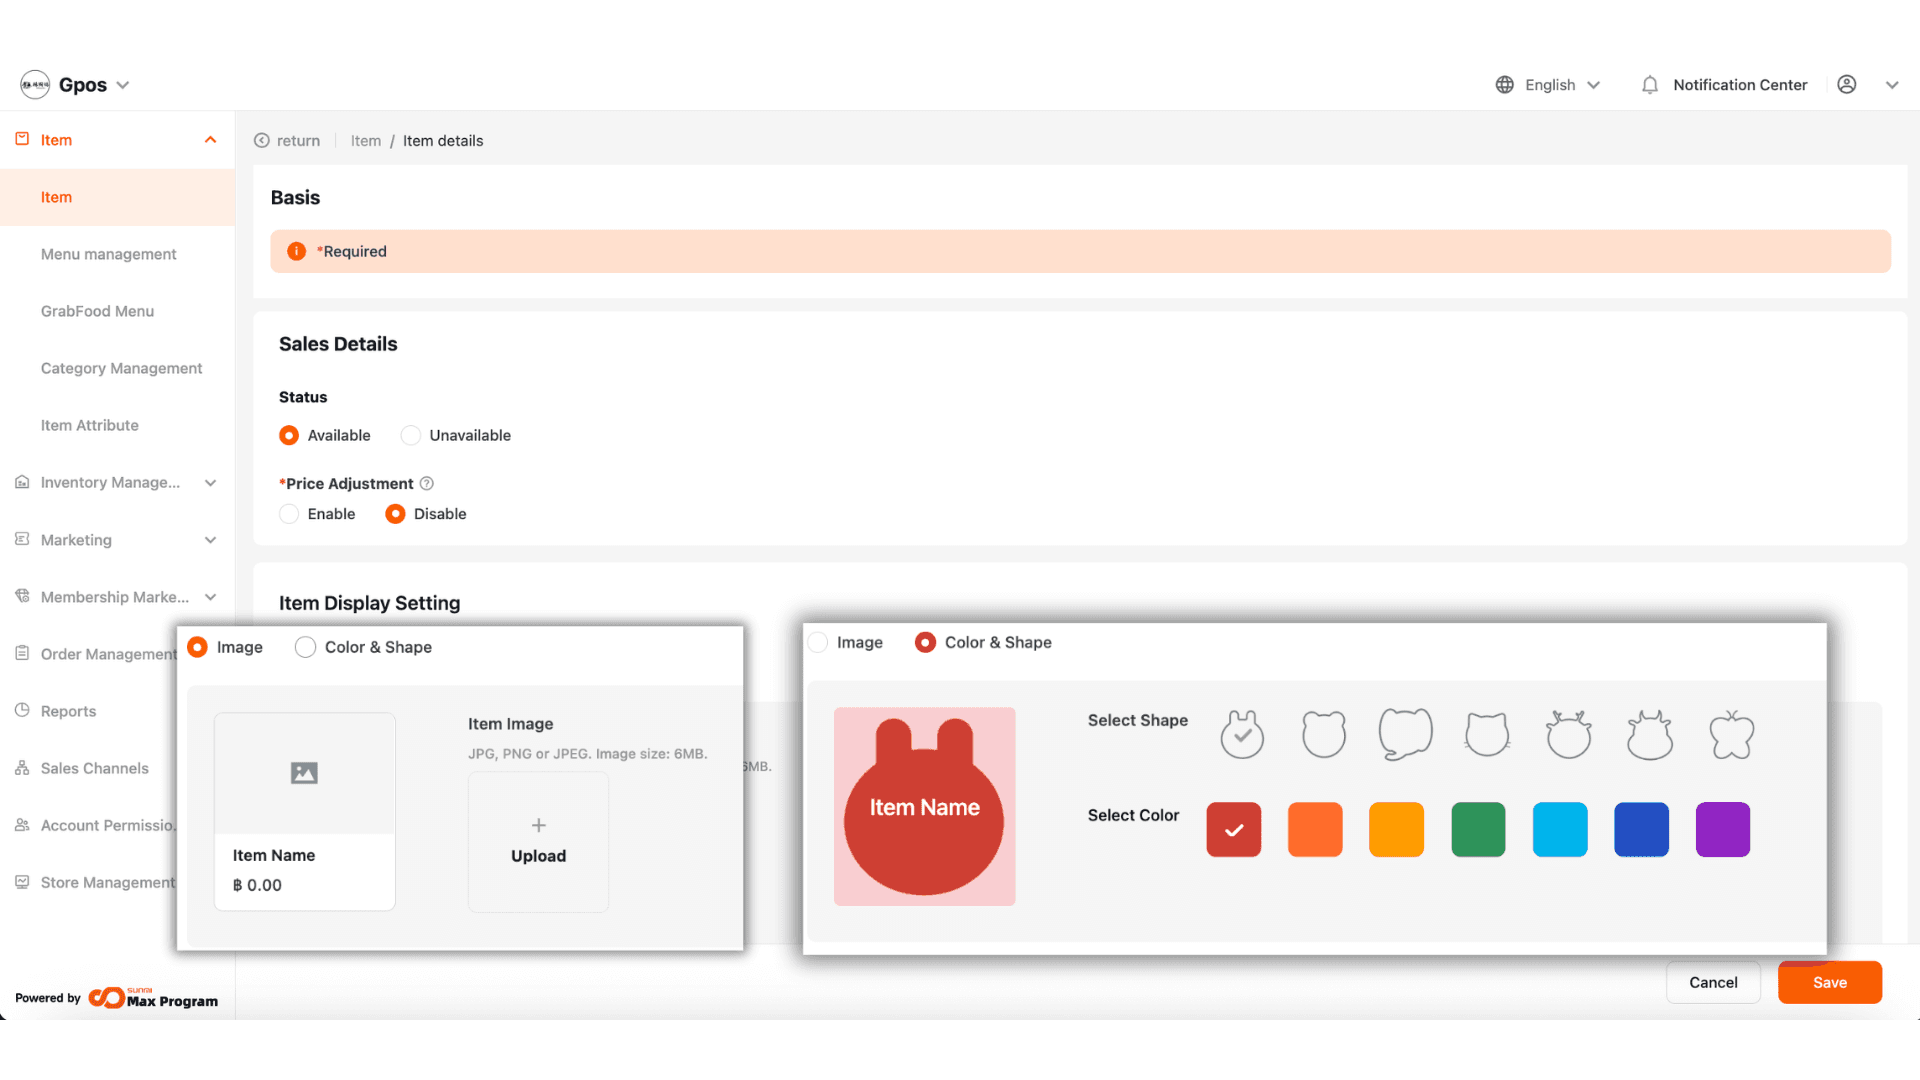
11. Status refers to the item availability. Select ‘Available’ to make the item available for sale, or ‘Unavailable’ to stop selling the item.
Price Adjustment allows you to freely modify the item price directly on the POS screen.
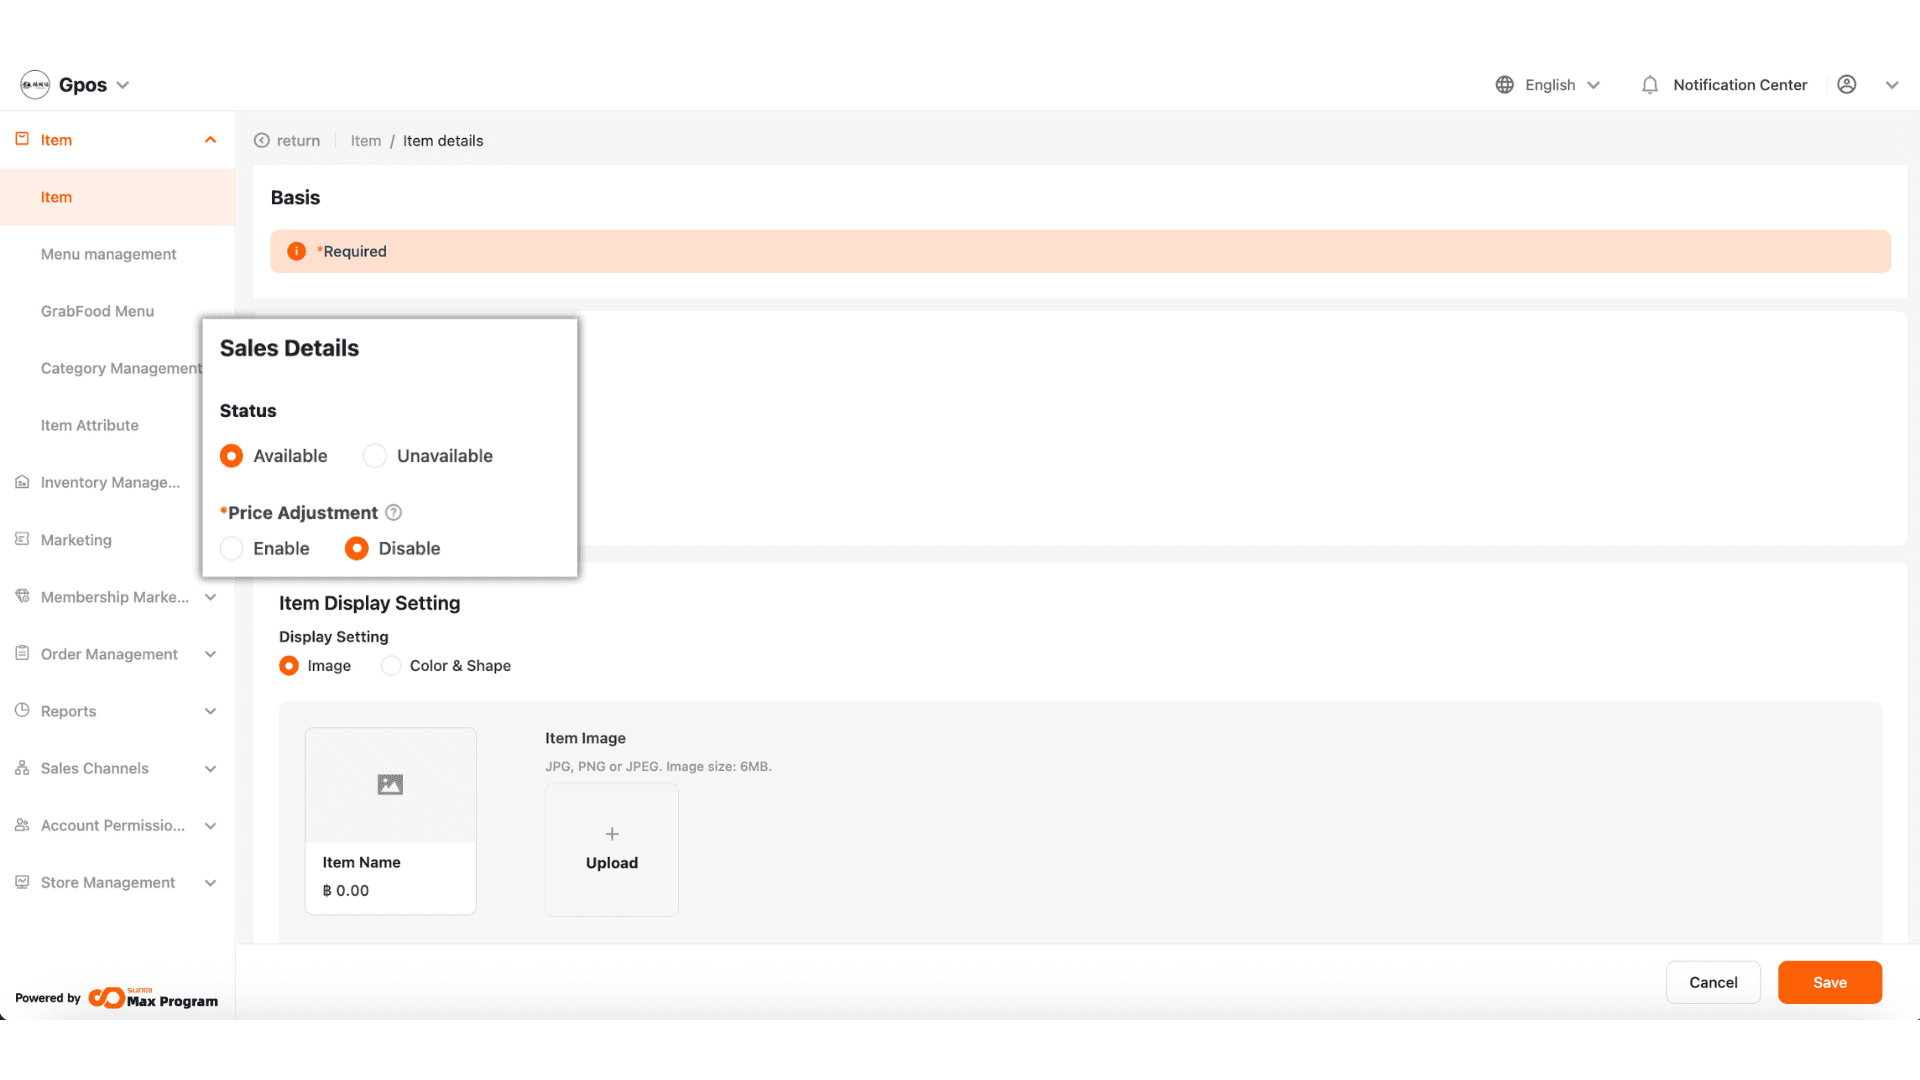
12. You can choose how the item is displayed, either as an image (by uploading a photo) or as a color/shape style.
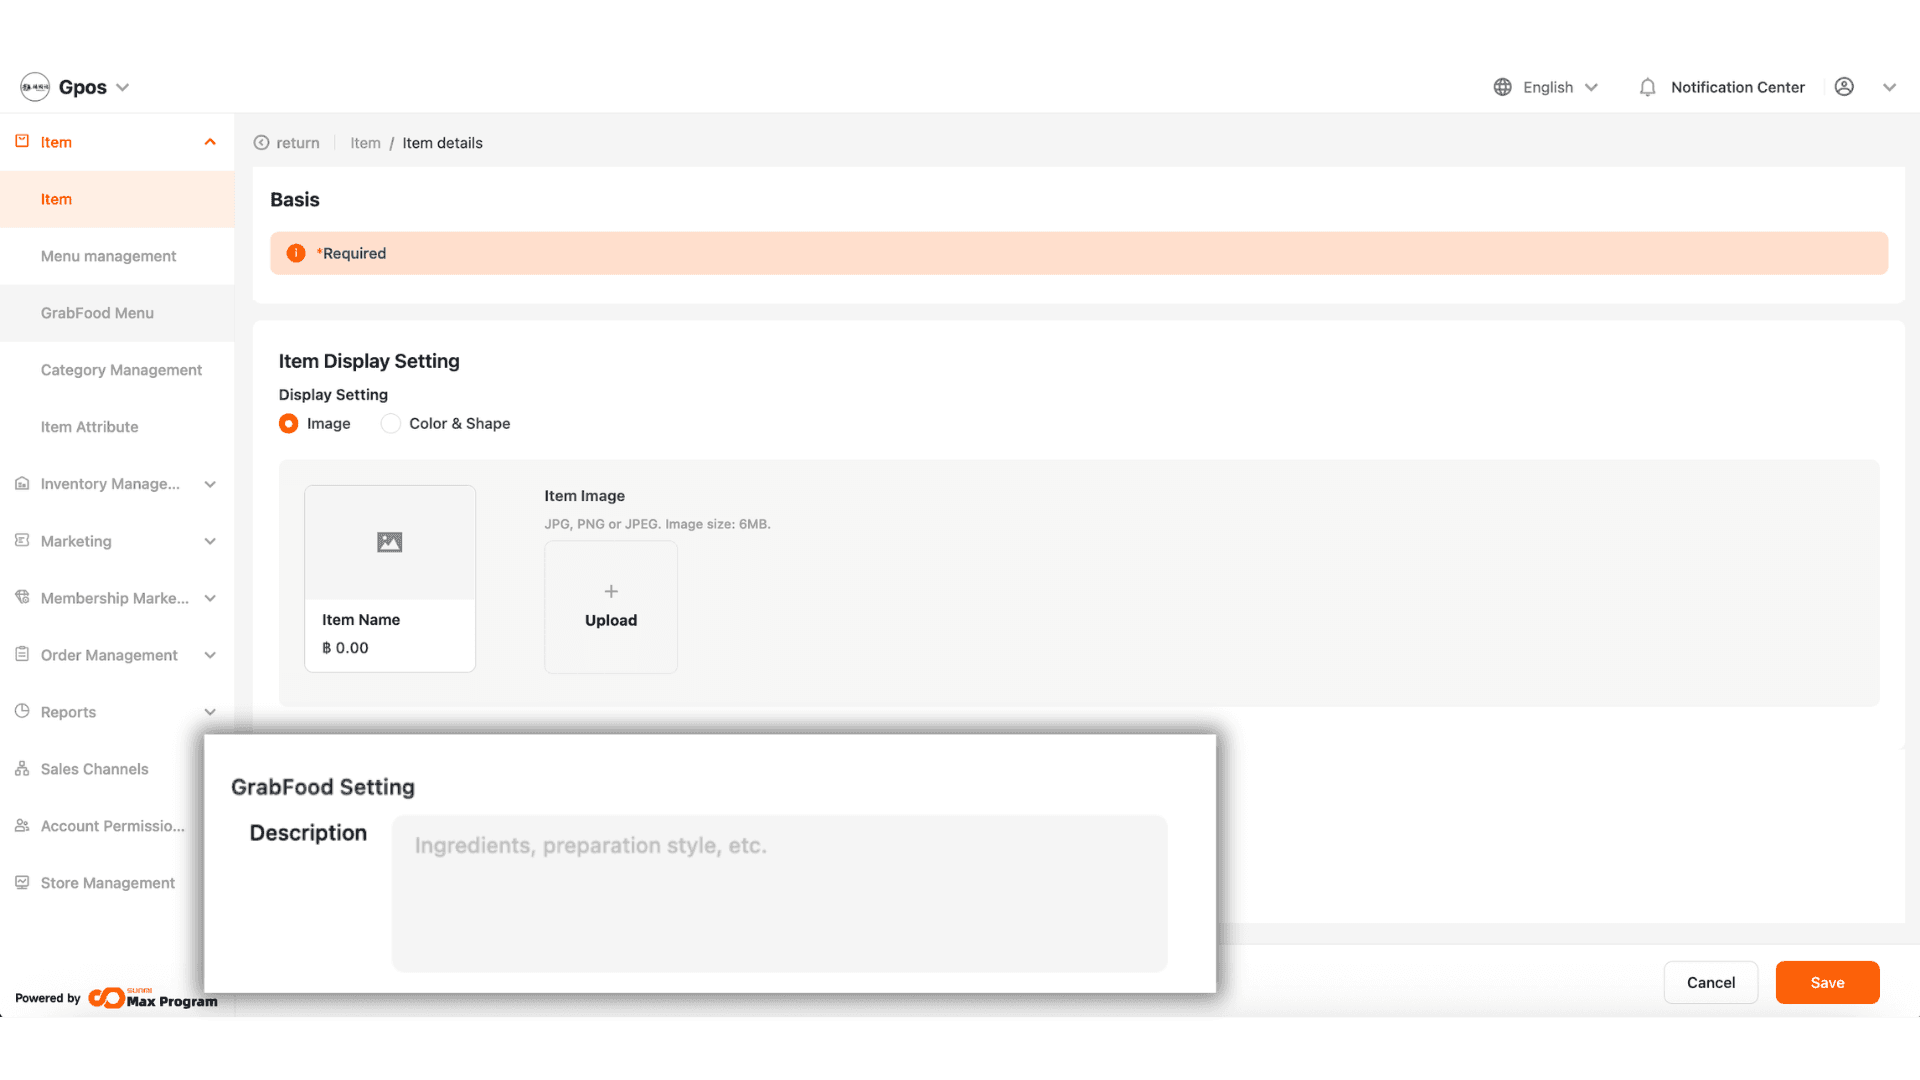
13. When integrated with GrabFood, you can add a product description for display on Grab, which will not impact the POS display.