Bulk actions (images, price, enable/disable sales, delete)
2026-03-26 14:46
Bulk Actions help users manage products quickly—whether deleting multiple items, batch-uploading images, updating prices, or enabling/disabling products in one go. Every step is designed for ease of use and to reduce product management time for store owners.
1. Log in to the Back Office
Go to the website login.gpos.co.th, enter your email and password, then click Log In.
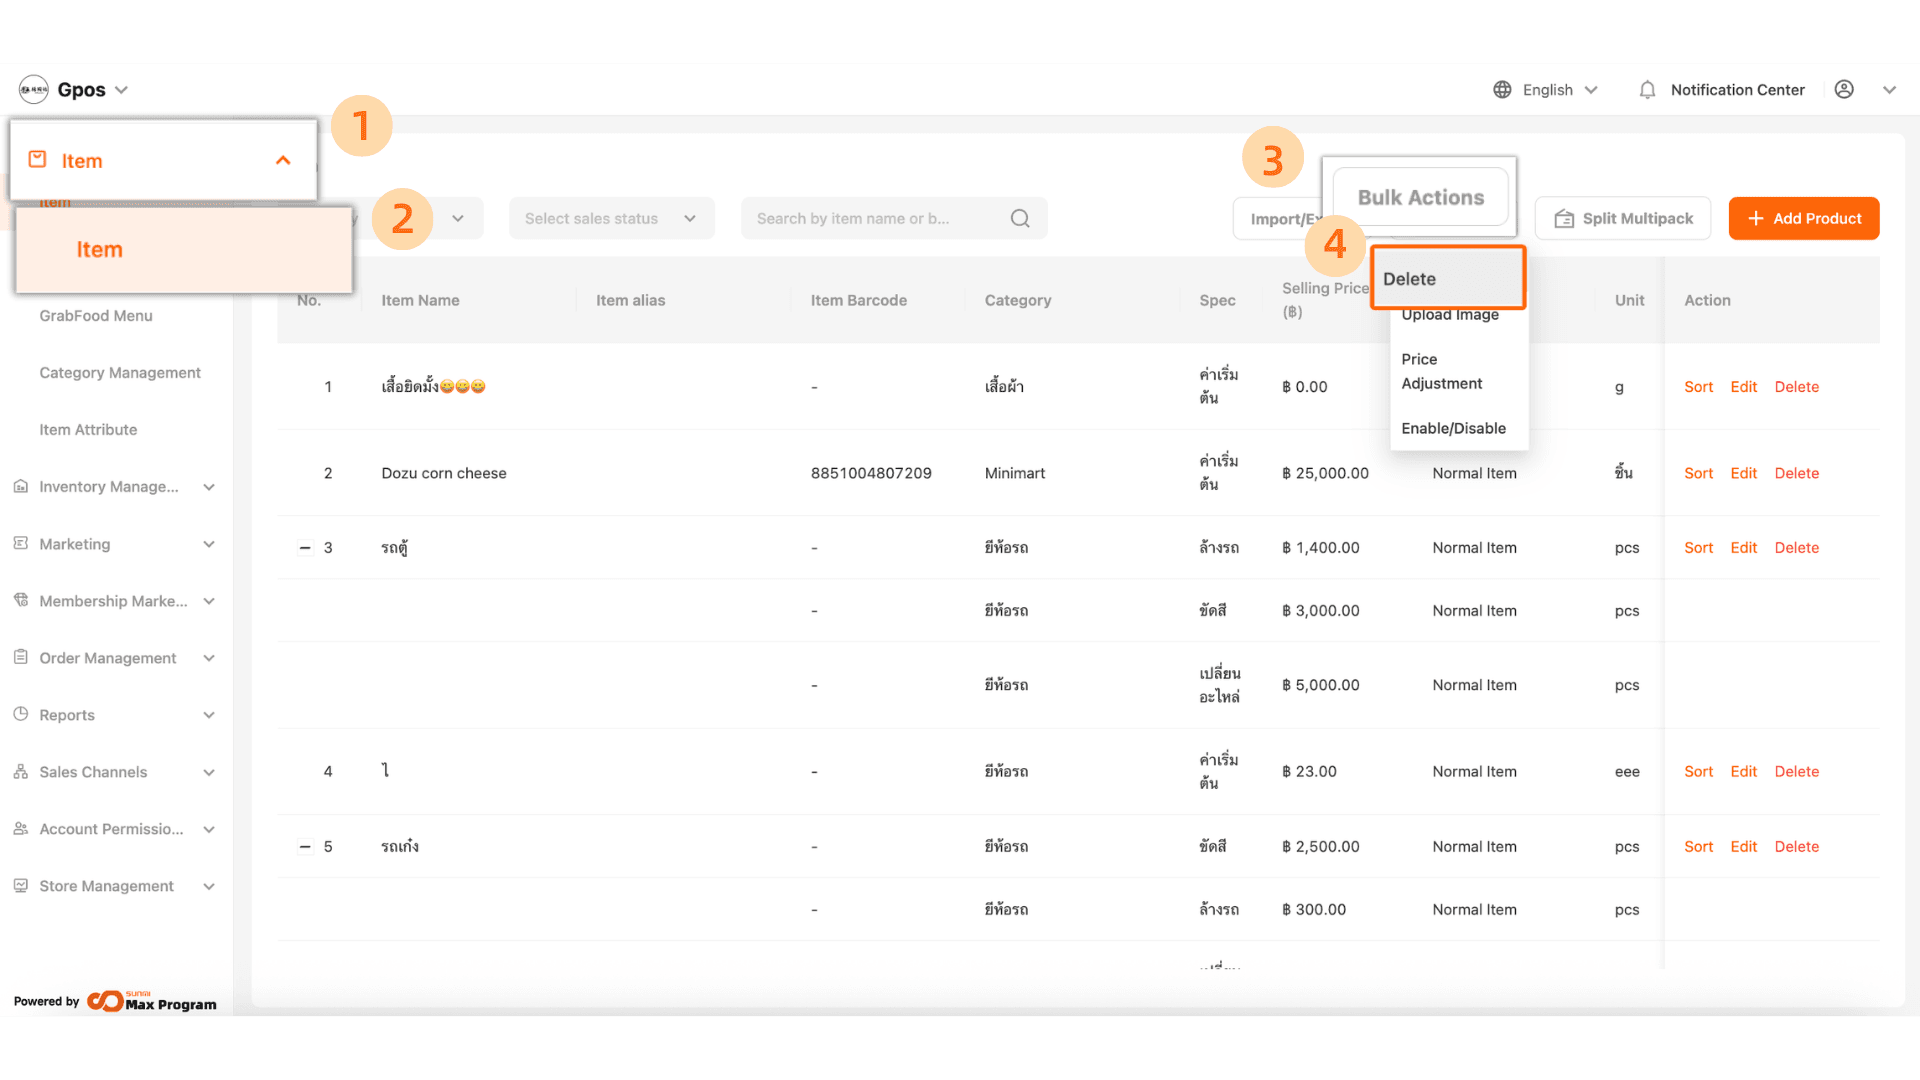
Click Item > Item > Bulk Actions > Delete
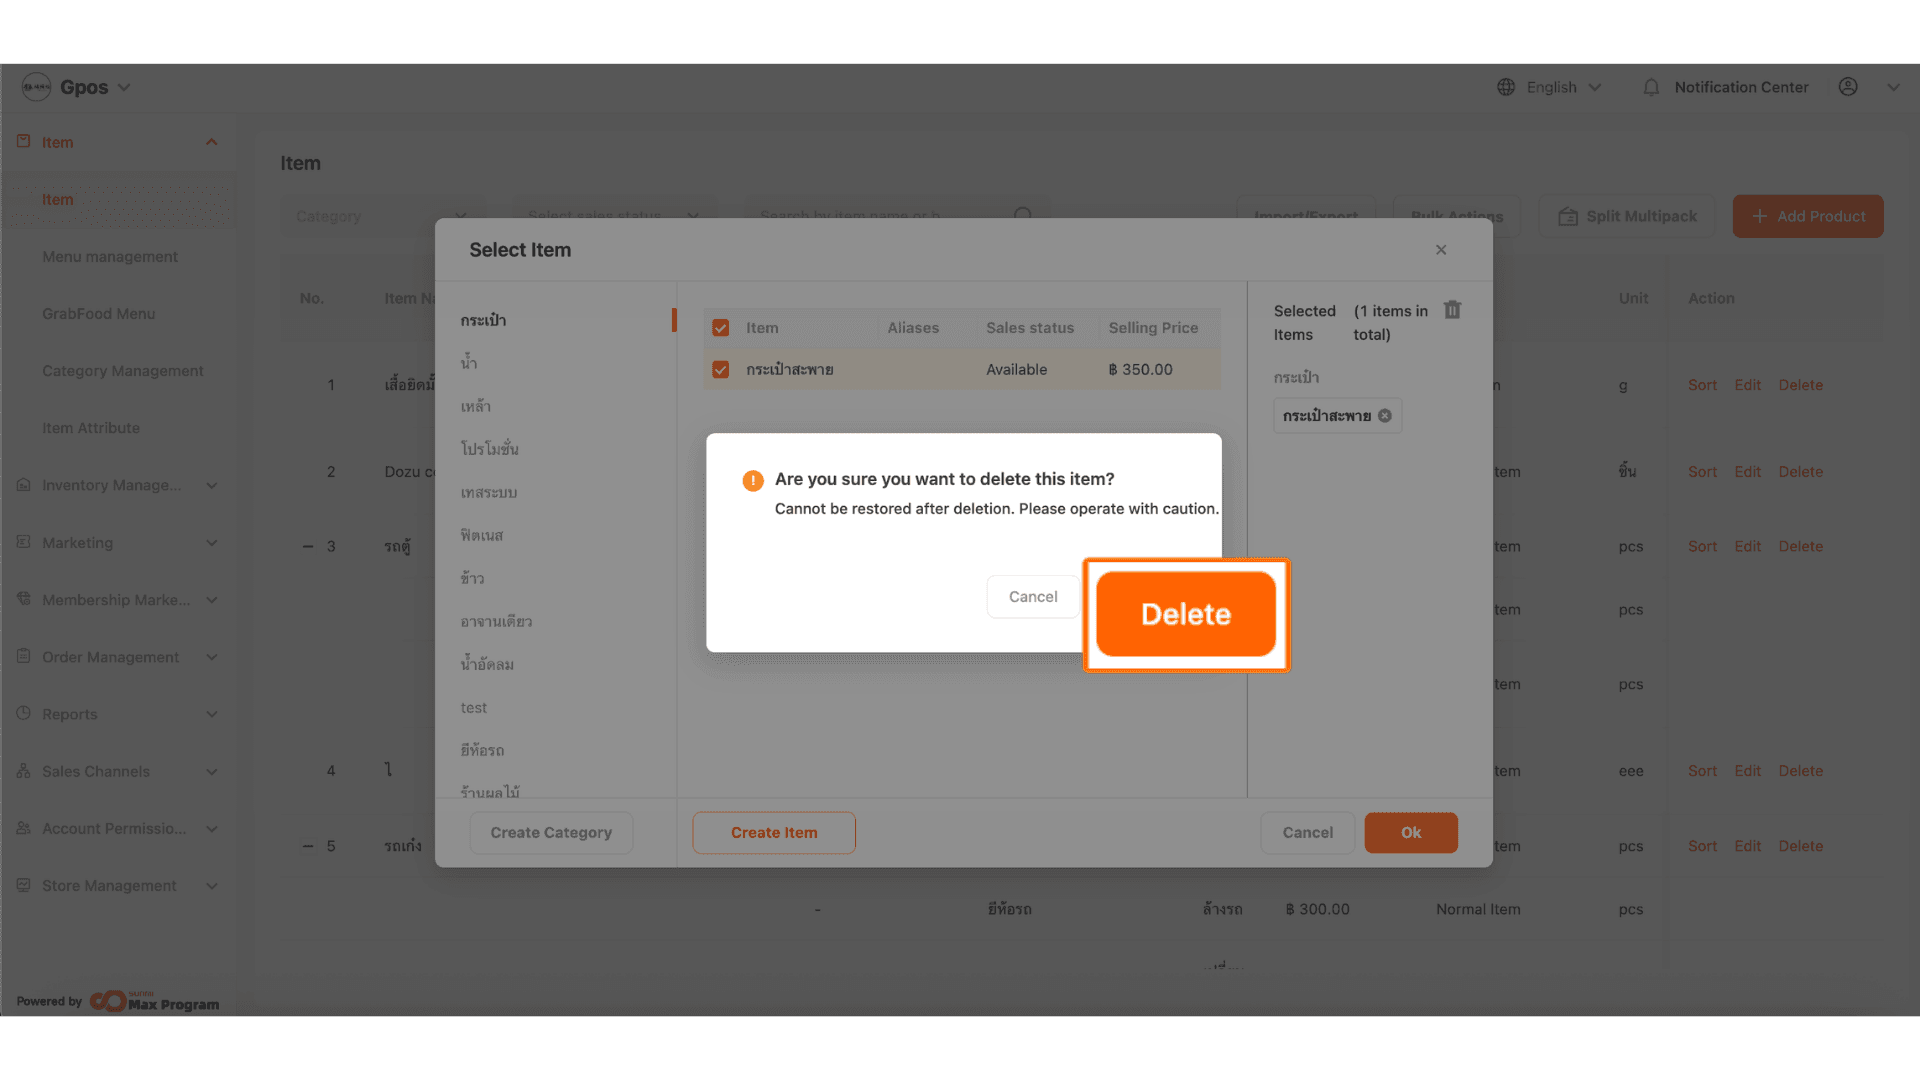
2. The system will display a list of products. Tick the products you want to delete and click “OK”.

3. The system will ask you to confirm again. Click “Delete” to complete the process.
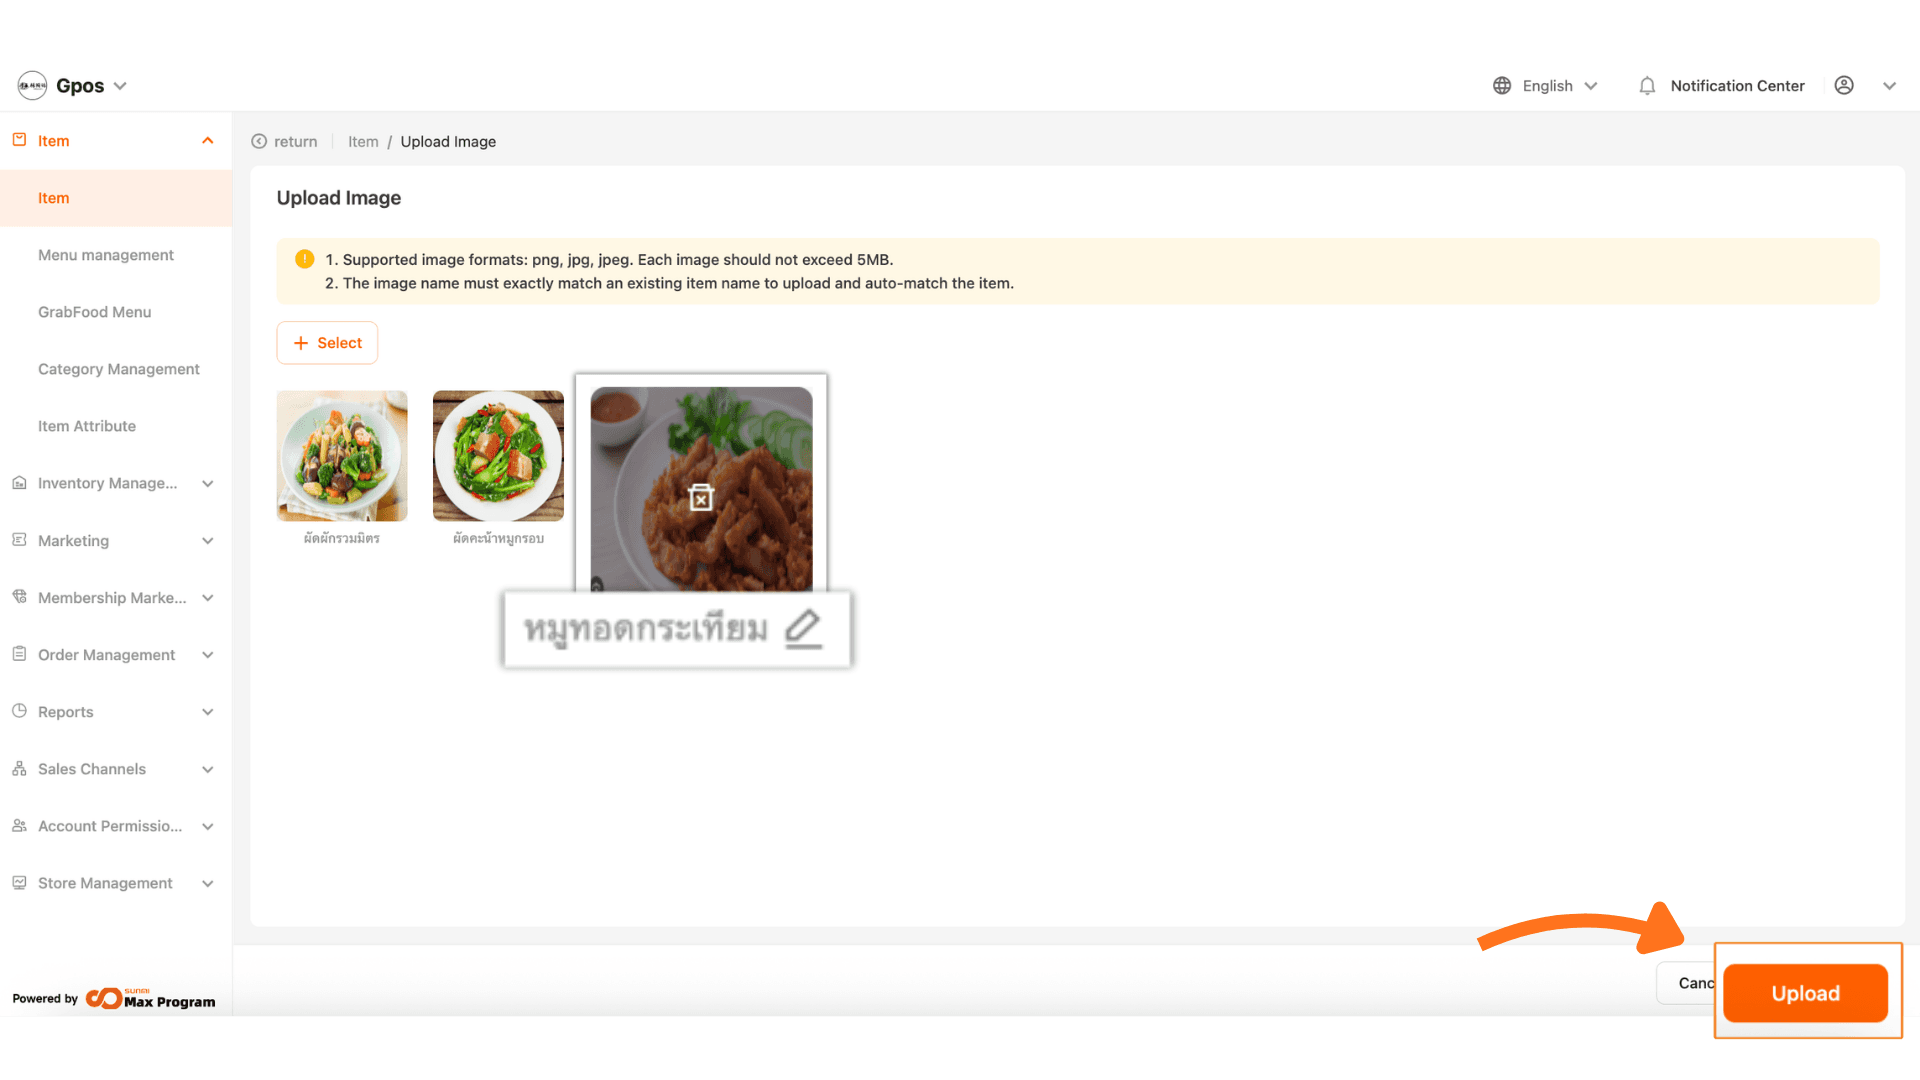
4. Go to the “Bulk Actions” section and select “Upload Image”.
Note : This feature allows you to upload multiple images and automatically match them with product names.

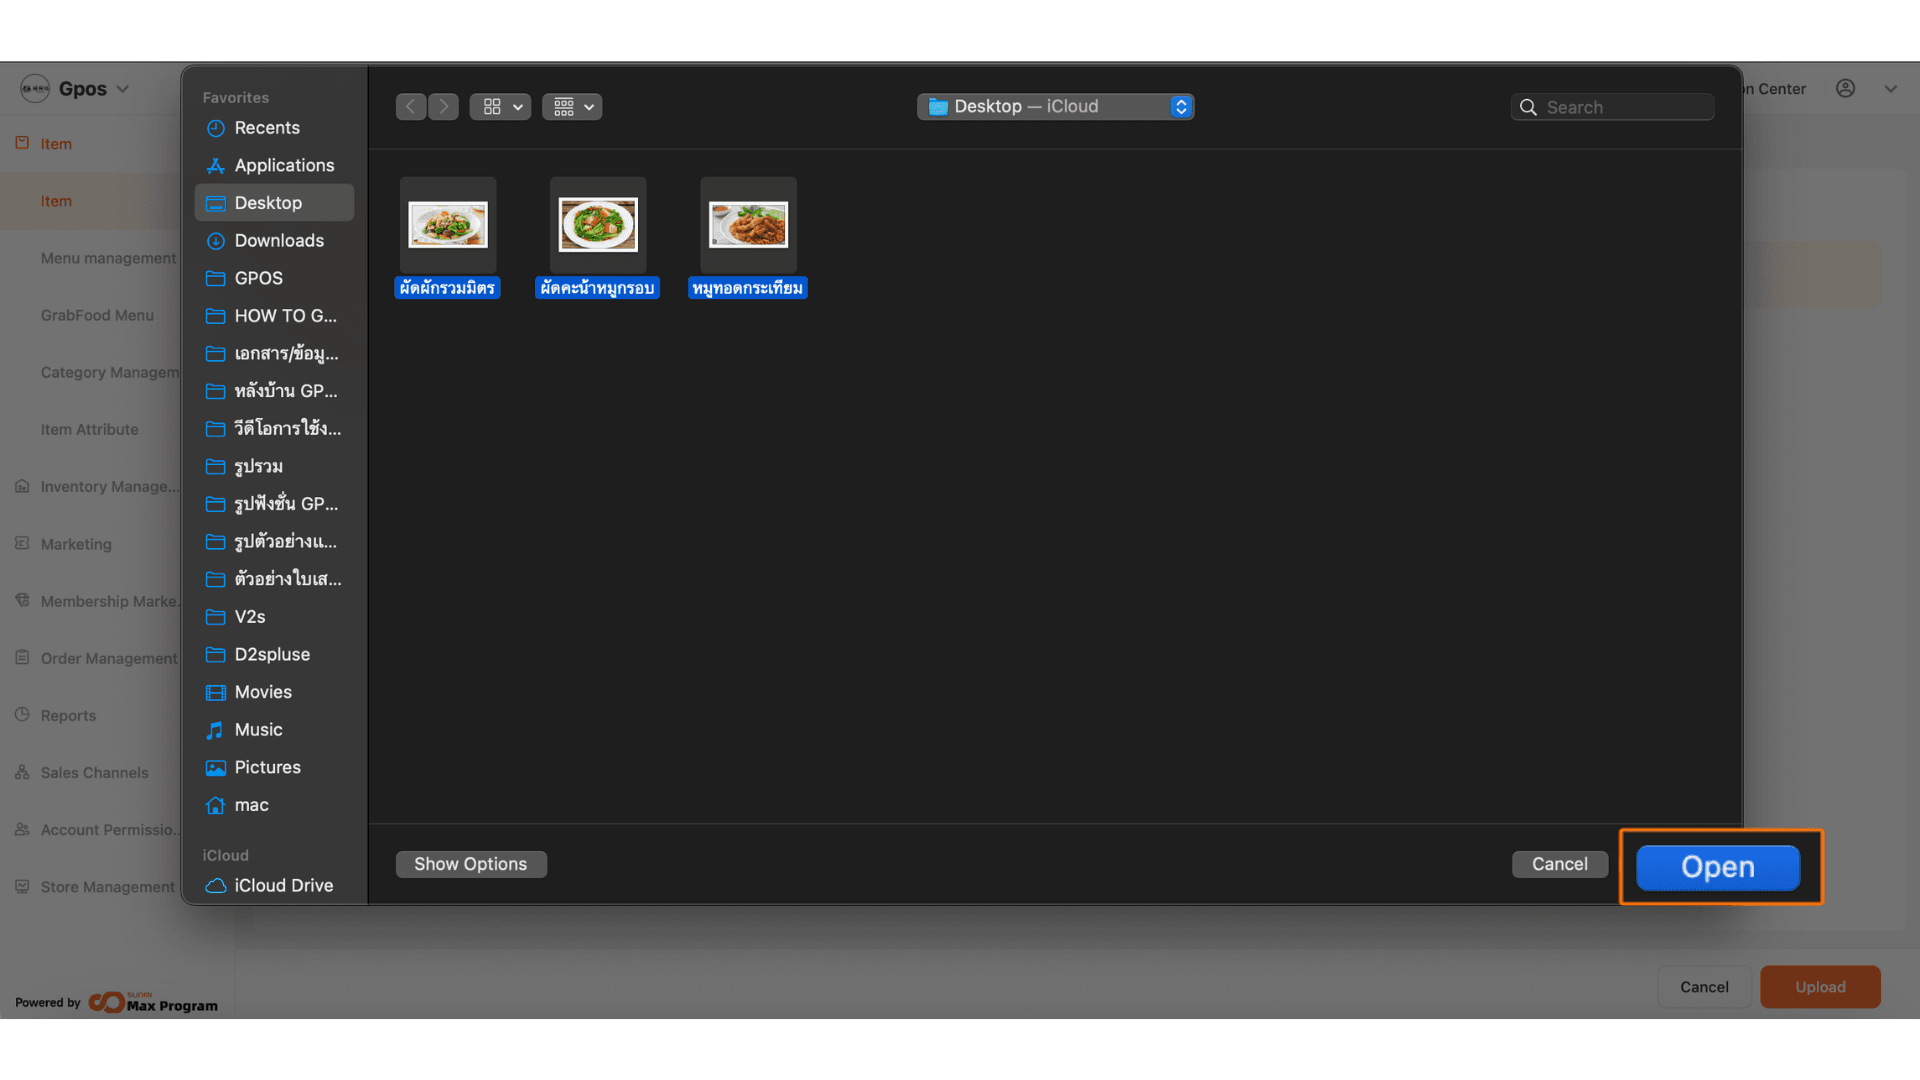
5. The system will take you to the image upload page. Click “+ Select”.

6. Choose the image files you want to upload and click Open.
7. After selecting images, you can
- Trash bin icon – Delete the image
- Pencil icon – Edit the image filename
After making changes, click “Upload” to save the images to the product list.
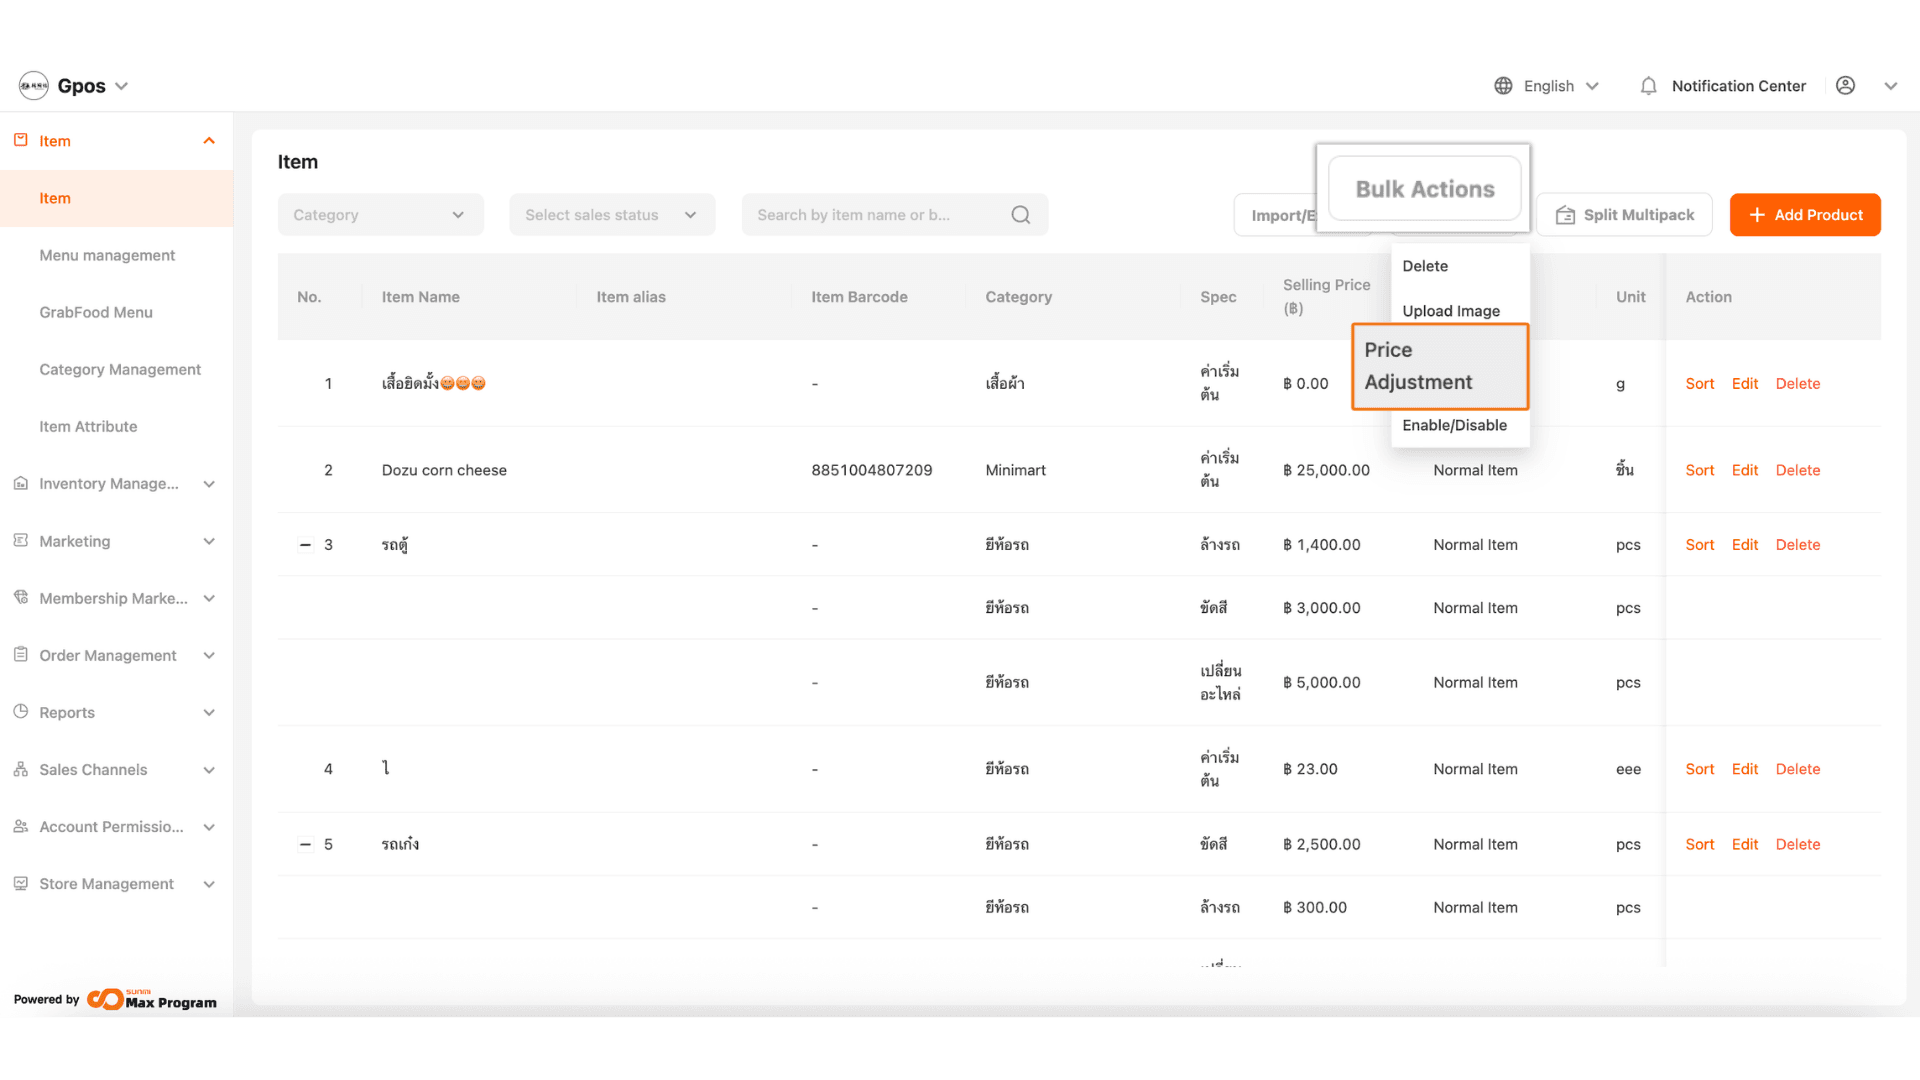
8.Go to the “Bulk Actions” section and select “Price Adjustment”.
Note : This feature allows you to update prices for multiple products simultaneously, minimizing errors compared to editing prices individually.
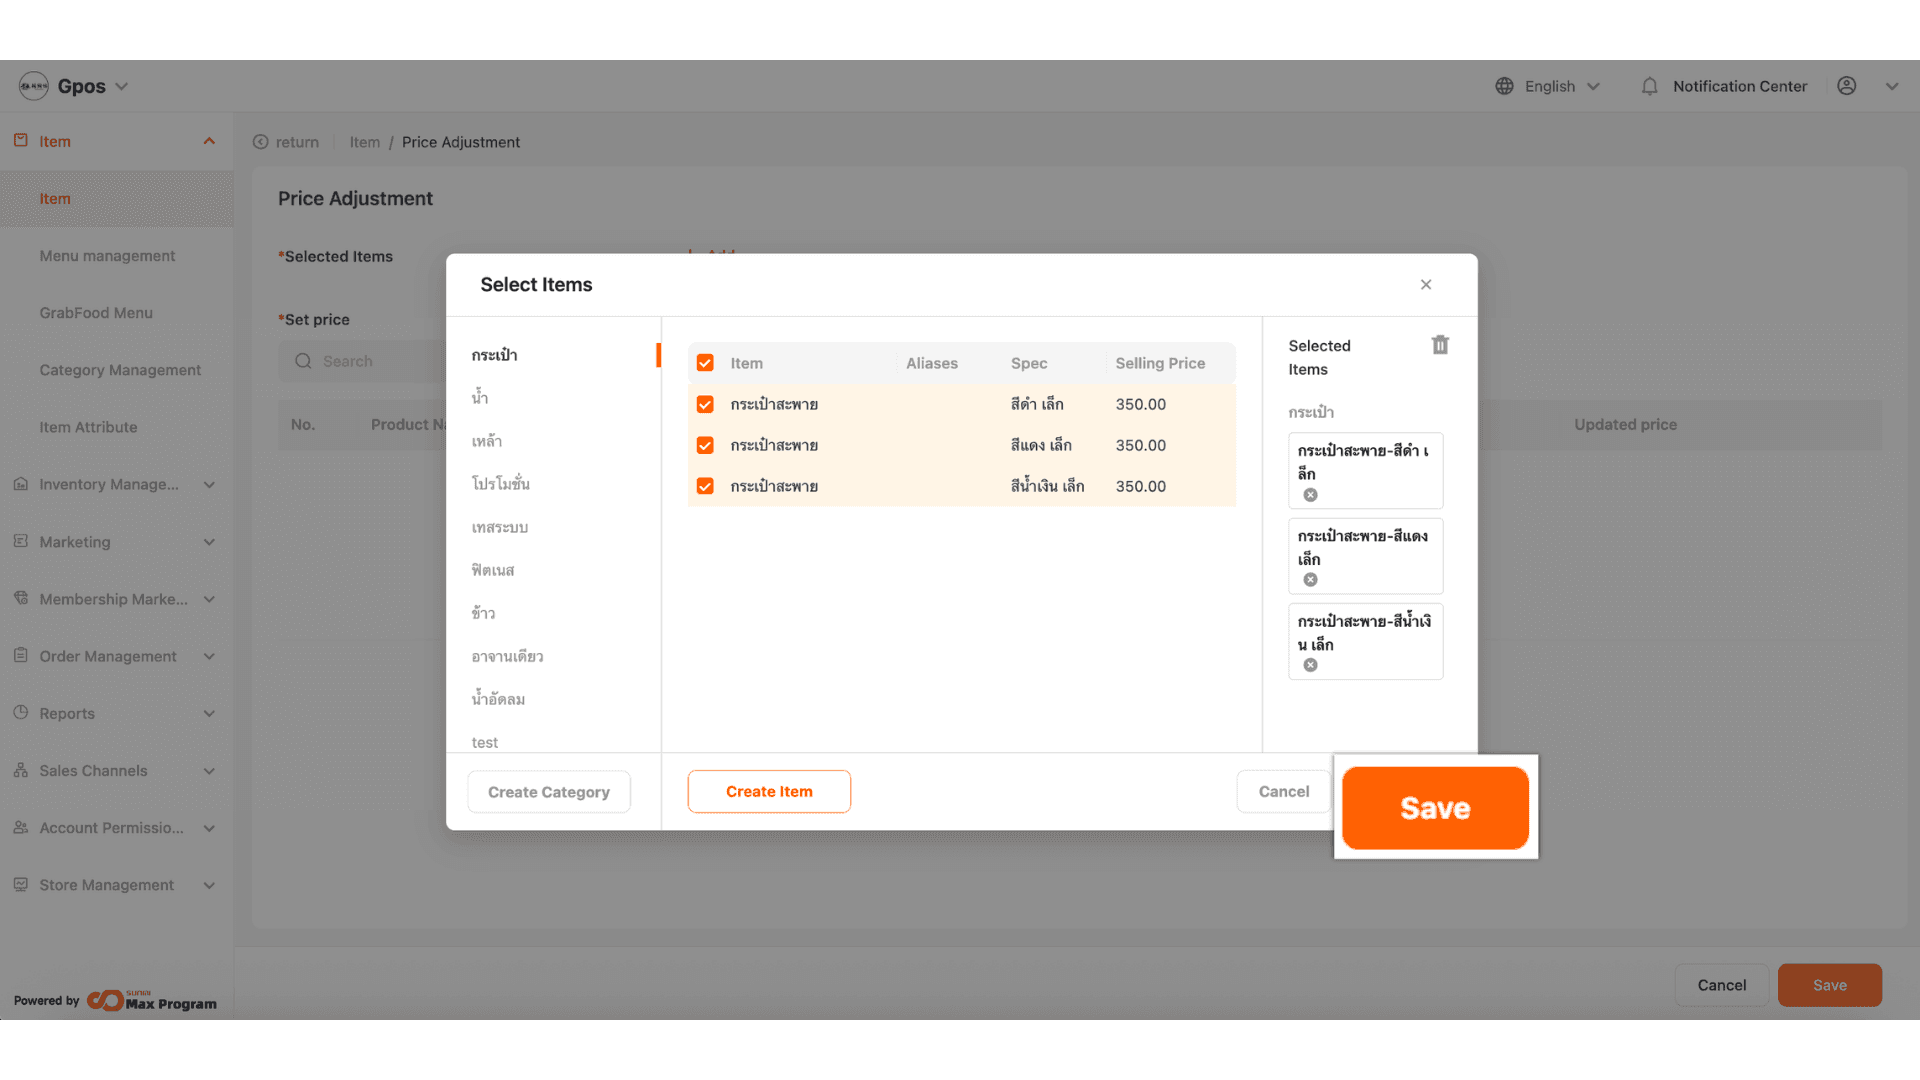
9. The system will display a list of products. Tick the products you want to update and click “Save”.
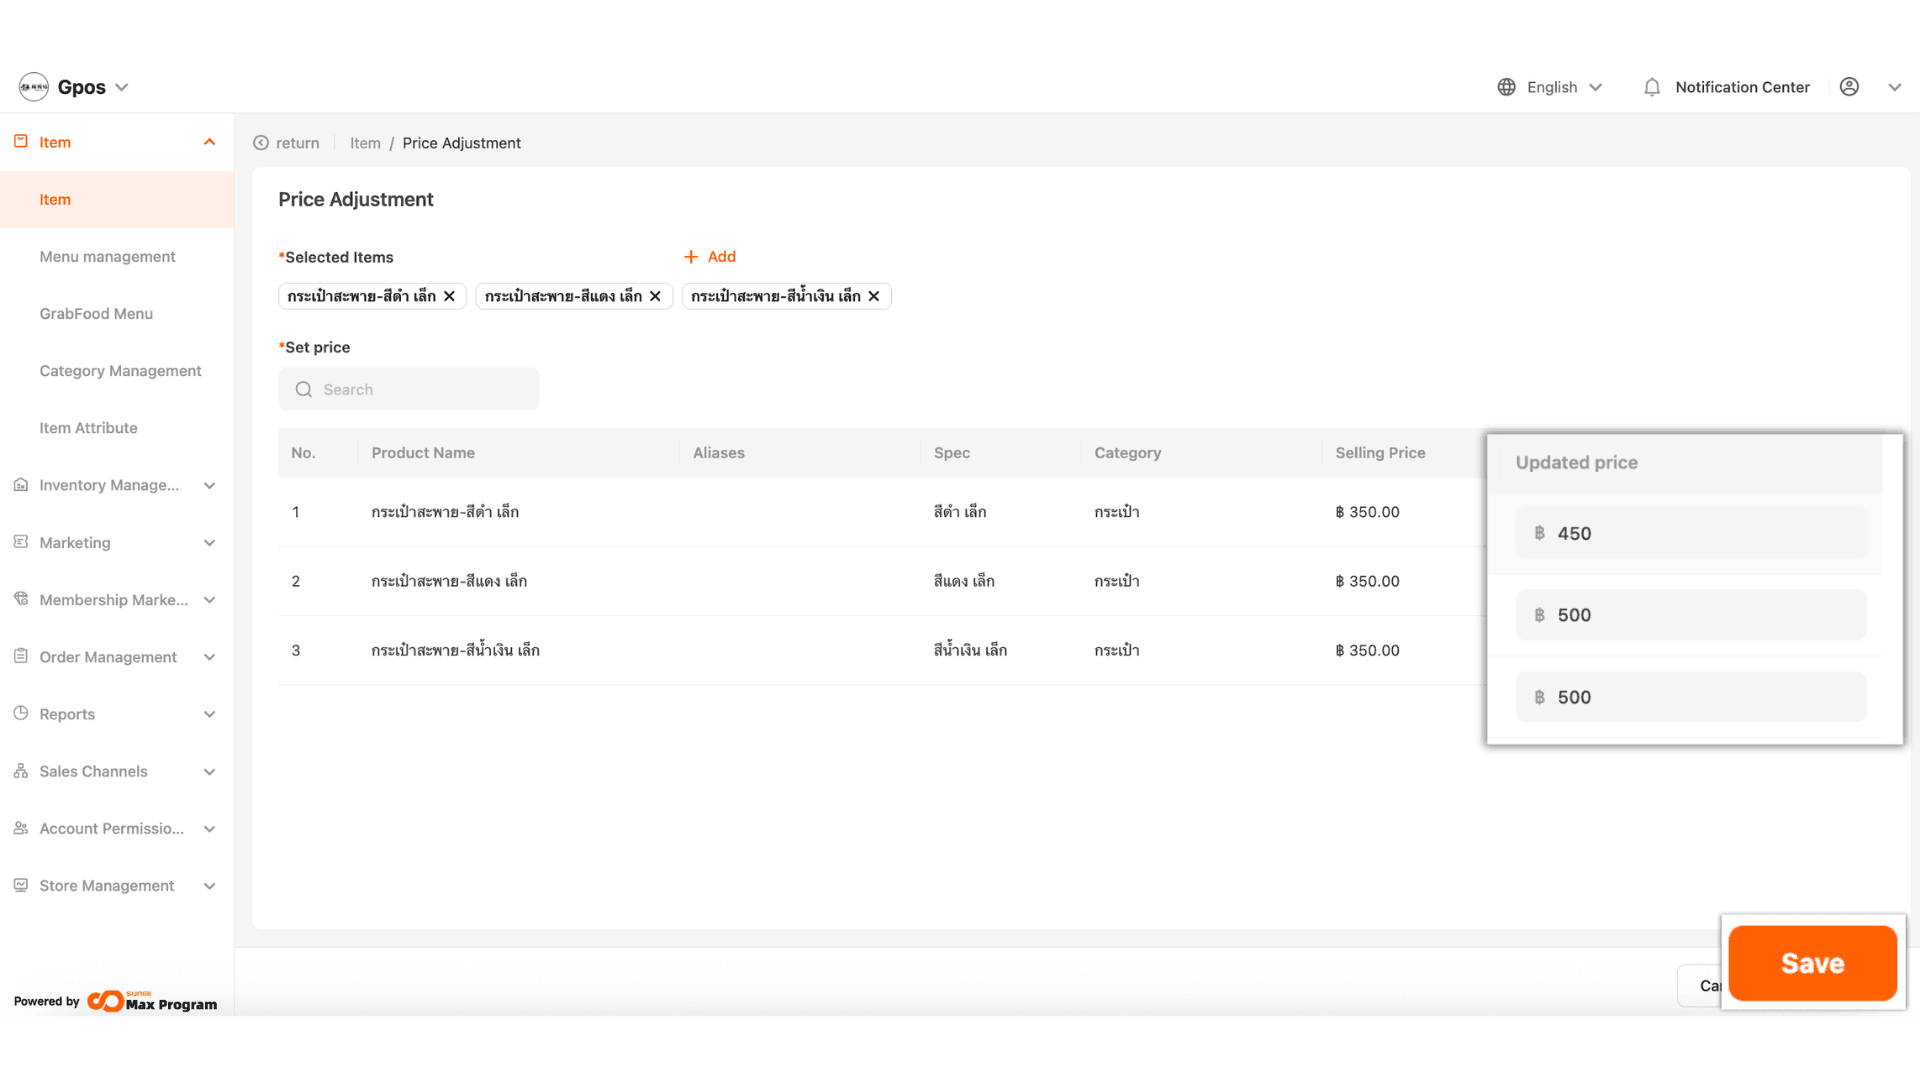
10. Enter the new price in the ‘Updated Price’ field, then click Save.
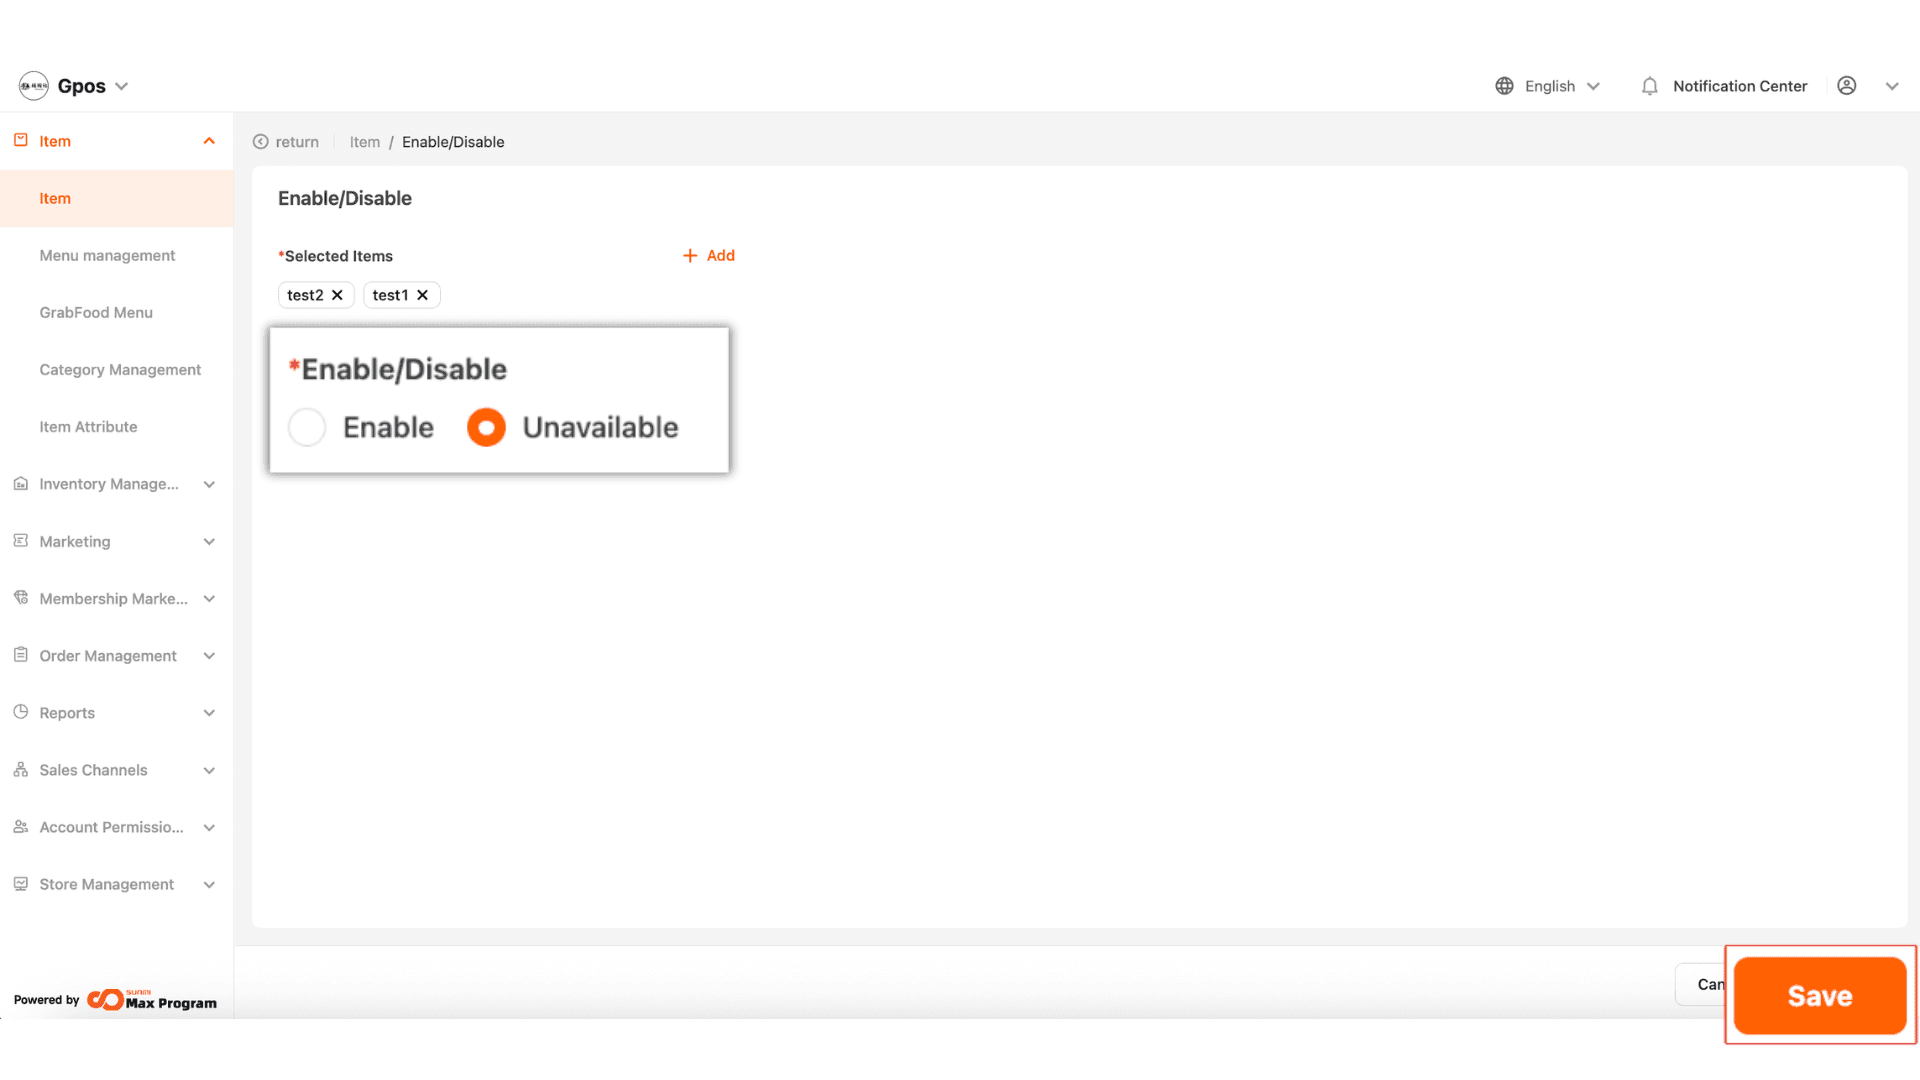
11. Go to the “Bulk Actions” section and select “Enable/Disable”.
Note : This function is used to activate or deactivate multiple products at once.
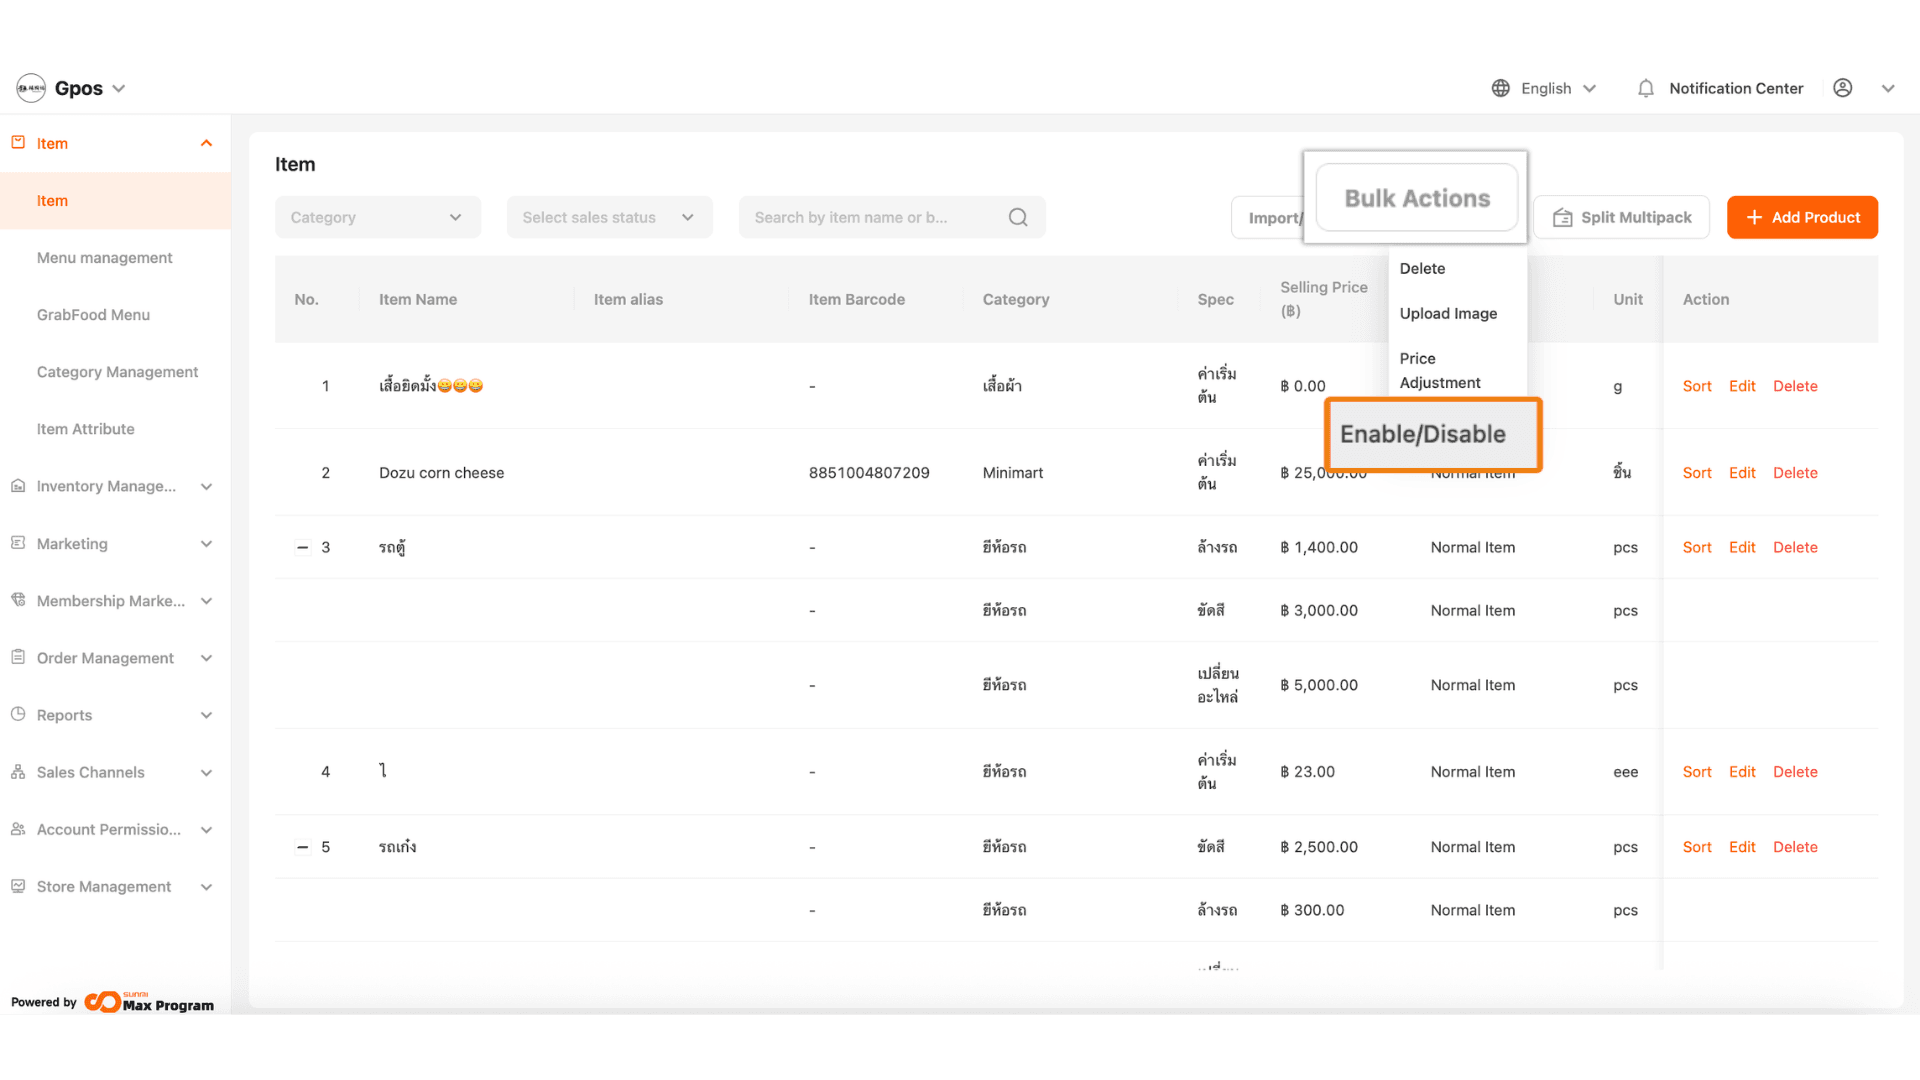
12.The system will display a list of products. Tick the items you want to enable or disable and click “Save”.
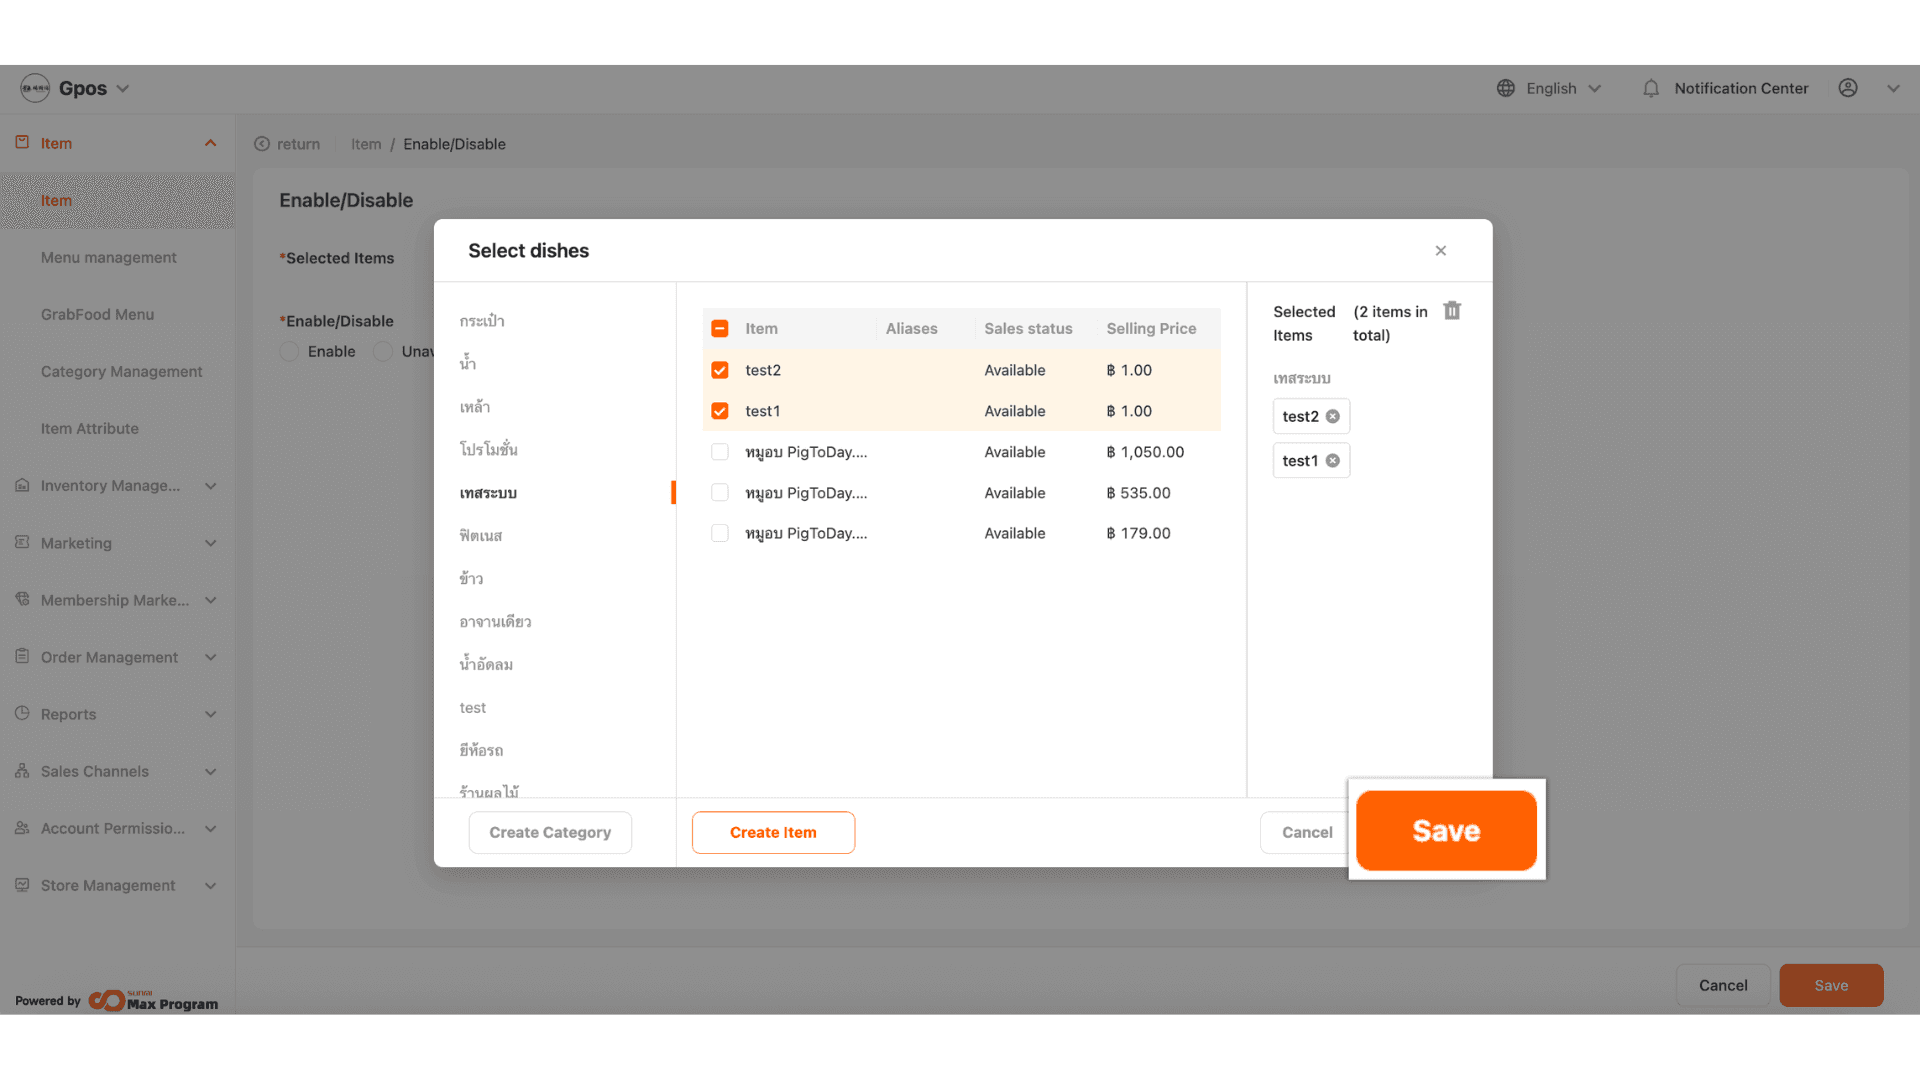
13. Then choose the desired status: Enabled (Available) or Disabled (Unavailable) and click “Save” to confirm.