How to create categories
2026-04-24 12:13
644 views
Creating categories helps organize items for easier search and management, enhances usability on POS devices and connected platforms, supports multiple languages, and reduces errors when importing product data.
1. Log into the Back Office System
Go to login.gpos.co.th, enter your email and password, then click Log In.
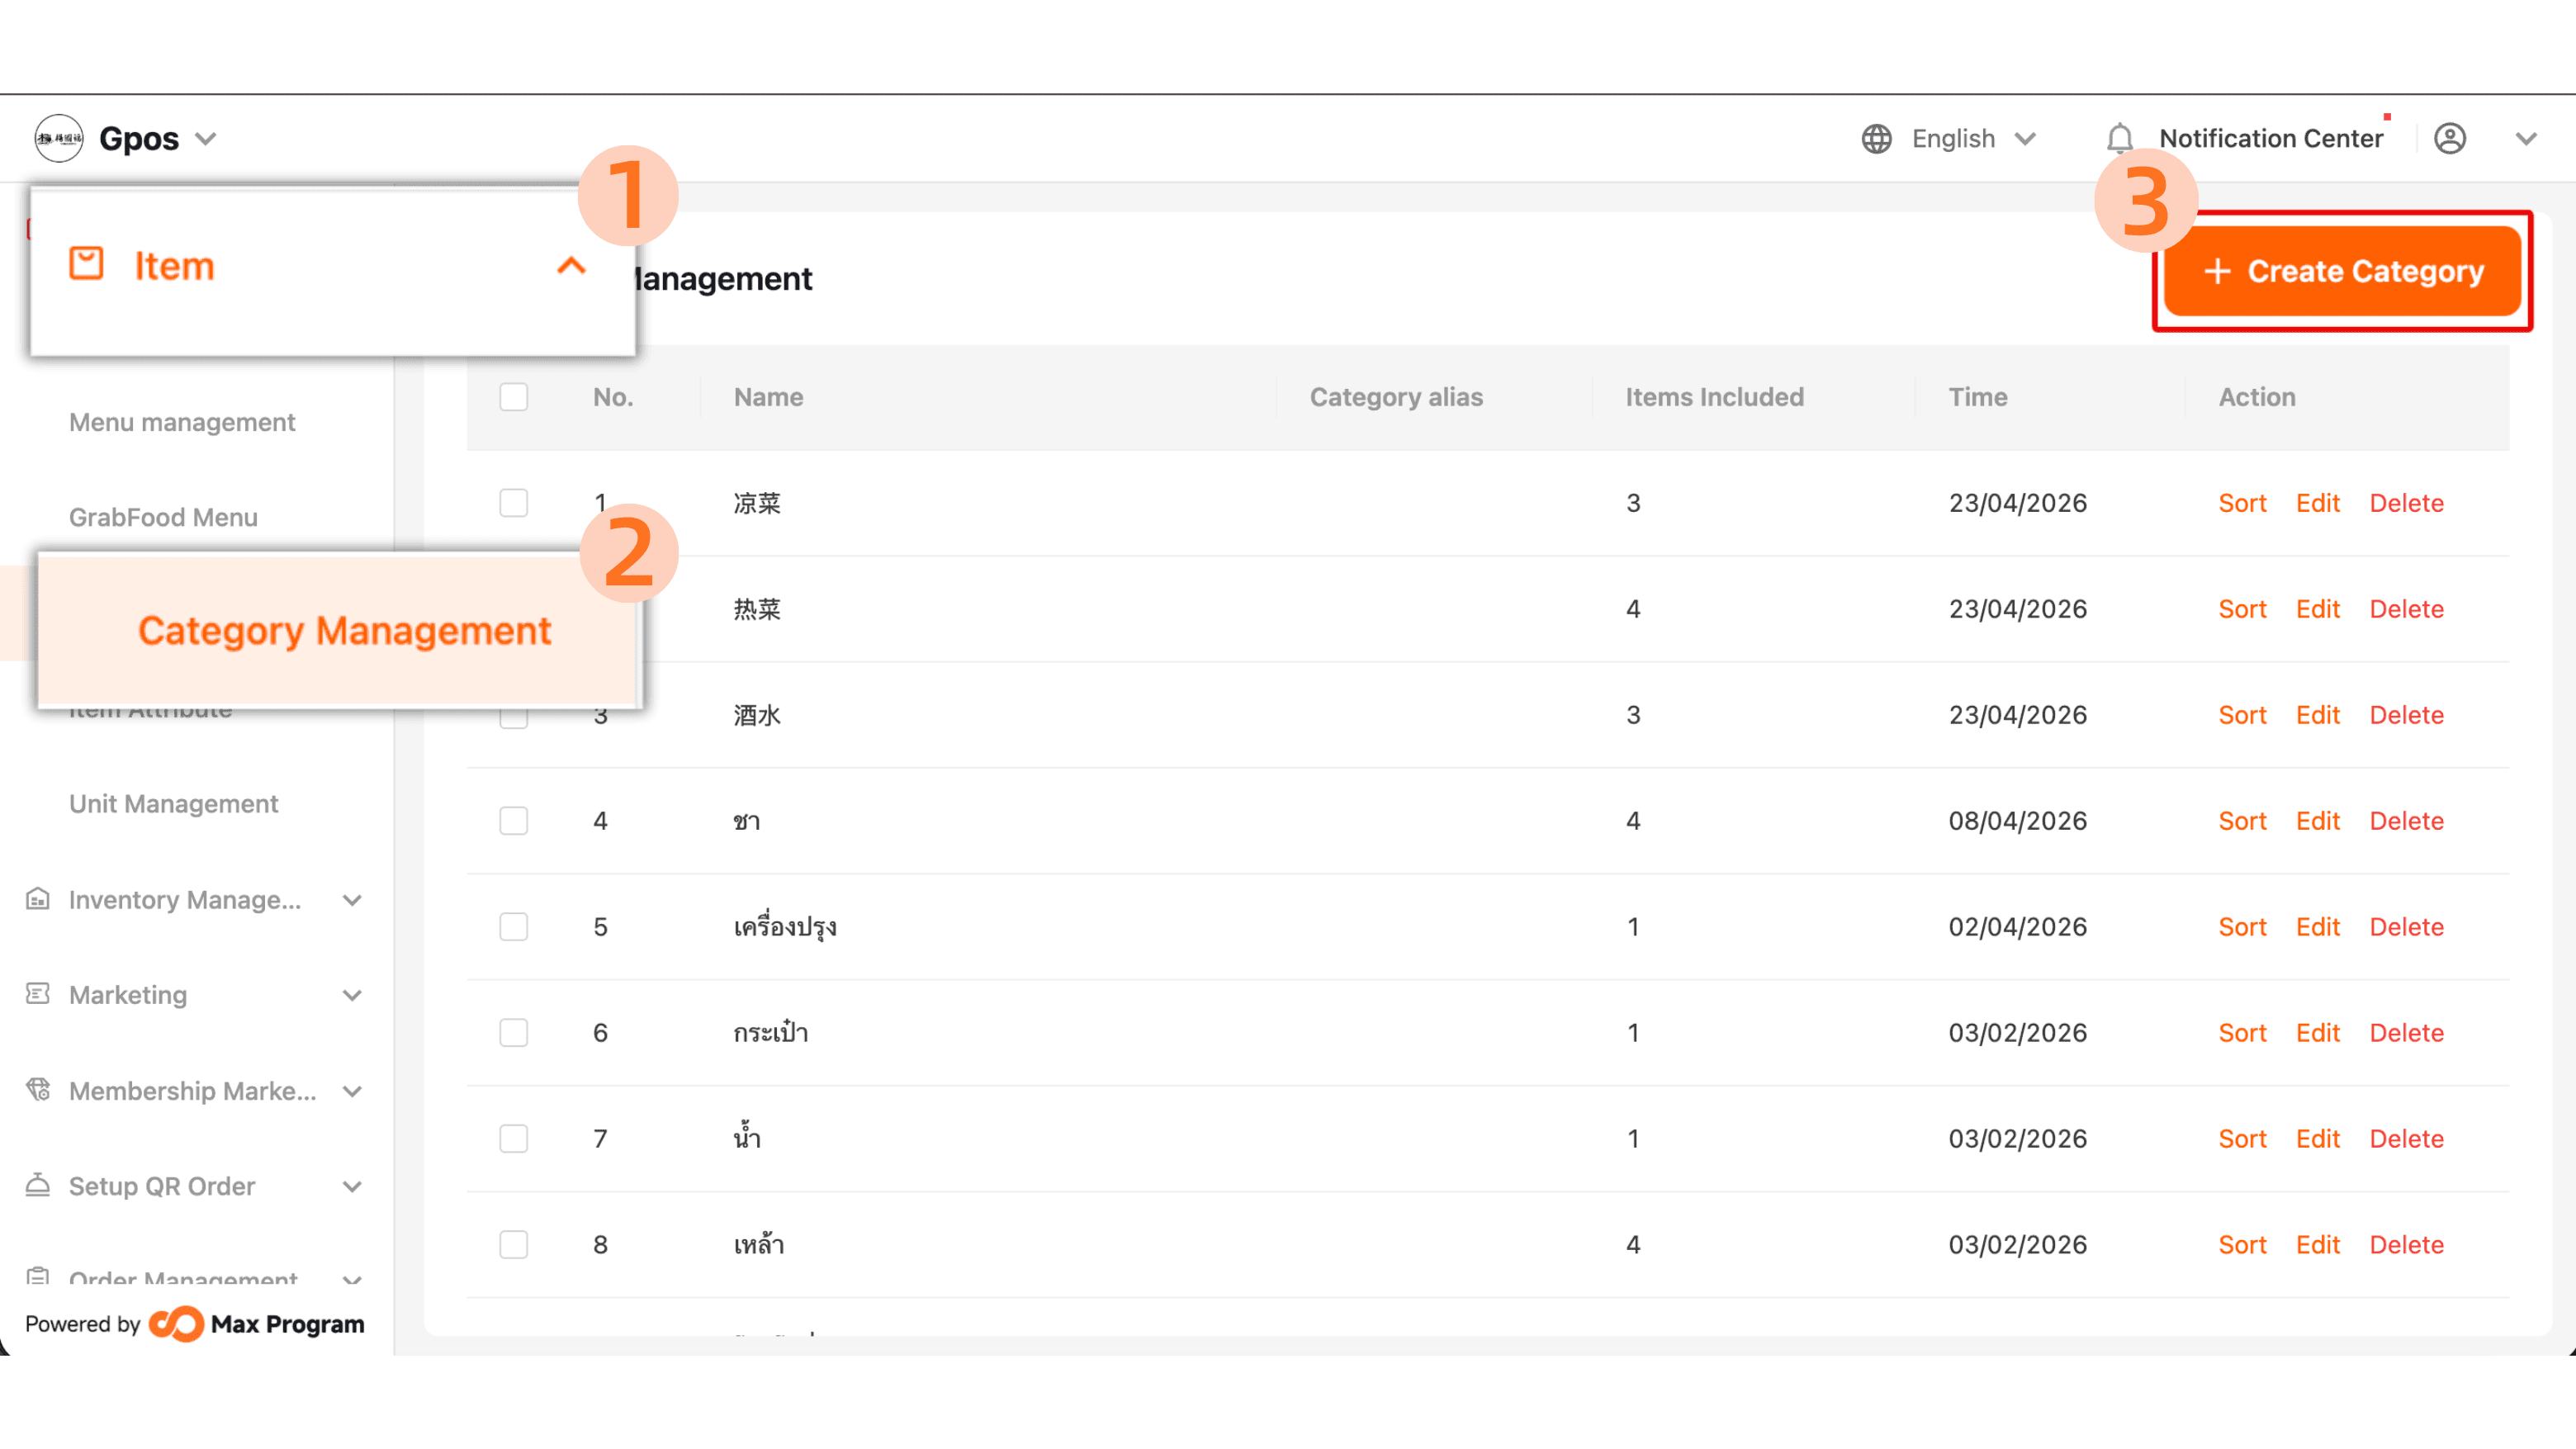
click Item > Category management > +Create Category
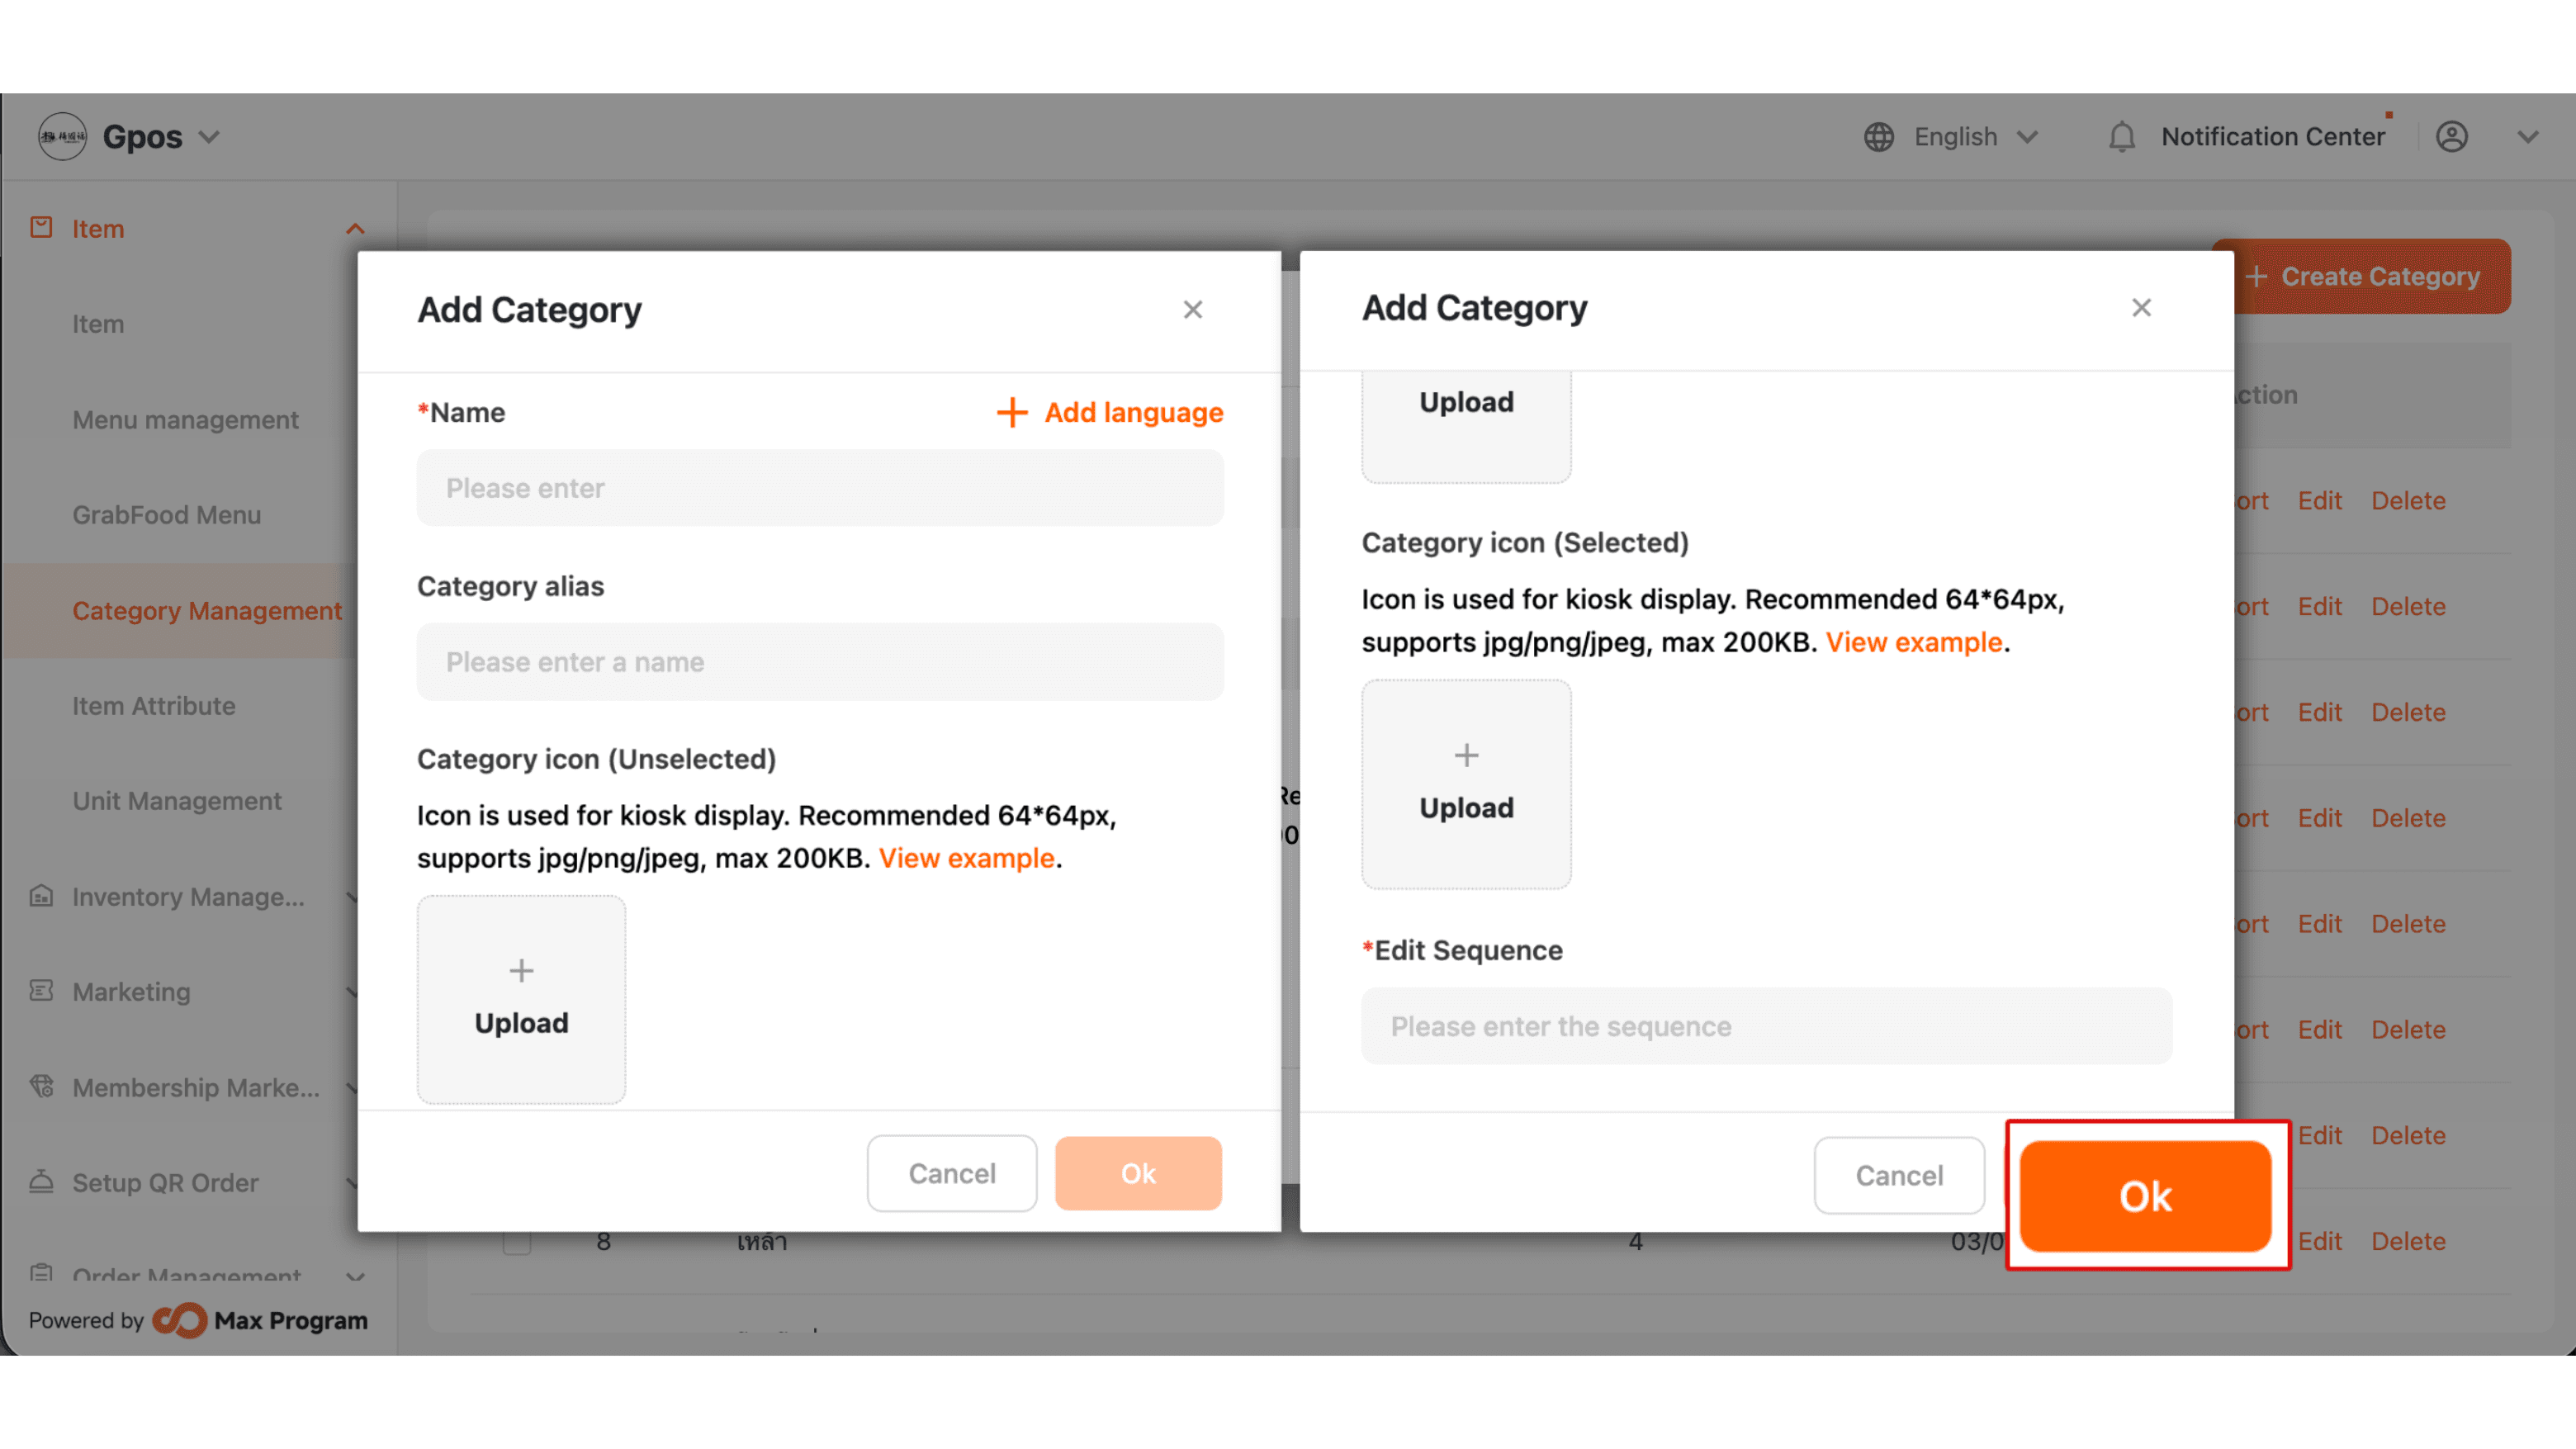
2.Enter the category name in the “Name” field, then scroll down and enter the order in the last field. After that, click “Confirm.”
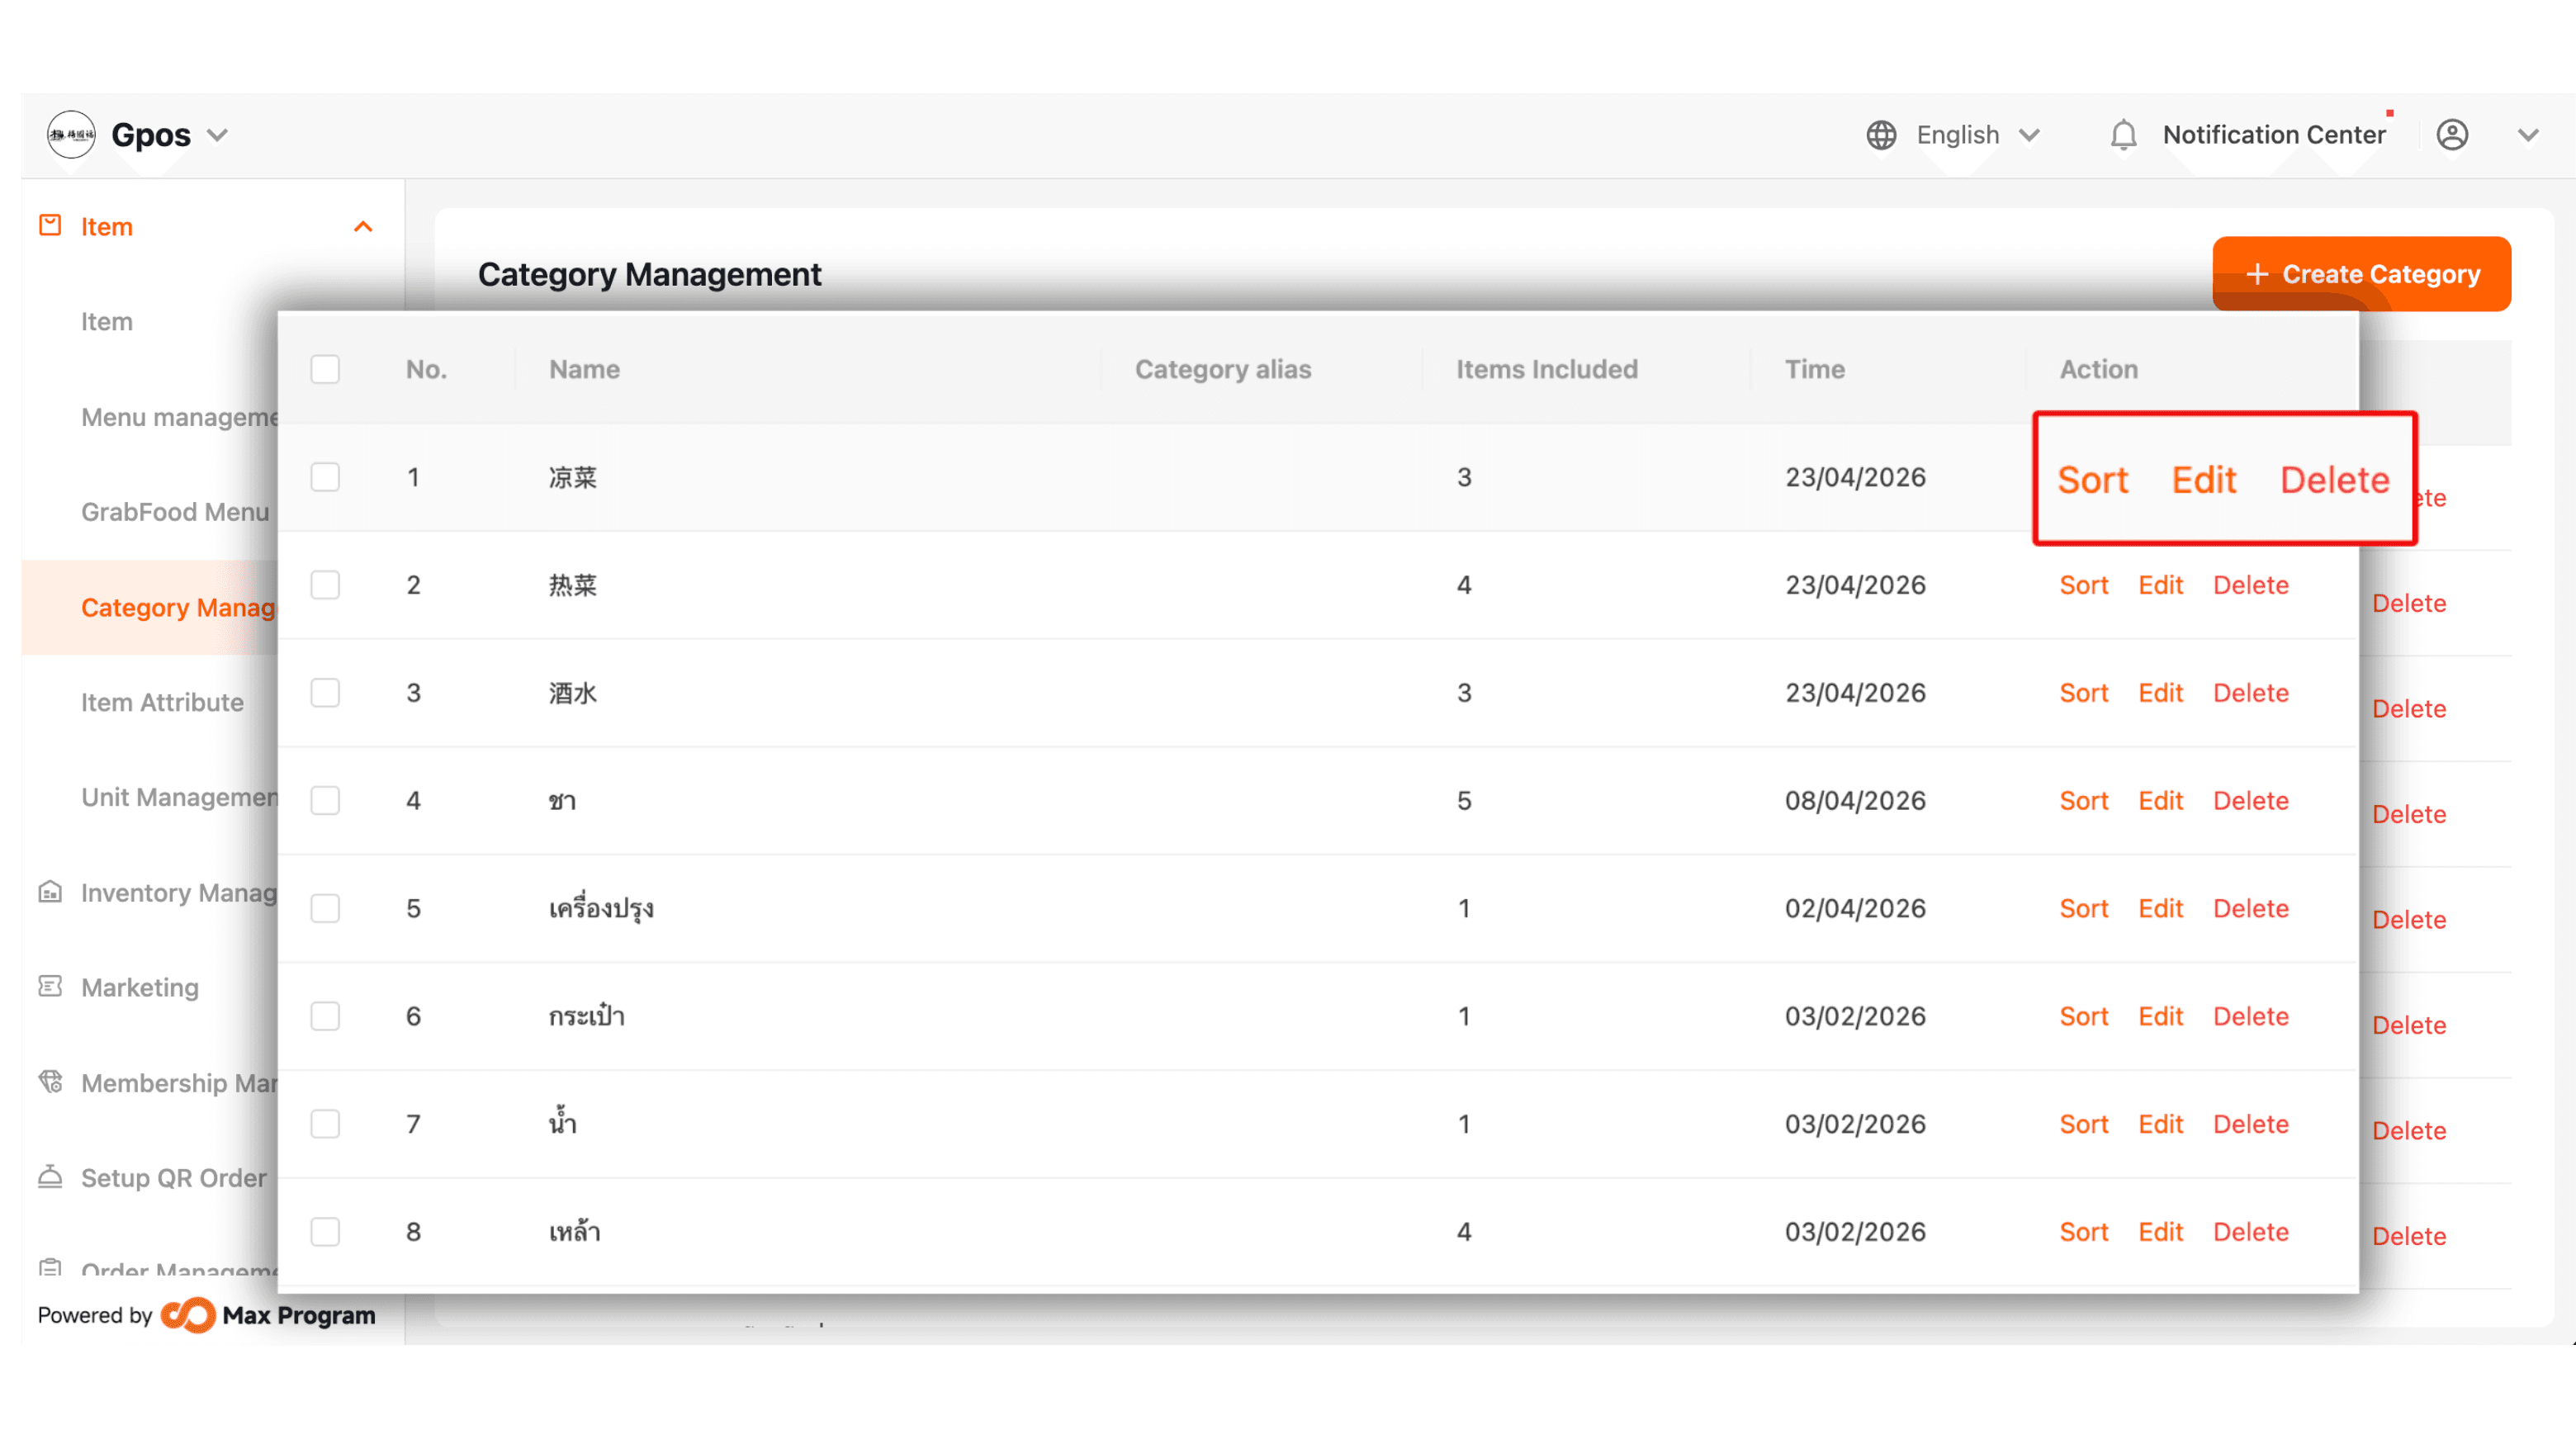
3.After creating the category, you can manage it in three ways: Sort, Edit, and Delete.