How to Create Product Combo List
2026-03-21 12:03
This guide helps users to set up product combos in the GPOS system accurately, quickly, and with standardization. It reduces errors, increases work efficiency, and supports sales on both POS systems and delivery platforms effectively.
1. Log in to the Back Office
Go to the website login.gpos.co.th, enter your email and password, then click "Login." Once logged in, go to the “Item” menu and select “Item.”
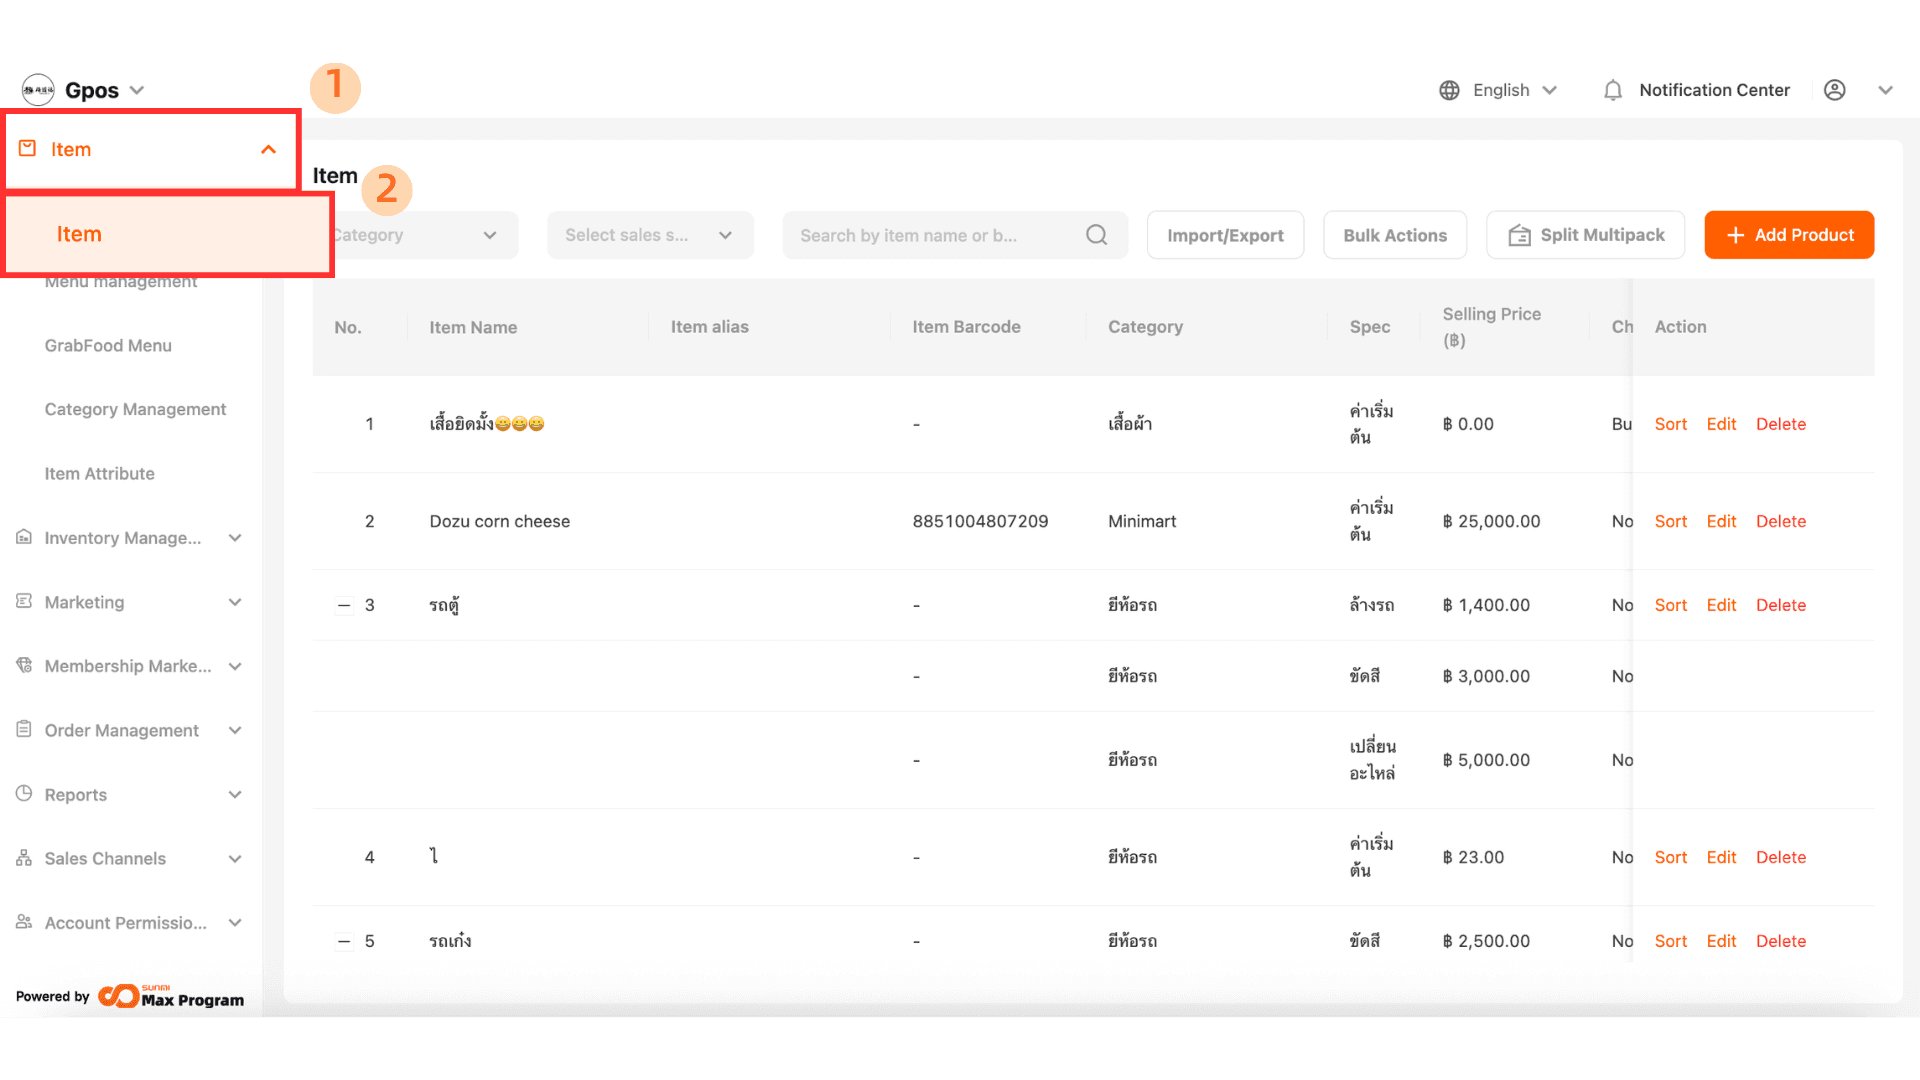
2. Add a New Product (Combo)
On the product list page, click the “+ Add Product” button. The system will prompt you to select the product type. Choose "Add Combo."

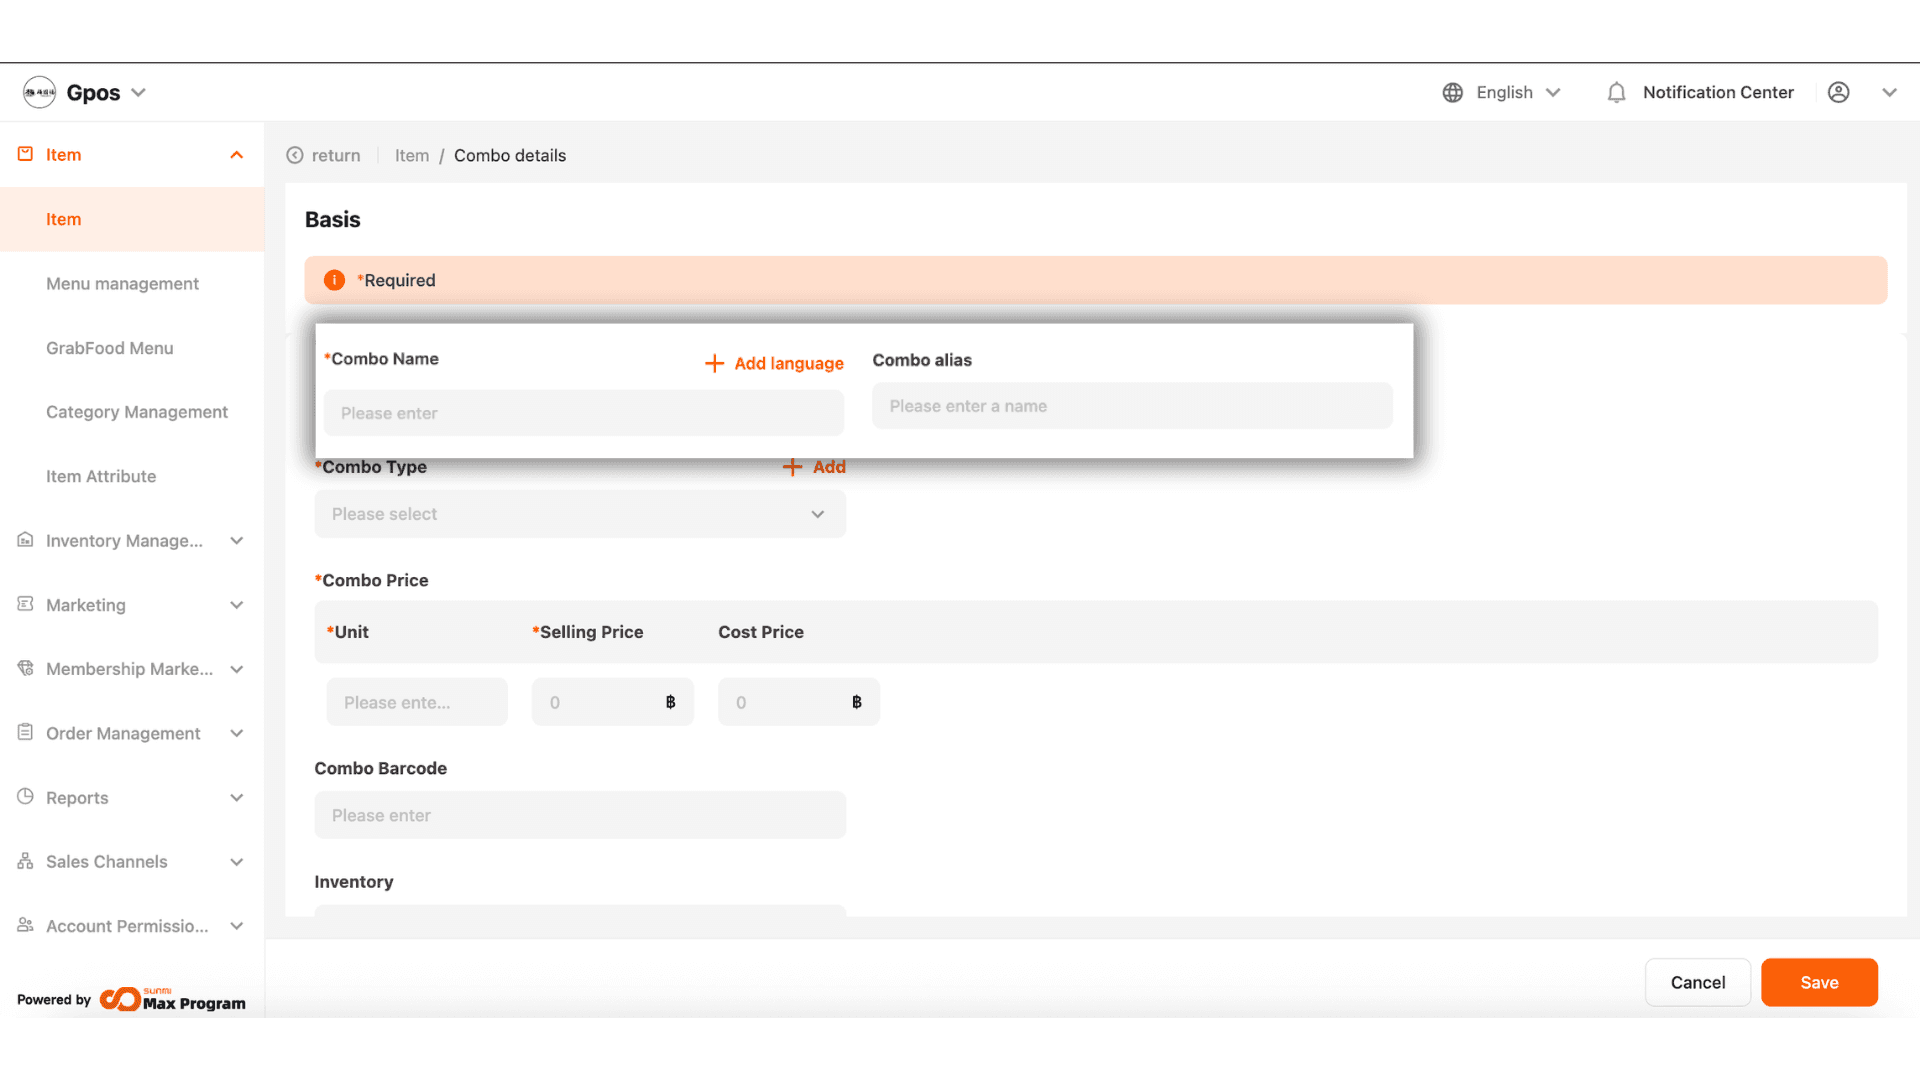
3. Set Combo Name
Define the combo name as required. It has two parts
- Combo Name – The name displayed on the POS system.
- Combo alias – The name of the combo shown on the Grab system (in case of integration with Grab).
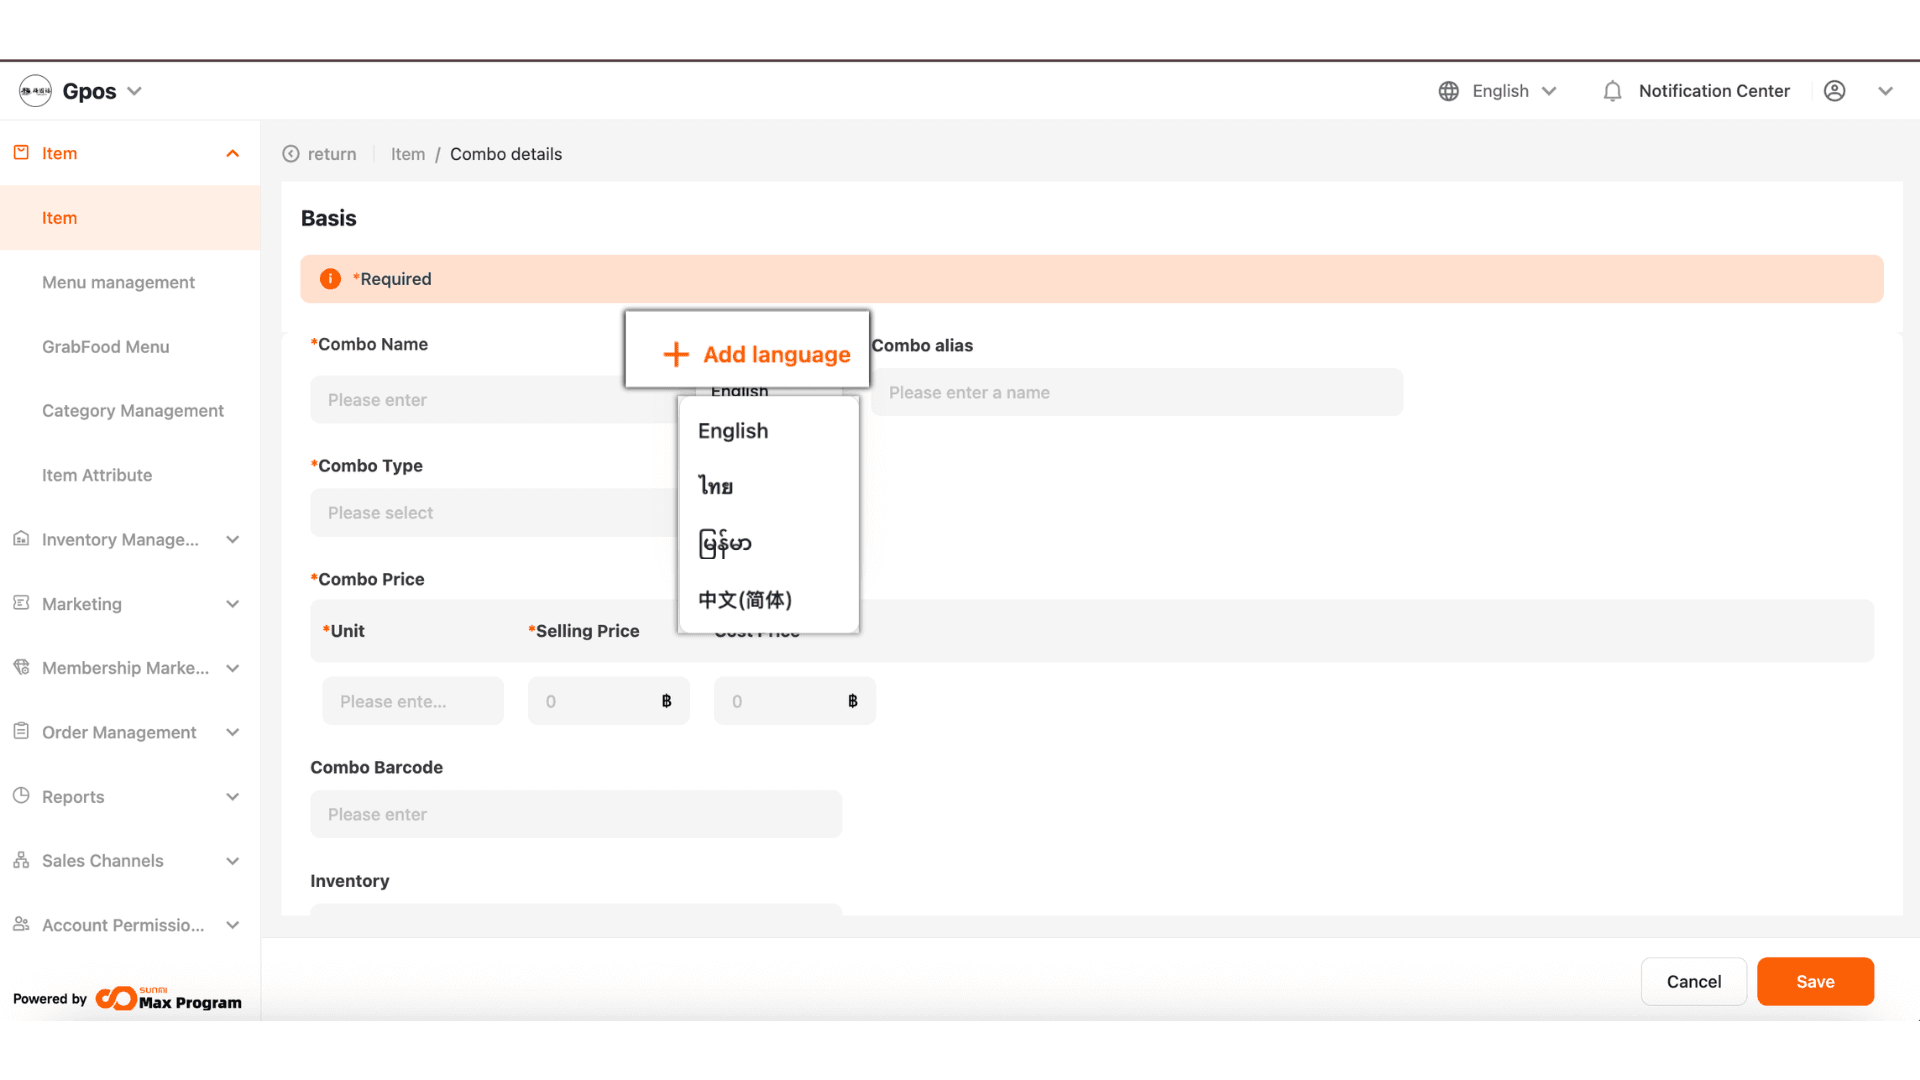
3.1 Add Additional Languages
You can click “+ Add Language” to add the combo name in other languages, such as Thai, English, Burmese, and Chinese. This is useful for the food ordering scan system that supports multiple languages.
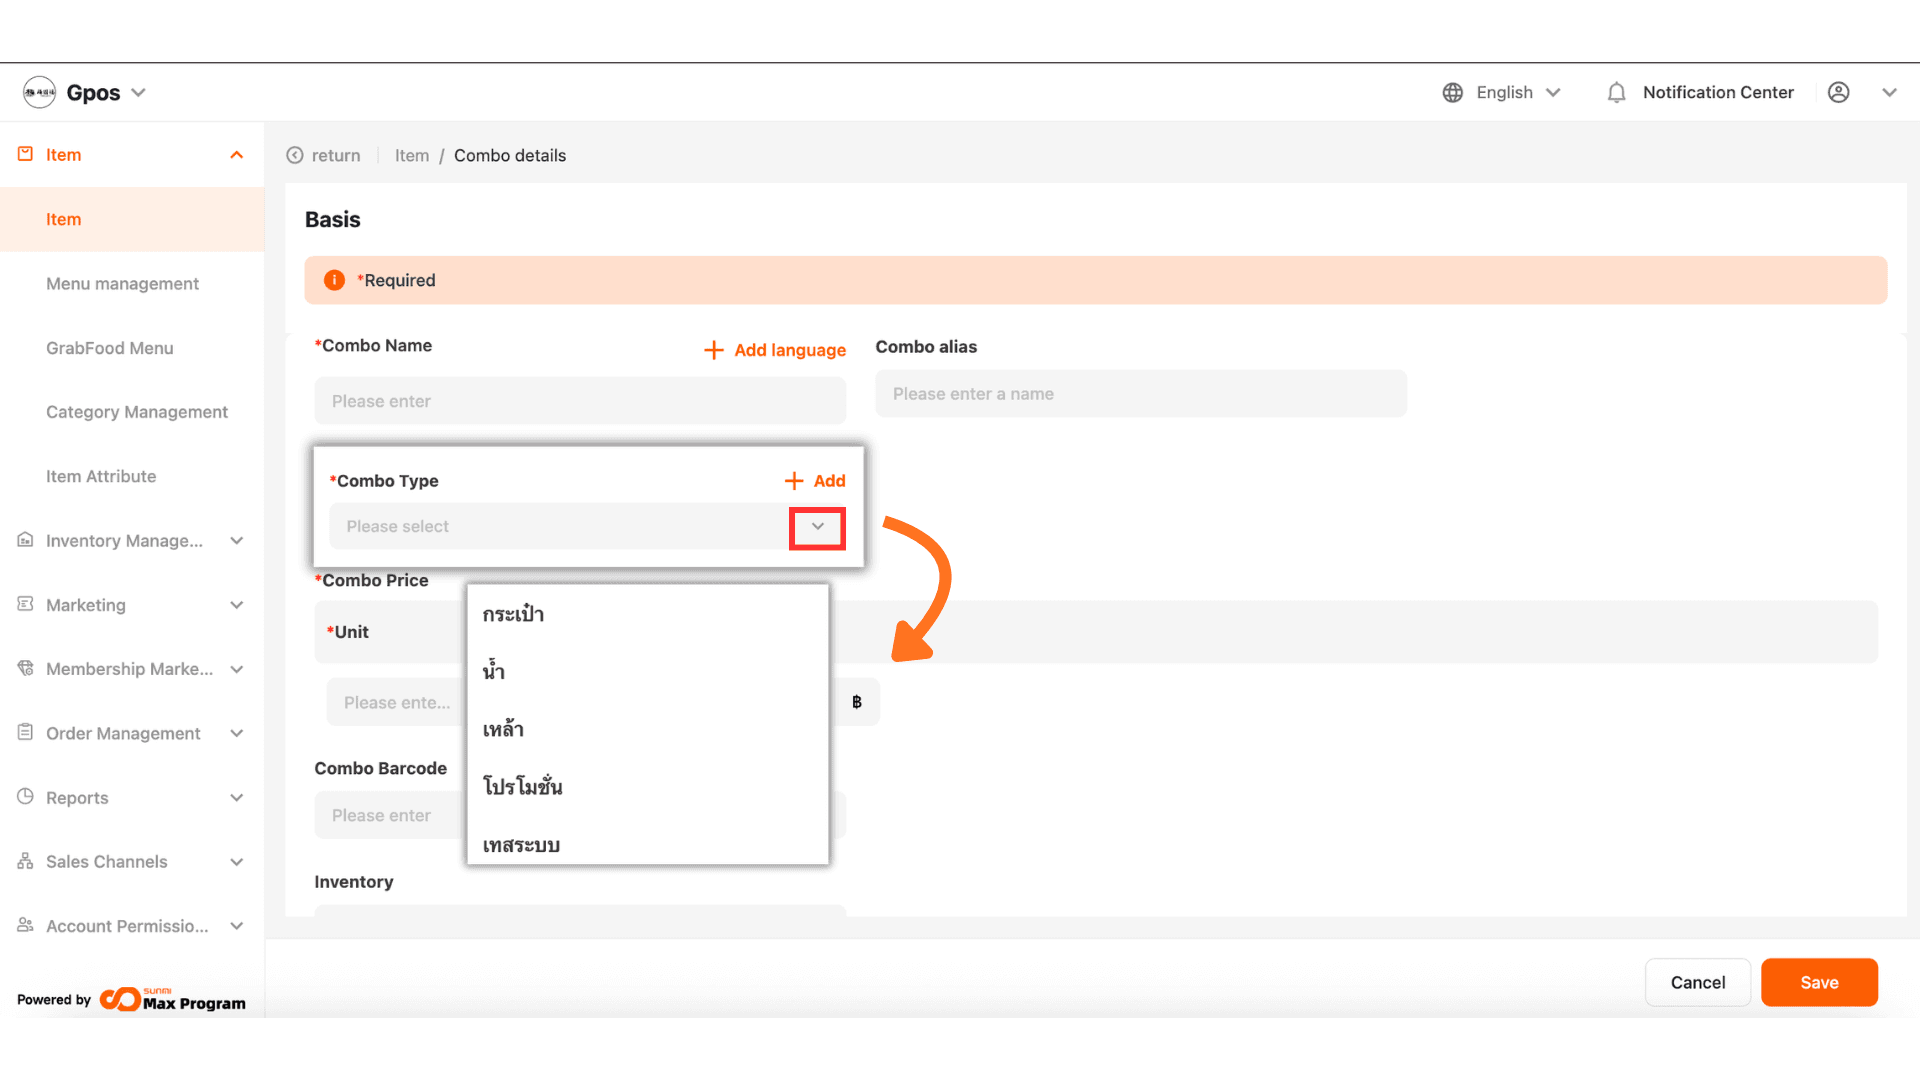
4. Choose Combo Type (Category)
Select the combo type or category you need by clicking the dropdown arrow to choose from existing categories.
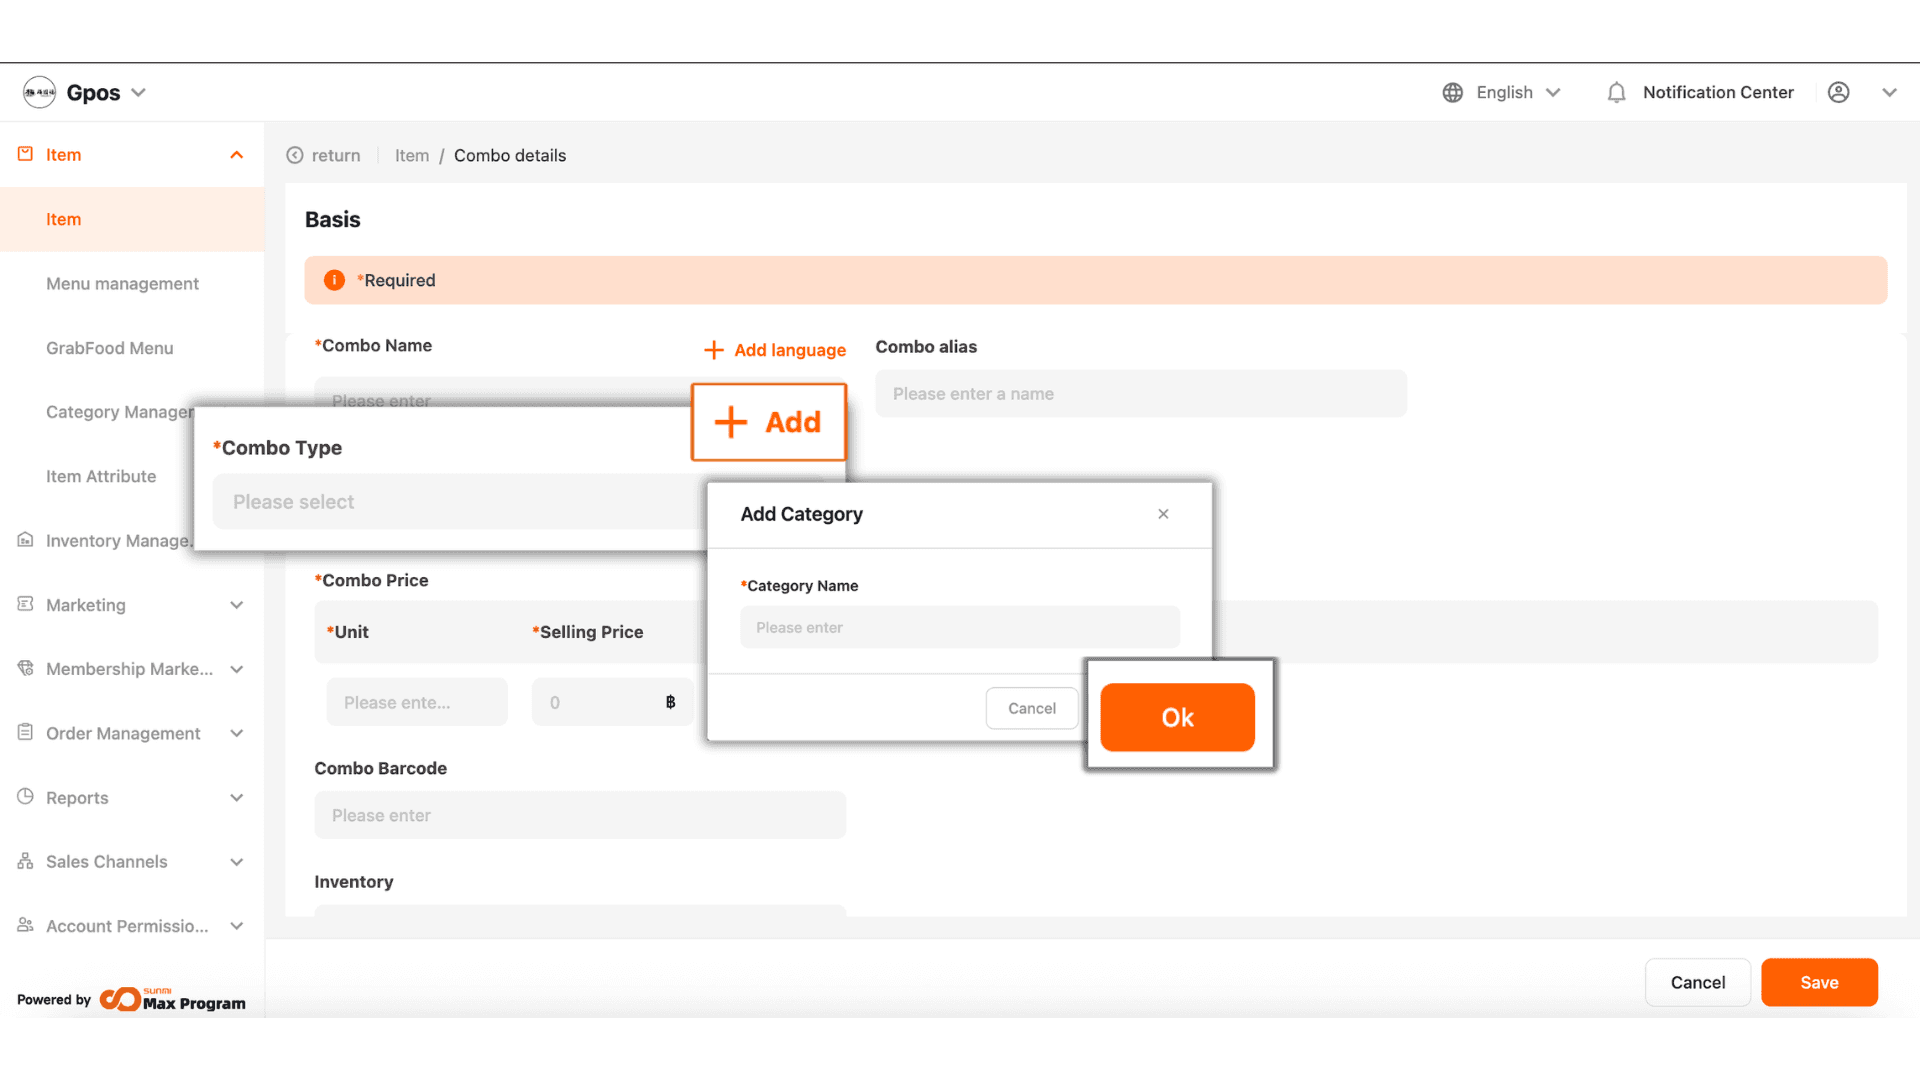
4.1 Add a New Category
If you need a new category, click “+ Add” on the right. The system will prompt you to enter the category name. Enter the desired name and click "OK."
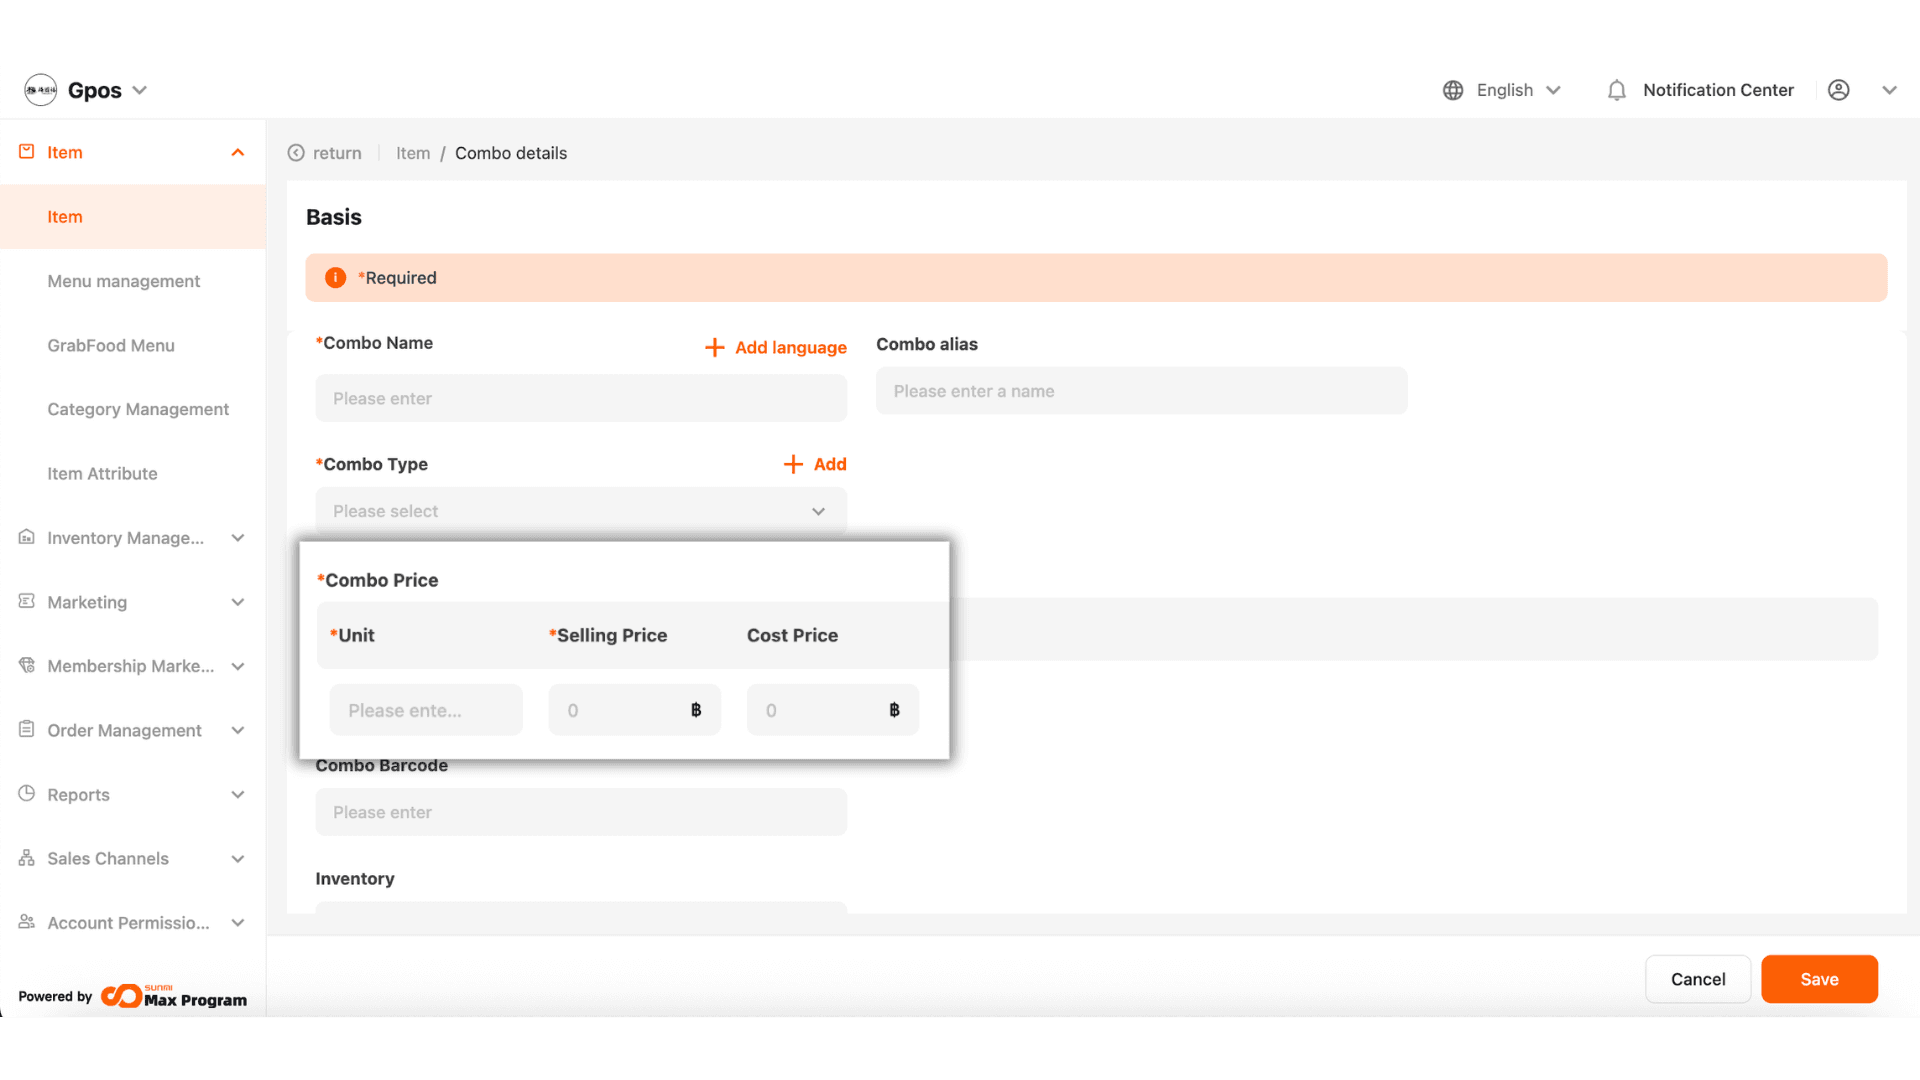
5. Set Unit Name and Sale Price
Specify the unit (the noun used to refer to the combo) such as "Set," the Selling Price, and Cost Price (if applicable).
Note : If you input the cost, the system will automatically calculate the net profit.
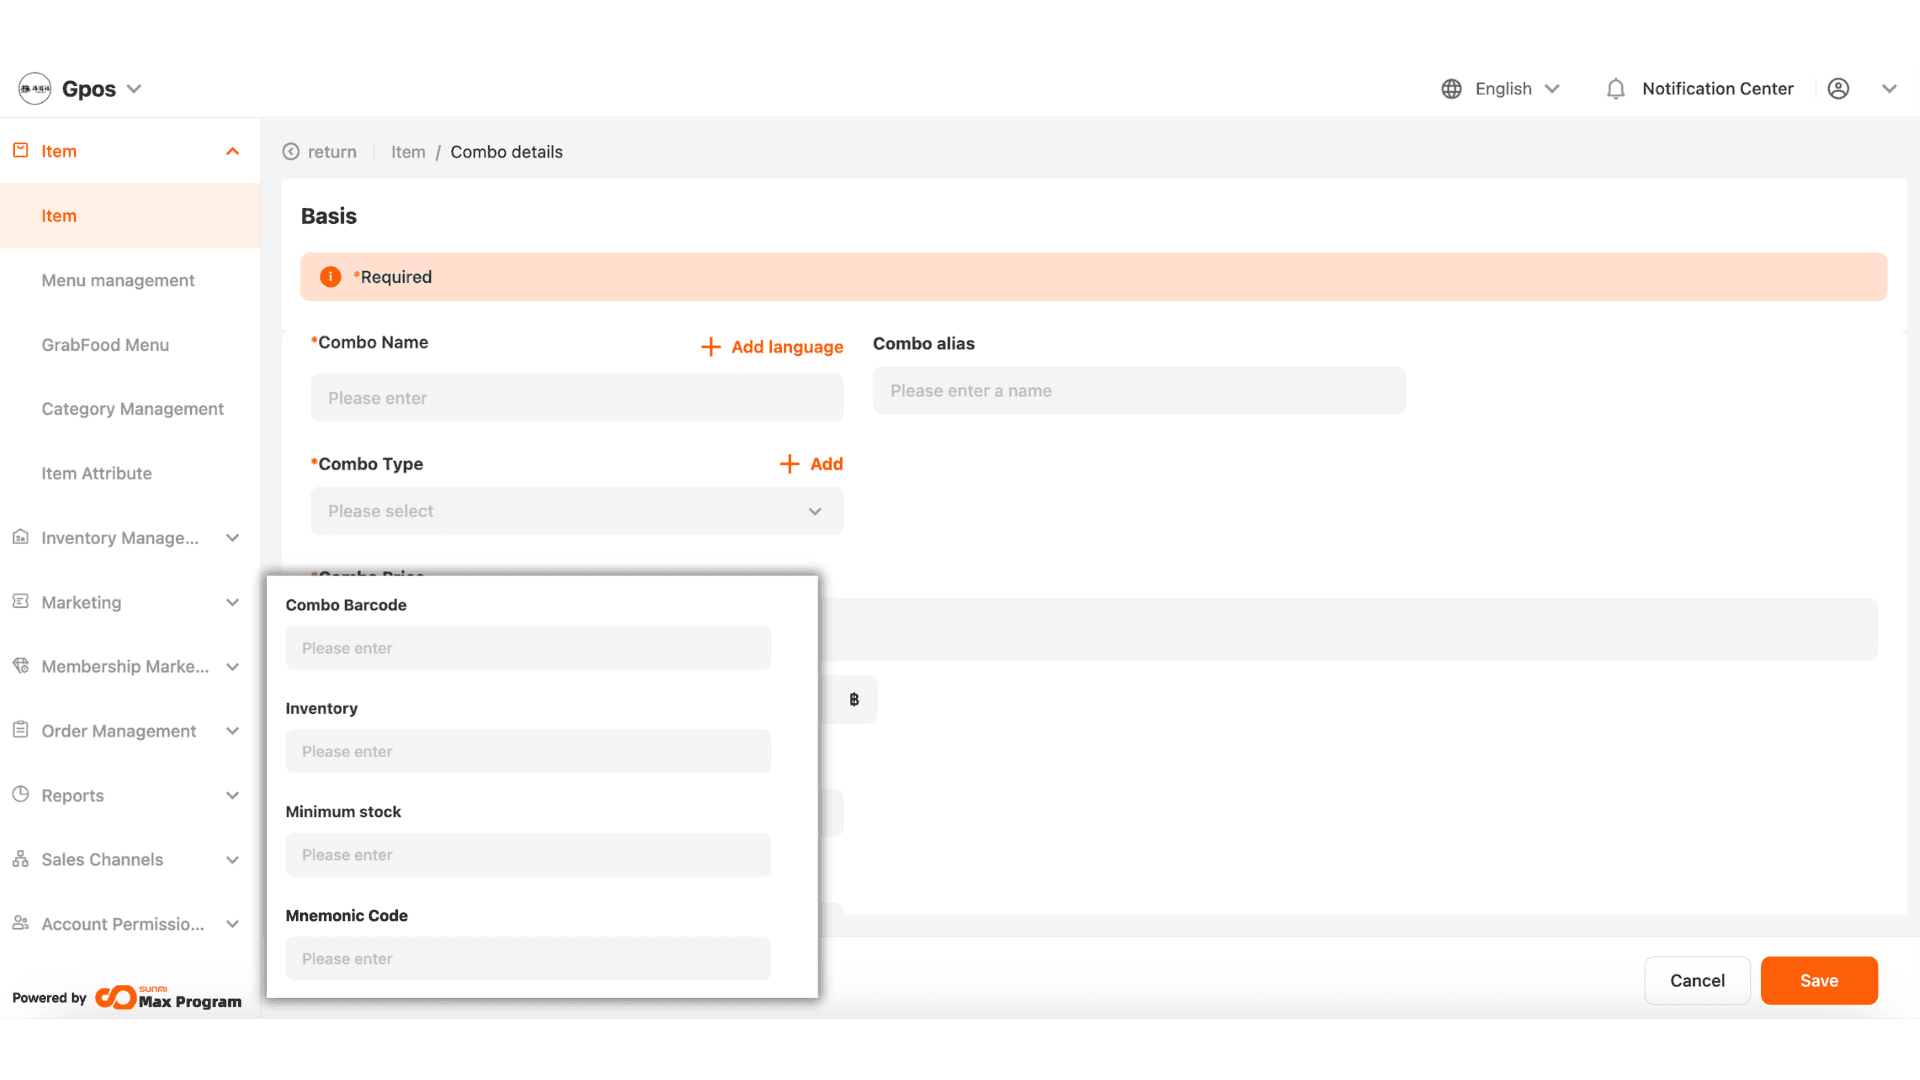
6. Add Additional Combo Information
Enter additional information for the combo
- Combo Barcode (if available)
- Inventory – You need to specify the stock, up to a maximum of 999,999 units.
- Minimum stock – Set up a stock alert for low inventory.
- Mnemonic Code – The system will auto-generate the SKU code.
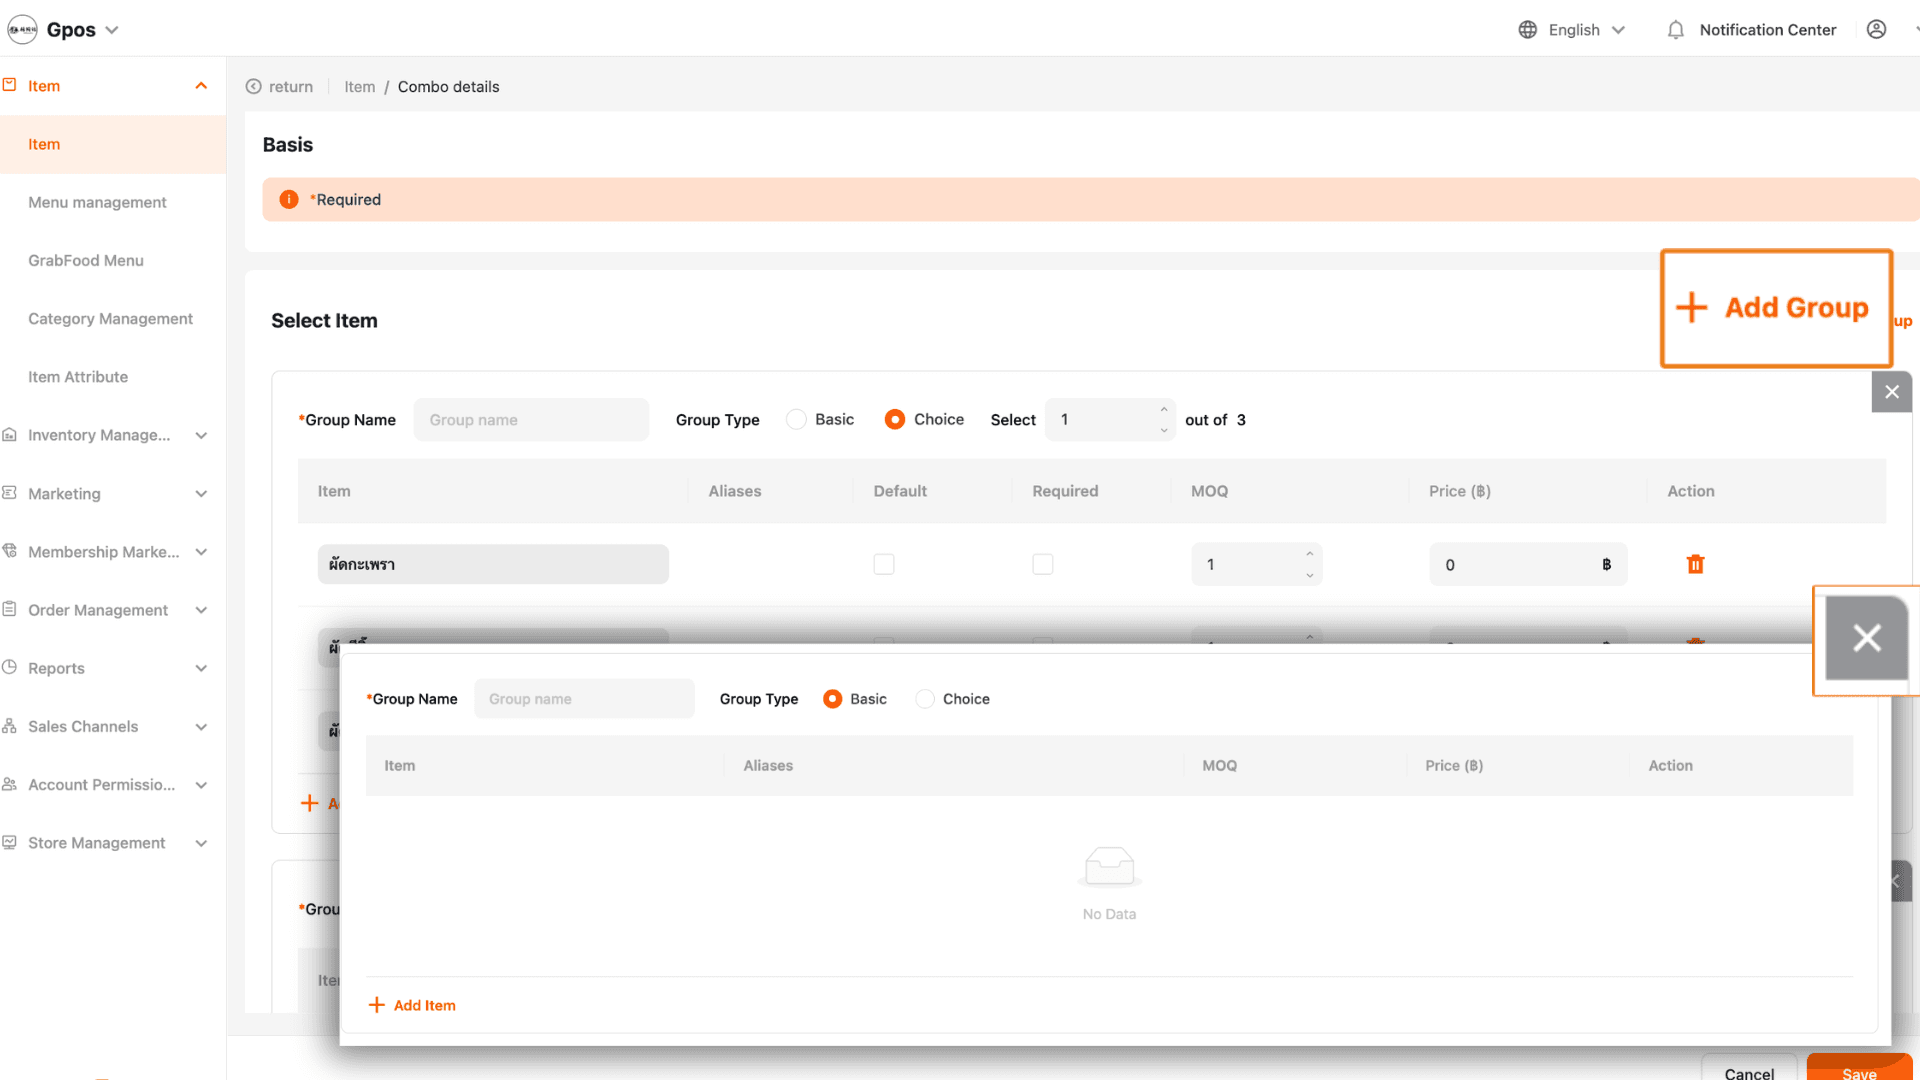
7. Set Option Groups for the Combo
Create option groups, such as a food group or a drink group, and click “+ Add Item” to add options.
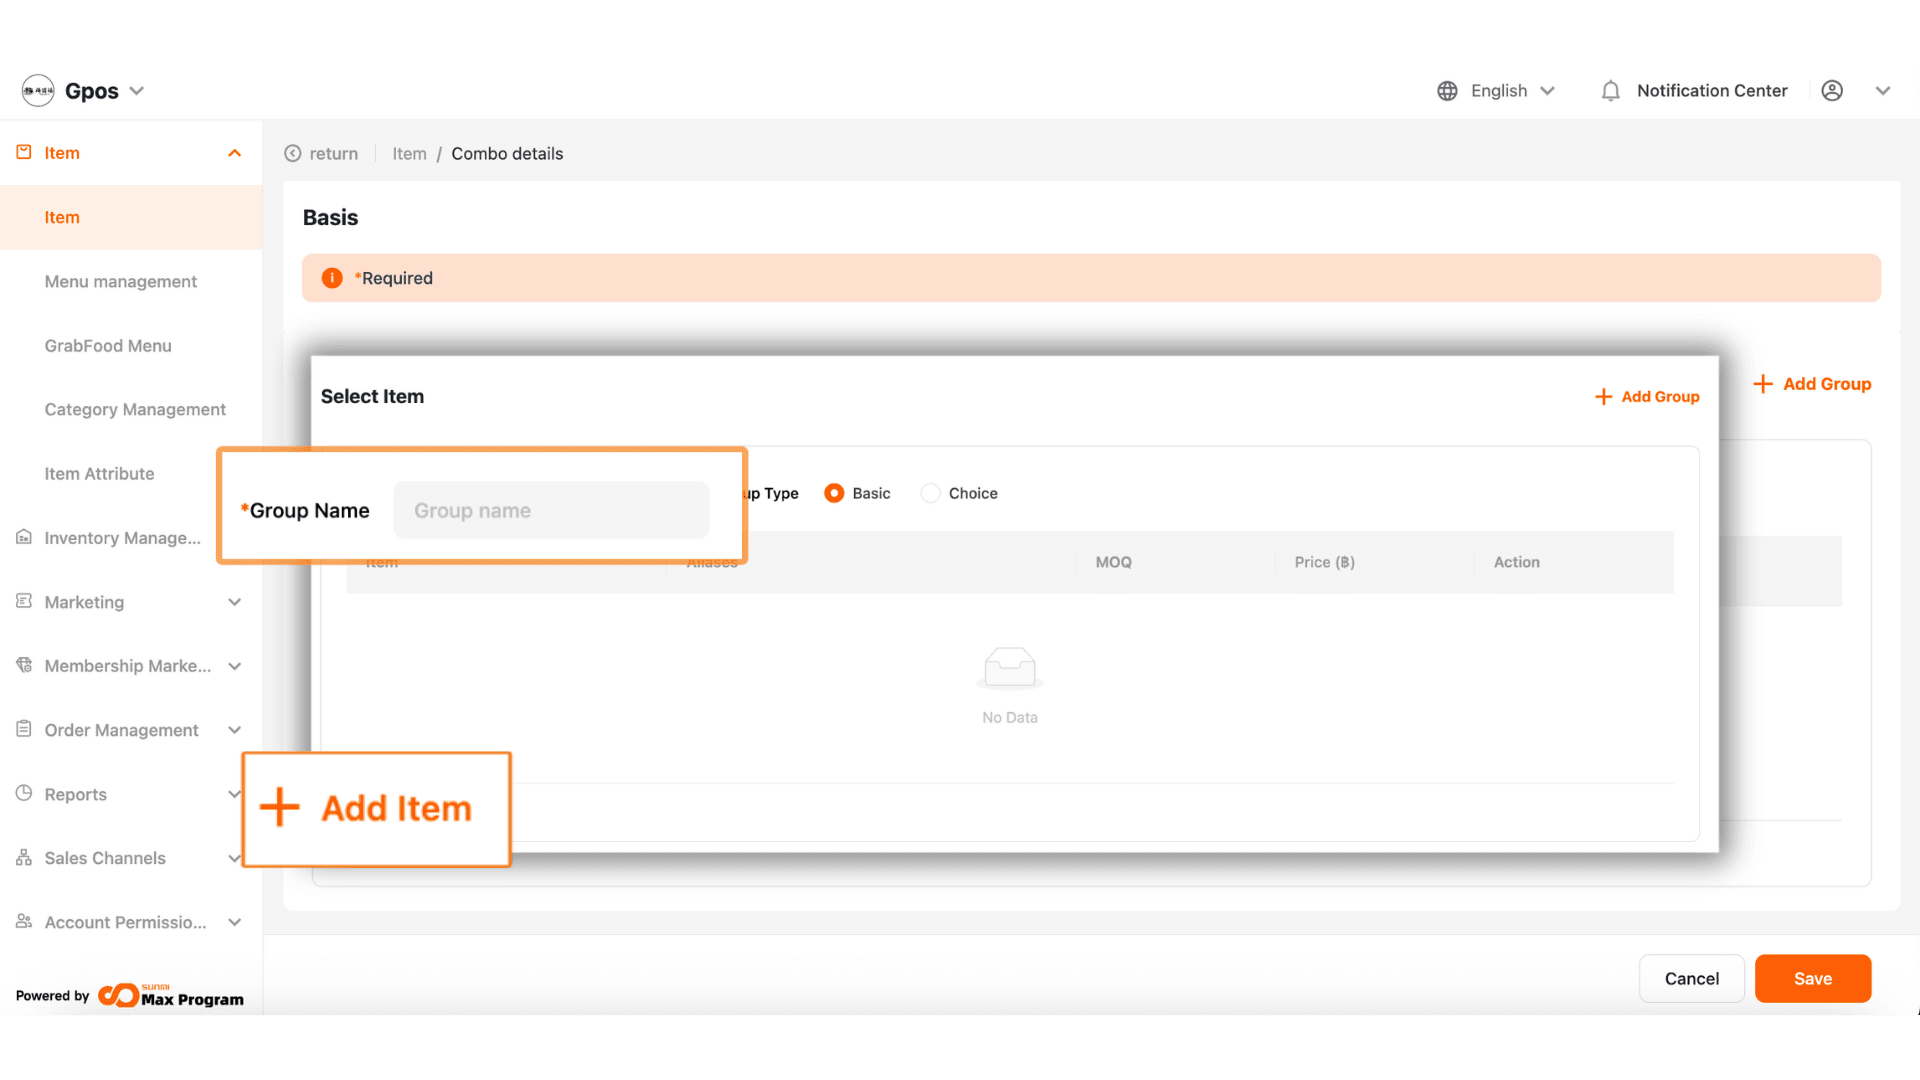
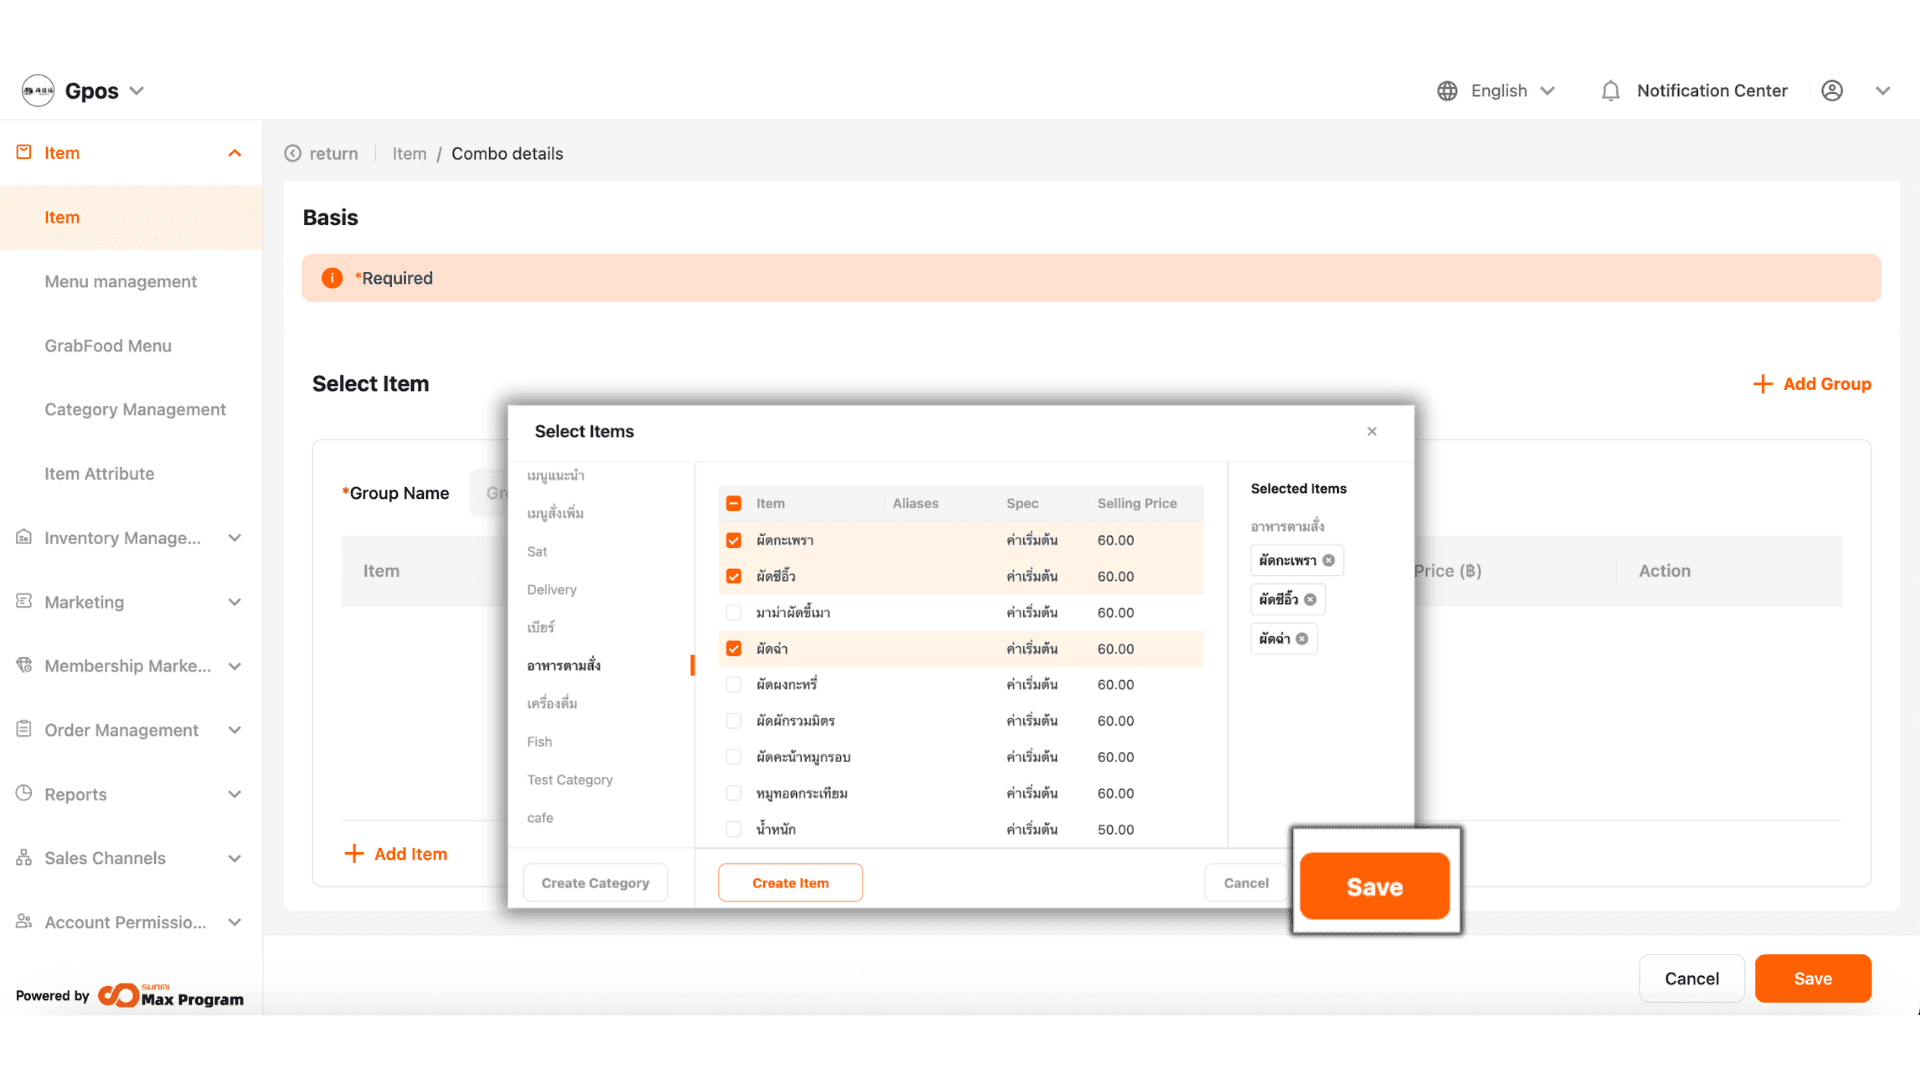
7.1 Choose Items in the Group
The system will show the categories on the side. Check the items you want, and click "Save."
Note : You can select up to 30 items per group.
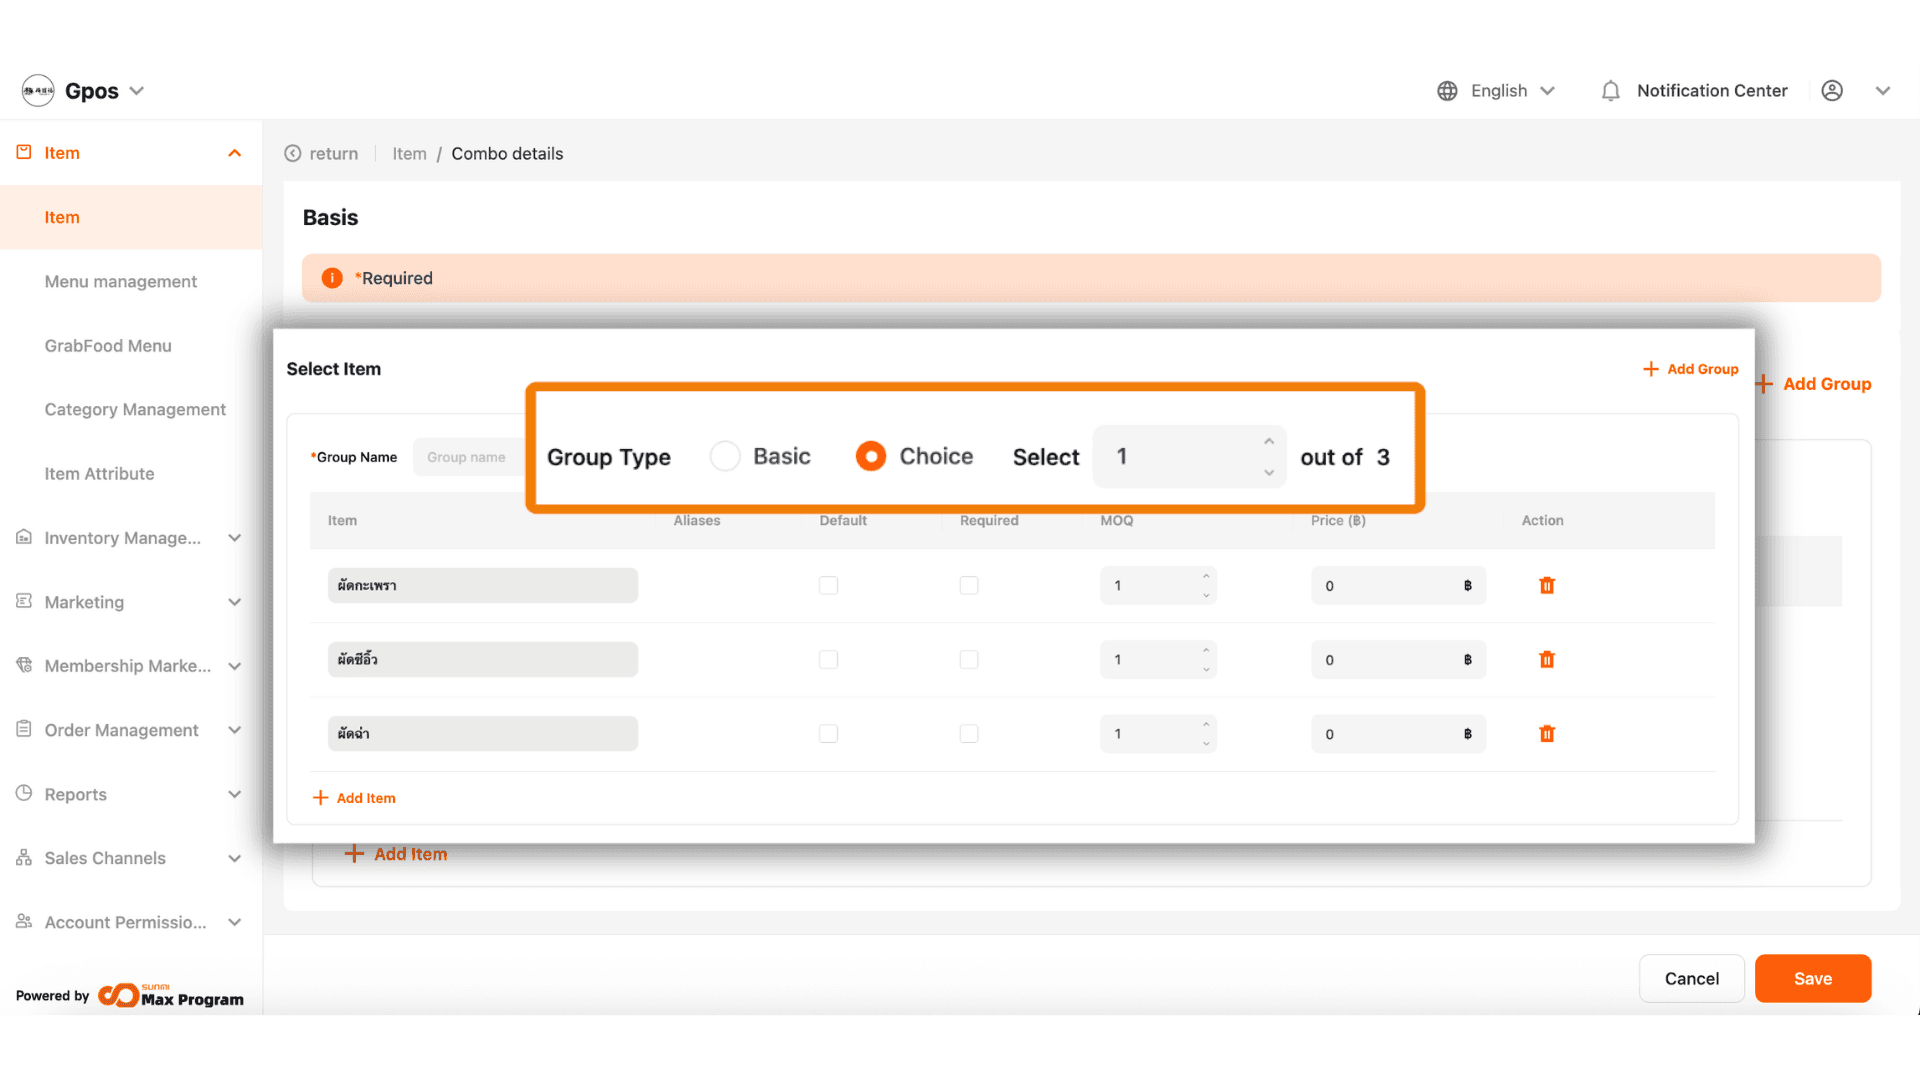
7.2 Choose Group Type
Choose the type of group. You have two options
- Basic – Select all items in the group.
- Choice – The system will prompt you to specify the number of items, e.g., “Choose 1 item” from the group.
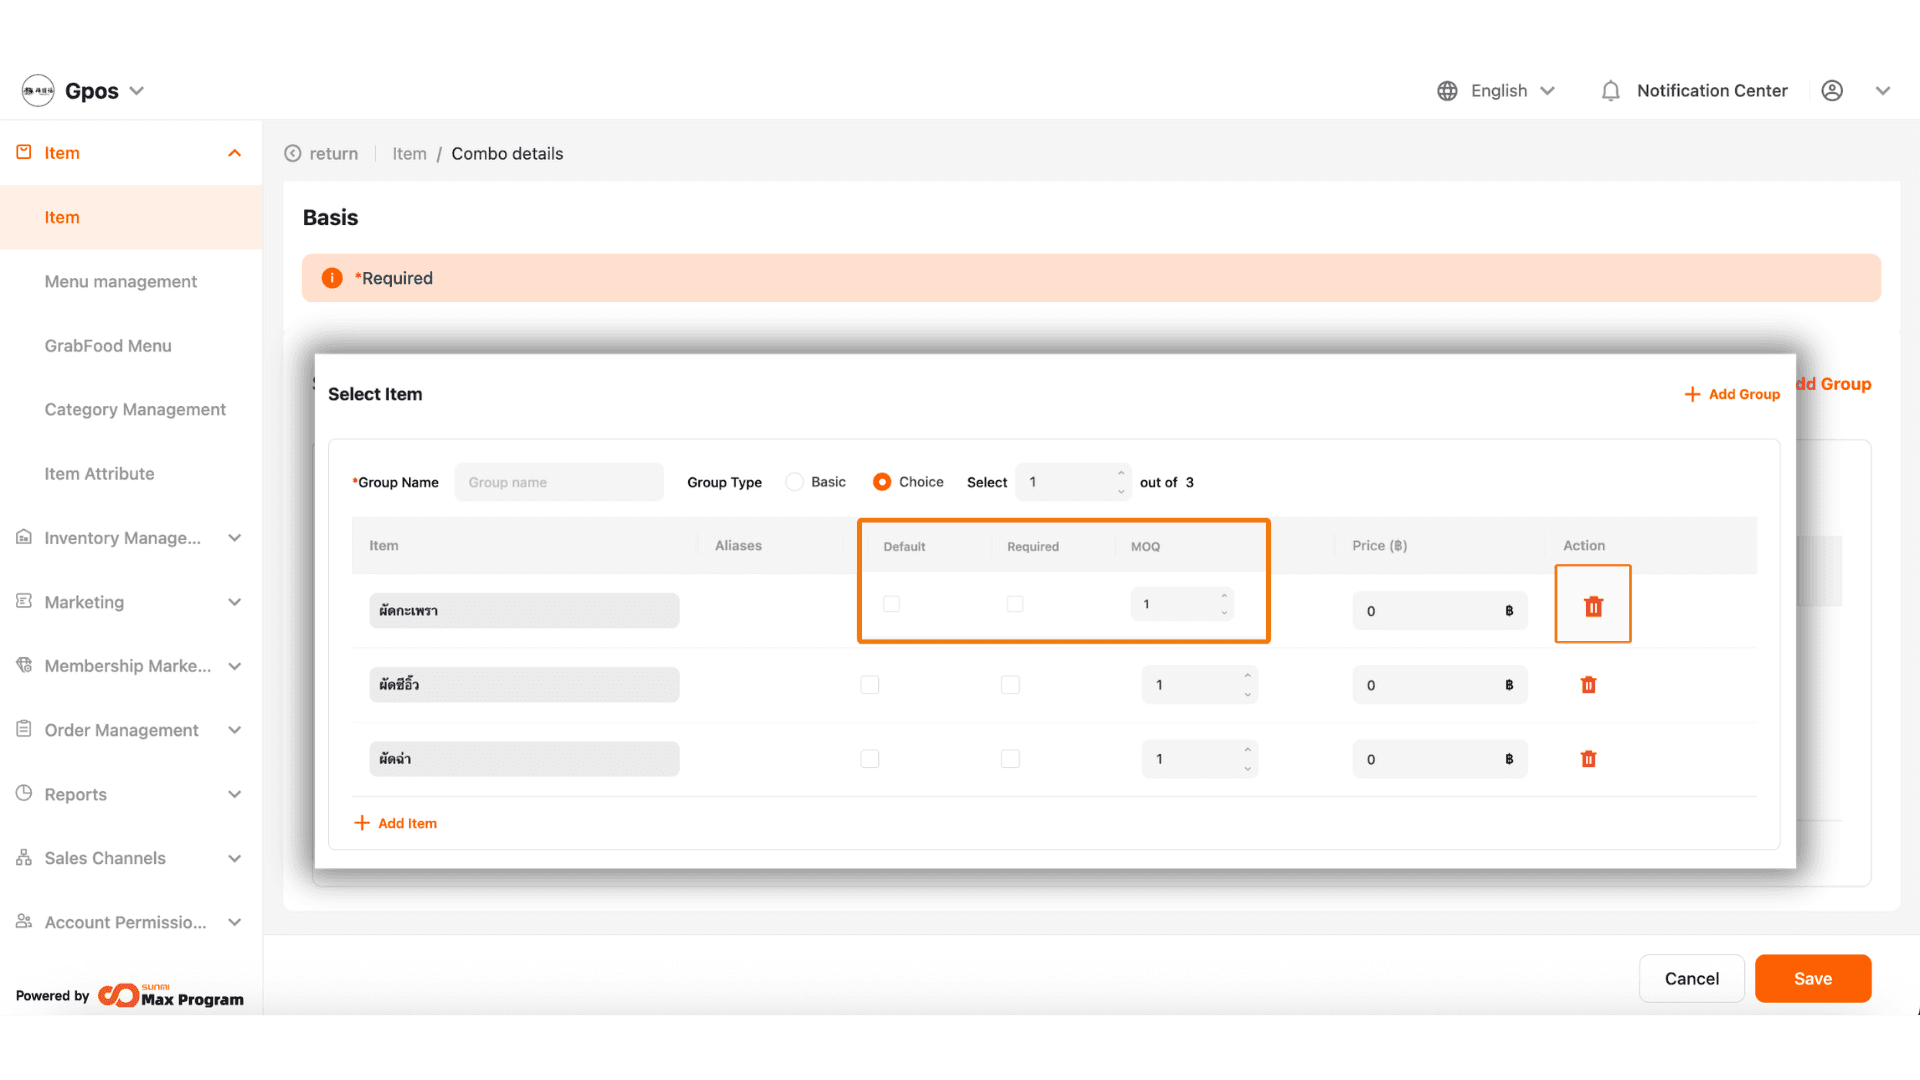
7.3 Manage Additional Items in the Group
You can manage the items in the combo group by:
- Checking the Default box – Set the first item as the default selection.
- Checking the Required box – Make it mandatory to select this item.
- Specifying the MOQ (Minimum Order Quantity) – Set the minimum quantity for the item.
- Using the Trash Icon – To remove an item from the group.
7.4 Add a New Group
Click “+ Add Group” to add another option group. You can delete a group by clicking the cross mark.
Example : First group = Food / Second group = Drink to be included in the same combo.
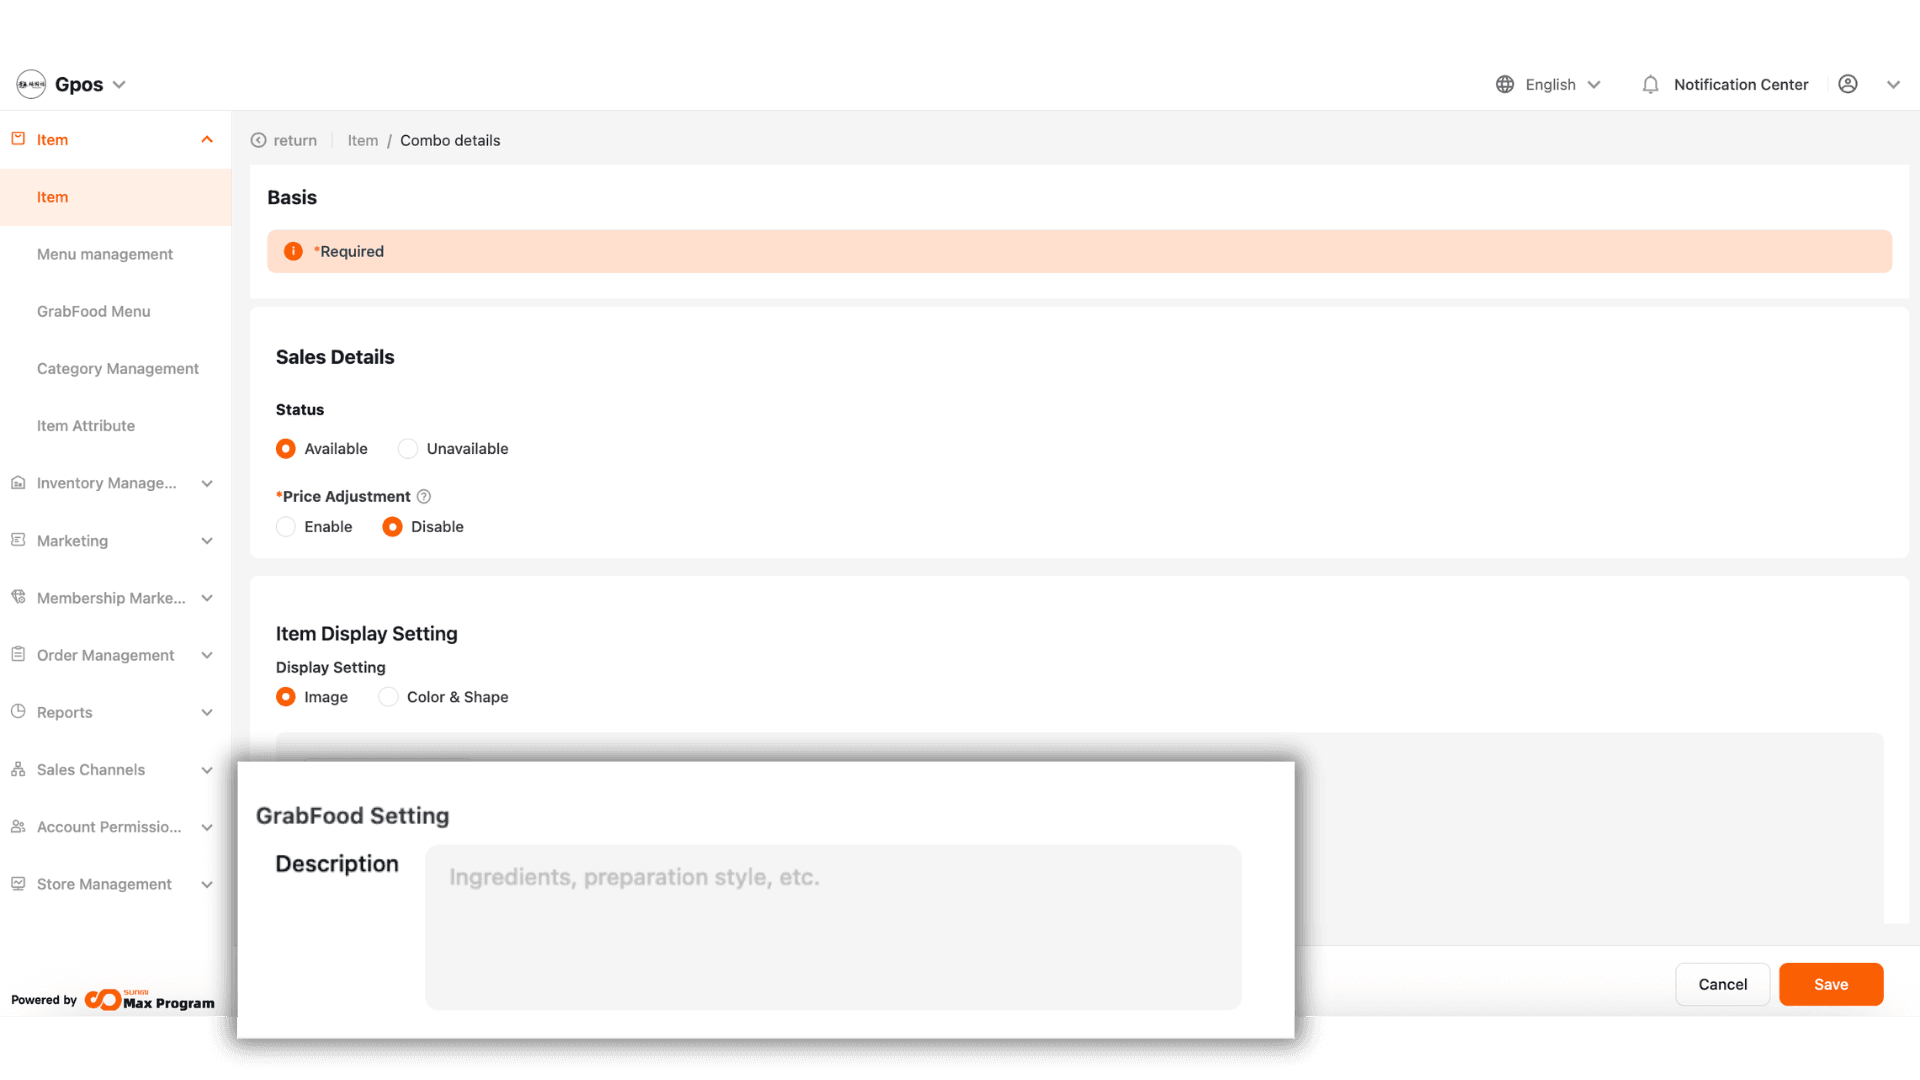
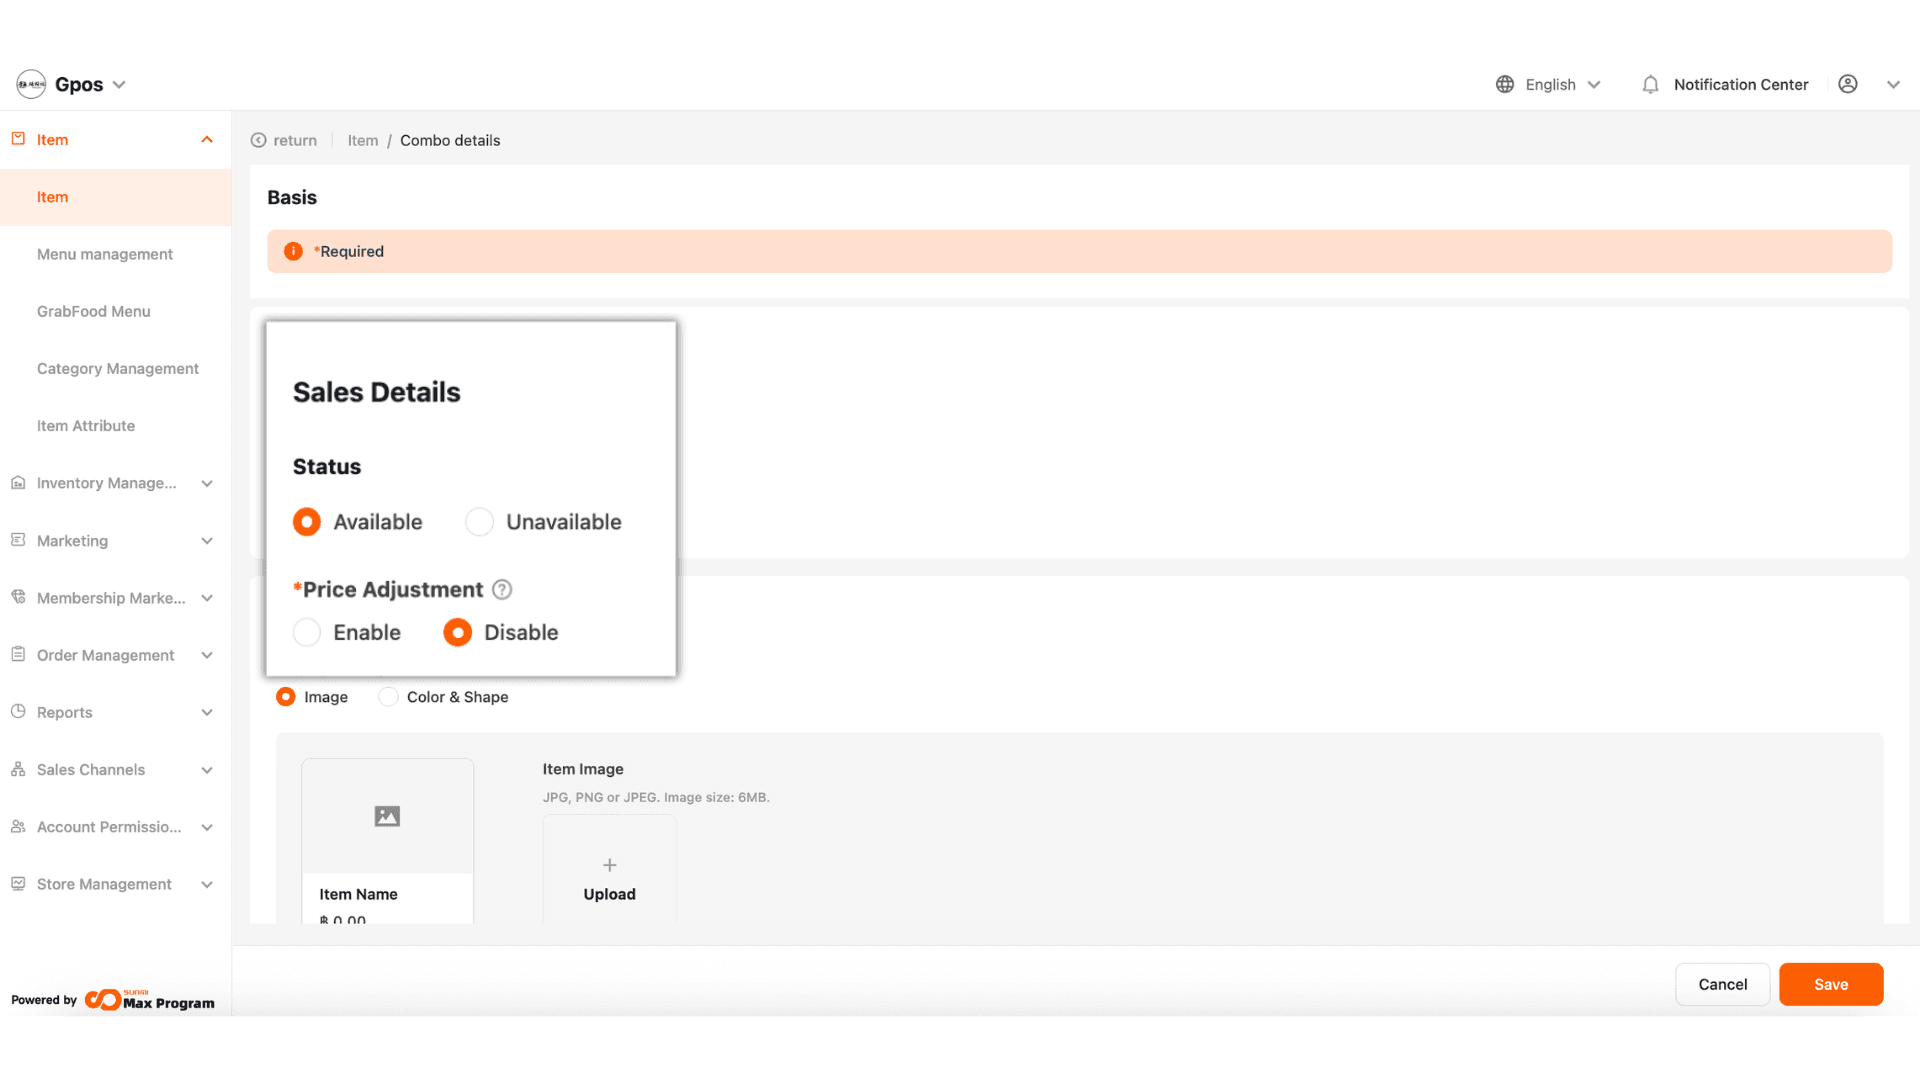
8. Set Additional Combo Settings
The system will prompt you to select the Status for the combo
- Available – The combo will be shown on the POS.
- Unavailable – The combo will not be shown on the POS.
The system will also ask whether you allow manual price adjustment at the POS for this combo
- Enable – Allows the price to be entered at the POS.
- Disable – The set price will be used.
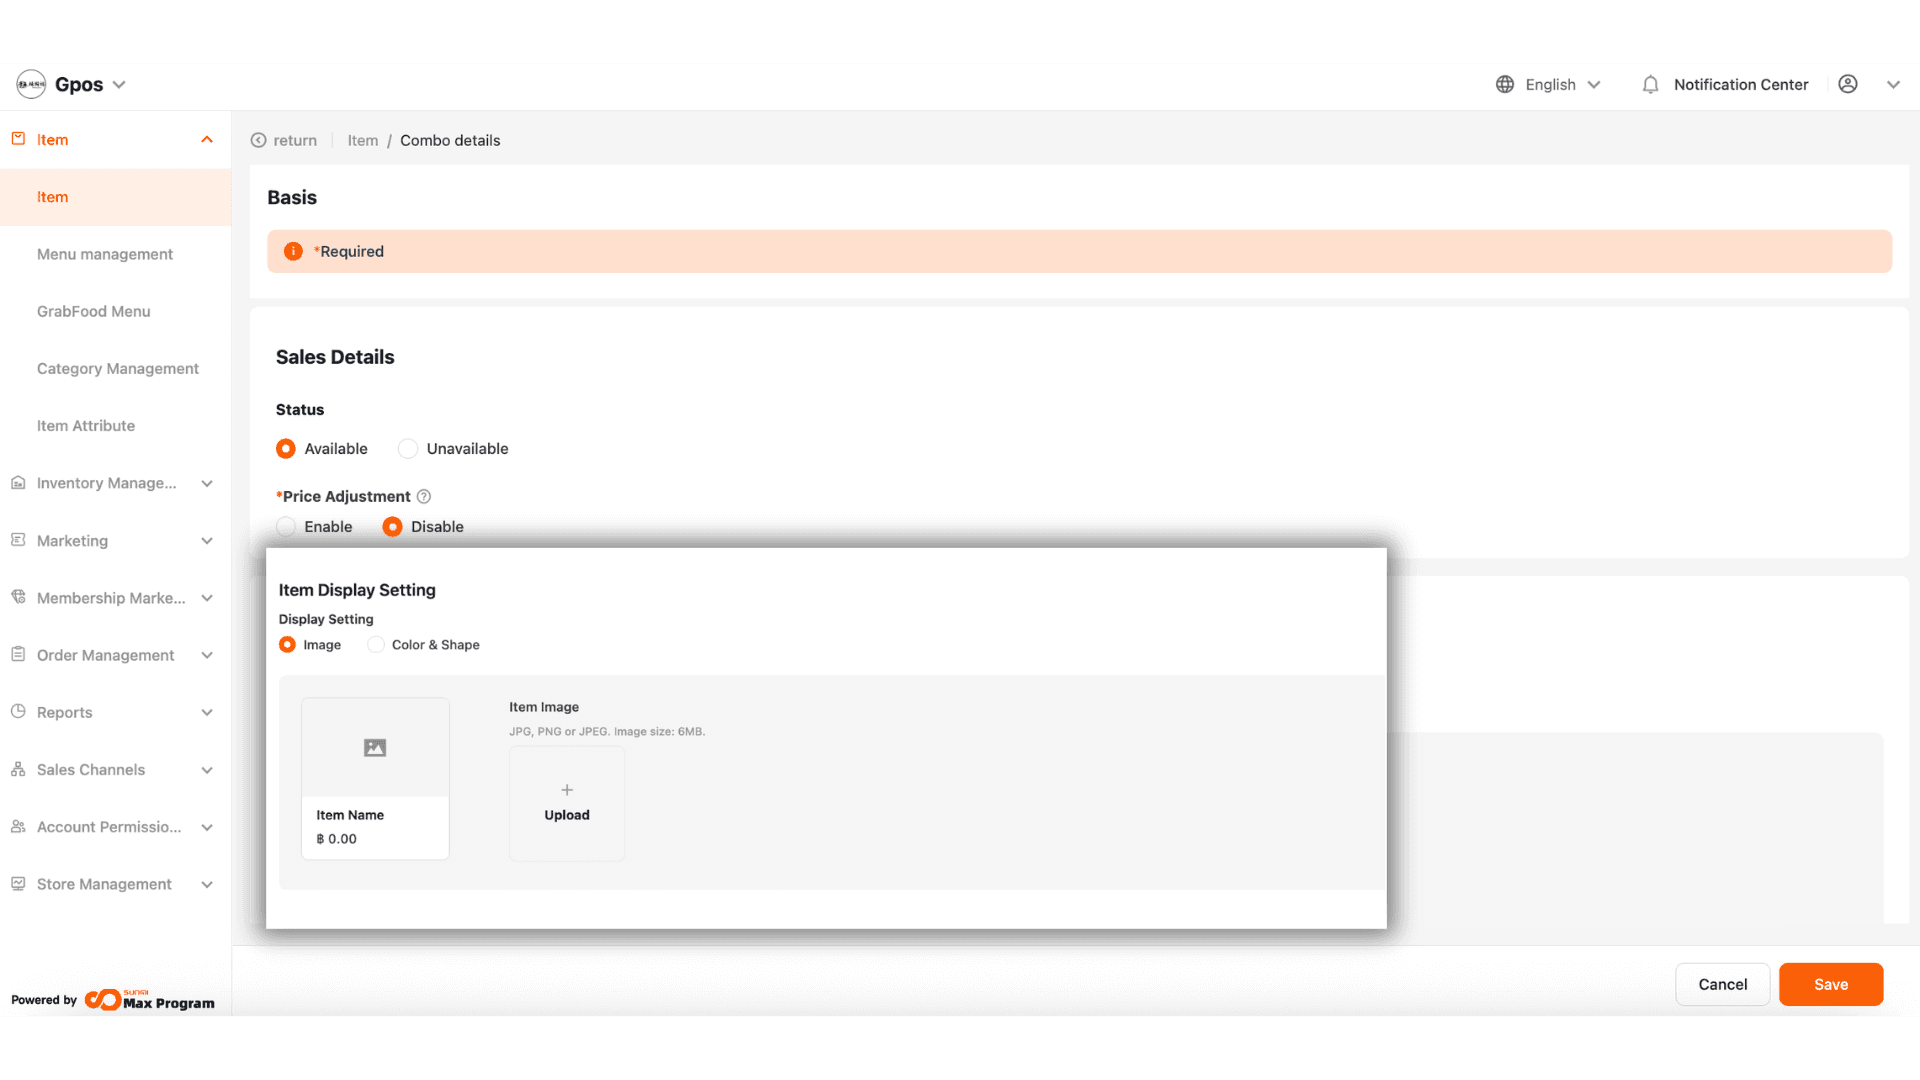
9. Set Display Settings for Items
You can select how the item is displayed in two ways
Upload an image by clicking “+ Upload” to choose the desired image for the combo.
Note : Supported file formats: jpg, png, jpeg, with a maximum file size of 6MB.
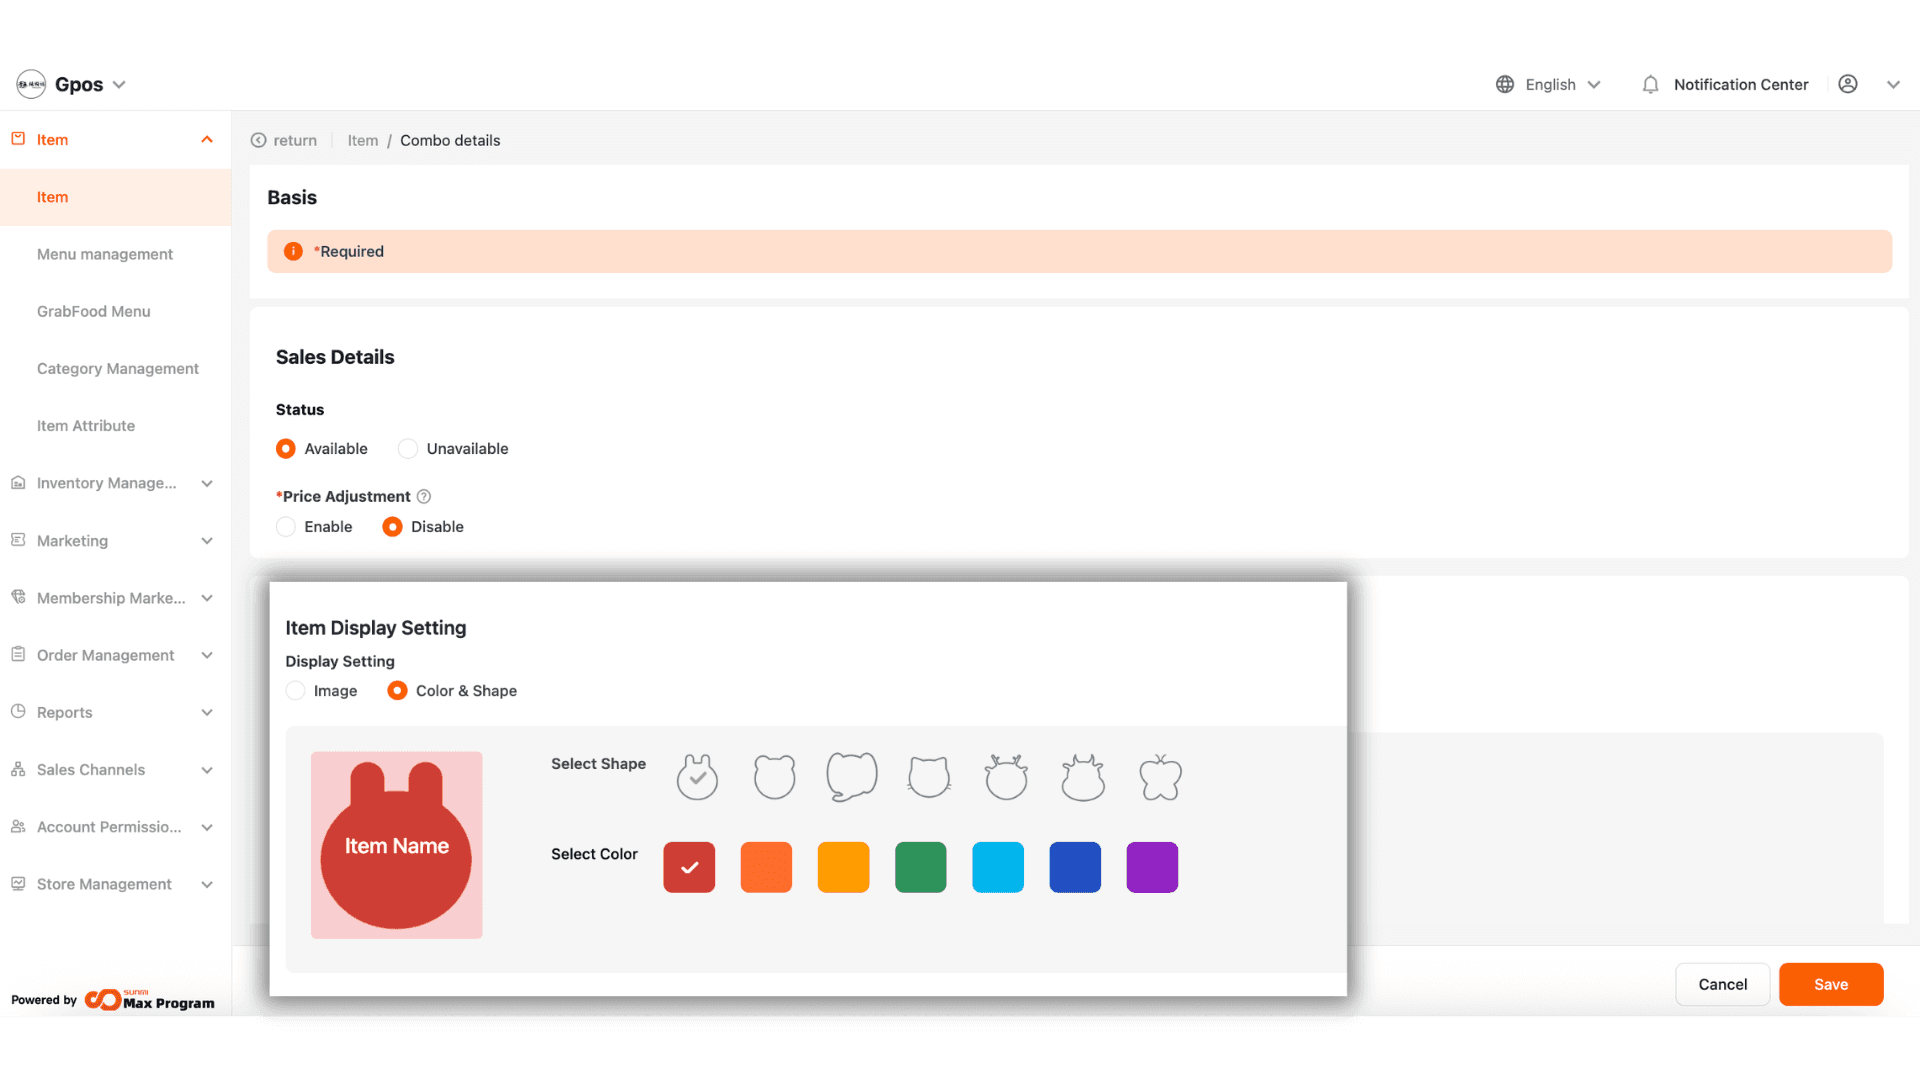
9.1 Choose Color and Shape
Use color and shape as a substitute for the actual image if you don't wish to upload a picture.
10. Add Item Description for Grab
If integrated with Grab, you can set a description for GrabFood Setting , such as menu details, ingredients, etc. Click “Save” to complete combo creation.