Option Management
2026-01-10 09:26
Helps manage product options in a structured, accurate, and consistent way across all channels, including POS, GrabFood, and the QR code ordering system. Supports multiple languages, reduces configuration errors, increases convenience for in-store sales, and makes it easier and clearer for customers to select products.
1. Log in to the Back Office
Go to login.gpos.co.th, enter your Email and Password, then click Log in.
After successfully logging in, go to the “Items” menu and select “Item Attribute.”
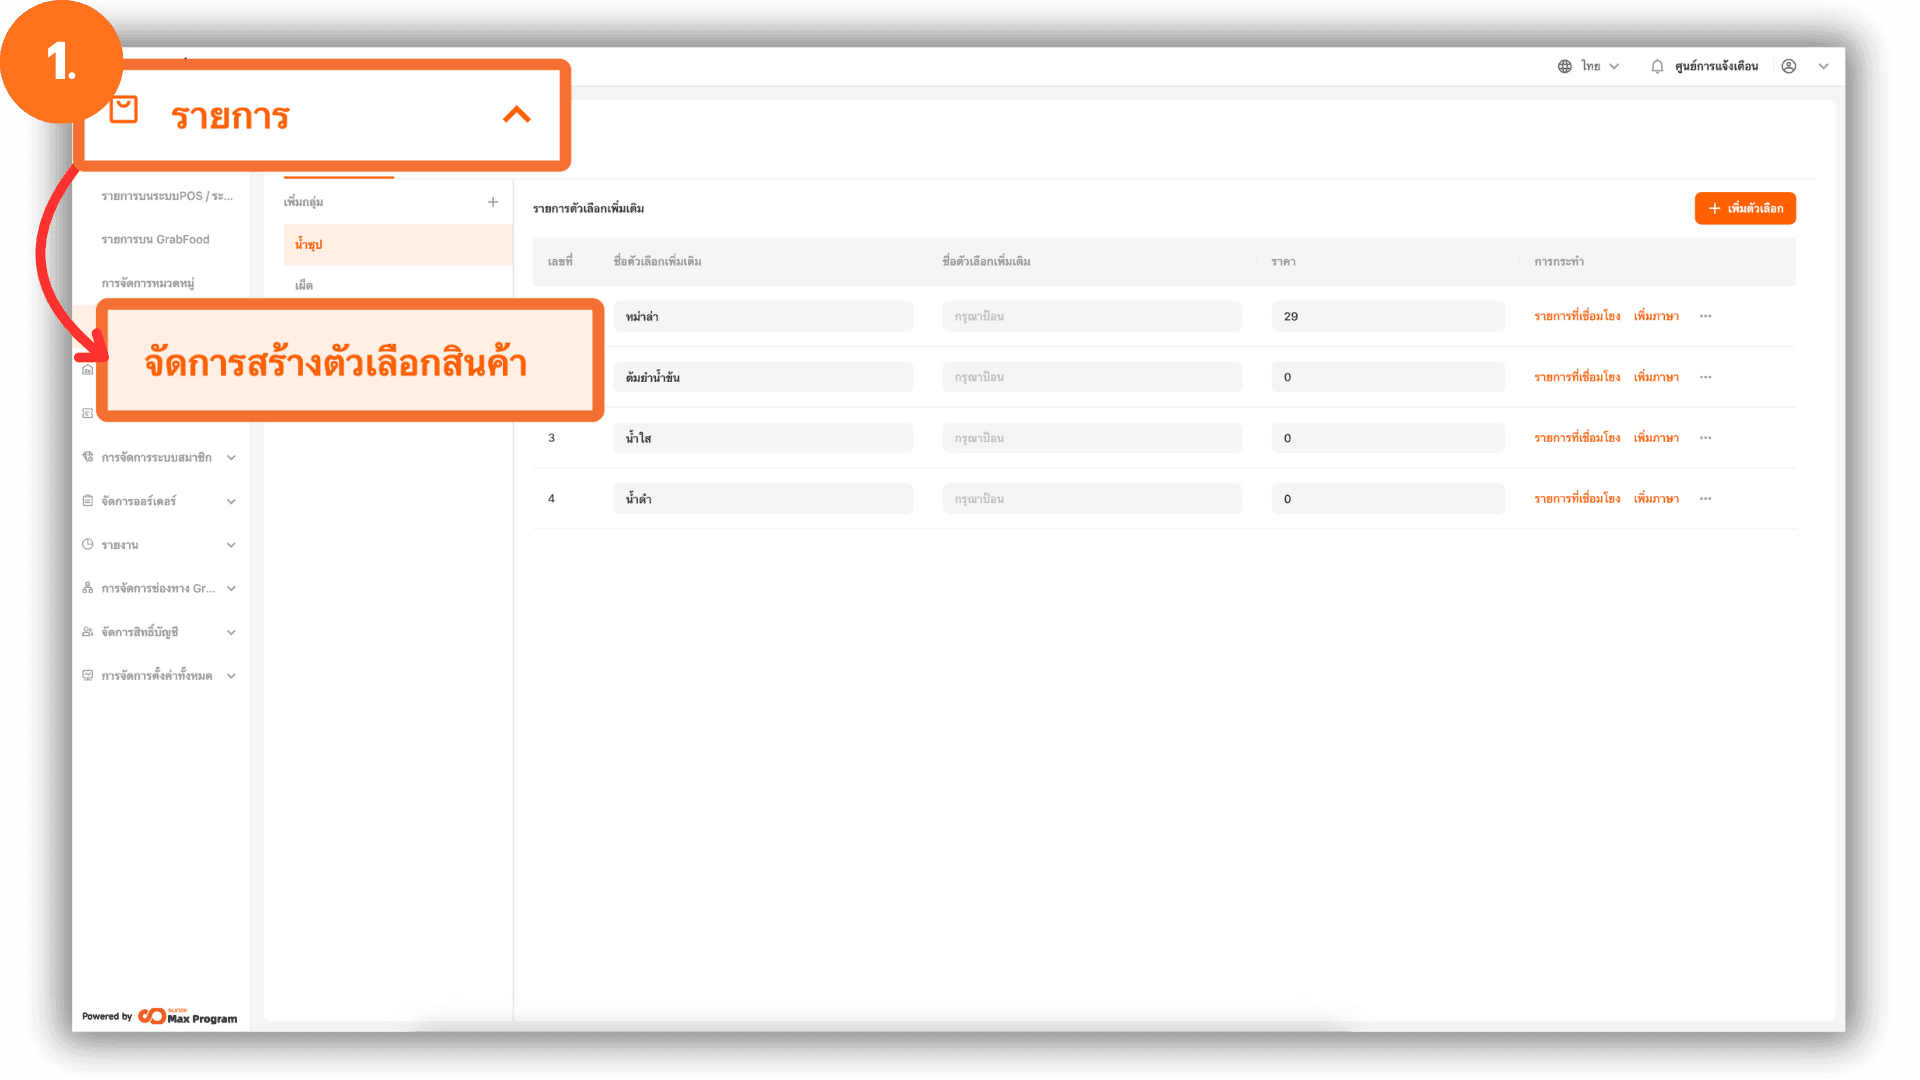
2. Creating an Option Group
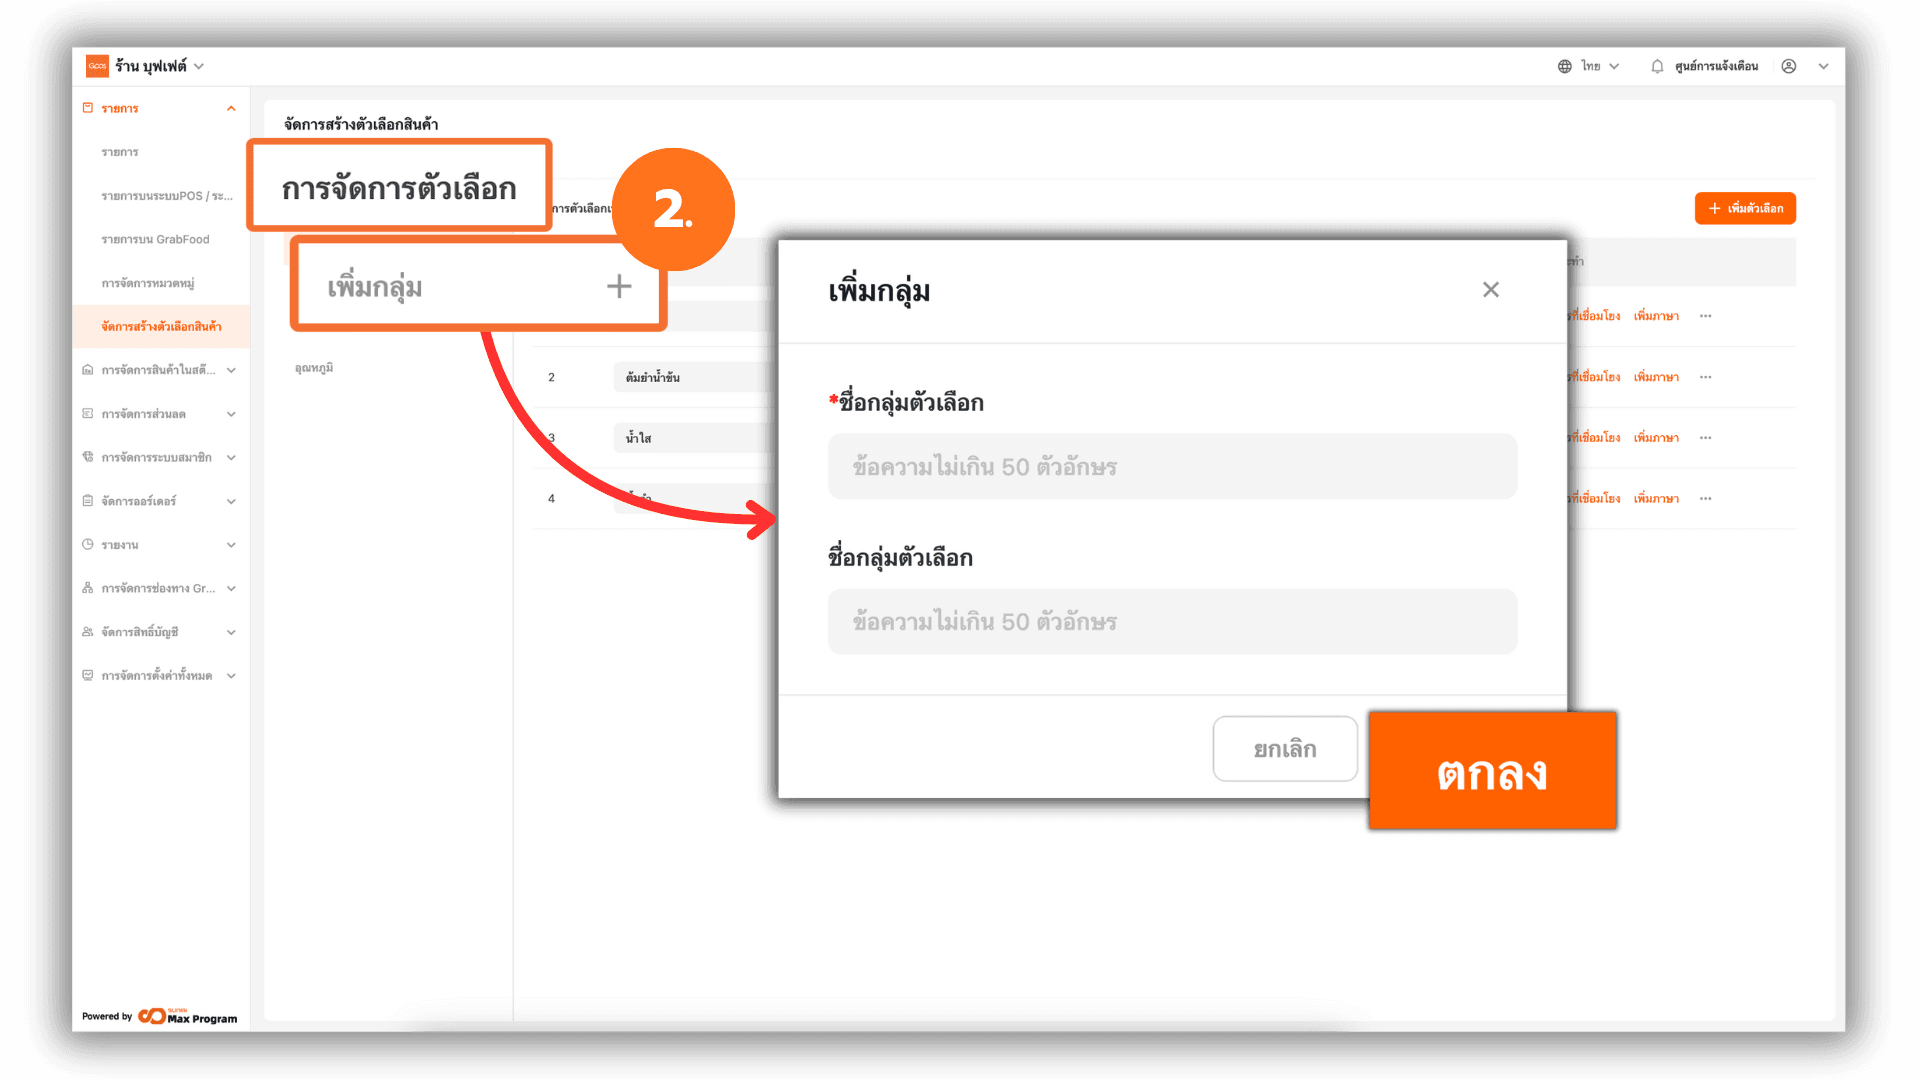
On the Item Attribute page, in the Preference Management section, click the + button next to Add Group to create a new option group. The system will display a window for you to enter the following information
- Group Name (POS)
- Group Name alias (GrabFood)
Fill in all required information and click Ok to save the new option group.
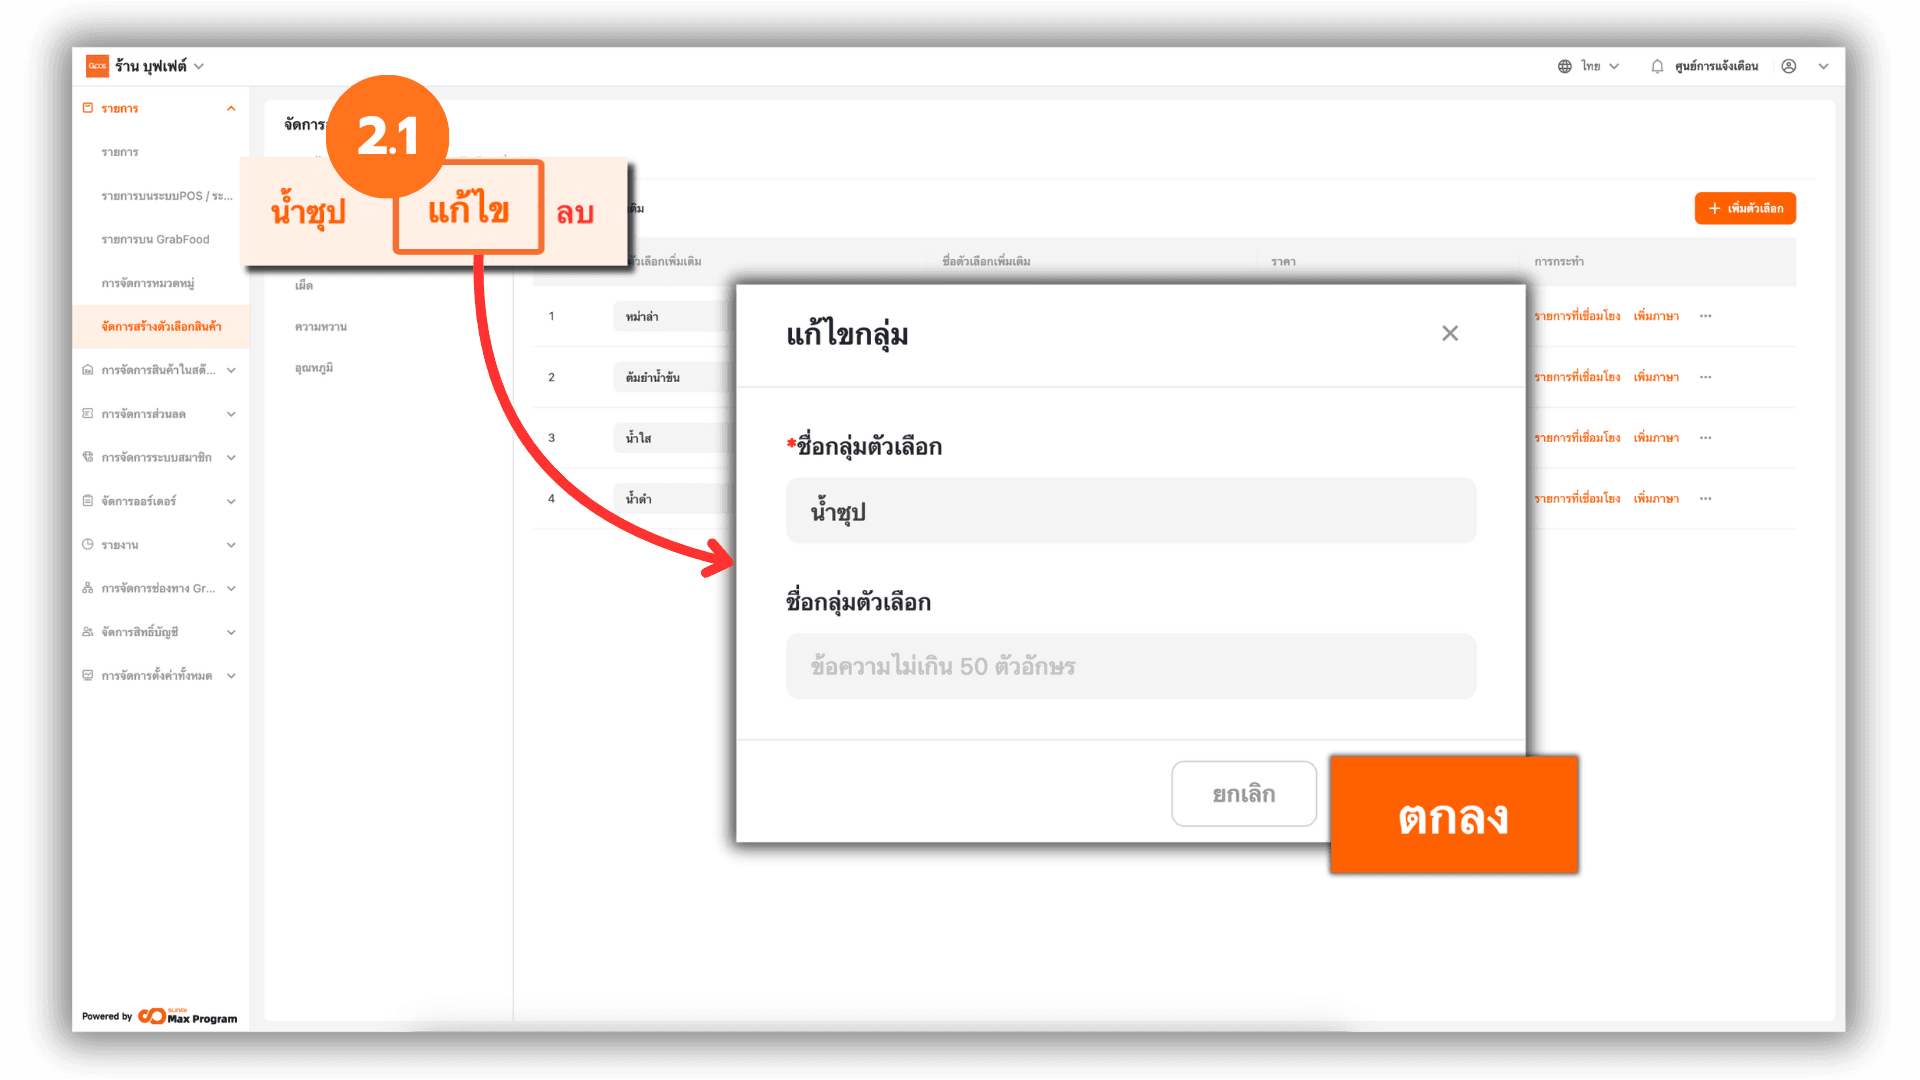
2.1 Editing an Option Group
Select the option group you want to edit and click Edit next to the group name.
You can edit
- Group Name (POS)
- Group Name alias (GrabFood)
Click Ok to save the changes.
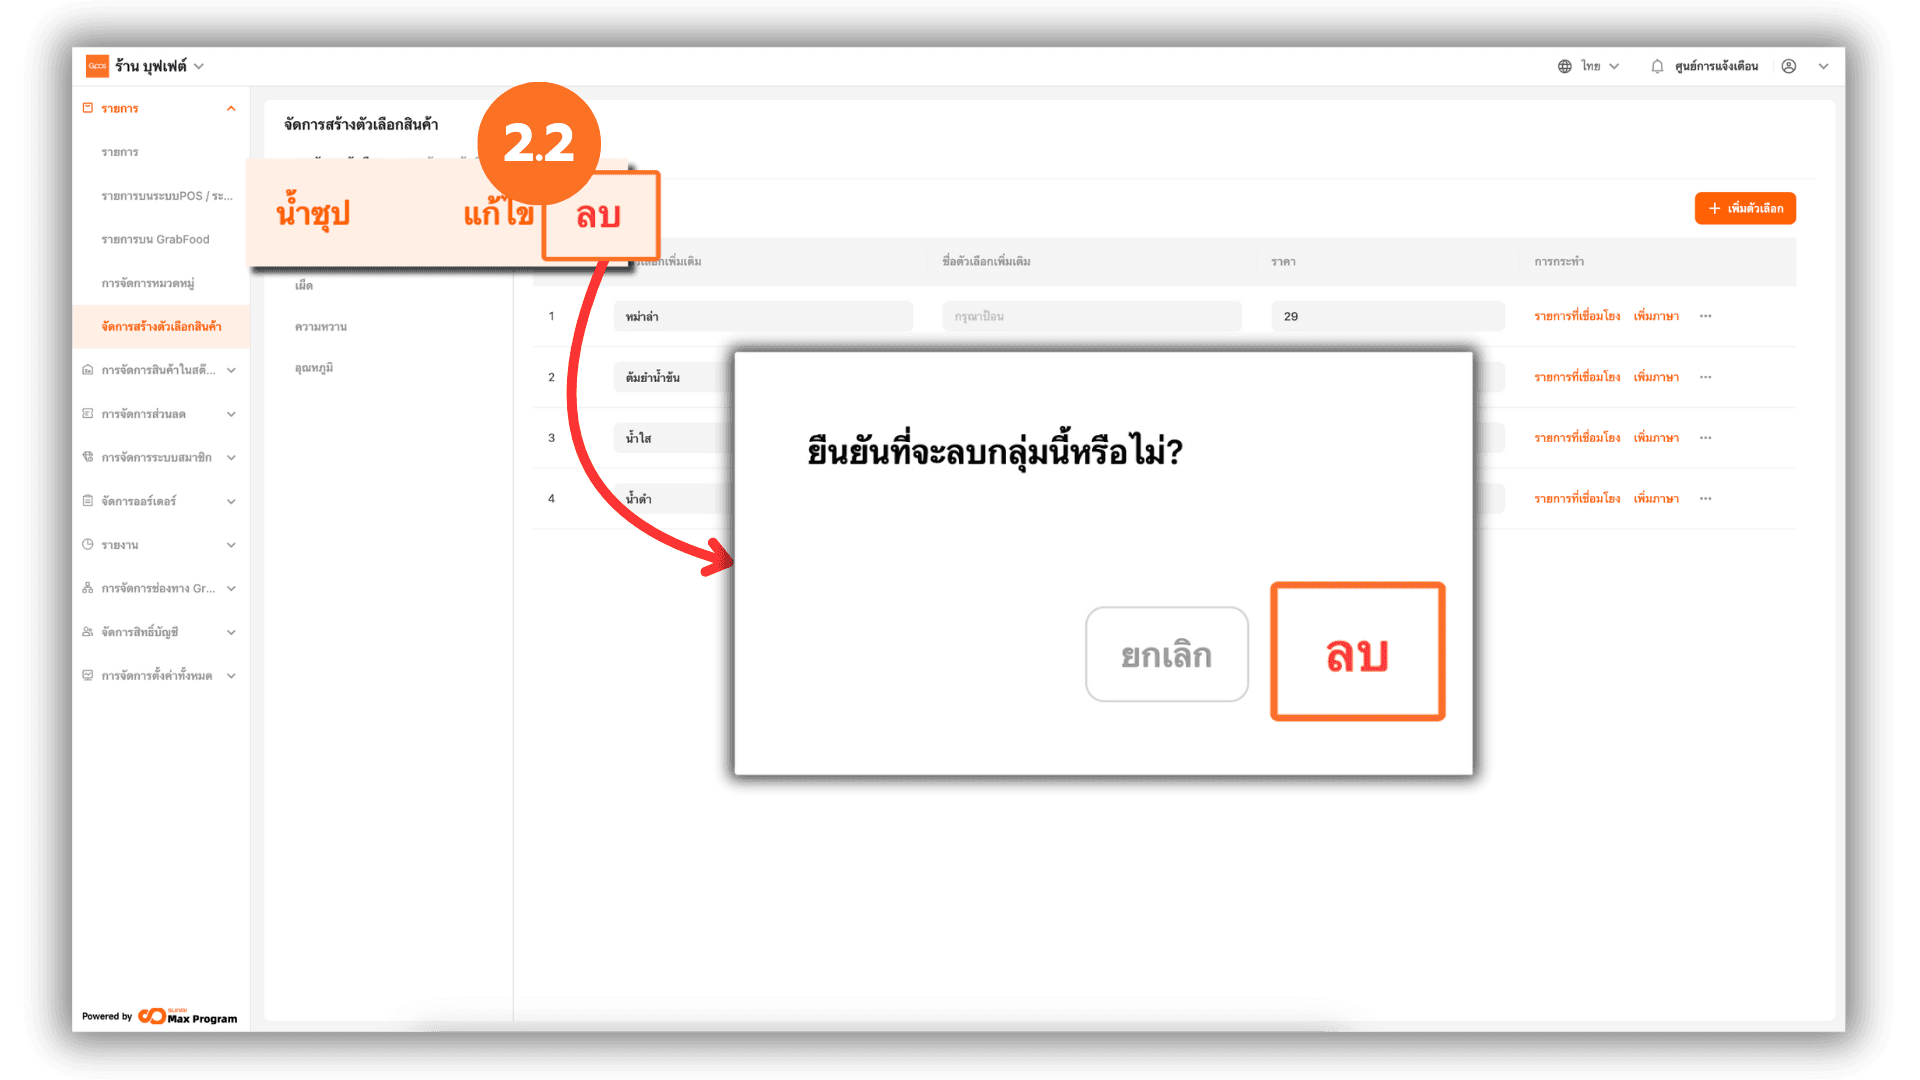
2.2 Deleting an Option Group
Click Delete next to the option group name. The system will display a confirmation message. Click Delete again to confirm.
Note : An option group can only be deleted if it does not contain any options.
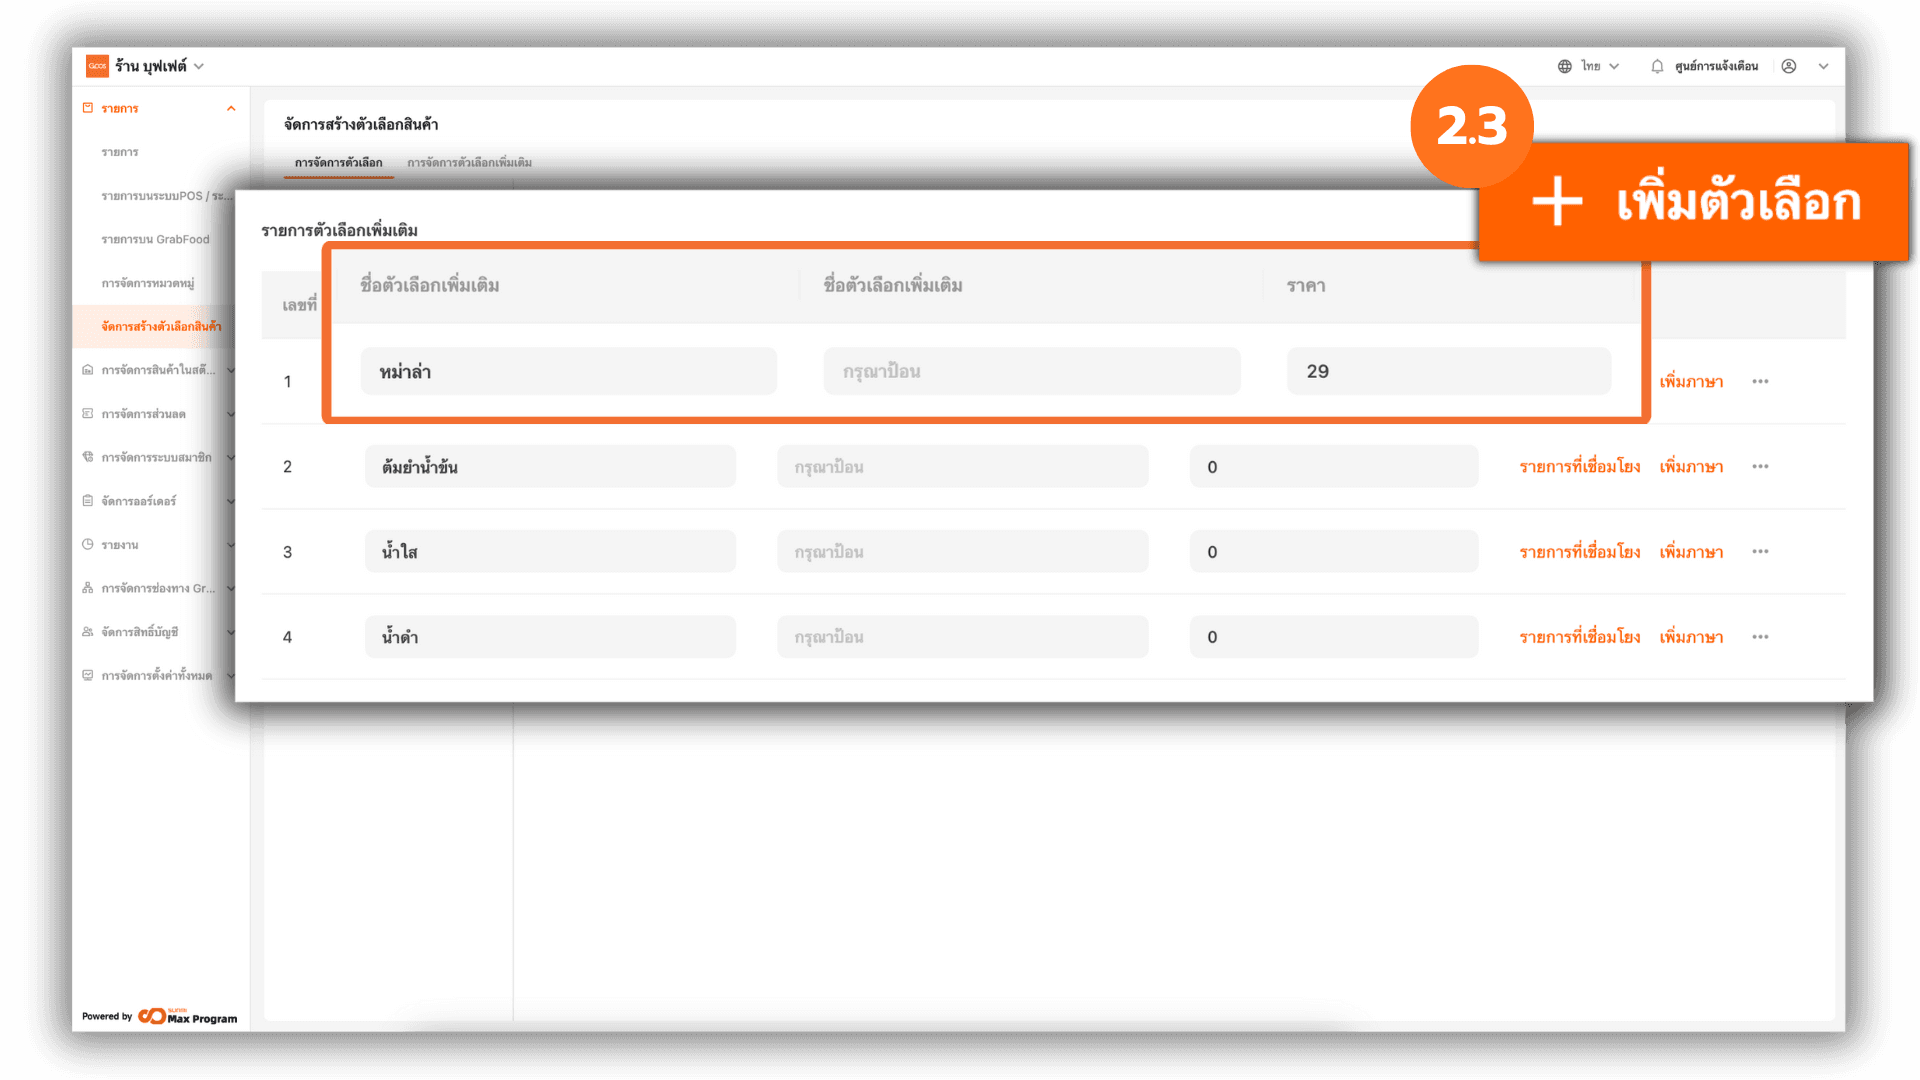
2.3 Creating Options within a Group
Select the desired option group and click + Create Preference. The system will prompt you to enter the following option details:
- Preference Name (POS)
- Preference alias (GrabFood)
- Price (in case there is an additional charge when selecting this option)
The system will automatically save the information.
Note : The specified price will be added to the product price when the option is selected.
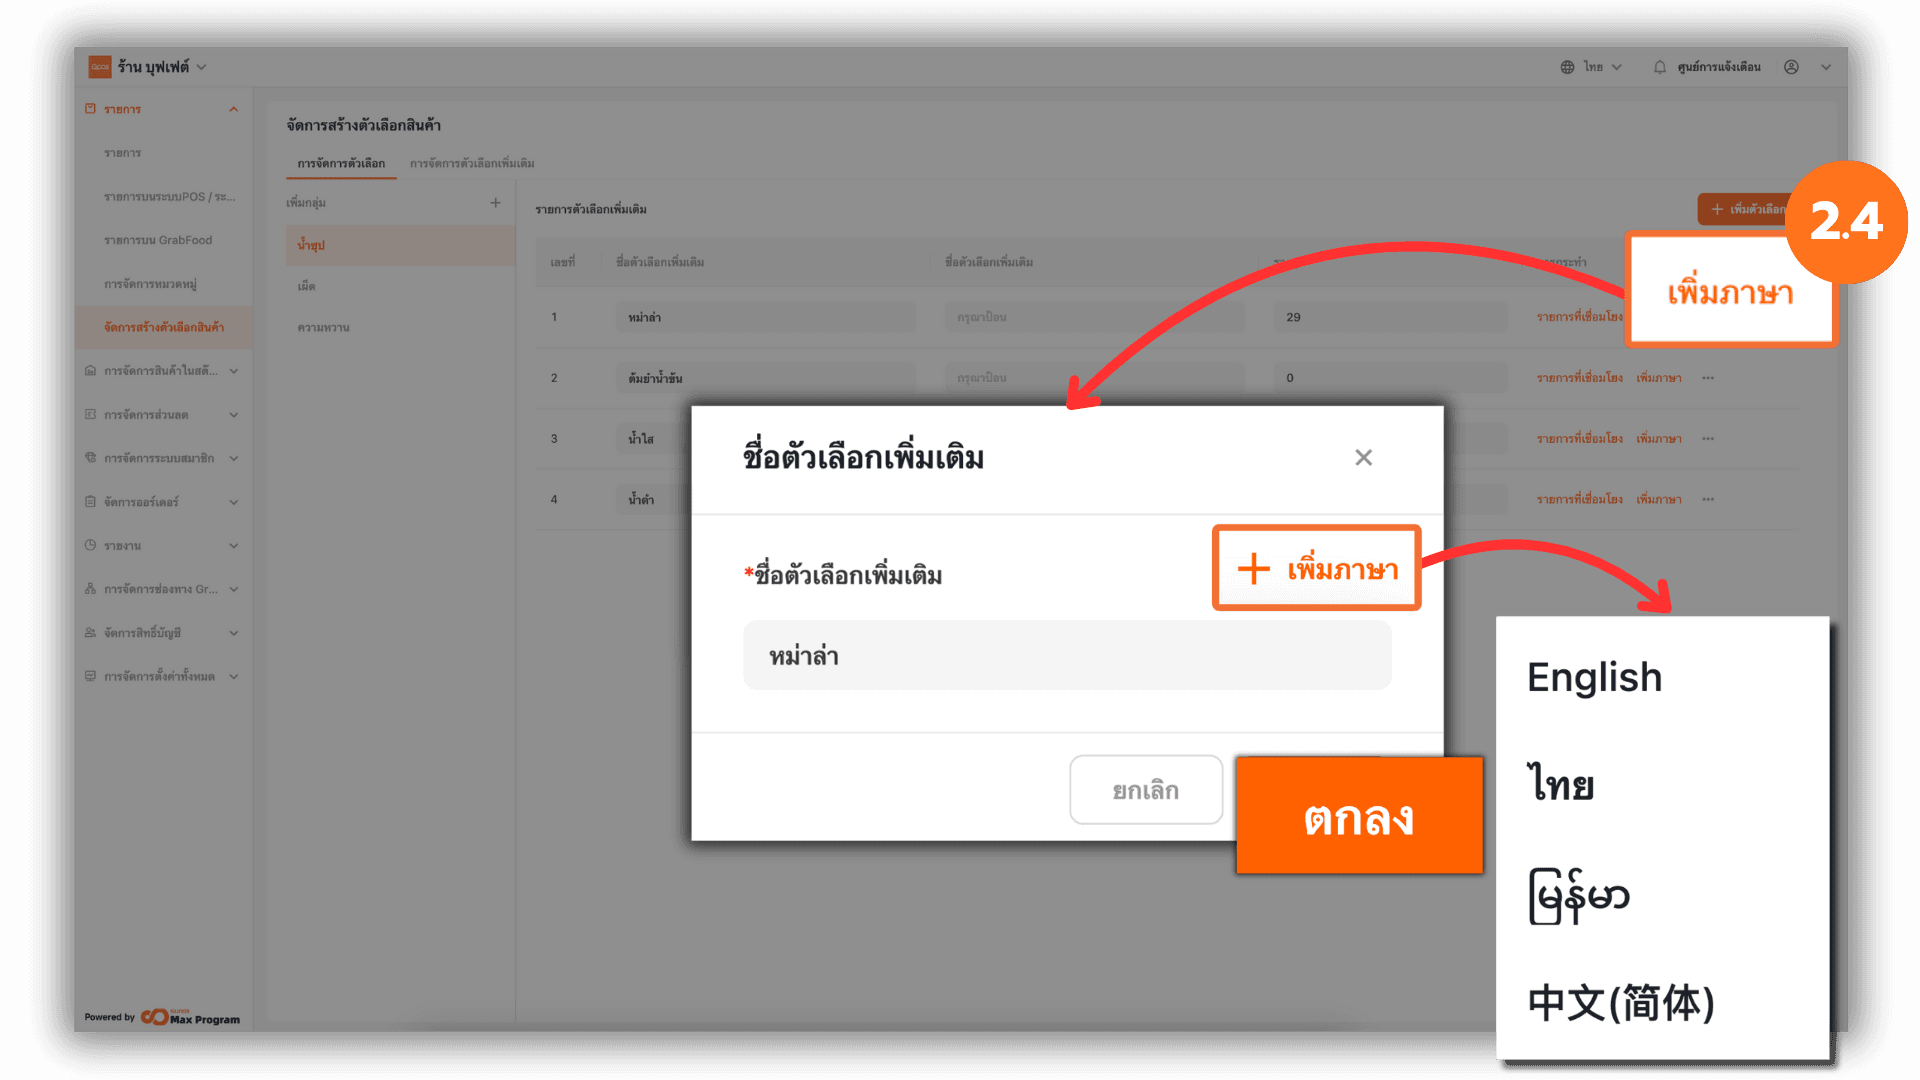
2.4 Adding Languages to Options
Click Add Language. The system will display the existing option names. Click + Add Language again to add option names in other languages, including Thai , English , Burmese and Chinese After adding the languages, click Ok to save.
Note : This feature is used for the QR code ordering system that supports multiple languages.
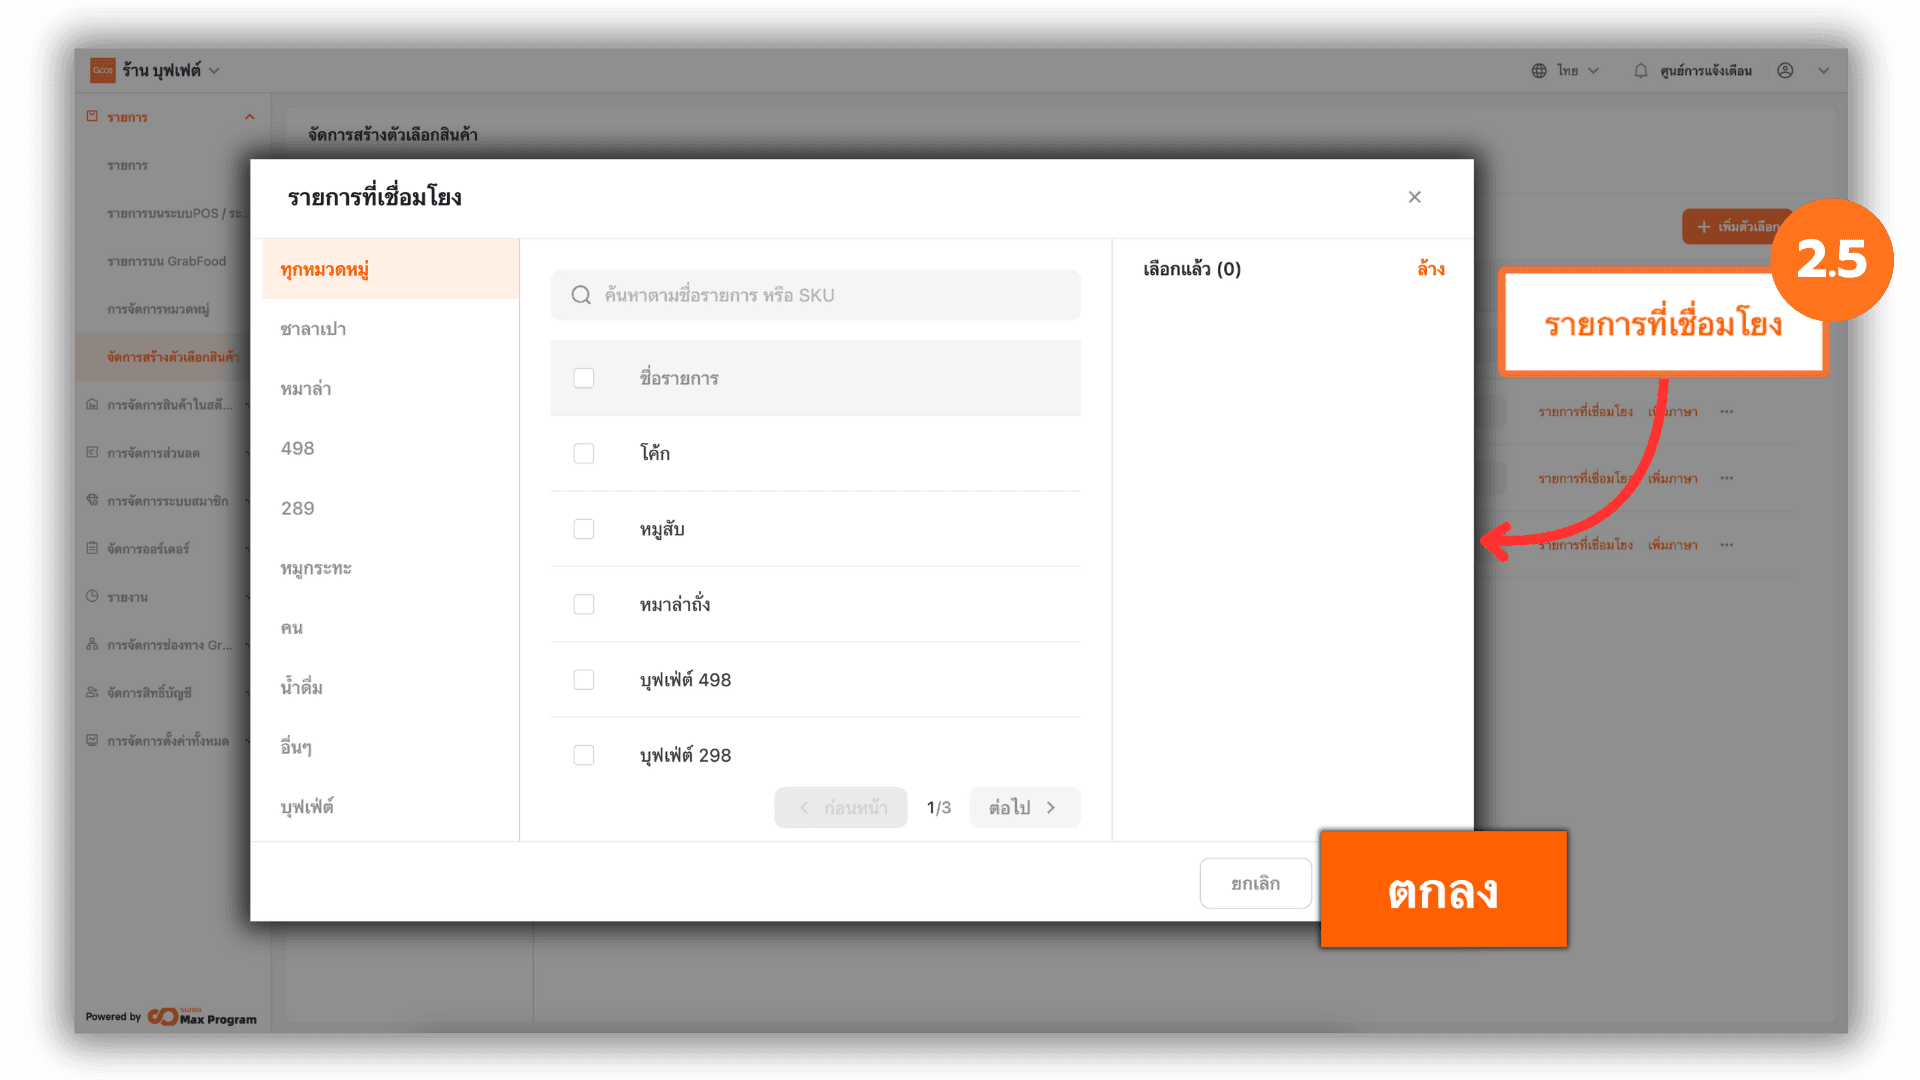
2.5 Linking Options to Products
If the option is created after the product has already been created, click Linked Items. The system will display all products. Select the products you want to link to the option, then click Ok to complete the linking.
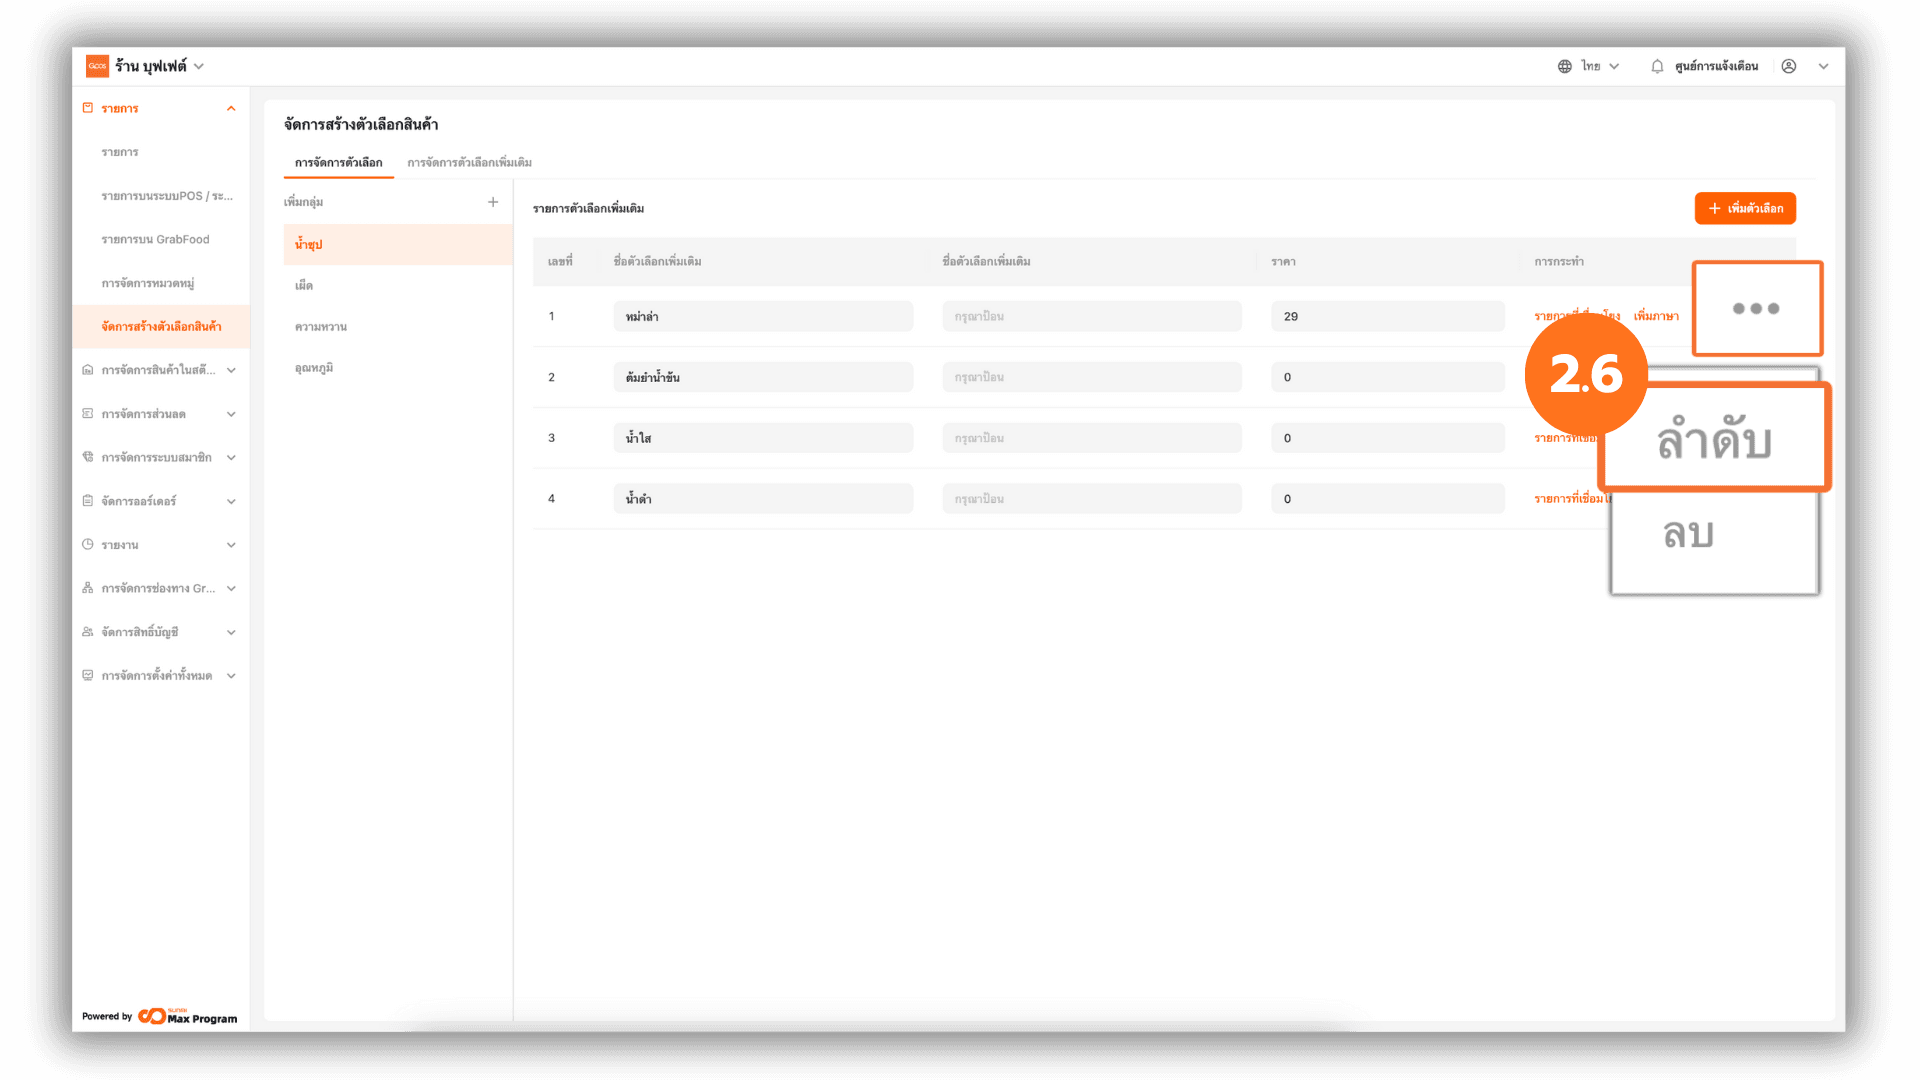
2.6 Arranging Option Order within a Group
Click the “...” button next to the option you want to arrange, then select “Sort.”
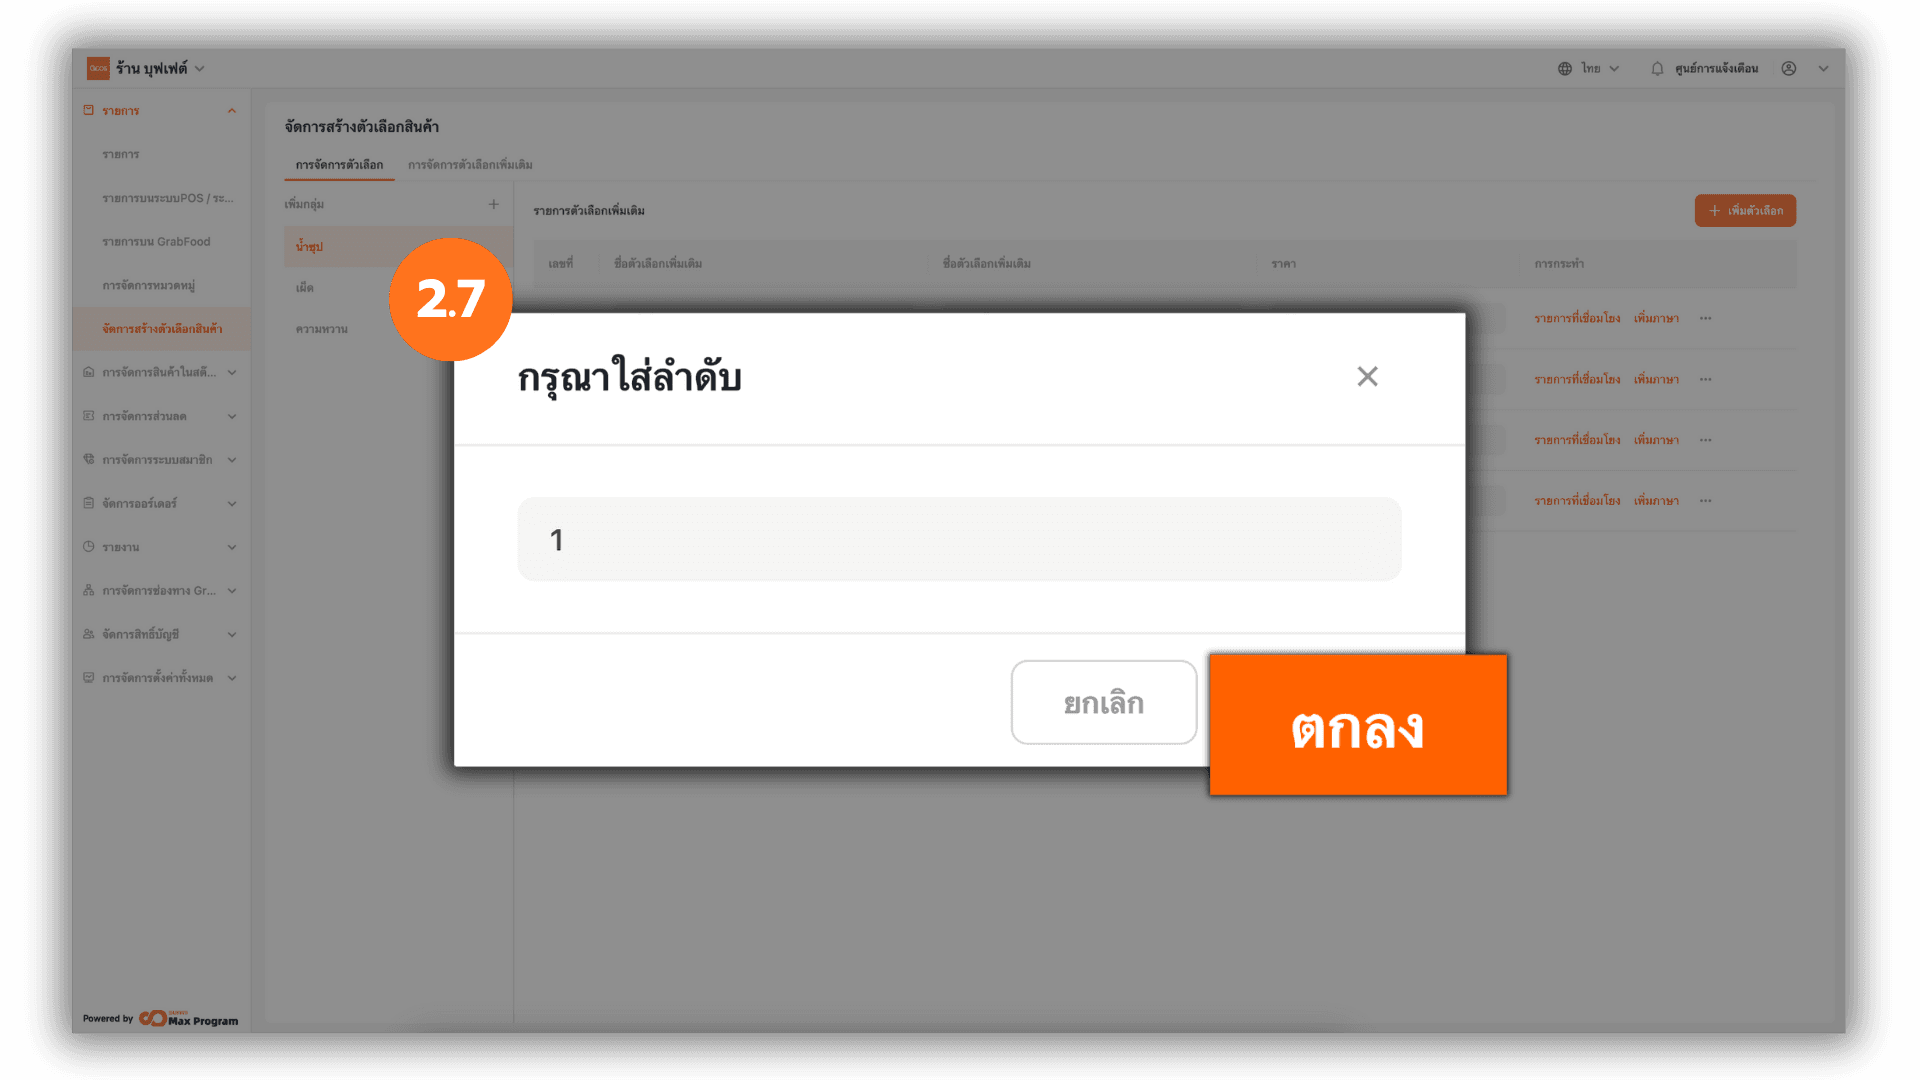
2.7 Setting Option Order
The system will display a field to enter the desired order number. Enter the order number and click Ok to save the order setting.
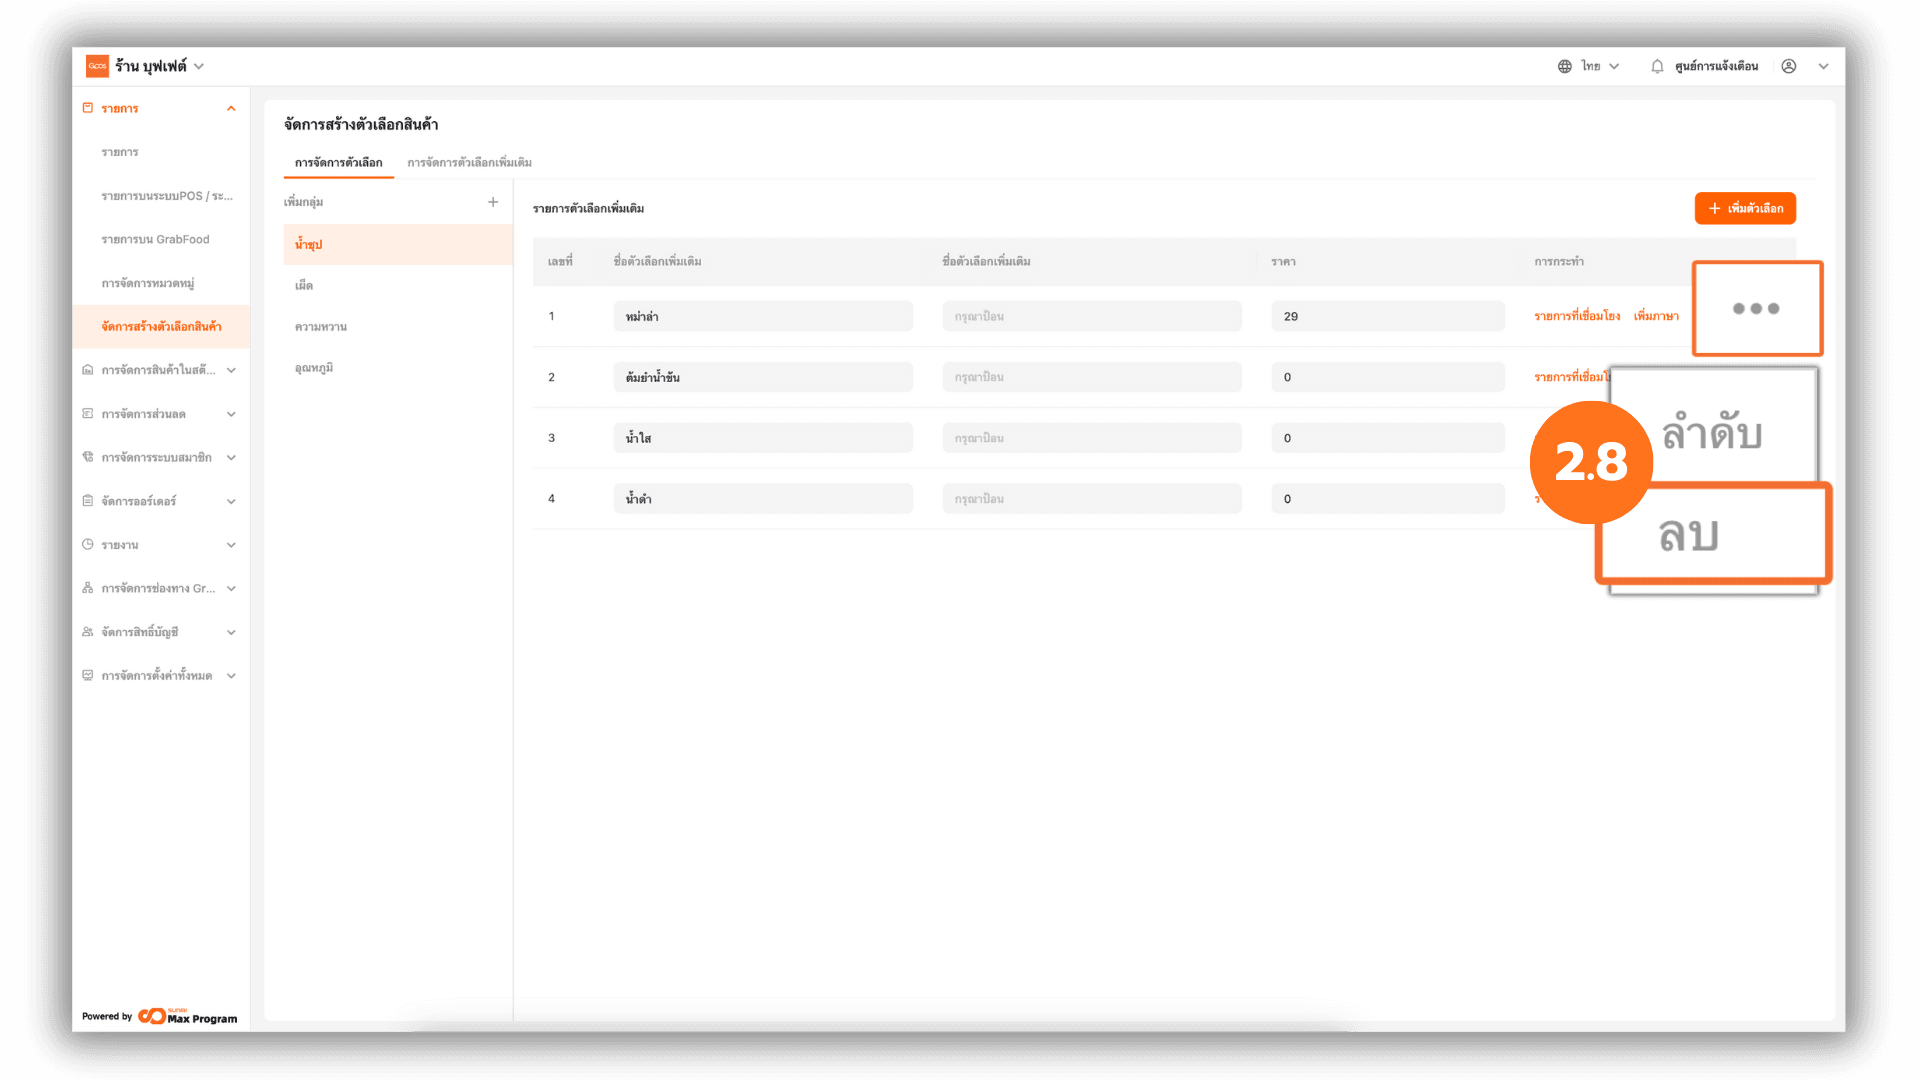
2.8 Deleting an Option
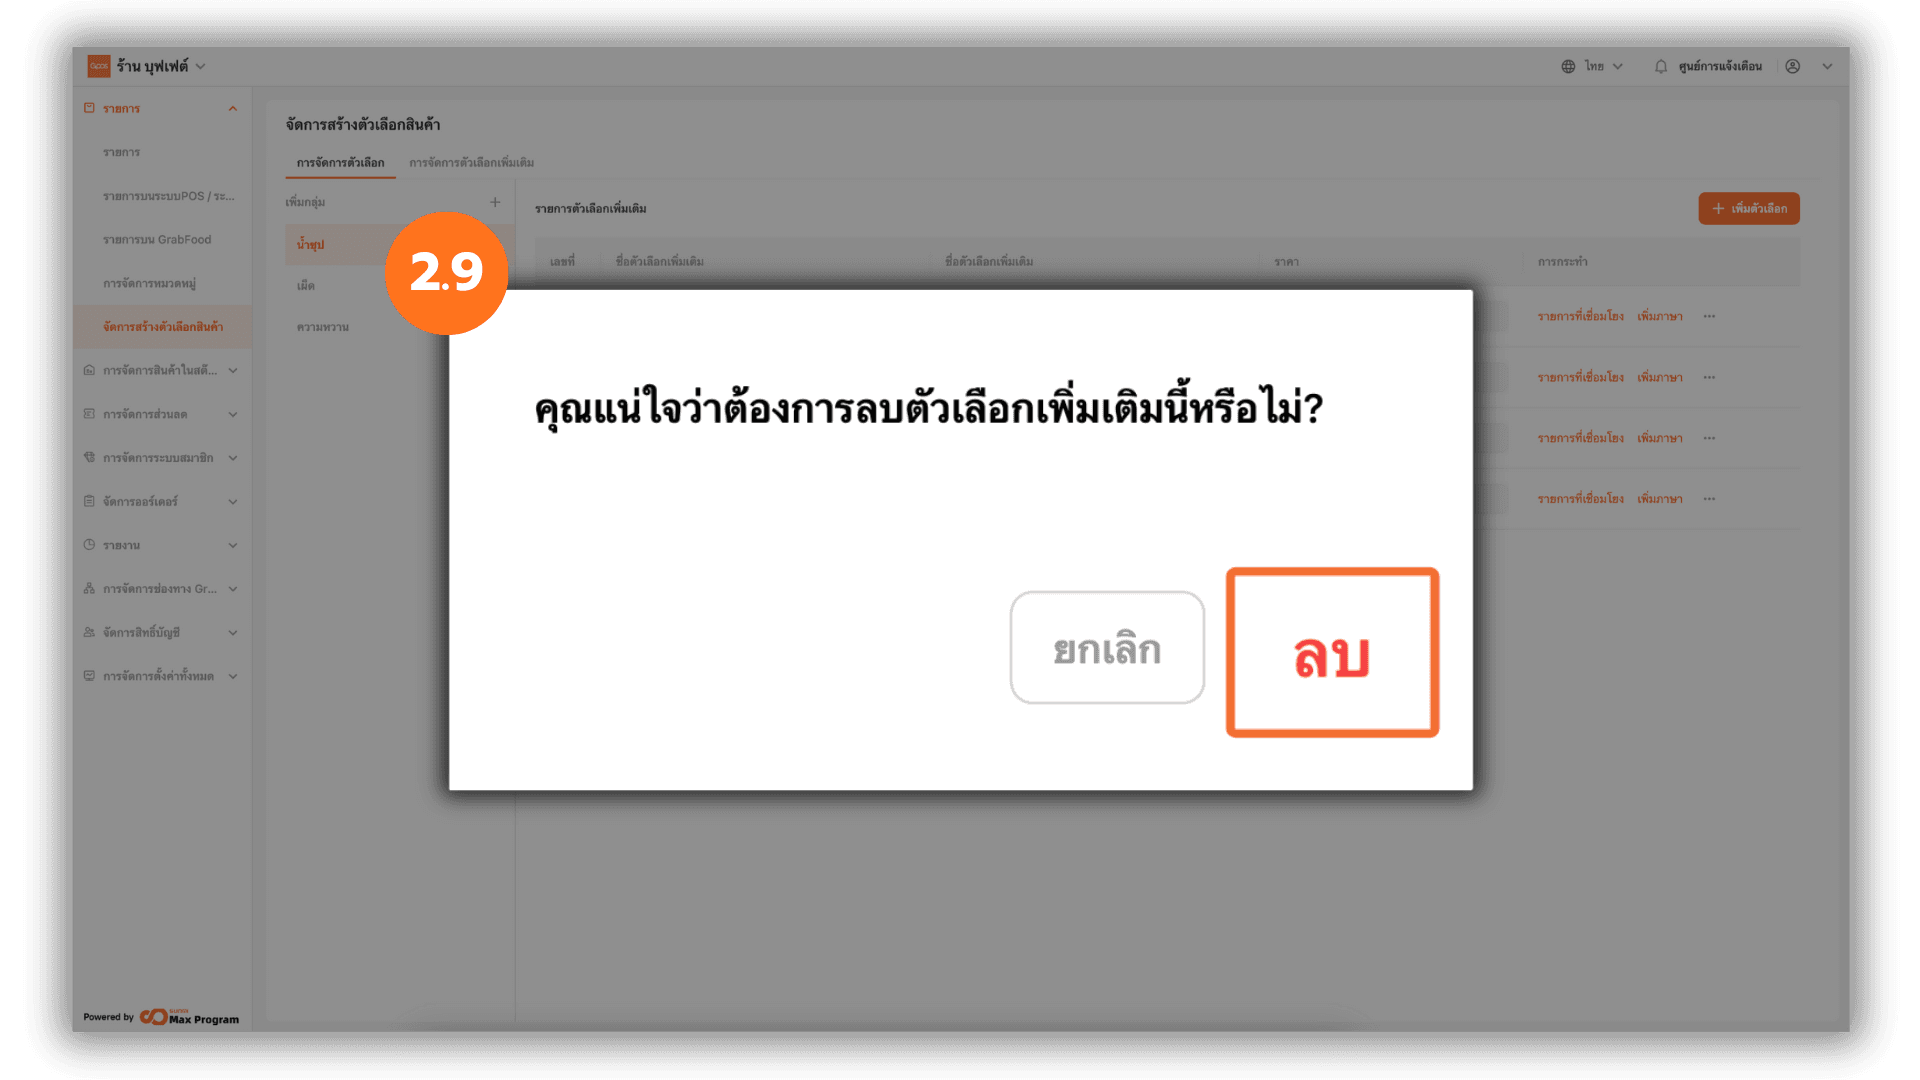
Click the “...” button next to the option you want to delete, then select “Delete.”
Note : An option can only be deleted if it has not been linked to any products.
2.9 Confirming Option Deletion
The system will display a confirmation warning. Click Delete to confirm the deletion of the product option.