Create Options / Additional Options (Back Office System)
2026-03-27 10:24
This guide helps users edit and configure product items correctly and systematically, reducing errors in option settings and ensuring smooth and efficient sales through POS and connected platforms.
1. Log into the Back Office System
Go to the websit login.gpos.co.th, enter your email and password, then click Log In.
Click "Item > Item Attribute
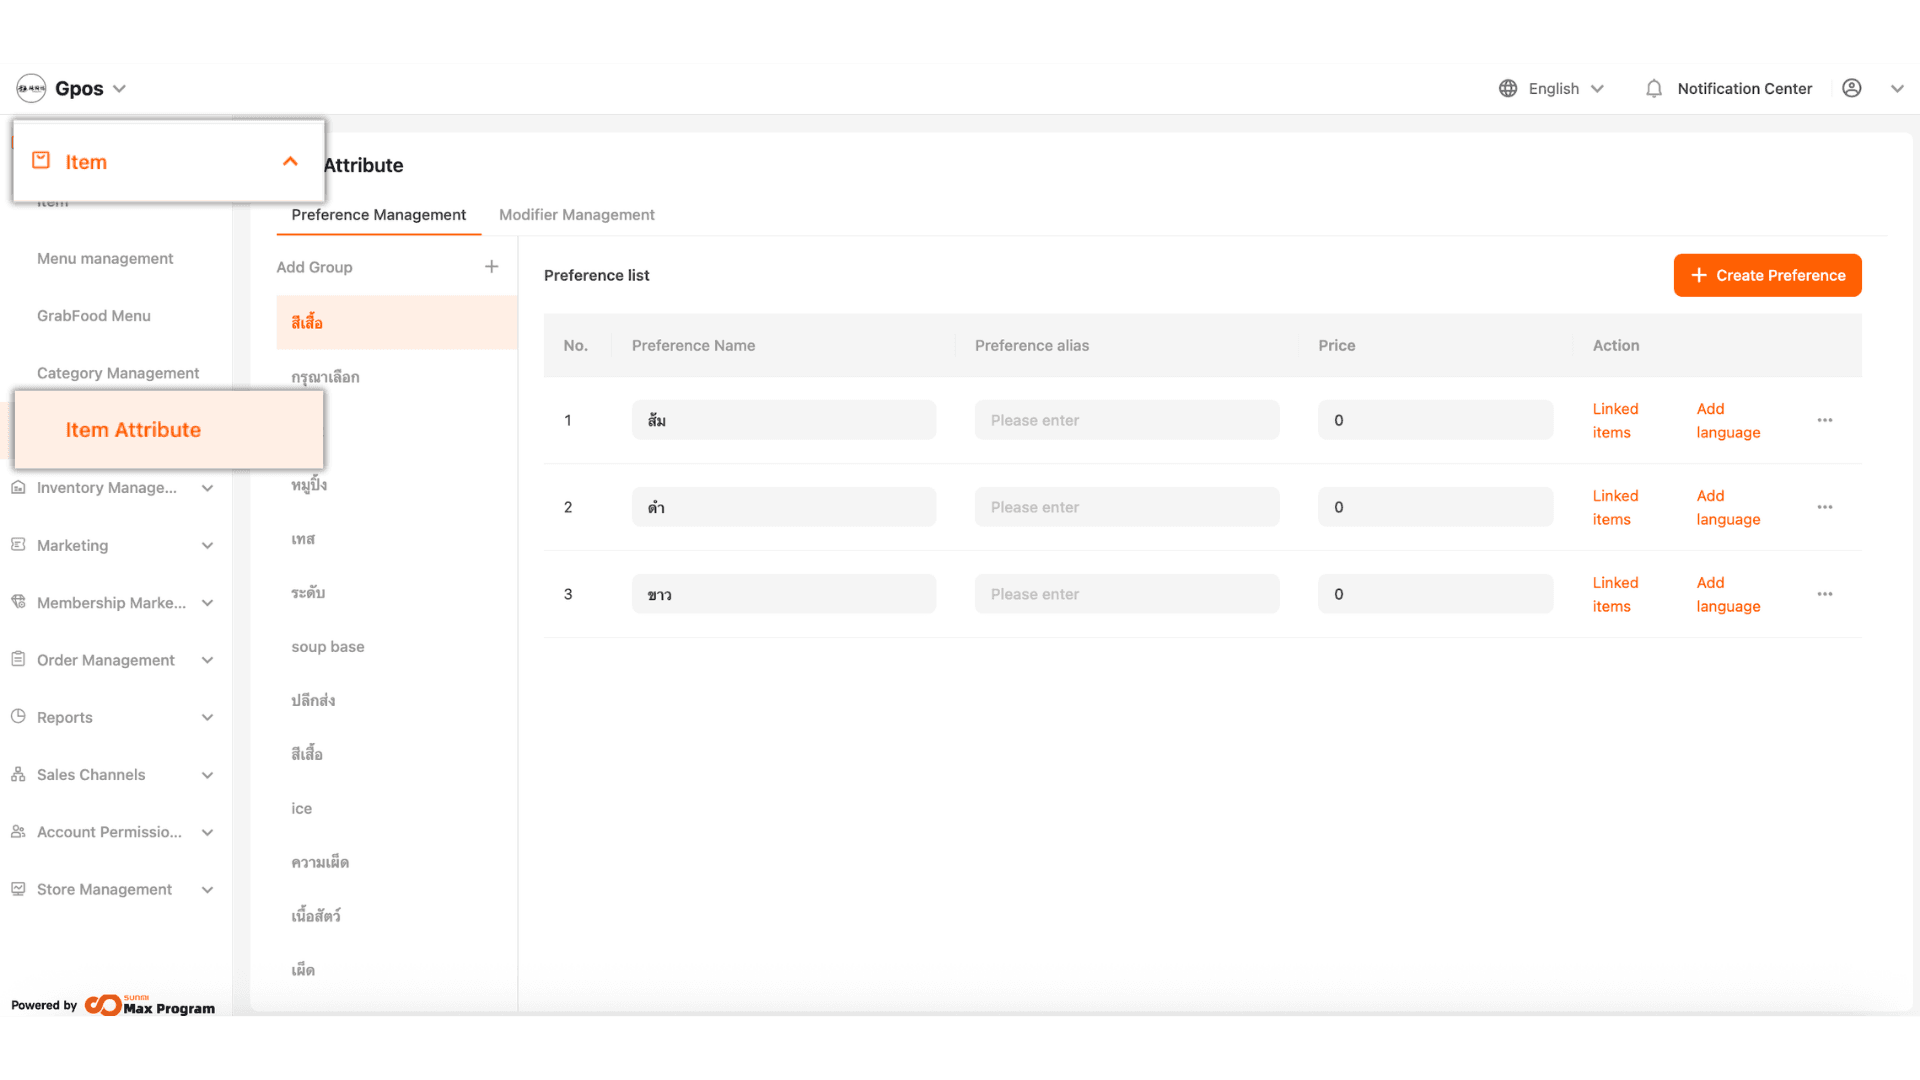
2. You can create options in the Preference Management or Modifier Management section.
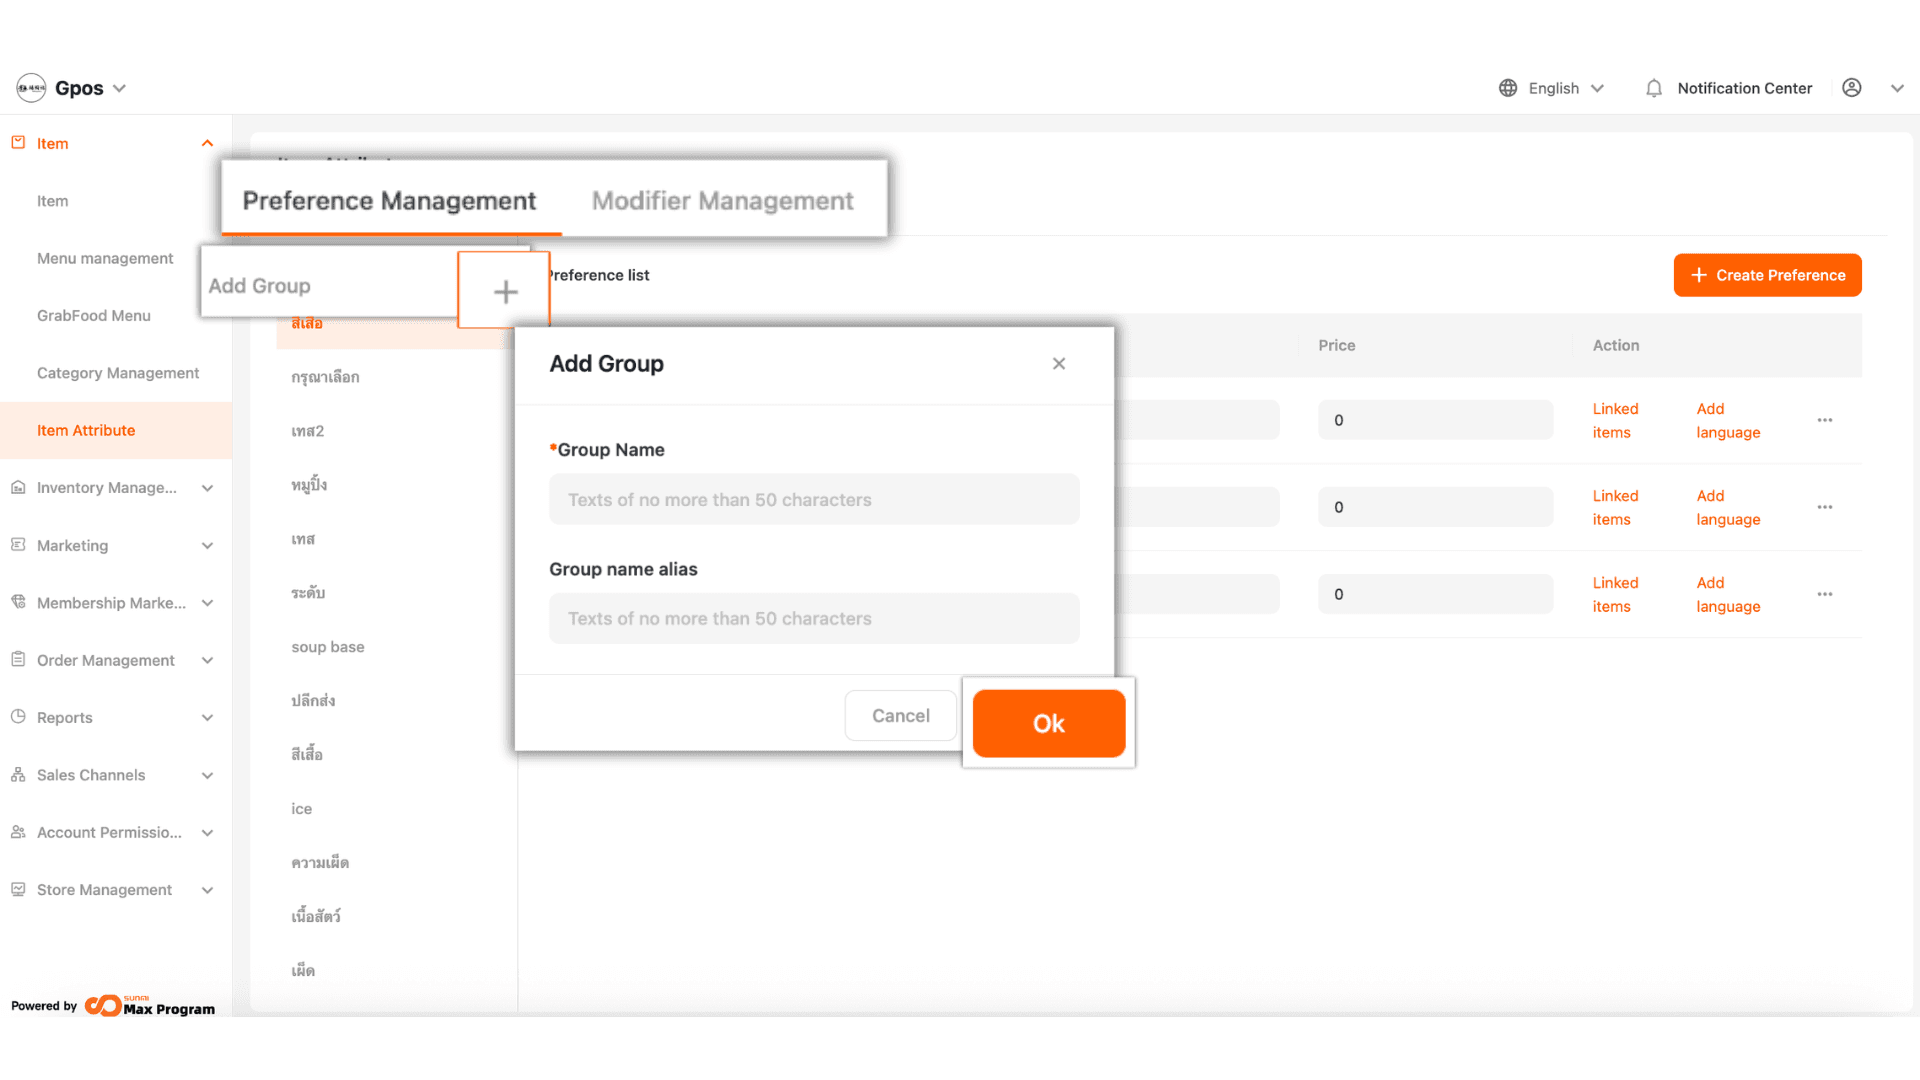
Then click + in the Add Group field to create a category first.
Group Name is the name displayed on the POS system.
Group Name Alias is the name displayed on the Grab system.
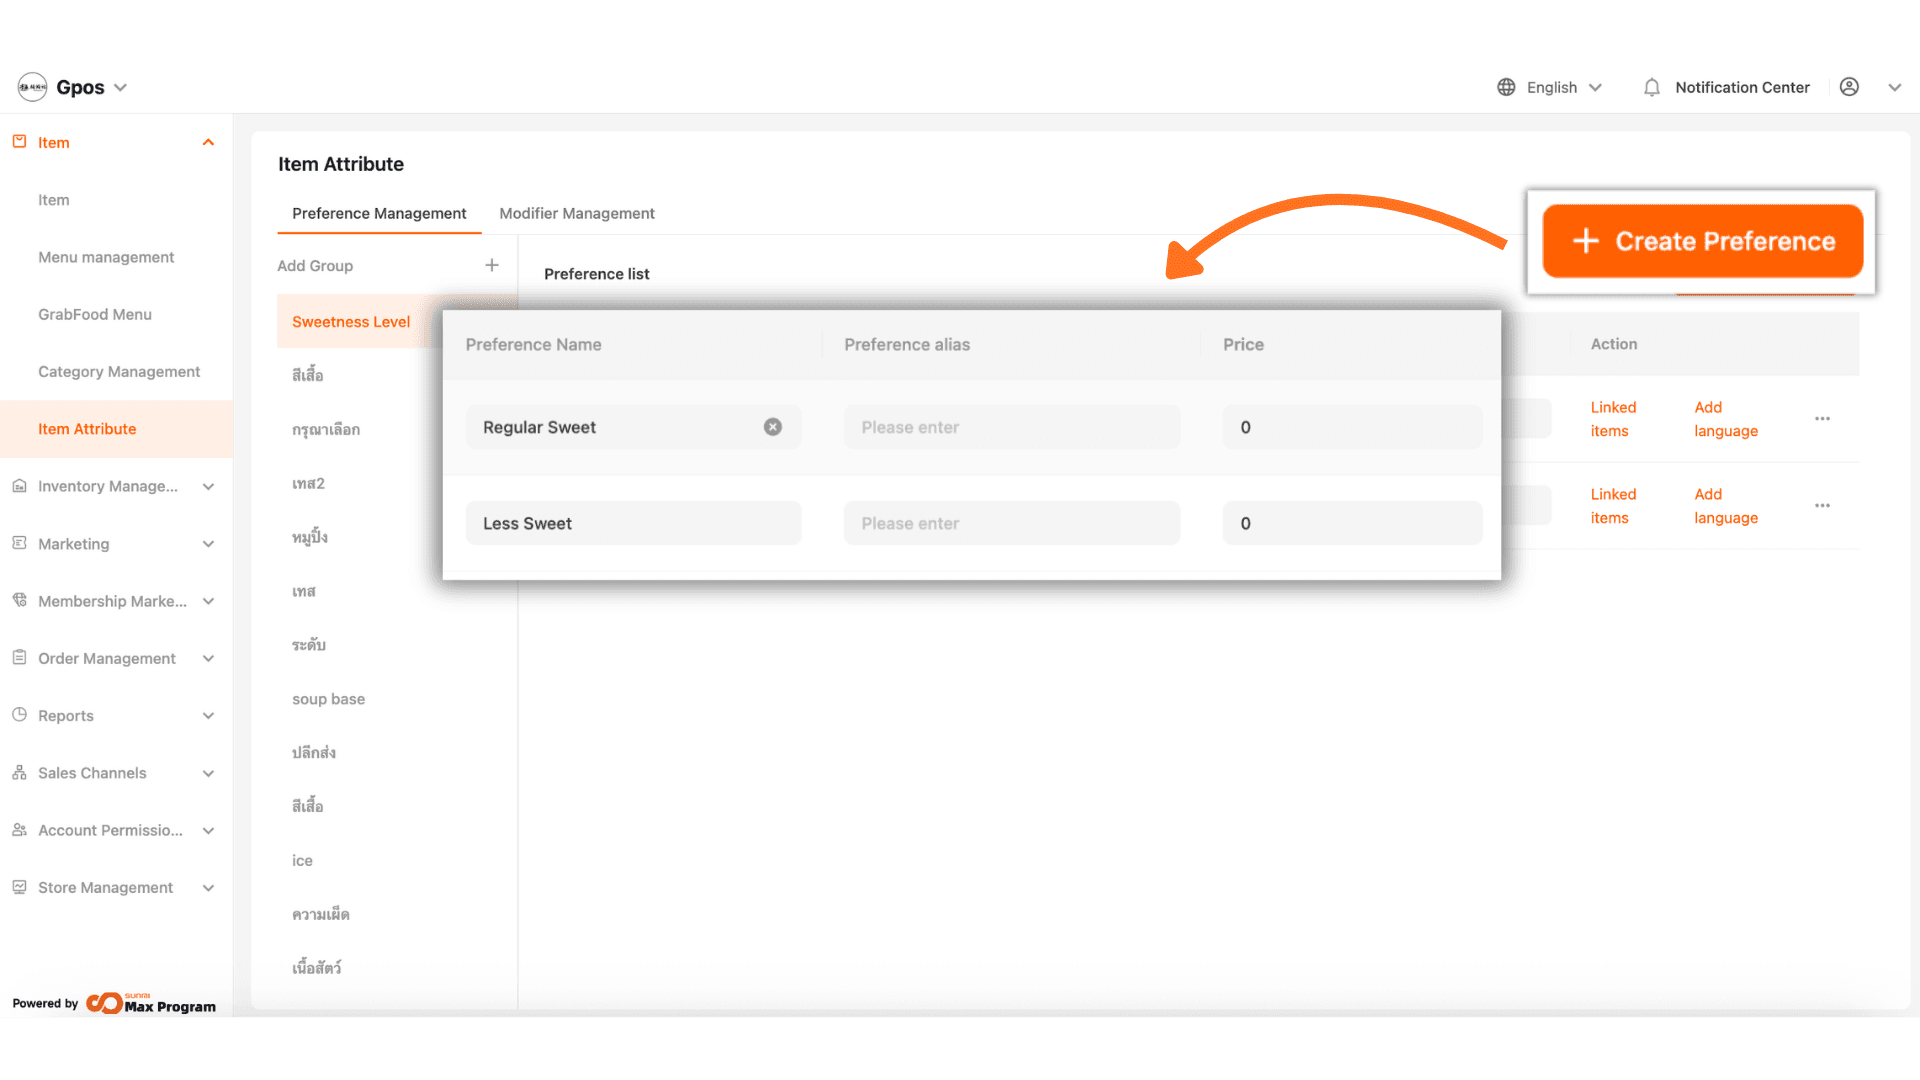
3. Click the + Create Preference button to add options, then enter the name/price for each option in the fields and add them one by one.
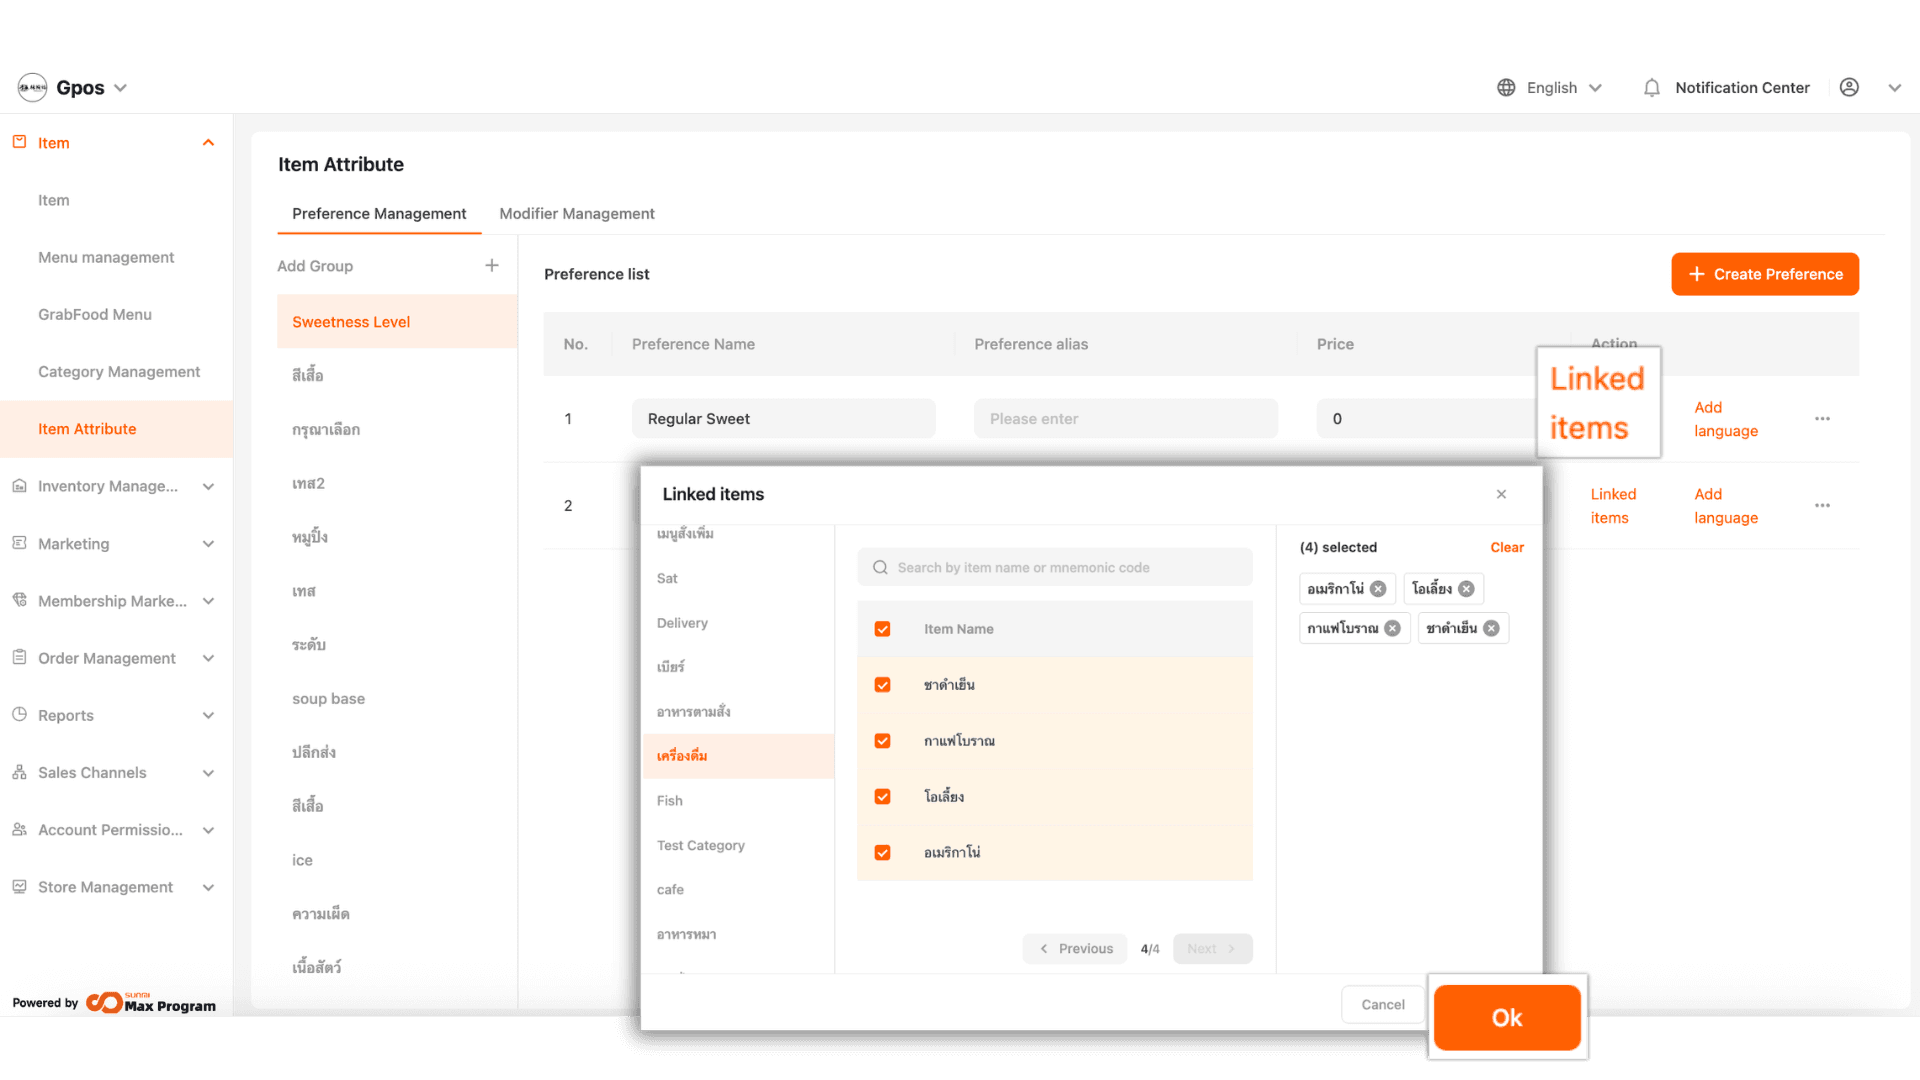
4. Click the ‘Linked Item’ button to select the desired item, then click OK.
5. Add Language is a button used to add languages for the QR ordering system. It supports translation in 4 languages, as shown in the example image.
If you want to delete or reorder options, you can click the ‘…’ button as shown in the example.
