Set POS Sales Time
2026-05-19 17:43
This feature helps manage separate sales times for each menu or product item based on the store’s preferred schedule. It also allows specific product groups to be available only on selected days and times.
1. Log in to Back Office
Go to login.gpos.co.th, enter your Email and Password, then click Log in.
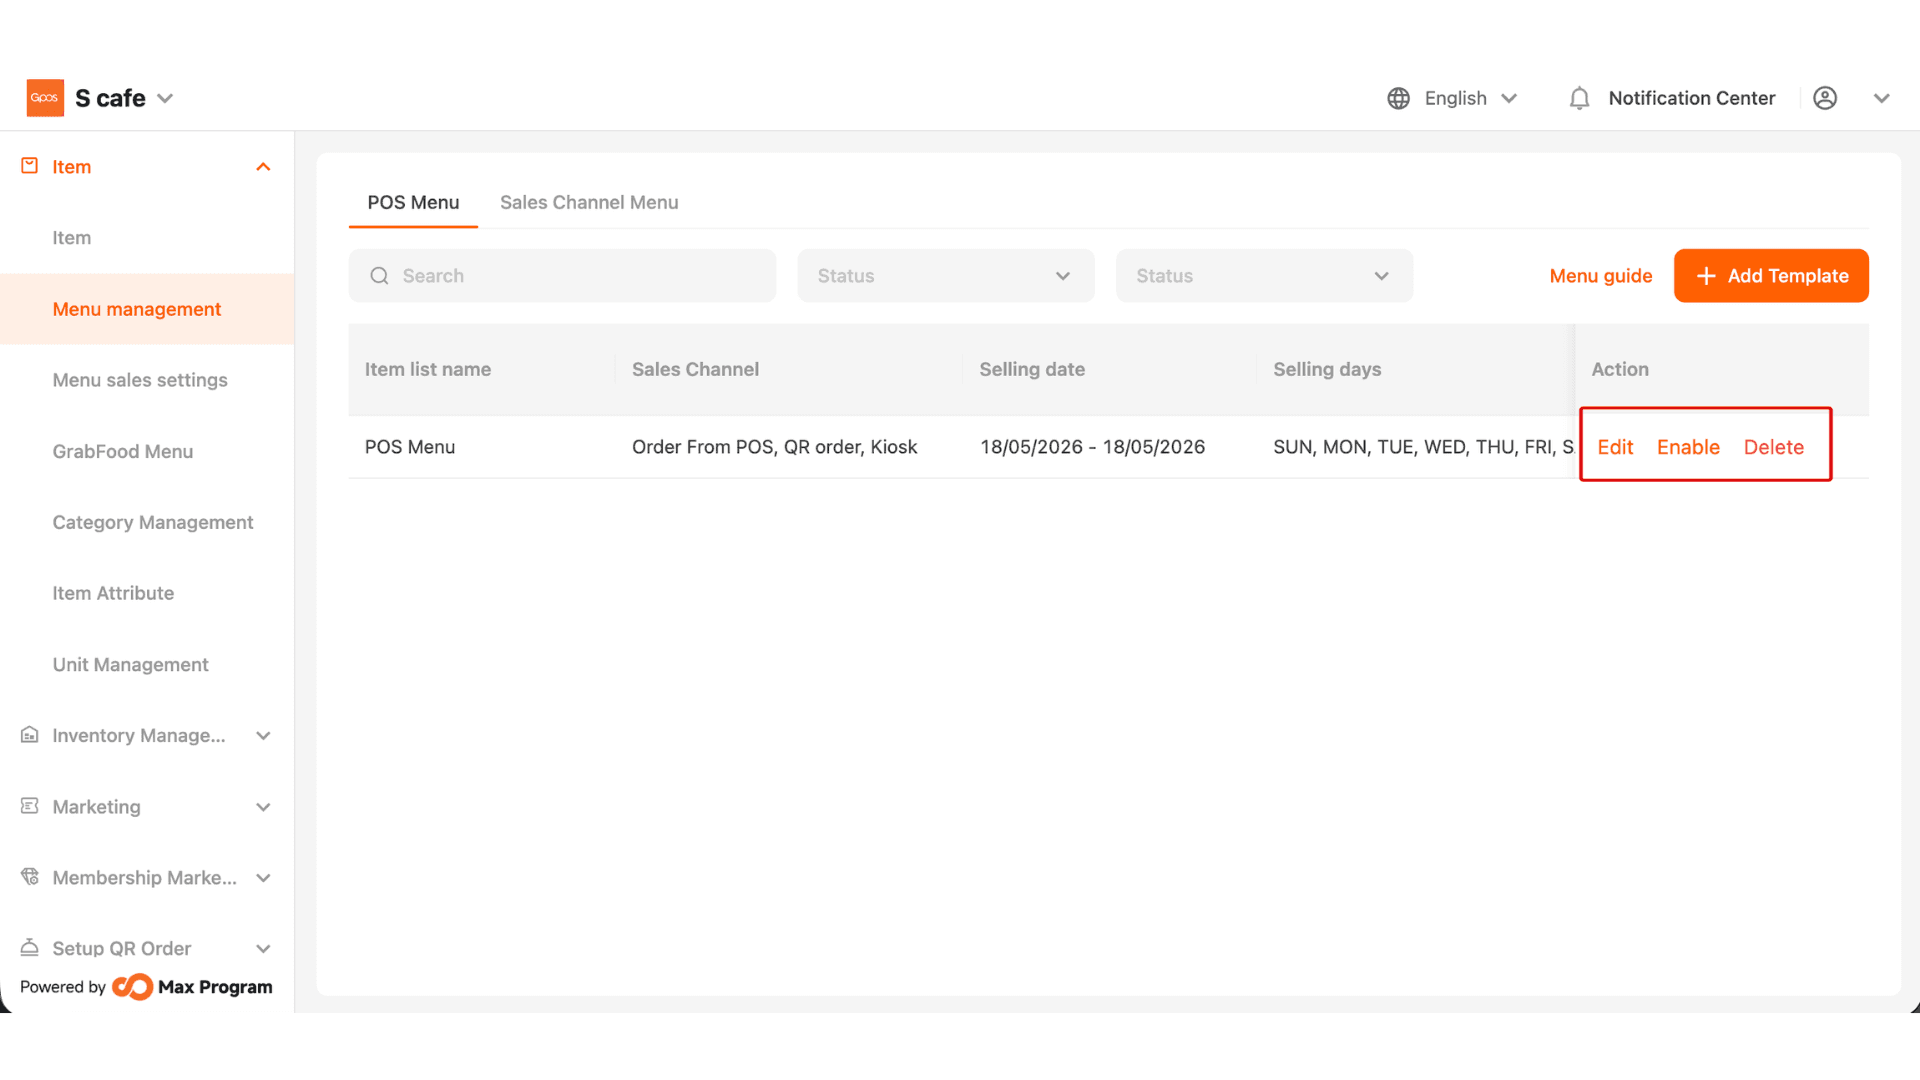
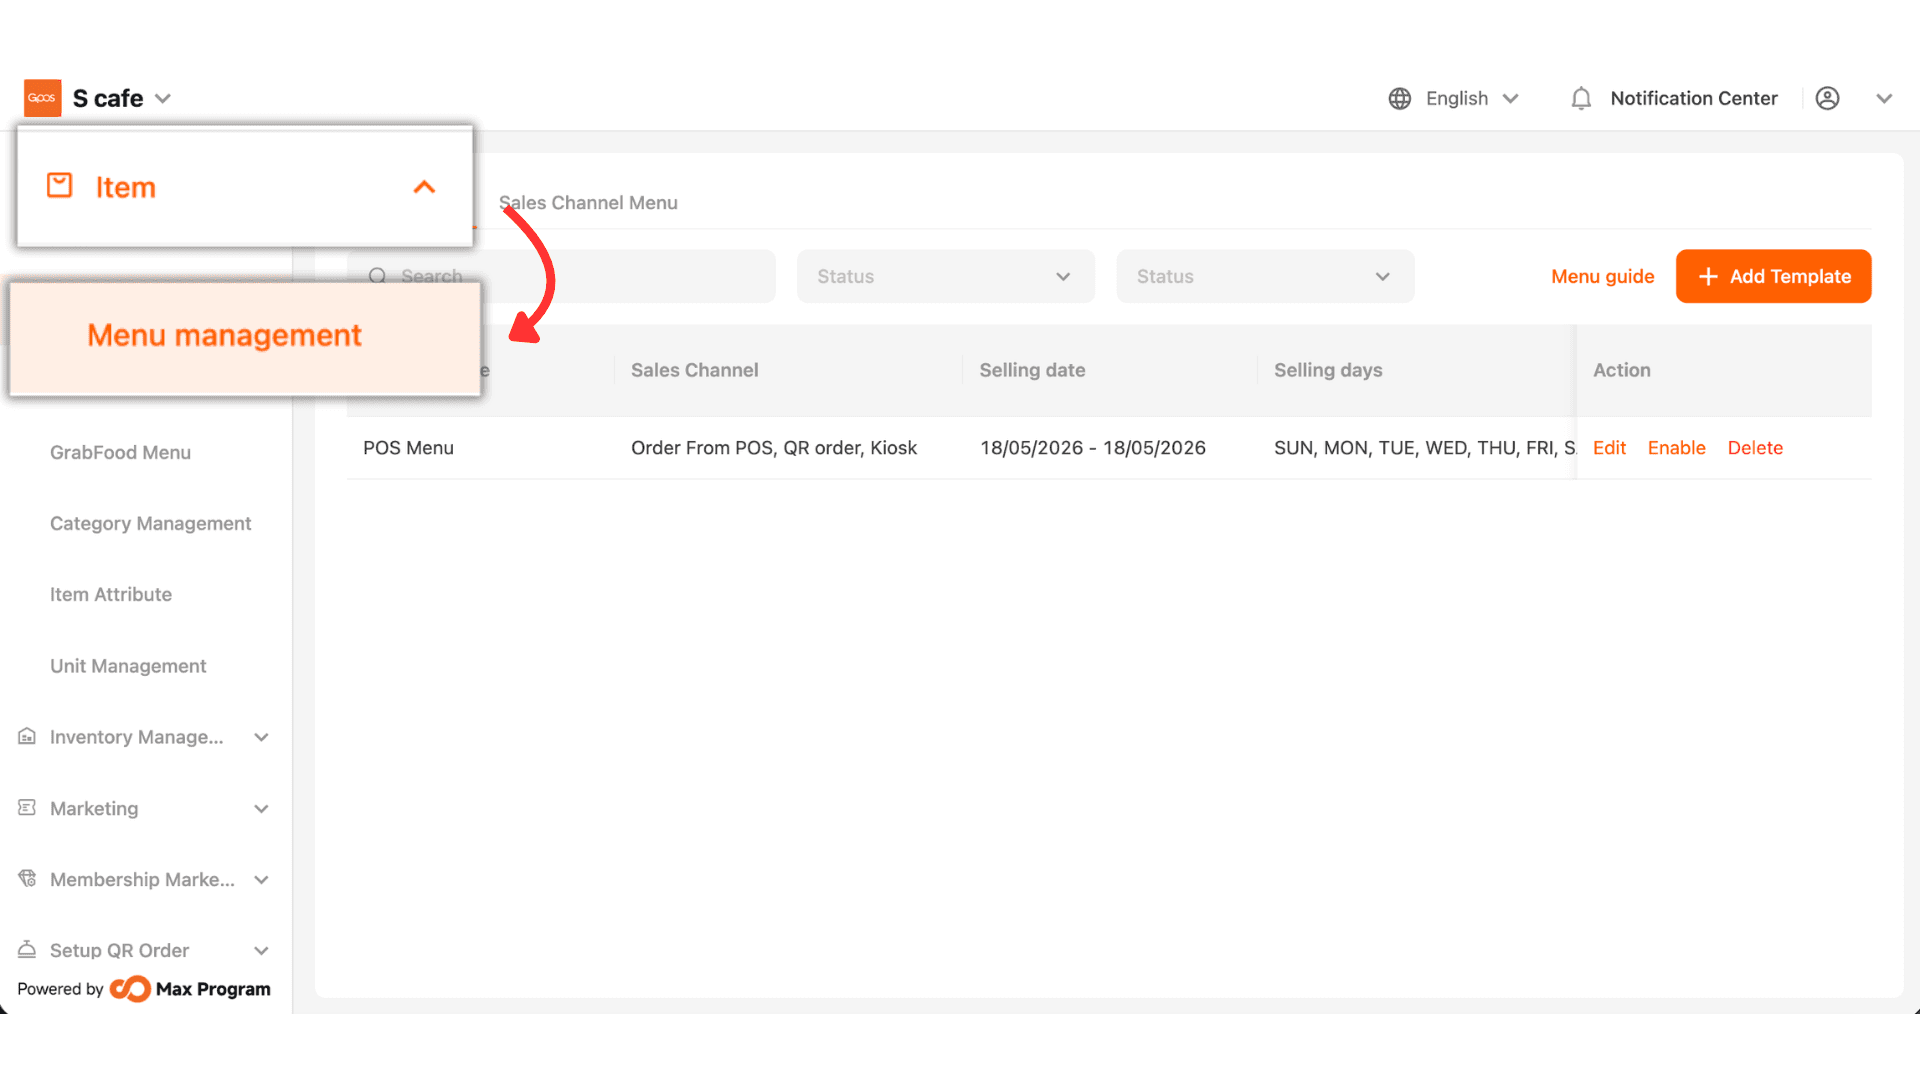
Click Items > Menu management.
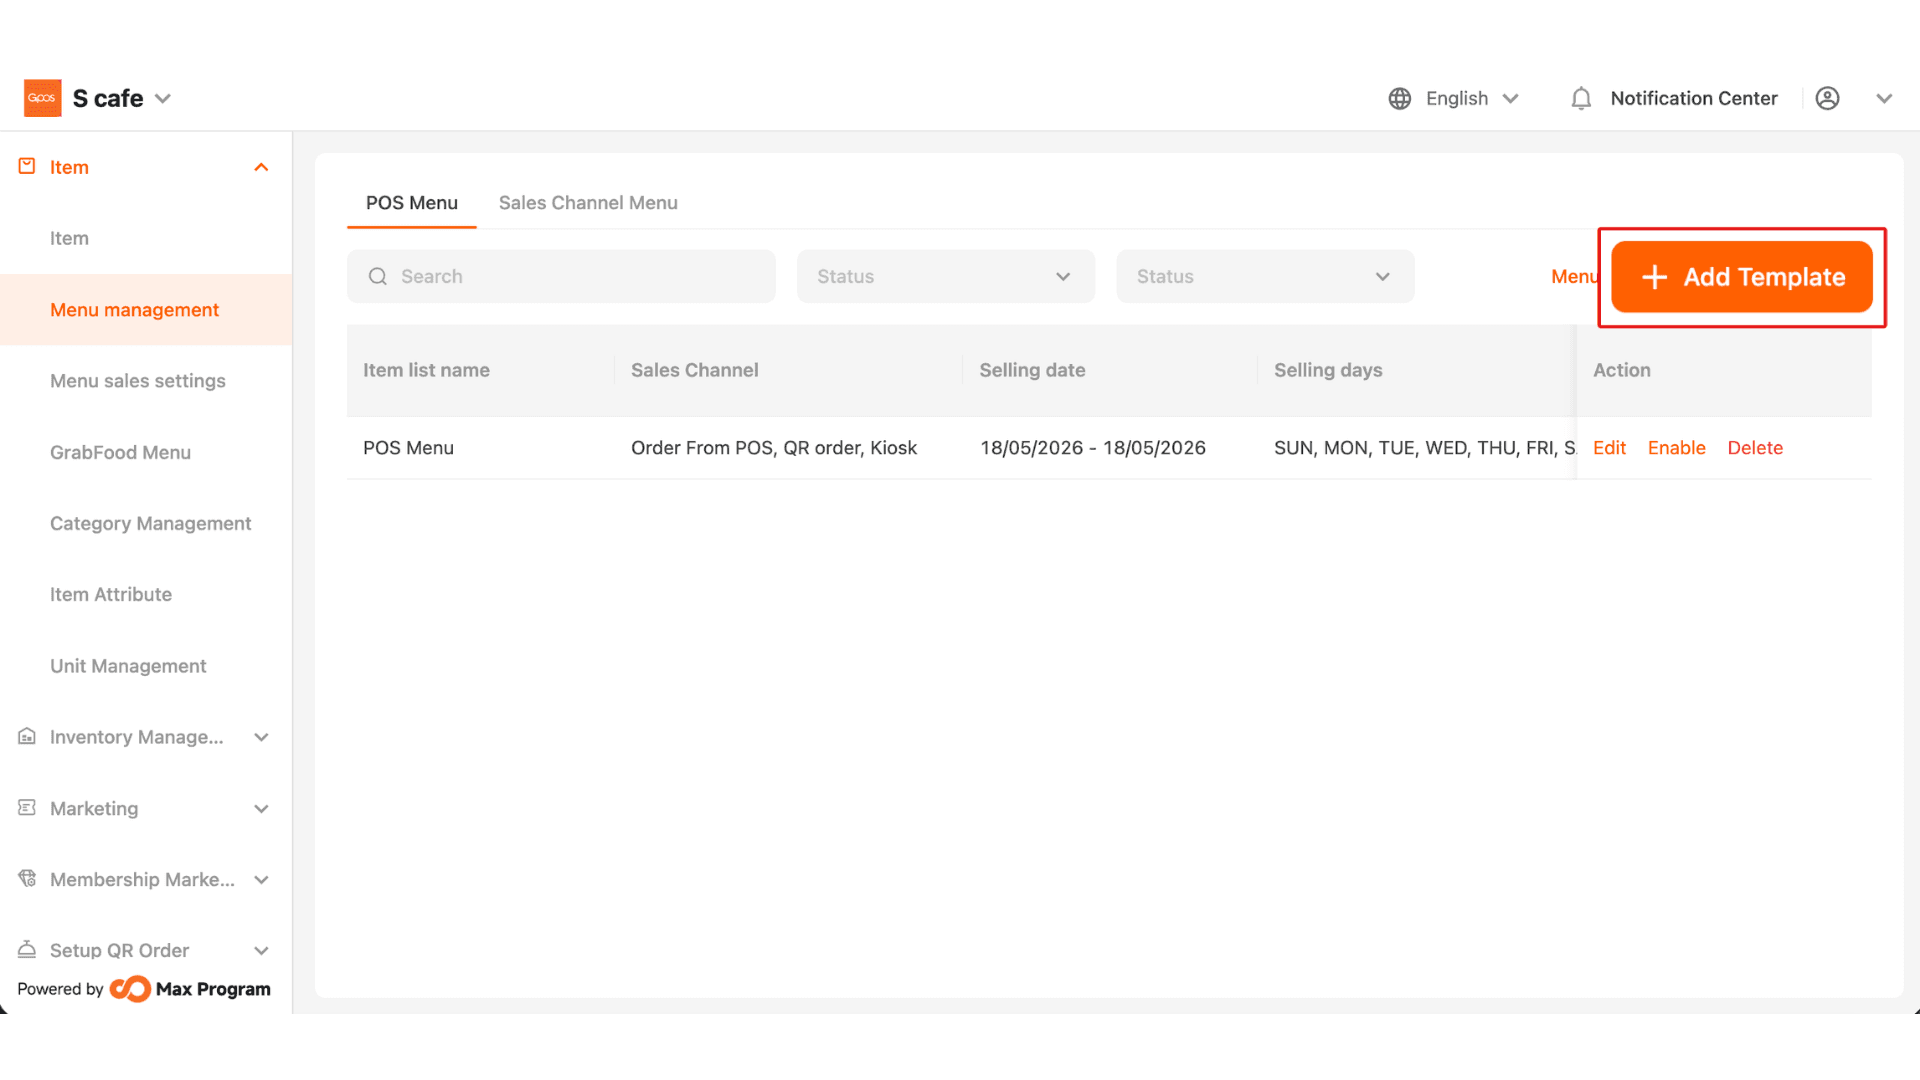
2. Click “Add Template".
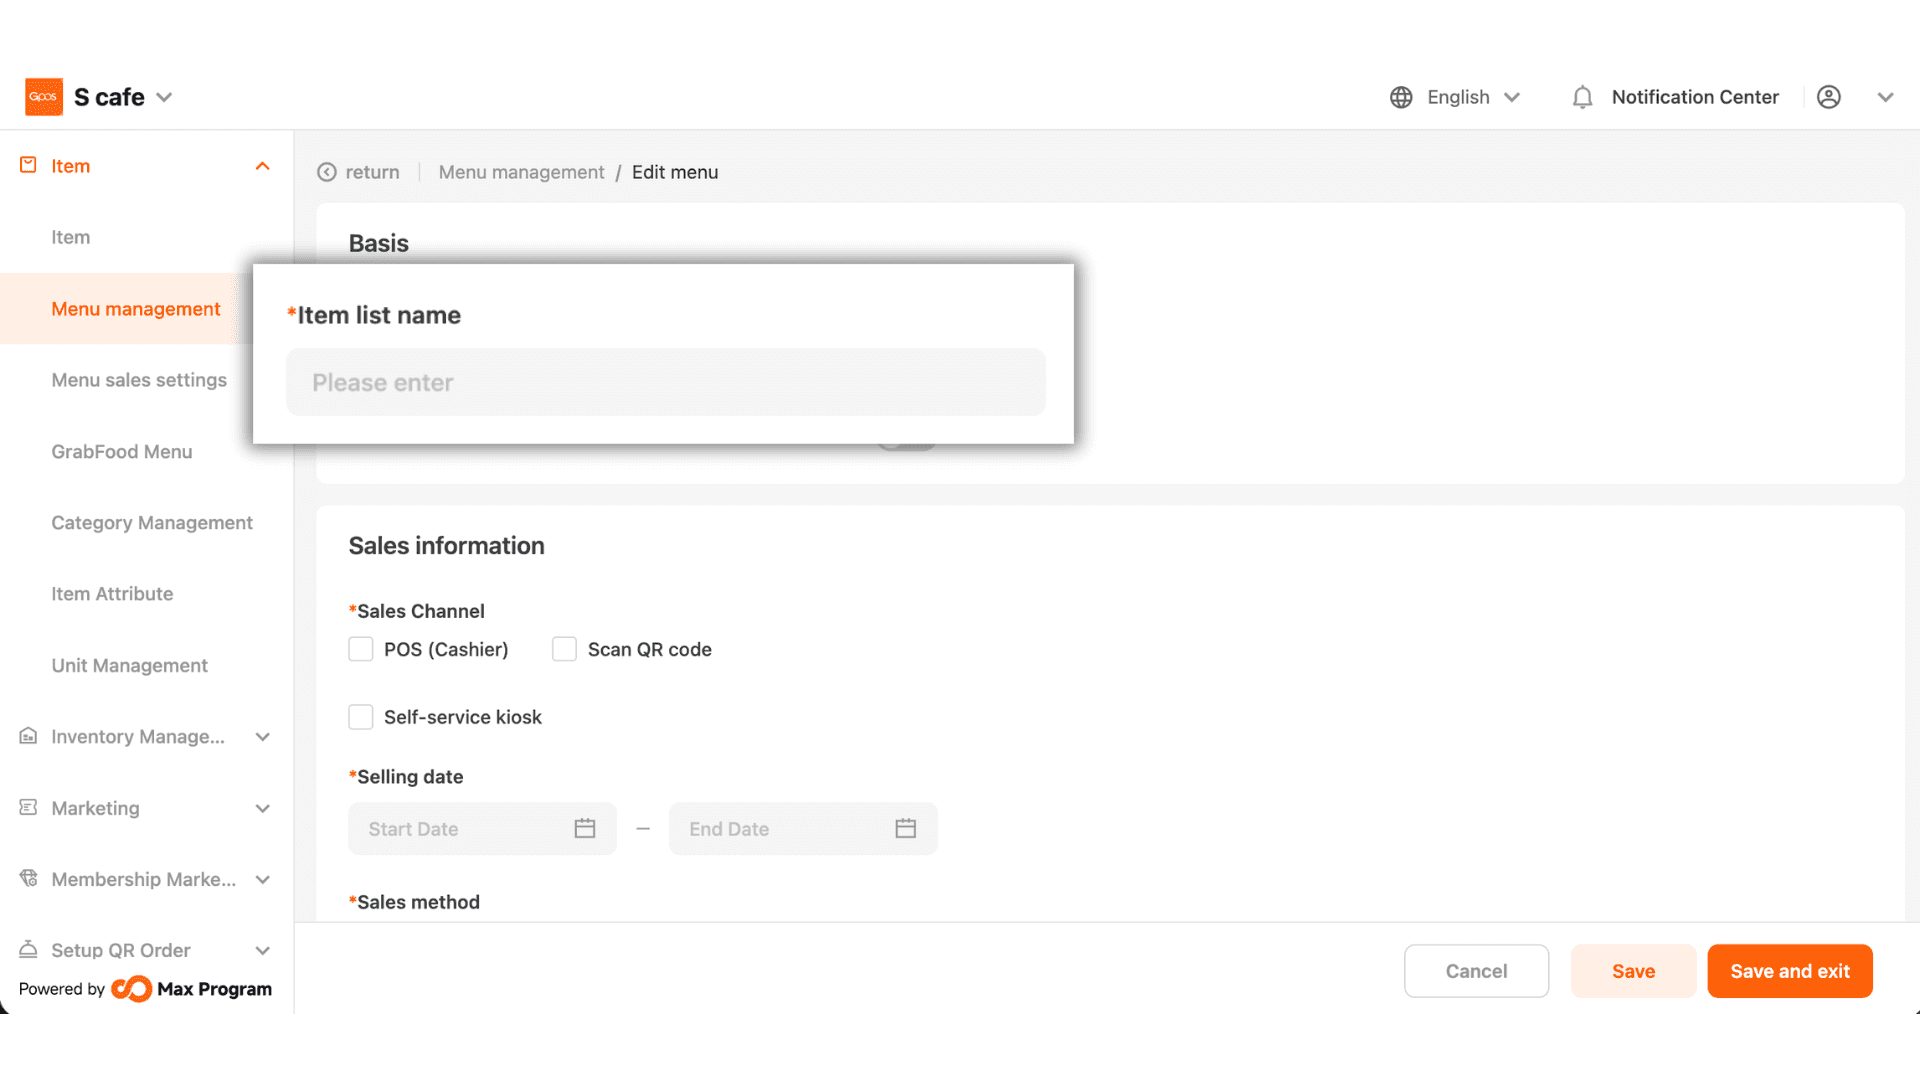
3. Enter the template name in the “Item List Name” field.
4. Click “Enable” status to activate this template.
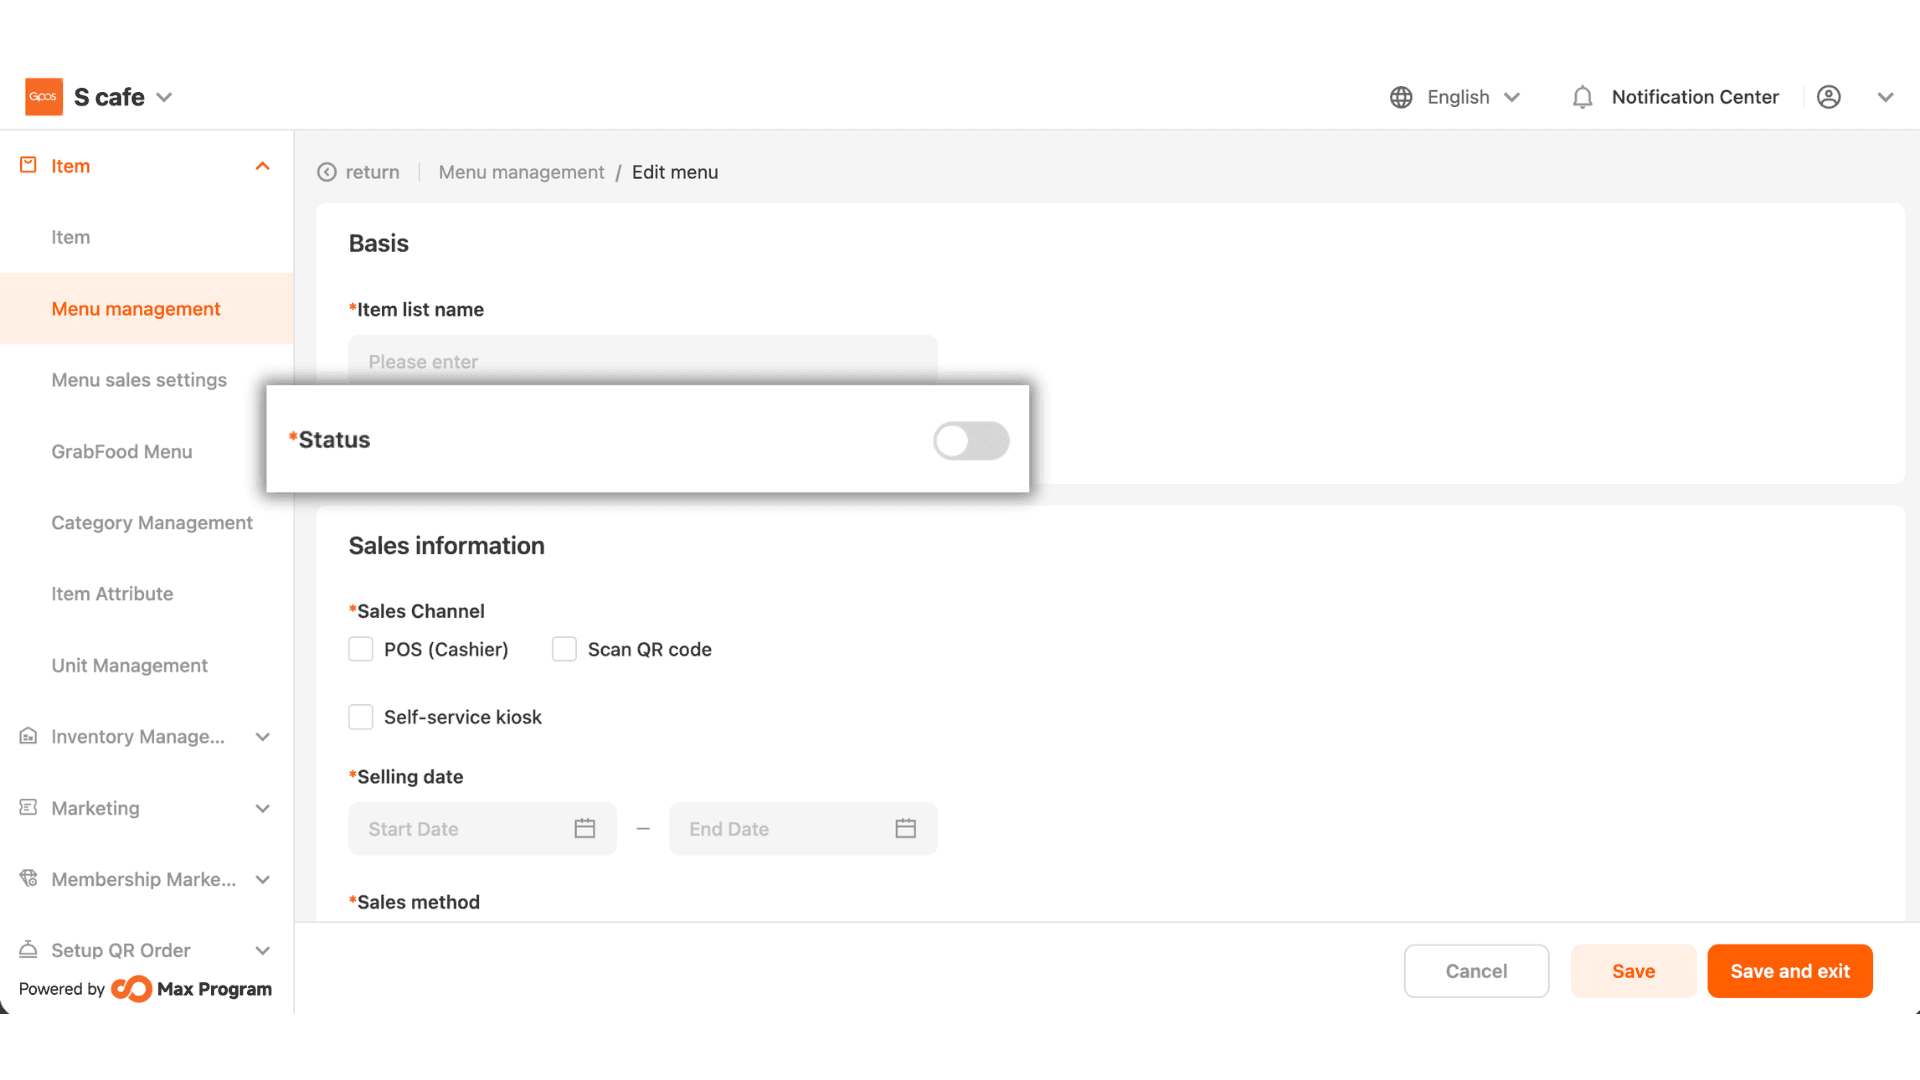
5. Select the sales channel, such as POS (Cashier) or Scan QR Code.

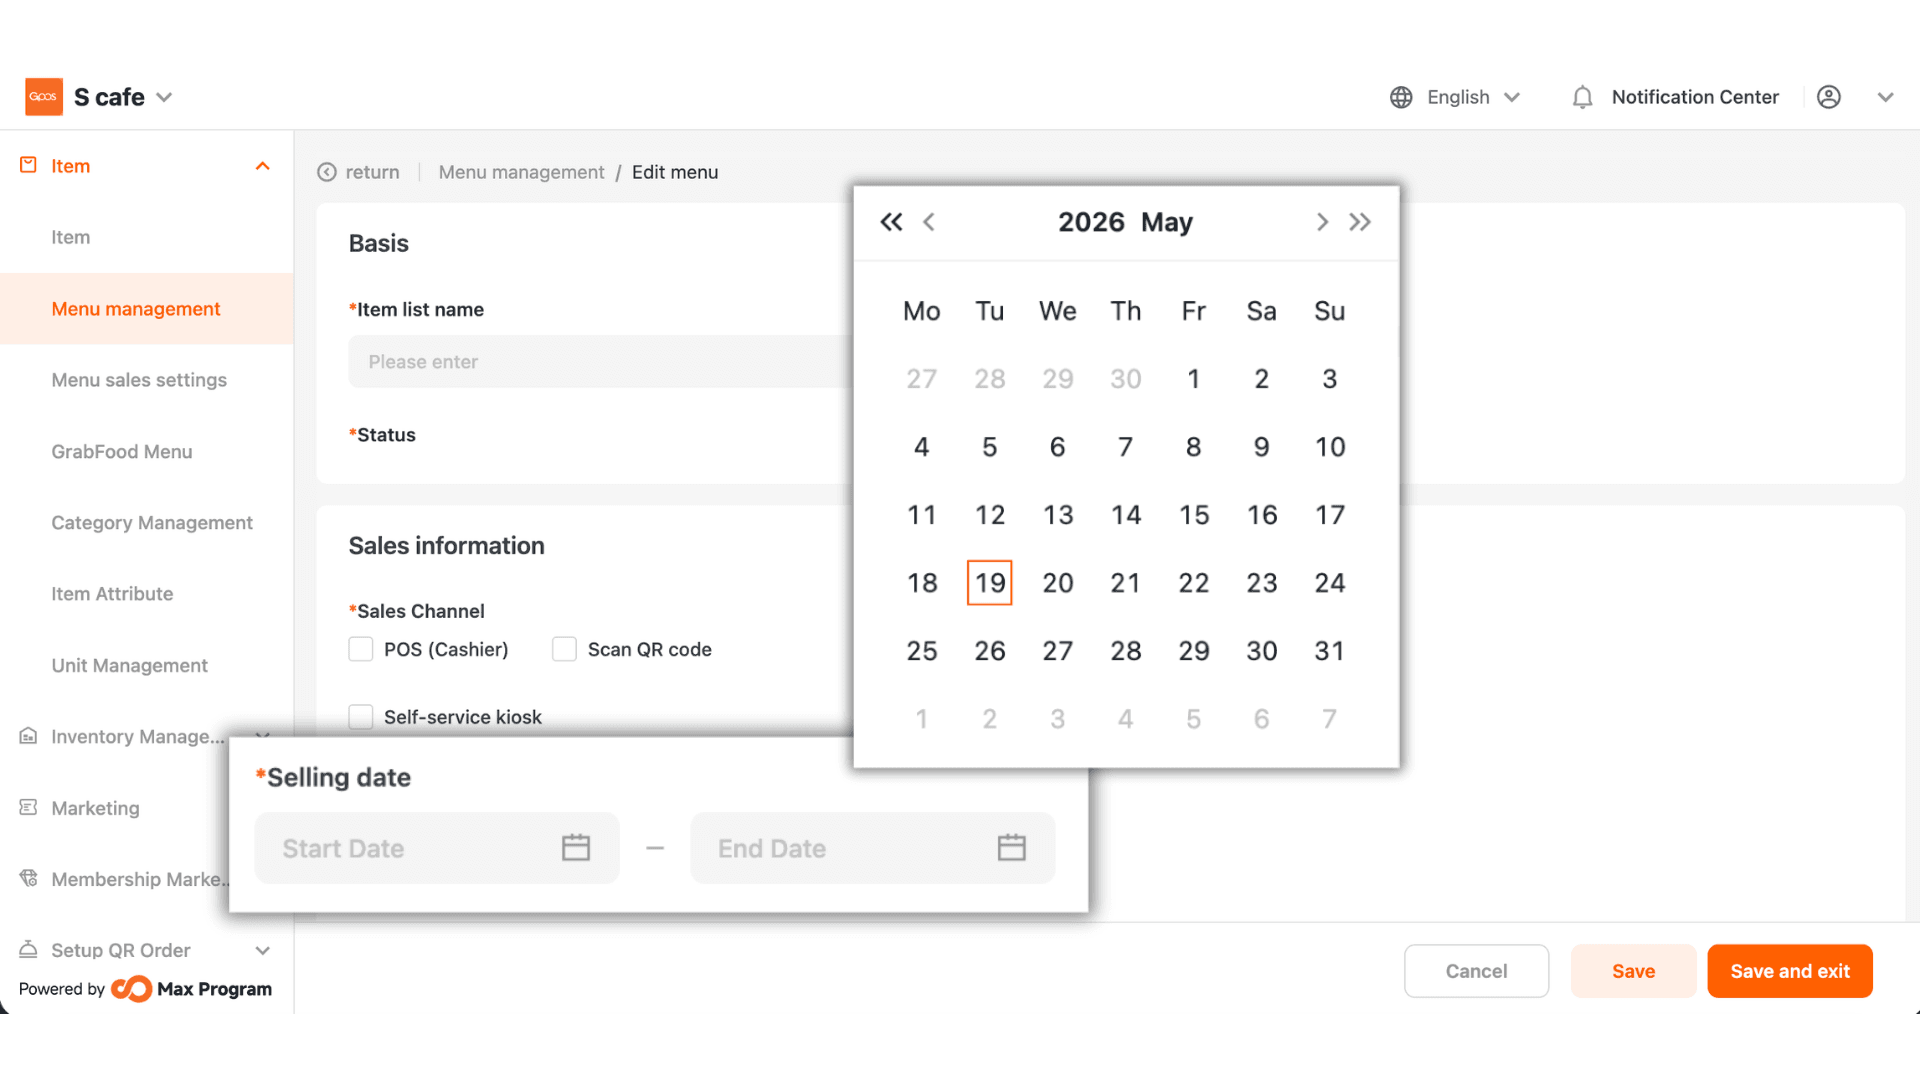
6.Click to select the sales start and end dates.
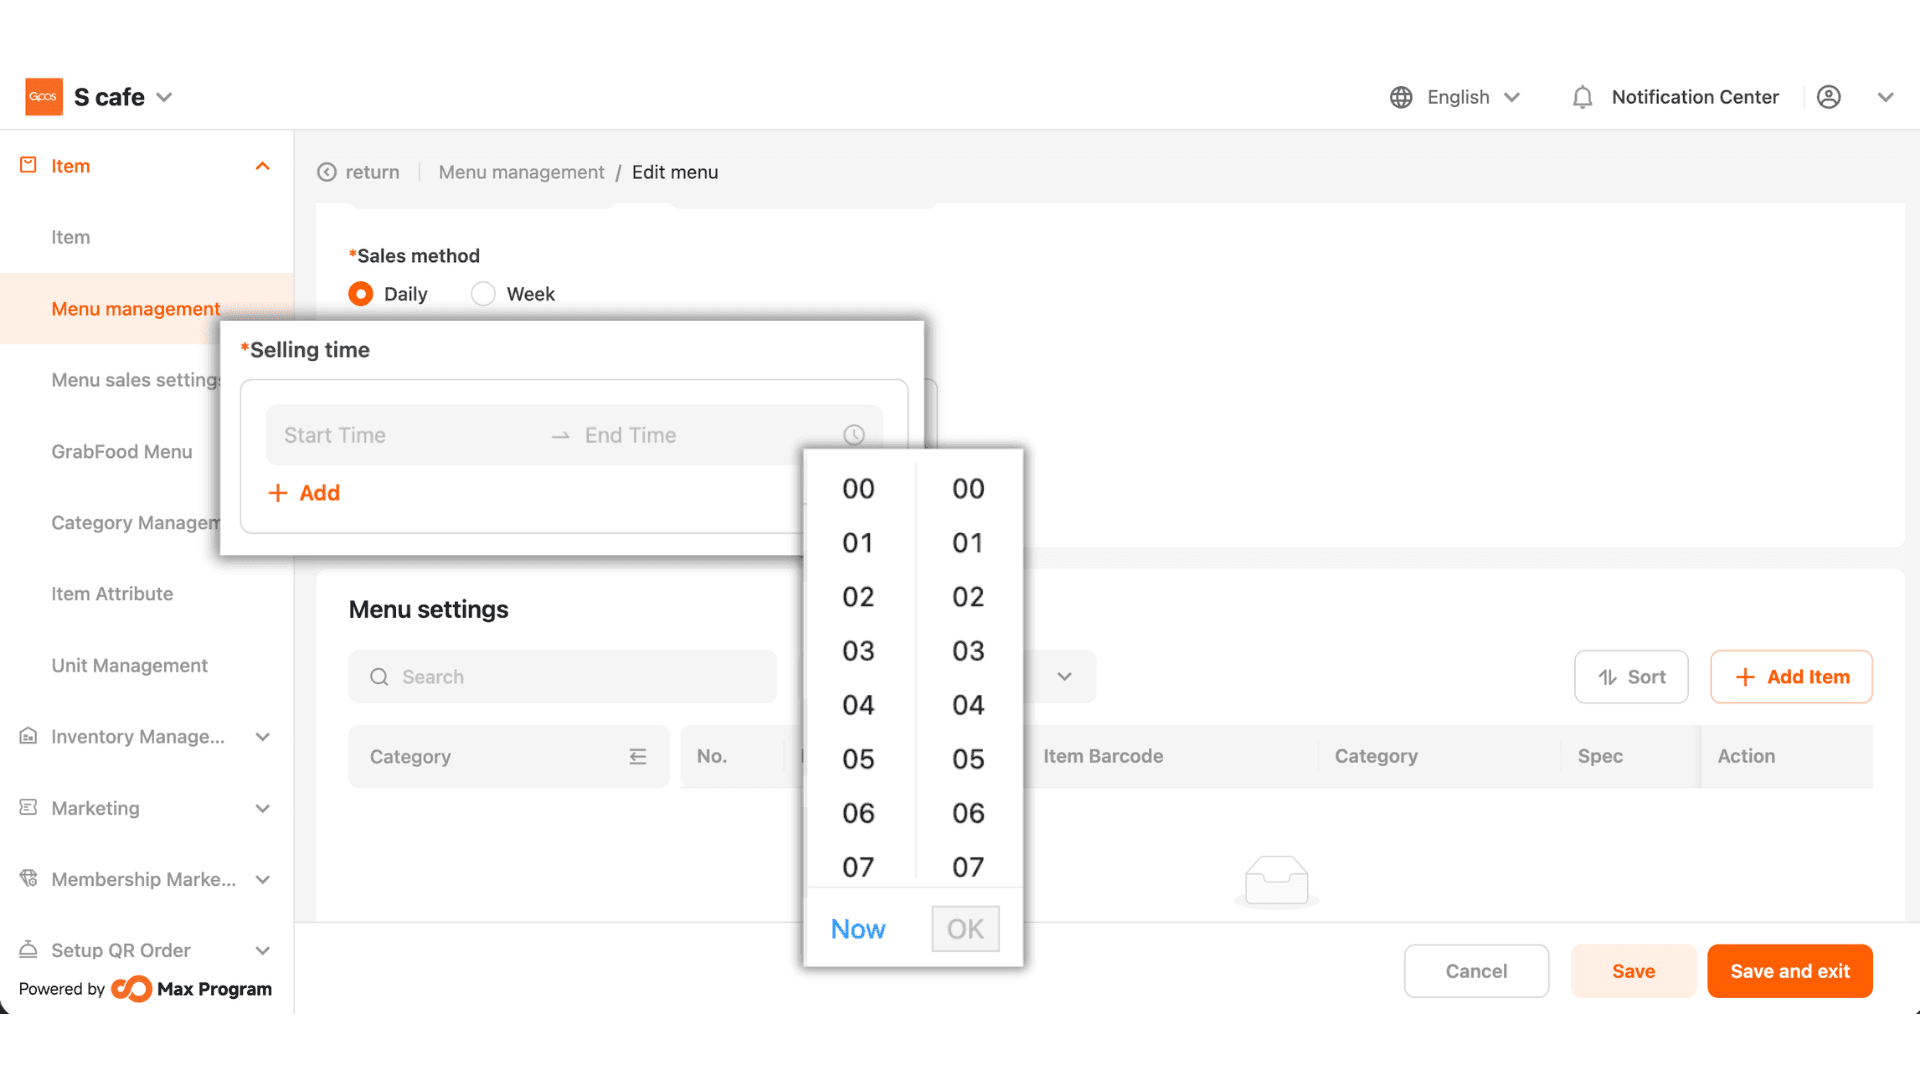
7.Set the sales start and end times.
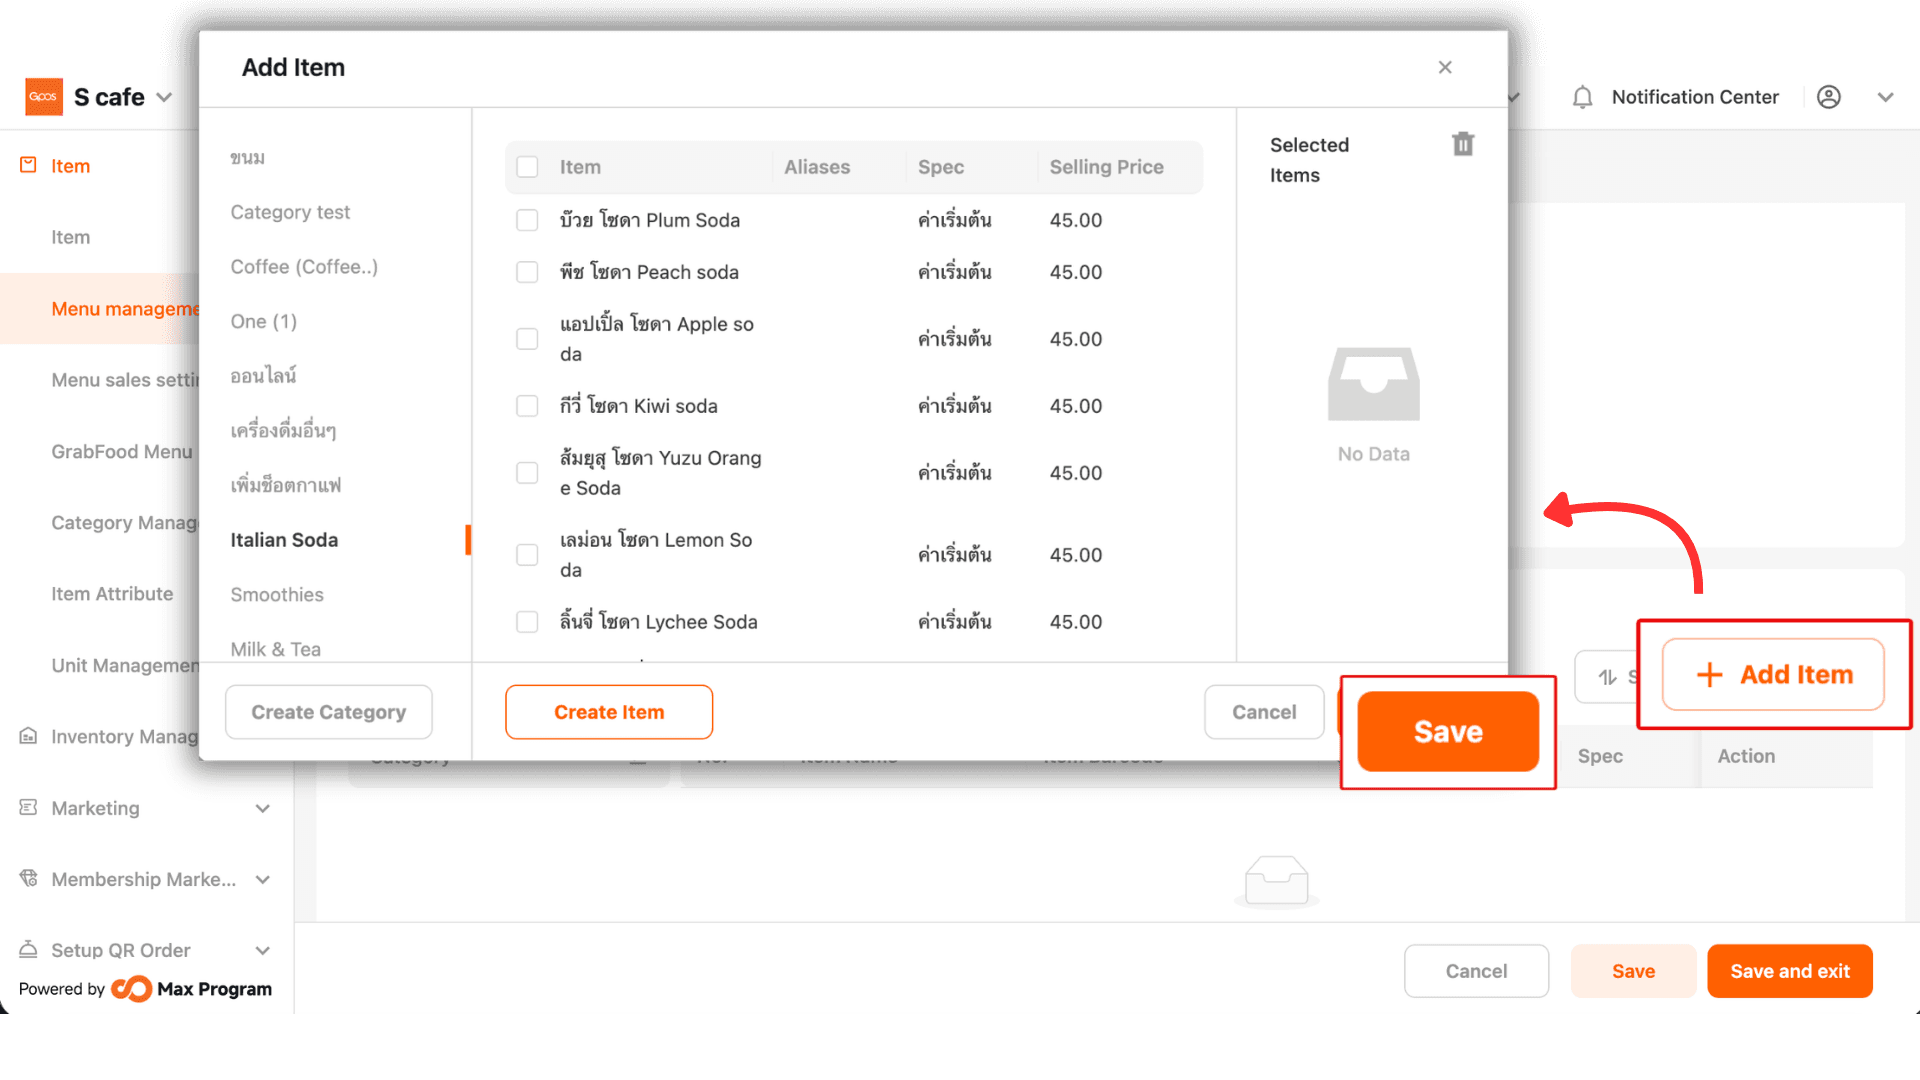
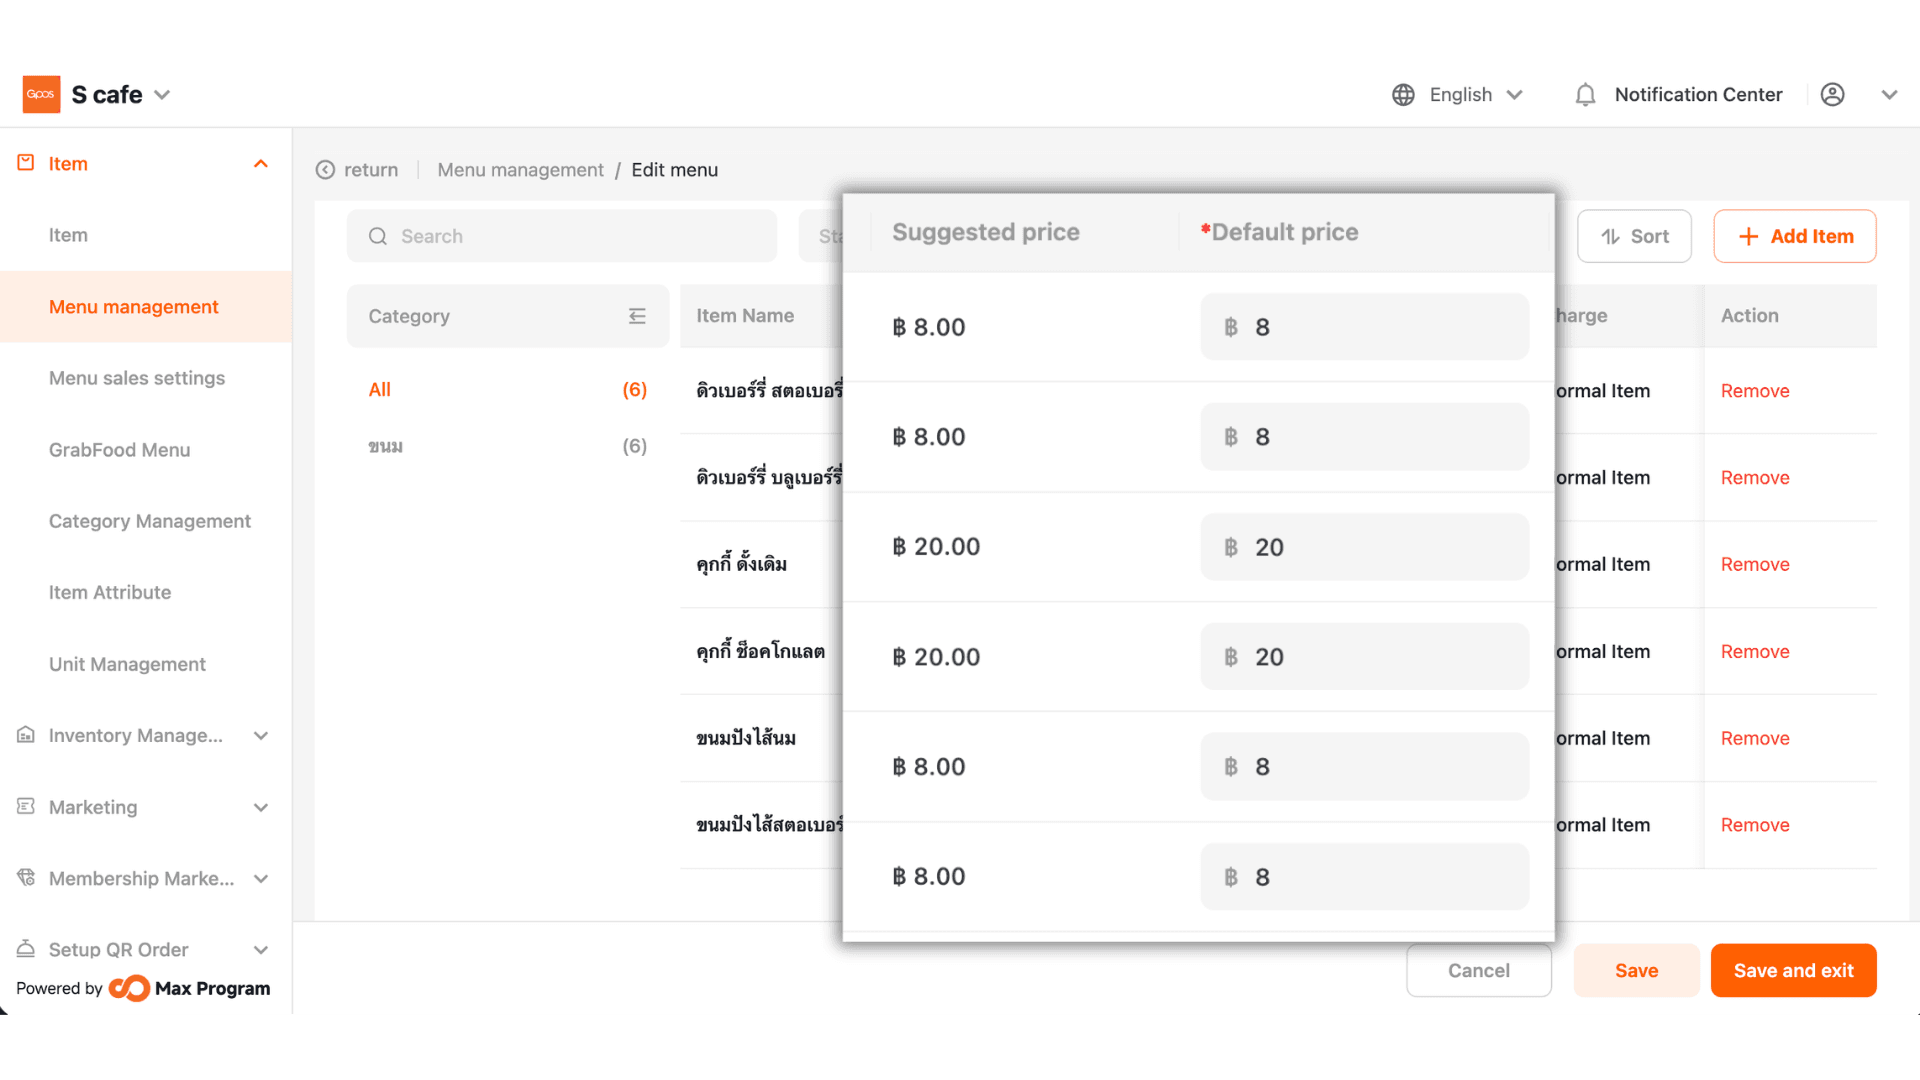
8.Click “Add Item” and select the products you want to sell during the configured date and time period.
9. You can set a different price from the default in the “Default Price” field.
10.You can edit, enable the template, or delete the template.