Add zones and add tables
2026-03-26 17:11
The table management system is designed to help users efficiently and systematically manage the layout of restaurants or cafés.
1. Log in to the Back Office
Go to login.gpos.co.th , enter your email and password, and click Log In.
Once logged in, select the menu “Store Management” .
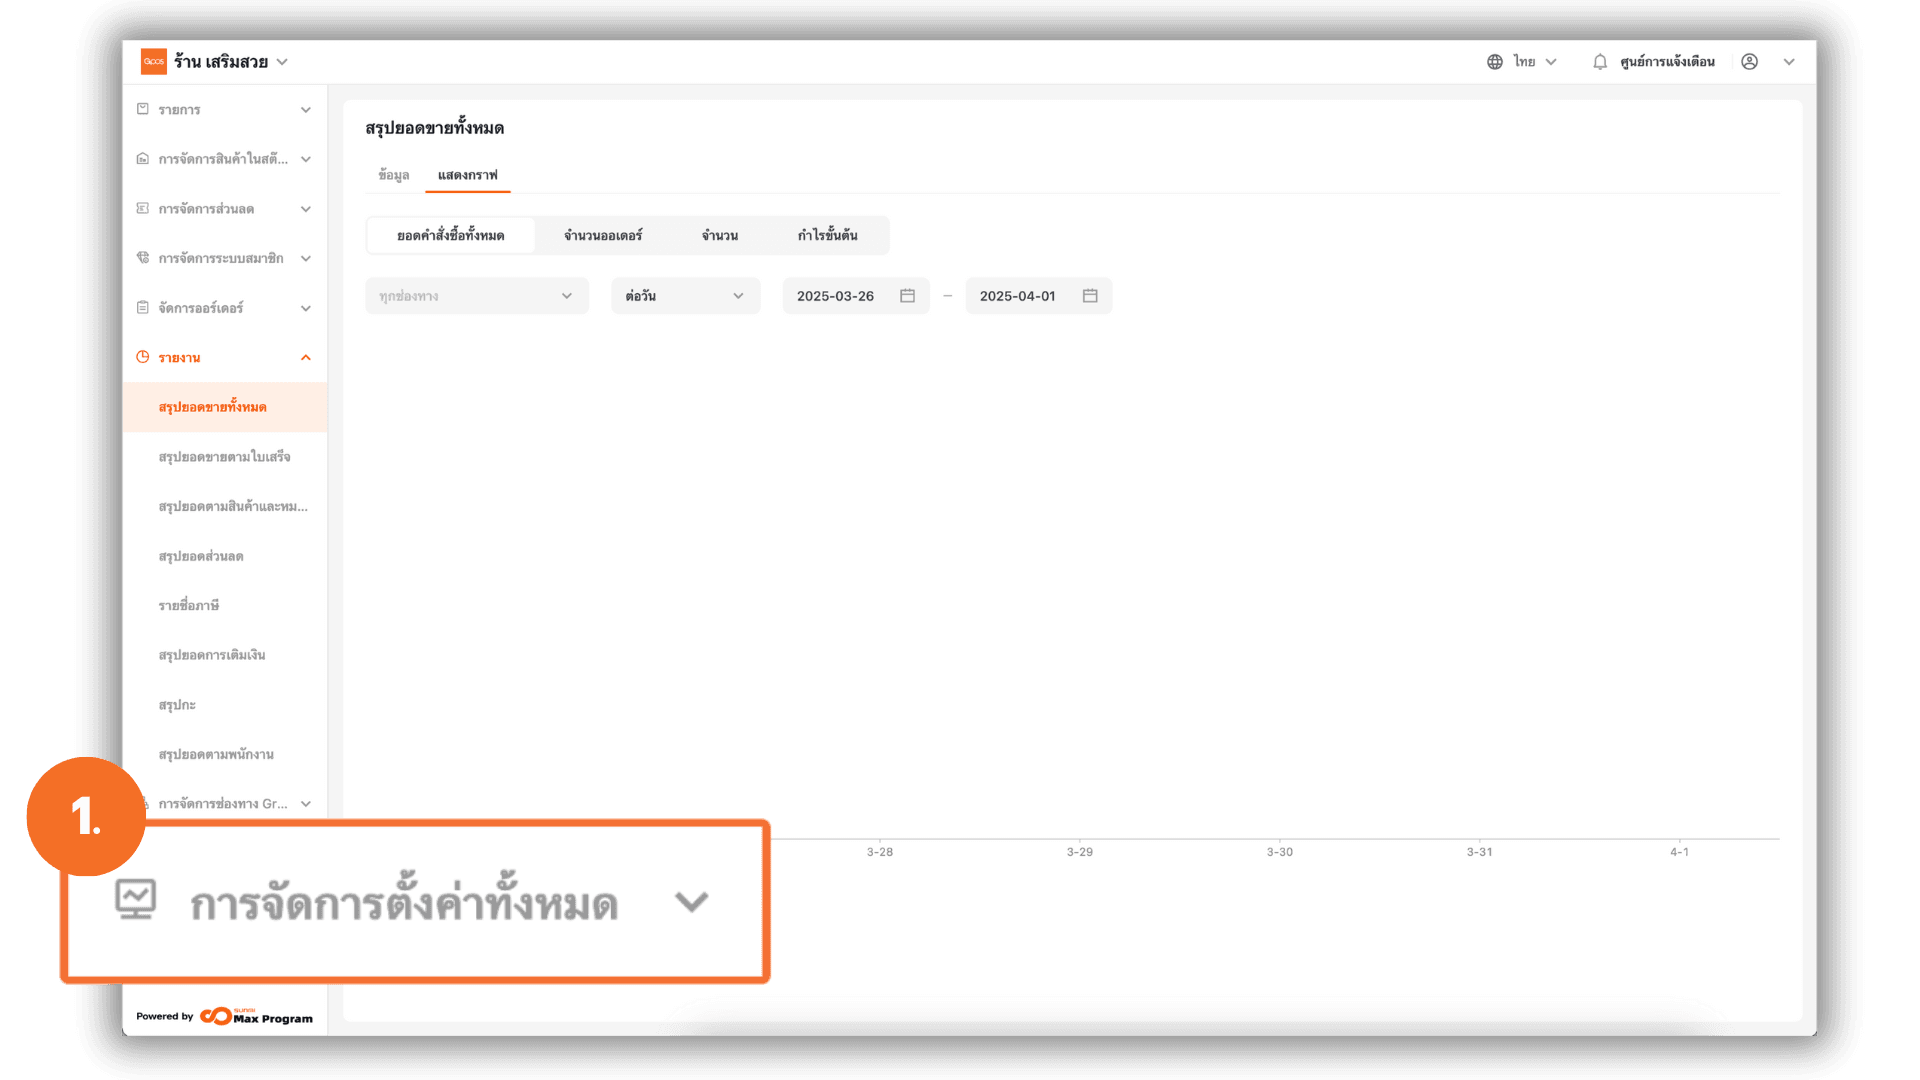
2. Manage Zones
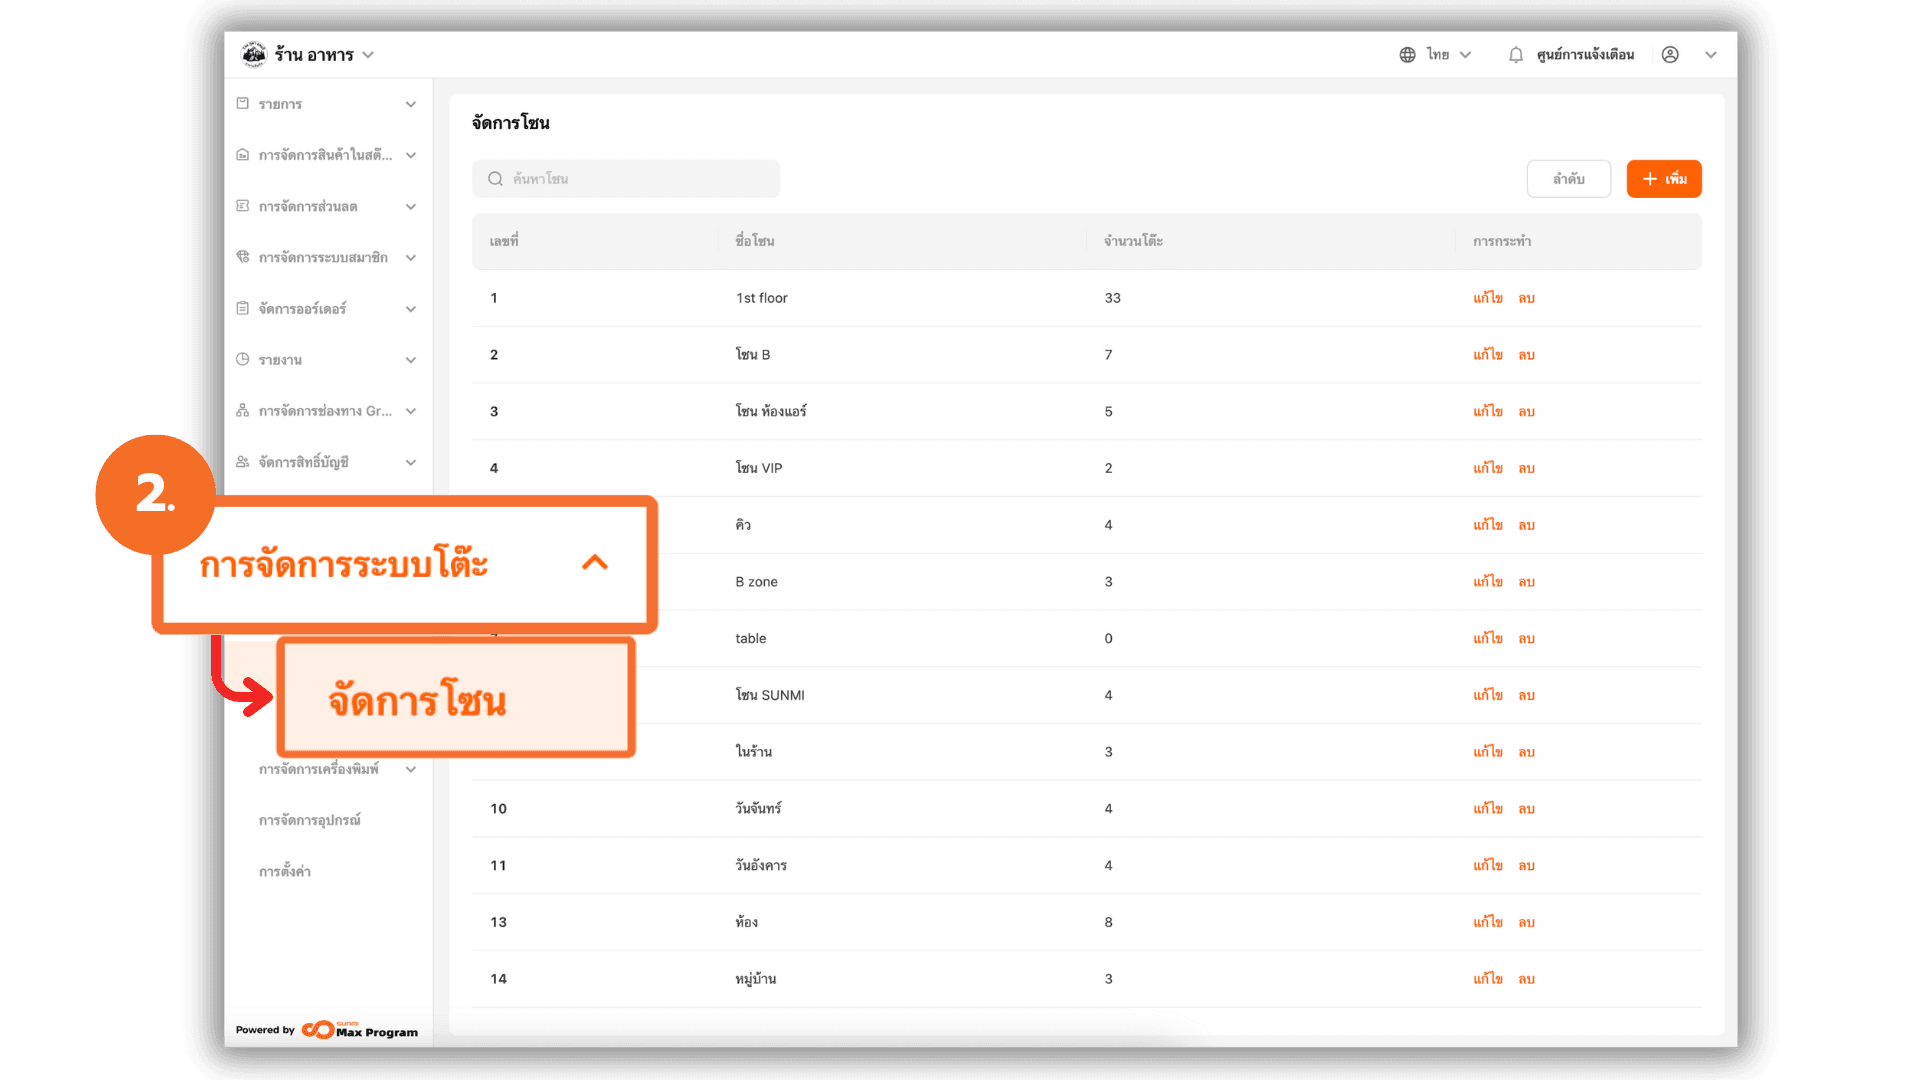
Go to the menu “Table Area Management”, then click on the submenu “Area”.
3. Add a New Zone
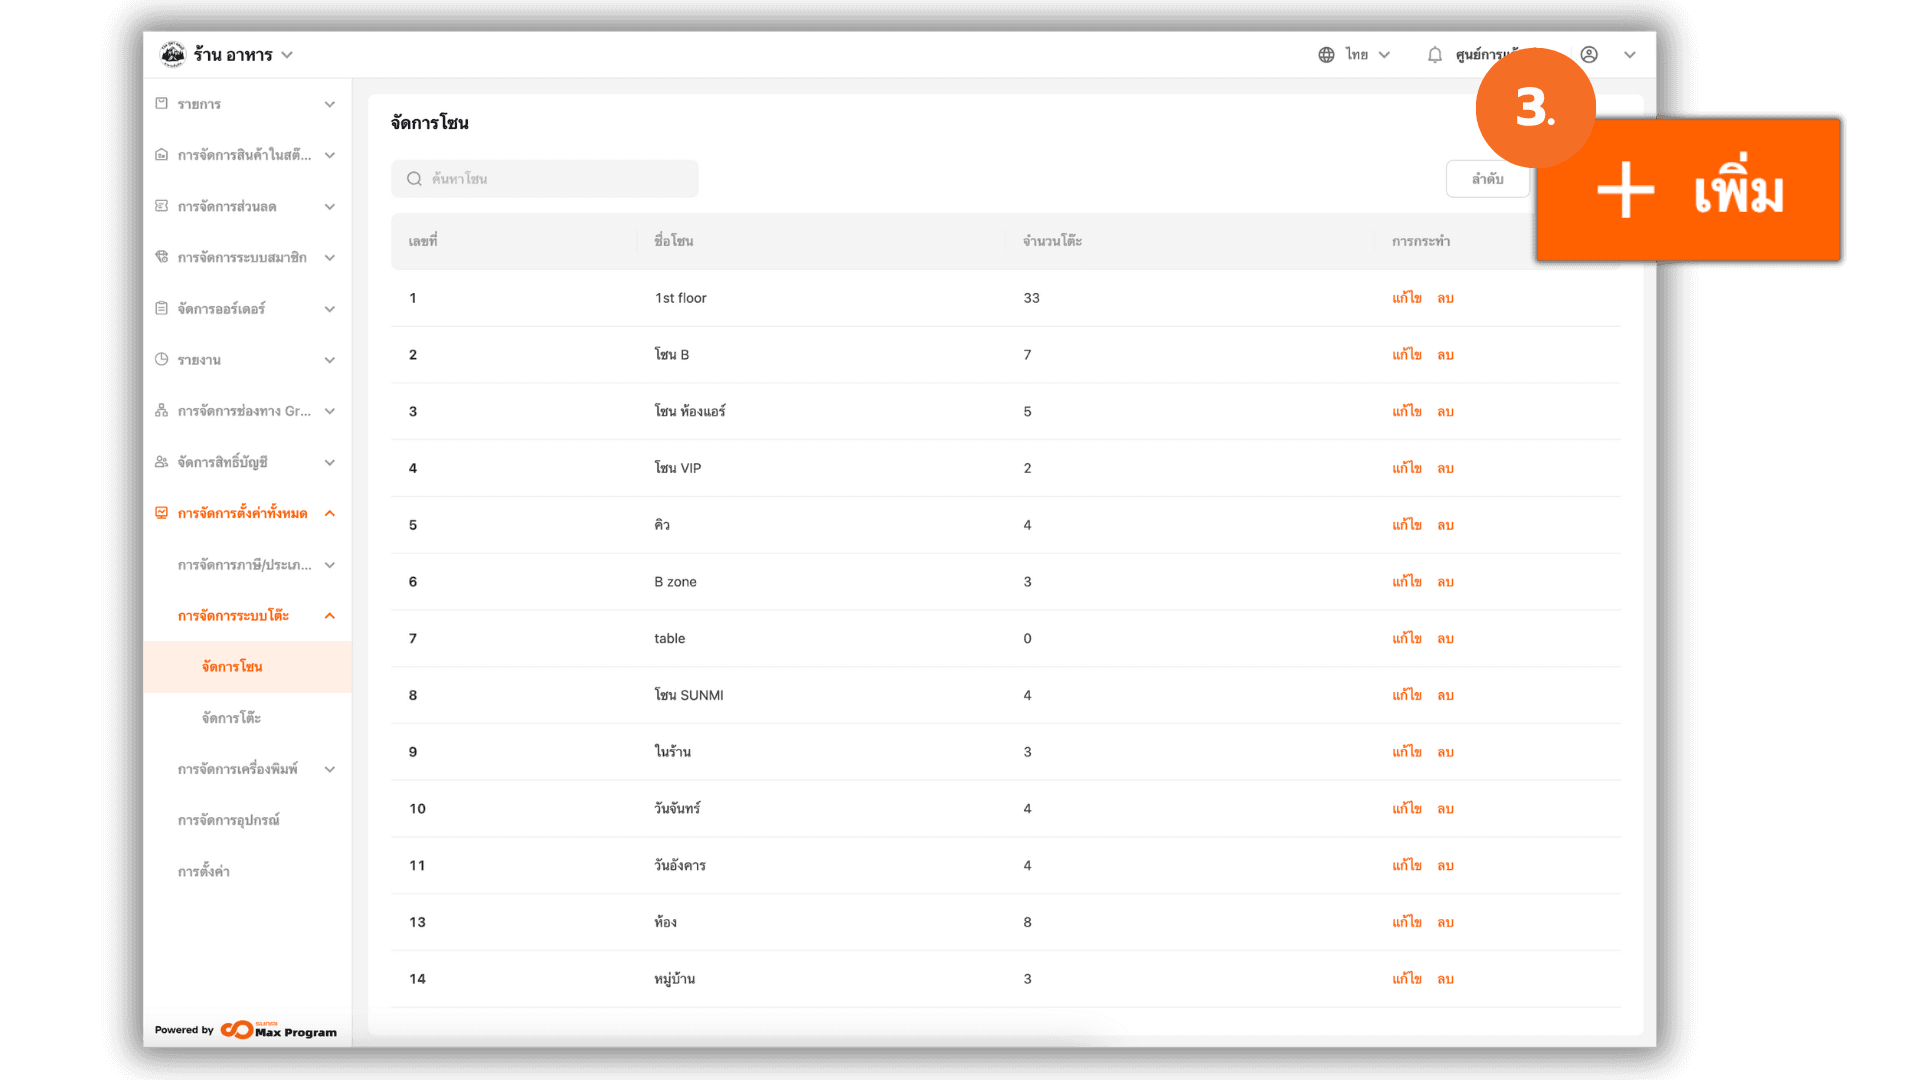
Click the “+ Add” button to create a new zone.
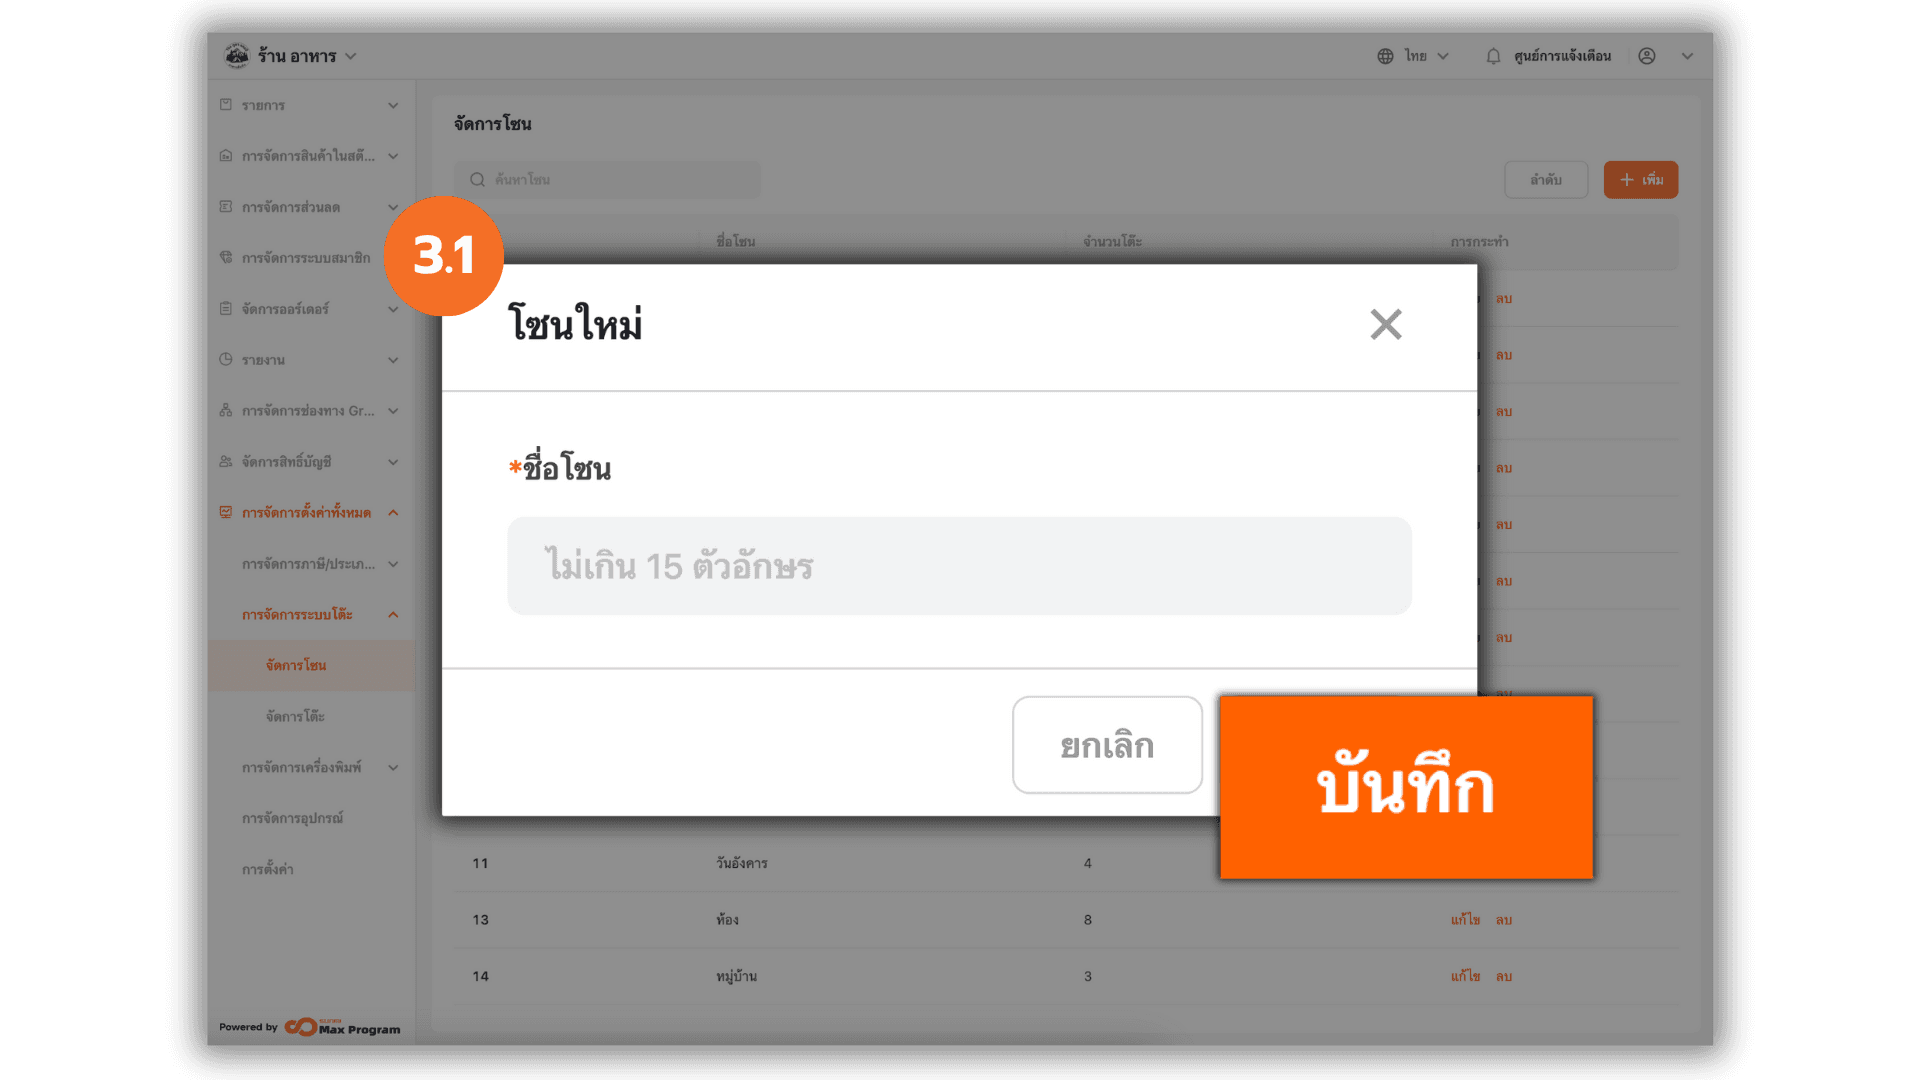
3.1 Fill in Zone Details
After clicking “+ Add,” the system will prompt you to enter zone details.
Enter the Area Name, then click “Save” to confirm.
Examples: Front Zone, Balcony, VIP
Note : Zone names must not exceed 15 characters.
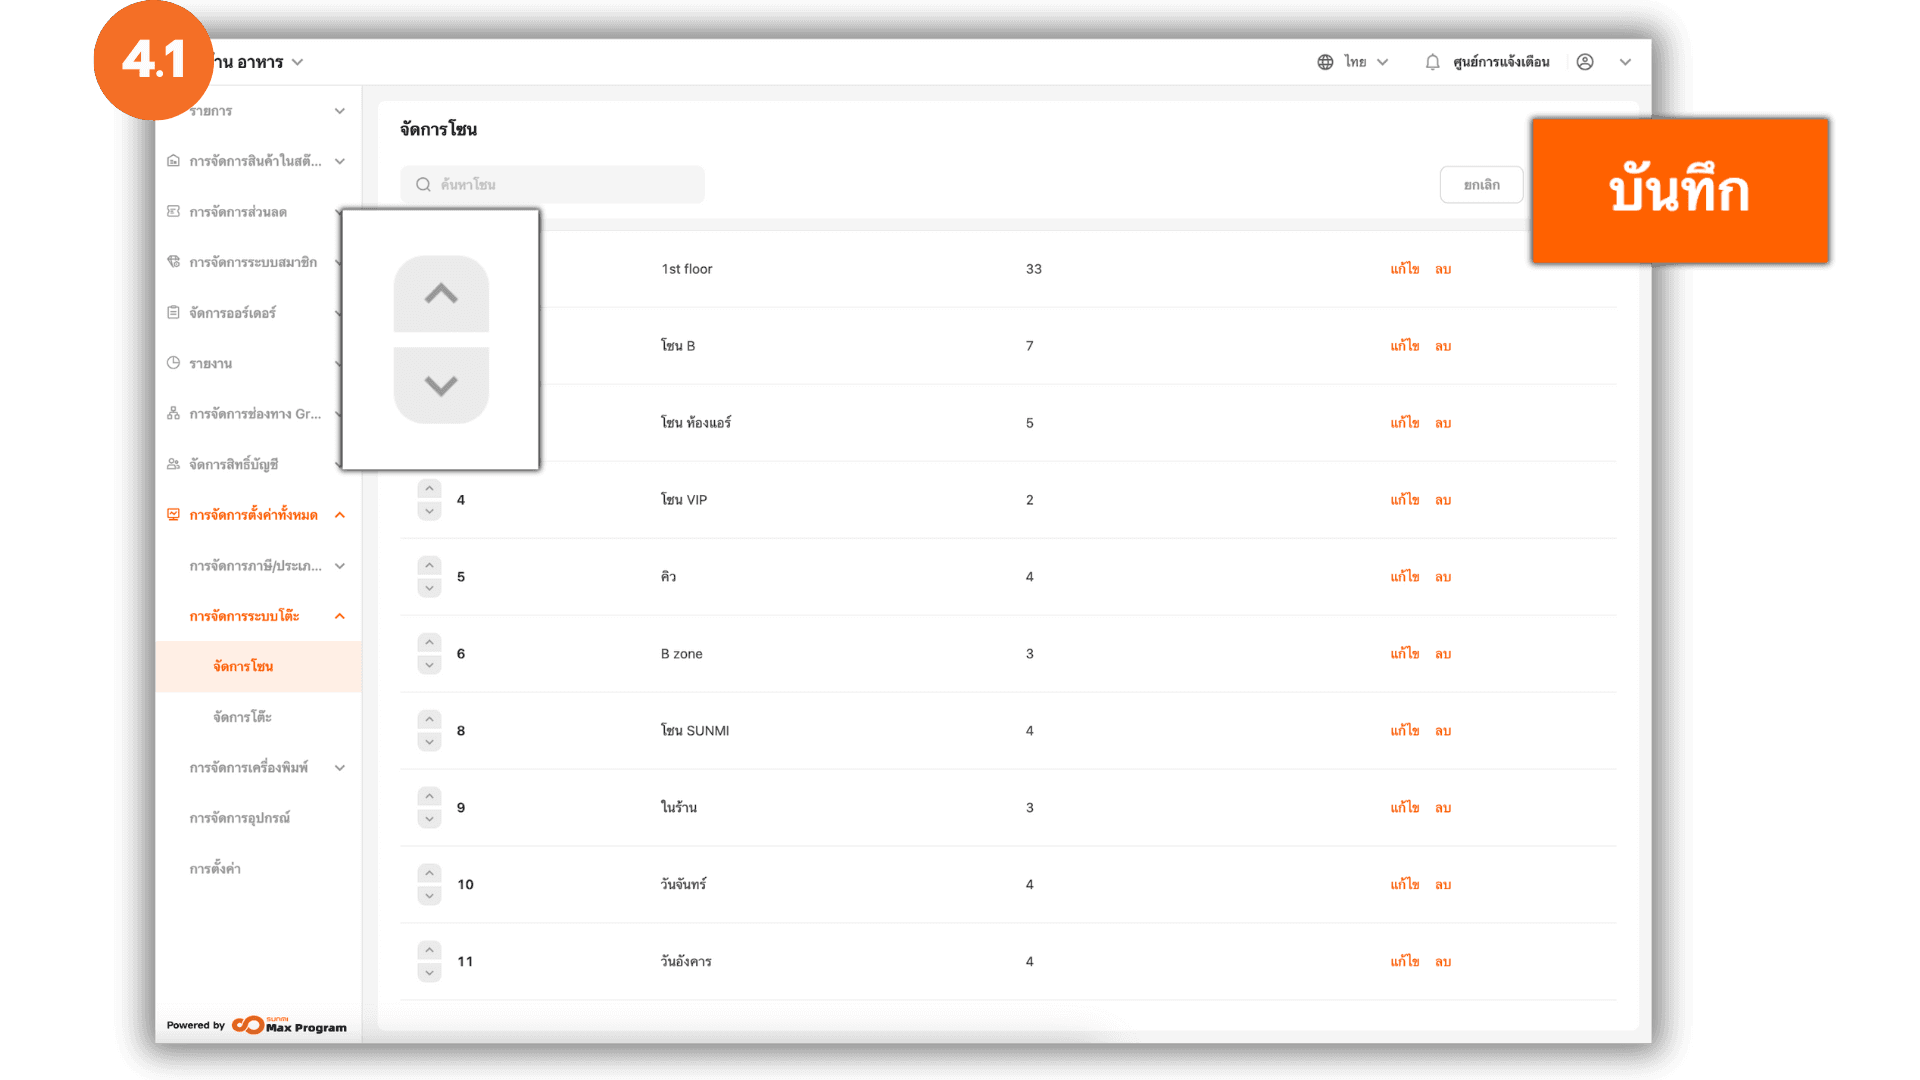
4. Sort Zone Order
Click the “Sort” button to rearrange the order of the zones.
4.1 Adjust Zone Order
Once clicked, arrow icons (▲▼) will appear next to each zone name. Click the arrows to move zones up or down as needed. Then click “Save” to confirm the new order.
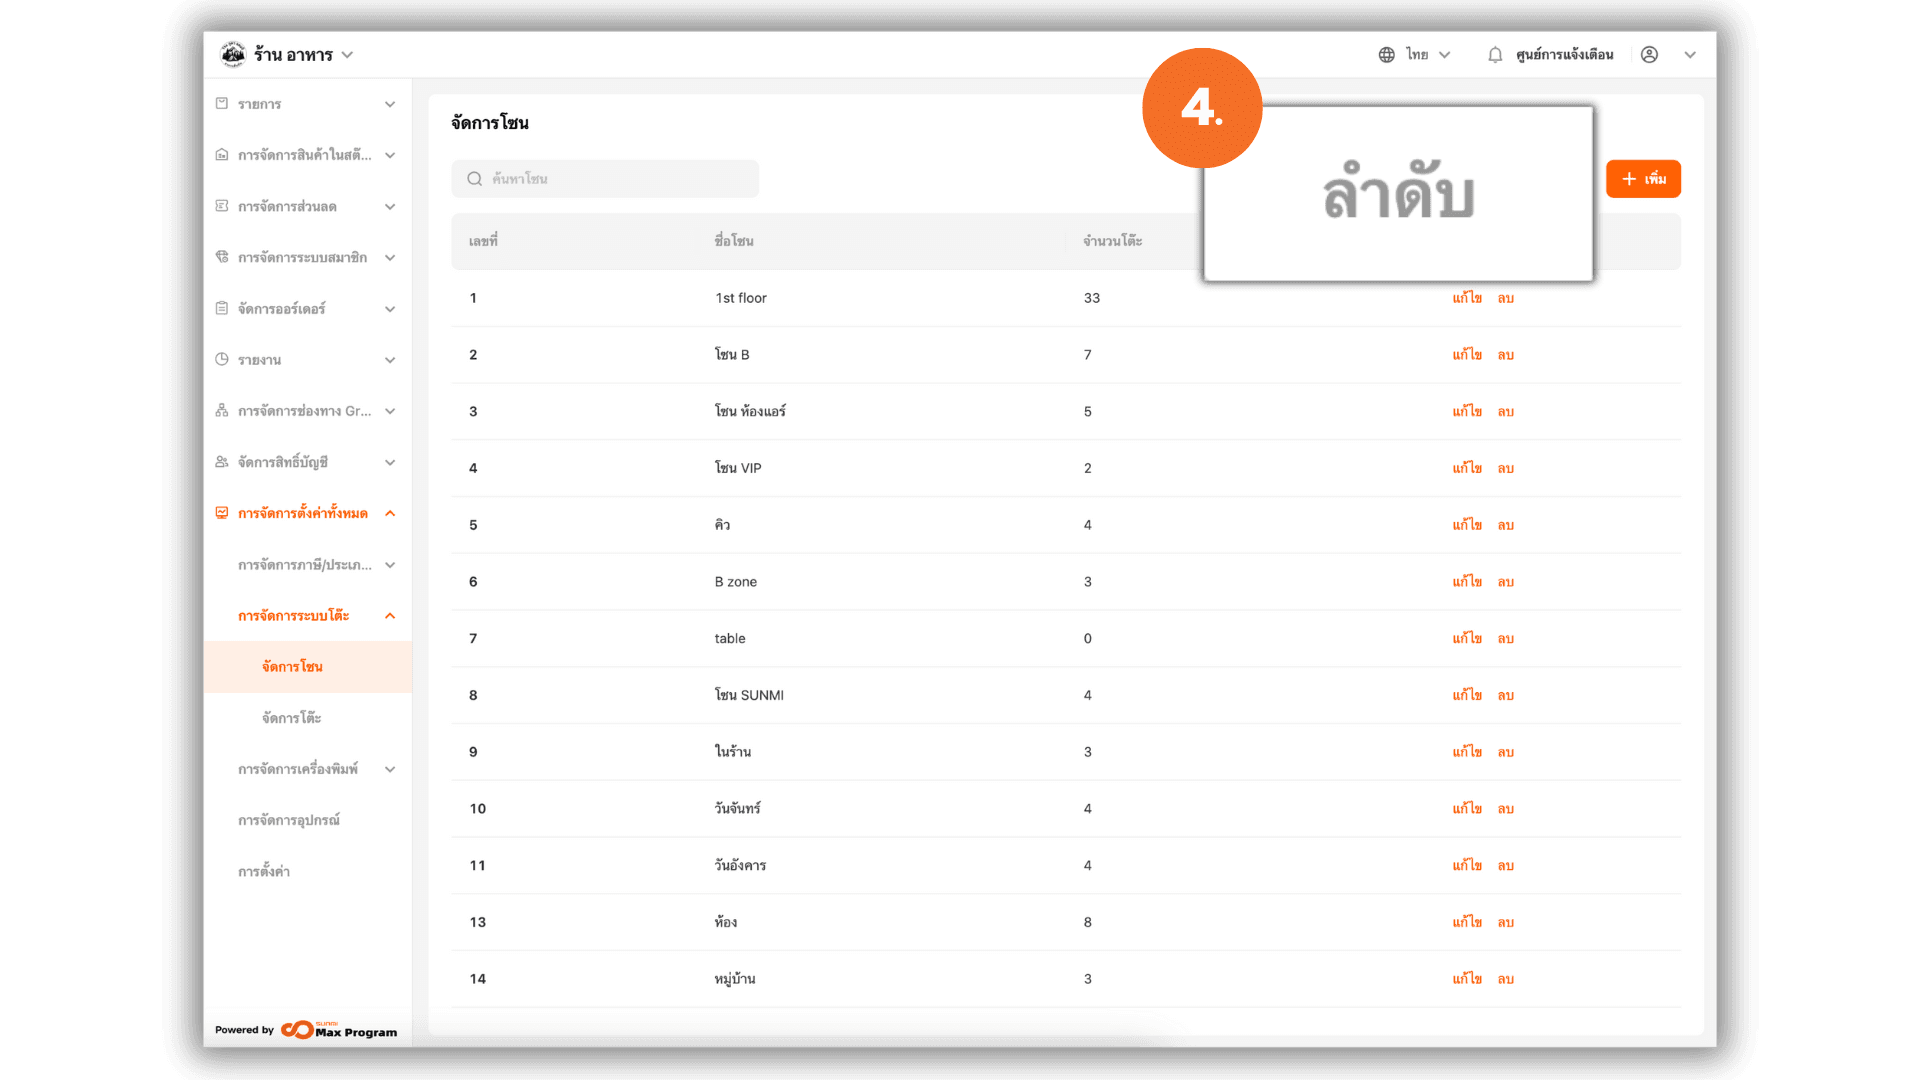
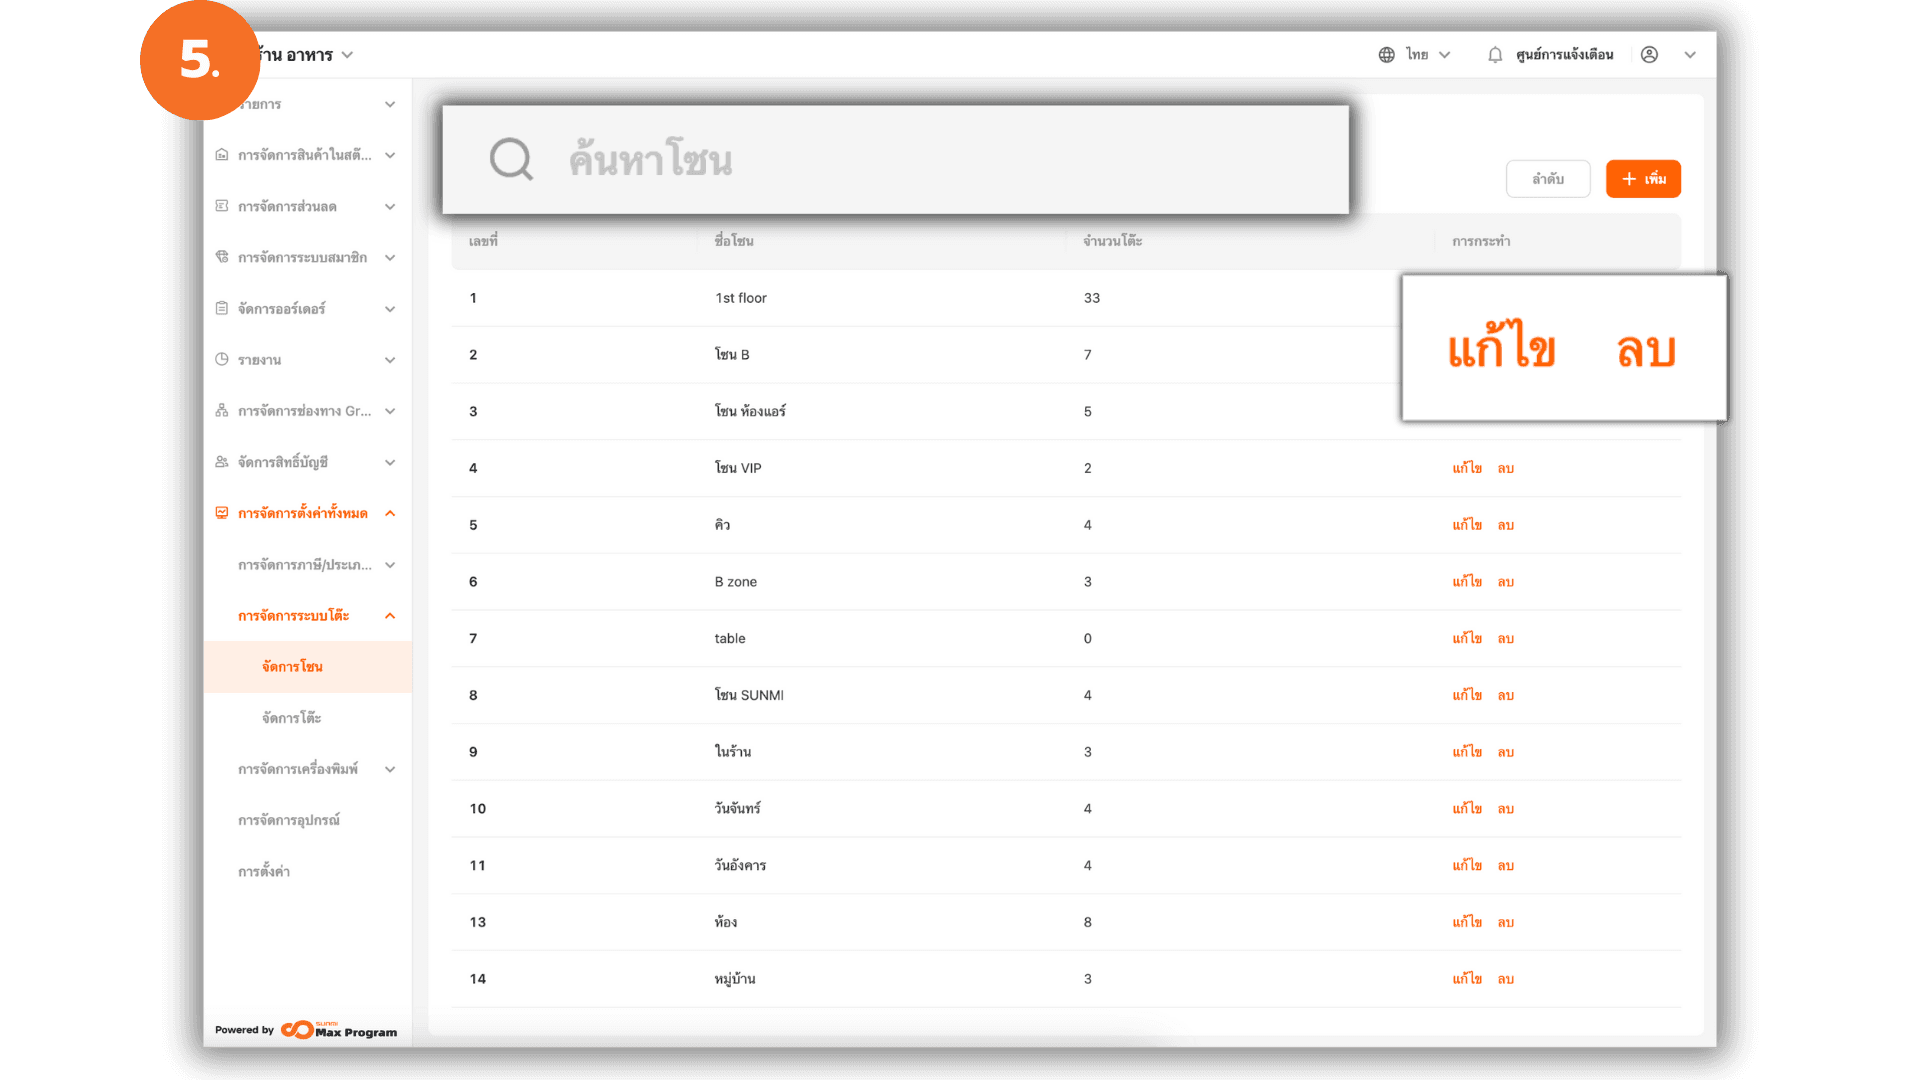
5. Edit / Delete Zones
Use the search bar to find the zone you want to manage.
- Click “Edit” at the end of the row to modify the zone name, capacity, or order.
- Click “Delete” to remove a zone from the system.
Note : If tables already exist in the zone, the system will not allow deletion.
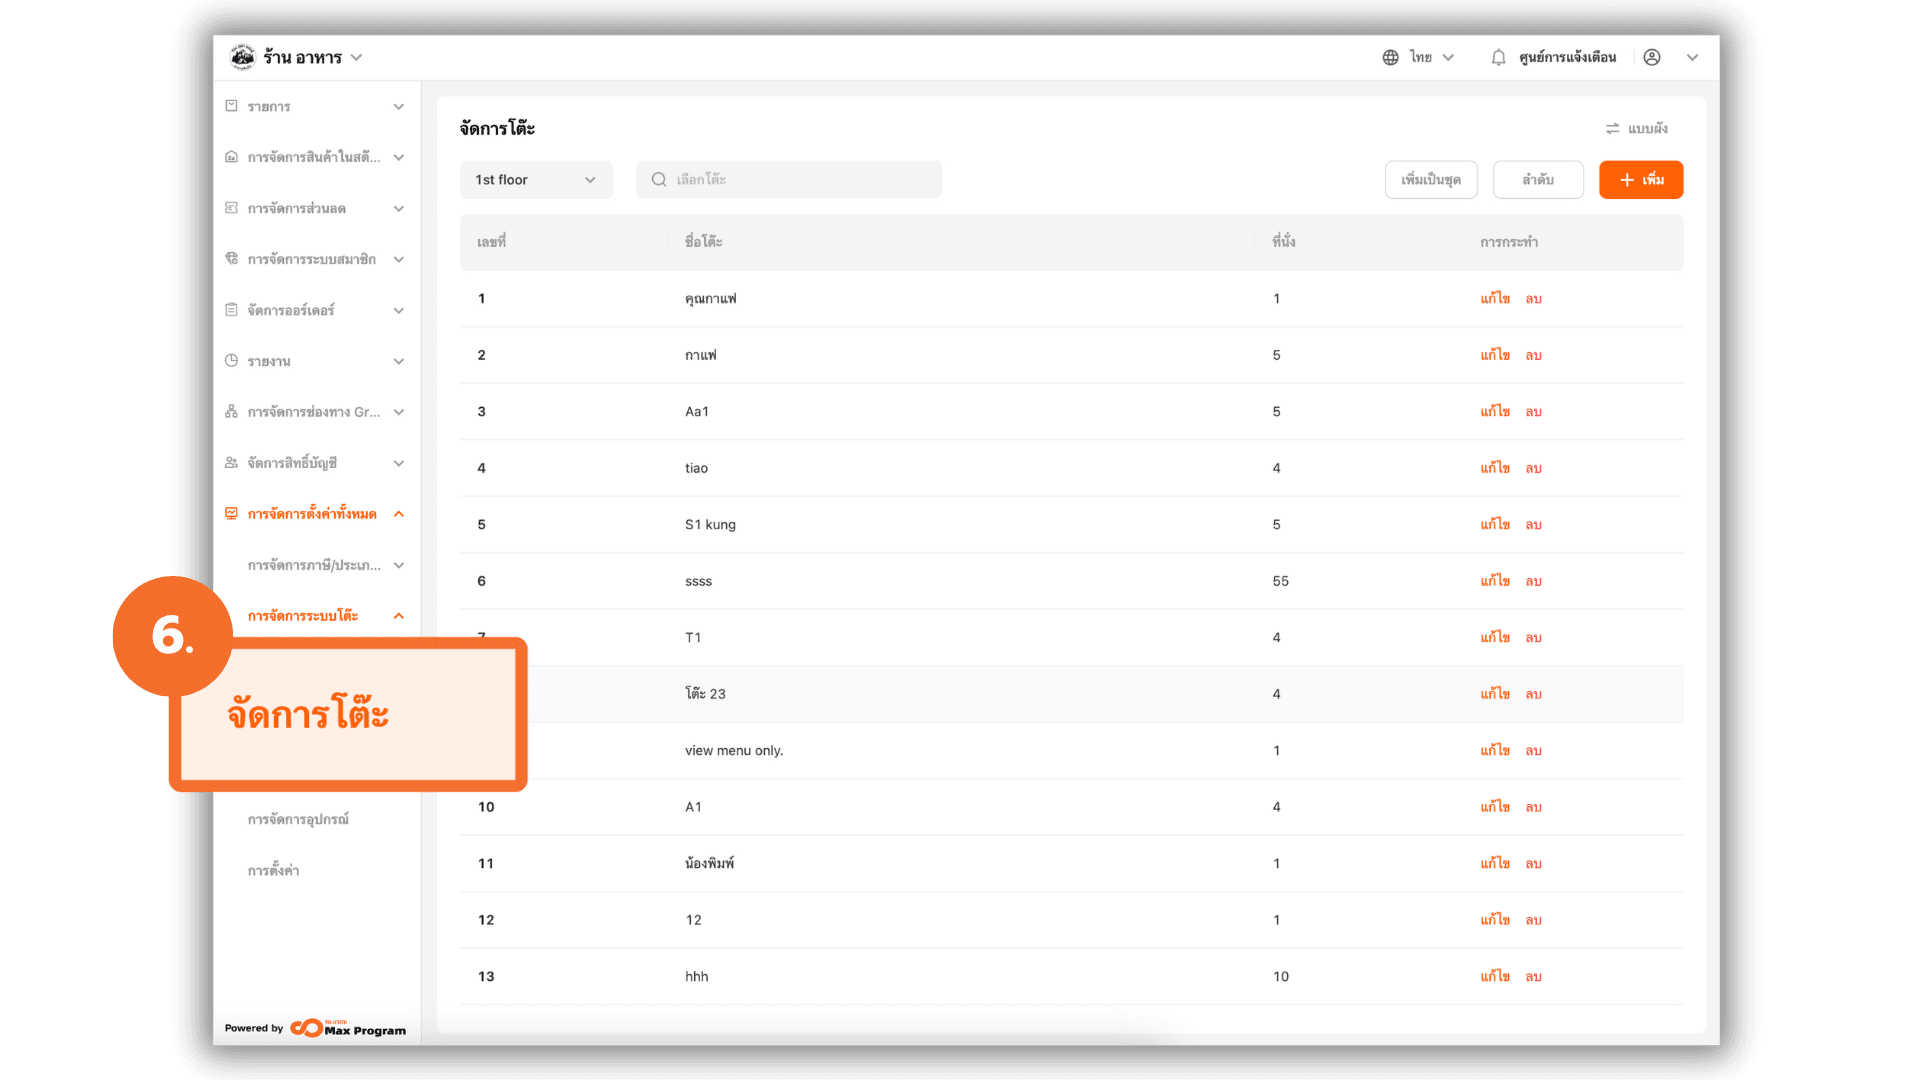
6. Go to Table Management Page
Once zones have been created, go to the “Table Management” menu.
Overview of Table Management
There are 2 views available for table setup :
- List Mode : Best for basic data input like table name, seat capacity, and order. Simple and quick.
- Canvas Mode : Allows tables to be arranged based on the actual layout of your venue (e.g. front zone, balcony, VIP room). Enhances visual understanding and helps front-of-house staff.
You can switch views using the toggle on the right side.

Adding Tables (List Mode)
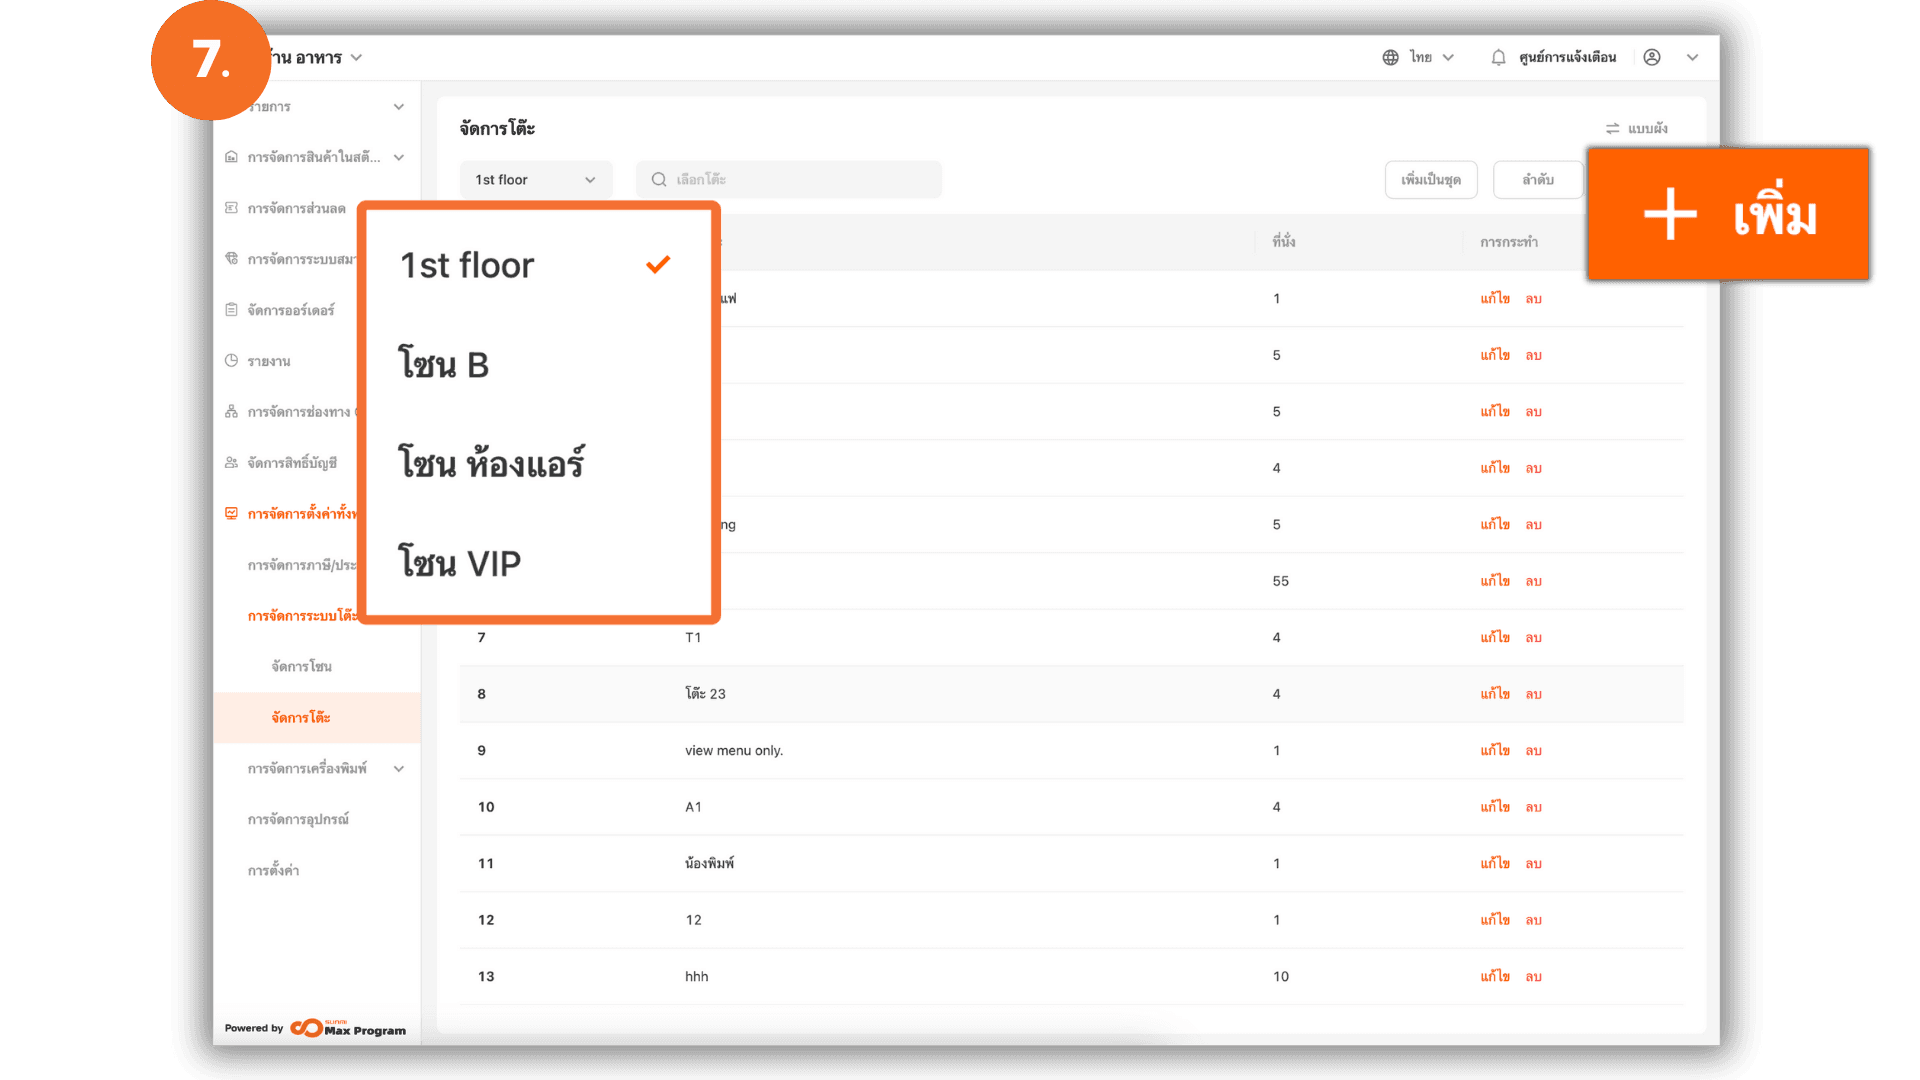
7. Access Table Management
From “Table Area Management”, select “Table Management” from the top menu.
Choose the area you want to add tables to and click “+ Add.”
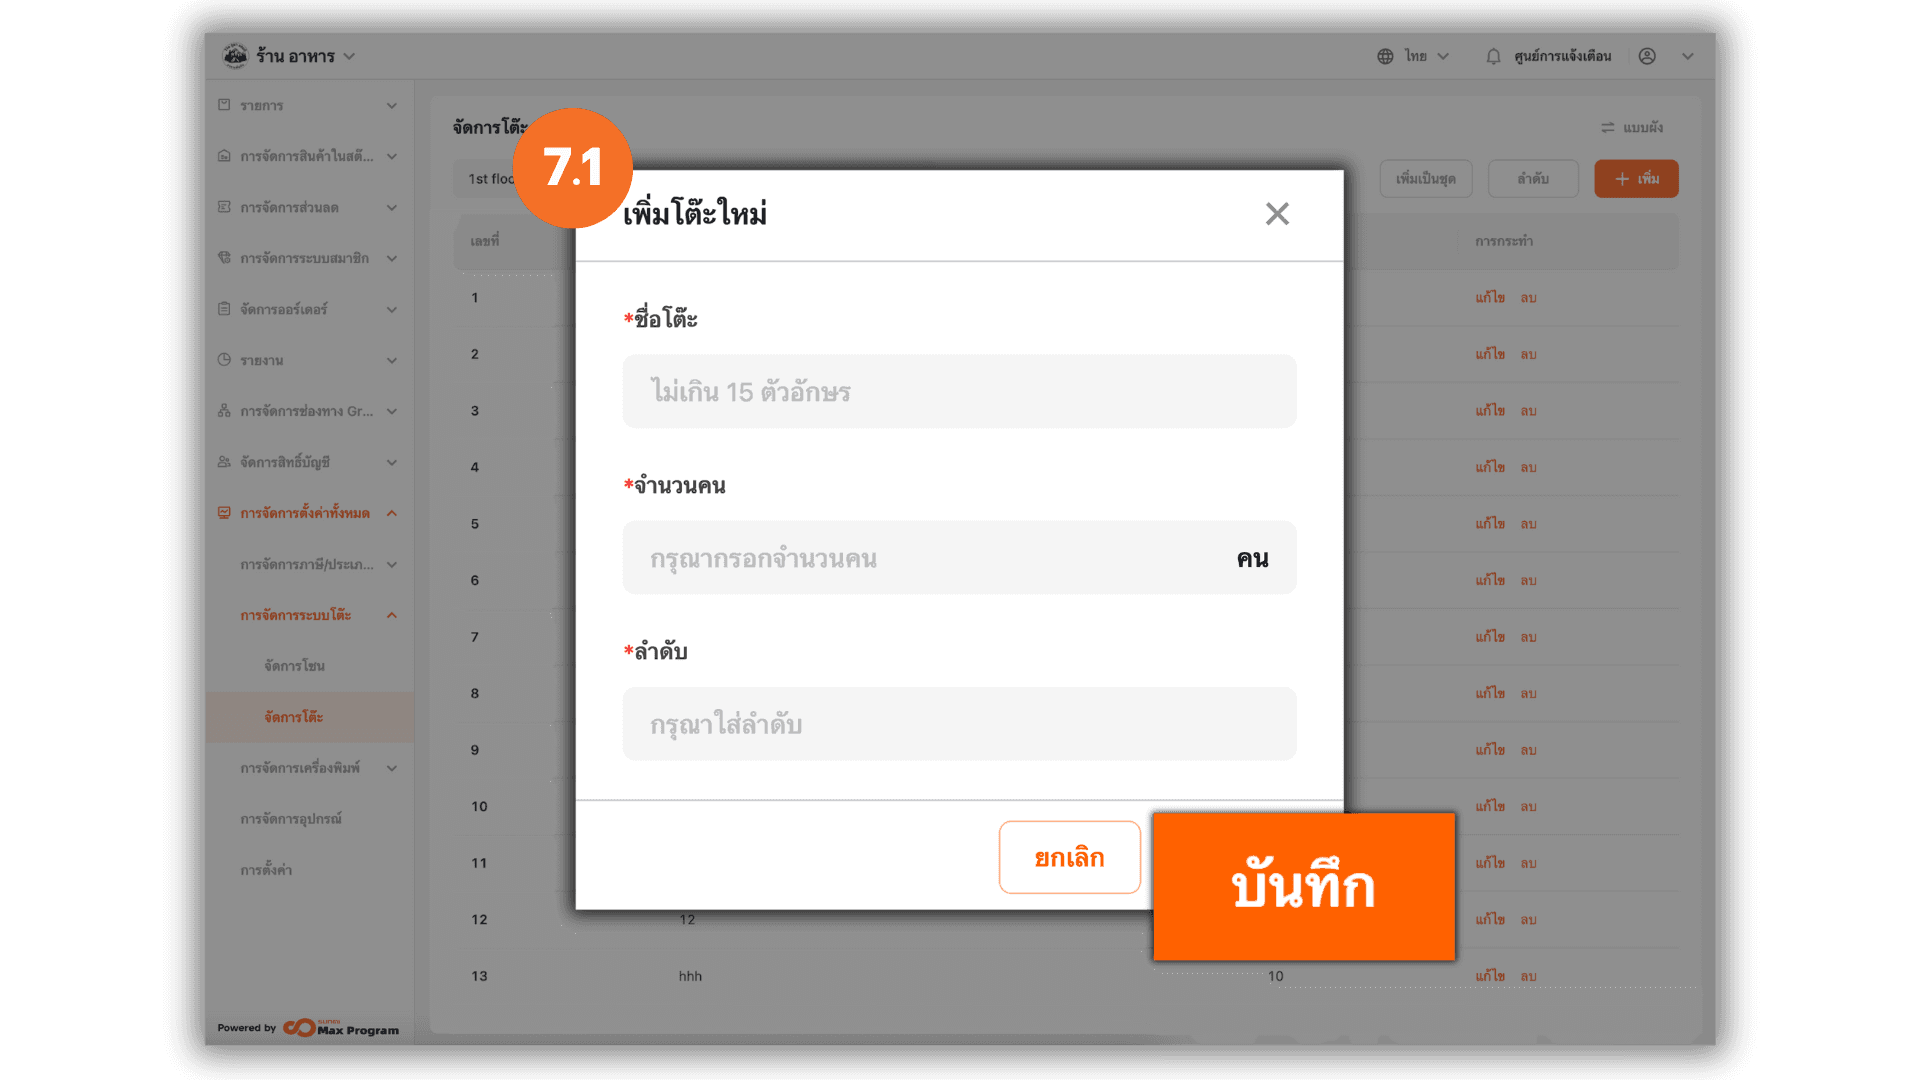
7.1 Add Individual Table
After clicking “+ Add” ,enter the following details :
- Table Name (e.g. A01, V02, Round Table 1)
- People (e.g. 2, 4, 6 people)
- Sort (e.g. 1, 2, 3 – used for table sorting in the zone)
Click “Save” to add the table to the system.
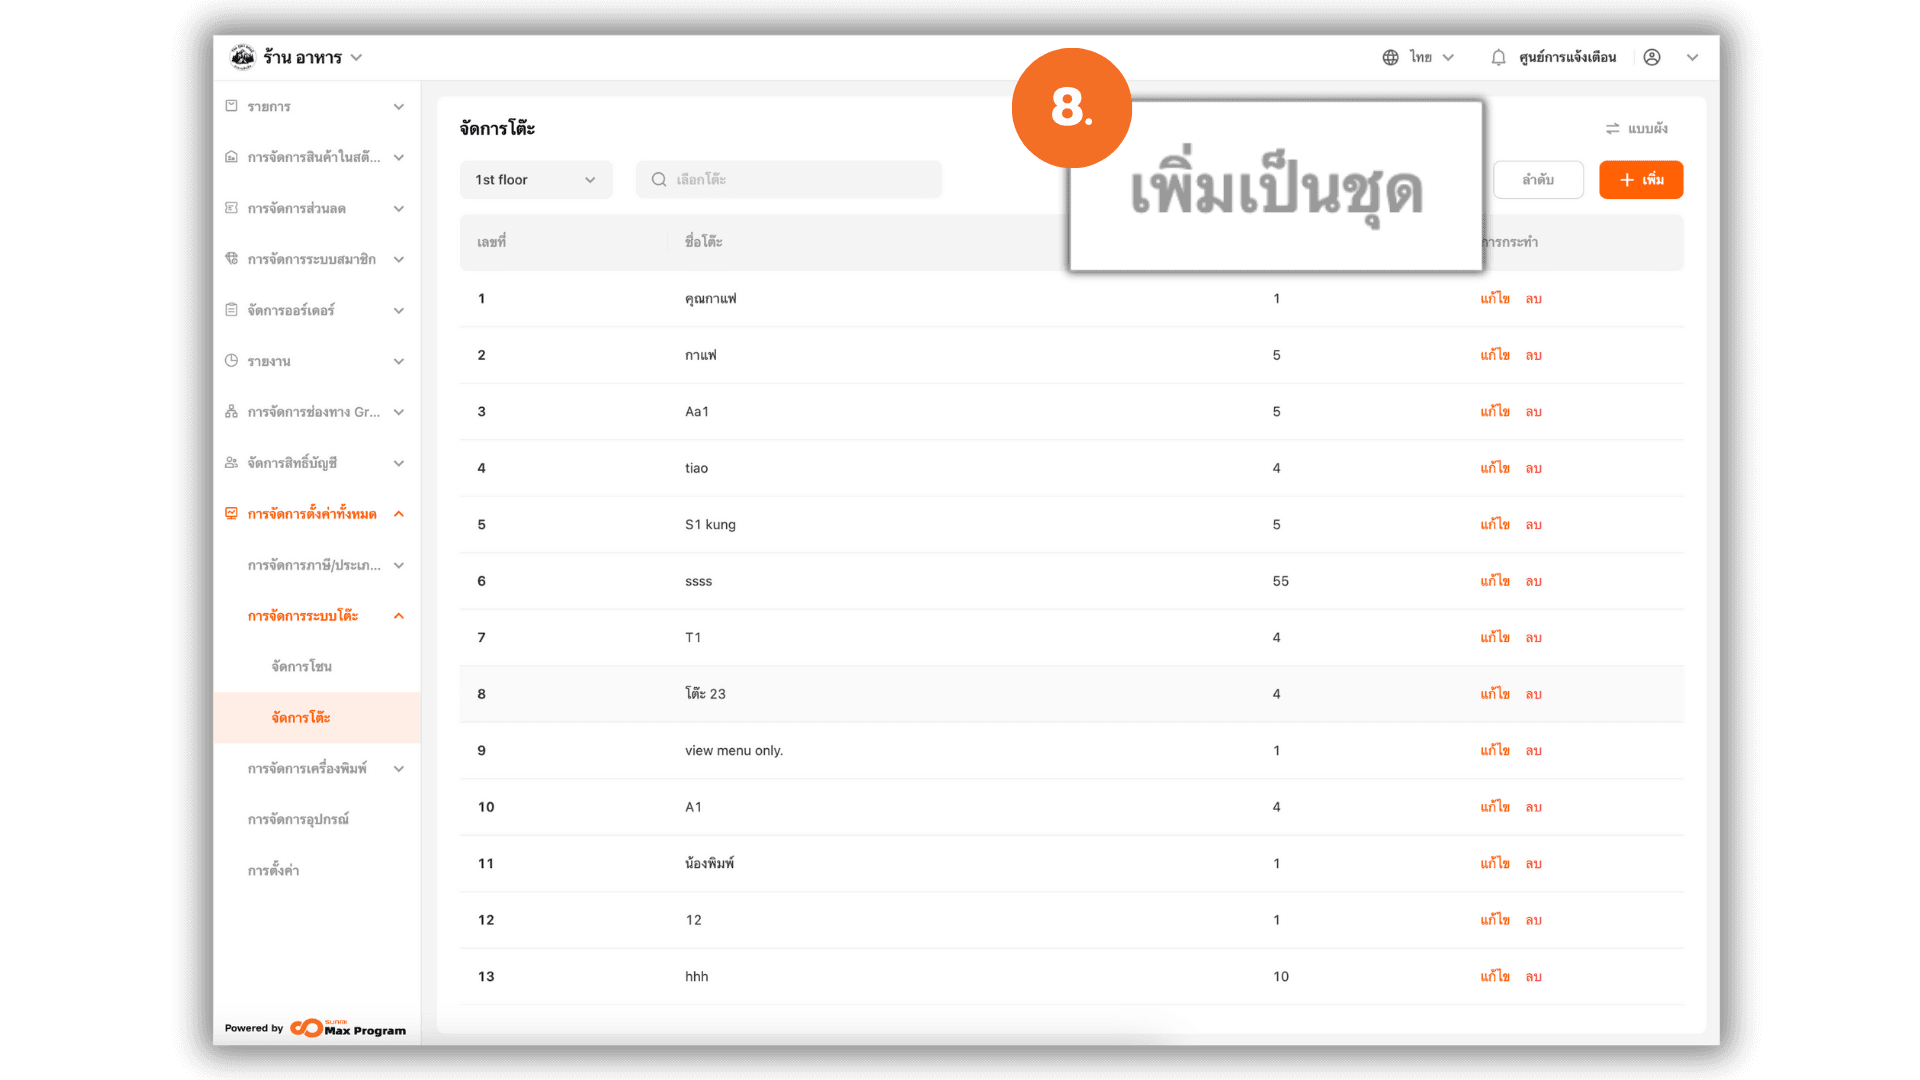
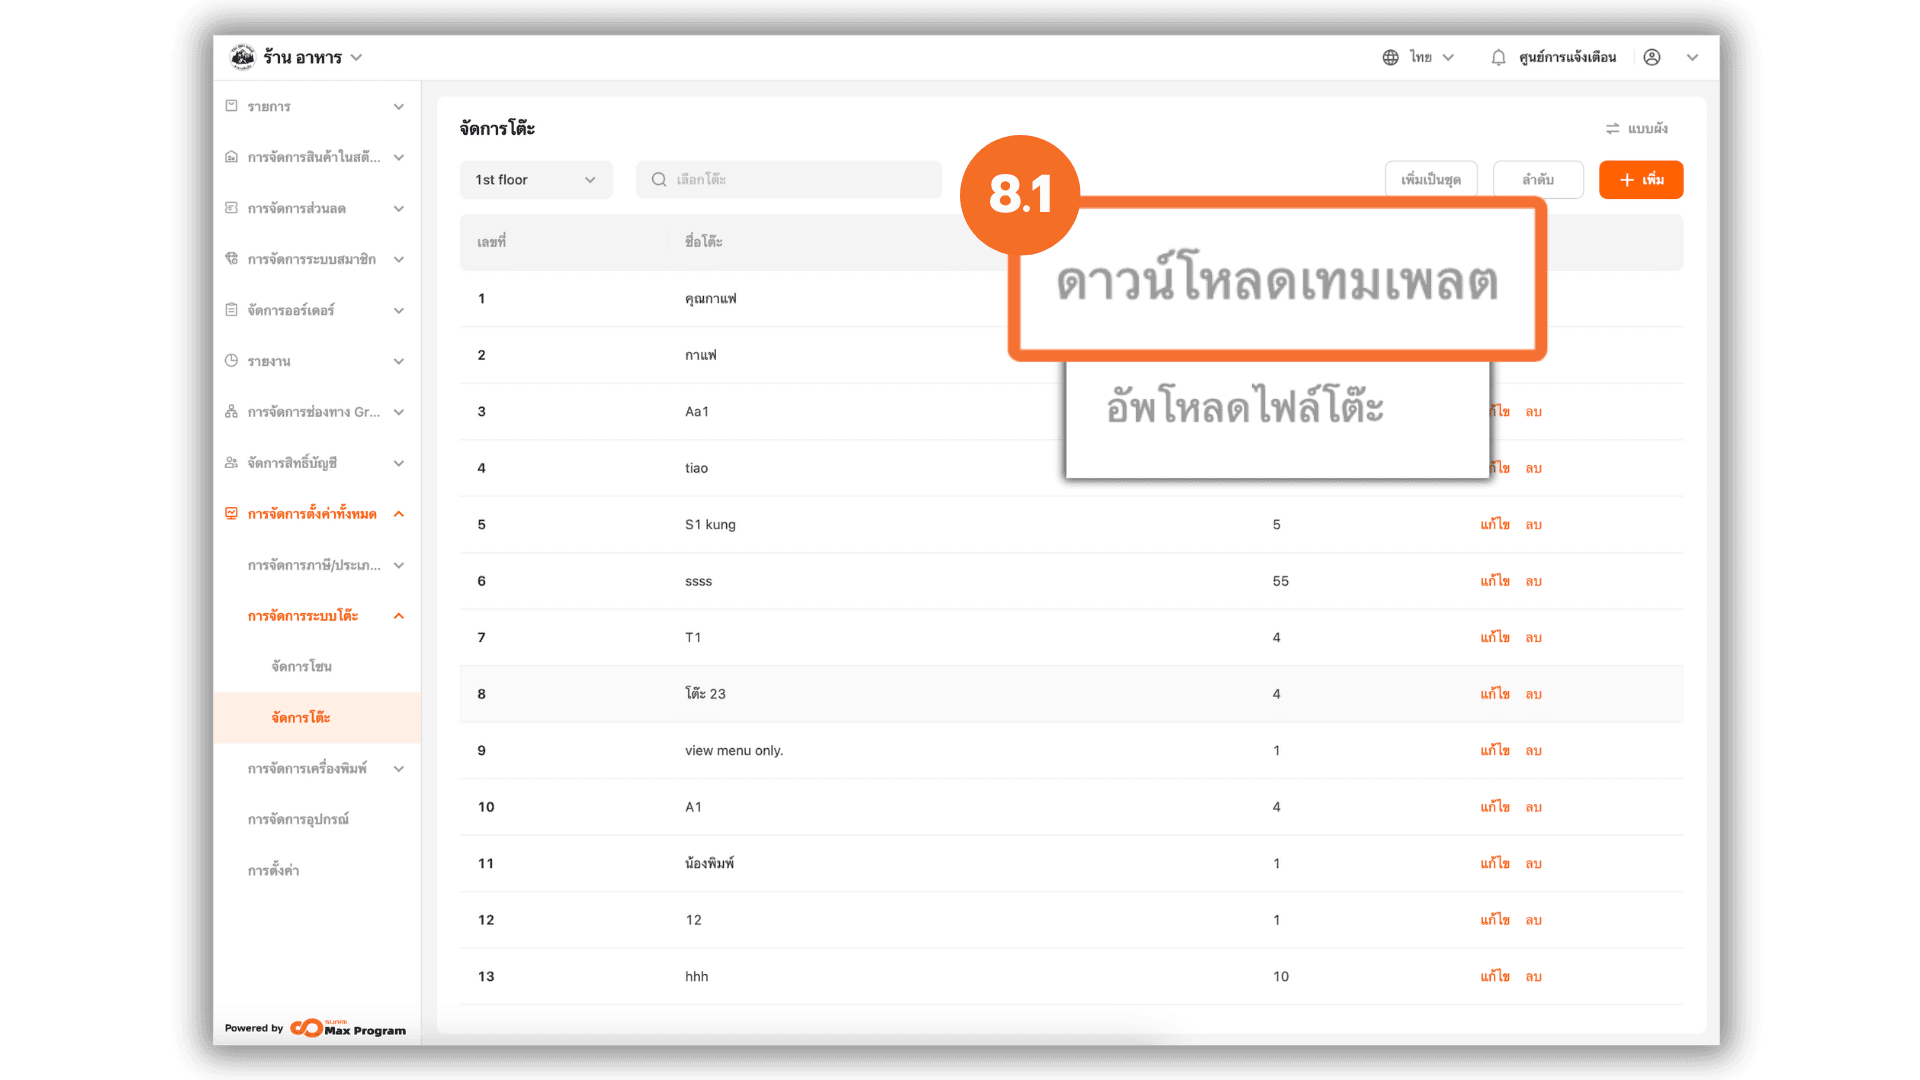
8. Add Multiple Tables (Batch Add)
On the table management screen, click “Batch Add”.
8.1 Download Template
Click “Download the template” to download an Excel file named “table Import Template.xlsx.”
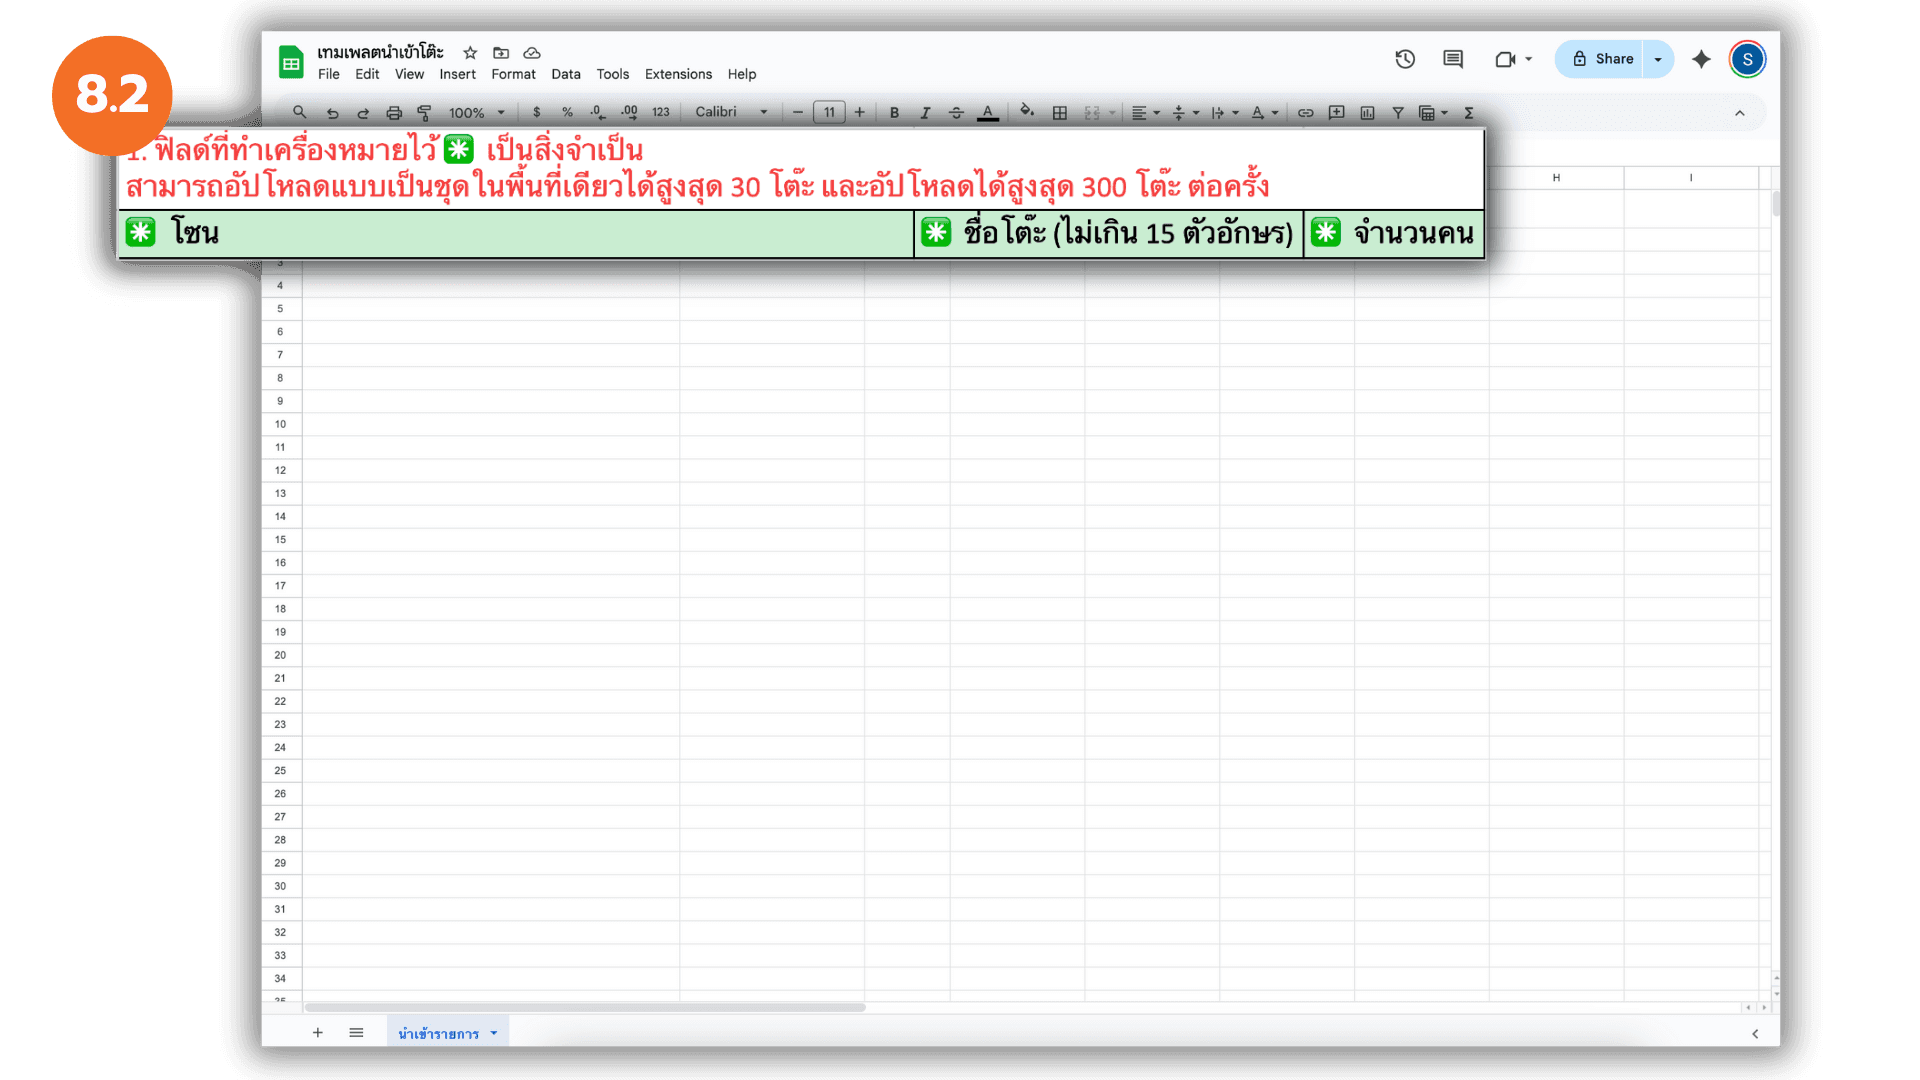
8.2 Fill in Excel Template
Open the template and fill in the table data:
- Area – Must match an existing zone name exactly
- Table Name – e.g. A01, B02, VIP01
- Number of people – e.g. 2, 4, 6 (actual table size)
Note : You can upload up to 30 tables per zone and 300 tables total per upload.
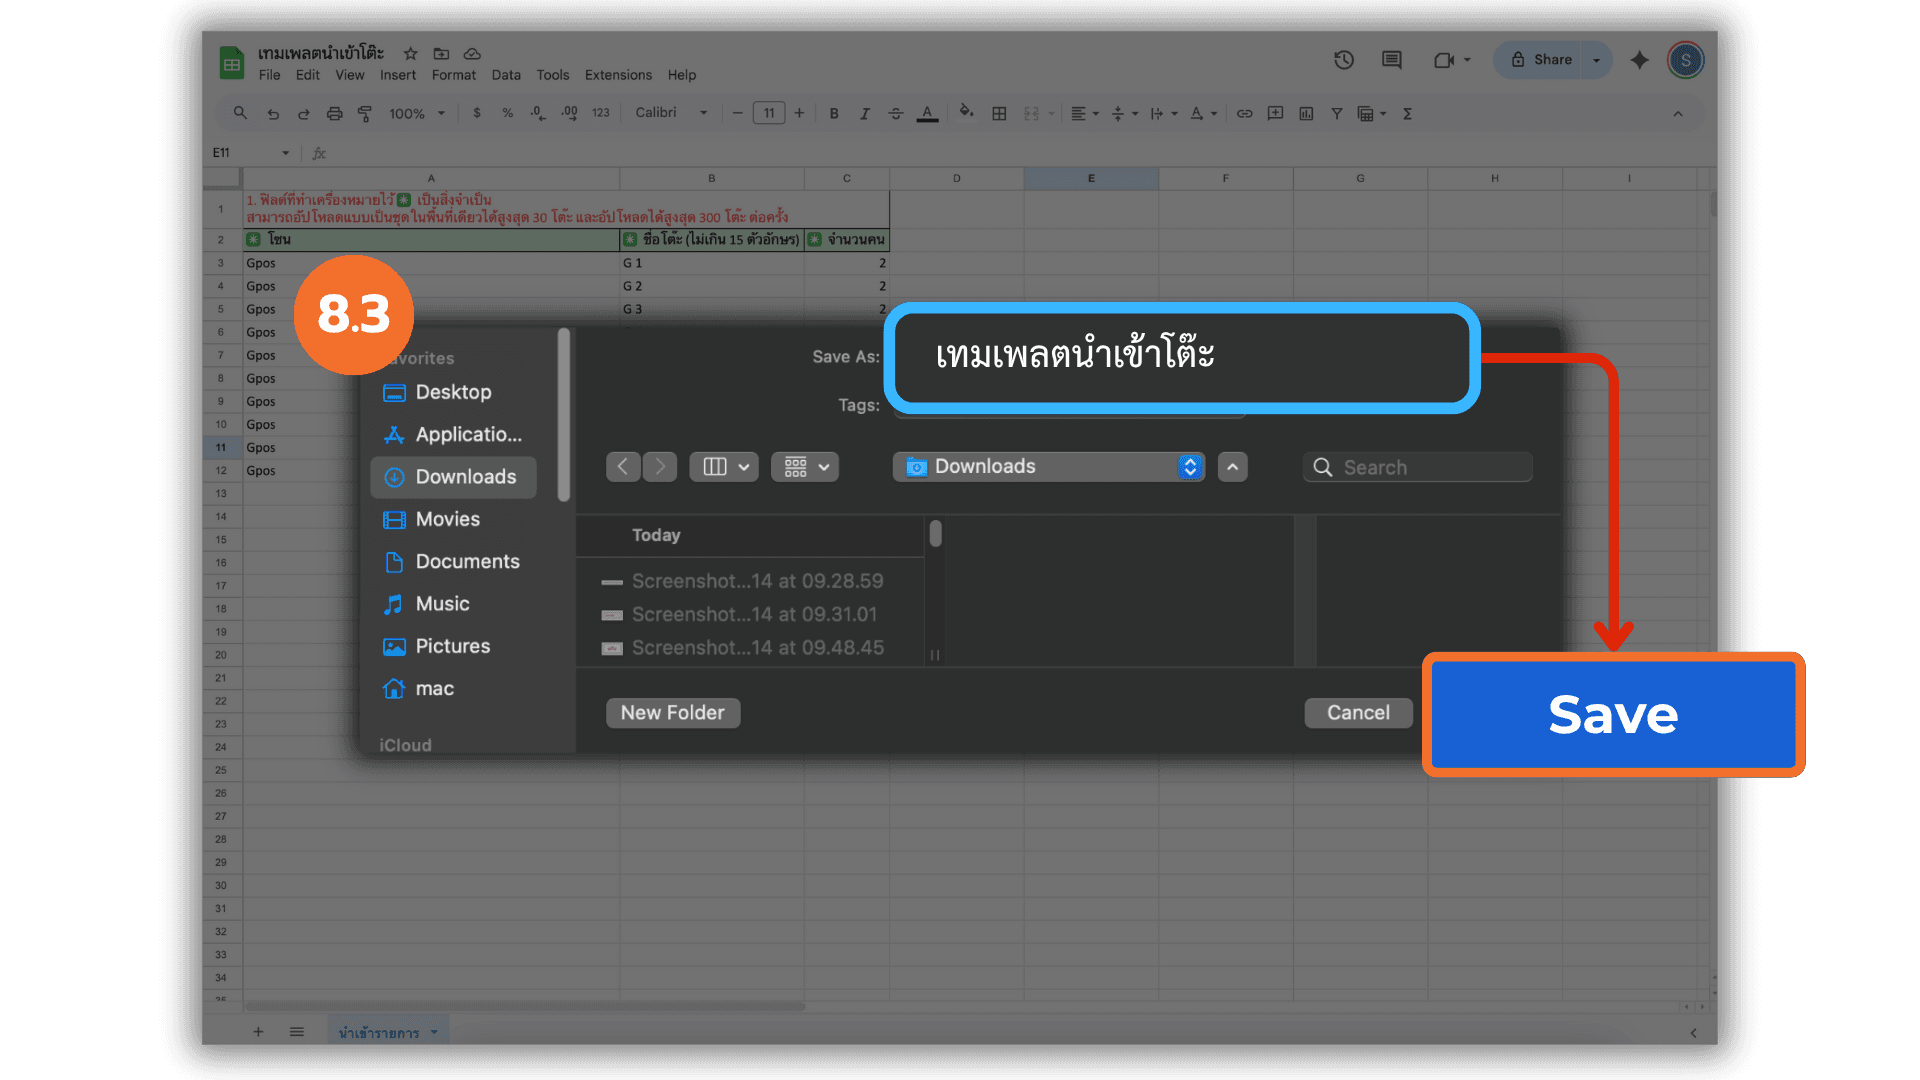
8.3 Save Excel File
After entering all data, save the file in .xlsx format.
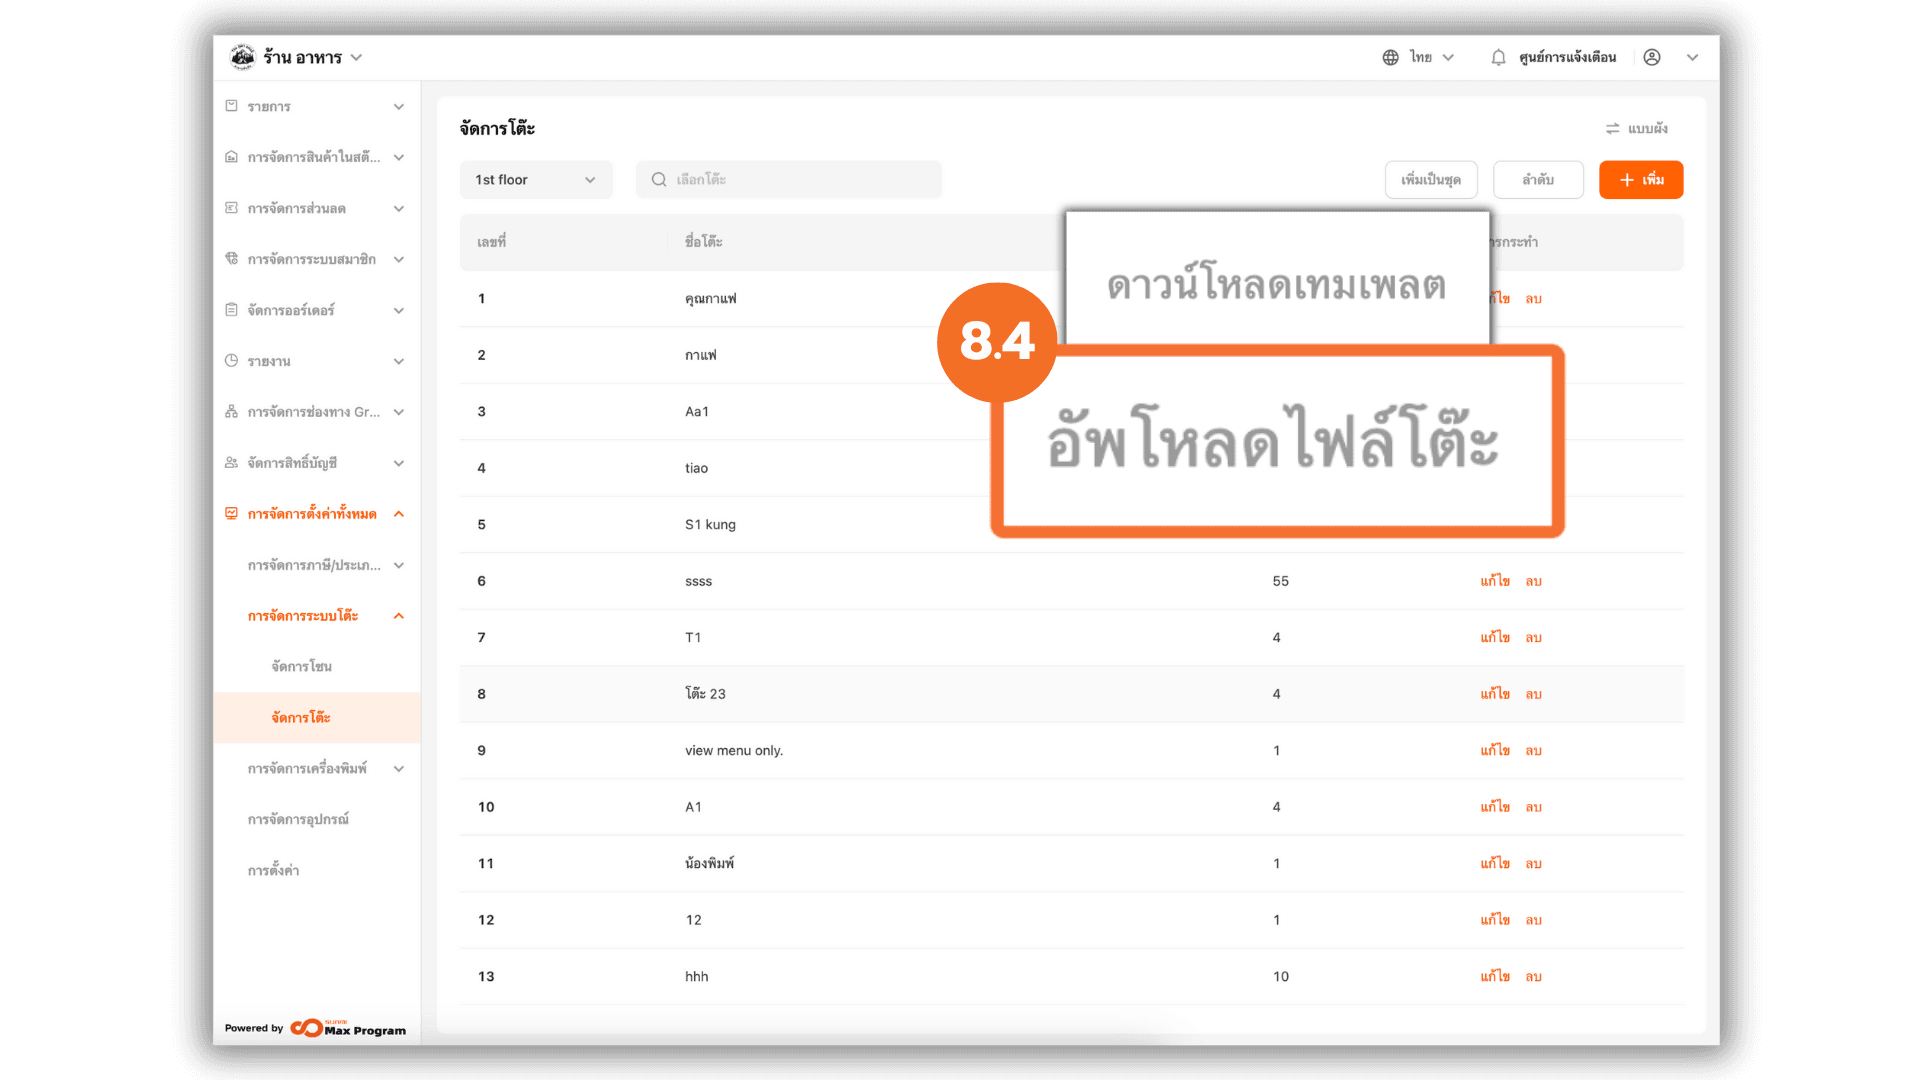
8.4 Upload Template
Return to the back office, click “Batch Add”, then select “Importing a table file”.
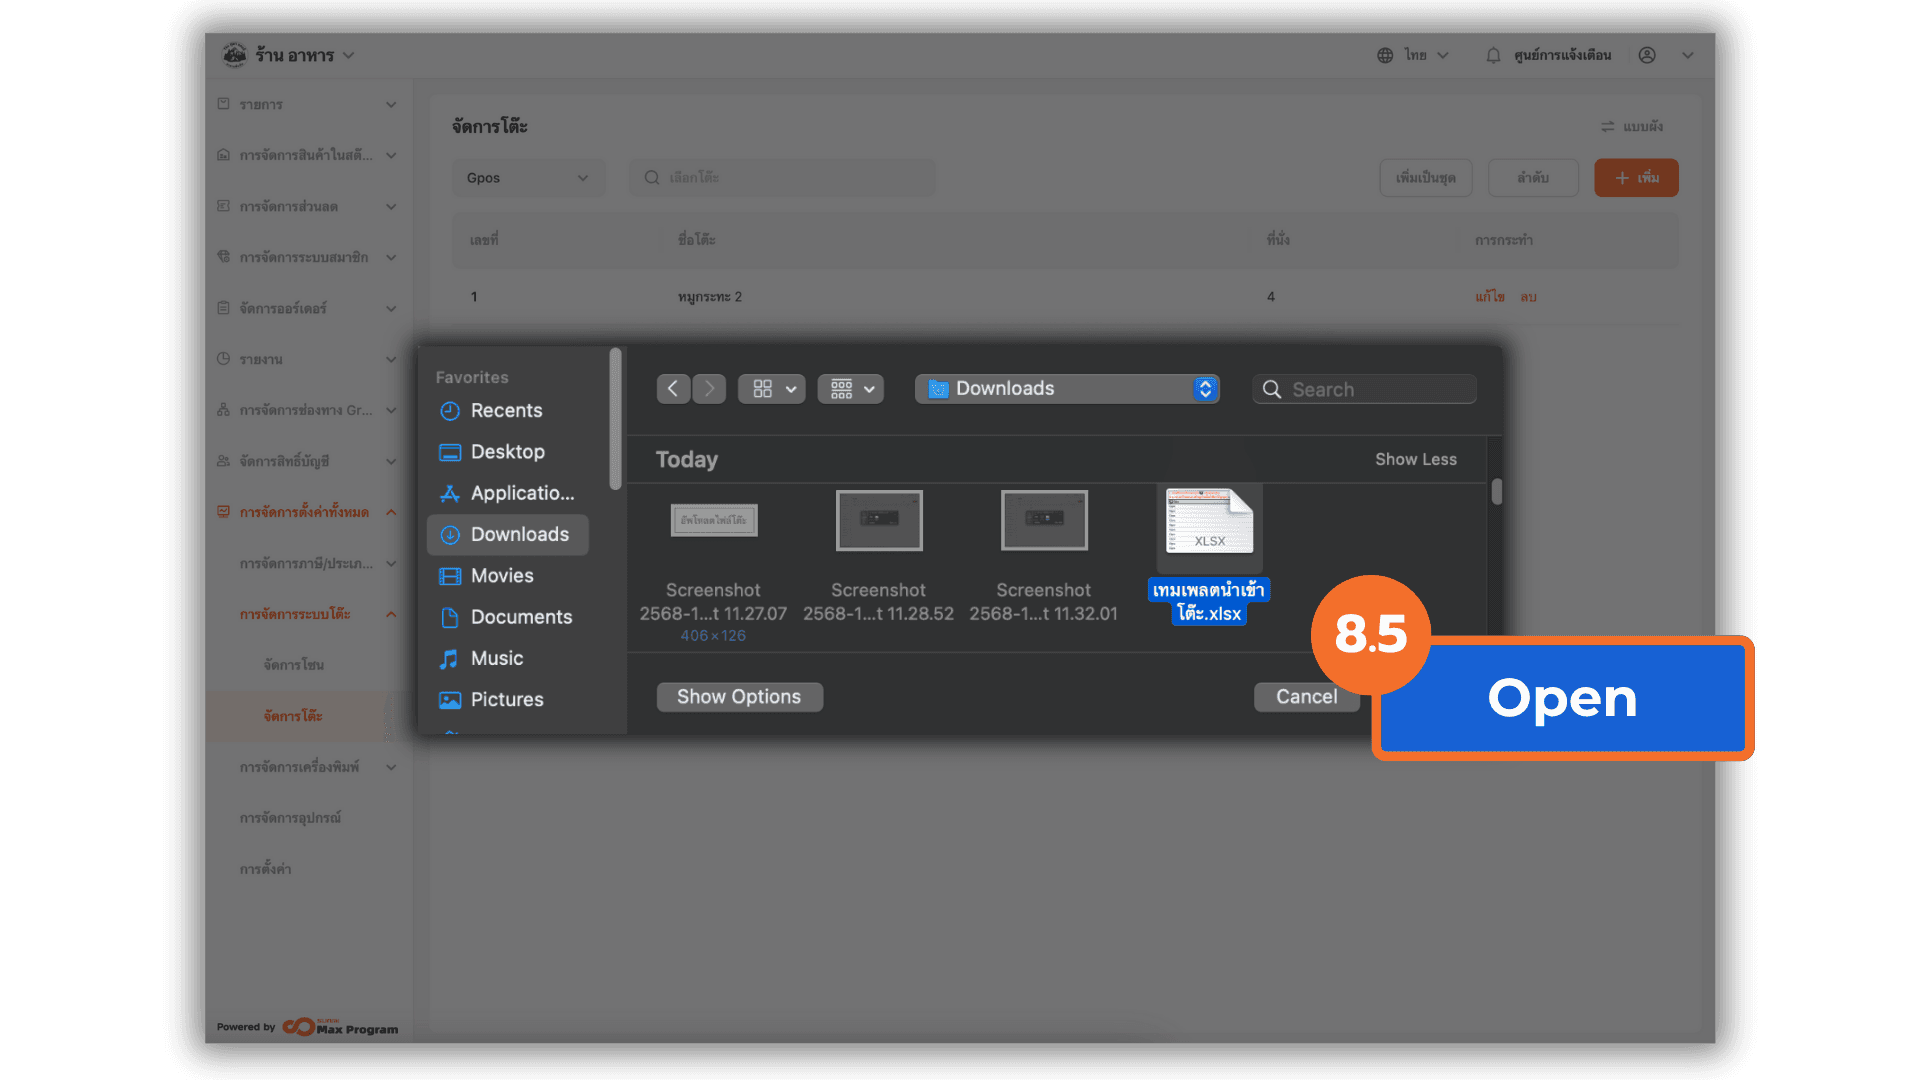
8.5 Upload the File
Choose the saved Excel file and click Open. The system will process and import all tables automatically.
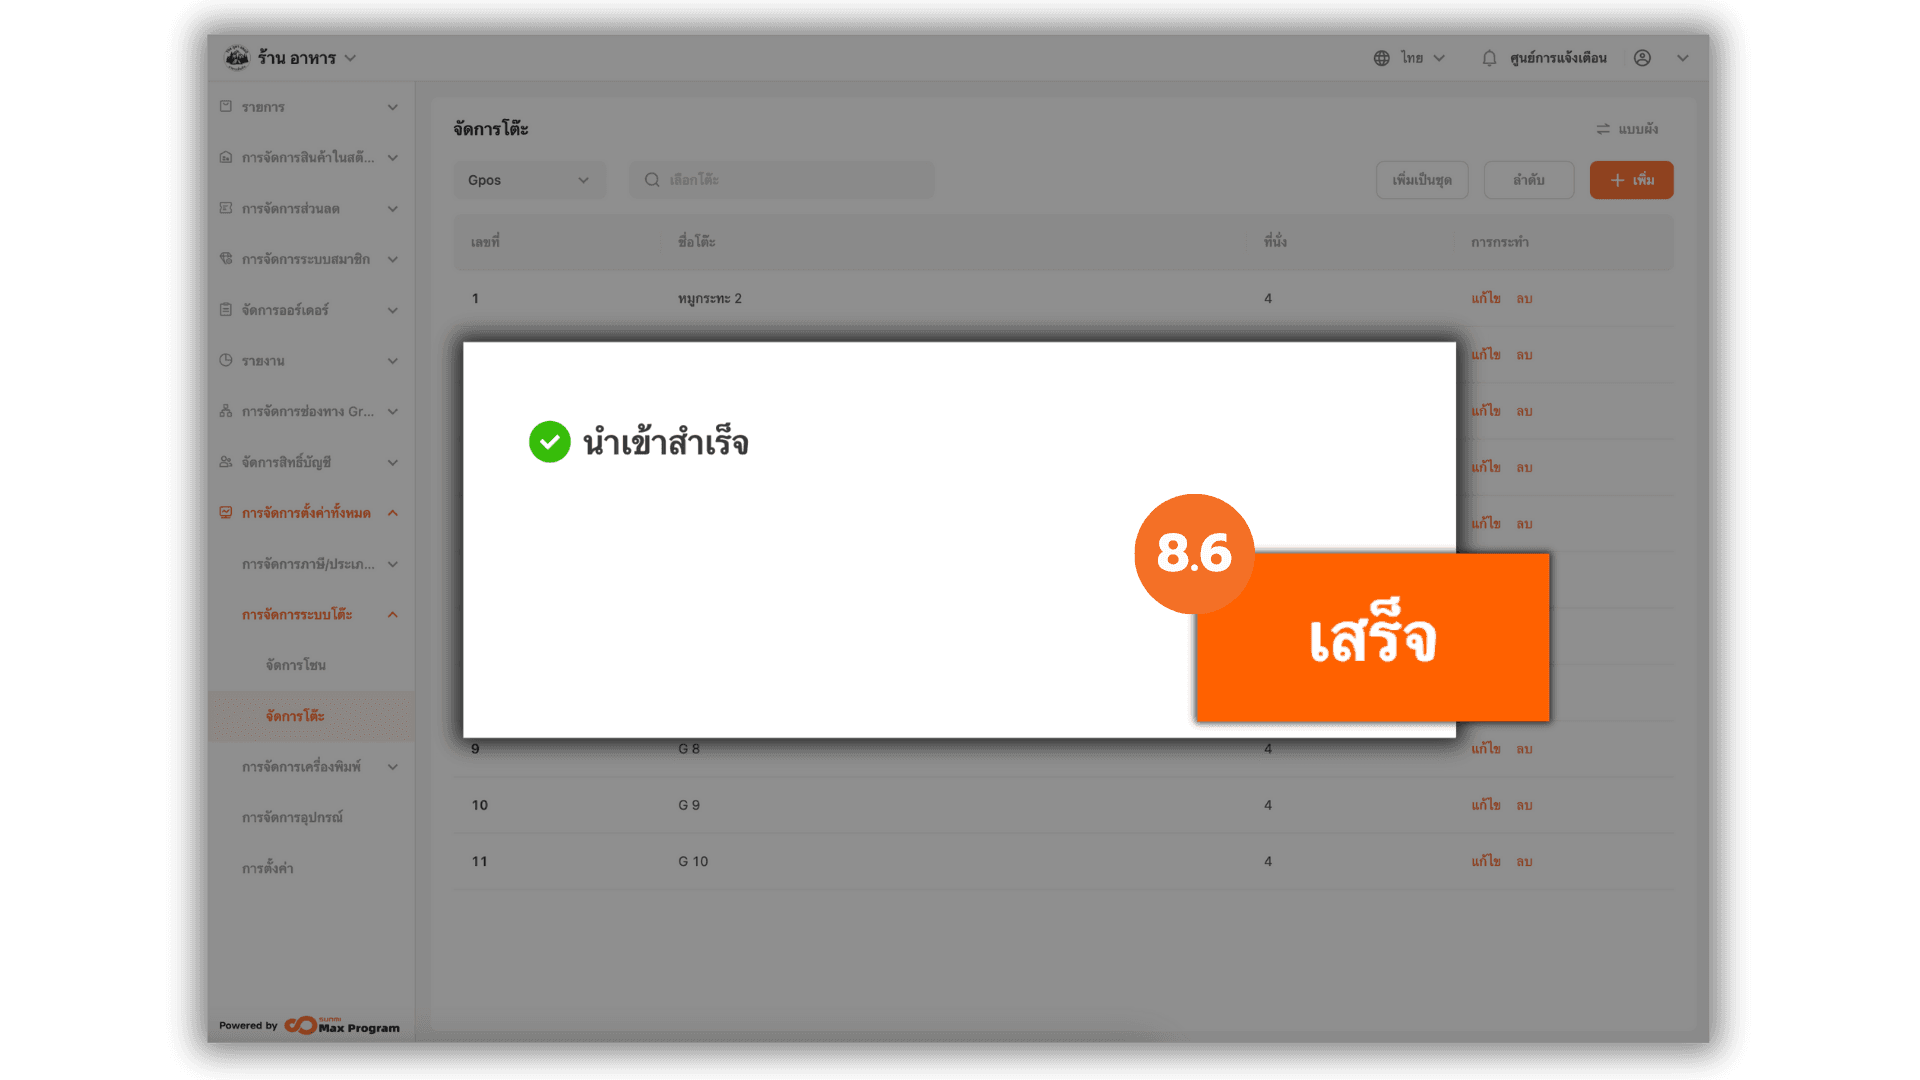
8.6 Complete Import
Once the system shows Import succeeded, click “Completed”. All tables will be added to their specified zones.
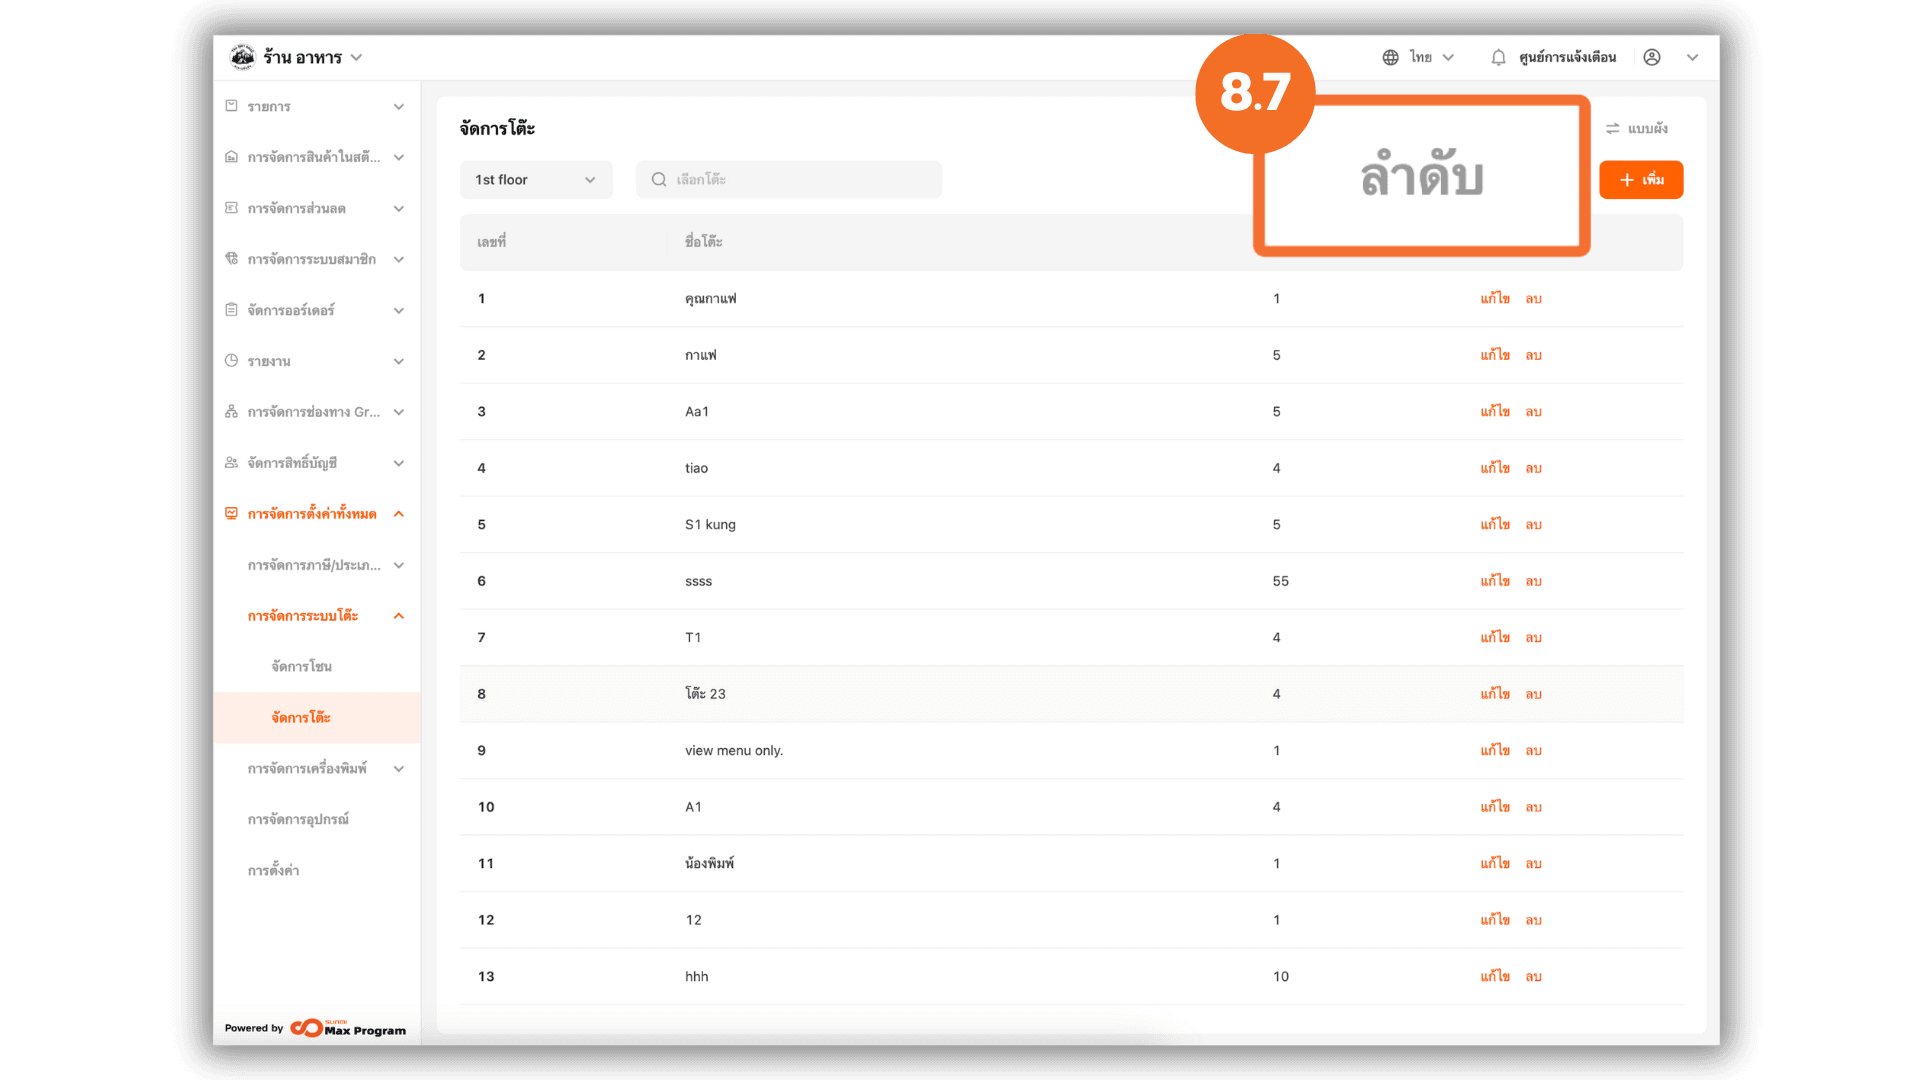
8.7 Sort Table Order
Click the “Sort” button to rearrange table order.
8.8 Adjust Table Order
Use the ▲▼ arrows next to each table to move them up or down, then click “Save” to confirm the new arrangement.

Adding Tables (Canvas Mode)
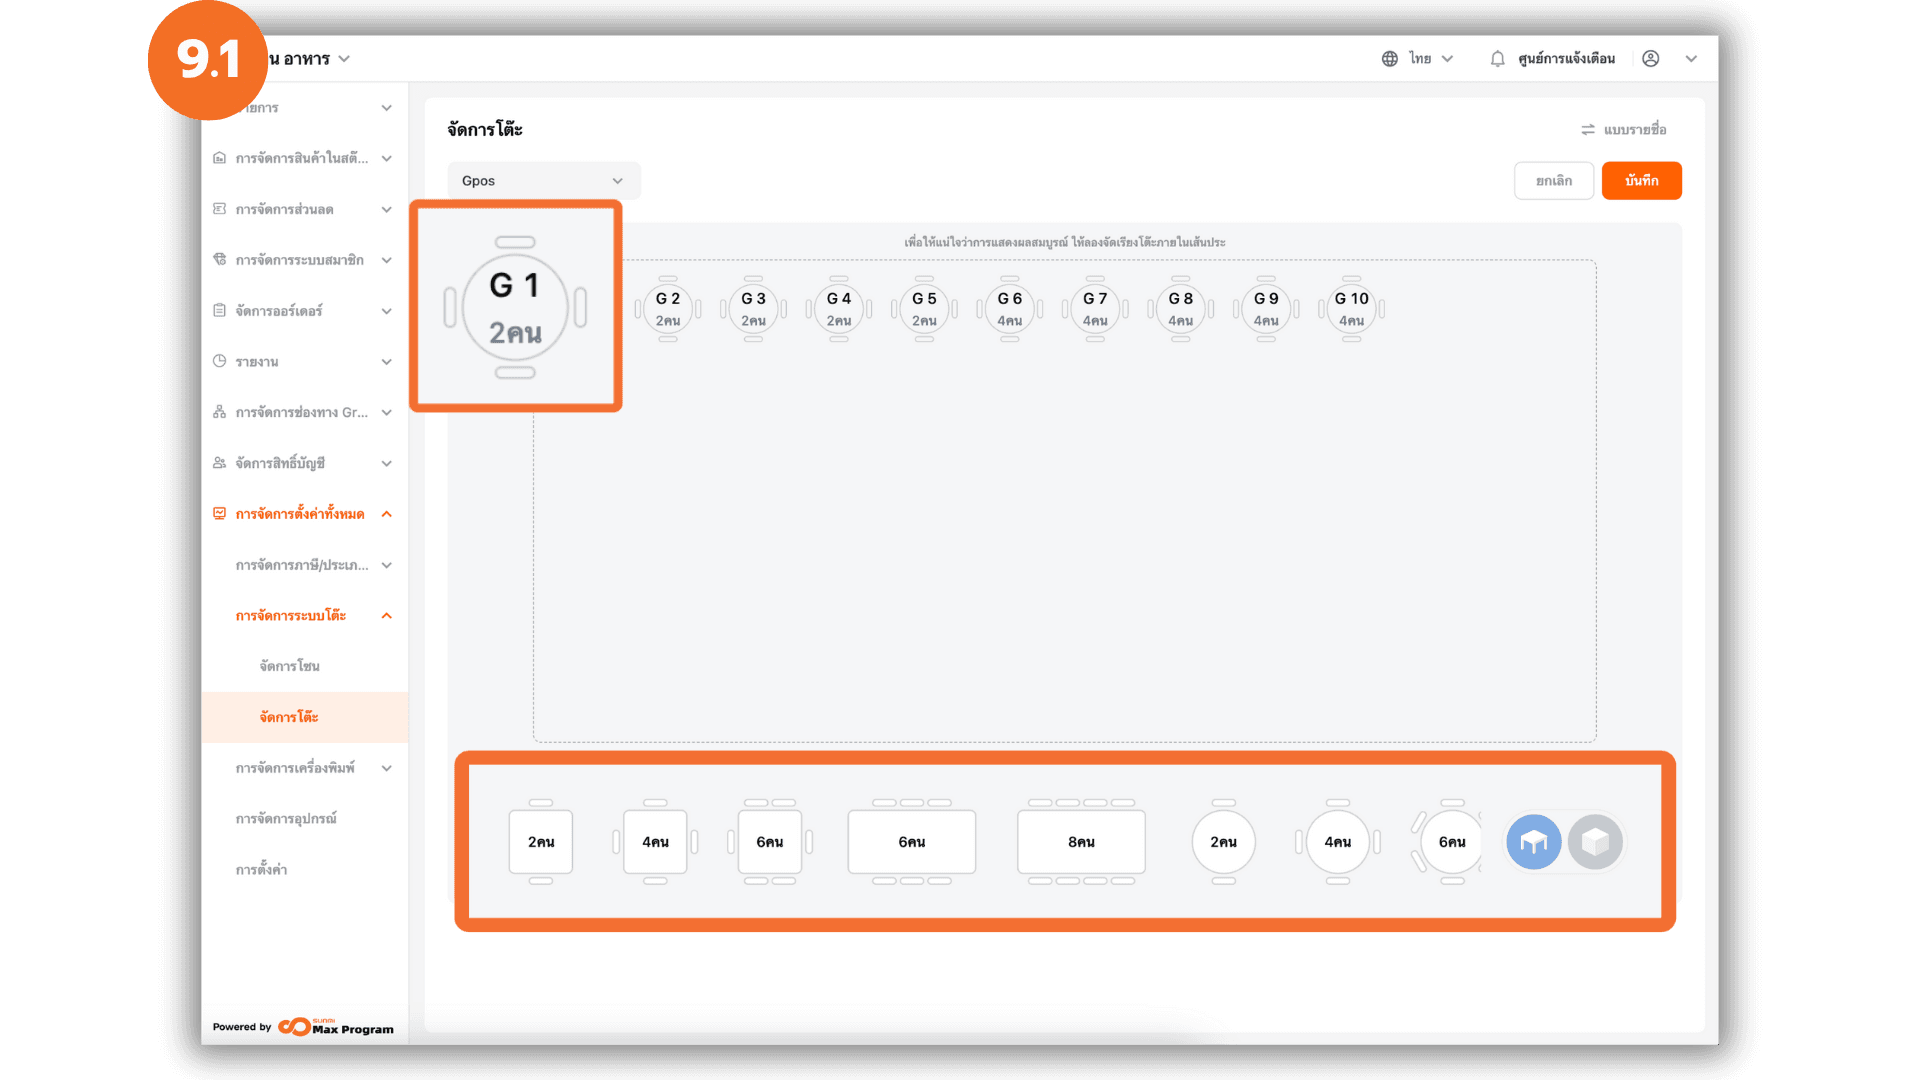
9. Access Table Management
From “Table Area Management”, select “Table Management” from the top menu, select a area, then click “Edit.”
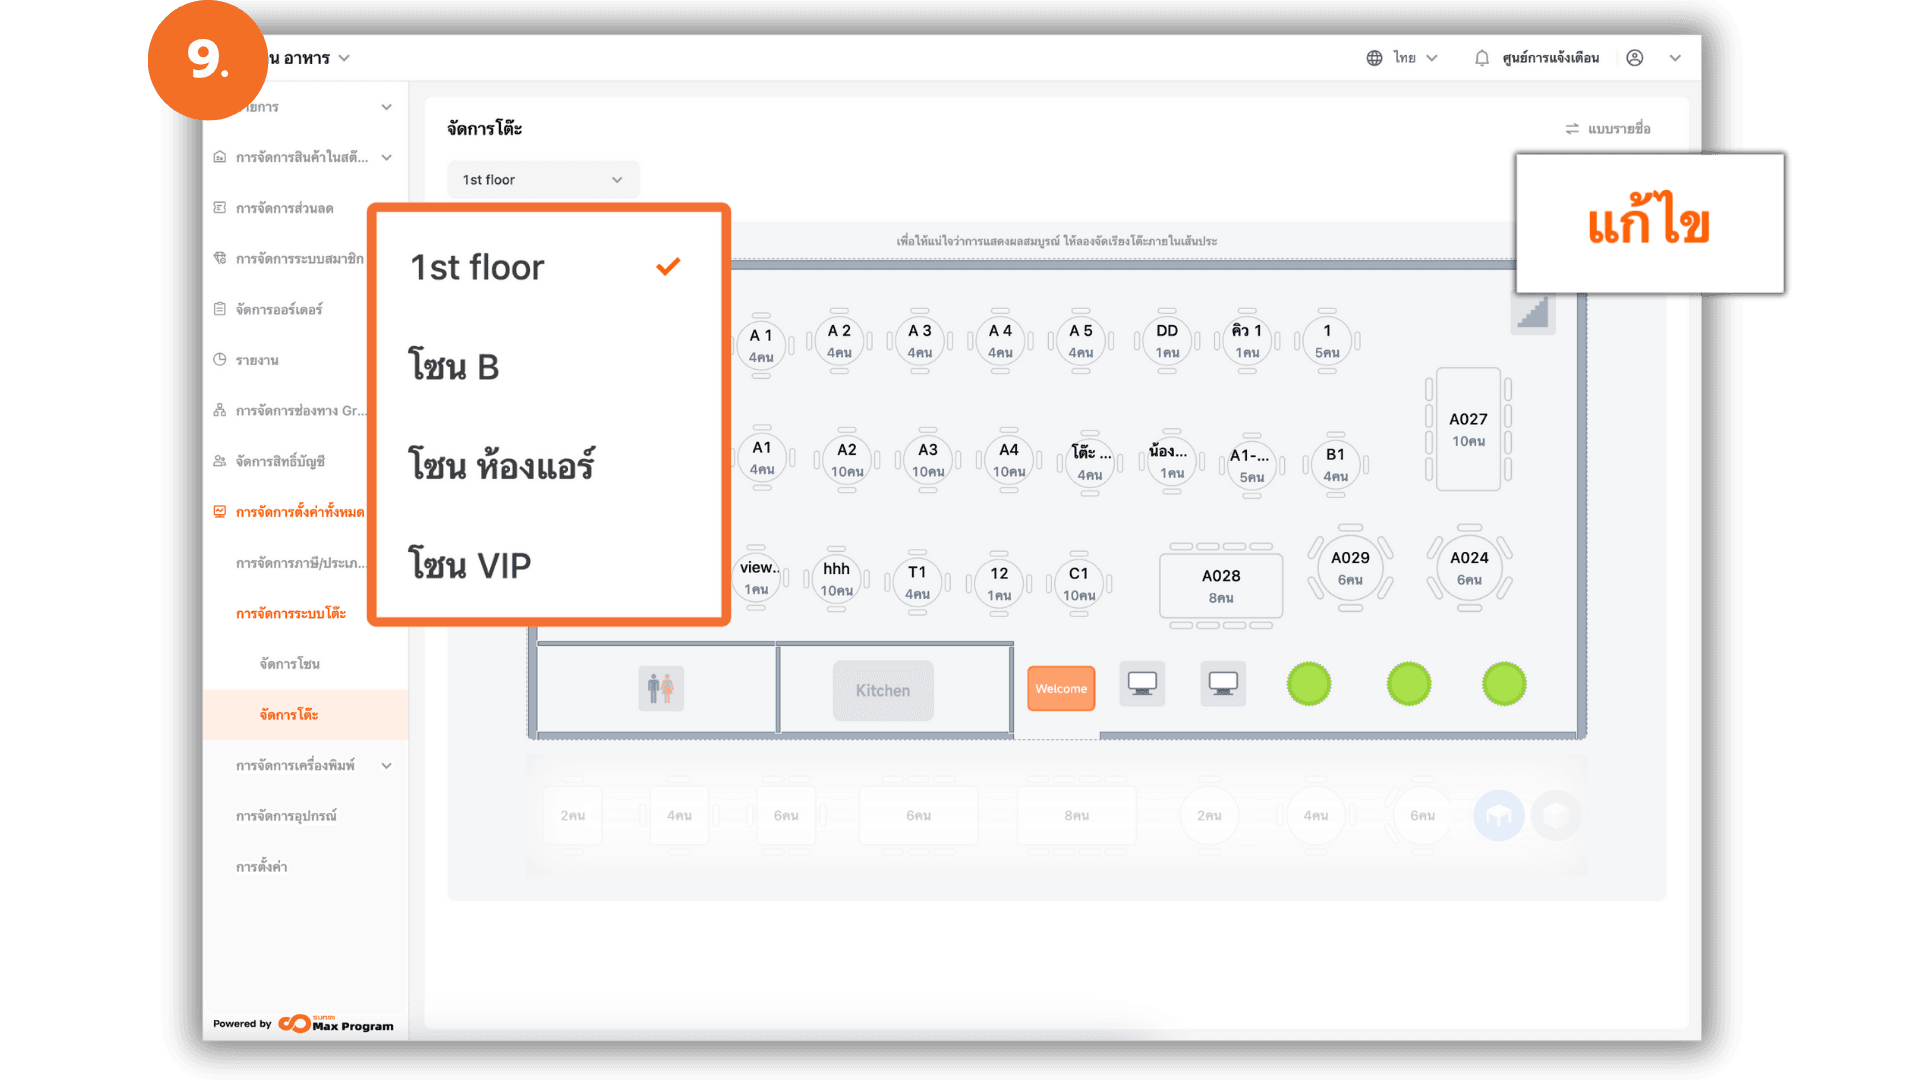
9.1 Select the Desired Zone
Click “Edit” to begin table layout or editing in that zone.
- Click an empty space to create a new table
- Click on an existing table to edit its details
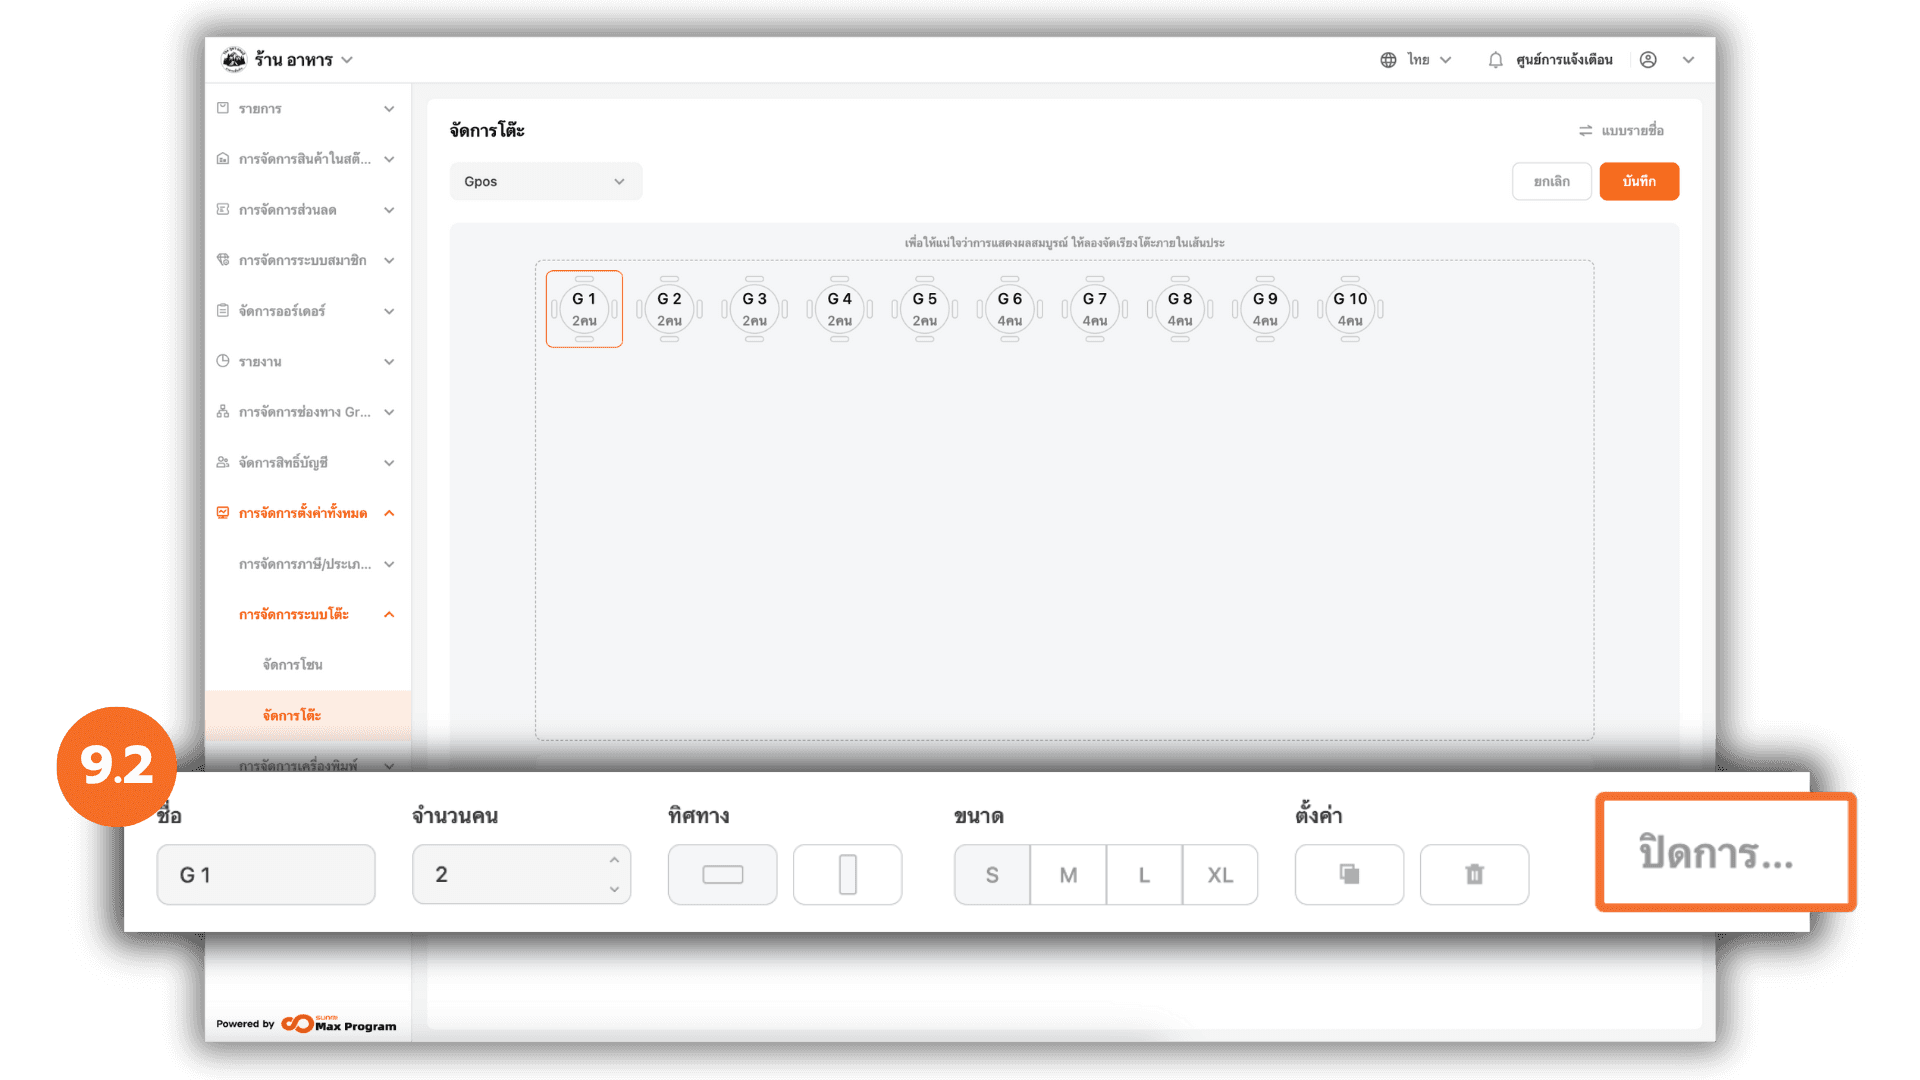
9.2 Edit Table Details
You can perform the following actions:
- Edit table name
- Change seating capacity
- Set table orientation (e.g. left, right, top, bottom)
- Adjust table size to fit the layout
- Copy tables to duplicate the same style
- Delete tables by clicking the trash bin icon
After editing, click “Disable” to confirm changes.
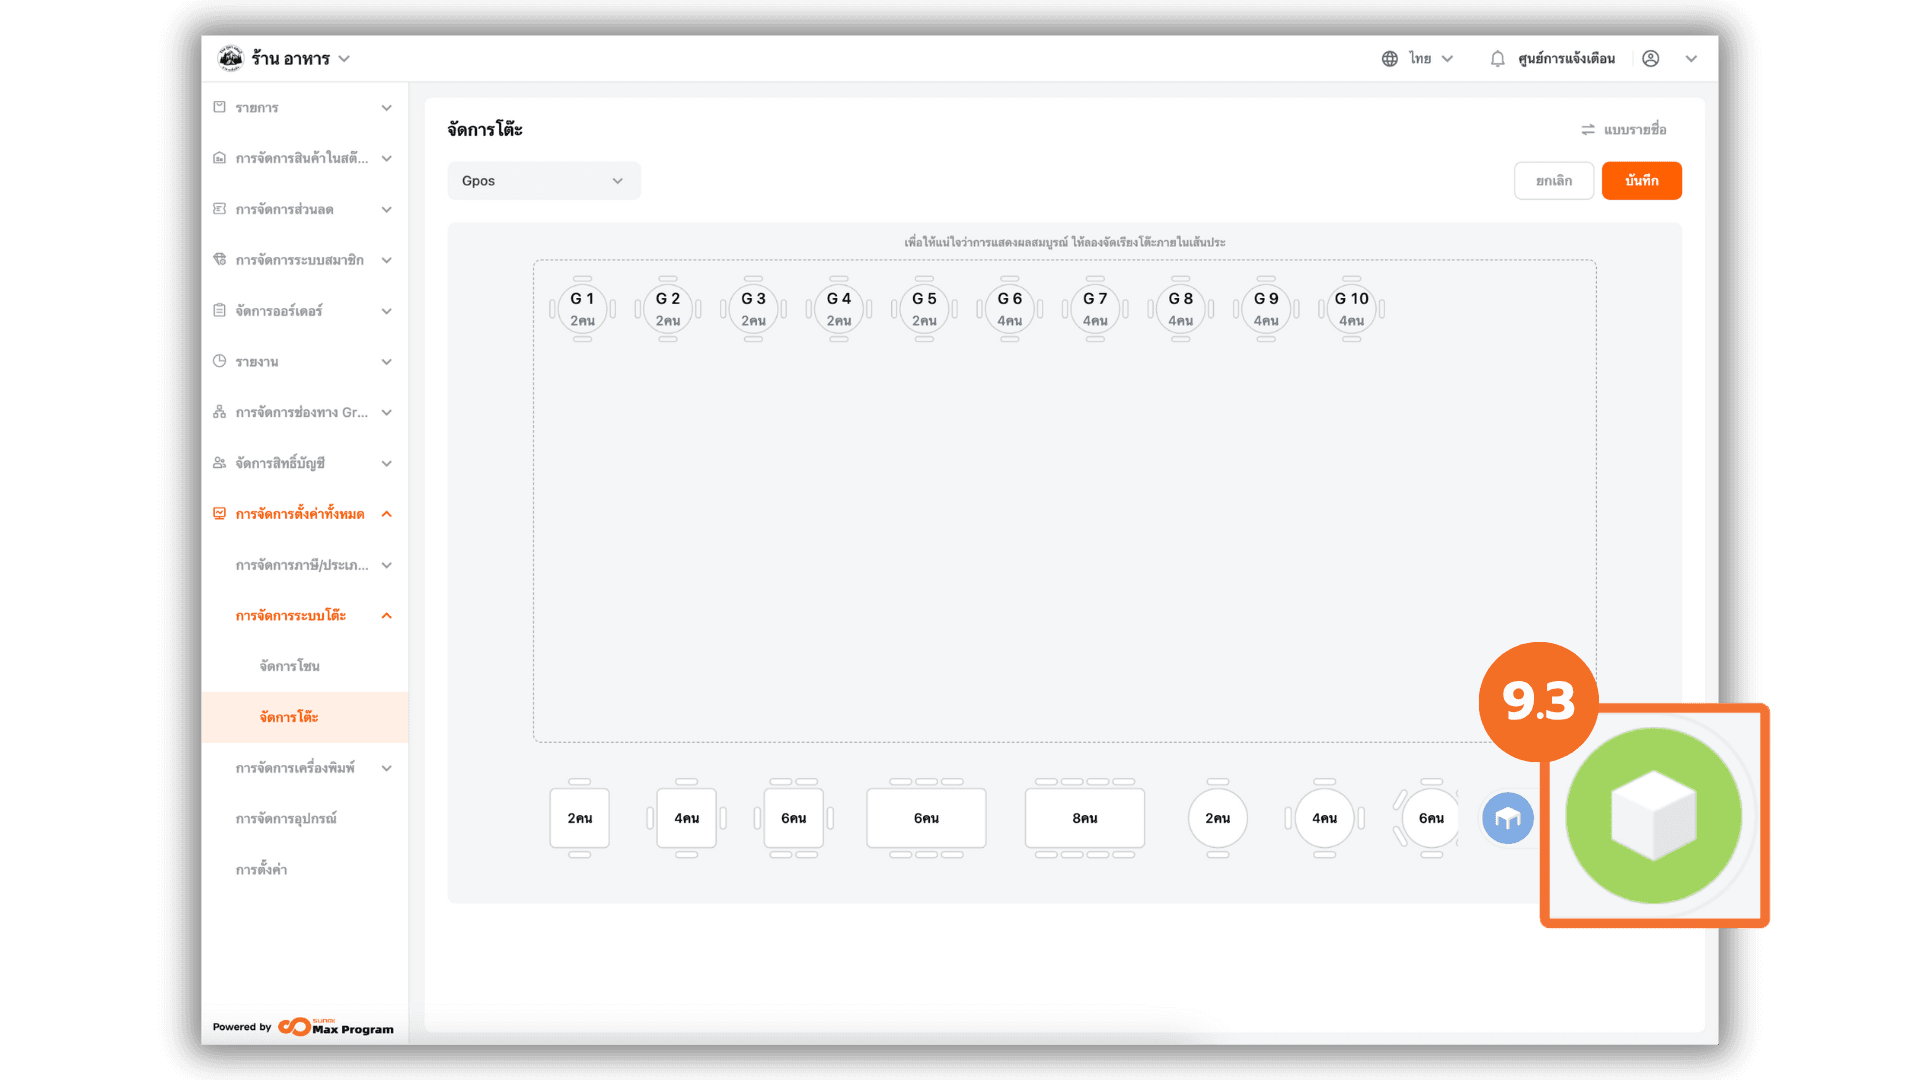
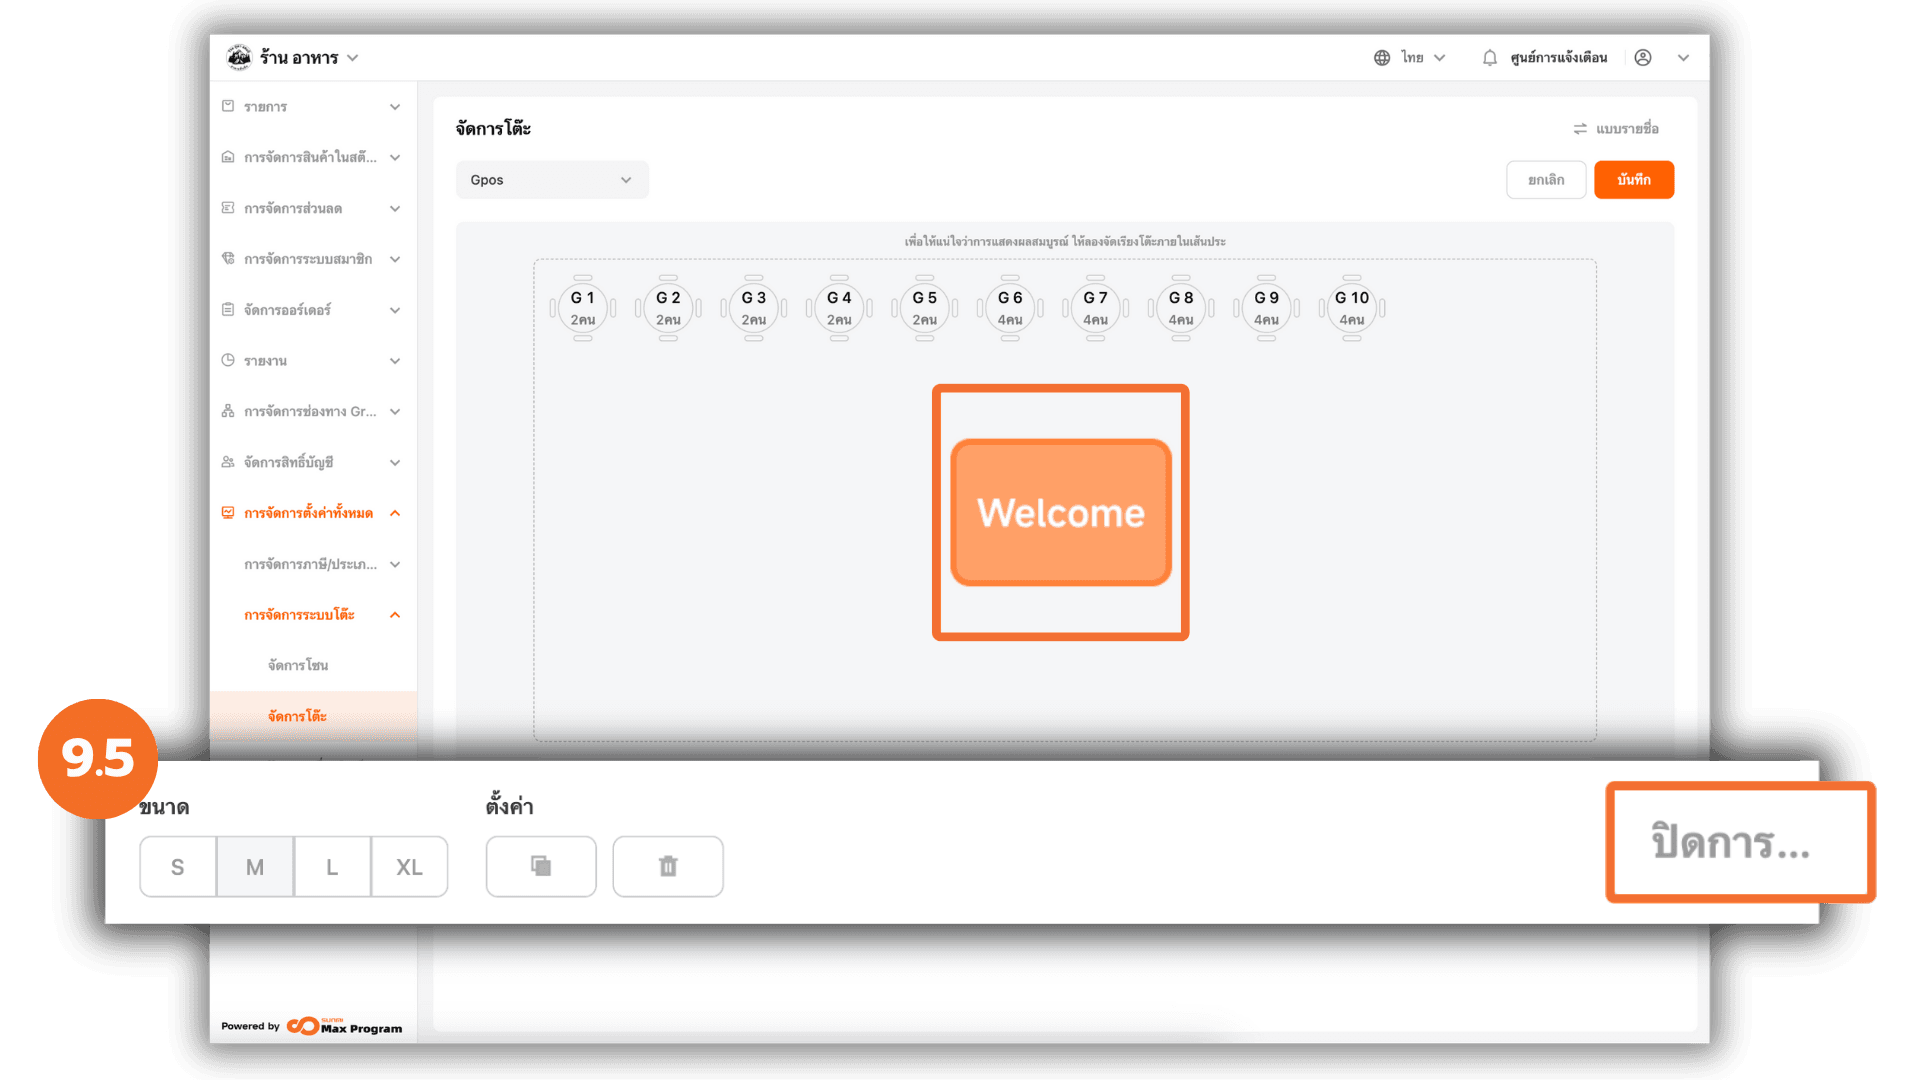
9.3 Decorate the Layout
Click the box icon to enter the layout decoration mode.
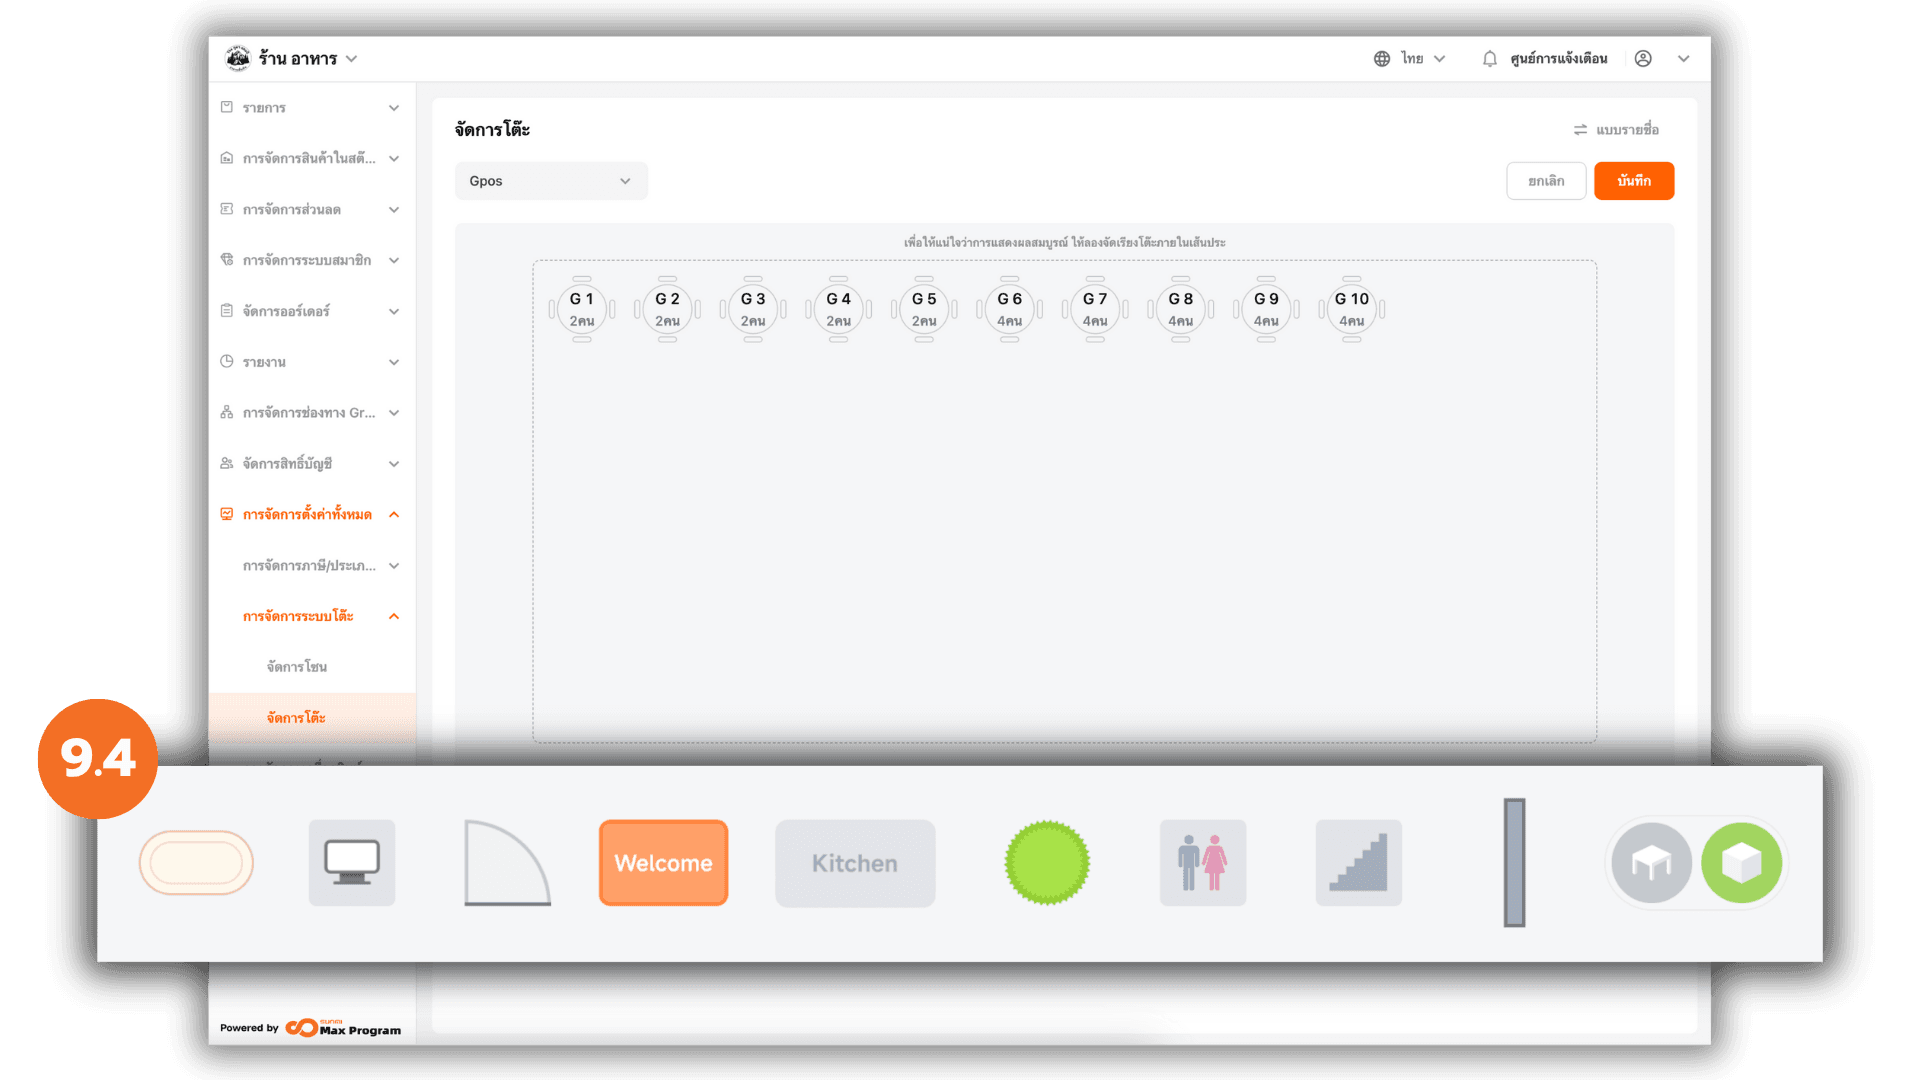
9.4 Select Decorative Items
Choose from decorative elements like : Plants , Doors , Restrooms , Stairs , Etc.
9.5 Adjust Decorations
After selecting an item, you can :
- Resize the item
- Copy the item
- Delete the item using the trash bin icon
Once decoration is done, click “Disable”.
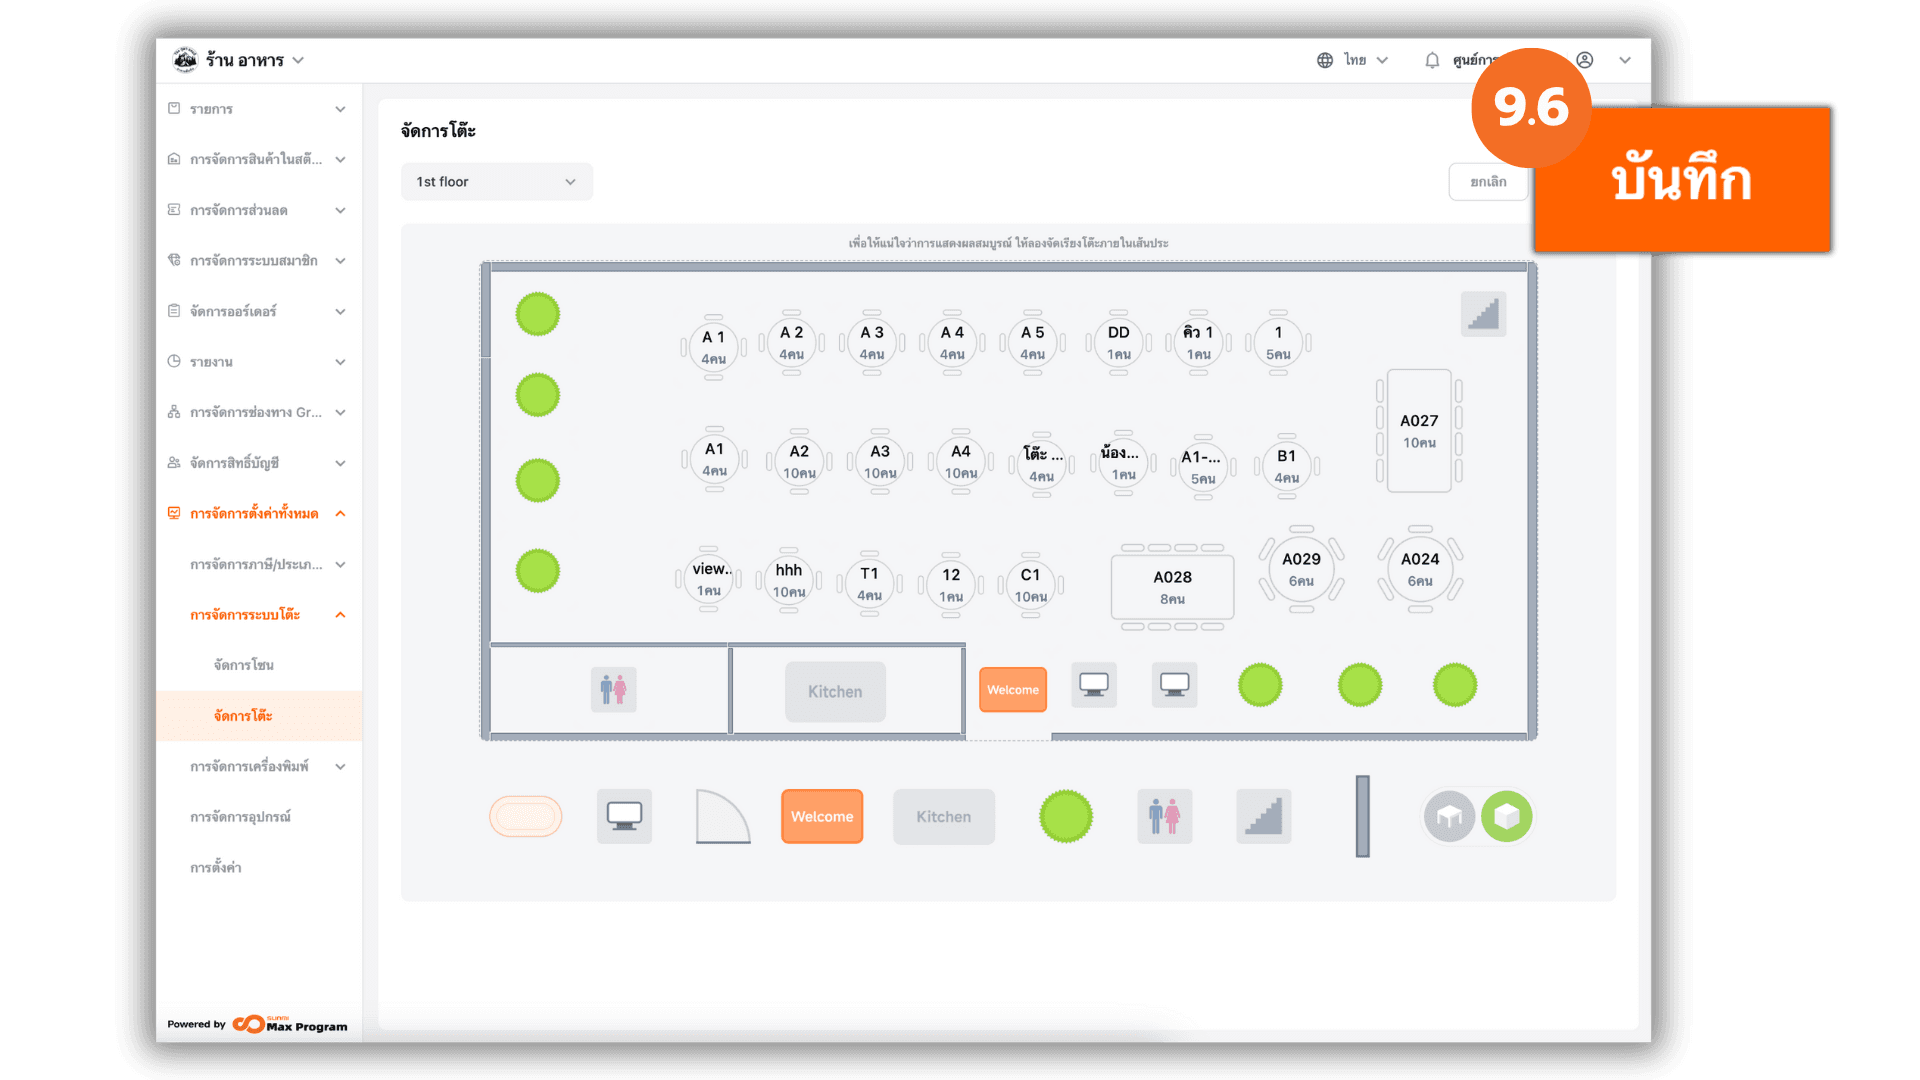
9.6 Save Changes
After finishing table layout and decoration, click “Save” to apply all changes.