Basic settings
2025-09-02 11:55
This manual helps merchants customize their sales interface and workflow to suit the specific operations of different business types. By tailoring the settings to match your store’s actual service process, you can improve staff efficiency and create a smooth customer experience throughout every step of the sales process.
1. Log in to the Back Office
Go to login.gpos.co.th , enter your email and password, and click Log In.
Once logged in, select the menu “Store Management” .
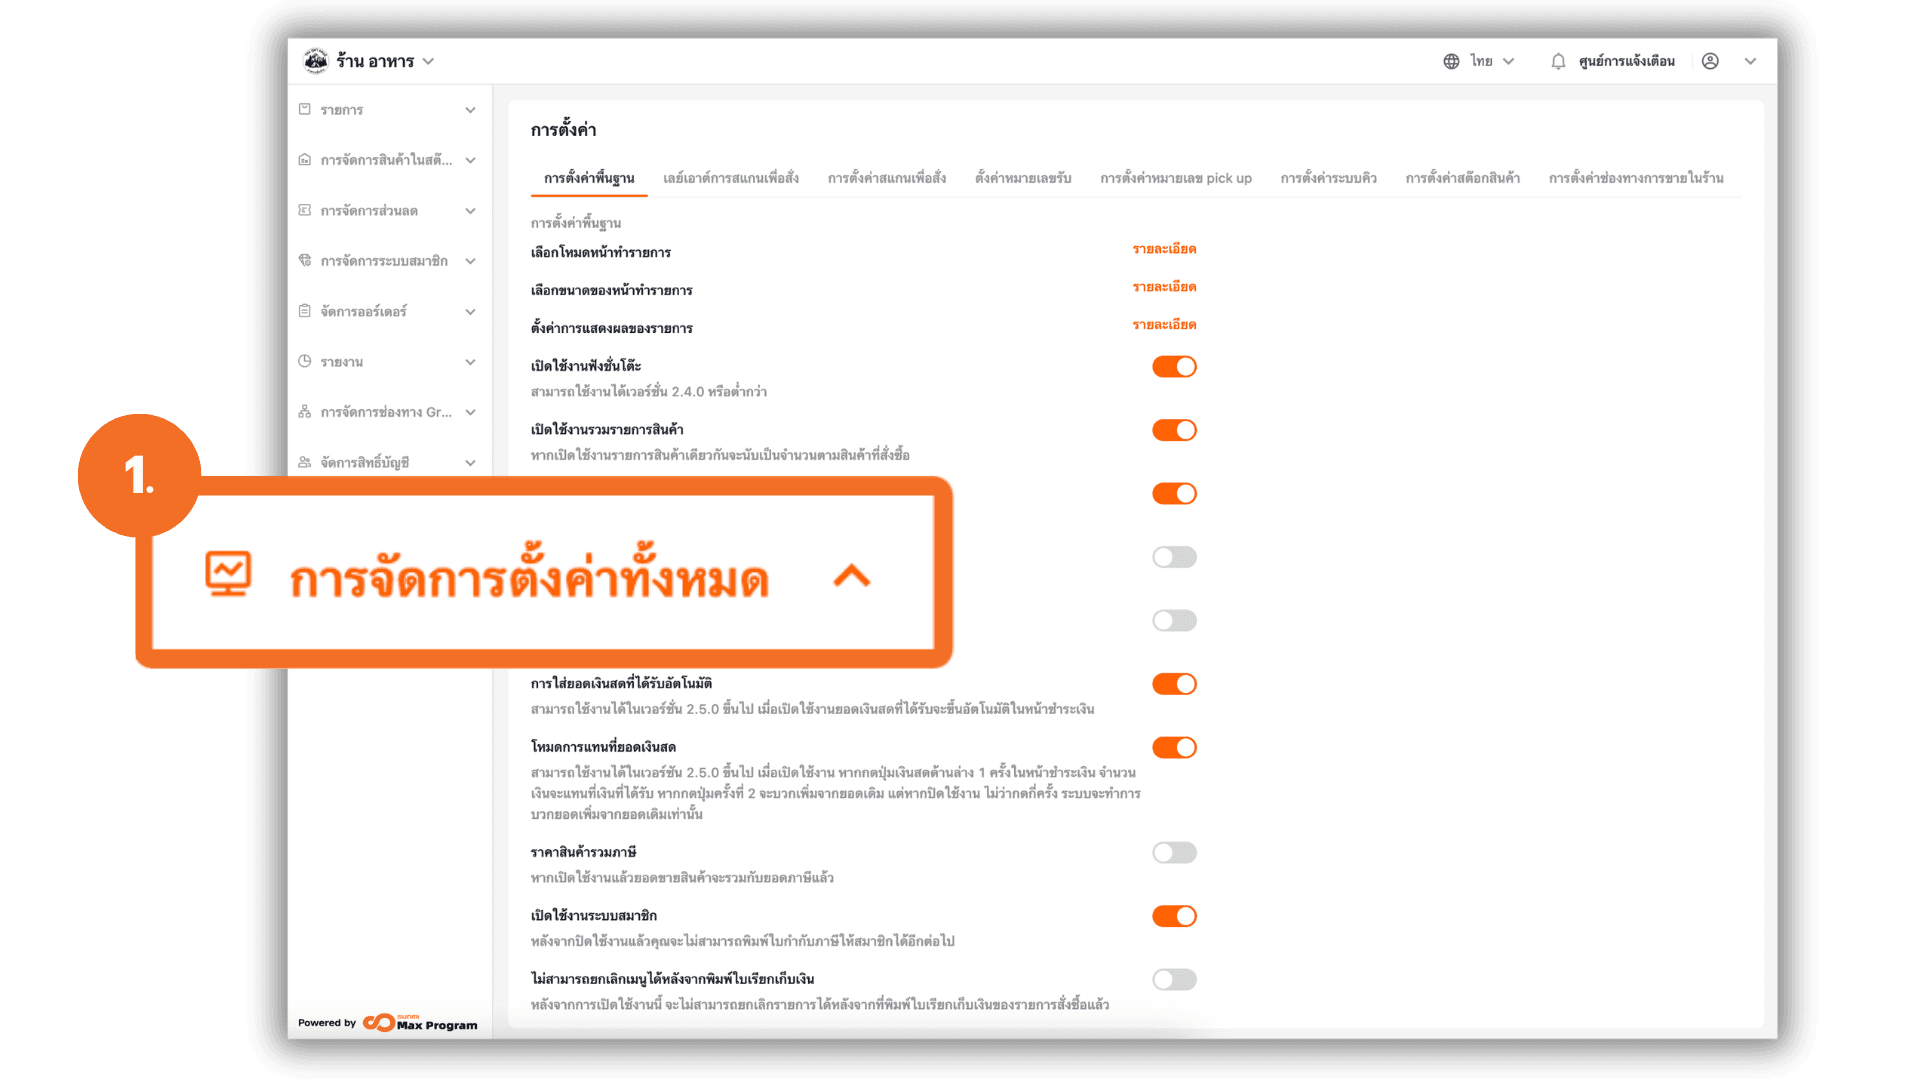
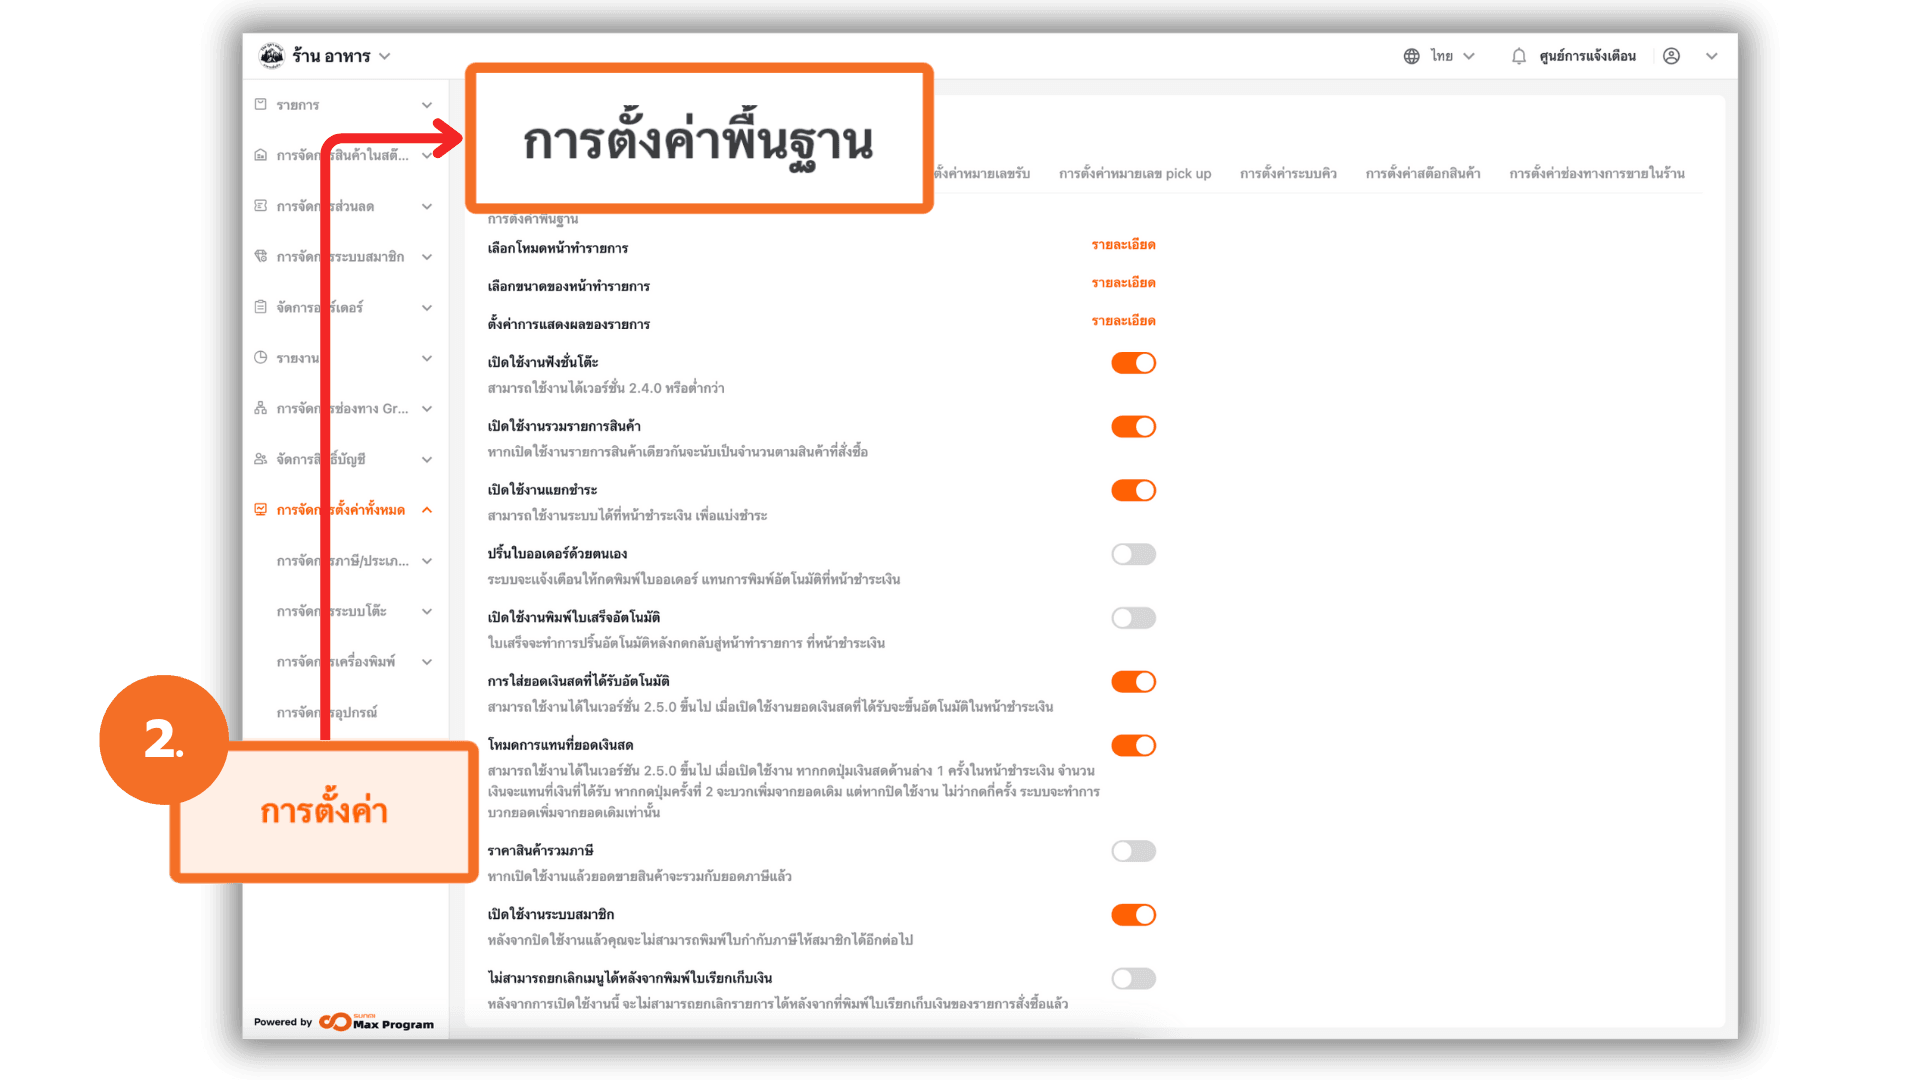
2. Access Settings Management
Go to the “Store Settings” menu and select the “Basic Store Settings” tab at the top of the page.
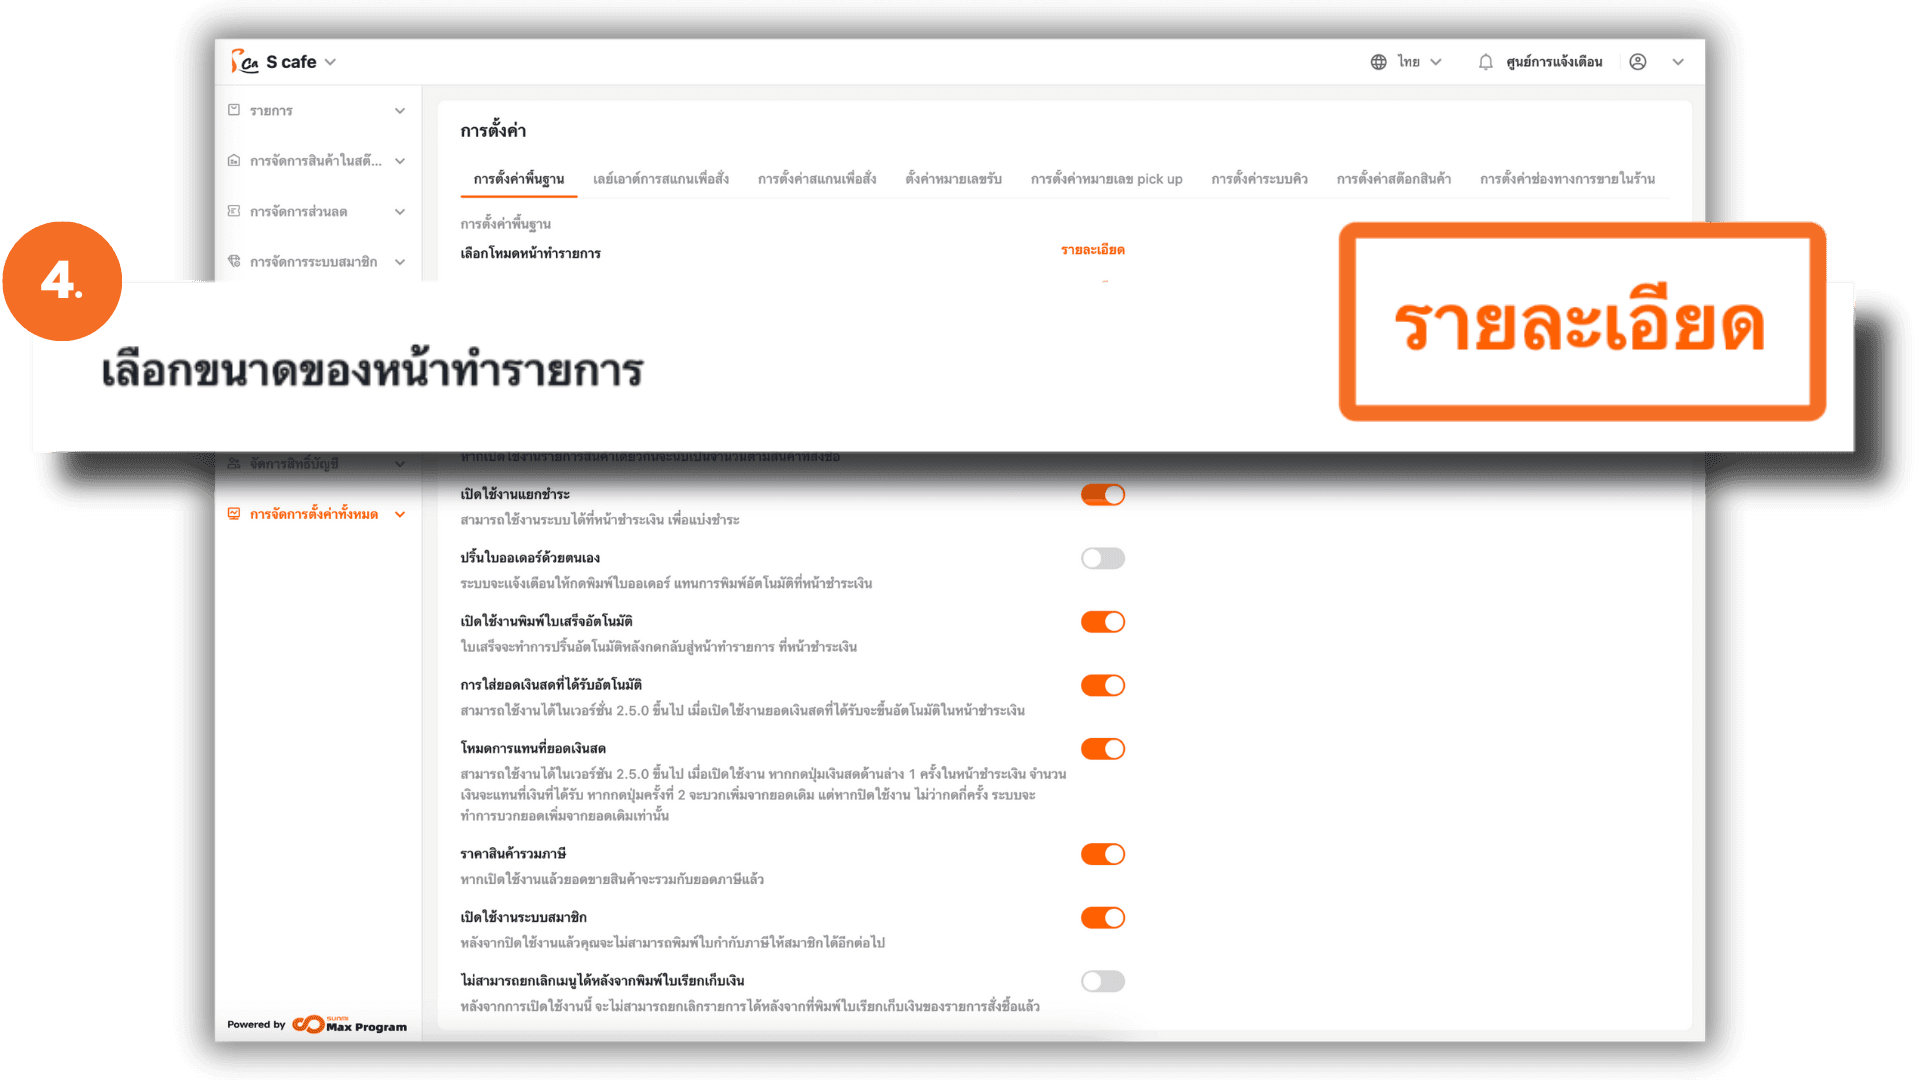
3. Configure “Layout Setup Mode”
Under Layout Setup Mode, click “Details”.

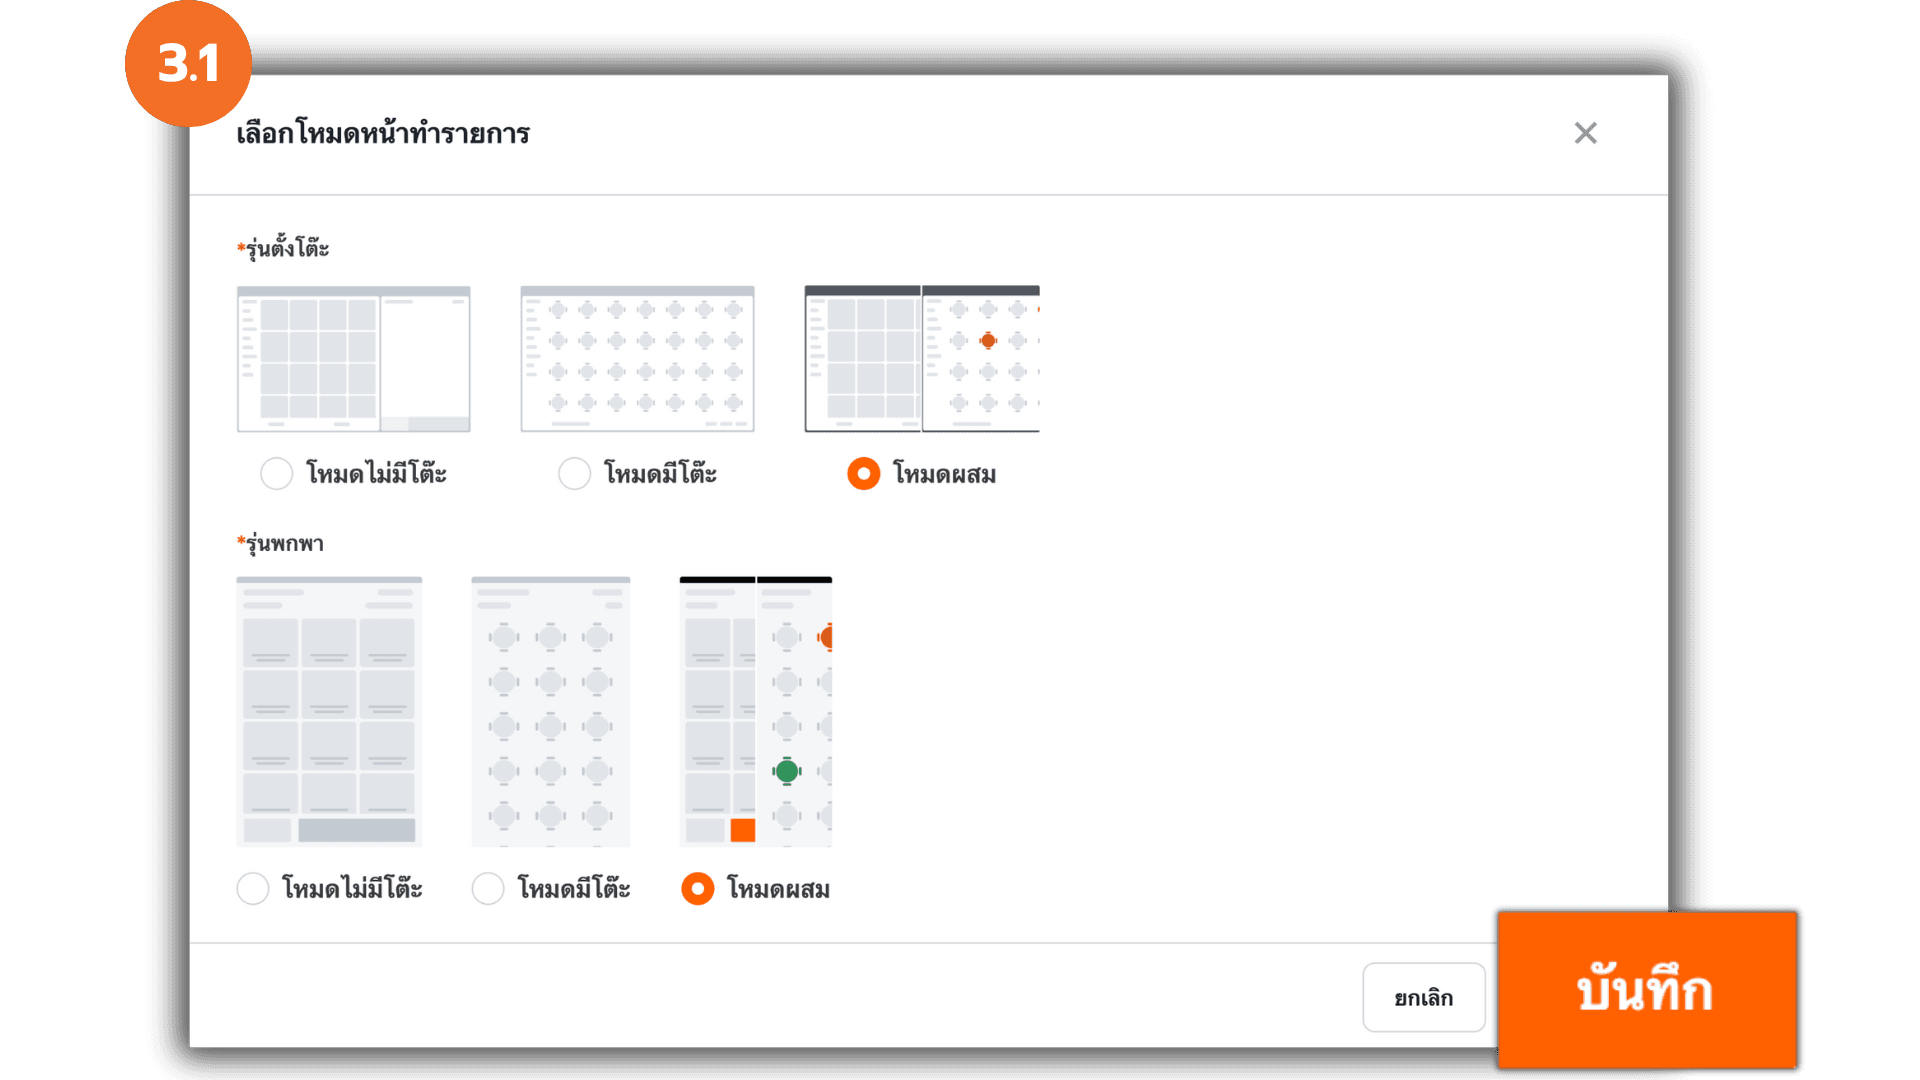
3.1 Select a Mode Type
A pop-up window will appear allowing you to choose the appropriate mode.
Modes are available for both desktop and Handheld (mobile) versions.
Available modes
- Quick Transaction Mode : Requires selecting a table before starting a transaction. Suitable for dine-in restaurants or establishments with table service.
- Table Mode : Allows immediate access to the sales screen without selecting a table. Suitable for takeaway or general retail shops.
- Mixed Mode : Supports both table selection and direct entry to the sales screen. Ideal for stores offering both dine-in and takeaway services.
After choosing the mode that fits your operation, click “Save” to confirm.
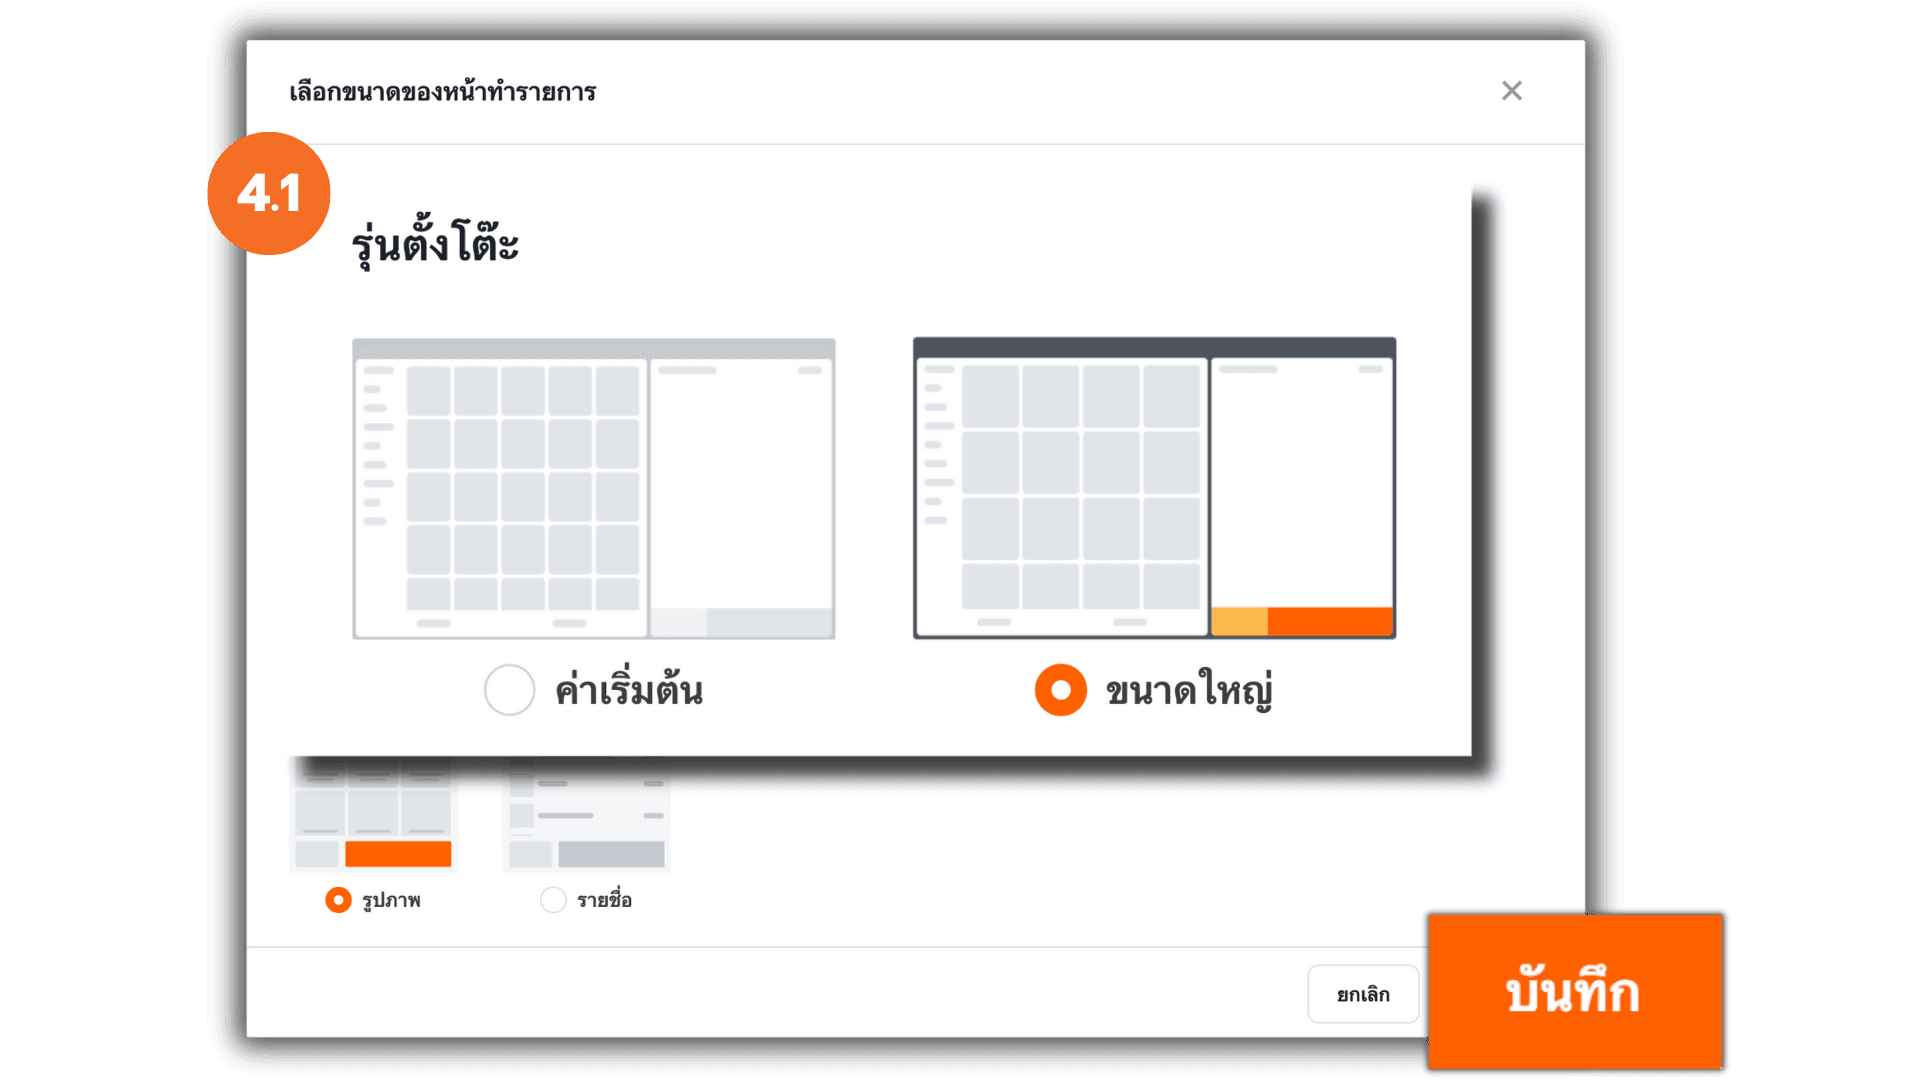
4. Configure “Cashier Layout”
Under Cashier Layout, click “Details”. You can adjust the display layout based on the device in use — desktop or handheld.
4.1 Desktop Version
- Standard : Displays items in a 5-column grid (smaller boxes, suitable for a large number of products).
- Large : Displays items in a 4-column grid (larger boxes for better visibility).
Select your preferred screen size and click “Save.”
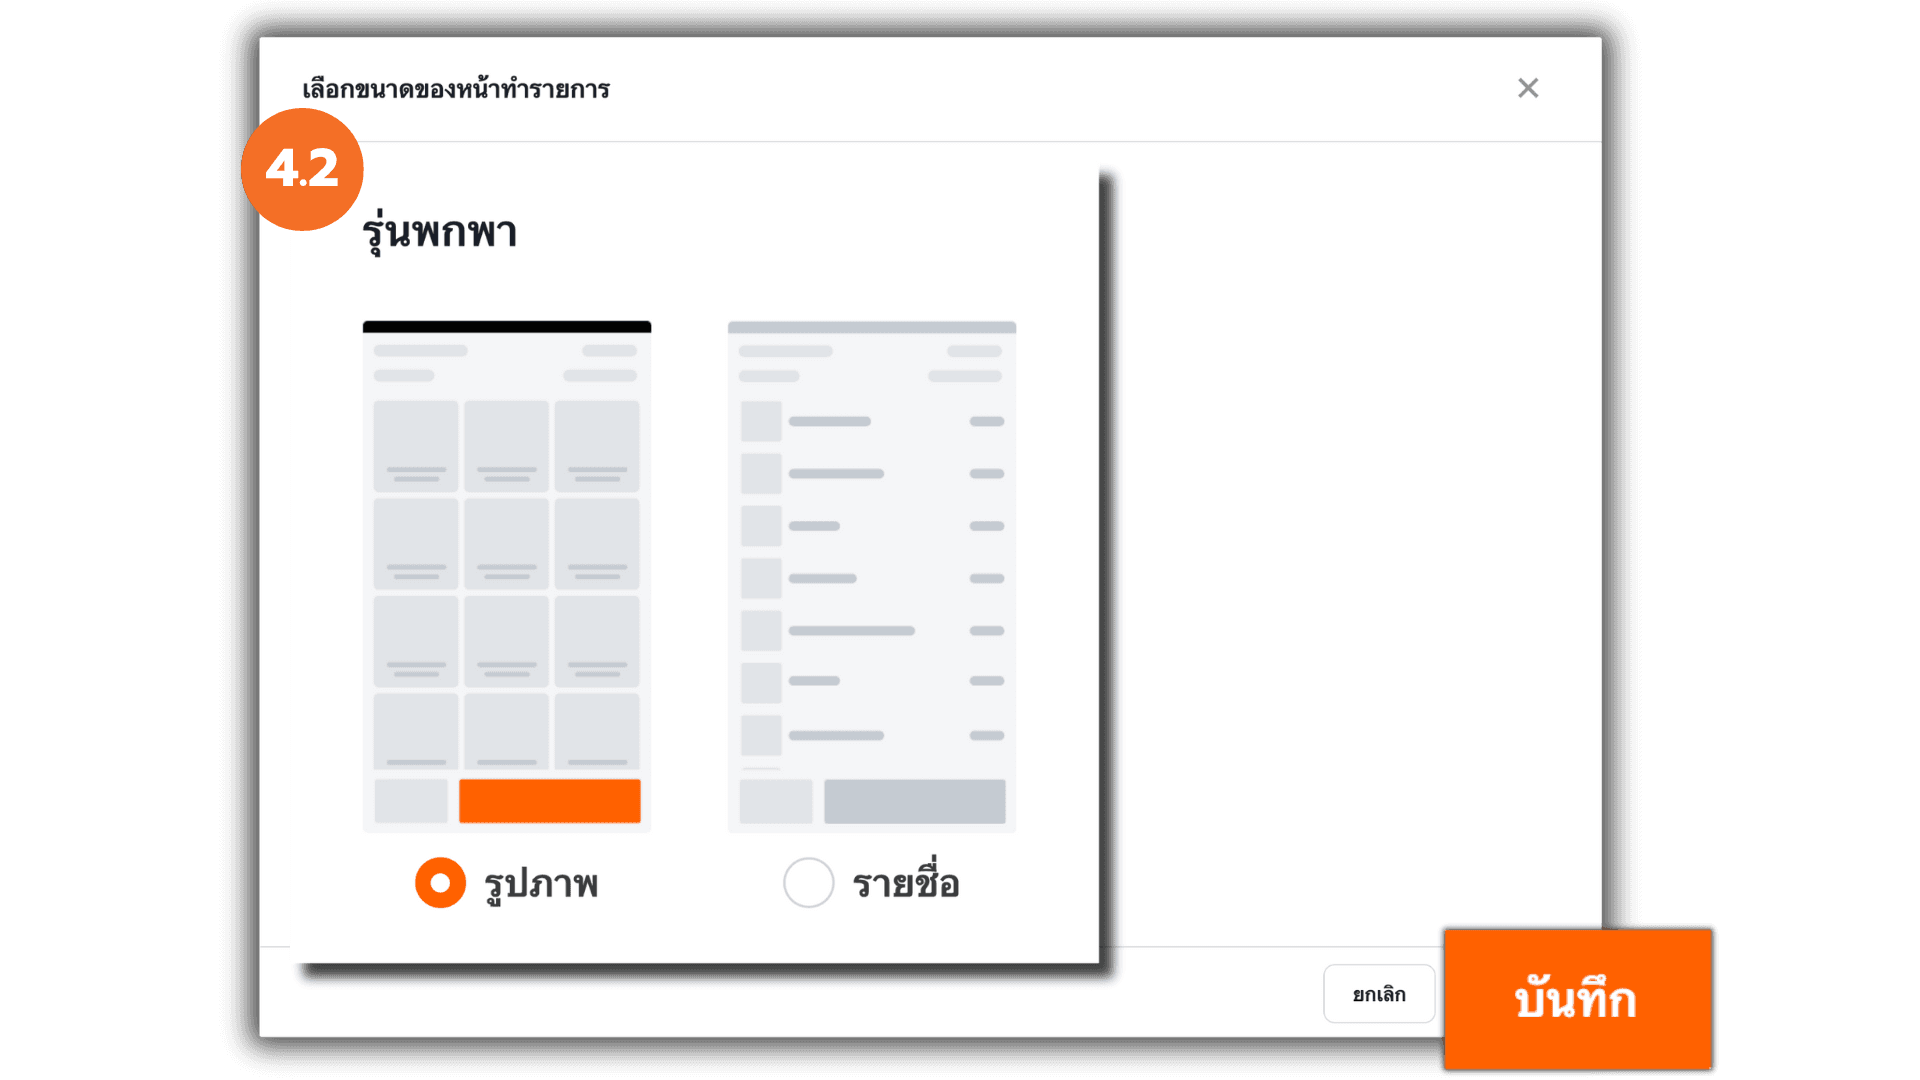
4.2 Handheld Version
- Grid : Displays the item name above the image — ideal for quick visual browsing.
- List : Displays the image on the left and item name on the right — an easy-to-read list format.
Select the desired display format and click “Save.”
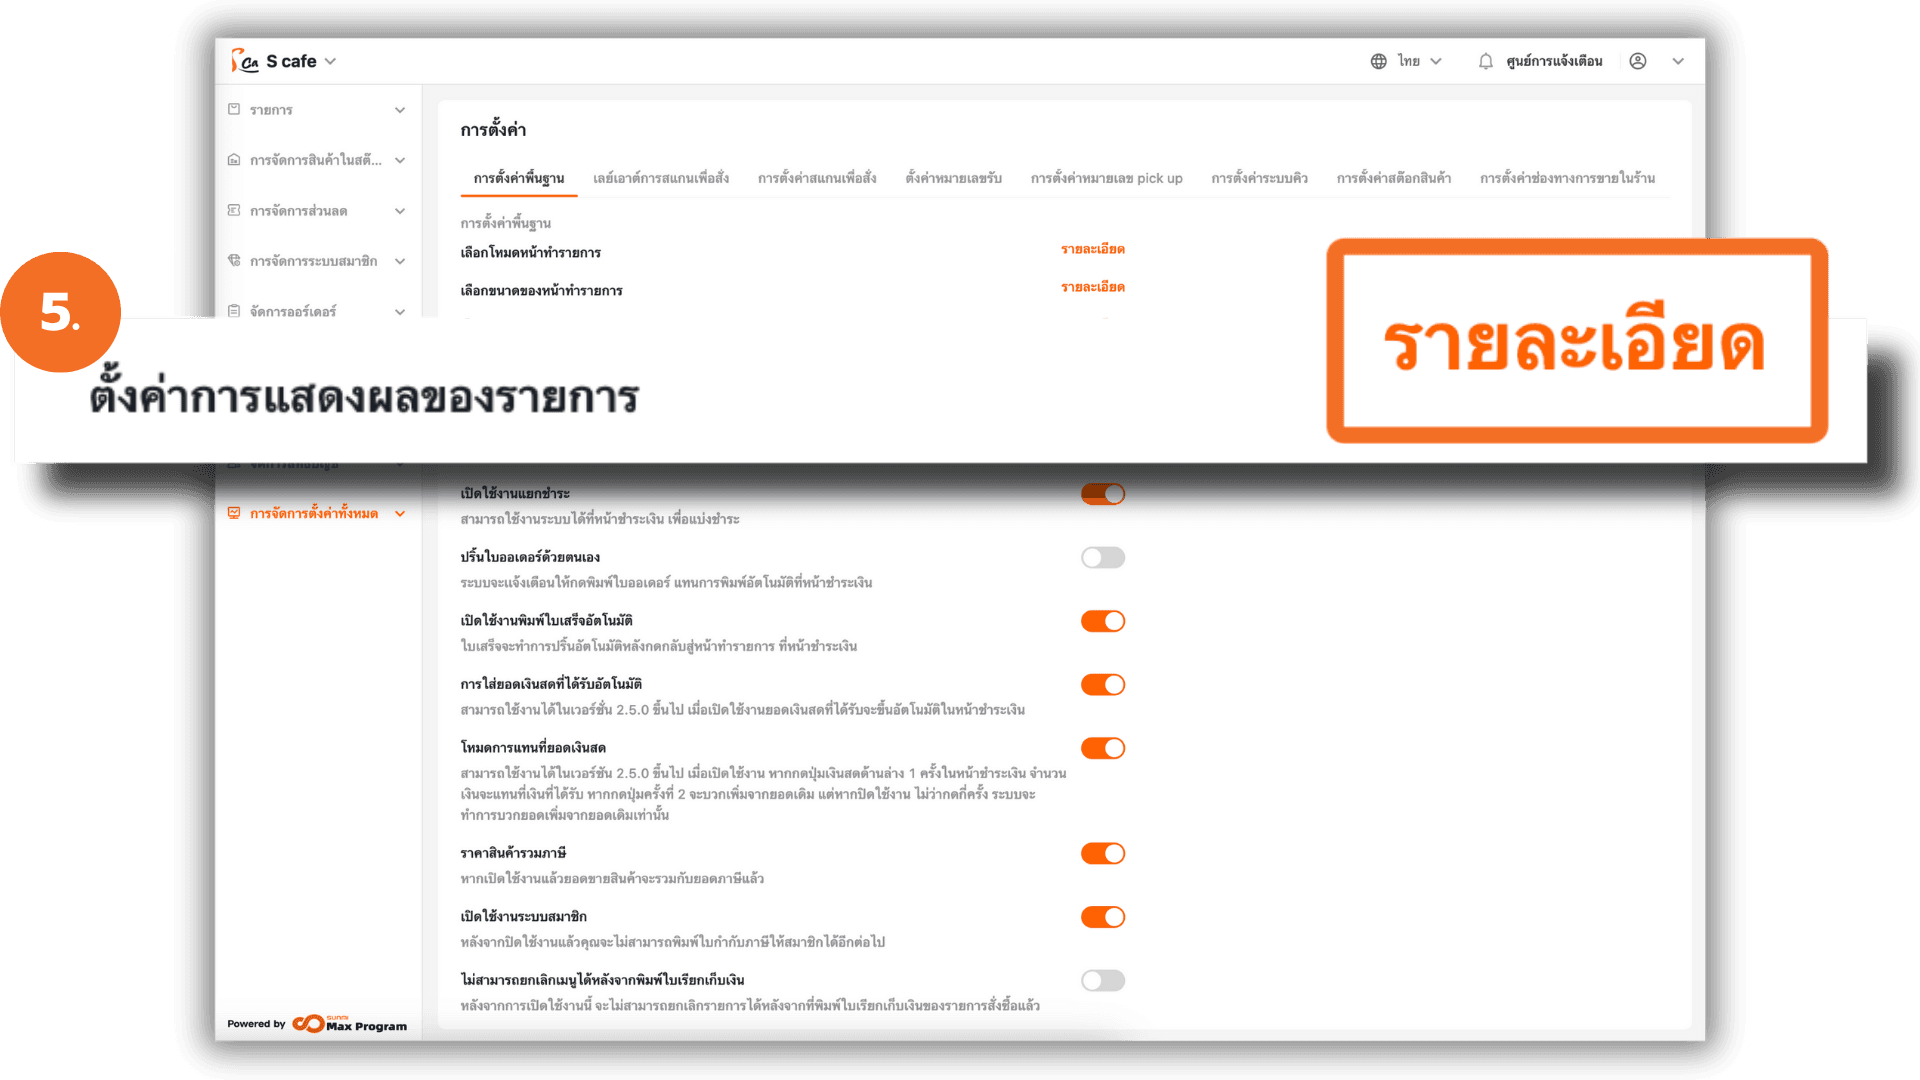
5. Configure “Item Card Setting”
Go to “Item Card Setting” and click “Details”.
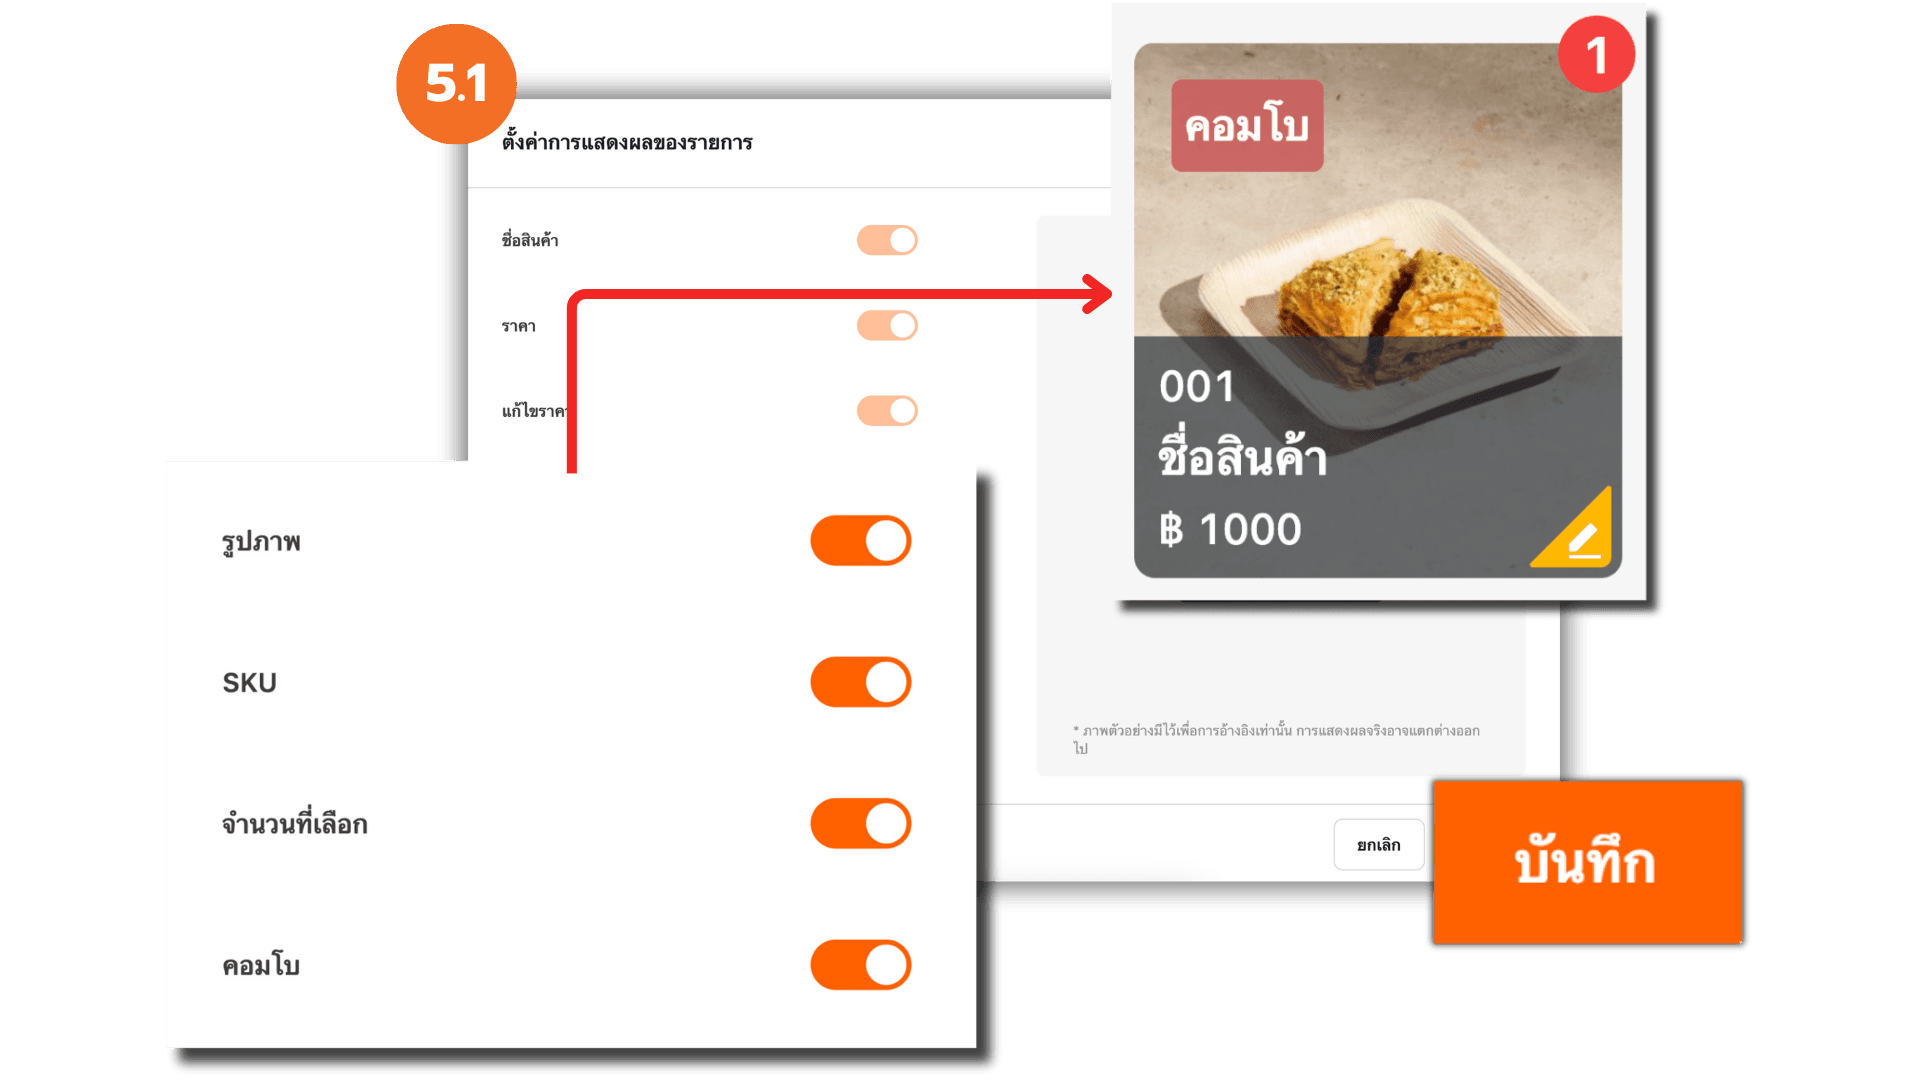
5.1 Item Card Setting
You can enable or disable specific display elements on the sales screen.
When adjusting the settings, a live preview will appear on the right-hand side.
After completing the setup, click “Save.”
Note : This feature is available for desktop version only.
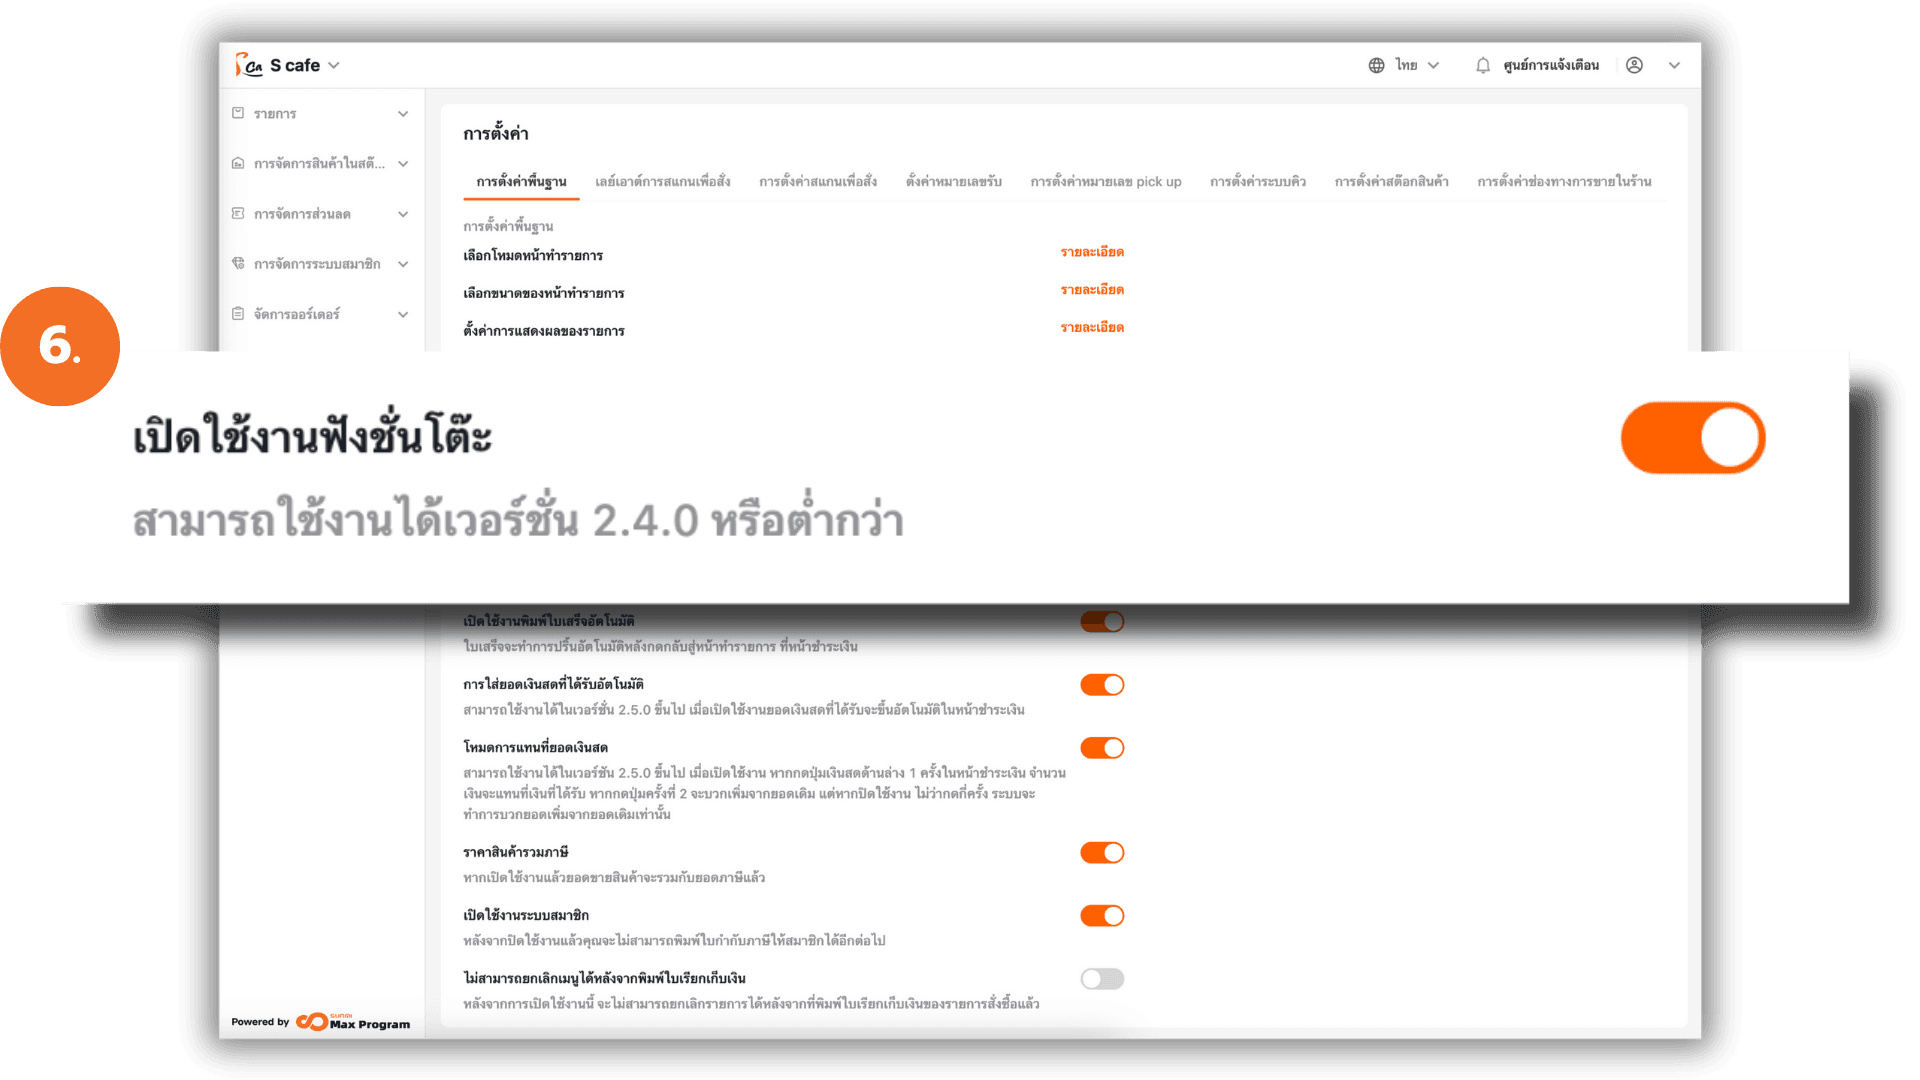
6. Enable/Disable Table Function
You can enable or disable the table function according to your business needs.
Note : This feature is available only for version 2.4.0 or earlier.
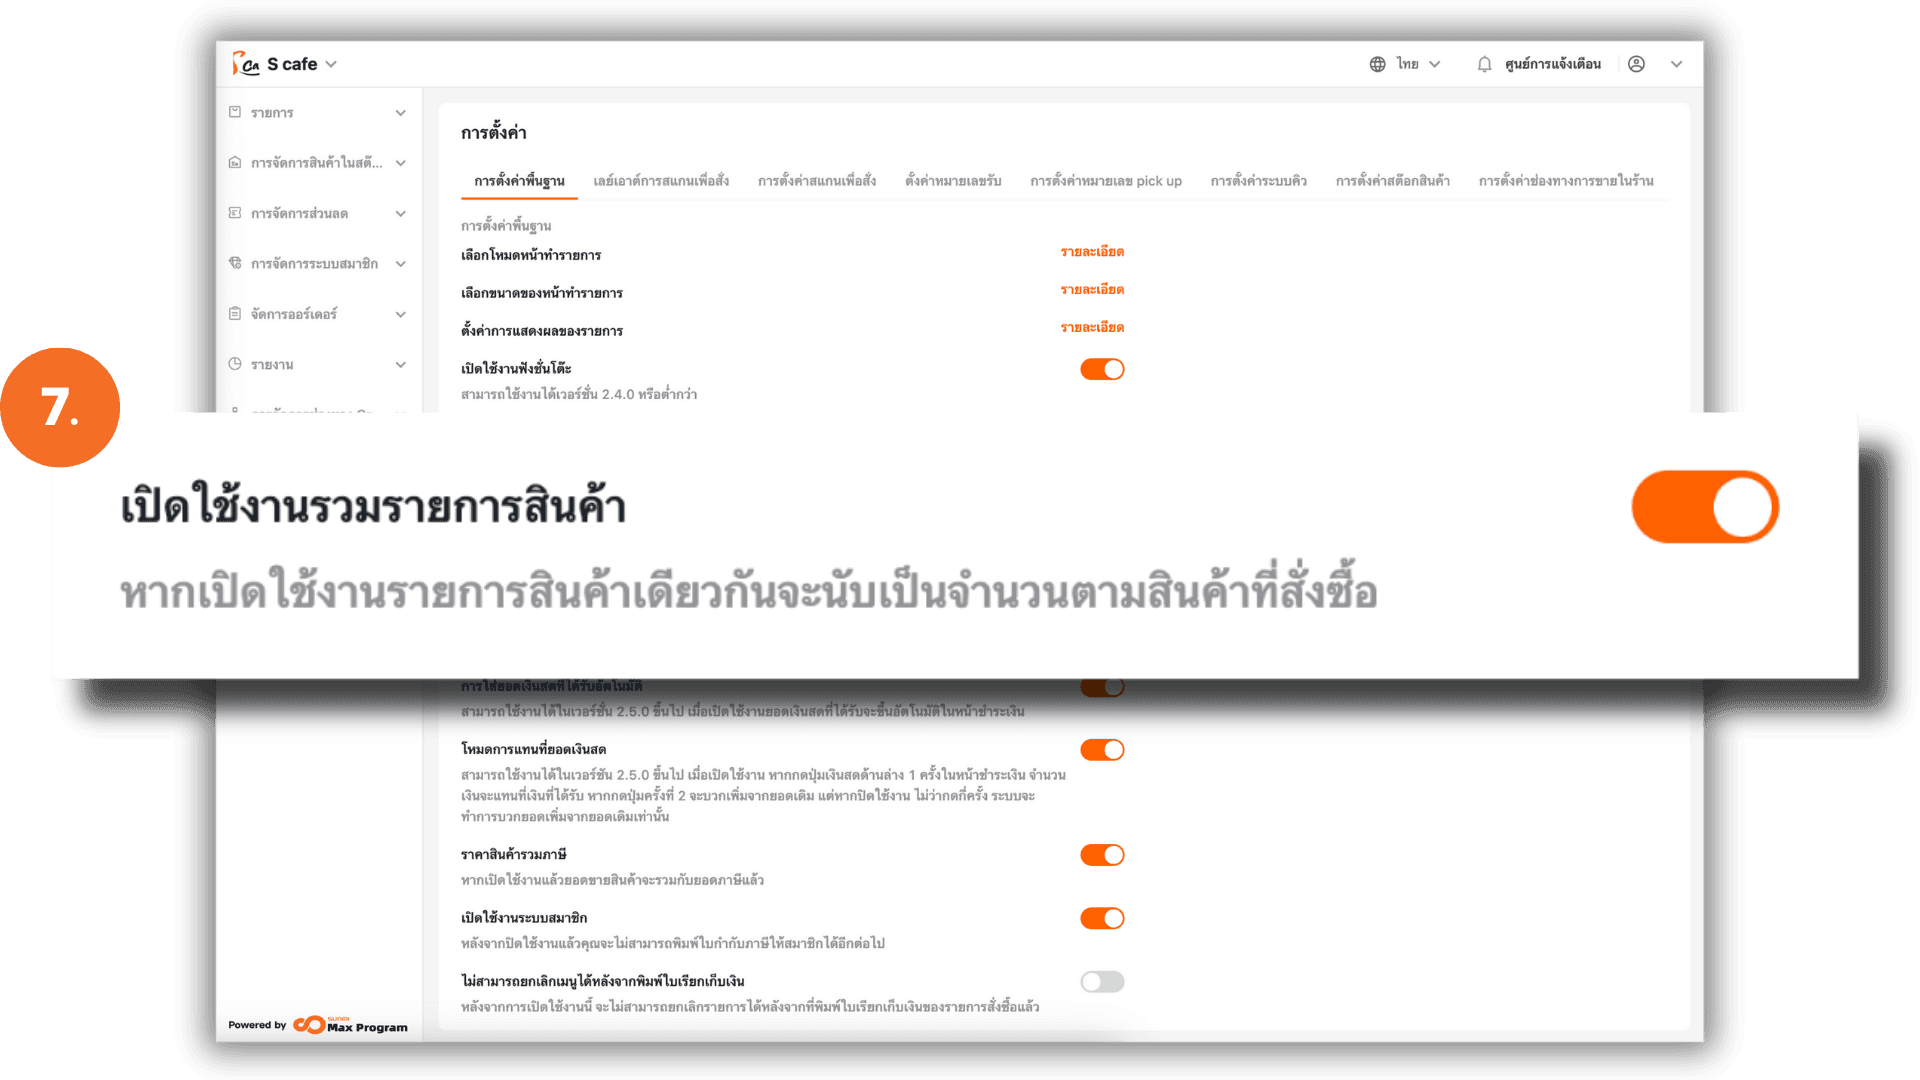
7. Enable/Disable “Combine Items”
Go to “Enable Combine Items” and toggle the switch on or off.
- Enabled : Identical items will be merged into a single line, and the quantity will increase accordingly. (No new line will be added.)
- Disabled : Identical items will appear as separate lines every time they are ordered, even if they are the same product.
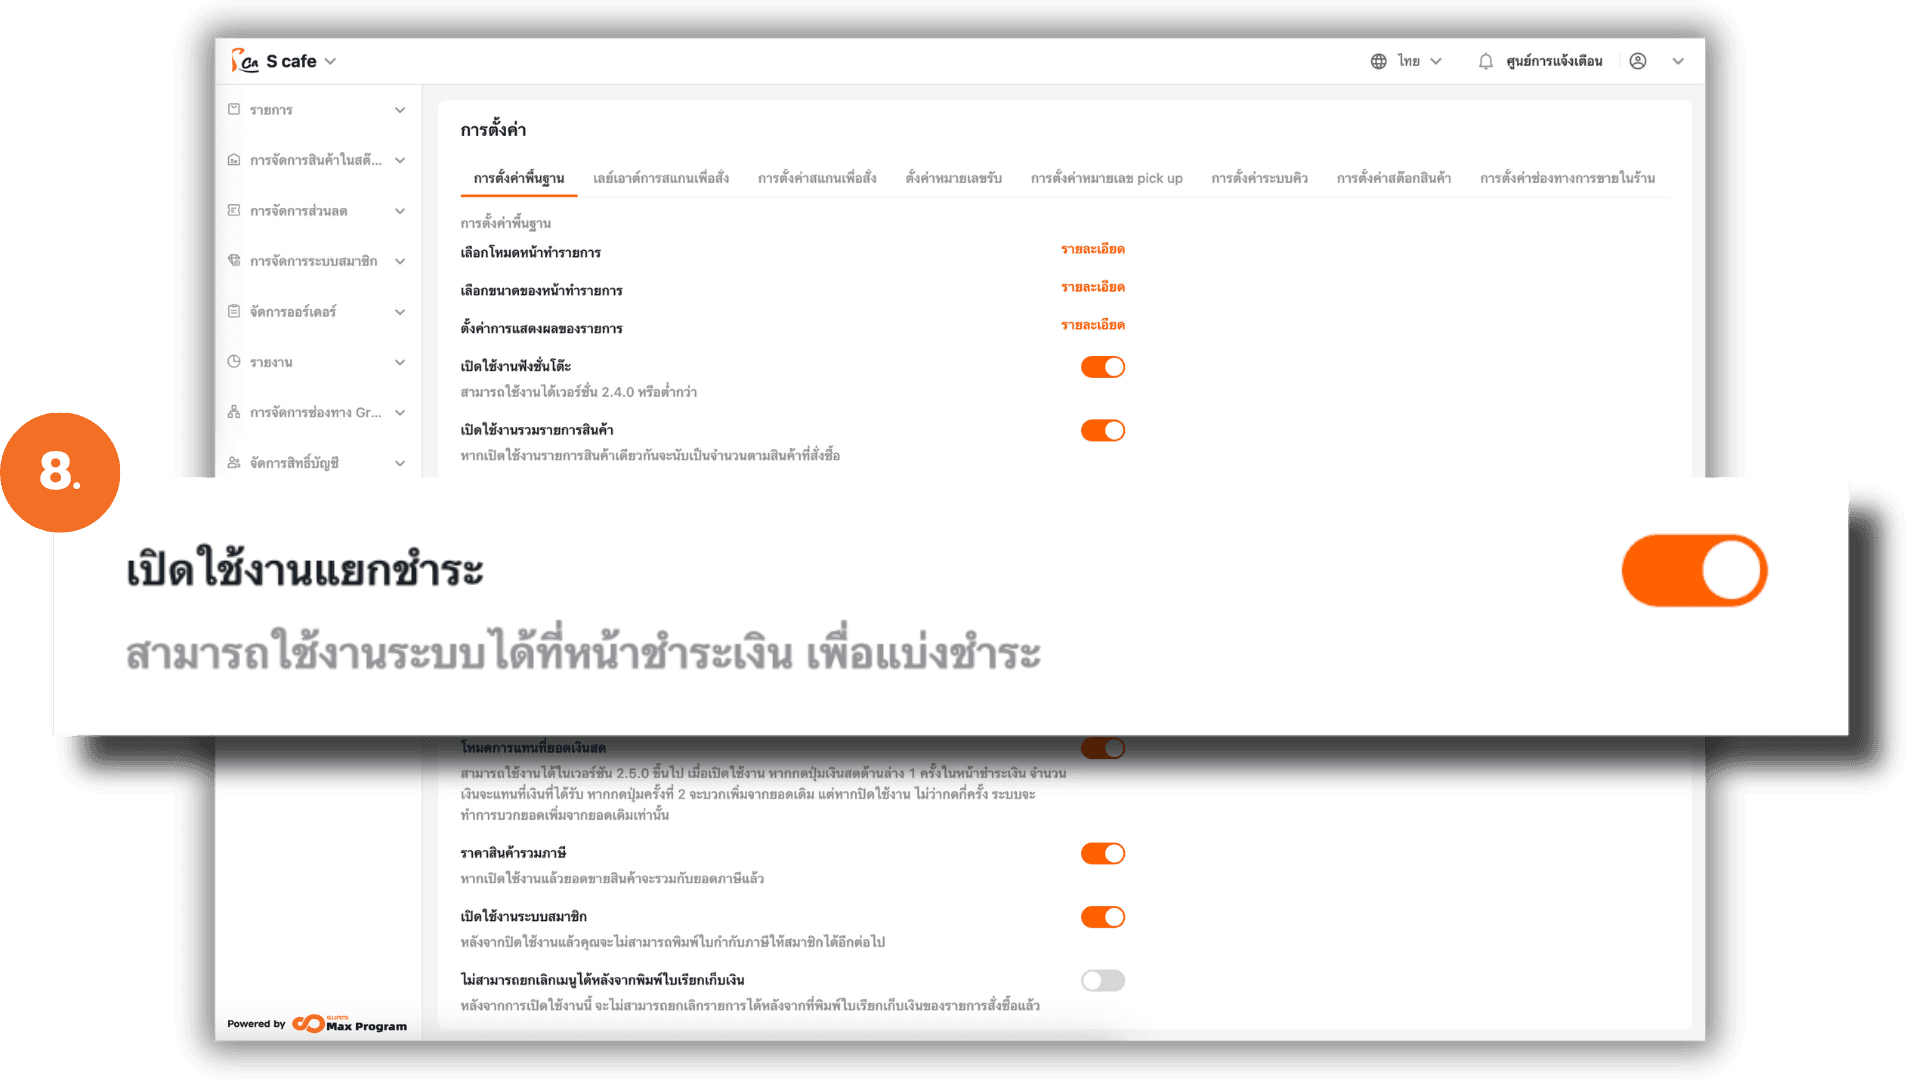
8. Enable/Disable “Split Payment”
Enable Split Payment if you want multiple customers at the same table to pay separately within the same bill. This is useful when customers share a table but prefer to make individual payments.
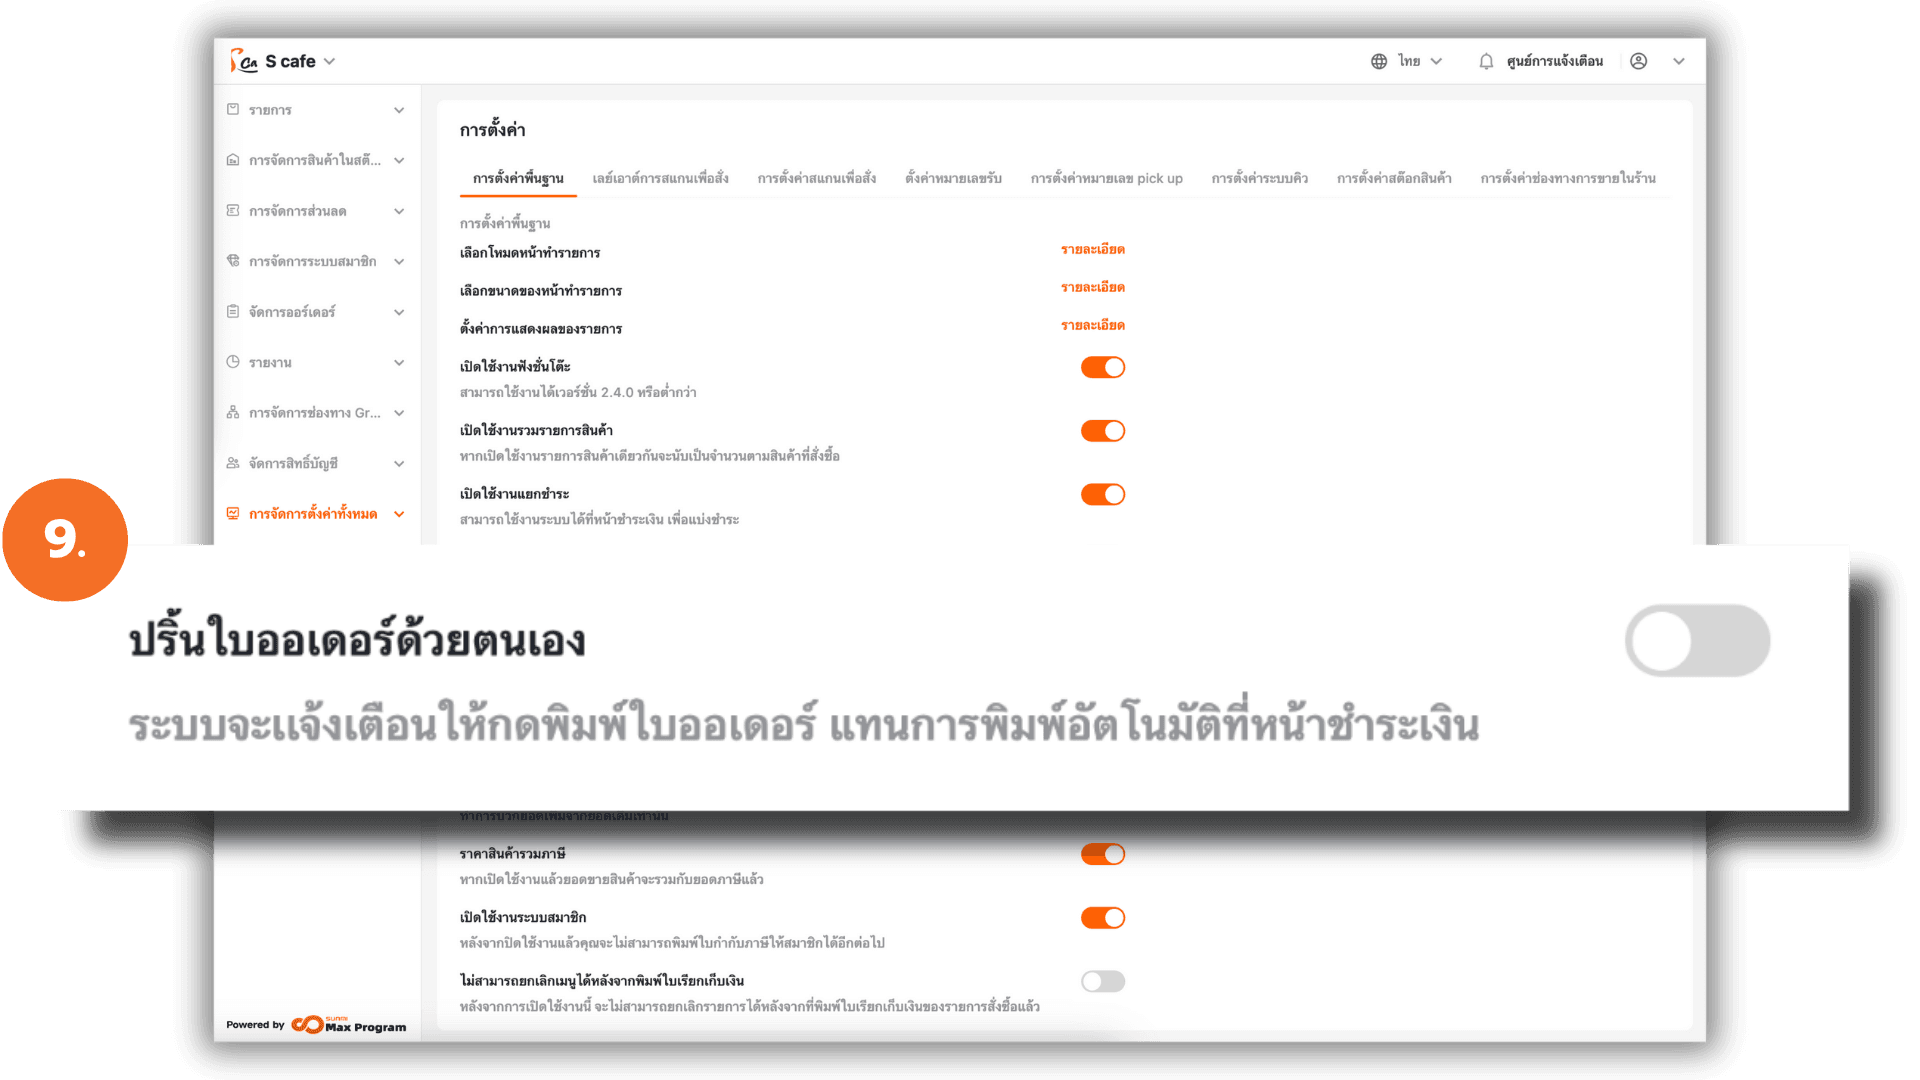
9. Enable/Disable “Manual Kitchen Ticket Printing”
When enabled, the system will not print the order slip automatically after placing an order. Instead, a prompt will appear at the payment screen, allowing users to manually print the order slip.
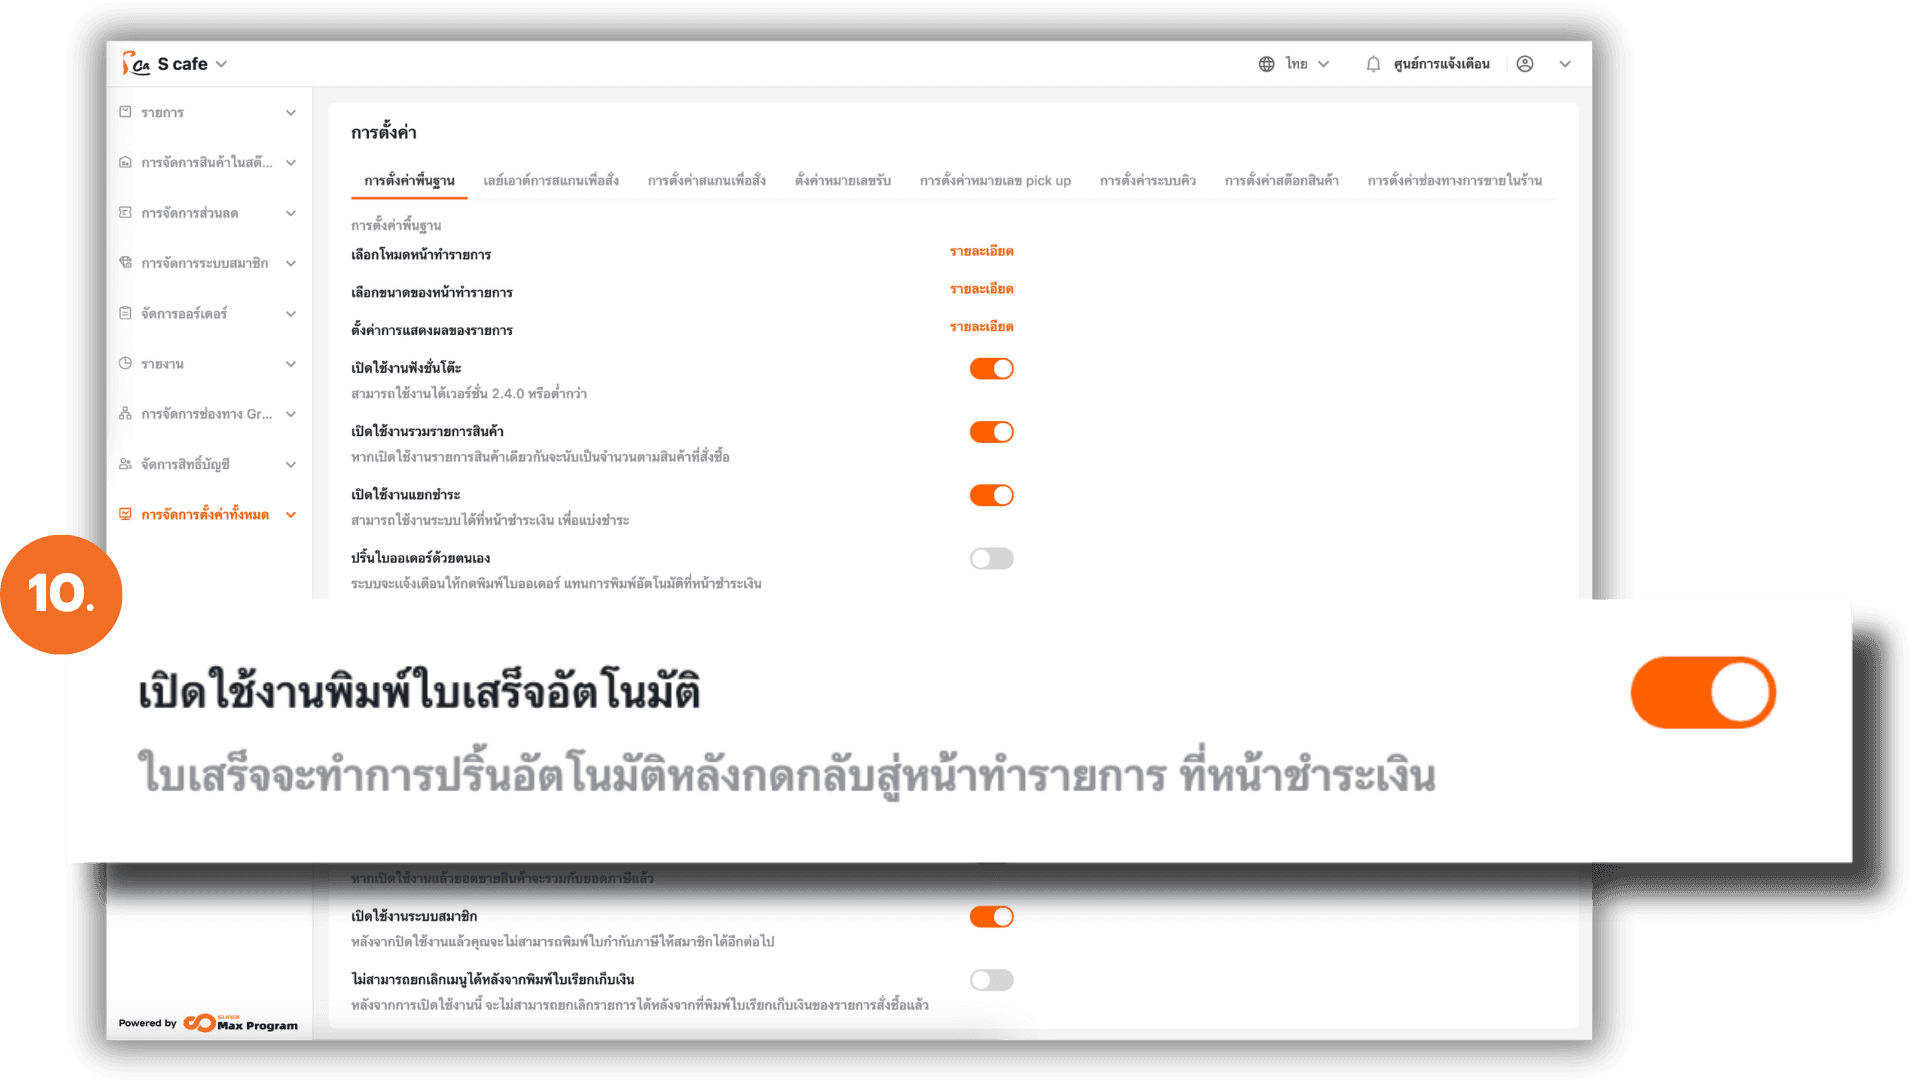
10. Enable/Disable “Print Receipt After Payment”
When enabled, the system will automatically print the receipt immediately after clicking Return to Sales Screen from the payment page.
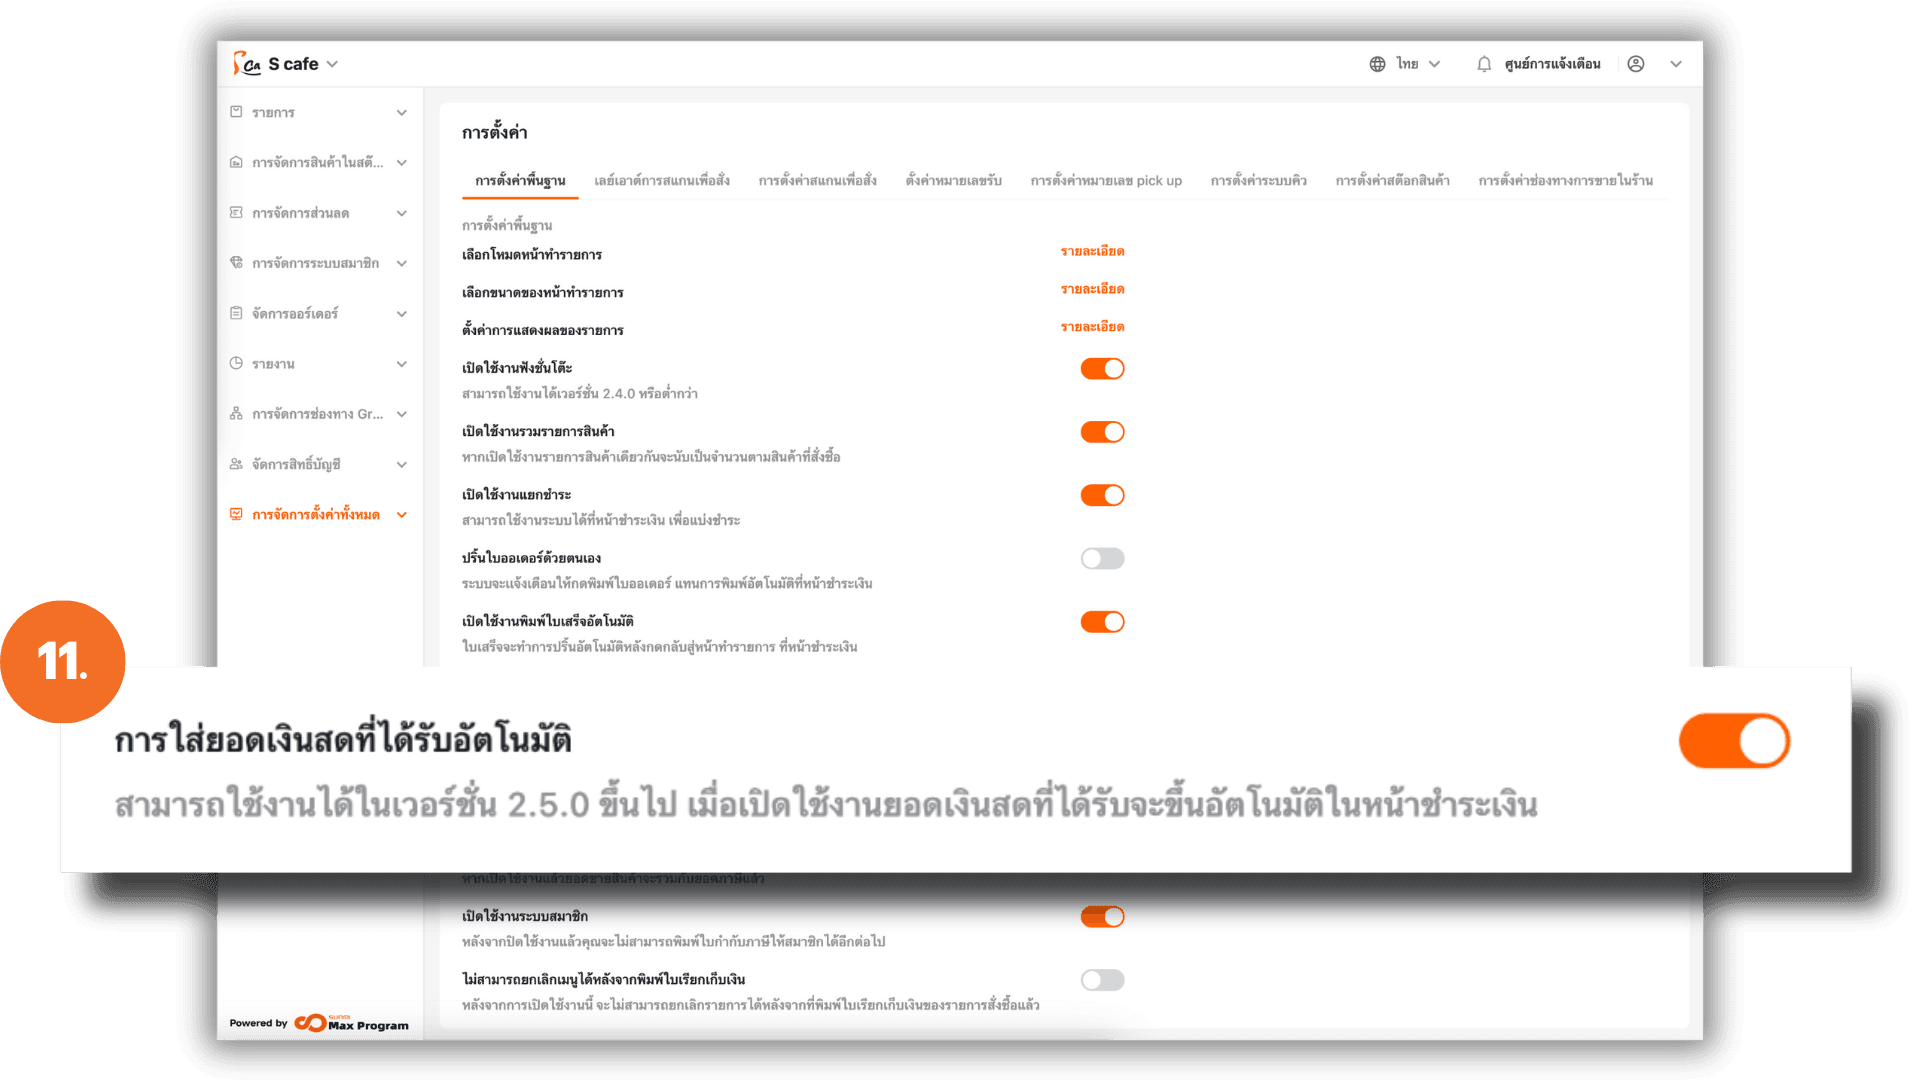
11. Enable/Disable “Autofill Amount Received”
When enabled, the system will automatically fill in the exact payable amount in the Cash Received field upon entering the payment screen.
Note : Available only for version 2.5.0 or higher.
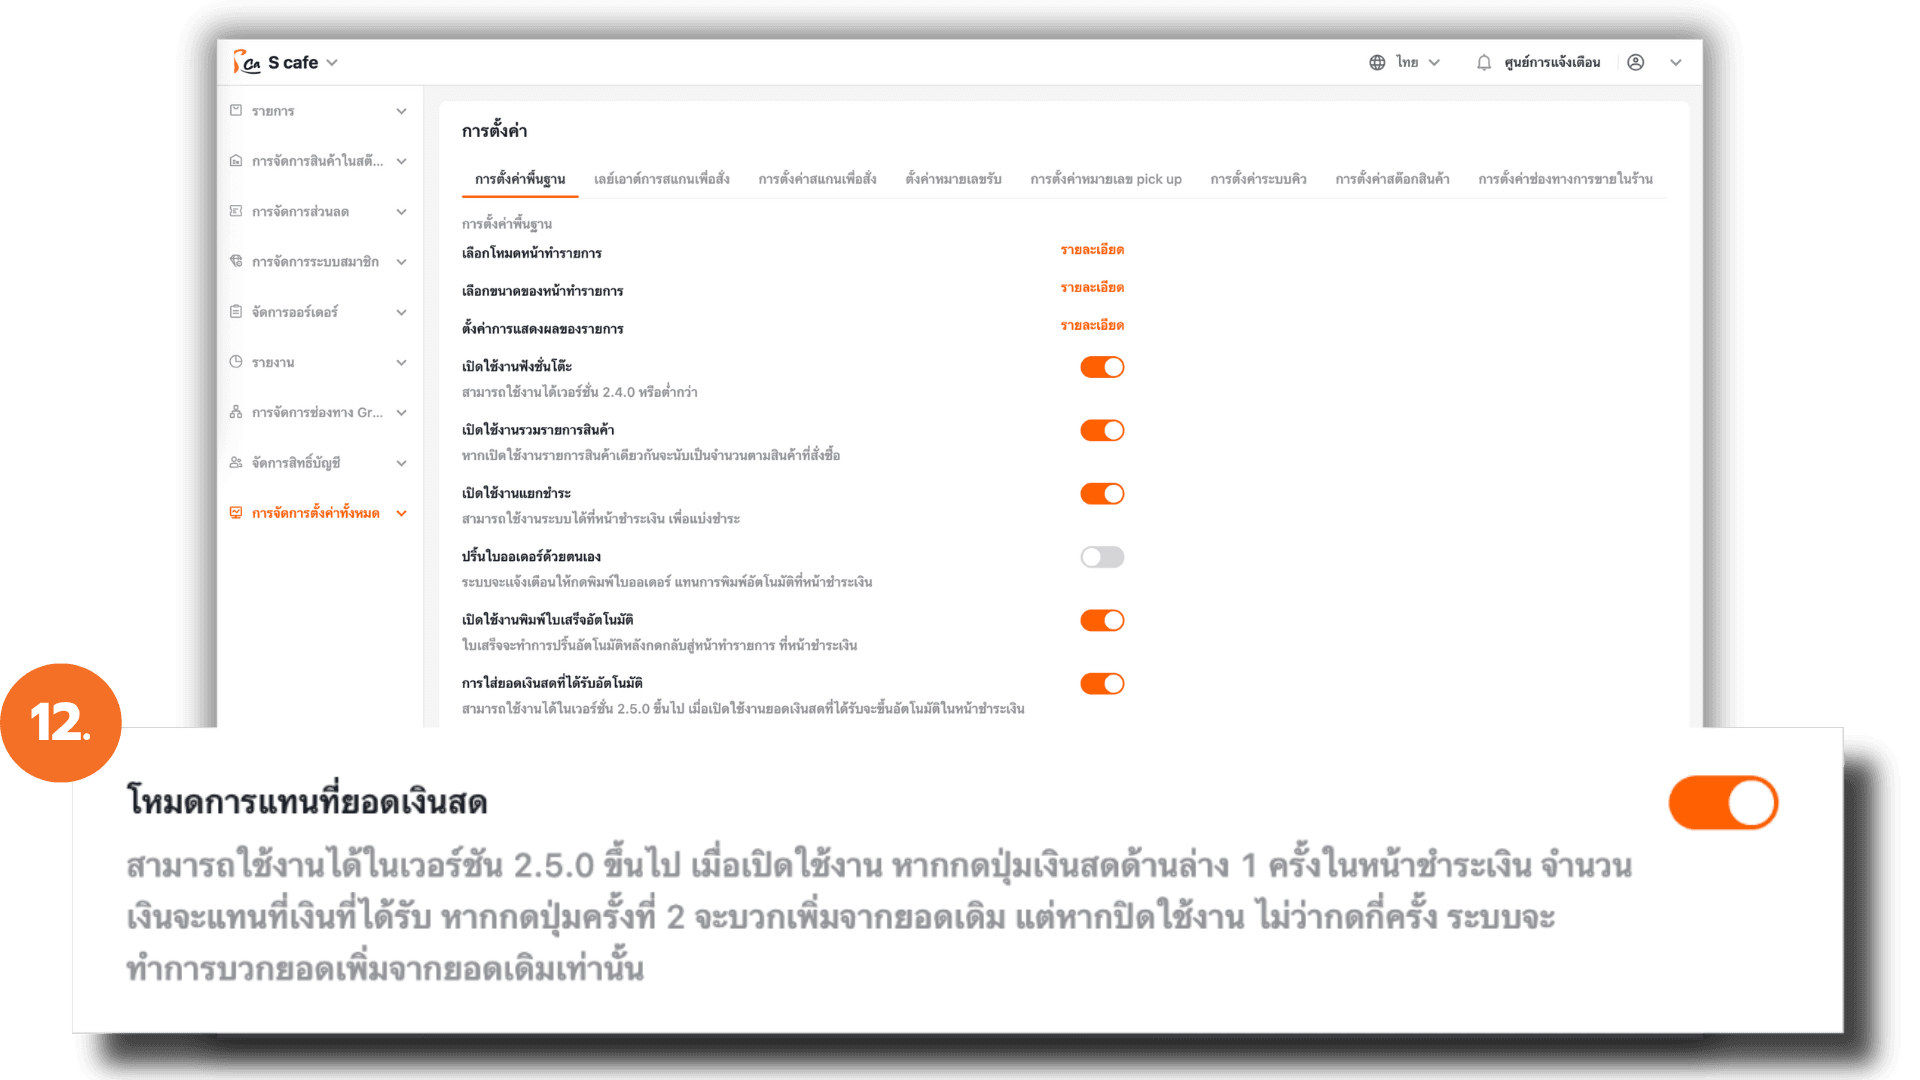
12. Enable/Disable “Override Preset Amount Mode”
This setting controls how cash amounts behave in the payment screen.
- When Enabled :
- First tap : The entered amount replaces the current amount.
- Second tap : The new amount adds to the current amount.
- When Disabled : Every tap adds the amount to the existing total.
Note : Available only for version 2.5.0 or higher.
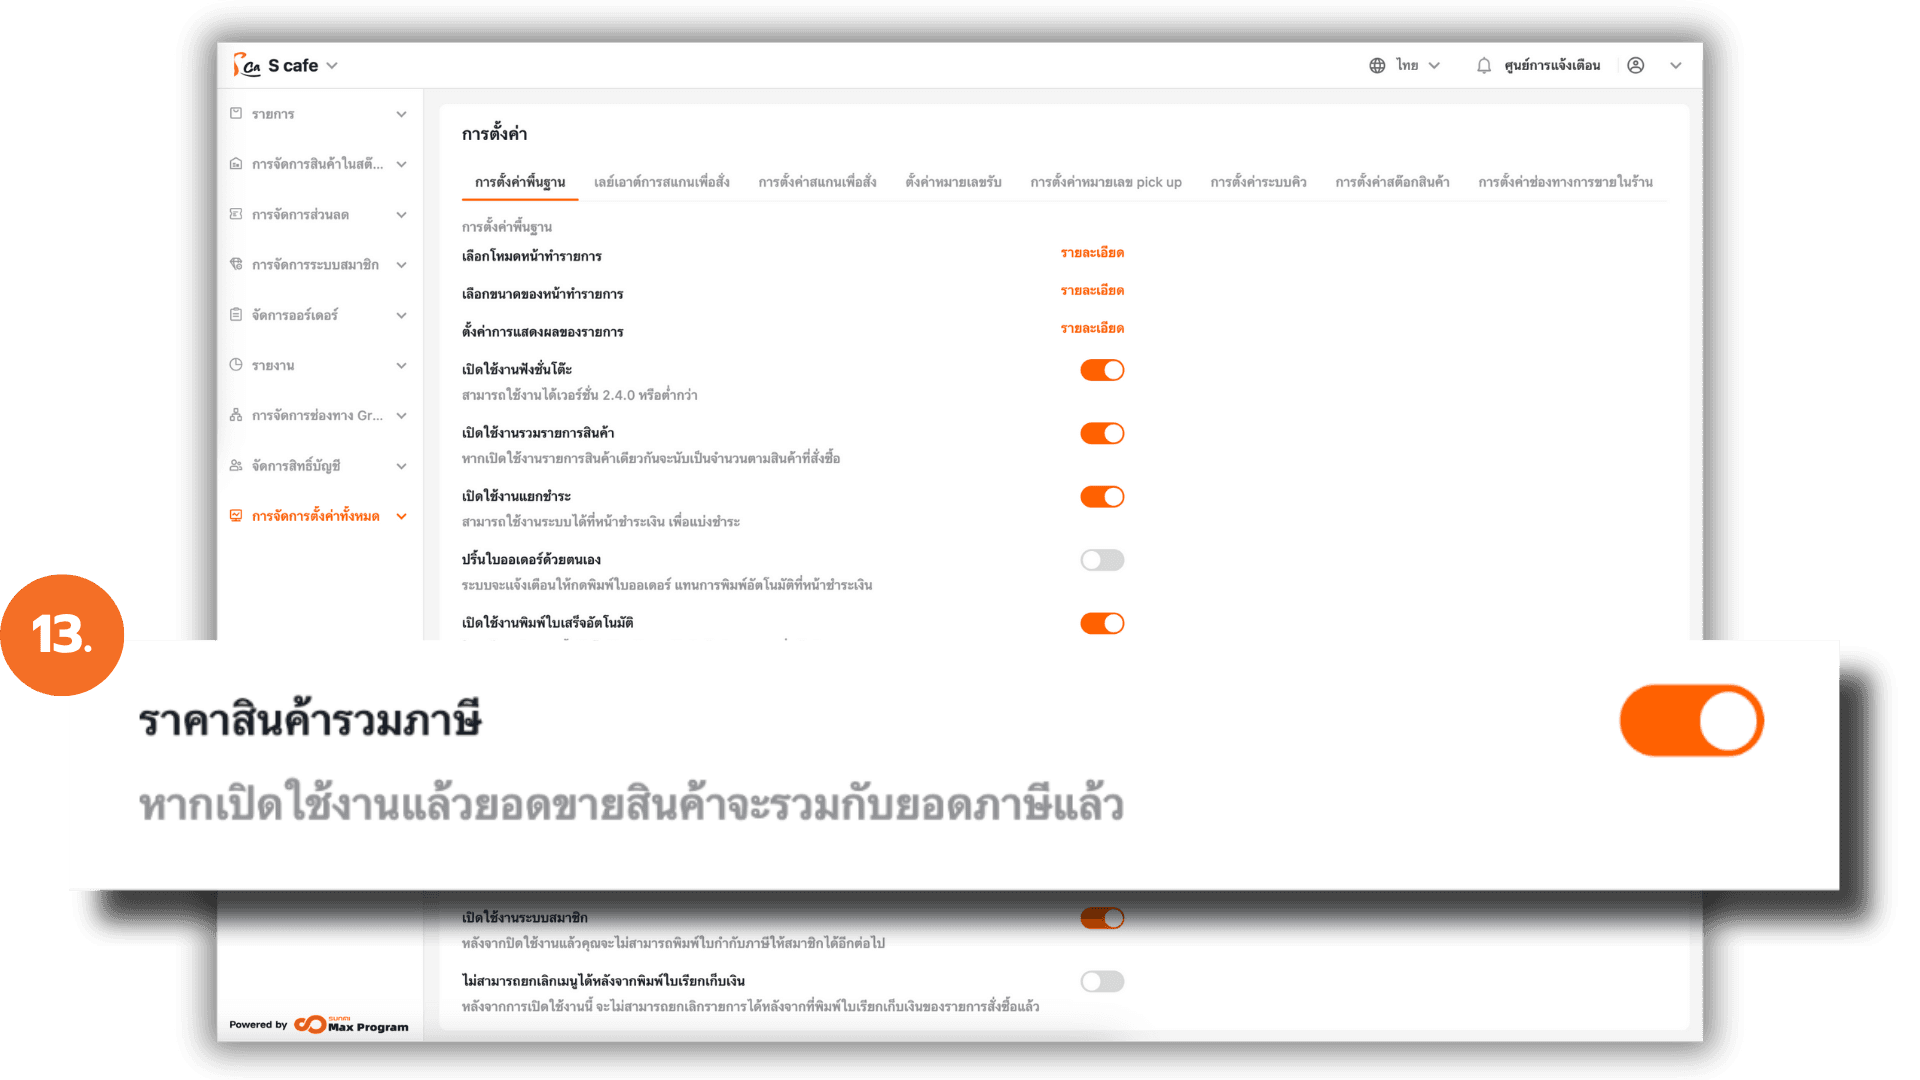
13. Enable/Disable “Tax Inclusive Item Price”
Configure whether product prices include VAT.
- Enabled : The listed price includes VAT.
Example: Selling price 100 → Product 93.46 + Tax 6.54 = 100 - Disabled : The listed price excludes VAT.
Example: Selling price 100 → Product 100 + VAT 7% = 107
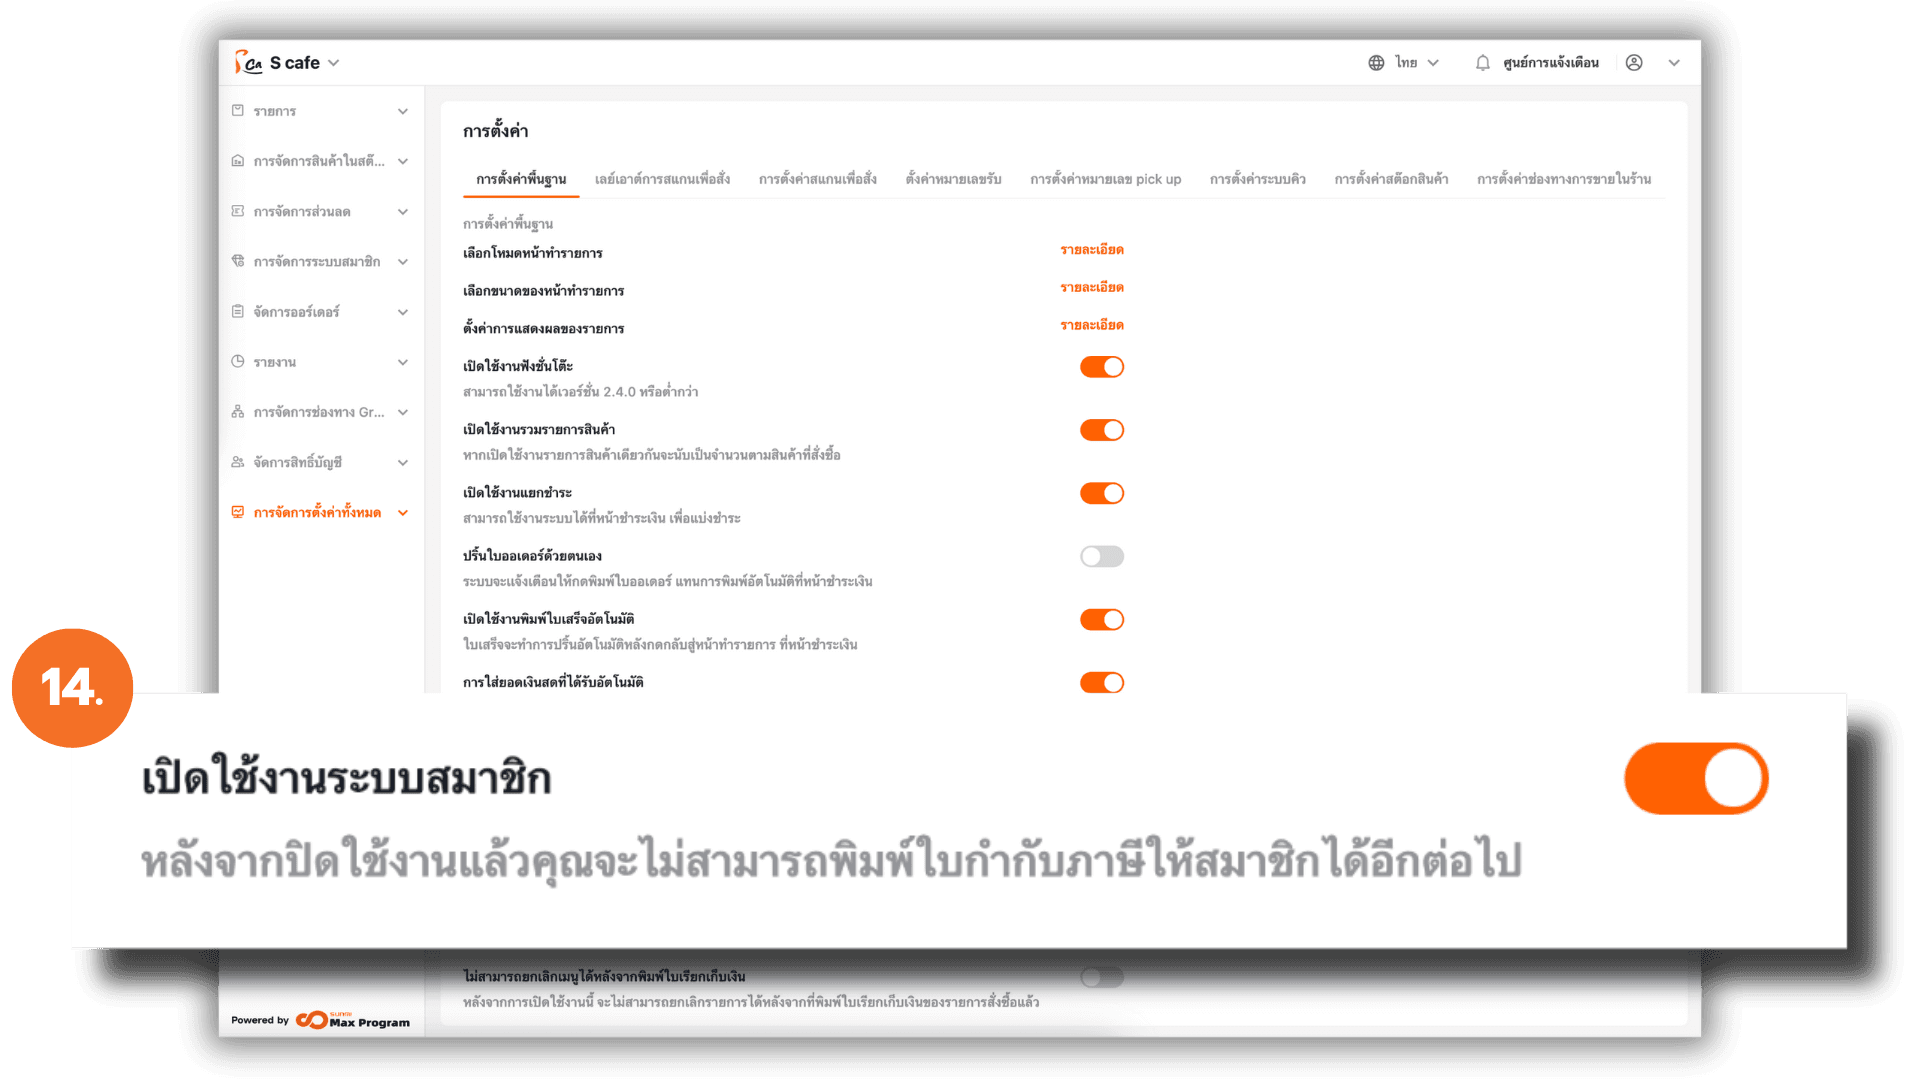
14. Enable/Disable “Membership”
Enable this option to use the Membership, including features like Point accumulation , Member discounts or Issuing tax invoices under the member’s name
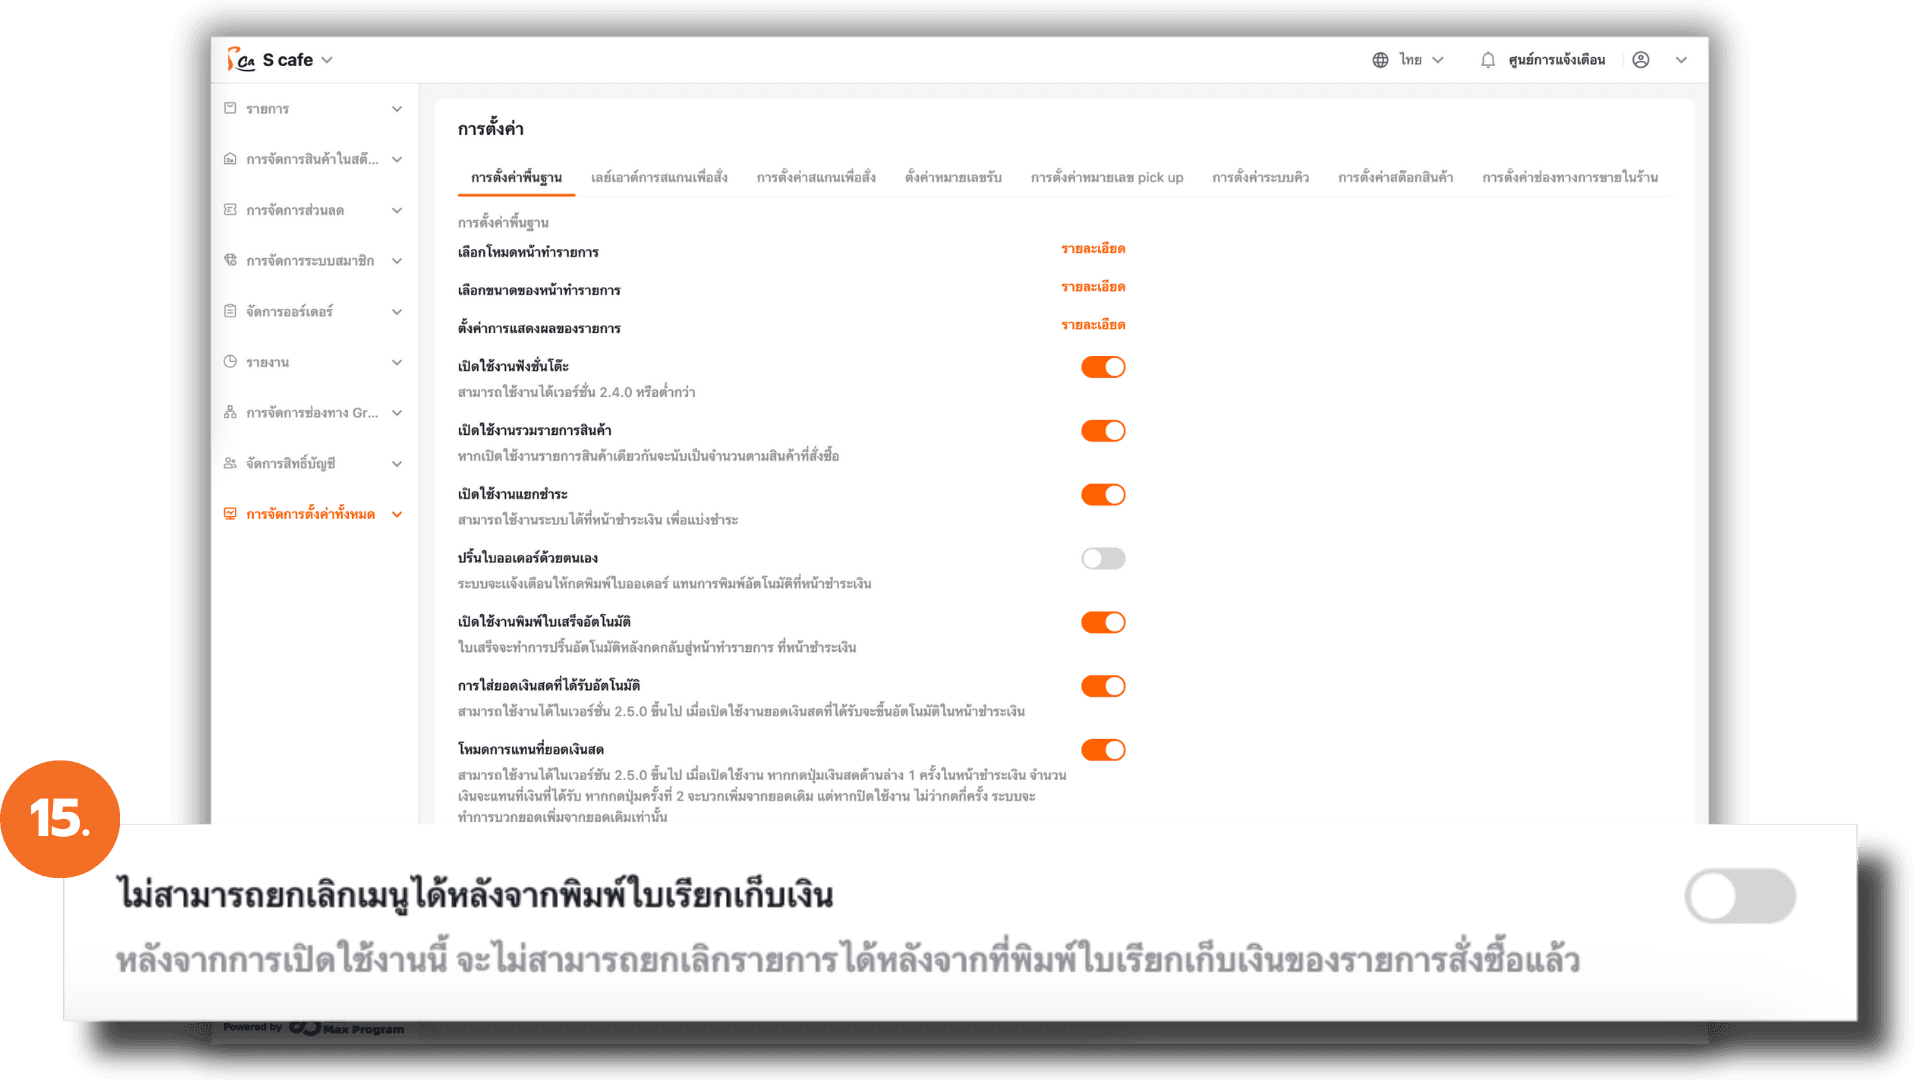
15. Enable/Disable “Cannot Void (Pre-bill Printed)”
Used to maintain sales accuracy and prevent record manipulation. This setting blocks order cancellation after a billing receipt has been printed.
- Enabled : Cancelling orders after billing is not allowed.
- Disabled : Orders can still be cancelled even after billing.