Cashier Sections
2025-11-21 10:45
This manual is created to help users correctly configure the cashier printer in accordance with each store type and its specific usage requirements.
1. Log in to the Back Office
Go to login.gpos.co.th, enter your email and password, then click Log In. After that, go to Store Management and select Print Management.
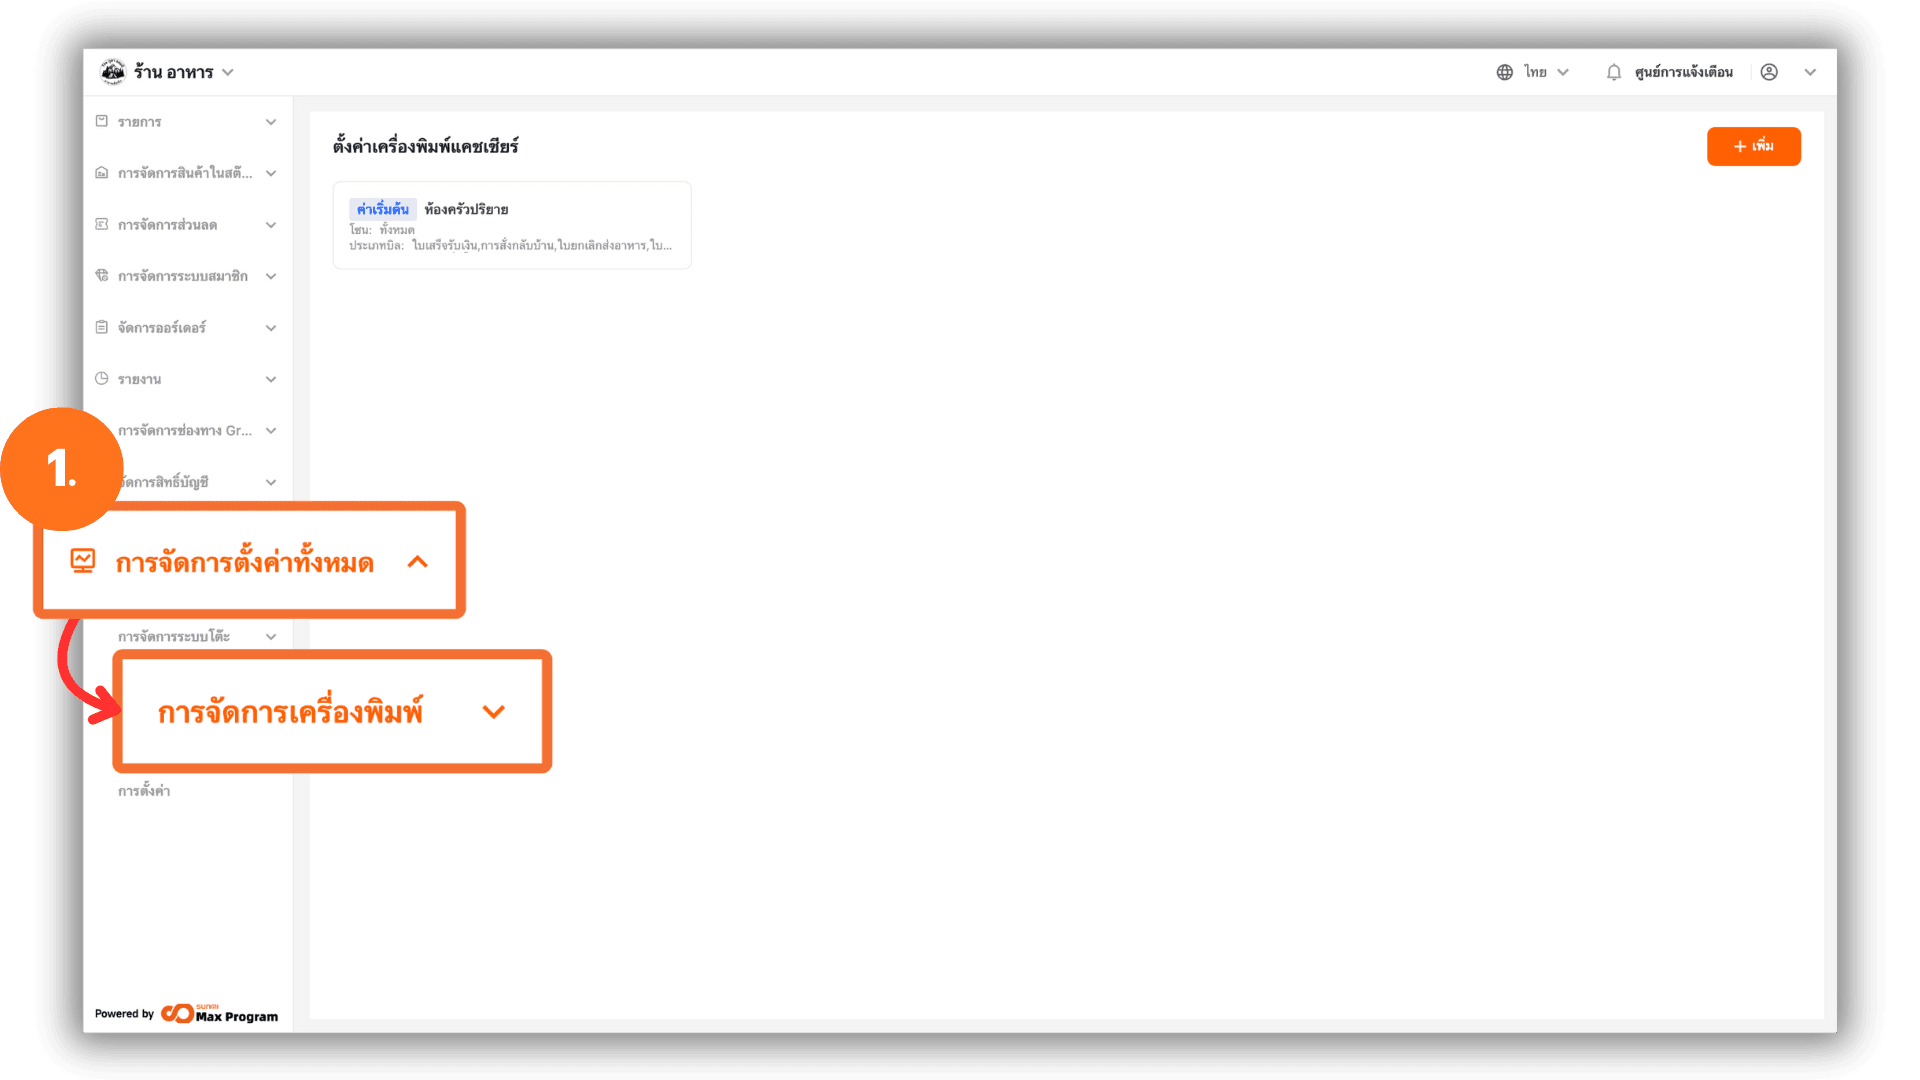
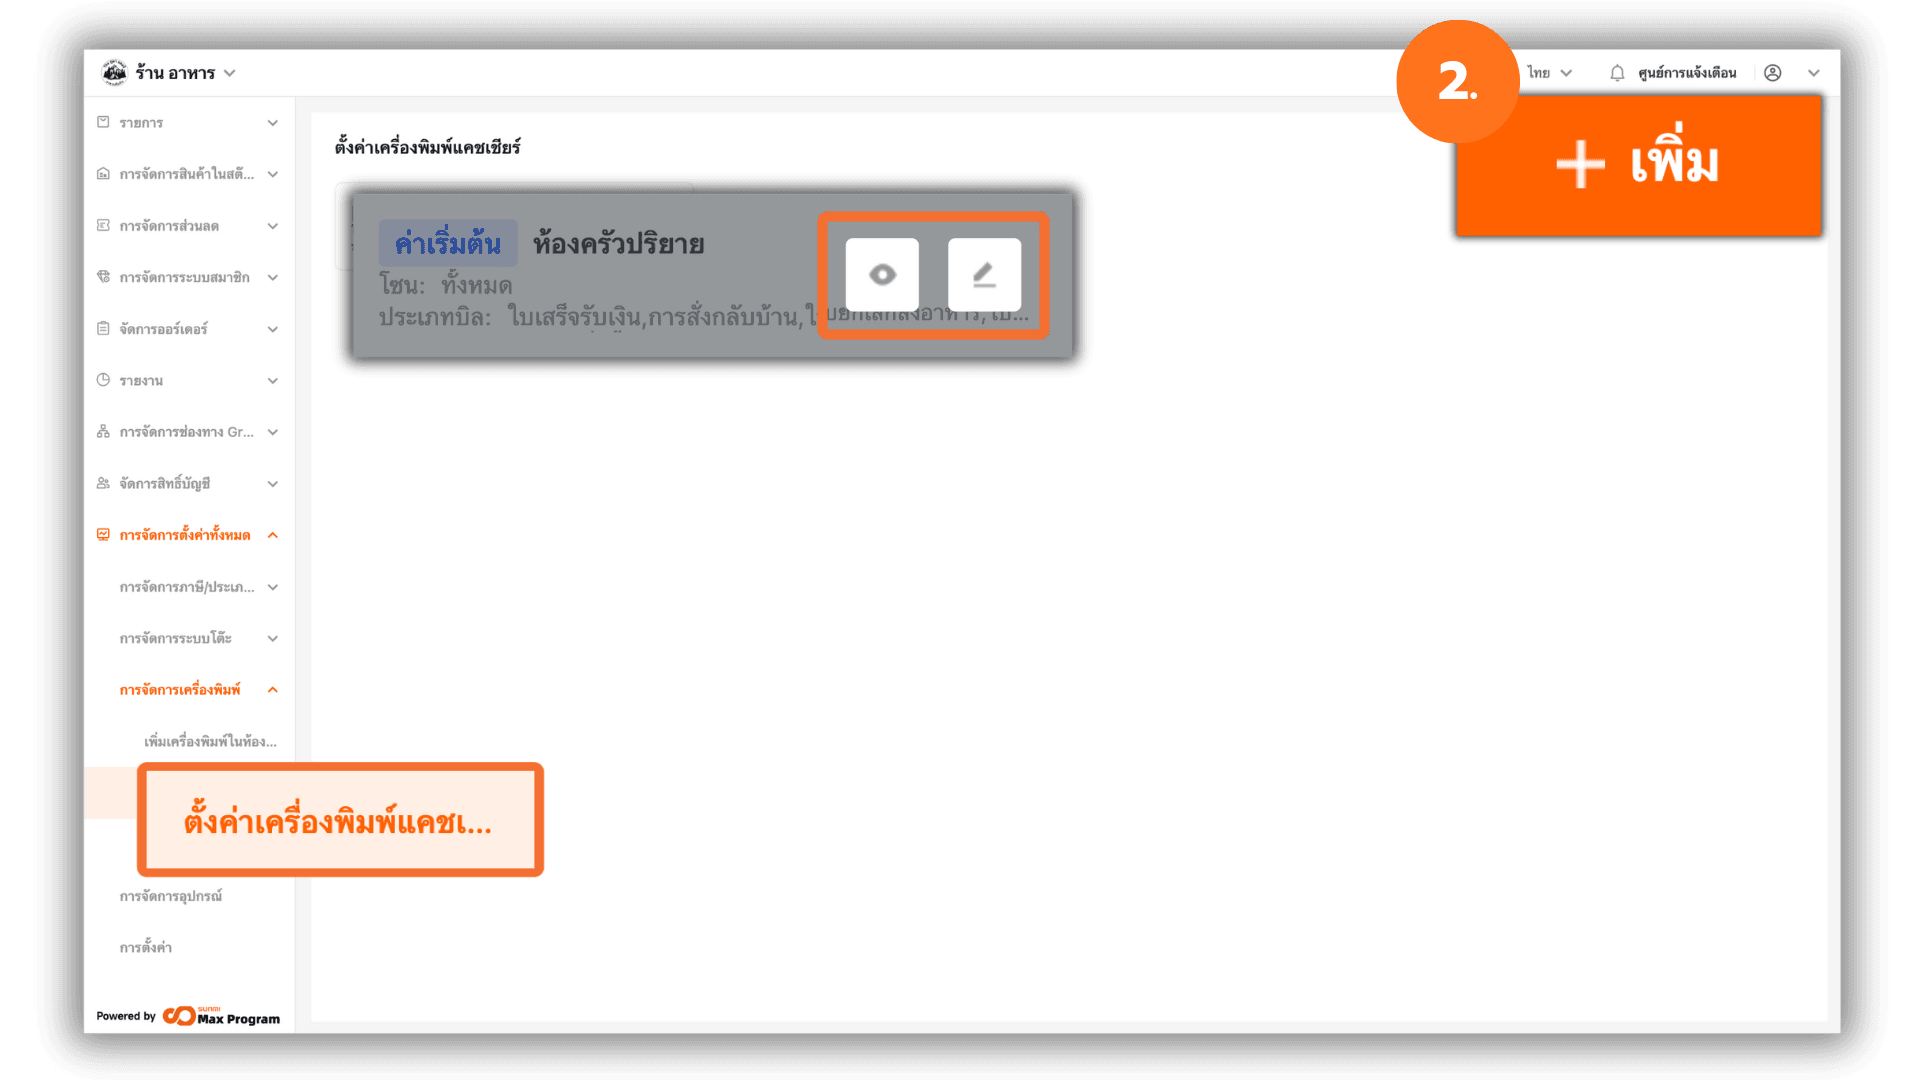
2. Select the Cashier Printer Settings Menu
Choose Cashier Sections. You can view or edit the default template, or click + Add to create a new cashier printer template.
3. Set the Payment Point Name and Printing Format
Enter the Cashier counter you want to use. Then select a Printing style, available in three options
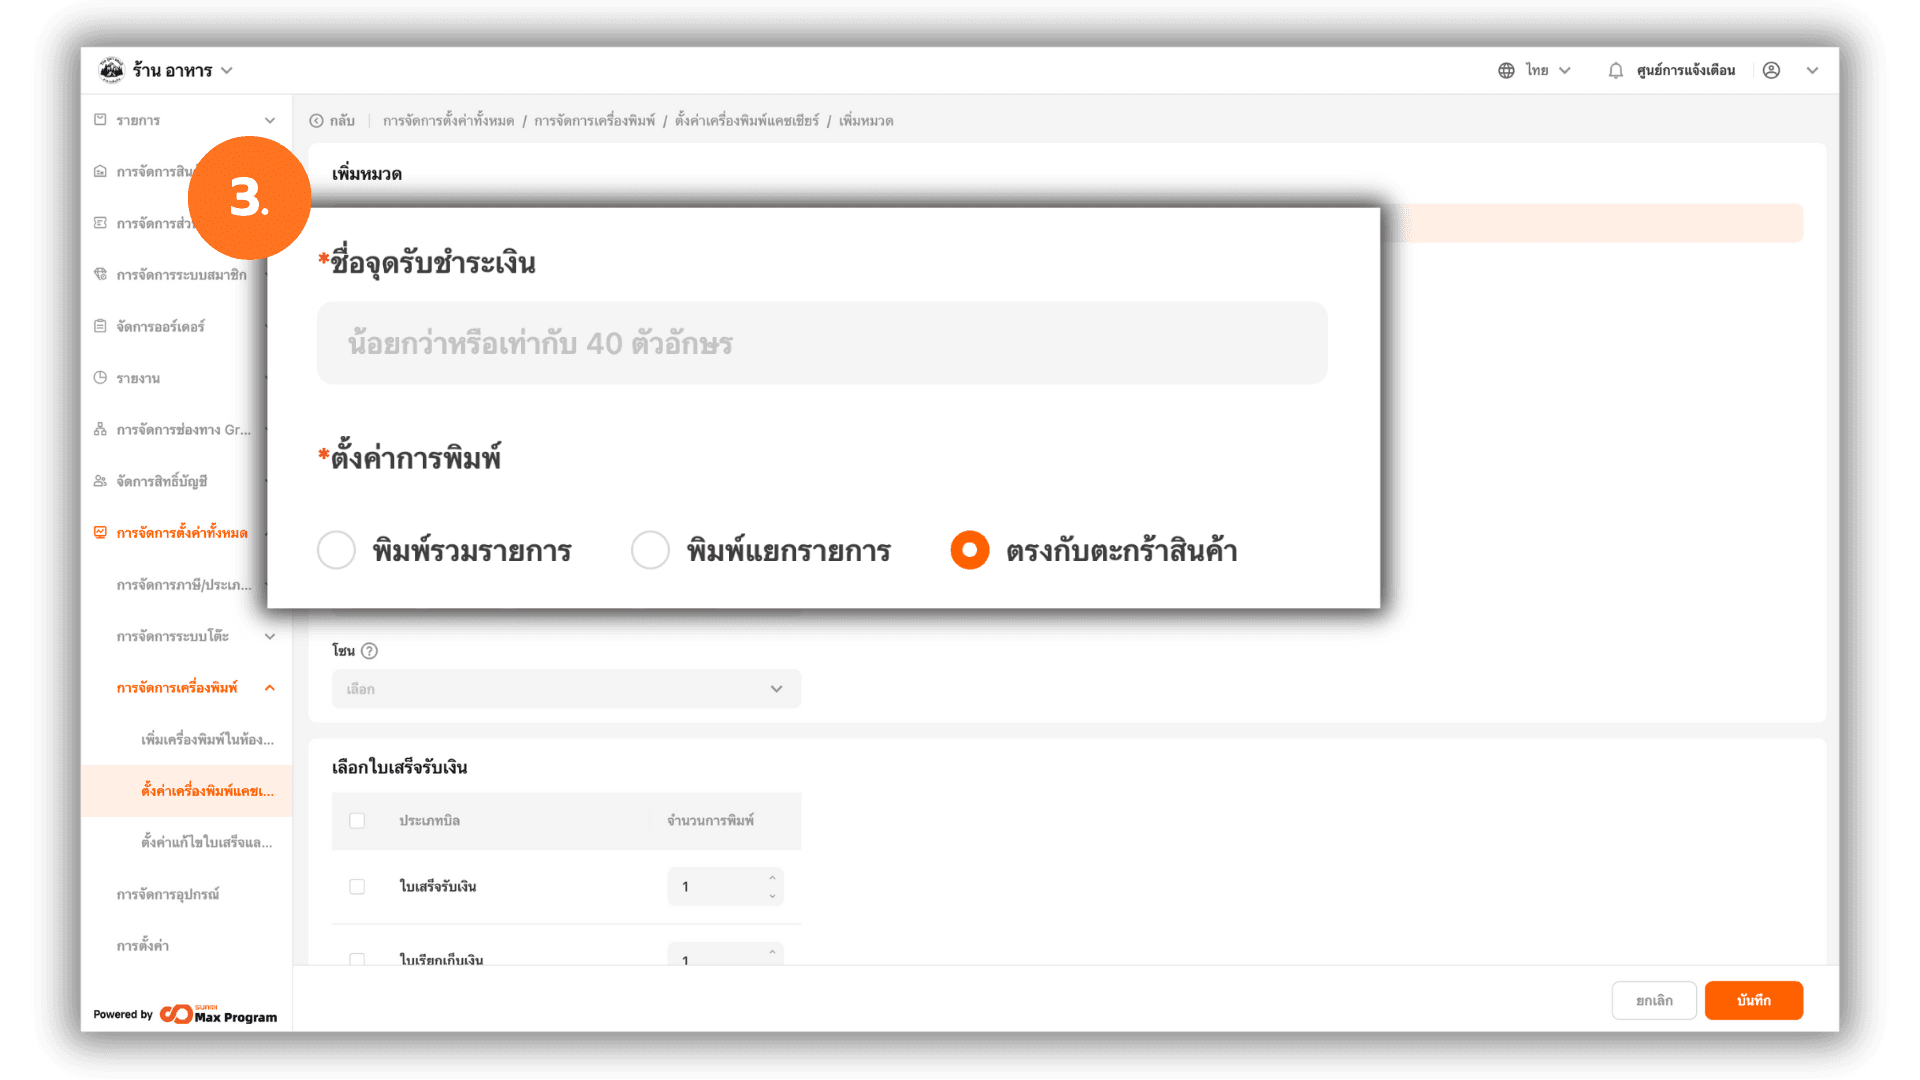
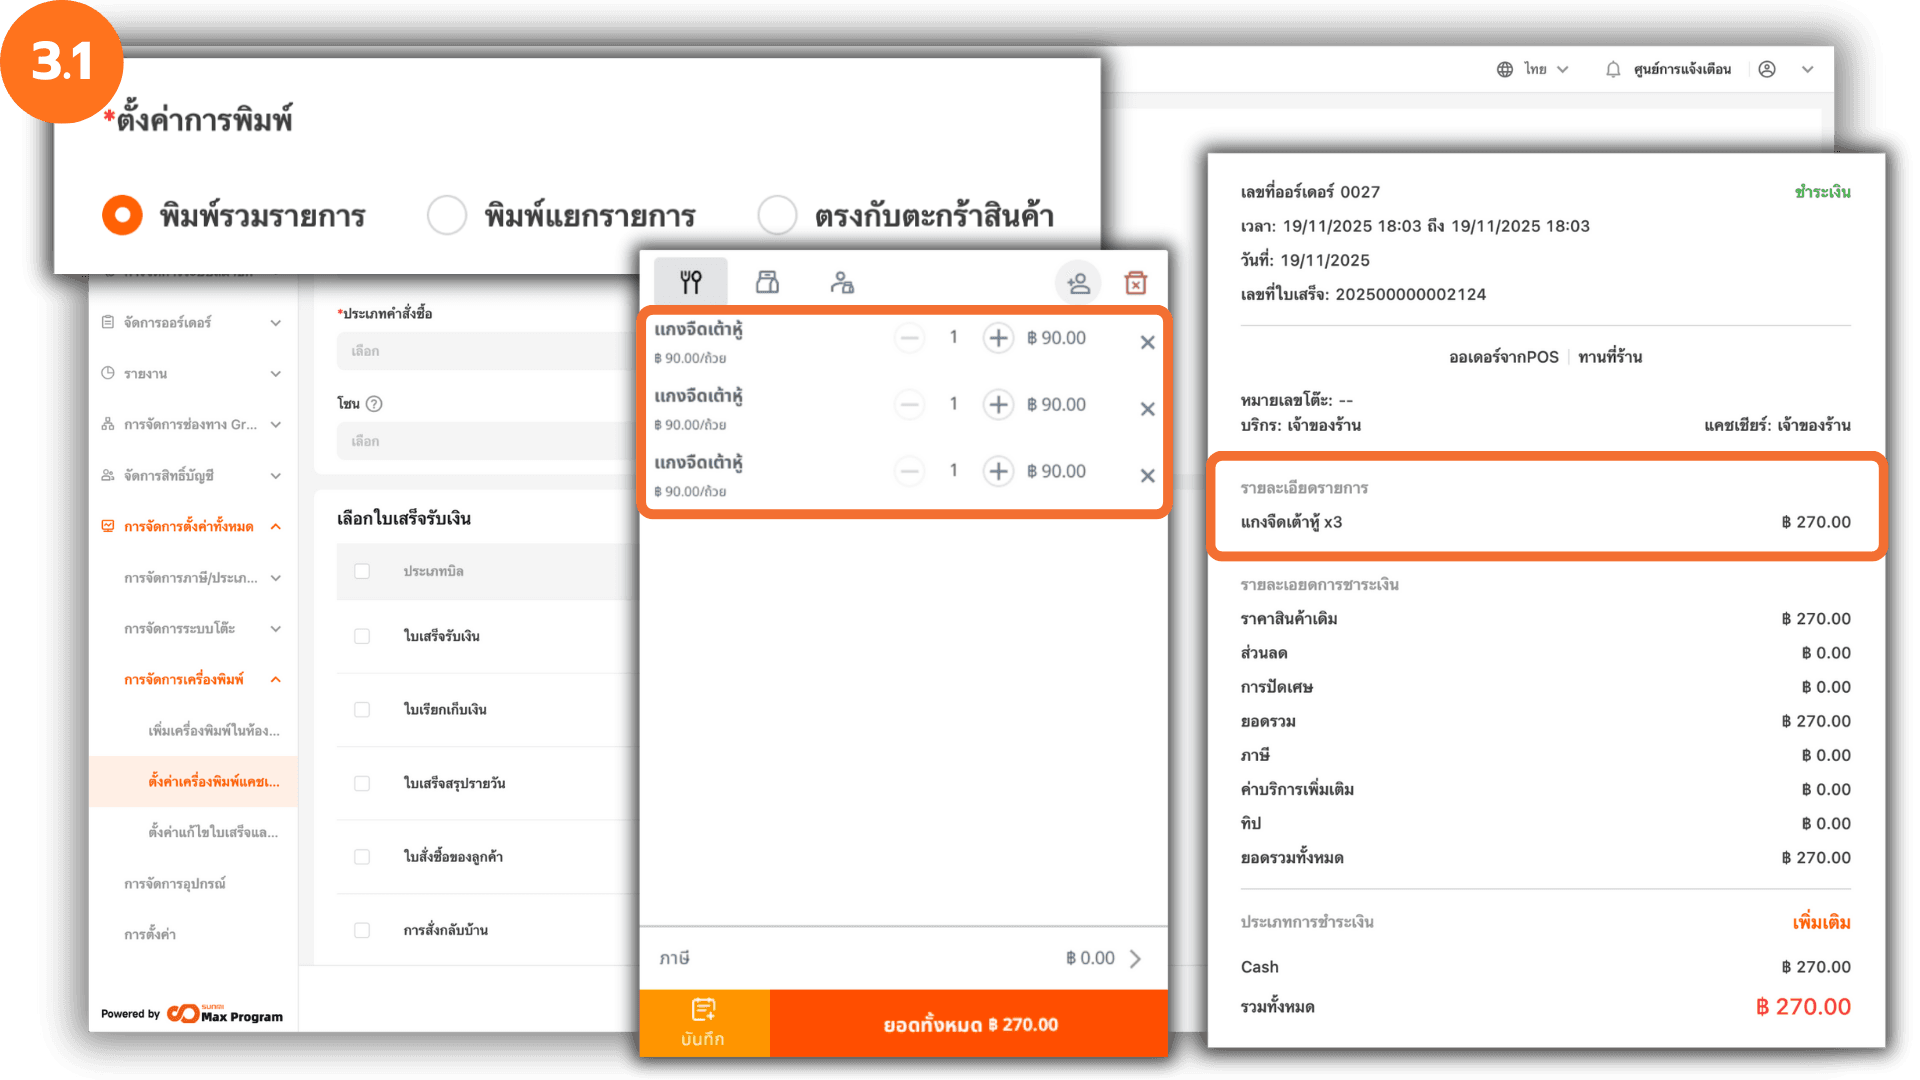
3.1 Consolidated Items
Identical items will be combine items on the receipt.
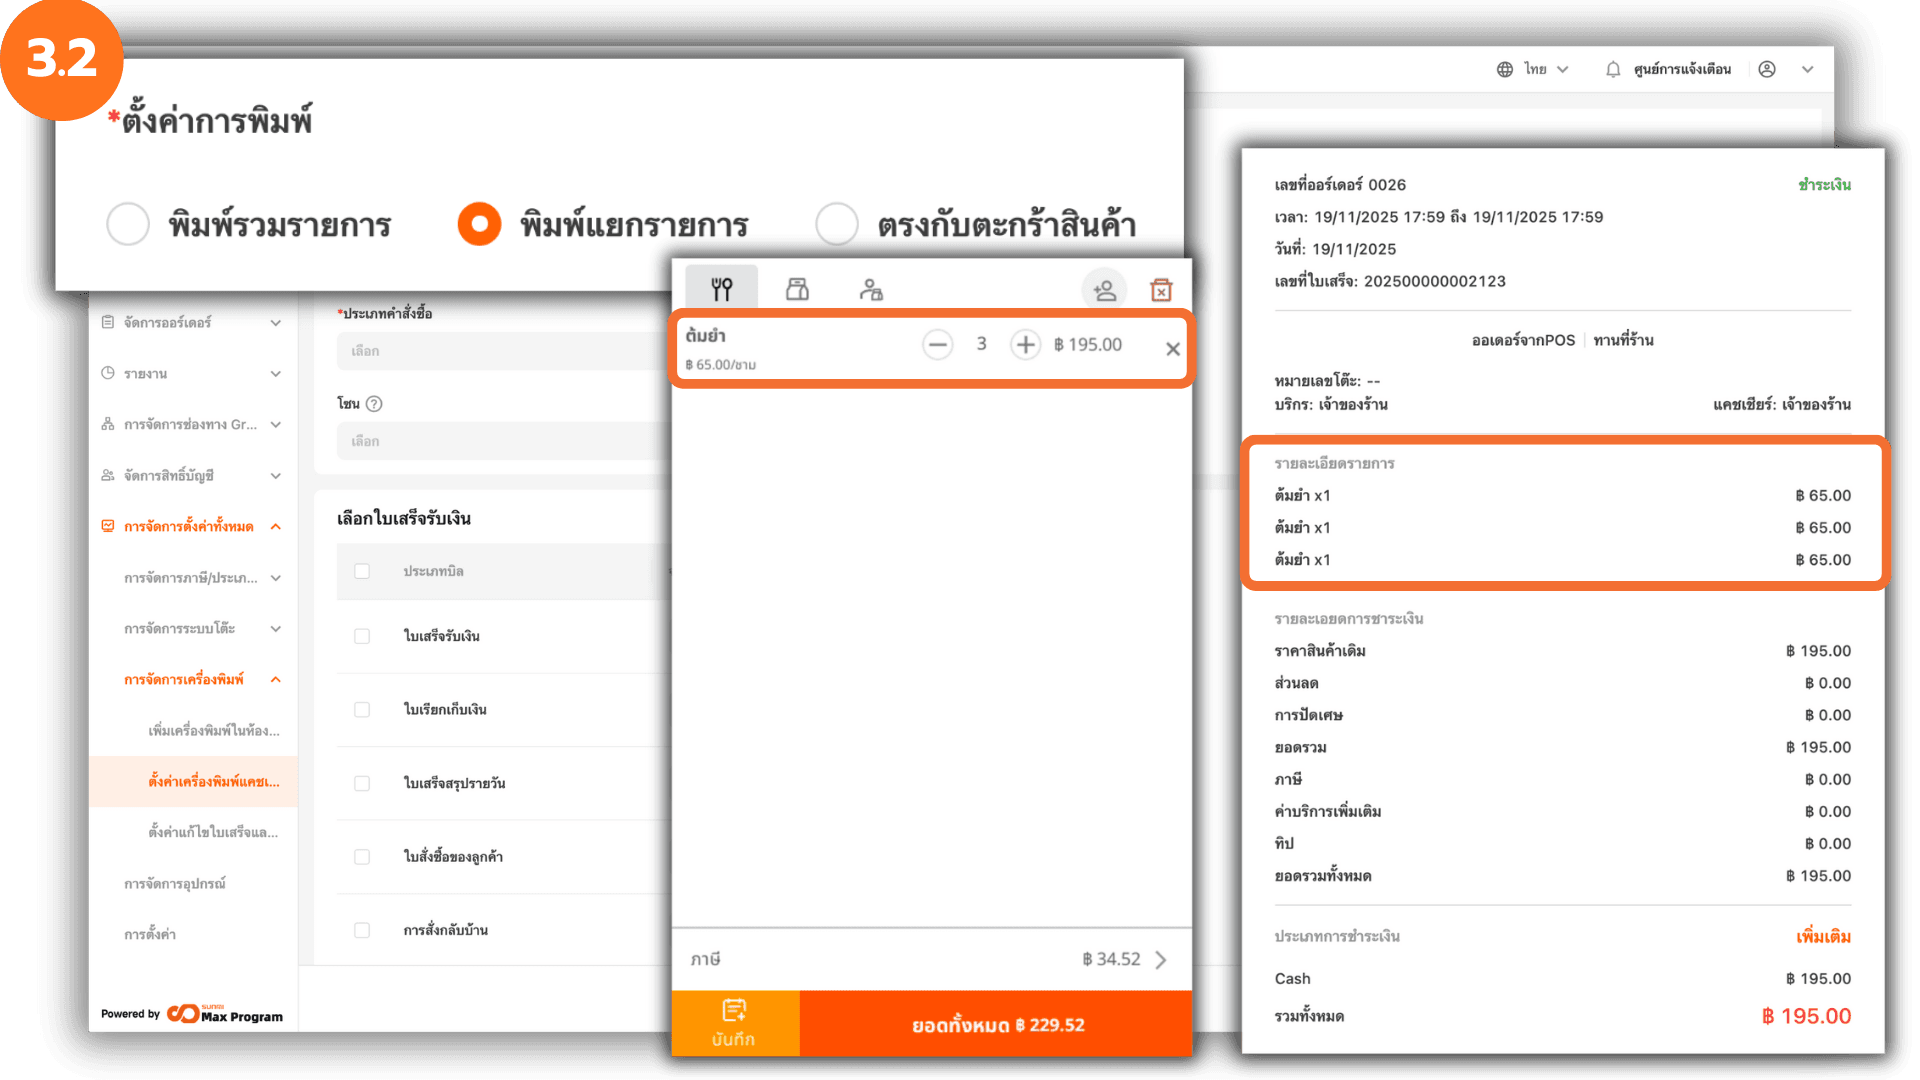
3.2 Separate Items
Identical items will be split print.
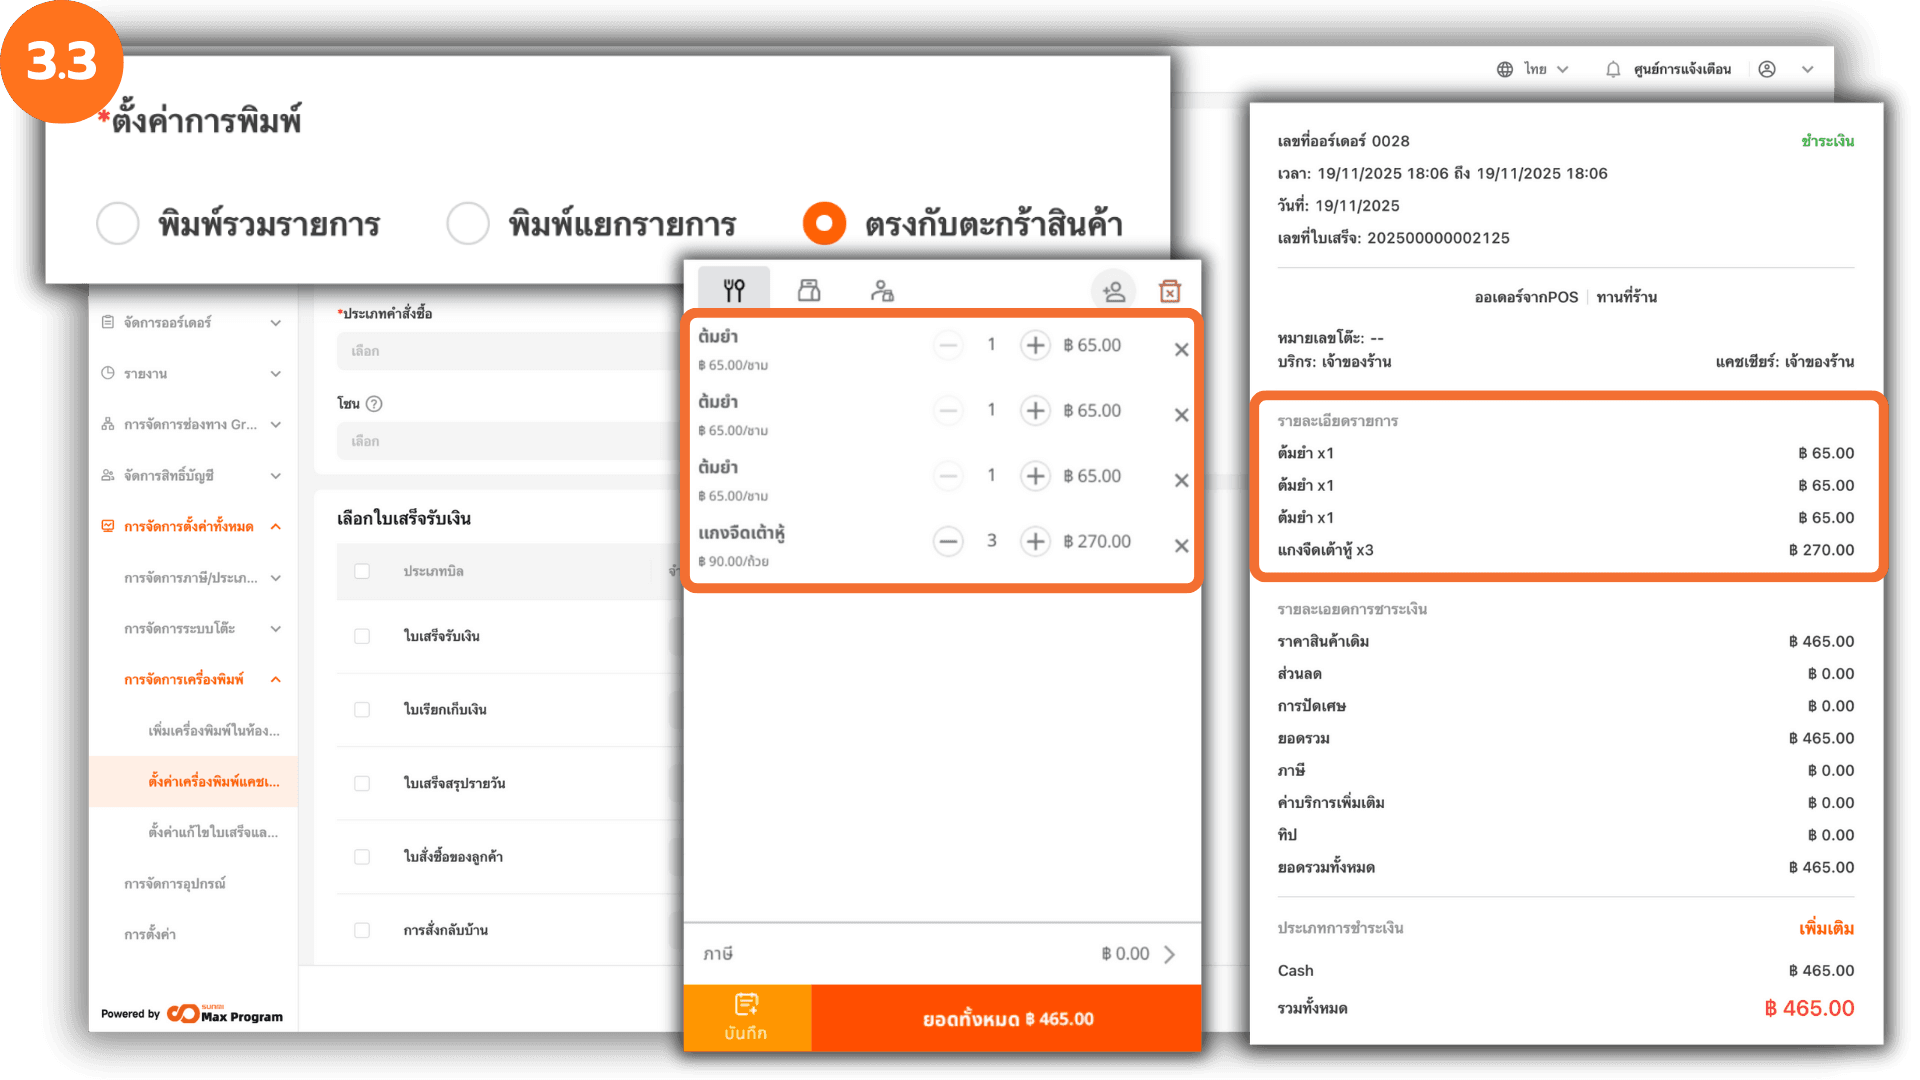
3.3 Match with cart
The receipt will be printed exactly according to the items in the cart as entered during checkout.
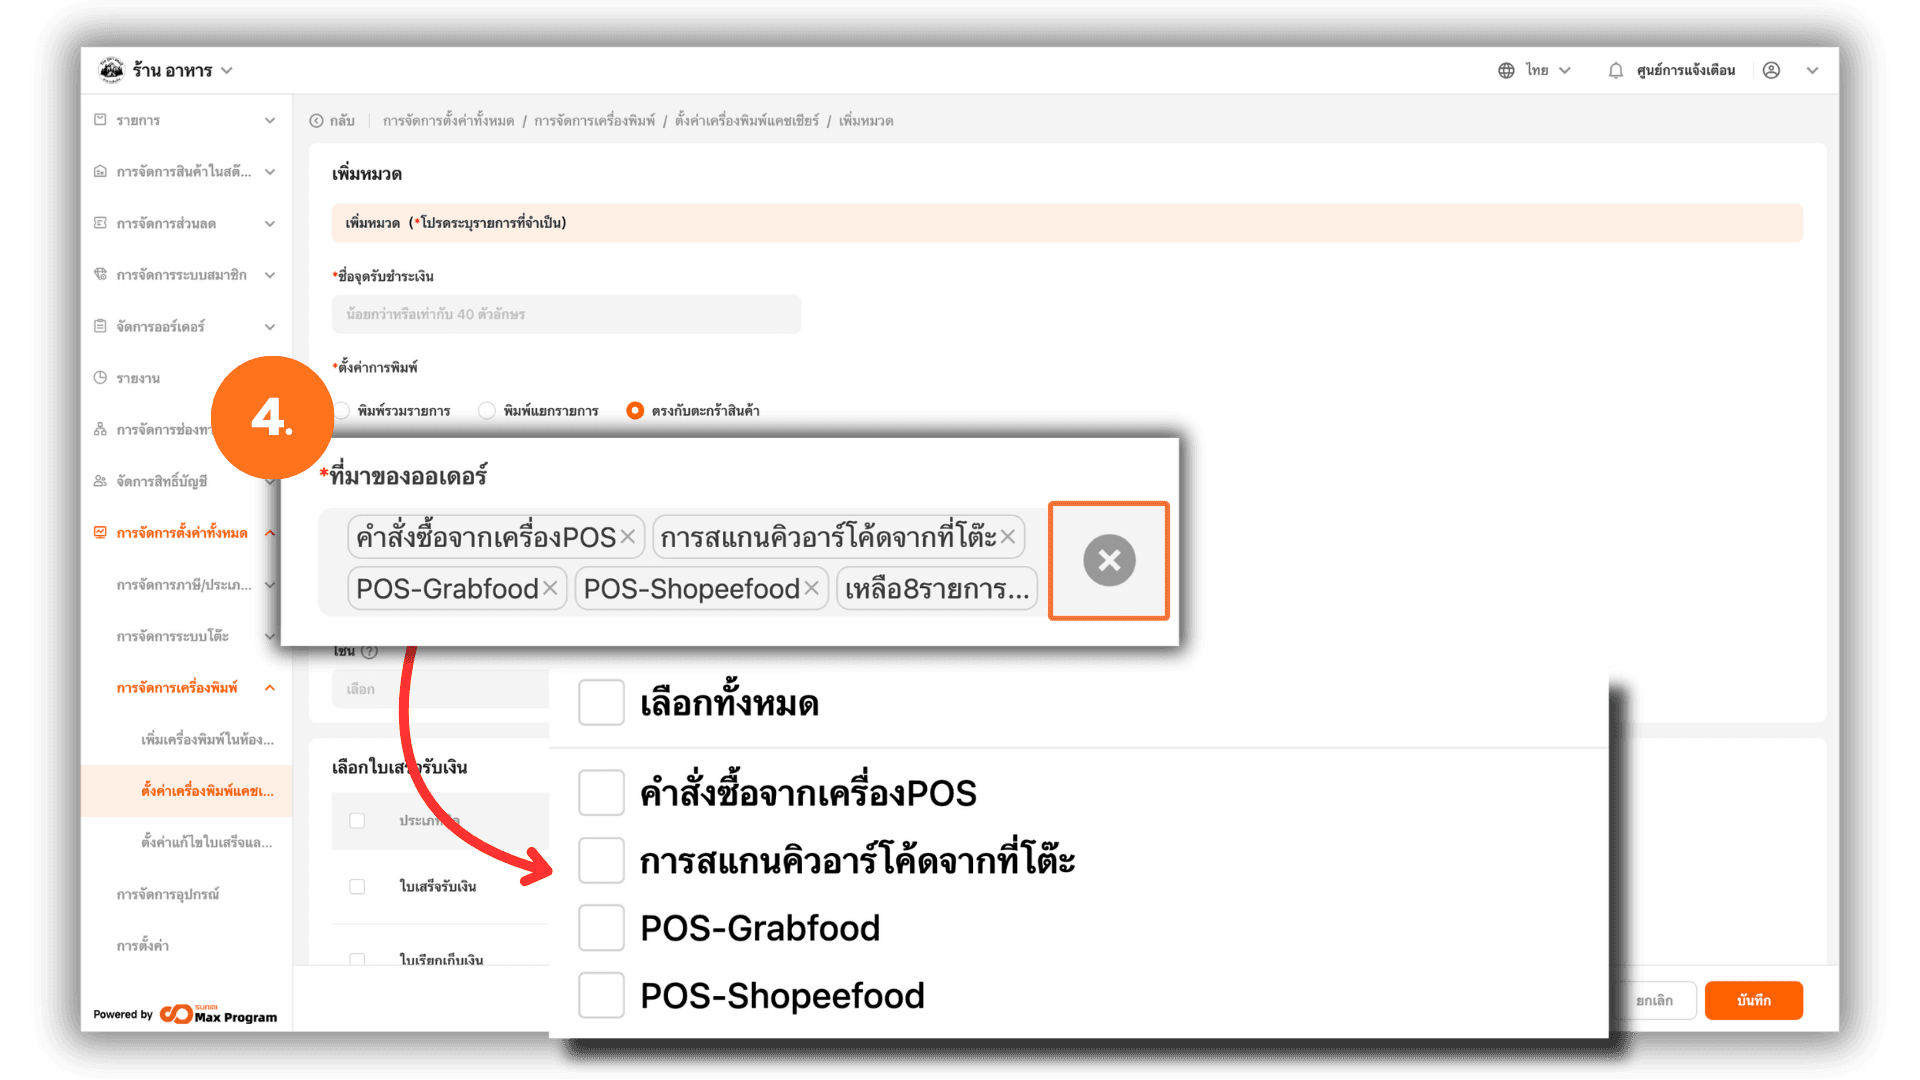
4. Select the Order Source
The system will select this automatically. To change it, click X to remove the selection, then choose a new one.
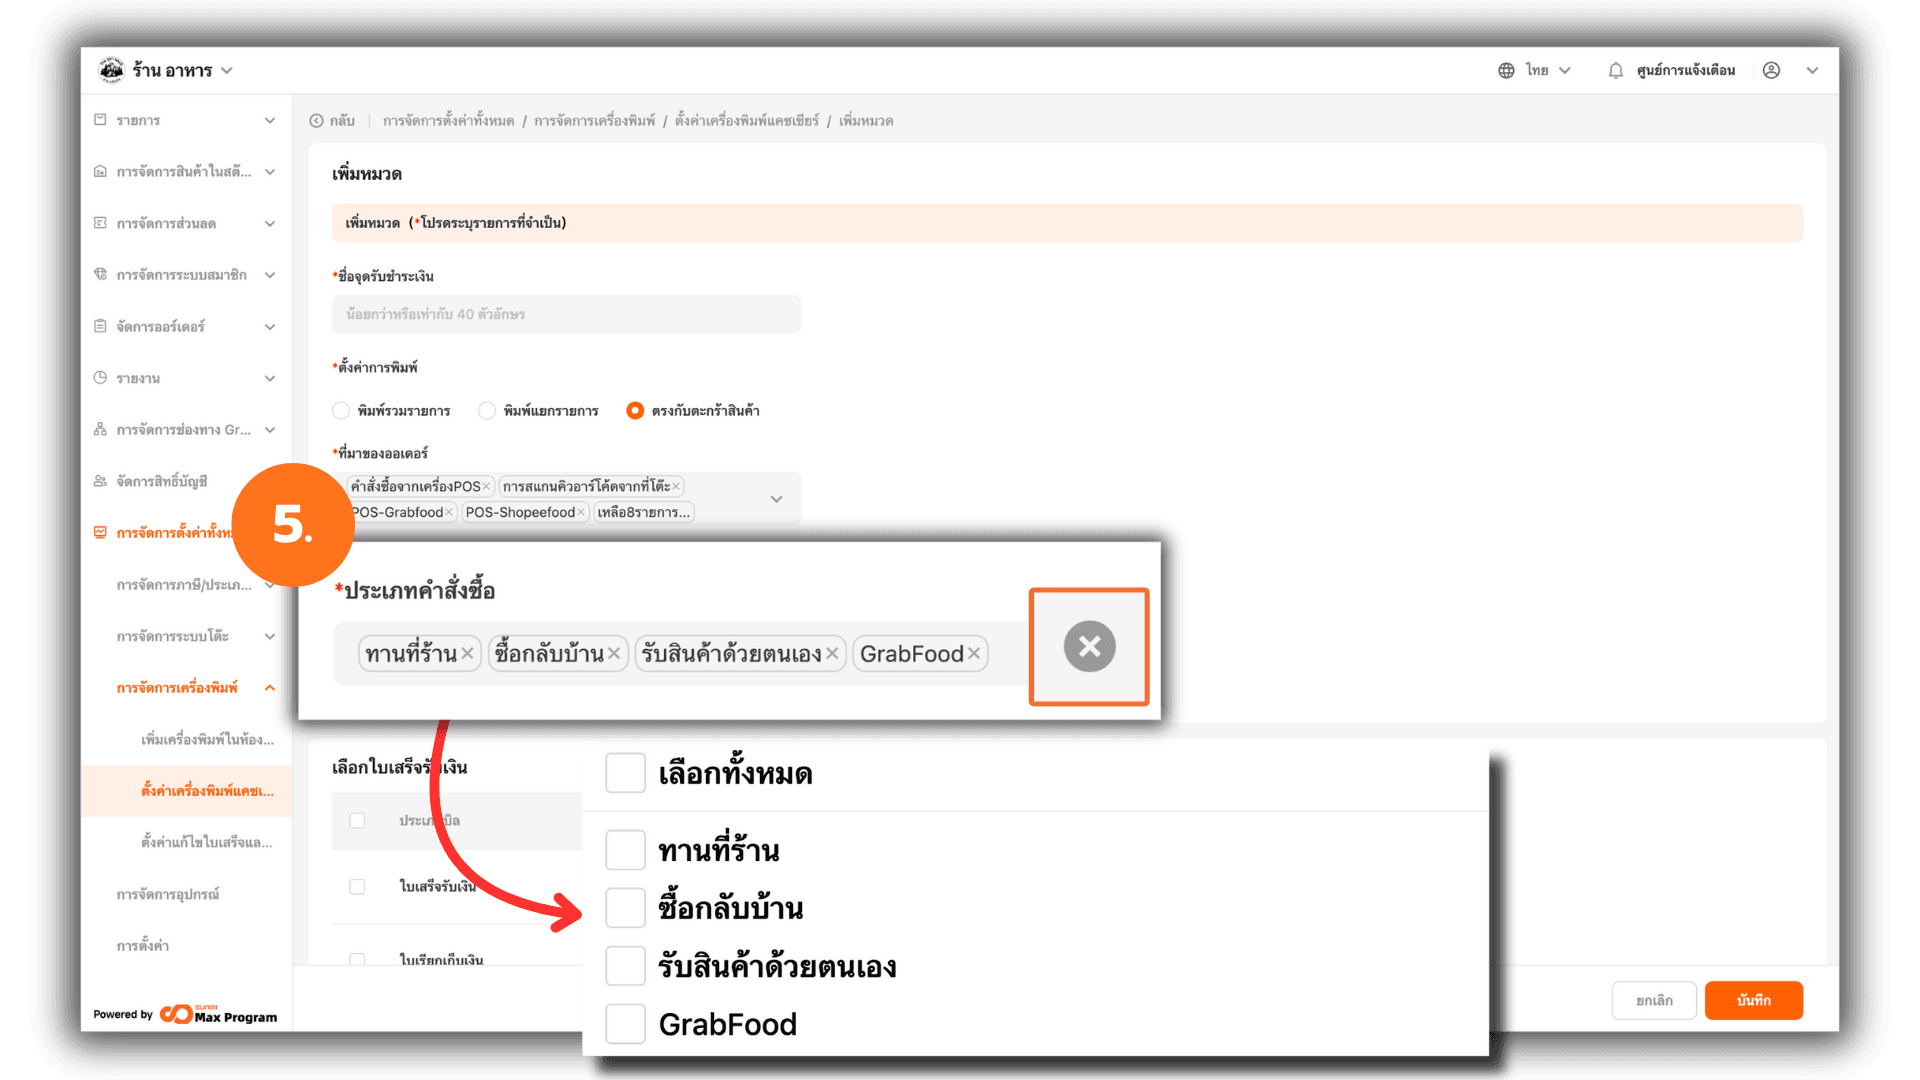
5. Select the Order Type
The system will also select this automatically. To change it, click X to remove and choose a new order type.
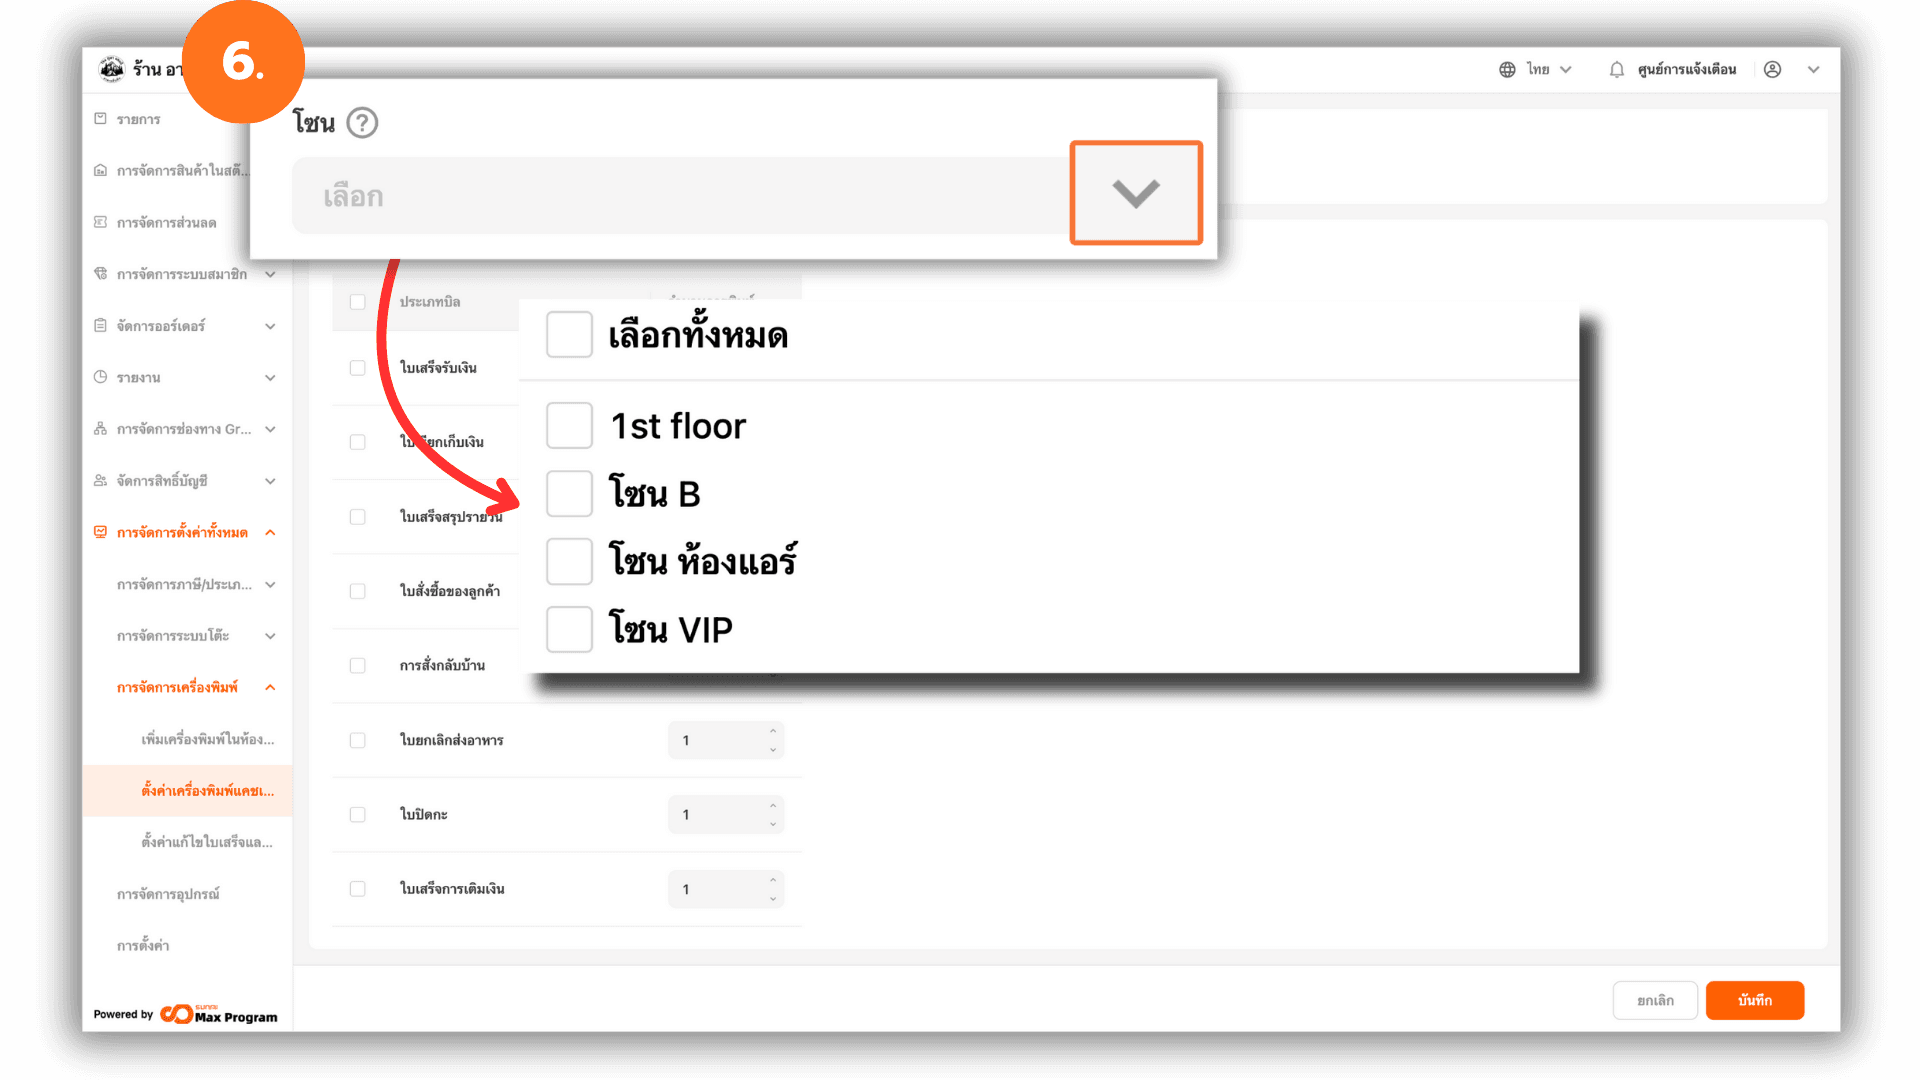
6. Select the Printing Zone
Click the dropdown arrow and choose the desired printing zone.
Note : If there is already an existing cashier printer template, zones must not be duplicated.
Additional Note : Quick-service food orders do not require a zone selection—the system will automatically print at the main payment point. Restaurant orders should have the printing zone selected according to the desired area.
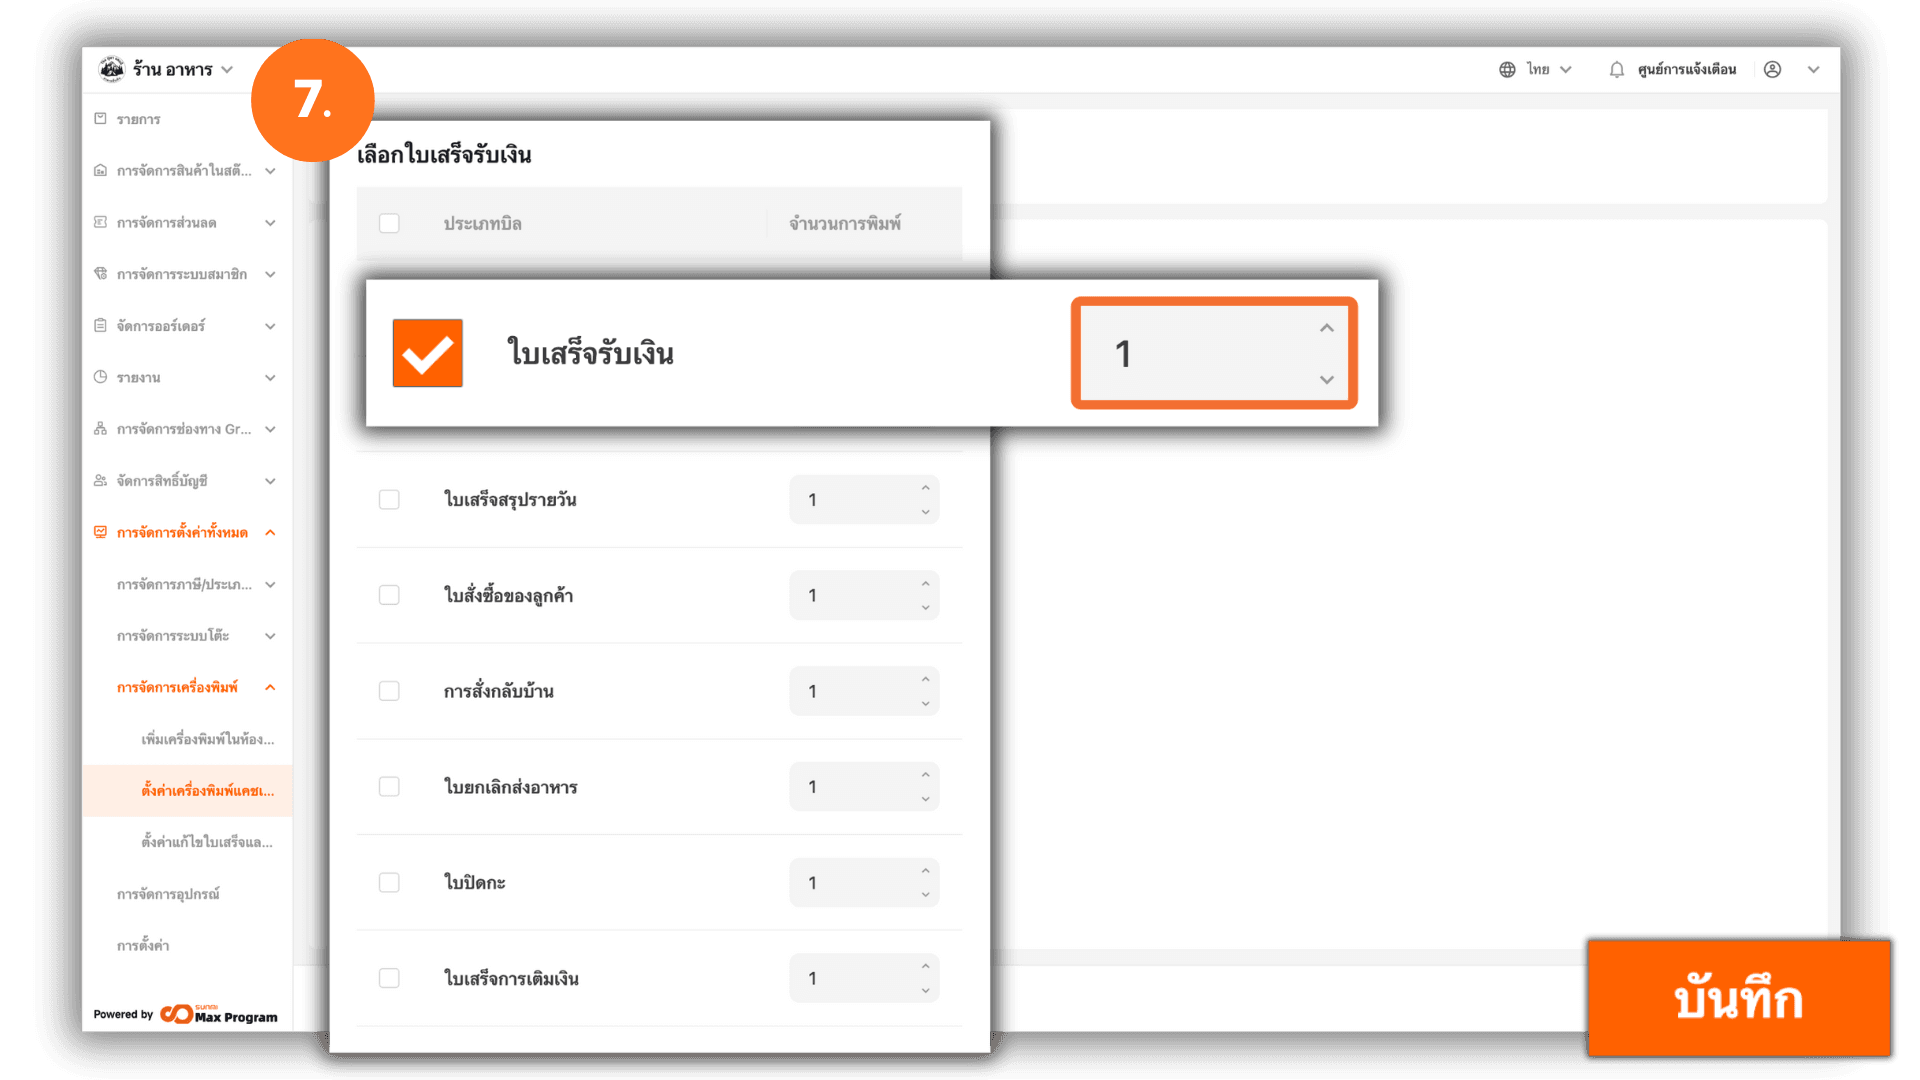
7. Select the Receipt Type and Number of Copies
Tick the types of receipts you want to use (e.g., sales receipt, billing receipt, etc.). Specify the number of copies to print. When finished, click Save to confirm the settings.
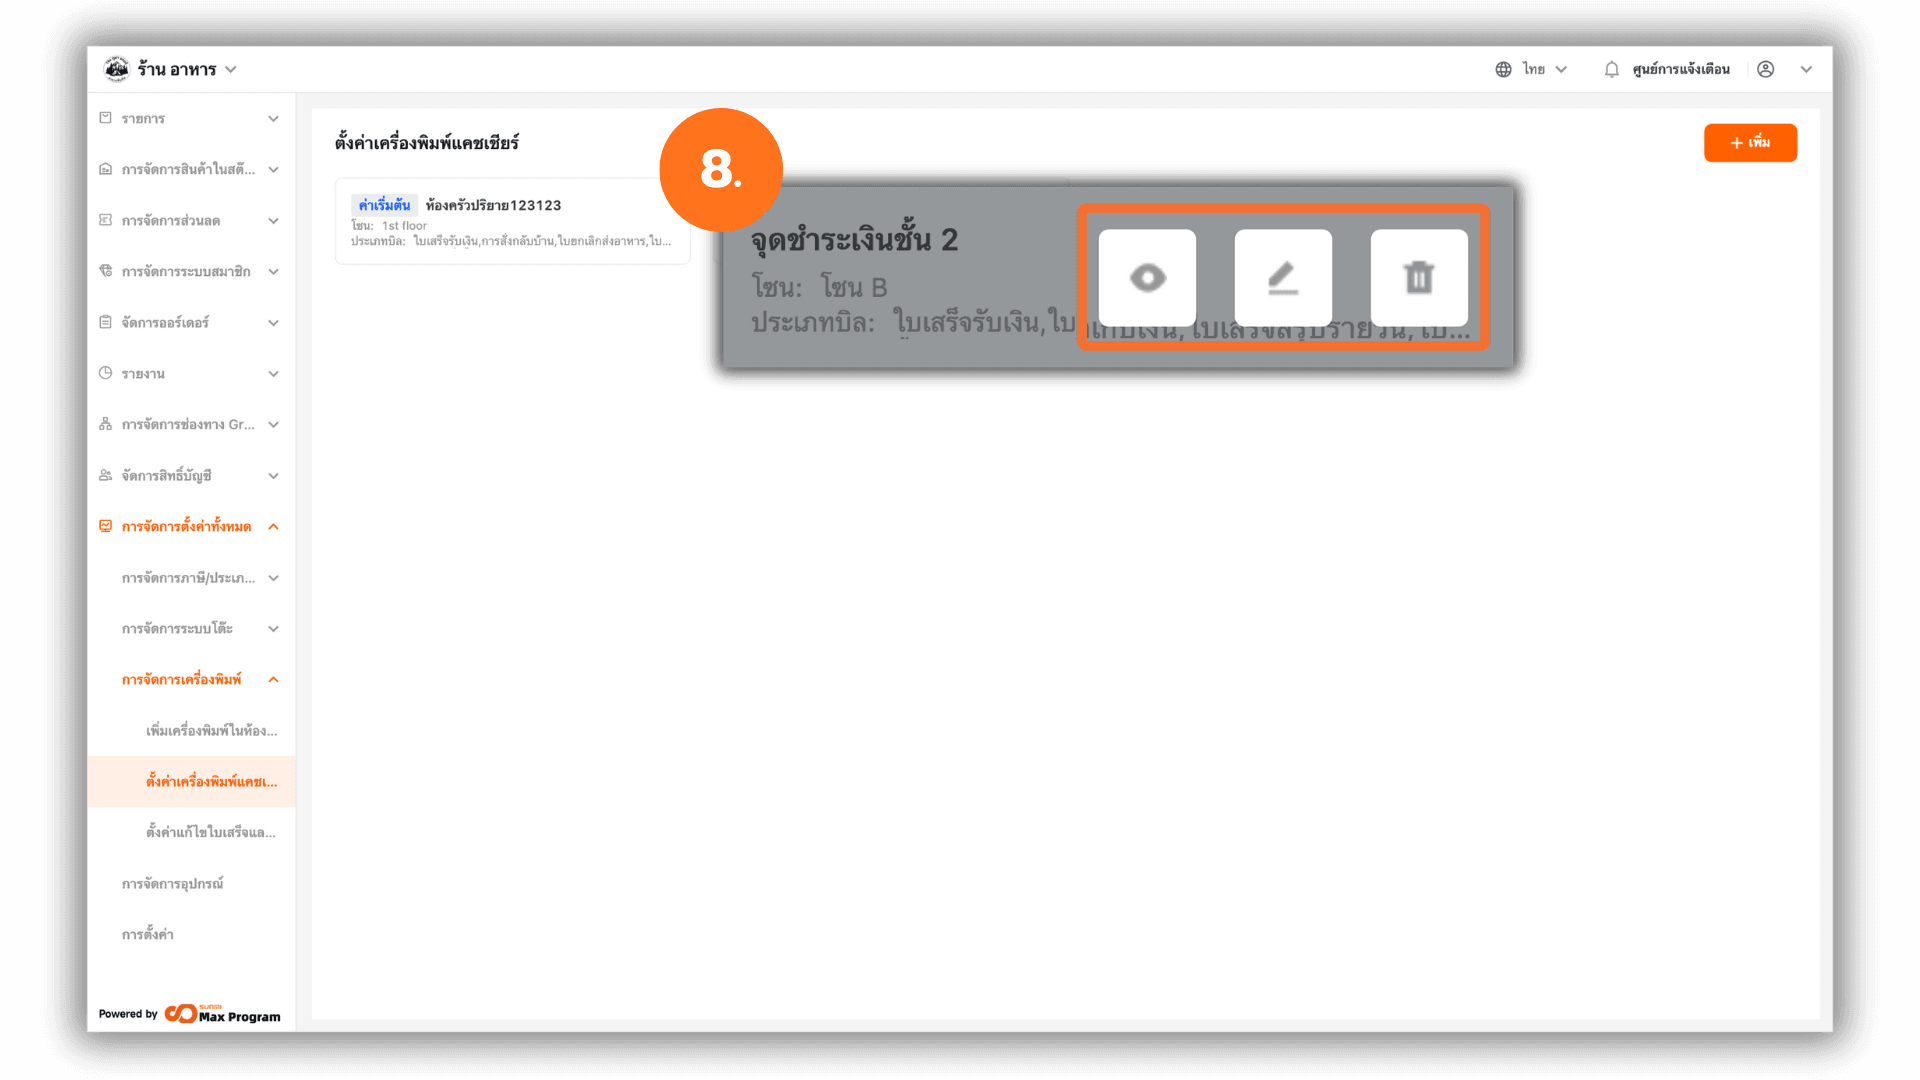
8. Managing Templates After Creation
After creating a cashier printer template, you can manage it further using the icons
- Eye icon – View the details of the template
- Pencil icon – Edit the template
- Trash bin icon – Delete the template a confirmation message will appear click Delete to confirm