Label production order format settings
2025-10-10 09:36
1. Log in to the Back Office
Go to login.gpos.co.th , enter your email and password, and click Log In.
Once logged in, select the menu “Store Management” .
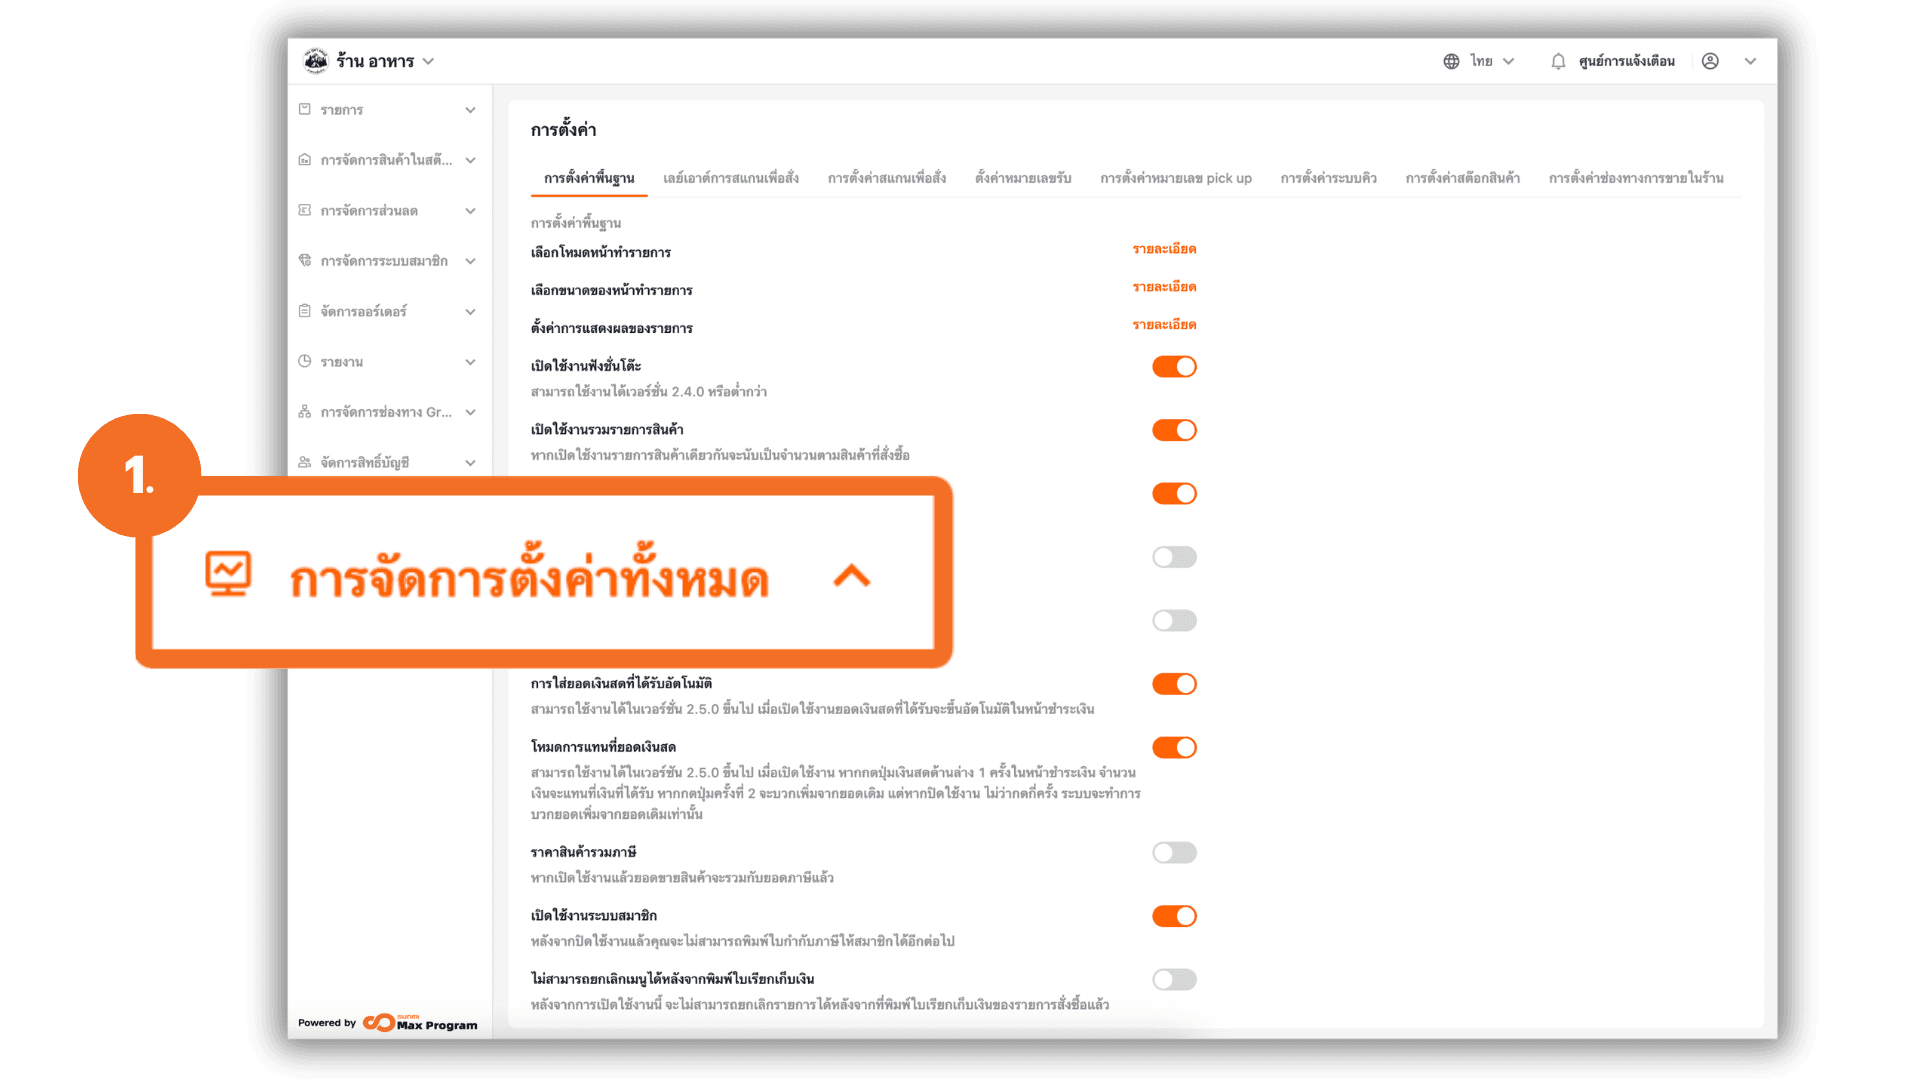
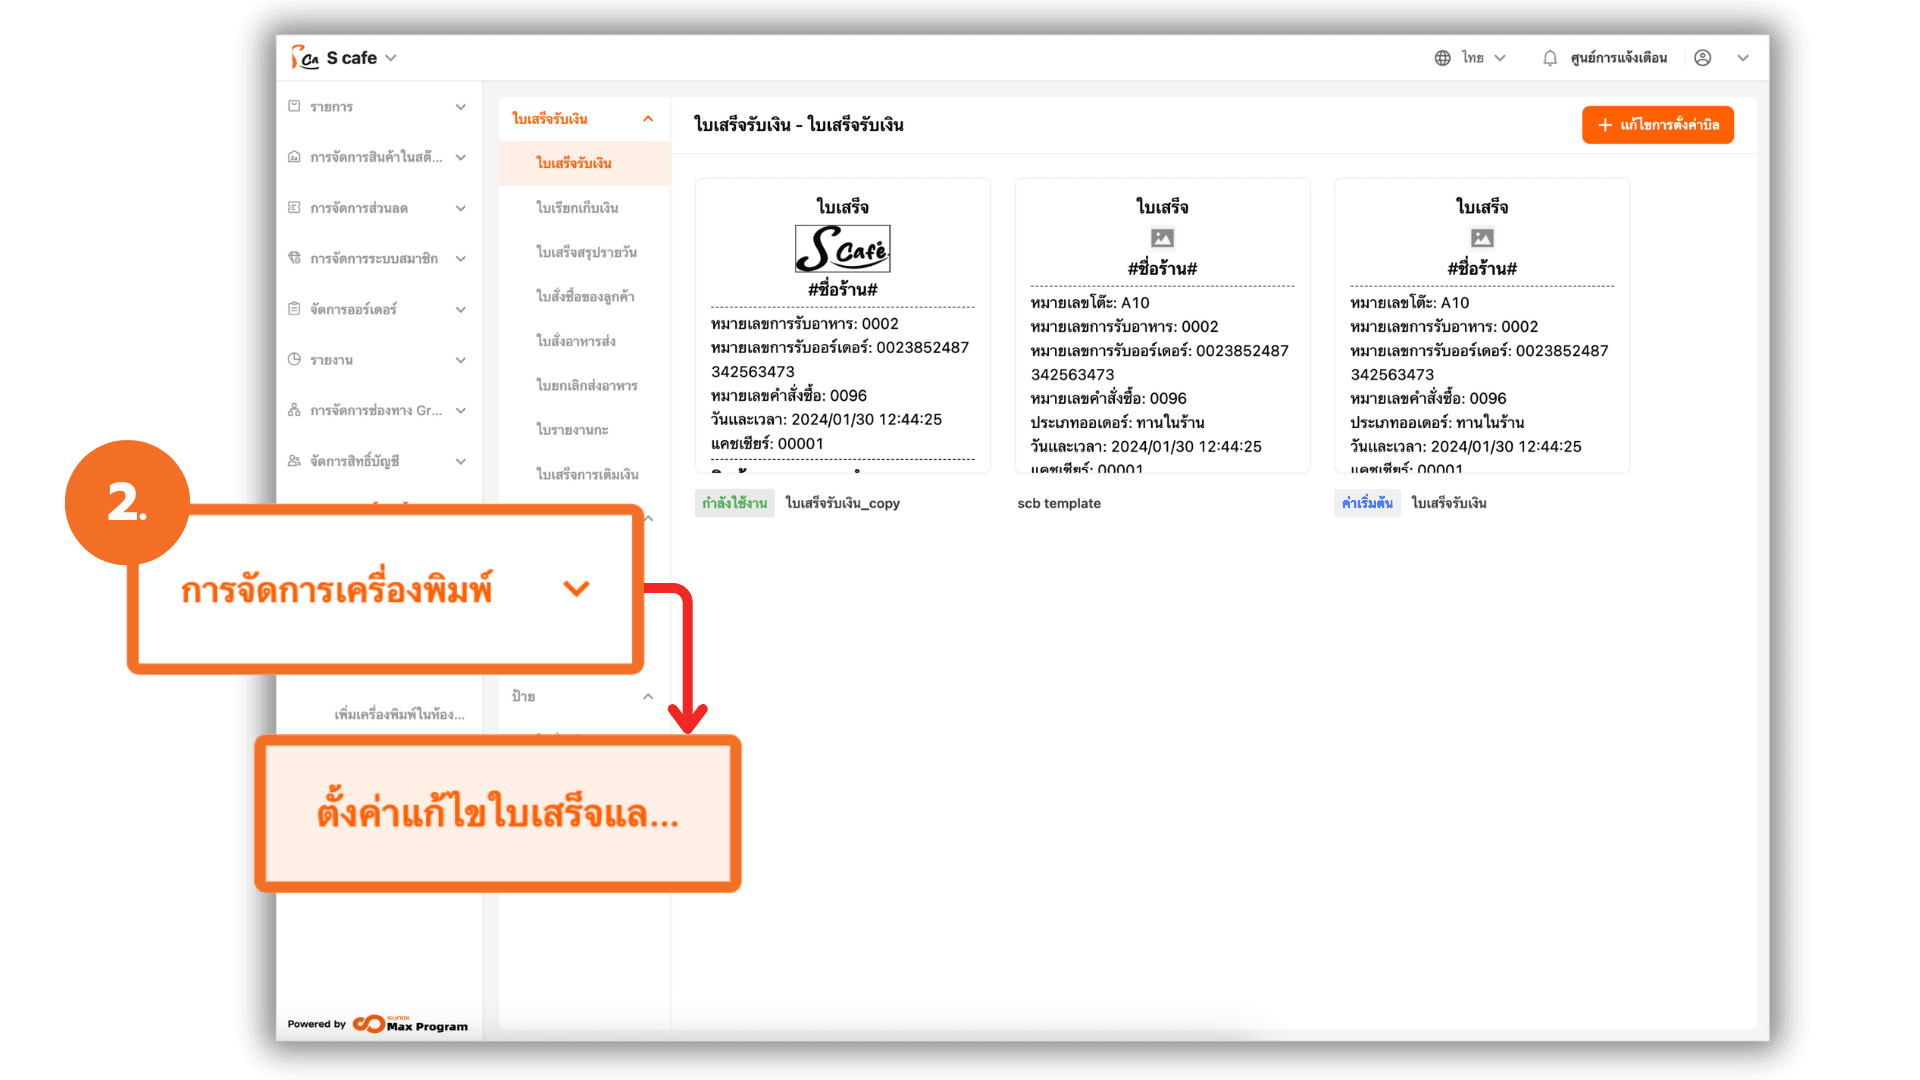
2. Navigate to “Receipt Management”
From the main menu, select “Print Management” Click on the section “Receipt Management”
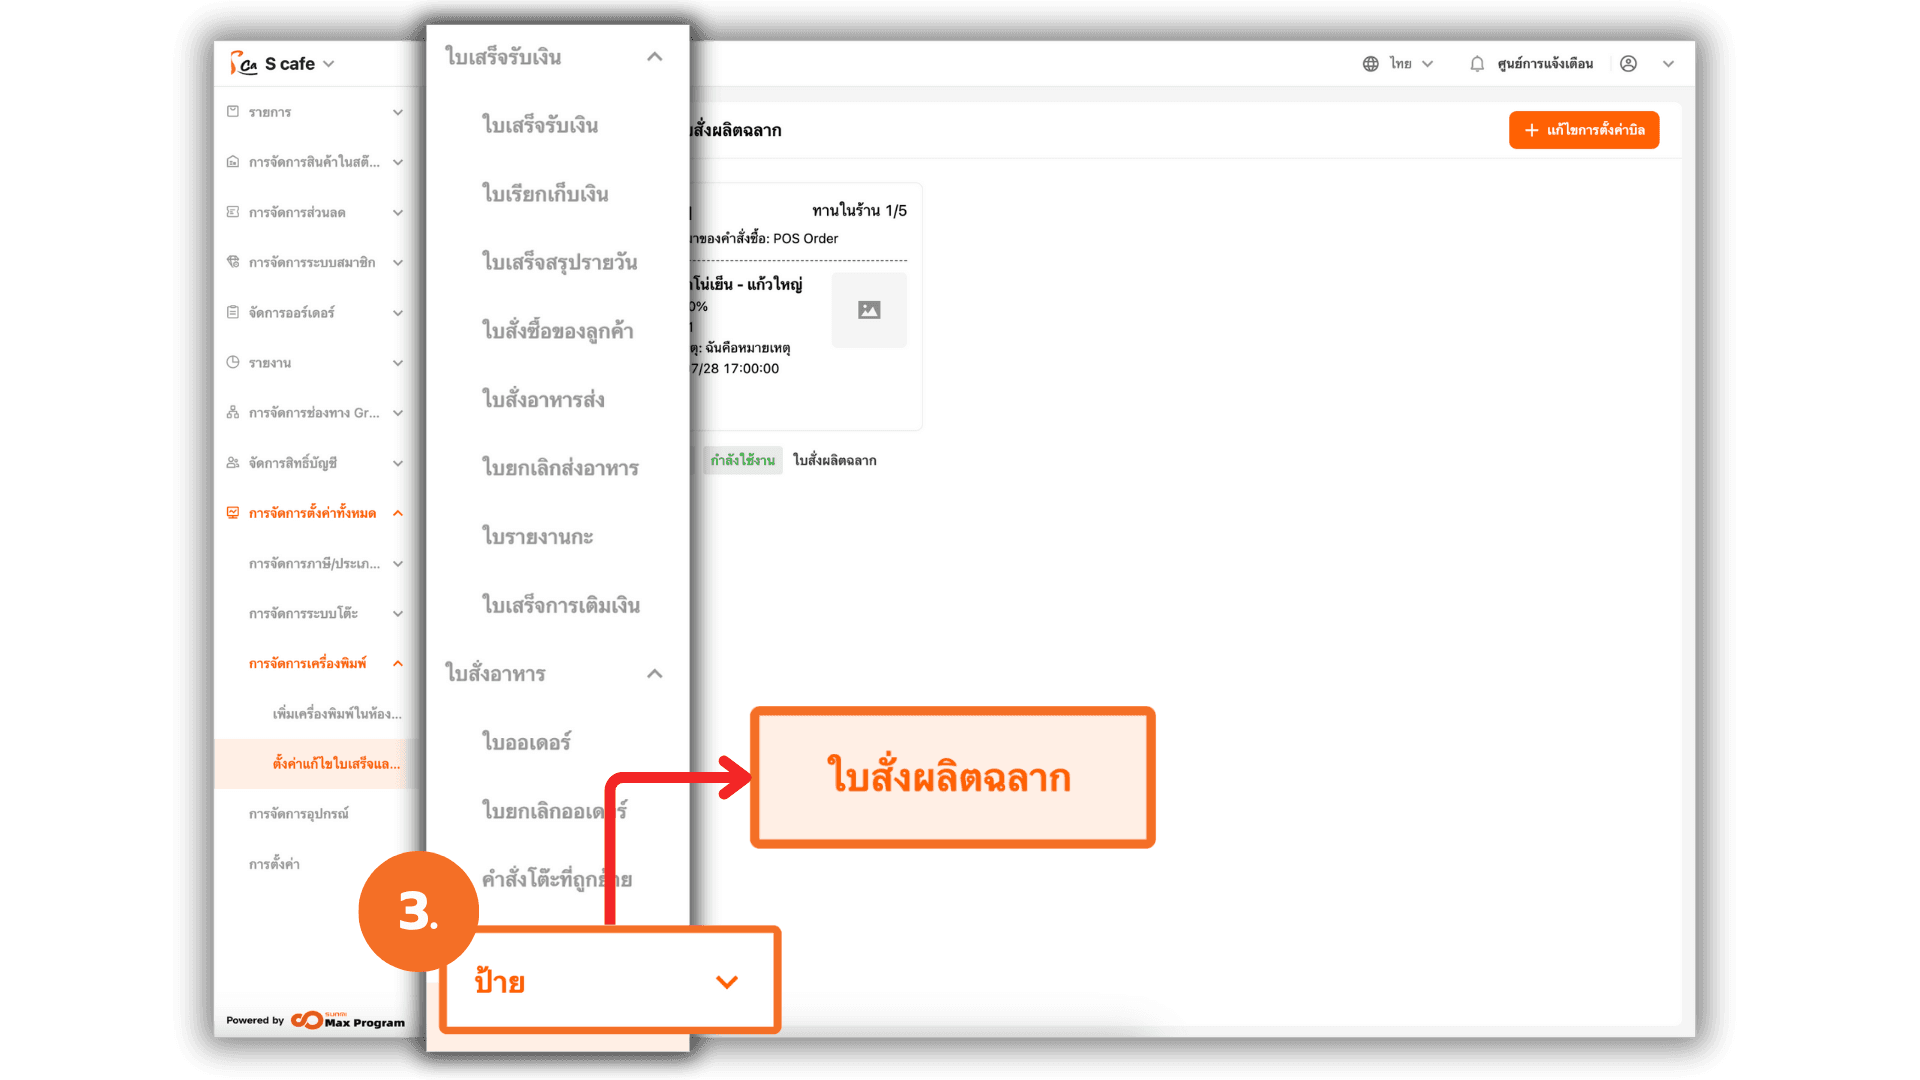
3. Go to the “Labels” section and select “Label Production Order”
On the left-hand side, you’ll see different categories. Select “Labels”, then click on the subcategory: “Label Production Order”
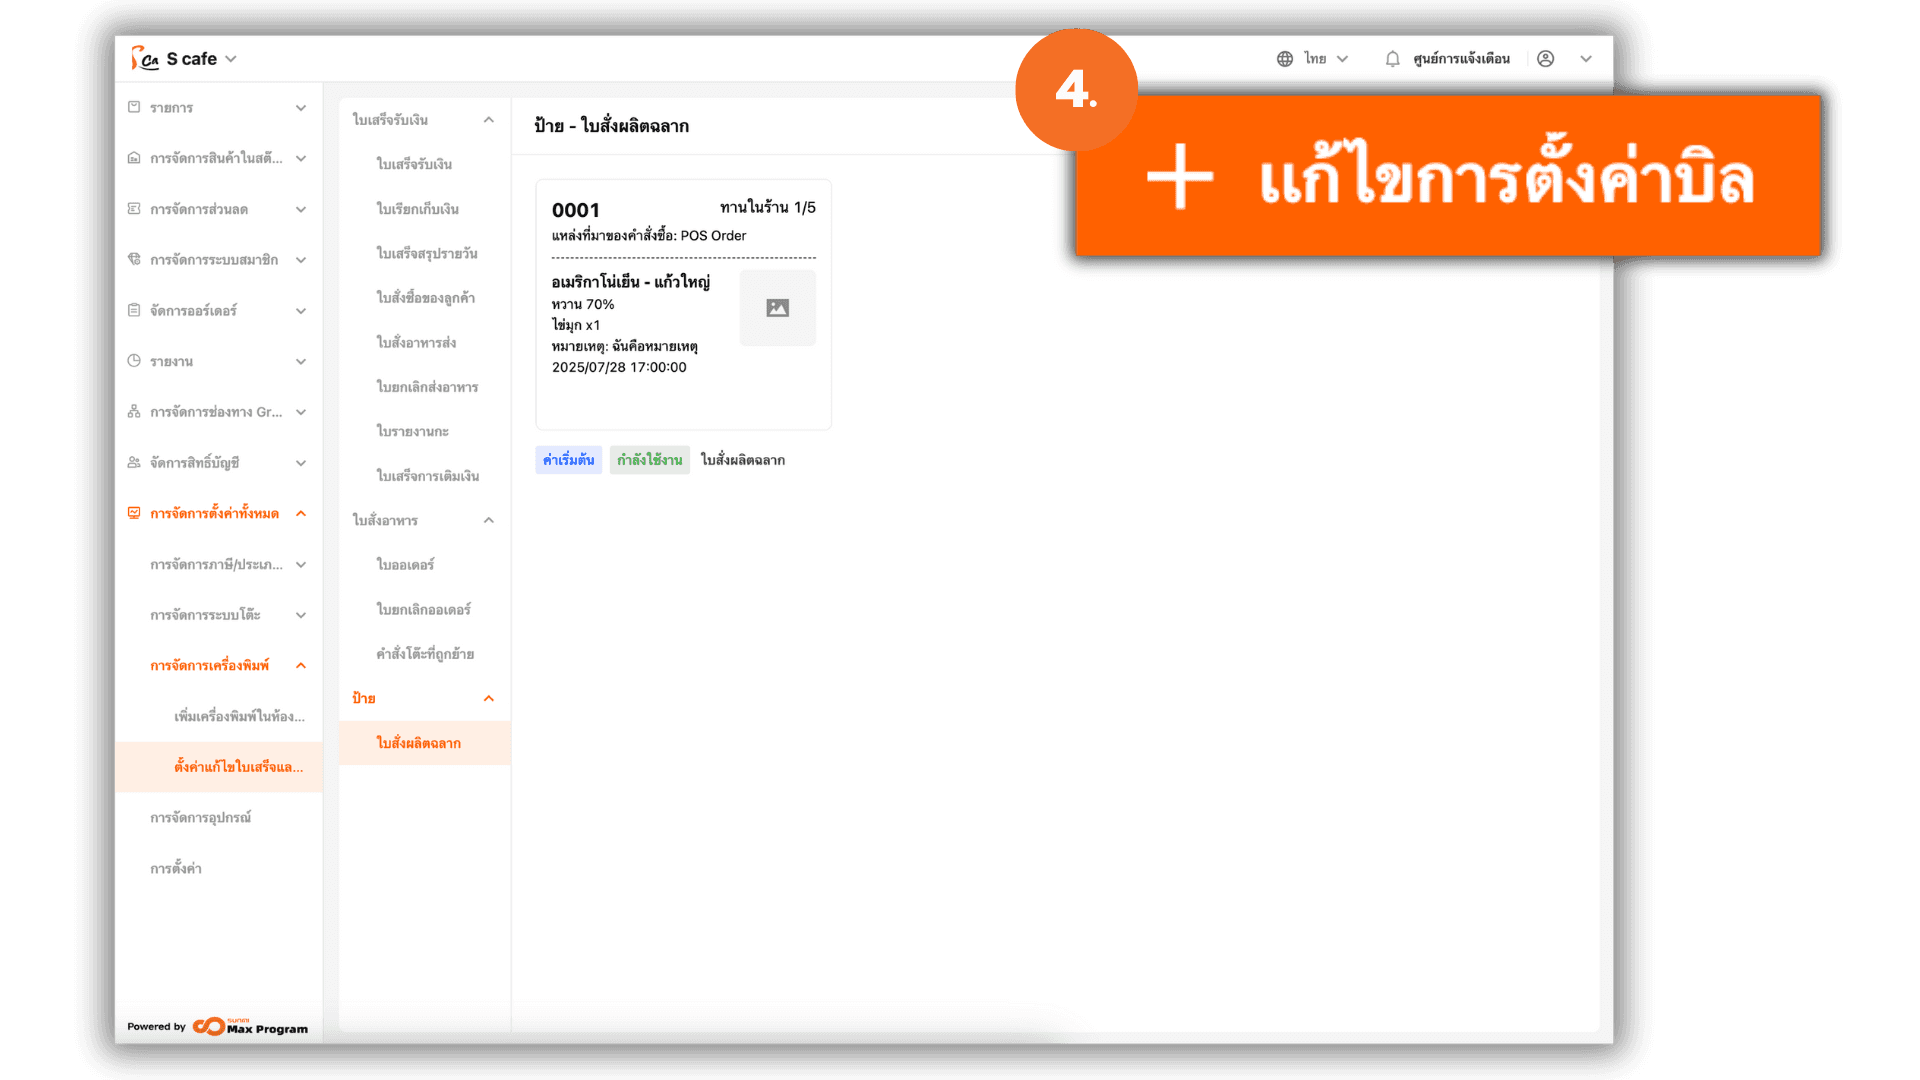
4. Create a New Template
The system will display a default template for the label production order, which cannot be edited or customized. Click the "+ Add a new invoice style" button to create a new template for the label production order.
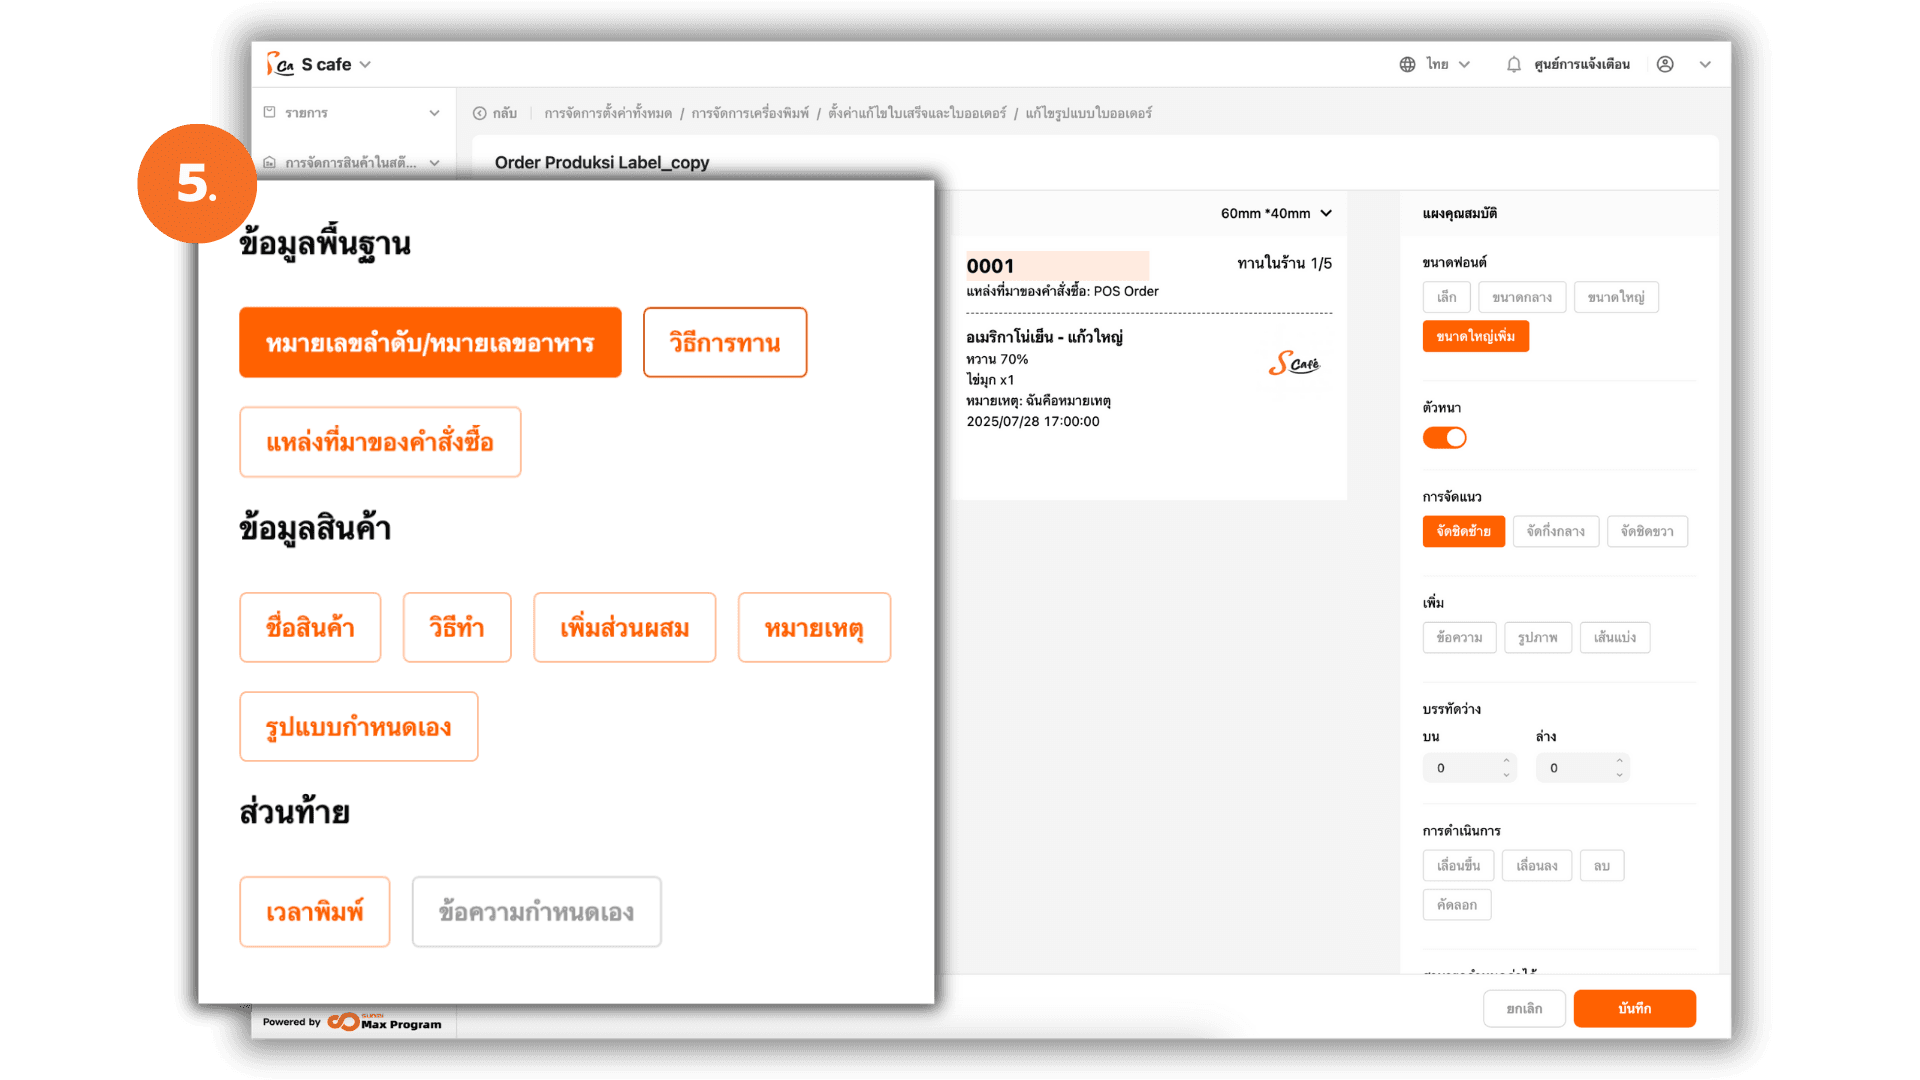
5. Configure the Items to be Displayed on the Label
The system will show the template configuration screen.
Select items from the left-hand menu that you want to display on the label, including basic information, Order Info, and the footer.
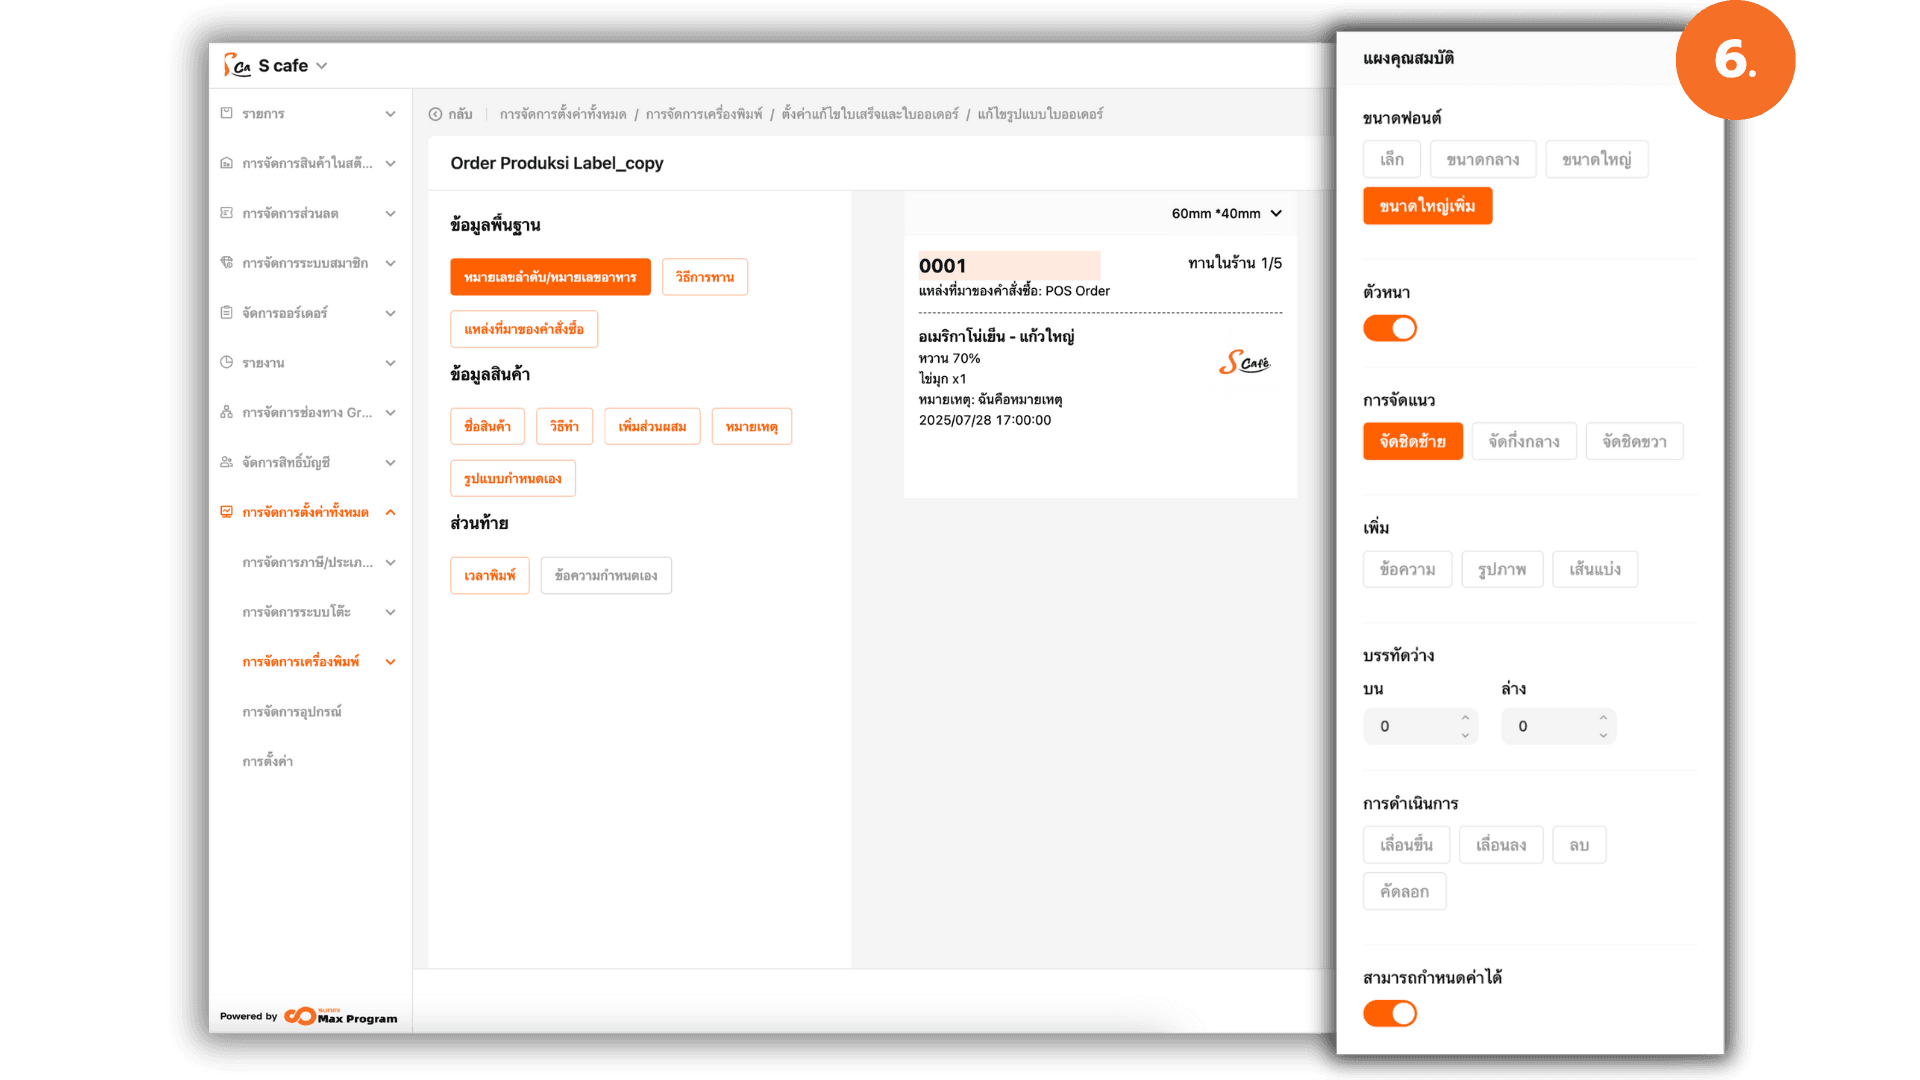
6. Customize Using the “Properties Panel”
Use the tools on the left panel to:
- Font Size – Adjust the size of the text
- Bold – Make the font bold
- Alignment – Align text (Left, Center, Right)
- Add – Add new text, image, or divider line
- Blank line – Adjust the spacing between lines
- Action – Click on the item you want to manage to Move it up or down , Delete and Copy
- Configurable – Enable/Disable permission to edit on the POS terminal
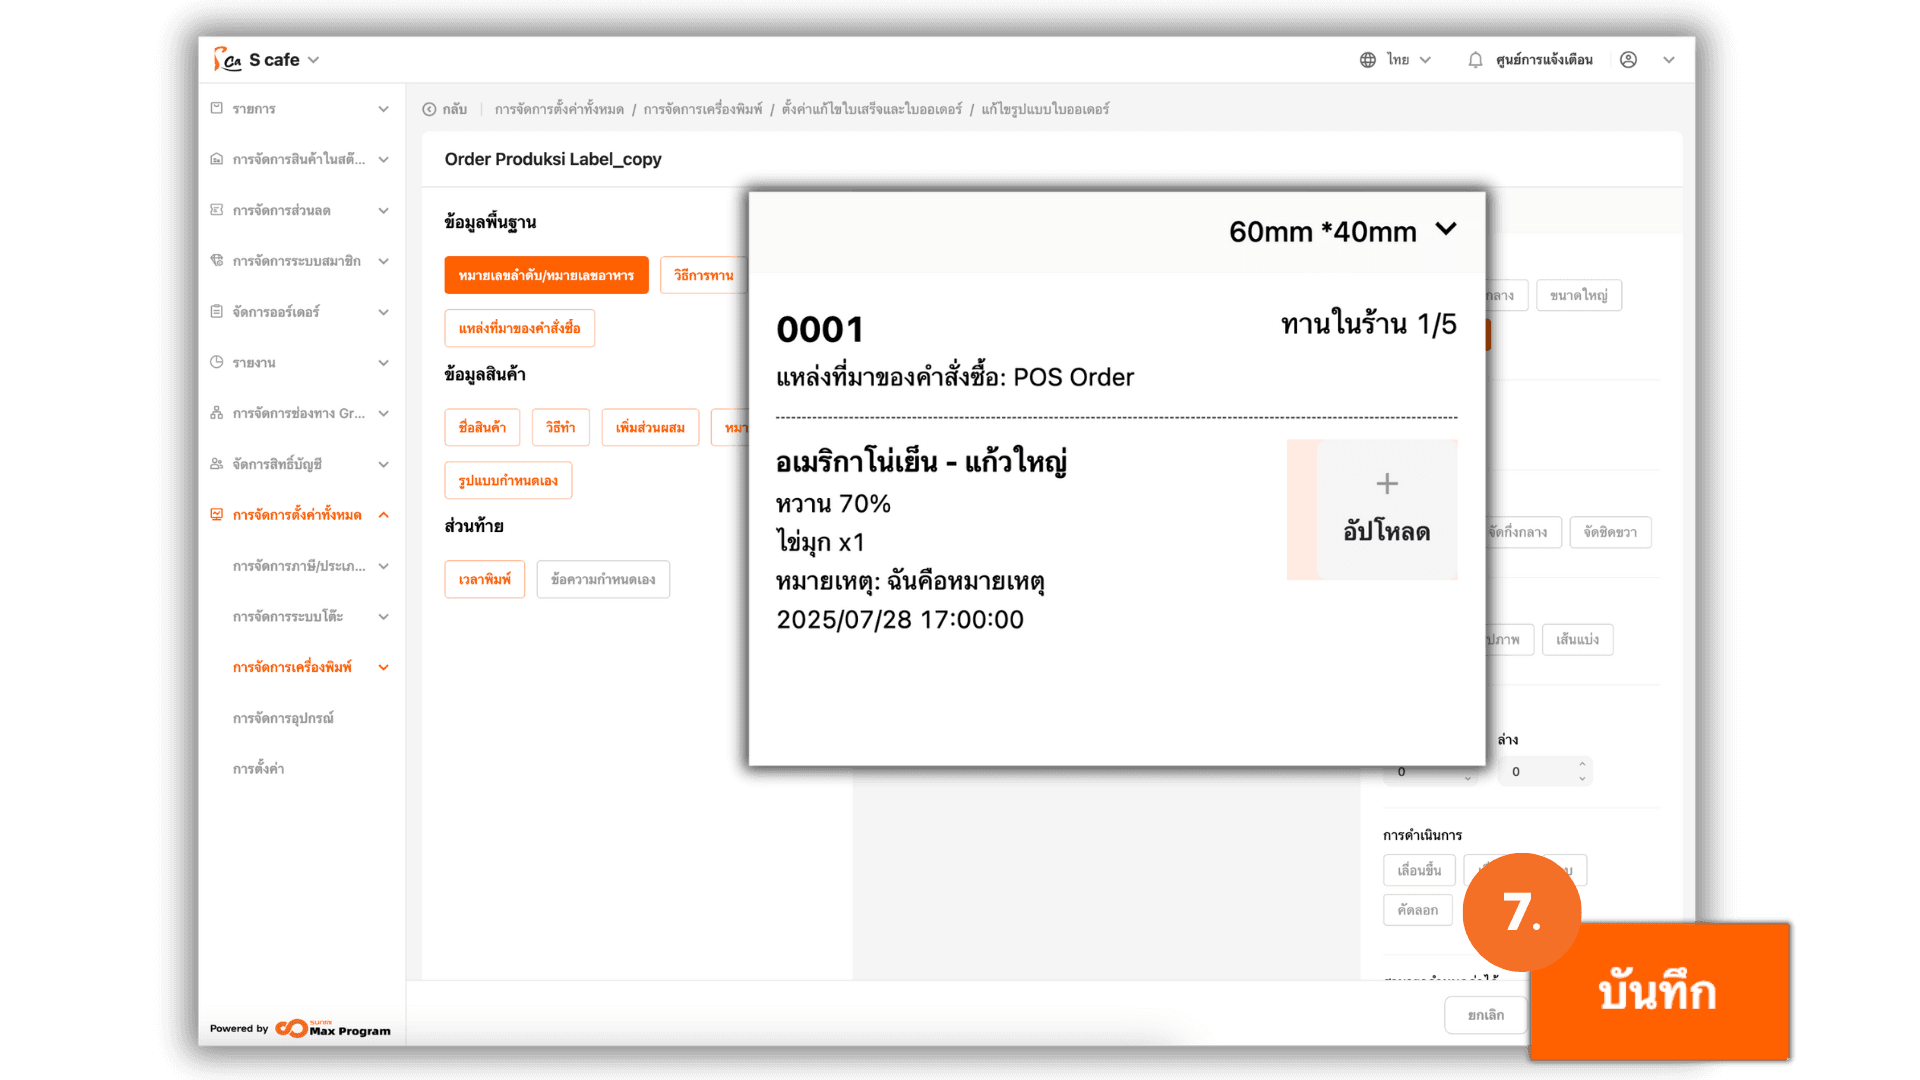
7. Preview and Add Images (if needed)
You can preview the label output in real-time. If you want to add a store logo or other images Click the "+ Upload" button to select an image from your device. When everything is set, click “Save”.
Note : It is recommended to use a black and white logo image to ensure clear printing on receipt printers. Images with light or very dark colors may be converted to dark gray or black tones when printed.
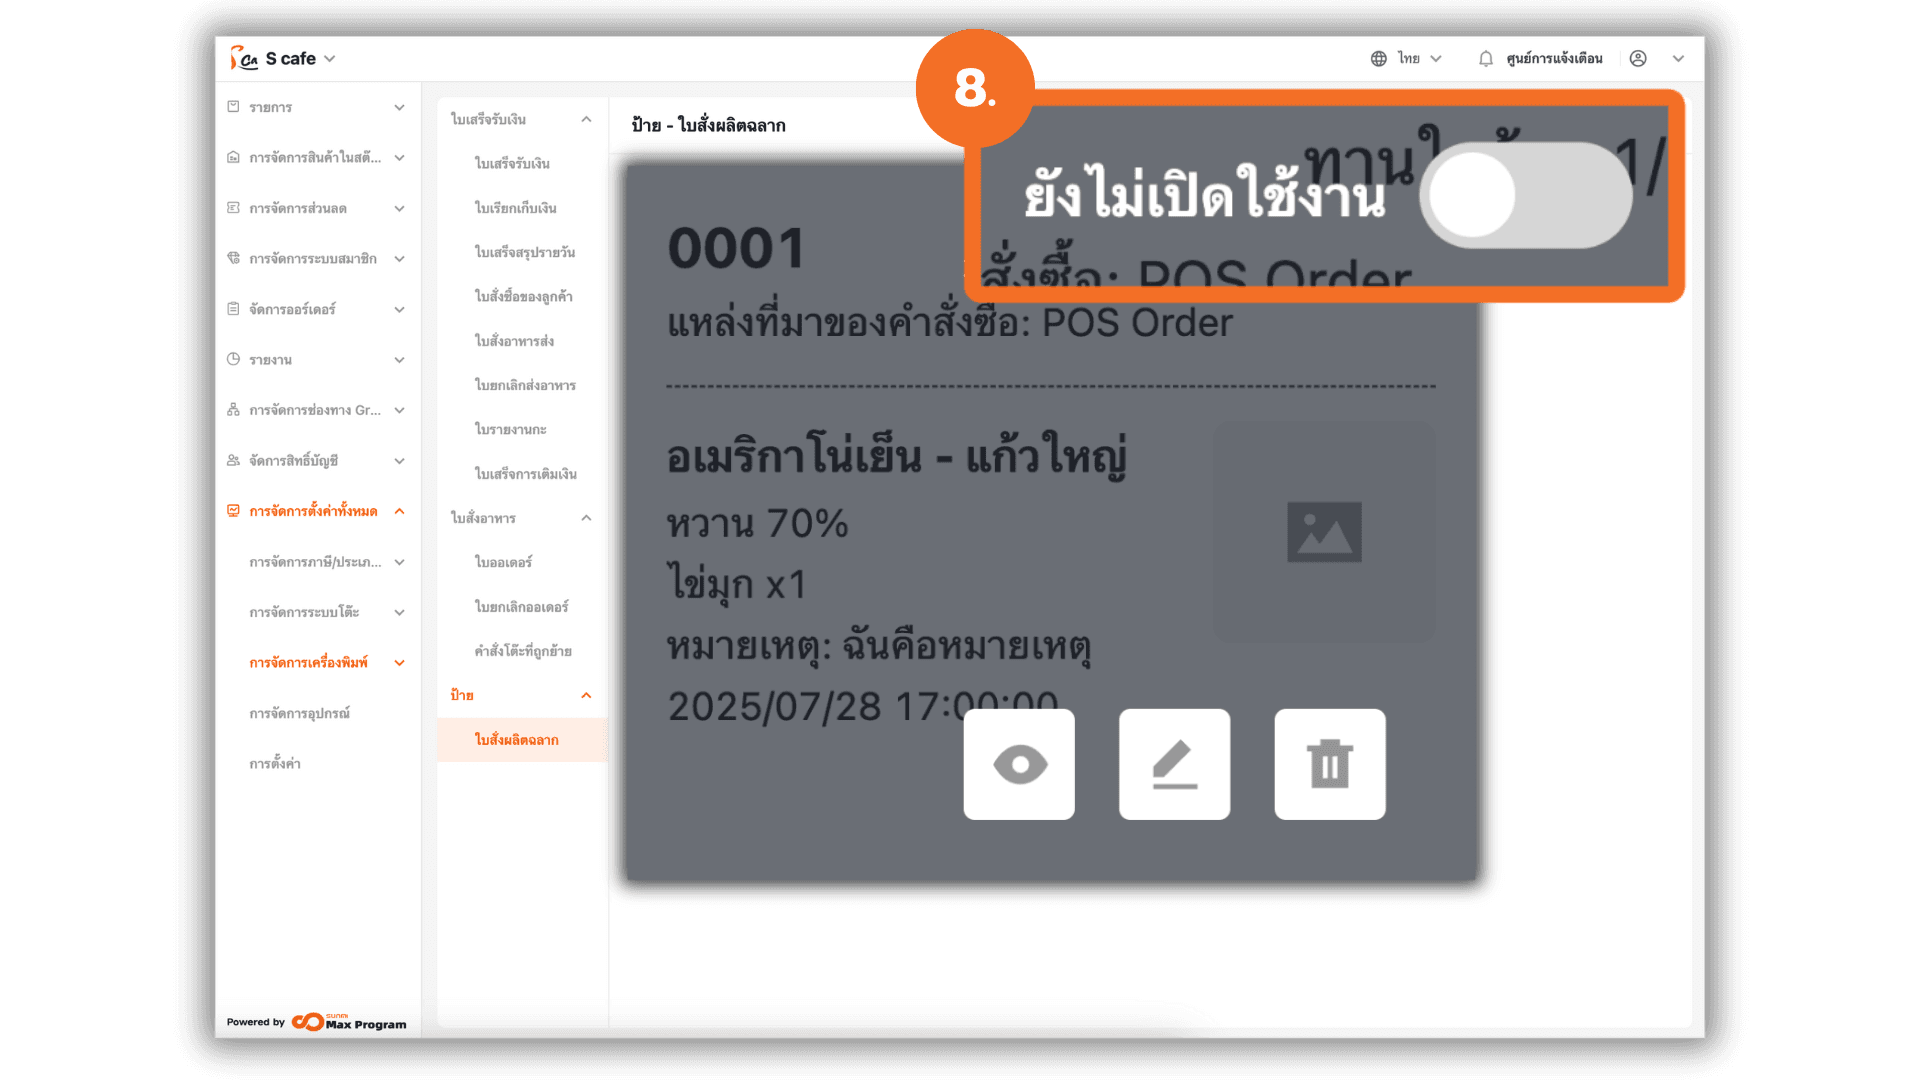
8. Activate the Created Template
After saving, your template will appear in the list below. Click the template name to activate it.
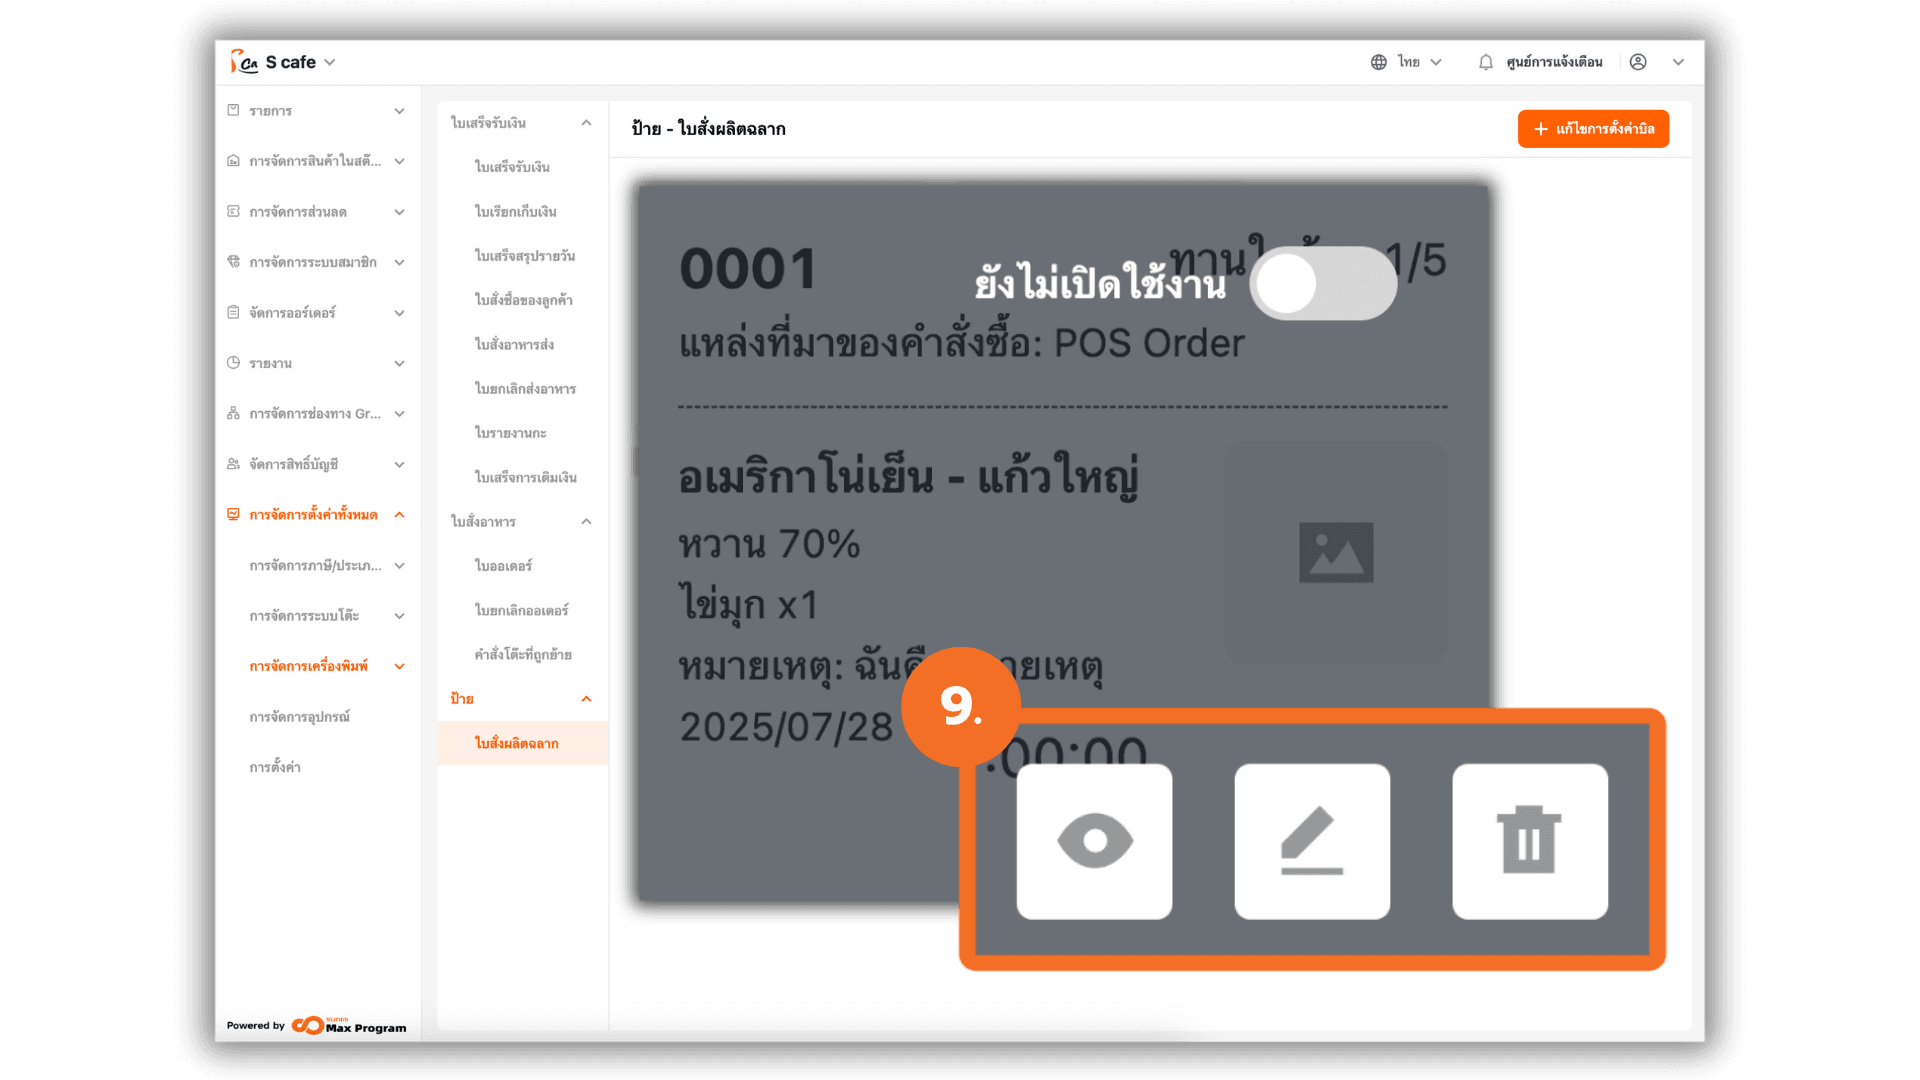
9. Manage Created Templates
- Click the eye icon to preview the label production order.
- Click the pen icon to edit the desired template.
- Click the trash icon to delete templates you no longer need.