Sales Channels
2025-10-09 14:51
This guide helps store owners or staff systematically manage sales channels. It is ideal for stores with diverse sales formats, helping to reduce complexity in menu management and increase flexibility in customer service.
1. Log in to the Back Office
Go to login.gpos.co.th , enter your email and password, and click Log In.
Once logged in, select the menu “Store Management” .
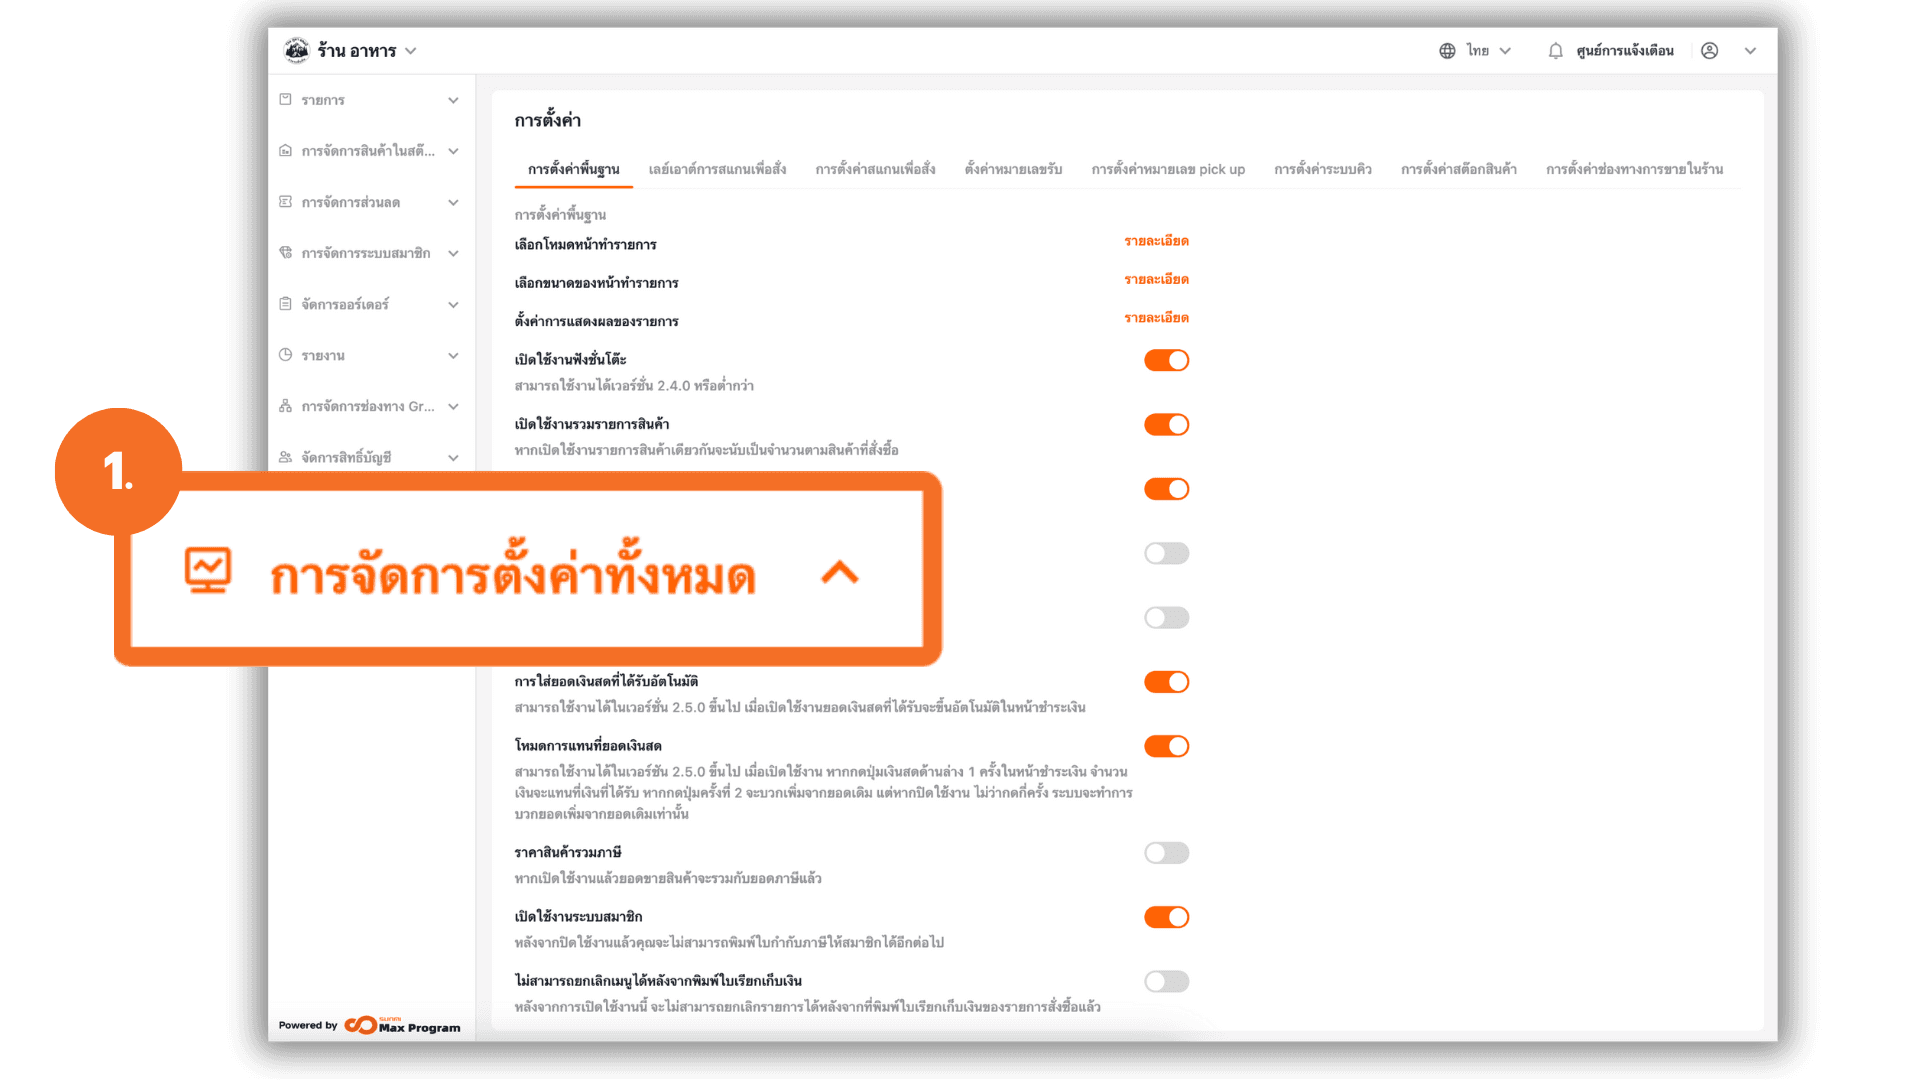
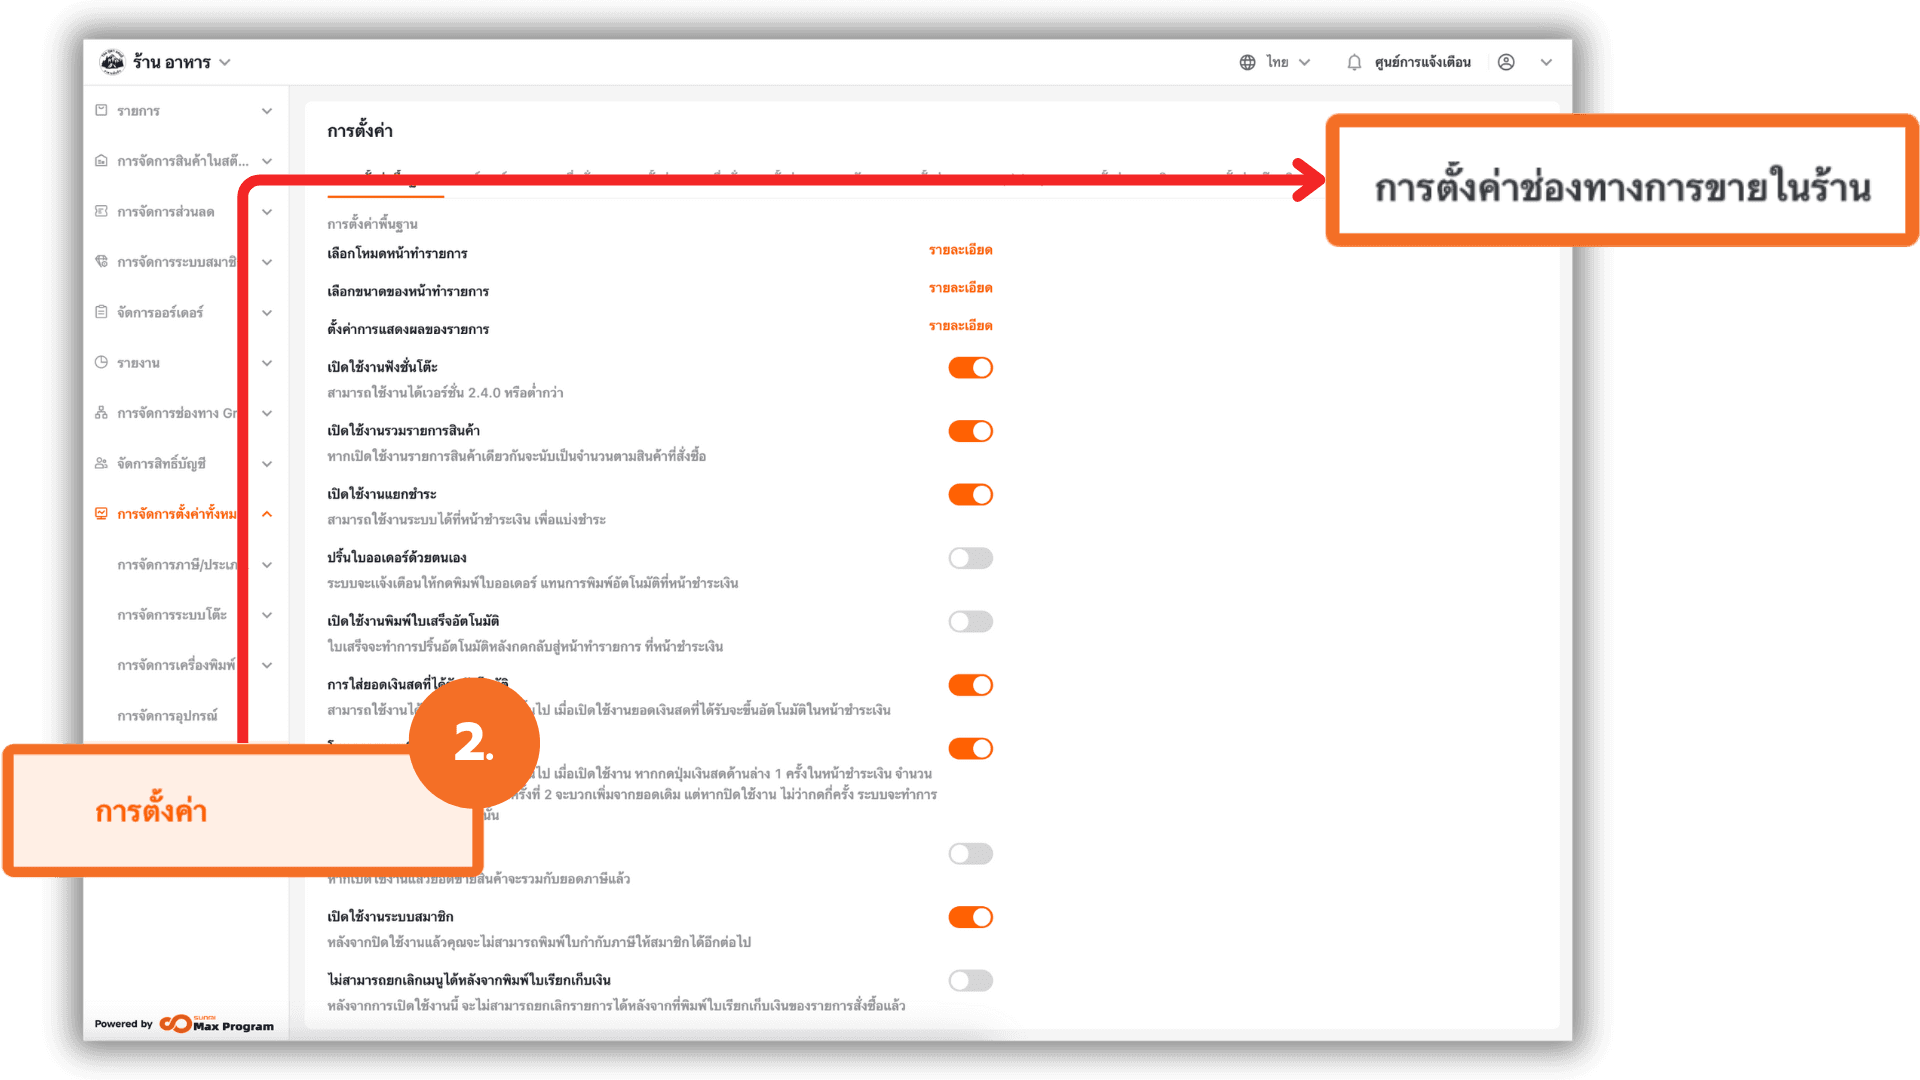
2. Go to Store Settings
Navigate to the “Store Settings” menu. At the top section, select “Sales Channels”.
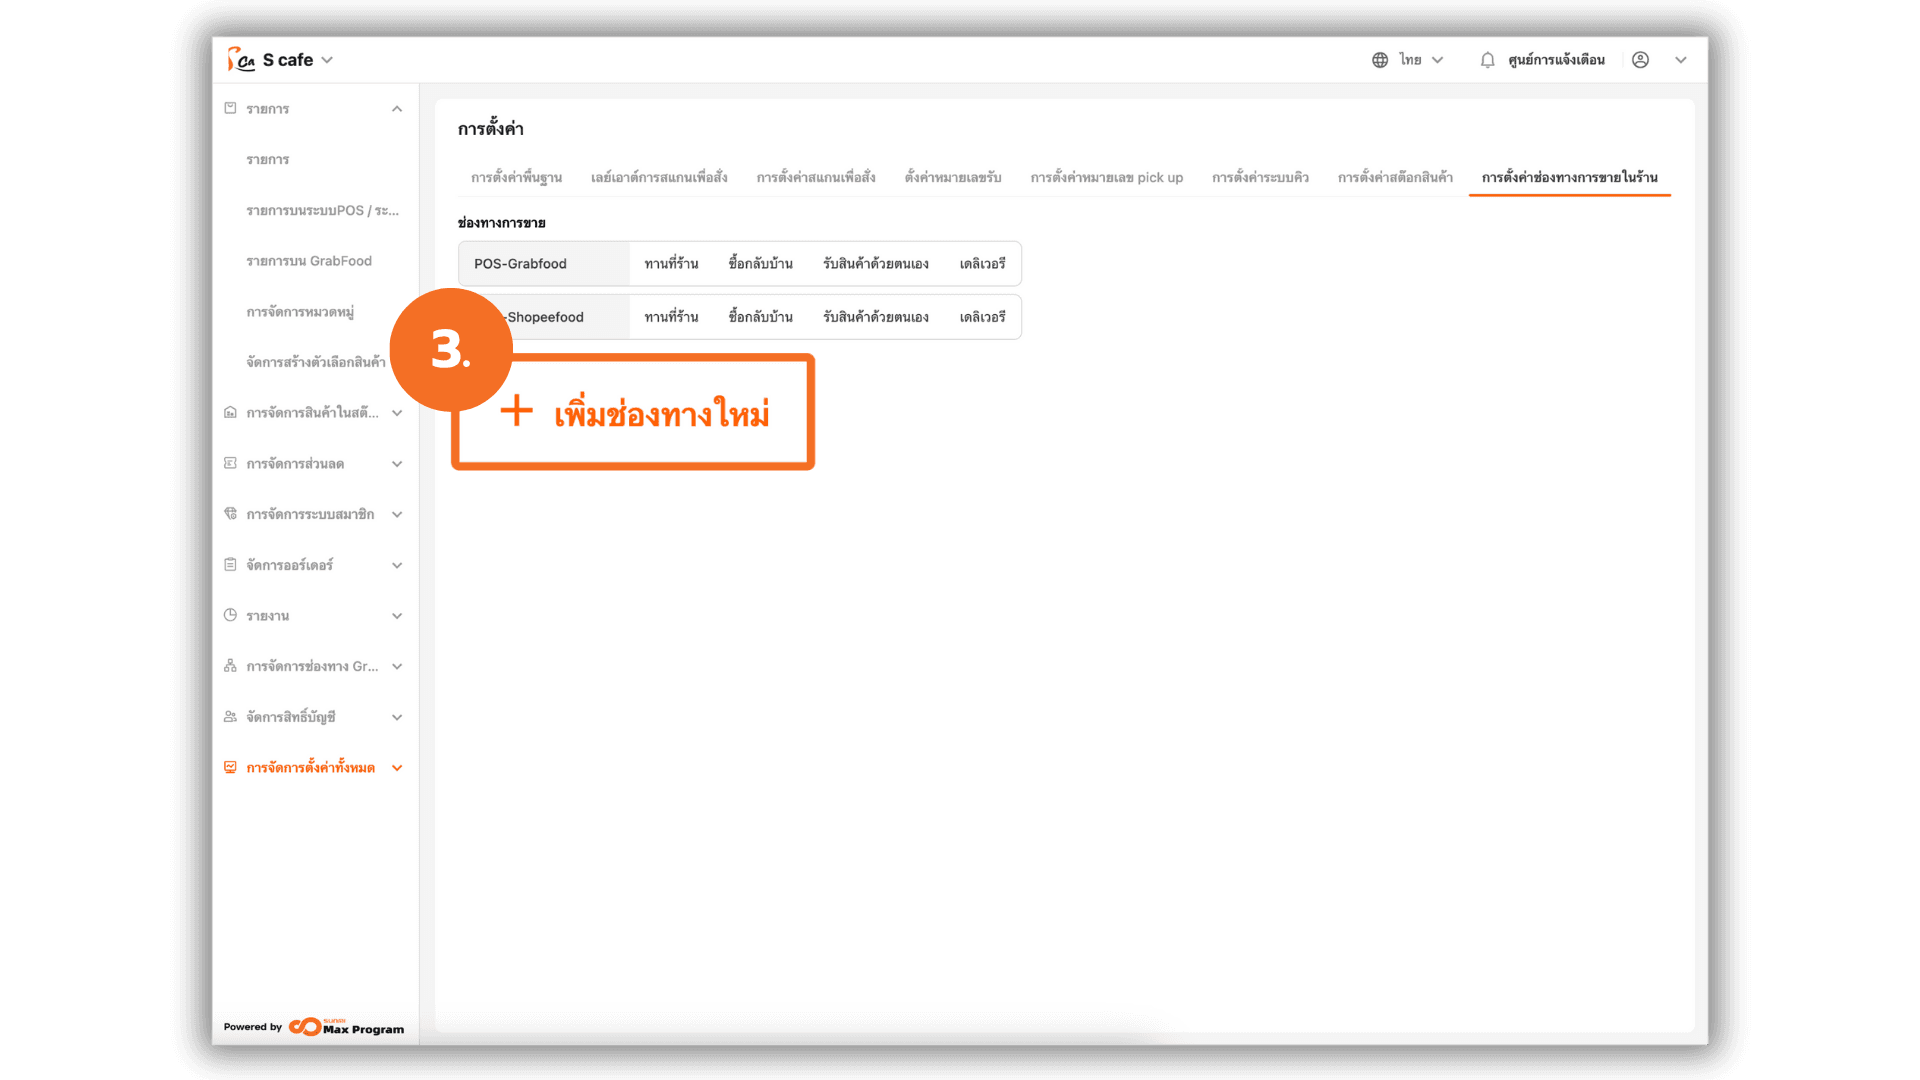
3. Add a Sales Channel
Click the “+ Add Sales Channel” button to create an additional sales channel for in-store use. This allows you to separate sales types or menu usage statuses, such as Main Storefront , Temporary Storefront , Pop-up Booths/Outdoor Sales , etc.
Note : This feature is compatible with both POS system and Scan system items.
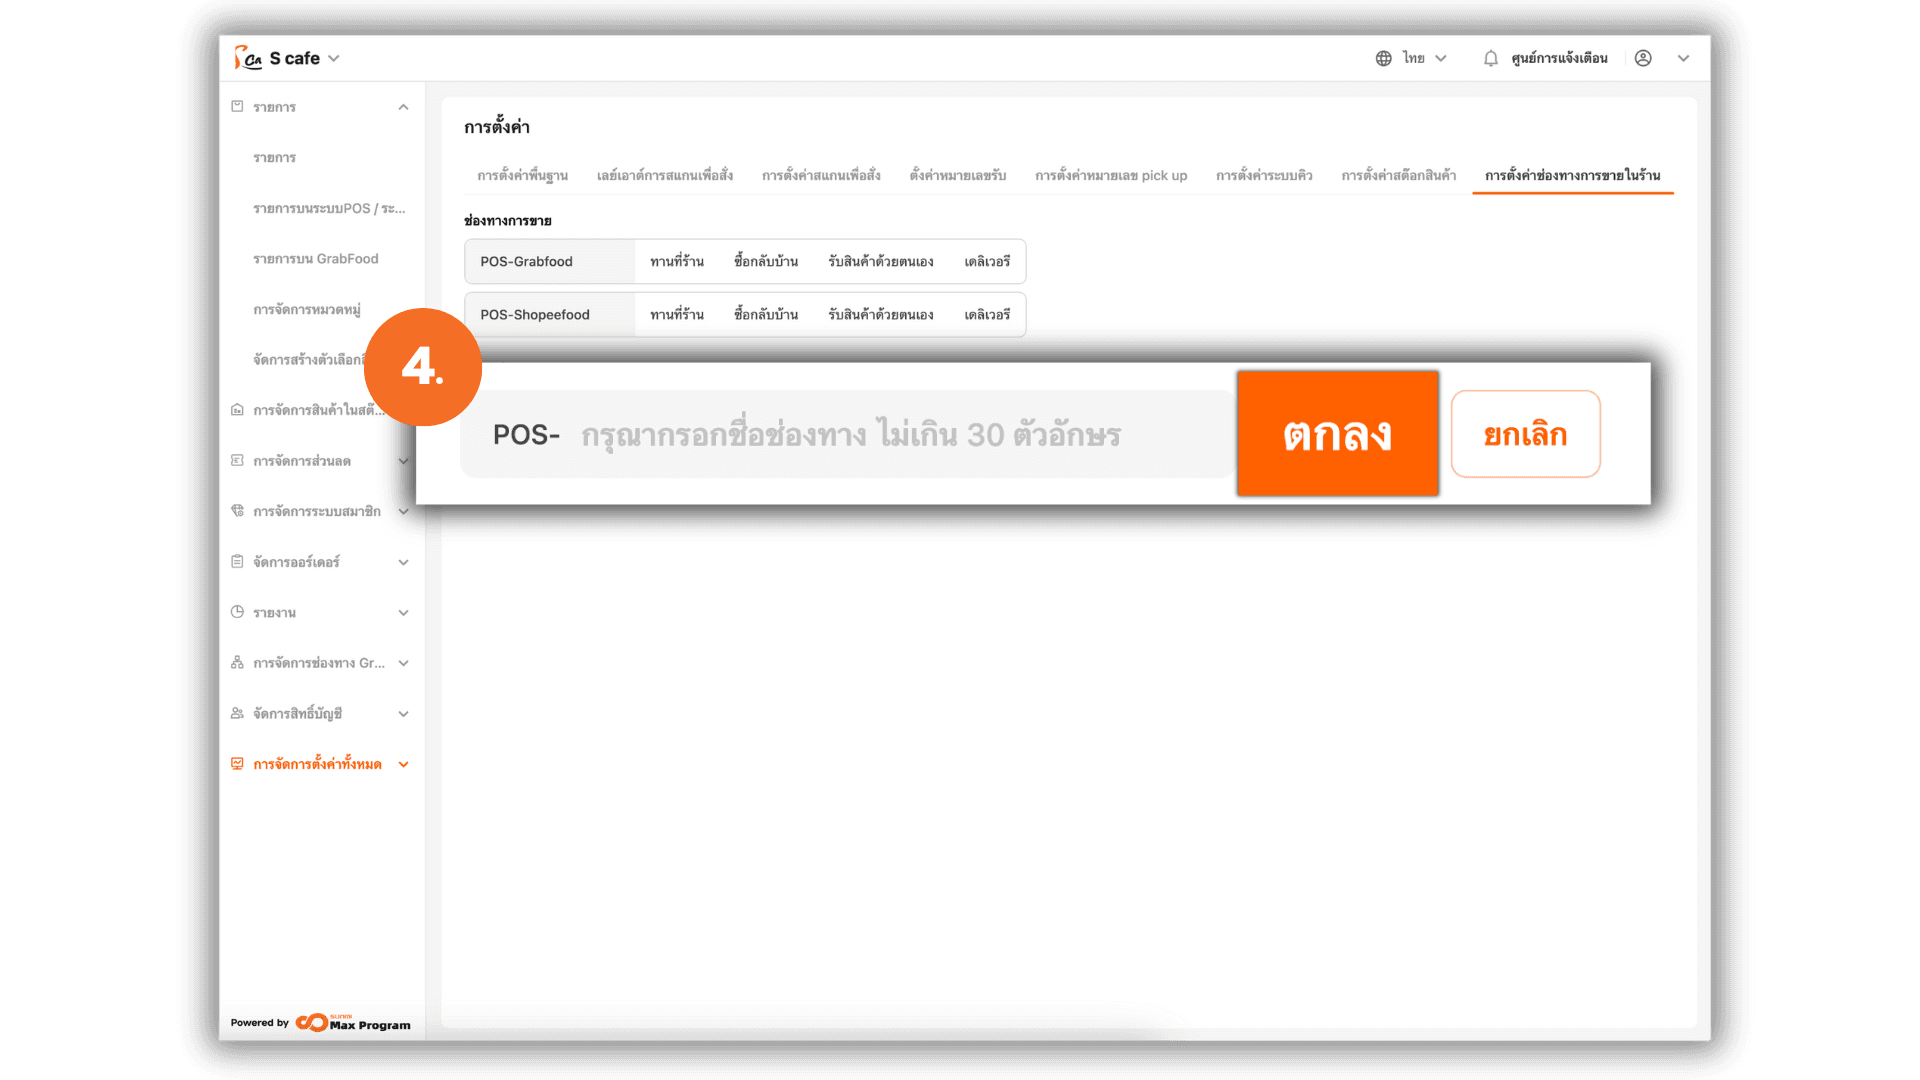
4. Name the Sales Channel
Enter the name of the sales channel, e.g., “Main Storefront”, “Fair Booth”, or “Takeaway Only”. Then click “Ok” to create it.
Note : Once created, the channel cannot be deleted or renamed.
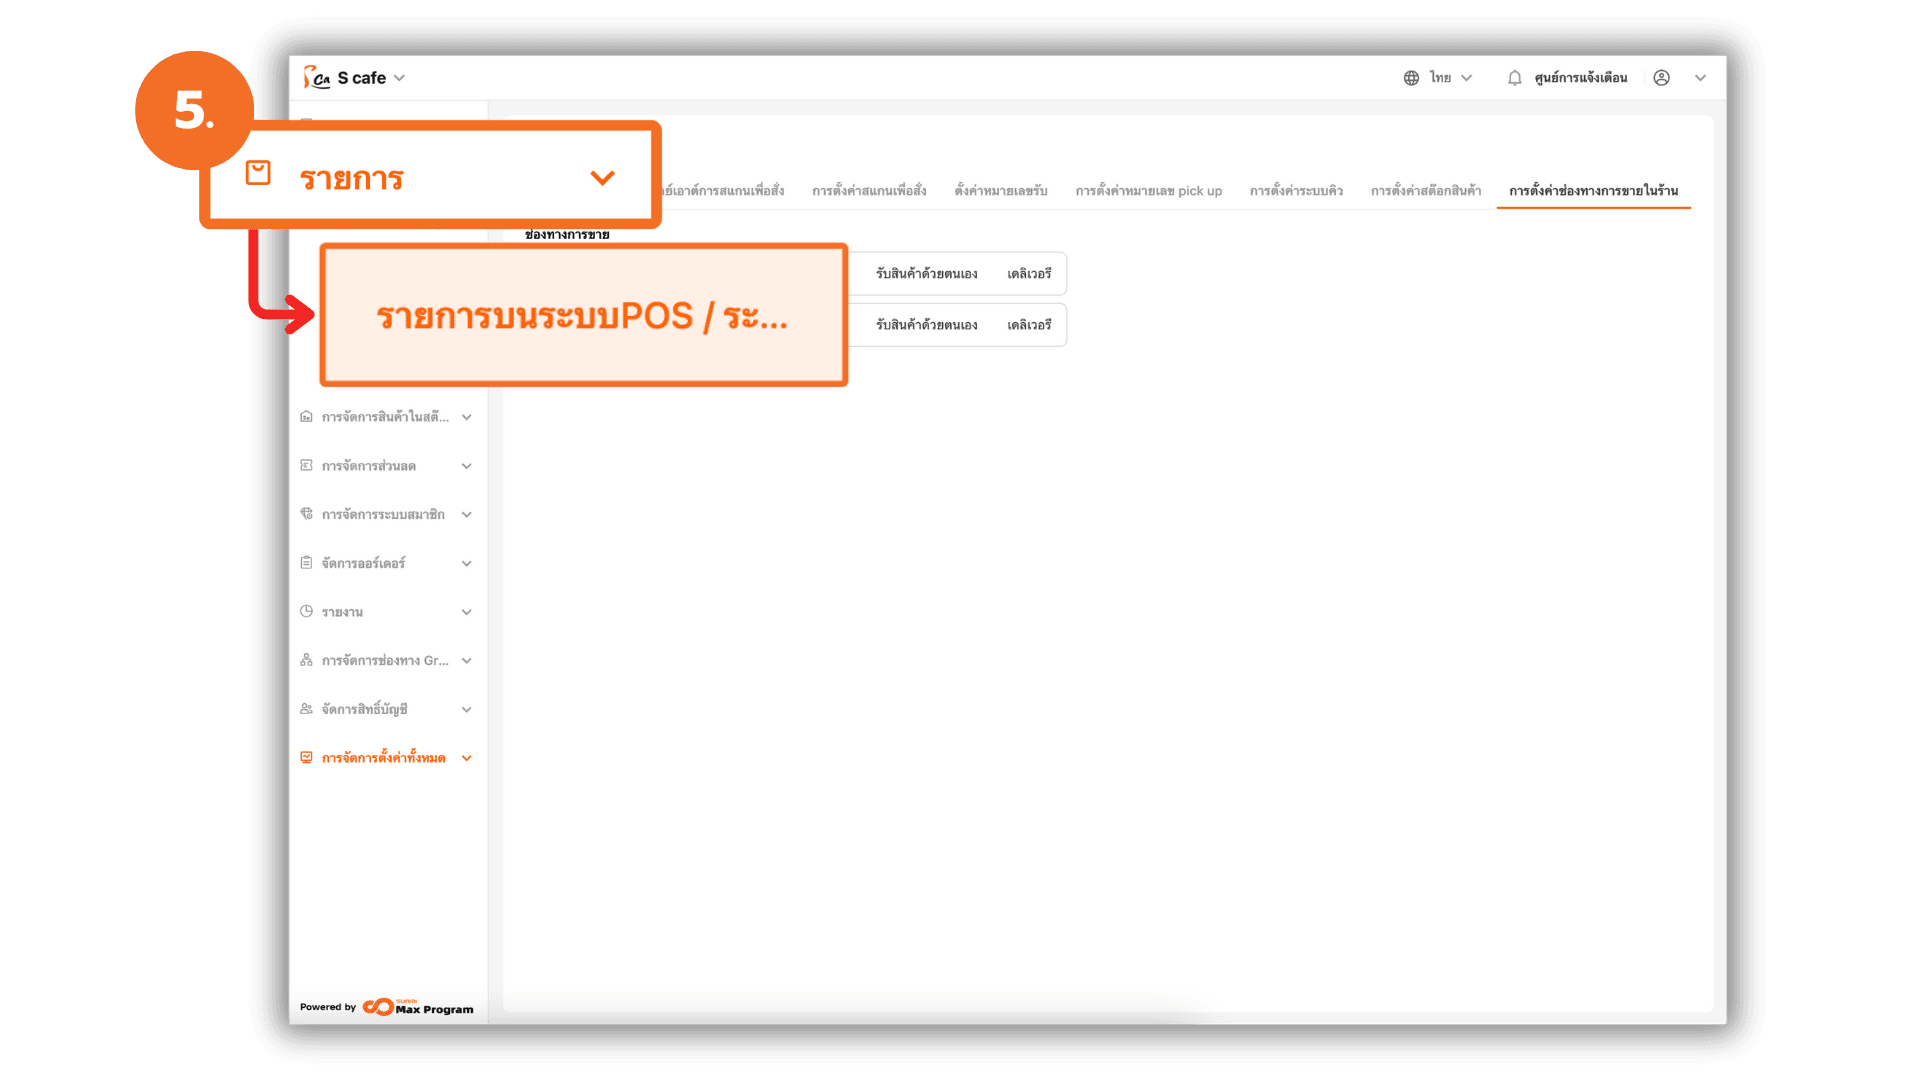
5. Add Items to the Created Sales Channel
Go to the “Items” menu, then select “Menu management”.
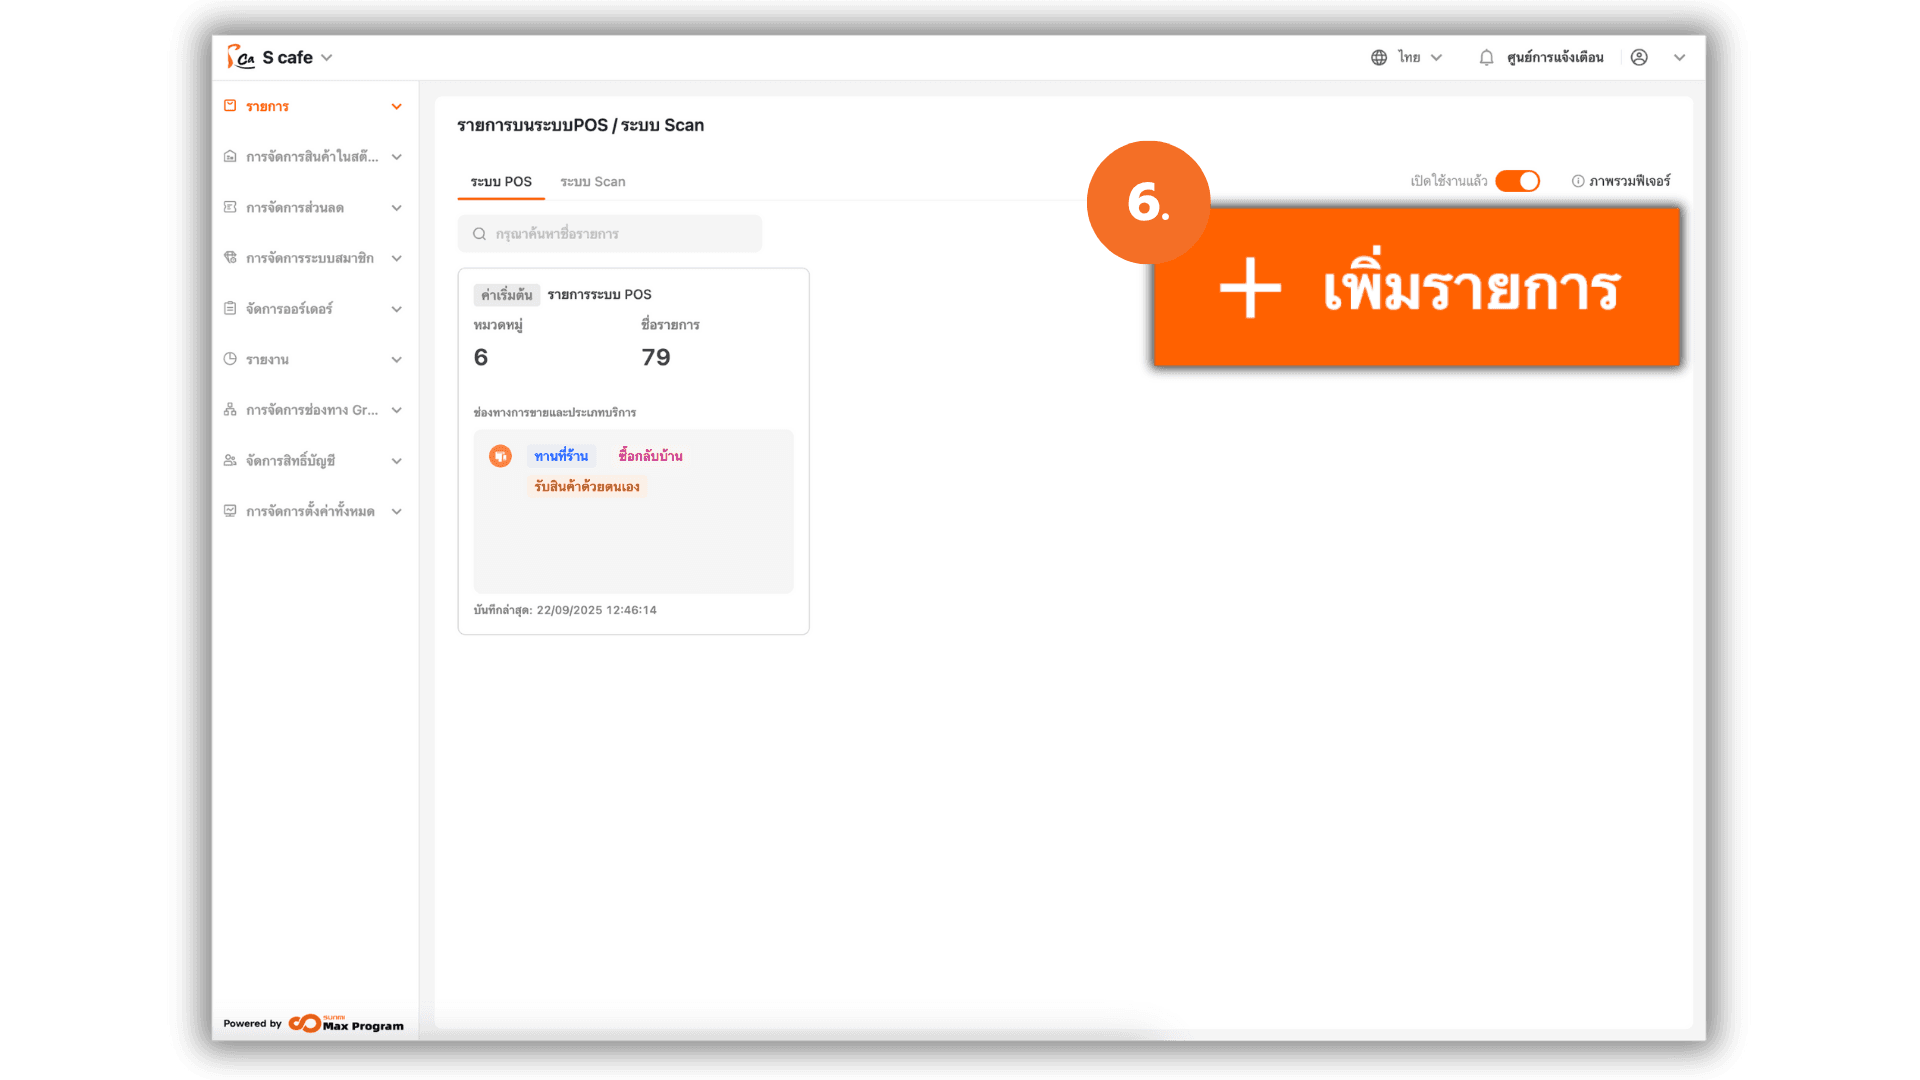
6. Manage Items on the POS Menu
In the POS Menu section, click “+ Add Template” to create a new template.
6.1 Using Sales Channels on POS
After clicking + Add Template, the system will prompt you to select a “Sales Channel and Service Types.” Choose the sales channel created in the previous step.

Additional Information
- The Menu management feature is designed to separate menus displayed on POS device screens and Scan QR systems
- Sales Channels allow you to separate item displays on POS devices, making it easier to switch between different sales locations such as POS for event booths , POS for specific zones or Dedicated POS terminals for certain purposes
How to Use “Sales Channels” on the POS Screen
After enabling the Items on POS / Scan System feature, and creating both sales channels and linked item/menu templates
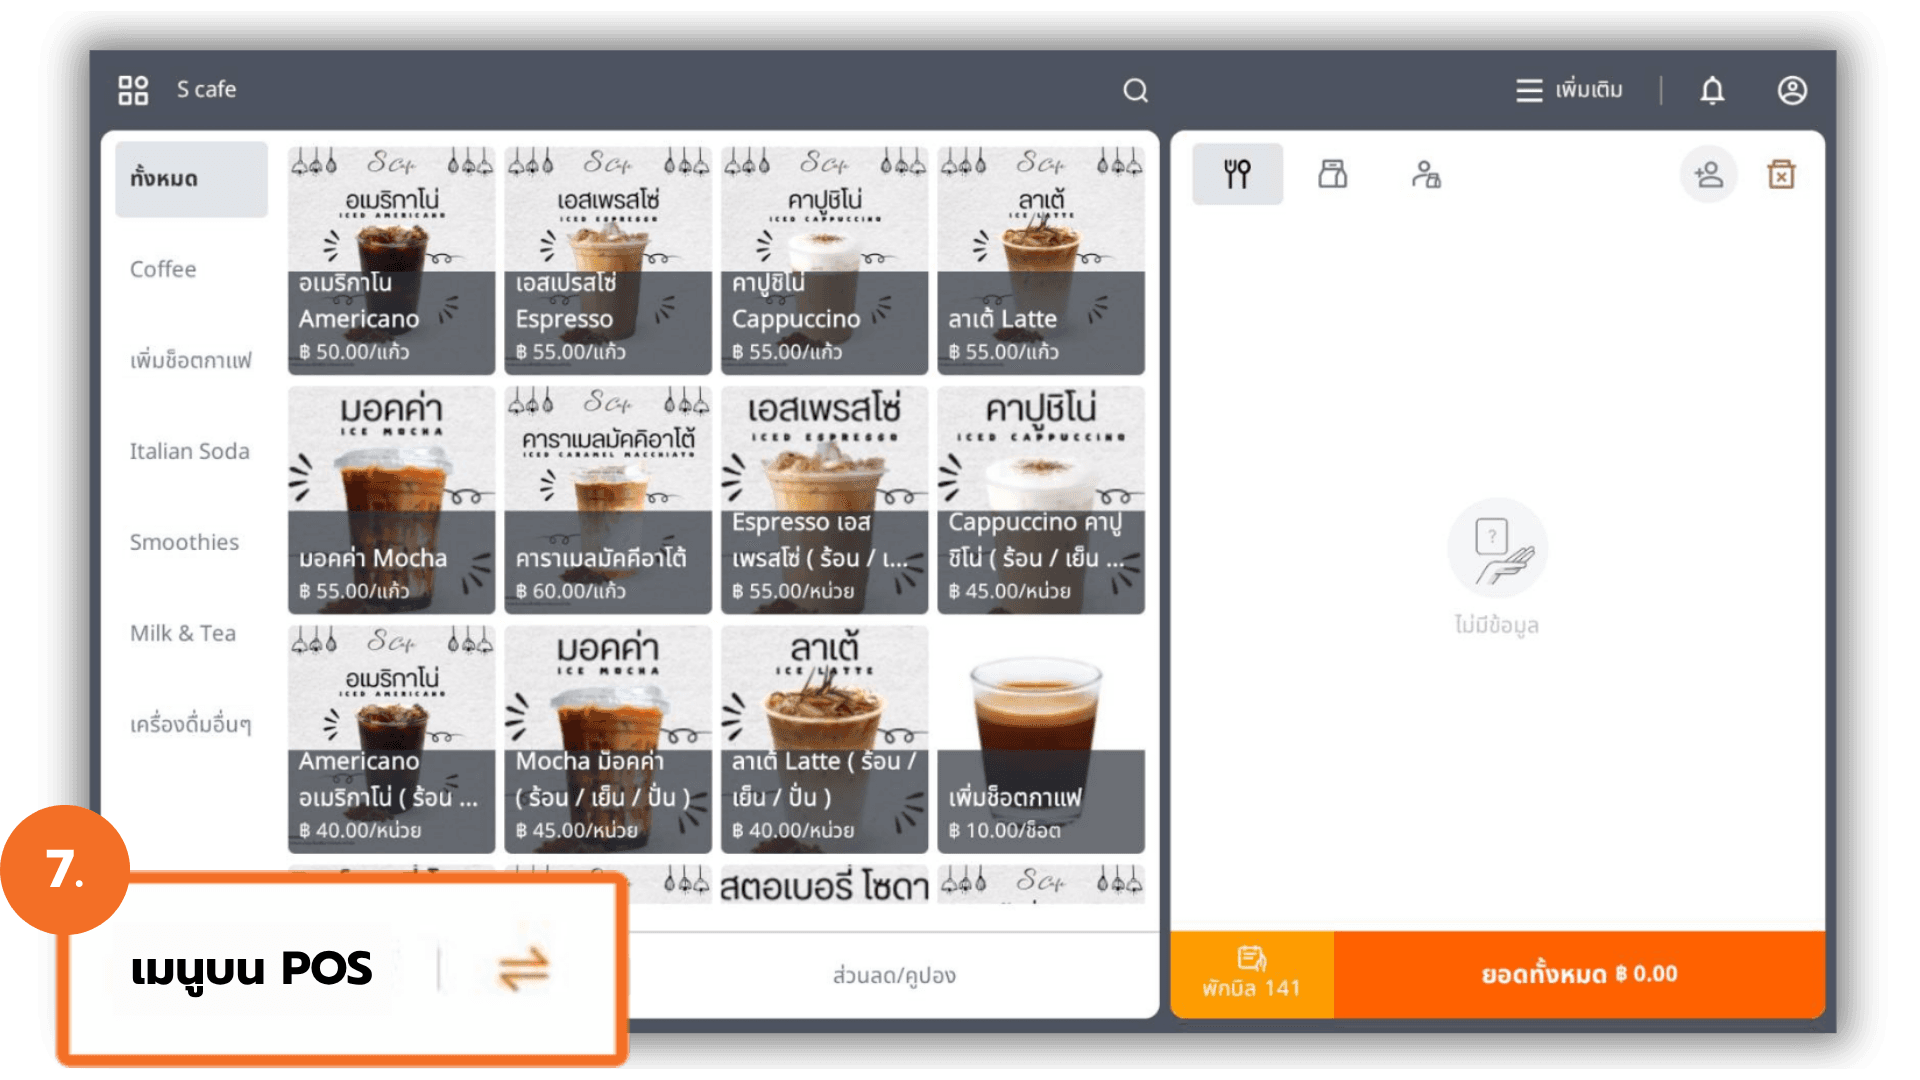
7. Accessing Sales Channels on POS
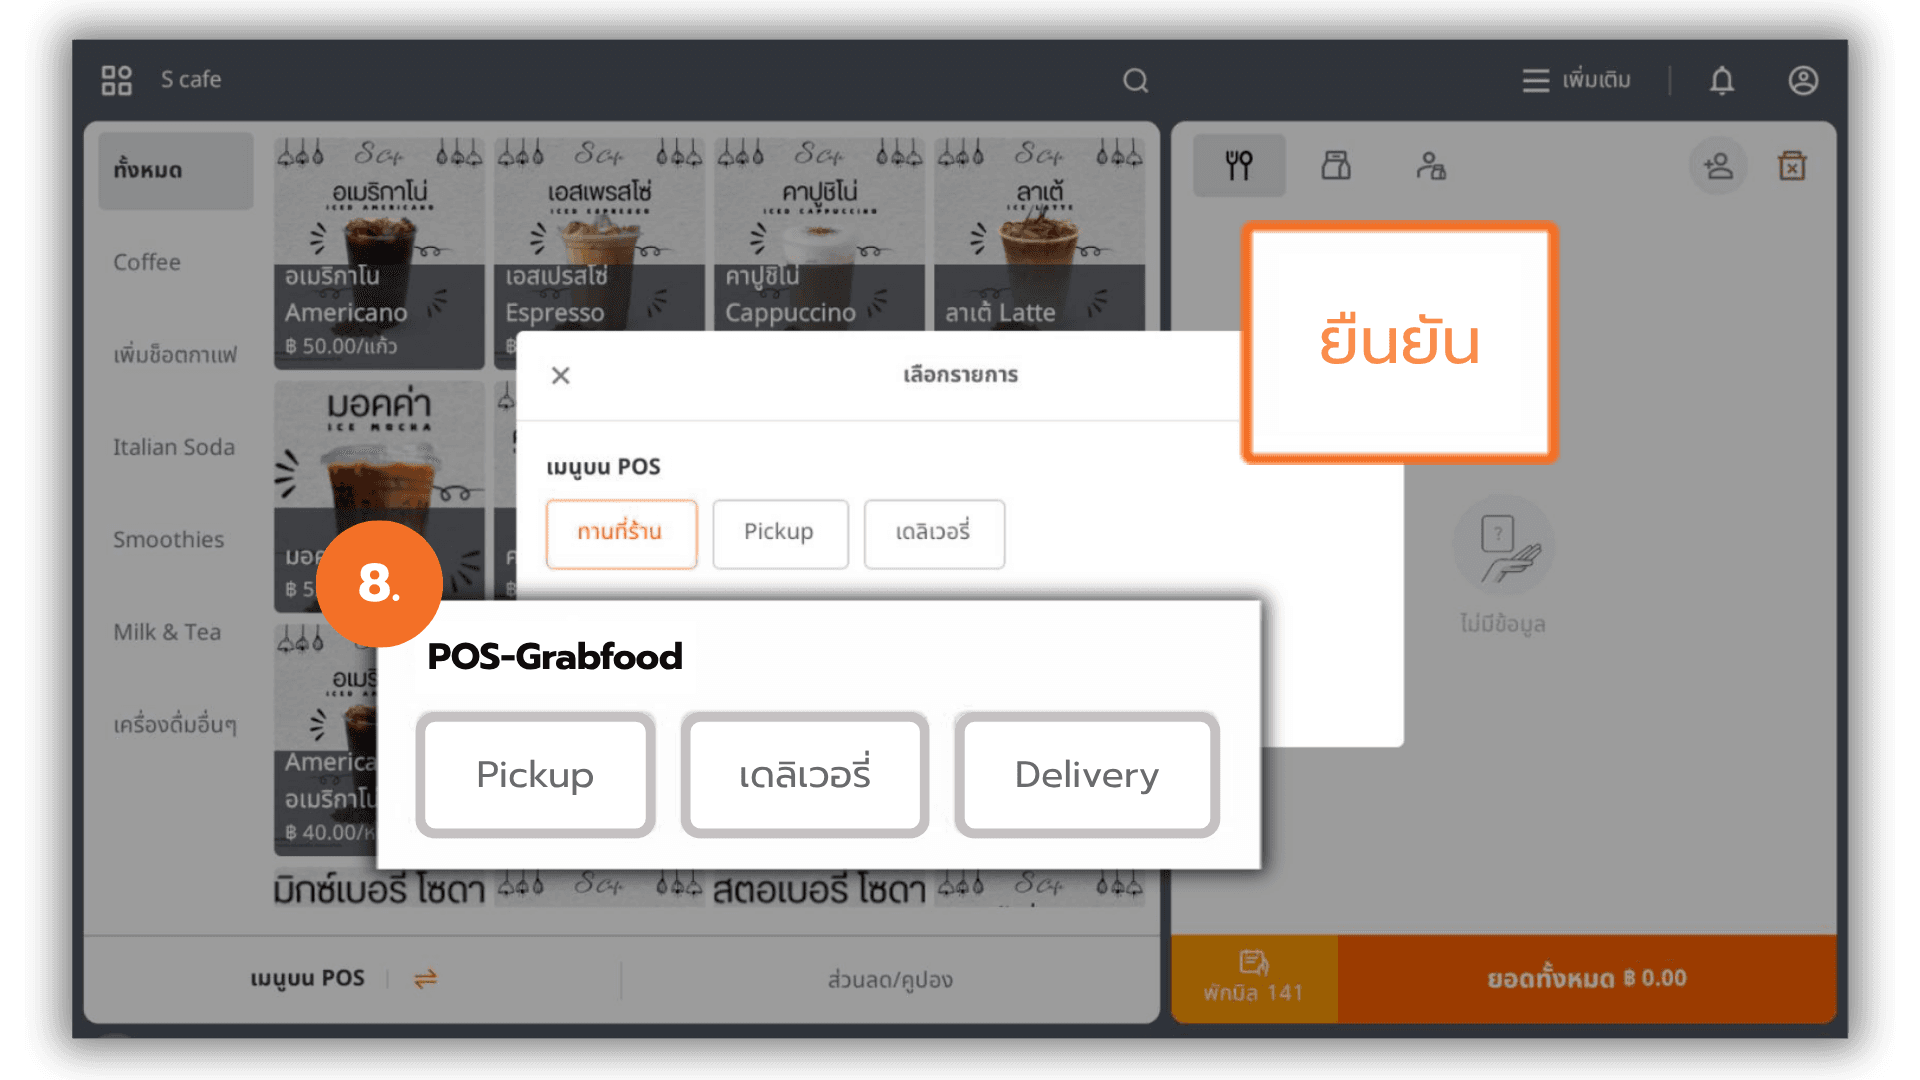
Go to the POS program (Point of Sale). At the bottom-left corner, click “POS Menu”. The system will display a list to select manu.
8. Switching Between Sales Channels
Select the desired sales channel. Click “Ok” to switch to that channel for active use during sales.