Scan To Order Layout
2025-10-08 18:17
This manual helps restaurants customize their customer QR scan interface to make it visually appealing, brand-consistent, and capable of promoting products or offers through marketing images and ad links. It also enhances the overall customer experience at every step of the ordering process through the GPOS system, while improving efficiency and professionalism in restaurant operations.
1. Log in to the Back Office
Go to login.gpos.co.th , enter your email and password, and click Log In.
Once logged in, select the menu “Store Management” .
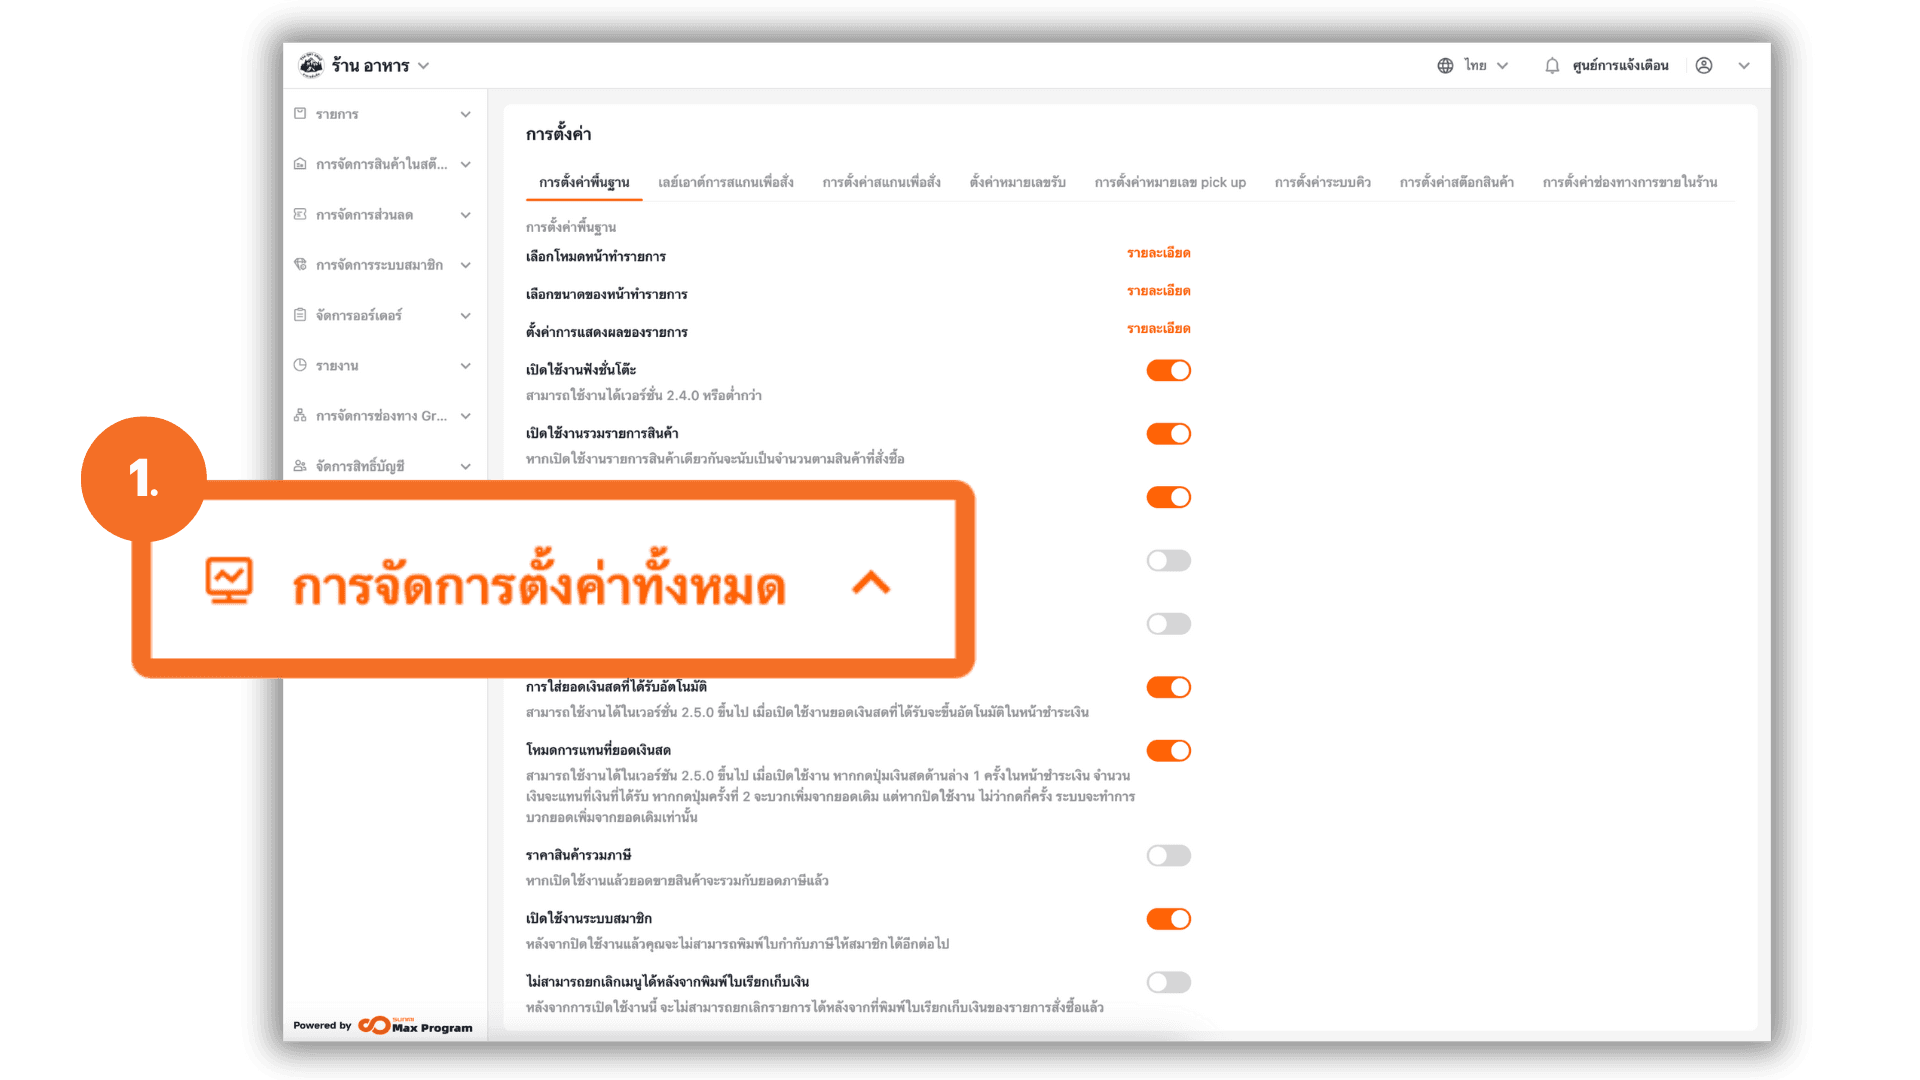
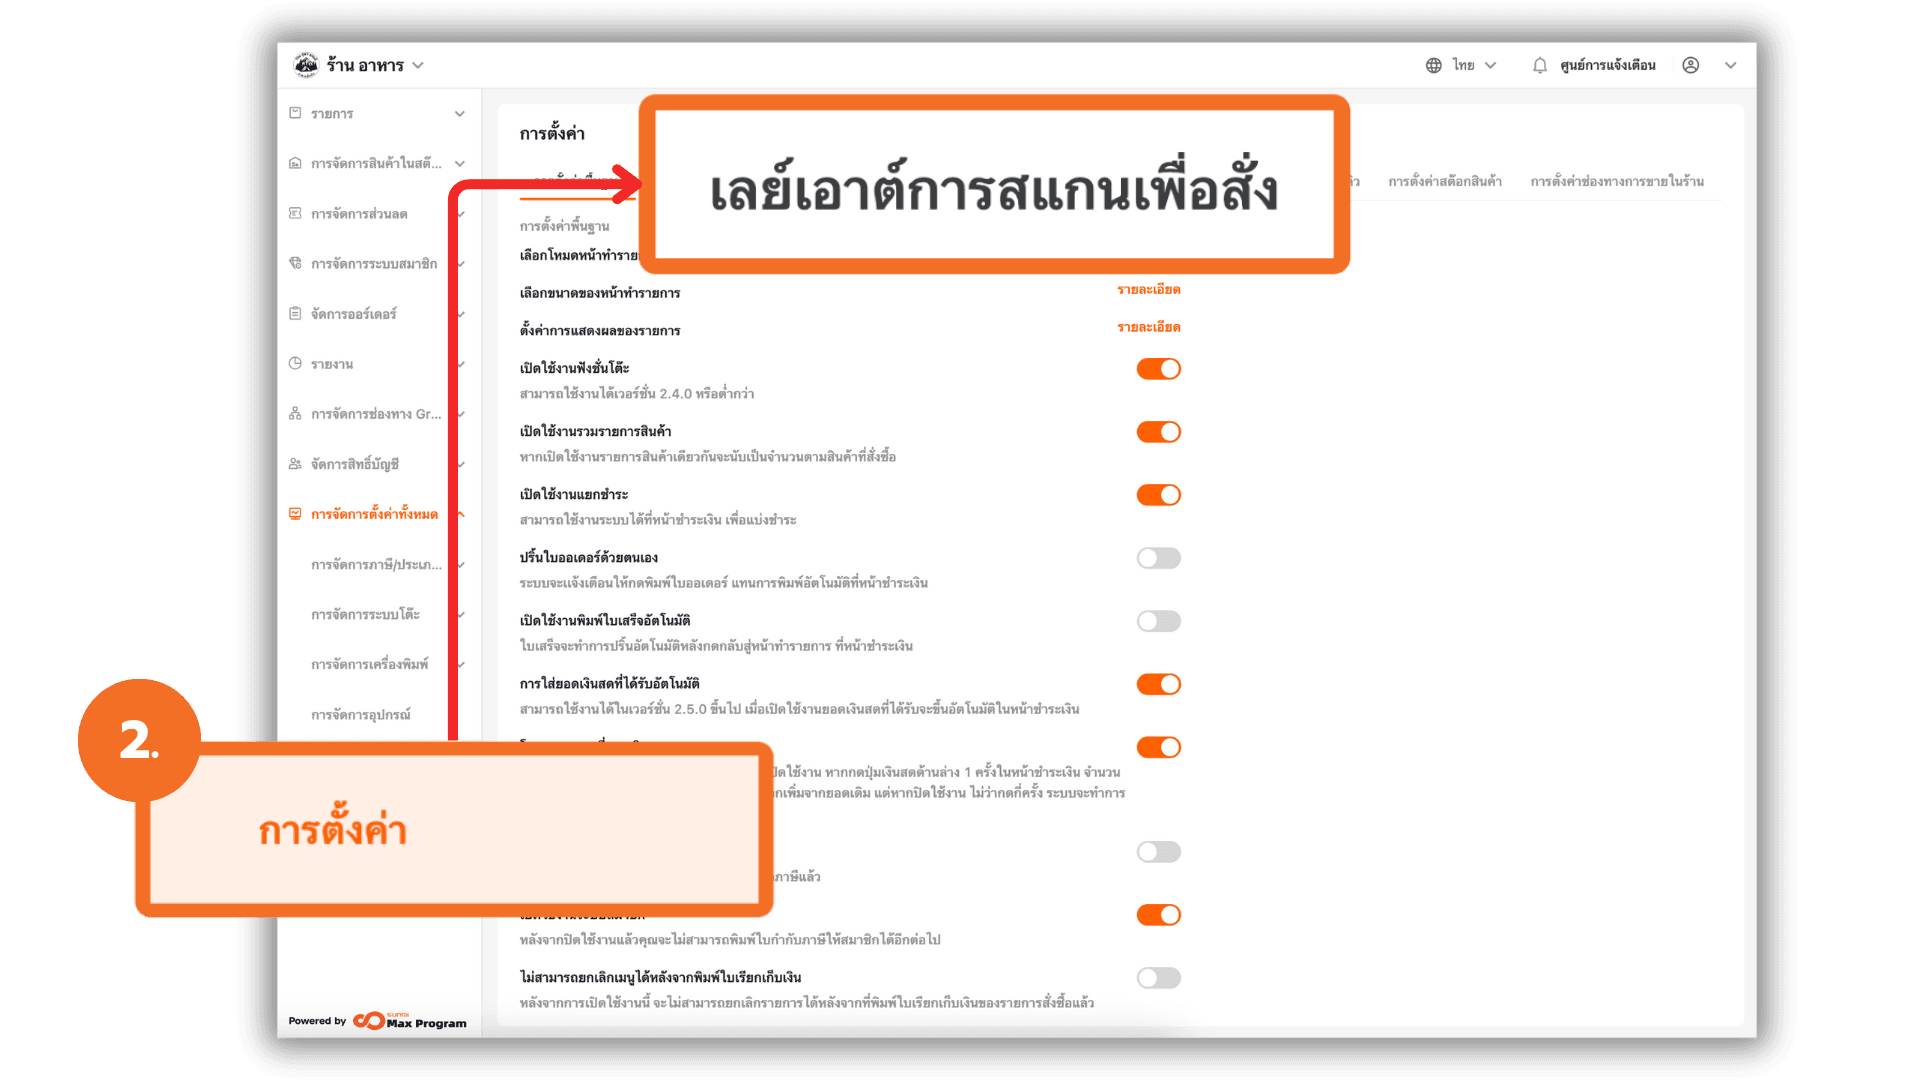
2. Access the Settings Menu
Go to the “Store Settings” menu and select “Scan to Order Layout” at the top of the page.
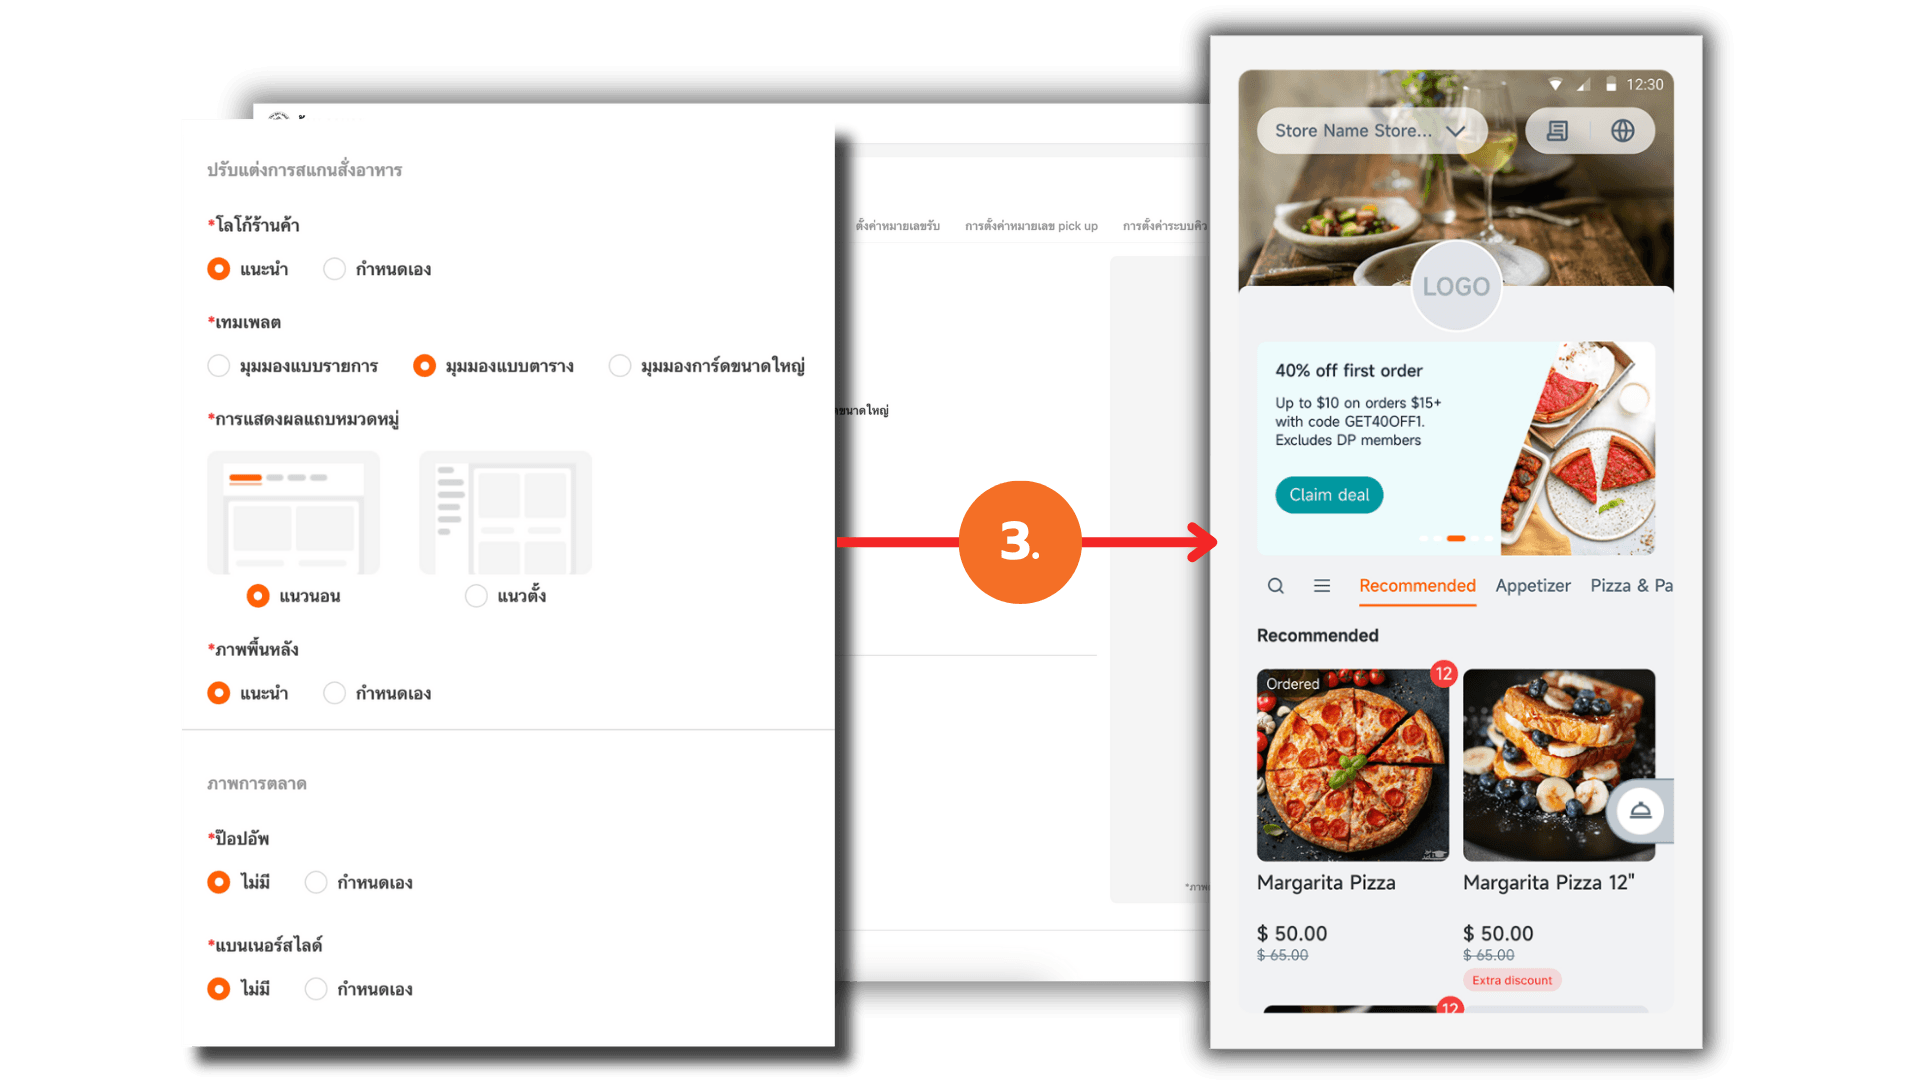
3. Layout Configuration Screen Overview
Once you open the page, the screen is divided into two main sections
- Left Side : Configuration settings
- Right Side : Live preview of how the layout will appear based on your selected options
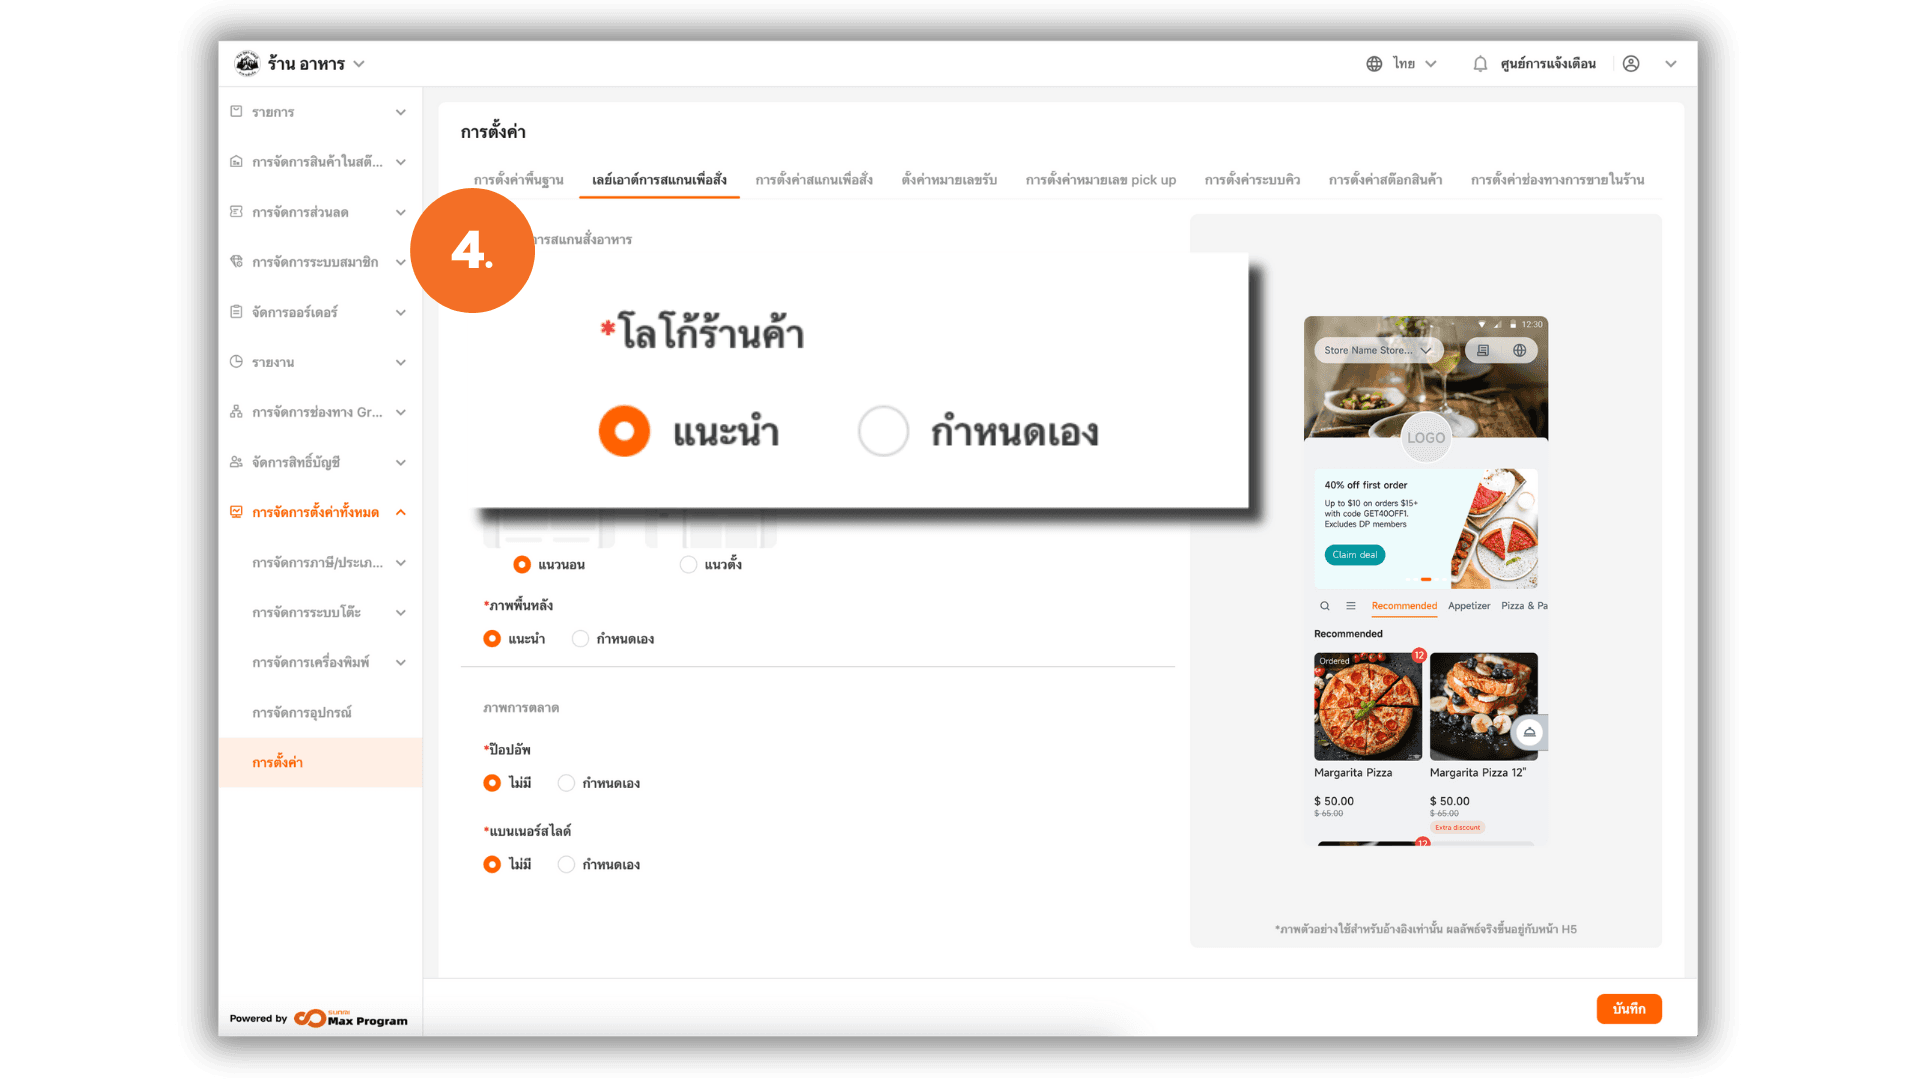
4. Store Logo Settings
You can select one of the following logo options
- Recommended Logo : The system will use the default standard logo provided.
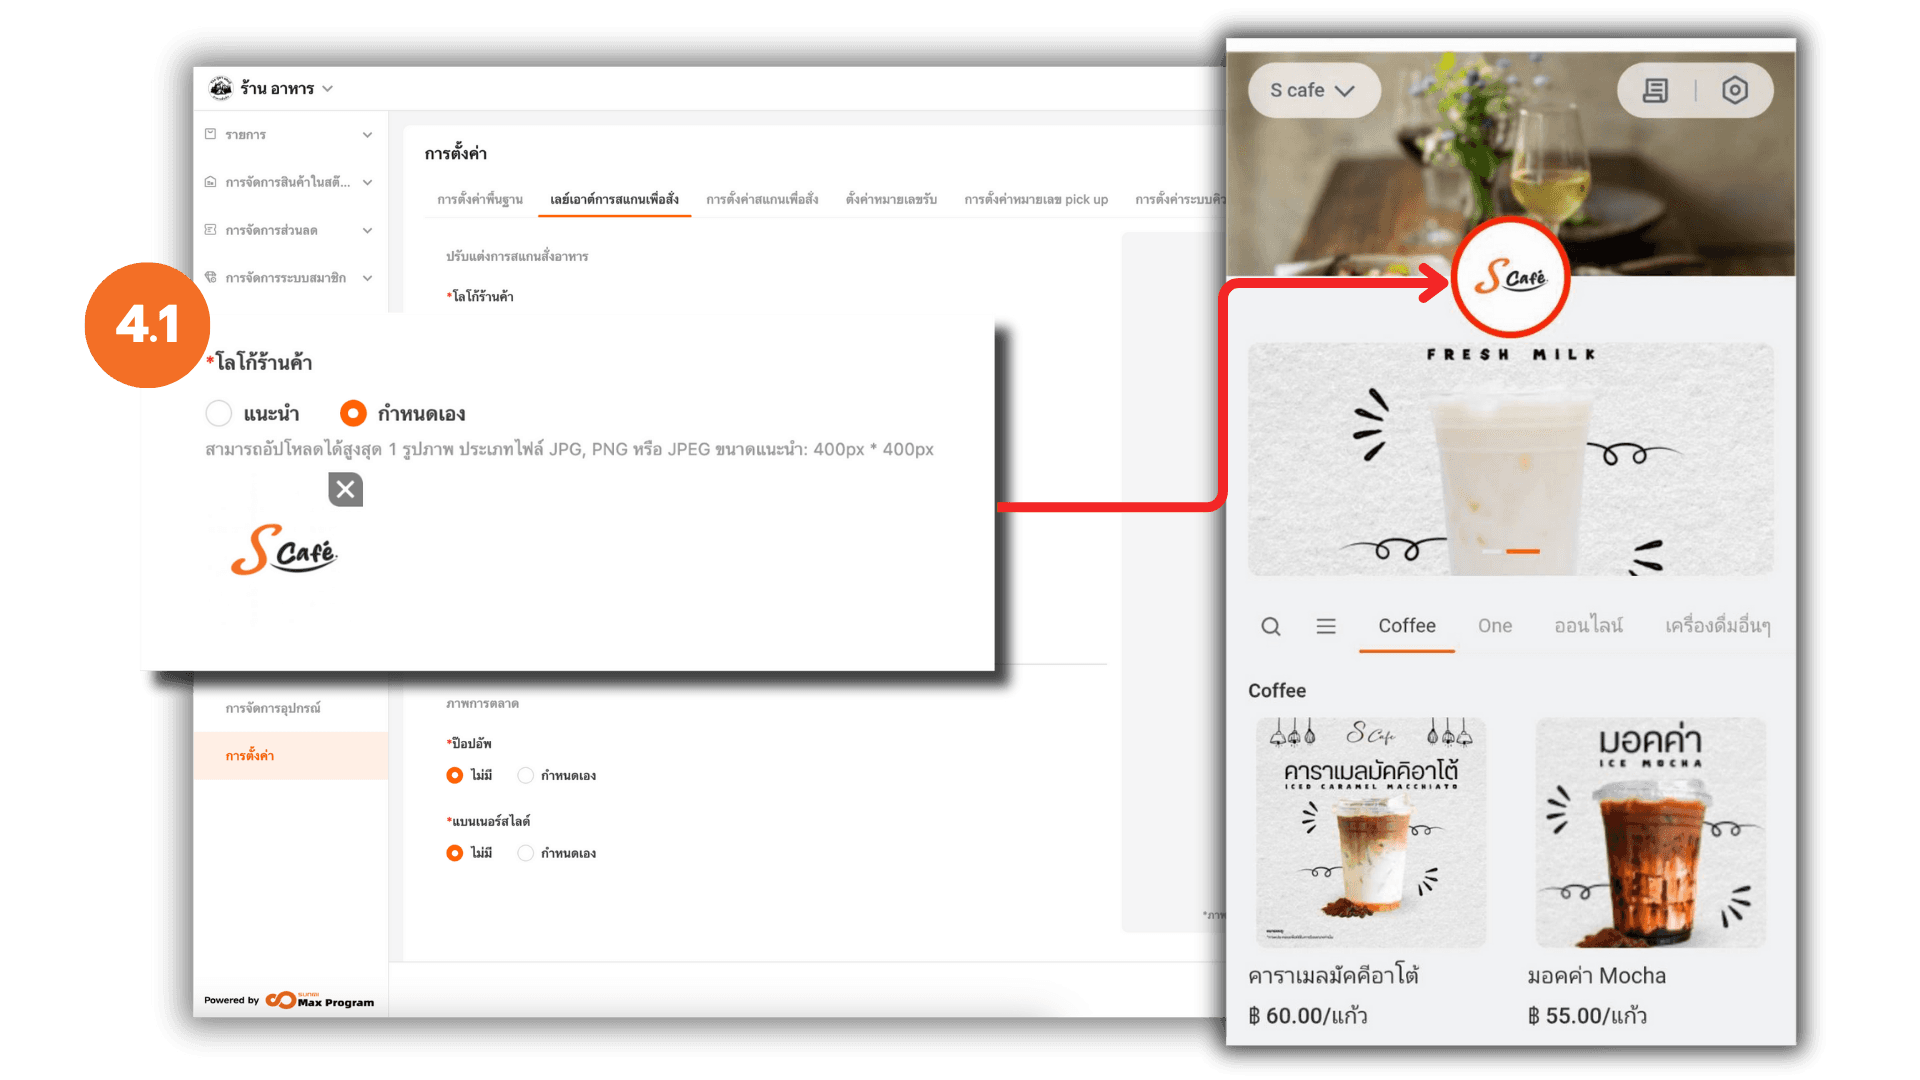
4.1 Upload a Custom Logo
To upload your Store logo Click the “+ Upload” button to select and upload an image from your device.
Note : Maximum: 1 image , Supported file types JPG, PNG, JPEG and Recommended size 400 × 400 pixels
5. Template and Category display
You can configure the template and Category display together. A live preview will appear on the right side as you make changes.
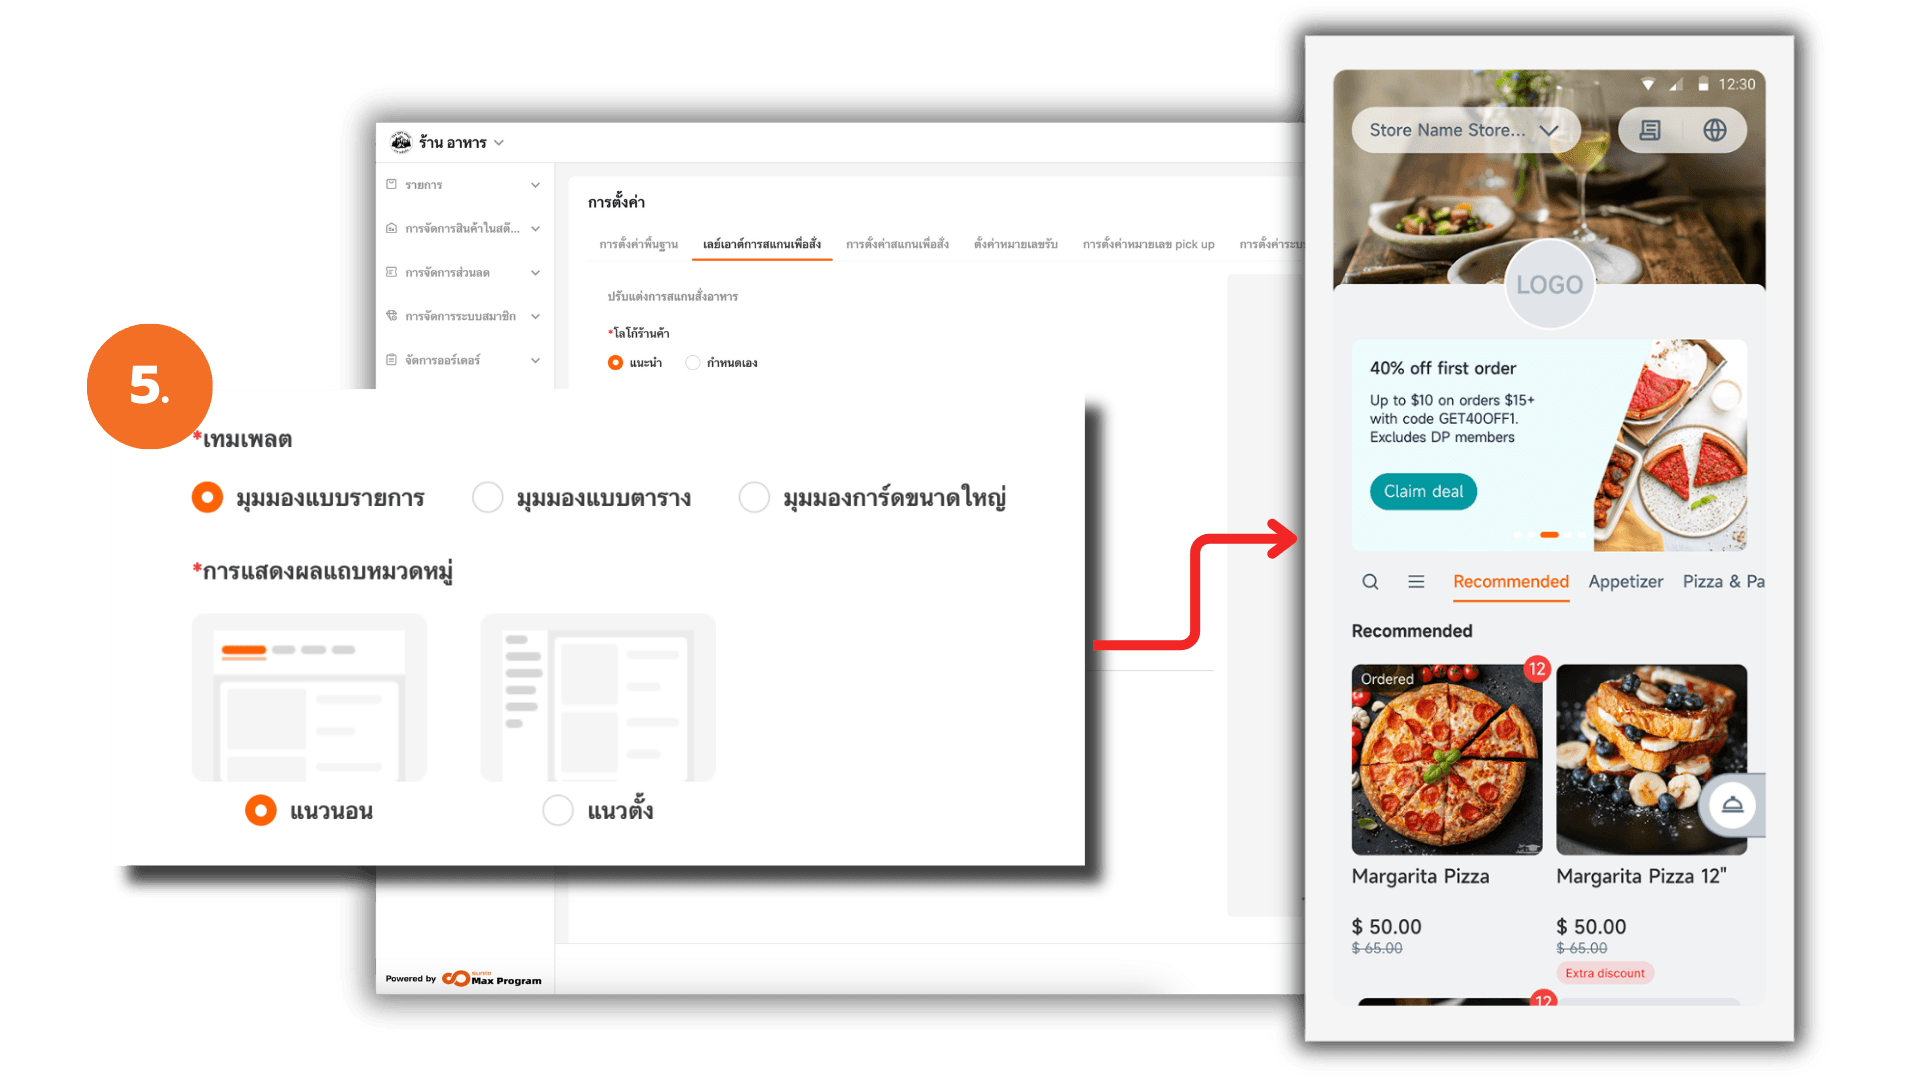
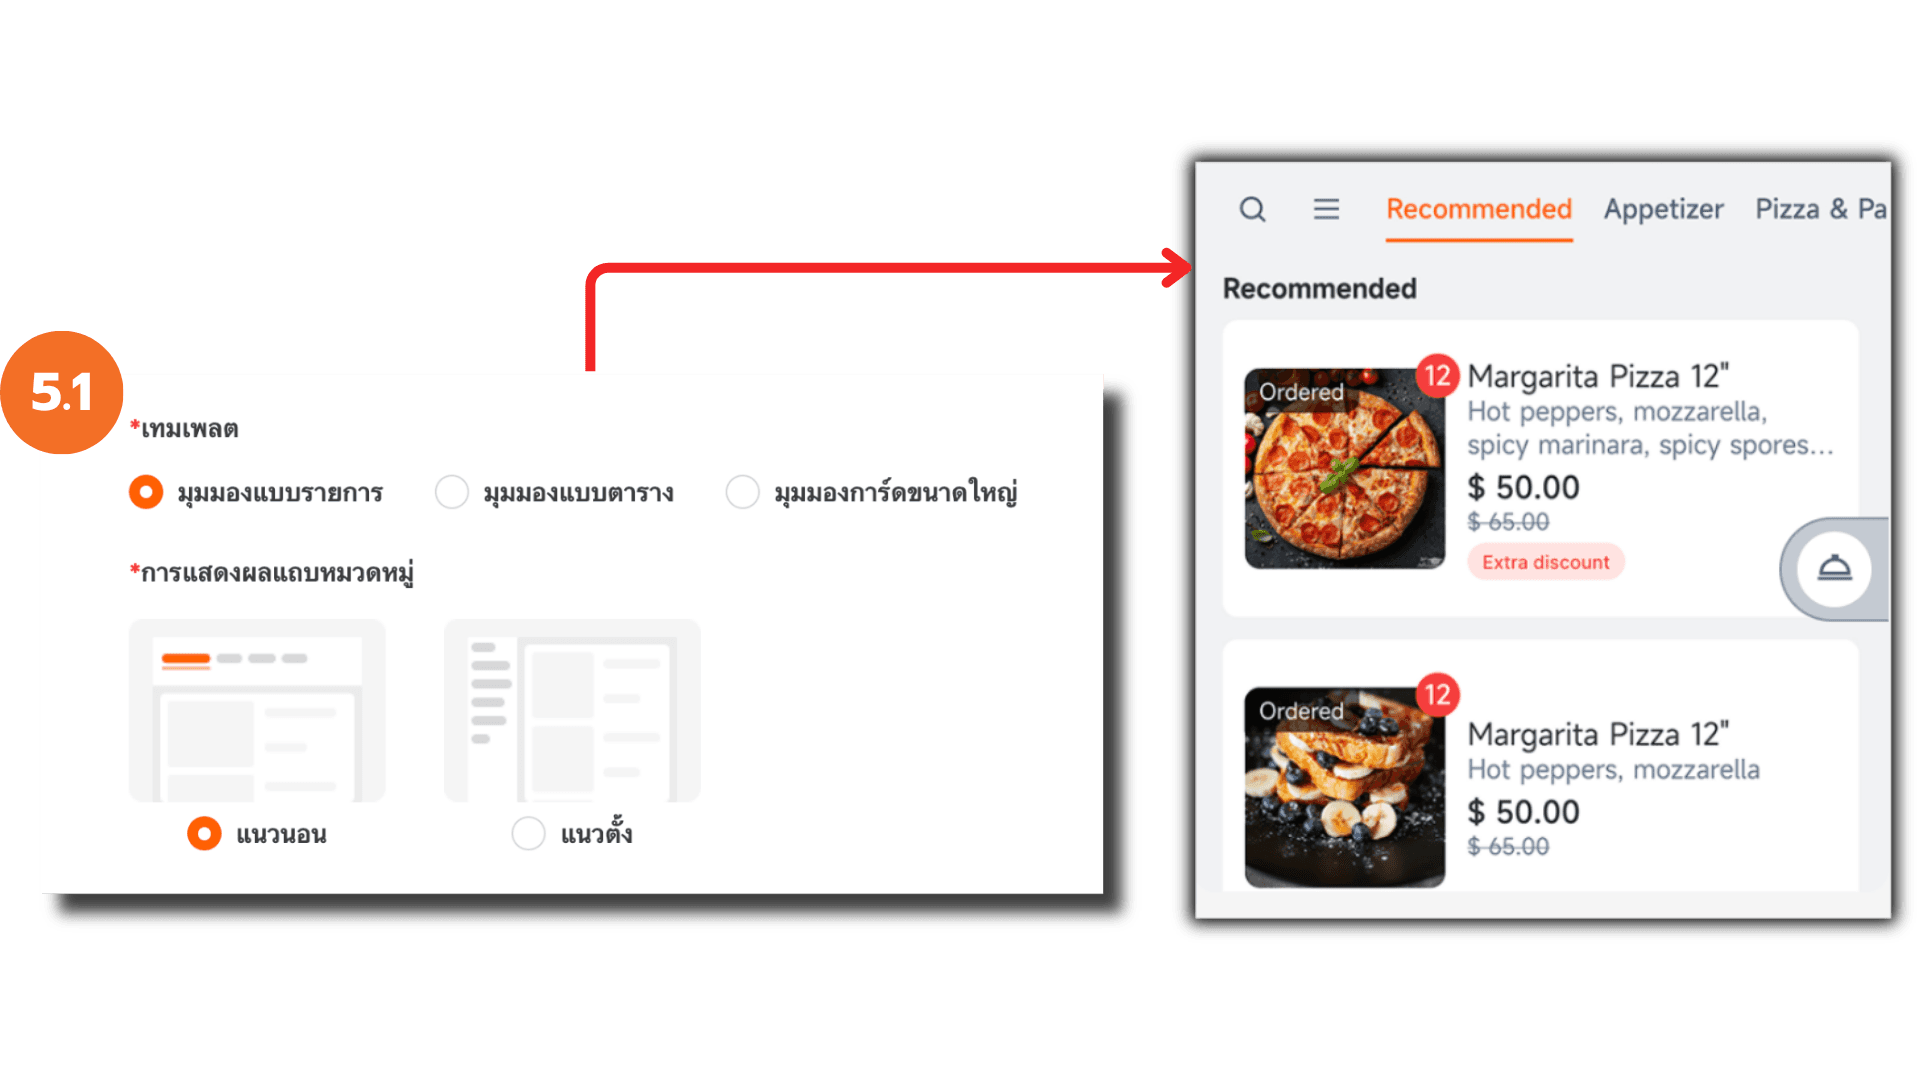
5.1 Horizontal List View
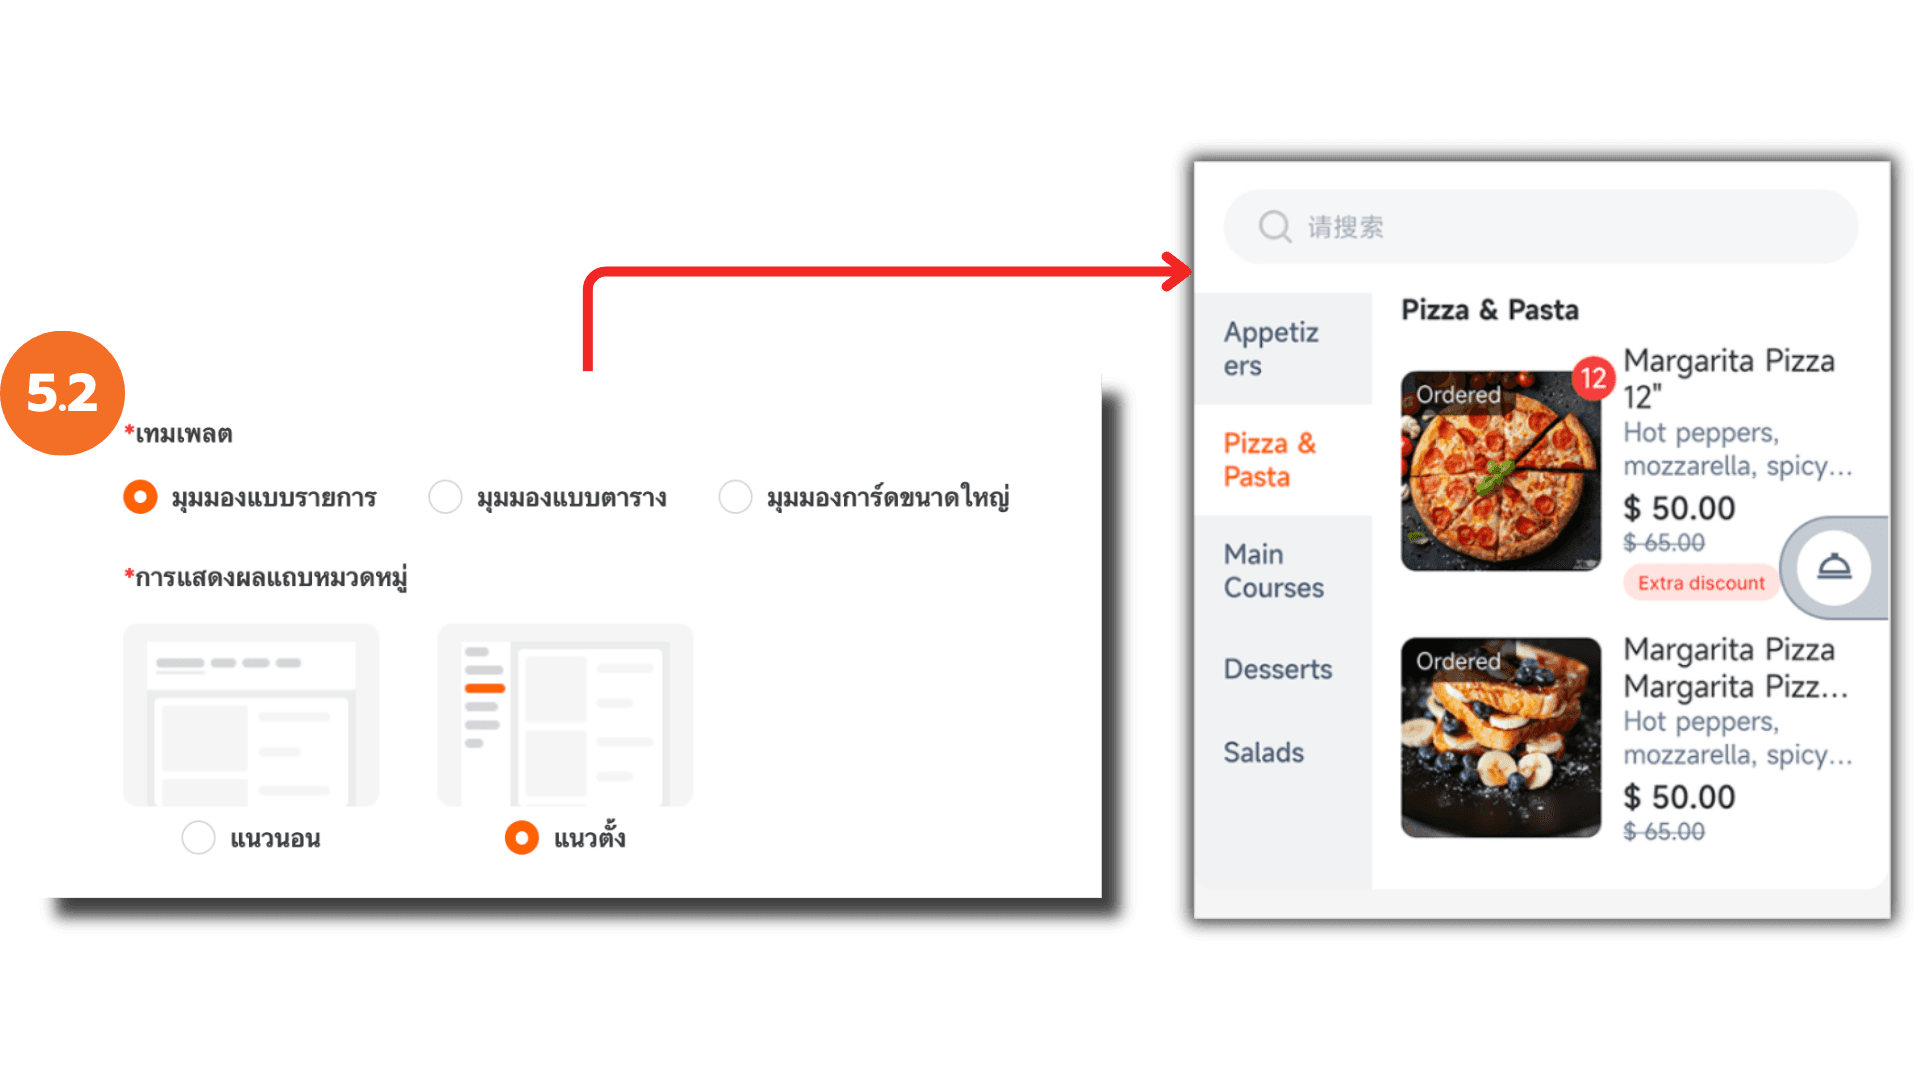
5.2 Vertical List View
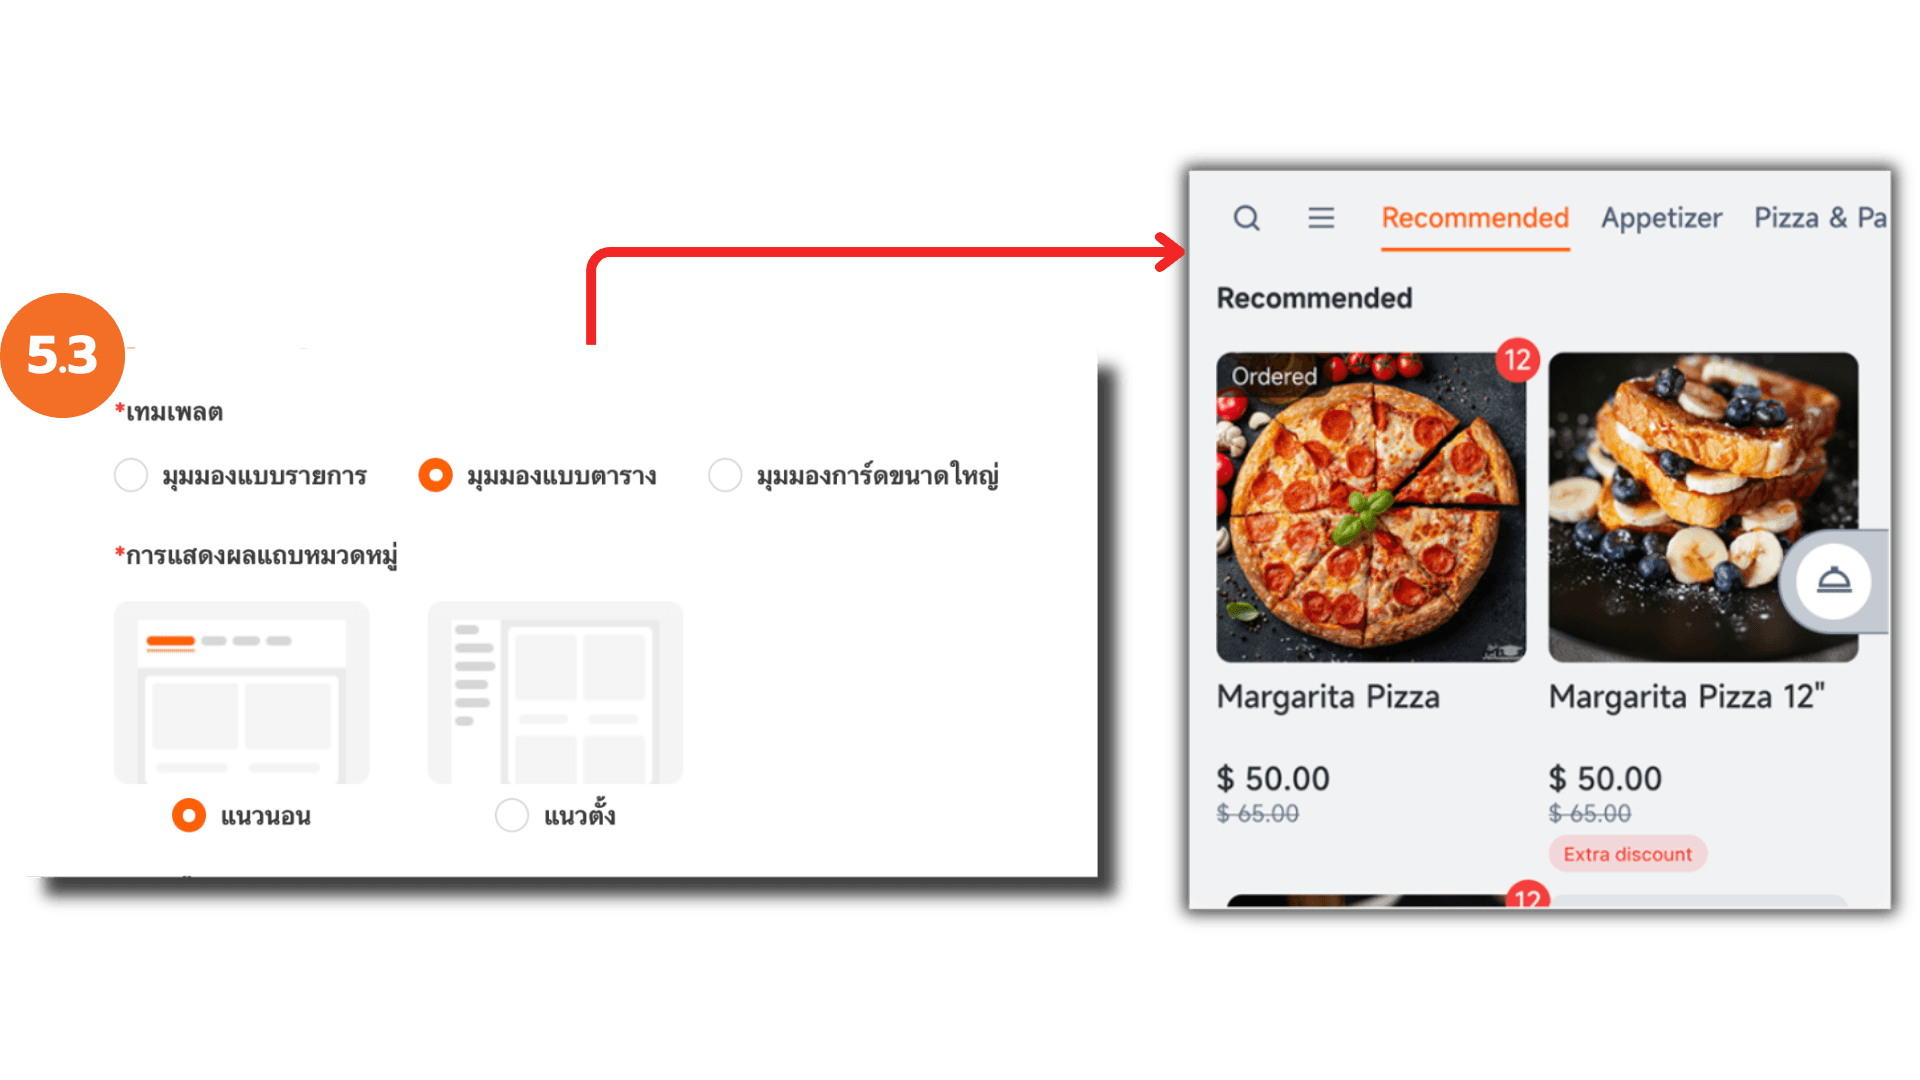
5.3 Horizontal Grid View
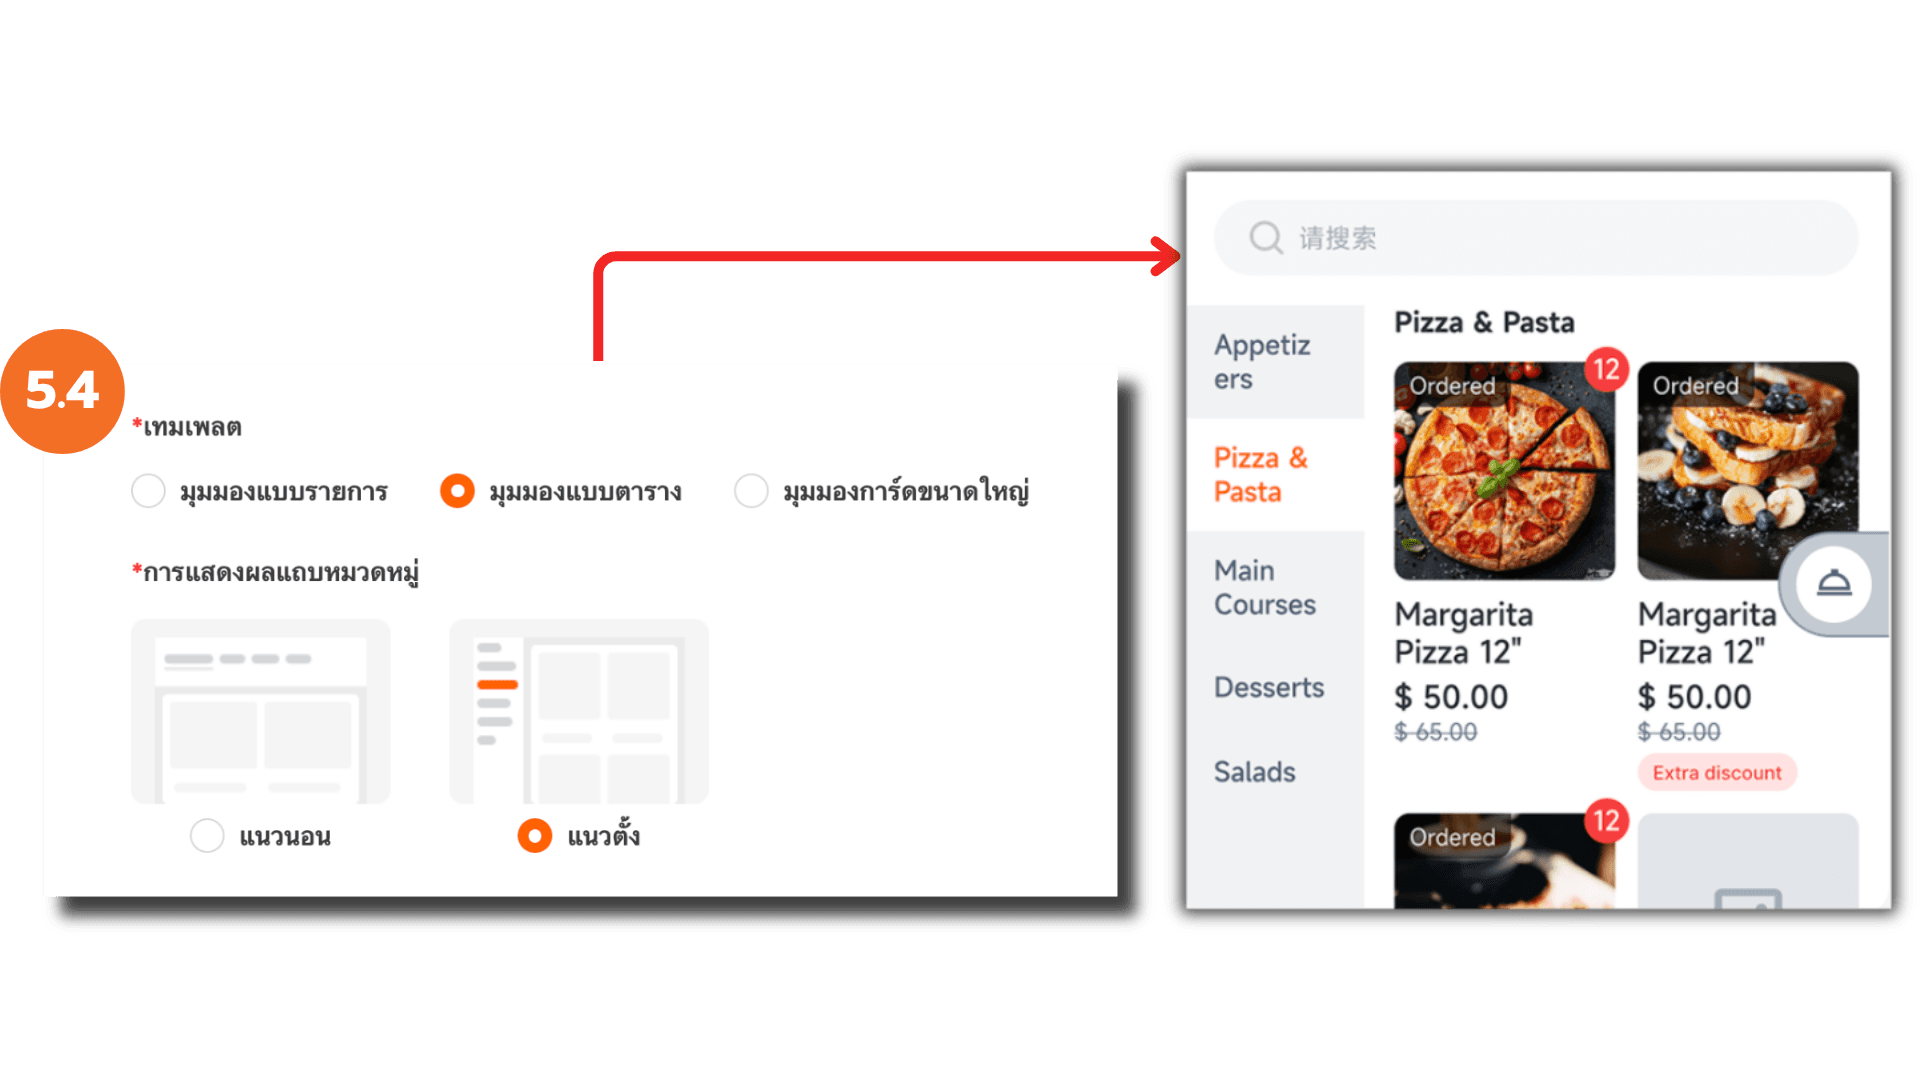
5.4 Vertical Grid View
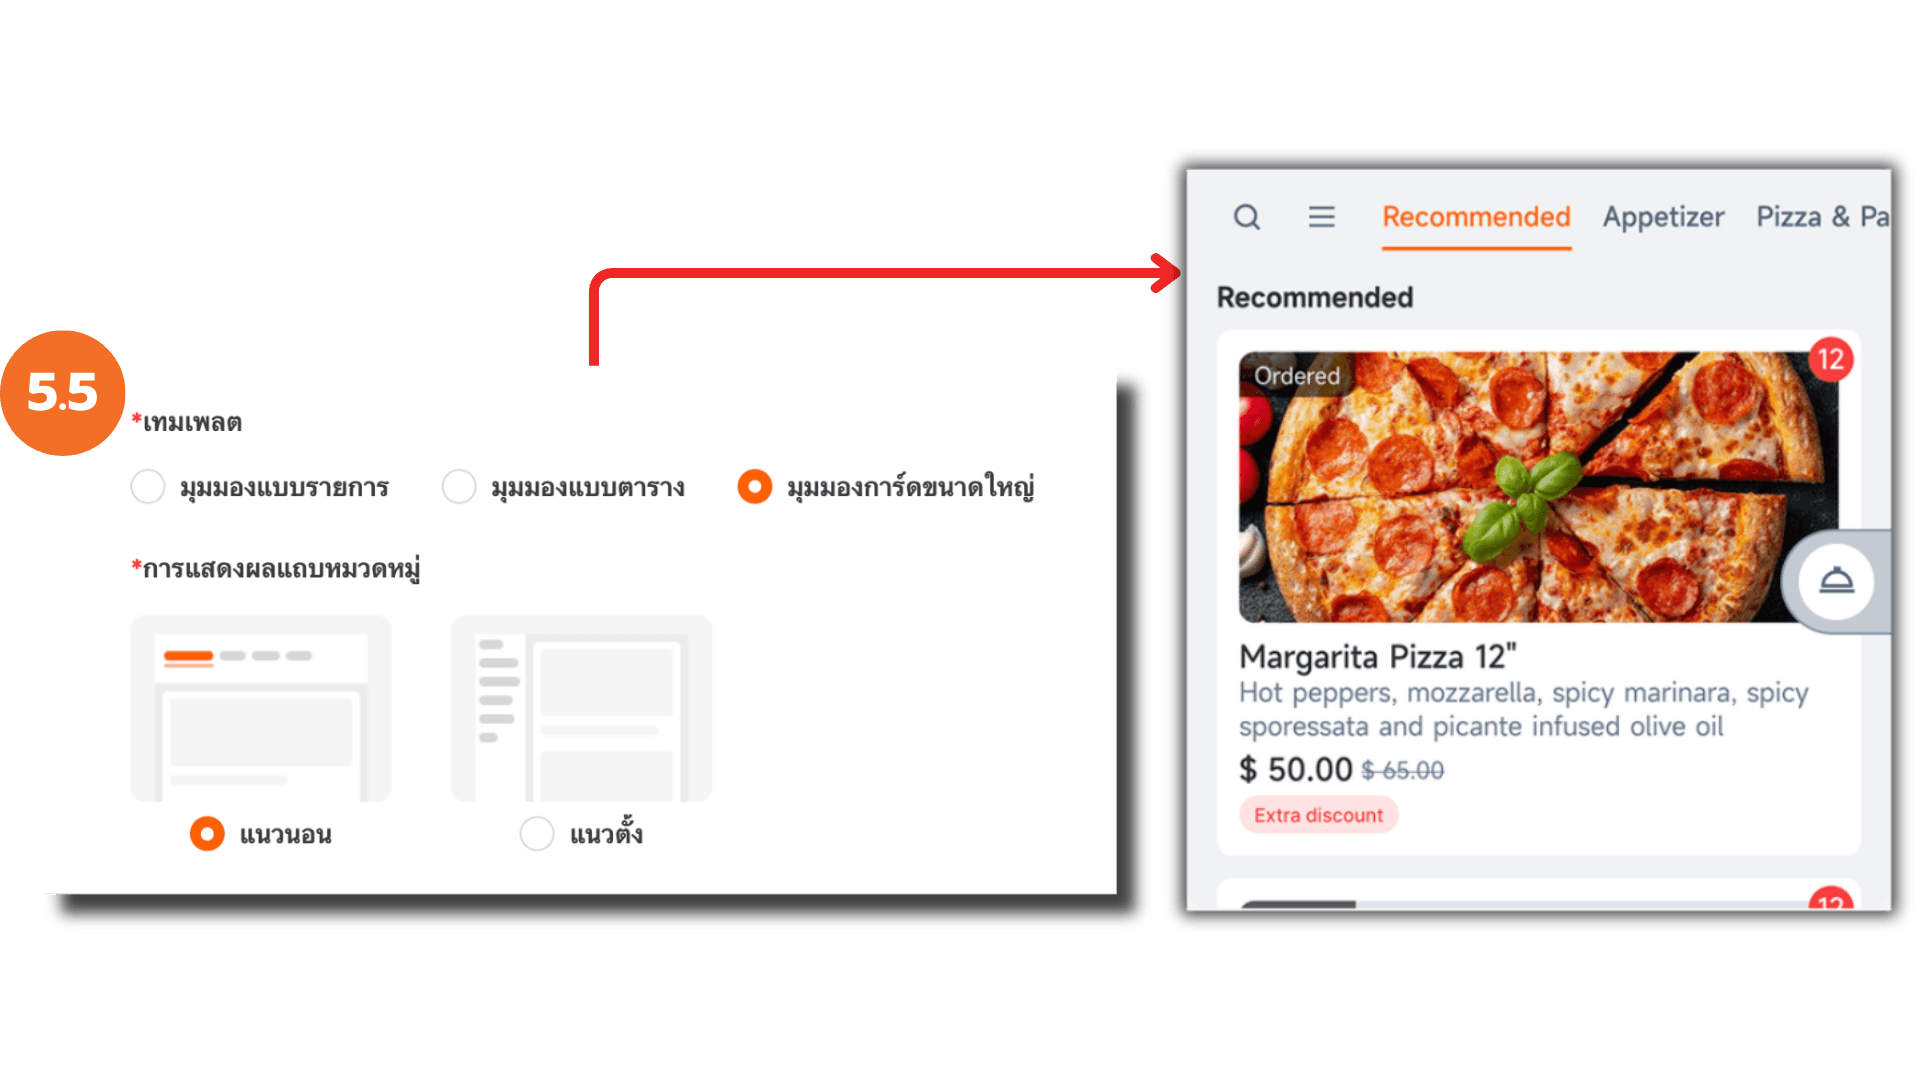
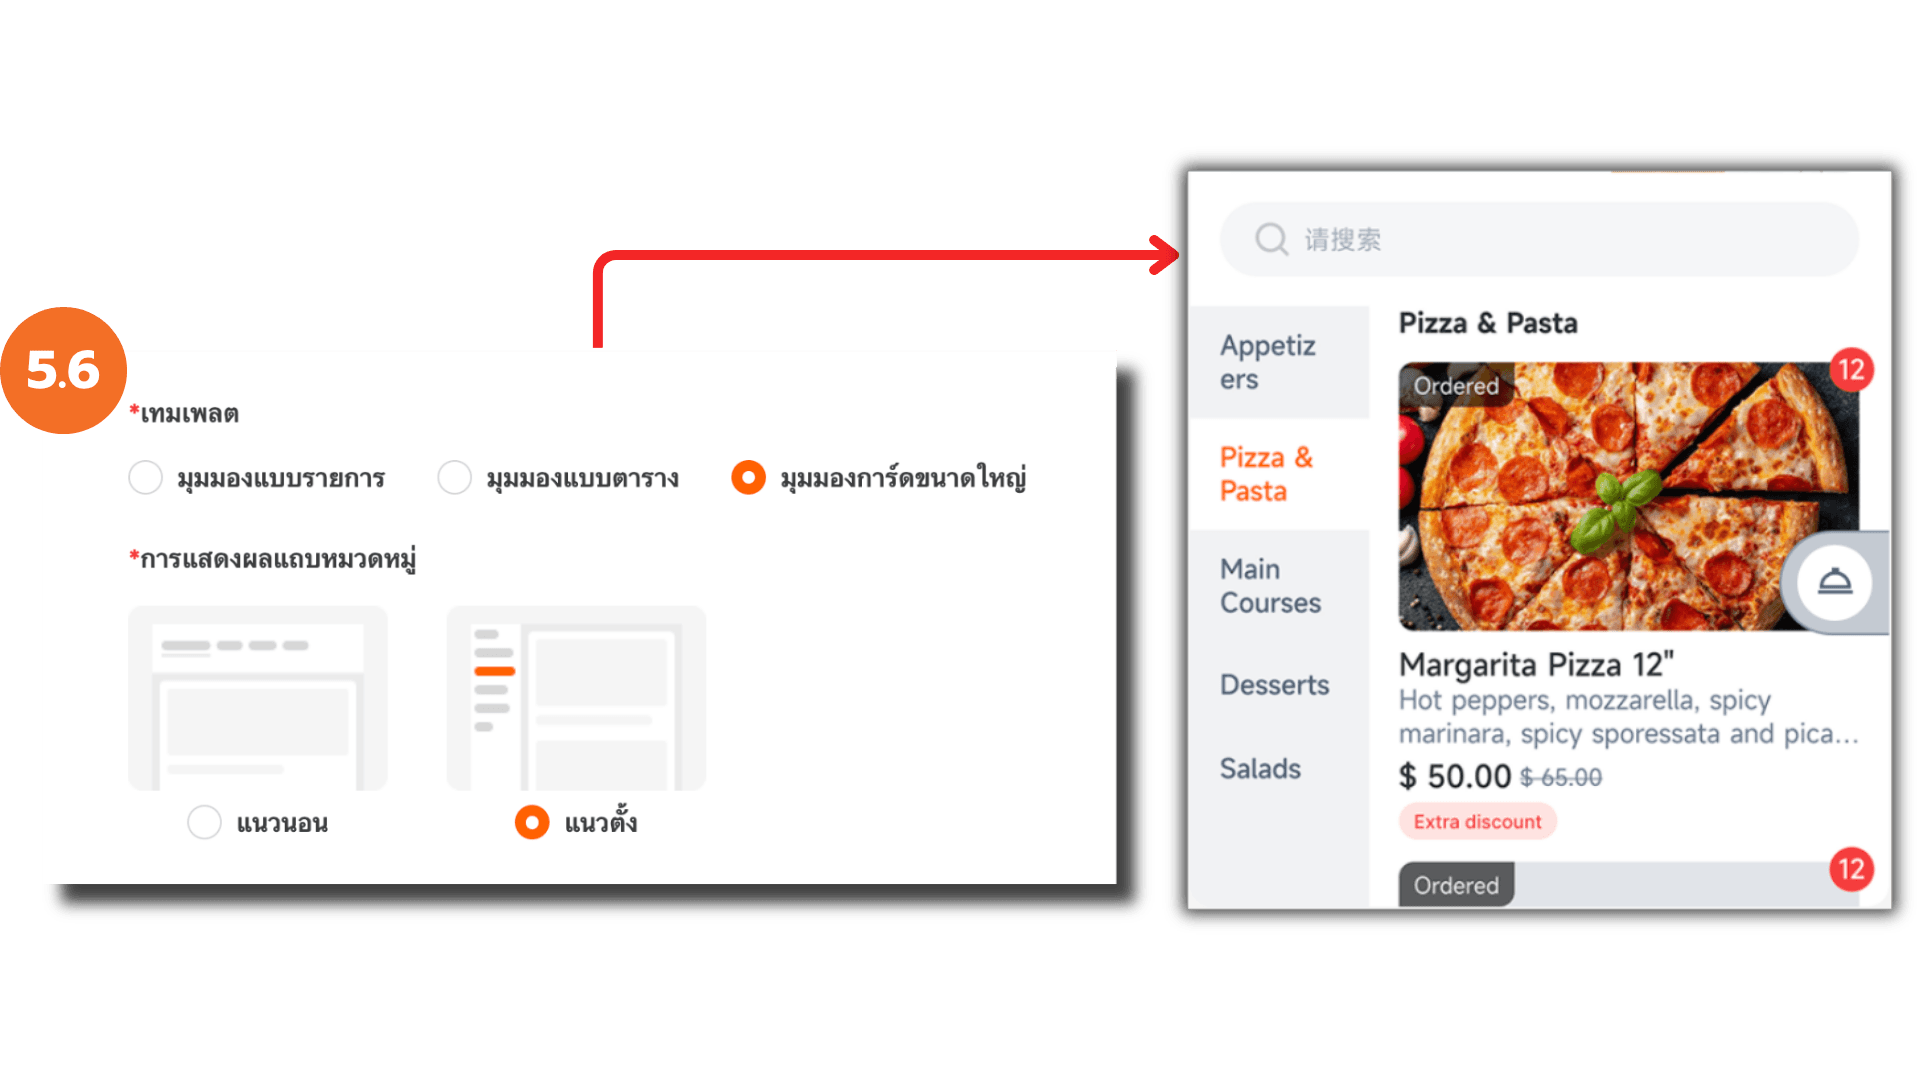
5.5 Horizontal Large Card
5.6 Vertical Large Card
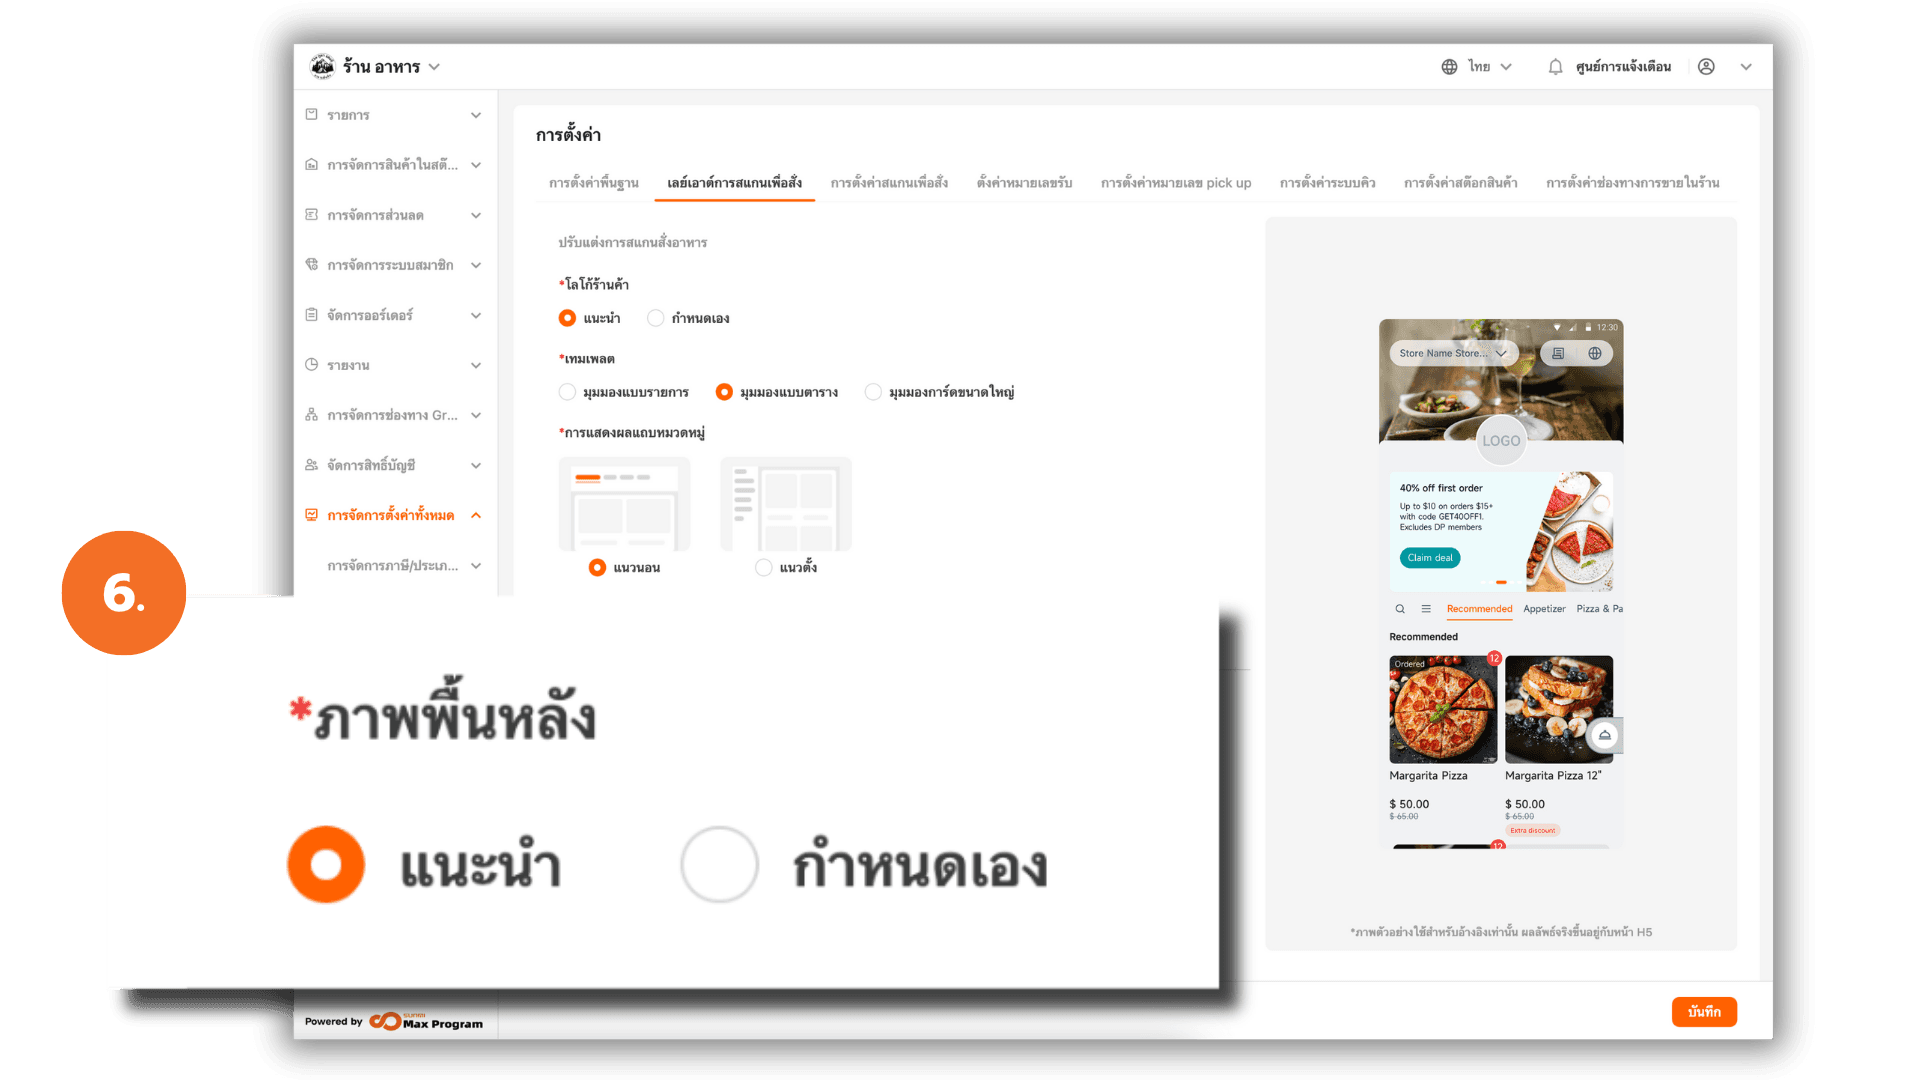
6. Background Image Settings
The background image appears behind the store logo and helps enhance the restaurant’s branding and aesthetics.
- Recommended : The system automatically selects a default background image.
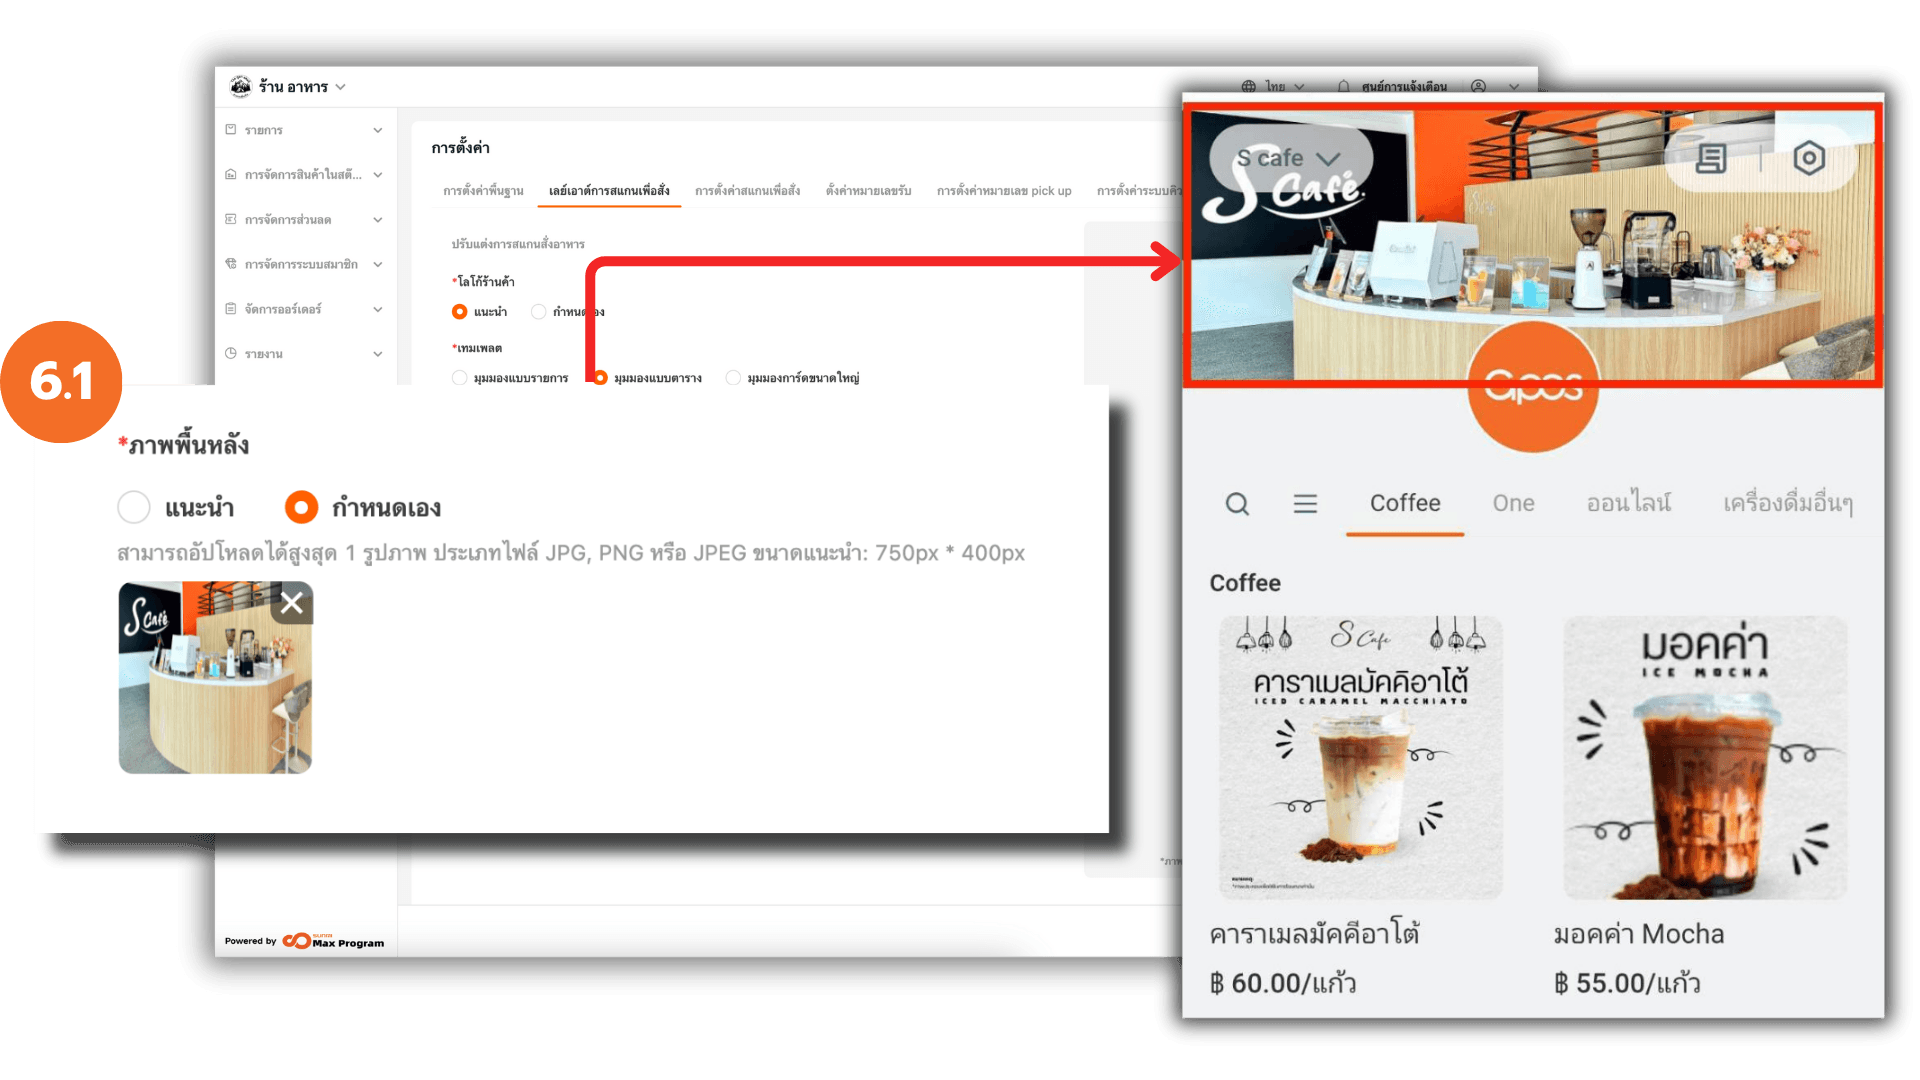
6.1 Upload a Custom Background
Click the “+ Upload” button to select and upload an image from your device.
Note : Maximum 1 image , Supported file types JPG, PNG, JPEG and Recommended size 750 × 400 pixels
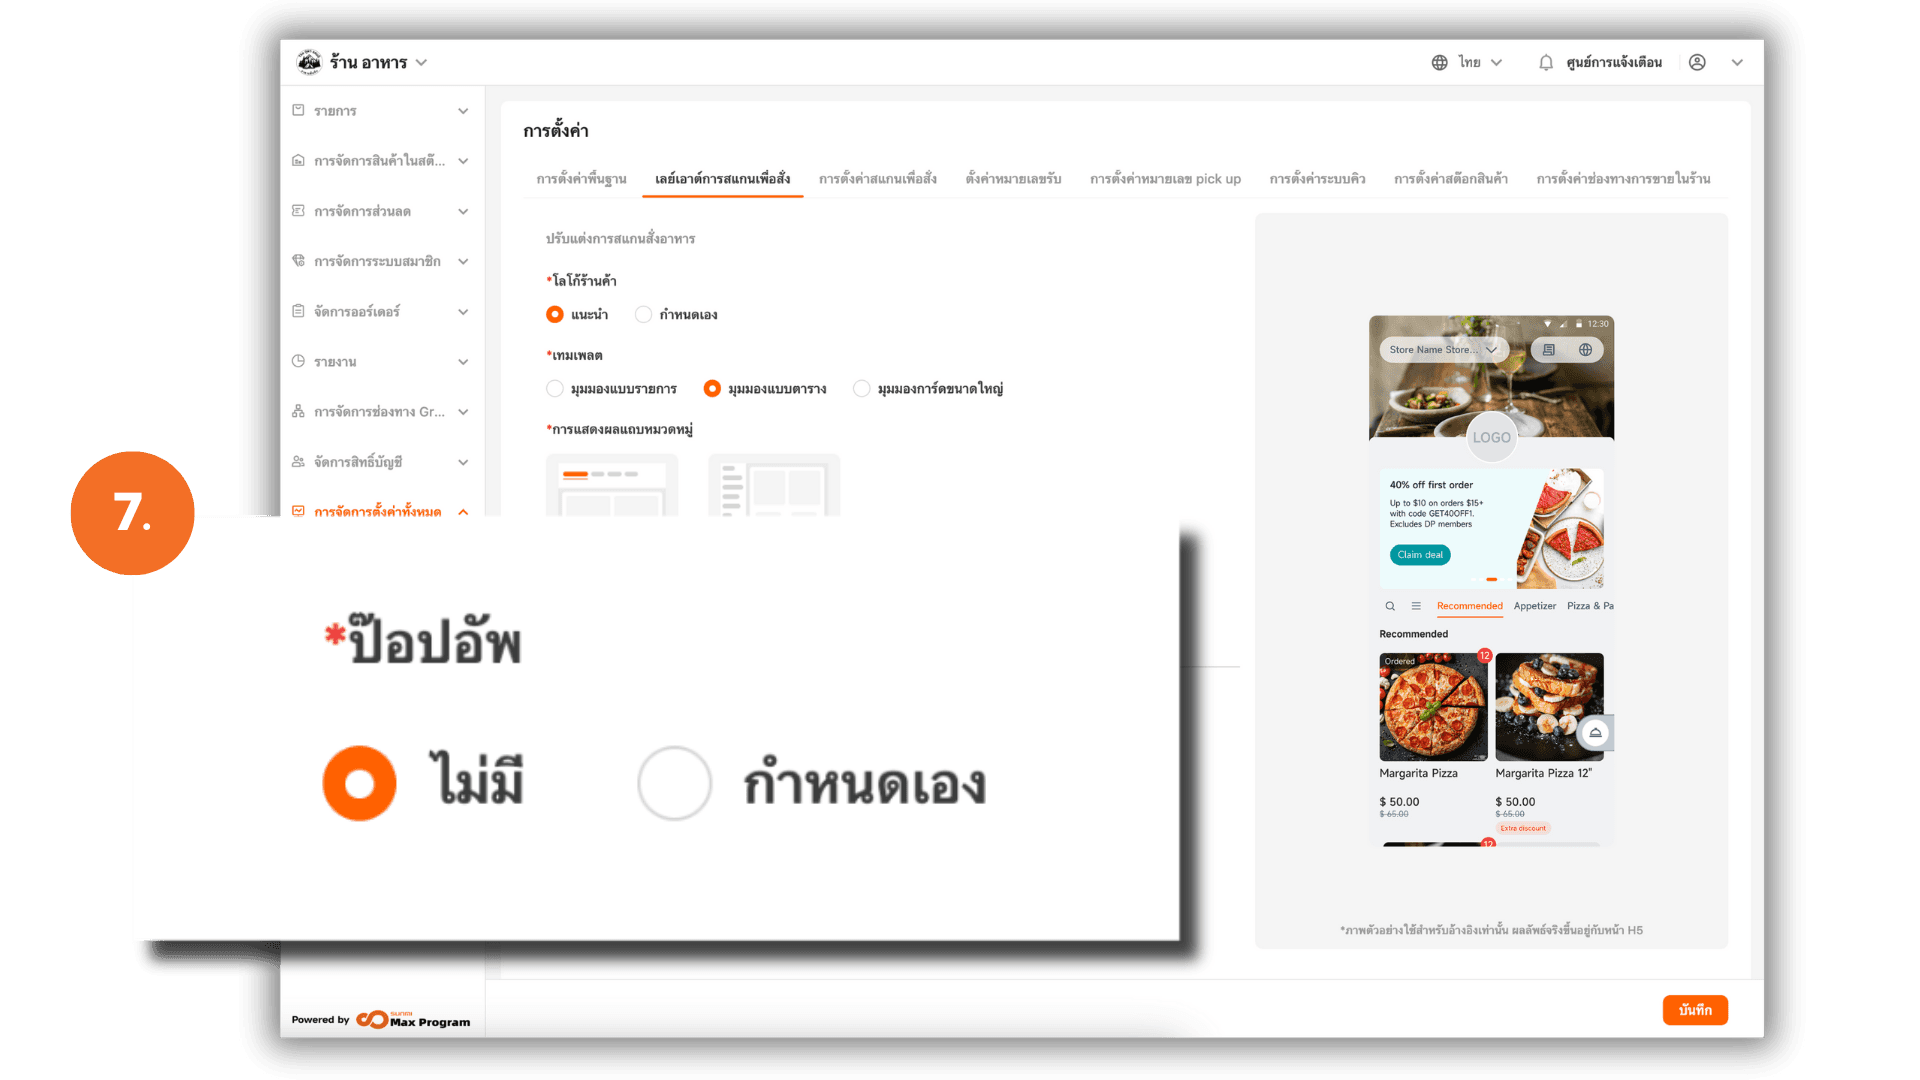
7. Marketing Image (Pop-up) Settings
The Popup carousel appears immediately after a customer scans the QR Code. It can be used for advertising, promotions, or highlighting special menu items.
Options:
- None : No pop-up image displayed.
- Click on image : Upload your own image and configure its action.
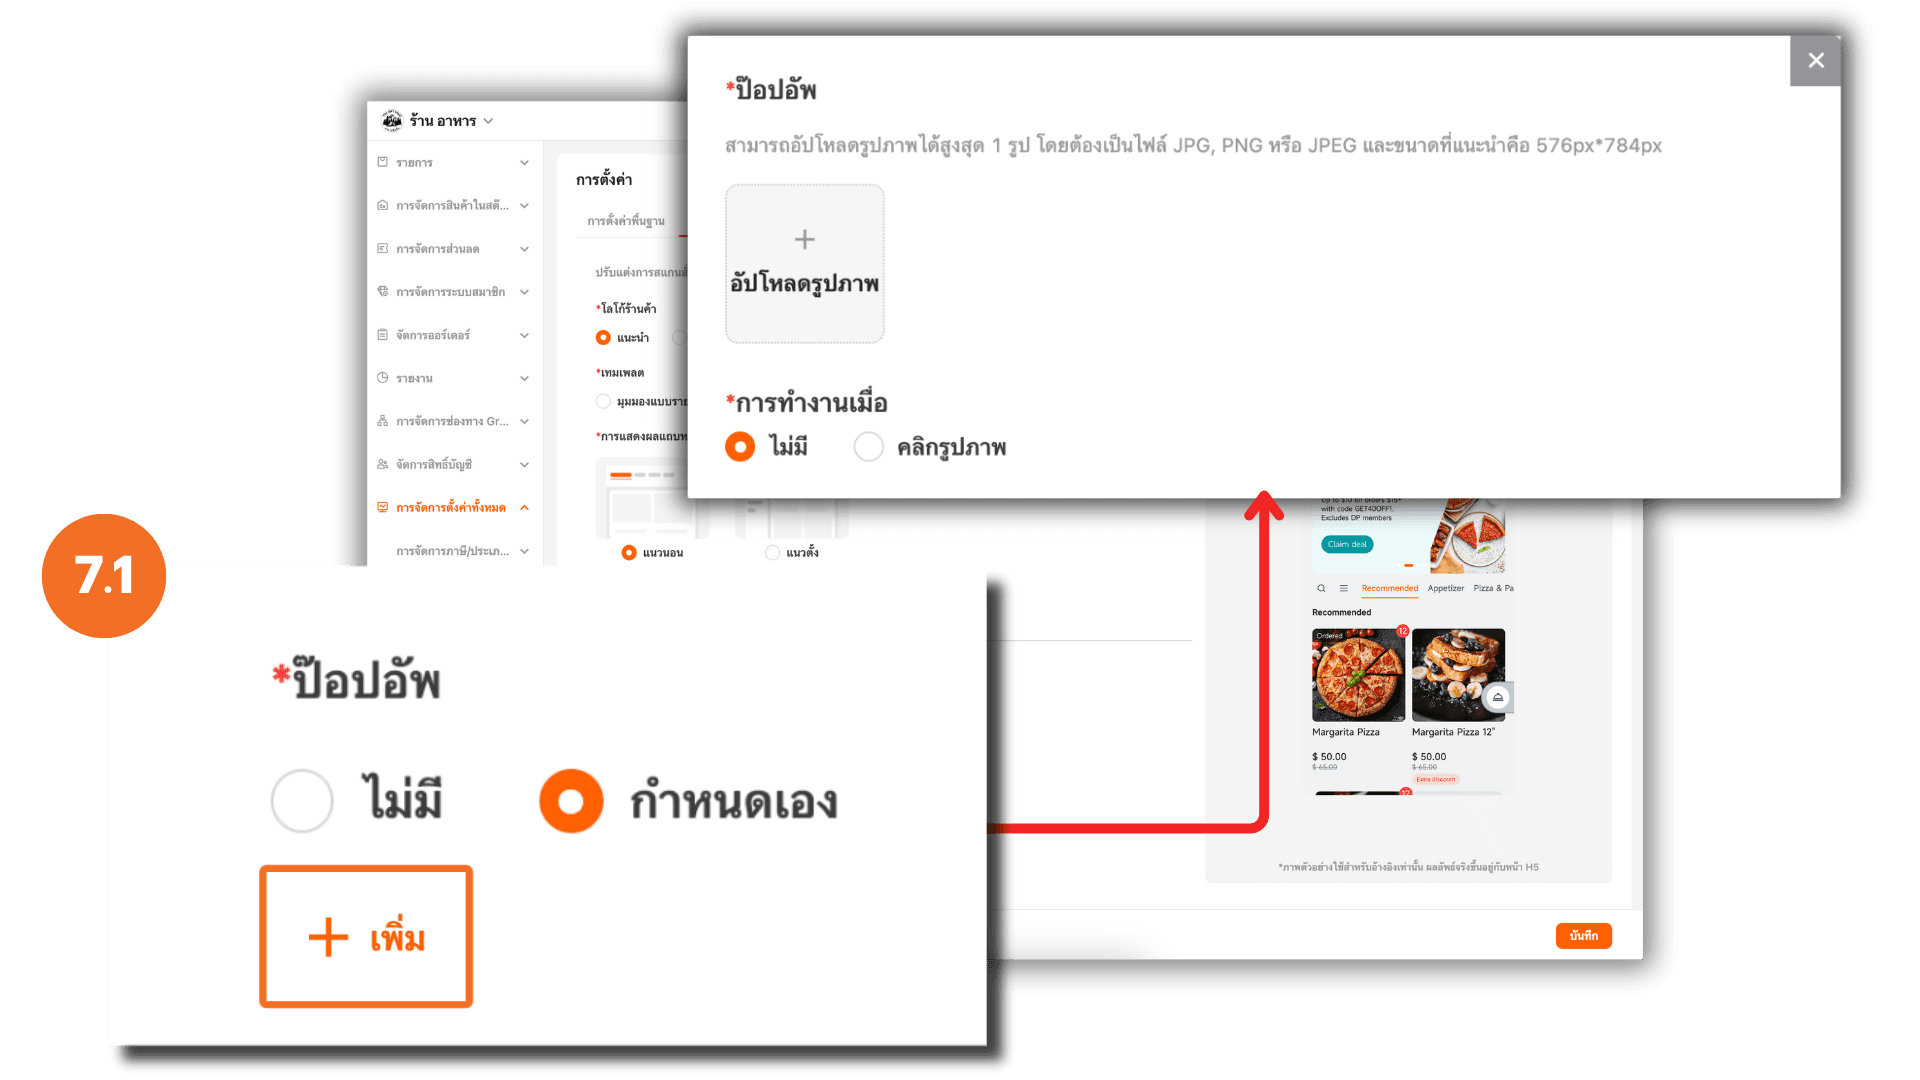
7.1 Add a Marketing Image
If you select Custom, click “+ Add” and then “+ Upload” to upload your desired image.
Note : Maximum 1 image , Supported file types JPG, PNG, JPEG and Recommended size 576 × 784 pixels
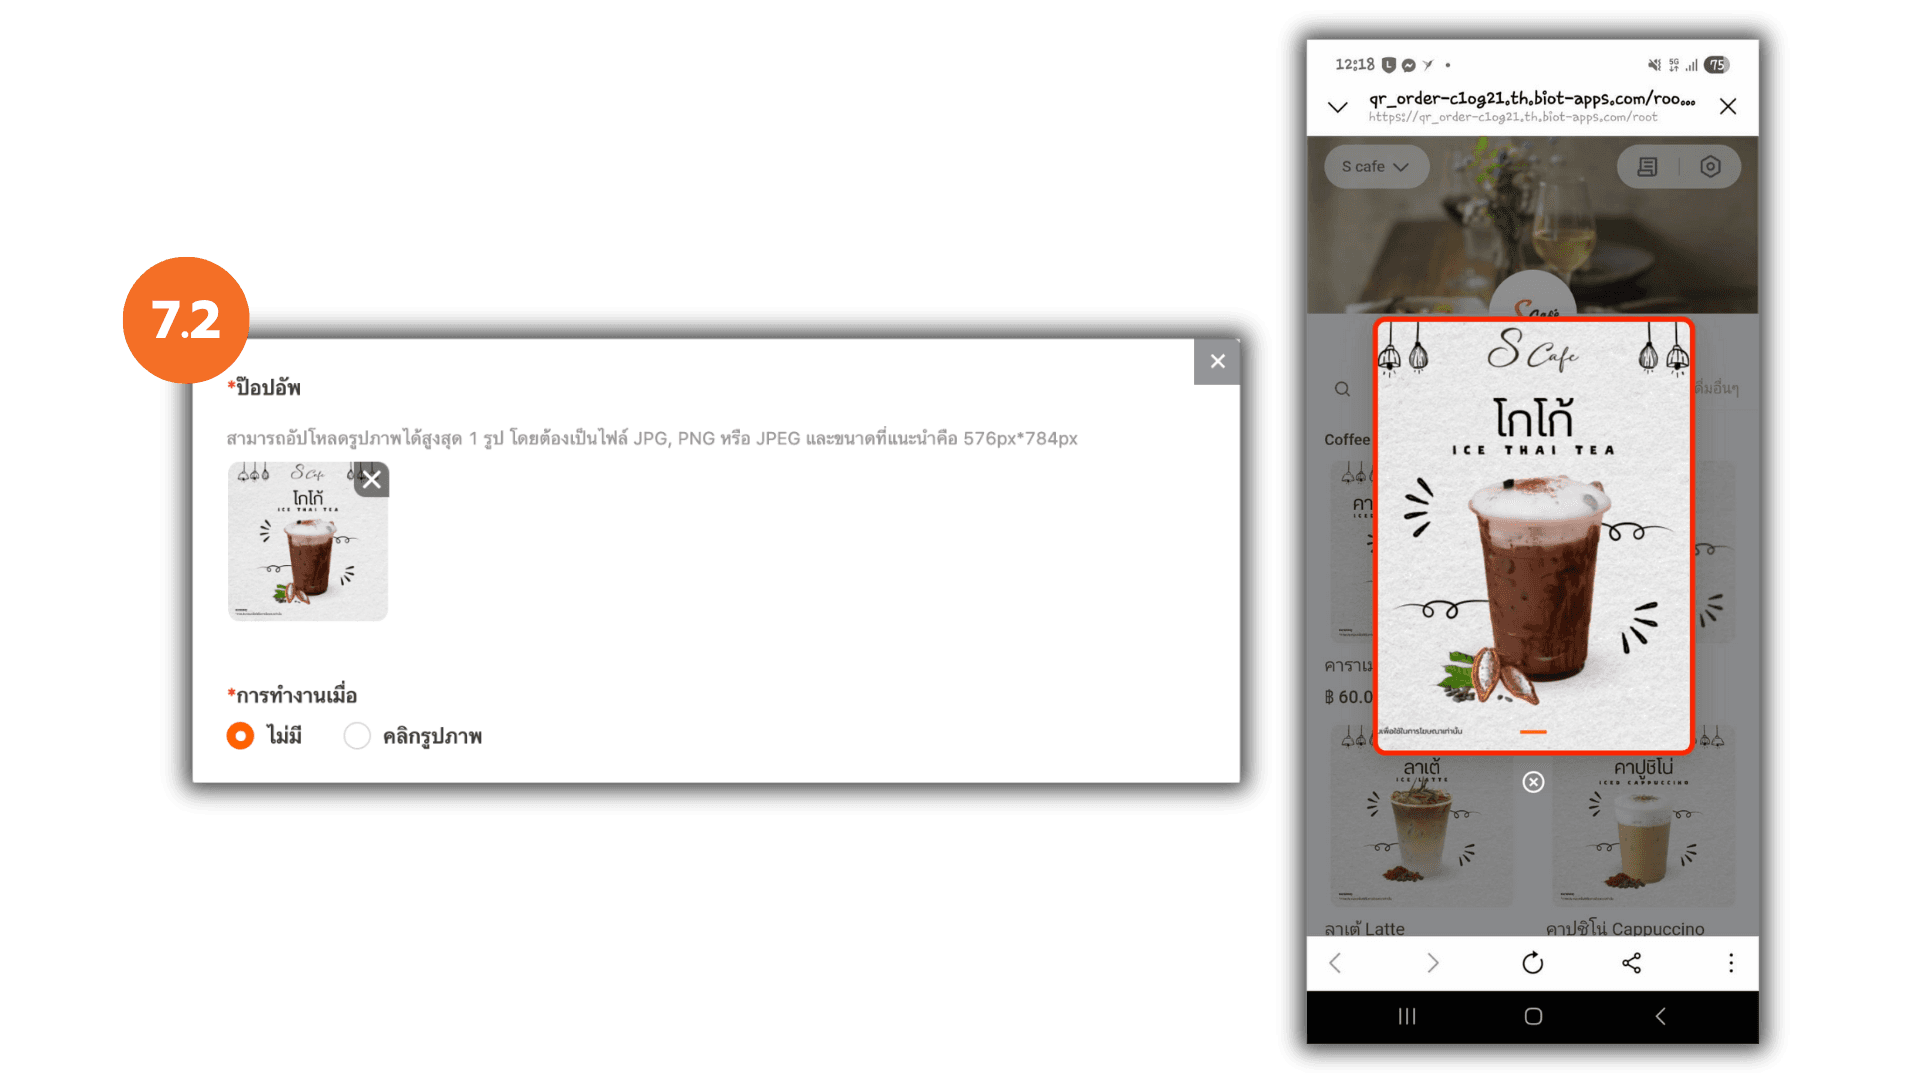
7.2 Pop-up Behavior : Display Only
Select “None” under the action options — the image will be displayed after scanning, and users can close it manually.
Example: Mobile view after scanning the QR Code.
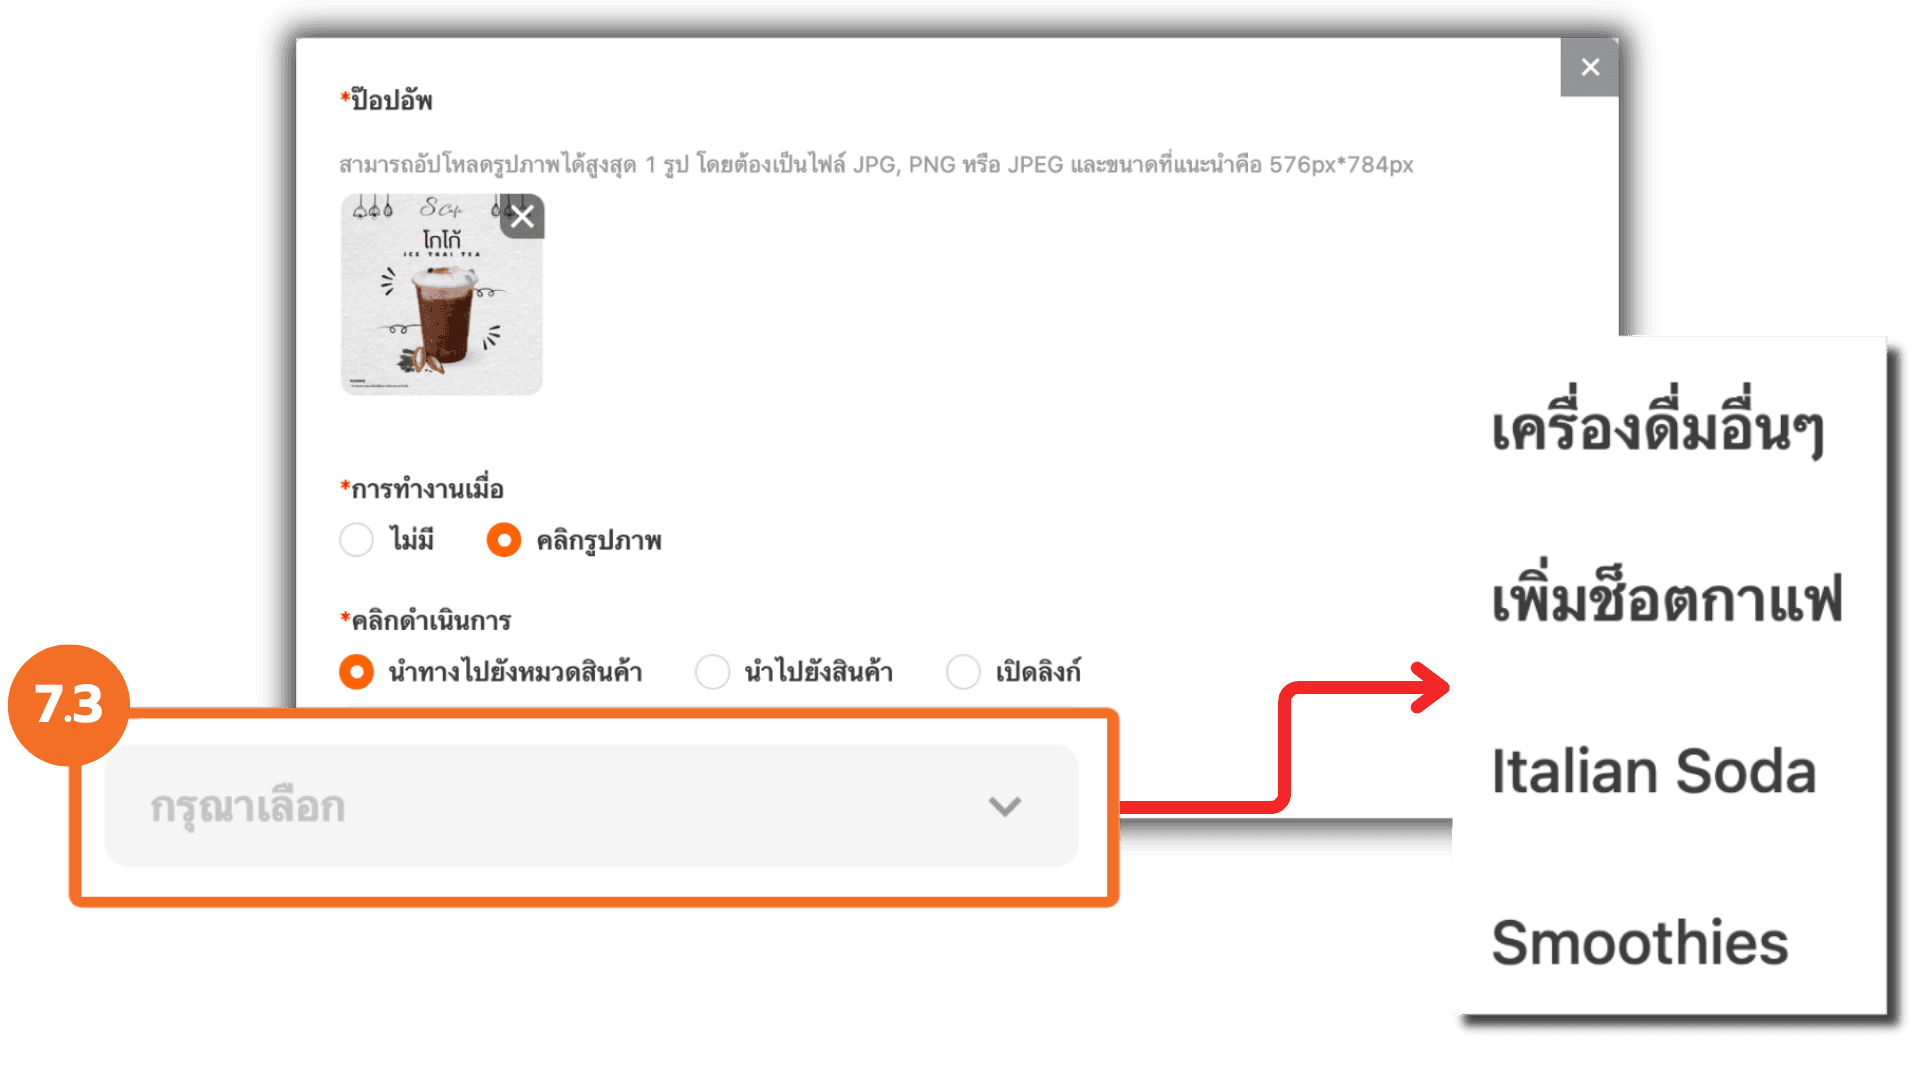
7.3 Pop-up Behavior : Link to Category
Select “Click Image → Go to a category”. Then choose the desired menu category.
When customers click the image, the system will redirect them to the selected category page.
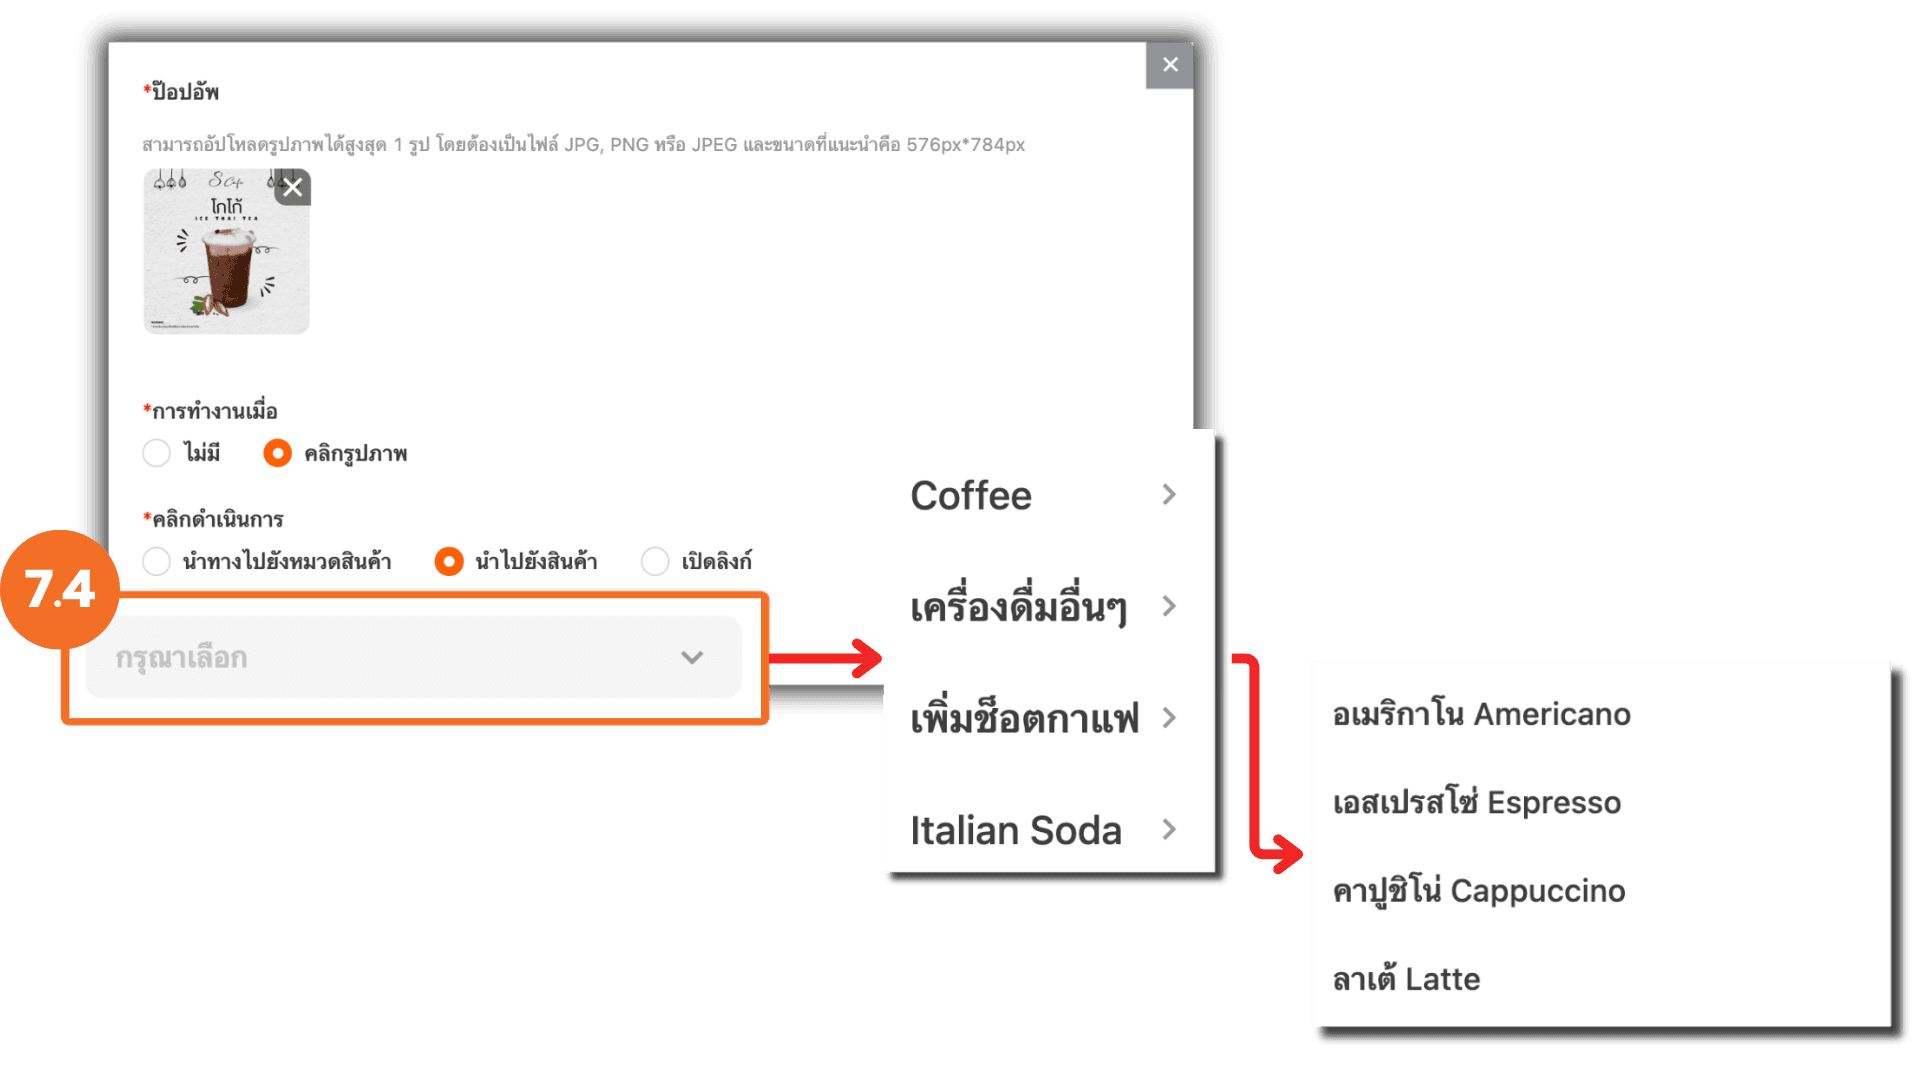
7.4 Pop-up Behavior : Link to Product
Select “Click Image → Go to item”. Choose a category, then click the “>” symbol beside the category name to select a specific product.
When clicked, the image will open the product detail page.
7.5 Pop-up Behavior : Open External Link
Select “Click Image → Open Link” and enter the desired URL.
When clicked, the image will open the specified external webpage.

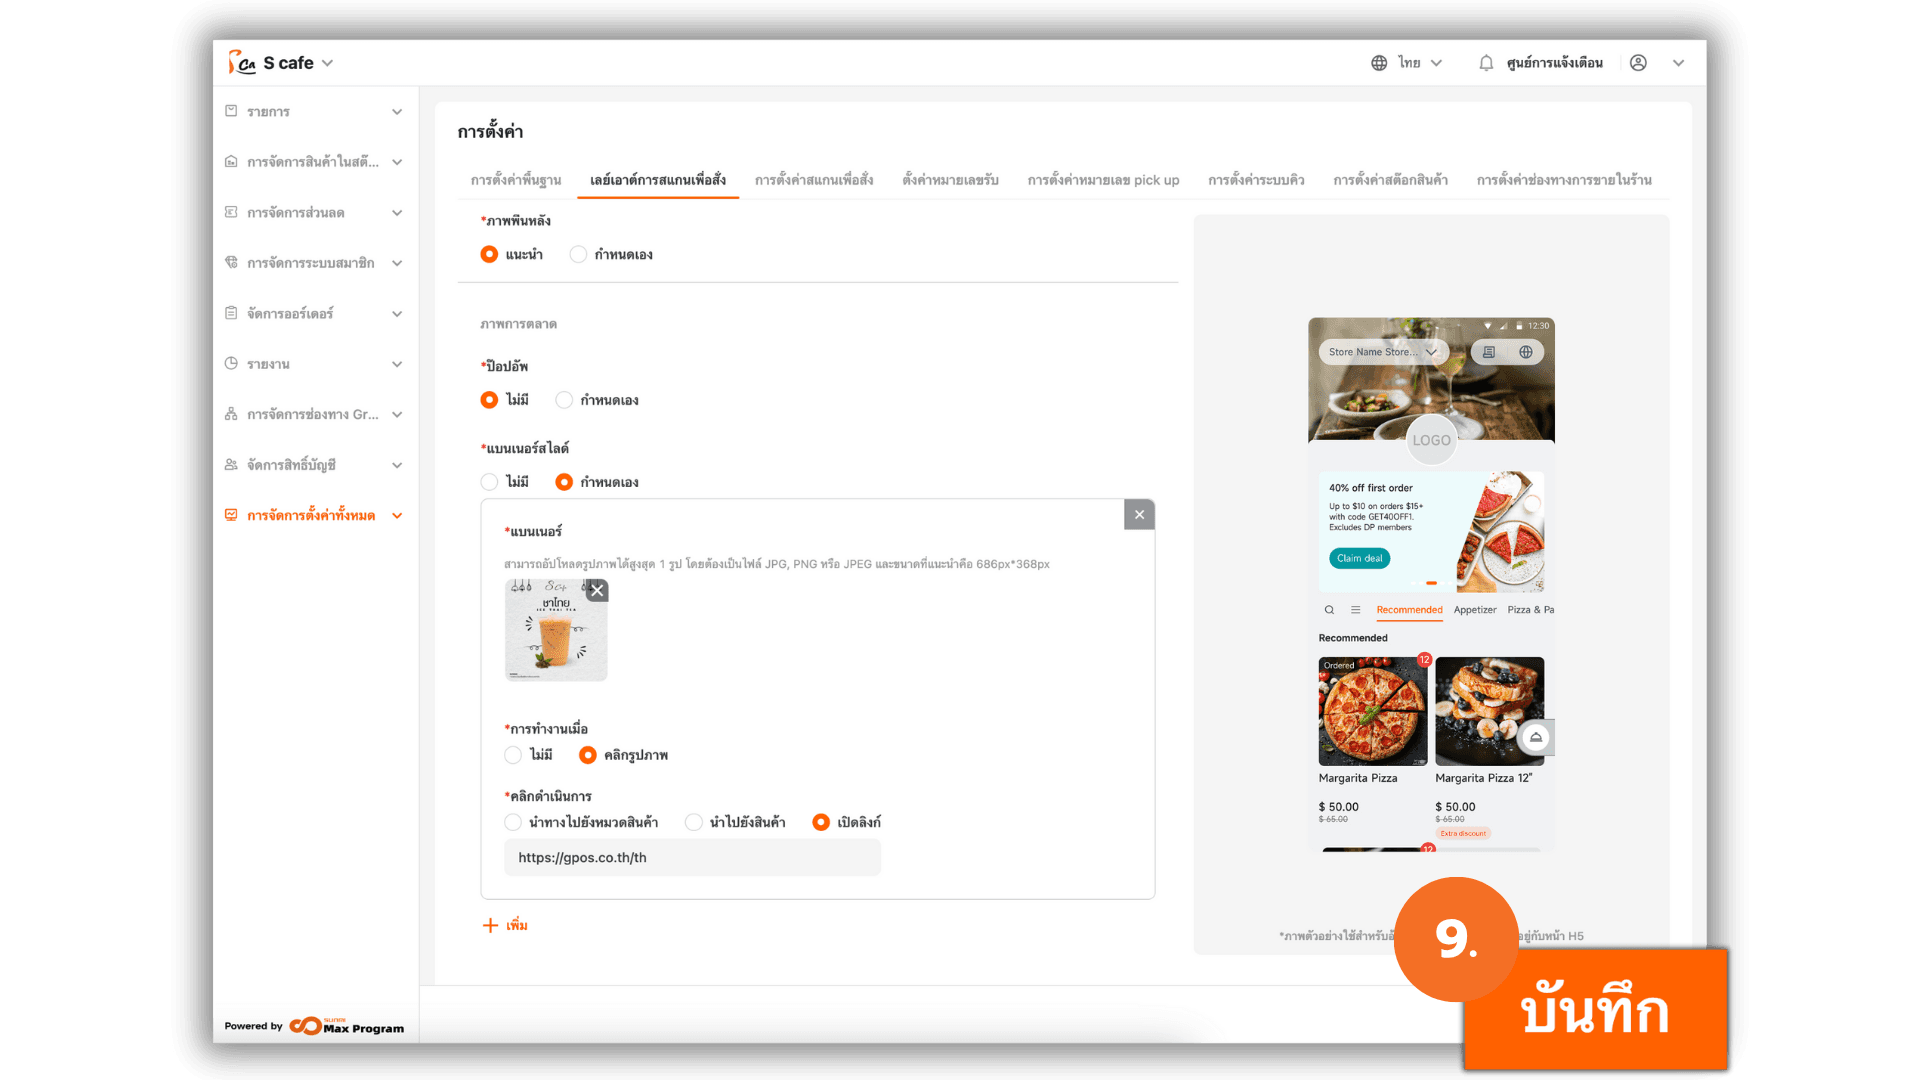
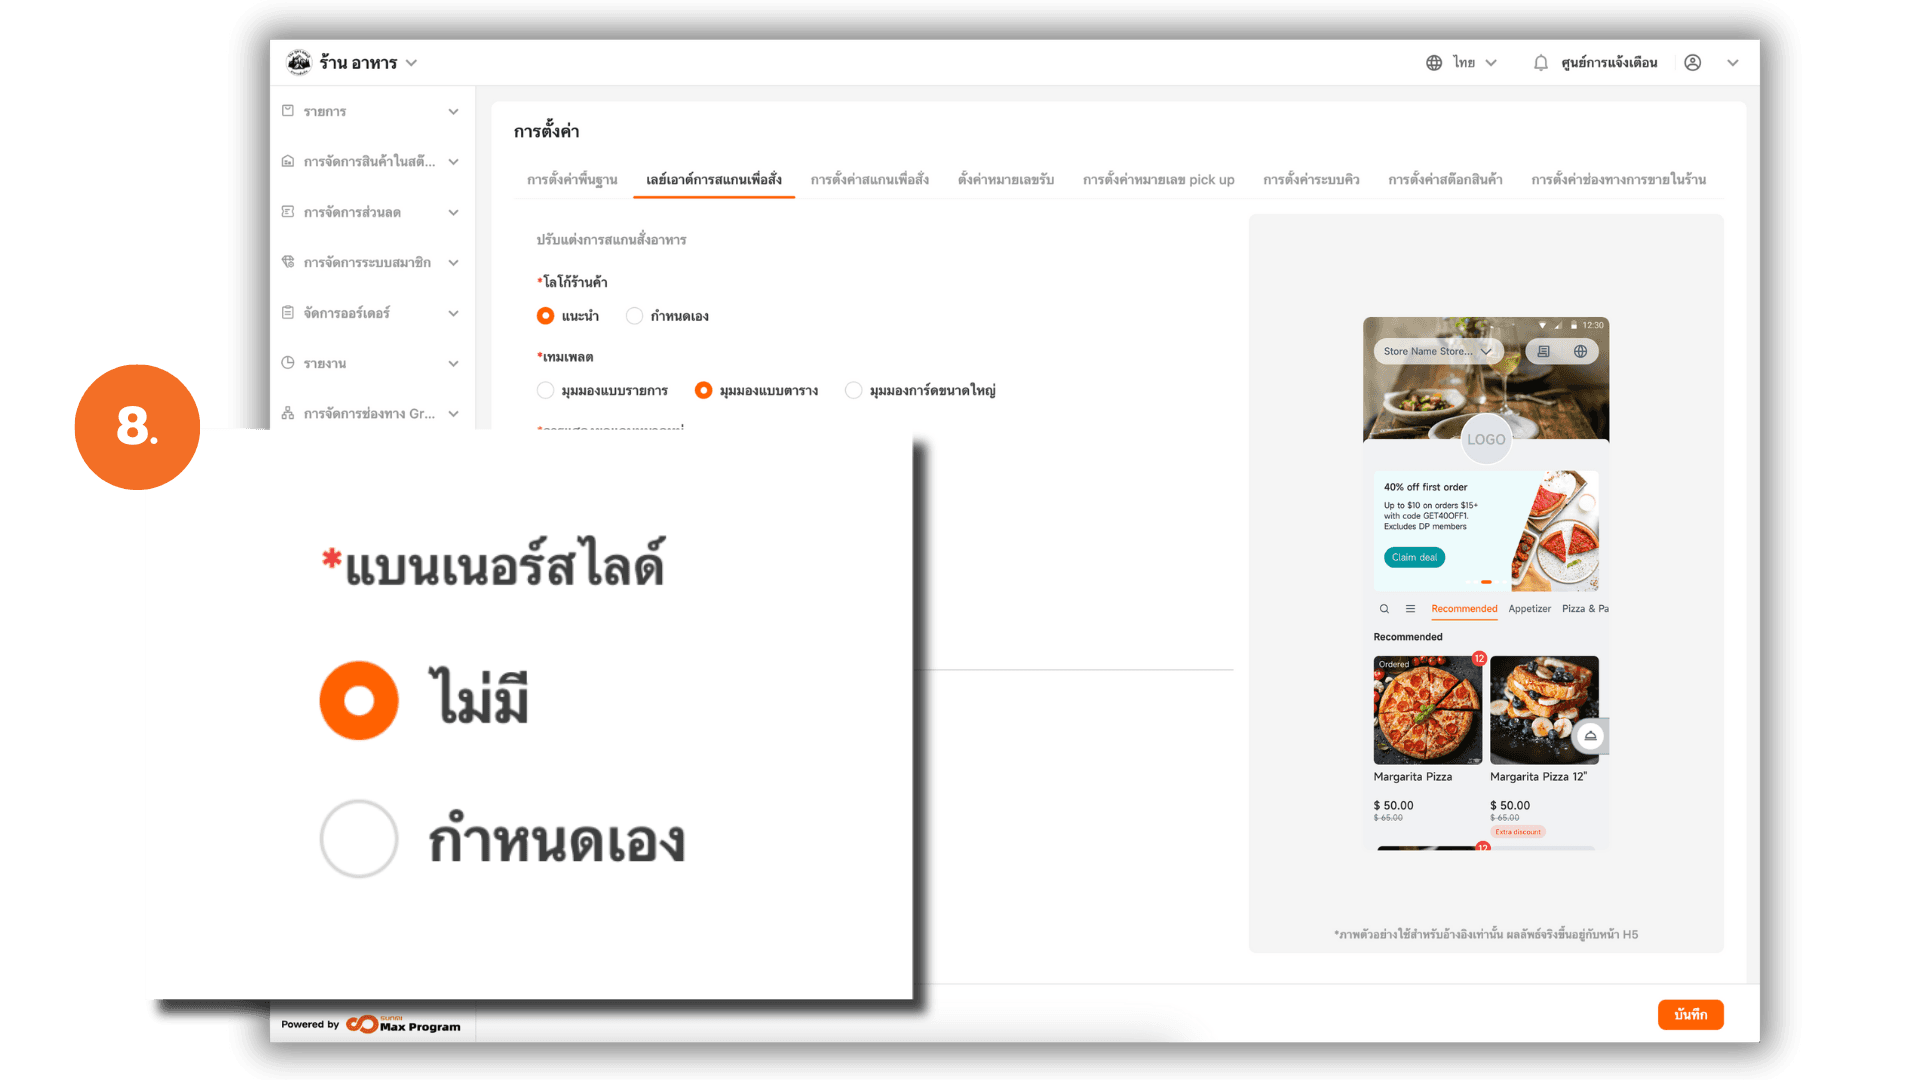
8. Marketing Banner (Slide Banner) Settings
The Banner carousel appears on the main screen when customers scan the QR Code. It automatically rotates through images to highlight promotions or featured menu items. Options
- None : No slide banner displayed.
- Custom : Upload and configure your own banner images.
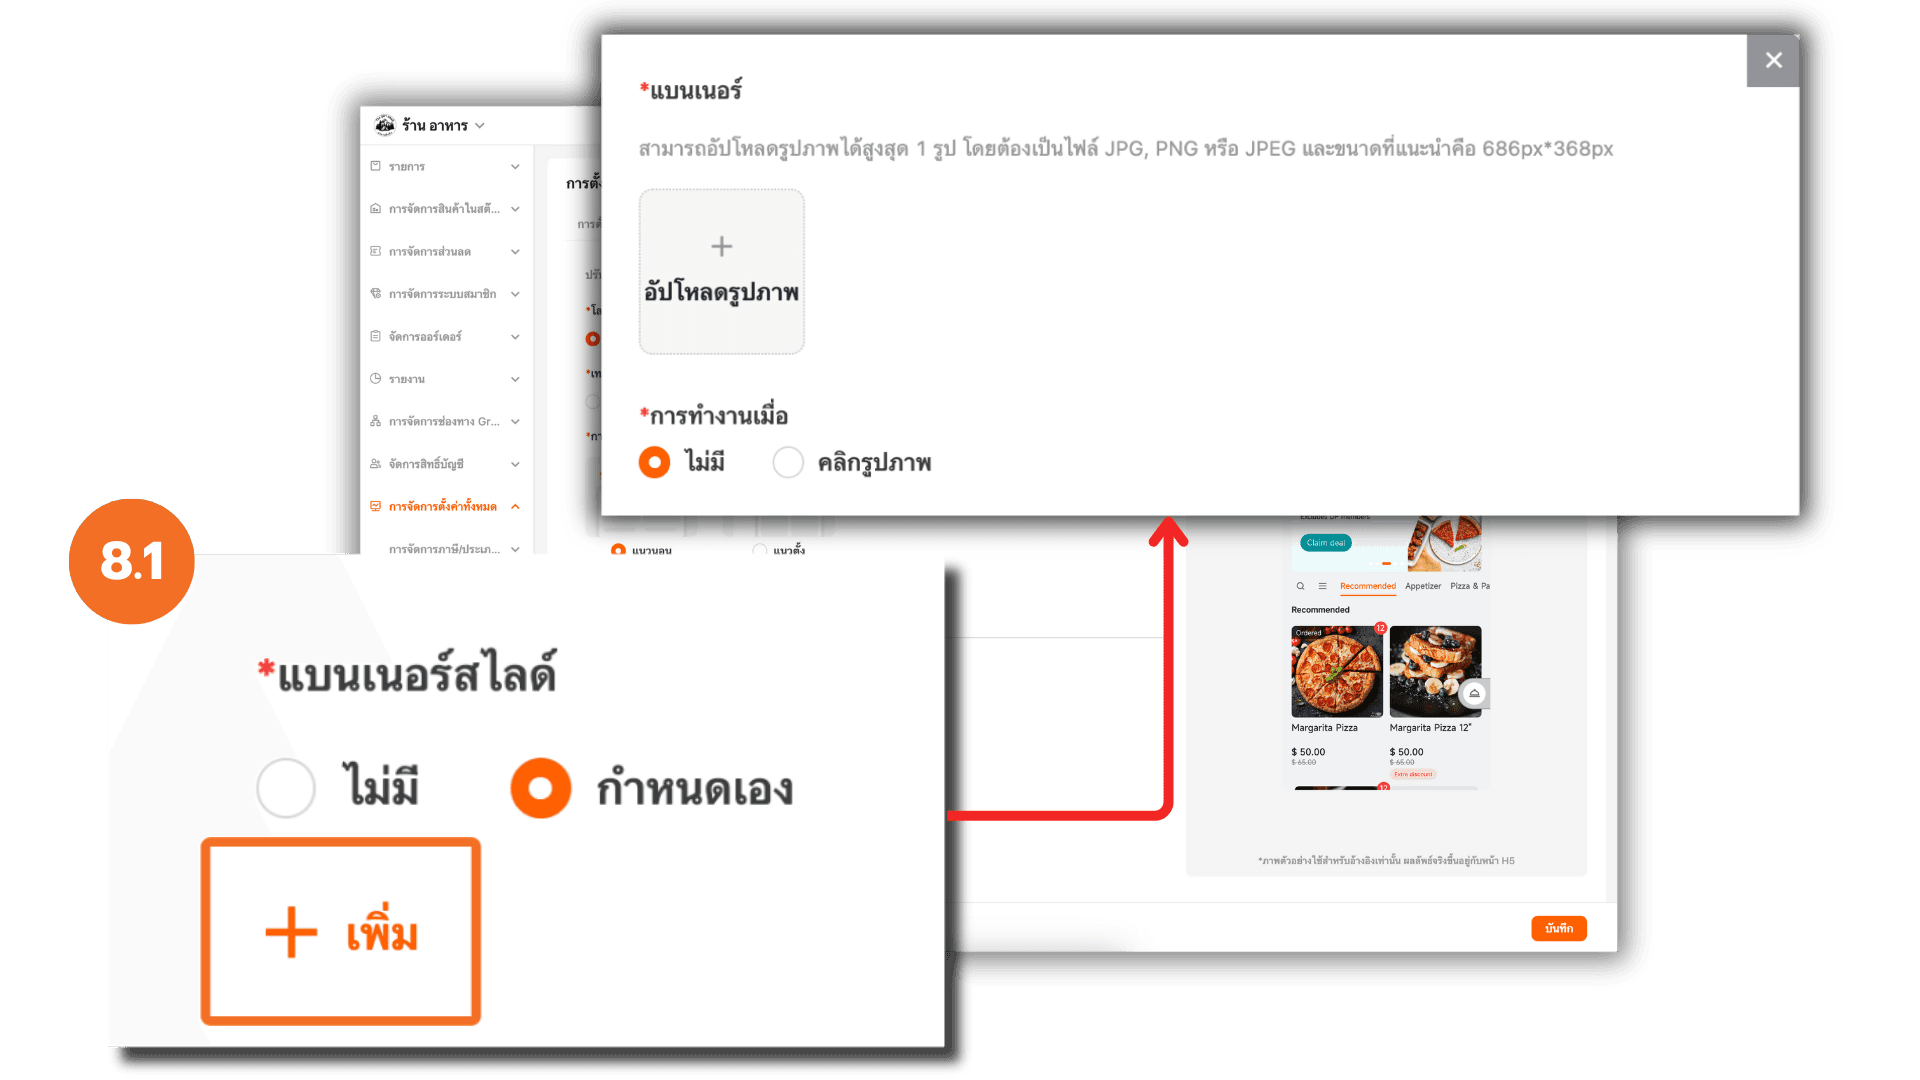
8.1 Add a Custom Slide Banner
If you select Custom, click “+ Add” and then “+ Upload” to upload your banner.
Note : Maximum 1 image per upload , Supported file types JPG, PNG, JPEG and Recommended size: 686 × 368 pixels
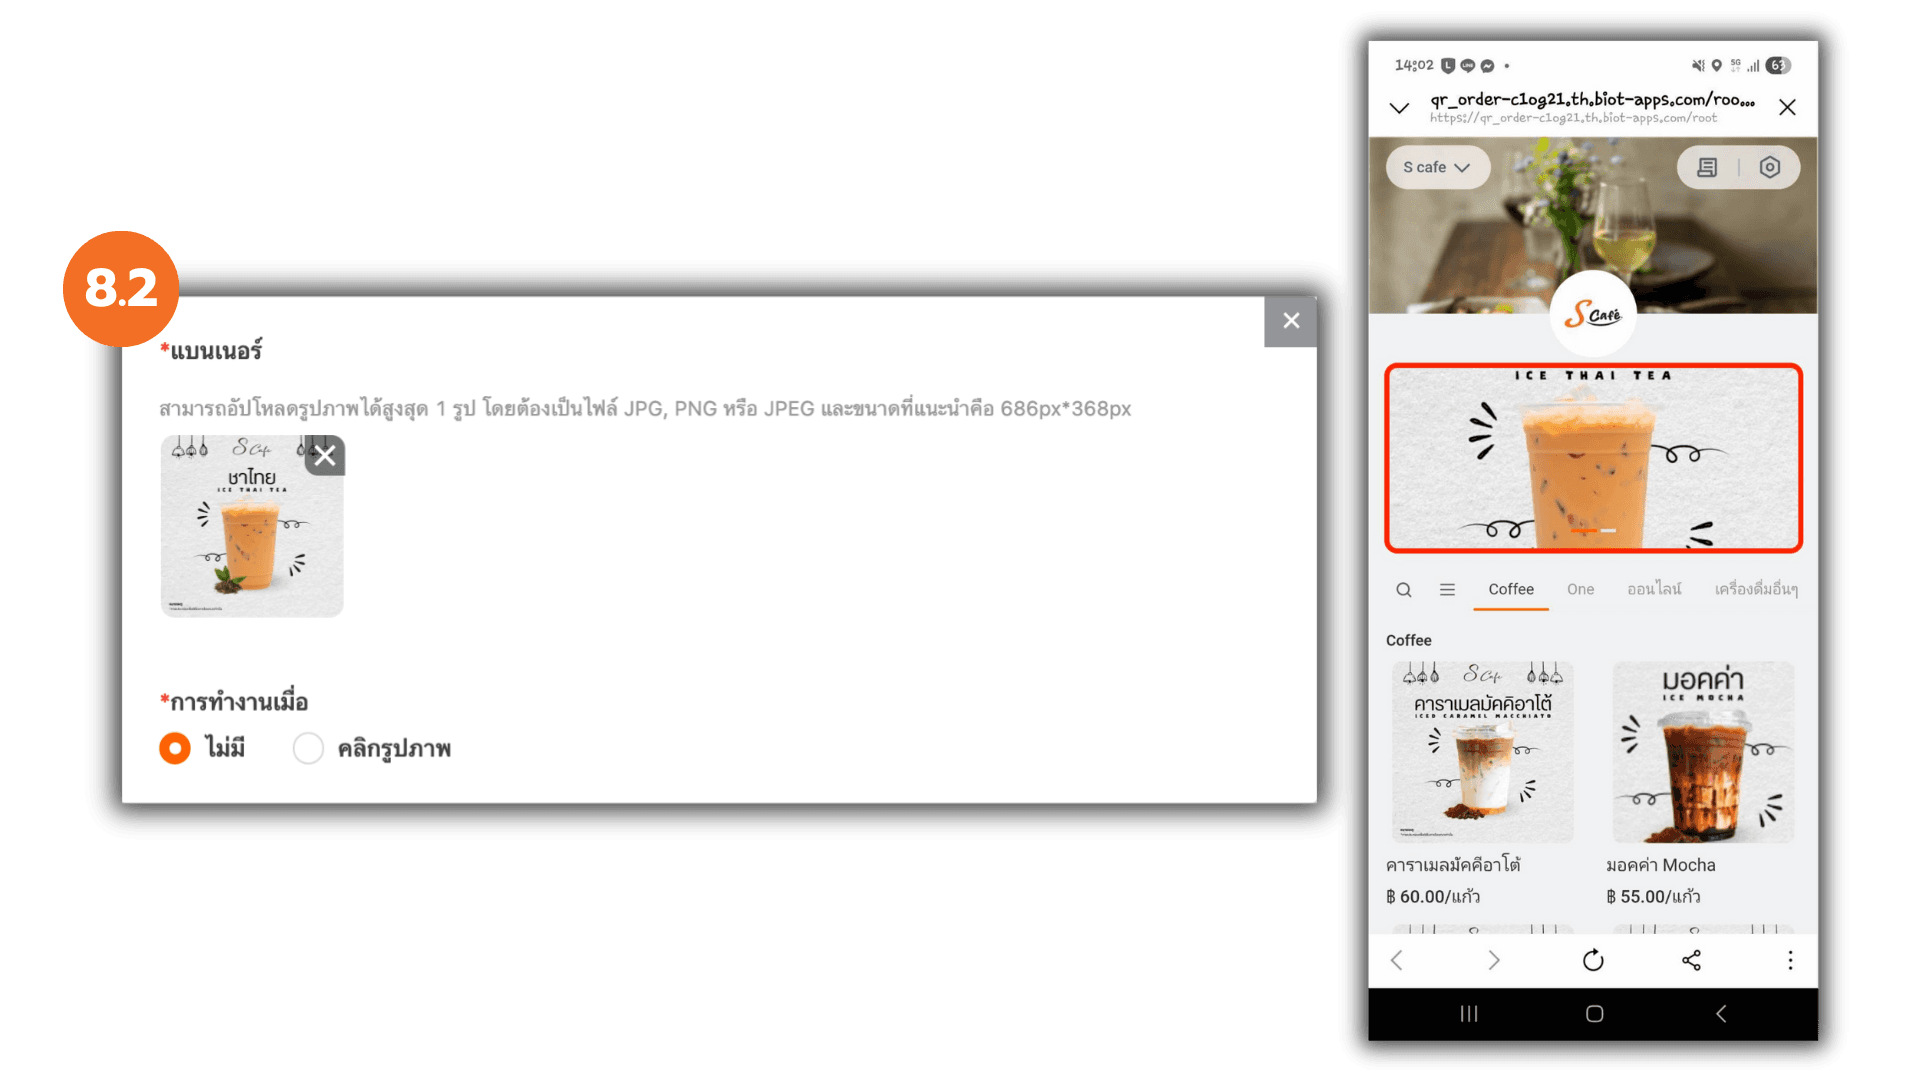
8.2 Banner Behavior: Display Only
Select “None” for banner action — banners will display in a sliding carousel format without clickable actions.
Example : Mobile view after scanning the QR Code.
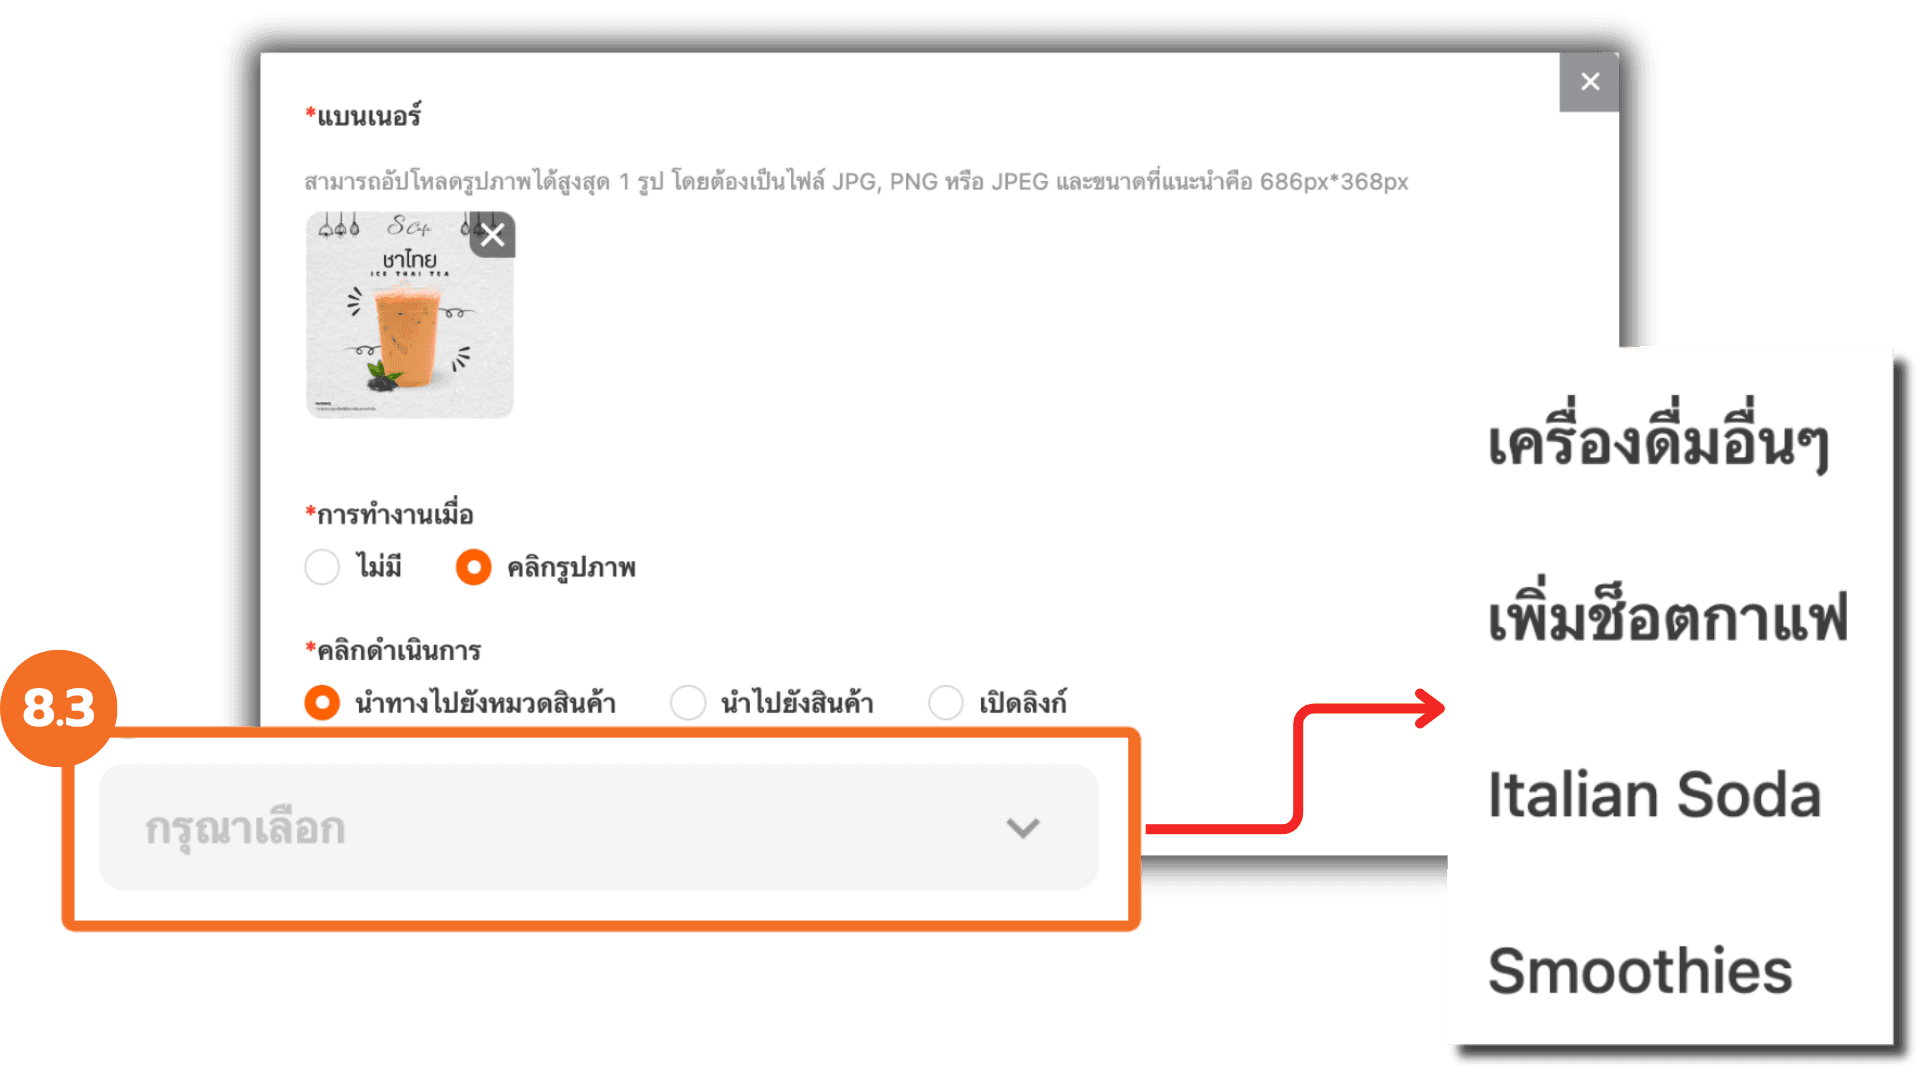
8.3 Banner Behavior : Link to Category
Select “Click Image → Go to a category”. Choose the desired menu category.
When customers click the image, they will be directed to the selected category page.
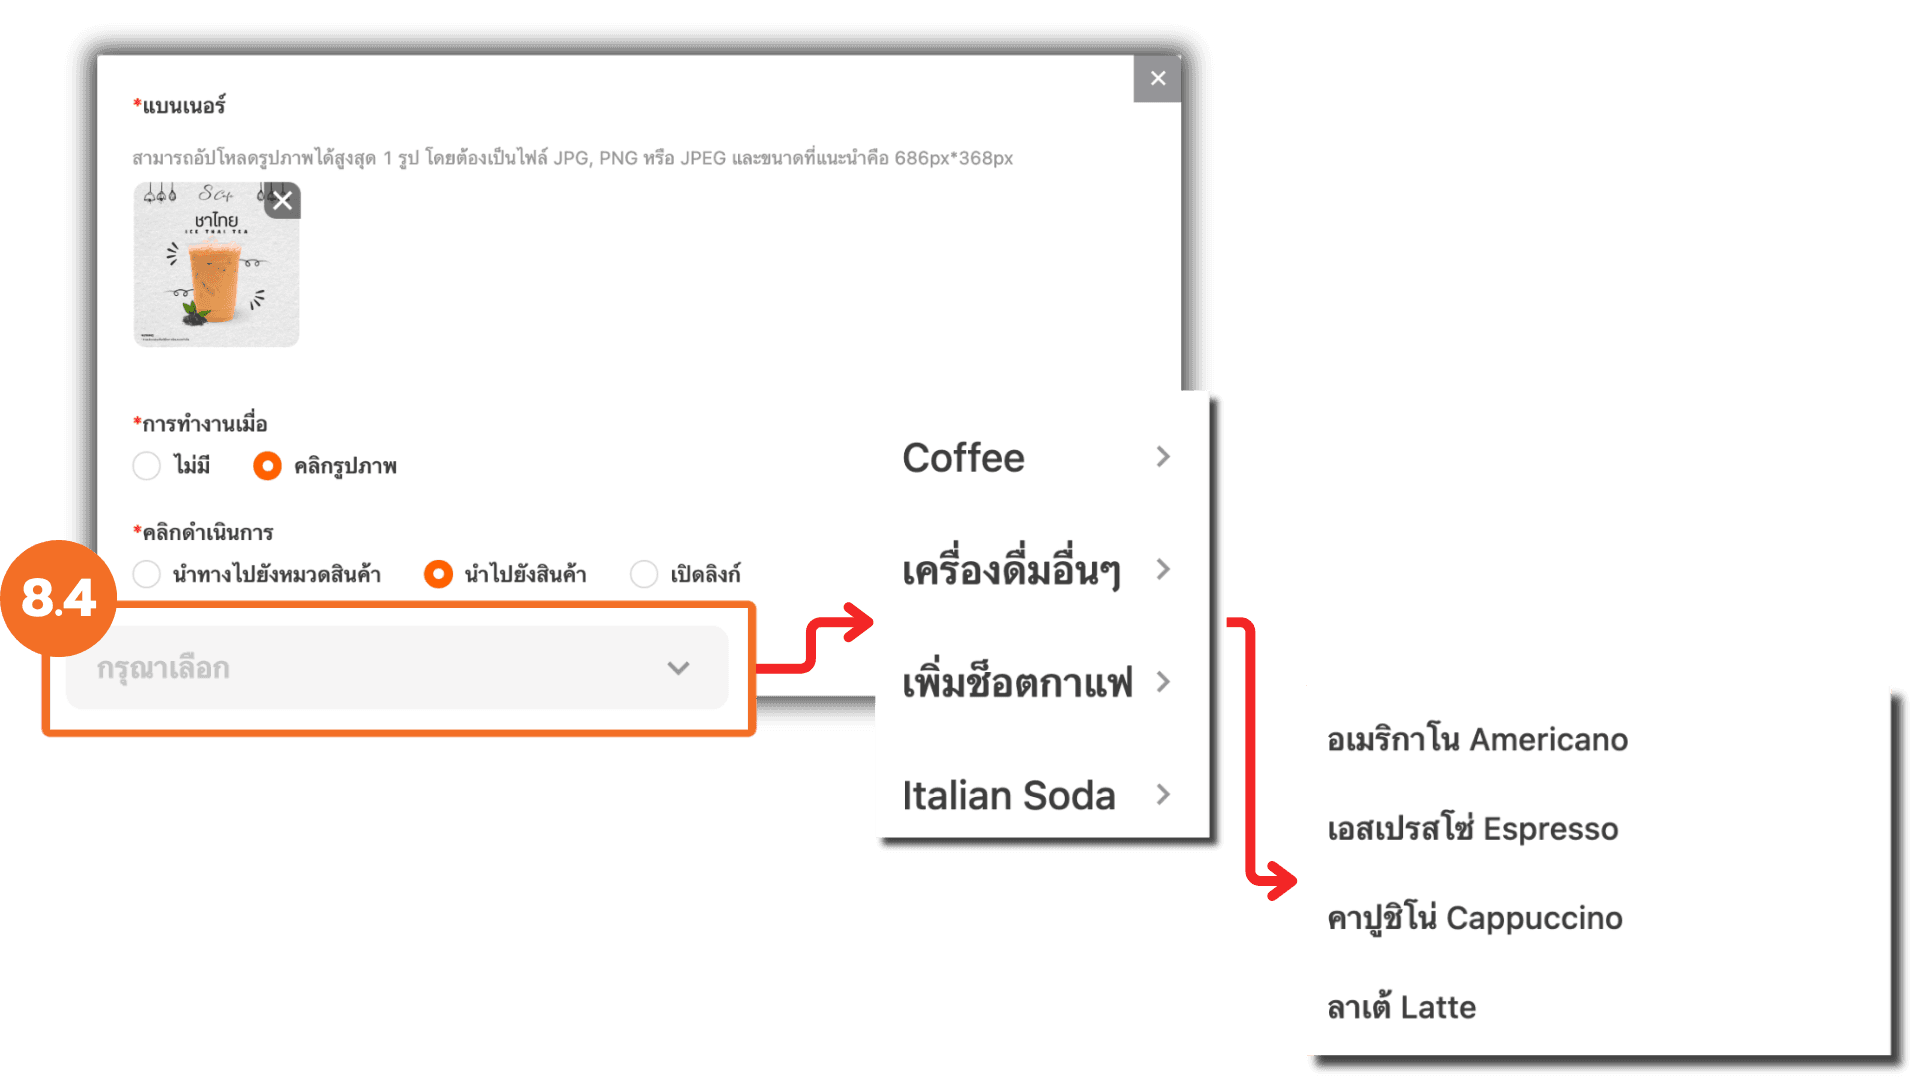
8.4 Banner Behavior : Link to Product
Select “Click Image → Go to item”. Choose the category, then select the specific product.
When clicked, the image will open the selected product detail page.
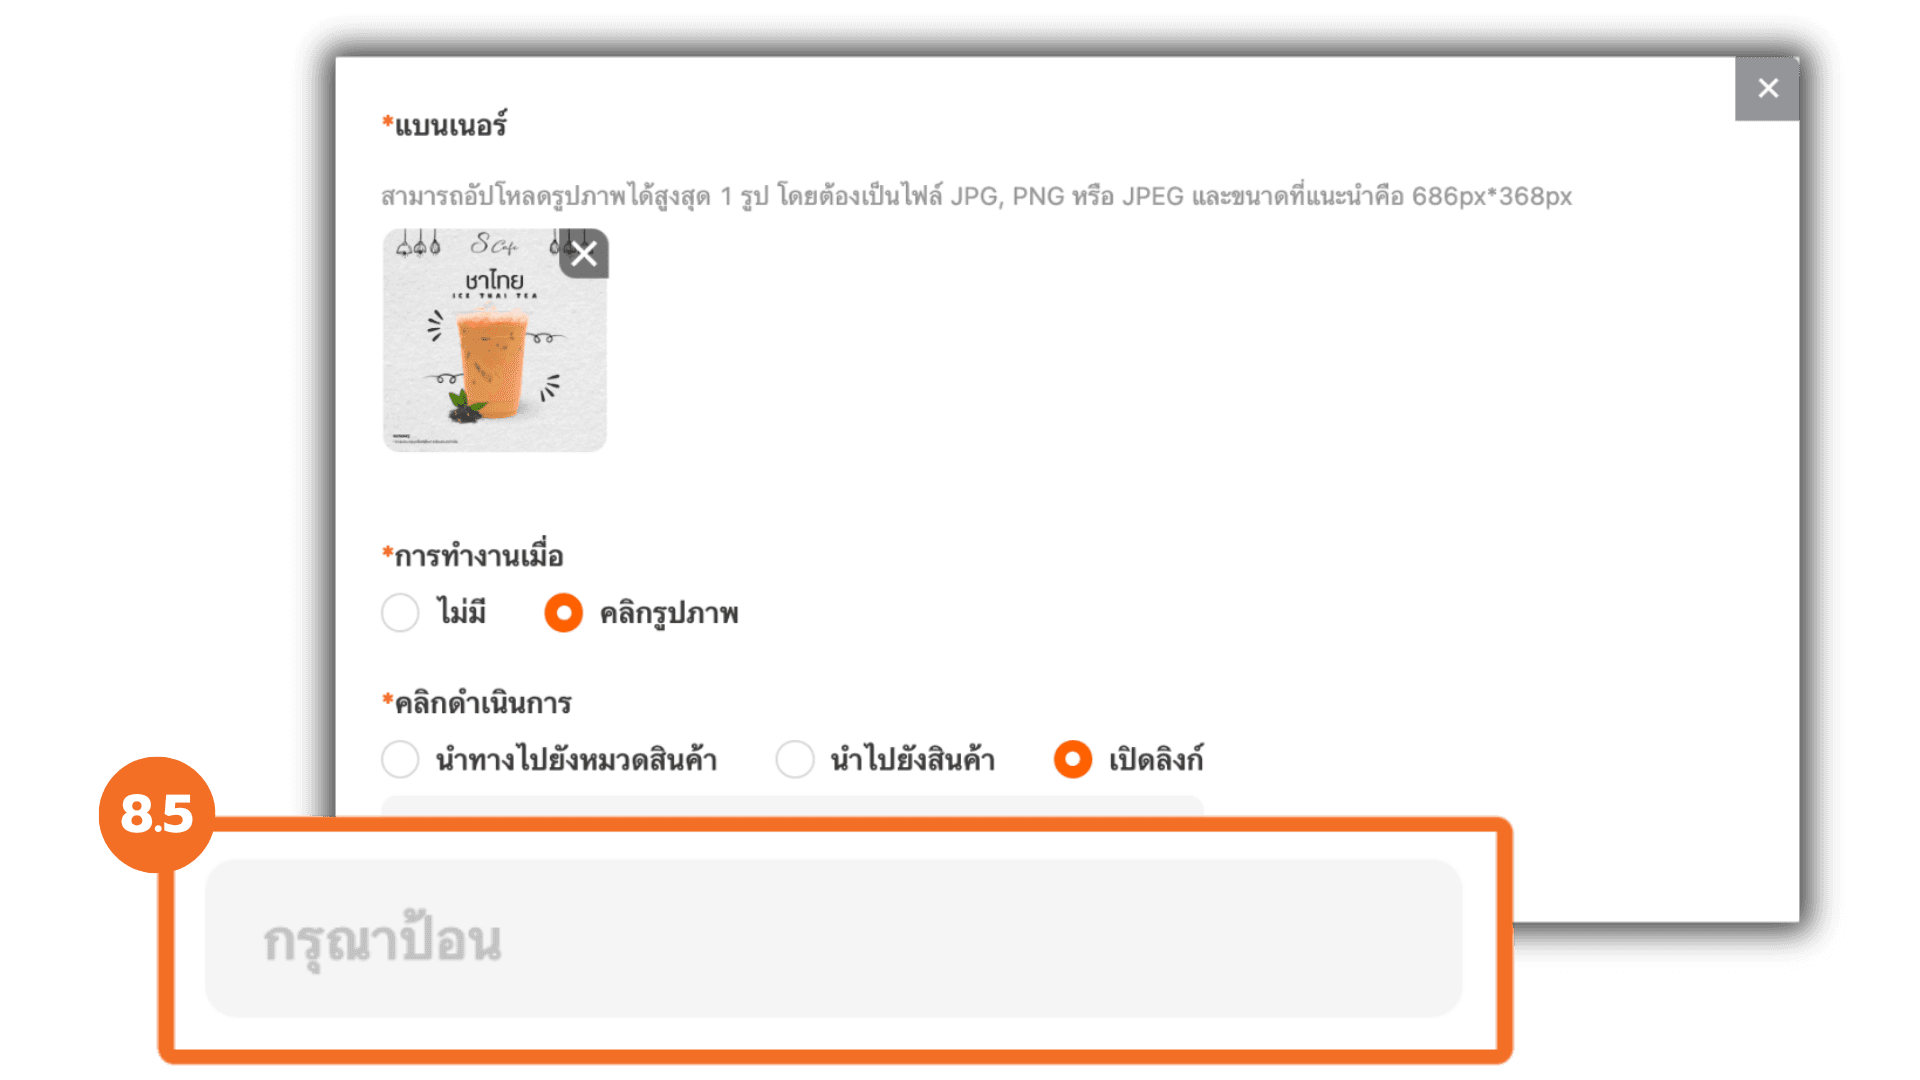
8.5 Banner Behavior : Open External Link
Select “Click Image → Open Link” and enter the desired URL.
When clicked, the image will open the assigned external webpage.
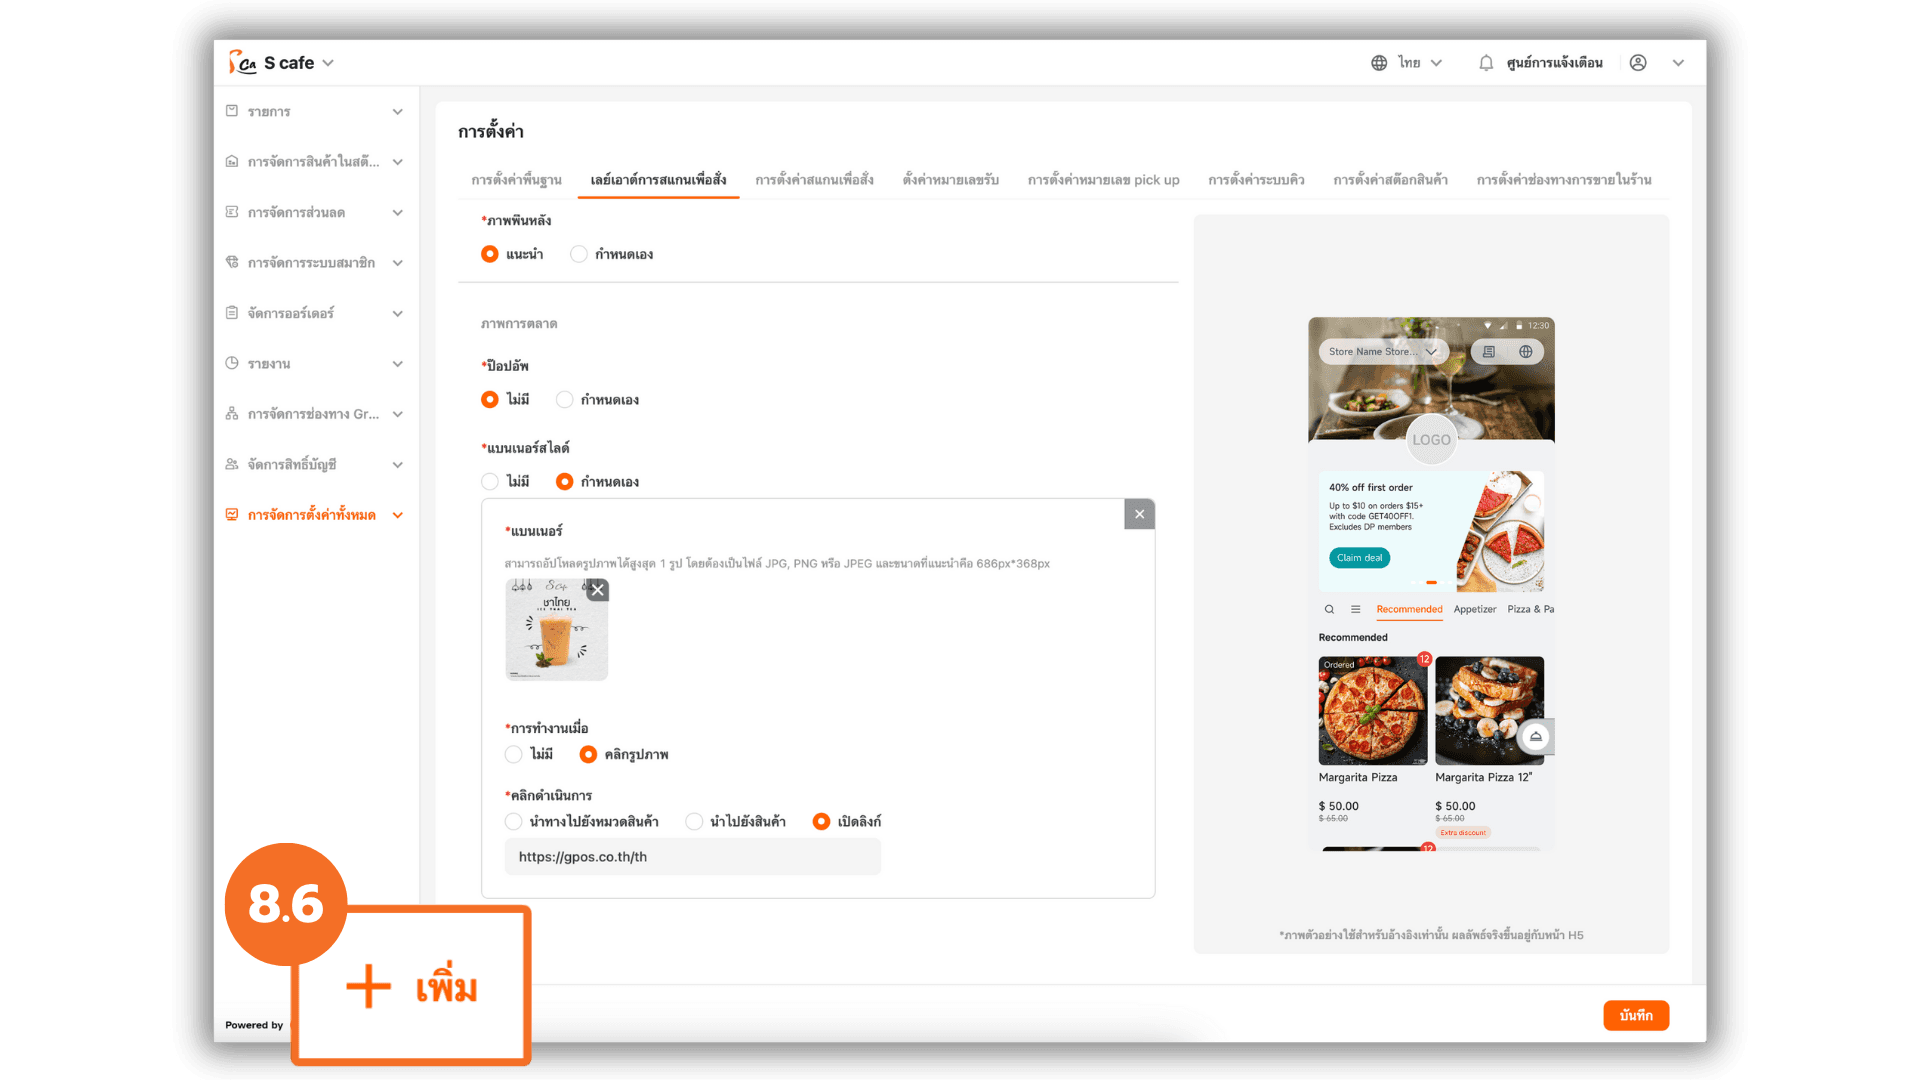
8.6 Add More Slide Banners
Click “+ Add” again to upload multiple banners. Each image will appear as part of a continuous slide on the customer’s main screen, and each banner can have a separate action.
Note : You can add up to 5 slide banners (1 image per upload).
9. Save Settings
After completing all configurations, click “Save” to confirm and apply all settings.