Scan To Order Settings
2025-10-09 12:28
This manual is designed for restaurants that want to provide customers with a convenient and secure way to view menus, place orders, and make online payments, helping to enhance service efficiency and reduce staff workload in a professional manner.
1. Log in to the Back Office
Go to login.gpos.co.th , enter your email and password, and click Log In.
Once logged in, select the menu “Store Management” .
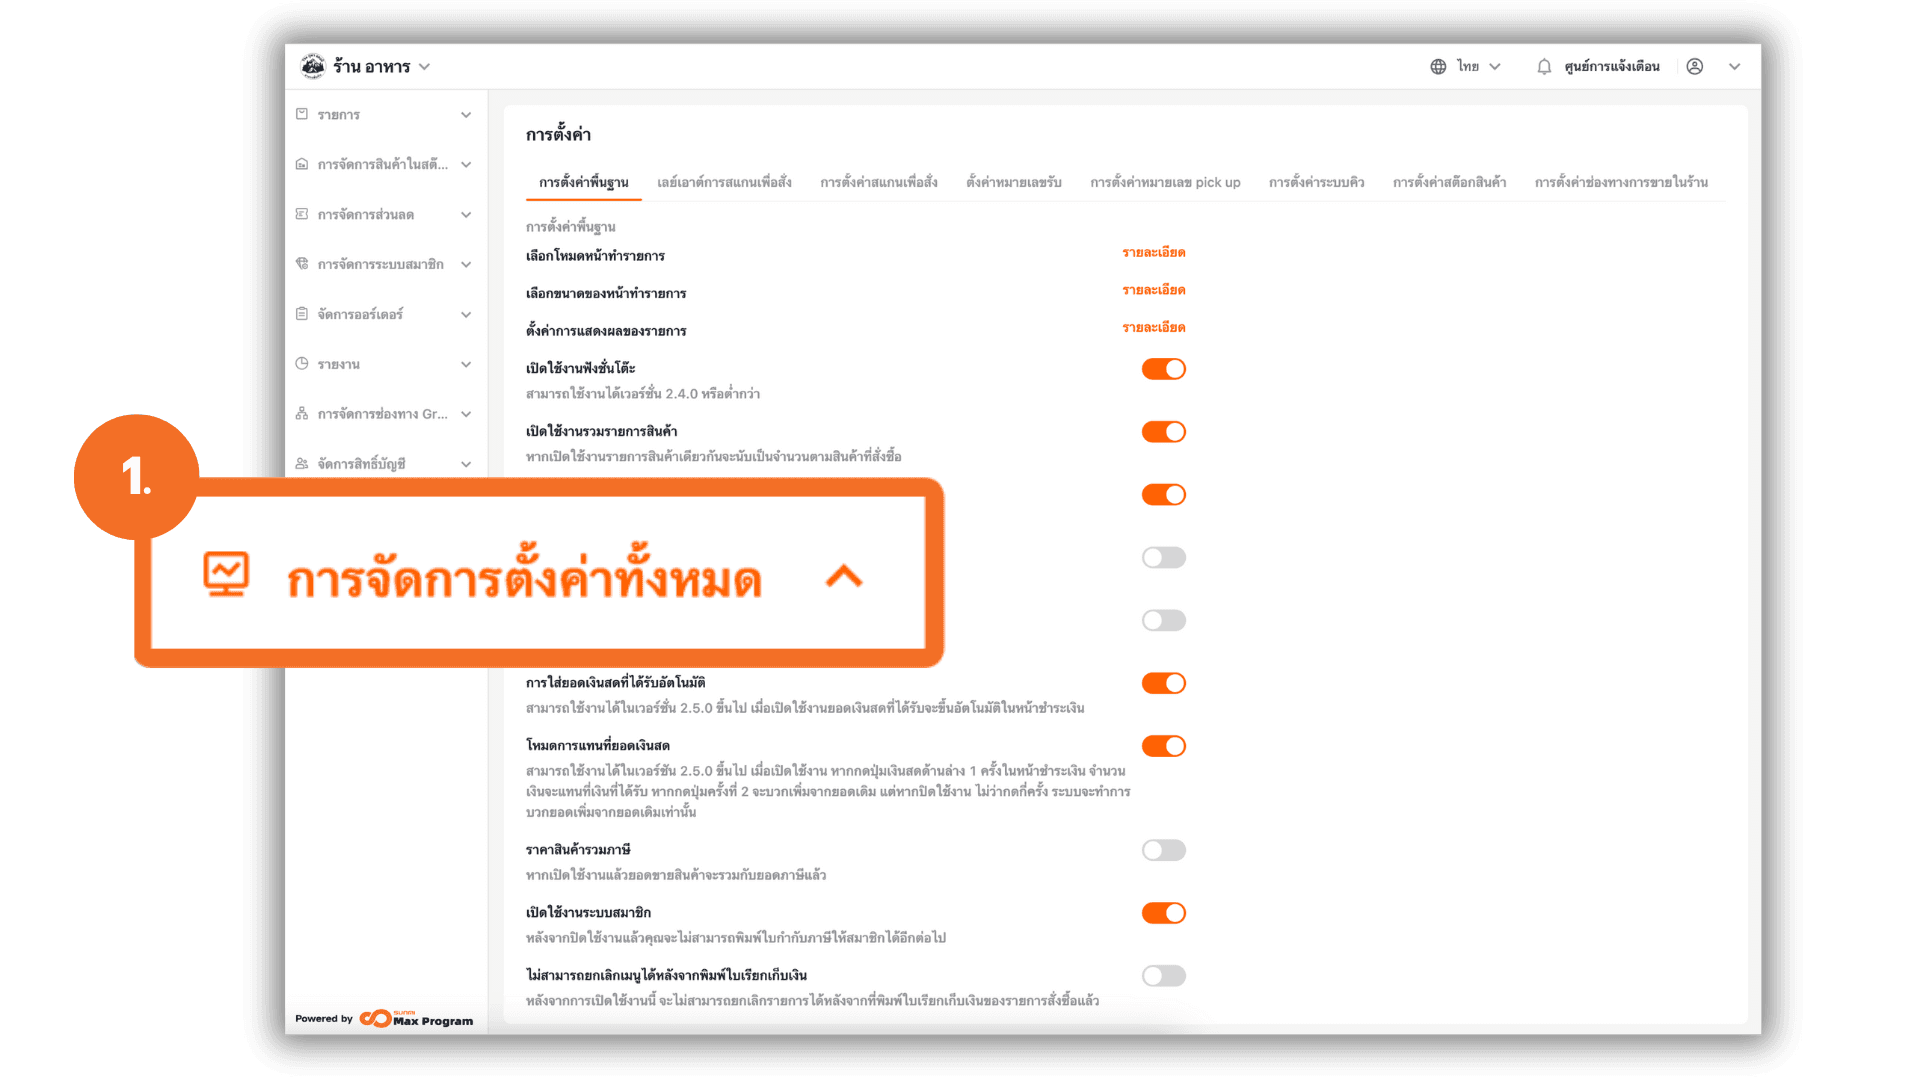
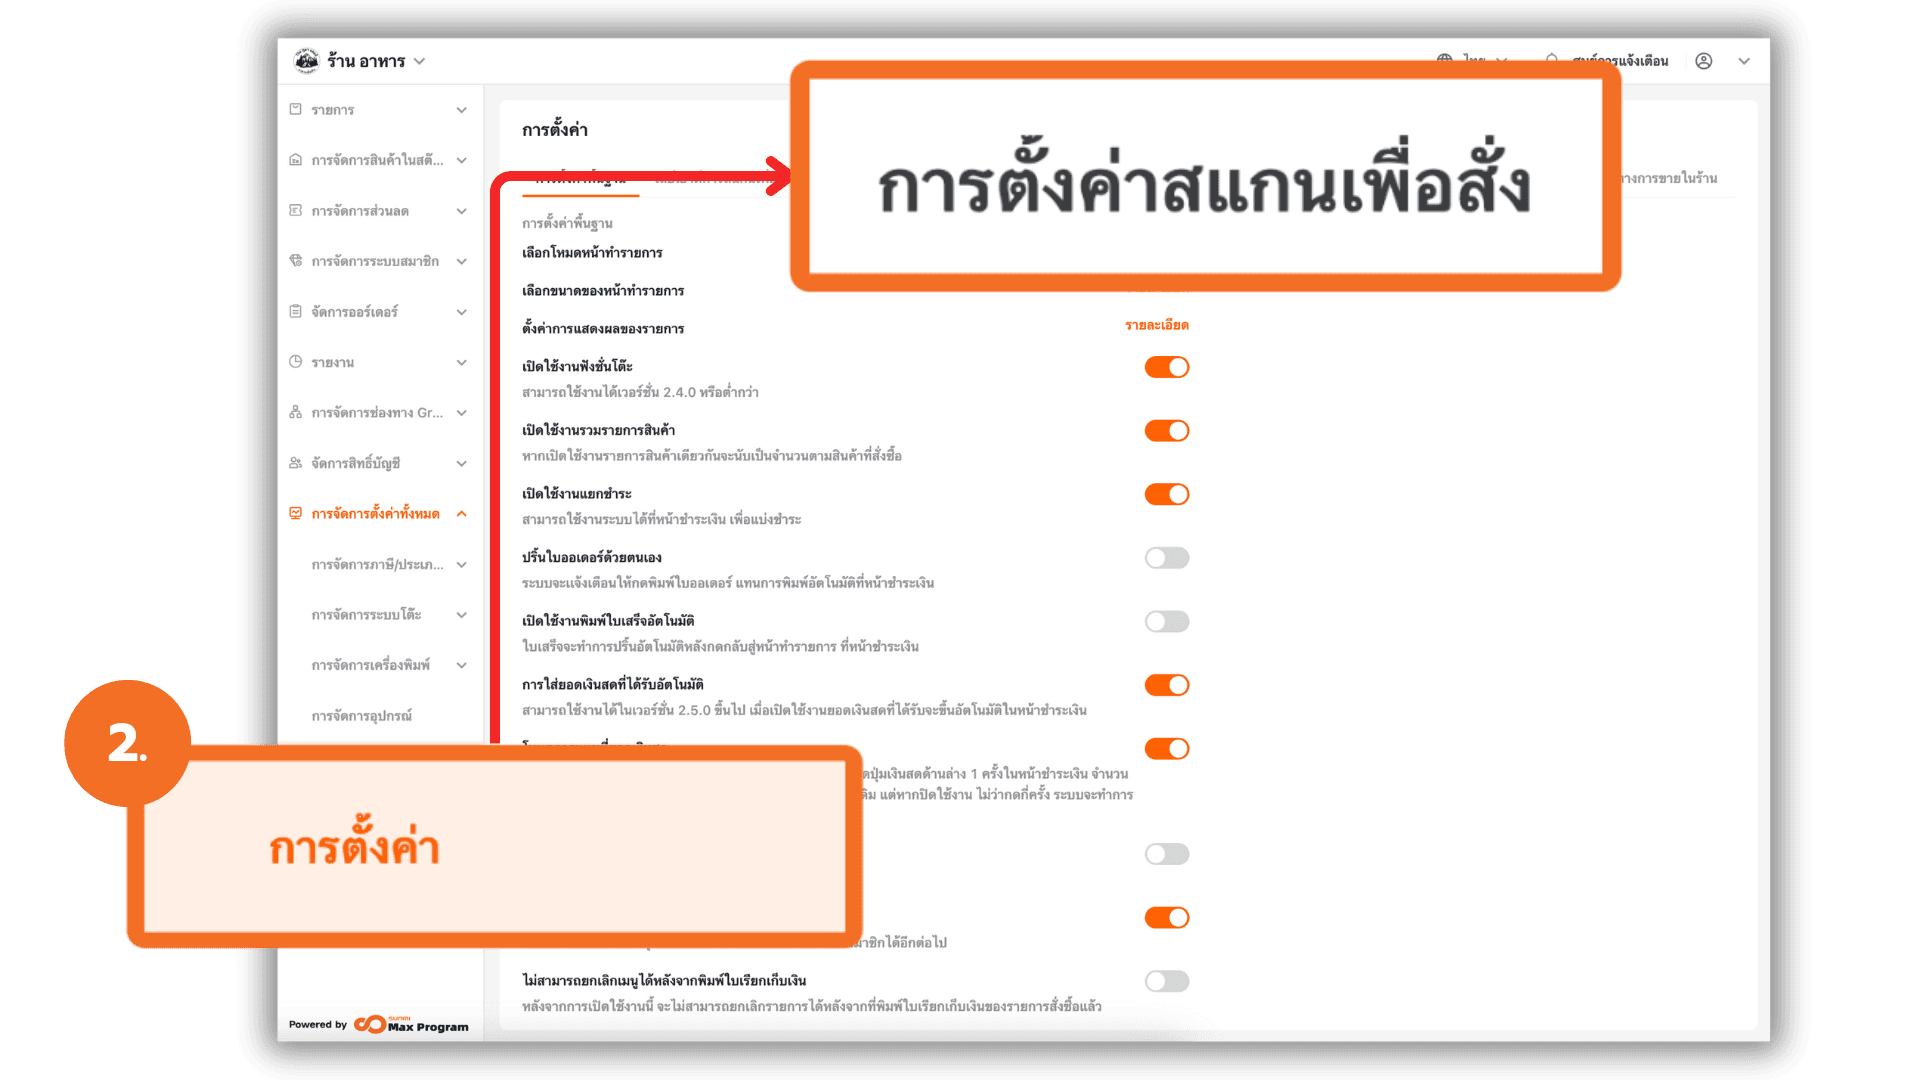
2. Access the Settings Menu
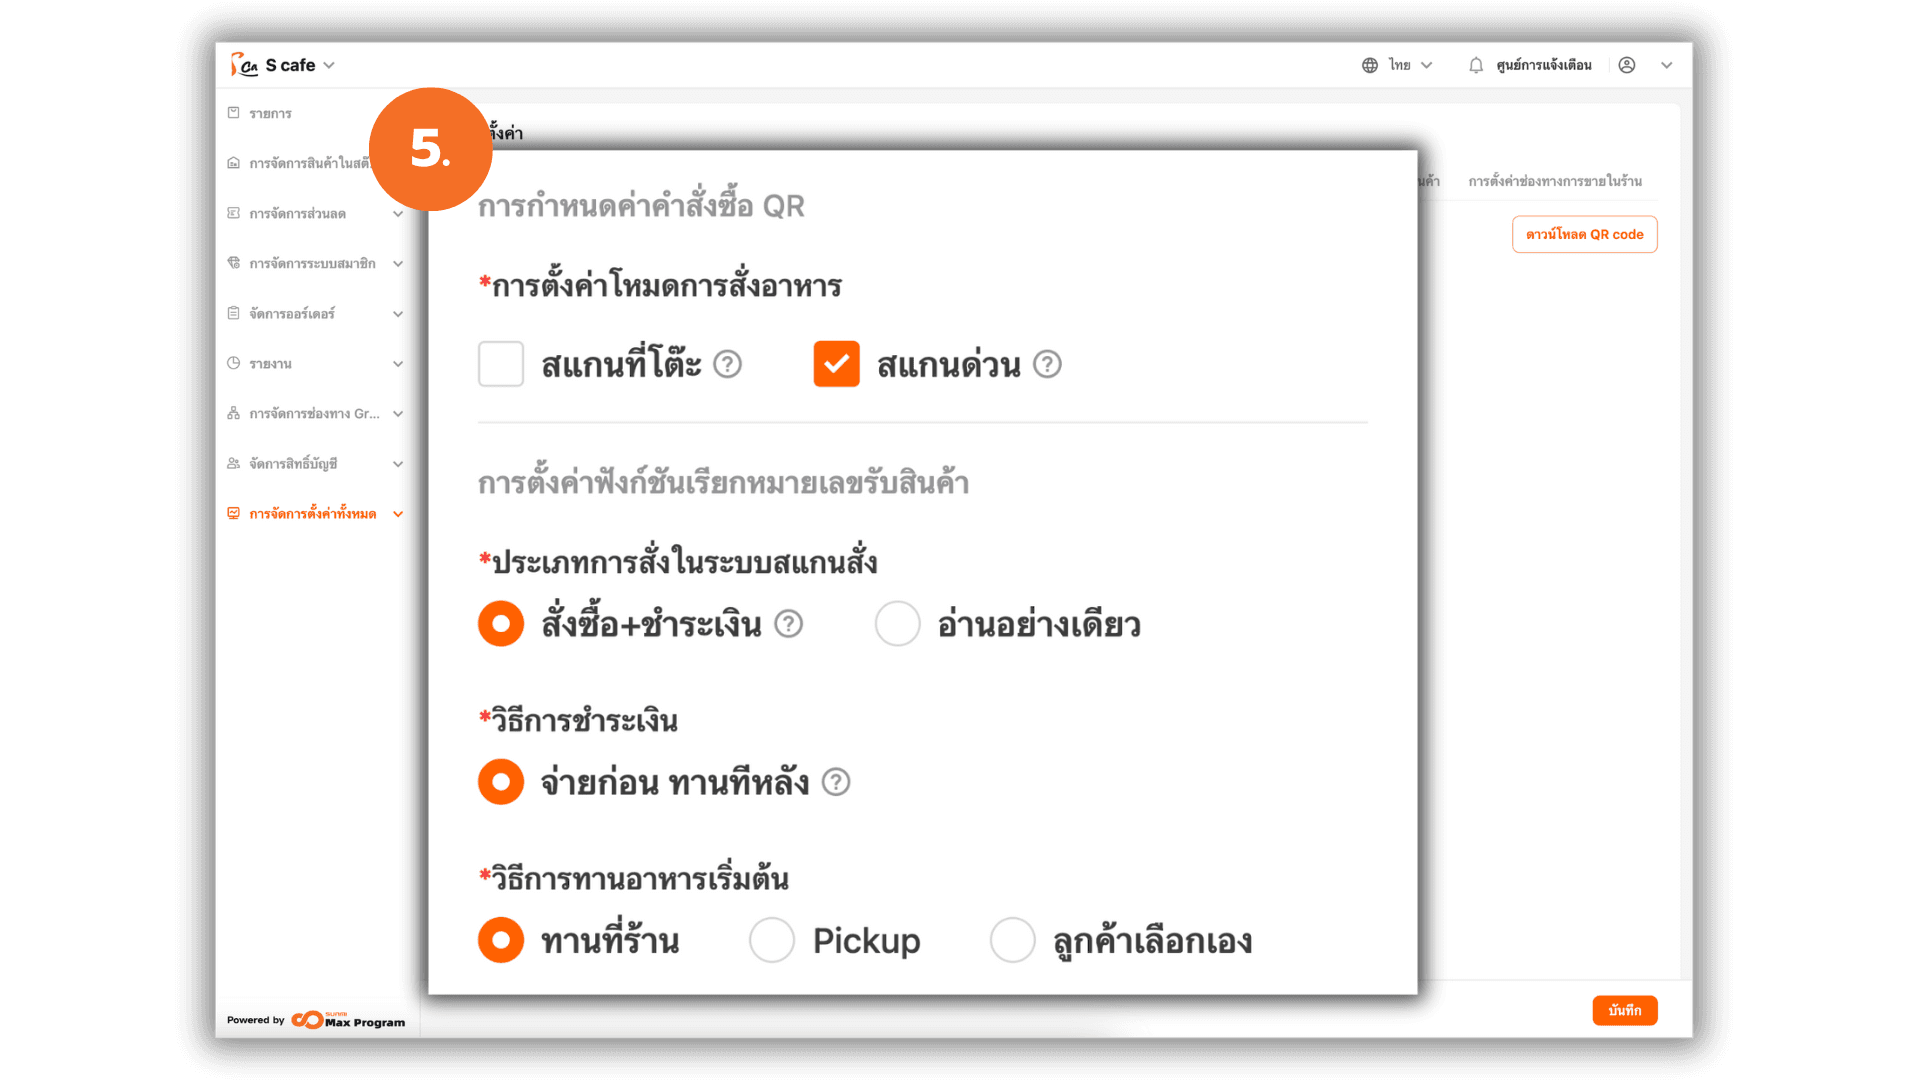
Go to the “Store Settings” menu and select the tab “Scan to Order Settings” at the top.
3. Configure the “Ordering Mode”
Choose the mode that fits your restaurant’s service style
- Table Scan : Use the QR Codes assigned to each table in the system.
- Quick Scan : No table assigned — customers can scan the QR and order immediately.
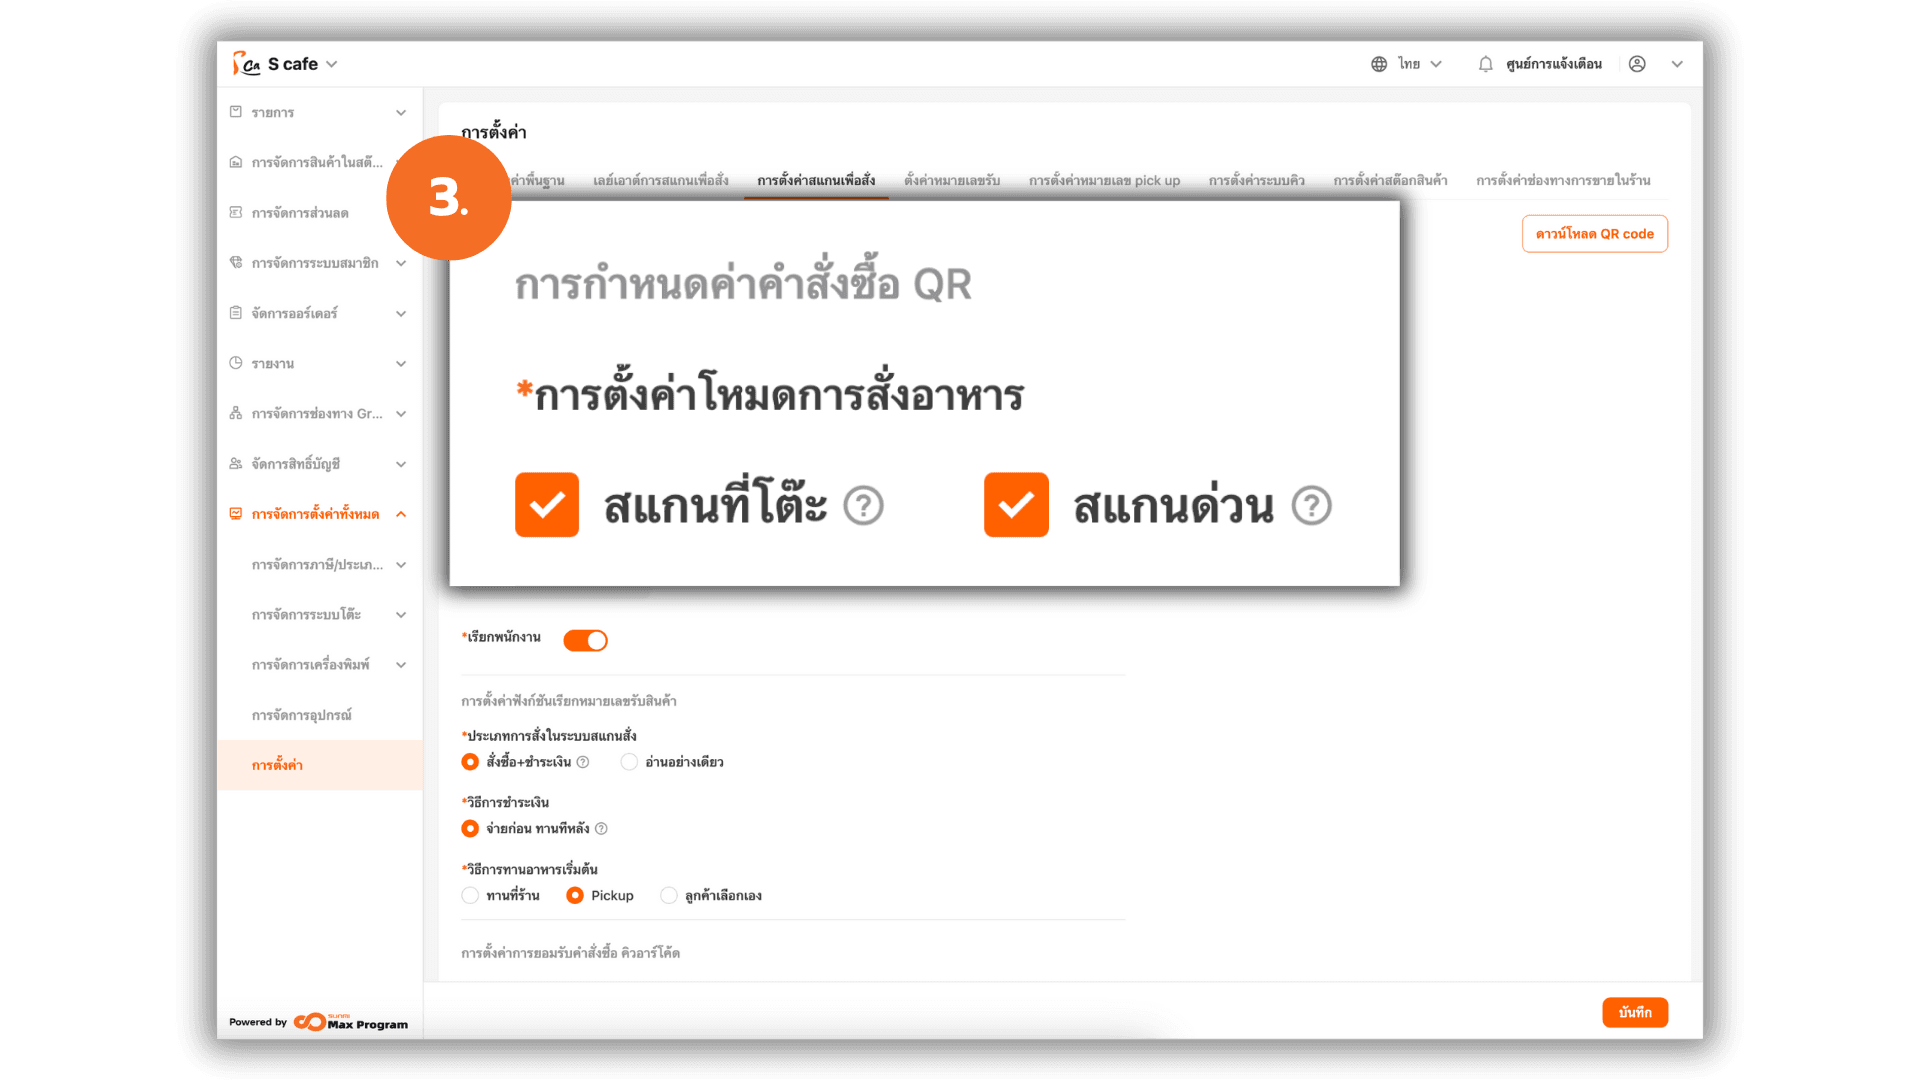
4. Settings for “Table Scan”
The system will display “Table ordering function settings”.
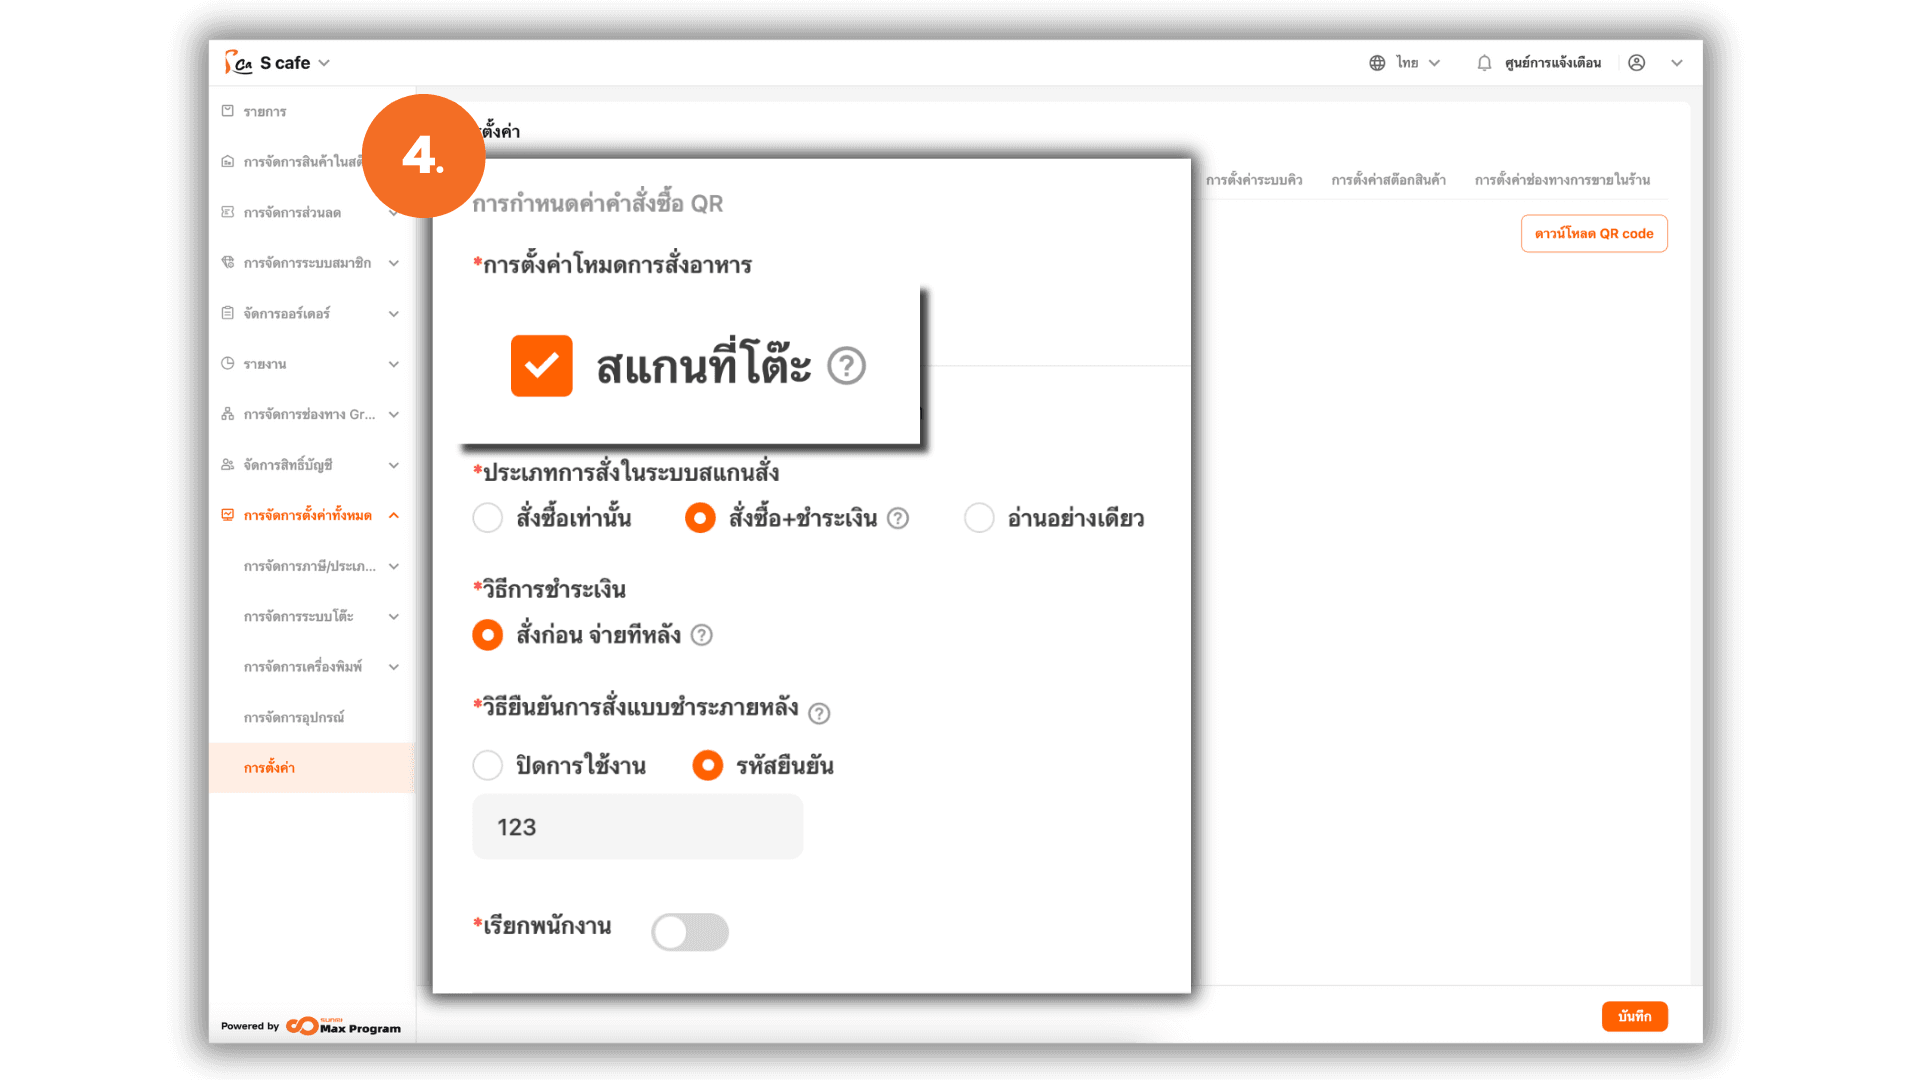
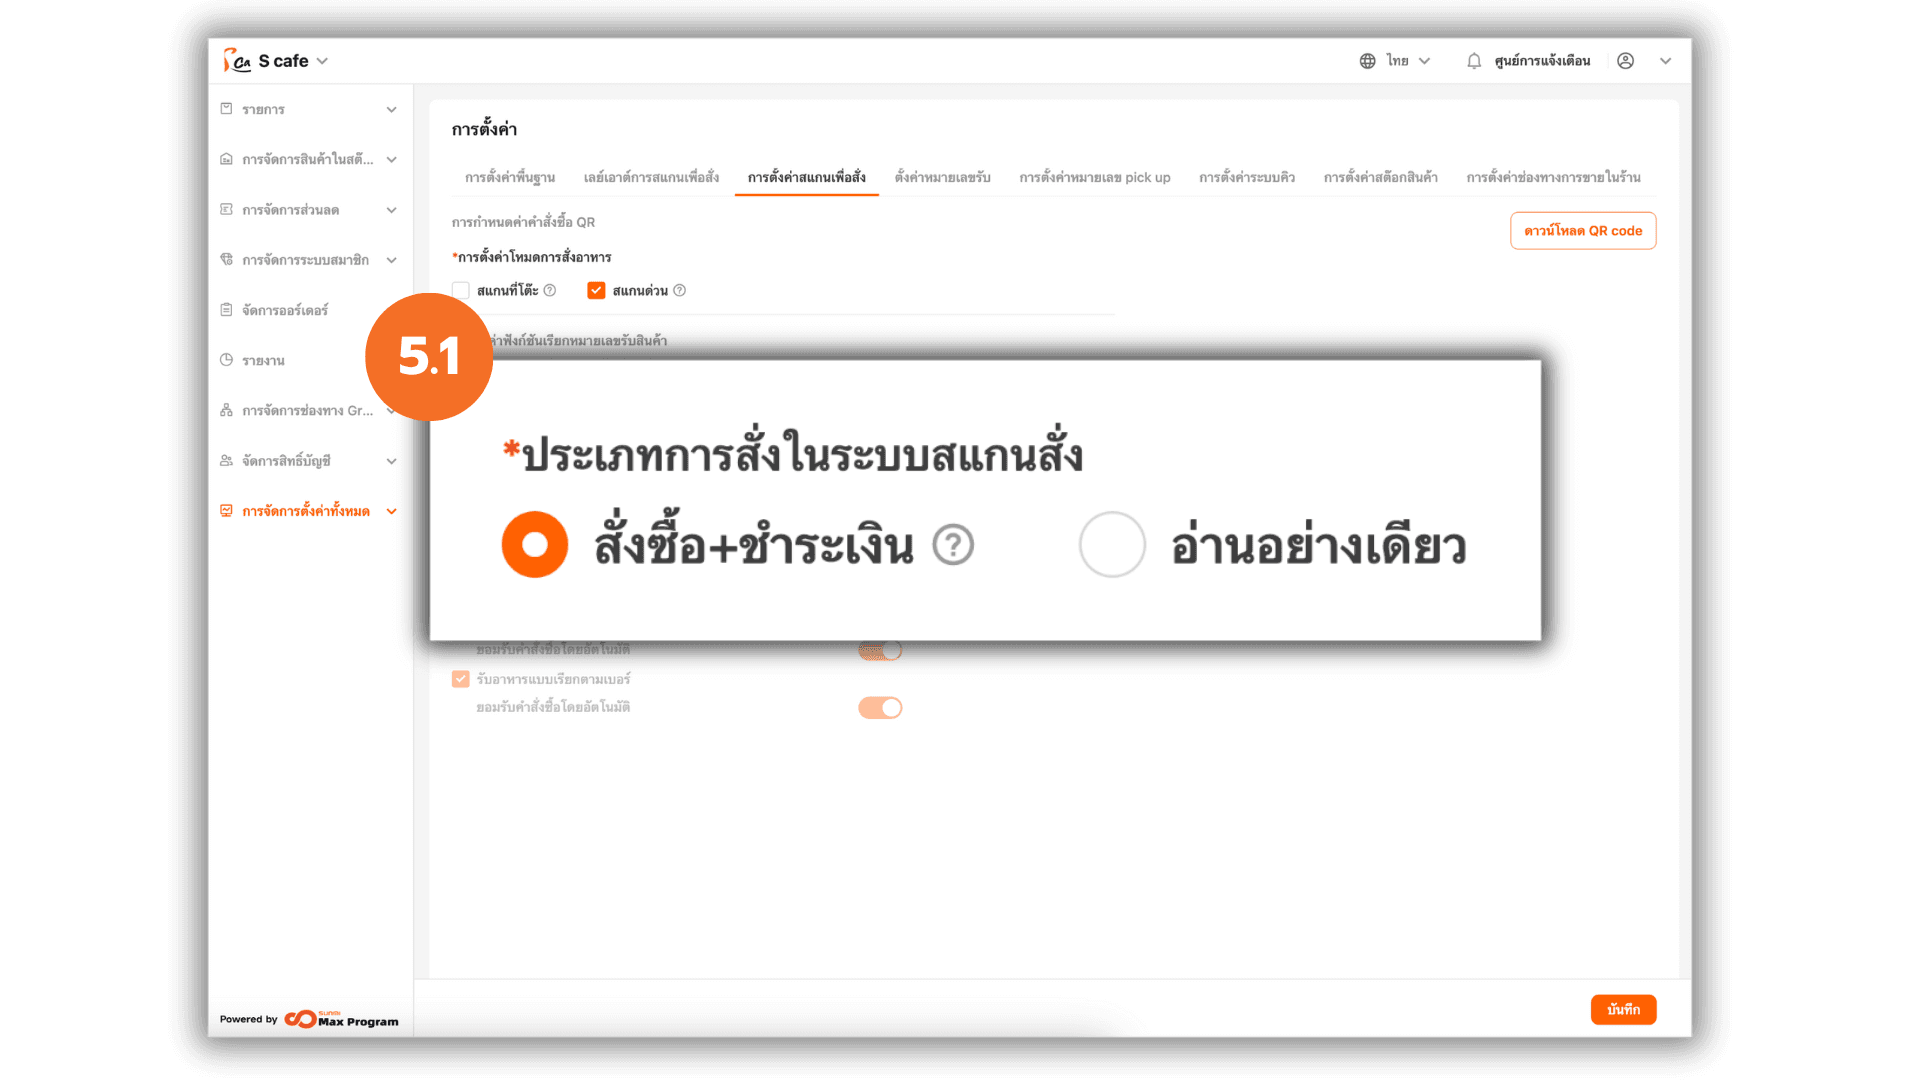
4.1 Order Type for Scan at Table
Choose the preferred mode of operation
- Order Only : Customers scan the QR to view the menu and place orders only; payment is made later to staff.
- Order + Pay : Customers scan, place orders, and pay online immediately via QR.
- View Only : Customers scan to view the menu only — no ordering or payment available.
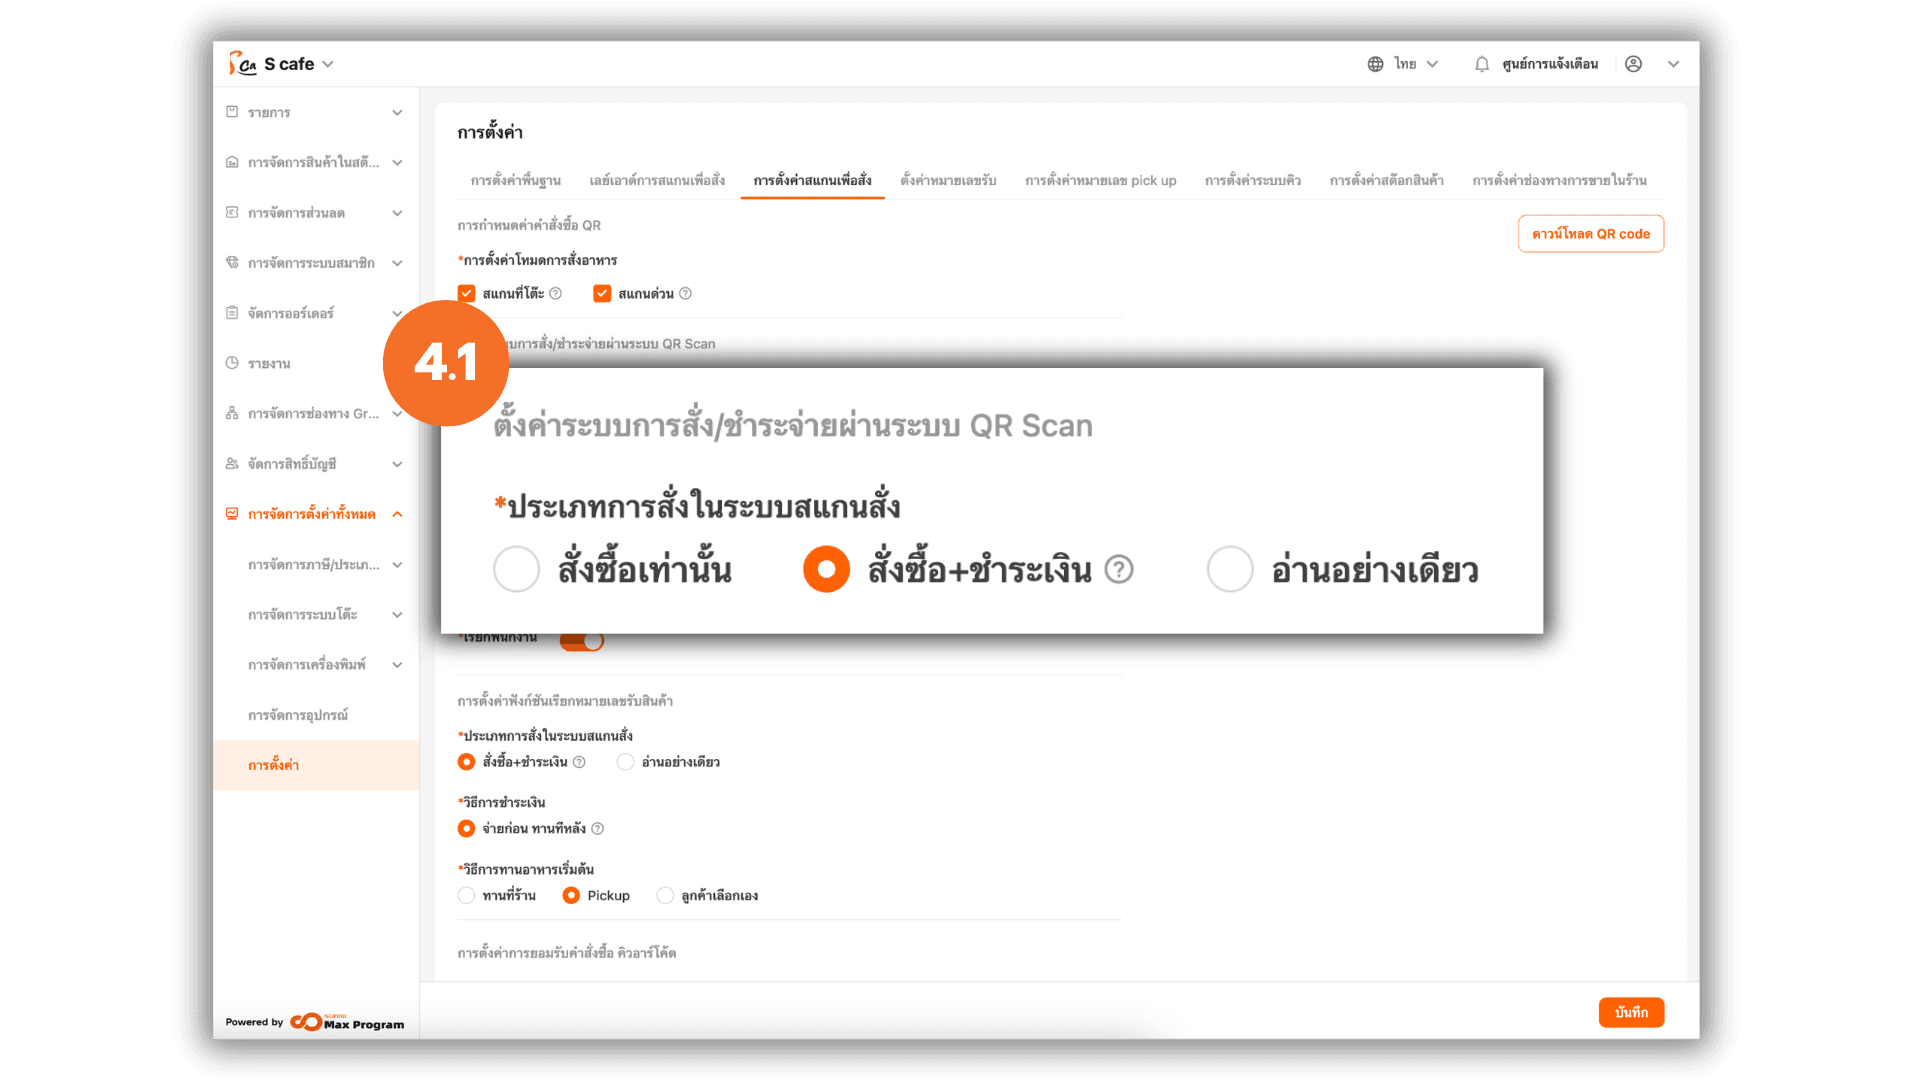
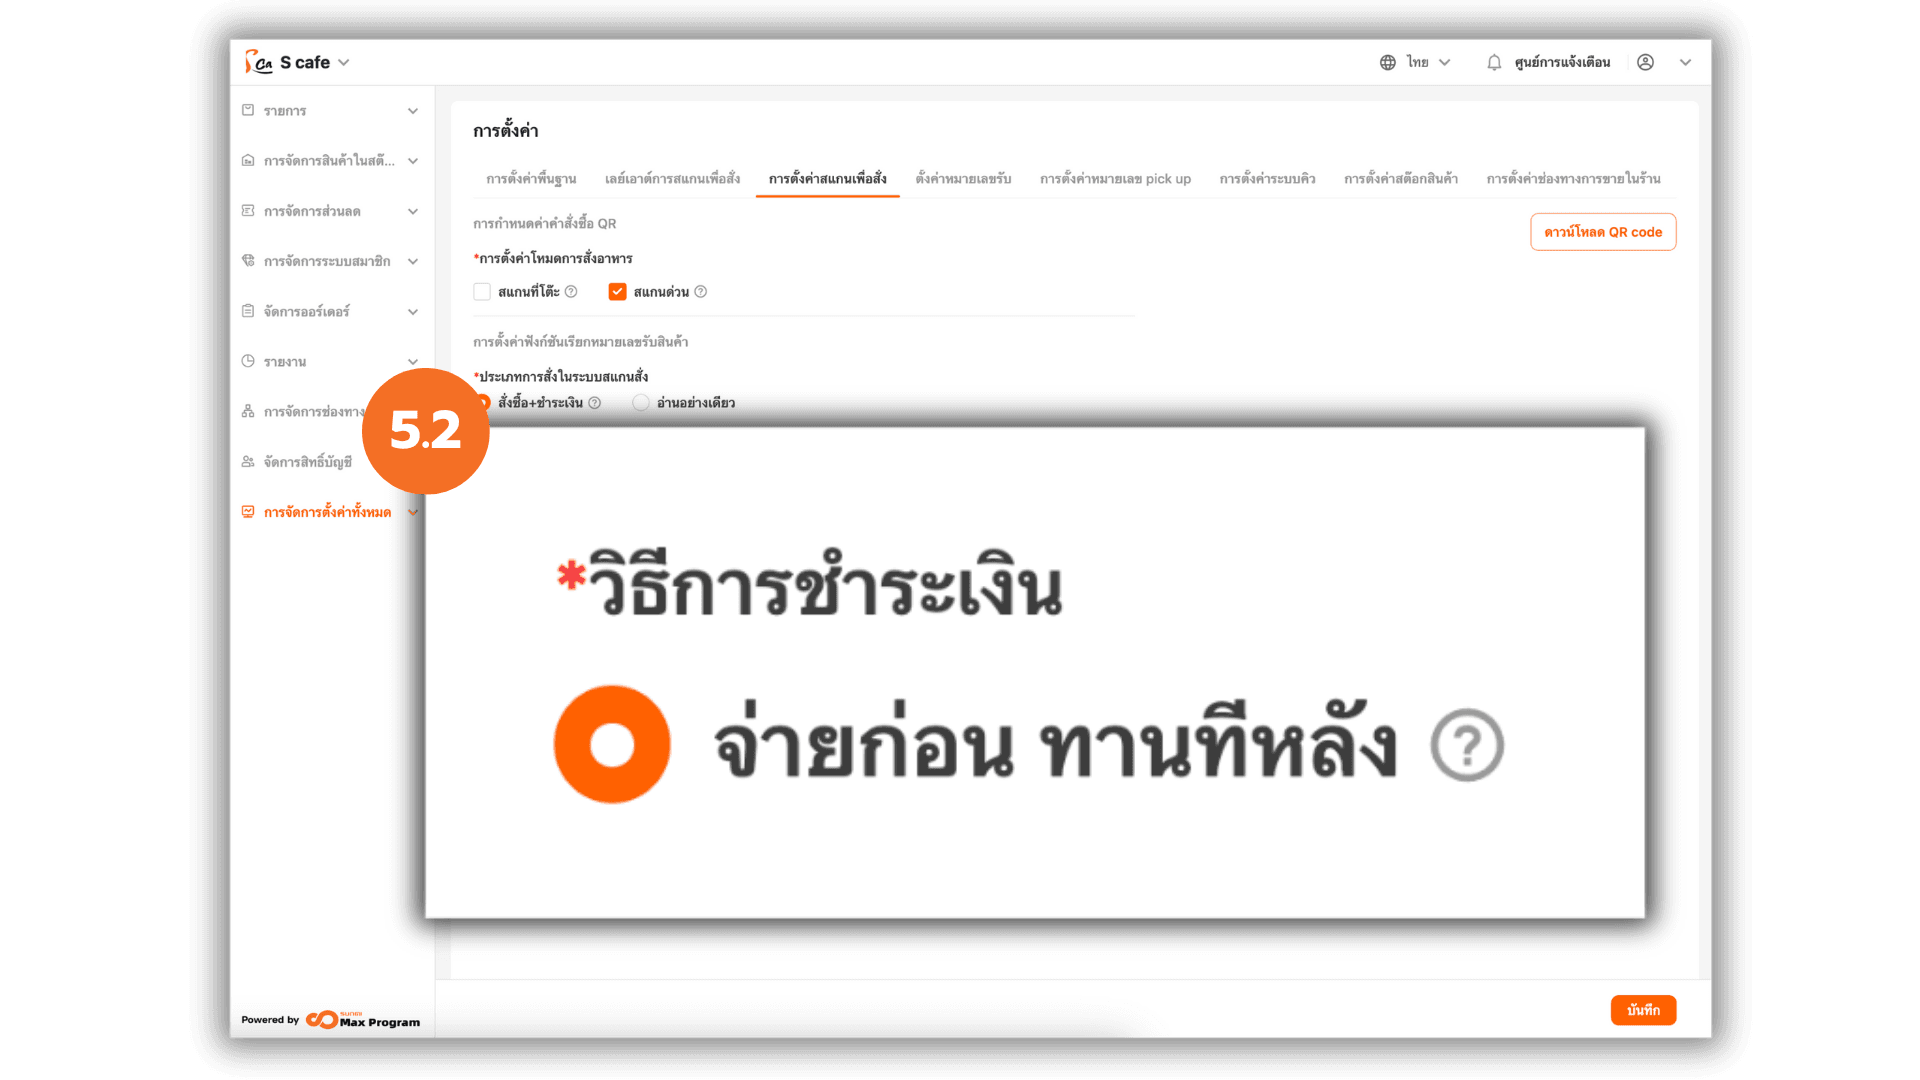
4.2 Payment Method Settings
This setting is used with the “Order + Pay” mode.
When a customer places an order, the system generates a QR Code for online payment.
Note : The KBank QR API must be activated before using this feature.
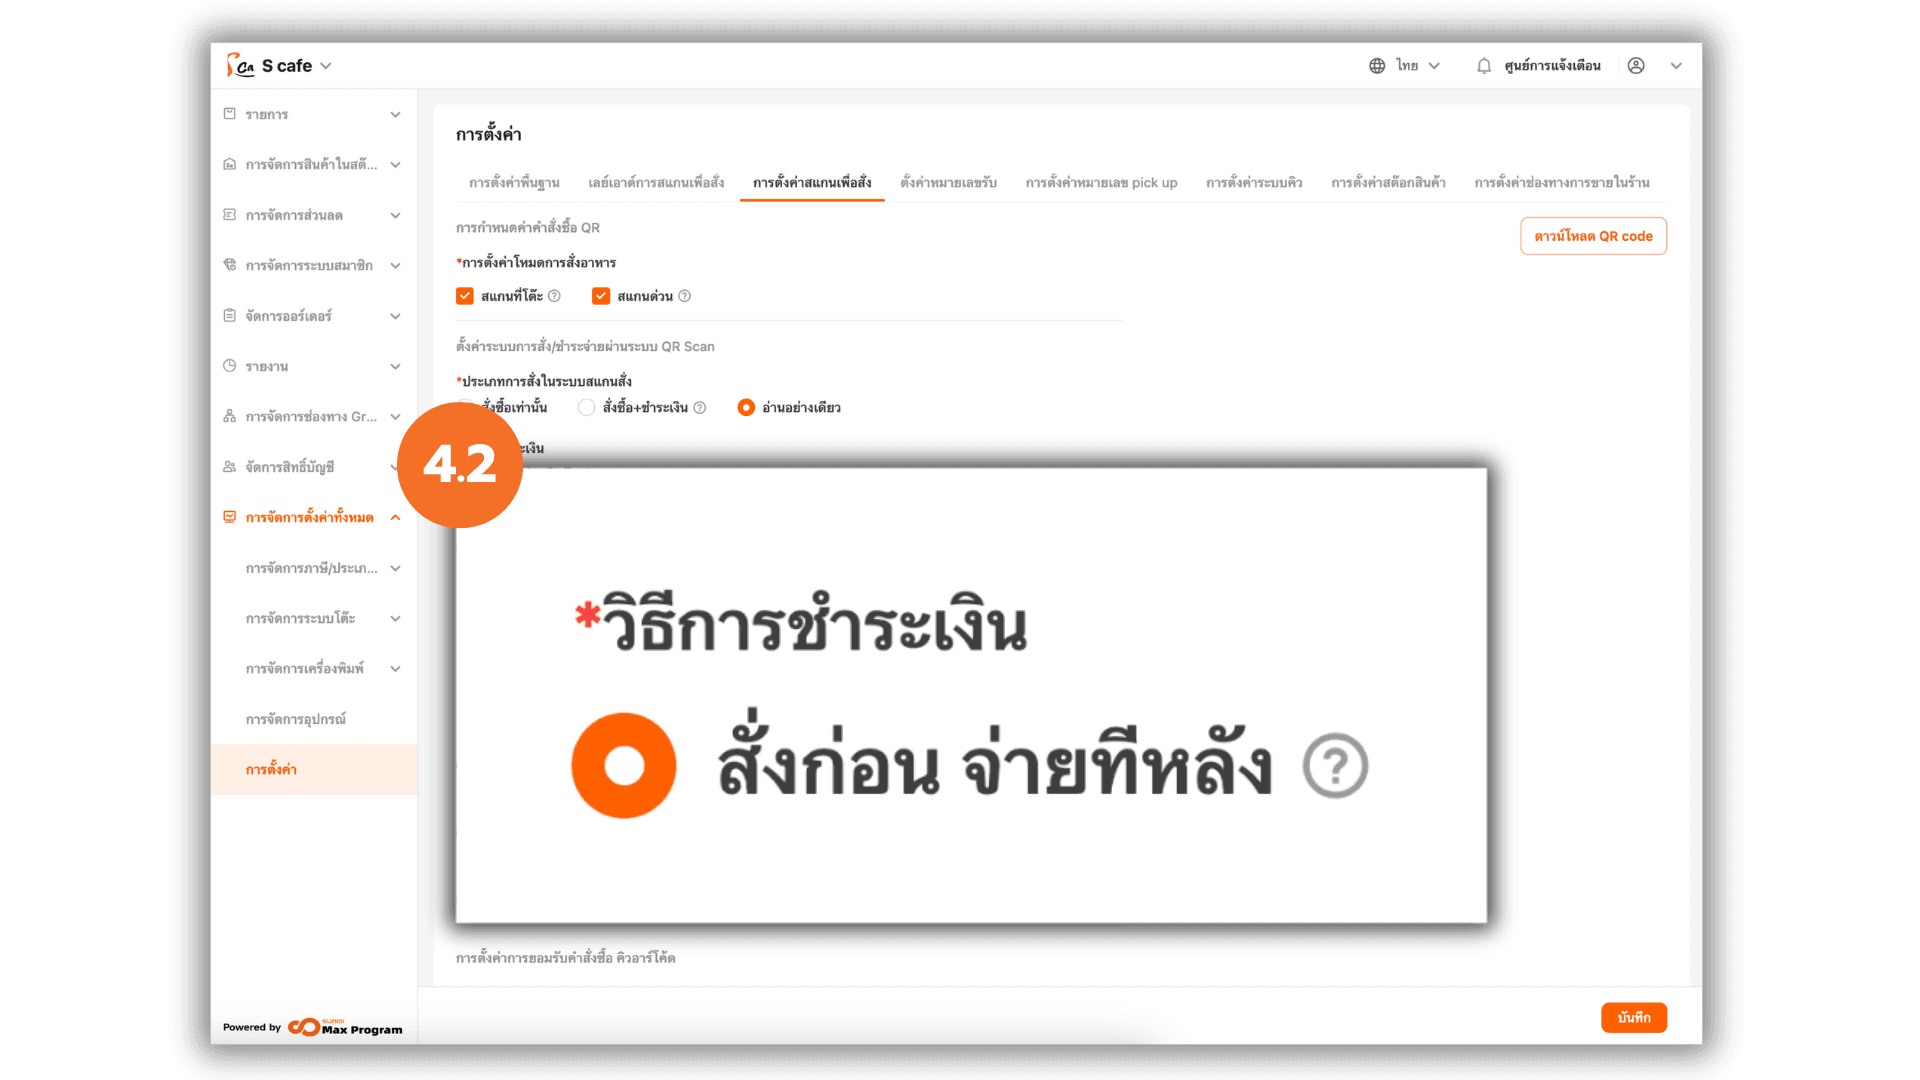
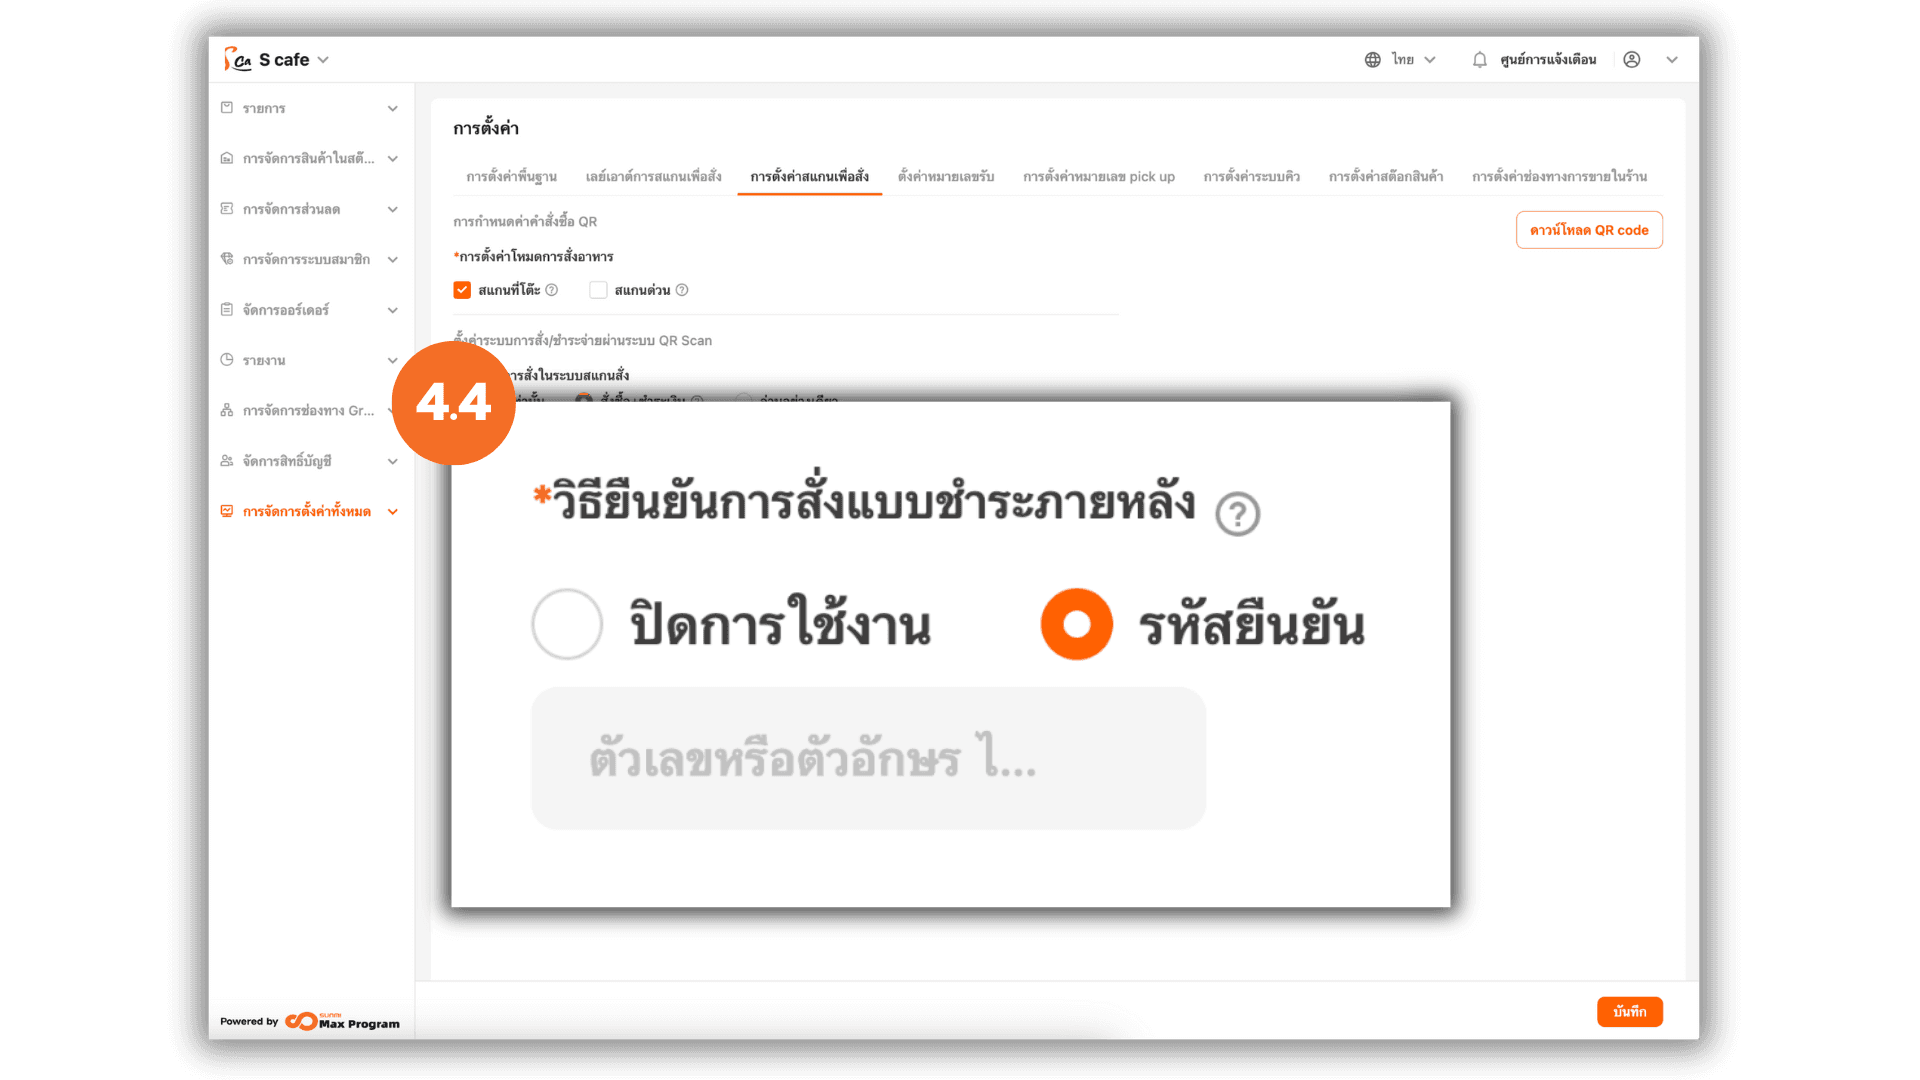
4.3 Order Confirmation for Pay-Later Orders
To prevent customers from scanning external QR codes and sending fake orders, you can require staff confirmation before orders are placed
- Disabled : Customers can place orders immediately.
- Verification code : Staff must enter a confirmation PIN before the order is submitted.
4.4 Set Confirmation PIN
If the confirmation feature is enabled, set a PIN code (Up to 6 characters letters/numbers).
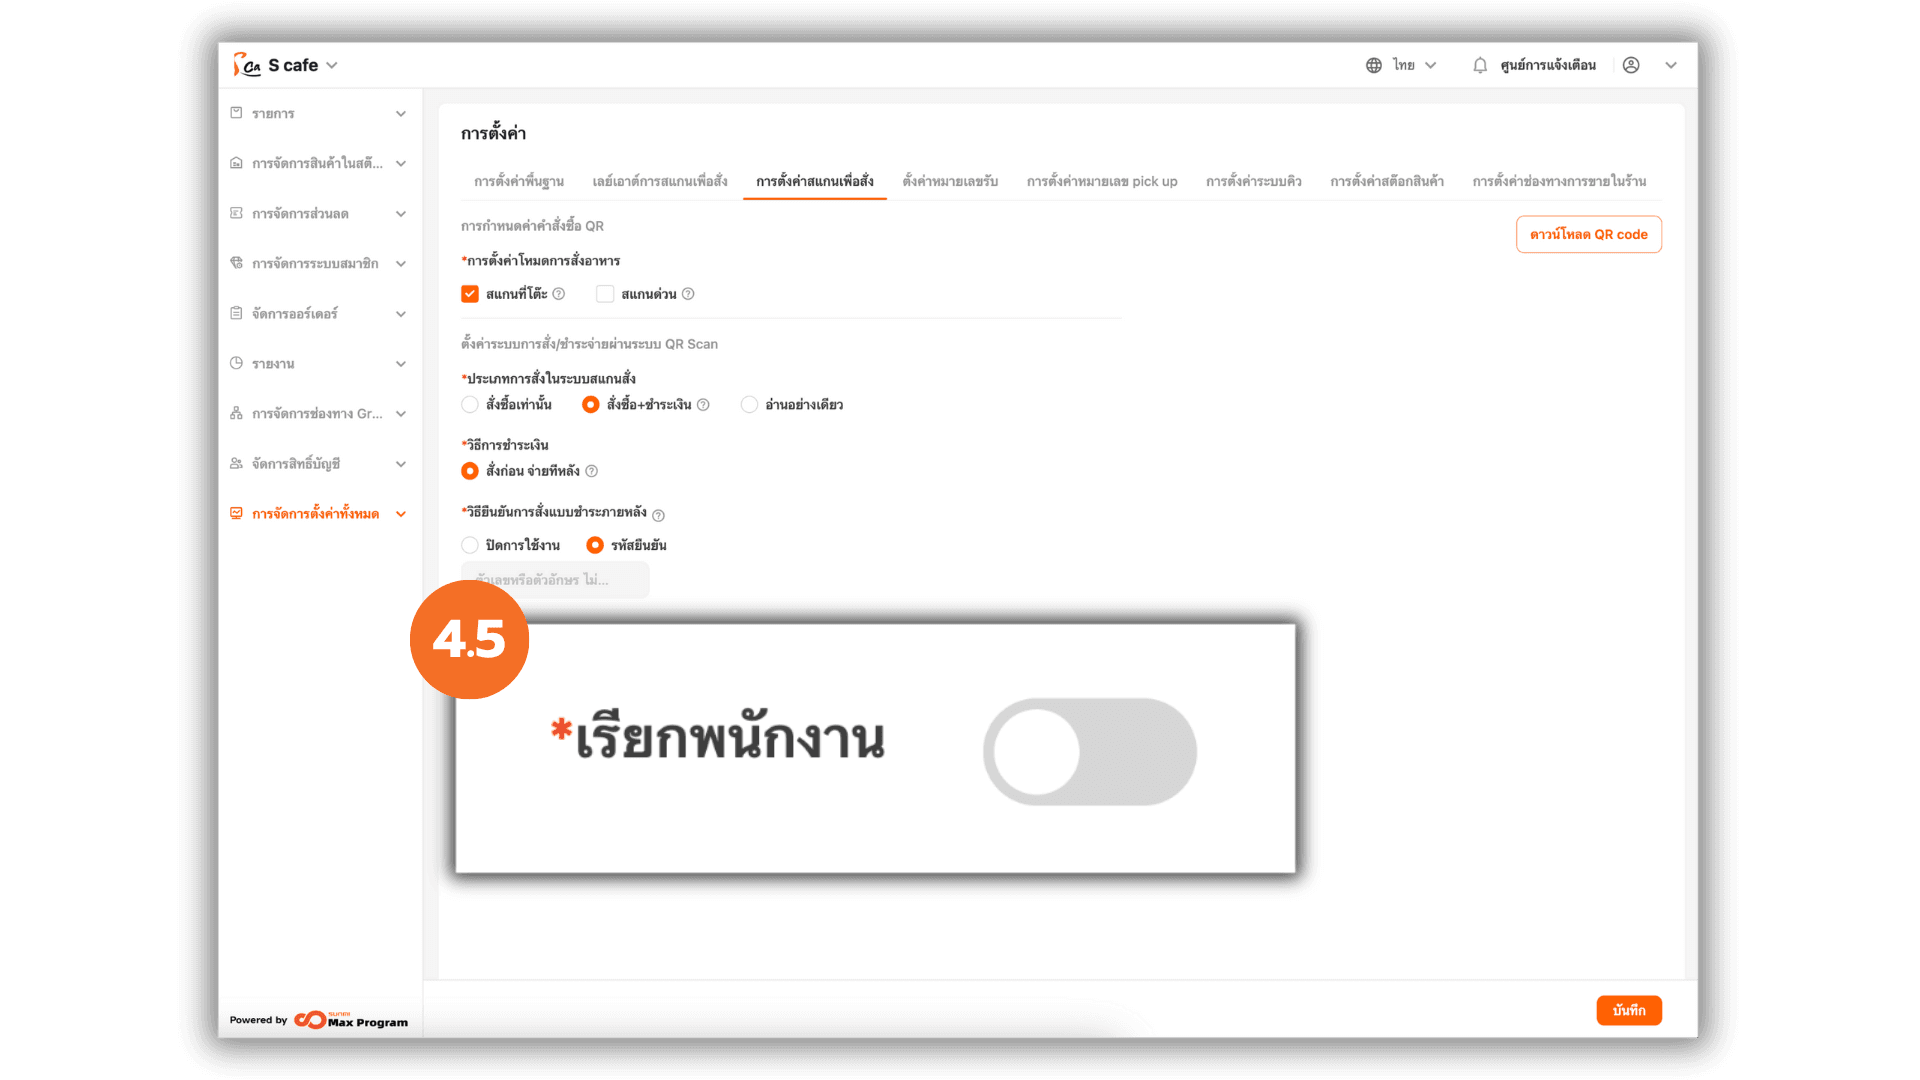
4.5 Enable/Disable “Call Staff” Feature
If enabled, customers can call staff through the table QR. Notifications will be sent directly to the POS system.
5. Settings for “Quick Scan”
When this mode is selected, the system will display an additional setting
“Queue pickup settings”. This allows customers to choose Dine-In or Self Pickup after ordering.
5.1 Order Type for Quick Scan
- Order + Pay : Customers can scan, order, and pay online immediately — no staff needed.
- View Only : Customers can only view the menu and cannot place orders.
5.2 Payment Method Settings
This setting is used with the “Order + Pay” mode. When a customer orders, the system generates a QR Code for online payment.
Note : The KBank QR API must be activated before using this feature.
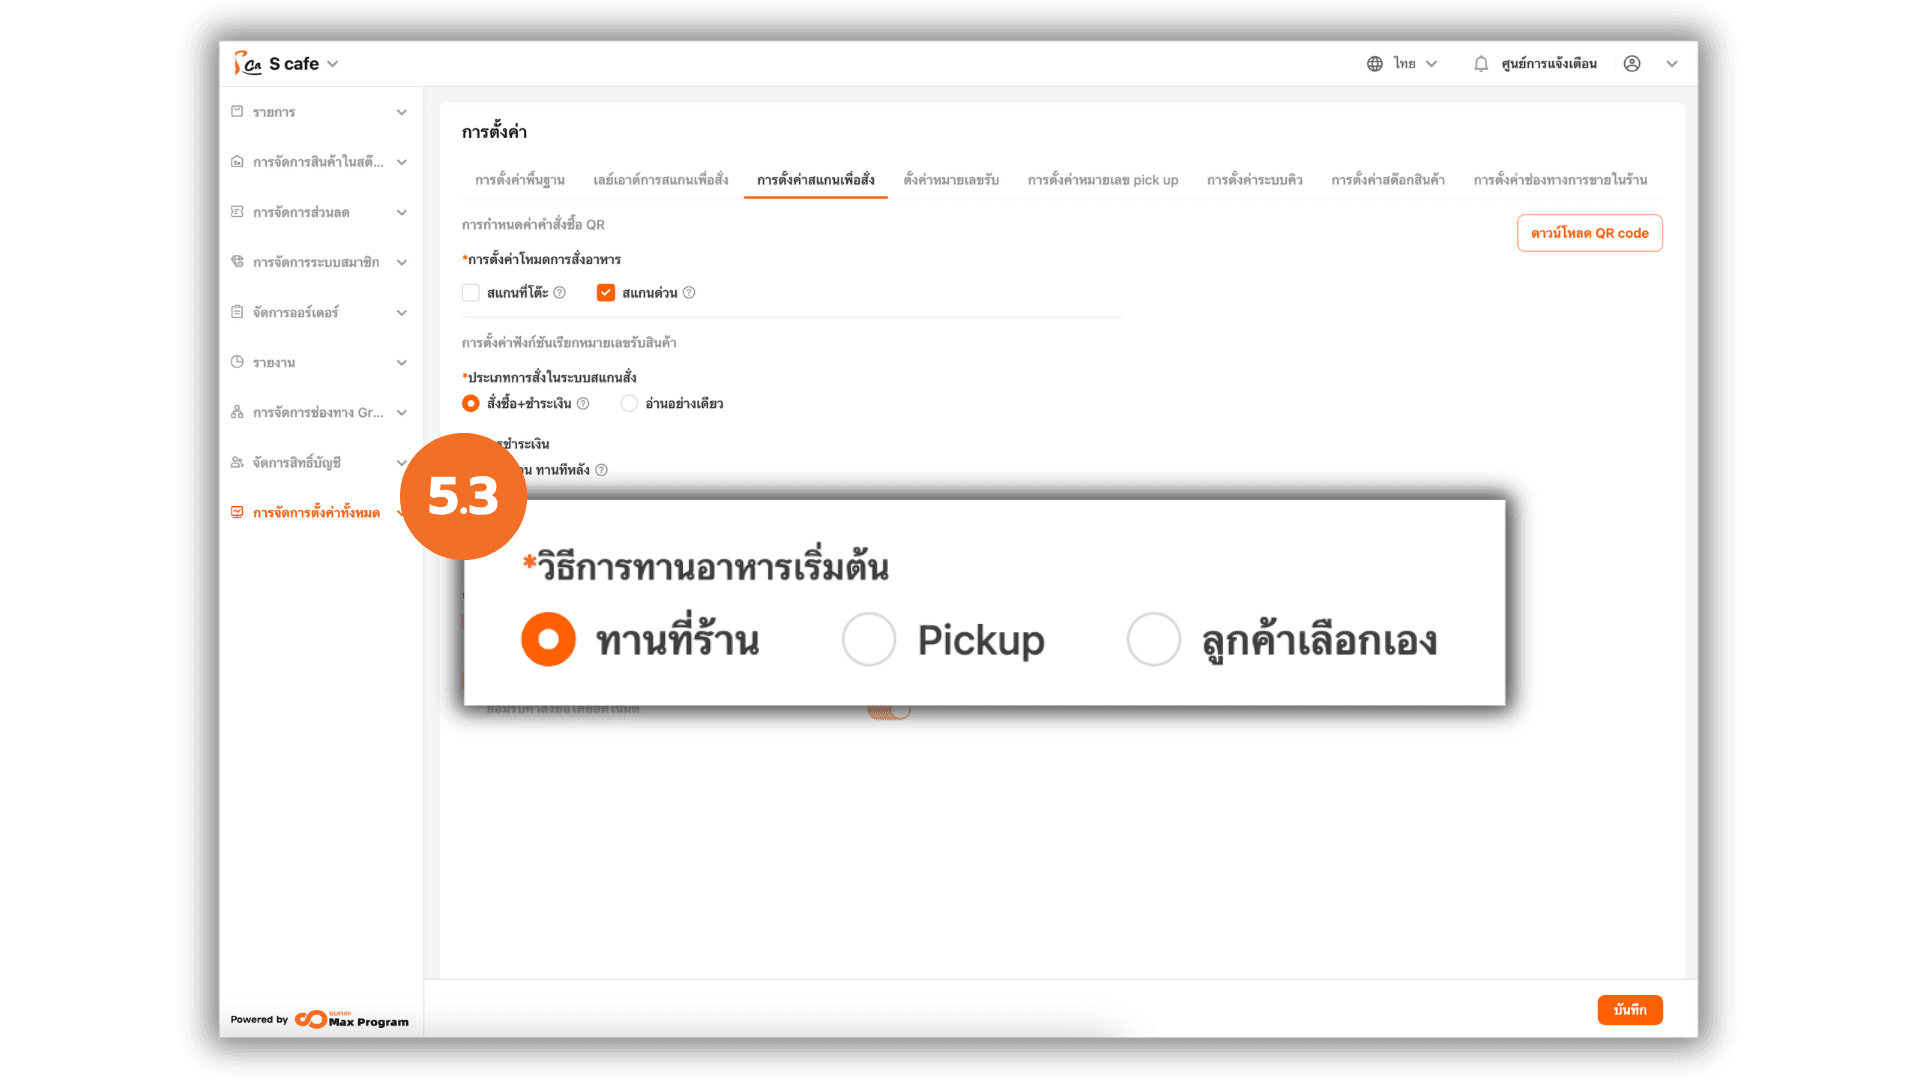
5.3 Set Default Dining Option
Choose the default dining type based on your restaurant’s service
- Dine-In : Customers select the number of guests, and the system automatically assigns an available table.
- Self-collection : Customers order for takeaway without specifying a table.
- Customer Choice : Customers can choose whether to dine in or order takeaway.
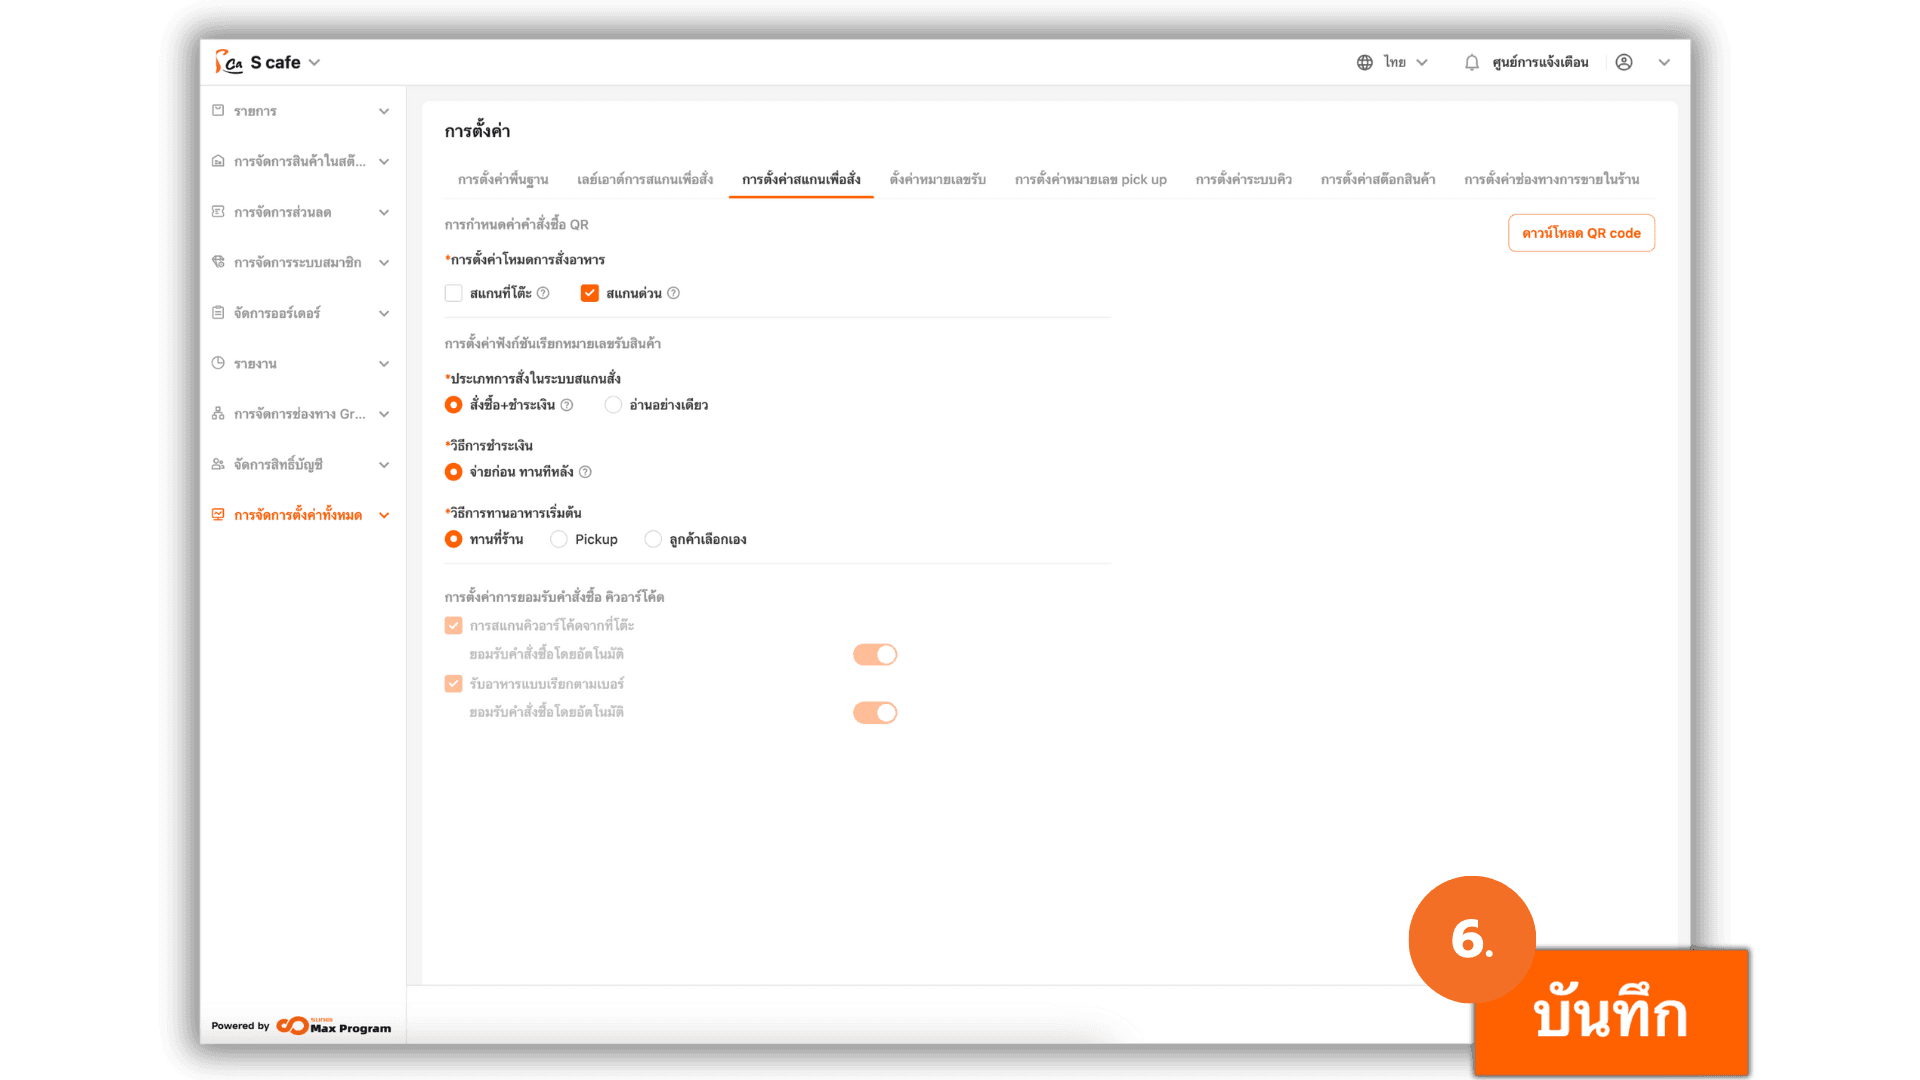
6. Save Settings
After configuring both Table Scan and Quick Scan modes, click “Save” to confirm and apply the settings.
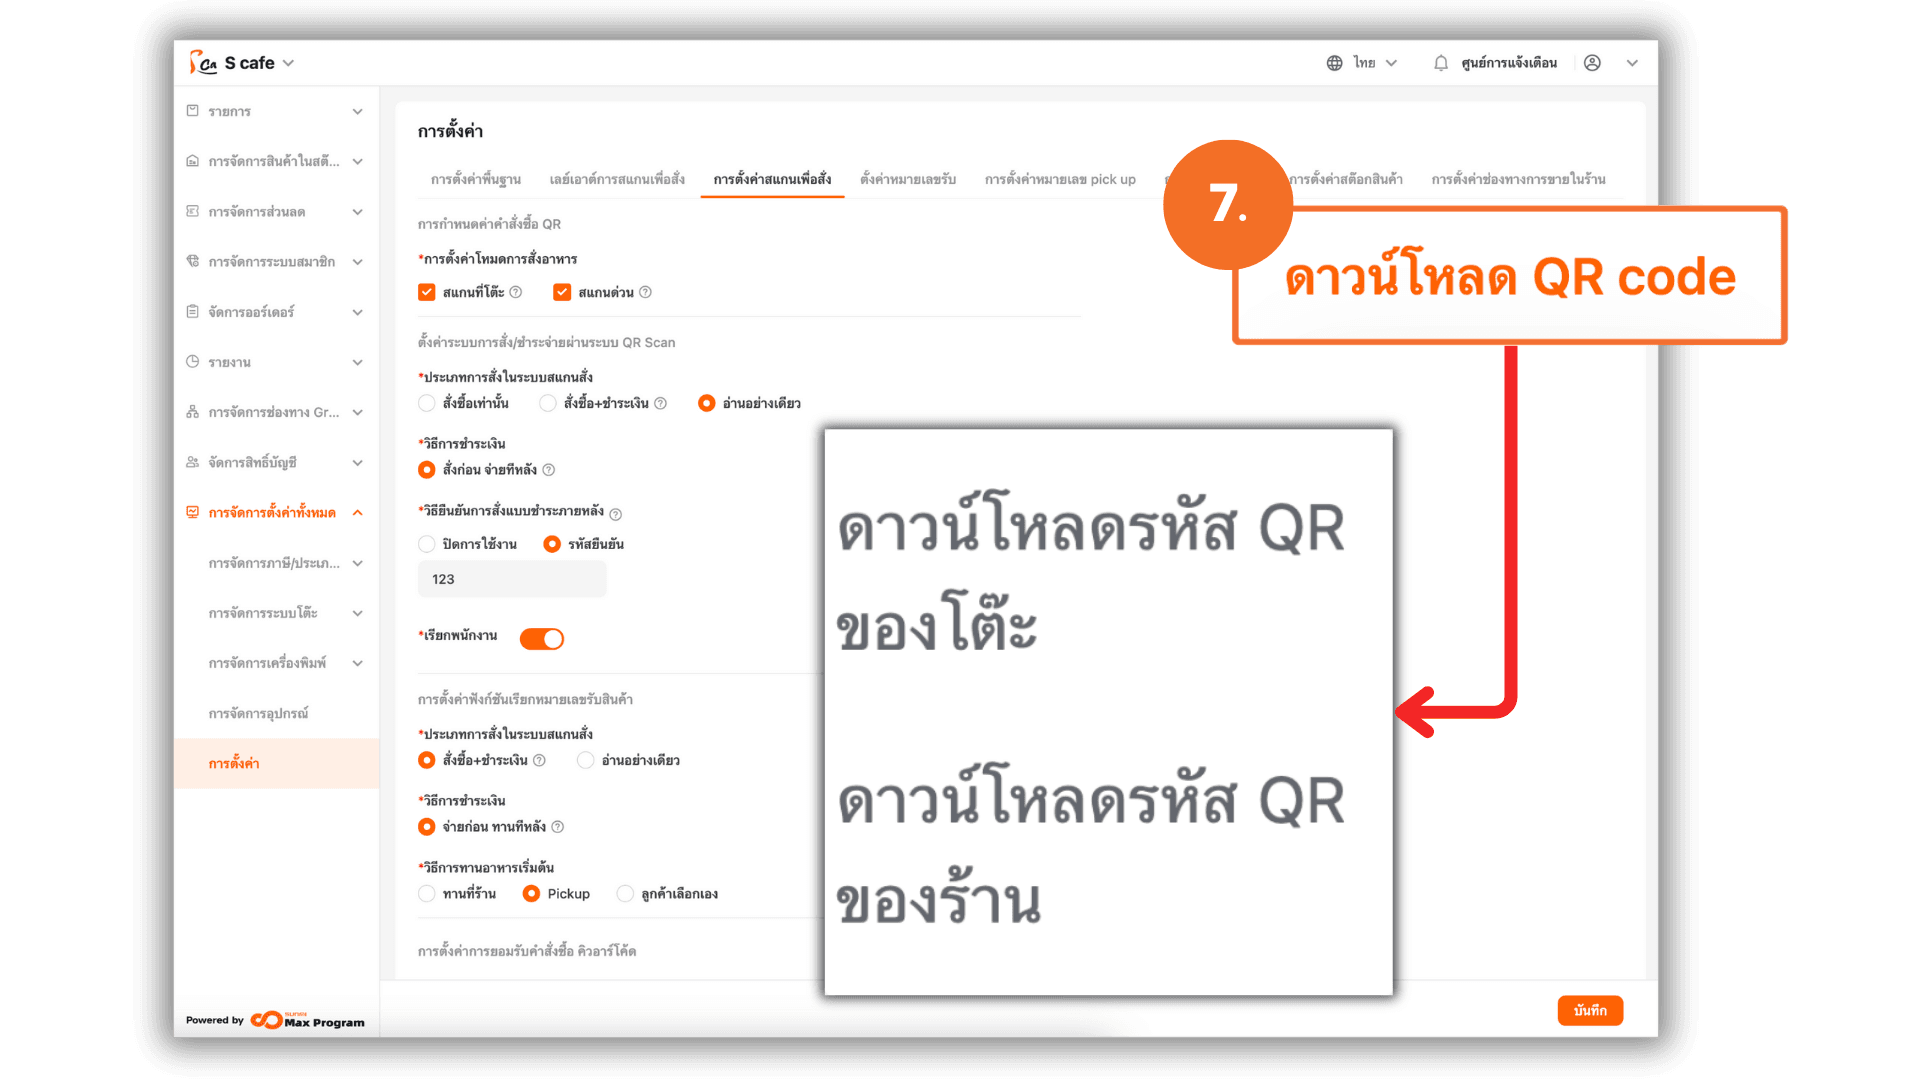
7. Download QR Codes
After completing all settings, the system will allow you to download QR Codes for actual use.
- Download Table QR Codes : Each table will have its own unique QR Code, linked to the specific table in the system. Suitable for restaurants using “Scan at Table” mode.
- Download Store QR Code : A single QR Code for the entire store, suitable for “Quick Scan” mode (no table assigned). The system will function according to the settings in Section 5.3 (Dine-In /
Self-collection / Customer Choice).