Set up receipt format
2025-11-21 16:06
This guide helps you design and customize receipts to match your store's style, creating a lasting impression for customers when they receive their receipt.
1. Log in to the Back Office
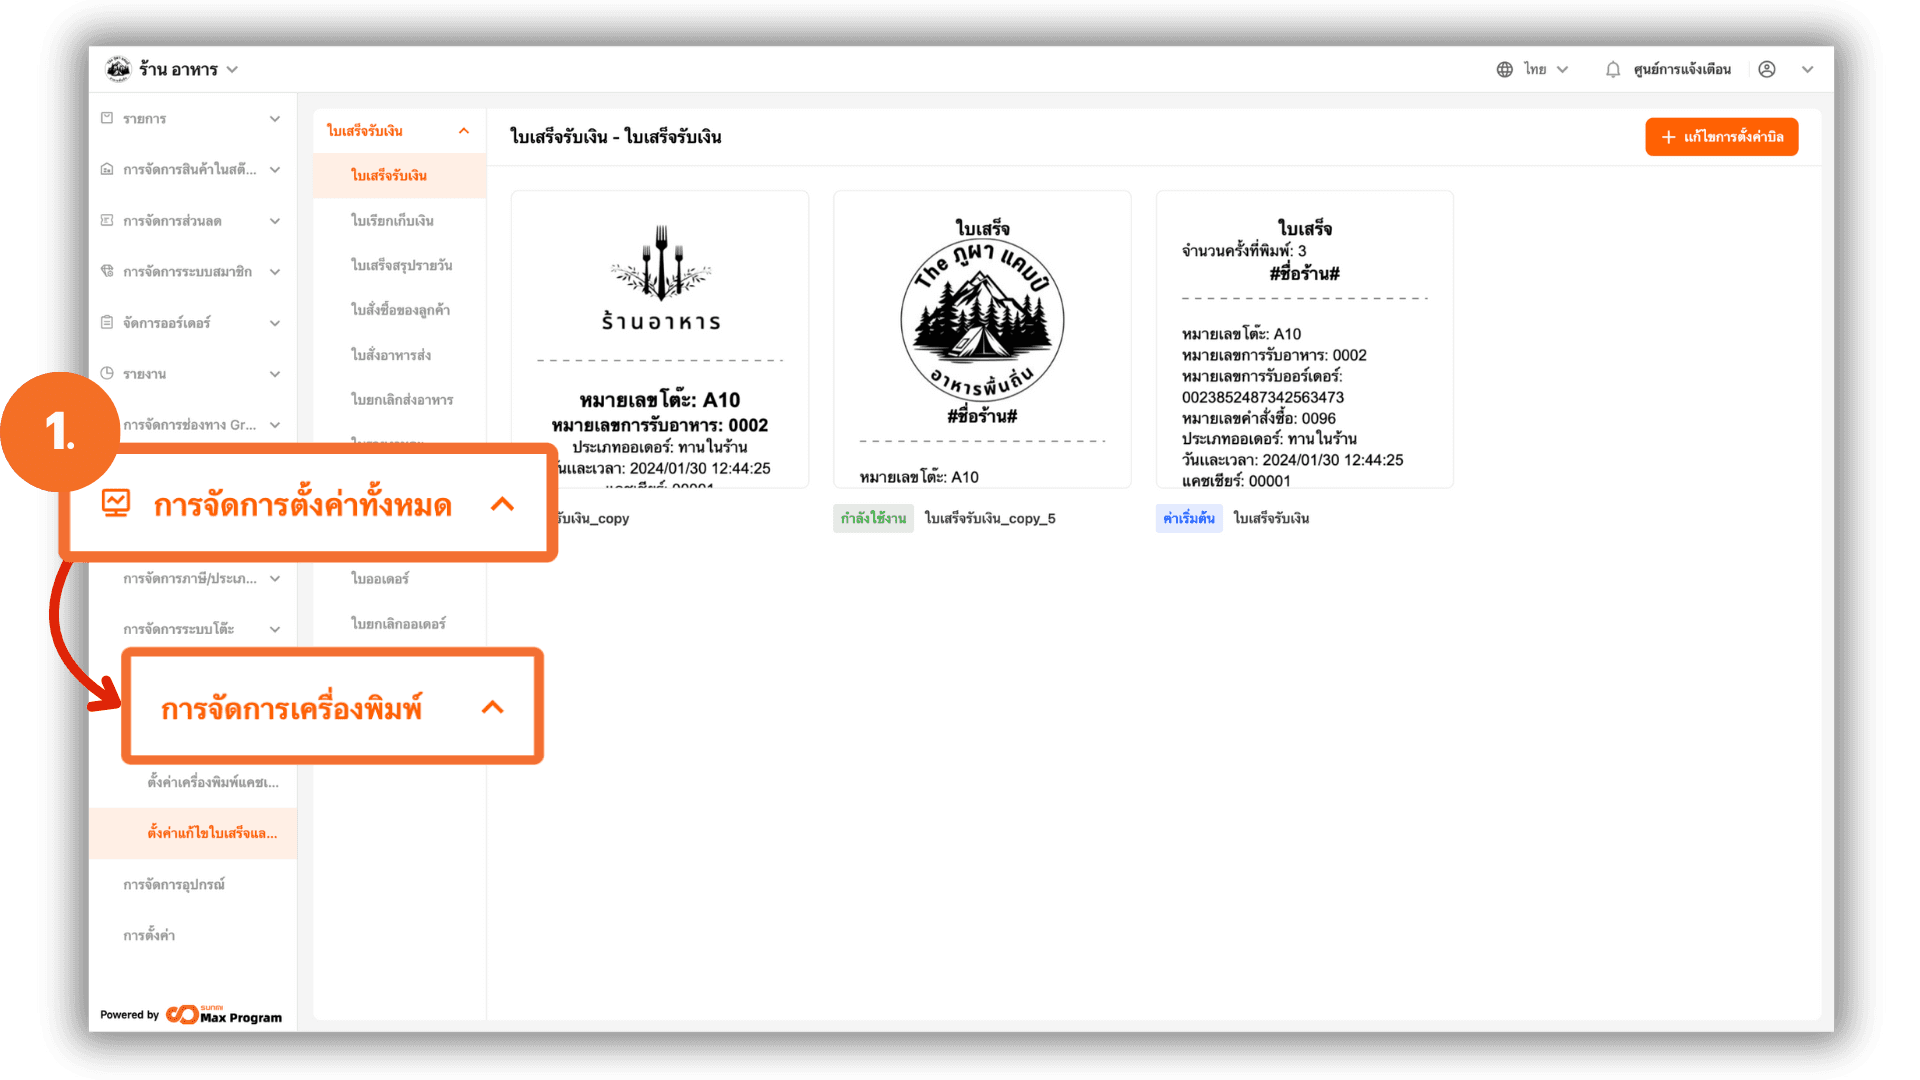
Go to login.gpos.co.th, enter your email and password, then click Log In. After successfully logging in, go to Store Management and select Print Management
2. Access the Settings Menu
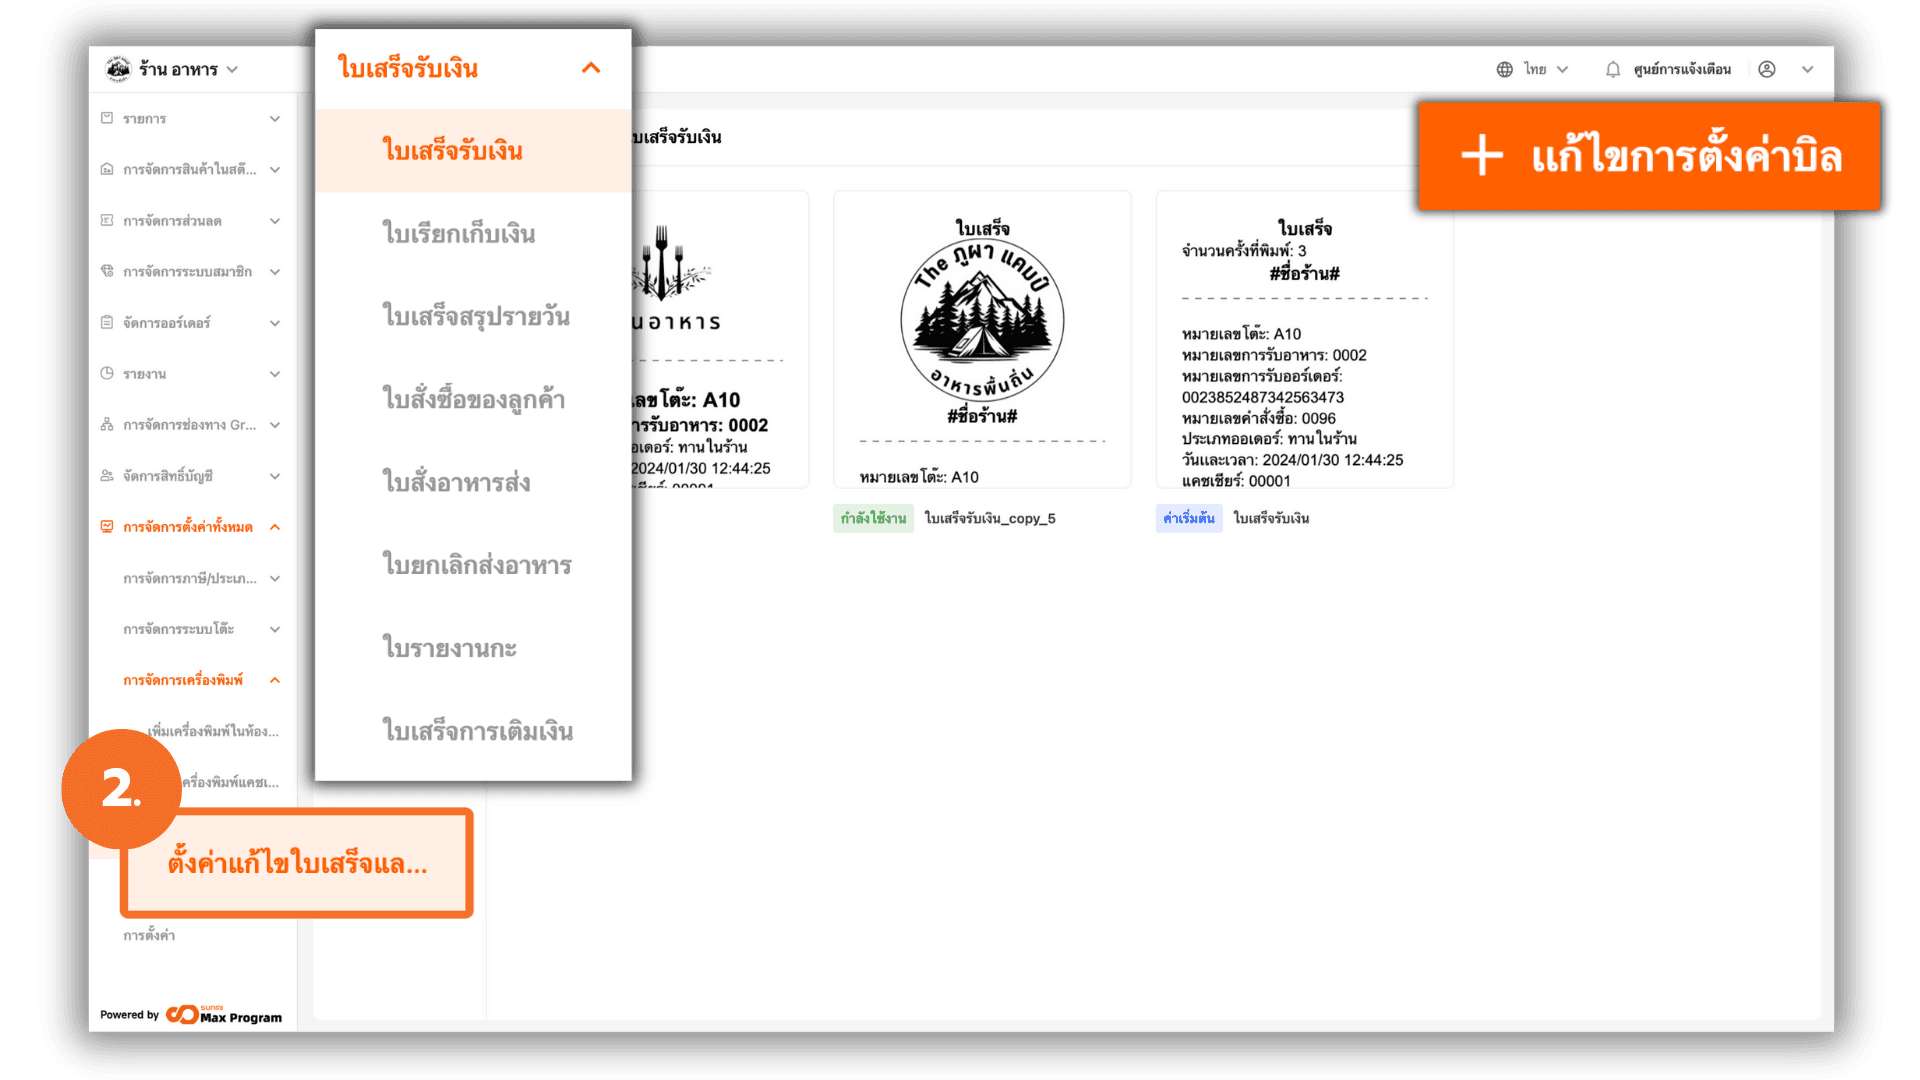
Select Receipt and Order Slip Customization. Choose the type of receipt you want to customize. If you do not wish to design your own layout, you may use the system’s default template. If you want to create or modify the design, click “+ Add a new invoice style” to enter the receipt design screen.
3. Customize the Receipt
The receipt customization screen is divided into three main sections
- Topic Panel (right side) – Enable or disable the sections you want to display.
- Properties Panel (left side) – Adjust the details of text or elements.
- Receipt Preview (center) – Shows real-time visual updates.
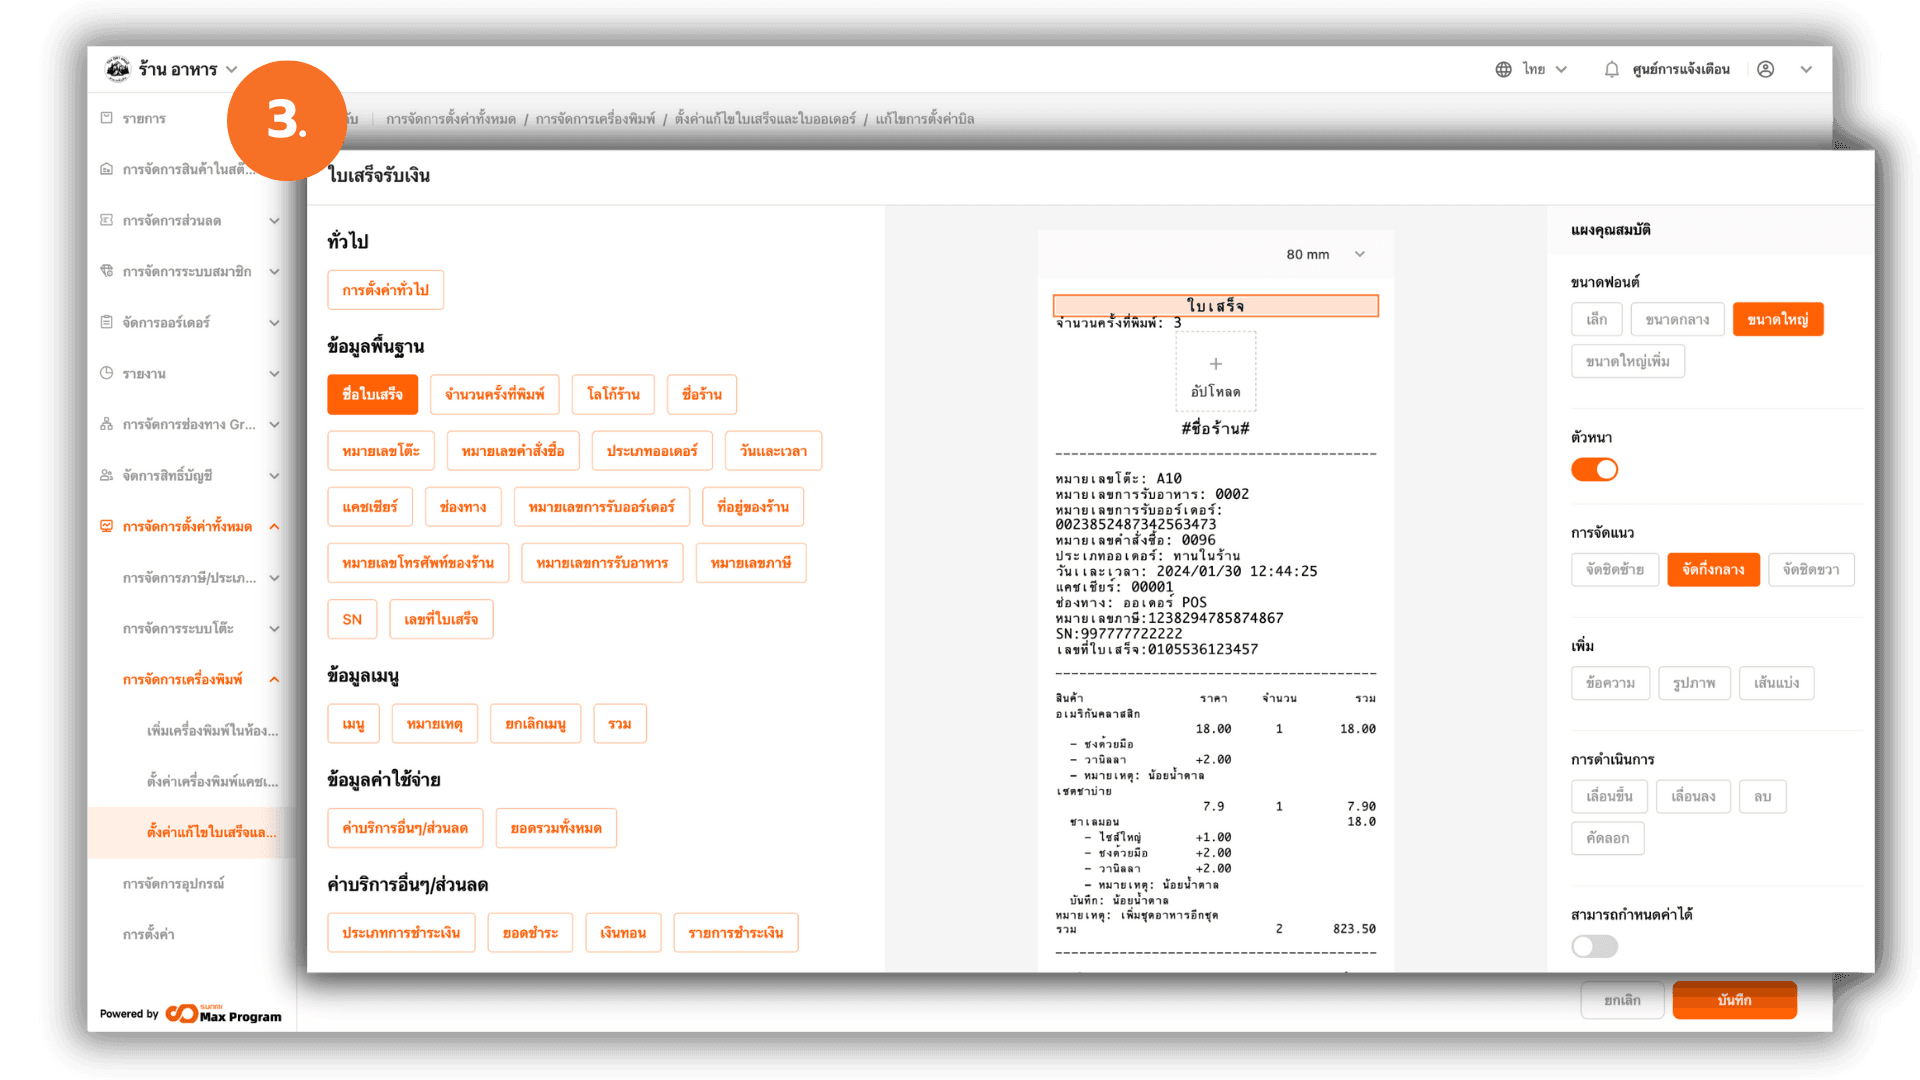
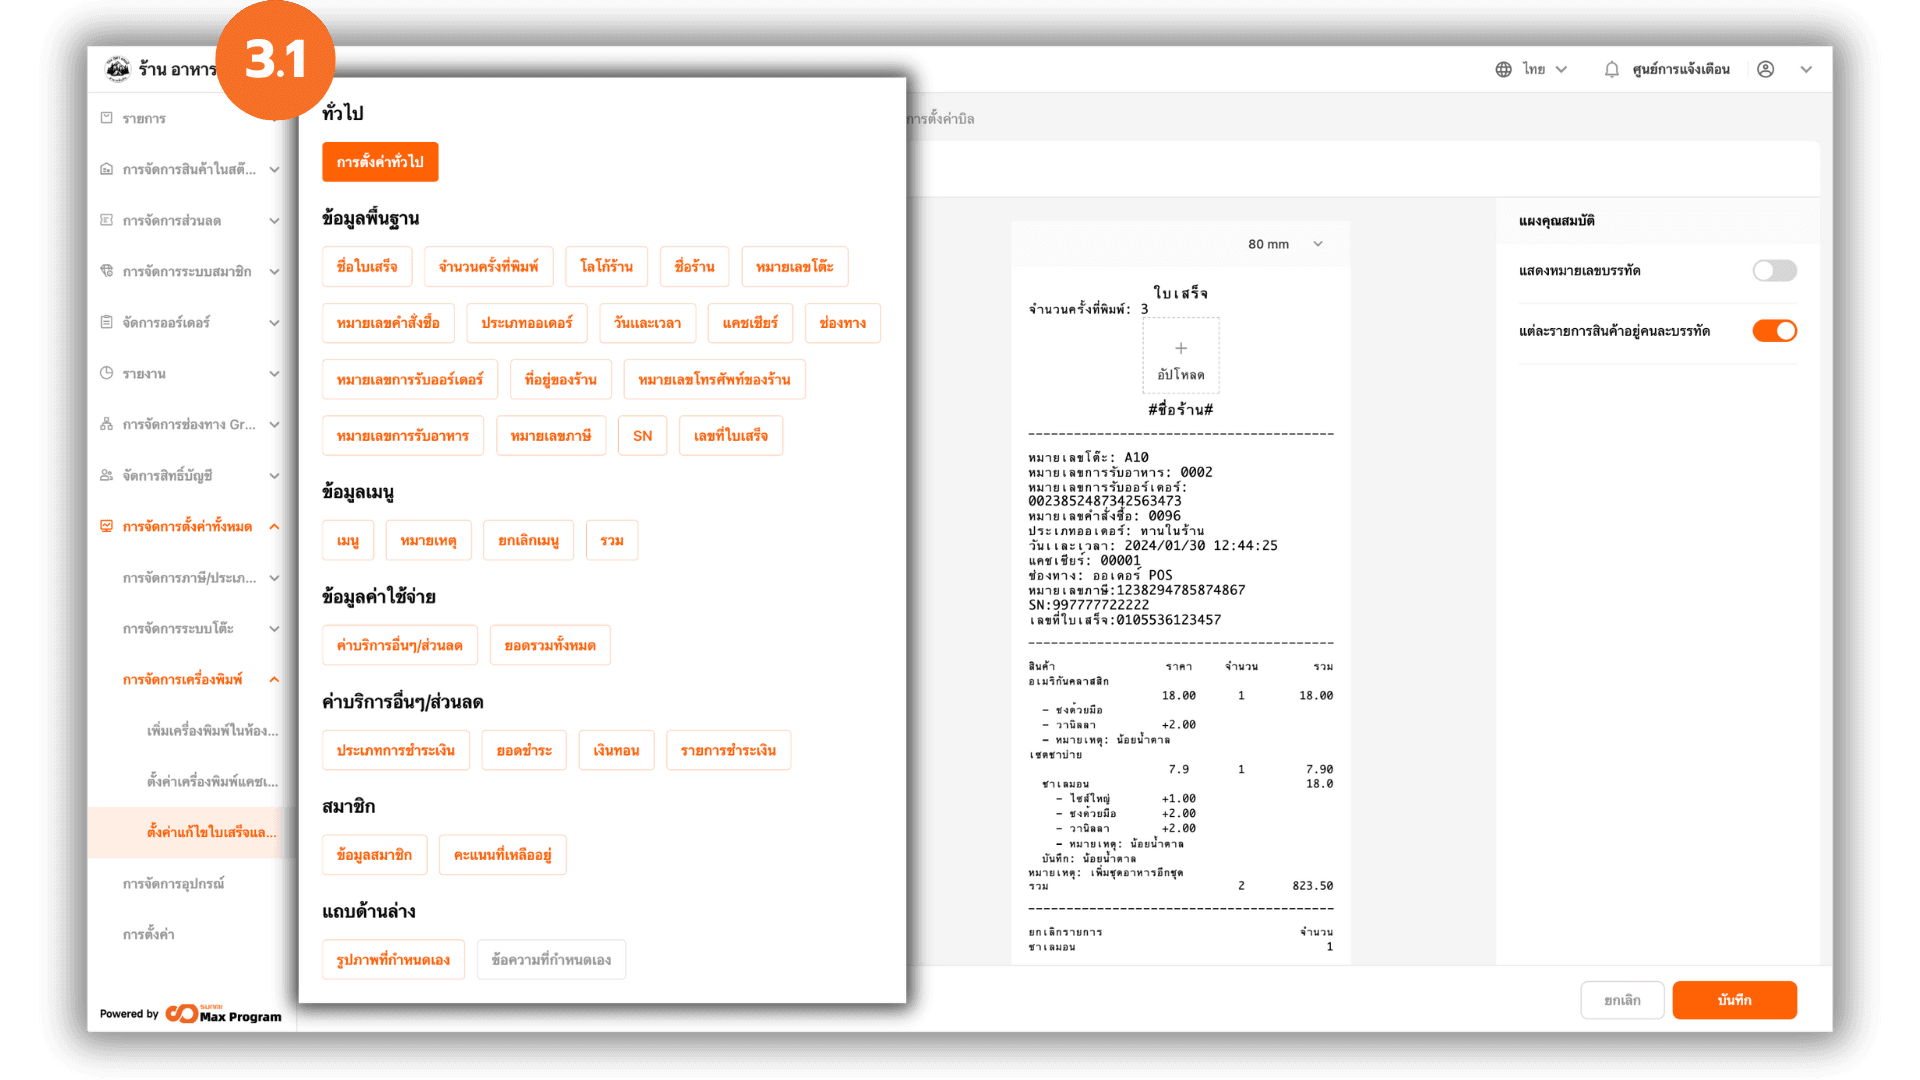
3.1 Select Sections to Display on the Receipt
The sections in this panel represent the primary components of a standard receipt for various types of stores
- Basic Information – Store name, order number, date and time
- Dish Information – Food/product items
- Cost Information – Total, tax, grand total
- Payment Information – Service charge, discounts
- Membership – Member details / member discounts
- Footer – Footer text such as “Thank you”
Note : System-defined text cannot be edited (except for “Custom Text”).
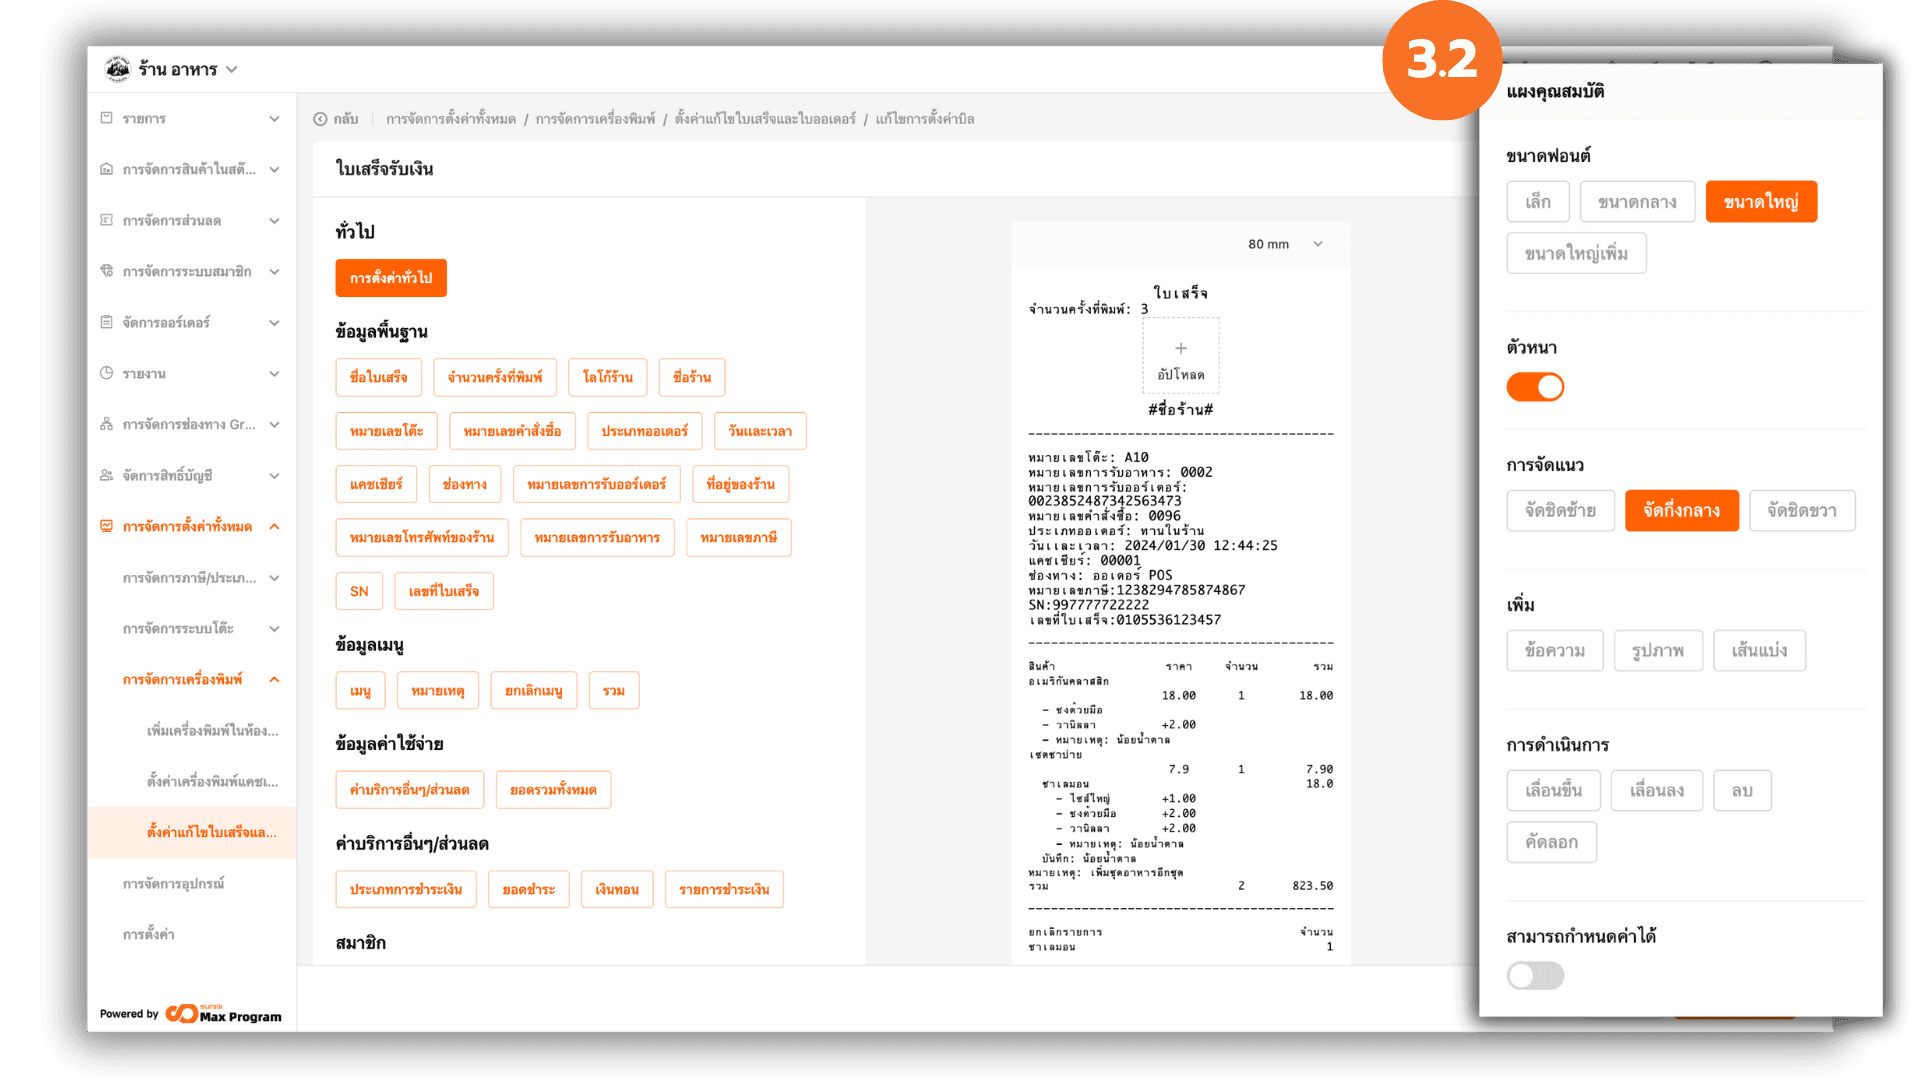
3.2 Customize Using the “Property panel”
The properties panel changes based on the selected section. Key customization options include
- Font Size – Adjust the text size
- Bold – Make the font bold
- Alignment – Align text (Left, Center, Right)
- Add – Add new text, images, or divider lines
- Blank line – Adjust the spacing between lines
- Action – Click on an item to Move up , Move down , Delete and Copy
- Configurable – Enable/disable permission to edit the template on POS devices
Note : When you add new text, a field will appear at the top of the Properties Panel for entering the content.
3.3 Add Images or Preview the Output
Select the receipt width that matches your printer (58mm or 80mm). To add a logo or image, click + Upload. Check the preview to verify the output. When finished, click Save.
Note : It is recommended to use black-and-white logo images for optimal clarity on thermal receipt printers. Very light or very dark images may be converted to darker grayscale when printed.

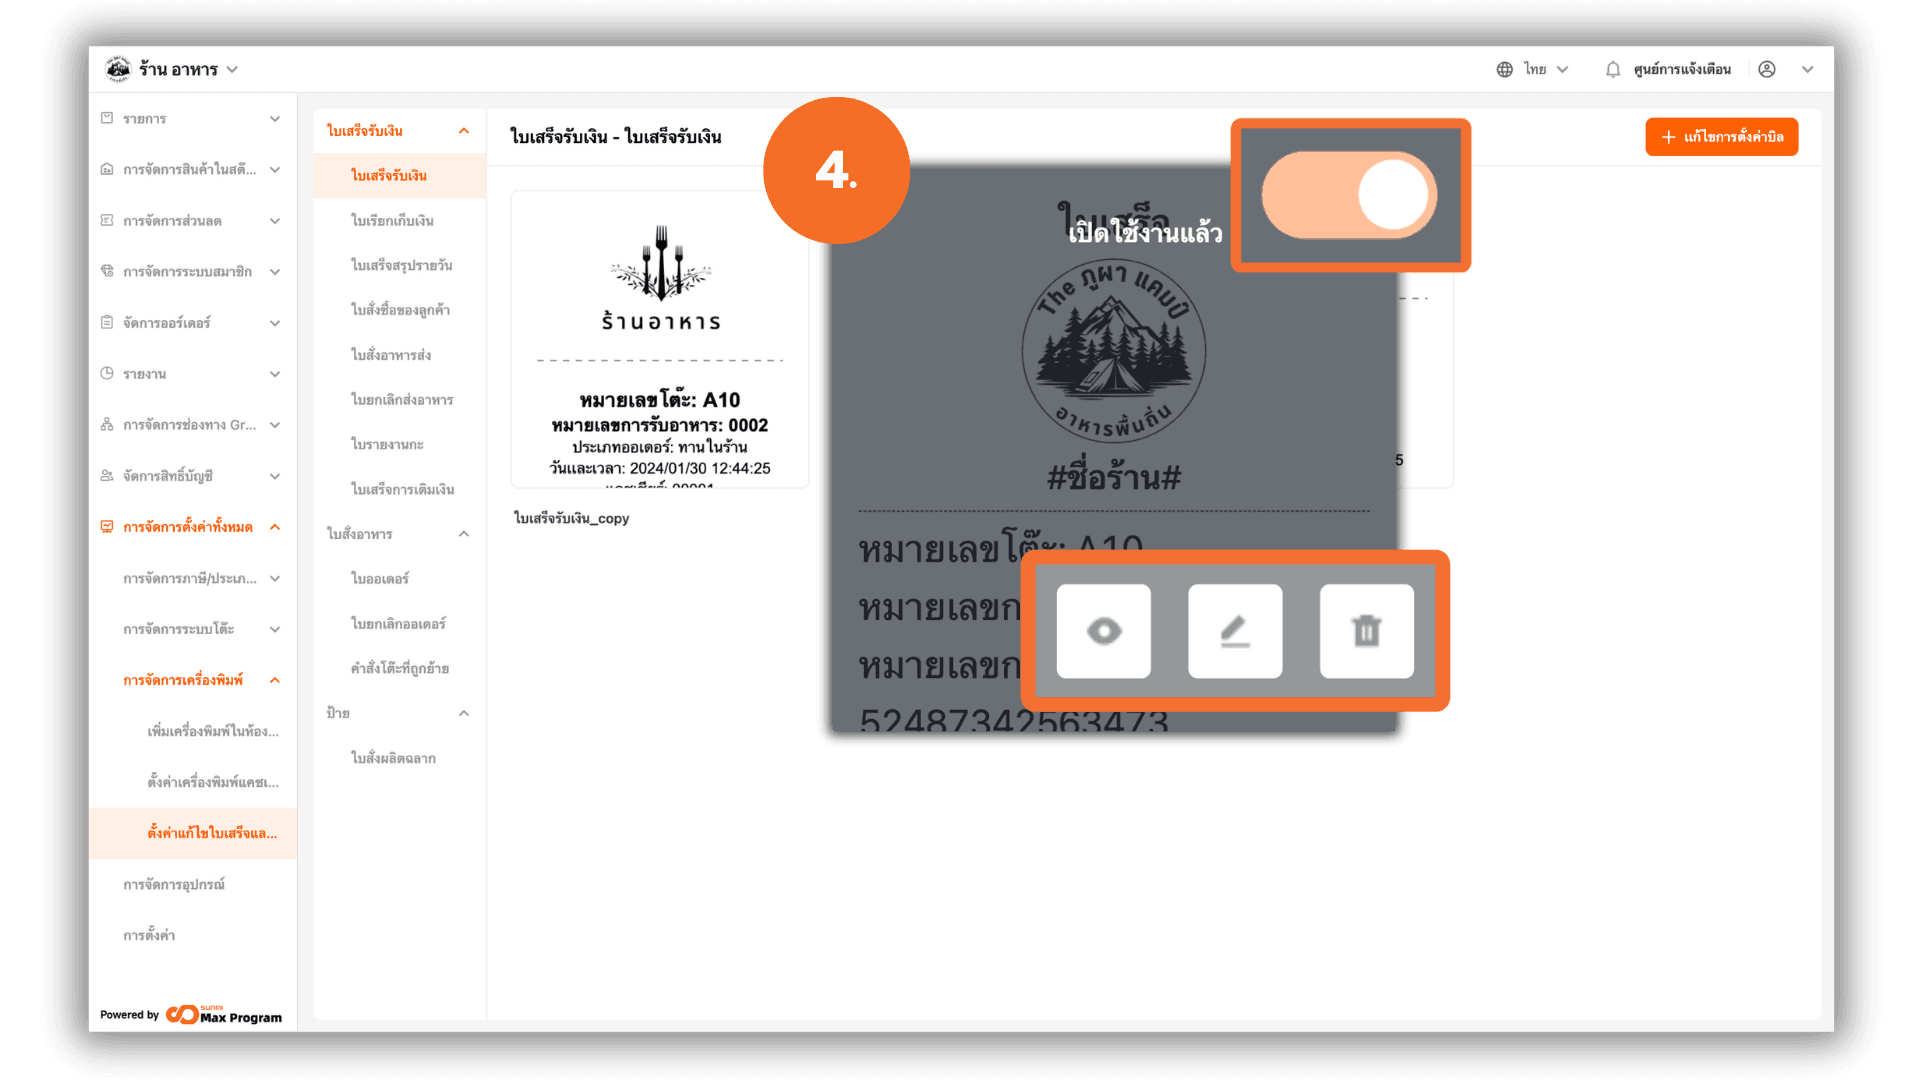
4. Activate the Receipt Format
After saving, click the receipt template you created and activate it to set it as the default (the system will use this template for all printouts). You can also manage the template using the icons
- Eye Icon – Preview the created receipt
- Pen Icon – Edit the selected receipt or order slip
- Trash Can Icon – Delete a receipt or order slip that is no longer needed