Export Inventory
2026-04-02 21:44
651 views
Used to record and manage product stock deductions accurately, helping keep inventory data up to date, reduce discrepancies, and support effective inventory control.
1. Log in to the Back Office
Go to login.gpos.co.th, enter your email and password, then click Log in.
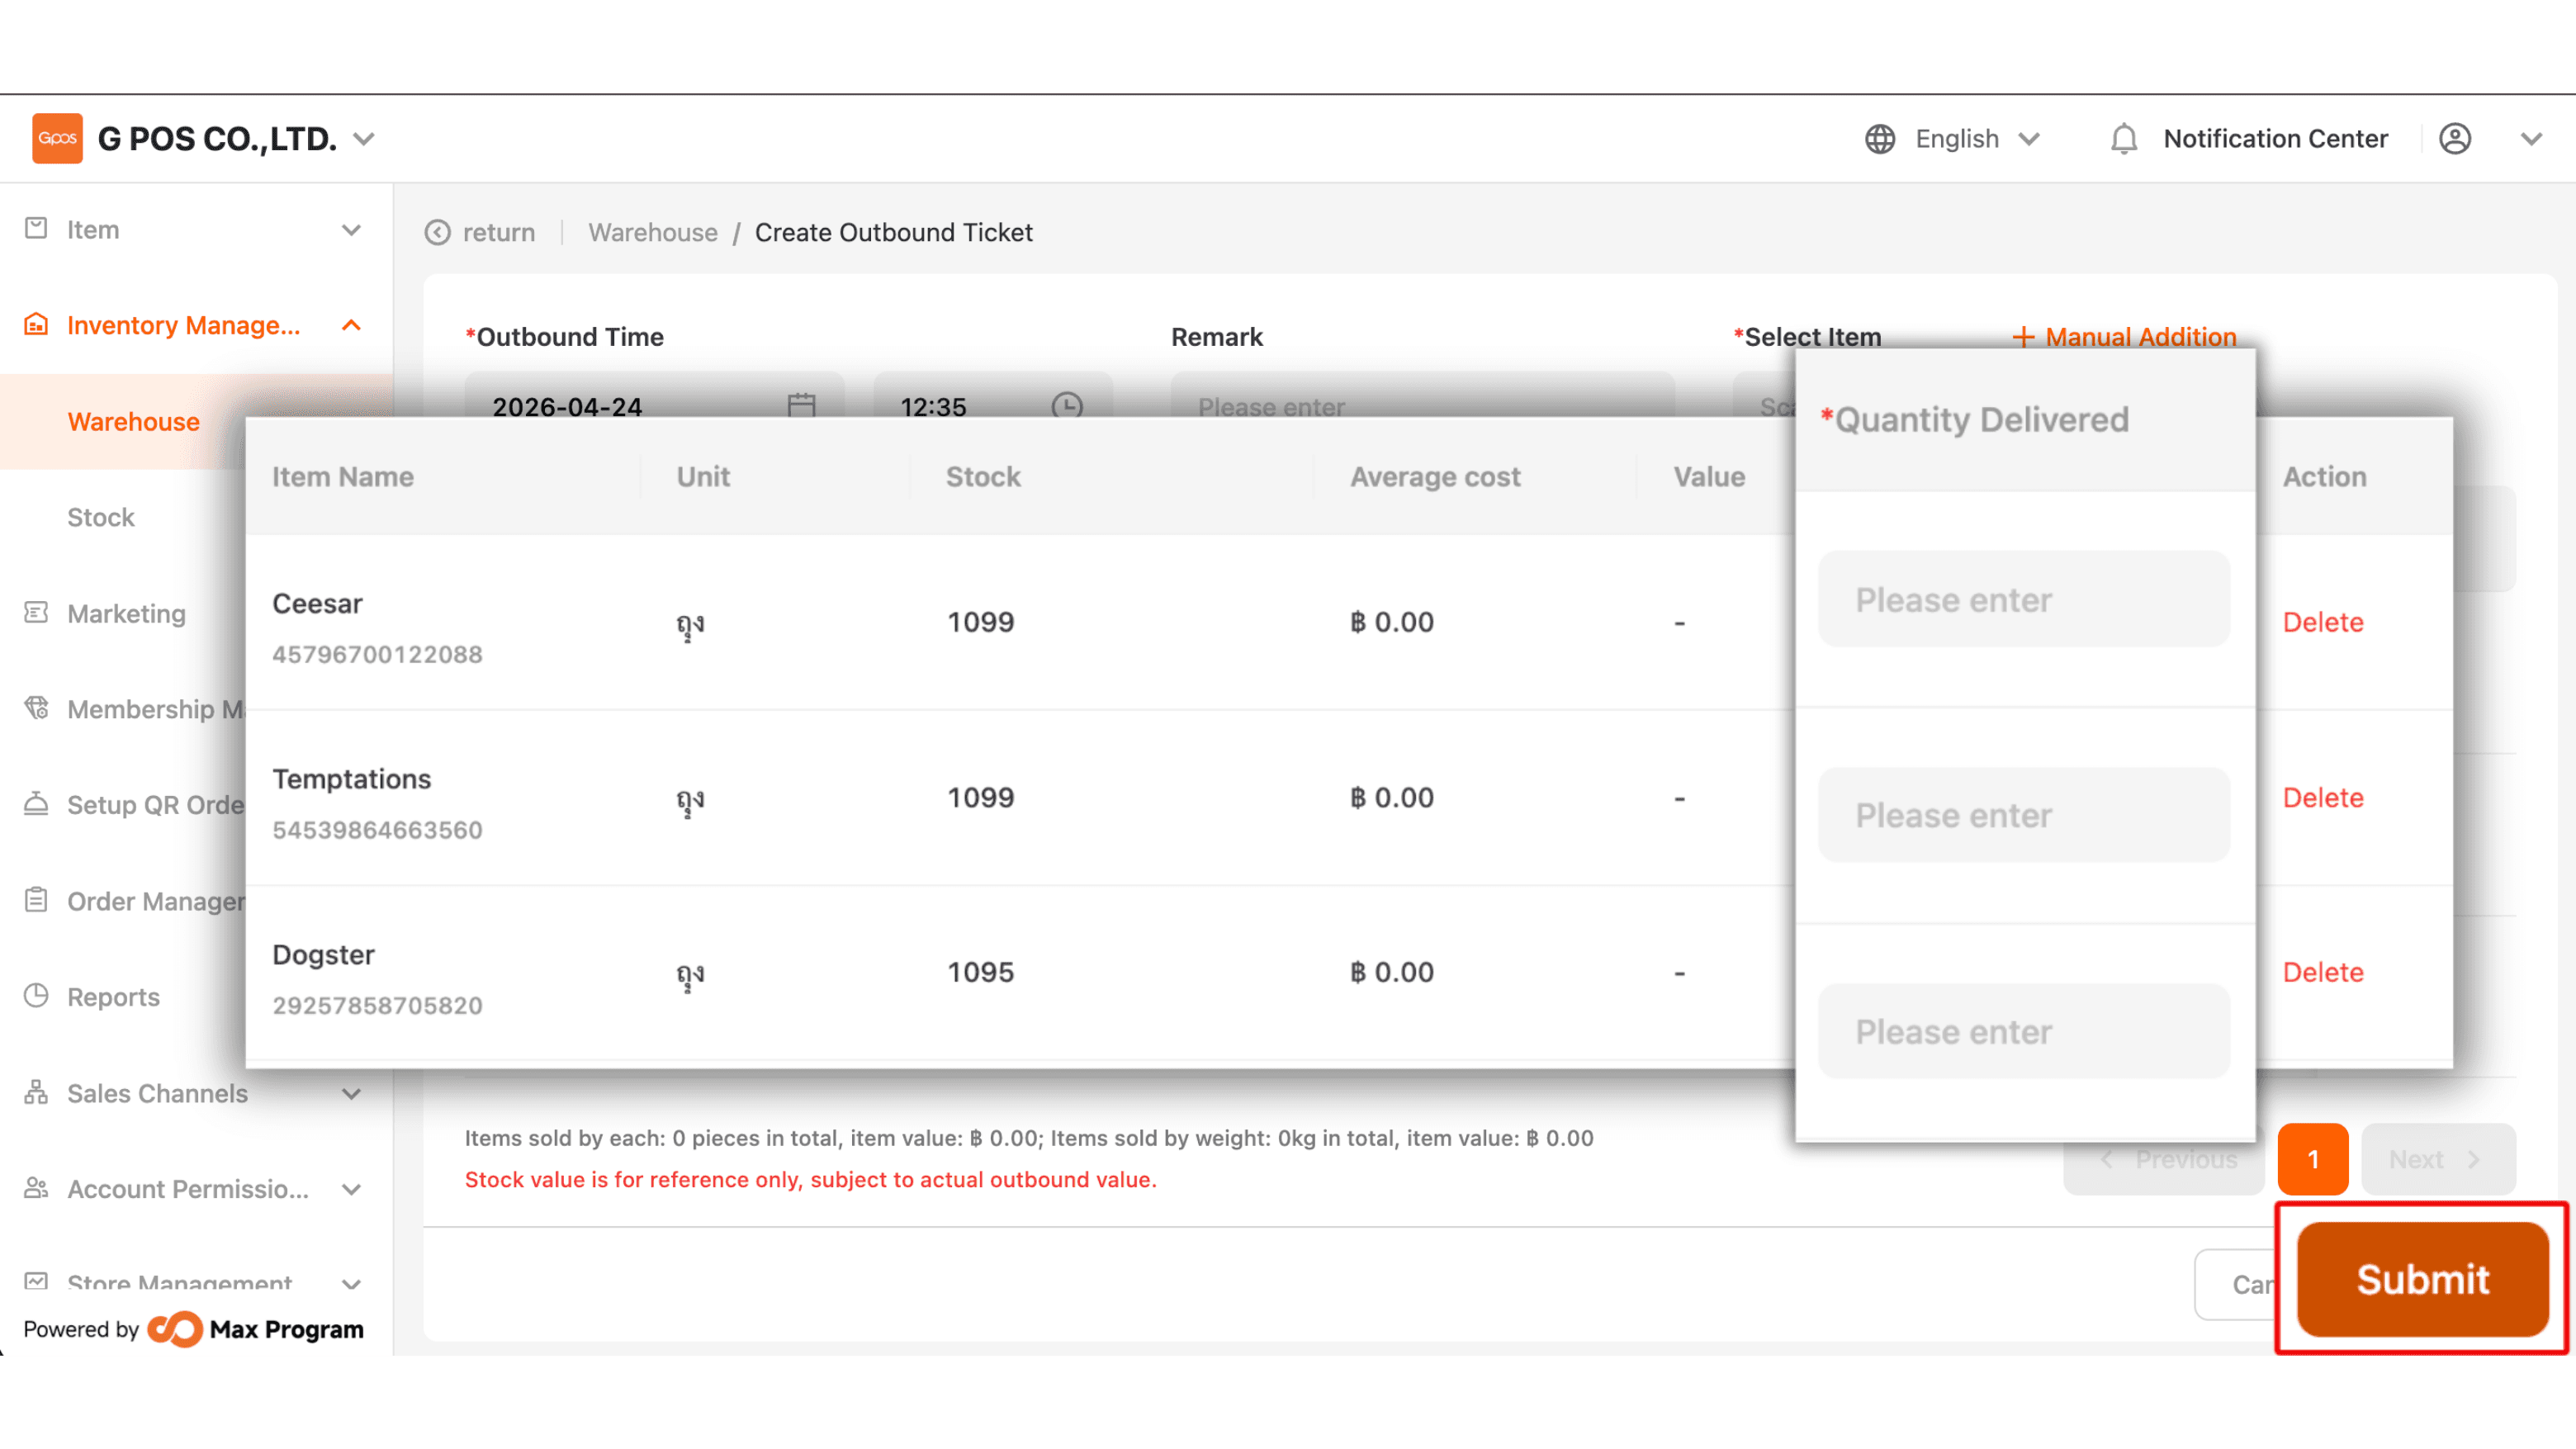
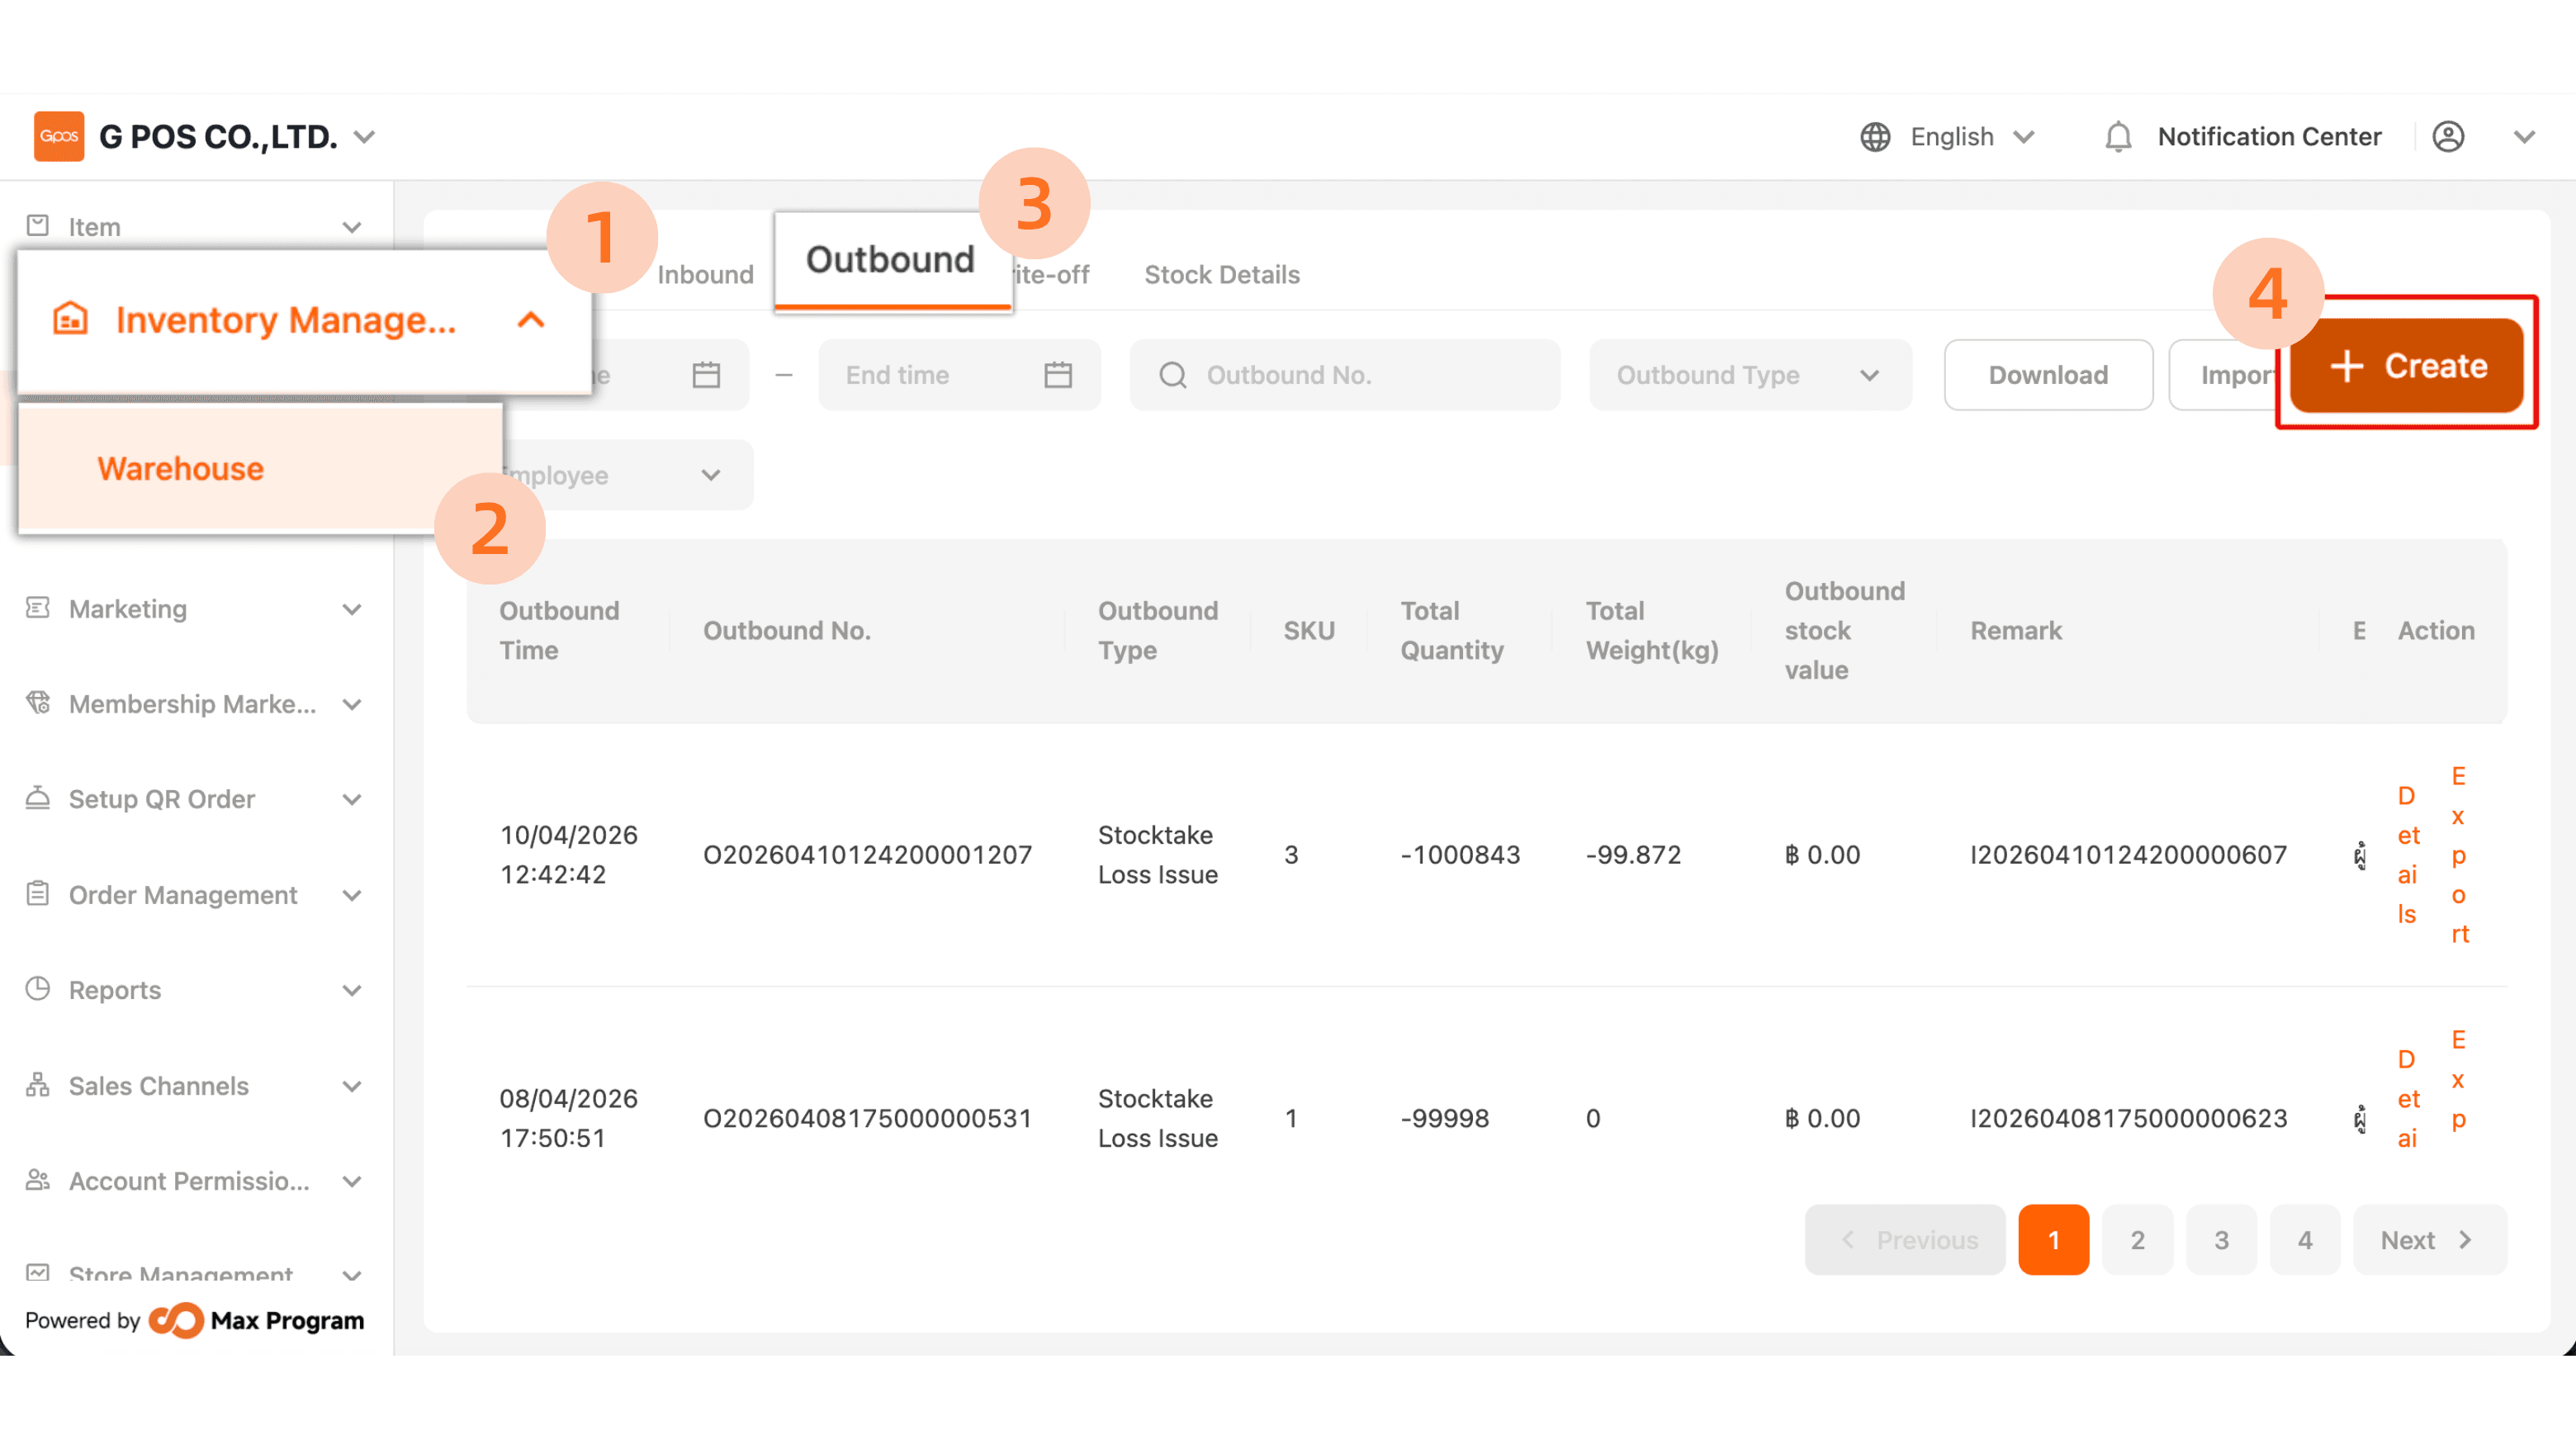
Click “Inventory Management” > “Warehouse” > “Outbound” > “+Create.”
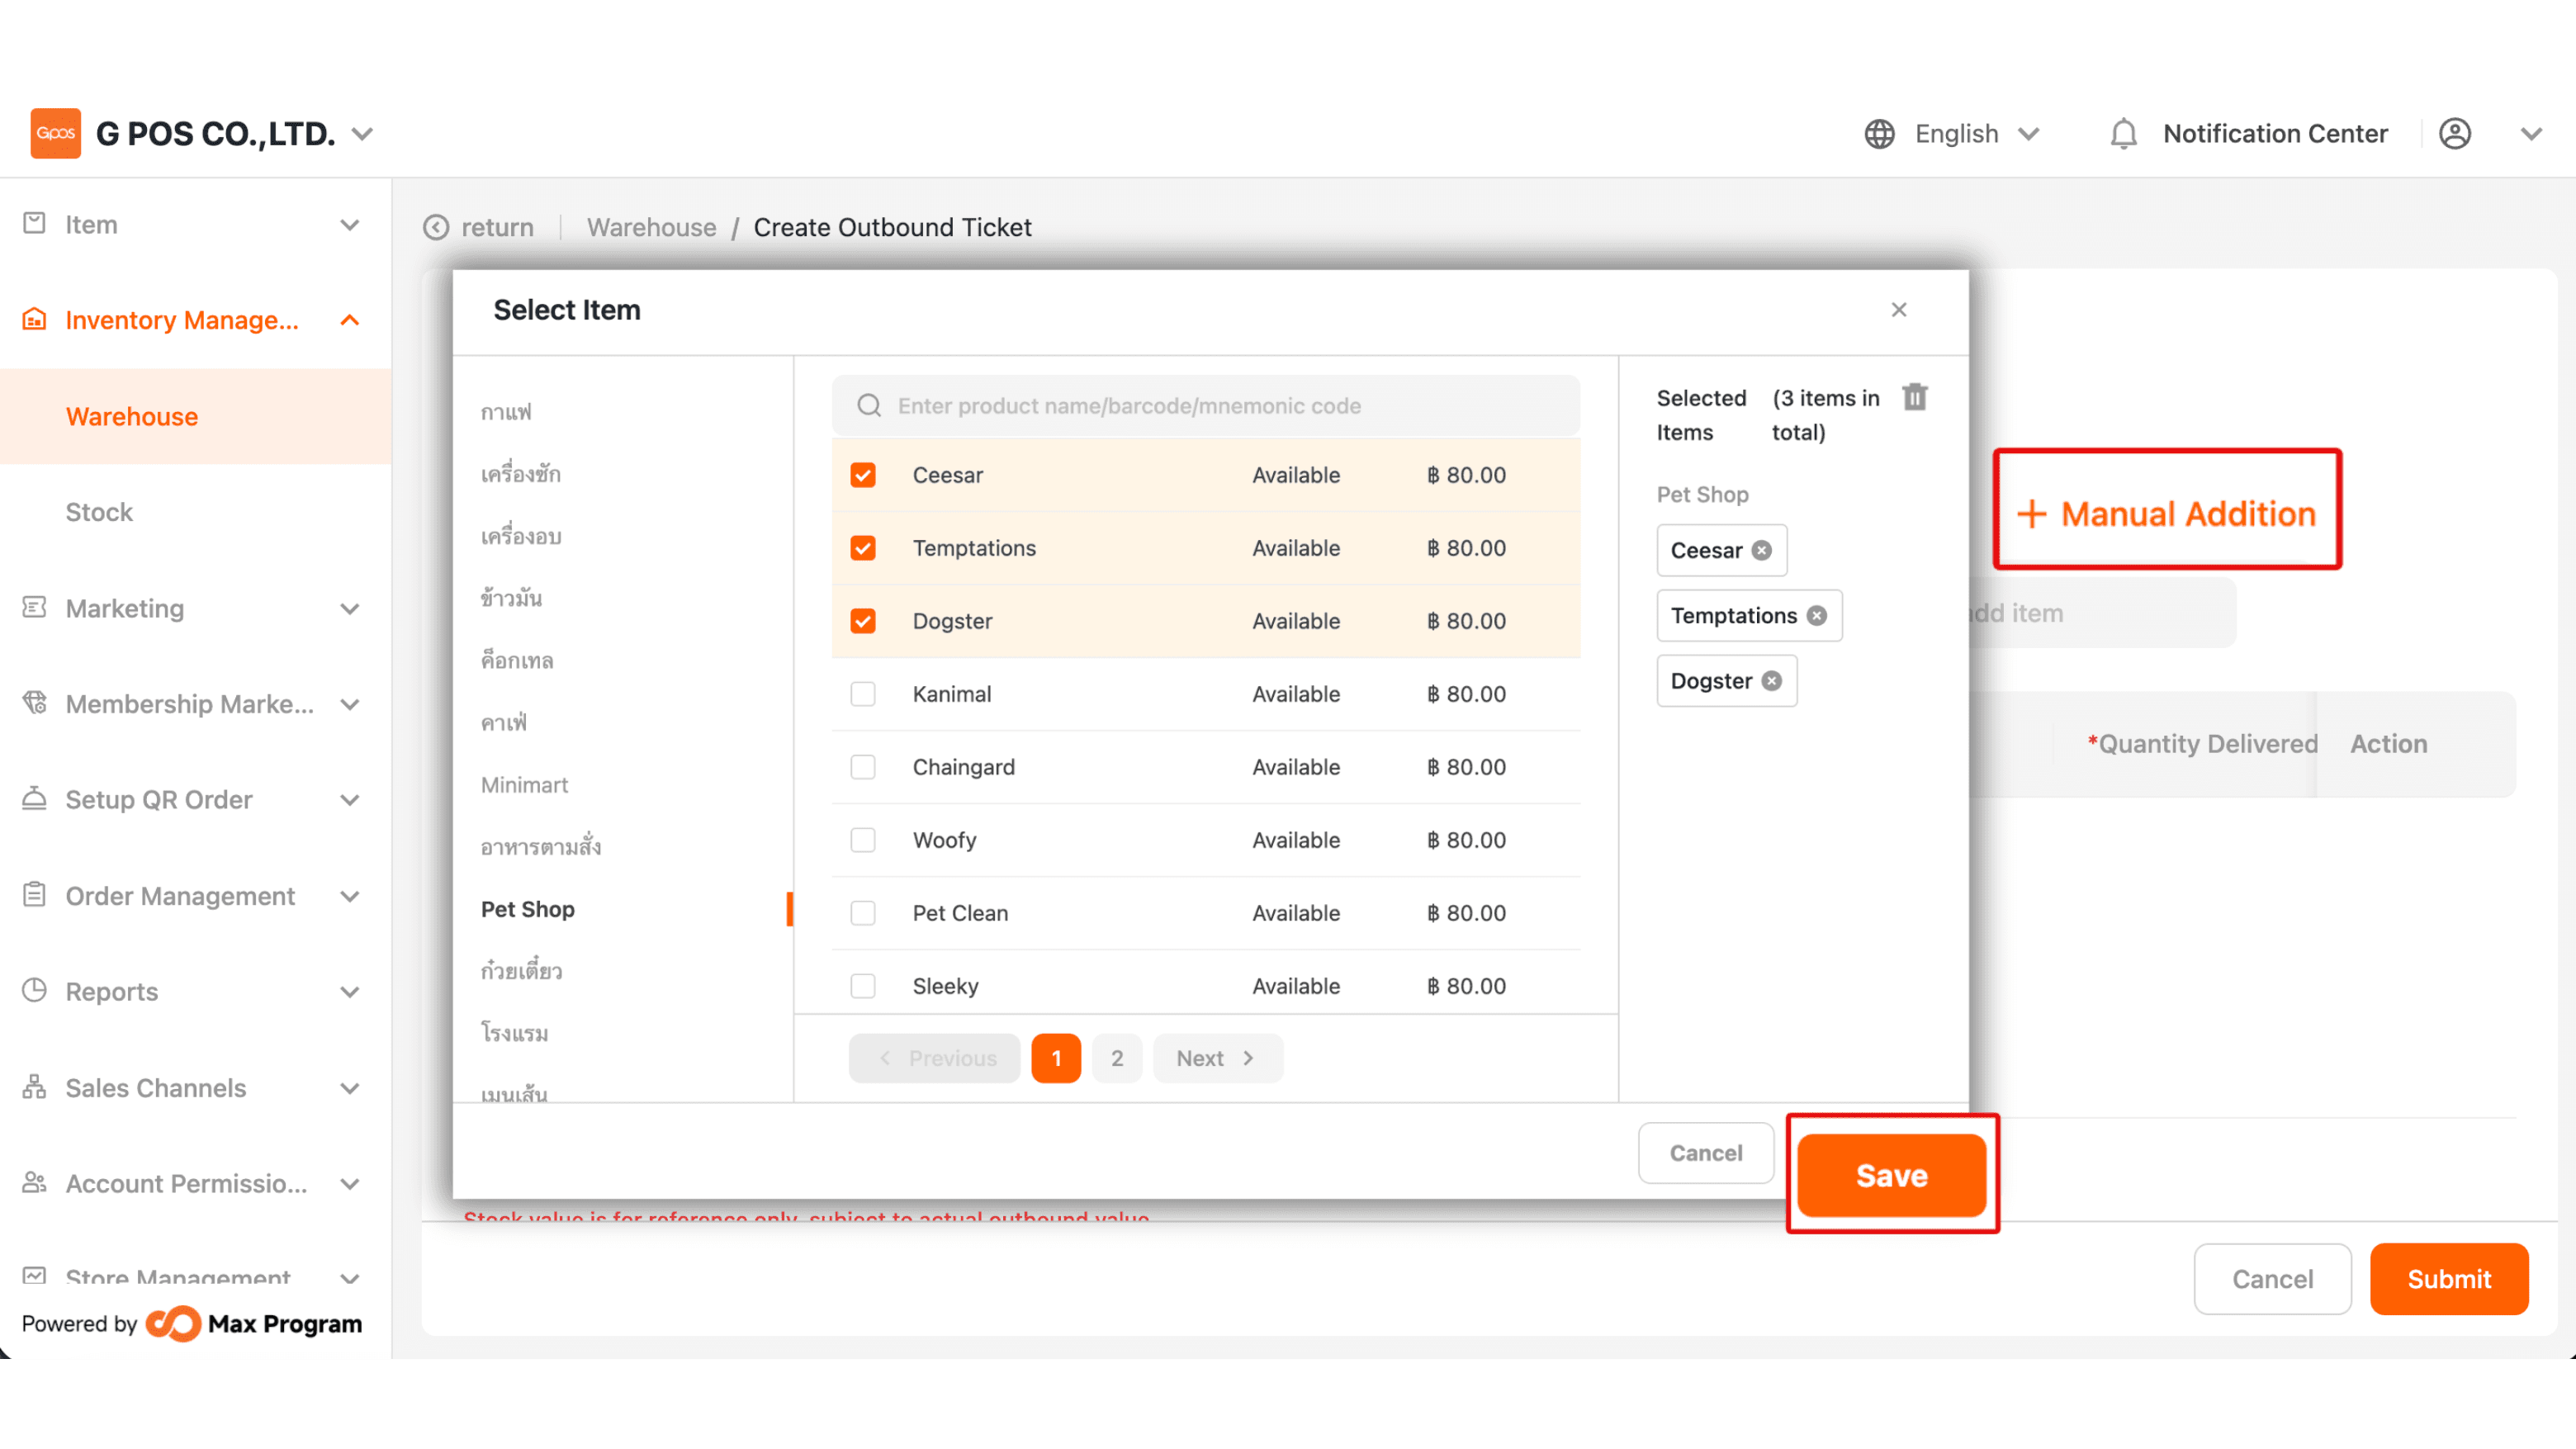
2. Tap “+ Manual Addition” to go to the item list page, then select the items as needed and press “Save.”
3. Enter the quantity to export in the “ Quantity Delivered” field. Once done, click “Submit” to save the transaction.