Import Inventory
2026-04-02 21:49
3,231 views
Helps keep inventory data up to date, accurate, and easy to verify. Improves efficiency and accuracy in inventory management, reduces issues of stock shortages or overstocking, and supports effective sales and purchasing planning.
1. Log in to the Back Office
Go to login.gpos.co.th, enter your email and password, then click Log in.
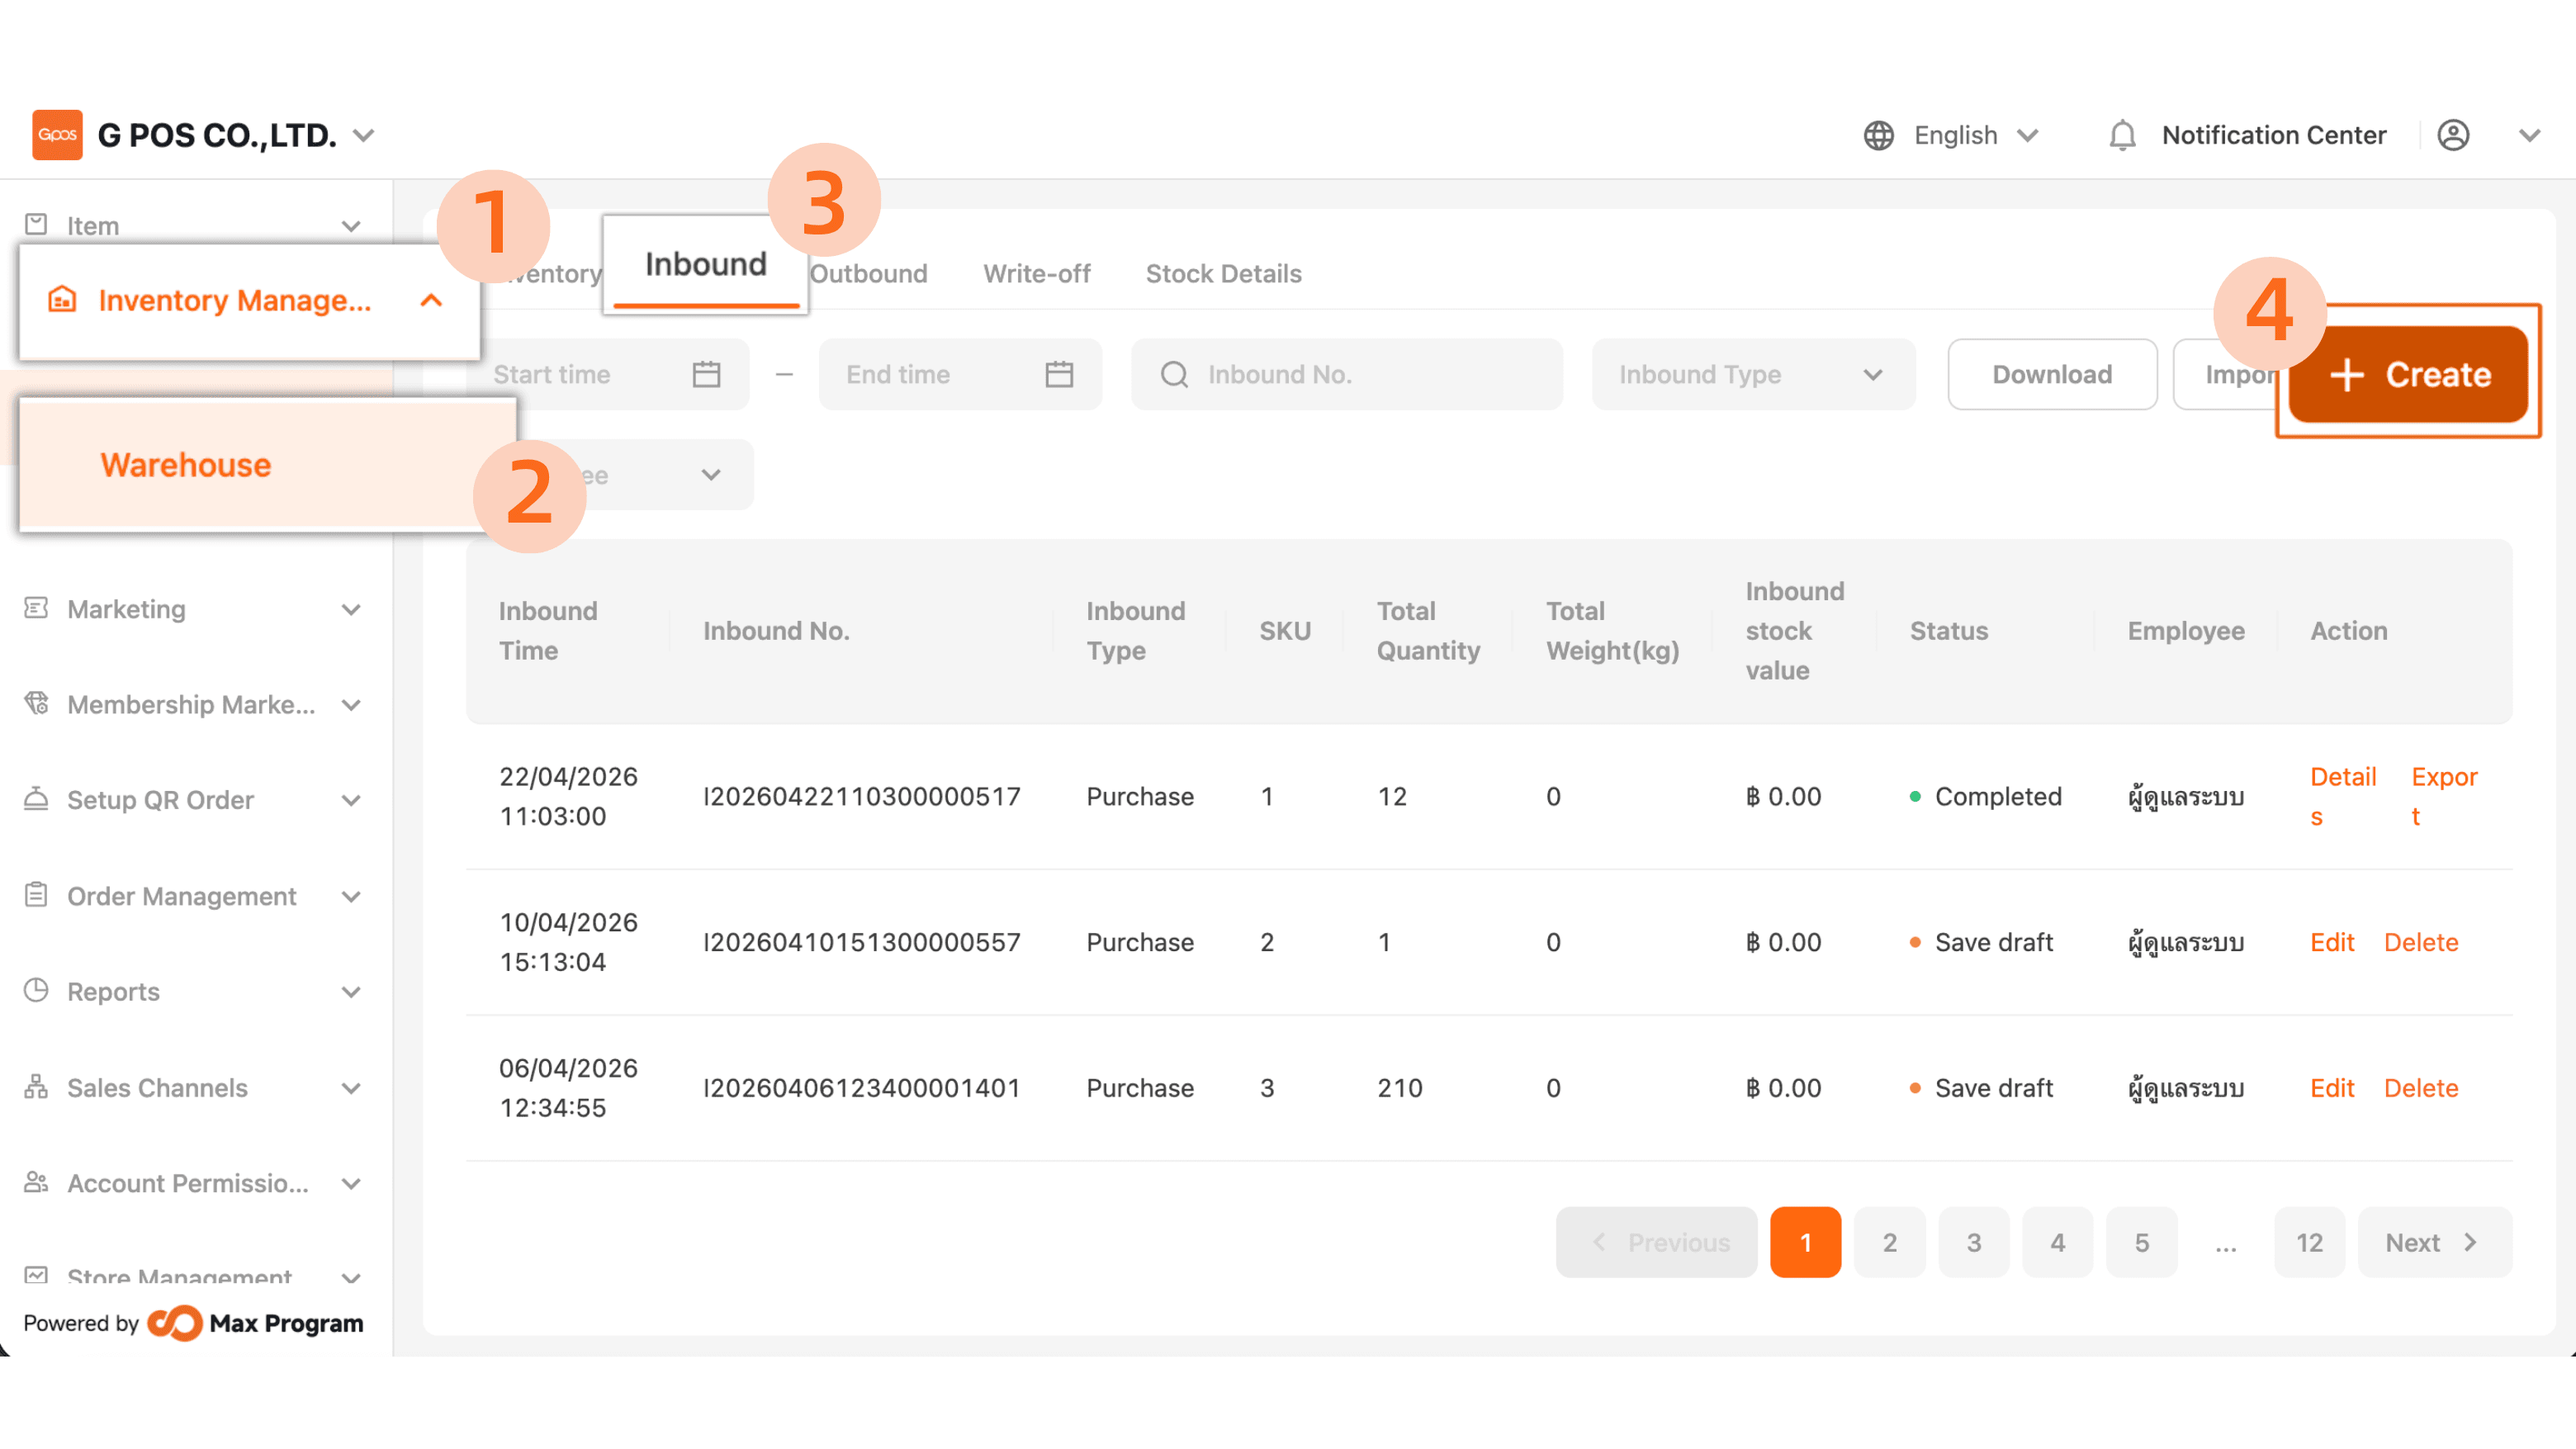
Click “Inventory Management” > “Warehouse” > “Inbound” > “+Create.”
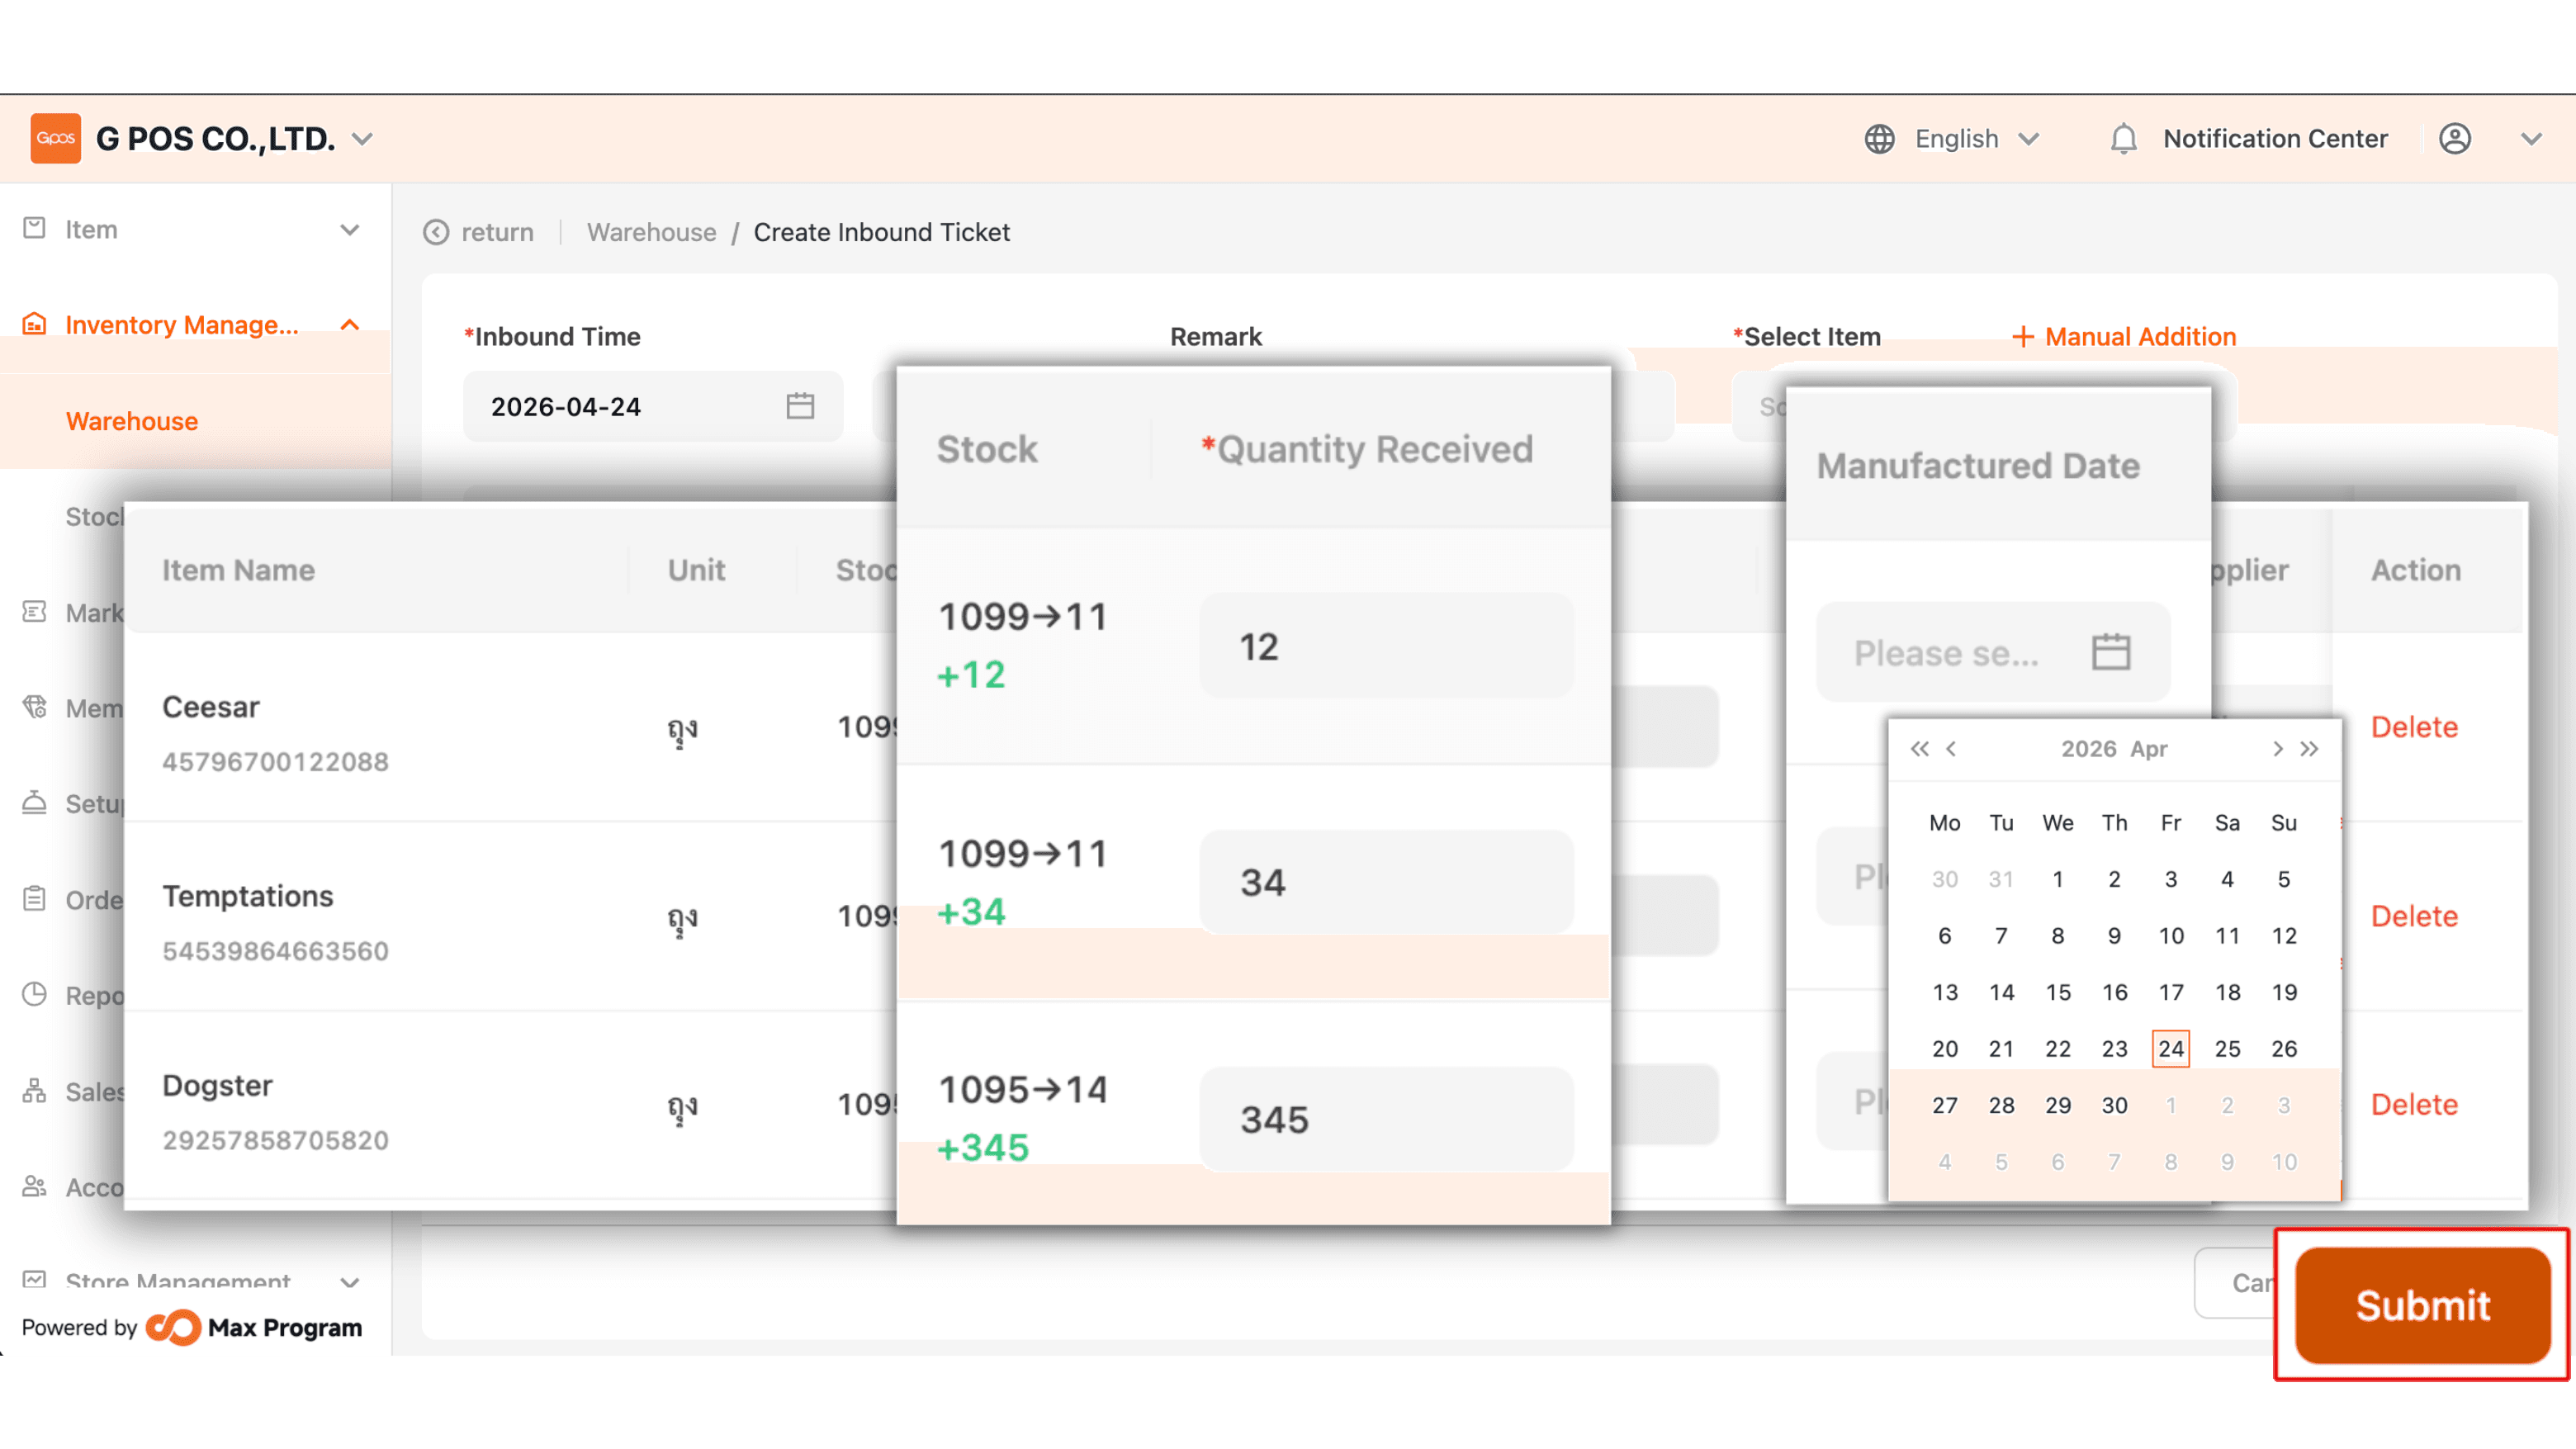
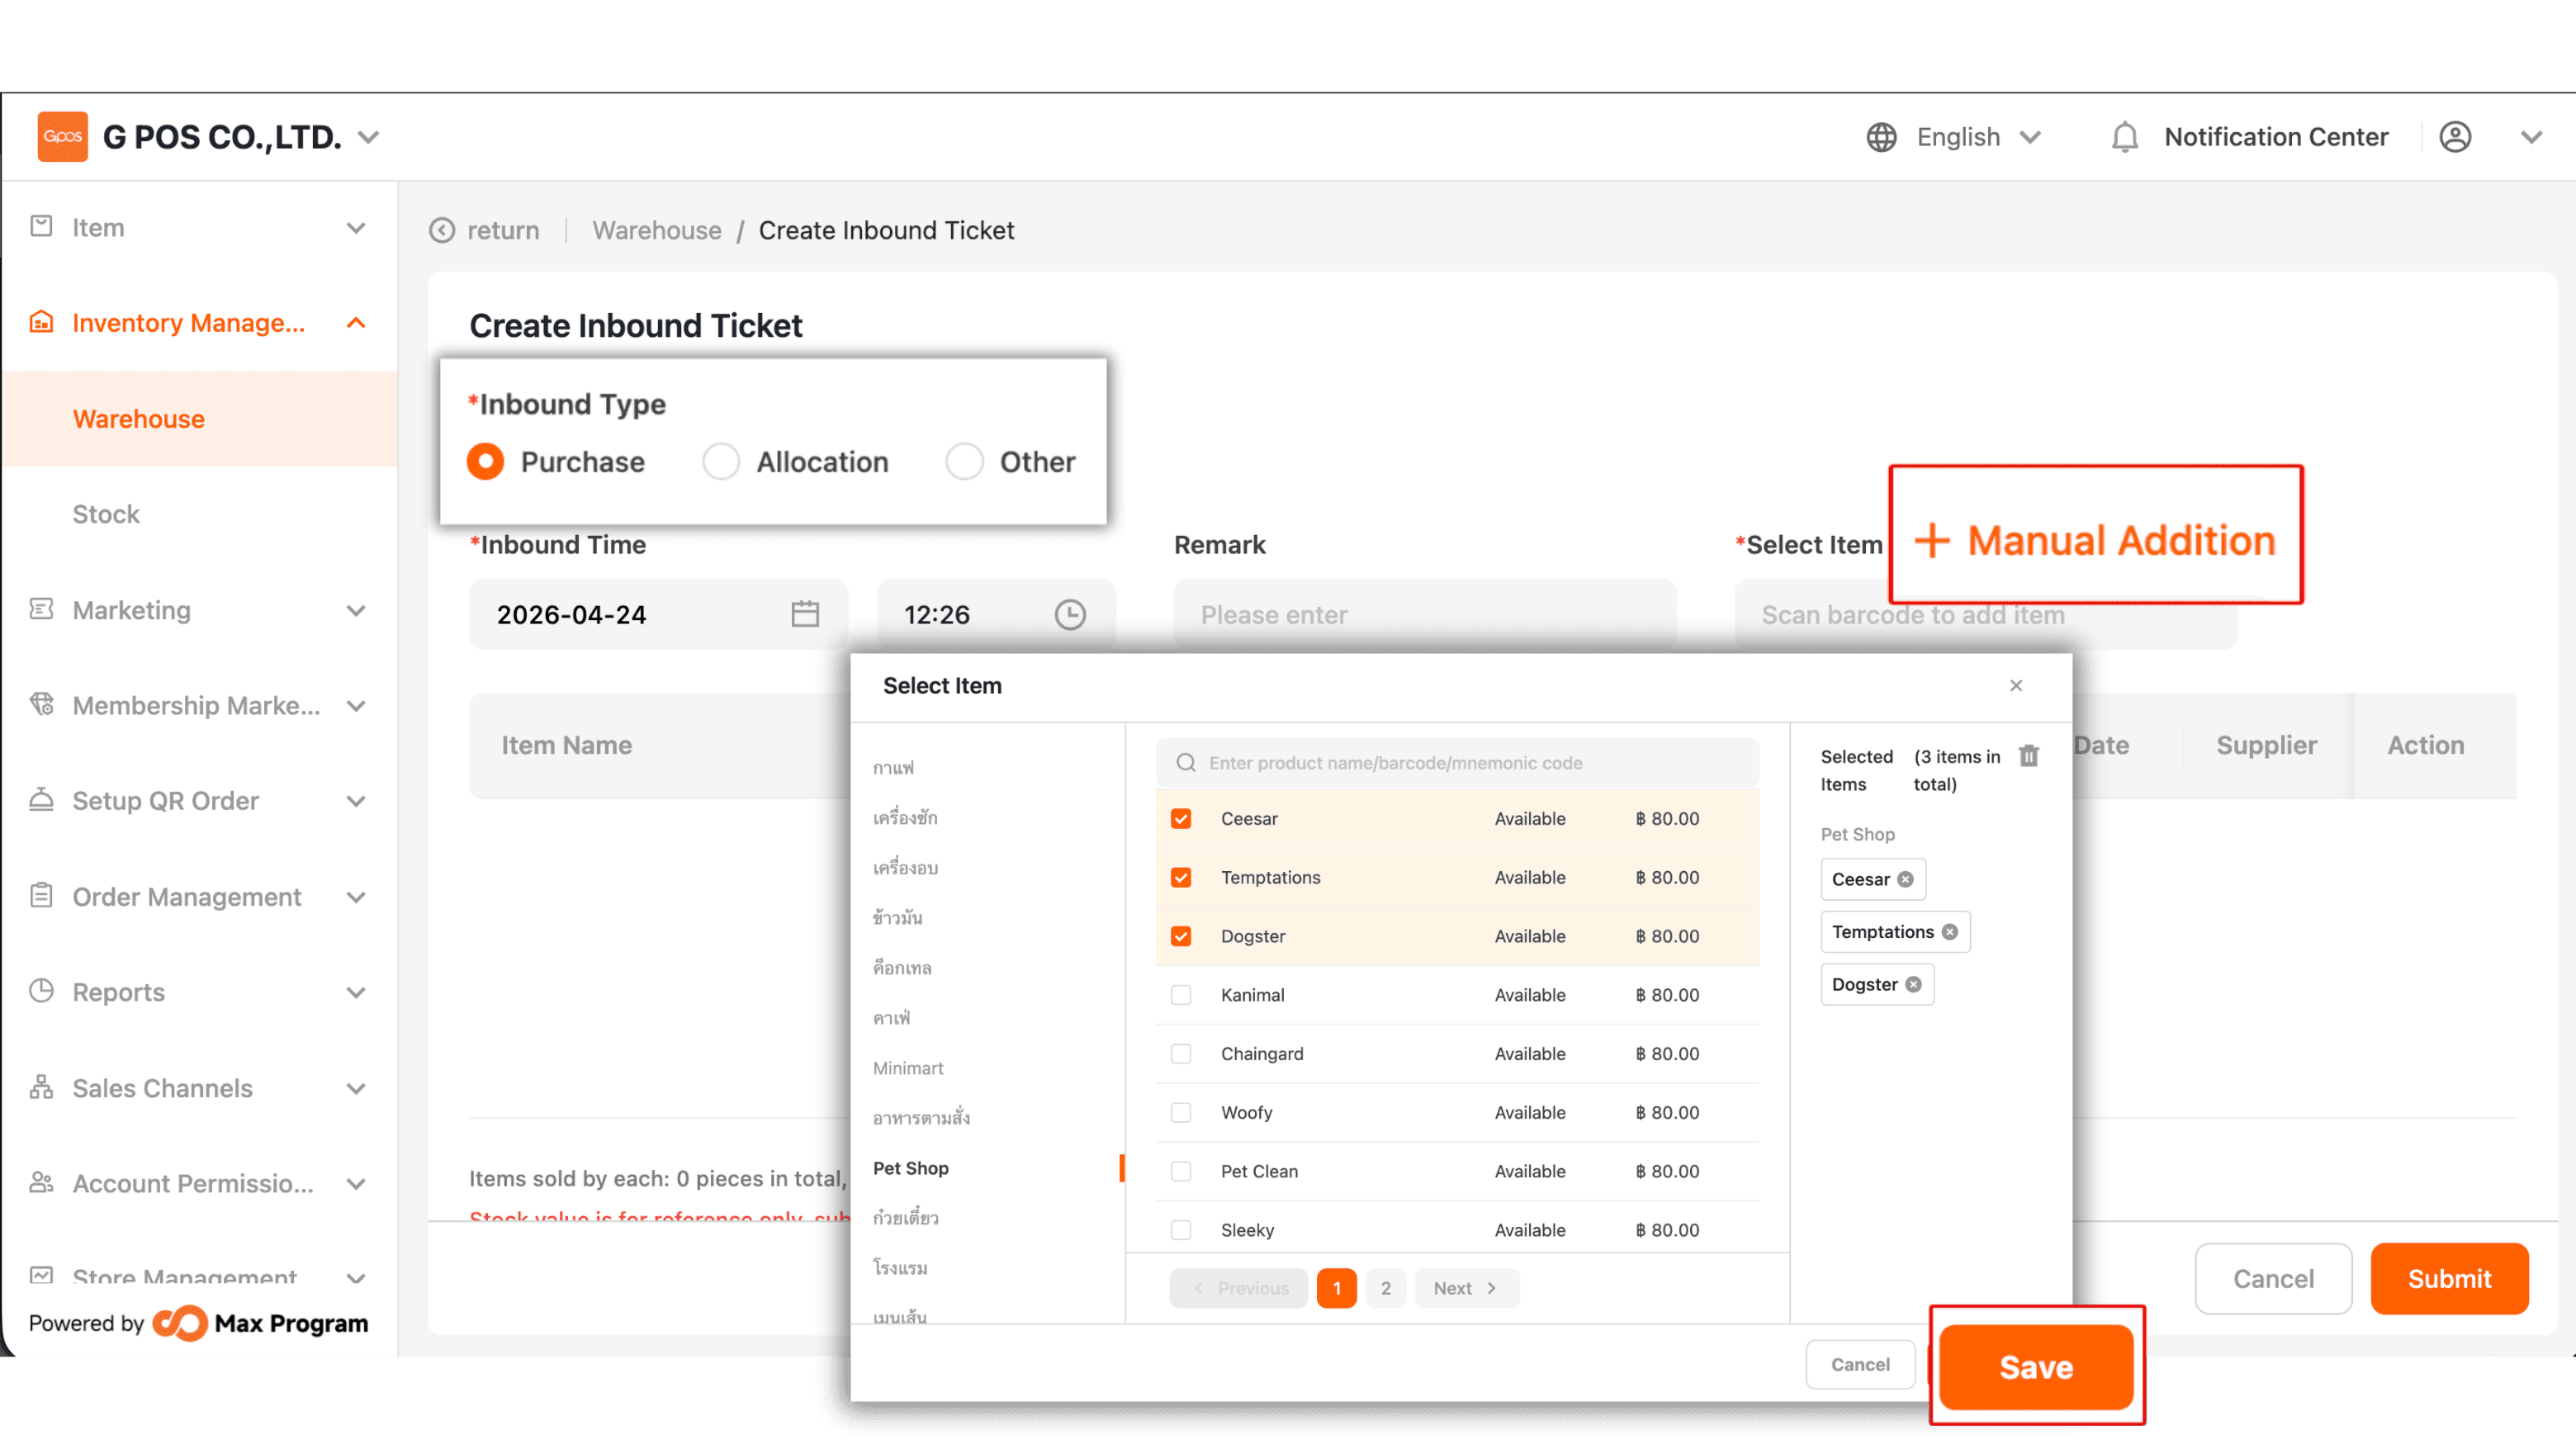
2. You can select the import type, then tap “+ Manual Addition” to choose the product items. After that, press “Save.”
3. Once the items are selected, enter the quantity in the “ Quantity Received” field based on the imported amount.
|Manufacturing Date is used if the store needs to track expiry dates or separate product batches; you can enter that information here.