Remove Distributed Items from Head Office to Branches
2026-02-16 16:08
Removing product items from the head office to branch locations helps keep menus up to date by removing unwanted products from all branches at once. This reduces sales confusion and enables efficient centralized control of product listings.
Before You Begin
Removing distributed product items means removing product items from Store Branches that were previously exported by the head office. You may use the same template previously used to add items or create a new template. You can view the template creation instructions in the Creating a Menu Template menu.
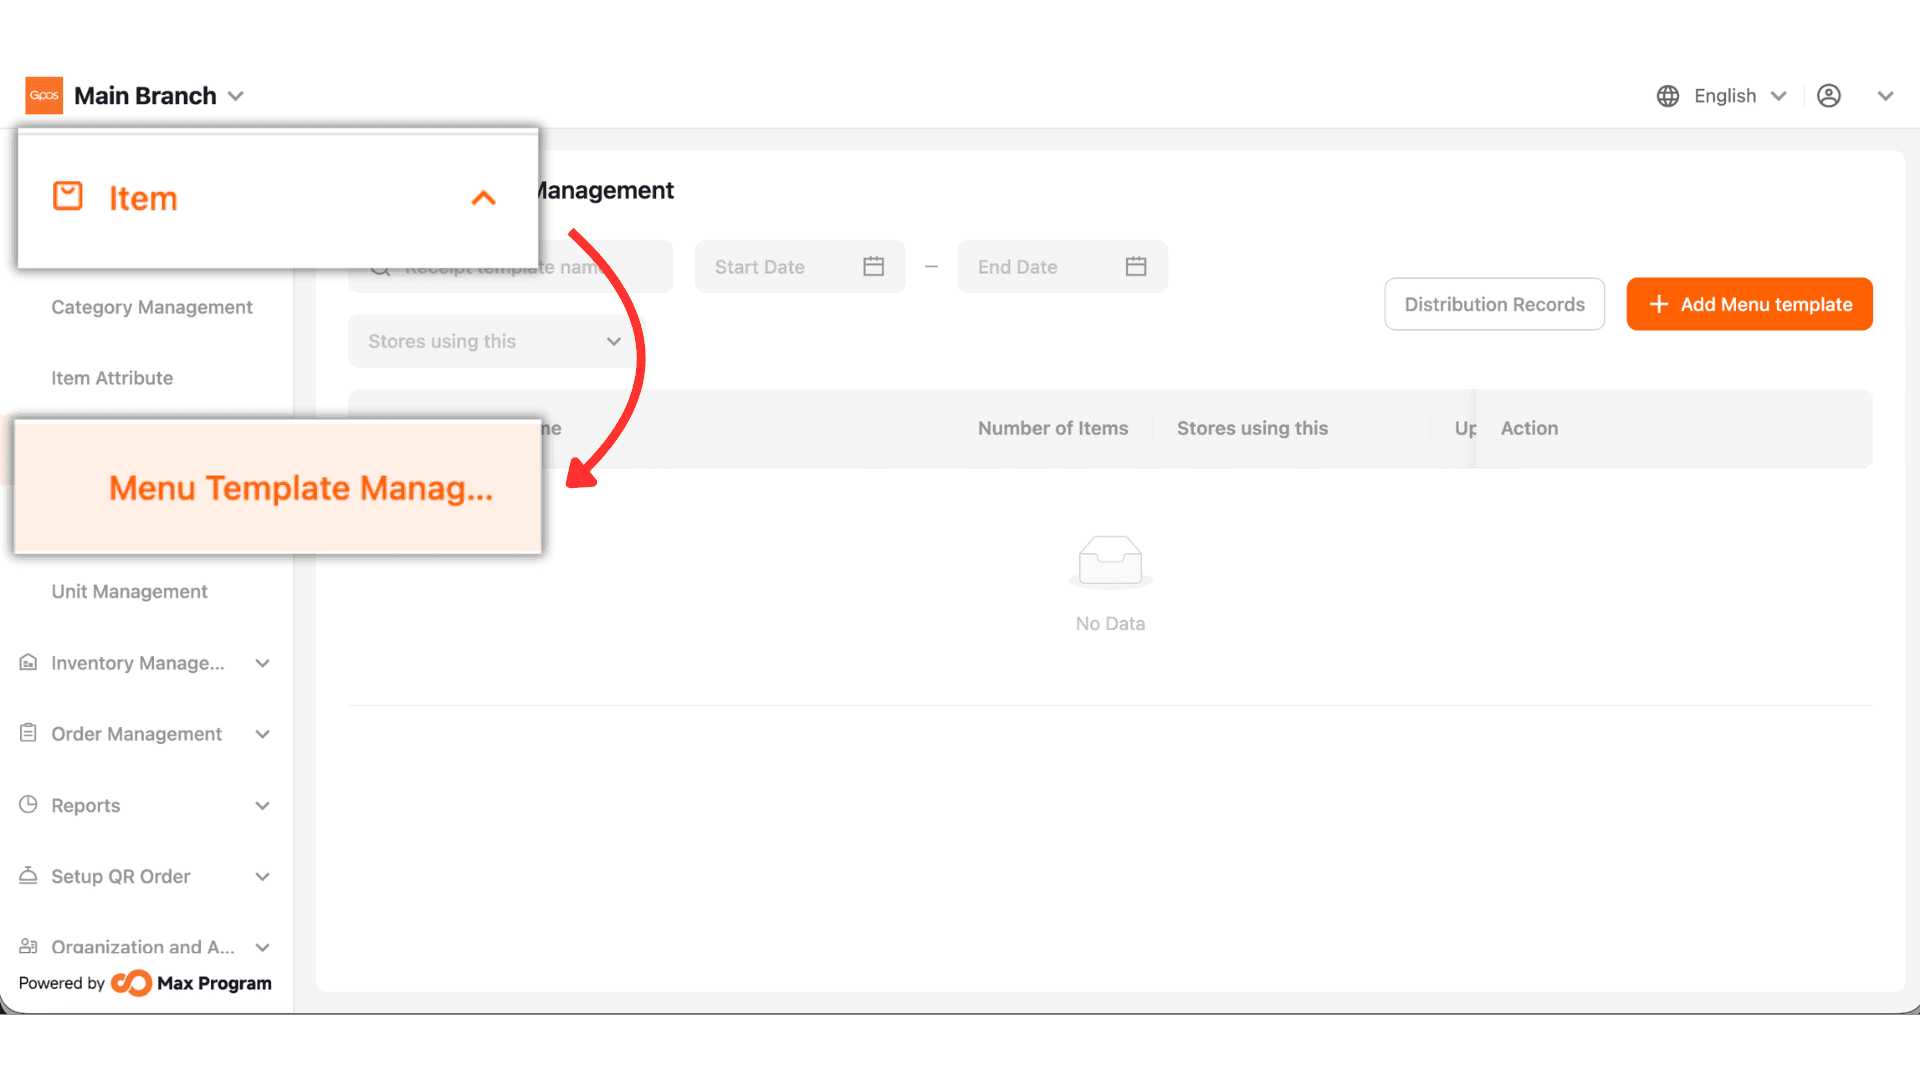
1. Click Item > Menu Template Management
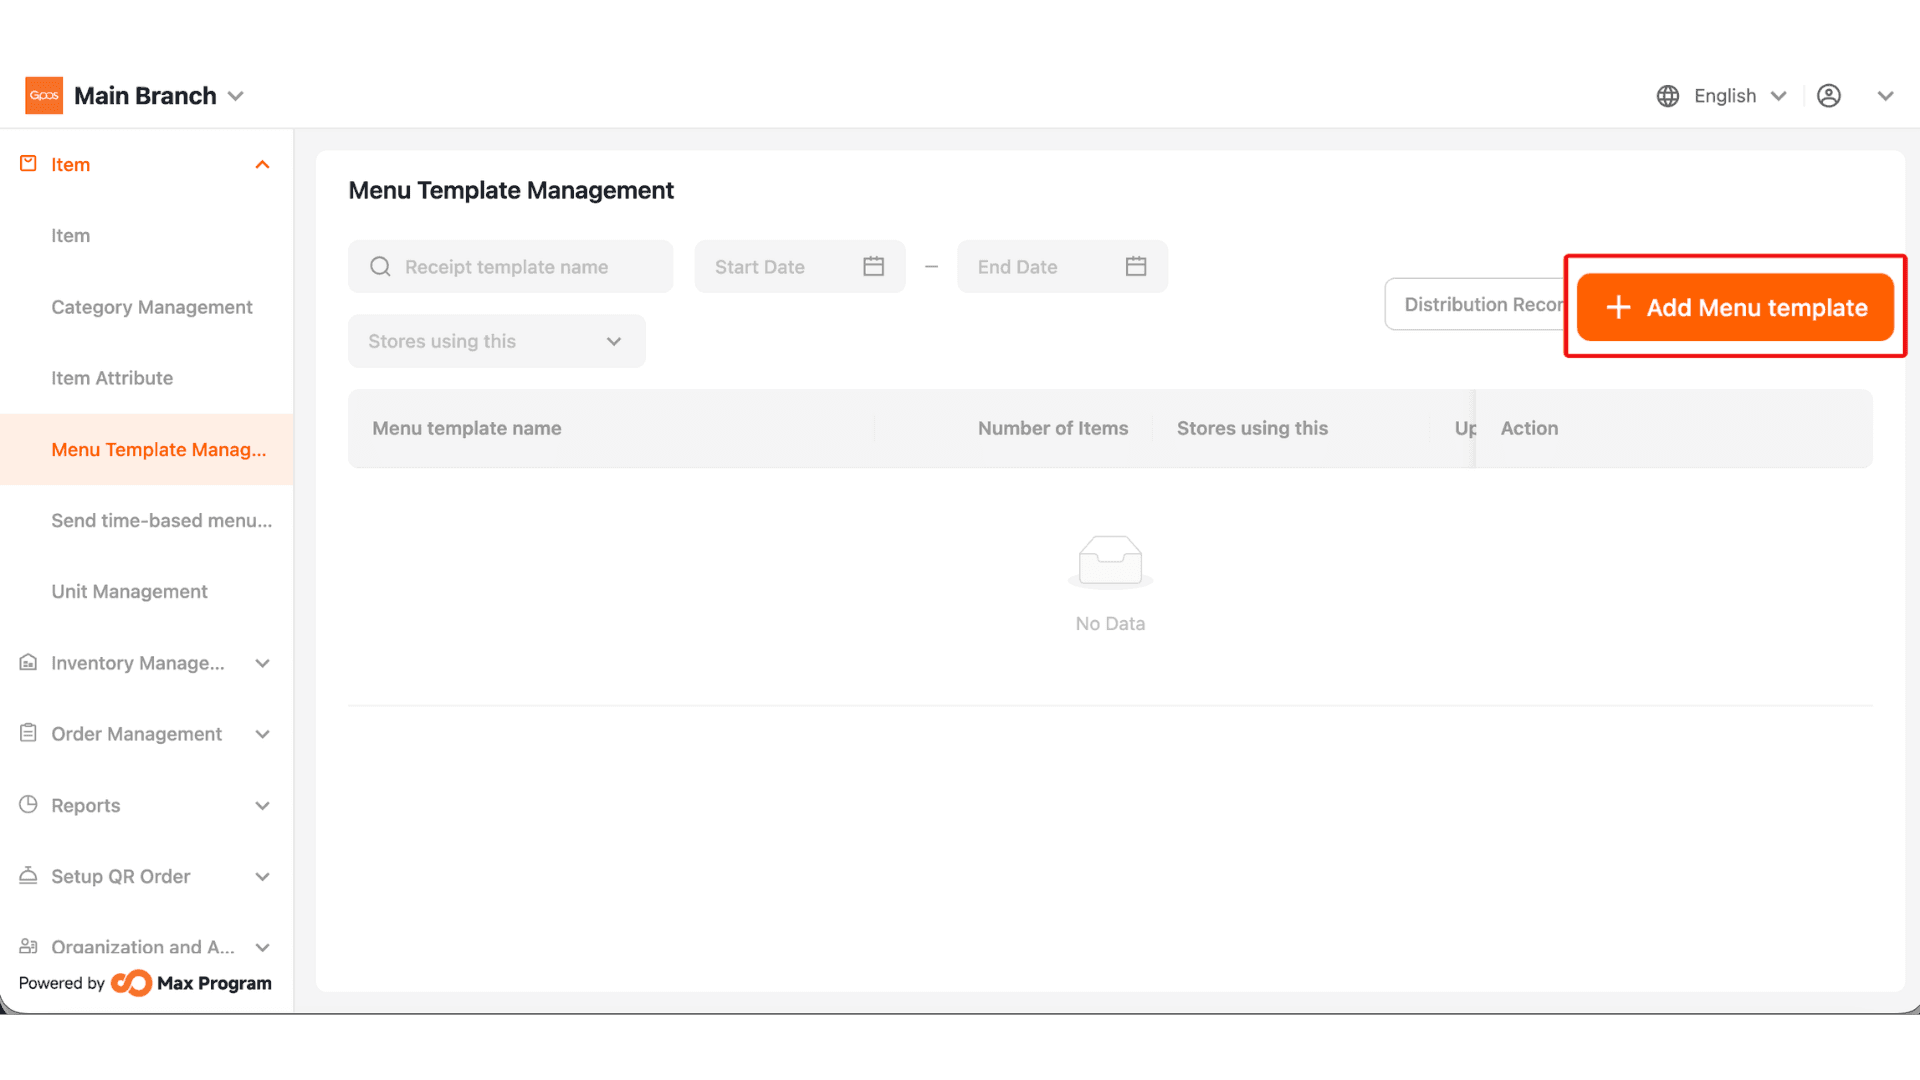
2. Click +Add Menu template
3. Set Template Name
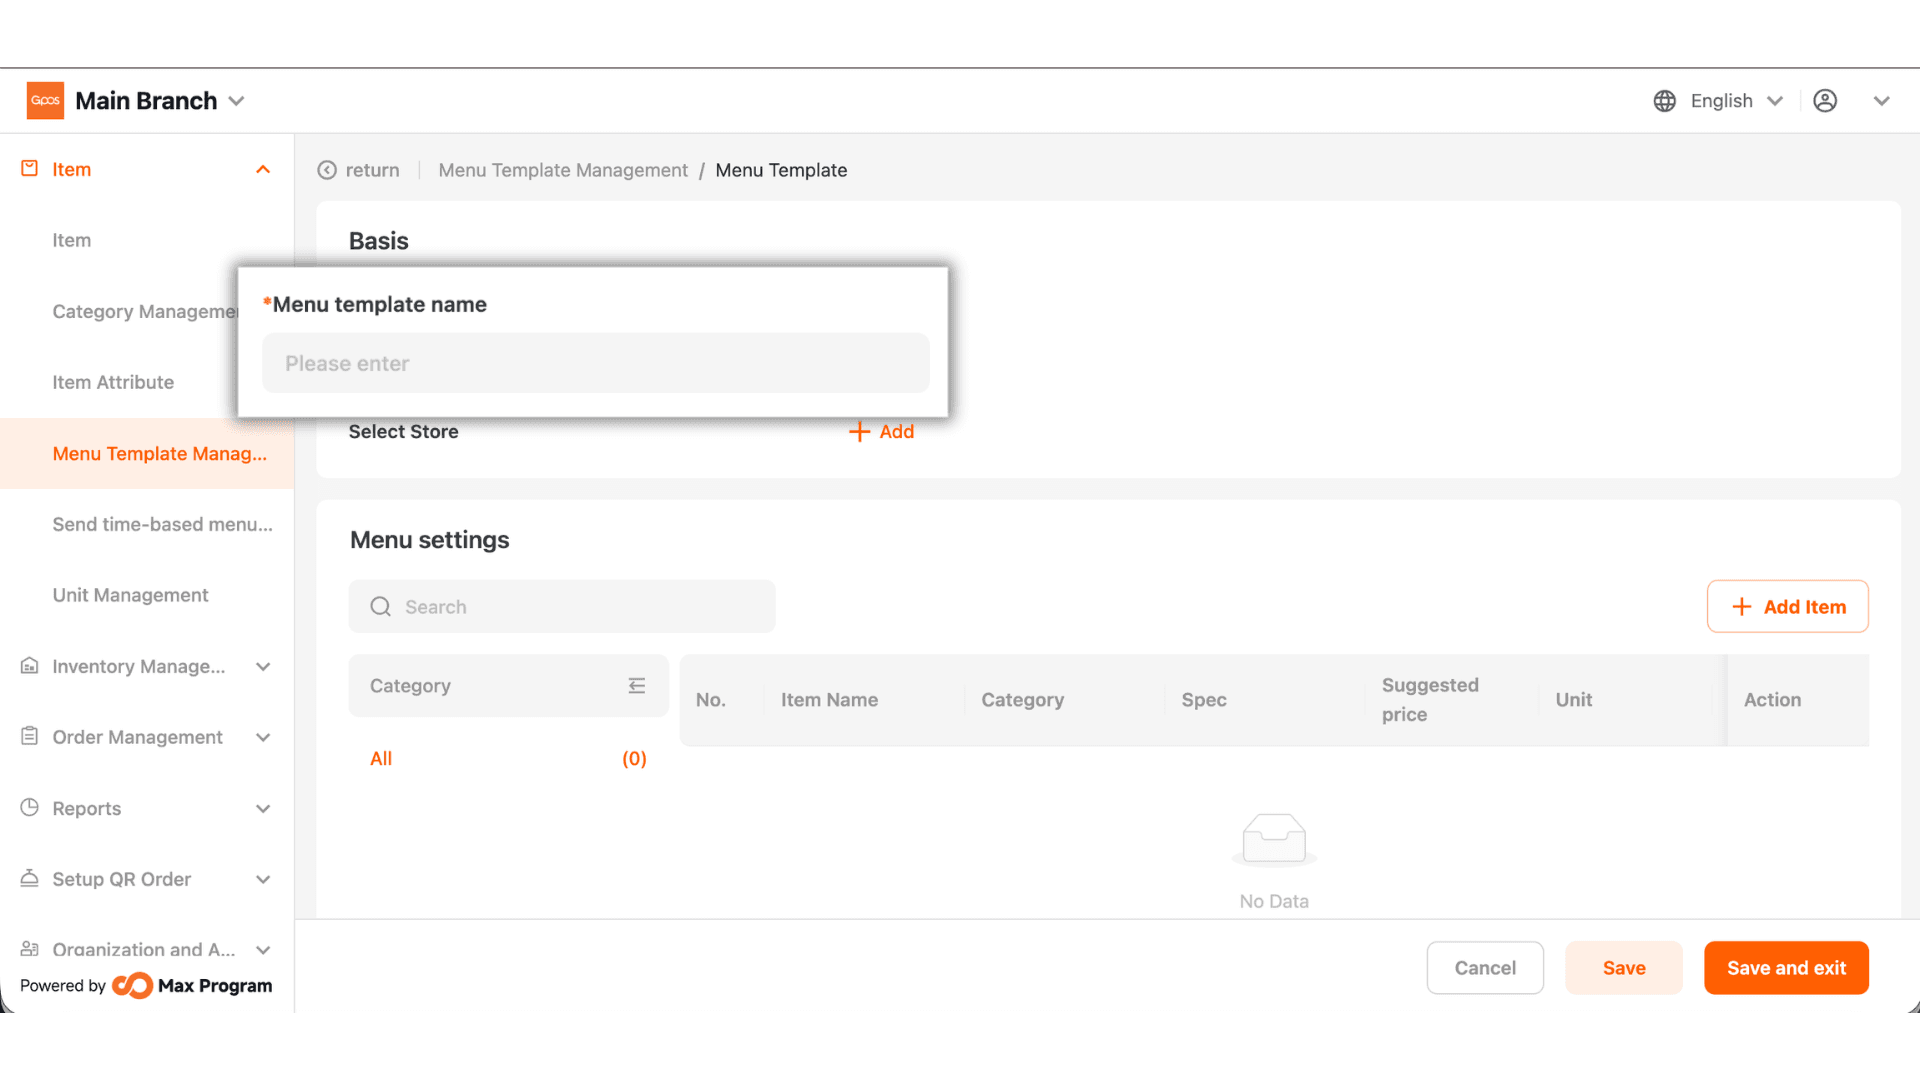
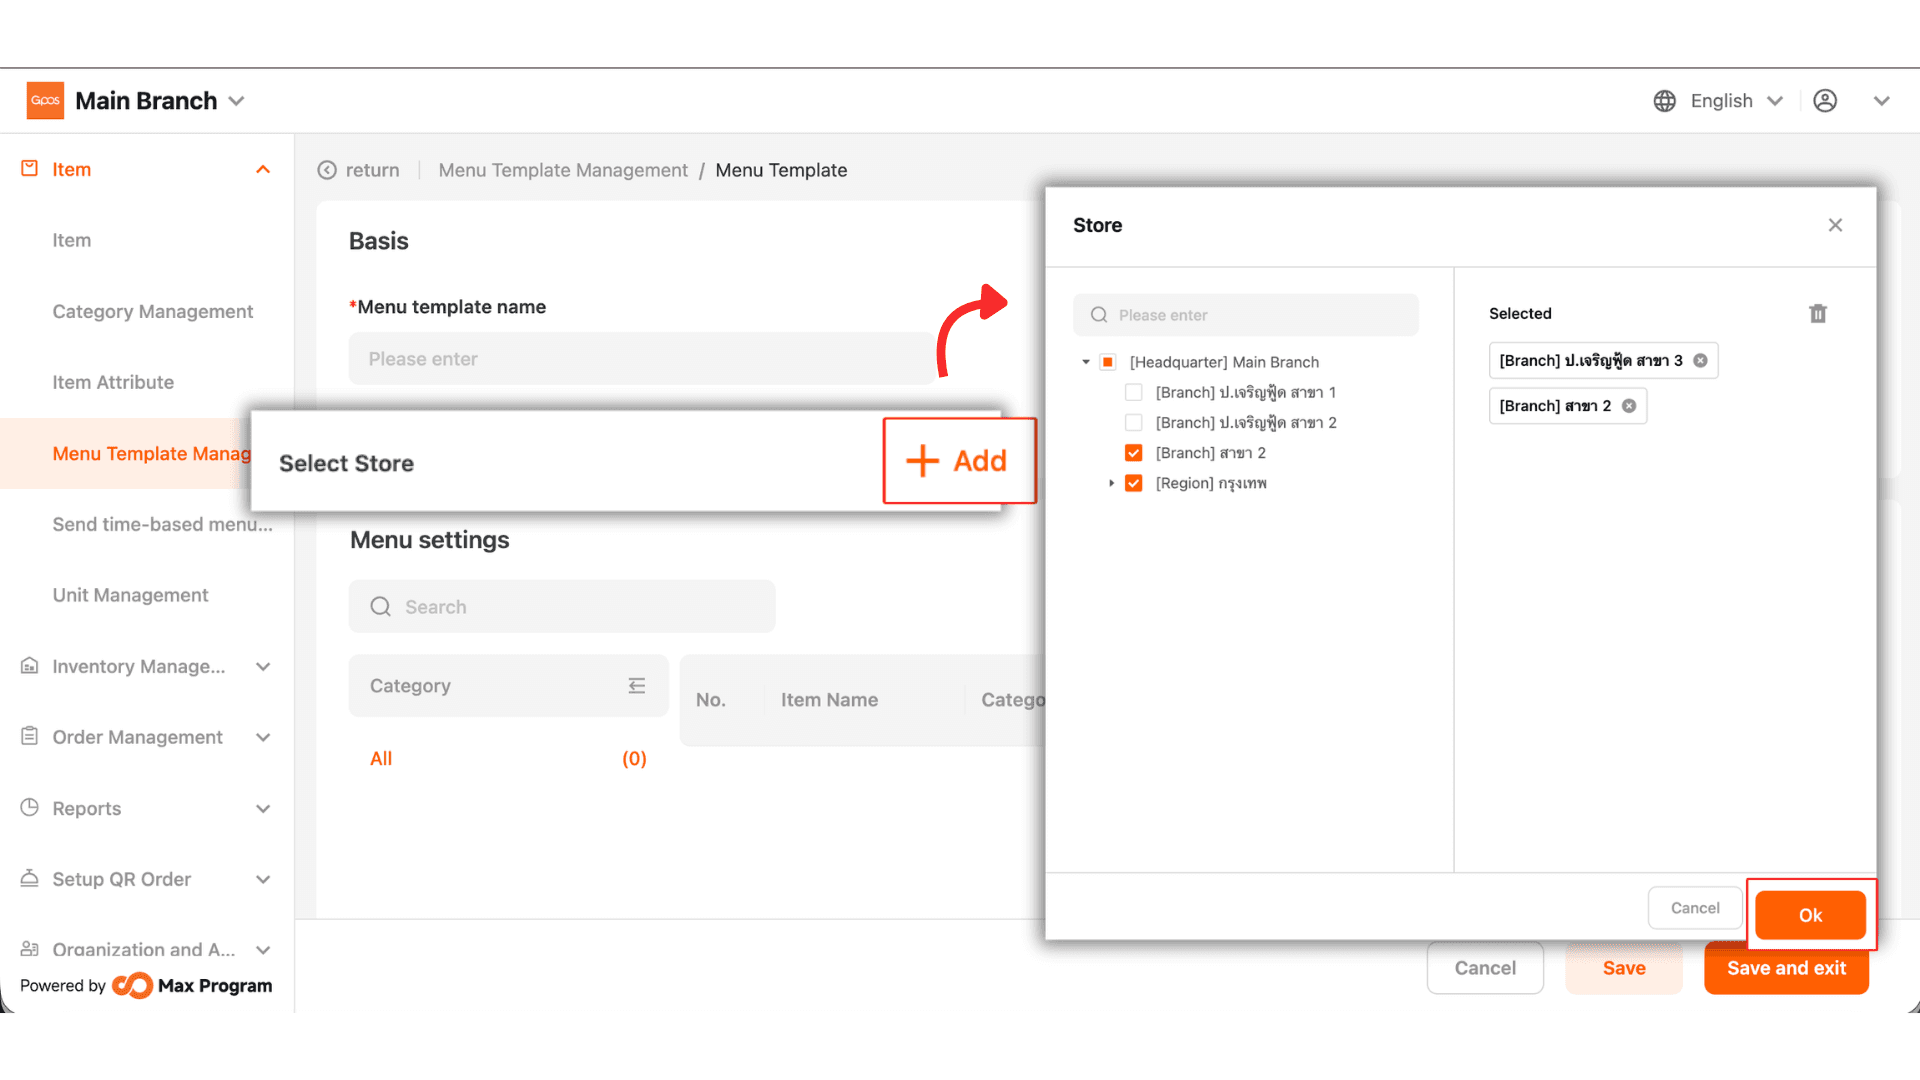
4. Select the store branch to export the selected items to that branch.
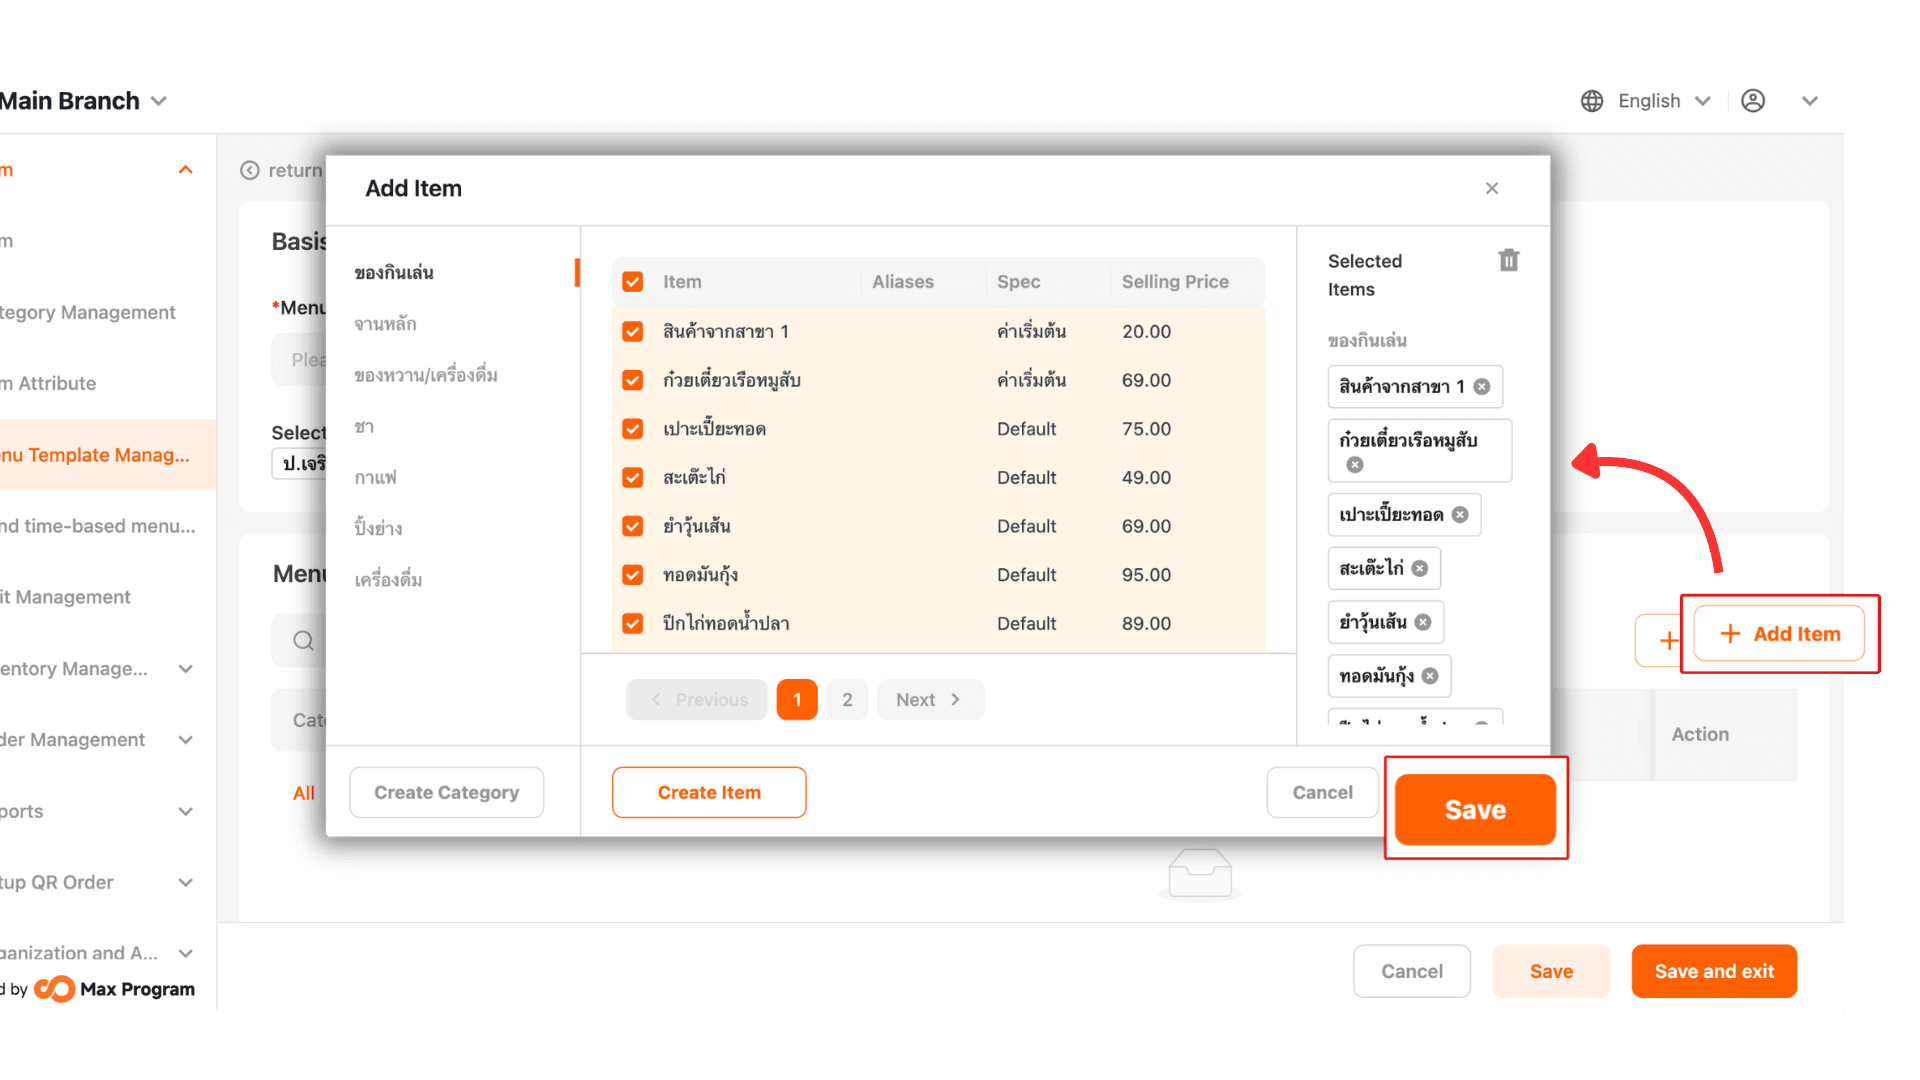
5. Add Items to select the desired products, then click Save.
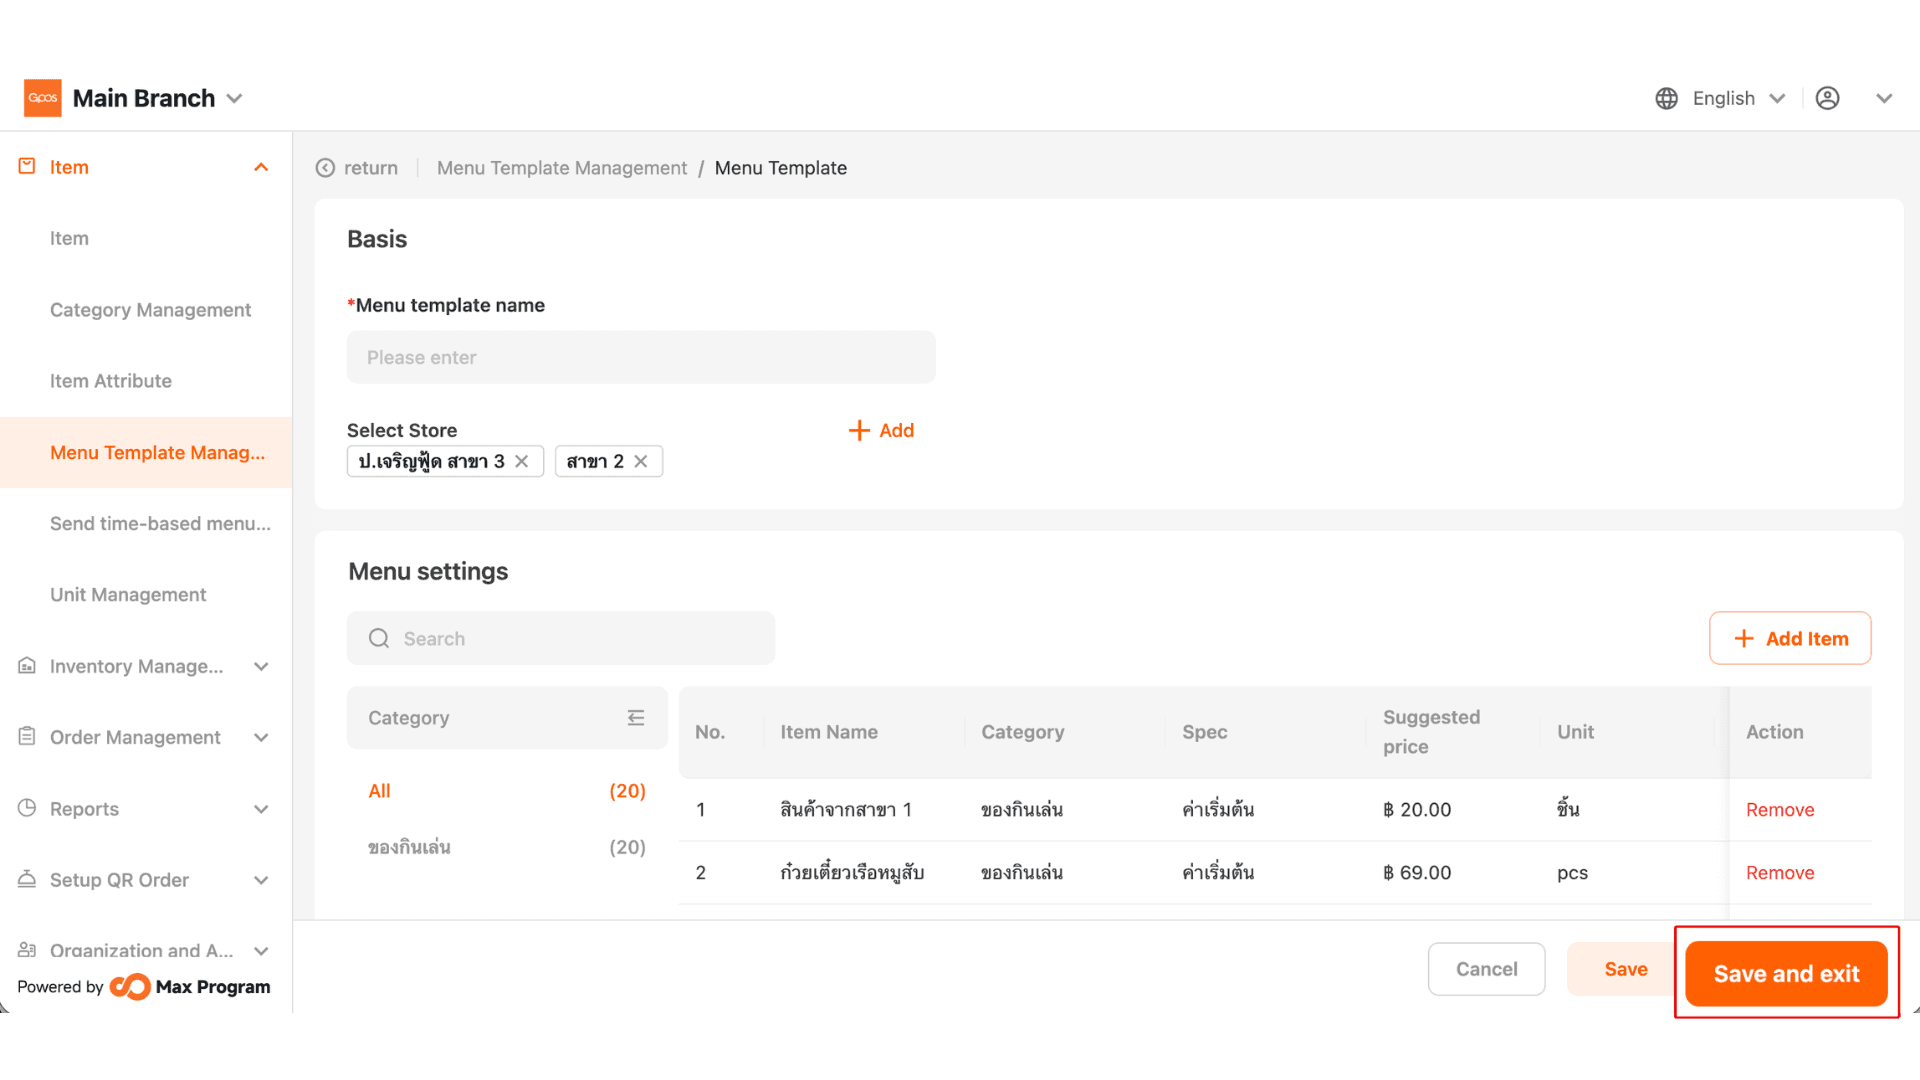
6. Click Save and Exit.
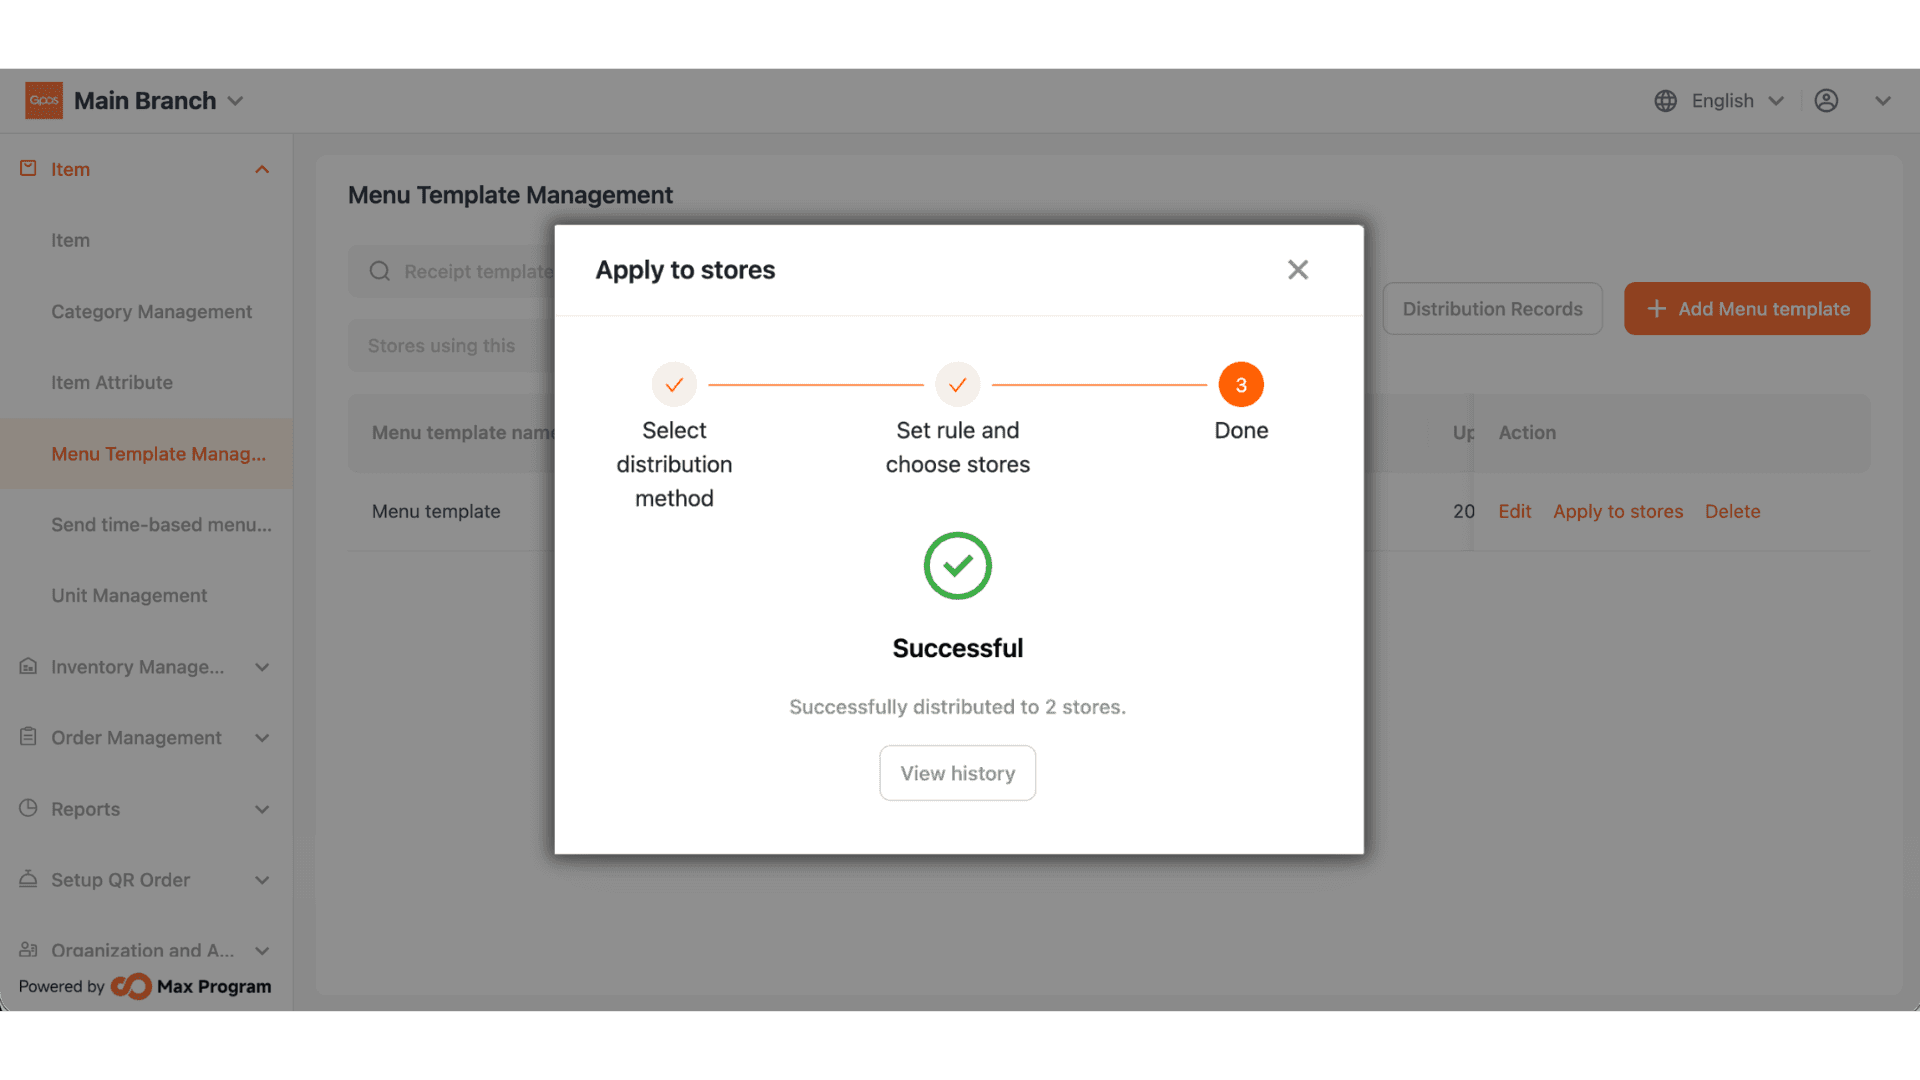
7. Click Apply to Store, remove Distributed item, then click Next.

8.Verify the information, then click Distribute.

9.Wait until the process is completed successfully.