Replace the menu from Head Office to Branches
2026-02-16 14:40
Replace the menu from the head office to branch locations allows you to update the entire product list at once while completely removing the previous menu. This ensures that all branches use the same standardized menu, reduces duplication, and enables efficient centralized management.
Before You Begin
Replace Menu means sending a new product list to Store Branches and deleting all previous product lists that were distributed by the head office. A new menu template must be created beforehand. You can learn how to create one in the Creating a Menu Template menu.
1. Go to the Product Distribution
After creating the menu template, go to the “Items” menu and select “Product Distribution.”
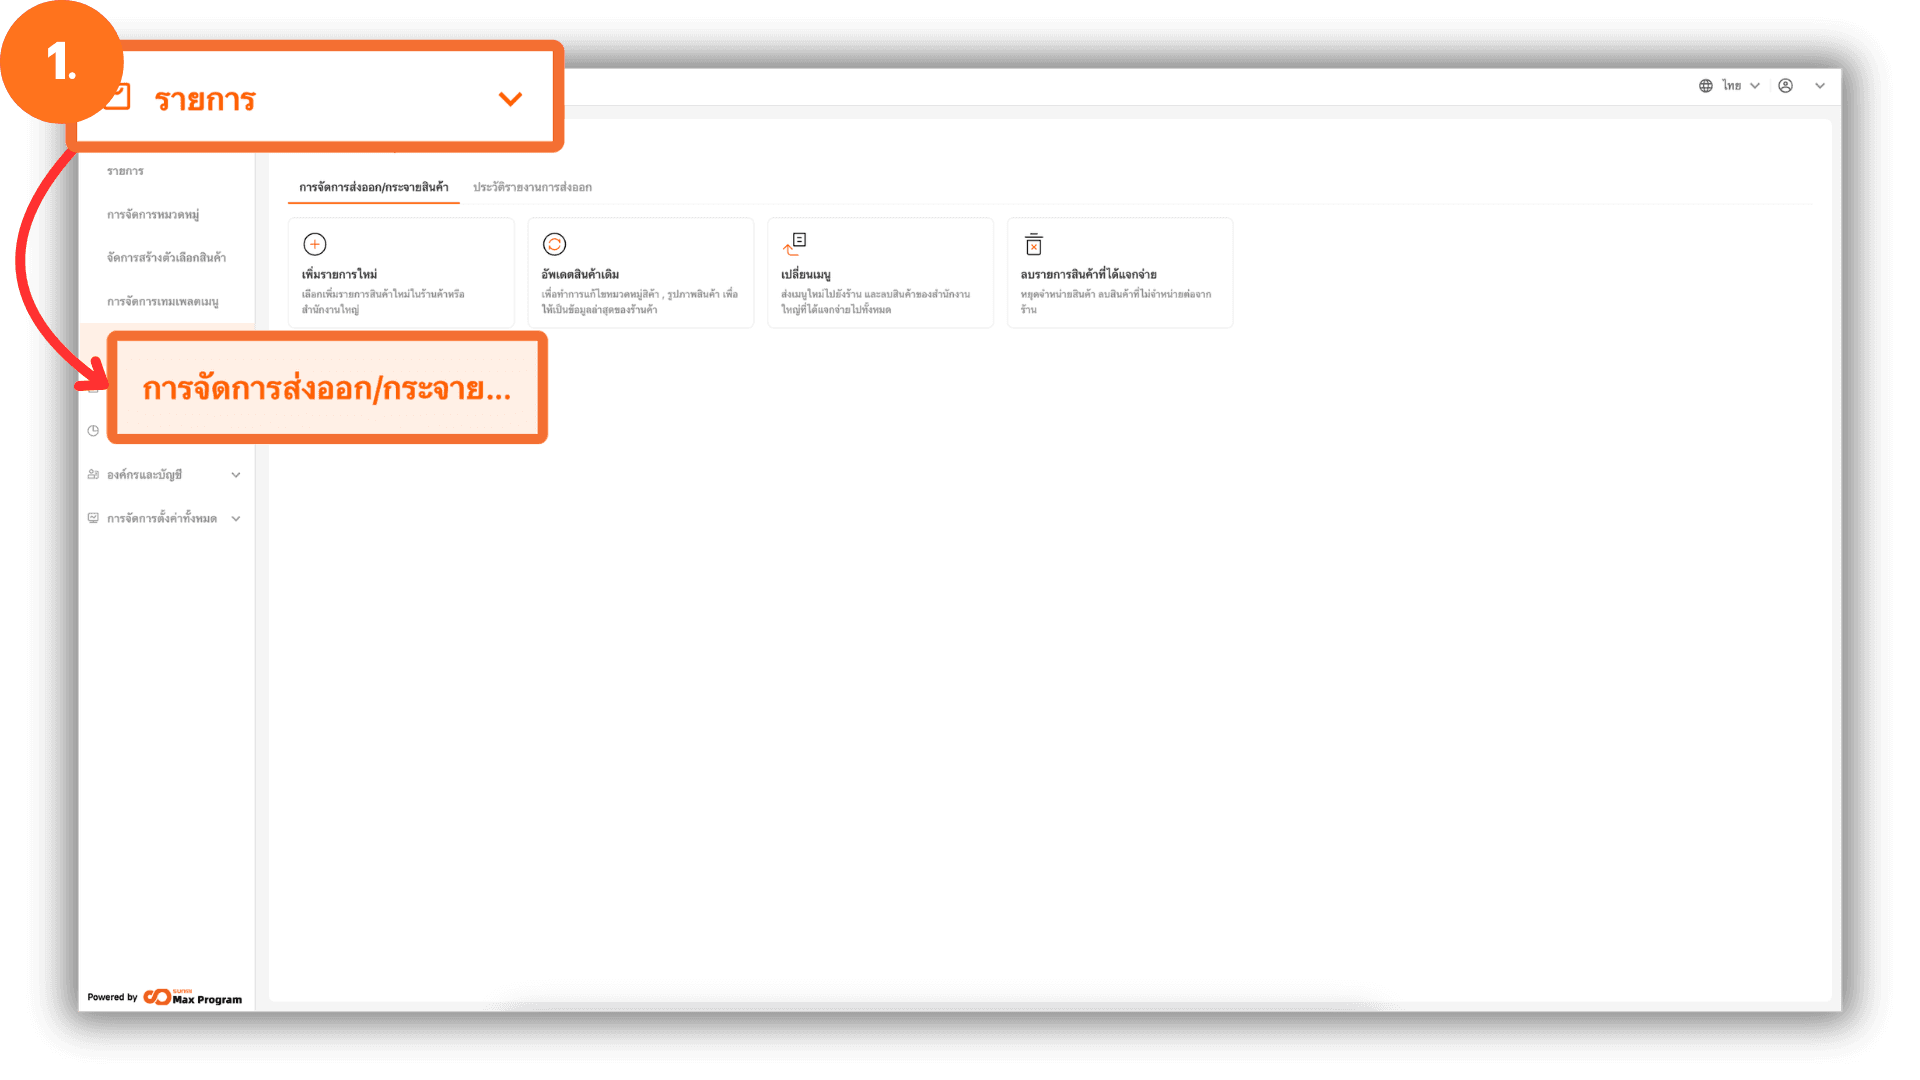
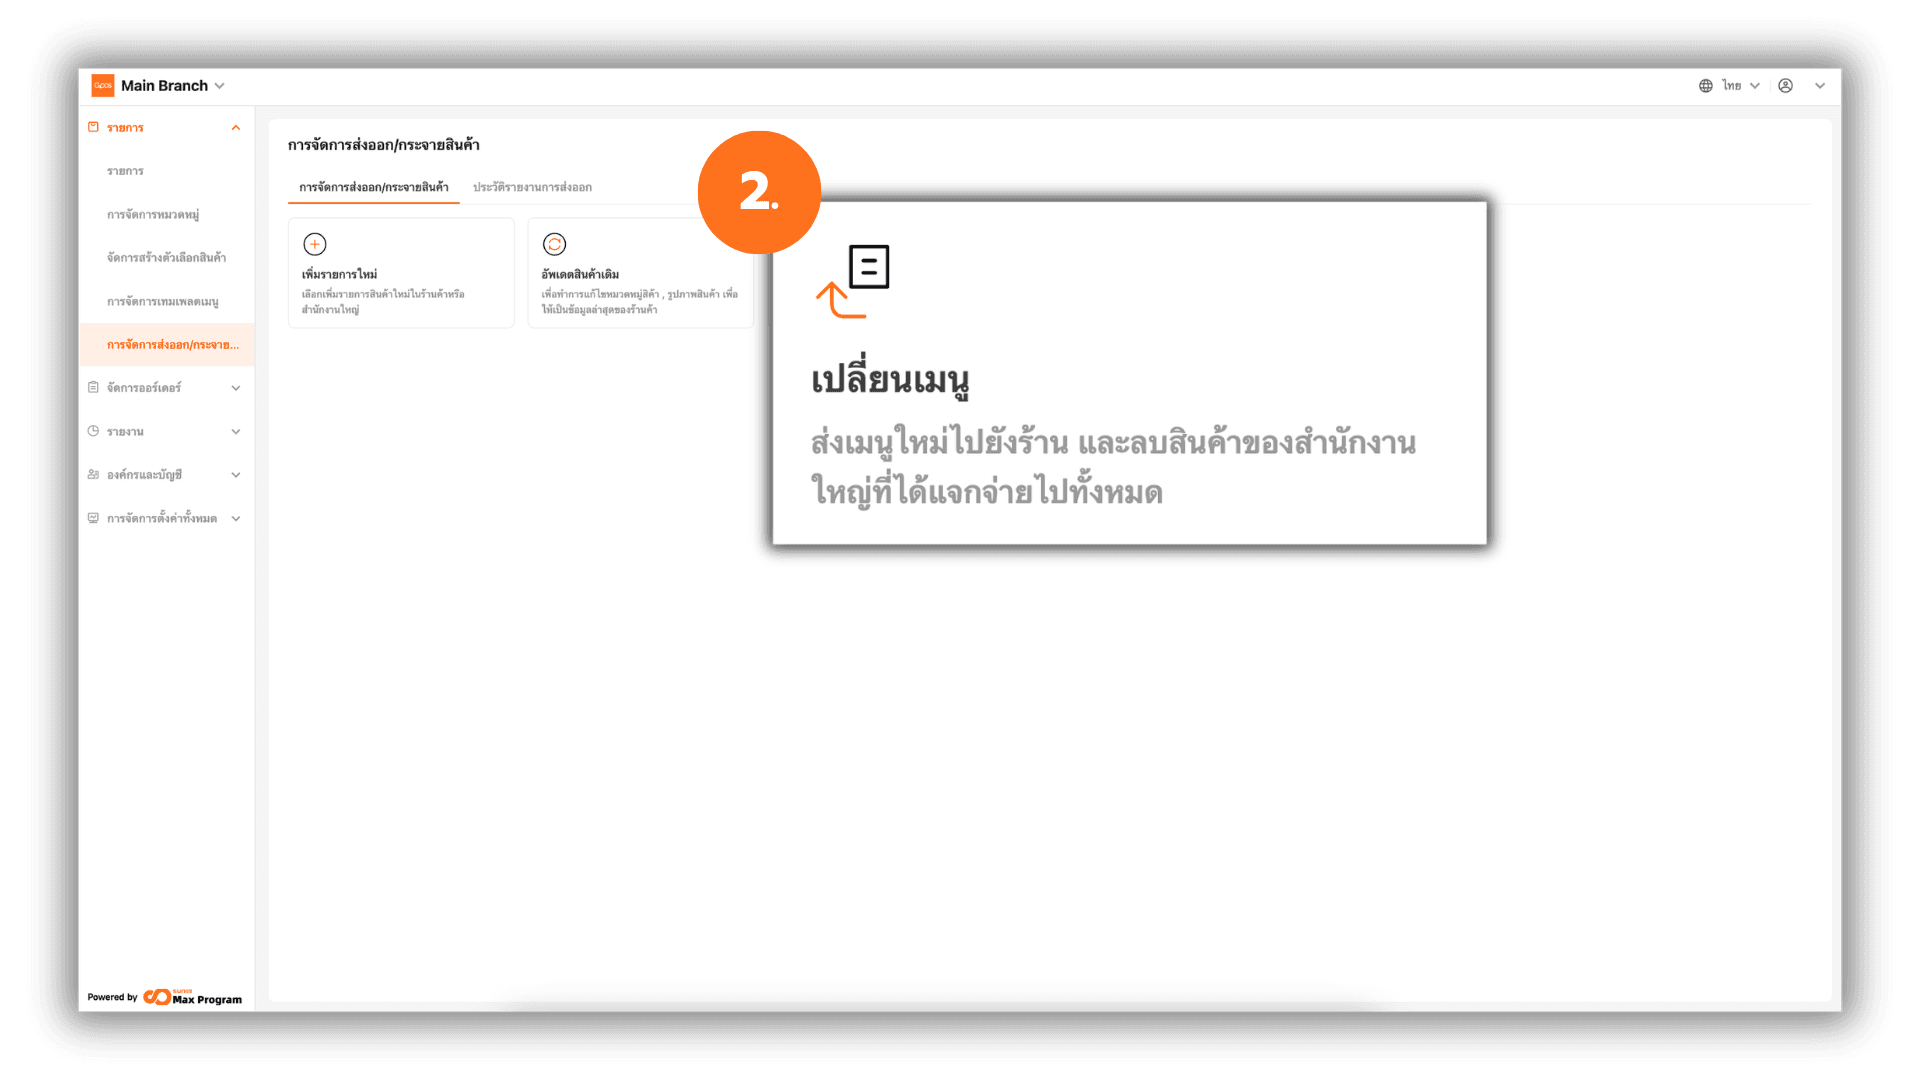
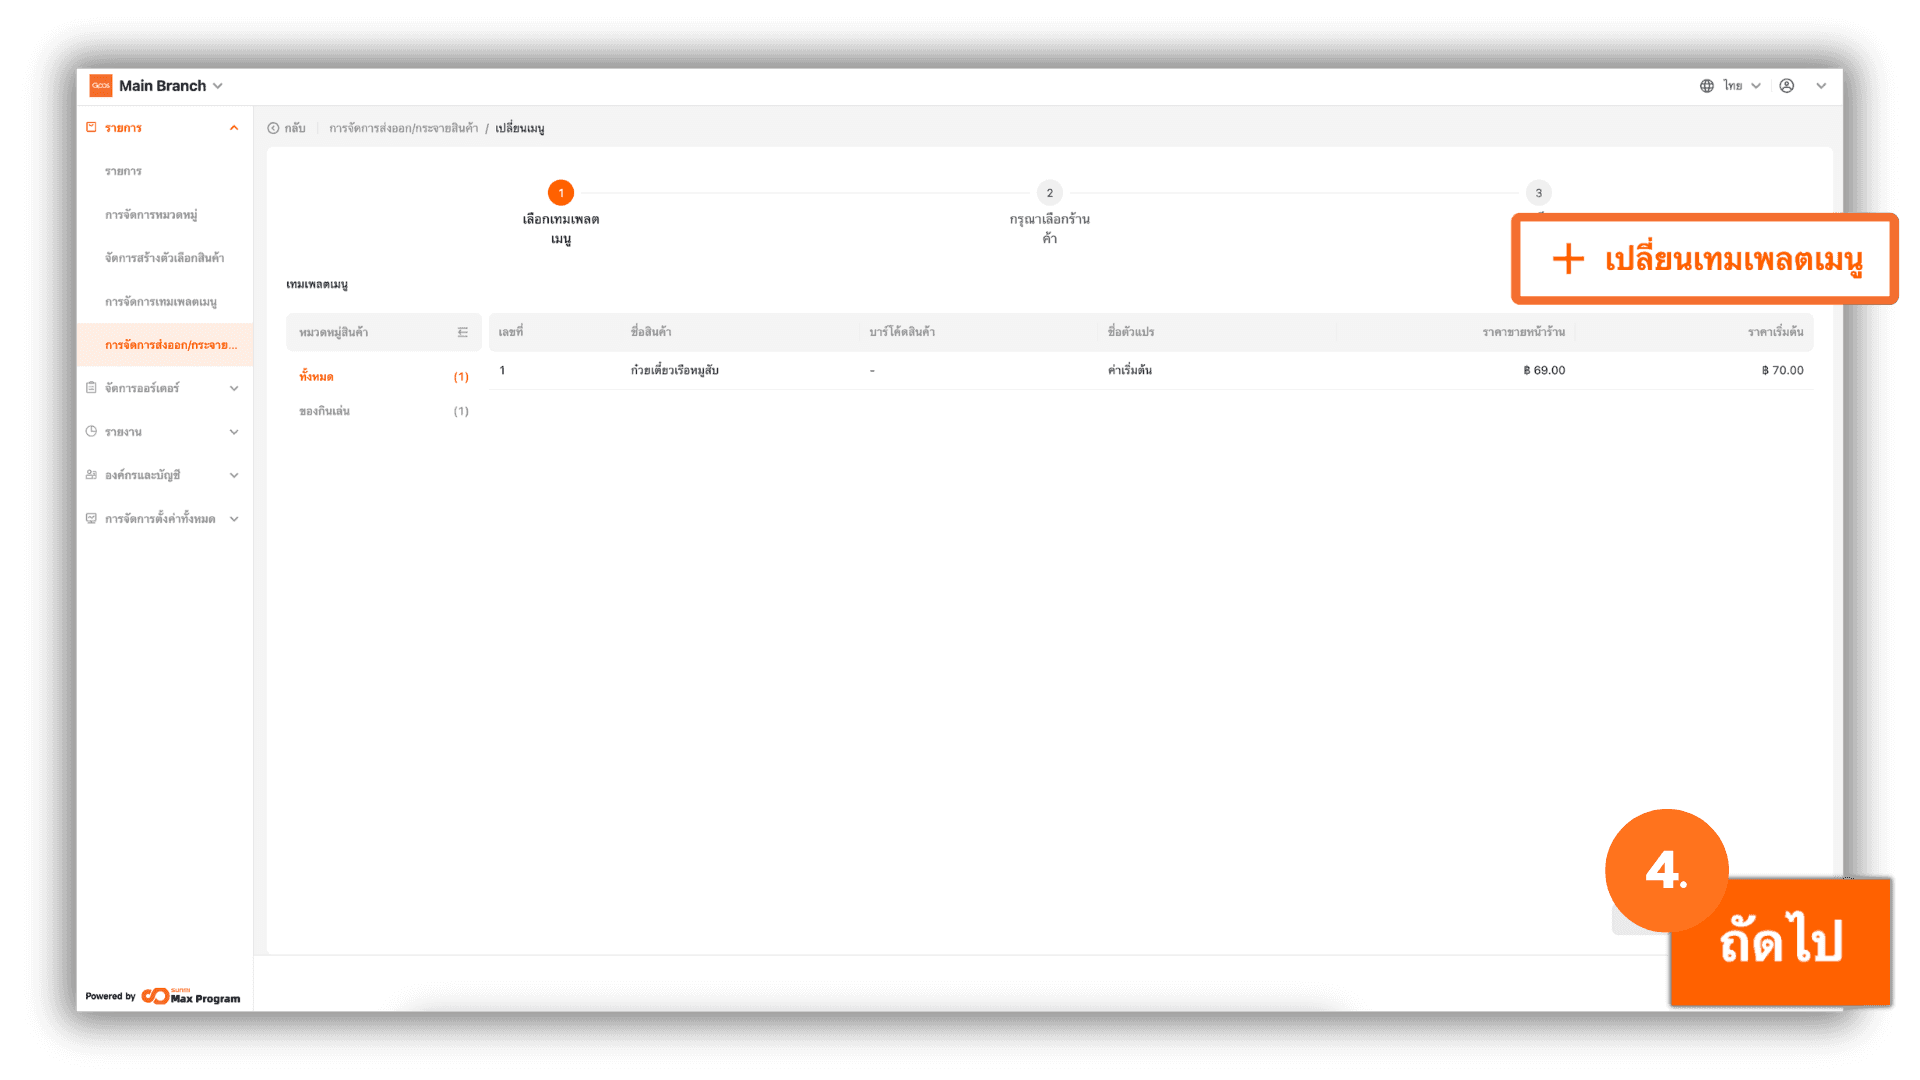
2. Select “Replace Menu”
On the Product Distribution page, click “Replace Menu.”
Note : This function sends a new product list and deletes all existing product lists from the Store Branches.
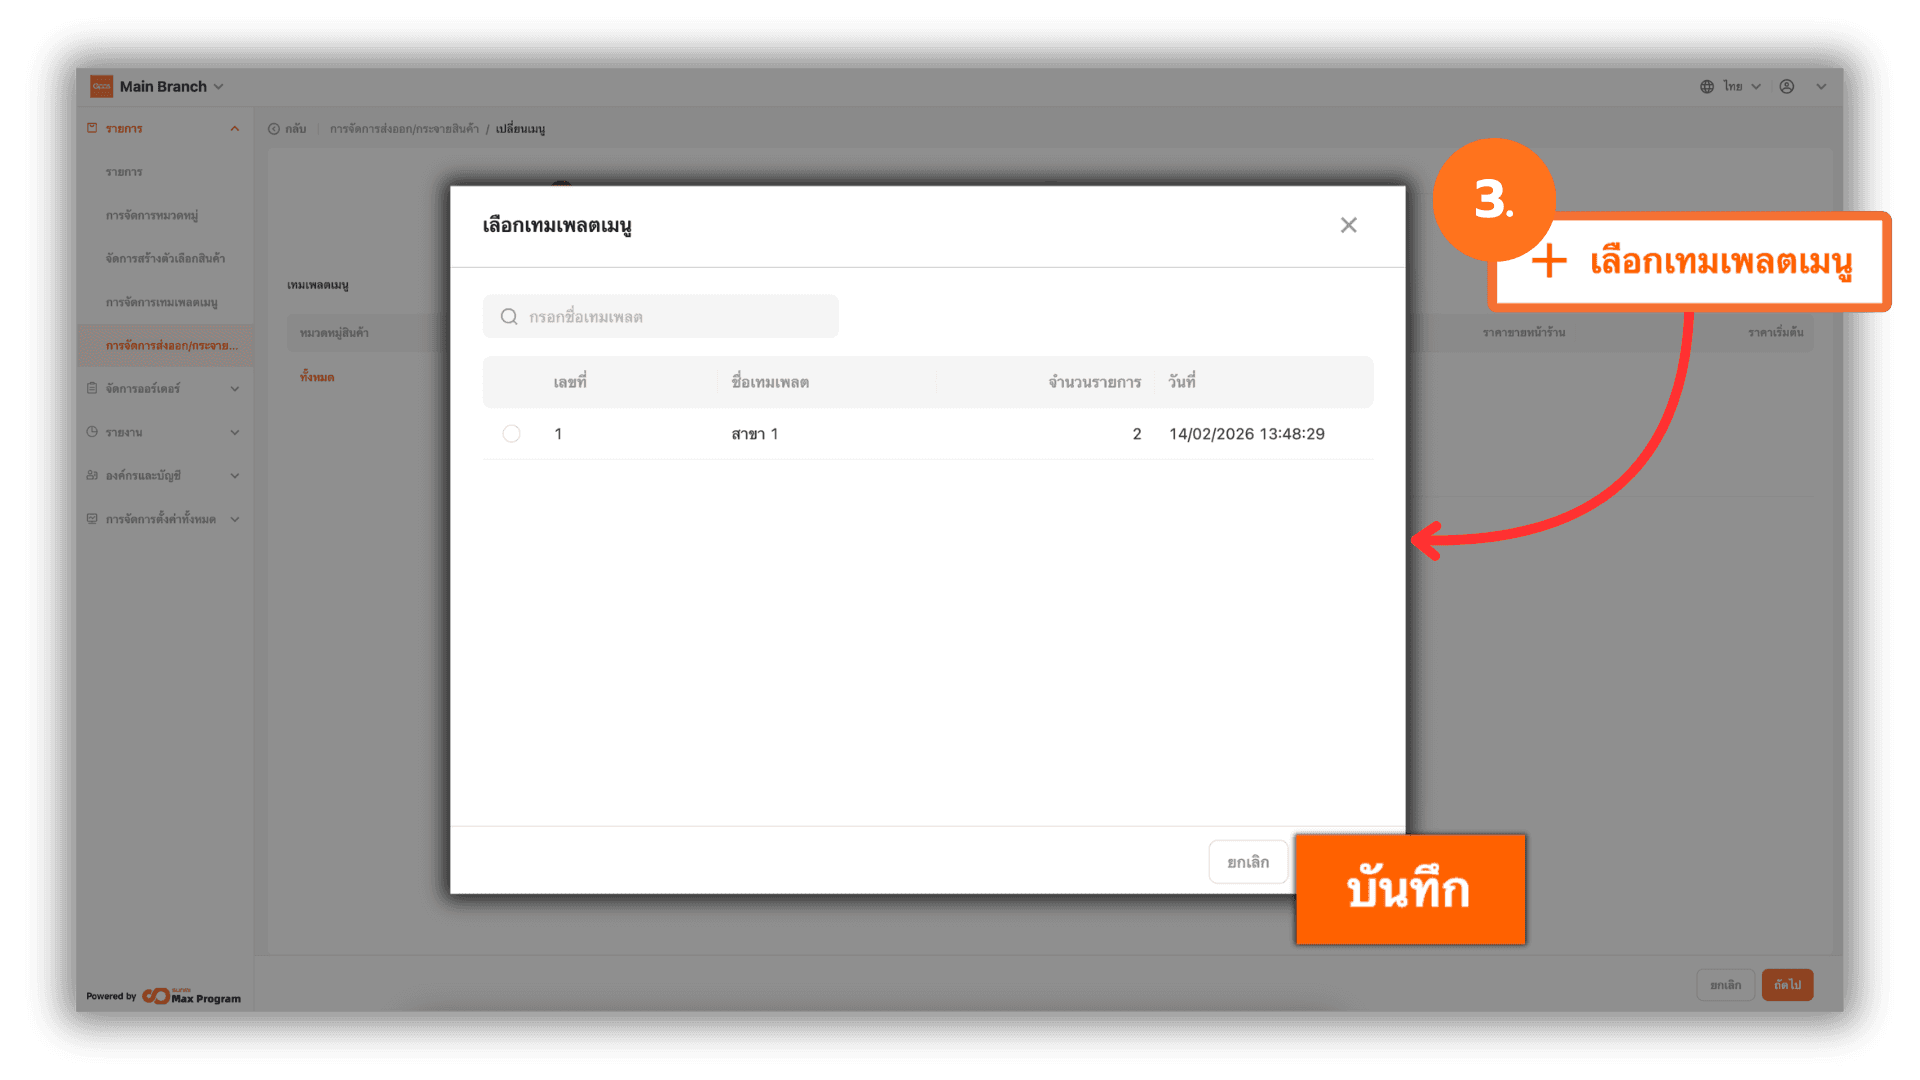
3. Select a Menu Template
Click “+ Select.” Check the desired template and click “Save” to confirm.
4. Verify the Template
Review the product list in the template again. If you selected the wrong one, click “+ Change” to choose a new template. Once verified, click “Next.”
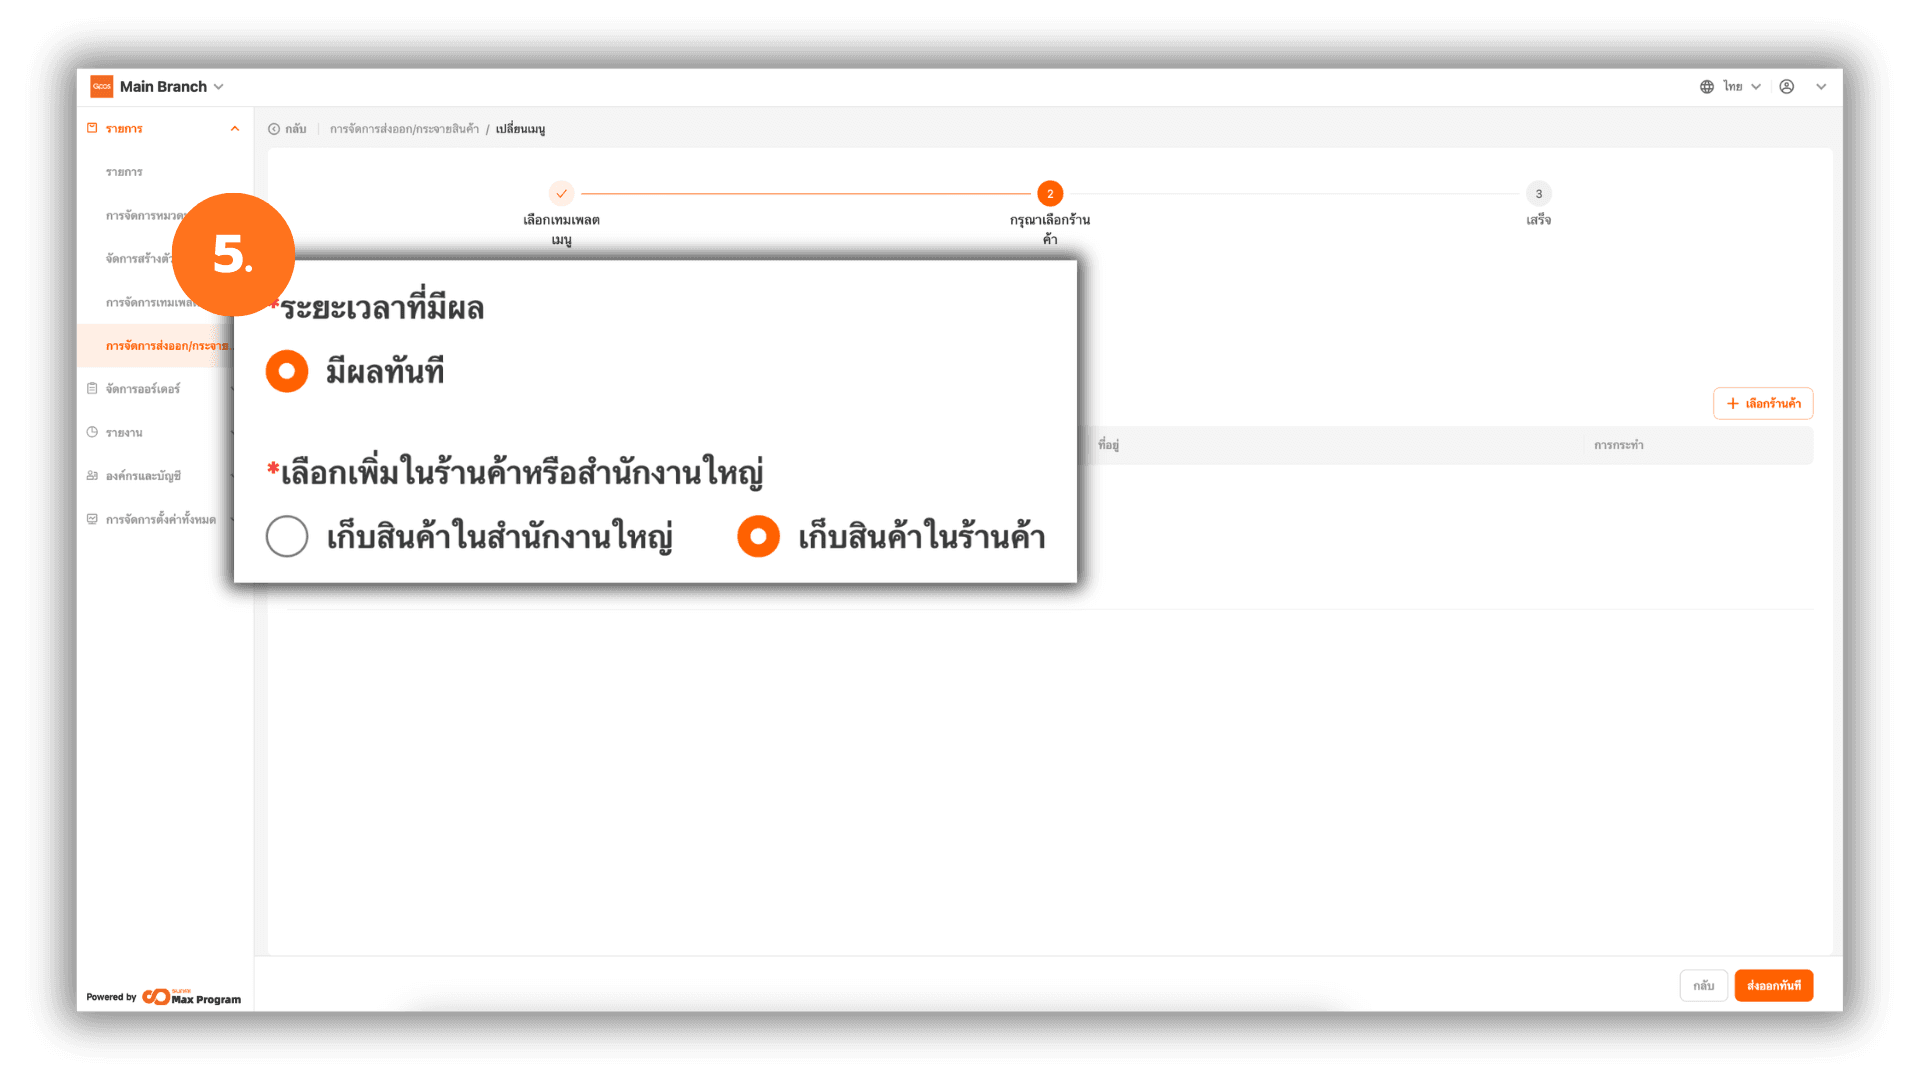
5. Select Product Storage Option
Choose how the product list should be stored by selecting one of the following options: Keep HQ Items or Keep Store Items.
Note : This option does not affect product usage. The product list will remain available at the head office as usual.
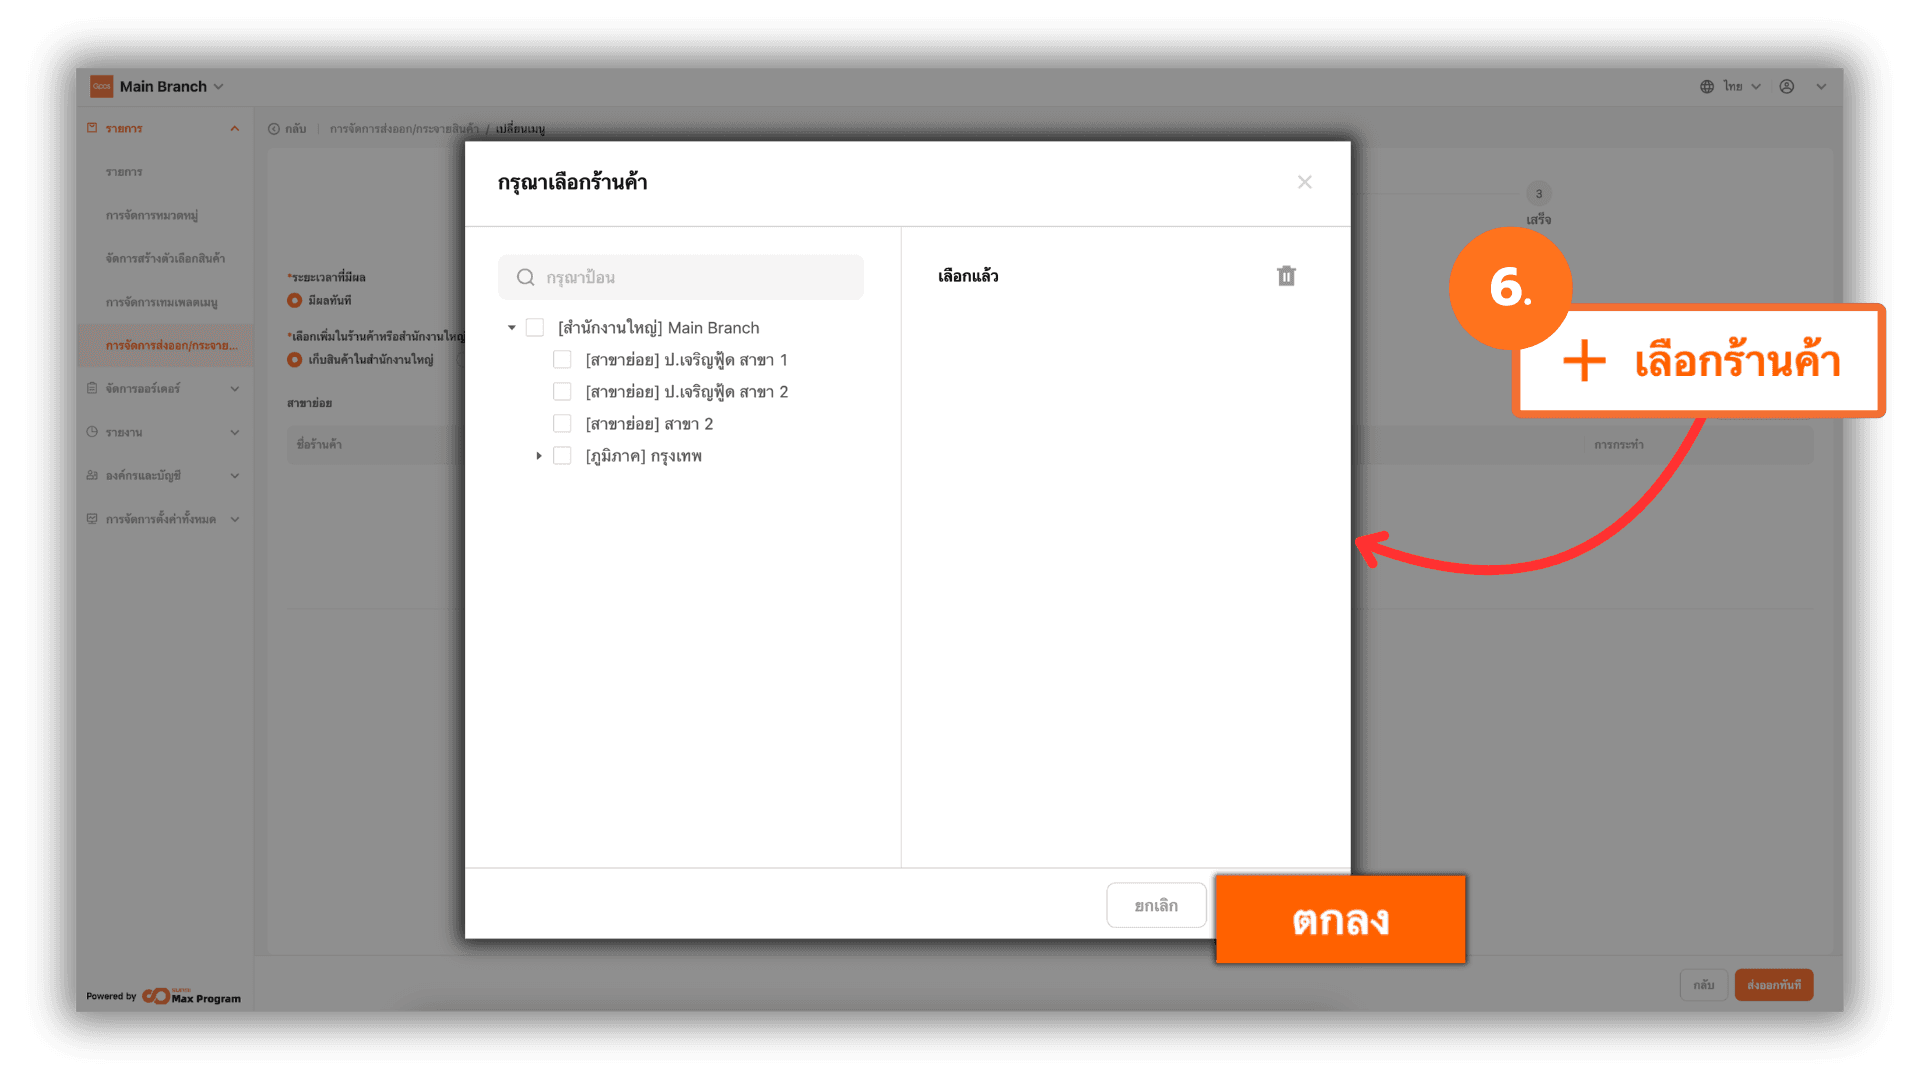
6. Select Branches to Apply the Menu Change
Click “+ Select Store.” The system will display a list of all Store Branches. Check the branches where you want to delete the product items and click “Ok.”
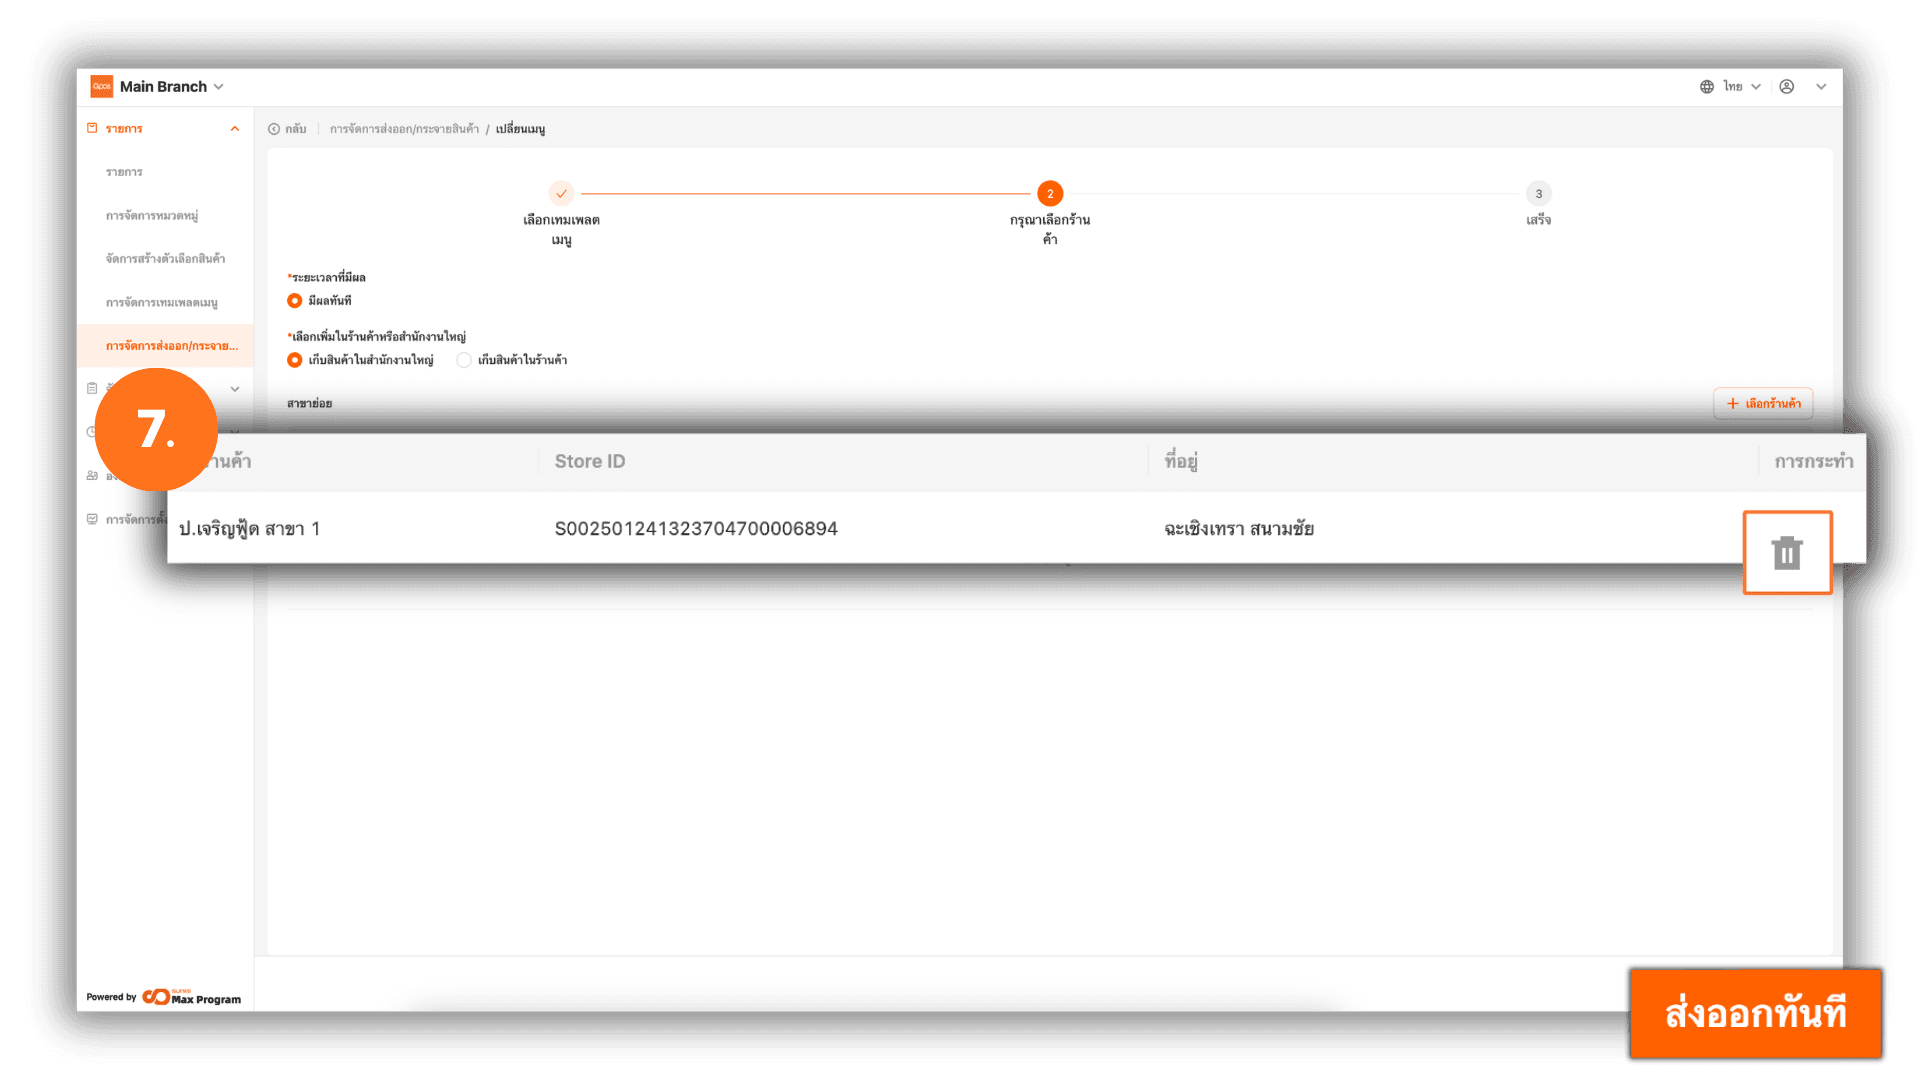
7. Review and Confirm Export
The system will display the selected Store Branches. If you want to remove a branch from the list, click the trash icon next to the store name. Once everything is correct, click “Distribute.”
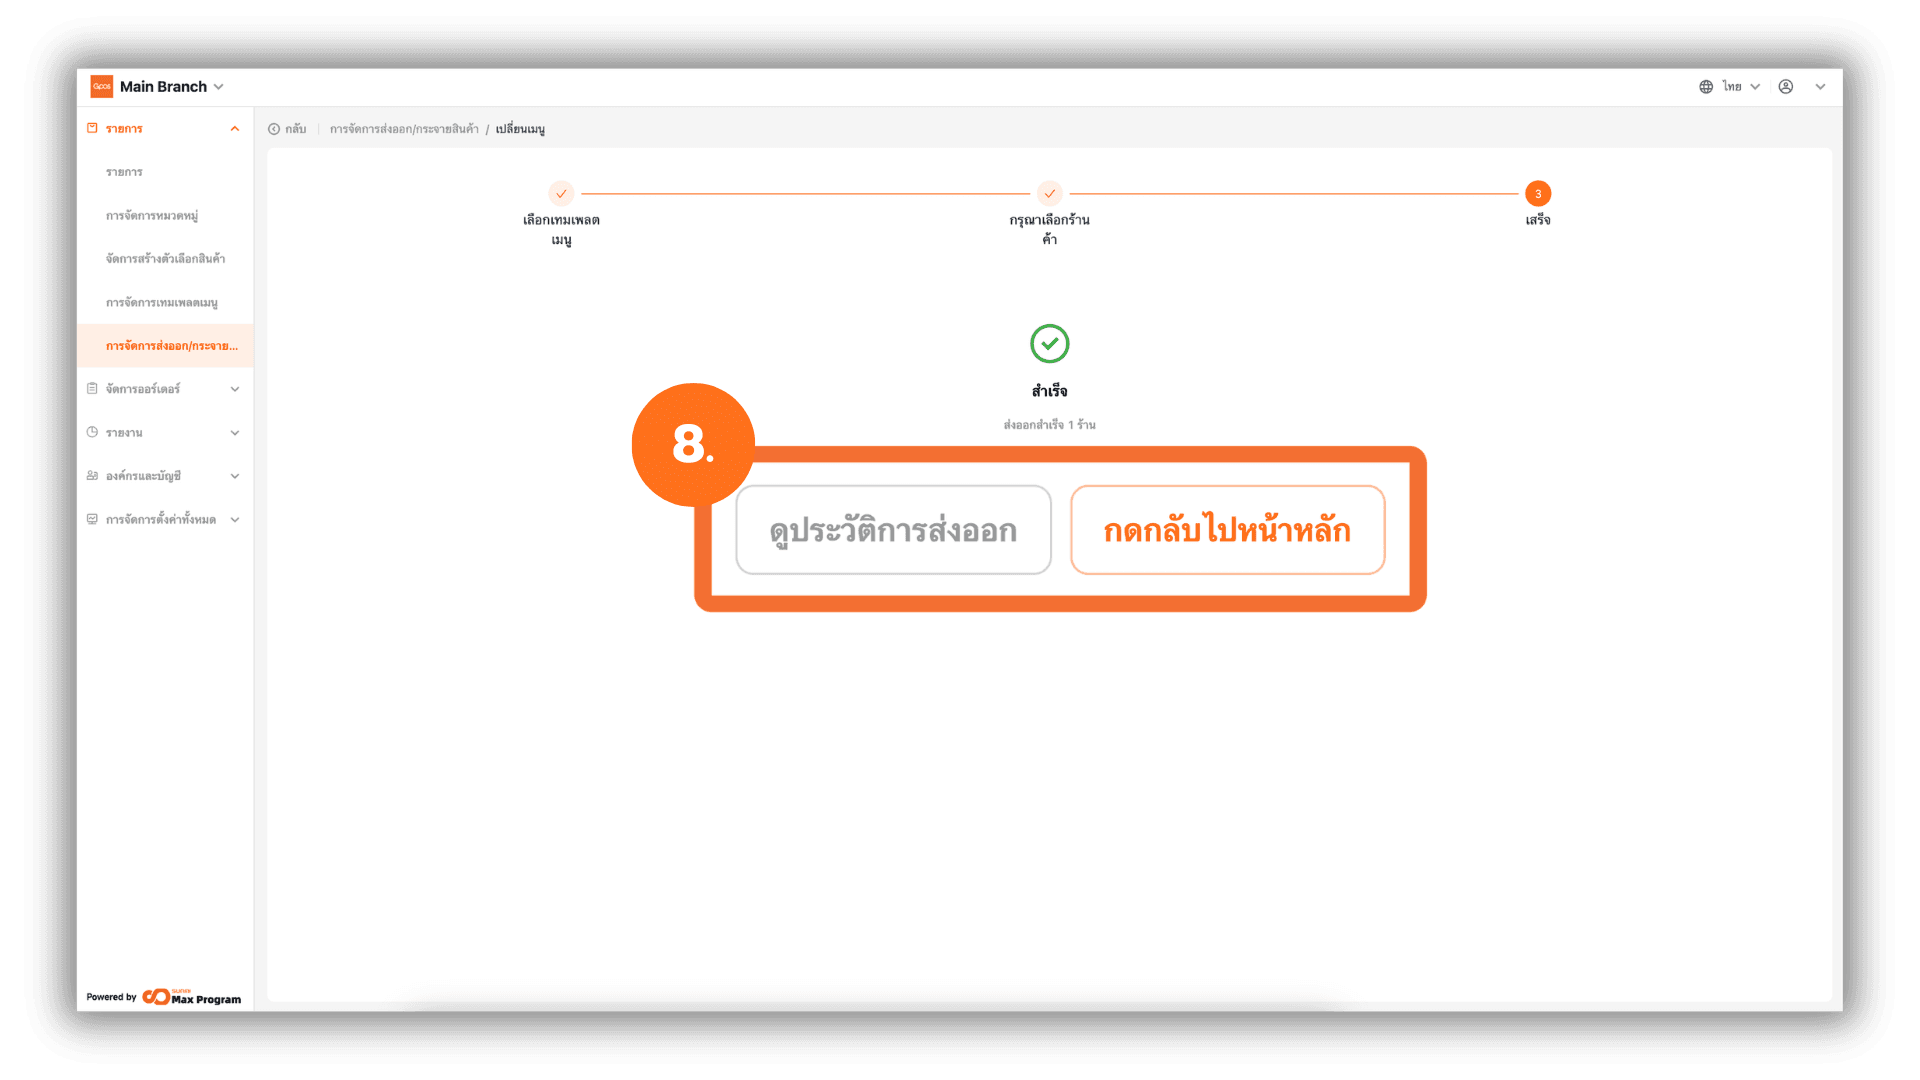
8. Export Process and Completion
The system will begin exporting the menu template to the selected branches.
Once completed, the status will display “Successful.” You can click “View History” or “Continue.”