Updating Existing Items from Head Office to Branches
2026-02-16 14:34
Updating existing items from the Head Office to branches allows you to modify product details such as prices, names, or settings and distribute the updated information to selected Store Branches. This ensures consistency and centralized control across all locations without recreating items.
Before You Begin
Updating existing items means modifying product information—such as the product name, product category, or product image—to ensure Store Branches have the most up-to-date information. When there are changes made at the Head Office, you can either Use the existing template previously used to add items, or Create a new template. You can view the template creation instructions in the Creating a Menu Template menu.
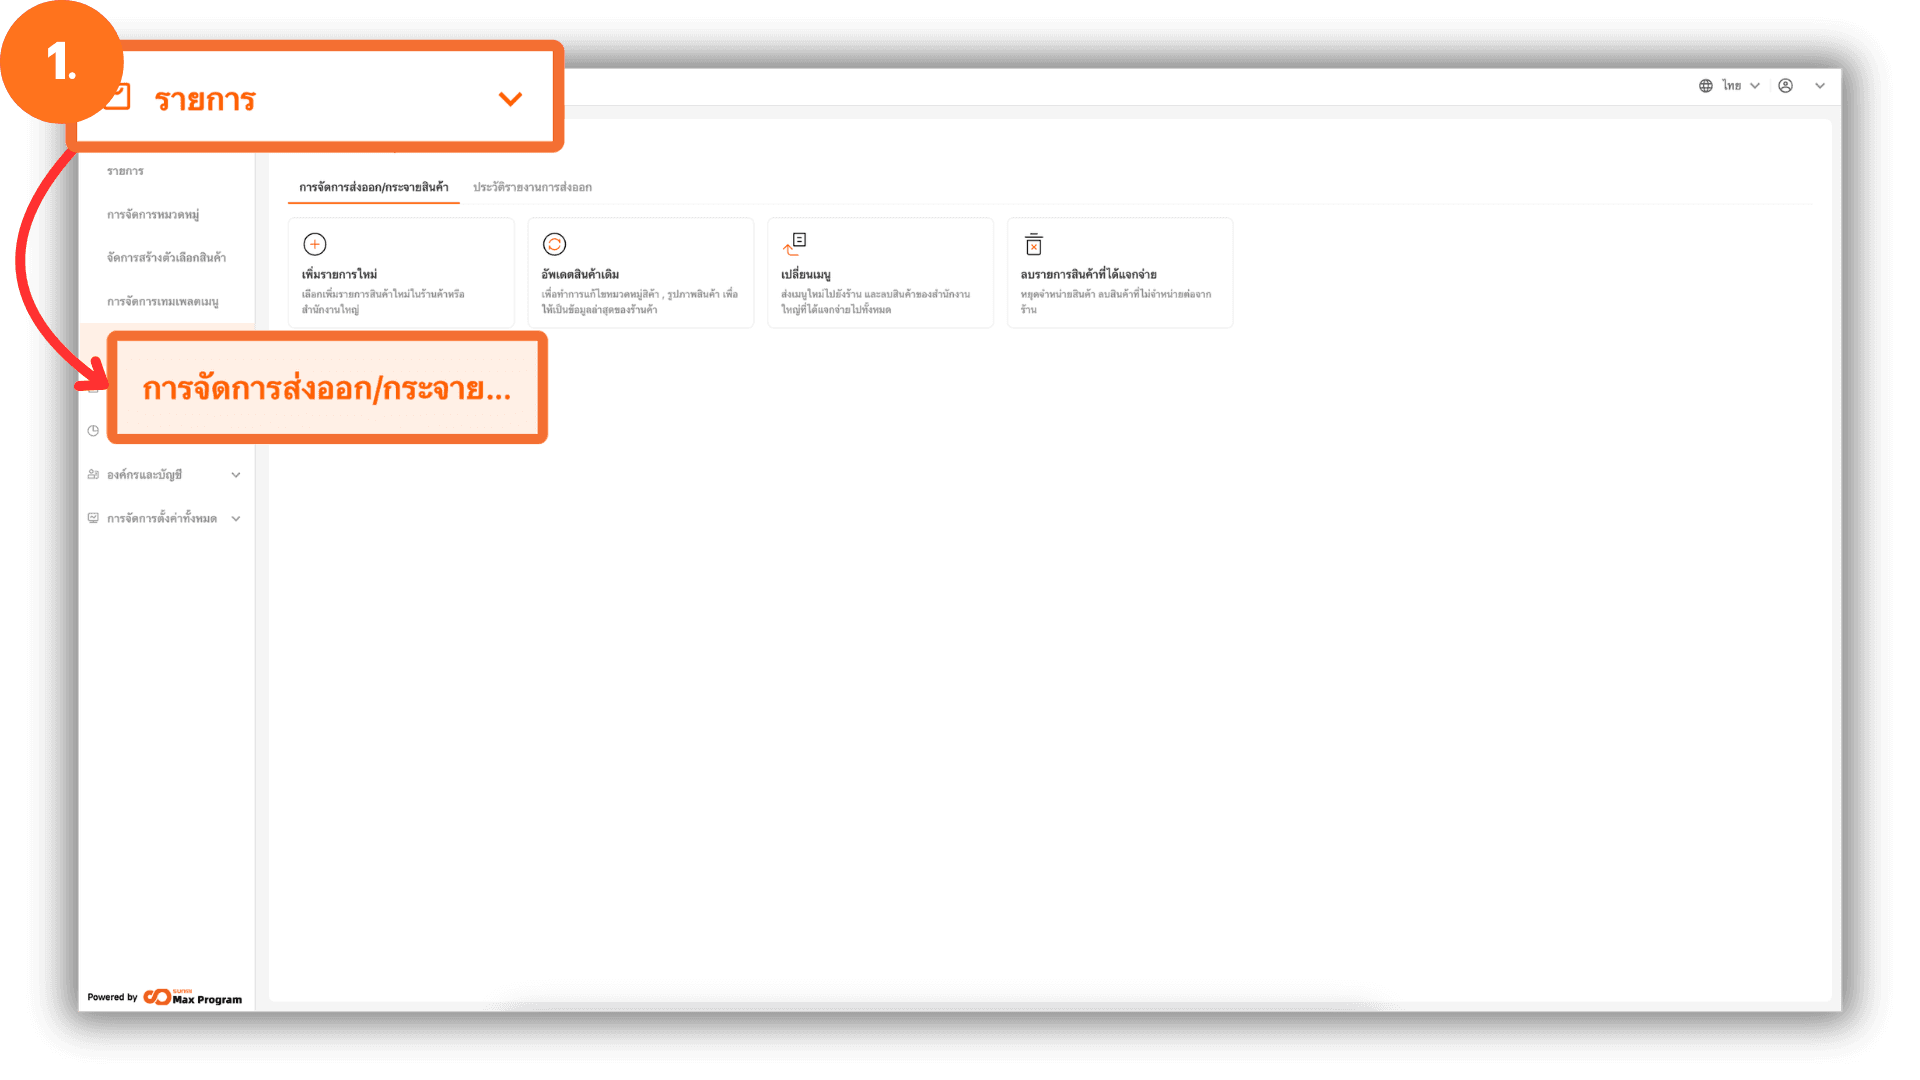
1. Access the Product Distribution
After creating the menu template, go to the “Items” menu and select “Product Distribution.”
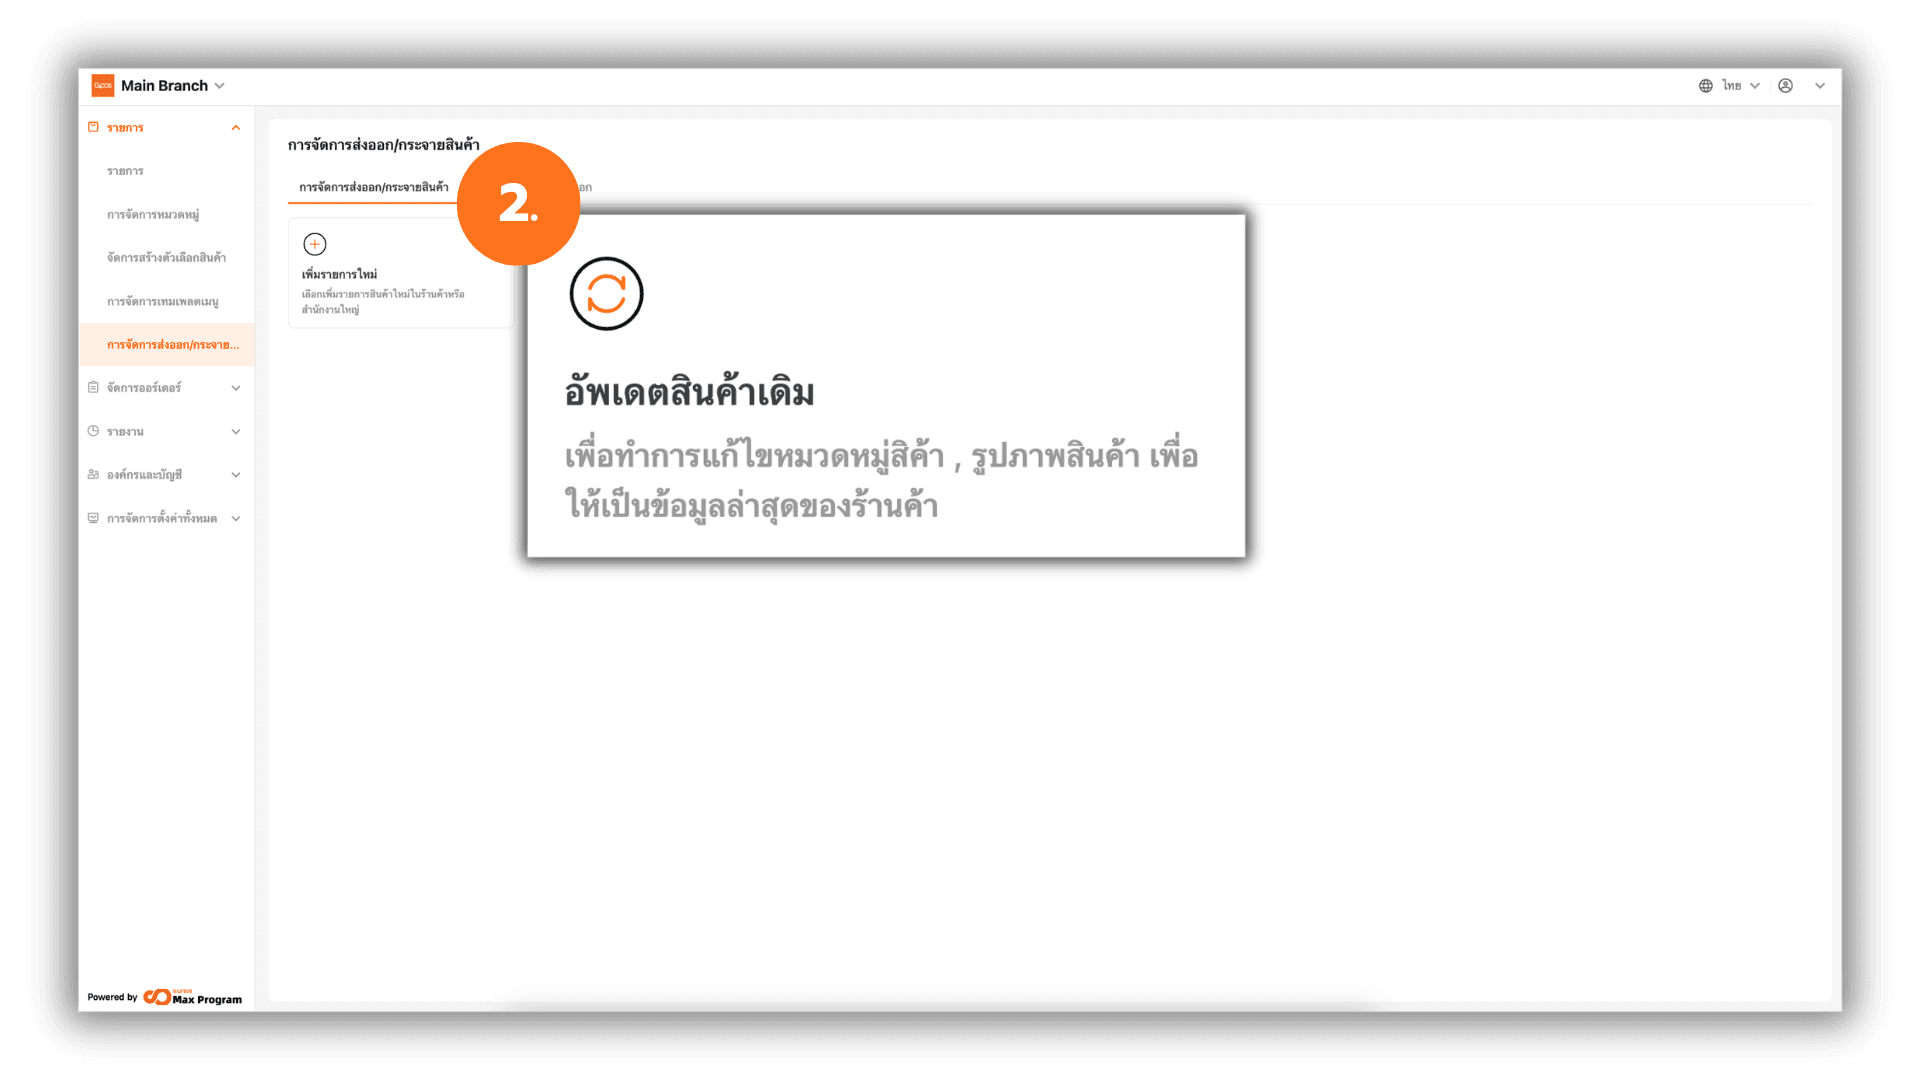
2. Select “Update Existing Items”
On the Product Distribution page, click “Update Existing Items.”
Note : This option is used when there are changes to the product name, product category, or product image.
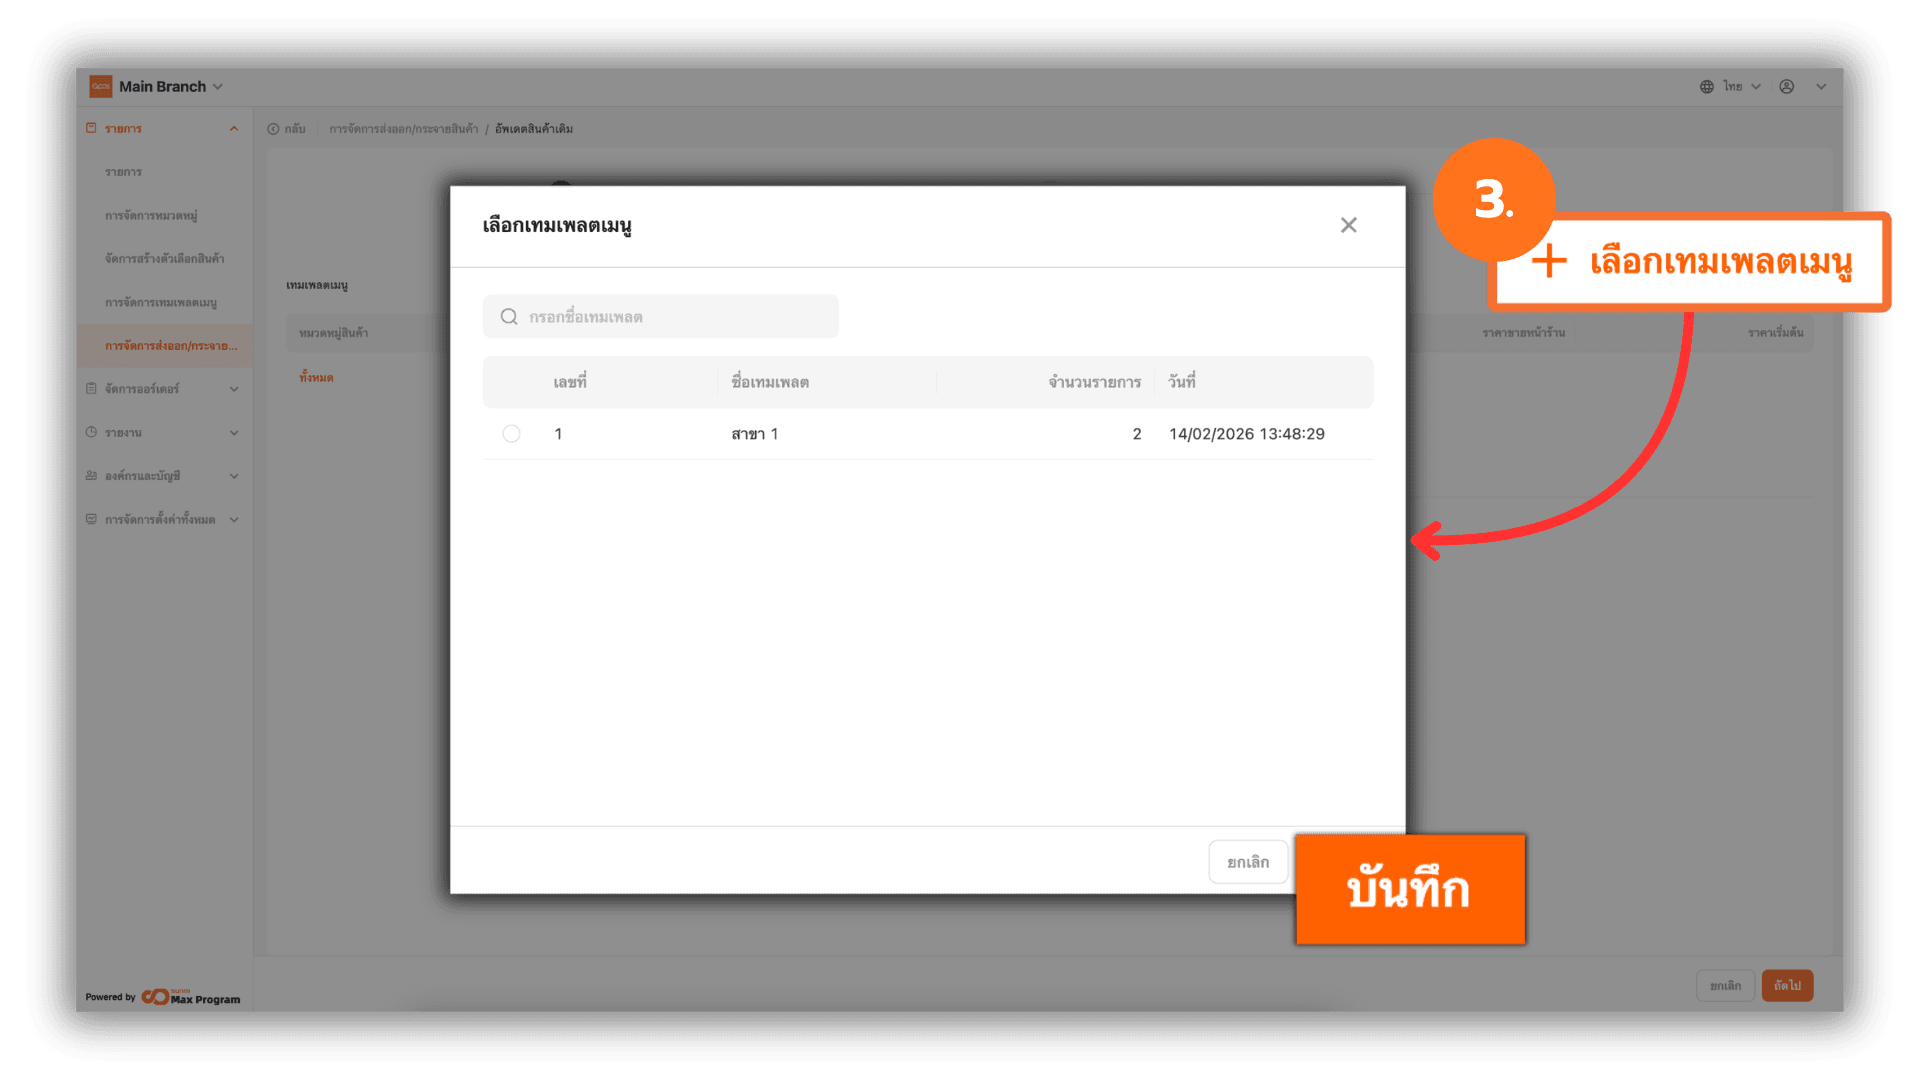
3. Select a Menu Template
Click “+ Select.” Tick the desired menu template, then click “Save” to confirm.
4. Verify the Template
Review the product list in the selected template carefully. If you selected the wrong template, click “+ Change” to choose a new one. Once everything is correct, click “Next.”

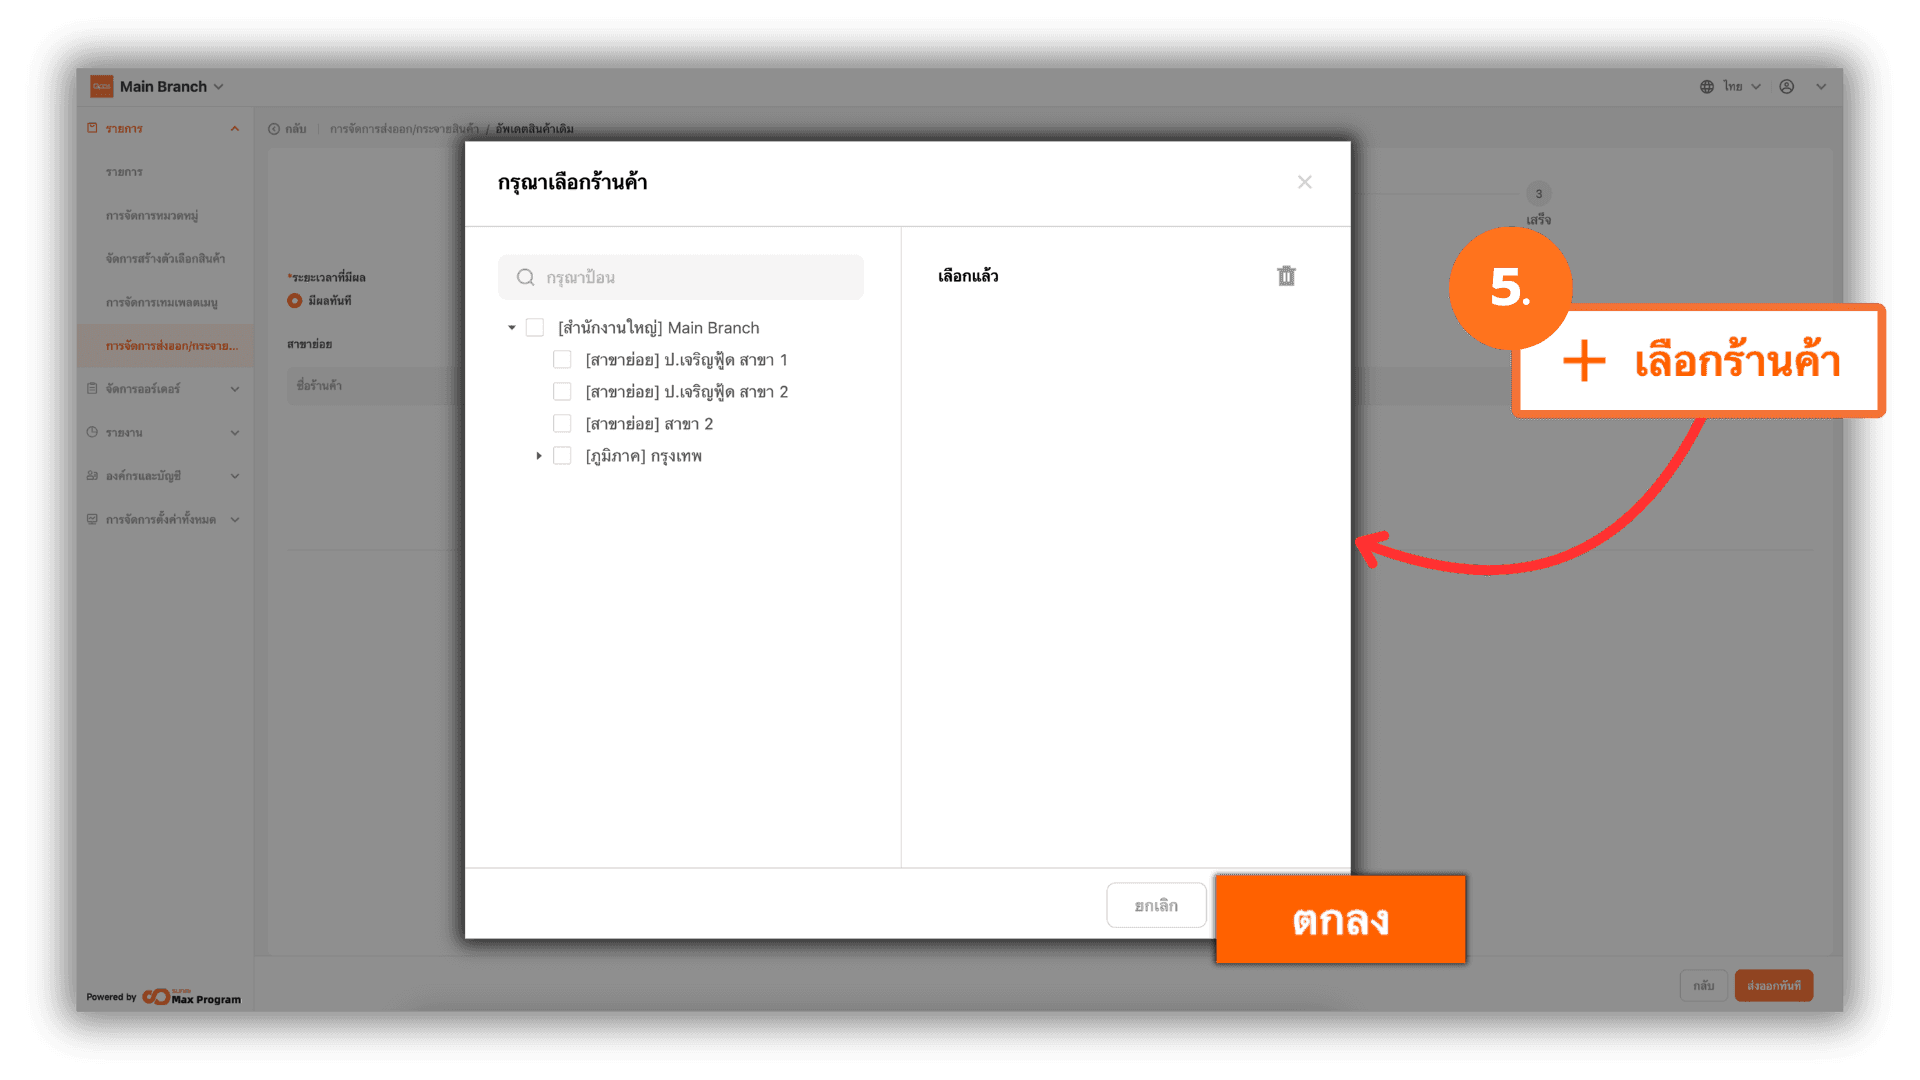
5. Select the Branches to Update
Click “+ Select Store.” The system will display a list of all Store Branches. Check the branches where you want to delete the product items and click “Ok.”
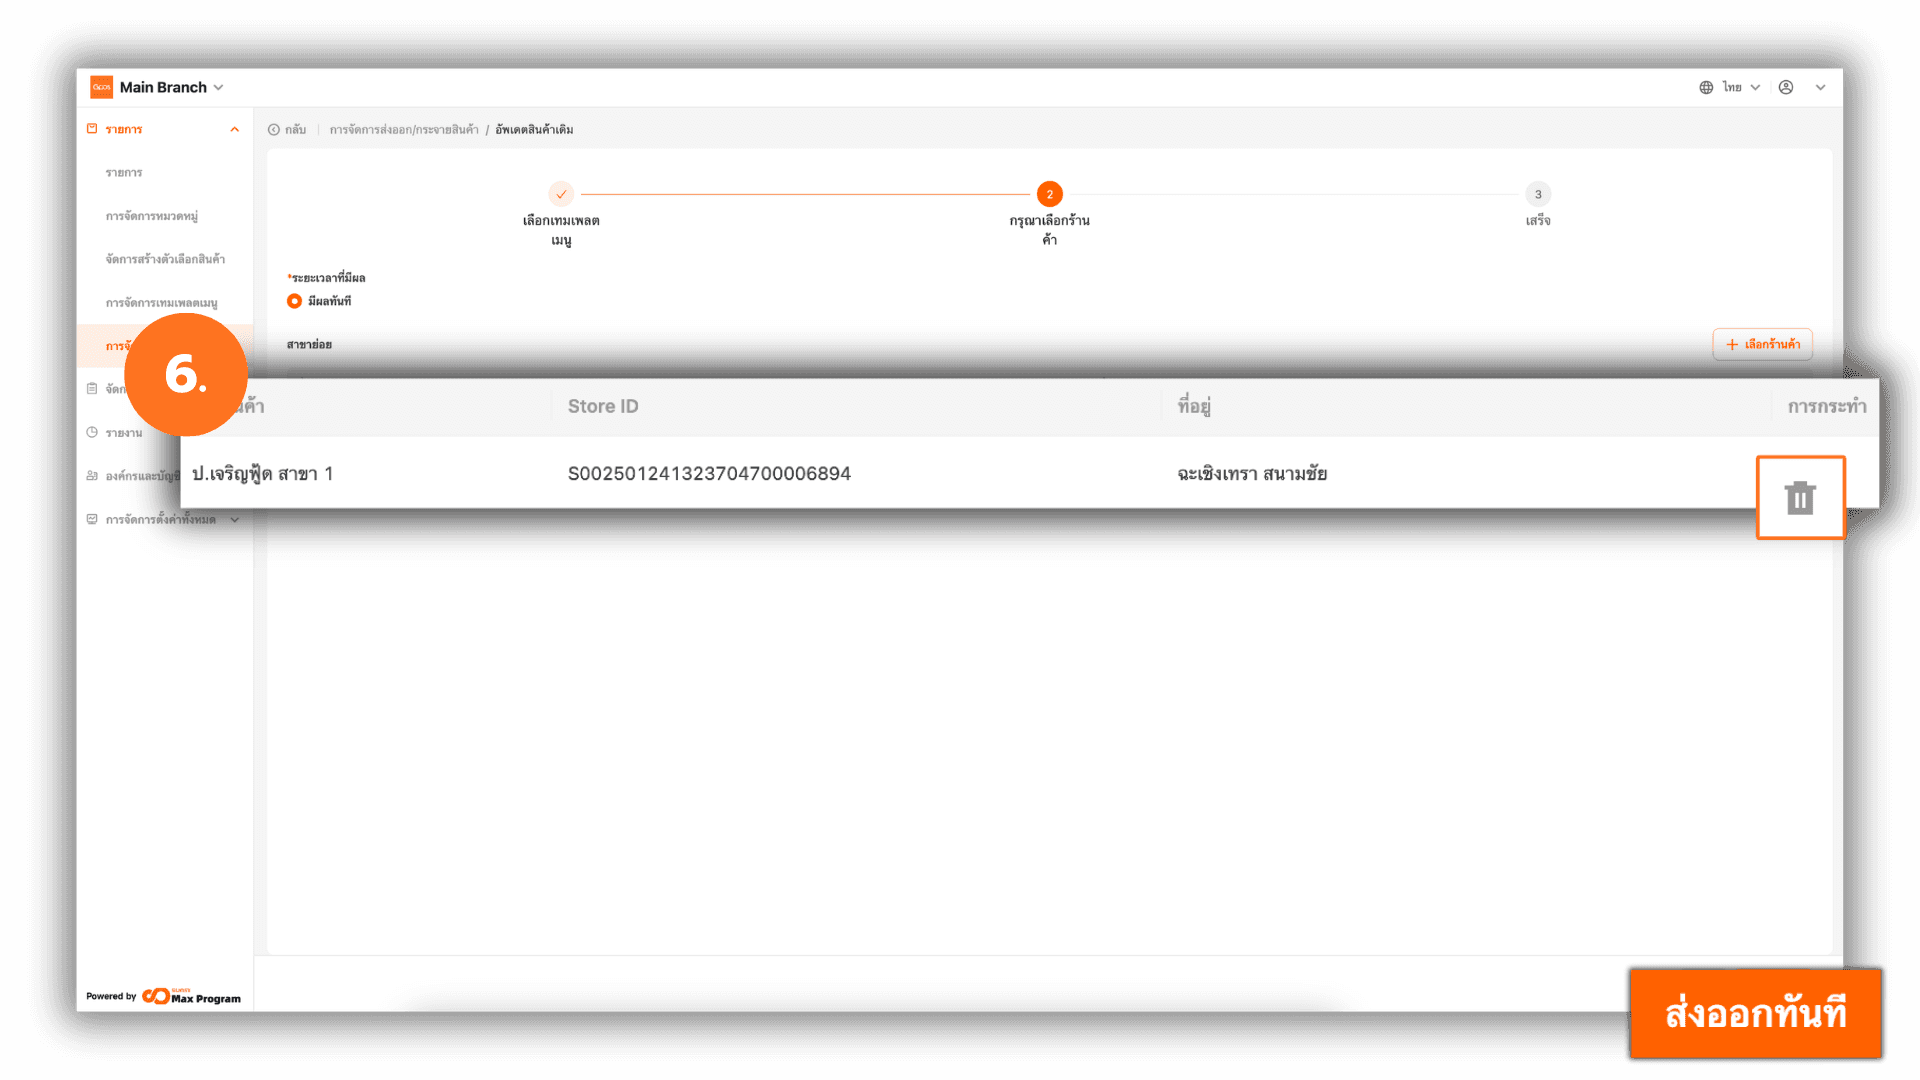
6. Review and Confirm the Export
The system will display the selected Store Branches. If you want to remove a branch from the list, click the trash icon next to the store name. Once everything is correct, click “Distribute.”
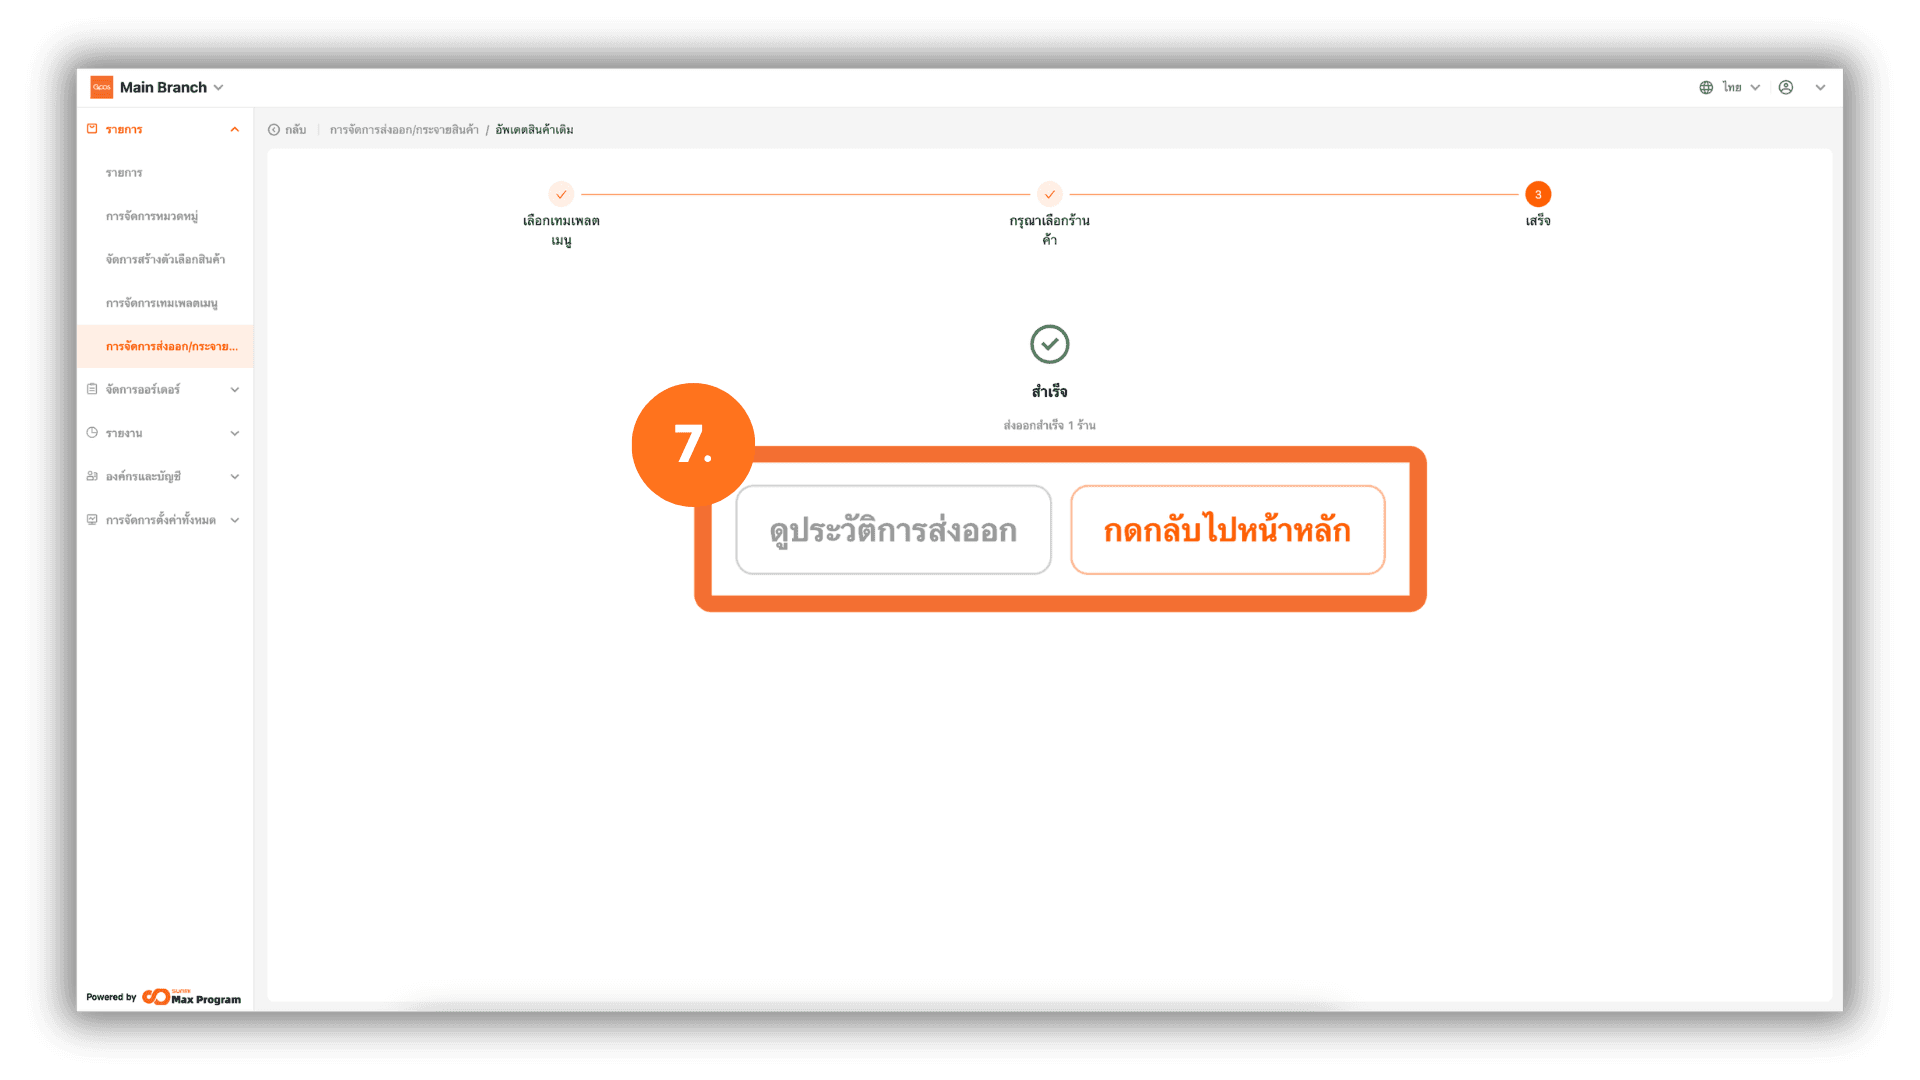
7. Export Updated Data
The system will begin exporting the updated product information to the selected Store Branches. Once the process is completed, the status will display “Successful.” You can click “View History” or “Continue.”