Add Member (Back Office)
2026-02-04 11:52
The membership system is used to manage customer data, such as adding, editing, and searching member information, assigning membership tiers, managing reward points, order history, and top-up history. This helps stores effectively manage customer relationships and benefits.
1. Log in to the Back Office
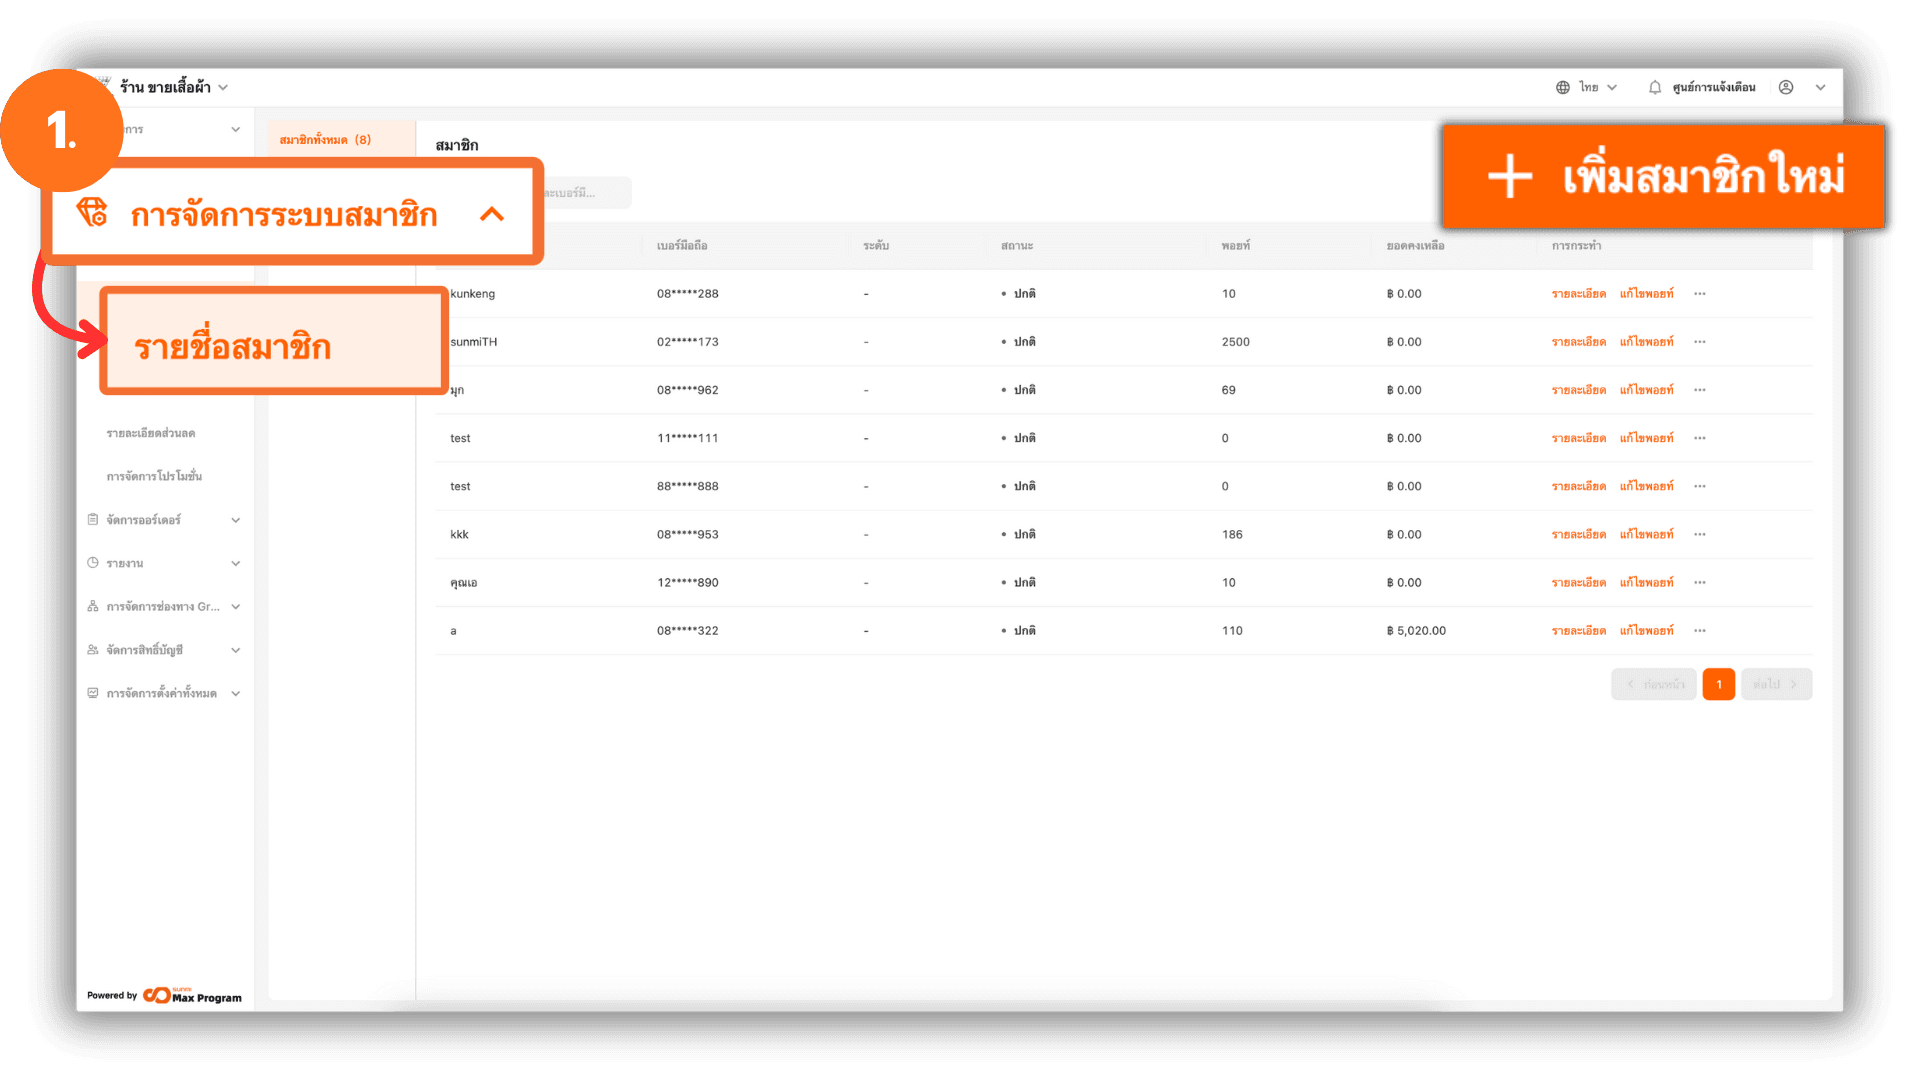
Go to the website login.gpos.co.th, enter your email and password, then click Log In. After successfully logging in, go to the Membership Marketing menu, select Member List, and click the + Add Member button.
Note : Once a member is added to the system, the member data cannot be deleted.
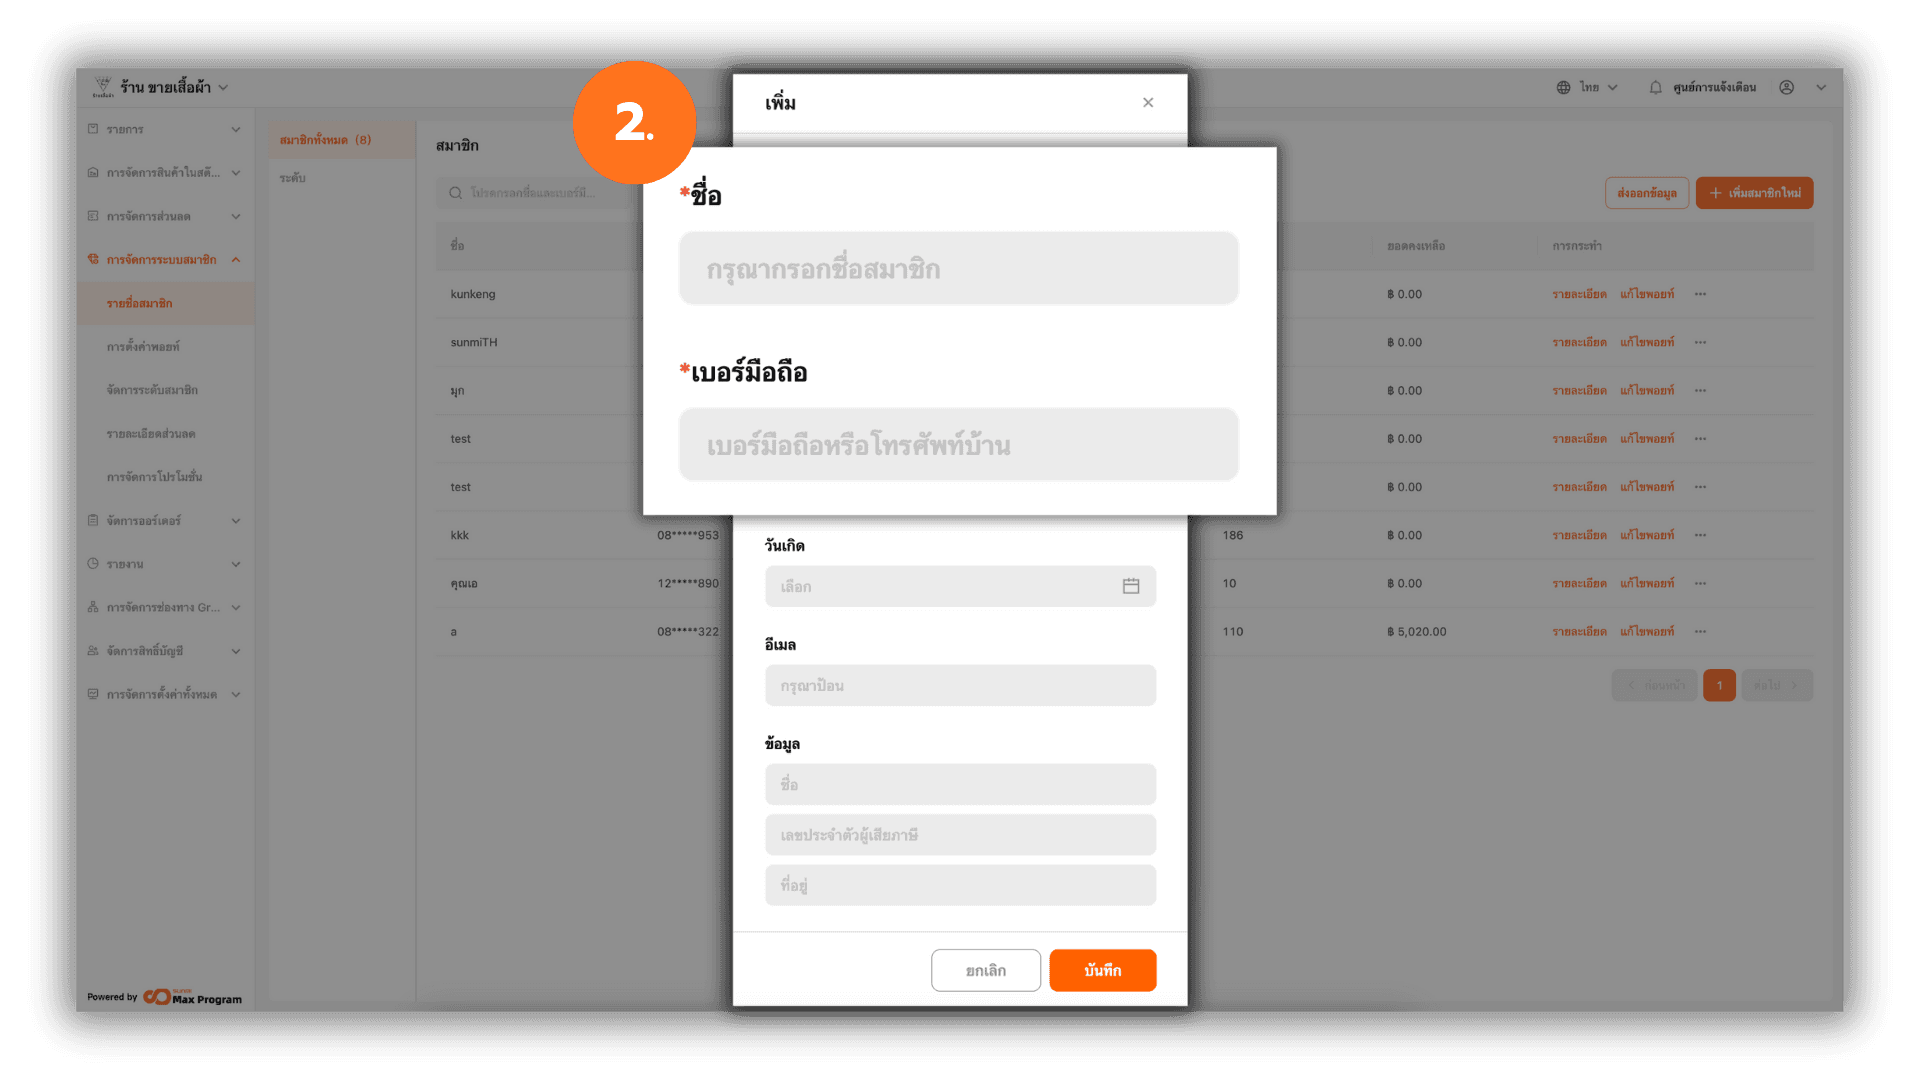
2. Entering Member Information
The system will display a form for entering member details. Please enter the name and phone number.
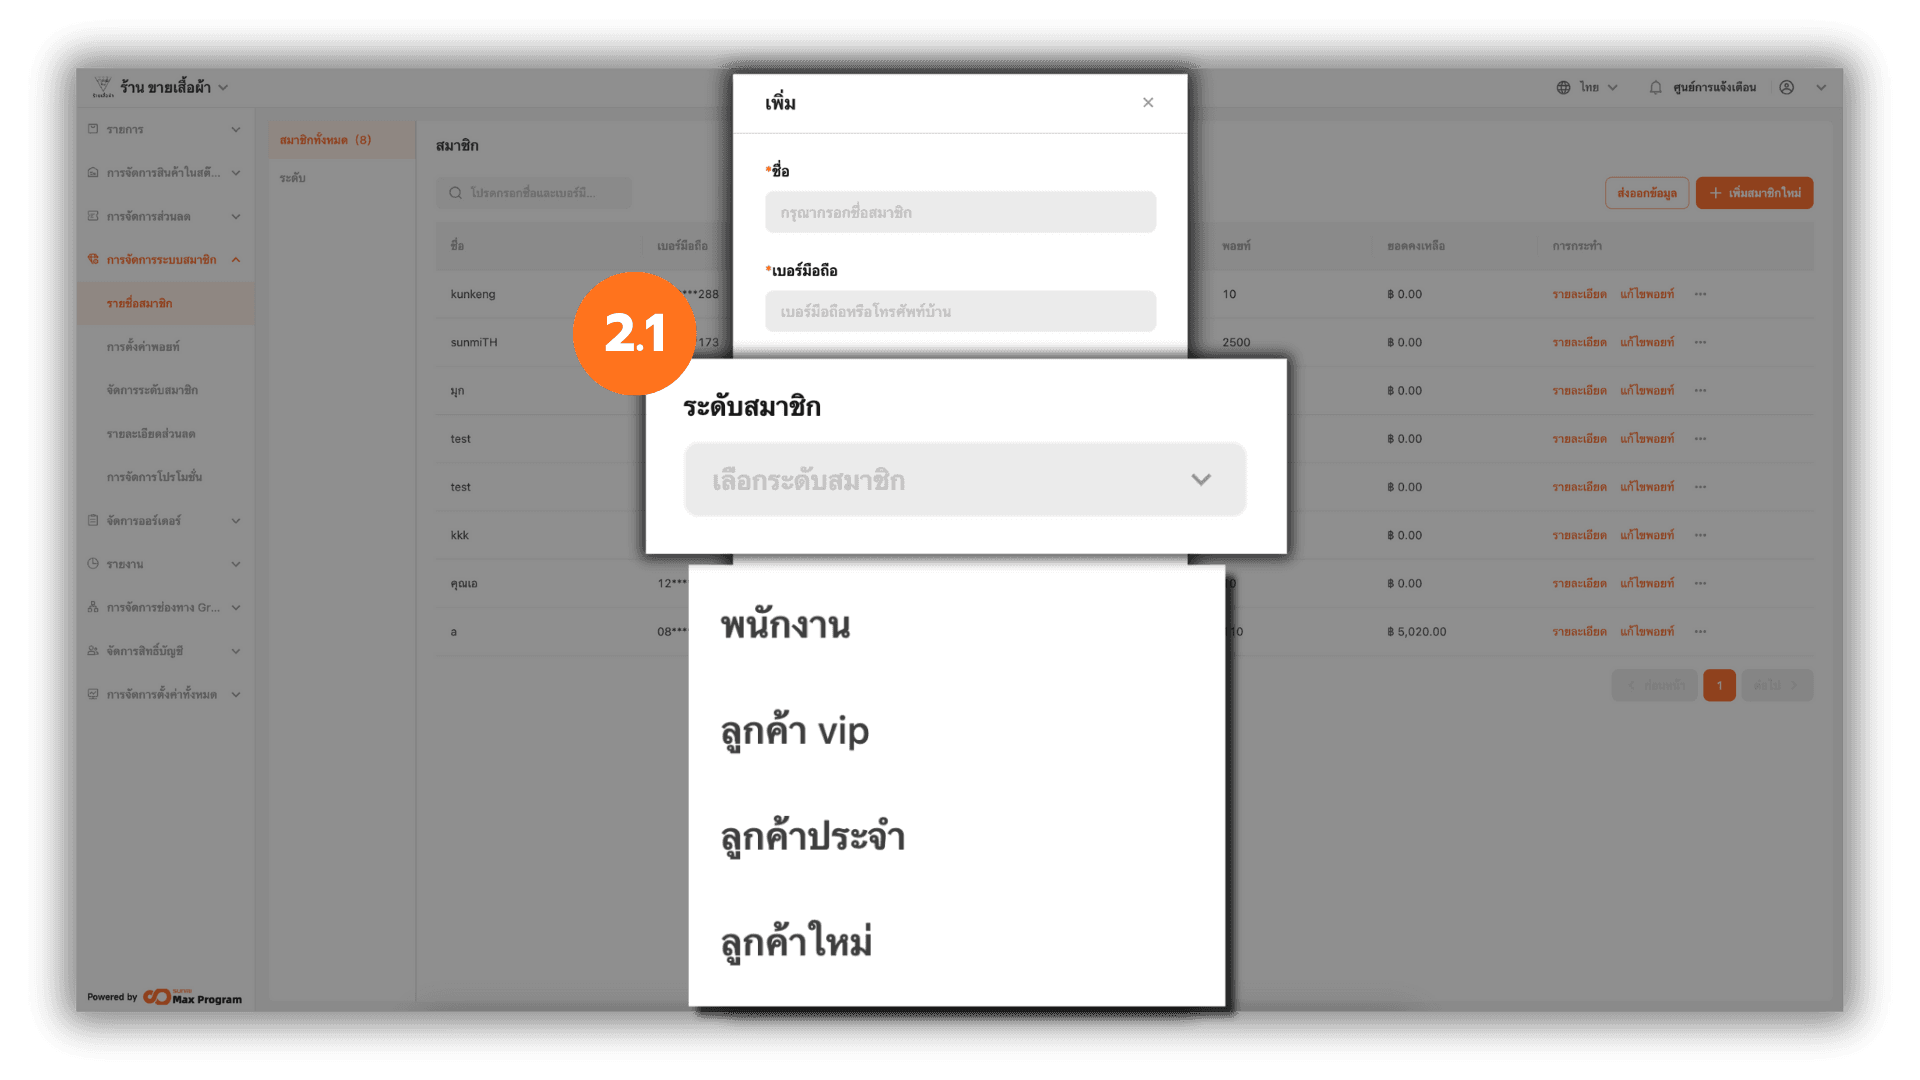
2.1 Selecting a Membership Level
Select the desired membership level (if available). Membership levels can be created in advance—refer to the Membership Level Management menu for instructions.
Note : The selected membership level affects the discounts defined for that level. Once a membership level is assigned, it cannot be removed. The system only supports changing the membership level.
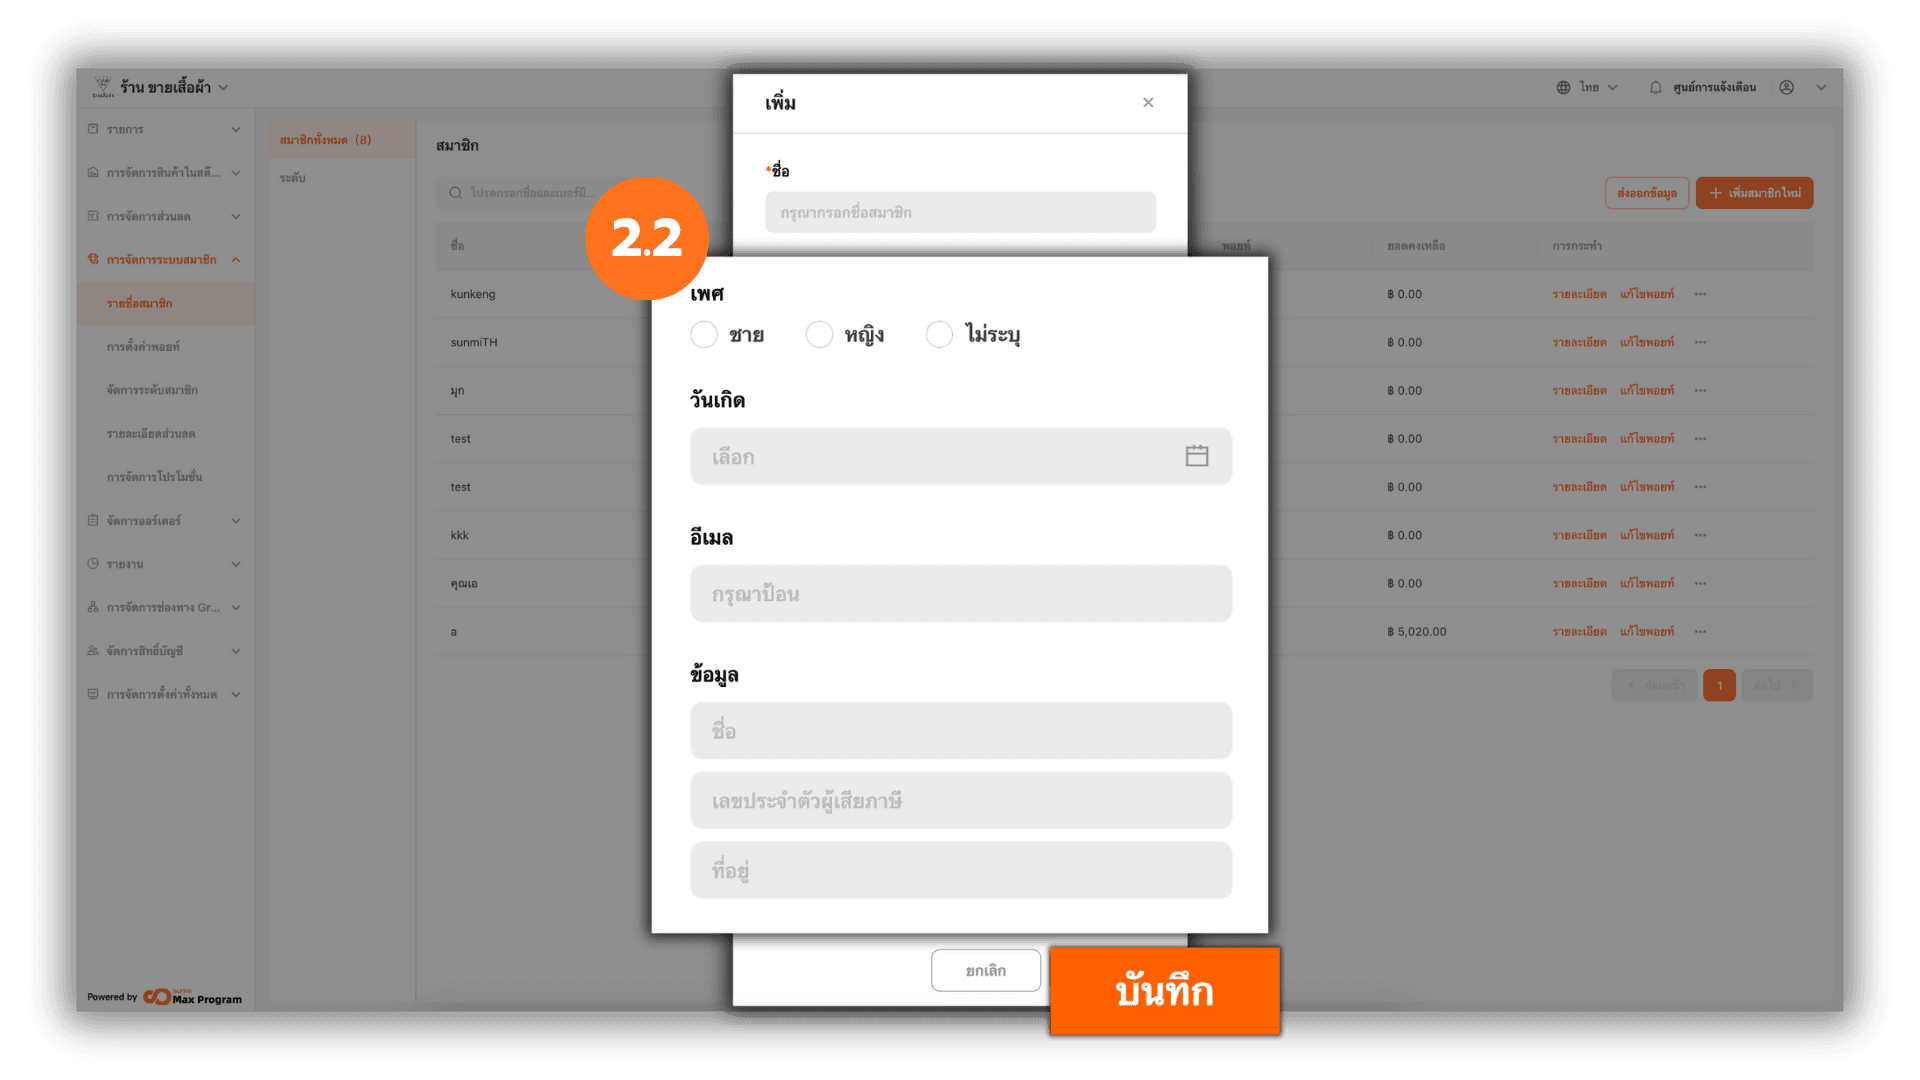
2.2 Entering Additional Information and Saving
Enter any additional member information as needed. Once all required information is completed, click Save to confirm adding the member.
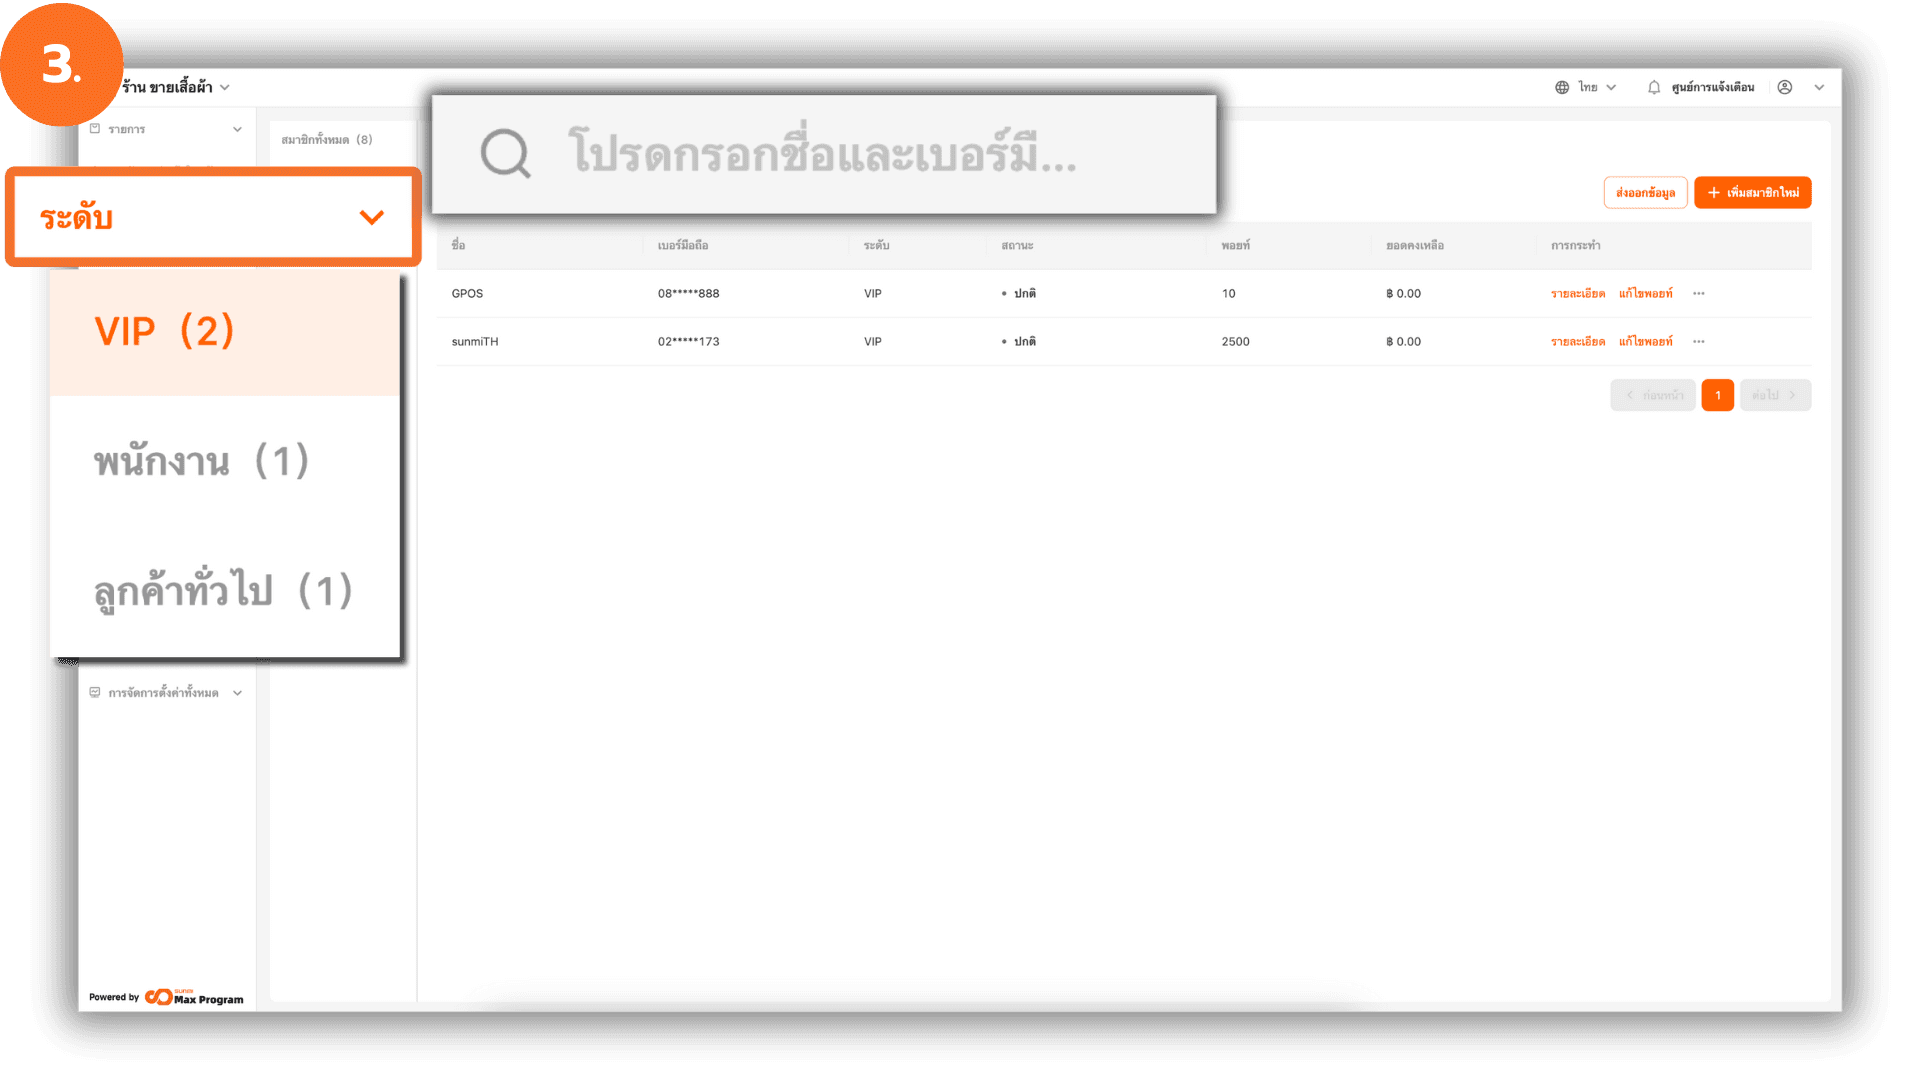
3. Searching and Viewing the Member List
You can click the side menu to view members by membership level or use the search function to search by name/phone number.
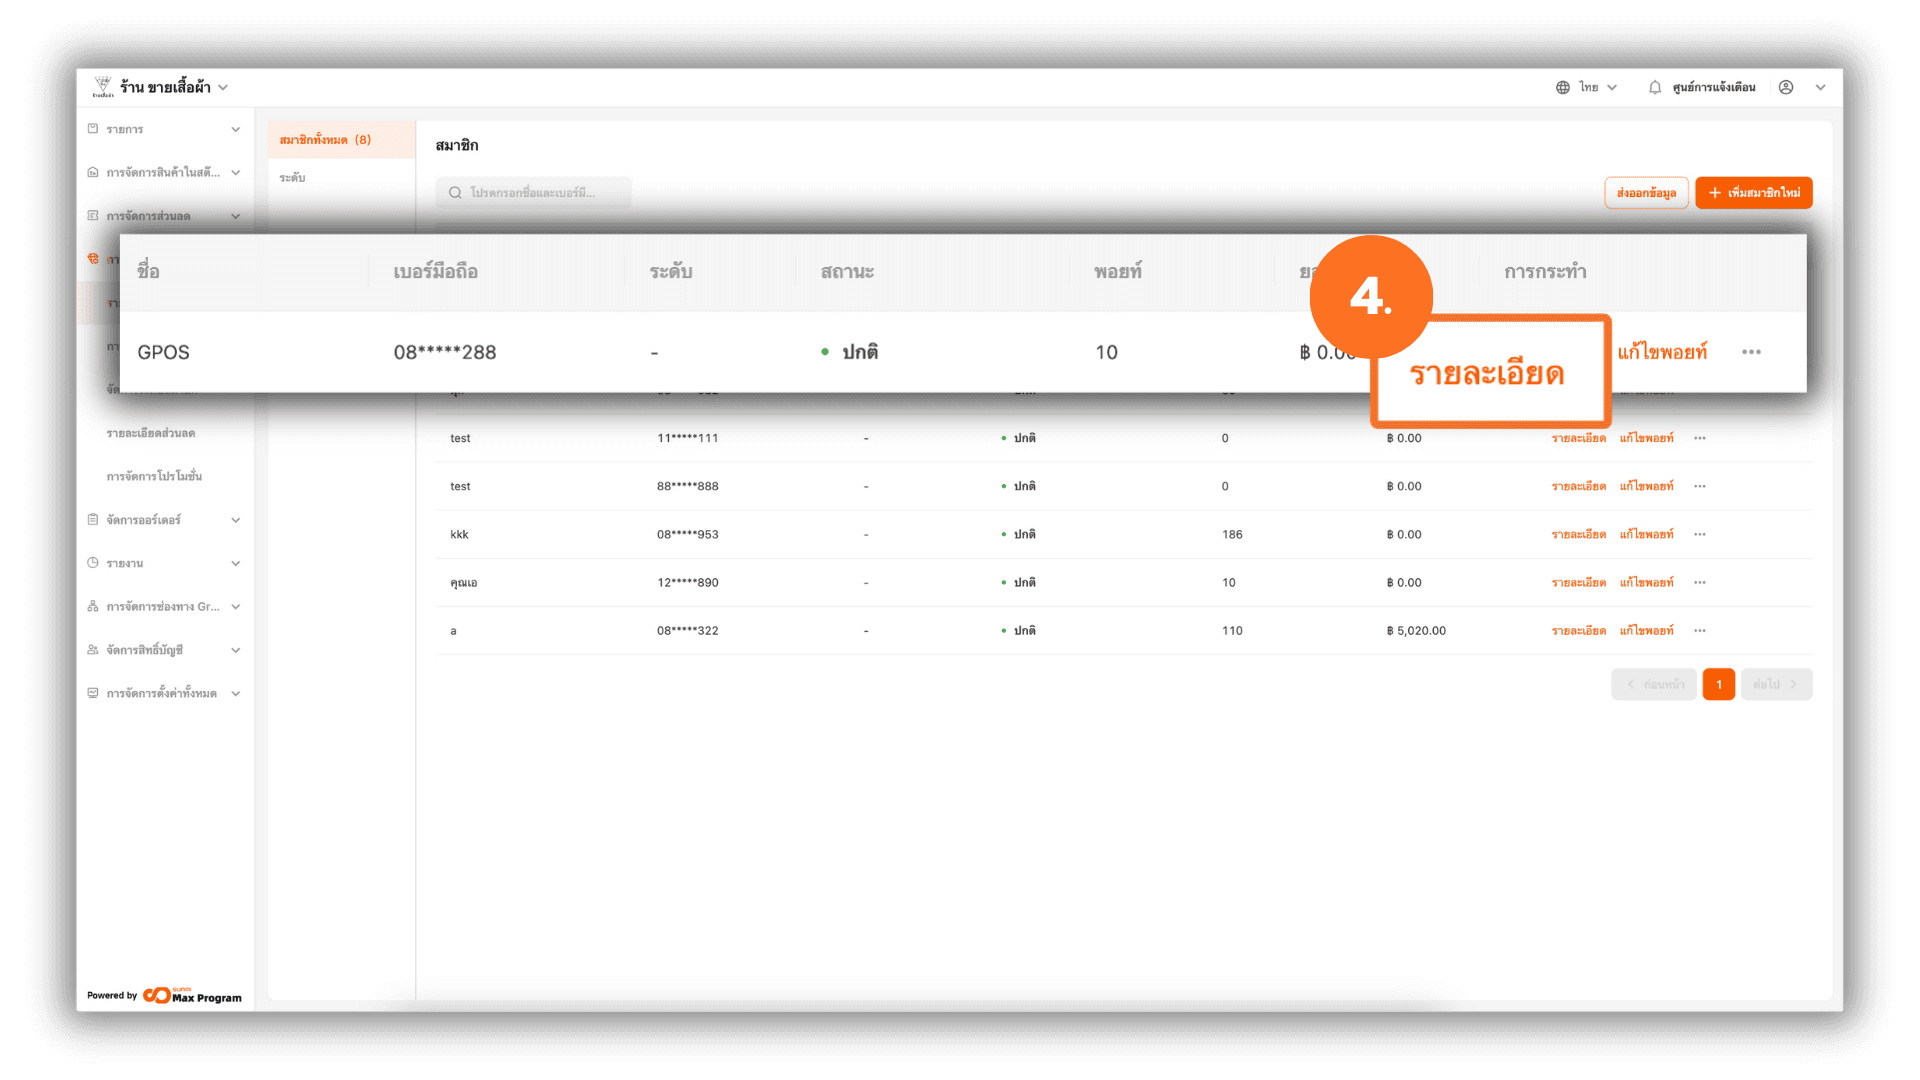
4. Viewing Member Details
Click the Details button next to the desired member’s name.
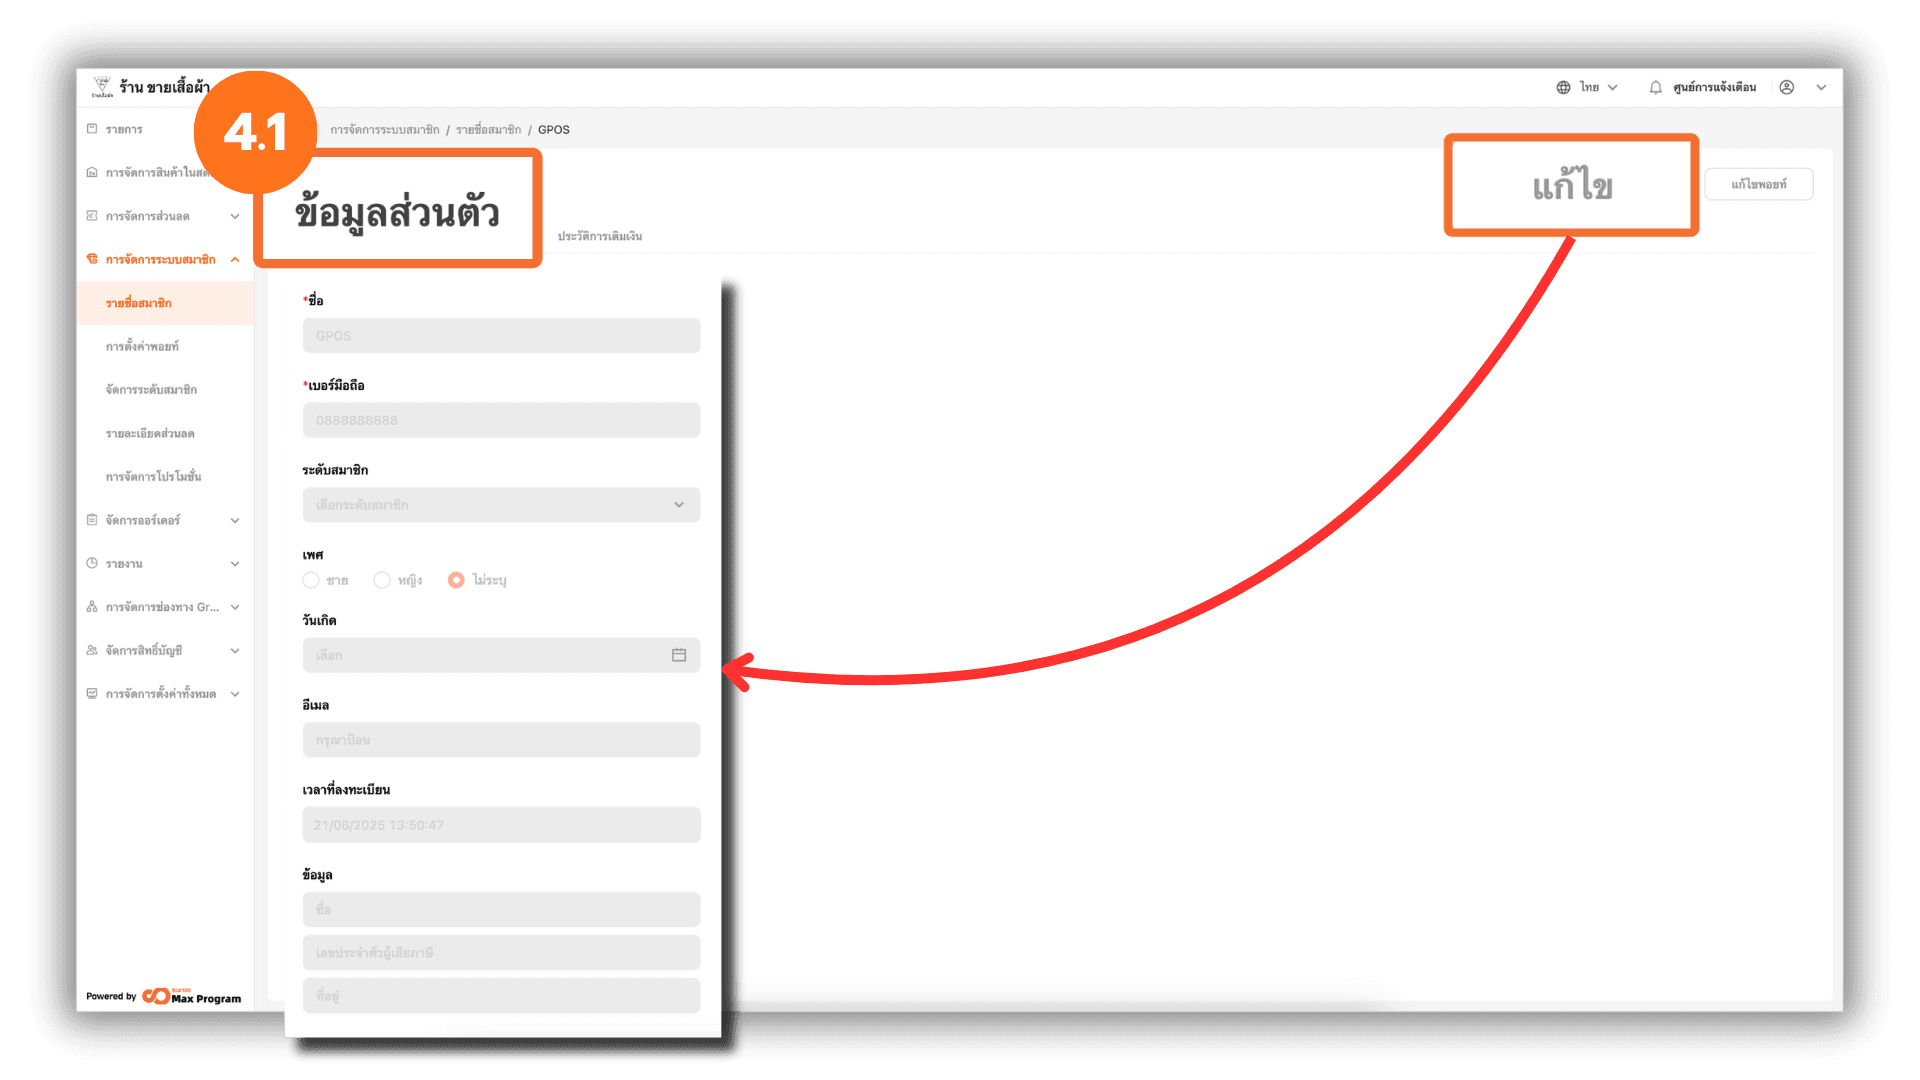
4.1 Editing Member Information
On the member details page, the system will display the selected member’s information. Click Edit to modify the member details.
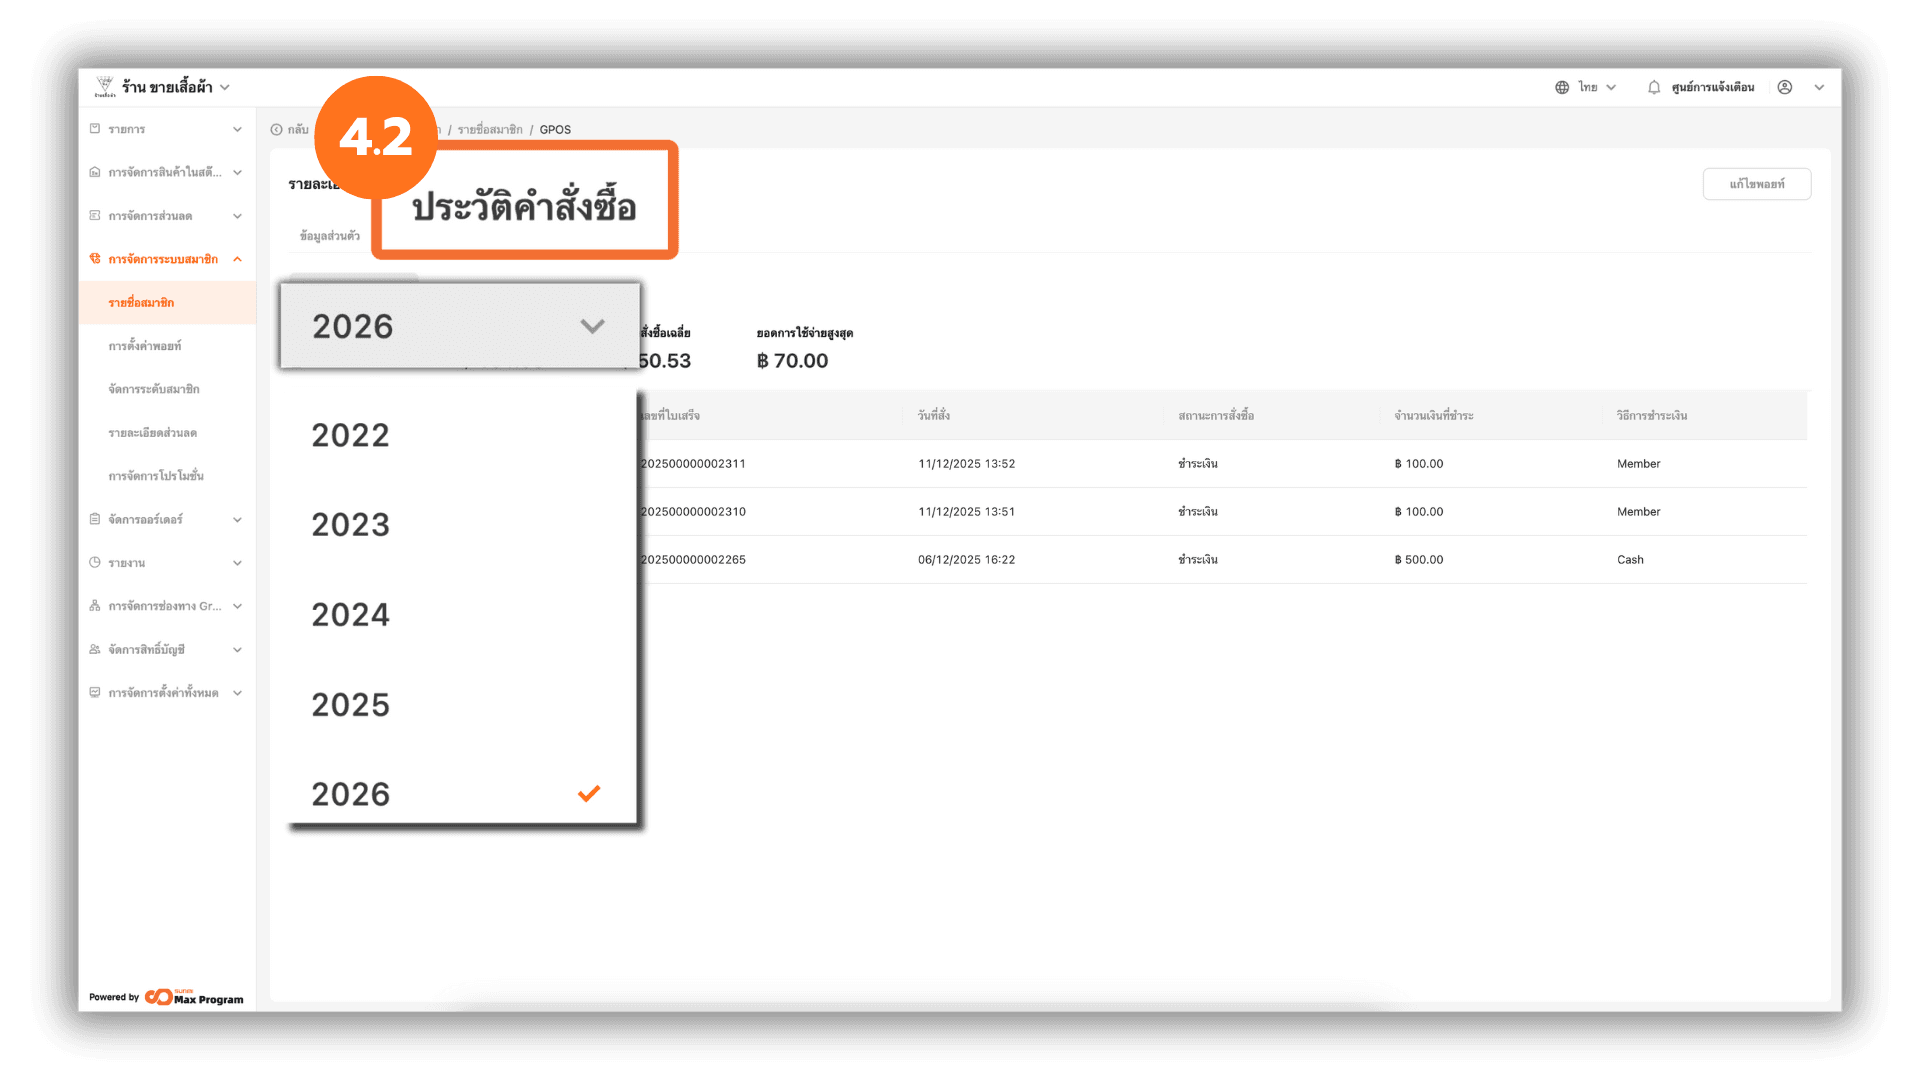
4.2 Viewing Order History
At the top section, select Spending Record. The system will display the member’s order information, which can be viewed by year.
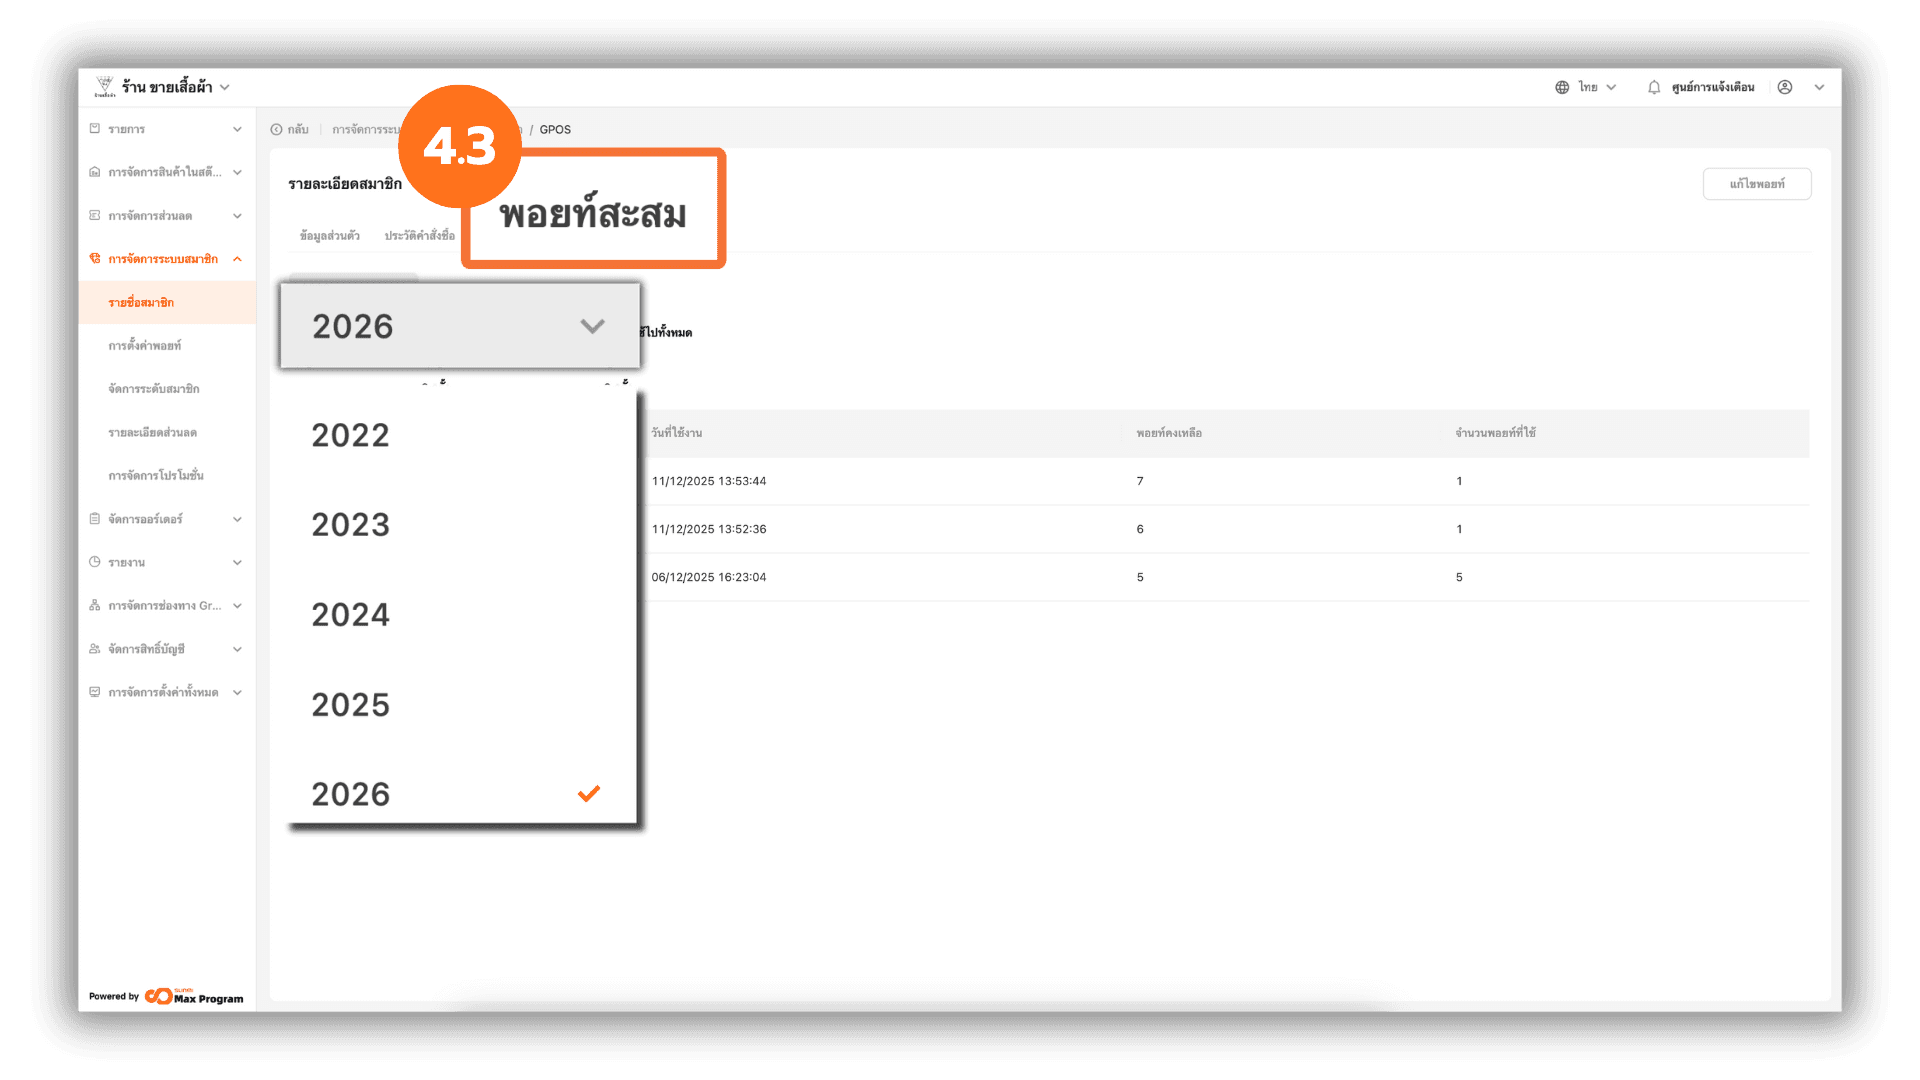
4.3 Viewing Reward Points
At the top section, select Points Record. The system will display the member’s accumulated points, which can be viewed by year.
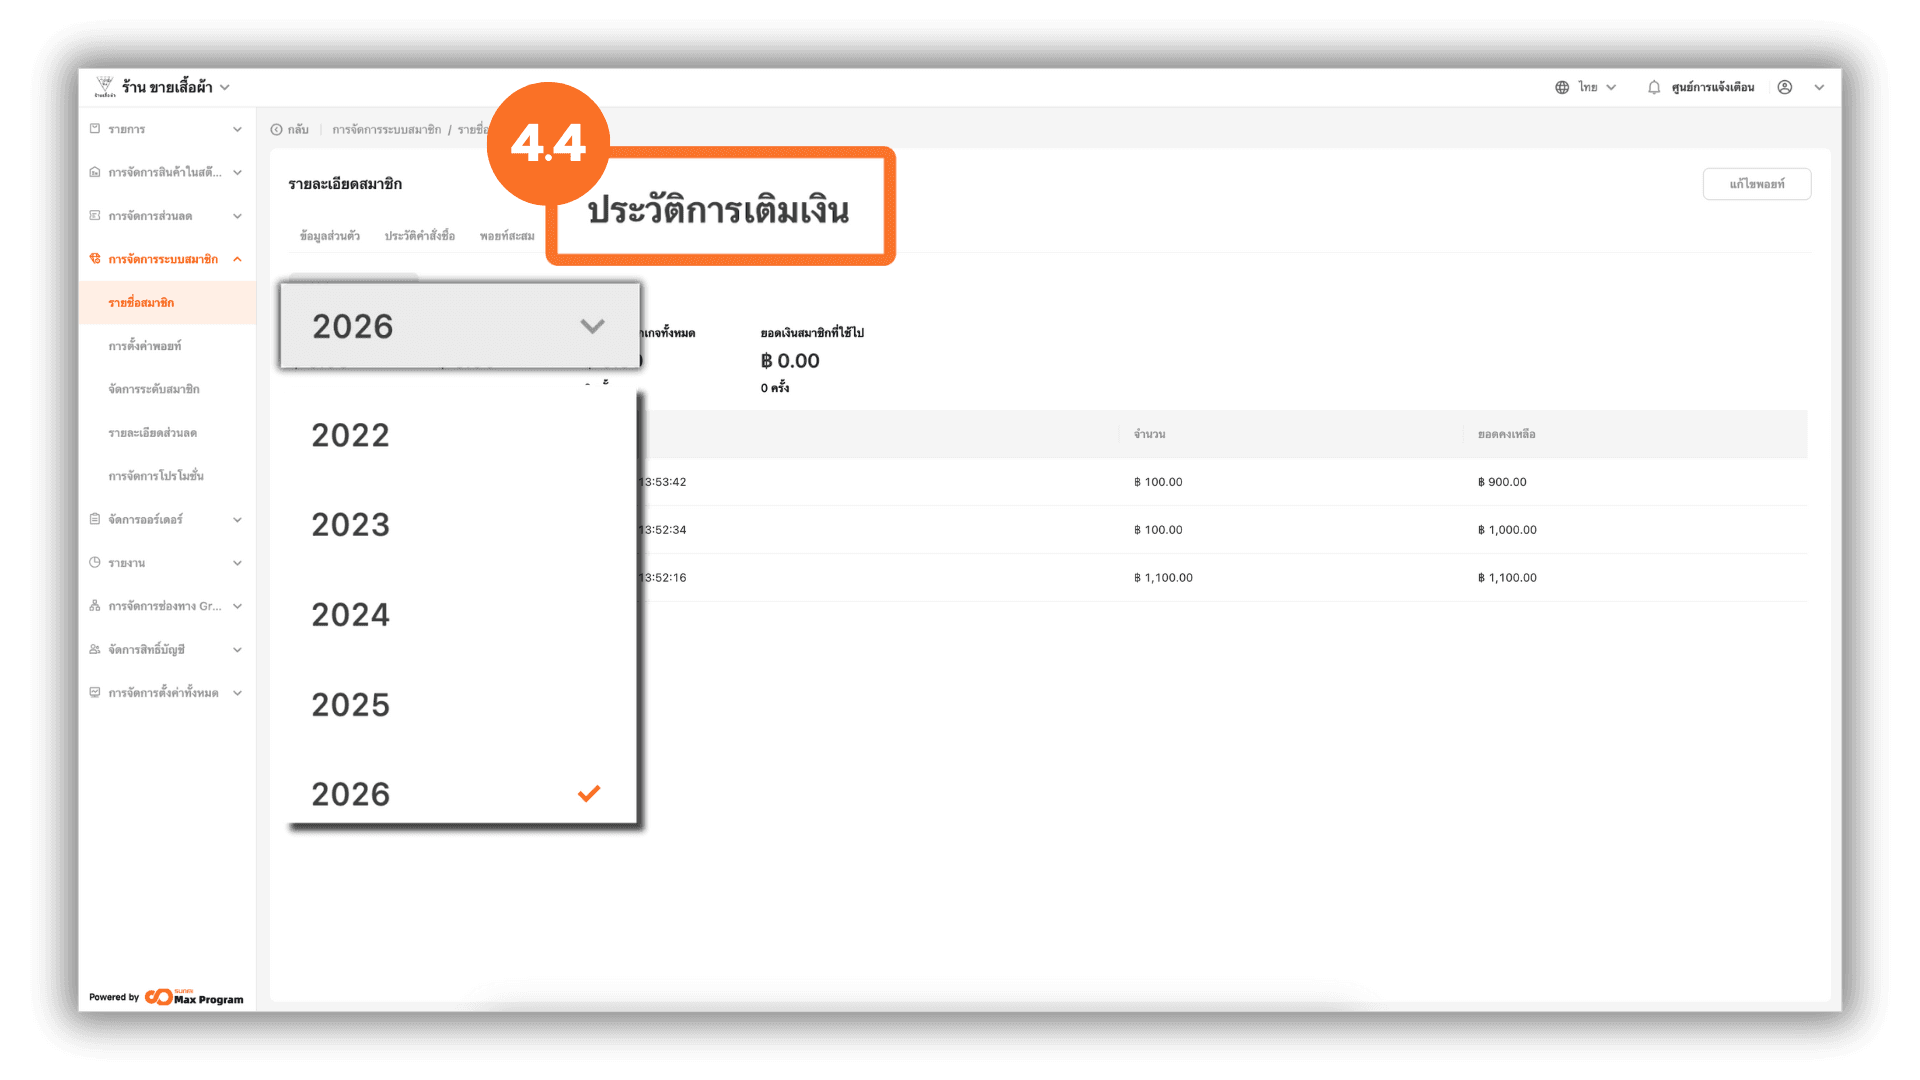
4.4 Viewing Top-up History
At the top section, select Top up Record. The system will display the member’s top-up records, which can be viewed by year.
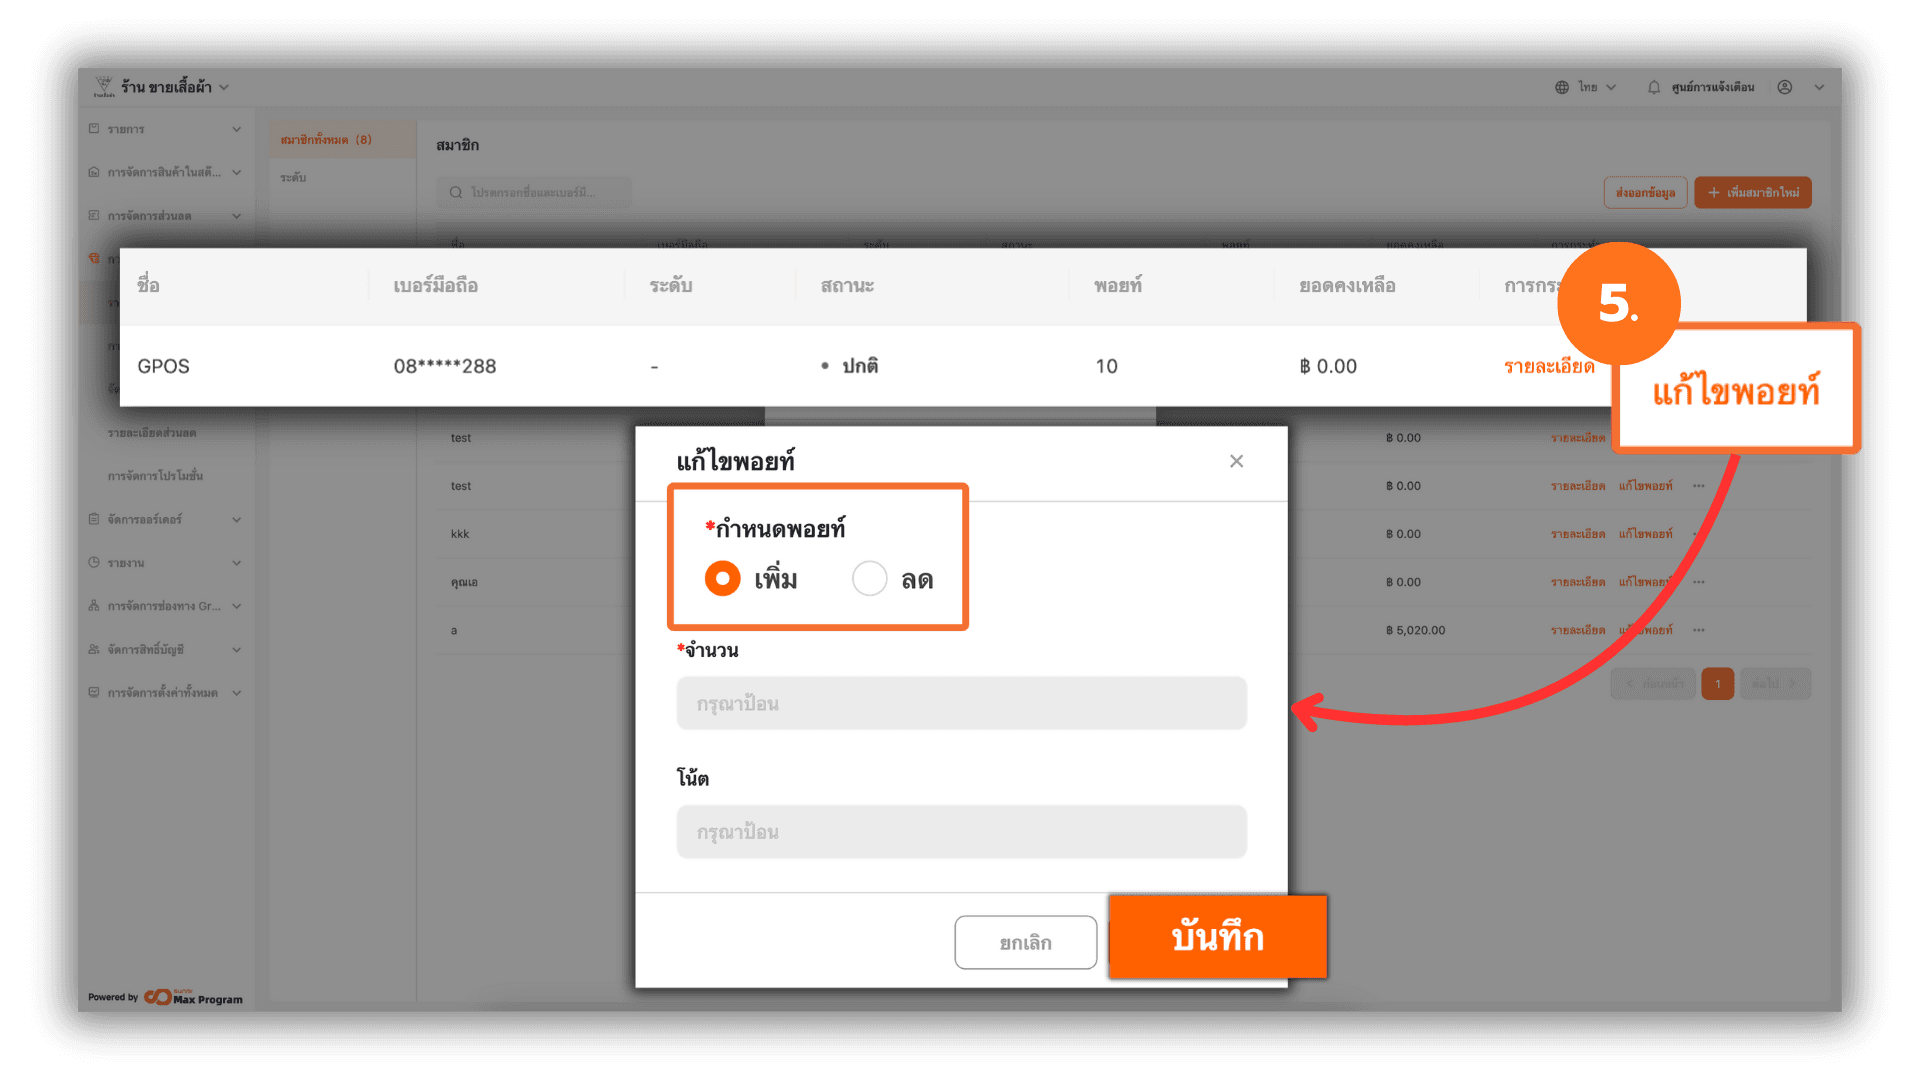
5. Editing Member Points
On the member list page, click the Change Points button next to the desired member’s name. The system will display the point adjustment screen. Choose whether to add or reduce points, enter the number of points to adjust, and click Save to confirm.
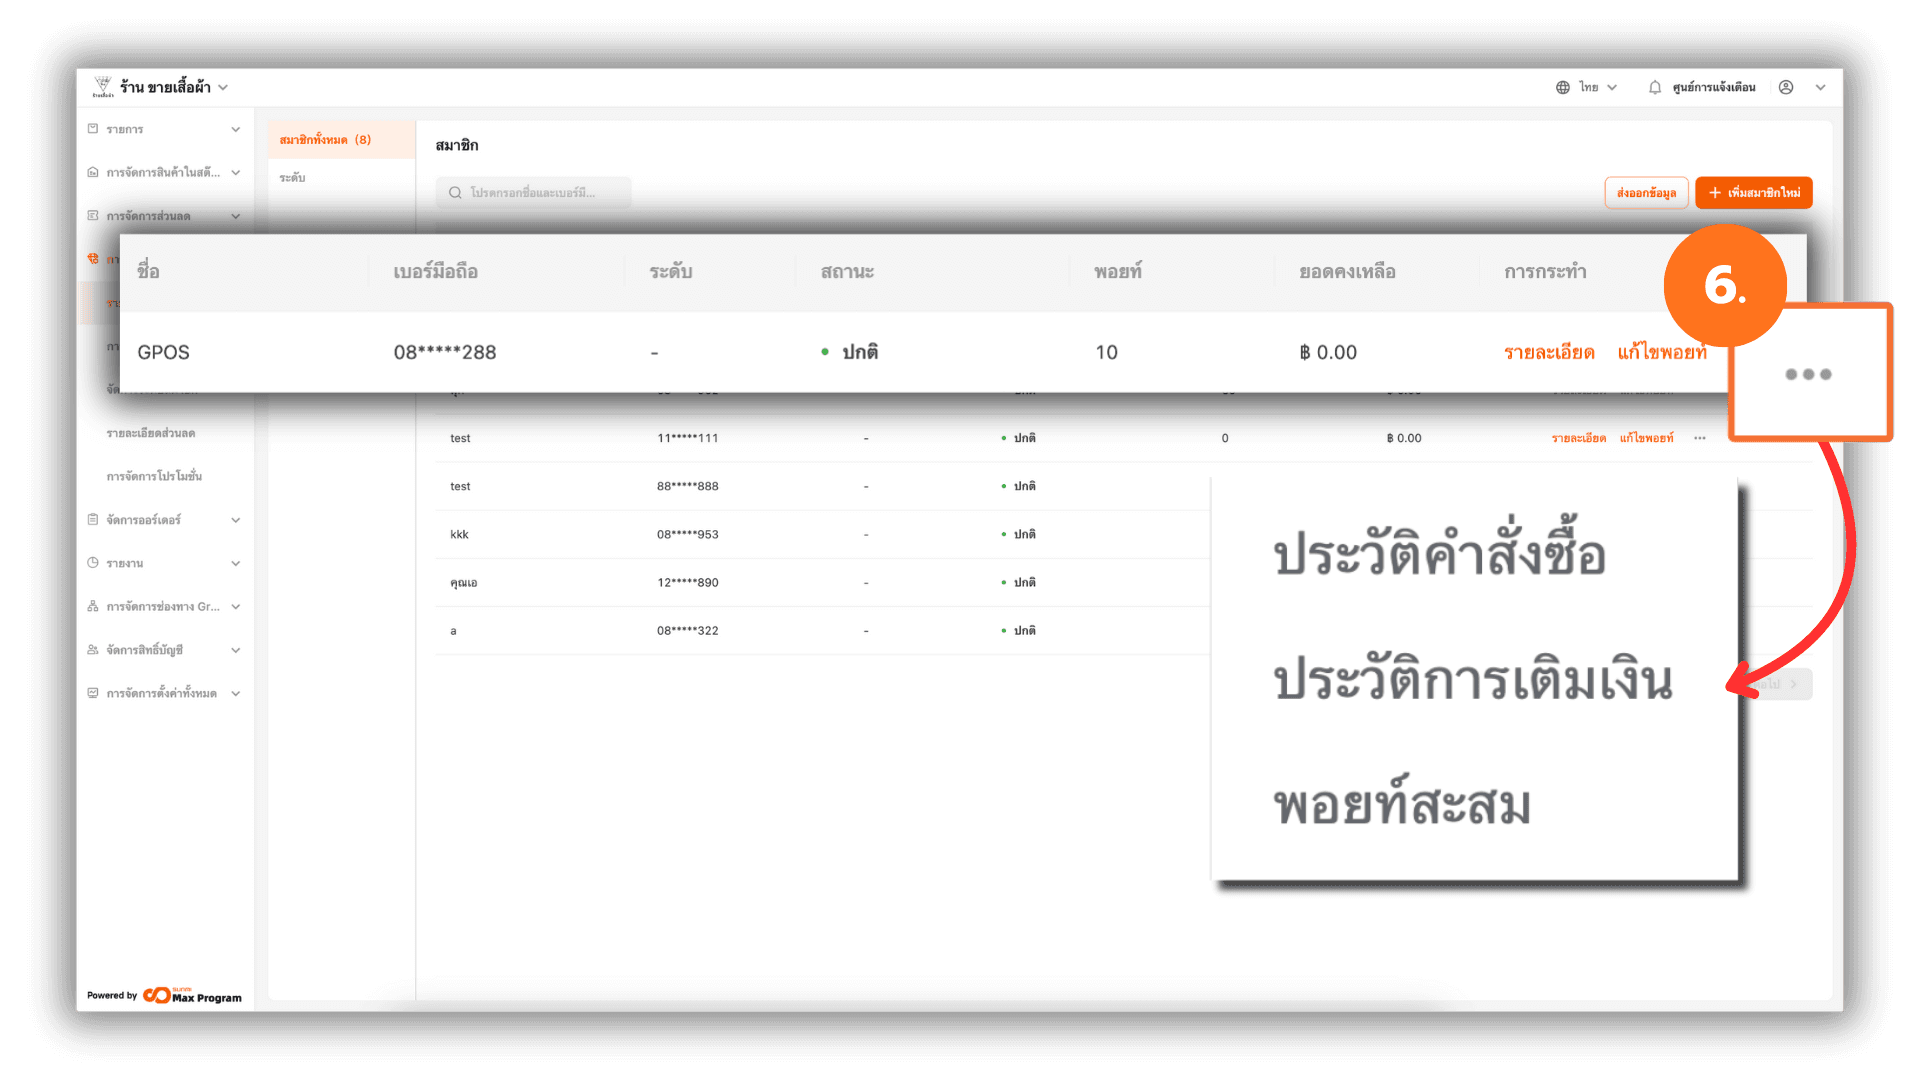
6. Accessing the Member Quick Menu
Click the ... button next to the desired member’s name. You can choose to view Spending Record, Top up record, or Points Record.
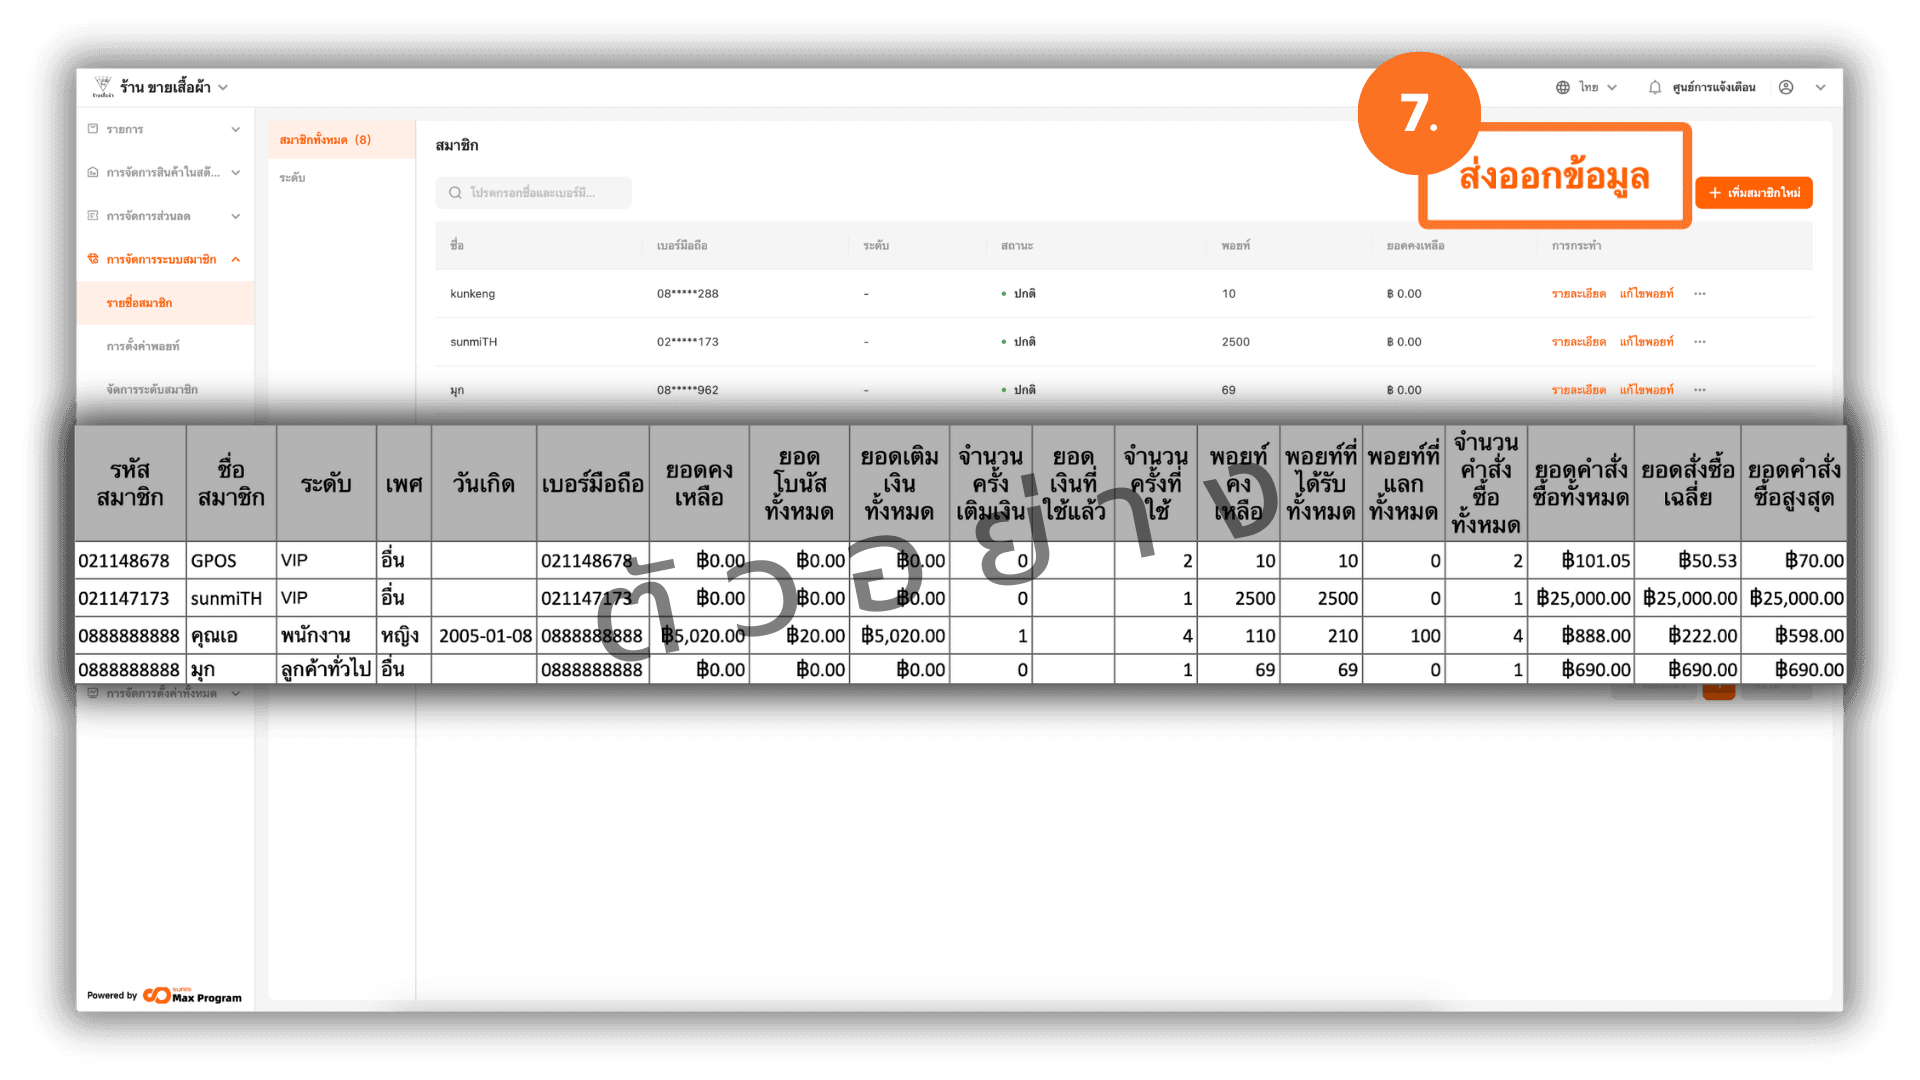
7. Exporting Member Data
Click the Export Data button. The system will export all member data in the system. The exported file will be in Excel format, containing summarized data according to the sample format.