Barcode generation system via Excel file
2026-03-24 10:09
This manual helps ensure the product import process follows the correct format, reduces errors, saves time, and provides convenience through automatic barcode generation—making product management fast and standardized.
1. Downloading the Template and Preparing the Excel File
Log in to the Back Office at login.gpos.co.th Then download the Product Import Template to fill in product information according to the required system format.
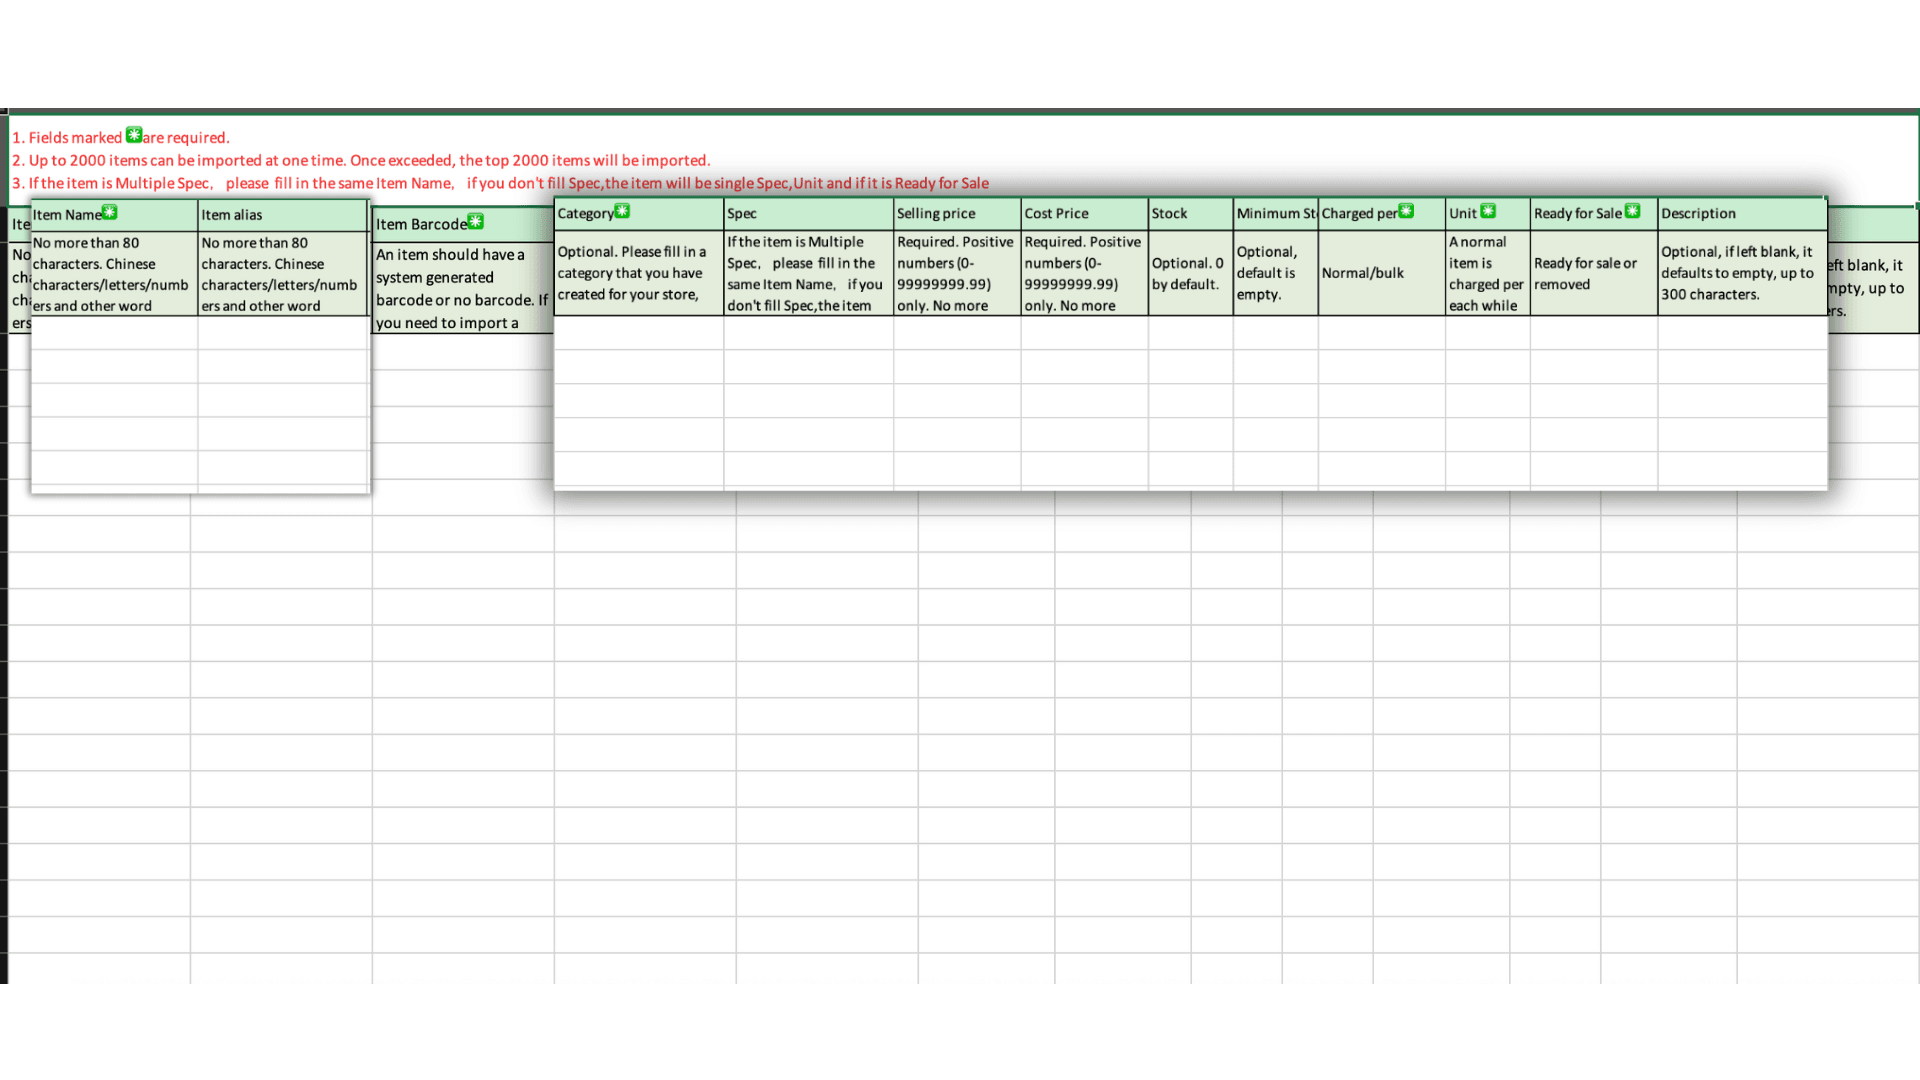
1.1 Fill in the Required Fields
Open the template file you downloaded and complete all product information in each column. You can refer to the explanations for each field in How to Create Product Items via Excel File.
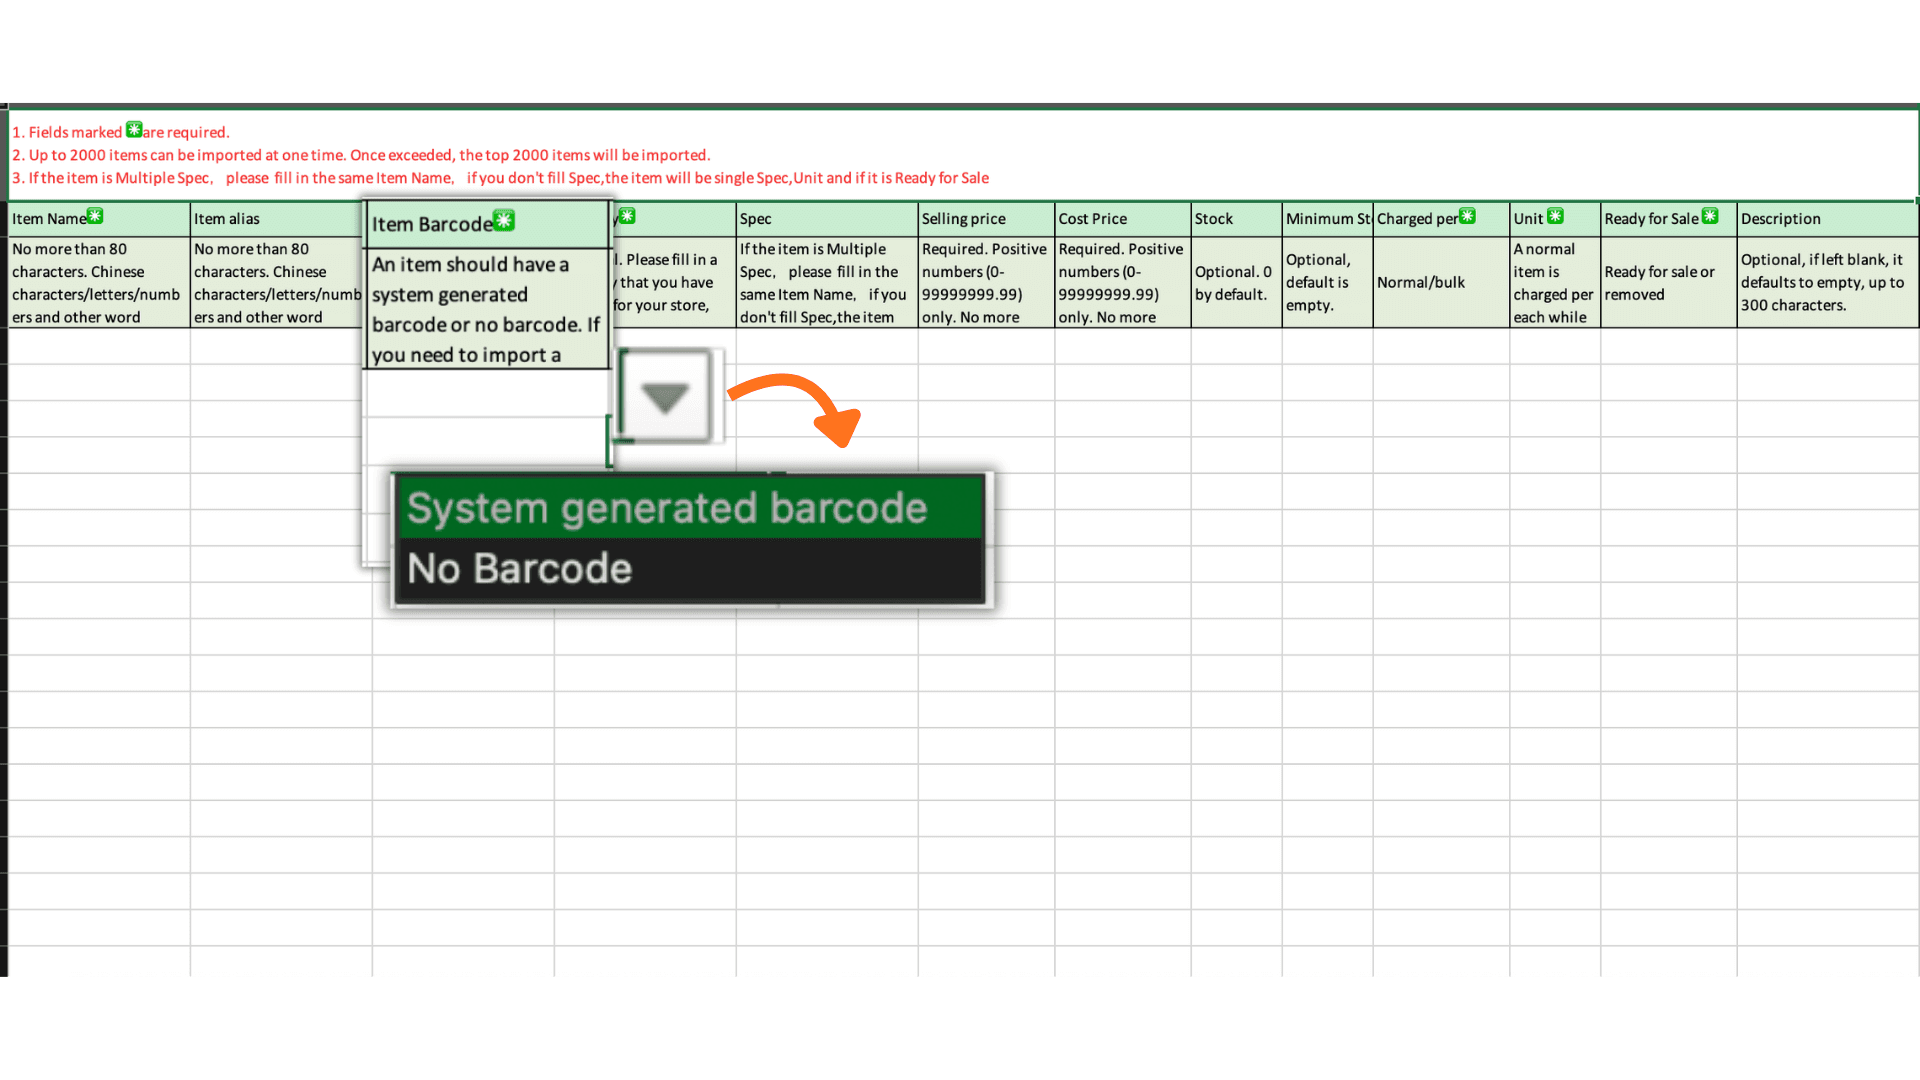
1.2 Auto-Generating Barcodes
For products that require the system to auto-generate a barcode, go to the Barcode column, click the down arrow, and select System Generate Barcode. When the file is imported, the system will automatically generate barcodes.
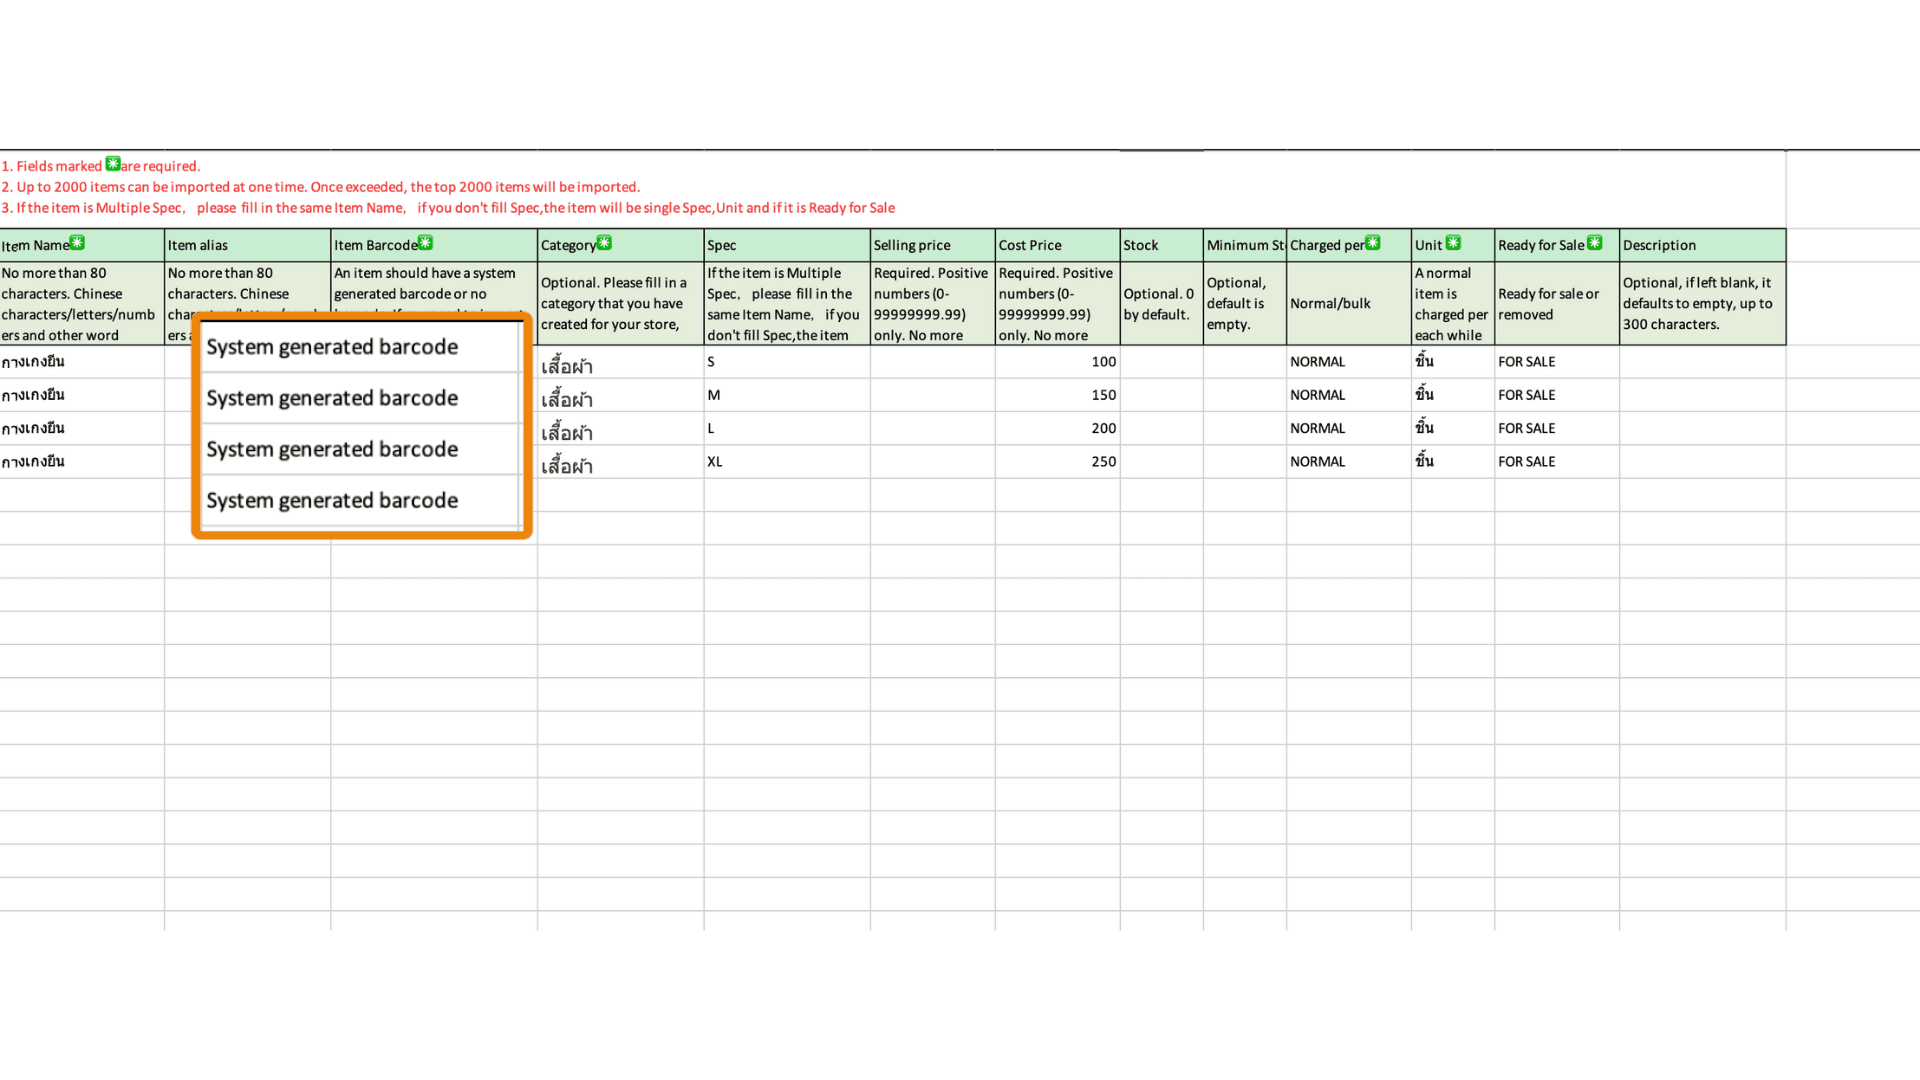
1.3 Review the Entries
Check all columns to ensure the information is complete and correct. Then click Save to save the data to the file.
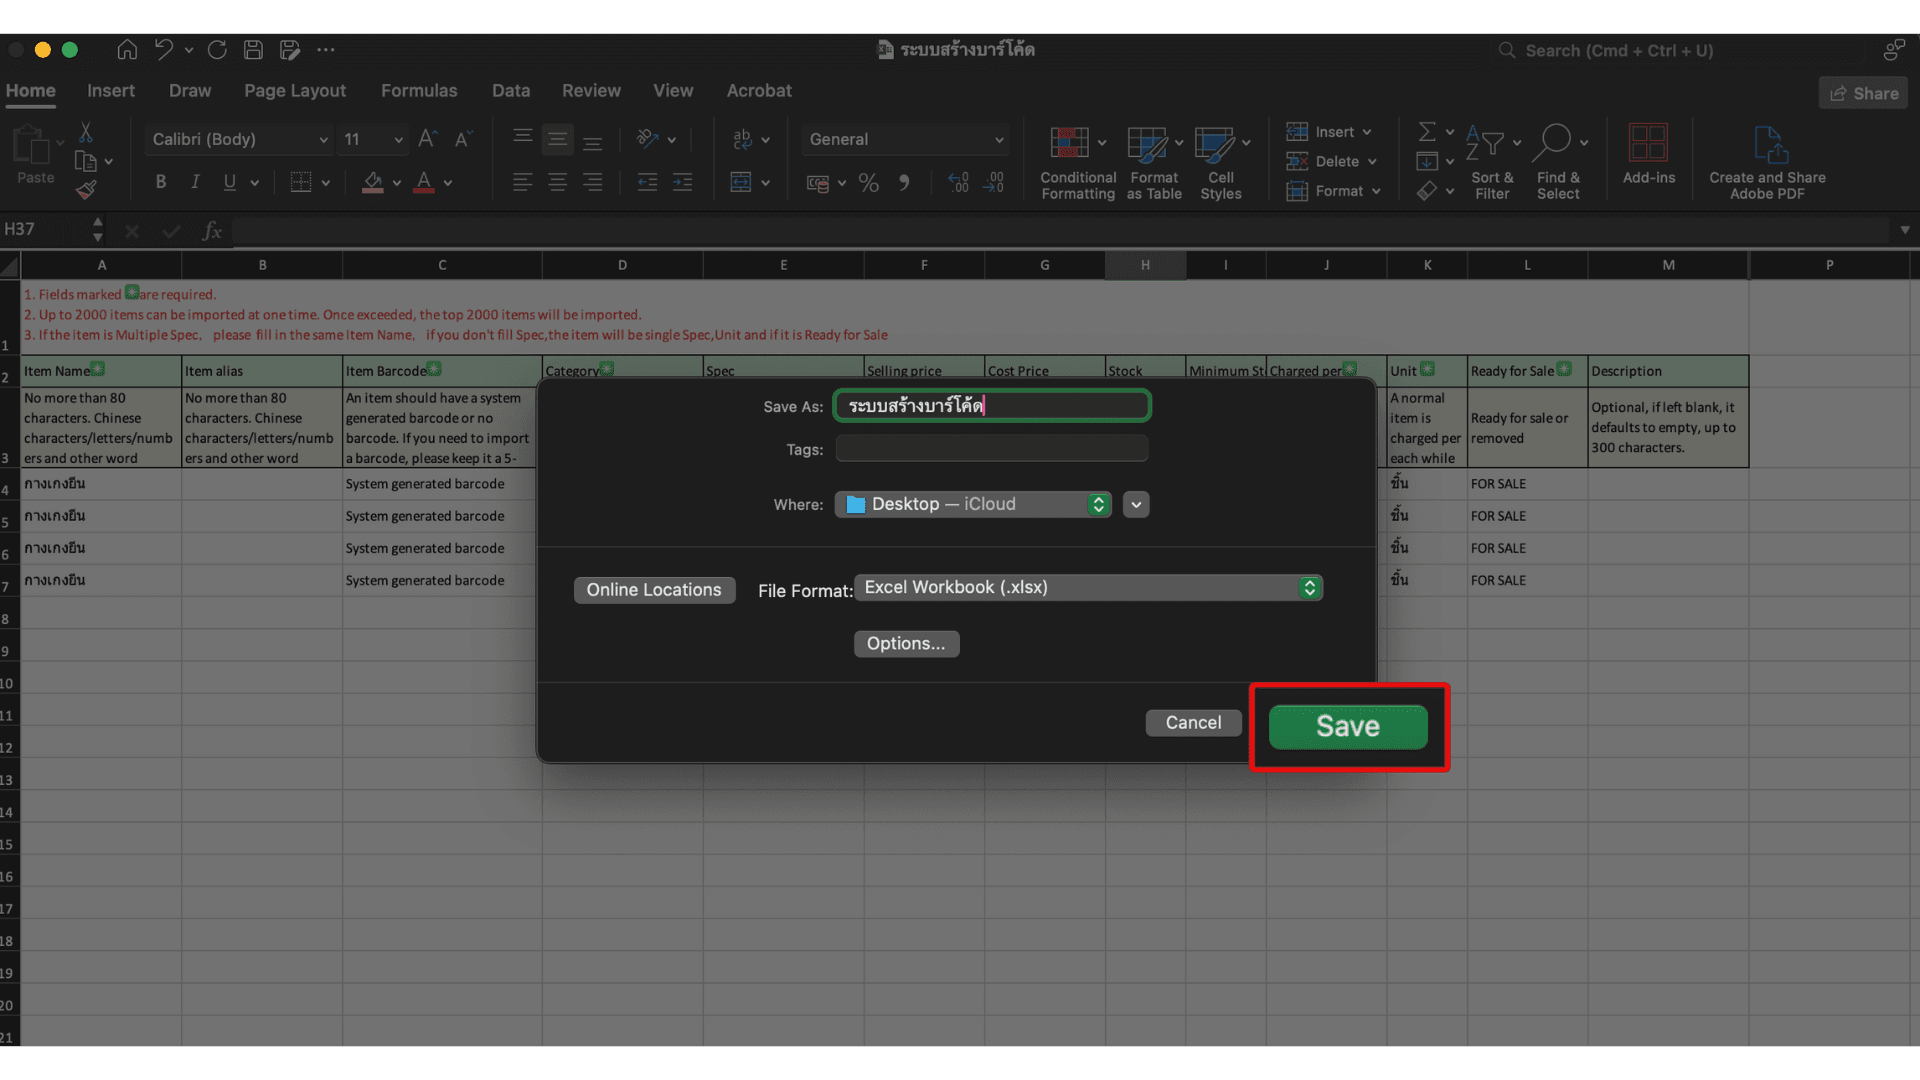
1.4 Prepare the File for Import
Rename the Excel file as desired and click Save to store it for importing into the GPOS system.
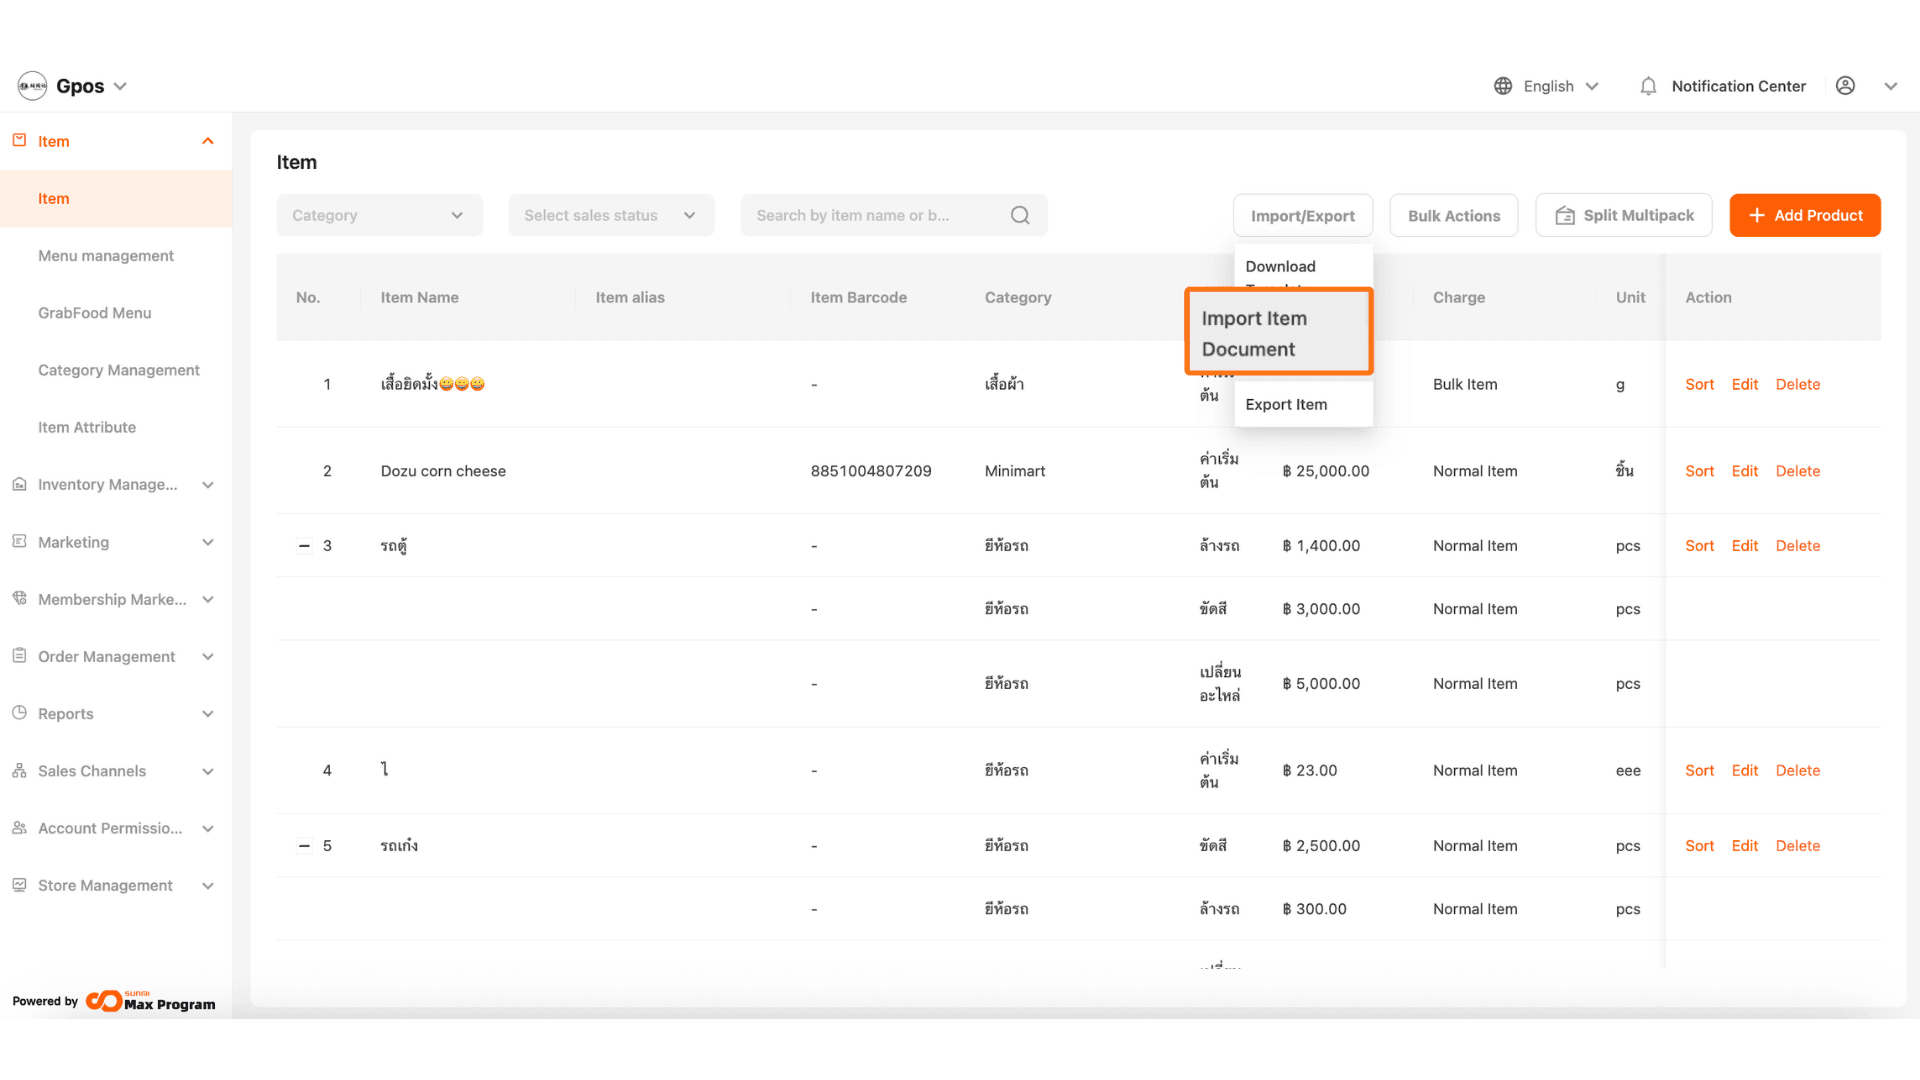
2. Accessing the Import Menu in the Back Office
Return to the Back Office system. Go to the Item menu, select Import/Export, and click Import Items Document.
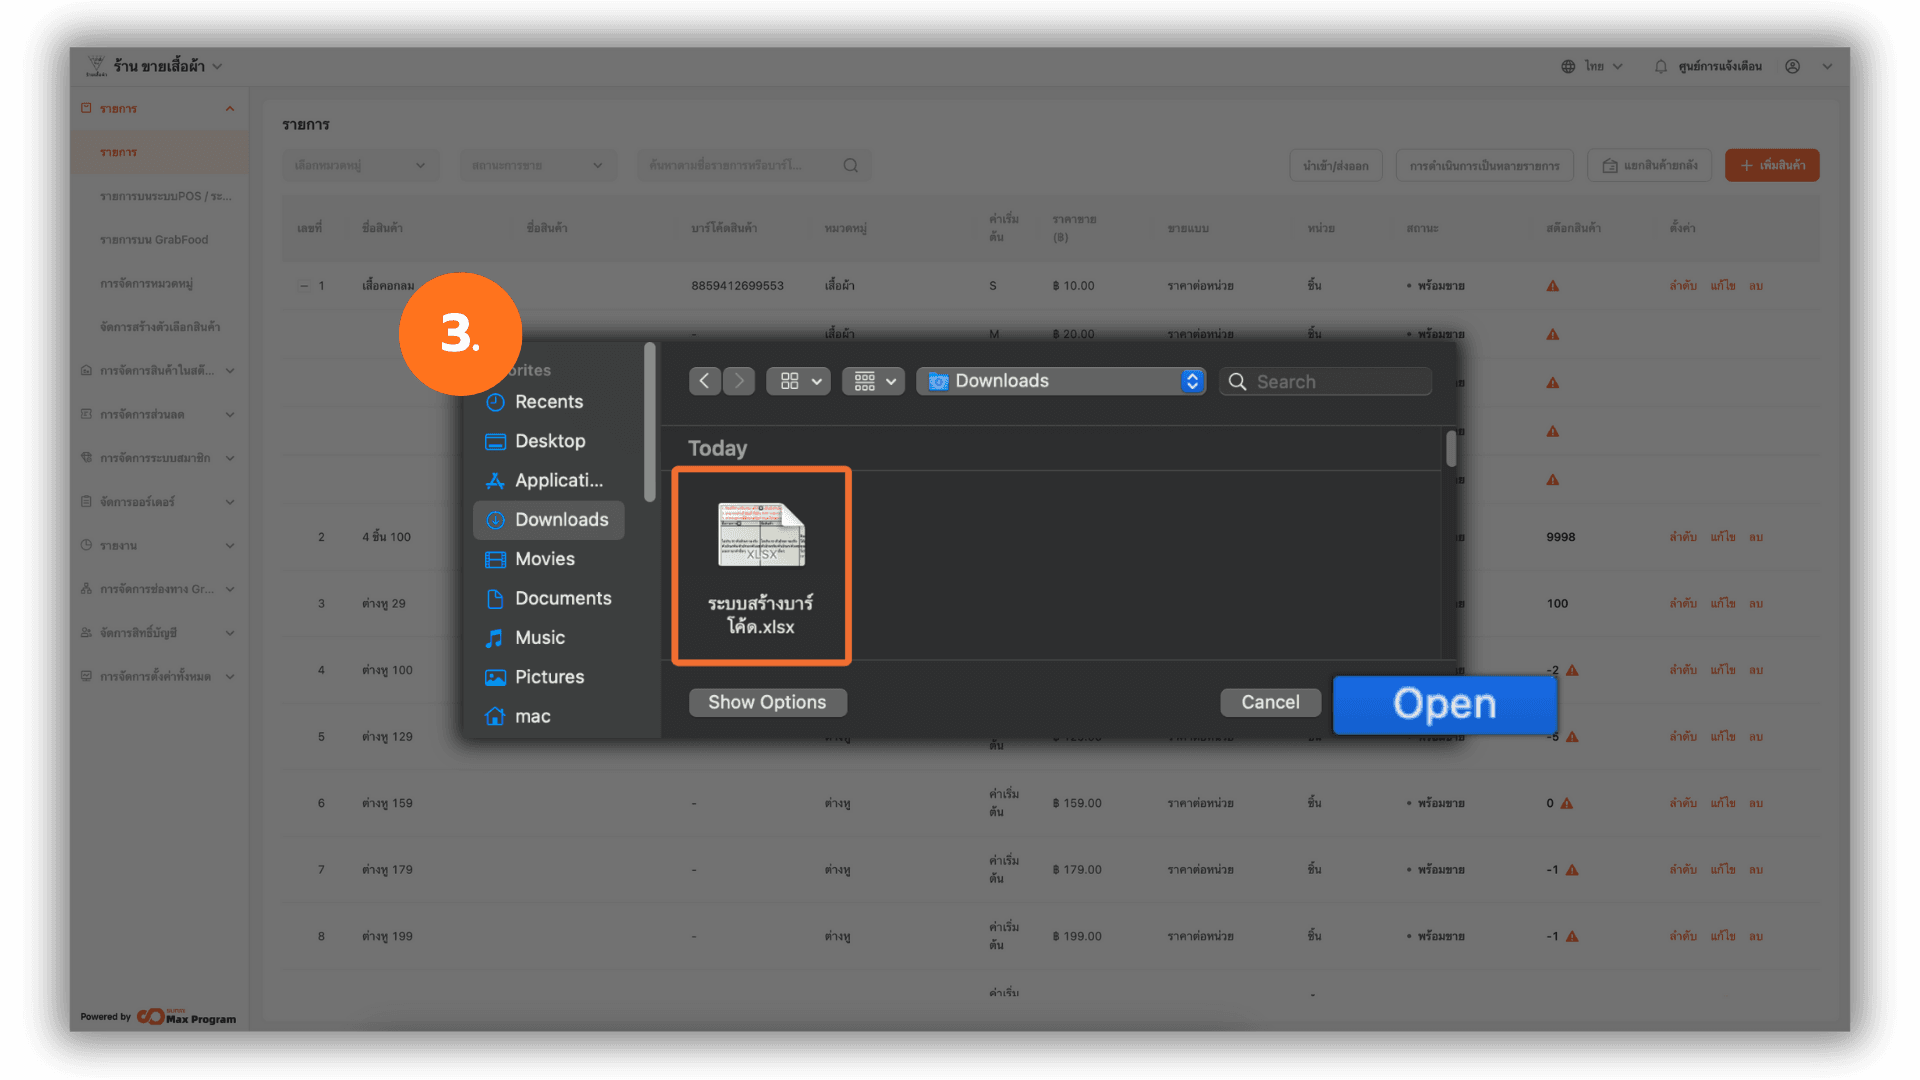
3. Importing Product Items
A window will appear for file selection. Click to select the Excel file you previously saved, then click Open to begin the import process.
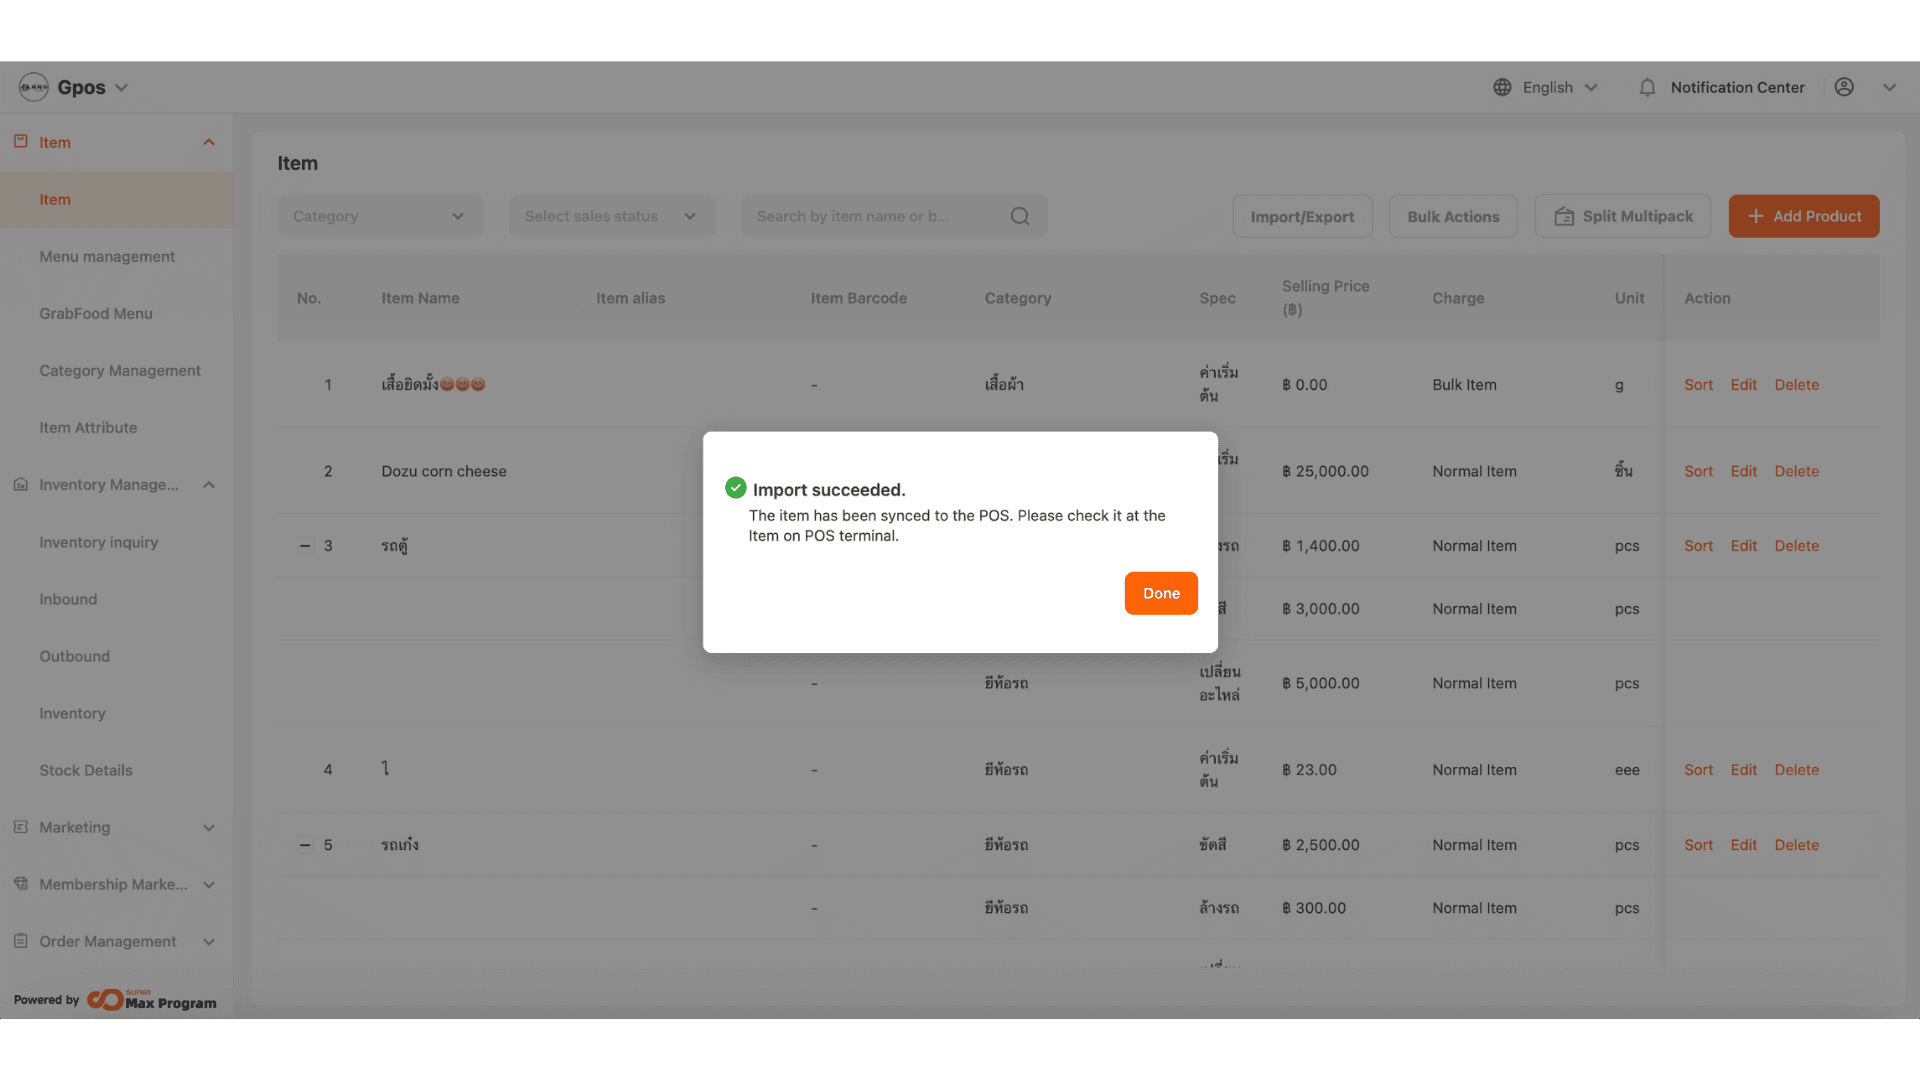
4. Import Completed
When the system finishes importing the data, a message stating “Import Succeeded” will appear. Click Done to close the notification window.
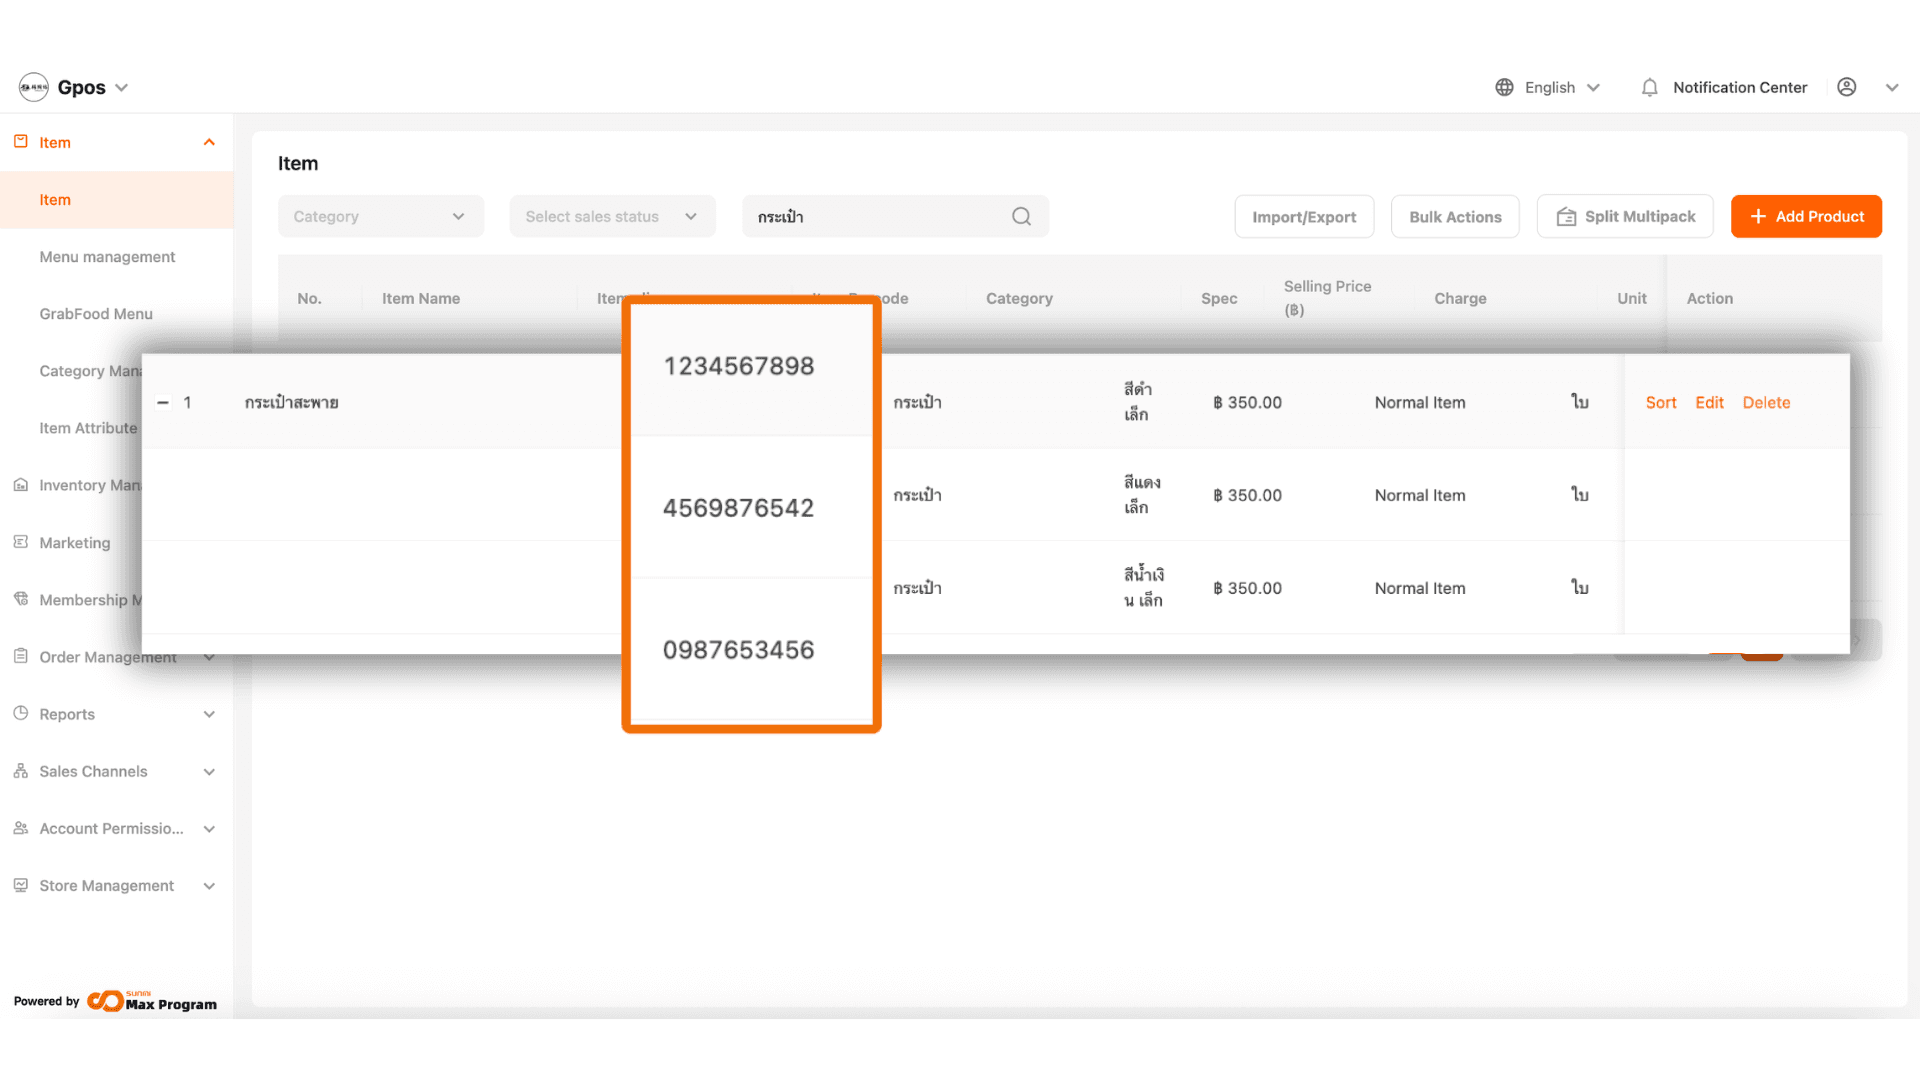
5. Reviewing Imported Items
After the import is completed, the system will automatically generate barcodes for items that used the System Generate Barcode function. You can review the imported items from the Items menu in the Back Office.