Role & Permission Management
2026-05-11 10:17
Defining roles and restricting employee permissions allows you to control access to system functions and business privileges, ensuring that each role has appropriate access according to its responsibilities.
1. Log in to the Back Office
Go to login.gpos.co.th, enter your email and password, then click Log in.
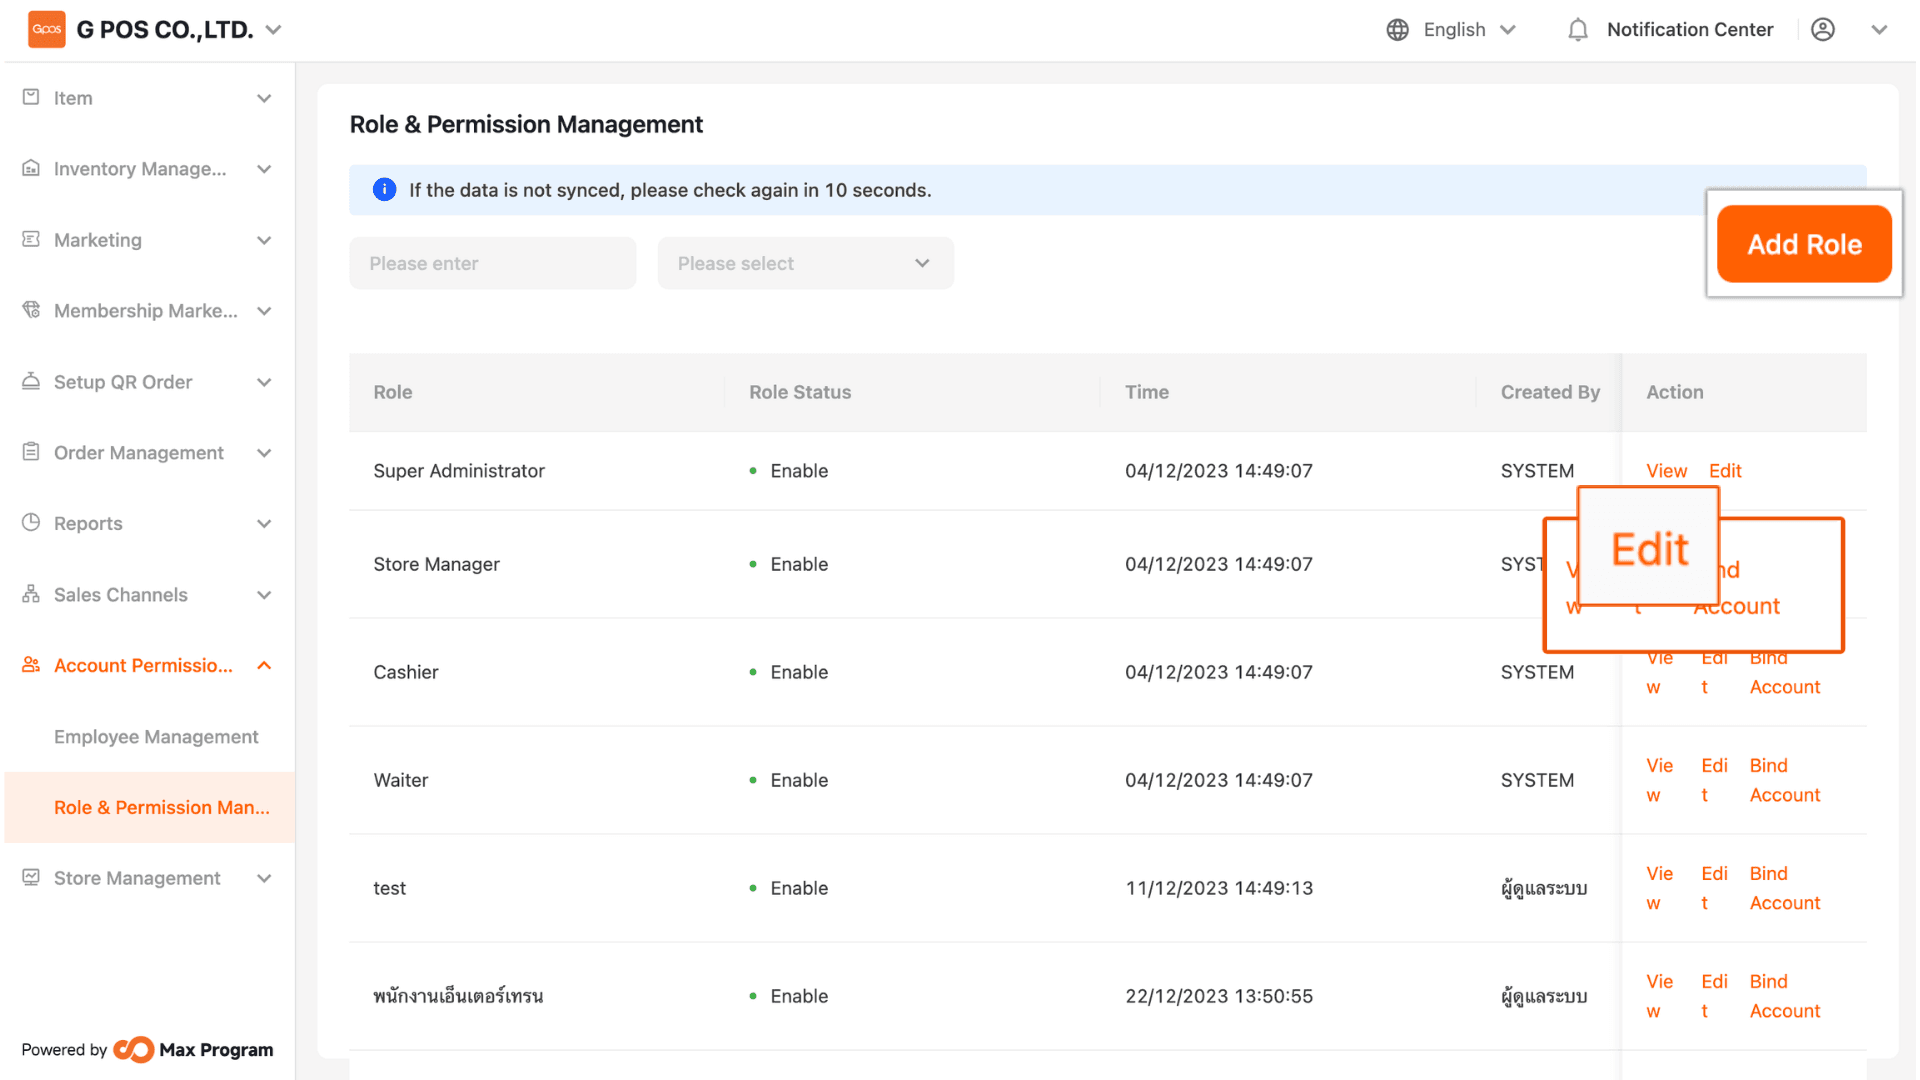
After successfully logging in, navigate to “Account Permission Management” and select “Role & Permission Management.”

2. Edit or Add Roles
Click “Edit” to modify the details of an existing role in the system, or click “Add Role” to create a new role.
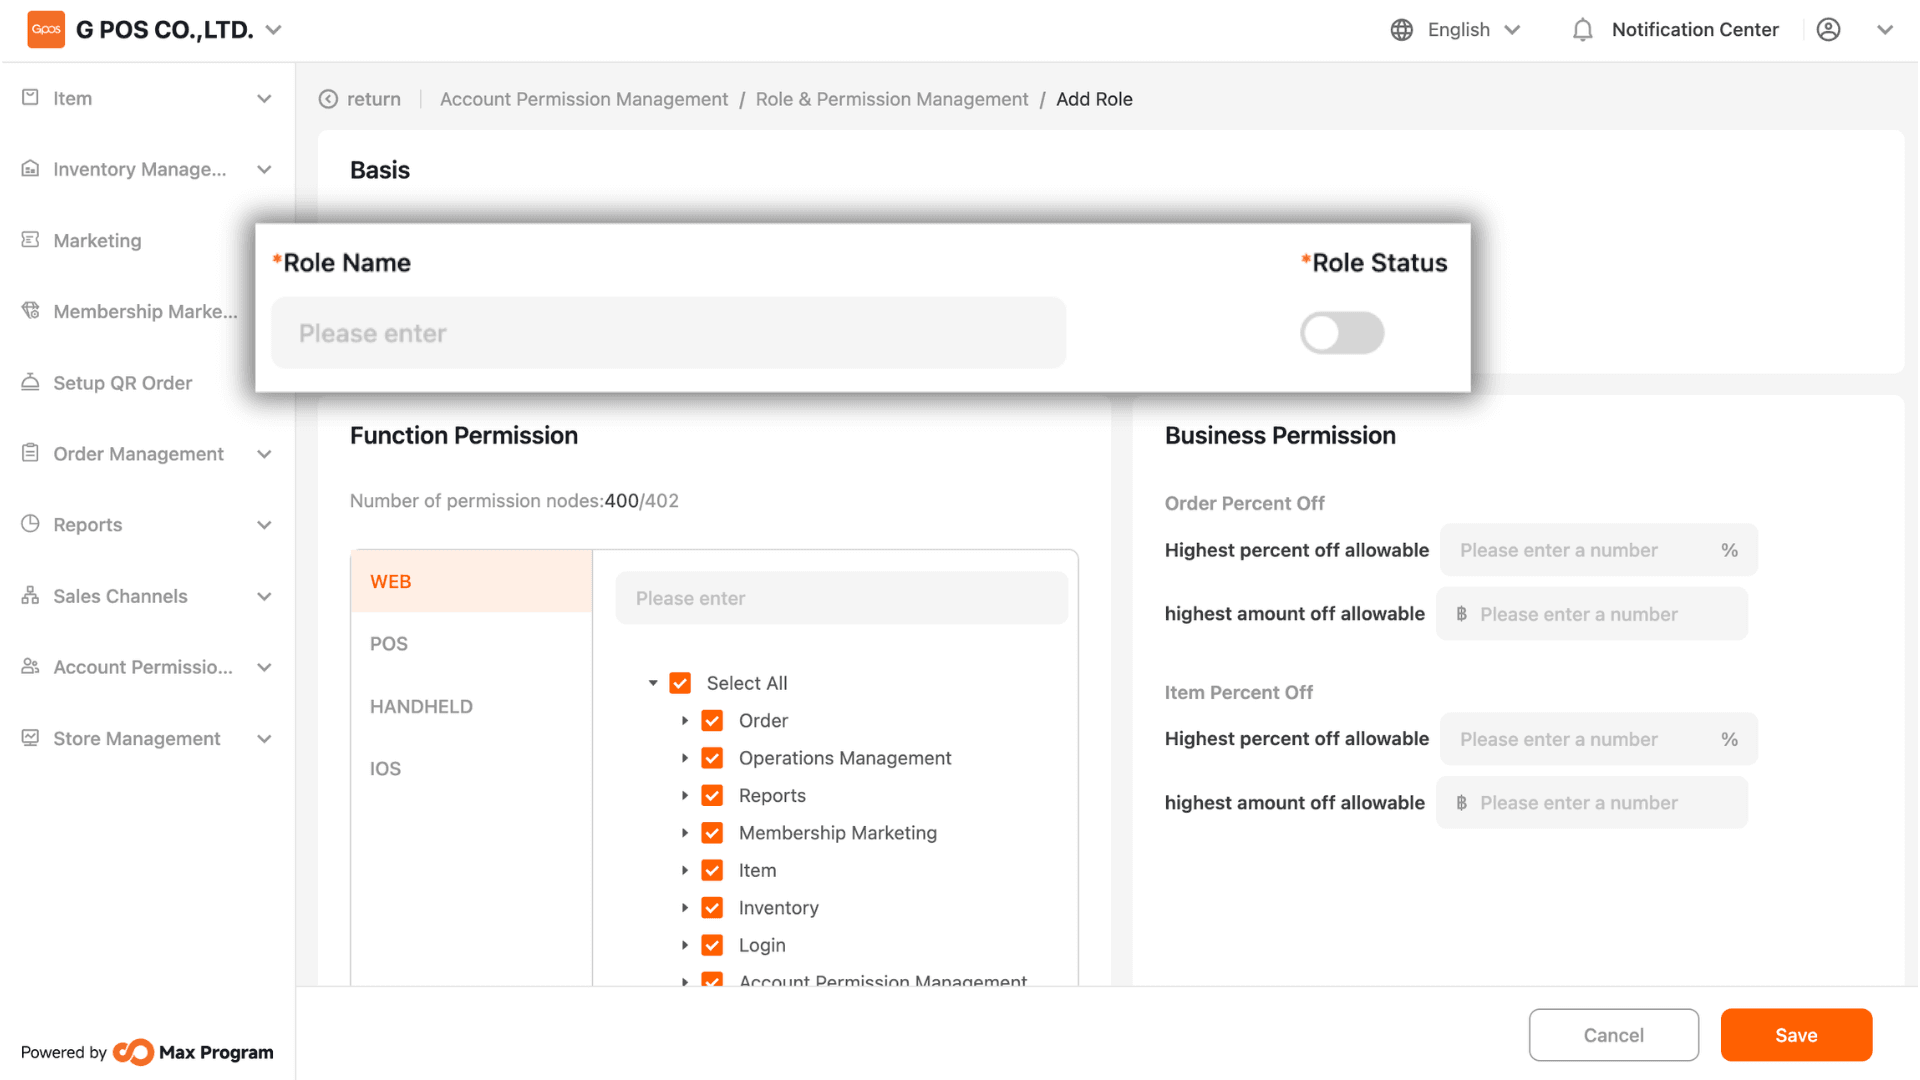
3. Role and Permission Settings
Enter the Role Name (e.g., Cashier, Waiter, etc.) and enable the role status.
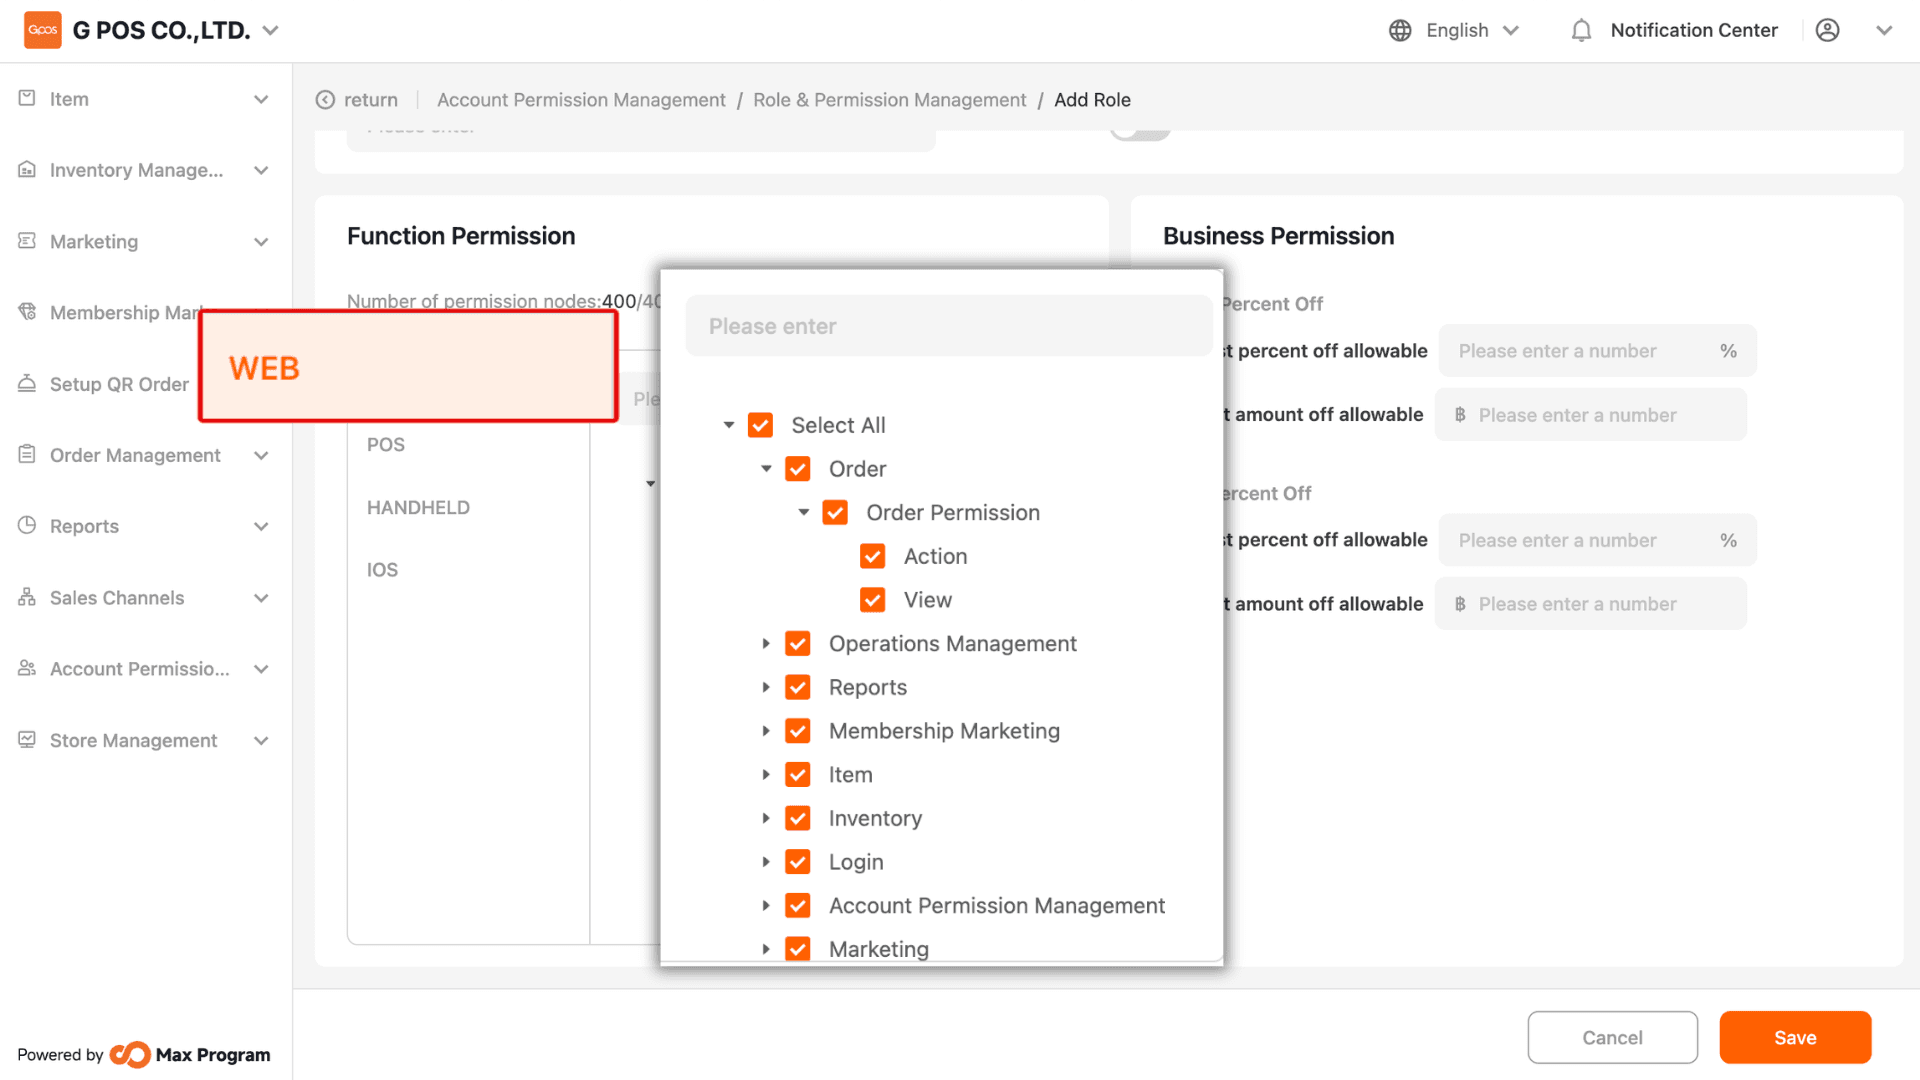
3.1 Web Function Permissions
Configure access permissions for the Back Office (Web System). Click the dropdown arrow to view sub-functions and select the desired permissions by checking the corresponding boxes.
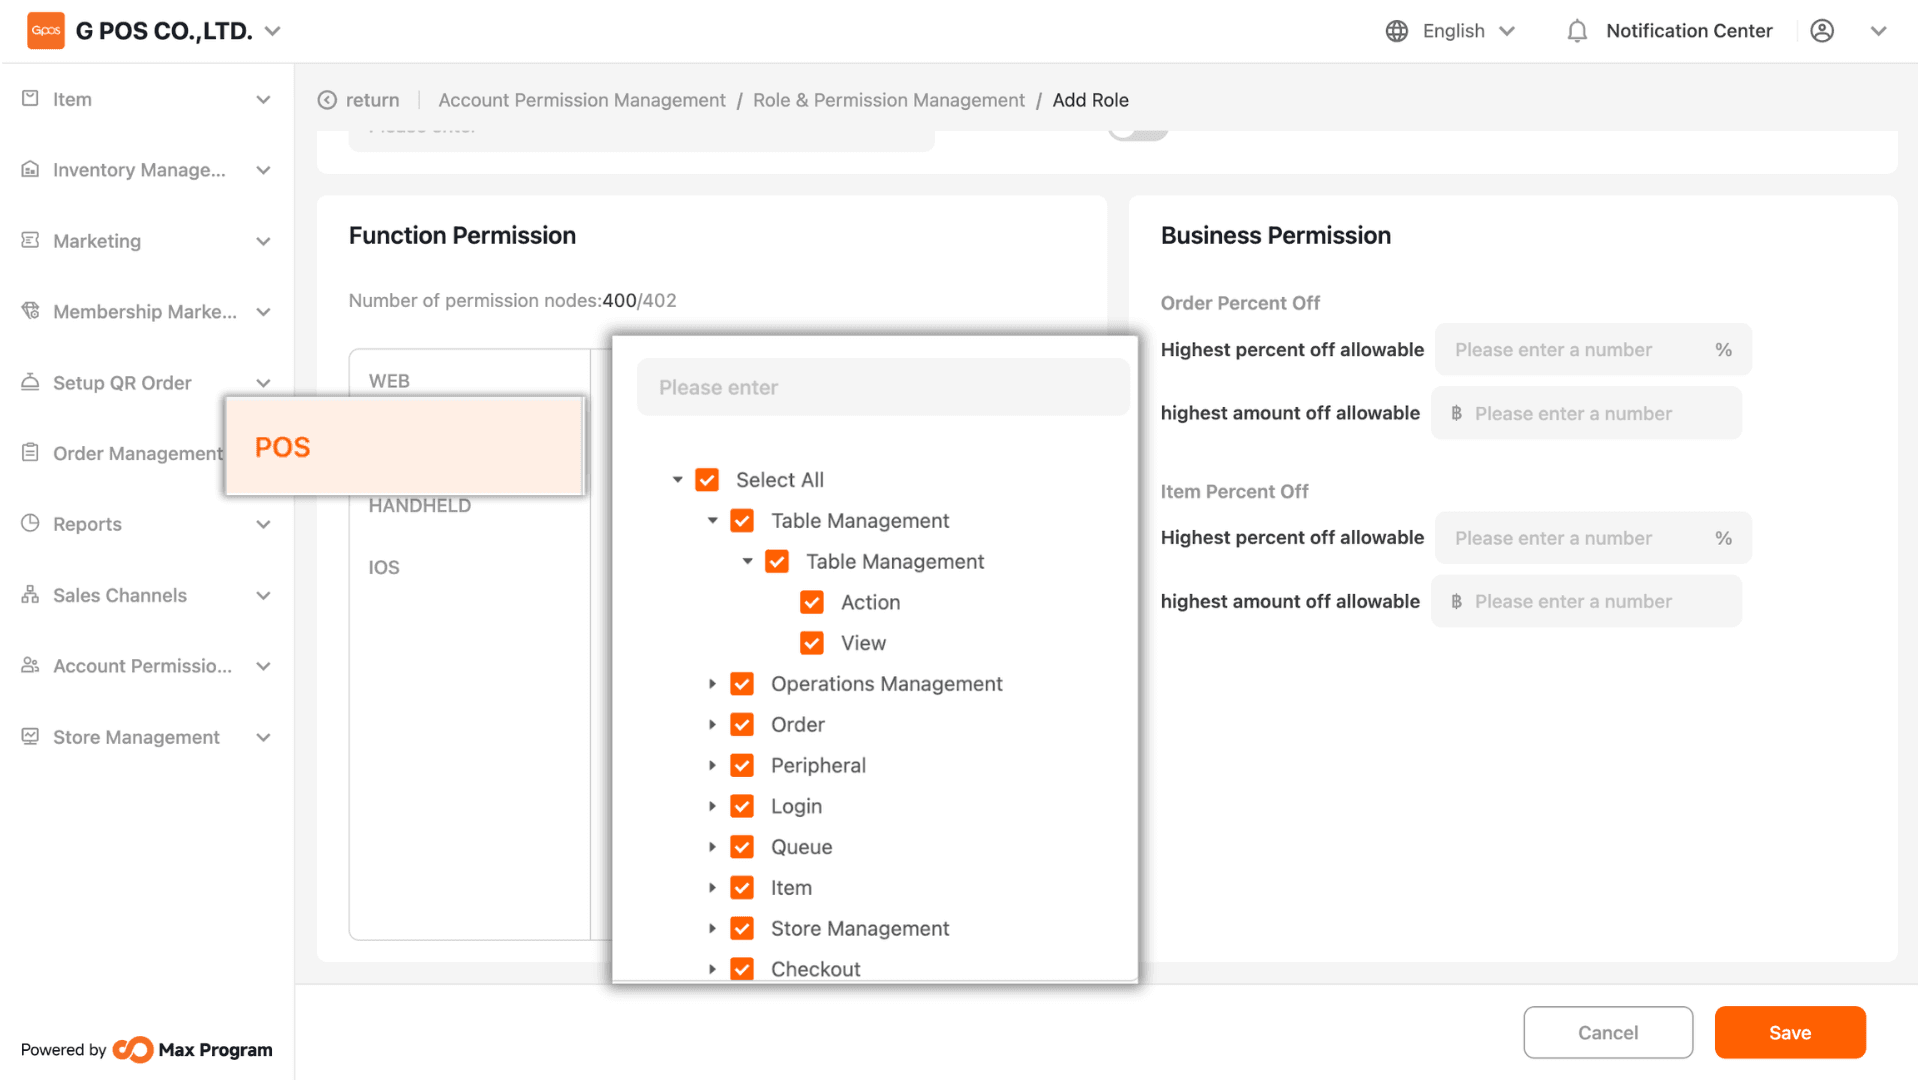
3.2 POS Function Permissions
Configure access permissions for the Front Store POS system (desktop devices). Click the dropdown arrow to view sub-functions and select the required permissions.
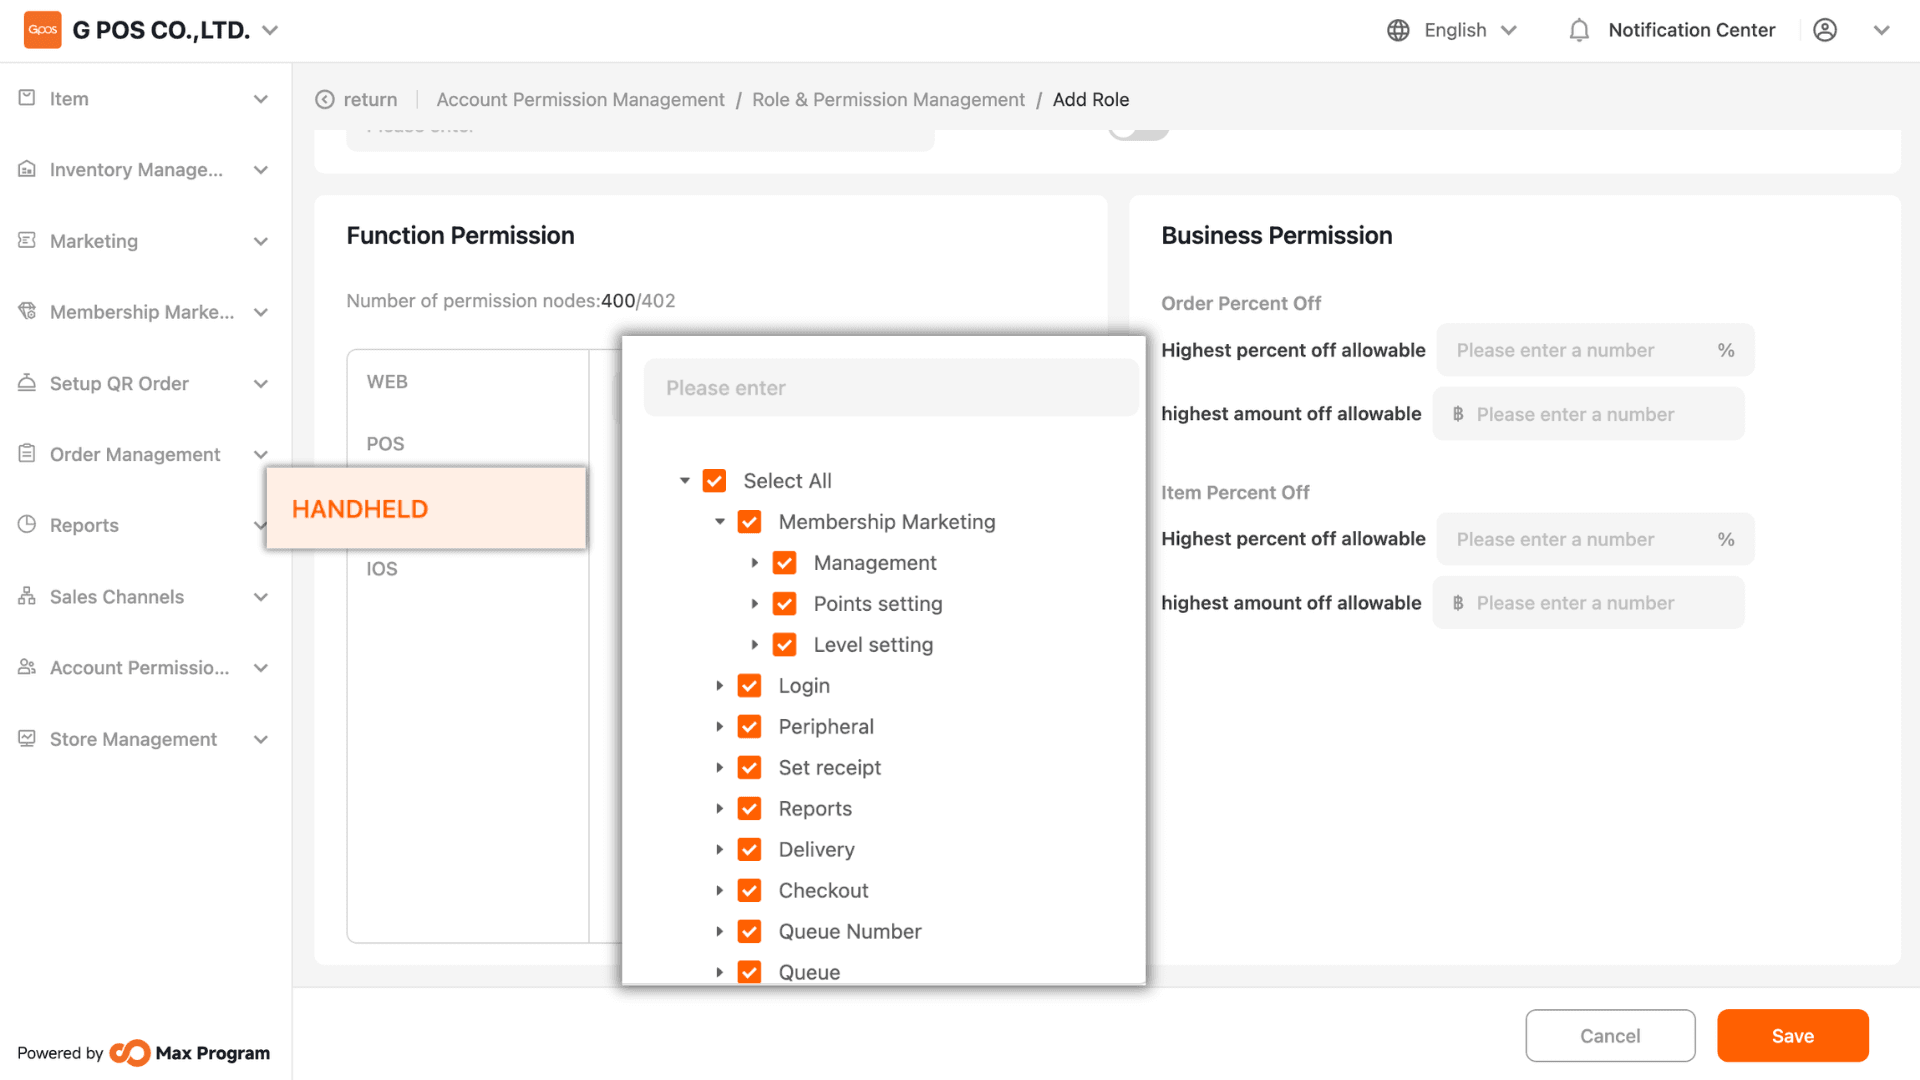
3.3 Handheld Function Permissions
Configure access permissions for the Front Store system on handheld devices.
Click the dropdown arrow to view sub-functions and select the required permissions.
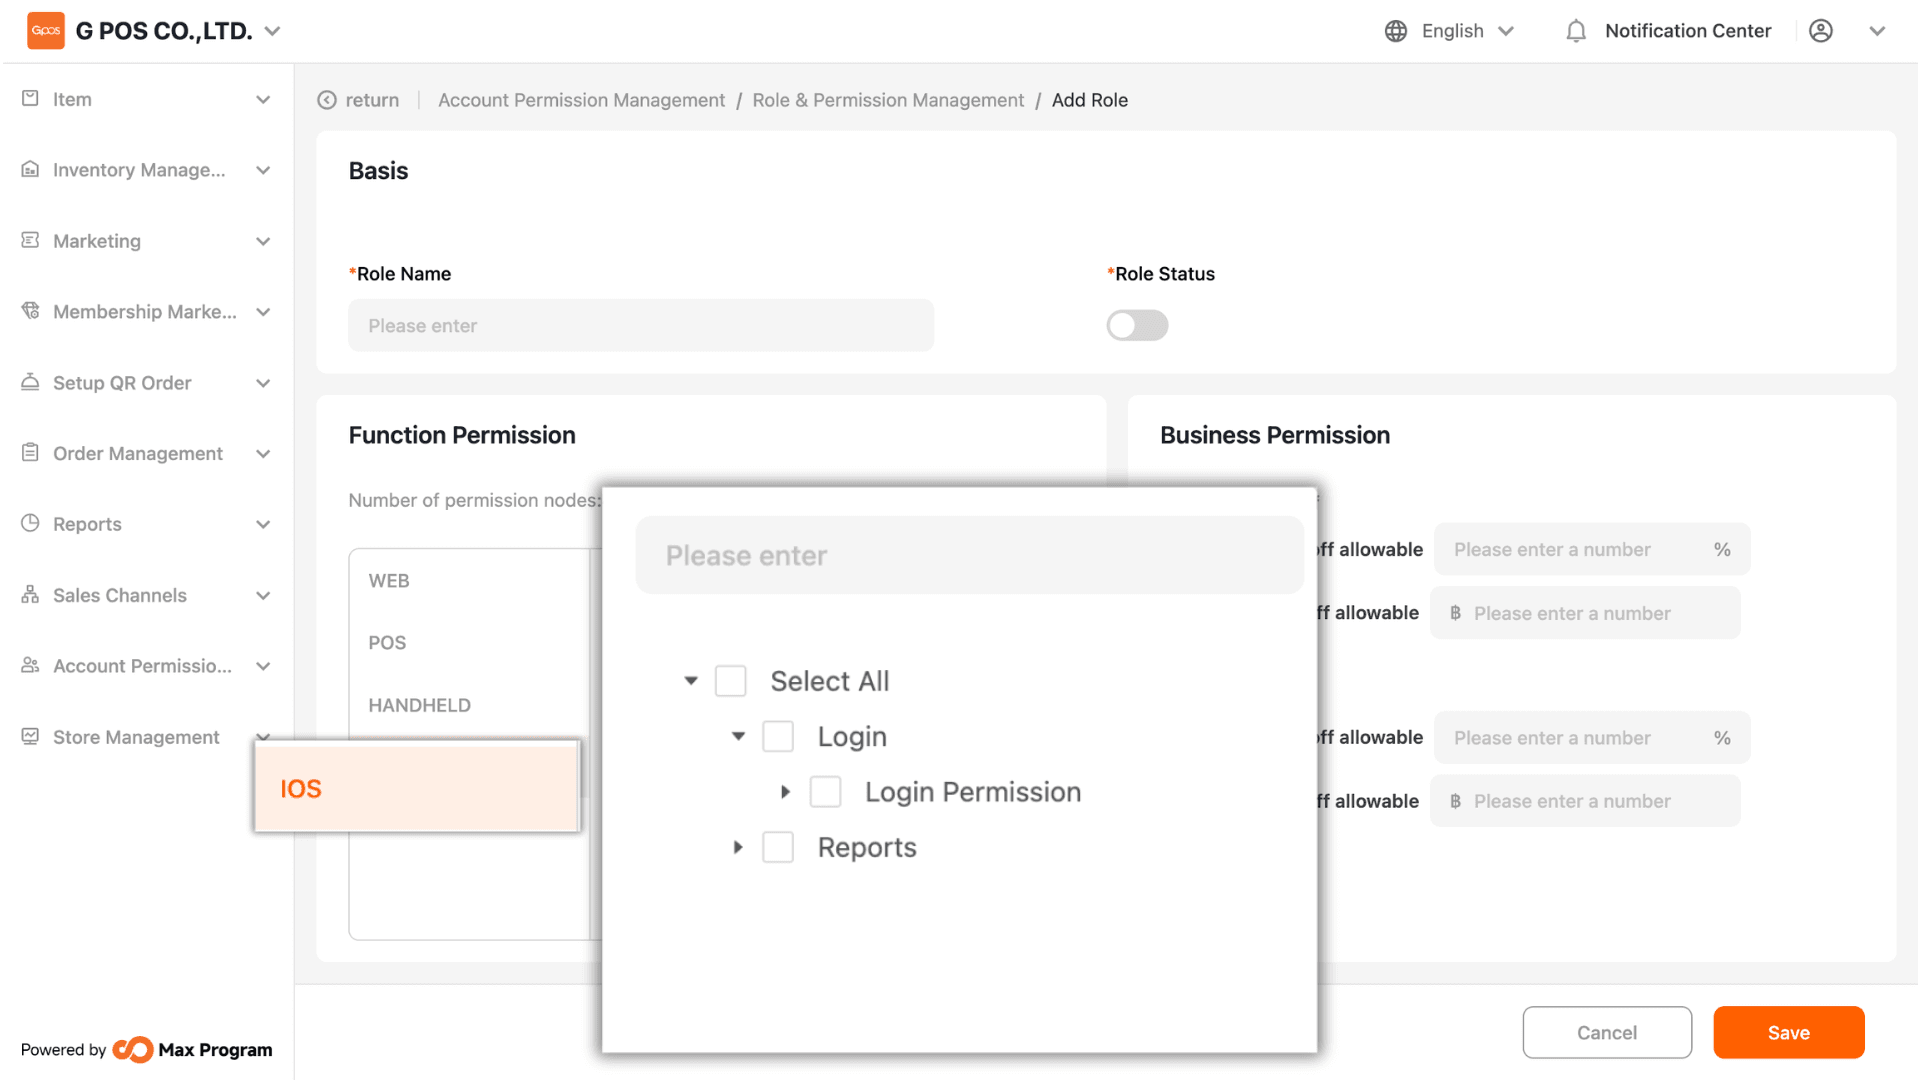
3.4 iOS Function Permissions
Configure access permissions for the Manage App. Click the dropdown arrow to view sub-functions and select the required permissions.
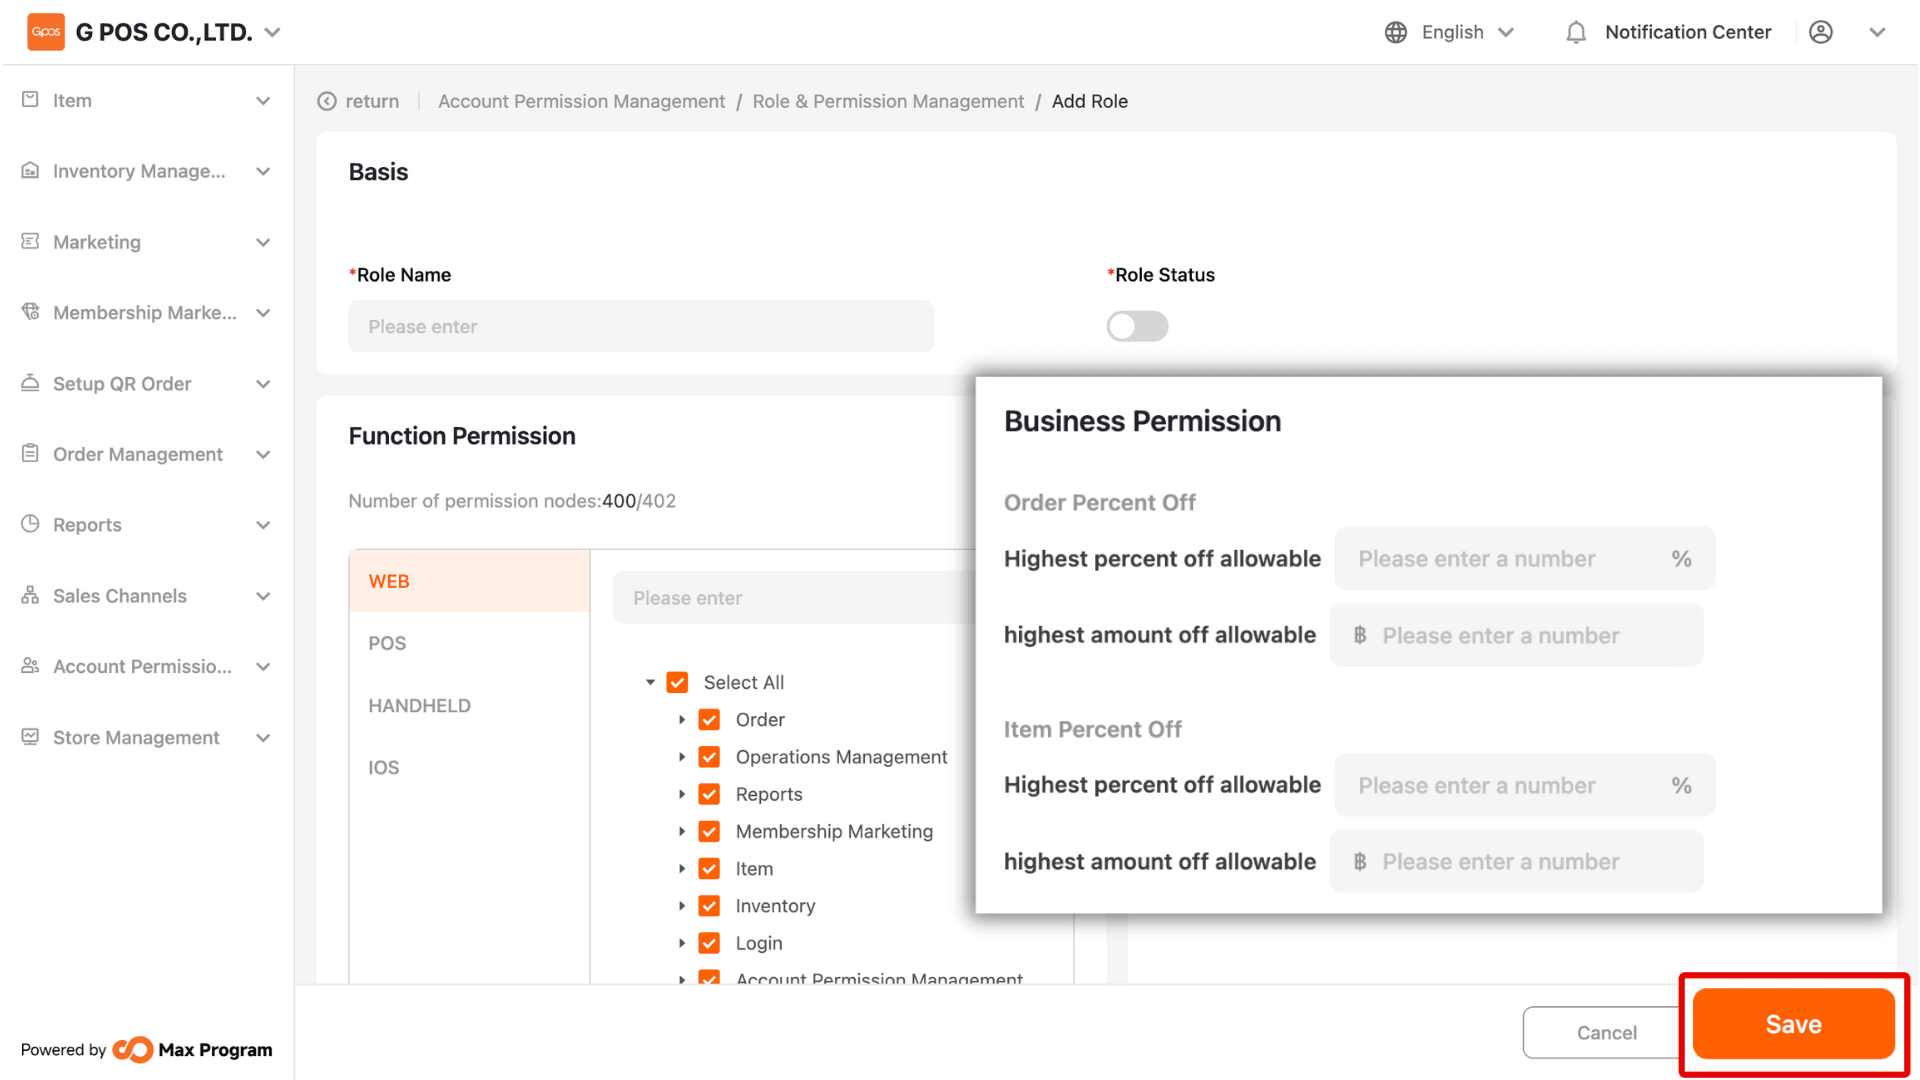
4. Business Permission Settings
Define discount permissions for each role. You can set Maximum discount per order, and Maximum discount per item. Discounts can be configured as either a fixed amount (THB) or a percentage (%). Once completed, click “Save” to confirm.