Employee Creation
2026-05-11 10:46
Creating and managing employee data in the Back Office system allows you to define user permissions, roles, and employee information in an organized manner. The system supports employee replacement or position changes without affecting system usage.
1. Log in to the Back Office
Go to login.gpos.co.th, enter your email and password, then click Log in.
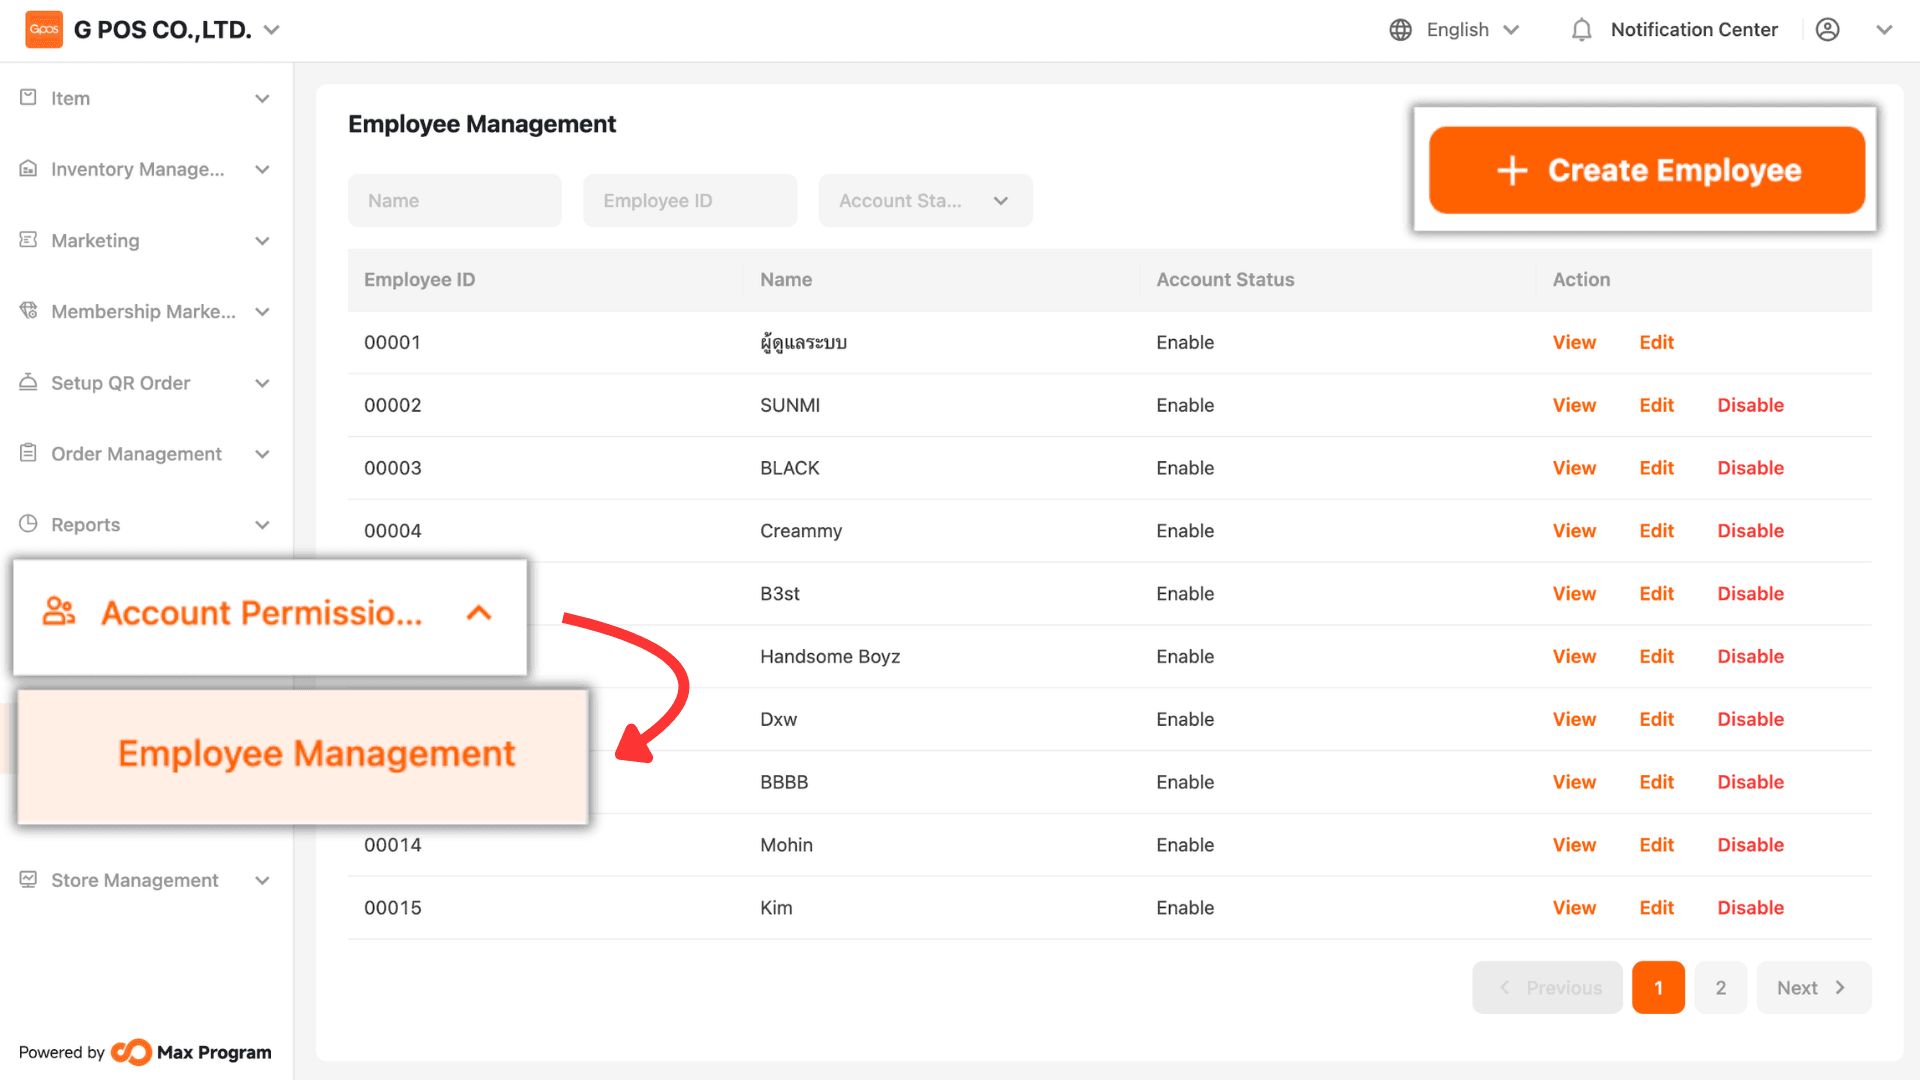
After successfully logging in, navigate to “Account Permission Management”, select “Employee Management”, and click the “+ Create Employee” button.
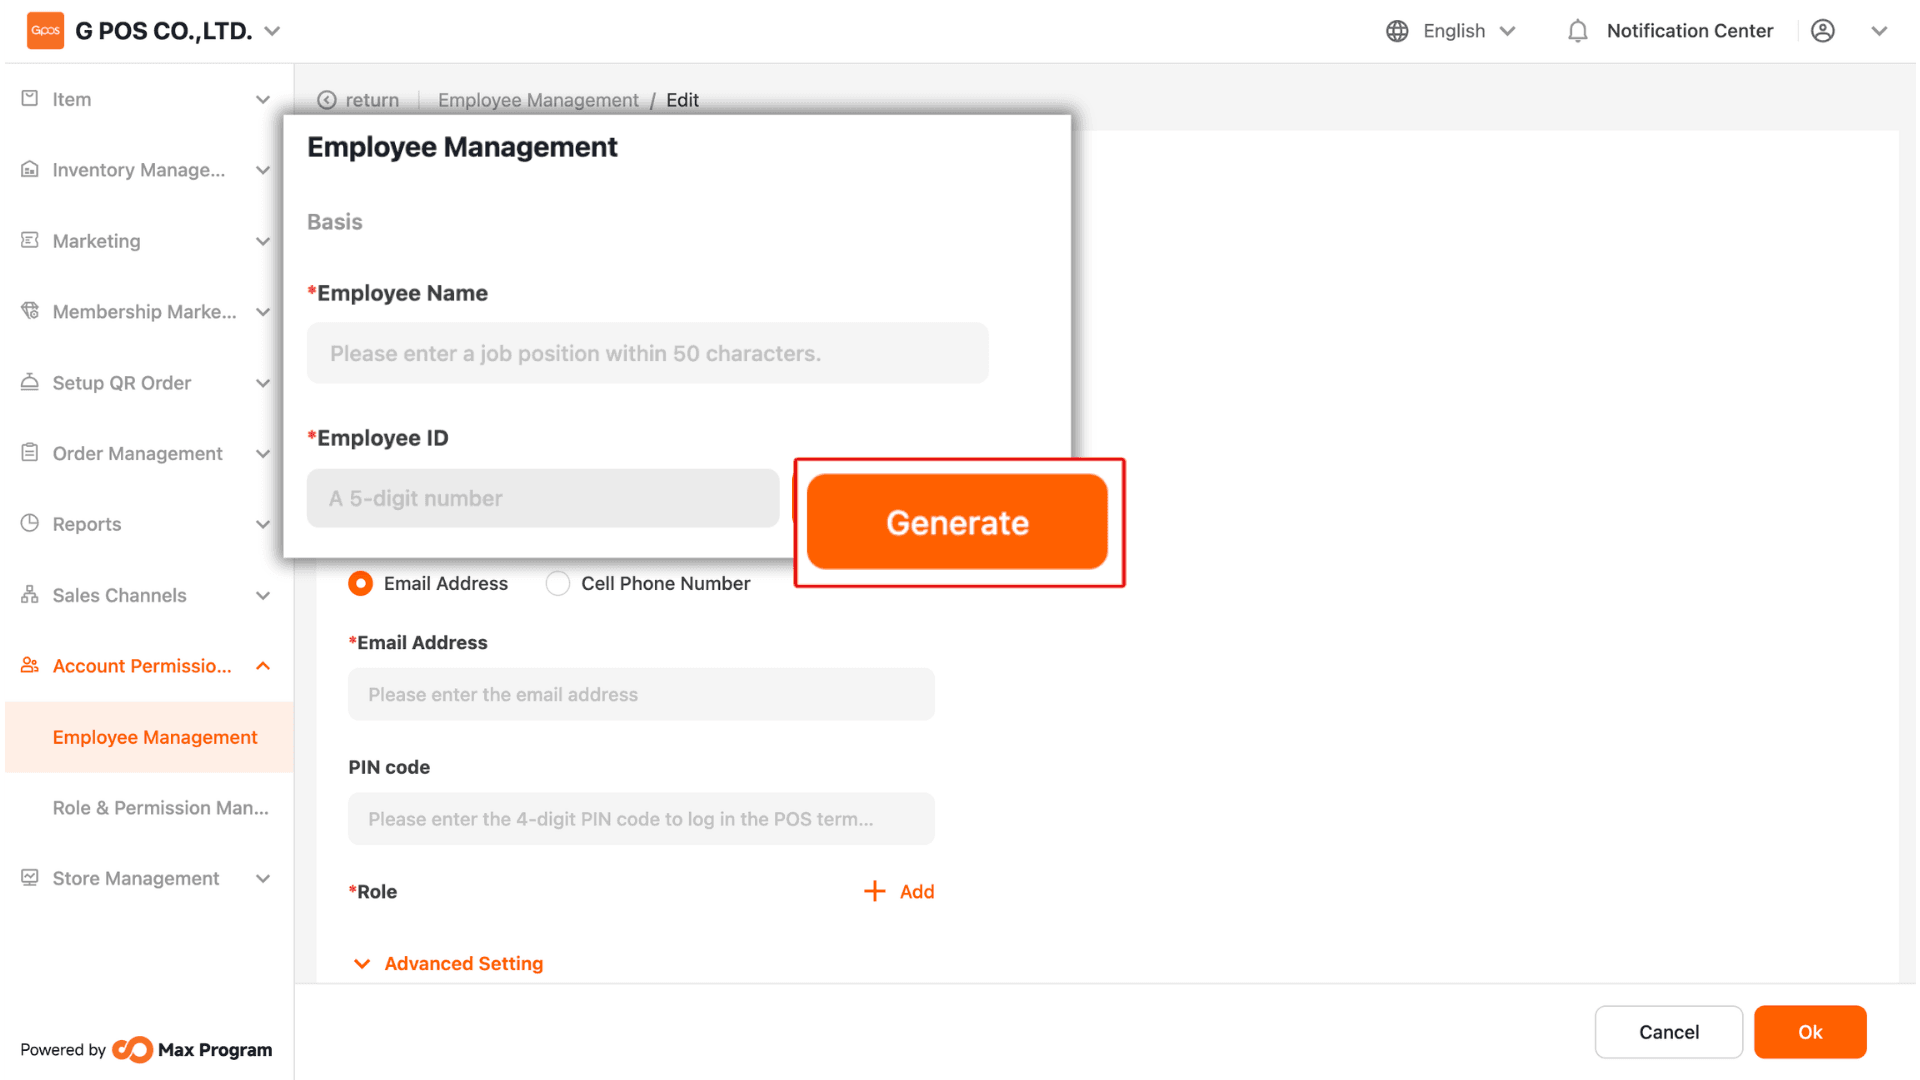
2. Enter Employee Information
Enter the Employee Name (you may set any name as desired). For the Employee ID, you can click the “Generate” button, and the system will automatically create an employee code.
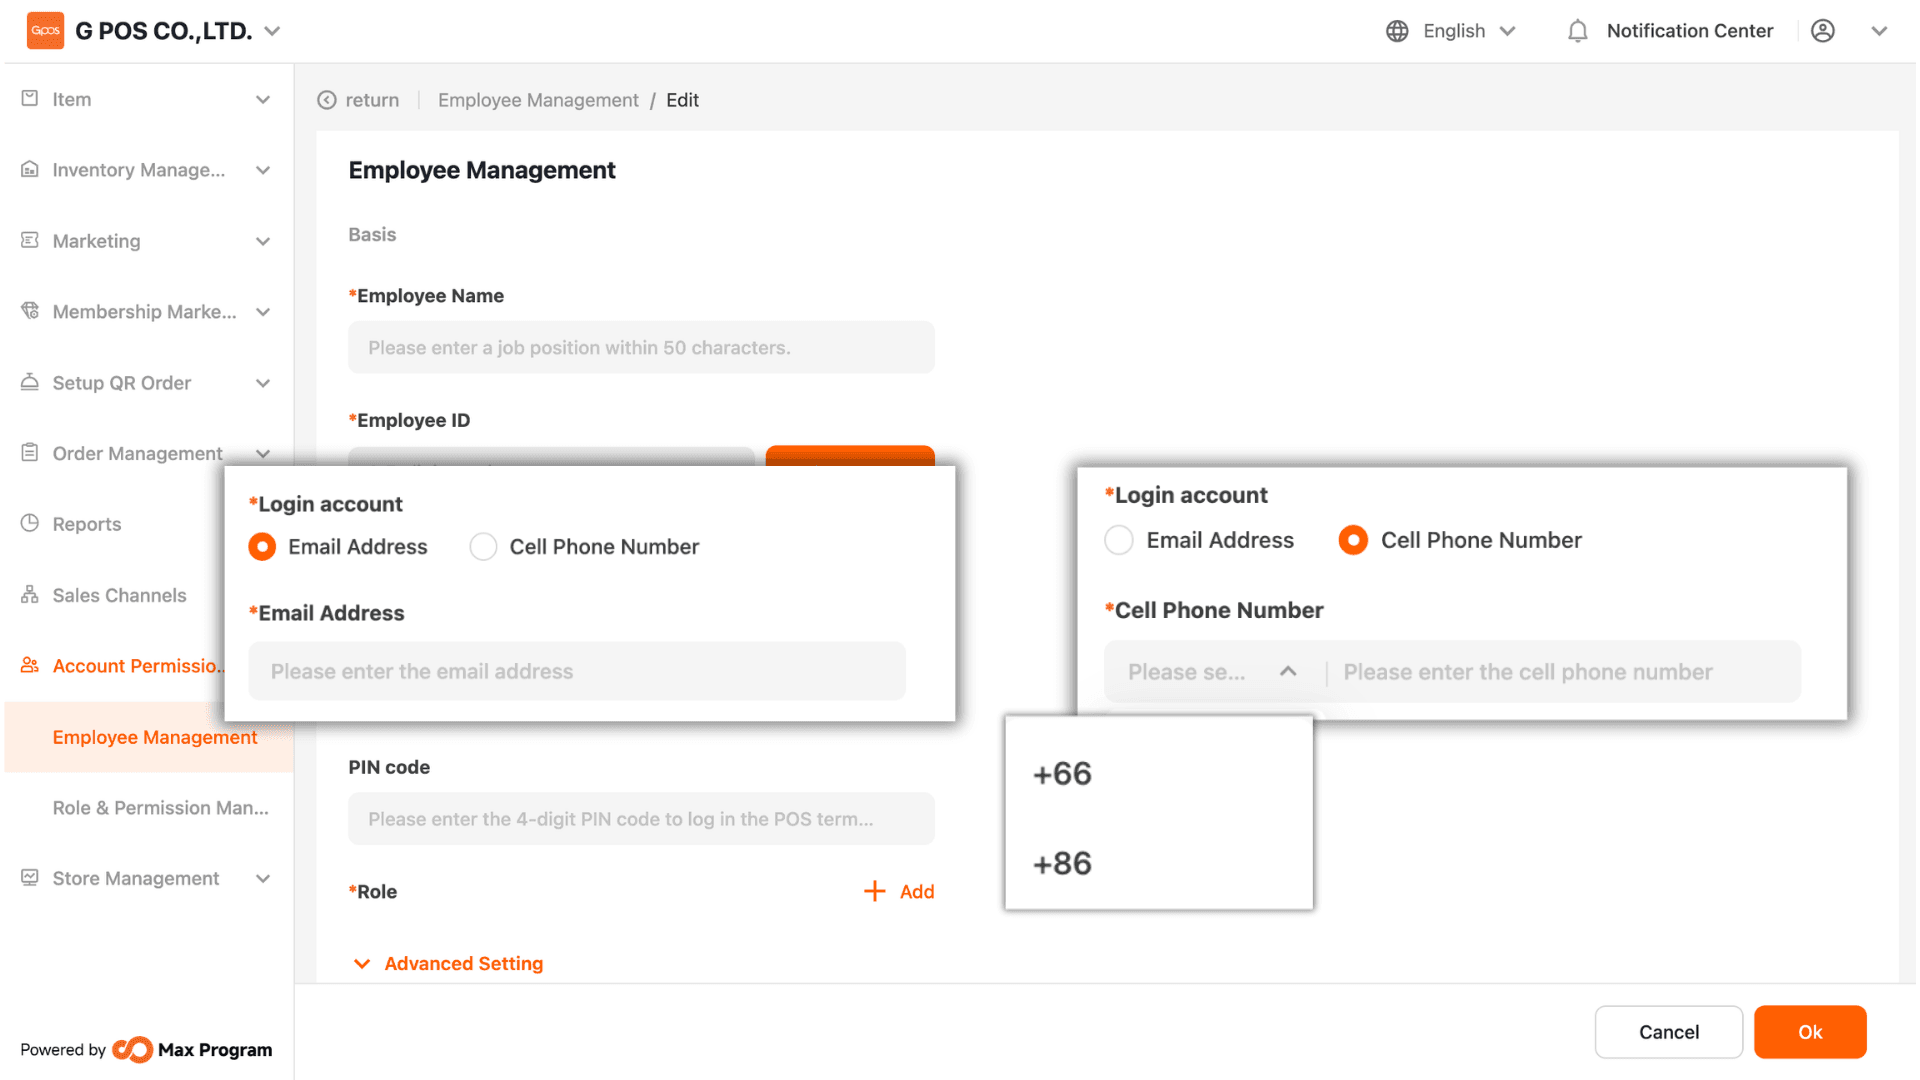
3. Select Login Method
There are two available login methods Email Address (for actual use), or
Cell Phone Number (format: 088xxxxxxx) The system will send the password to the email address or mobile phone number entered.
Note : The entered email address or mobile phone number, along with the received password, will be used for the first login on the POS device.
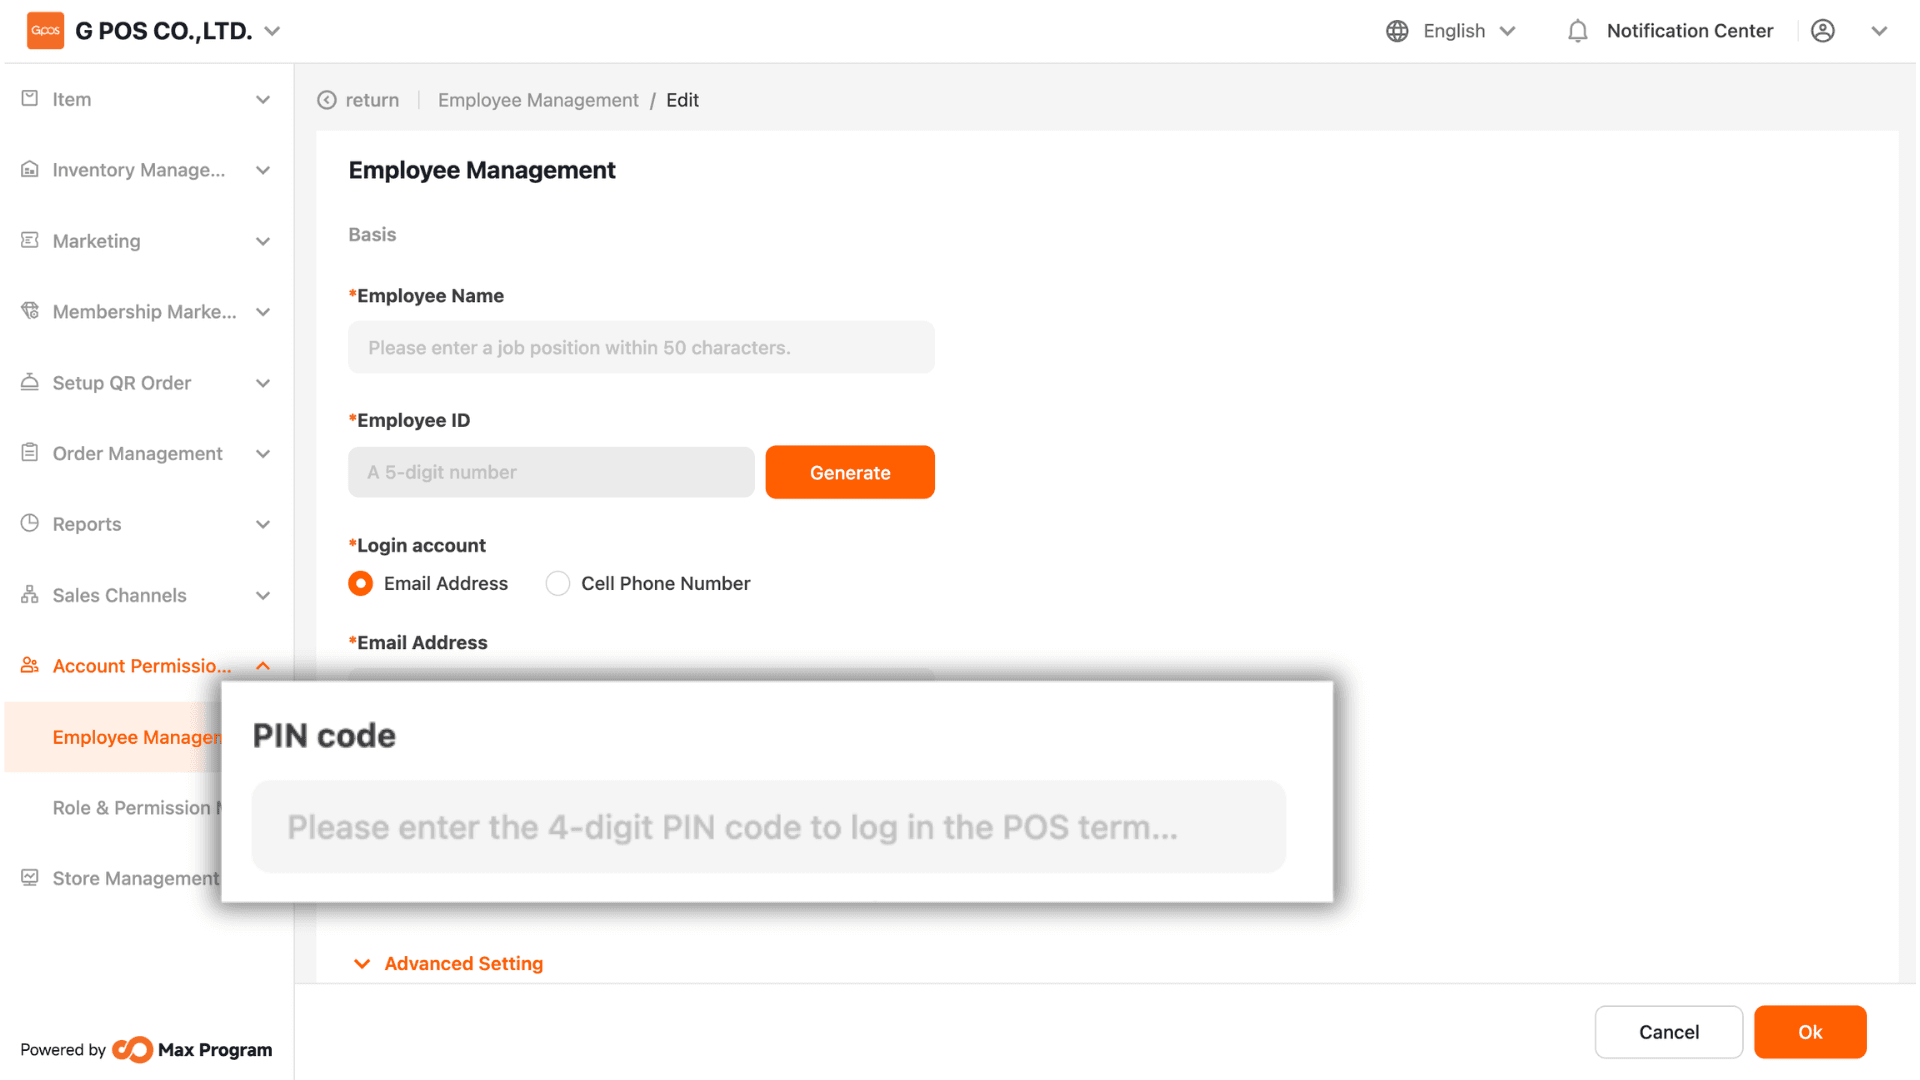
4. Set PIN Code
Specify a 4-digit PIN code, which will be used after logging in or when switching between employee and owner accounts.
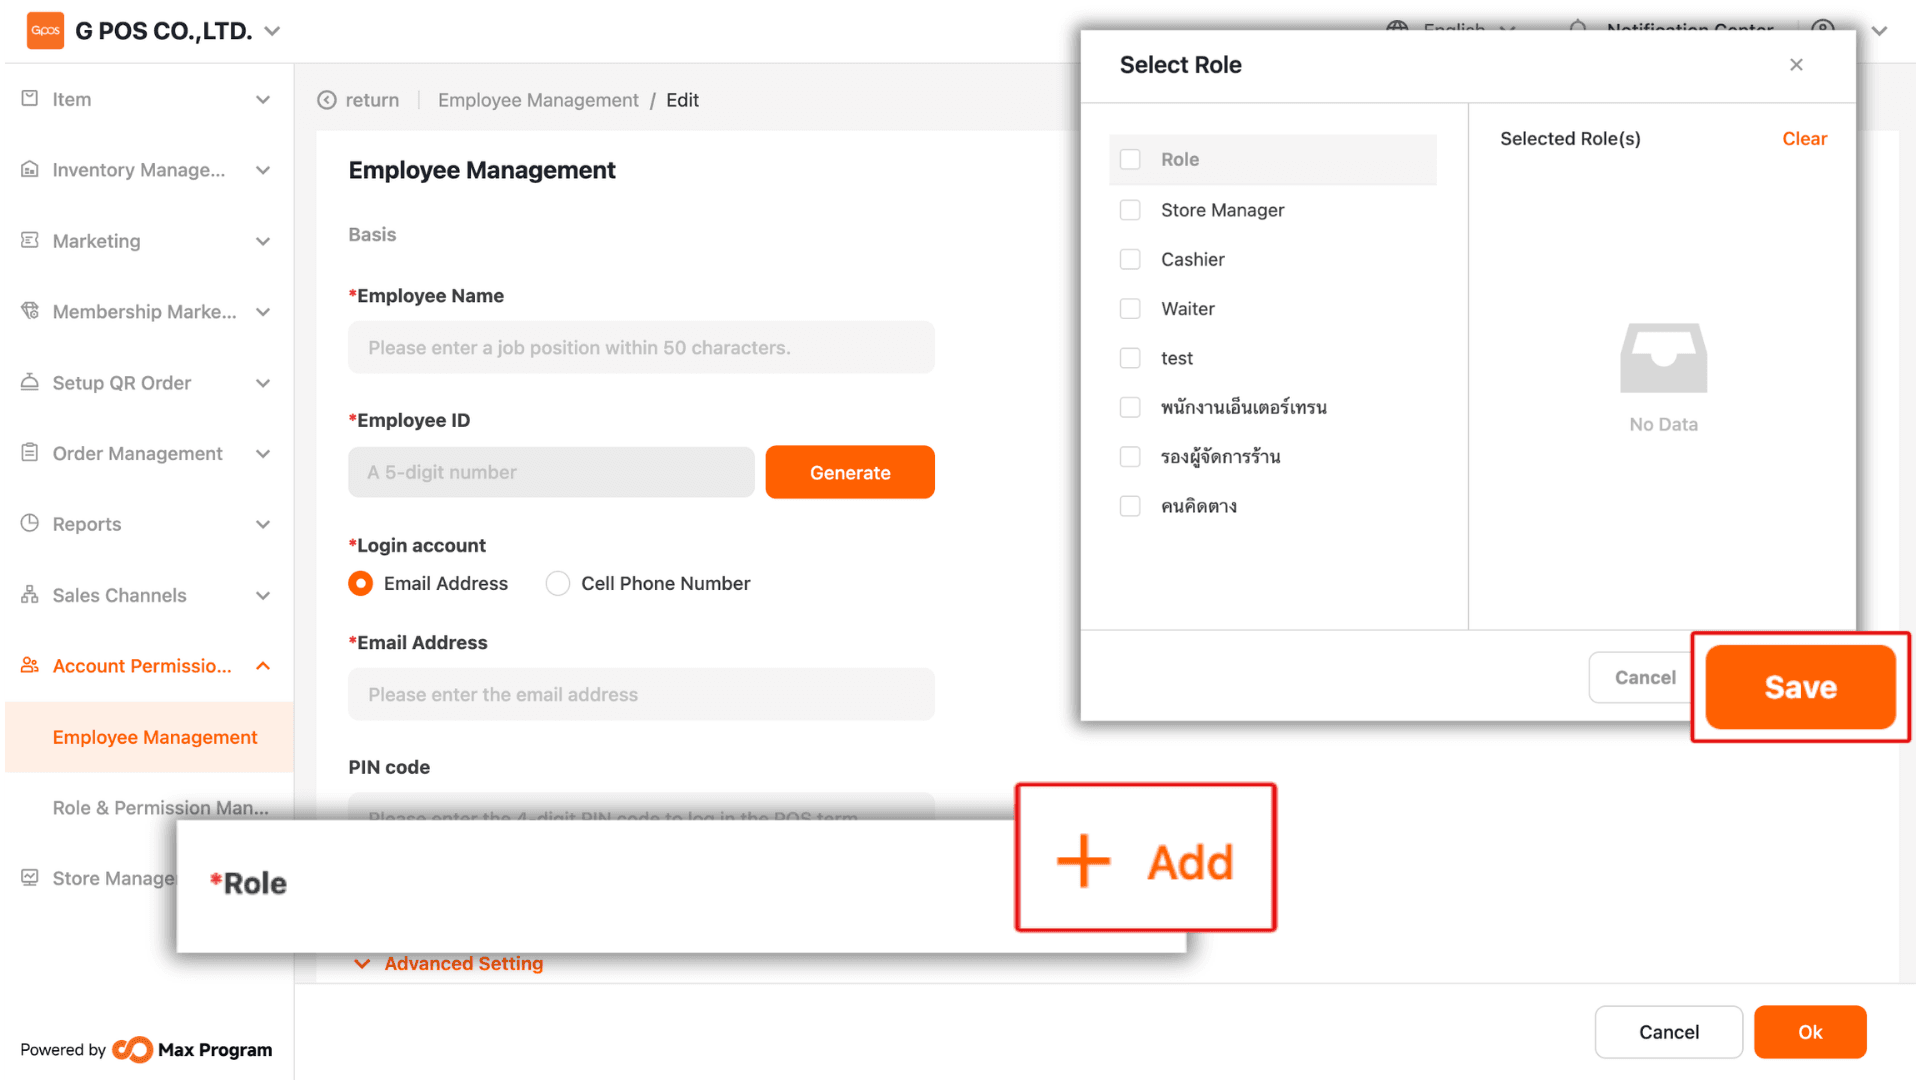
5. Assign Employee Roles
Click the “+ Add” button in the Roles section. The system will display available roles or roles that have already been created. Select the desired role(s), then click “Save” to confirm.
Note : You can refer to the instructions for creating roles in Role & Permission Management.
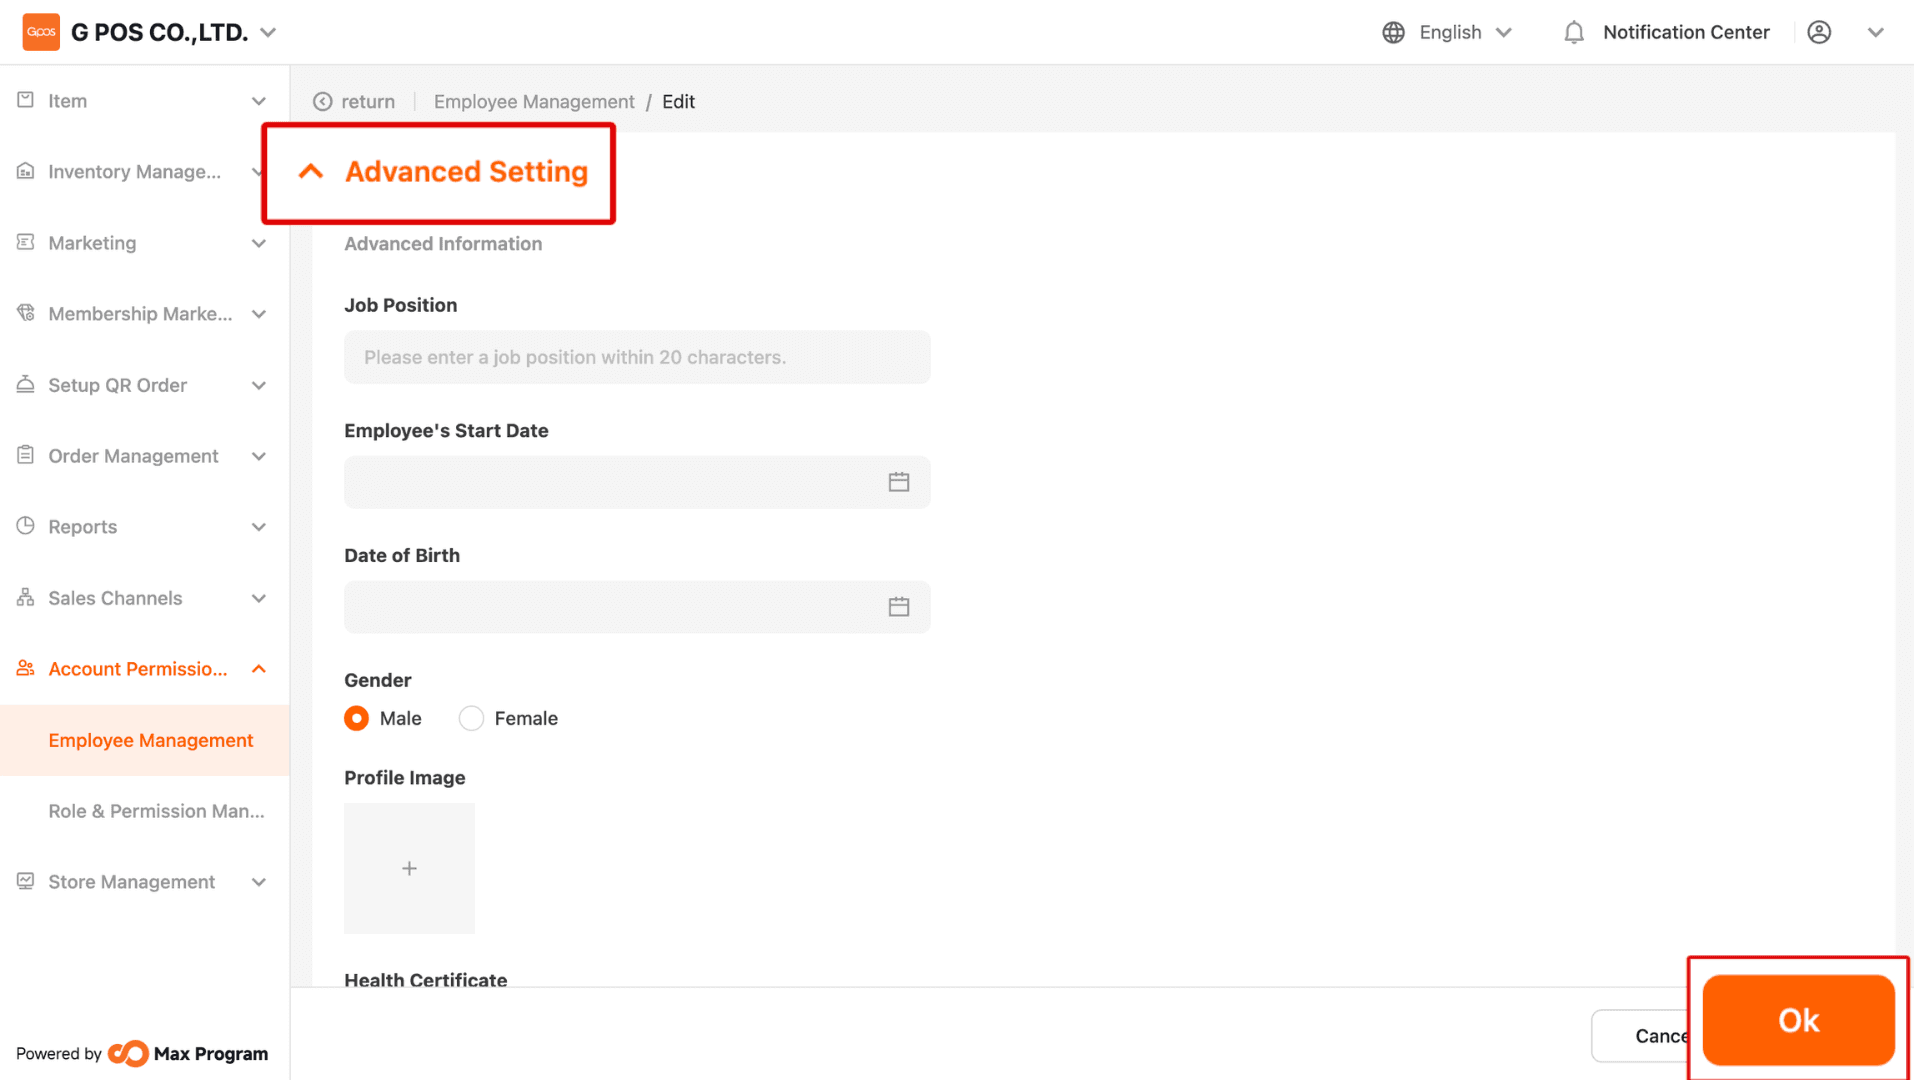
6. Advanced Settings and Save
You may click Advanced Settings to enter additional employee details in various sections (optional). Review all entered information and click “Ok” to save the data.
Note : The system does not require all fields to be completed. You may fill in only the necessary information without affecting system functionality.
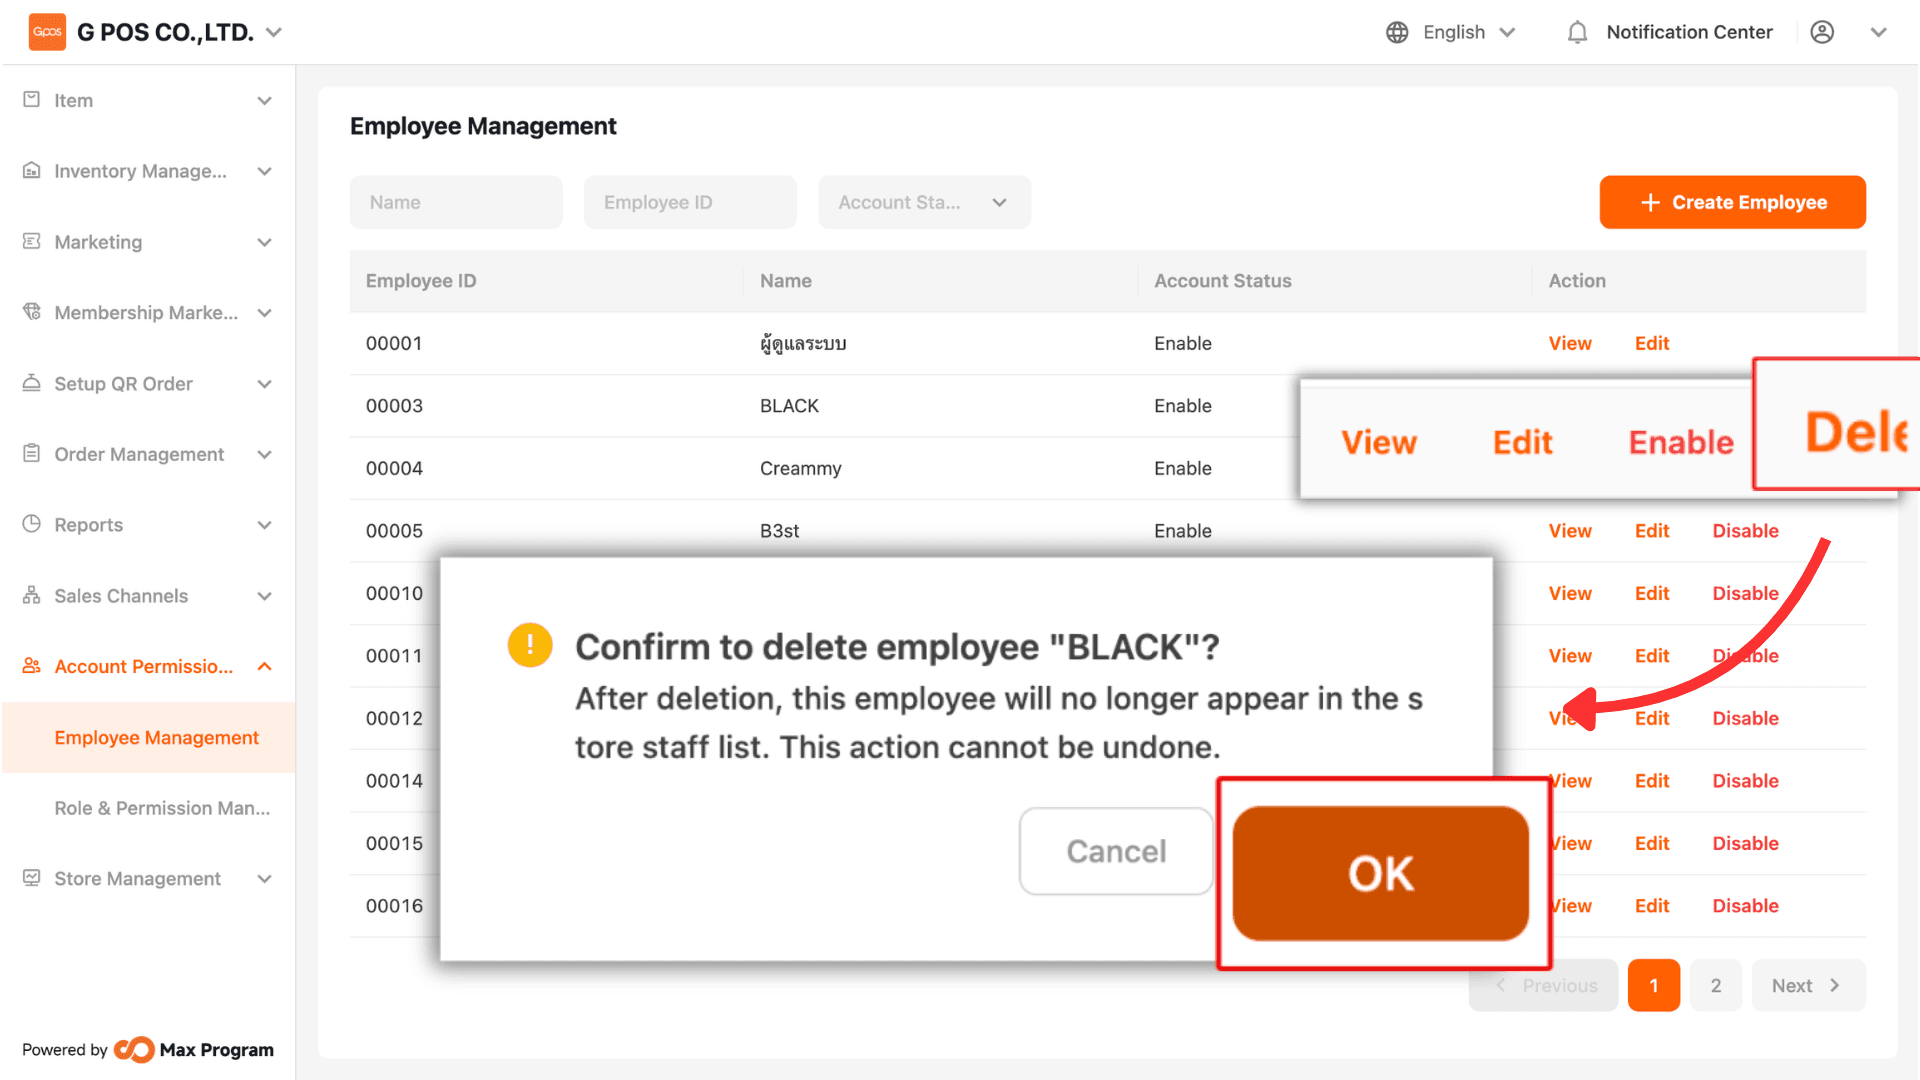
7. Deactivating and Deleting Employees
Employees created in the system can be Disable. The system will display a confirmation message. Click “Disable” again to confirm the action.
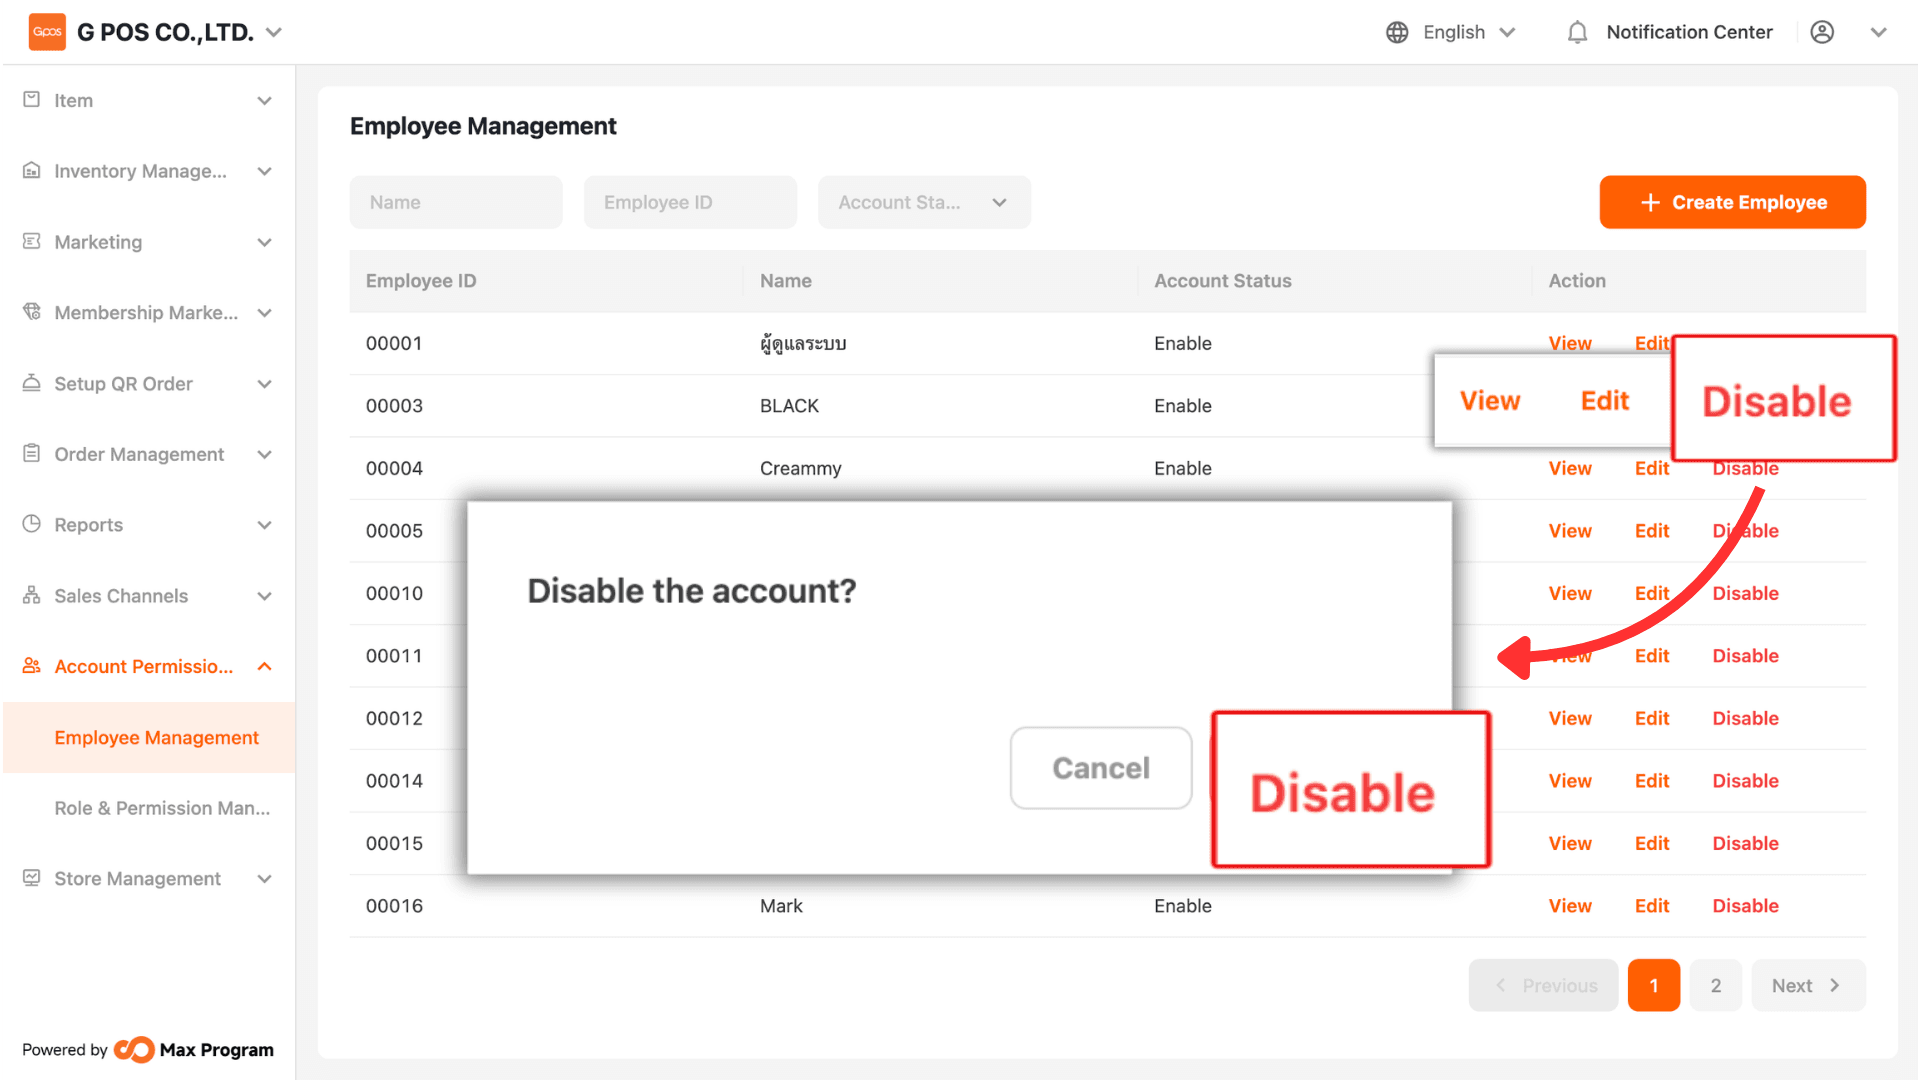
7.1 Reactivating or Deleting Employees
After deactivation, the system will provide options to Enable or Delete the employee. If Delete is selected, the system will display a confirmation message. Click “Delete” again to confirm the action.
Note : Once an employee has been deleted, the email address or mobile phone number previously used cannot be reused in the system.