Creating a Cashier Printer and Exporting It to Store Branches
2026-02-24 10:37
Creating a cashier printer and exporting it to store branches ensures that each branch receives standardized and accurate printing settings from the head office. This helps reduce receipt printing errors and improves the efficiency of front-end store management.
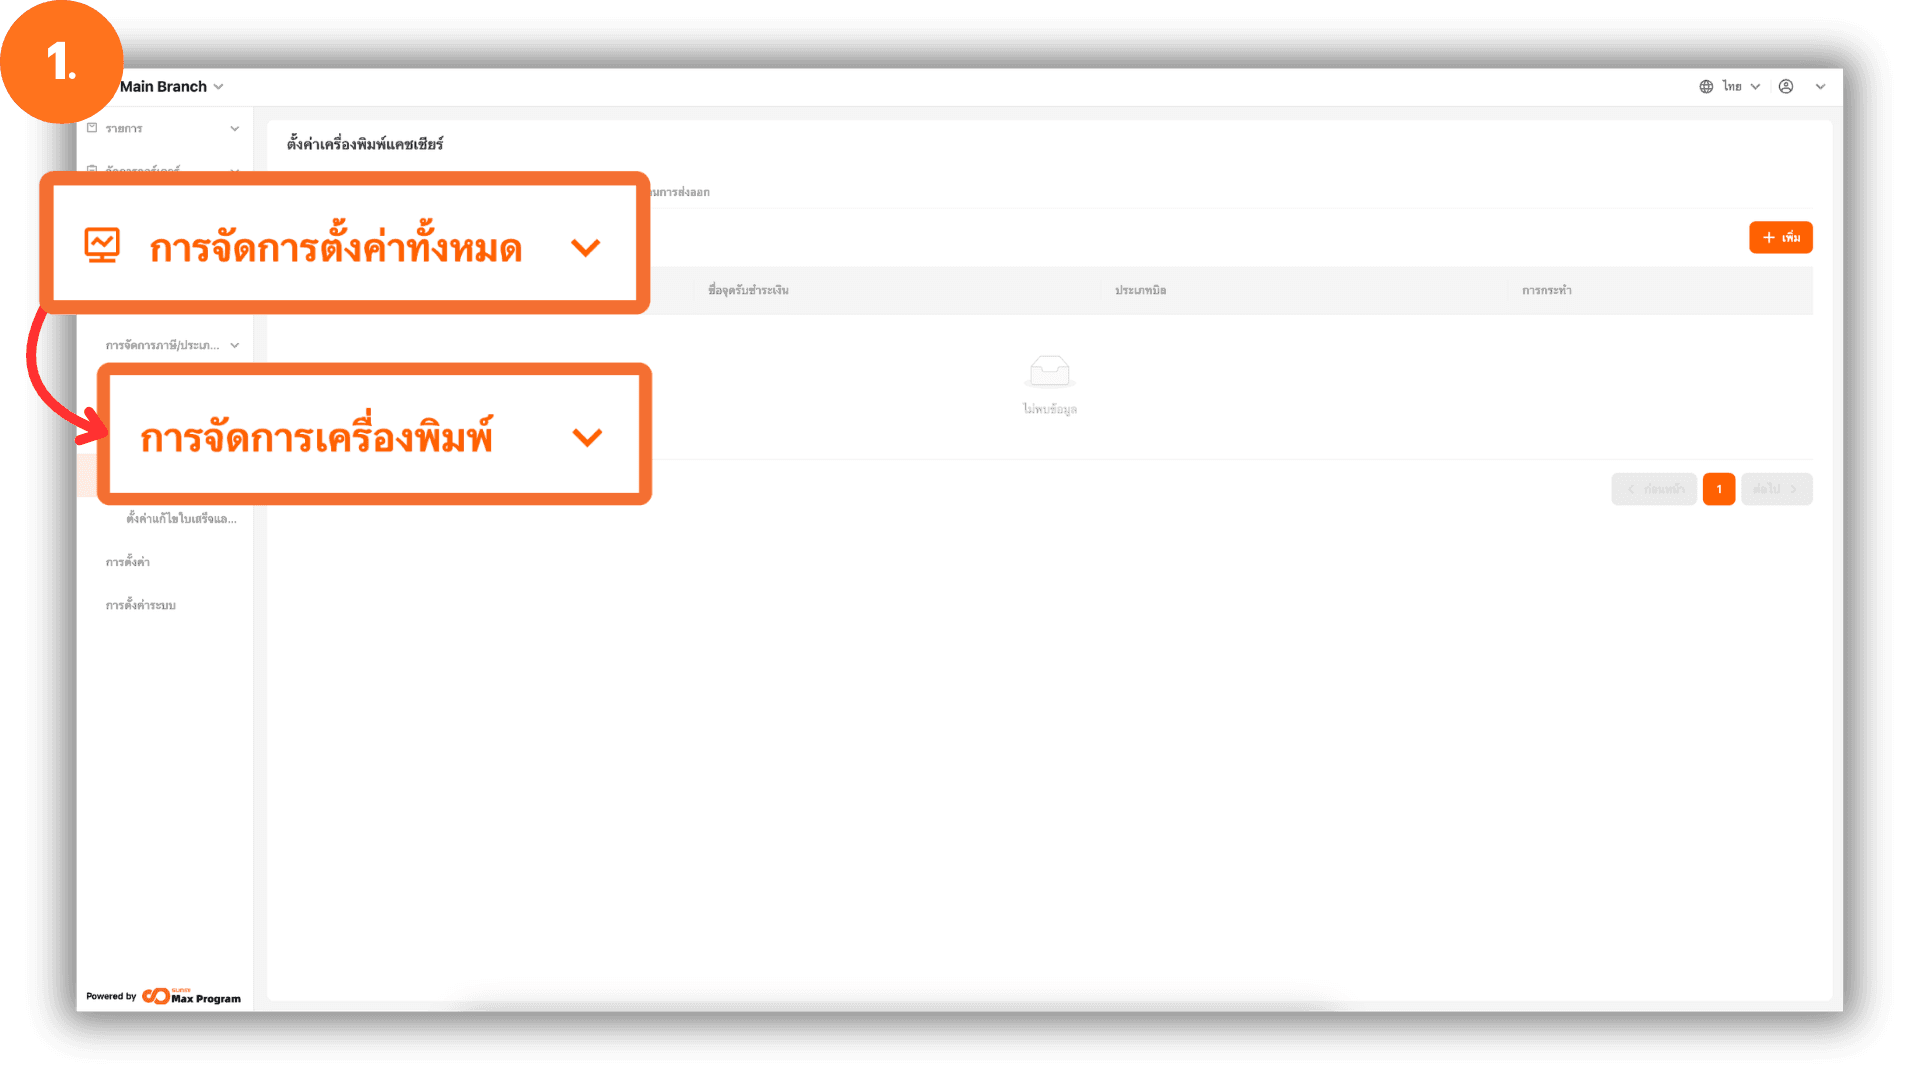
1. Log in to the Back Office System
Go to the website login.gpos.co.th, enter your email and password, and click Log In. Once logged in successfully, select Head Office, then go to the menu “Store Management” and choose “Print Management.”
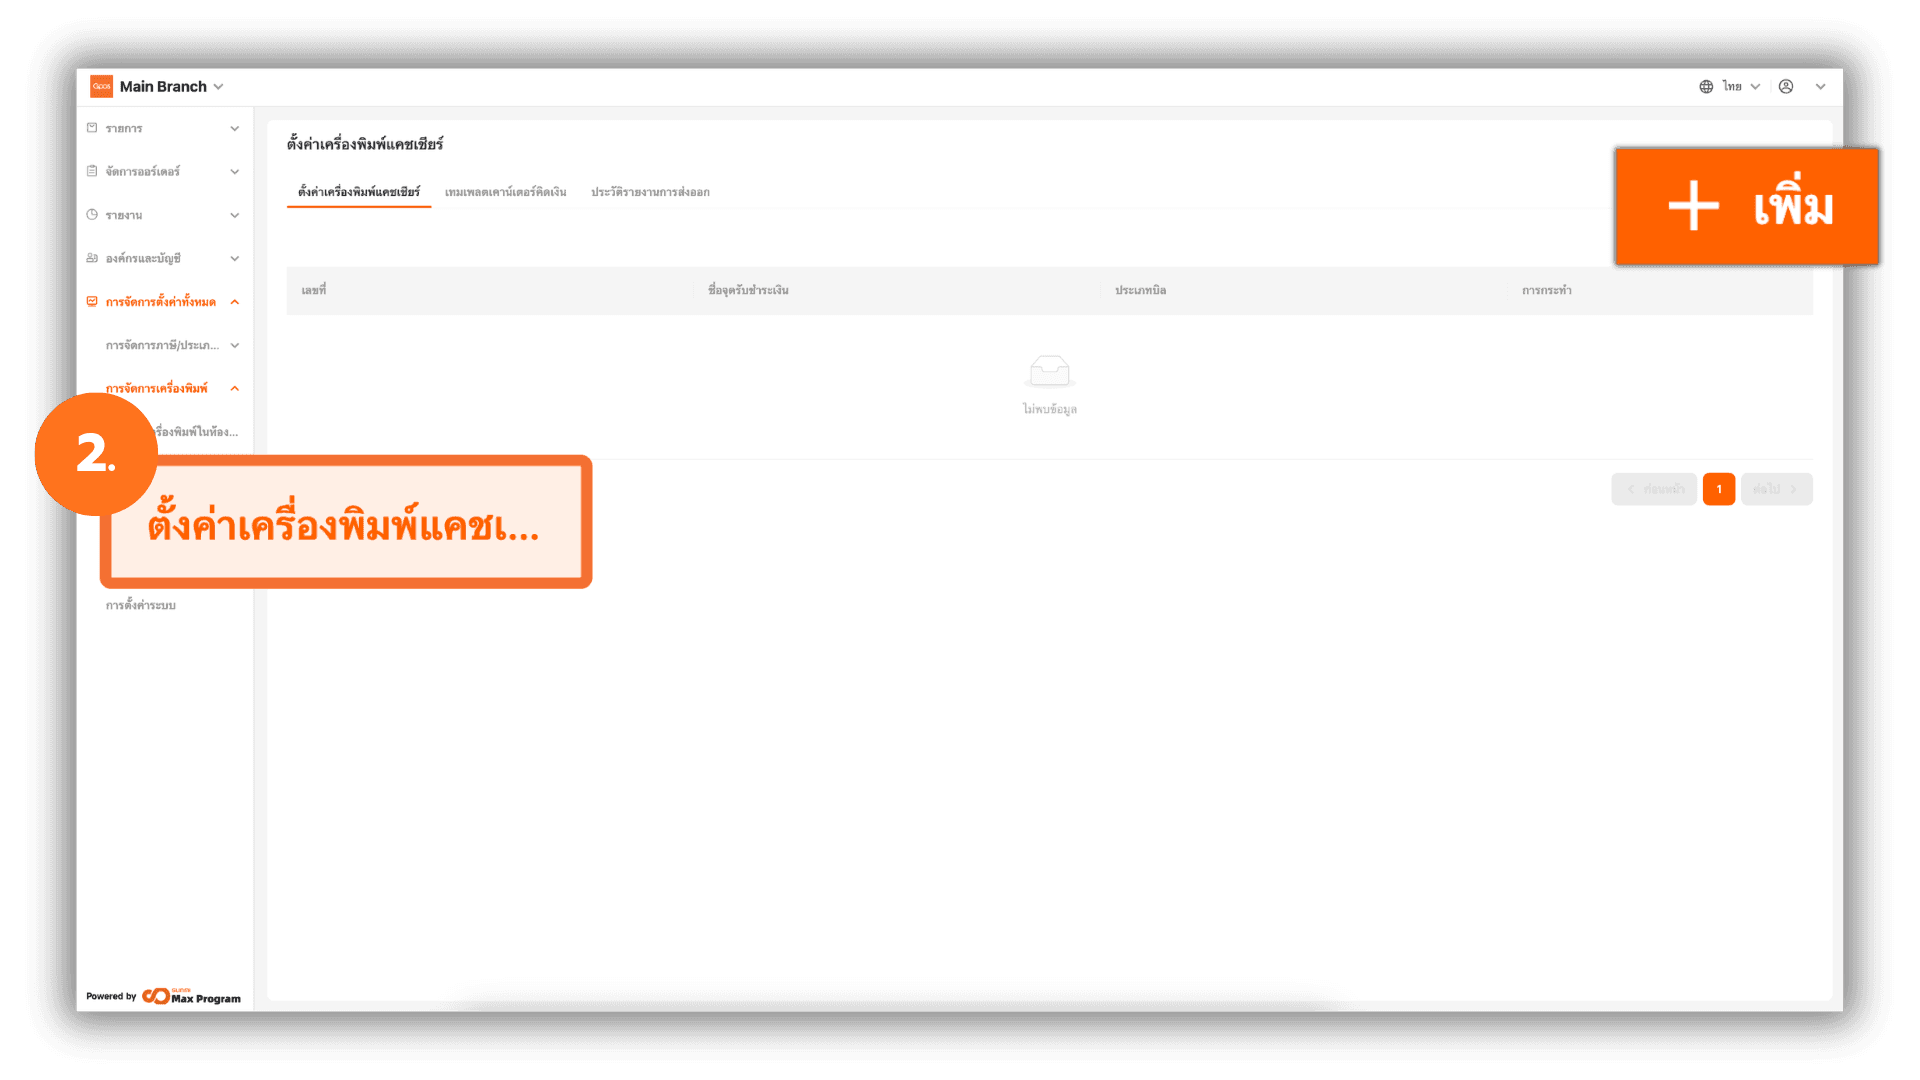
2. Add a New Cashier Printer
Select the menu “Cashier Sections”, then click the “+ Add” button to create a new printer.
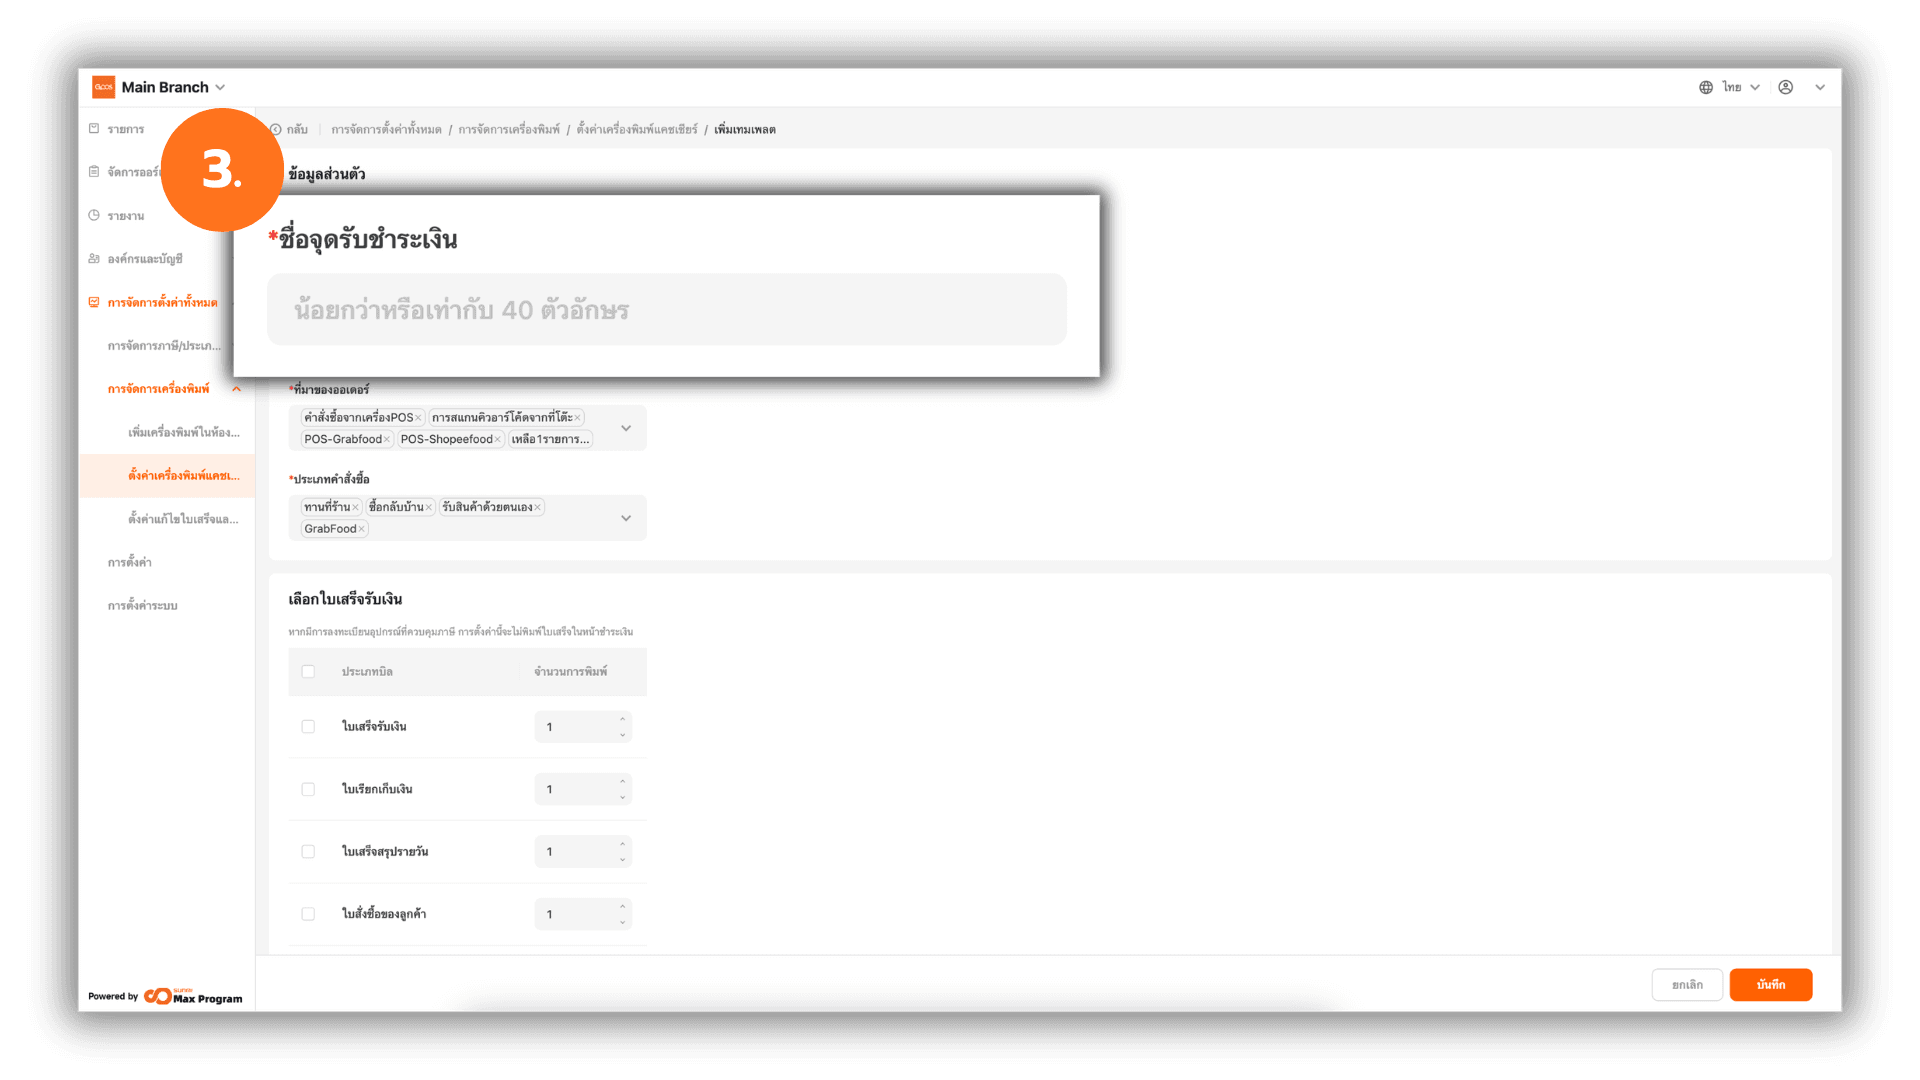
3. Configure Information and Print Settings
When entering the settings page, the system will display a form for entering details. Fill in the “Cashier counter” as required.
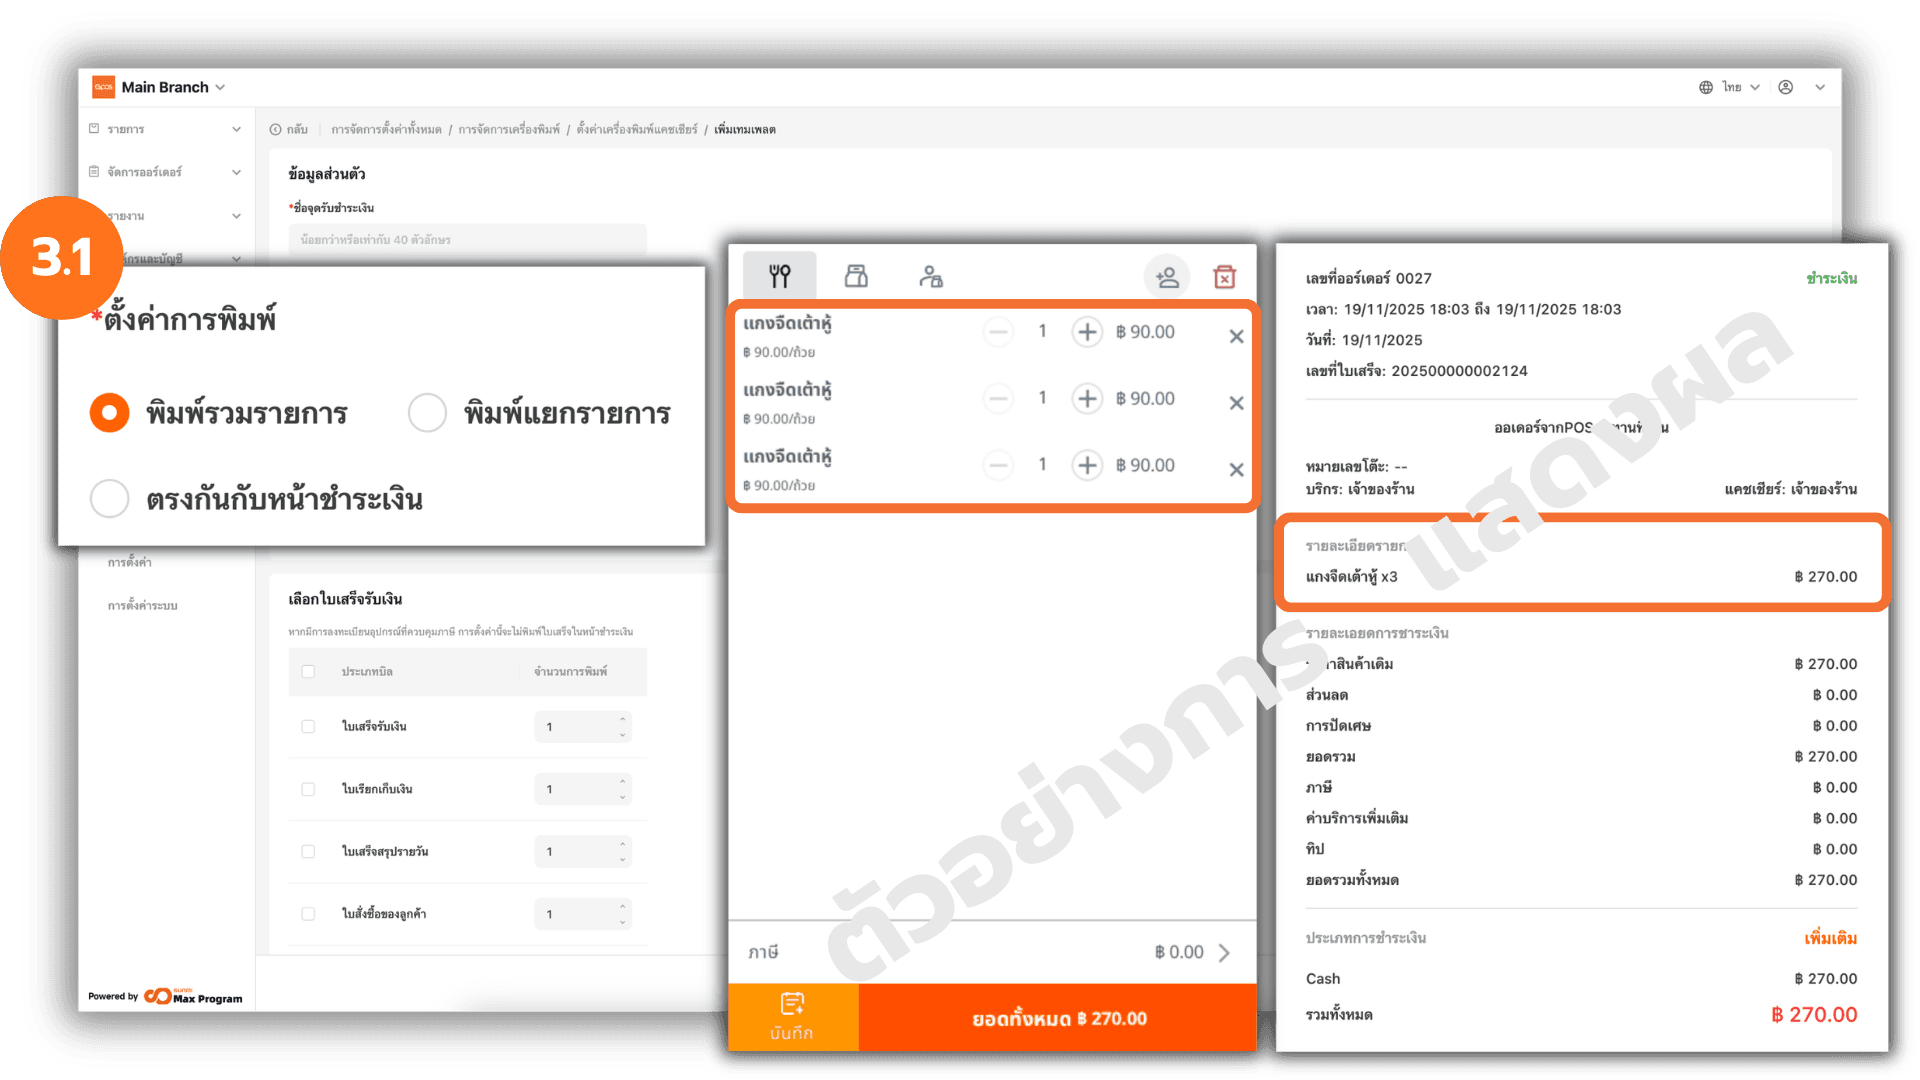
3.1 Set Combined Item Printing
Select Combine Items if you want identical products to be grouped into a single line item on the receipt.
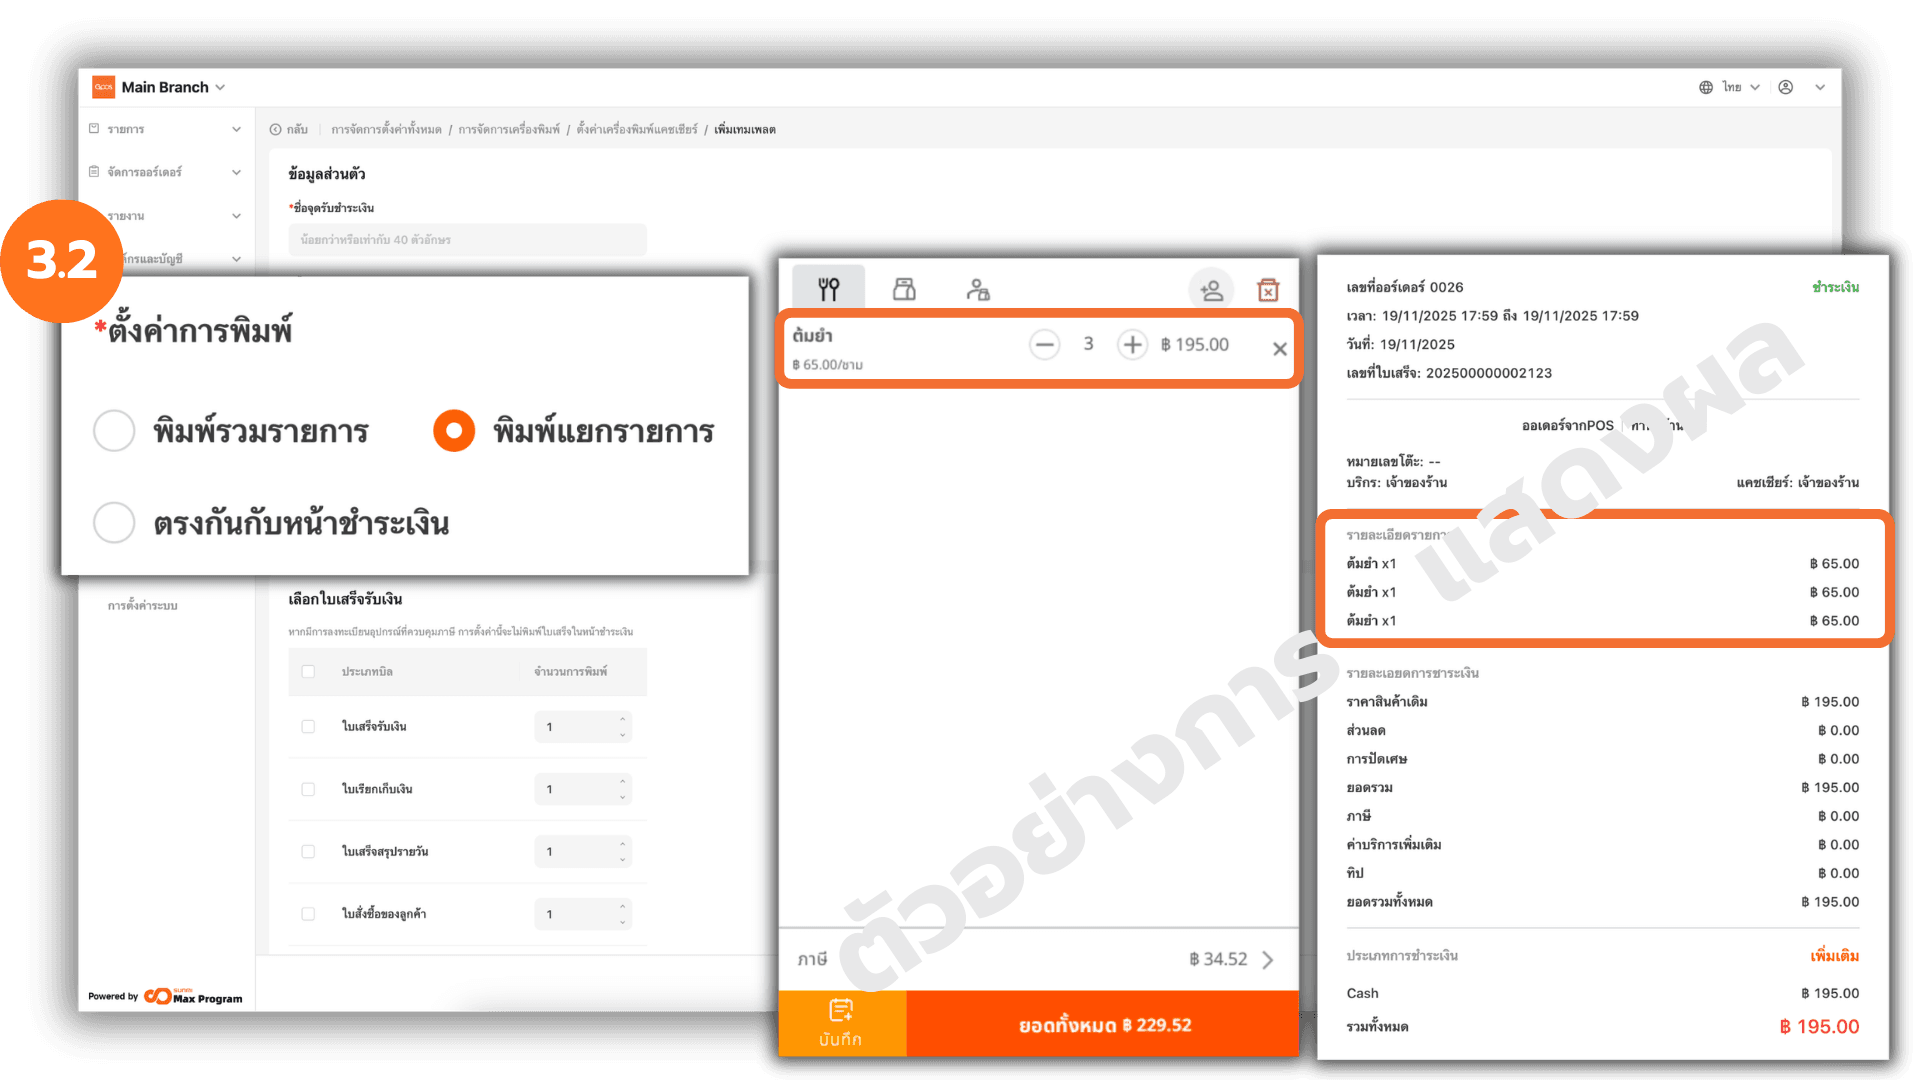
3.2 Set Separate Item Printing
Select Split print if you want identical products to be displayed as individual line items on the receipt.
3.3 Set Printing to Match the Payment Screen
Select Match with checkout page if you want the receipt items to display exactly as shown in the shopping cart.

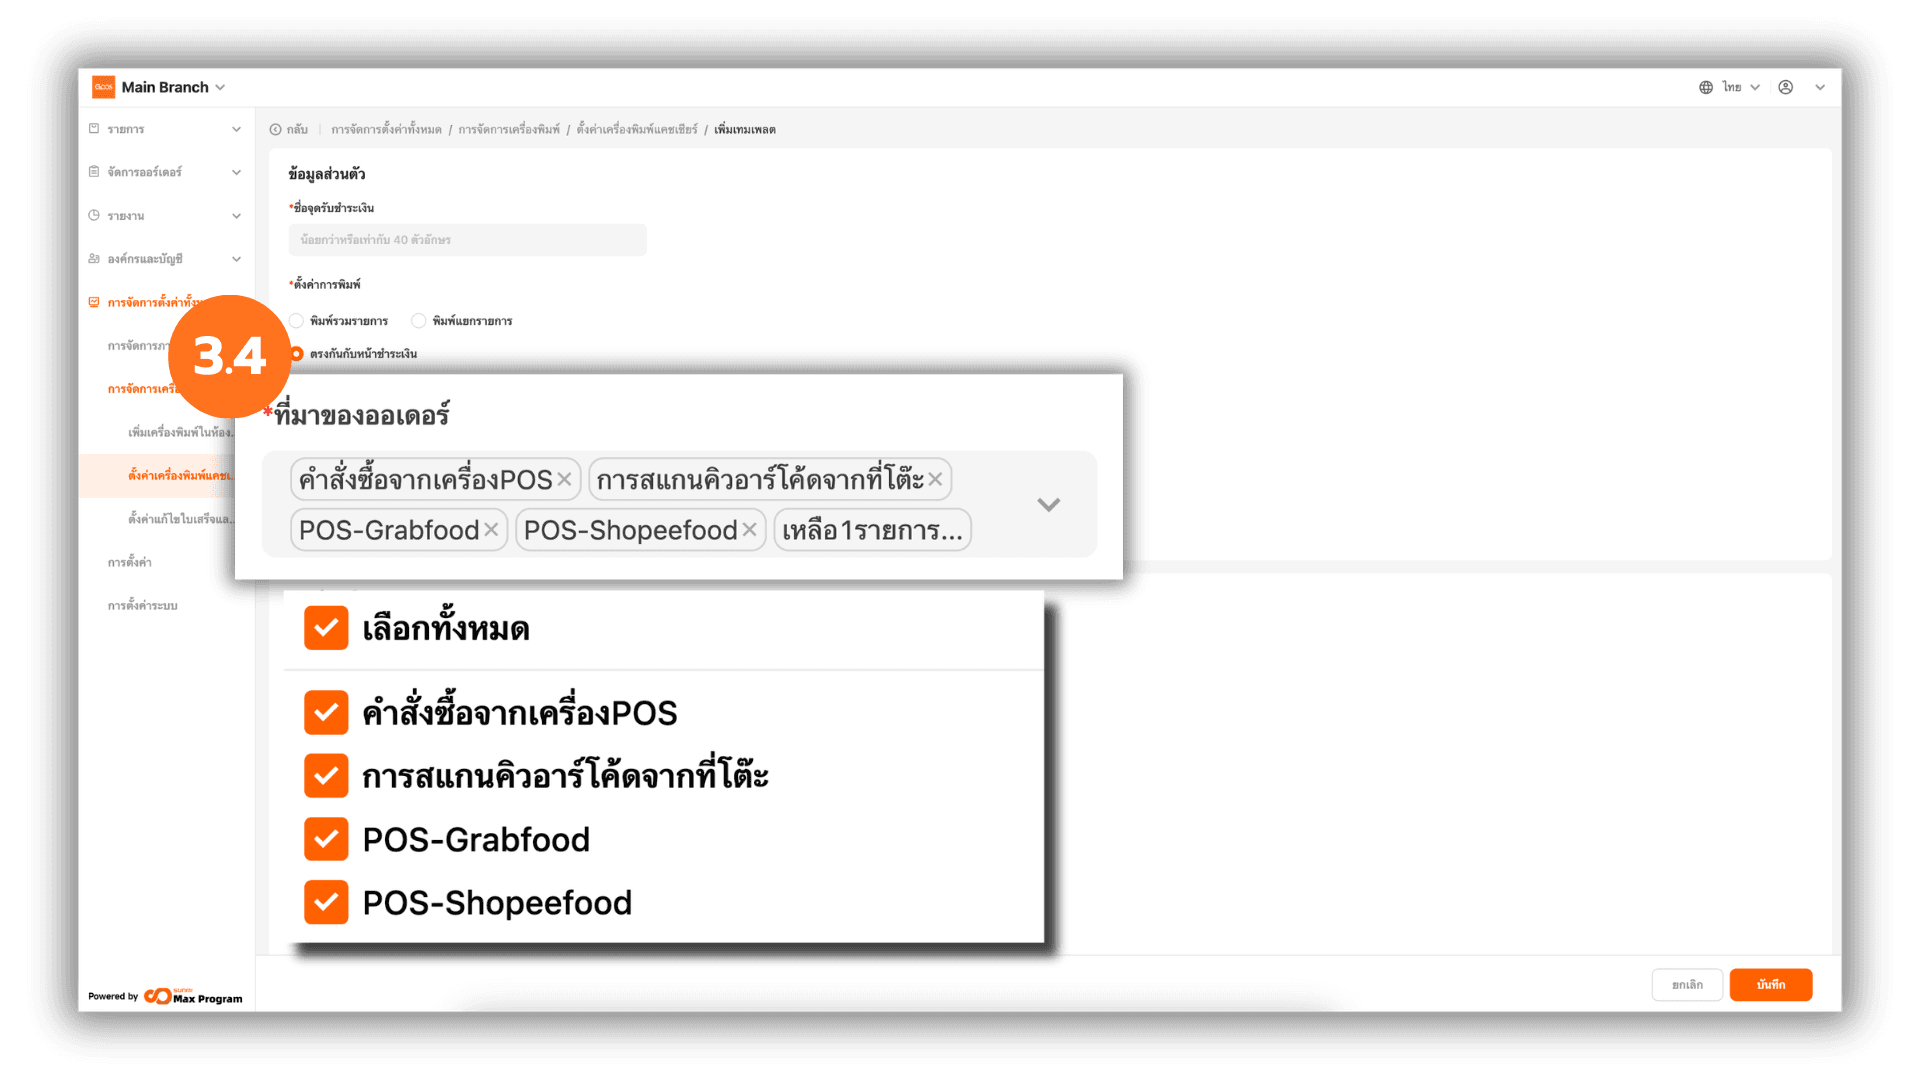
3.4 Order Source Settings
The system automatically selects the Order Source. If you want to change it, click X to remove the existing source and select a new one.
Note : Order sources can be created in the Creating Sales Channels via Head Office menu.
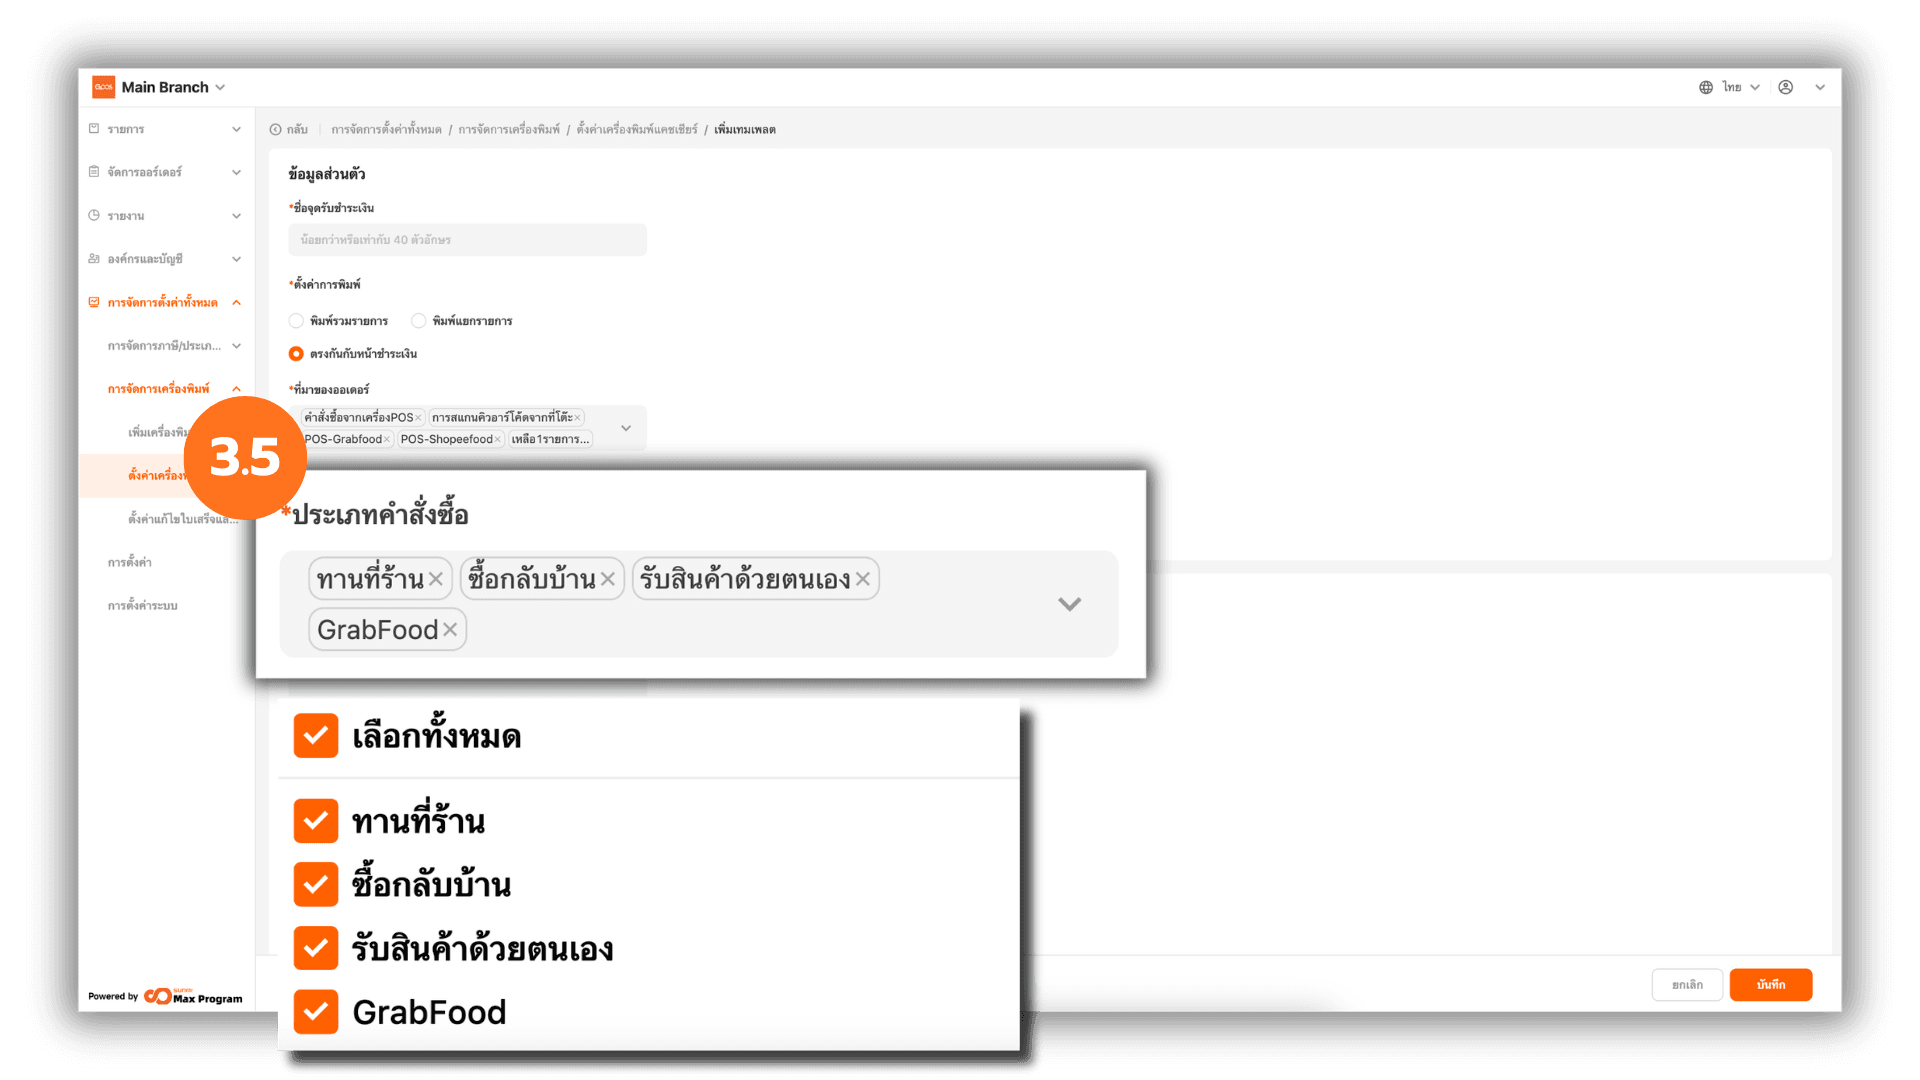
3.5 Order Type Settings
The system automatically selects the Order Type. If you want to change it, click X to remove the existing type and choose a new one as needed.
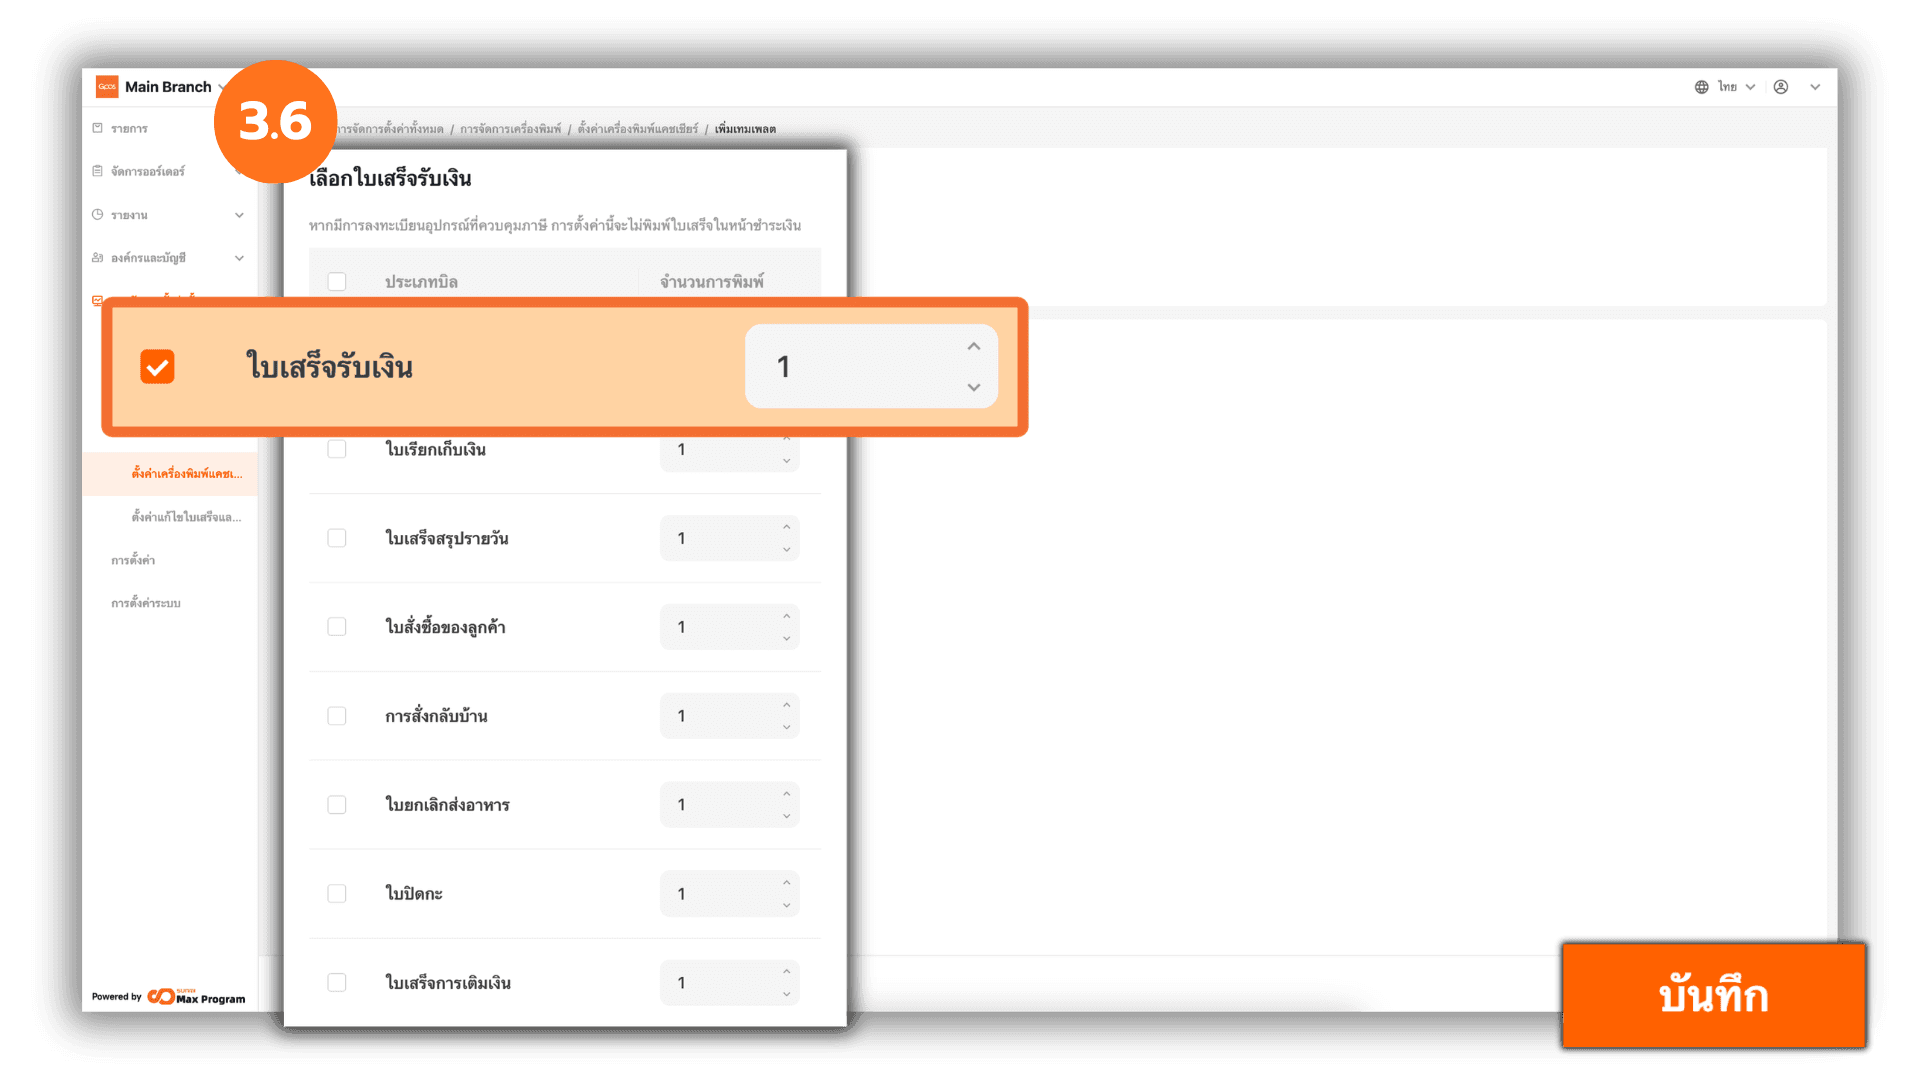
3.6 Select Receipt Types to Print
Select the receipt types you want to print. You can choose more than one type, including : Checkout receipt , Pre-bill receipt , Daily Receipt , Customer Viewing Order , Delivery order , Order Cancellation , Shift Handover Receipt or Top-up Receipt. Tick the receipt types you wish to print and specify the number of copies required. Once all settings are configured, click “Save” to confirm.
Note: If tax registration information is entered in the Tax Management menu, the system will not print receipts on the payment screen according to this setting.
4. Managing the Cashier Printer After Creation
After successfully creating the cashier printer, the system will return to the Cashier Sections page. You can manage the created printer as follows :
- Edit – Modify the printer information.
- View – View detailed printer information.
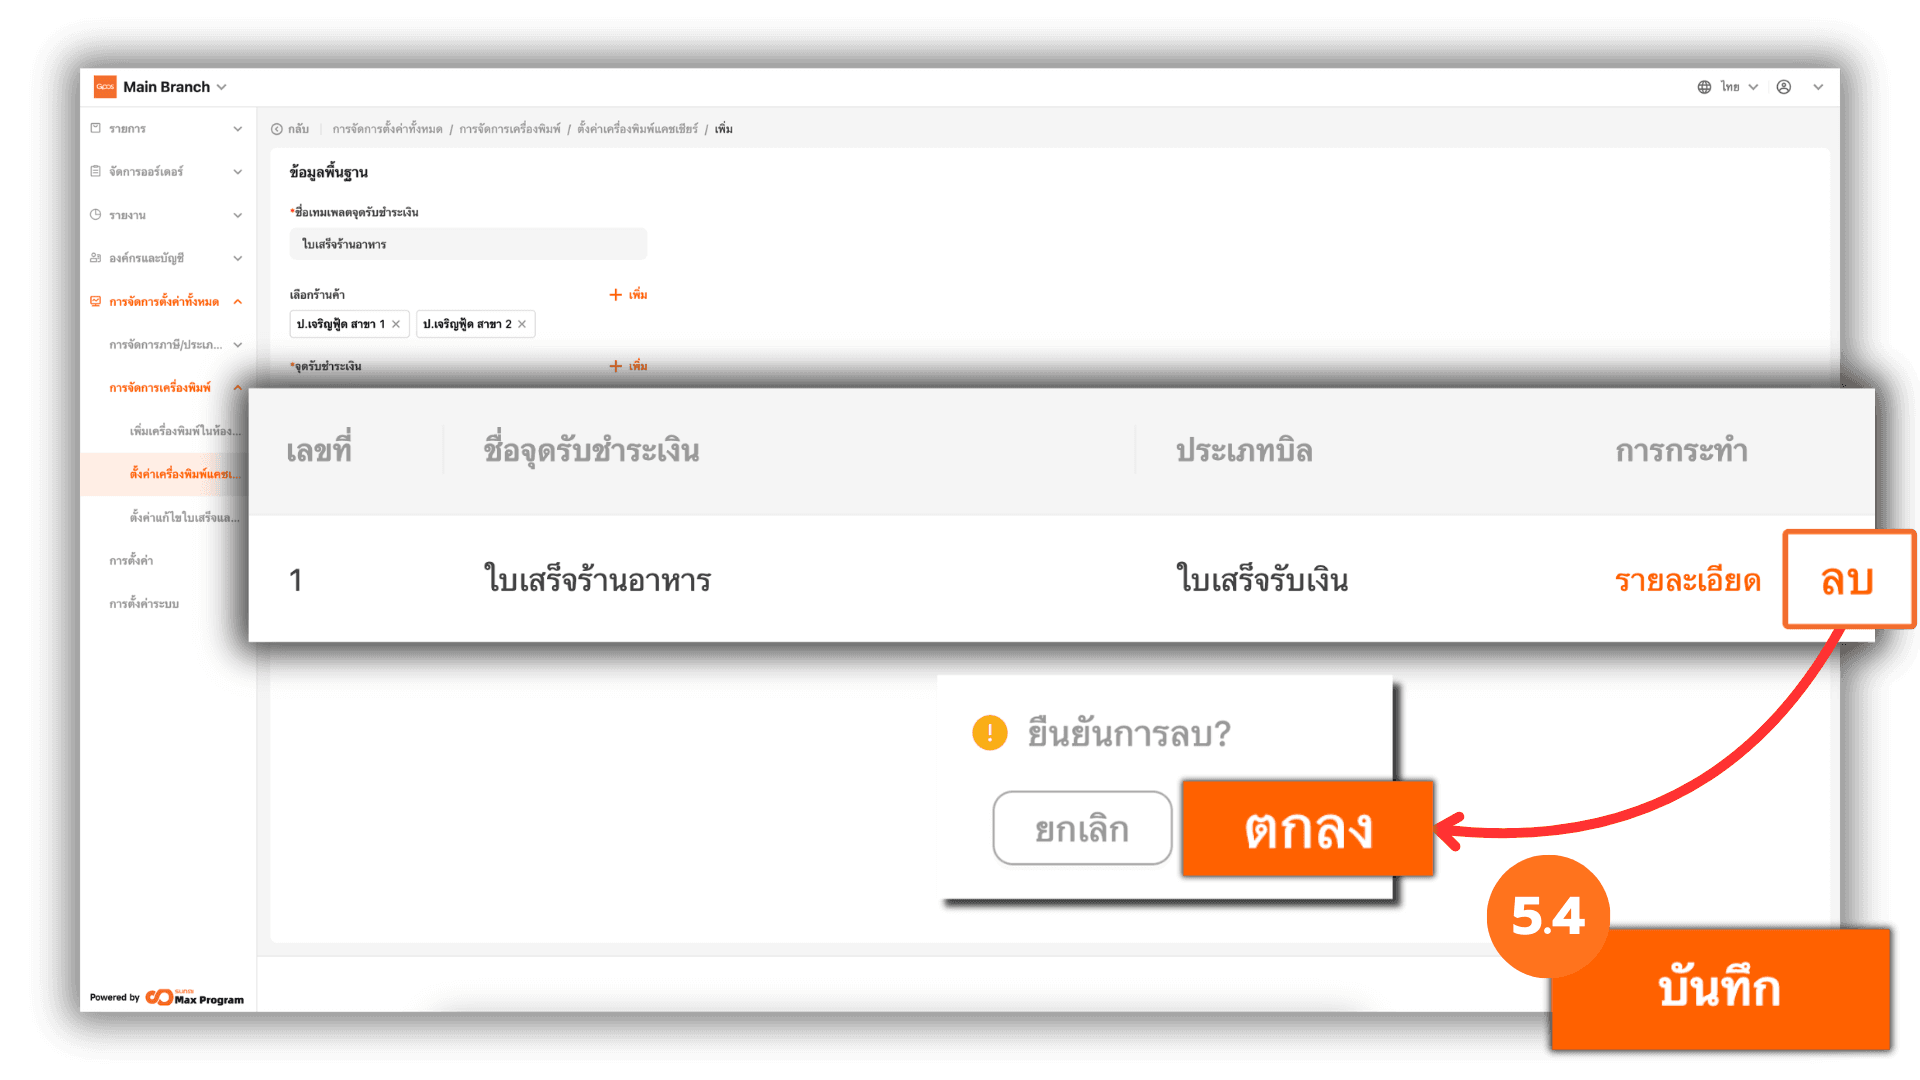
- Delete – Remove the printer. The system will display a confirmation message, and you must click Ok again to confirm.
Note : If printer information is edited, you must export the cashier counter template again to update the information to the store branches.

5. Creating a Cashier Counter Template
Go to the top menu and select Cashier Counter Template, then click + Add.

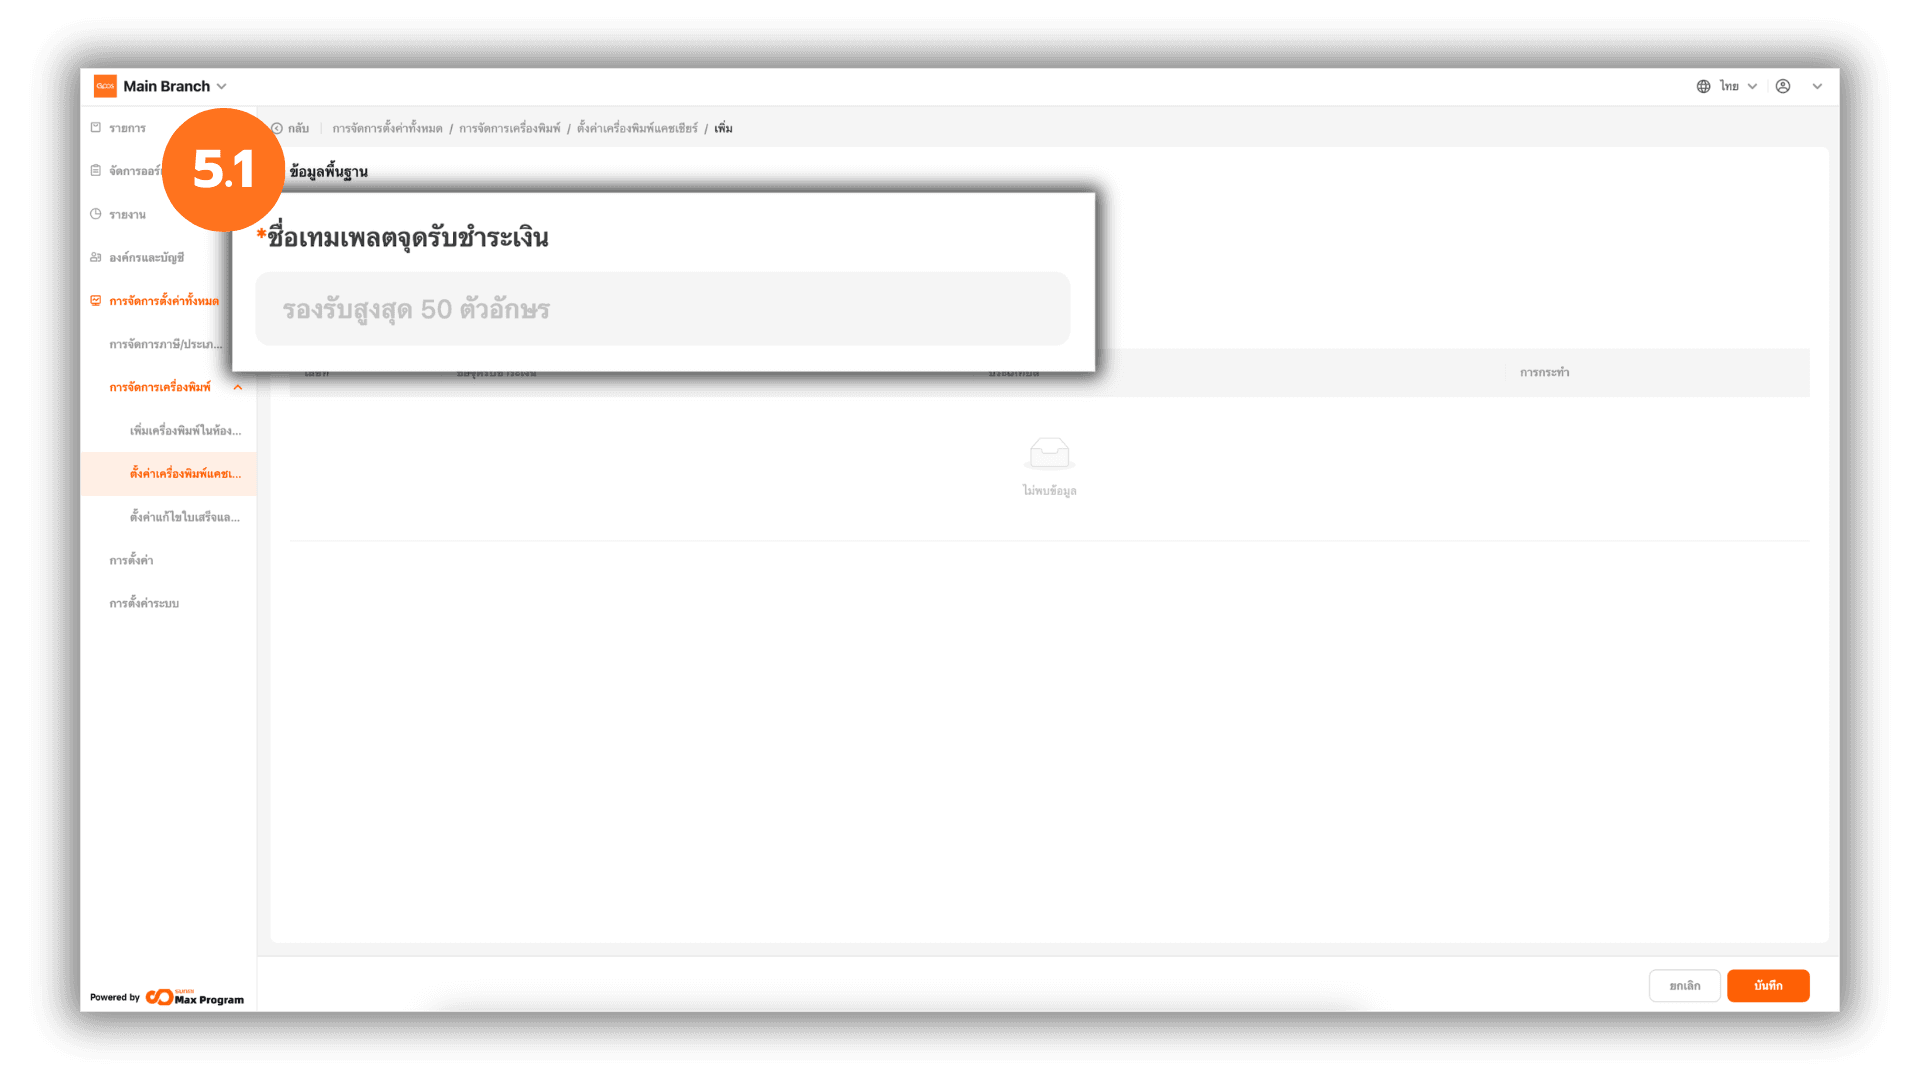
5.1 Enter Basic Template Information
The system will display a basic information page. Enter the Cashier counter template Name as required.
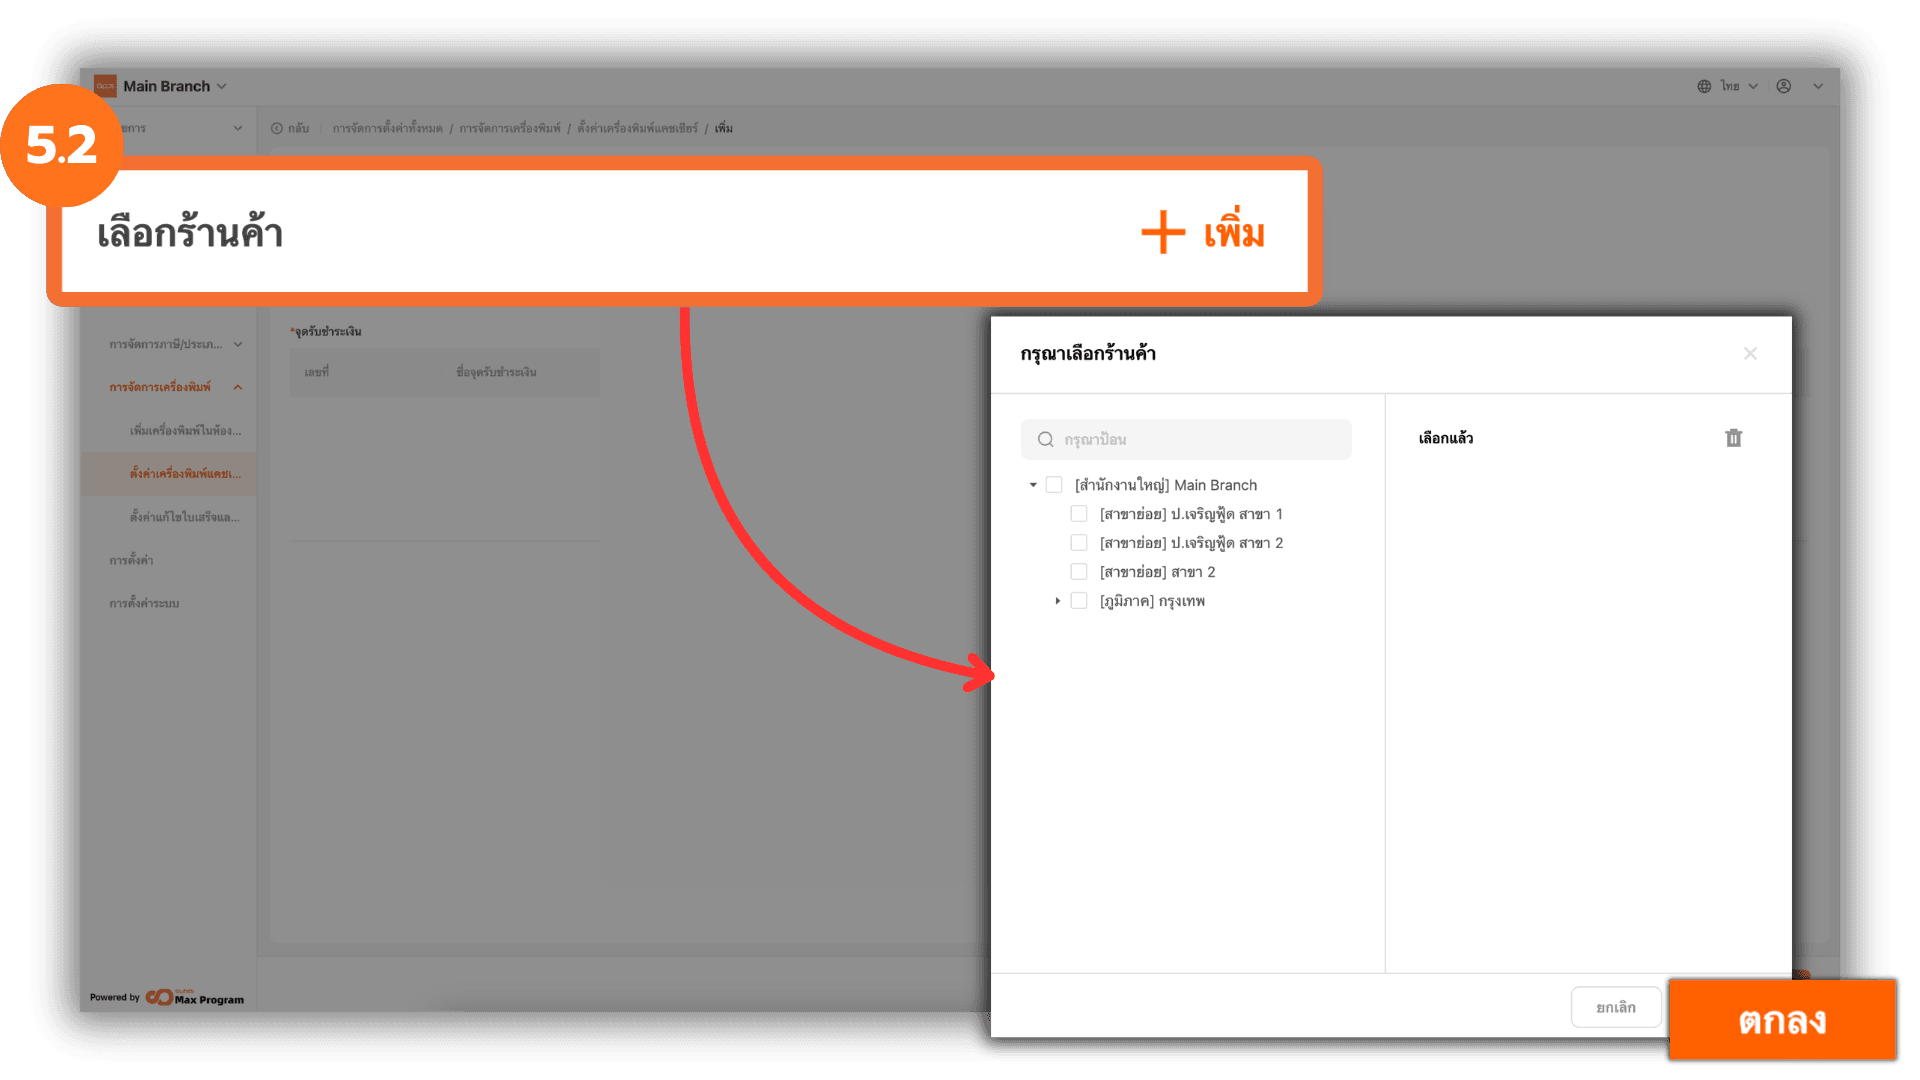
5.2 Select Store Branches
Click + Add next to the Store section. The system will display a list of all store branches. Tick the branches you want and click Ok to confirm.
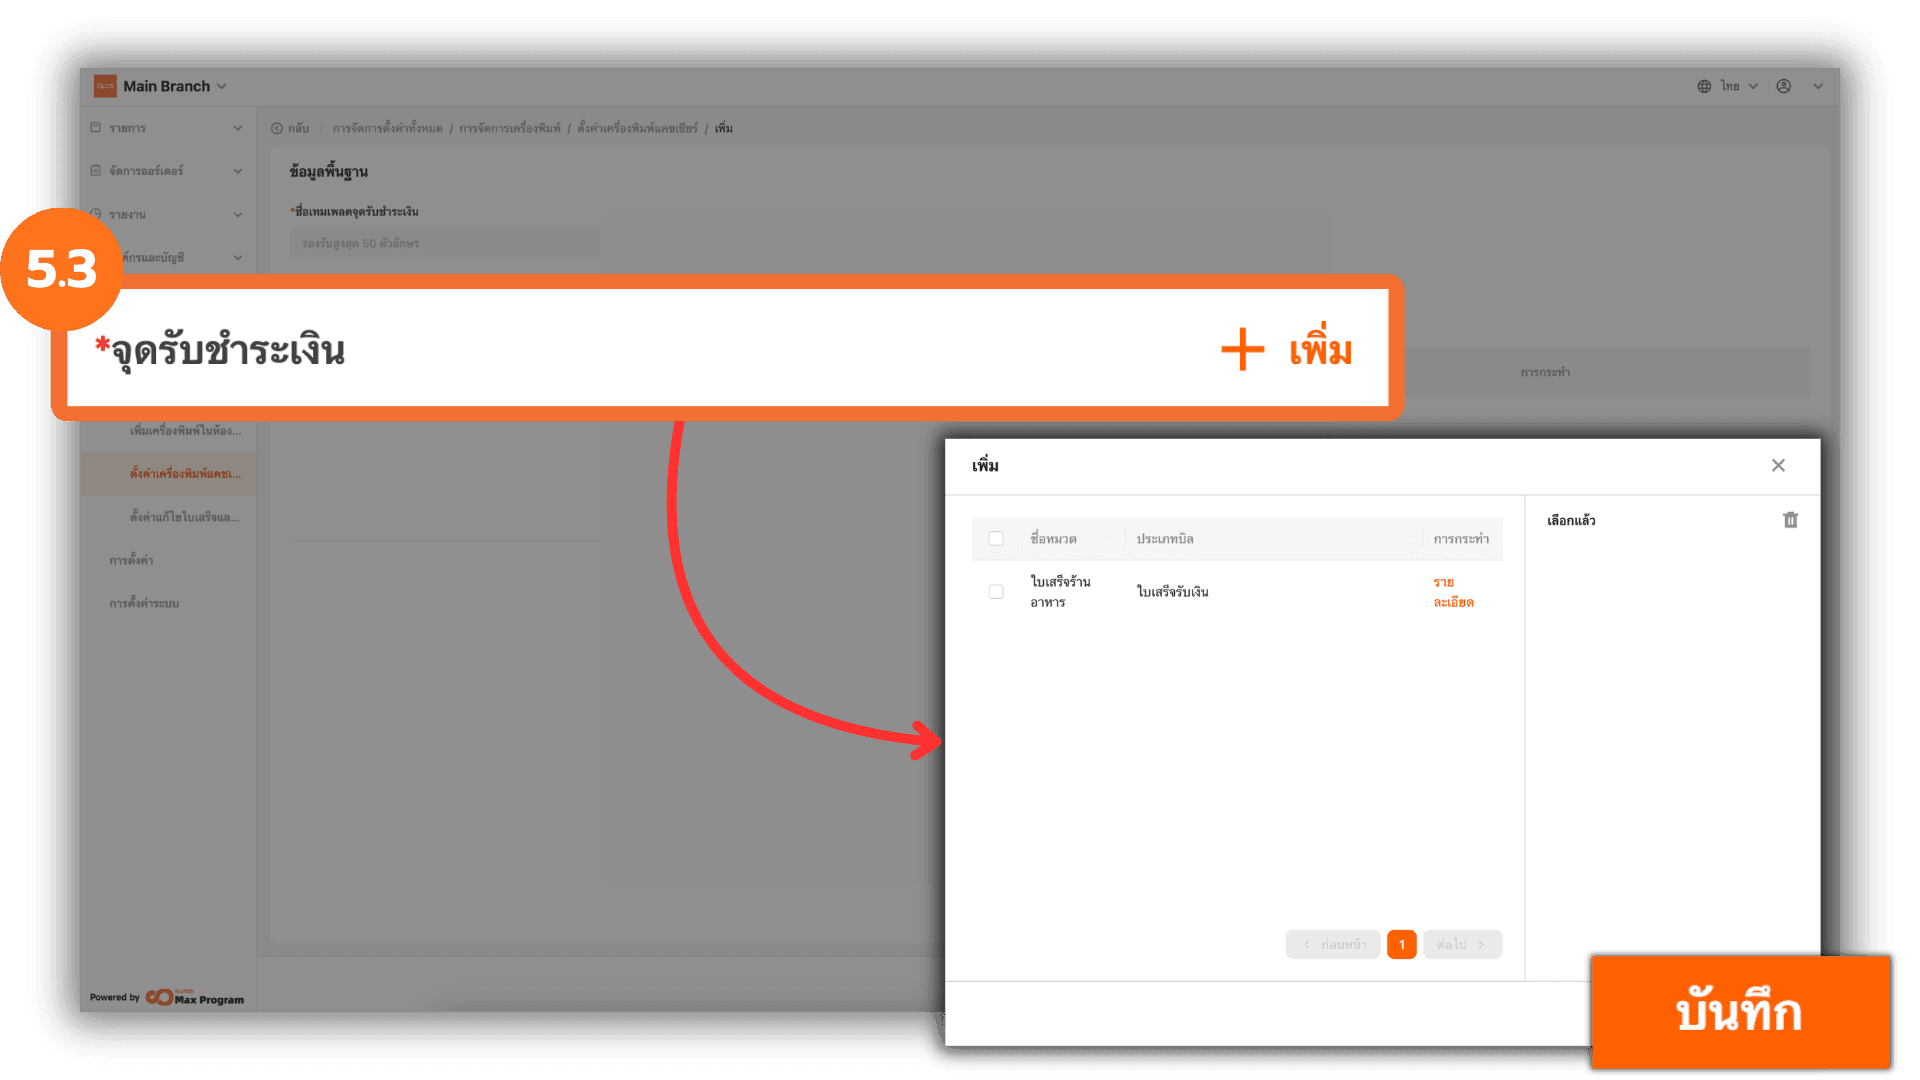
5.3 Select Payment Points (Cashier Printers)
Click + Add next to the Payment Point section. The system will display all cashier printers created in the system. Tick the desired printers and click Save to confirm.
5.4 Review and Save the Template
Review the selected store branches and cashier printers. If you selected an item incorrectly, click Remove to the printer to remove it. Once verified, click Save to confirm template creation.
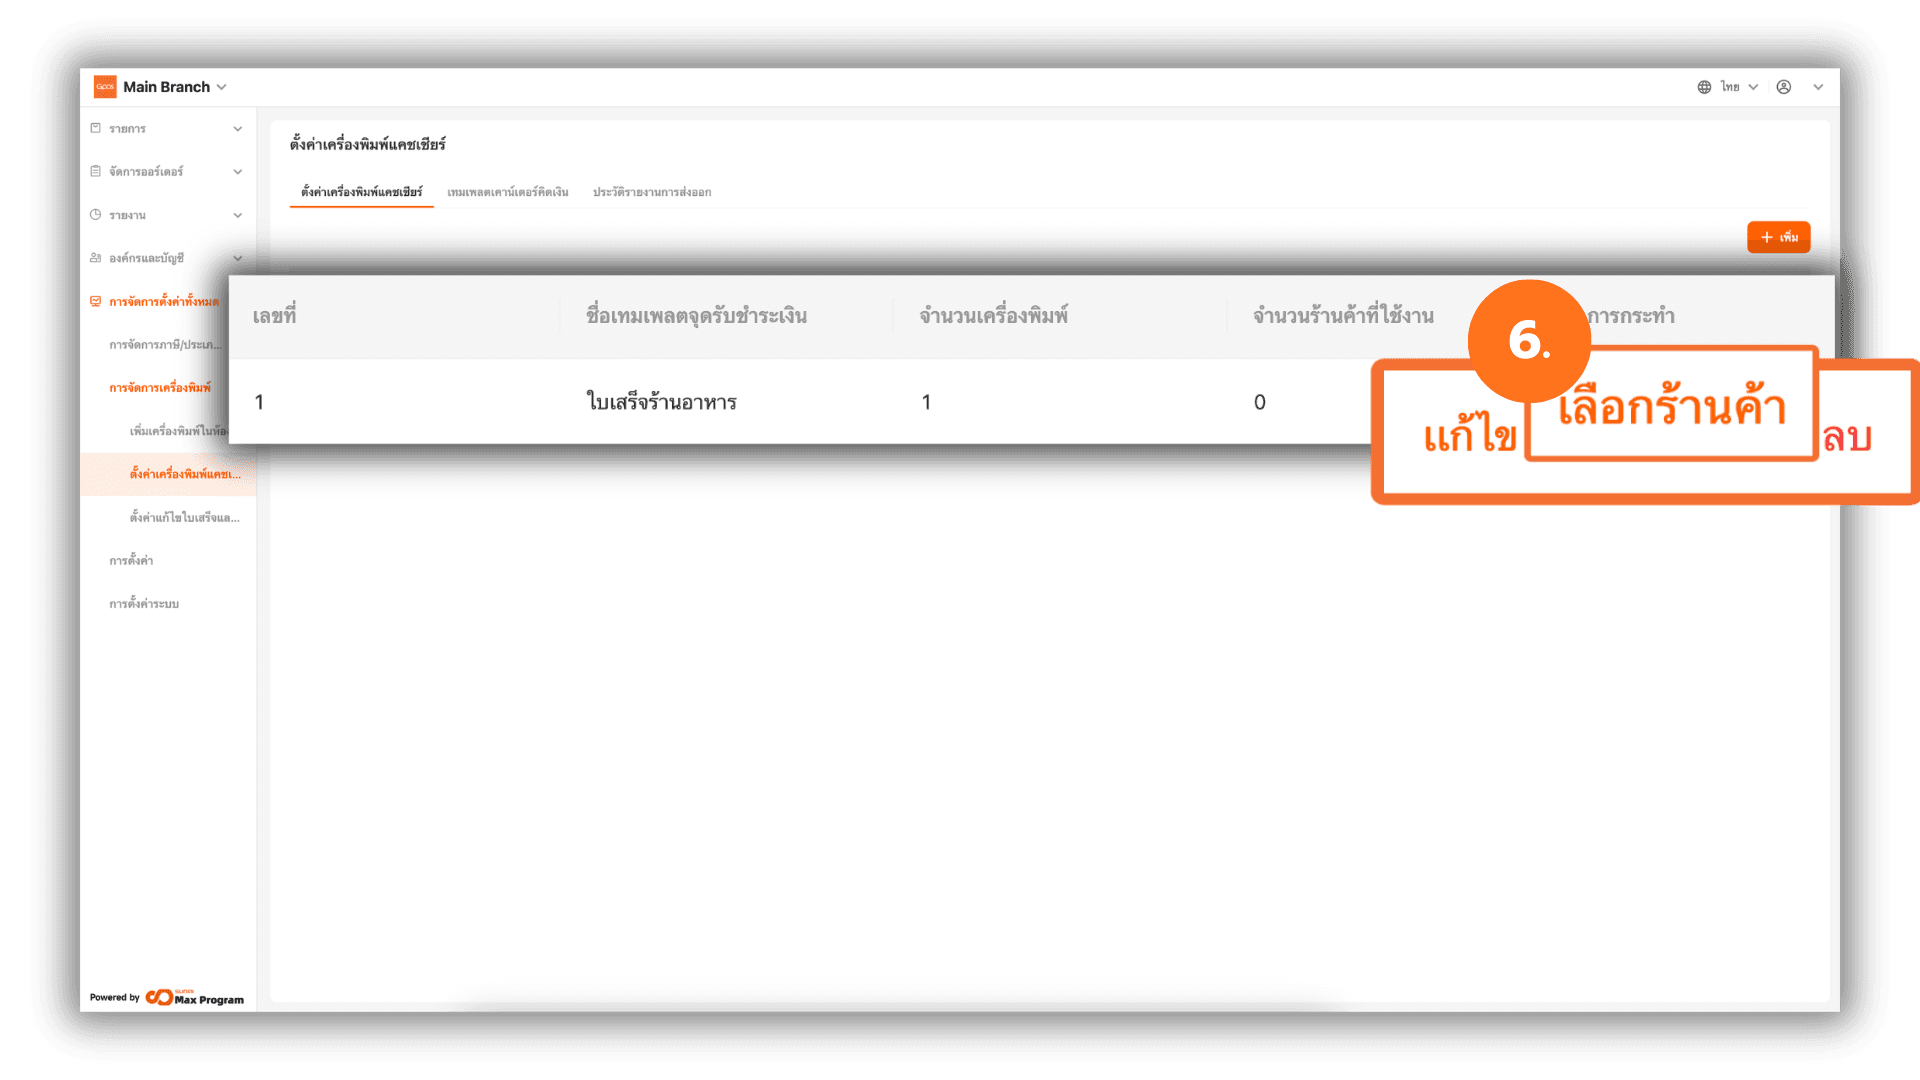
6. Managing and Exporting the Cashier Counter Template
After creating the template, the system will return to the Cashier Counter Template page and display the list of created templates. You can manage them as follows :
- Edit – Modify or update template information.
- Distribute – Confirm and export the template to store branches.
- Delete – Remove the template.
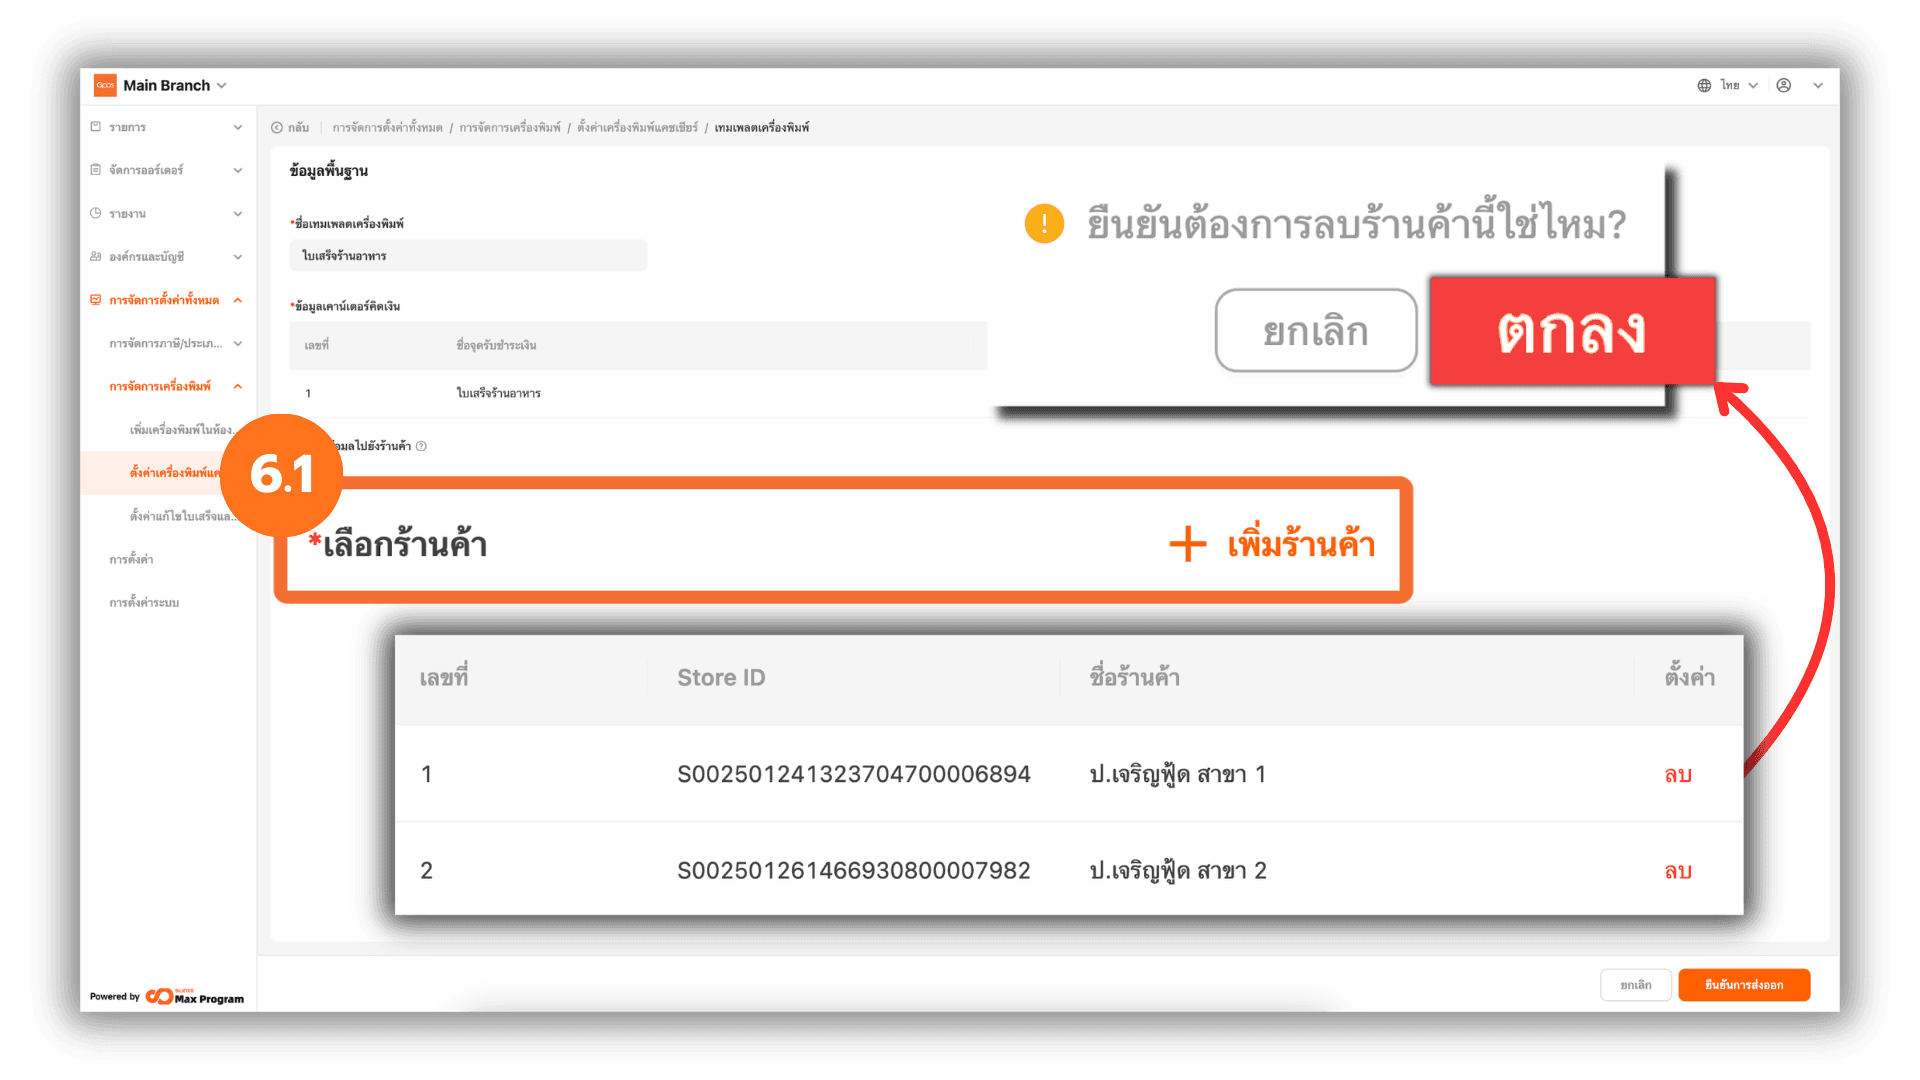
6.1 Managing Stores Before Export
After clicking Select Store, the system will display the template details again. You can click + Add Store to add branches or click Remove to remove selected branches as needed.
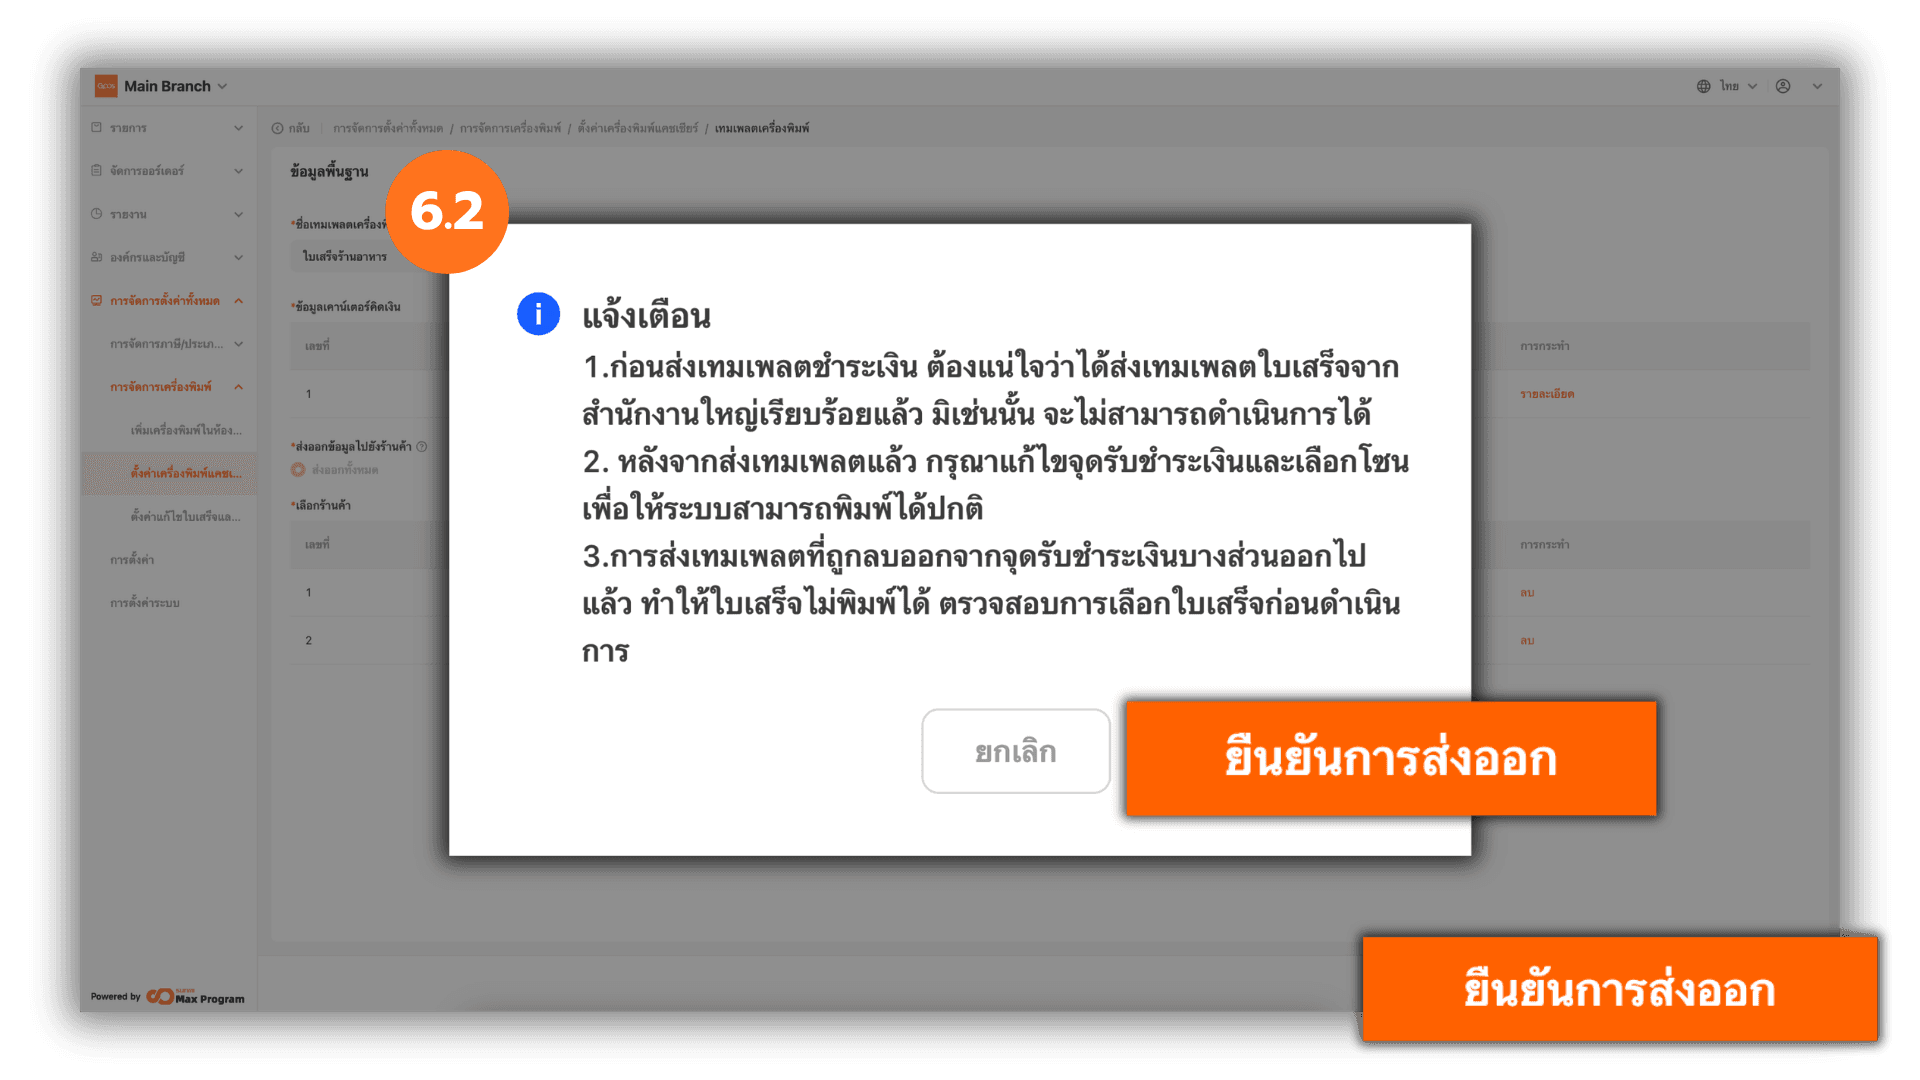
6.2 Confirm Export
Click Confirm distribution to proceed. The system will display a confirmation message. Click Confirm distribution again to export the cashier counter template to the selected store branches.
Note : The receipt template must be exported from the head office first before exporting the cashier counter template. After exporting, you must configure the payment point and select the correct zone to ensure proper receipt printing. Also, check the receipt types before exporting. Removing certain receipt types may prevent receipts from being printed.
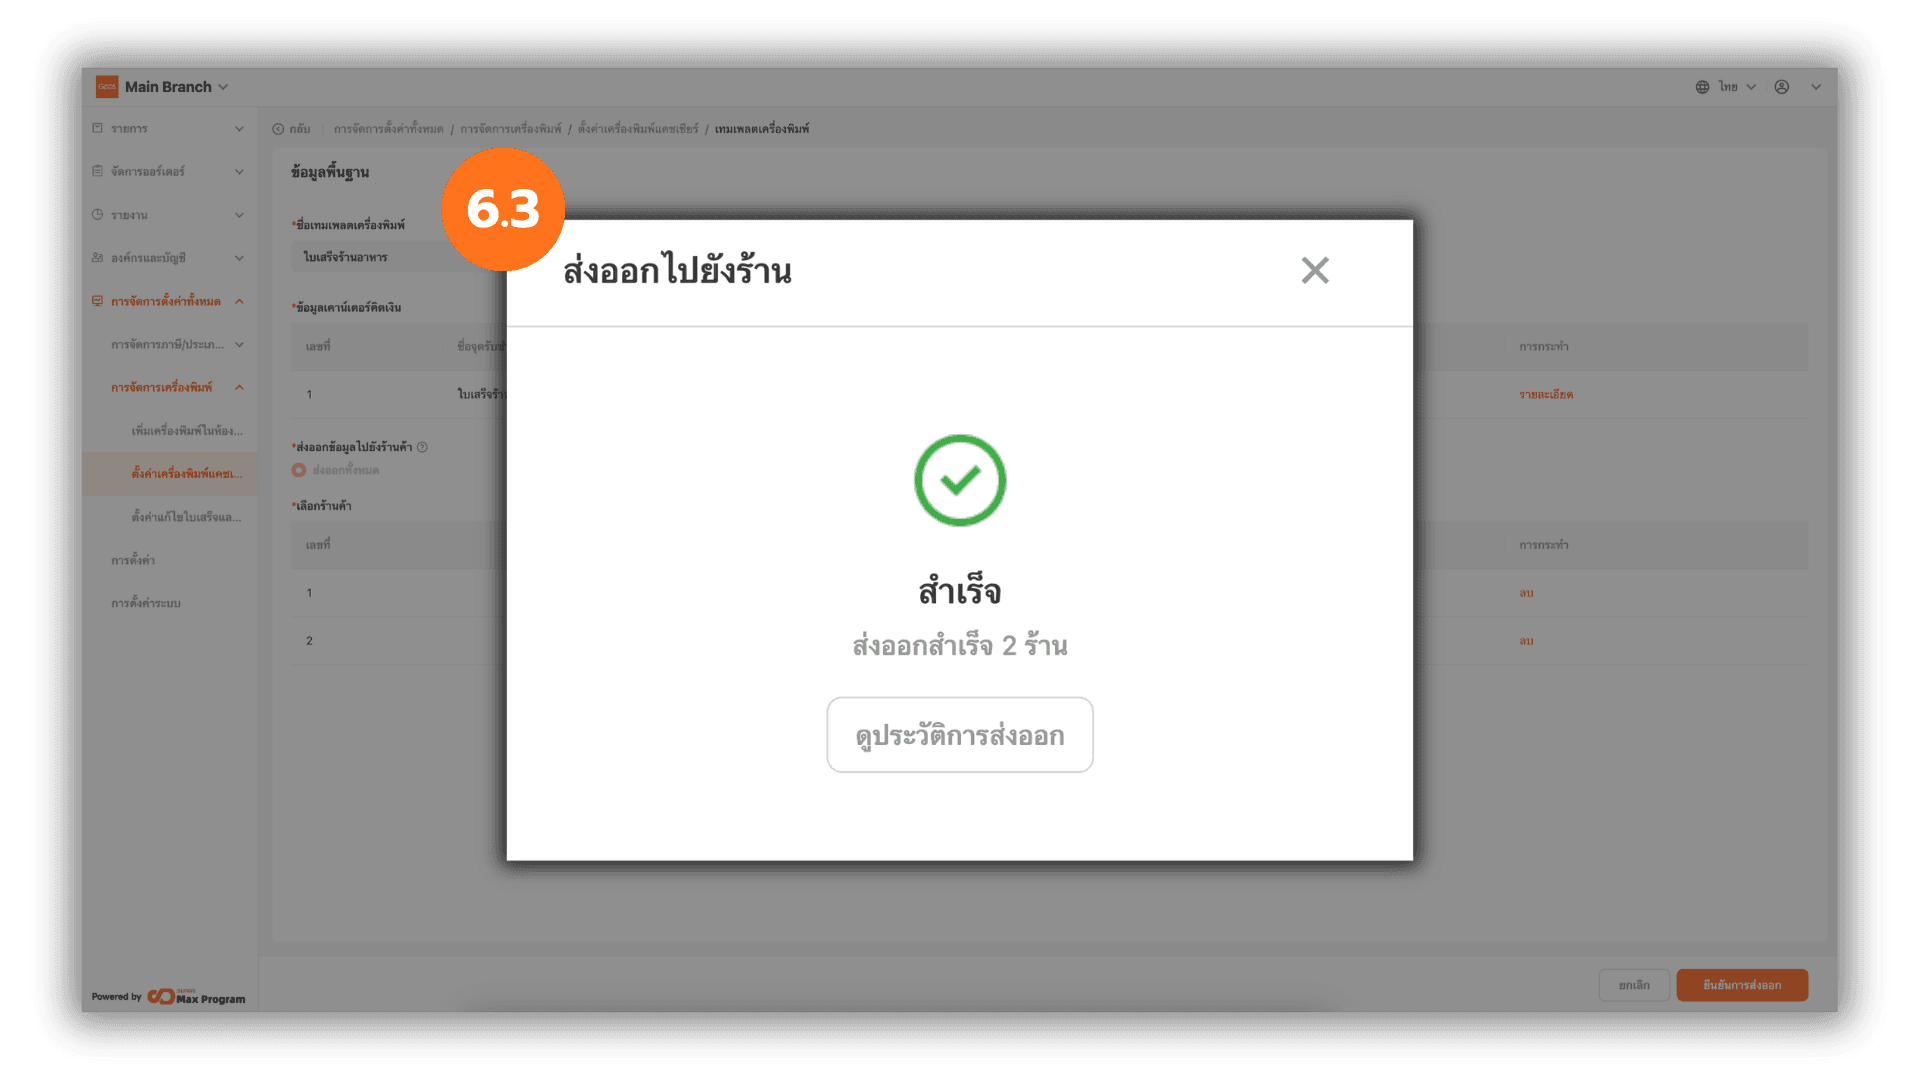
6.3 Check Export Status
Once the export is completed, the system will display the status as Successful. You can click X to close the window or click View History to review export details.