Create Product List via Excel File
2026-03-21 16:54
This guide helps merchants create product categories and import product lists accurately and systematically. It reduces data-entry errors, speeds up the process of adding products, enables precise stock control, and supports efficient sales management across both in-store POS and online platforms.
Preparing Categories Before Importing Products via File
Go to the website login.gpos.co.th, enter your email and password, then click Log In. After logging in, you must first create product categories. You can view the detailed steps for creating categories in the topic How to Create Categories.
Note : If categories have not been created, you will not be able to import or add products via file. Categories are used to organize products in an orderly manner.
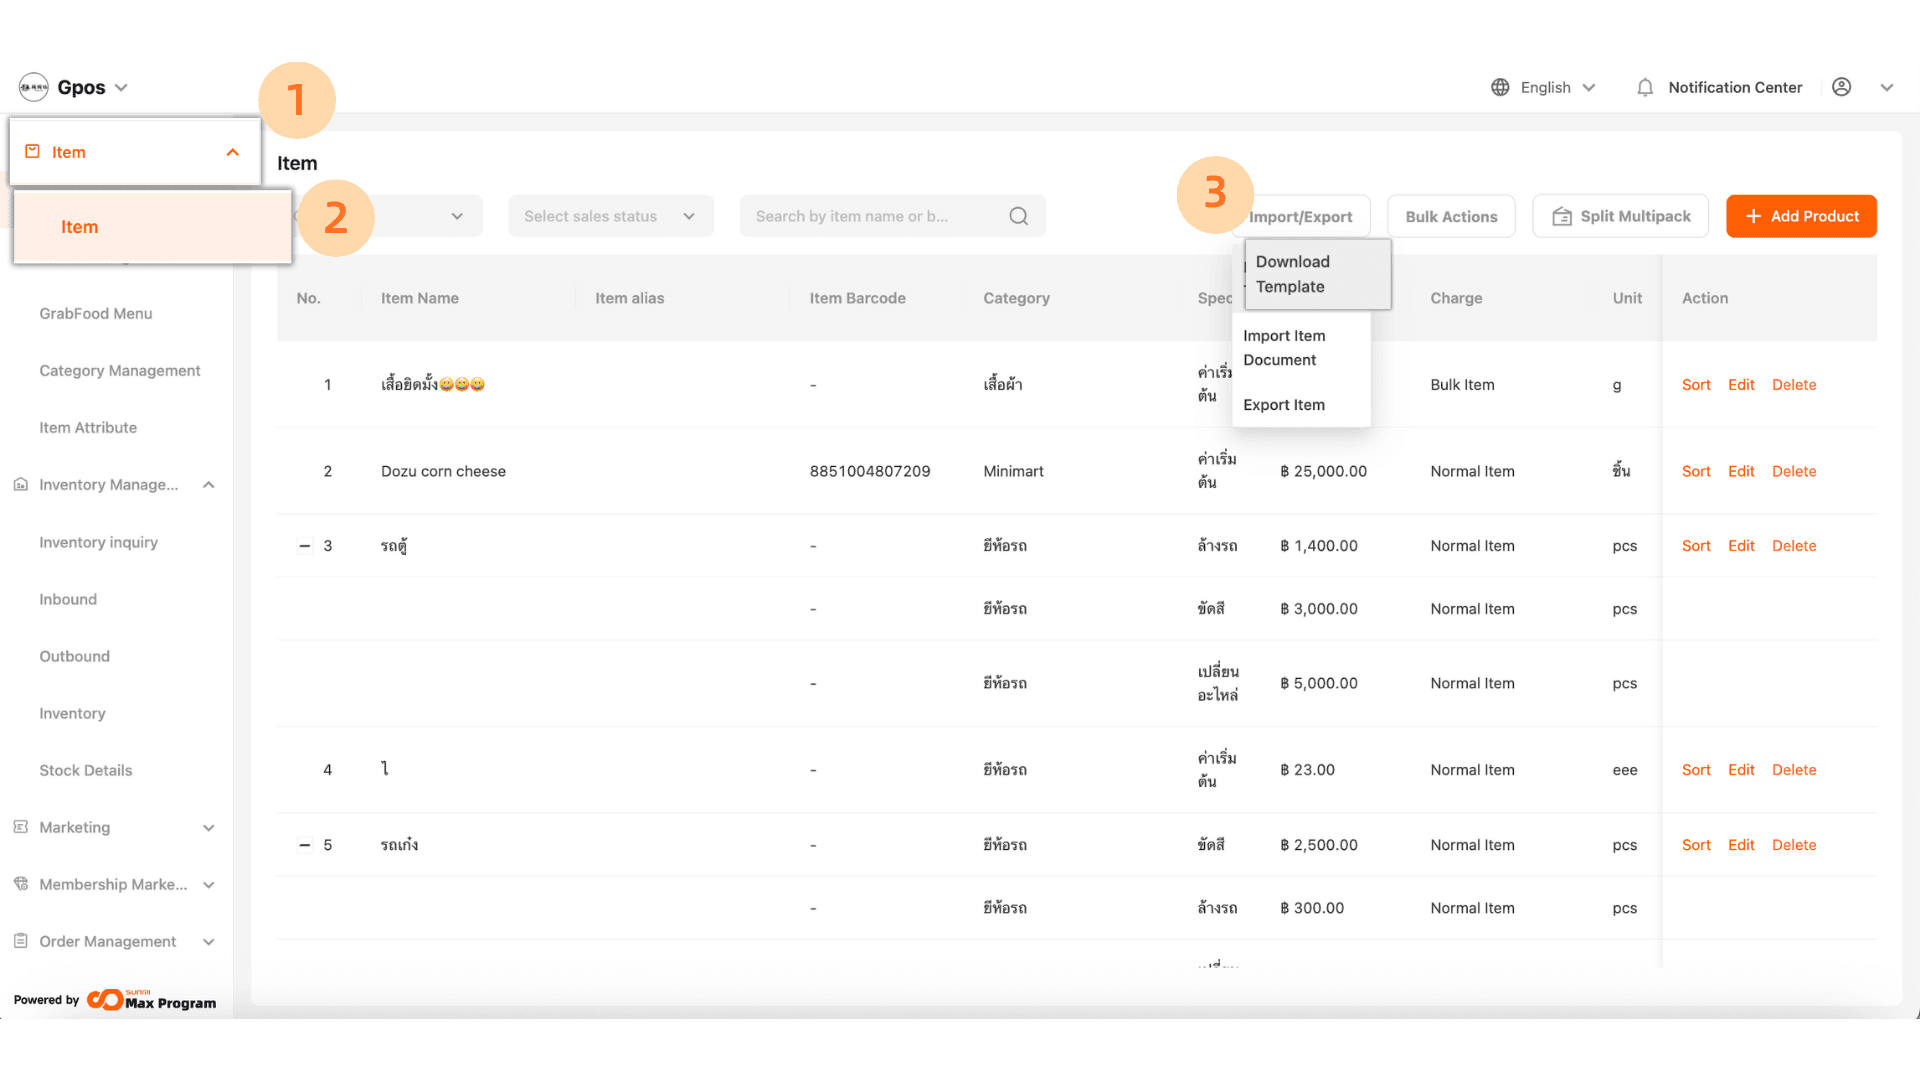
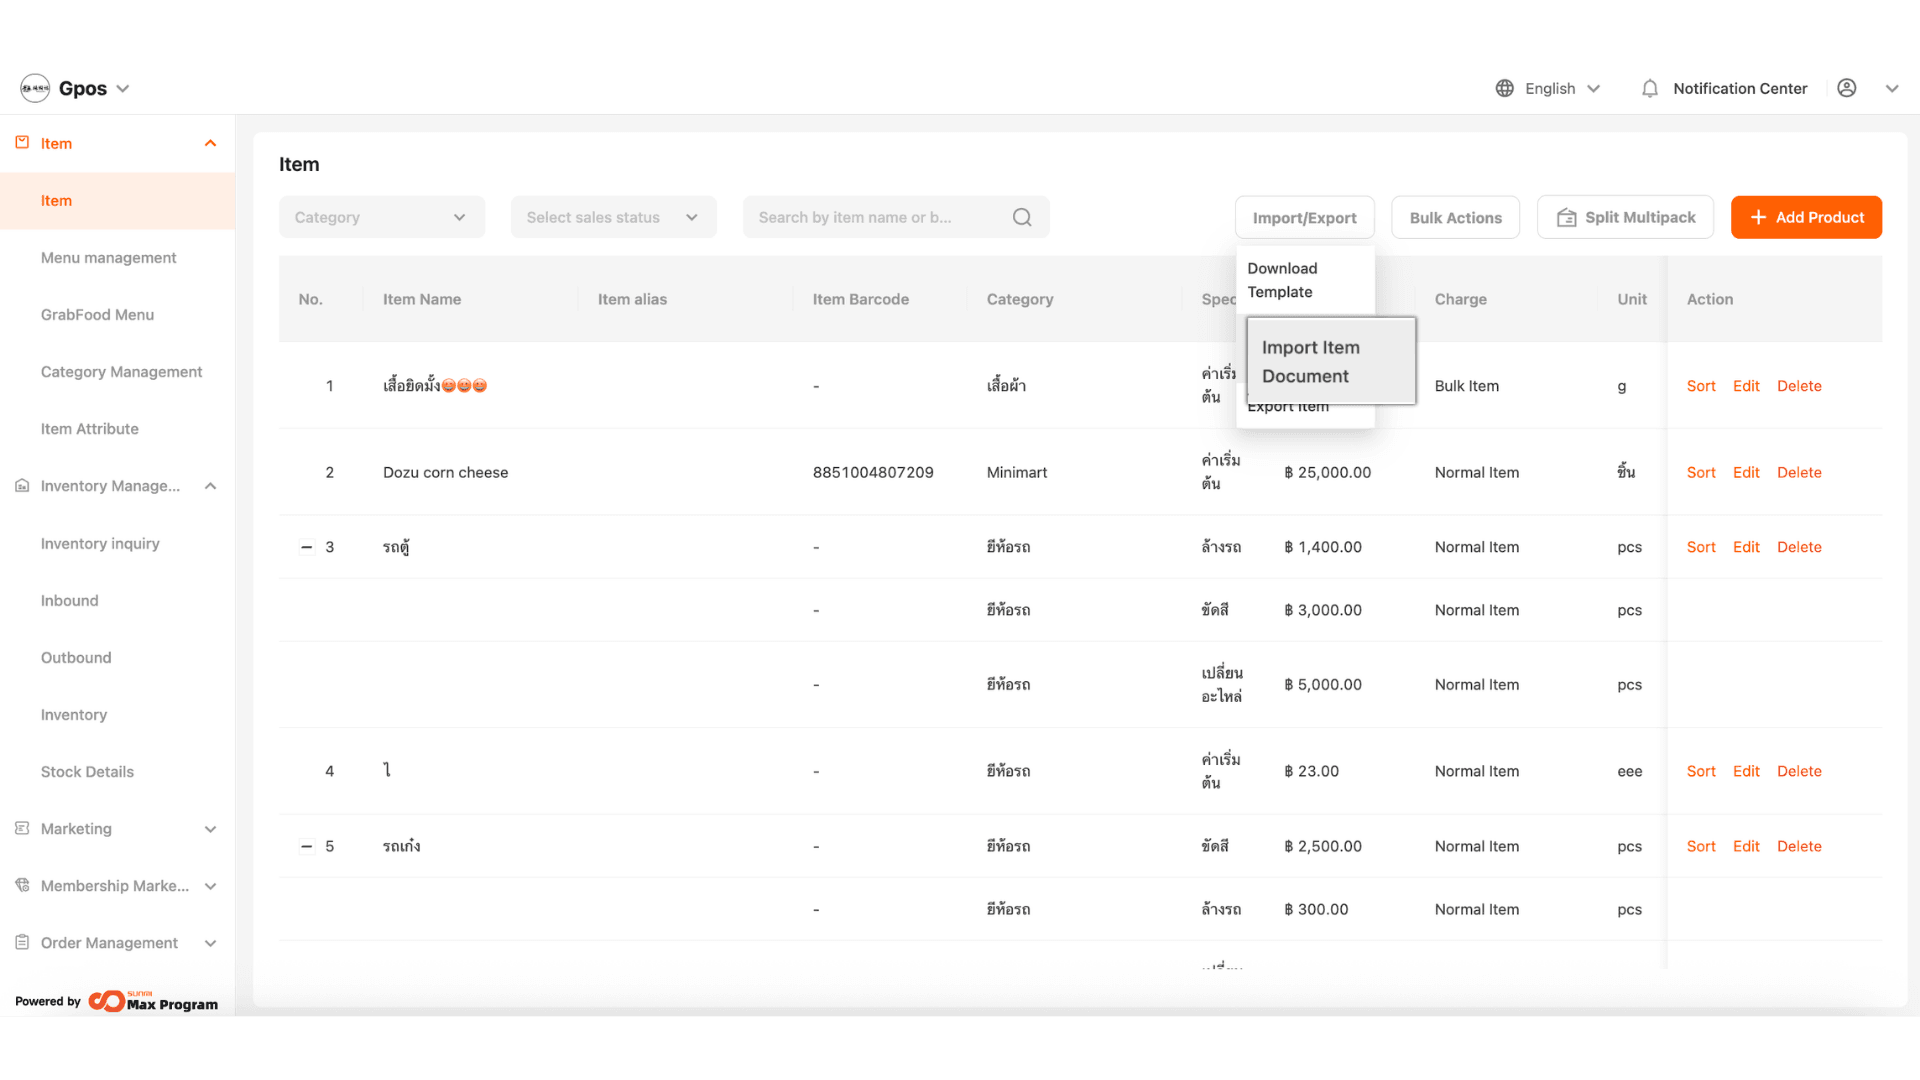
1. Click ‘Items’ > ‘Items’ > ‘Download Template’.
2. Open the downloaded Excel file to add items. First, please read the system conditions.
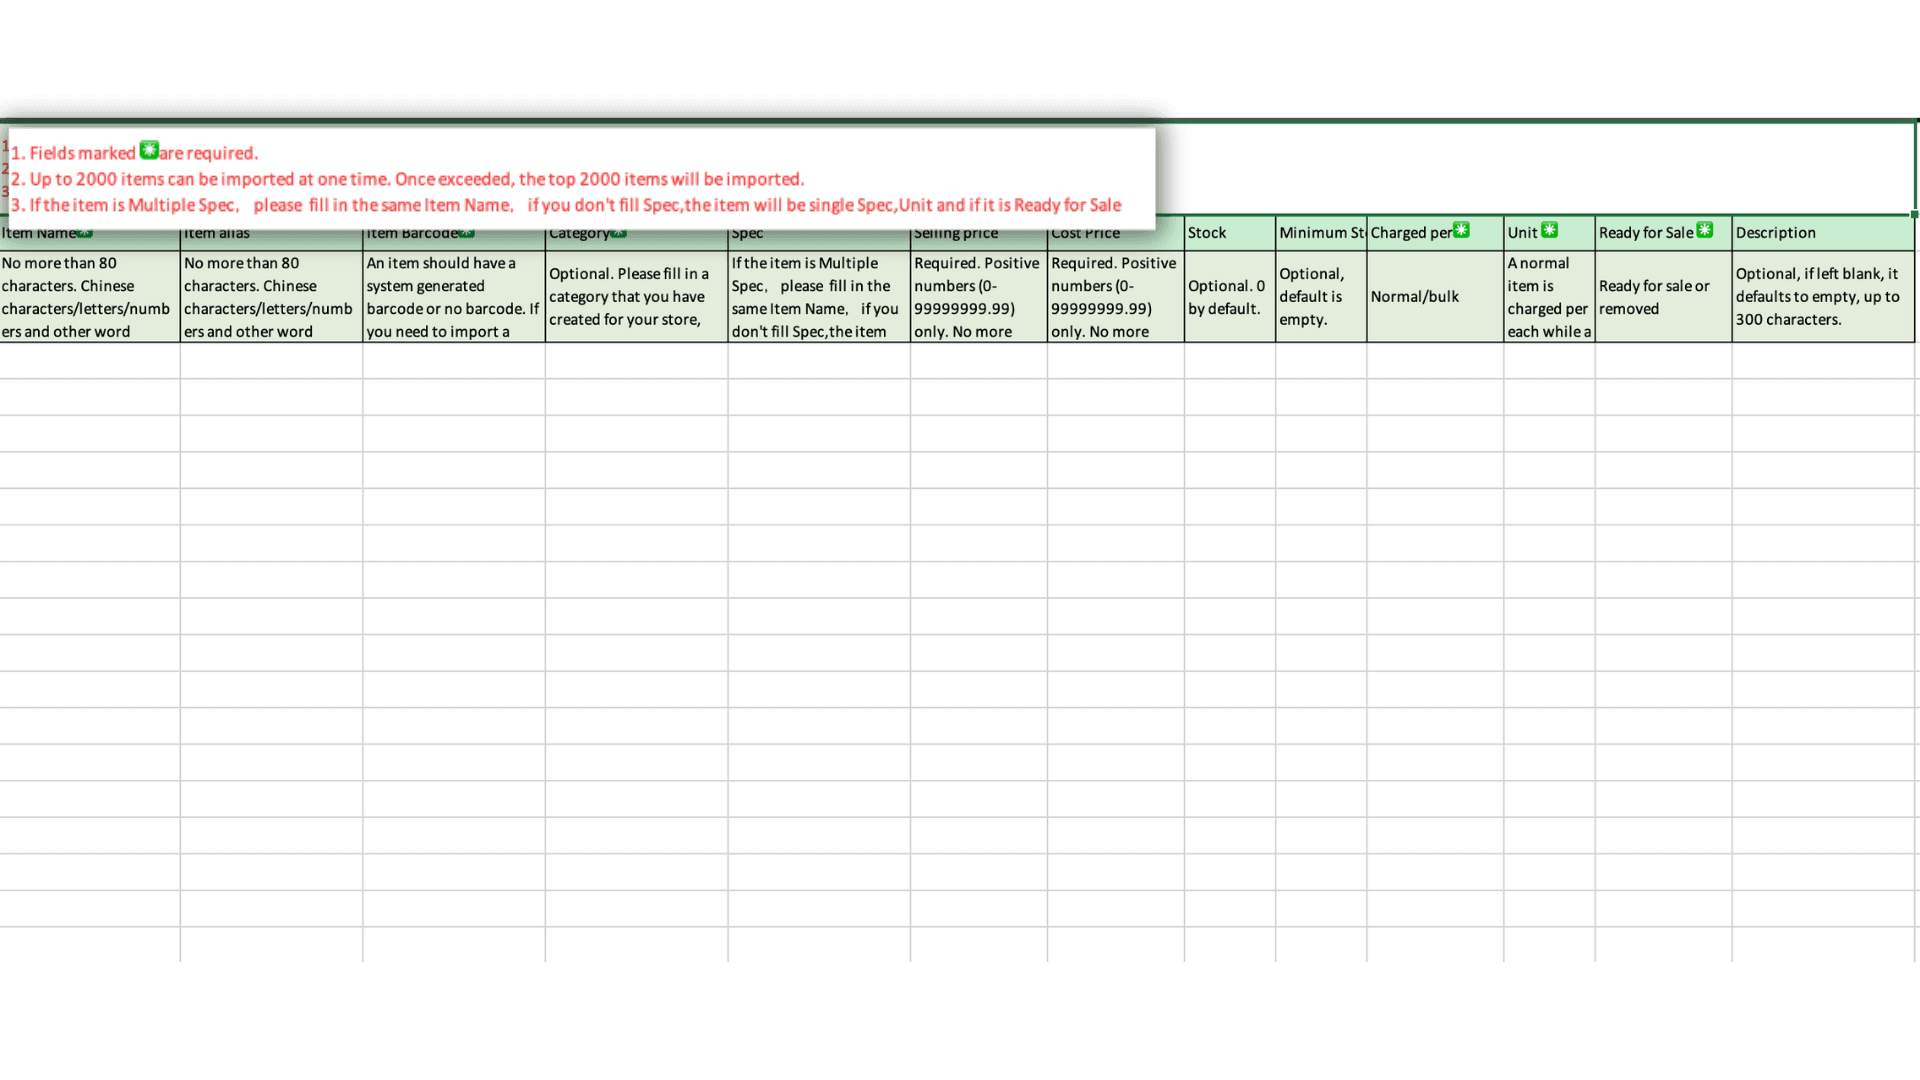
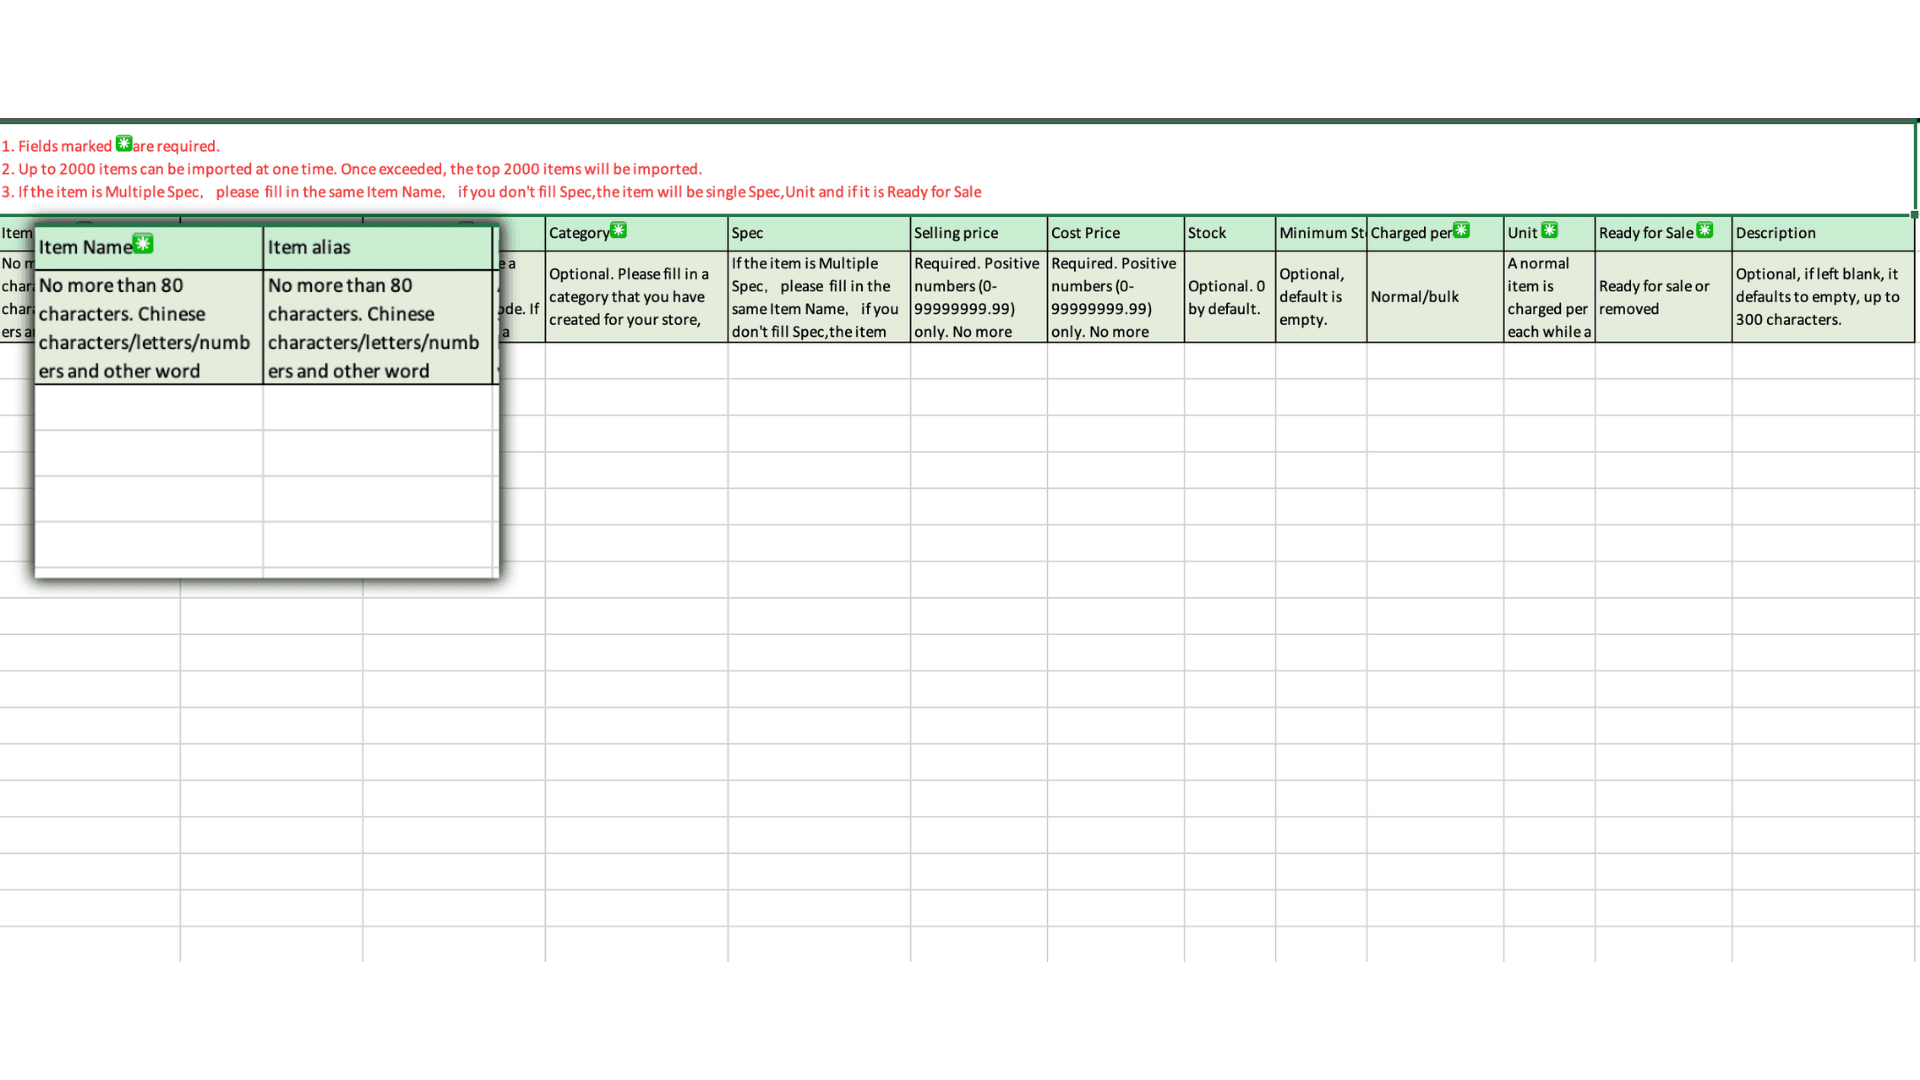
3. Please enter the item name in the ‘Item Name’ field.
‘Item Name’ is the name displayed in the POS system (GPOS)
‘Item Alias’ is the name displayed on Grab.
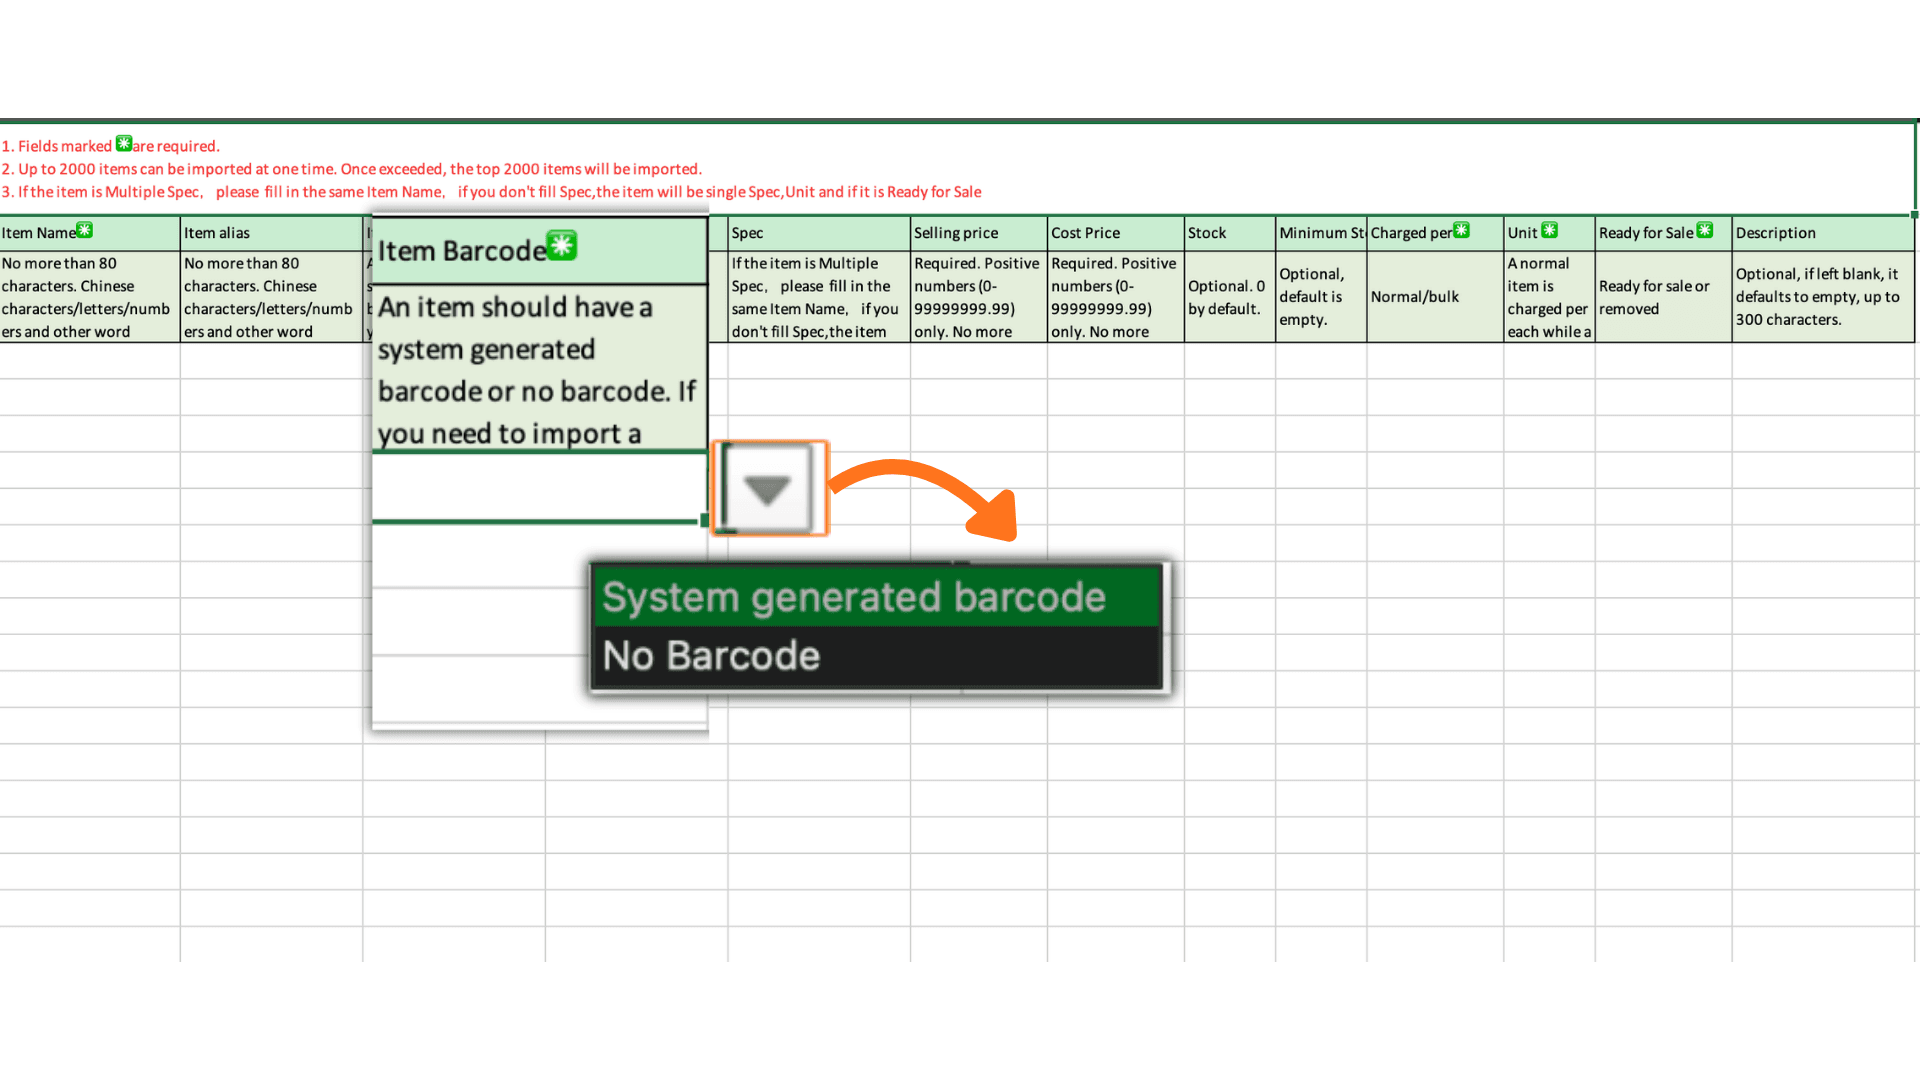
4.If the item already has a barcode, enter the 5–14 digit number in this field. If not, click the triangle icon to select ‘No barcode’, or choose ‘System generated barcode’ to let the system create one for you.
The system supports numeric barcodes only.
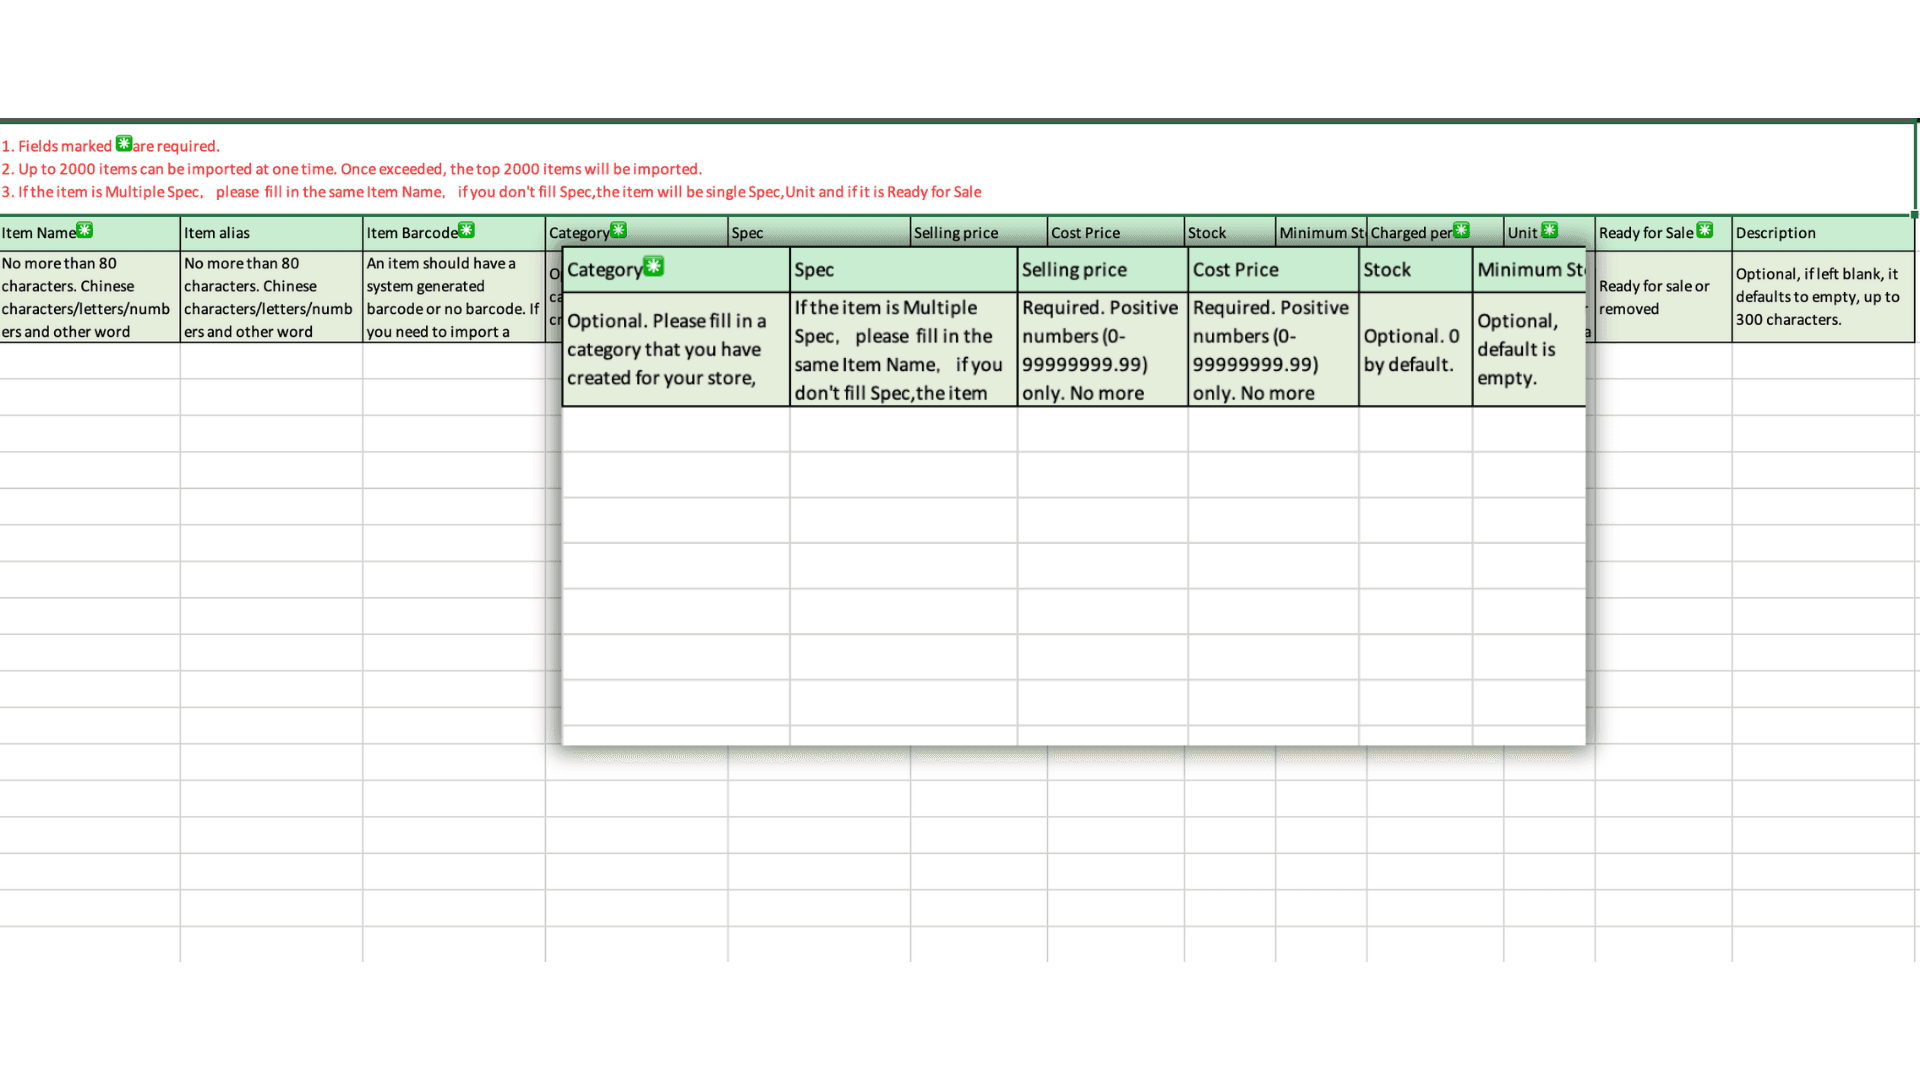
5.Category: Product category name (must match the categories created in the GPOS system)
Spec: Used for item variations or multiple options/prices (e.g., S, M, L; pork, chicken, beef)
Selling Price: Item price
Cost Price: Item cost (if not provided, the system will calculate profit as 100%)
Stock: Inventory quantity
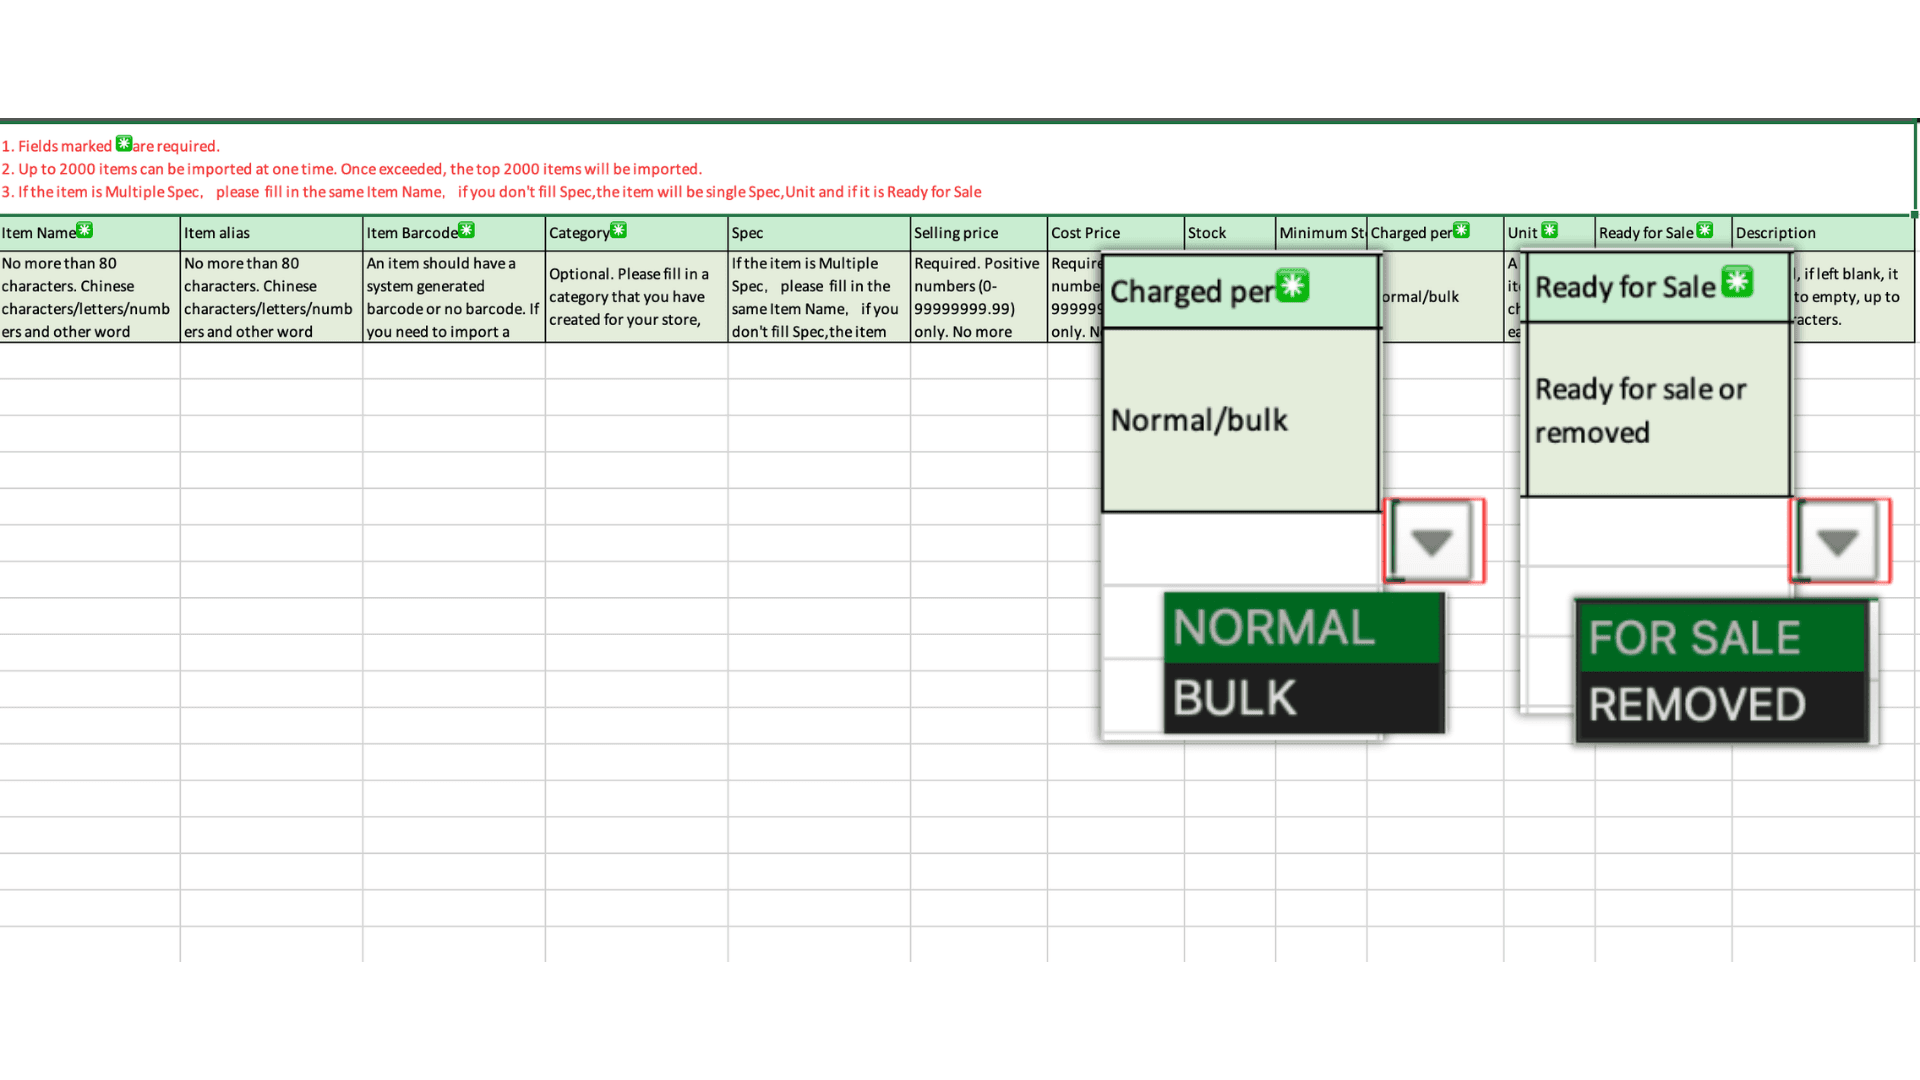
6.In the ‘Charged per’ field, if ‘Normal’ is selected, enter the unit in the ‘Unit’ field (e.g., piece, item, bottle, plate, etc.). If ‘Bulk’ is selected, the ‘Unit’ field must be either ‘g’ or ‘kg’ only.
- For the ‘Ready for Sale’ field, select either ‘For Sale’ or ‘Removed’ only.
- These two fields cannot be manually entered and must be selected from the system only.
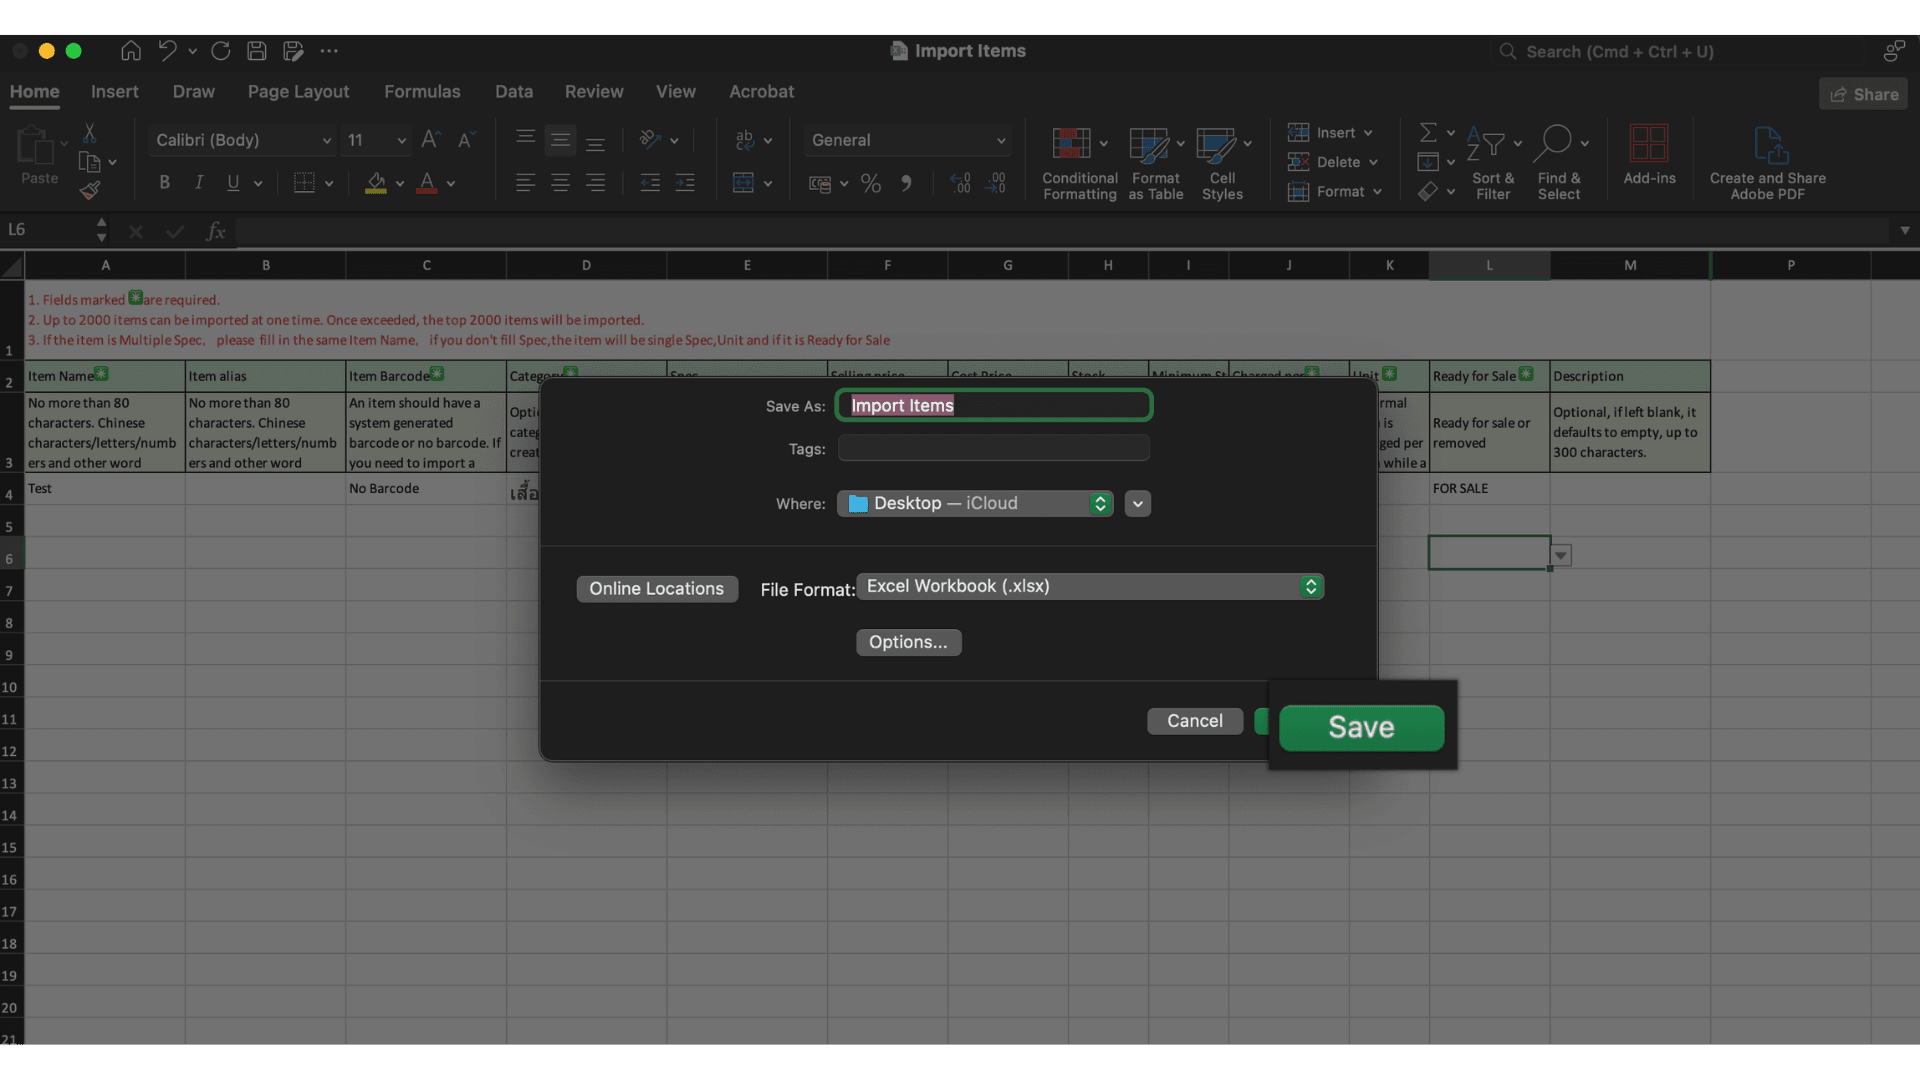
7. Once done, save the file, enter a file name, and click ‘Save’.
8.Return to the GPOS back office, click ‘Import/Export’ again, then select ‘Import Item Document’ to upload the file into the system
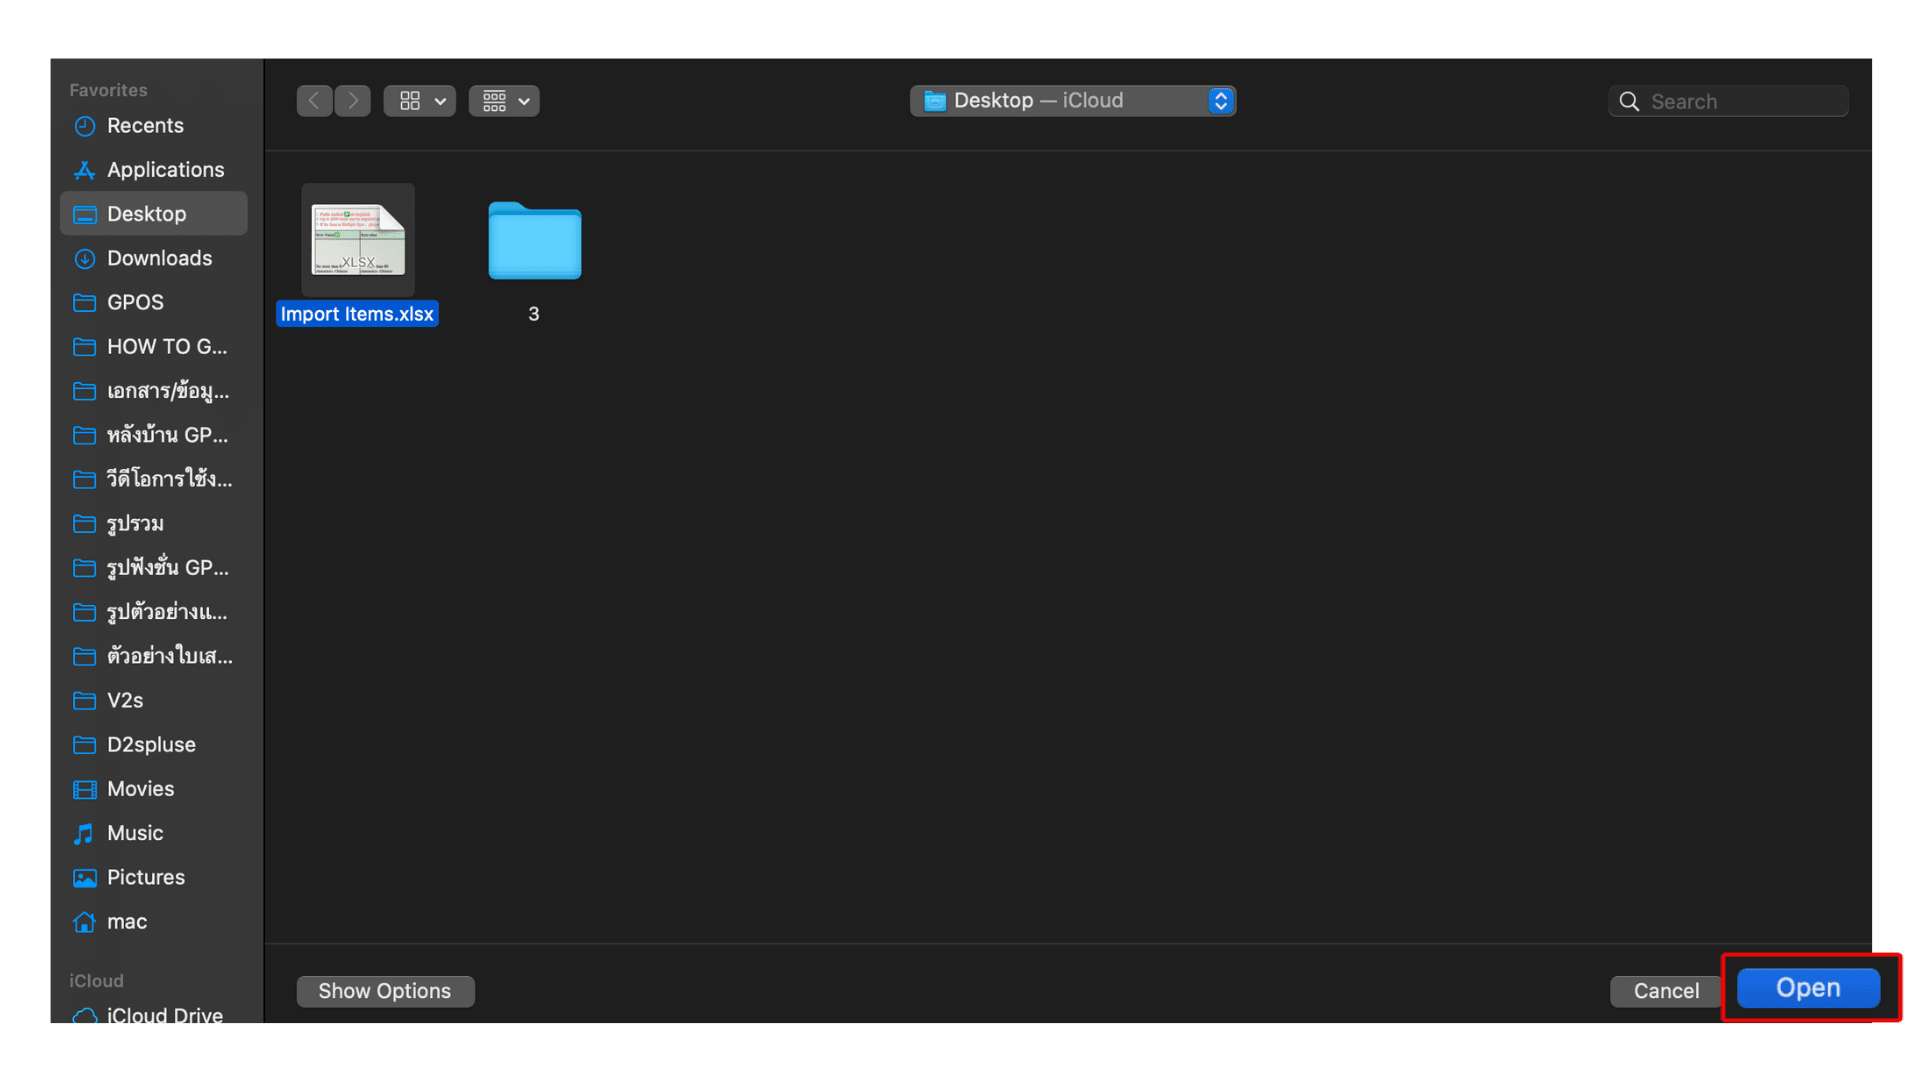
9. Select the saved file, then click ‘Open’.
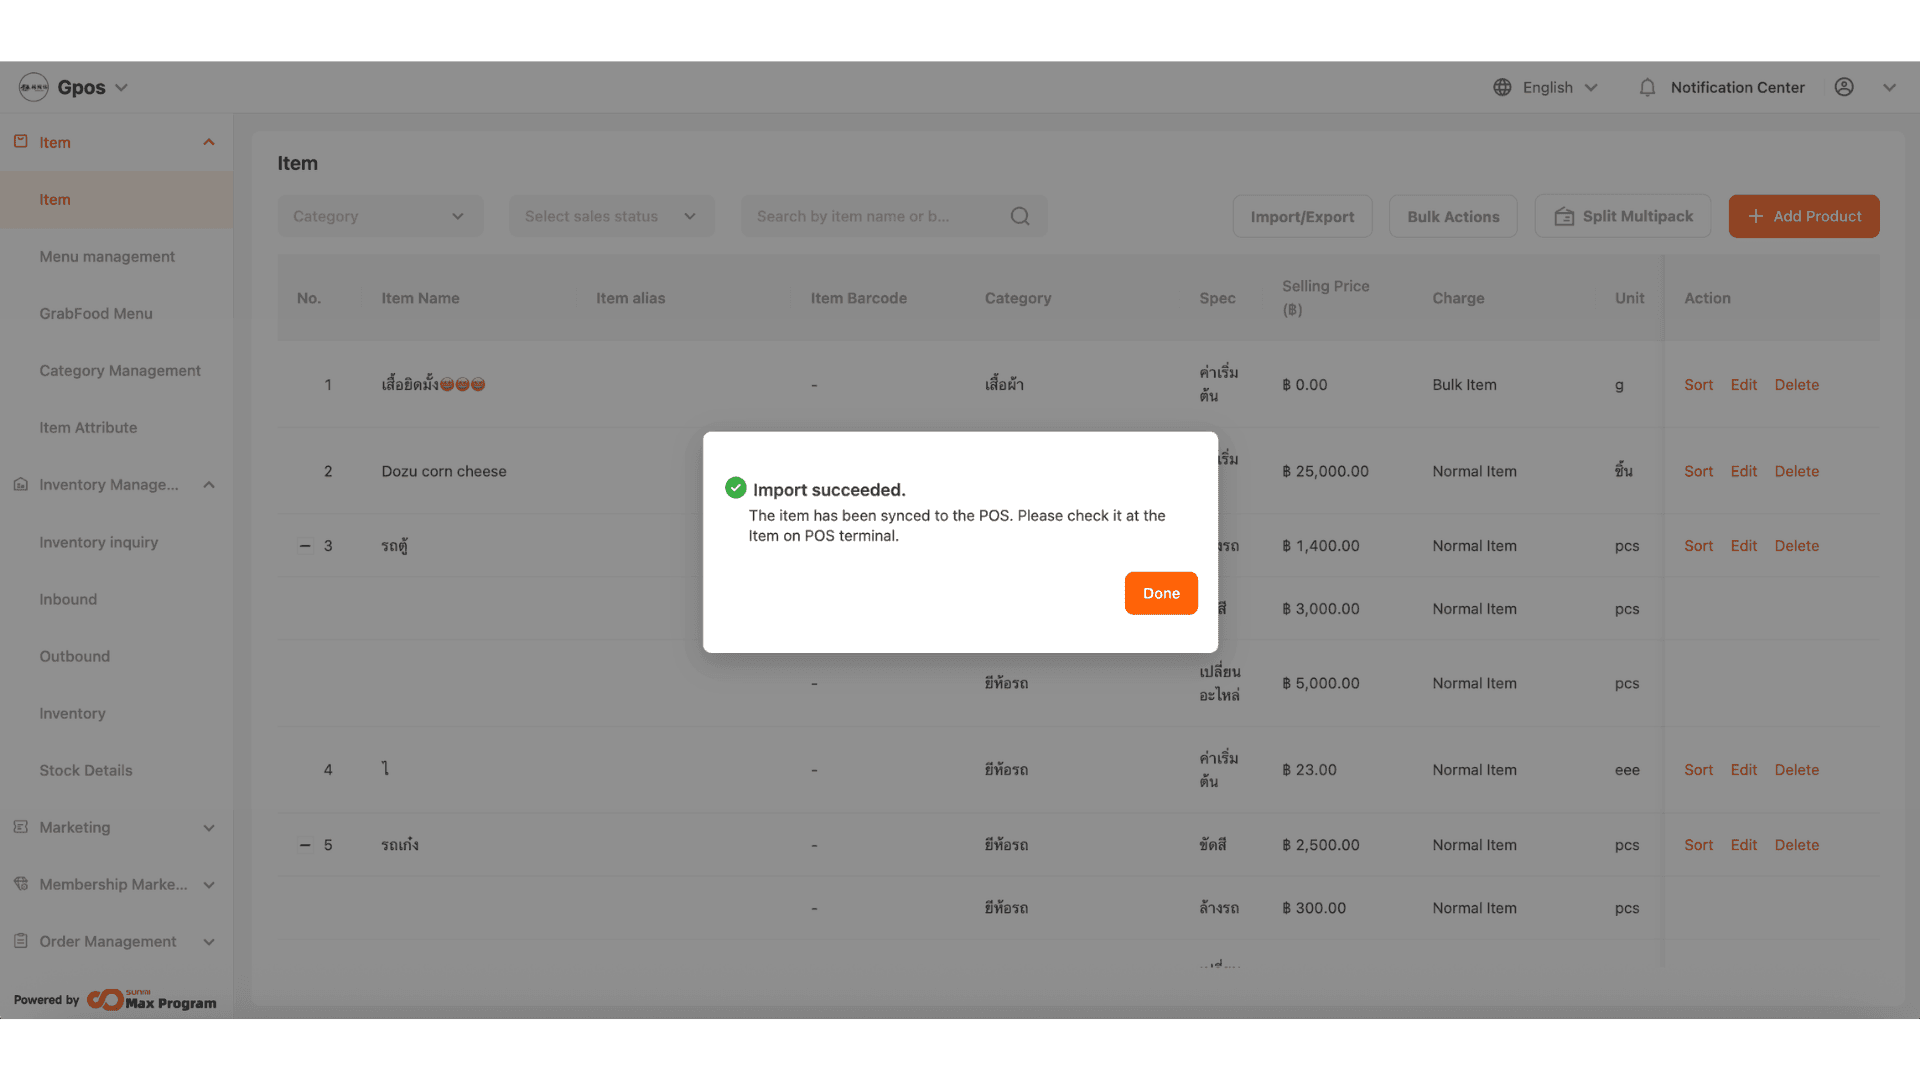
10. After a successful import, the system will appear as shown in the image. The item upload via Excel is now complete.